Community Brag Posts


Farmhouse King Bed- Beetle Kill Pine

This was our first build and it was quite a big project to take on to start with. We had so much fun and learned so much along the way.
Our biggest lessons were to hand pick our wood and make sure we get the straightest pieces possible. We had to wrestle some wood to make this bed work! Clamp everything especially when using large bolts as the pieces would pull apart from each other. We even used a ratchet strap at one point becuase our small clamps weren't cutting it. I'm sure there's a better way and we'd love to hear about it but we made what we had work. We also had to figure out how to attach the side rails and at what height. We ended up using 3 4-inch screws on each end to screw them into the posts.
We love this bed not only because it was a labor of love but because its such a solid beautiful piece.


Built from Plan(s)
Estimated Cost
$200
Estimated Time Investment
Week Long Project (20 Hours or More)
Finish Used
Minwax Polycrylic Water based - 4 coats, sanded using a 220 grit sanding block in-between each coat.
Recommended Skill Level
Intermediate
Comments
Sun, 03/01/2020 - 11:29
What about the red tendencies of 4*4 lumber?
Very nice! I love the lighter wood too, but my wife likes the darker stain, so we compromised in the middle for the finish. Why arethe post always so red? I can appreciate the natural tendency of nature to add color, but the 4*4's are always red-er in color. Do they always use a different pine or certain part of the tree for those?
Mon, 01/18/2021 - 11:27
I believe the posts are…
I believe the posts are actually Douglas fir and not pine judging by the look and color of the grains.
Modern Adirondack Chairs

This was a fun project and the plans were perfect.
Built from Plan(s)
Estimated Cost
$60
Estimated Time Investment
Day Project (6-9 Hours)
Recommended Skill Level
Beginner
Rustic Nightstand

I really liked the plans and did not change from them too much. The top is pine 2 X 4's and color is bluish grey minwax stain aged barrel.
Perry


Built from Plan(s)
Double Desk

This was our first project! We built it exactly like the plans. We finished it with a clear satin poly and we are thrilled with the results. Next we plan to paint the room.
Estimated Time Investment
Week Long Project (20 Hours or More)
Recommended Skill Level
Intermediate
Husky Farmhouse Dining Table

I love building my own wood furniture so that I can have beautiful pieces of furniture in my home while saving money! And while this project definitely cost more than the others I have done, I am so glad I splurged on the table legs. They ran me about $260 after tax and shipping costs, but I really think they give the table that extra OOMF! So a total of about $300 is nothing compared to a price tag at Pottery Barn or Restoration Hardware!
I chose this stain because I really wanted something to contrast with our dark leather couch and white dining chairs and this stain was even more perfect than what I expected it to be.


Built from Plan(s)
Estimated Cost
$300
Estimated Time Investment
Weekend Project (10-20 Hours)
Finish Used
Varathane Early American with Helmsman protective coating
Recommended Skill Level
Beginner
Pallet outdoor sectional!

I made the sectional from pallet wood
Needed extra wood for legs to be stable. I made these under the house, and unfortunately had to take apart to get out! luckily i used screws.
I made to measure after getting the outdoor cushions first.
Taught me heaps

Built from Plan(s)
Estimated Cost
Cost of cushions $60nzd and paint $25nzd
Estimated Time Investment
Week Long Project (20 Hours or More)
Finish Used
paint
Recommended Skill Level
Beginner
Modern Oversized Outdoor Chair

I made one of these chairs the the back hit me to low and was uncomfortable so this one I the legs 5 1/2” longer. This is my second project and took half a day but I am very happy with the outcome and started a second chair to match.

Built from Plan(s)
Estimated Cost
$50
Estimated Time Investment
Afternoon Project (3-6 Hours)
Finish Used
Valspar Transparent Redwood and I used a 1/4 Roman Ogee router bit on the arms and legs
Recommended Skill Level
Beginner
DIY Wood Chair

Still needs a finish but I couldnt wait to share.
Danny
Built from Plan(s)
Saw Horse Work Bench

This was my first project off of Ana's site. I followed her simple sawhorse table plans verbatim. The only thing different I did was use a self-made chalkboard paint for the top (instructions under the finish section) and added screws to the left side to mount my power strip with (easy on and off for everything on the bench). I made the top a chalkboard top so that I could write notes on the table and mark measurements for various projects. Costs were $30 for wood (some leftover), $8 for paint, $2 for screws, and $5 for surge protected power strip. If you have any other questions please let me know.


Built from Plan(s)
Estimated Cost
$45
Estimated Time Investment
Afternoon Project (3-6 Hours)
Finish Used
Espresso stain for legs and a self-made dark blue chalkboard paint for top (mix about 1 cup of paint with 2 tablespoons of non sanded tile grout).
Recommended Skill Level
Beginner
Emily's playroom chairs

So we had our grandchild Emily needing a play table and chairs, a limited budget, an old play table but no chairs! Ana White to the rescue! We made 4 chairs and painted them and the table to match. As you can see Emily has made lots of new friends over tea!
Built from Plan(s)
Estimated Cost
$30
Estimated Time Investment
Weekend Project (10-20 Hours)
Finish Used
Enamel paint and clearcoat
Recommended Skill Level
Beginner
Modern Adirondacks UK

Hi Ana
Just wanted to say thanks for the plans. Here's how ours came out!
Ben.
Built from Plan(s)
Estimated Cost
£50
Estimated Time Investment
An Hour or Two (0-2 Hours)
Finish Used
Tanalised pressure treated timber.
Recommended Skill Level
Intermediate
Washer and Dryer Pedestal

Our very first project! We absolutely love how it looks and that there's an easy way for our kids to sort their laundry. Can't wait to start more projects! You can see how we built it here http://addicted2diy.com/2014/01/14/diy-laundry-pedestal/
Built from Plan(s)
Estimated Cost
$125
Estimated Time Investment
Weekend Project (10-20 Hours)
Recommended Skill Level
Beginner
School Library Cart

My 11 year old son made this library cart for our homeschool books. He followed Ana's plans with a few changes on dimensions. I love how it turned out, and it is a perfect addition to our school room. We kept the cost low by using some wood and paint that we already had.
Built from Plan(s)
Estimated Cost
$23.00
Estimated Time Investment
Day Project (6-9 Hours)
Recommended Skill Level
Beginner
Shared room

We have 3 (almost) teenage boys and needed the storage of the Brookstone bed for their sport gear, etc. I built 2 of them and my 15 year old built his. I can't get over how easy they were to build! This was the first building project I ever made and they turned out beautifully! The headboard took about 2 hours to build and the bed about 5 hours. I was pretty slow though, checking and double checking measurements, glueing and clamping like crazy, being careful not to rush. Still, 7 hours to make the bed and a couple hours to paint, not a bad days work! The lumber cost $144/each so we were happy with the cost of the beds. I would highly recommend furniture movers underneath them. I used 4 huge ones under the ends of the 2x2 supports and small squares under the legs/headboard. They move so easily with them! Thanks, Ana, for a great plan!! We are so thankful and love our new beds!!

Built from Plan(s)
Estimated Cost
$144 for lumber
Estimated Time Investment
Day Project (6-9 Hours)
Finish Used
Grey paint. Wanted a grayish stain but couldn't get the pine to take it the way I wanted it to.
Recommended Skill Level
Beginner
Comments

Toy Box
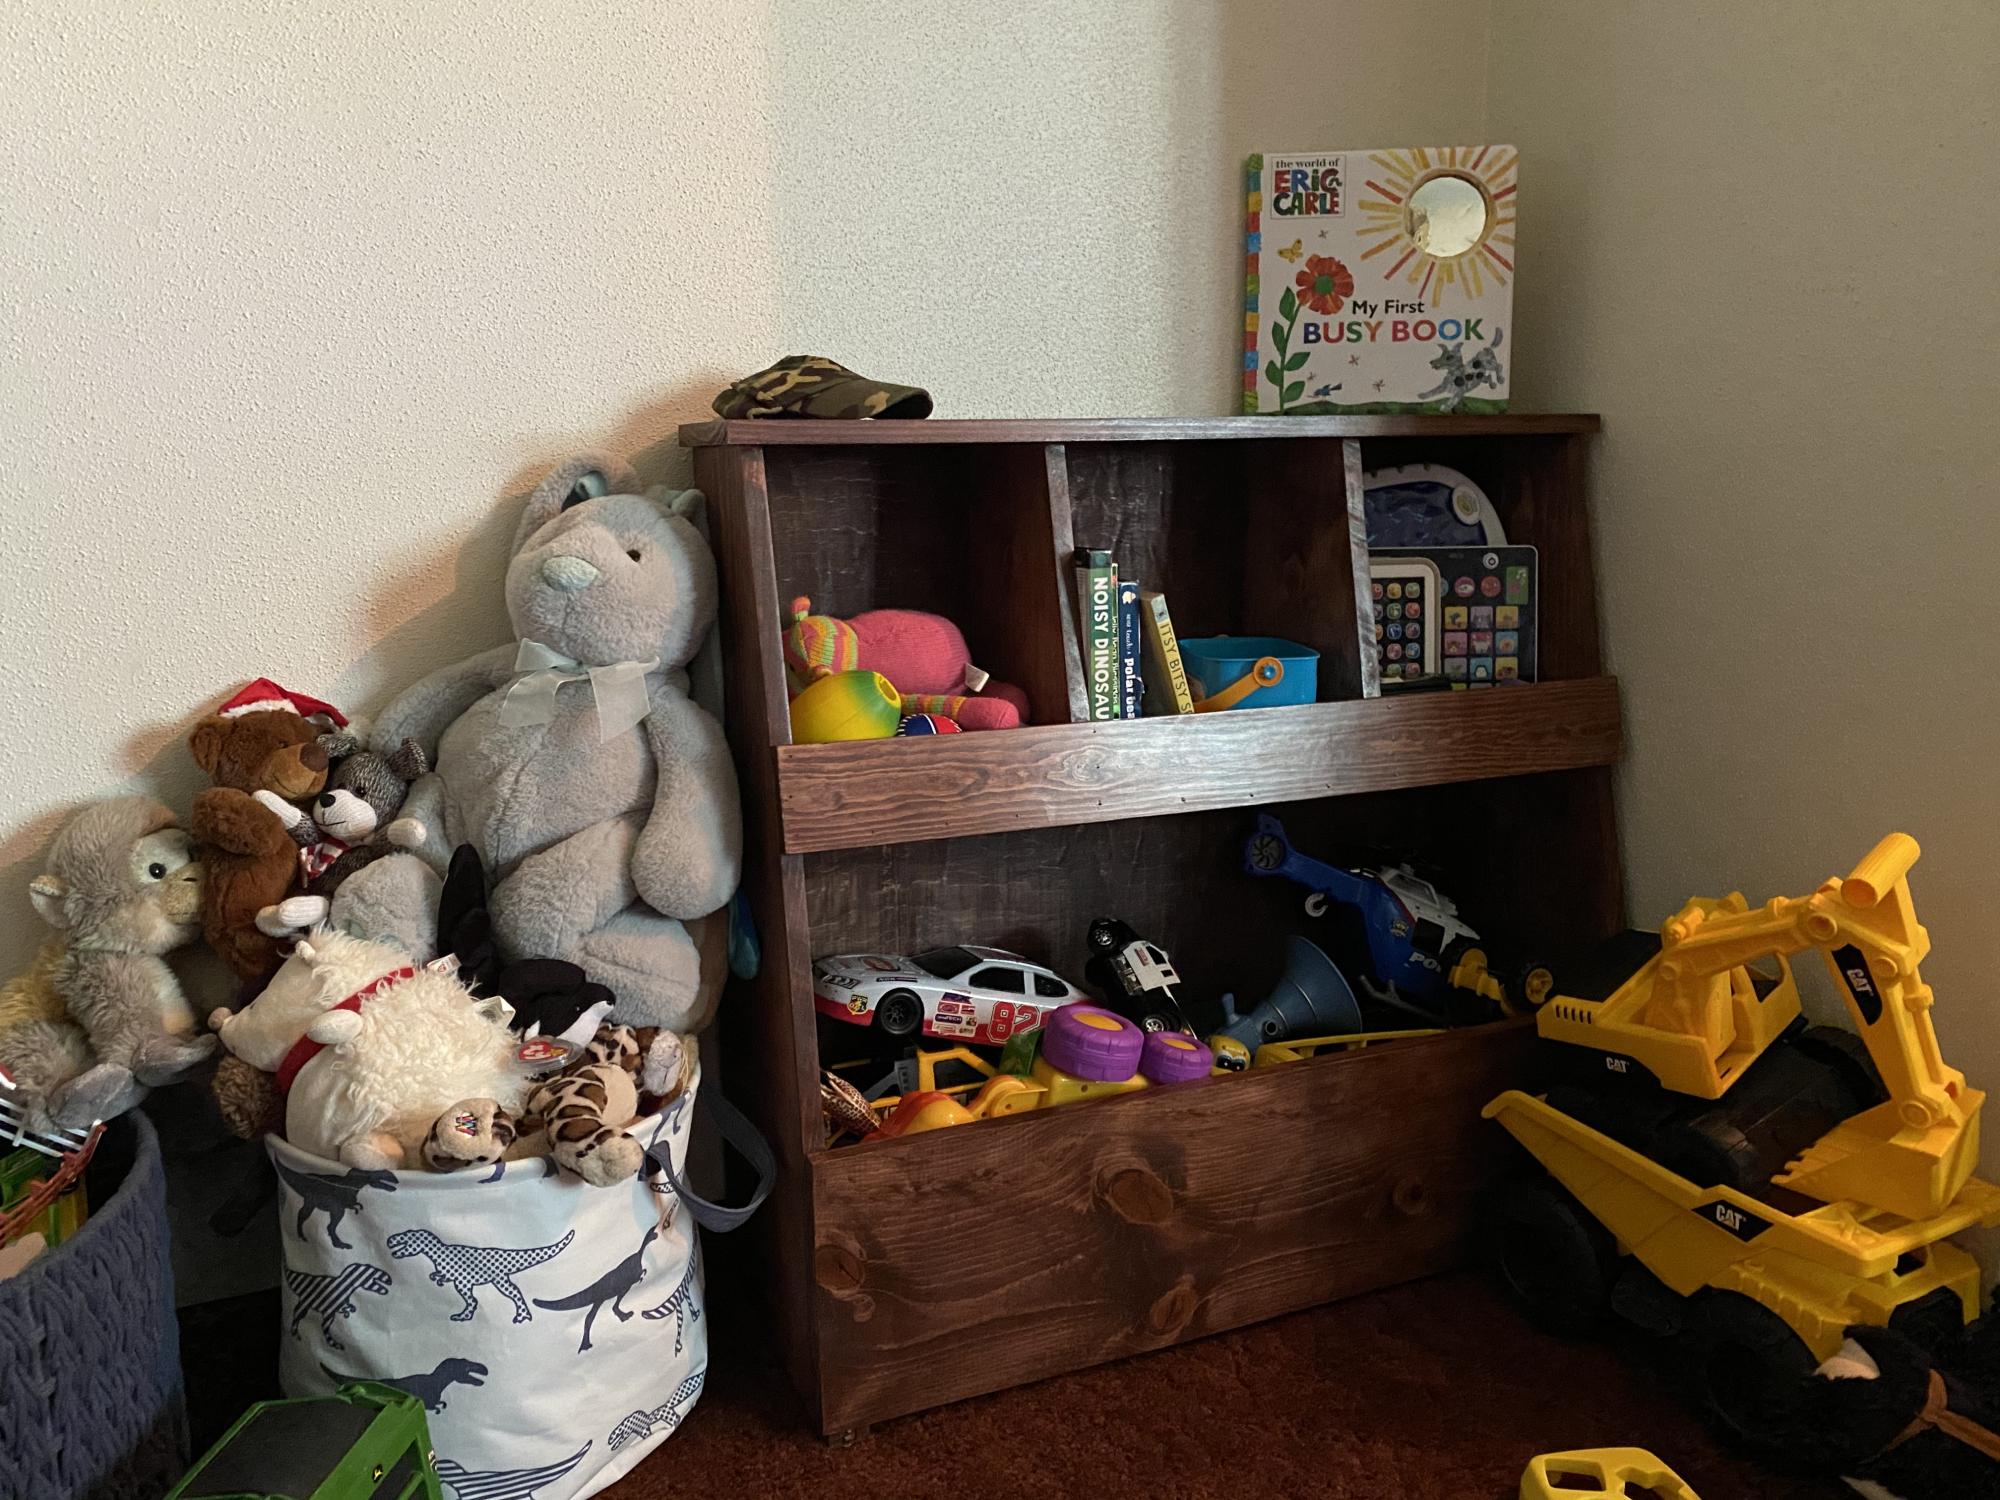
This design turned out to be perfect! It was super simple and easy to build! Easy to follow plans! Great beginner project!
Estimated Cost
Around $40 in lumber
Estimated Time Investment
Day Project (6-9 Hours)
Finish Used
Varathane Premium Wood Stain in Red Mahogany
Recommended Skill Level
Beginner
Comments
Wood Picnic Table

Built this to replace a cheap picnic table that I had bought. The table is solid and a great first project for me Pops. The grandkids will enjoy this one and Gammy has me already building #2 table. Thank you for the plans and your expertise.
Mark E aka Pops
Built from Plan(s)
Neighbors
I found Ana's website in my search for the desk plans, and in the process found many other wonderful plans I want to try. My goal is to make a sawhorse desk for my new home office. I need to learn all proper woodworking skills, however.
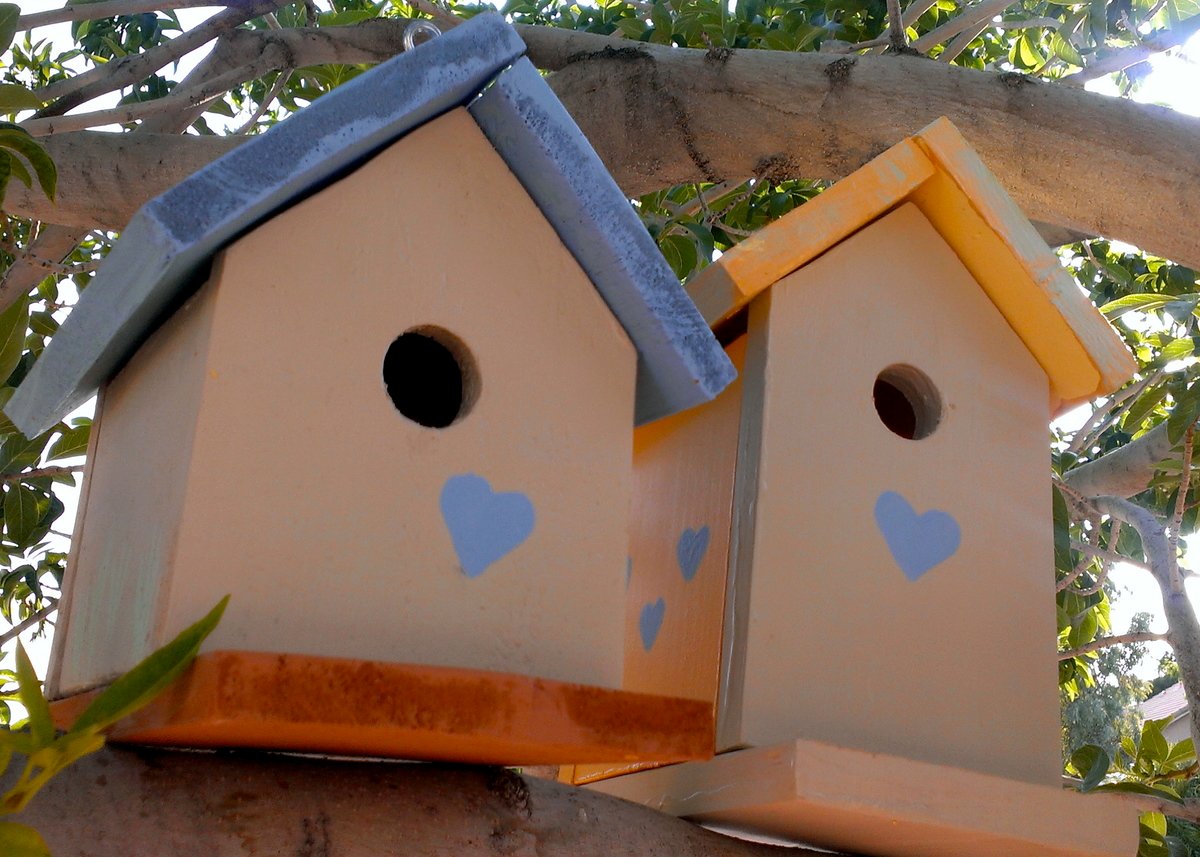
Therefore, I decided to start with this birdhouse project, which was a joy for me since I have a fascination with photographing birdhouses wherever I go. I also have fond memories of making birdhouses with my mother when I was a little girl. She did all the cutting and nailing, and I sanded and painted.
This project brought back happy memories, and my mom got a kick out of seeing photos of the finished results.
In addition, today I had the wonderful opportunity to photograph my own birdhouses!
Built from Plan(s)
Estimated Cost
$3 per house for the wood
Estimated Time Investment
Afternoon Project (3-6 Hours)
Finish Used
I used a combination of paint I had on-hand, all Valspar. Most of the paints were Valspar Ultra Paint & Primer.
Paint colors for the birdhouse on the left are called: Country Heather (blue), Bittersweet Stem (beige), brandywine (terracotta), and Pistachio Ice (green) for accents.
The colors of the house on the right also included Country Heather, Bittersweet Stem, and Pistachio Ice (again for accents). In addition, Buttered Hazelnut was used for the walls and roof.
I completed most of the painting prior to assembly, adding only accents such as hearts and windows post-assembly.
Recommended Skill Level
Starter Project
Surf Shack Bunk Bed (Using Club House Bed Plans)

We decided to follow the Club House bed plans, but we added another bunk below. We did this by adding a foot to the height and duplicating the slats and ends etc. My boys absolutely love this bed! We actually enjoyed building it. I can't wait to try more Ana White plans - they were so easy to follow and it's so satisfying having made something cool from scratch.
Built from Plan(s)
Estimated Cost
$200
Estimated Time Investment
Weekend Project (10-20 Hours)
Finish Used
One part water to two parts white paint
Recommended Skill Level
Intermediate
Simple Wood Pantry Shelves

The wire shelves that the builder placed were not cutting it for storage. This setup from your plan helped garner so much more space for organizing. The pantry is roughly 54”x 35” and we were able to place five shelves instead of the four. Thank you so much for your assistance!

Built from Plan(s)
Coffee table with toy box trundle

This was my second project ever, so I know it is far from perfect, but I am so happy with it. It is super useful since I have 3 little kids that are so far the only grandchildren from both sides of the family and I have the impression that toys come to our house to reproduce.
I made a mistake on choosing the stain for the top, and had to adapt to what I wanted, but I kinda like the end result, although it is more formal than what I had wanted at first.
It is a gloss mission oak, from miniwax.
I built this without the Kreg, but I have bought one since, so my next project should be better!
The paint is Antique White from Glidden (DUO), distressed until my shoulders could not handle it anymore.
Building is so empowering, I am so happy I found this site! Thanks Ana for all the great work!


Built from Plan(s)
Estimated Cost
100
Estimated Time Investment
Weekend Project (10-20 Hours)
Finish Used
Miniwax Mission Oak Gloss Polyshade for top and inside the trundle.
Glidden Antique white and distressing with sandpaper and stain.
Glidden Antique white and distressing with sandpaper and stain.
Recommended Skill Level
Beginner

Comments
jeannemariahunt
Thu, 05/15/2014 - 07:43
Farmhouse Table
This was a fairly simple plan and I'm thrilled about how the table looks.