


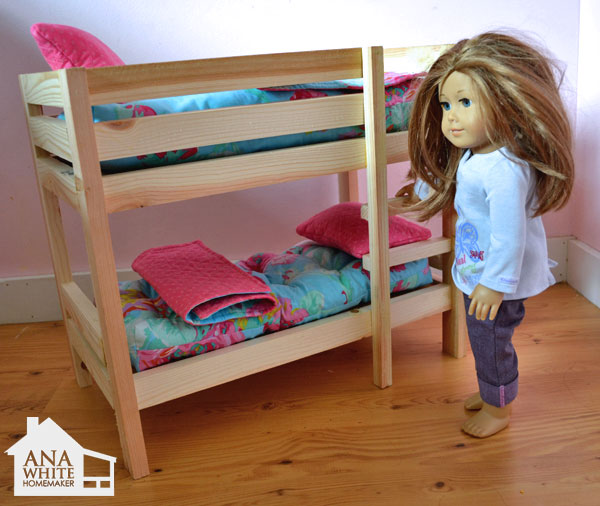
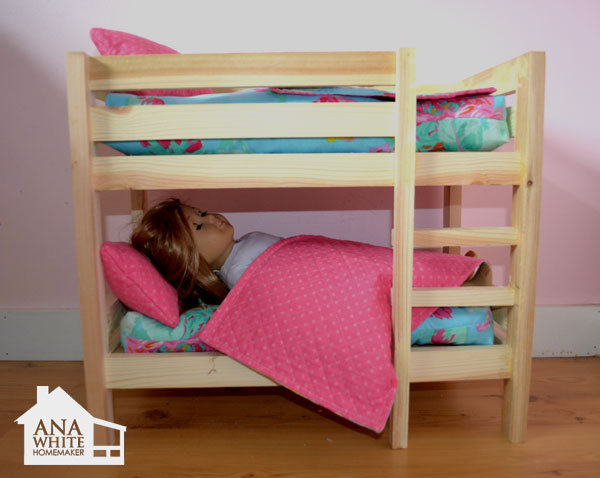
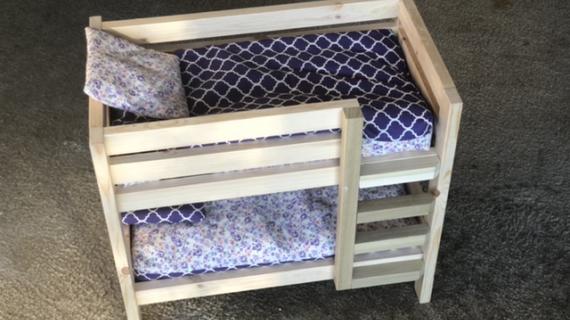
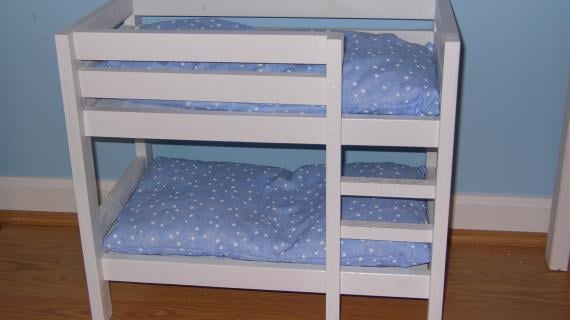
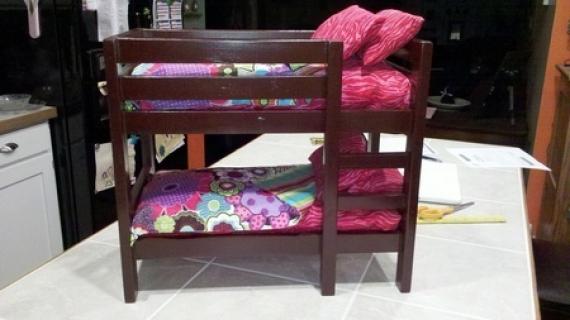
Make your own doll bed for American Girl Doll or other 18" Doll. This sturdy wood doll bed is quick and easy and inexpensive to make. Free step by step plans to DIY a doll bed for your American Girl.
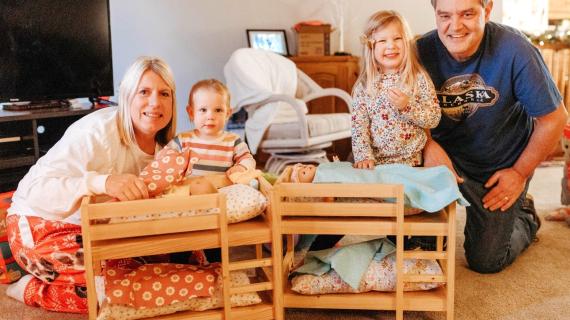
Today was my daughter's friend's birthday. The Birthday Girl has been talking quite a bit about getting her first American Girl doll, so Grace and I thought we'd make her a bunk bed.
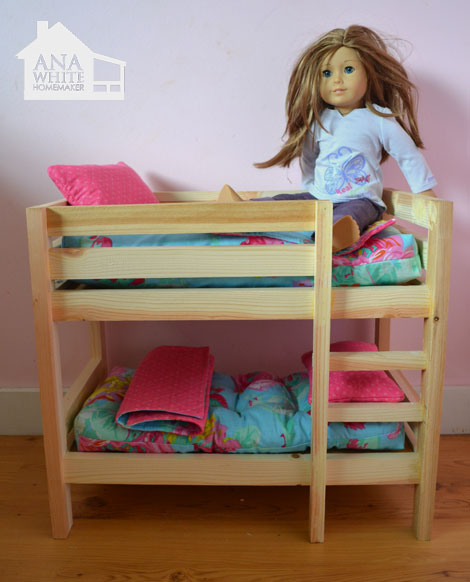

We love this bed because . . .

Pin For Later!

Preparation
4 - 1x2 @ 8 feet long
1 - 1x1 @ 8 feet long
(look for a square trim board that measures 3/4" x 3/4" or if you have a tablesaw, rip a 1x2 in half)
Scrap hardboard, 1/4" plywood or other sheet goods Use either the pocket holes or regular screws:
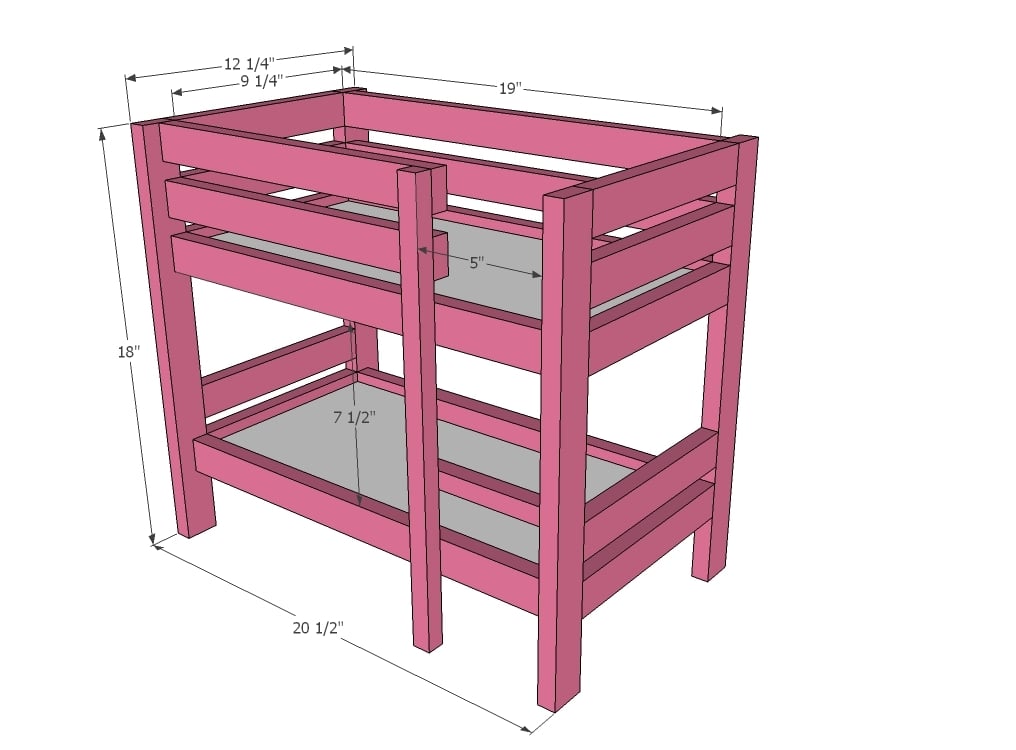
10 - 1x2 @ 9 1/4"
4 - 1x2 @ 18"
6 - 1x2 @ 19"
2 - 1x2 @ 14"
1 - 1x1 @ 18"
2 - 1x1 @ 5 3/4"
4 - 1x1 @ 19"


Please read through the entire plan and all comments before beginning this project. It is also advisable to review the Getting Started Section. Take all necessary precautions to build safely and smartly. Work on a clean level surface, free of imperfections or debris. Always use straight boards. Check for square after each step. Always predrill holes before attaching with screws. Use glue with finish nails for a stronger hold. Wipe excess glue off bare wood for stained projects, as dried glue will not take stain. Be safe, have fun, and ask for help if you need it. Good luck!
Instructions
Step 1
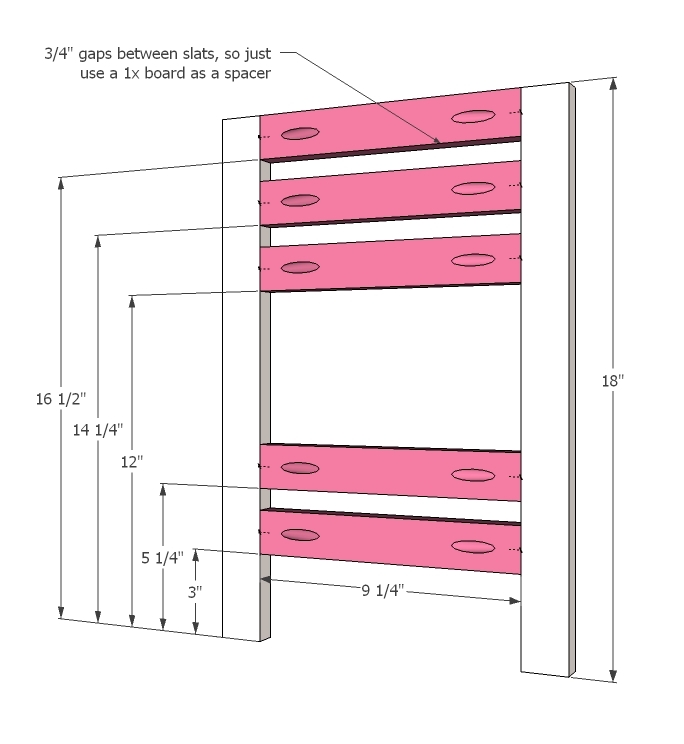
Build two of the ends as shown above. I used the Kreg Jig to hide all holes, but you could use countersunk 2" screws from the outsides. Use a piece of 1x material as a spacer.
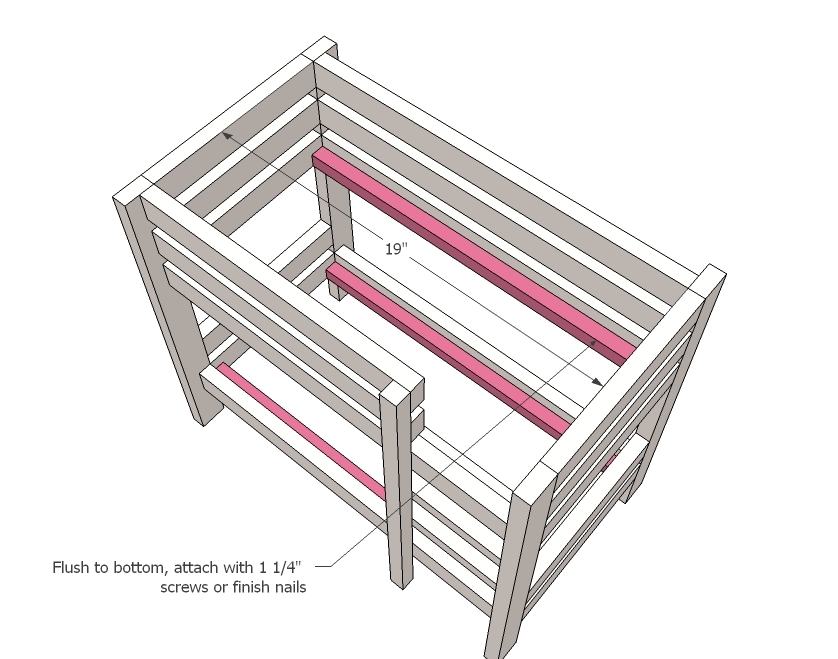
Step 2
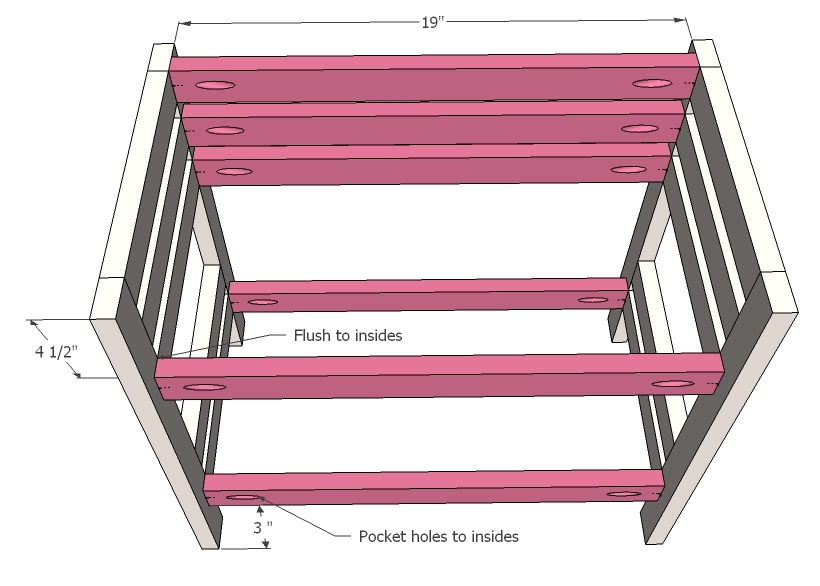
Now join the two ends as shown above.
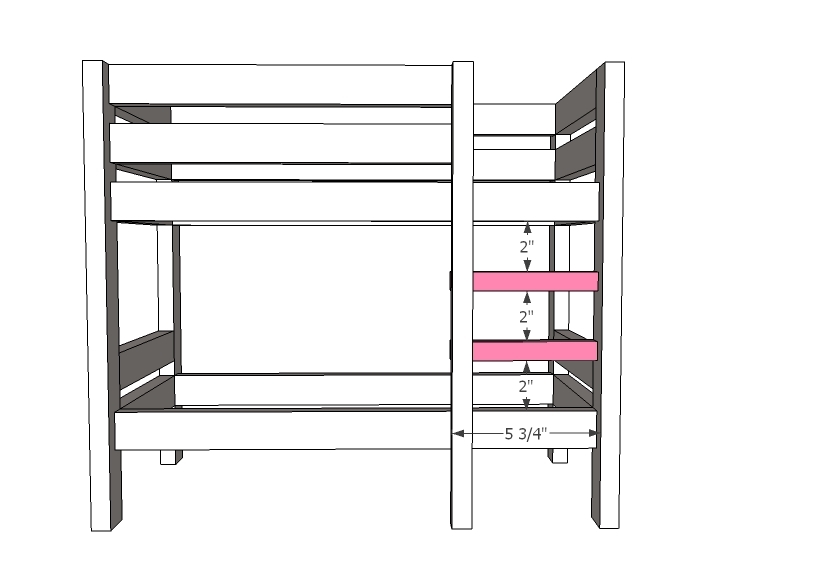
Step 3
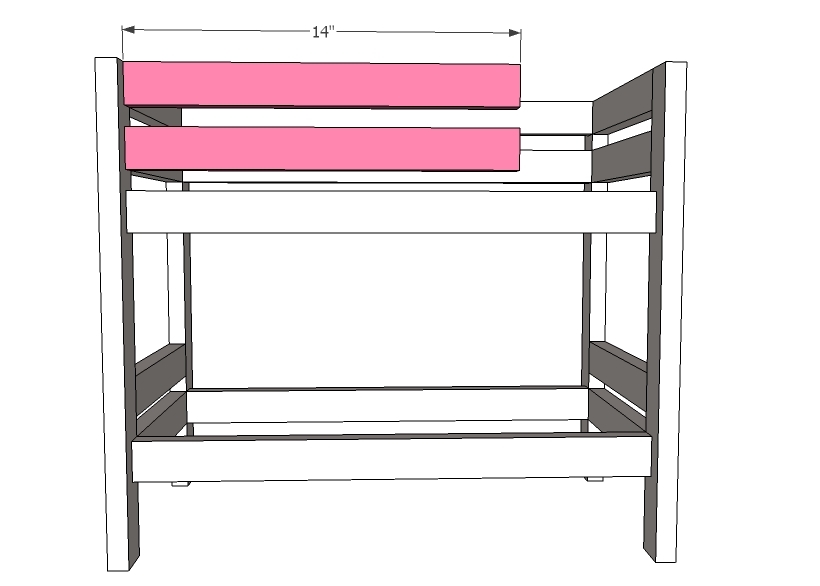
Followed by the guardrail on the ladder side.
Step 4
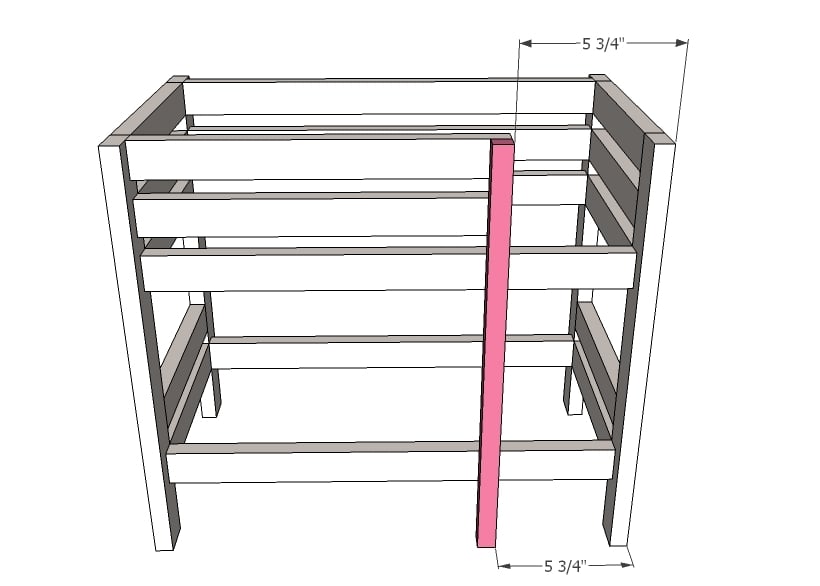
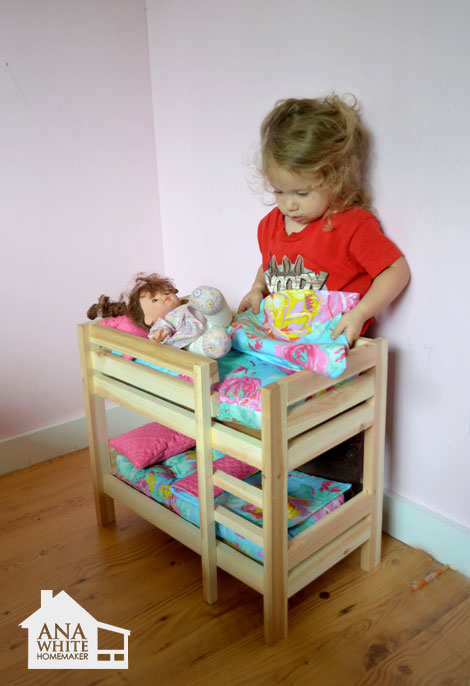
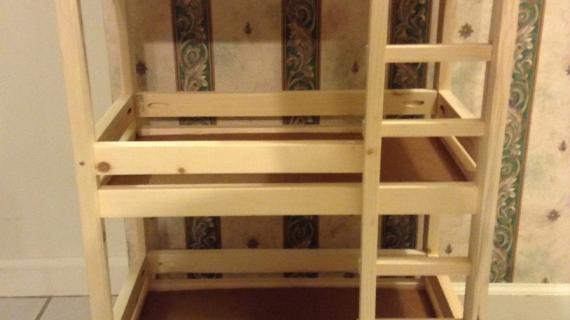
Now here is where the clamps are your good friend. Position, glue and clamp, then nail in place with 1 1/4" nails. You could also use 1 1/4" screws, but then you got to cover the screw holes, which is no big deal if you are painting it. But in our case, we wanted to gift the doll bed unfinished so the birthday girl could do the painting.
Step 5
Step 6
I have a pretty good sized nailer and was able to get it in there. But if you are at all concerned, you could definitely add the cleats before step #2.
Step 7
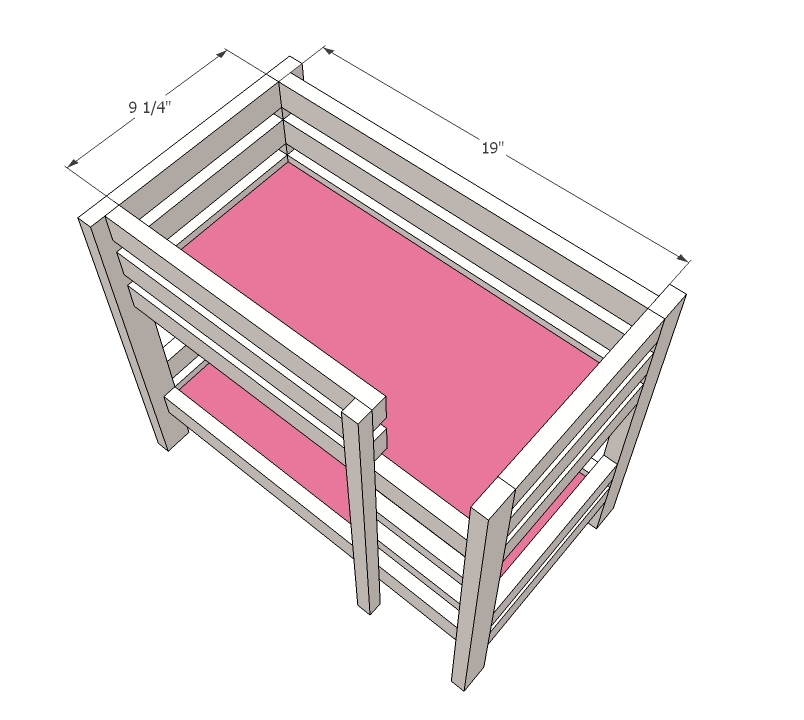
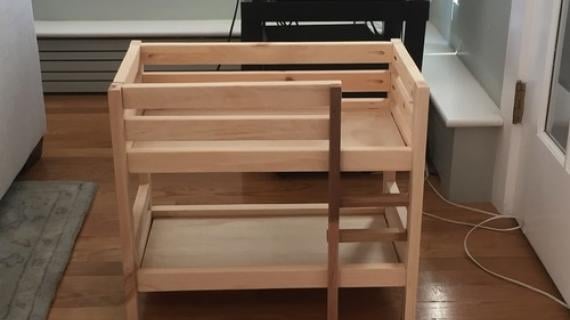
Really, anything works here. I had some scrap 1/4" PureBond Plywood (Formaldehyde Free, yay!) so I put that in there.
It is always recommended to apply a test coat on a hidden area or scrap piece to ensure color evenness and adhesion. Use primer or wood conditioner as needed.

Comments
blessednest
Thu, 08/11/2011 - 22:52
GAH!!!
ANA! WHYYYY?!?!?! lol, i just made my list of "to makes" for our homemade Christmas. I was going to make two of the farmhouse doll beds [one for each of our daughters and their AG doll & blabla doll]
BUT
I.LOVE.THIS!!!! I might make the bunks instead. or make bunks out of the farmhouse beds lol!
LOVE IT! THANK YOU!!!! You & your plans pretty much rock my stars. true story.
mamma_joy
Fri, 08/12/2011 - 01:35
A trundle?!?
I think if you left the ladder support piece shorter, you could even swing adding a trundle! My posted trundle plan would be a little tall, but you could make it work with a 1x3 instead of a 1x4--easy modification! That'd be great for my neighbor with three girls!
Athena (not verified)
Fri, 08/12/2011 - 05:57
I seriously can not wait to
I seriously can not wait to make this! My girls will be so excited.
spiceylg
Fri, 08/12/2011 - 07:36
wow
You continue to amaze! This is too adorable!
Guest (not verified)
Fri, 08/12/2011 - 08:09
ANA is AWESOME!!!!
Ana....this bunk bed is SO PERFECT for our dolls! I knew you would eventually post a bunk bed, and this is why I have waited for your post...because these plans are AWESOME!!! I have linked to your plans for my readers to enjoy. Thanks for these....REALLY!!!! And thanks for "teaching" me to build, girl! You ROCK!!! :)
Kristi @ Pieces for Reese
http://piecesforreese.blogspot.com/2011/08/18-doll-ana-white-bunk-bed.h…
jeanne (not verified)
Fri, 08/12/2011 - 08:29
really want to try this
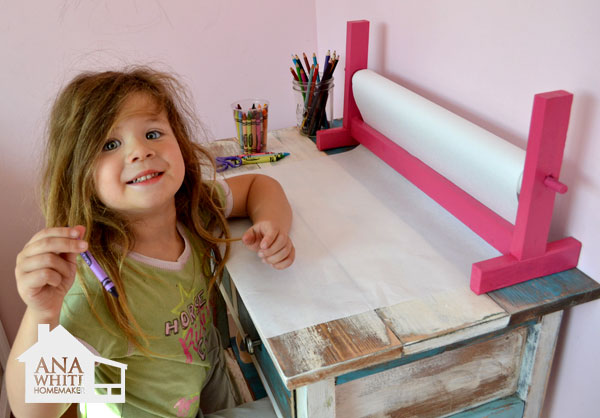
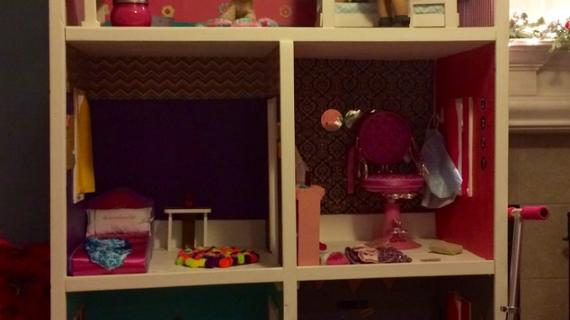
I realllly want to make a bed like this for my girls. And I love the paper roll holder on the adorable desk as well!!! And the "Beach Hair" We have a lot of that at my house too :) I can't get my littlest to hold still to even pull her bangs out of her face most times. Well... they aren't so much bangs anymore anyway...
I love your stuff. Some day I will build stuff.
Cherie Heltne (not verified)
Fri, 08/12/2011 - 08:31
Nice!
This is great. I just made my own farmhouse style bunk bed set for my daughter a couple of weeks ago when she got the bitty twins. I will be making this one for my daughter's friend, too.
Miasmom (not verified)
Fri, 08/12/2011 - 10:10
1x1s
Would 3/4" wooden dowels work instead of the 1x1? And I think you're missing 2 1x1s at 19" for an extra set of cleats. :)
I can't wait to make this! I already made the farmhouse doll bed for my daughter, but she's managed to pile more than 3 dolls on it at a time. Thank you, thank you for your wonderful and generous plans!
guest (not verified)
Fri, 08/19/2011 - 19:24
I am totally making this.
I just want to say how much I LOVE this website. I have never made anything out of wood in my life, but with your detailed instructions and the shopping list and cutting list etc. (you have thought of EVERYTHING!) I feel absolutely confident that I can do this.
I don't even have a saw, but I know my local hardware store will cut the wood for me (for a price, but still it's totally worth it).
Vladimir (not verified)
Sun, 09/04/2011 - 23:52
I just want to tell you thanks.
Hi Ana, my name is Vladimir, I'm from Russia. A live in Syberia. I read your blog and lost you year ago. Then a seek you and I happy to found your site. I can,t speak English well, but can read with dictionary. I love your life story. I just want to tell you that. I like all that you builds. Is there in your site SketchUp models your builds? I want to build toy bed for my doughter. Of course I can use you pictures, but if you give to people you models, they can translate mesures. This certain not necessarily. Forgive me for my bad engilesh.
Mairi (not verified)
Wed, 09/07/2011 - 02:51
Bed!
Hi there! I've absolutely loved making this! Thanks so much for the pattern! You are a legend! Just one thing I noticed... In the cutting unless I'm going mad it should be 4 x 1x1 x 19" for the mattress supports. No biggie but it may make the difference between one length of timber and two!
Thanks again!
Mairi
My Favorite Dolly (not verified)
Thu, 09/22/2011 - 21:39
Awesome!
I'm a doll maker, and I have 2 boys, with 2 dolls, and it's virtually impossible to find doll beds for boy dolls. I figured I'd have to make it myself. I'm a sewer- not a woodworker, but this looks like something I can definitely do. Thanks so much for posting it!
~Erin
Guest (not verified)
Tue, 10/04/2011 - 14:37
Bunkbeds
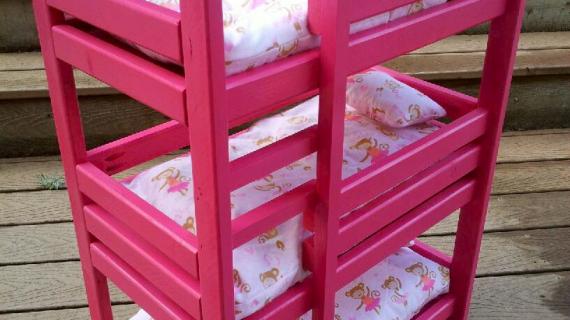
Thanks for the plans! I just completed this project and it came out great. I don't have a Kreg jig so I drilled holes and used dowells so that all front facing surfaces are nice and smooth. I wanted to use wood stain it came out so well but my daughter wants to paint it pink which is fine by me as it's for her!
Thanks again!
Guest (not verified)
Tue, 10/04/2011 - 14:37
Bunkbeds
Thanks for the plans! I just completed this project and it came out great. I don't have a Kreg jig so I drilled holes and used dowells so that all front facing surfaces are nice and smooth. I wanted to use wood stain it came out so well but my daughter wants to paint it pink which is fine by me as it's for her!
Thanks again!
margjack
Thu, 10/20/2011 - 14:27
I think there are a couple of
I think there are a couple of errors in the cut list. As someone already pointed out, there should be 4 1"x1"x19" cuts for the cleats. To get all of the cuts out of one 1"x1"x8', I made the 4 cleats about 16 inches each.
Also, you can't get all of the cuts out of 3 1x2s. I didn't want to run back to the store, so I left out the middle side rails on the top bunk. I kind of like the more "mod" look! (and it's not like you need the rail for safety!)
Otherwise, this plan is super easy and sturdy - I had fun making it!
Flipper bed (not verified)
Fri, 11/04/2011 - 01:02
Decorating a kid's bedroom
Decorating a kid's bedroom can be fun. You can include playful and appealing designs that will be suitable for your kids.
Imagination and creativity can be most experimented in this part of your home where the Decor has to be changed more frequently with the growing age and maturity of the children and also their changing tastes and ideals.
Paul H. (not verified)
Mon, 11/14/2011 - 08:28
Attaching the rungs
I am building two of these for my daughters for Christmas. The first one is assembled and ready for finishing work.
I believe I have learned from my mistakes during the assembly process and will be better prepared for the second one. On step 5 (attaching the rungs) the rungs butt up against one end so I wasn't sure the best way to attach it.
To anyone who has built this (or Ana), did you attach that end using a pocket hole on the back side or just a use a screw through the outside?
I have all the wood cut and the pocket holes drilled for the second bed. The Kreg Mini Jig (and accessories) was the most expensive part of this project but well worth it in the end.
Donna Huisinga (not verified)
Tue, 12/13/2011 - 16:08
thank you
Ana,
How generous of you to share these instructions. I think this is an awesome project. I only wish I had someone to make it for. I can only imagine a little girl's delight when she receives this. I'm so glad I found you. I just pinned it.
Guest (not verified)
Mon, 01/16/2012 - 23:11
Amazing bed
My daughters birthday is in a couple of days do we decided that we are getting her her 3rd doll but she's always asking for a bed so this plan is PERFECT!!!! We are gonna make two of them.
jennybriggs1970
Tue, 01/24/2012 - 21:31
!x1
Has anyone ever, used 1x2 instead of the 1x1? I cant find any 1x1 for less than $5 a foot? That is almost the whole $10 rught there?
pjhaan
Tue, 02/14/2012 - 10:07
If you have a table saw, you
If you have a table saw, you could rip a 1x2.
I used a 1x1 but cut it from an 18 foot board in the trim/molding area that charges by the linear foot. I think it was about $2/foot. I build two so I think this was the most expensive part of the project!
Guest (not verified)
Sun, 02/12/2012 - 07:16
Buy it?
Could you make these for sale because I don't have the skills or equipment to make the bunk bends and they are so nice!!!
Guest (not verified)
Thu, 02/16/2012 - 08:20
Bunk bed plan
Excellent design and simple to make. One minor problem is the quantities of wood required. 1X2 should read 4 1X2 @ 8' and not 3 (check cut list total quantities). Cut list should also read 1X1 @19" qty 4 not 2 (base supports).
Thanks
Guest (not verified)
Fri, 03/23/2012 - 17:59
WOW!
Is there a way to make a smaller one?
Cherica (not verified)
Thu, 04/05/2012 - 18:41
Just built this bunk bed today.
My daughter asked for this for her birthday. I have been bitten by the building bug. This was my first wood working project and I had a blast!! I can't wait to tackle my next project!
Jen A (not verified)
Wed, 05/09/2012 - 09:28
Prett Easy
I am in the process of completing one of these. It was very easy to do. My onkly suggestion is that if you use a 3/4x3/4x8 piece of trim to use shorter nails or screws then listed. Otherwise the points will stick out the other end.
Can't wait to add the final touches and paint it!
I have a feeling I will be making more for friends and family!
ann-sewsalot (not verified)
Sat, 09/22/2012 - 18:48
Bunk Bed and plans
This is so awesome of you to share these plans(along with your others). I started one of these today. Got it almost done, and would have had it completed had I not ran out of board and had to wait for my hubby to bring me another one.
As mentioned previously, the supply list is a bit shy of having enough 1x2's. Also, I couldn't find 1x1's, other than in the dowel section(I don't have a table saw to rip a 1x2). I decided 1/2" square dowel would be plenty big enough for the cleats. I just cut 2 of them in half, giving me 4 18" cleats. I just centered them. I don't think the 1/2" missing at each end will make any difference in the finished product. I'm also going to use a 1x2 for the ladder support because the 1/2" just doesn't look right and I have extra 1x2 now! I'll post pics of my finished one soon.
Thanks again, Ana! You Rock!
Tammie (not verified)
Thu, 10/11/2012 - 16:25
DIY bunkbed
My husband just made this for our granddaughter and we aren't sure where you can make this for $10. It's very cute, but cost more than $10 project.
Richard (not verified)
Fri, 12/21/2012 - 06:33
Suggestions for Modification and Comments on 18 inDoll Bunk Bed
I agree with several earlier posts that this project requires 4 pieces of 1x4 8' long.
Also, made this bed 1.5 inches wider by moving the long rail to the outside edge. This required the left hand side of the ladder to be notched where it intersected with the bed frame. Relatively easy to do and use glue to secure.
Also, made the bed using dowel rods and glue only to connect all joints. This added more complexity and would suggest nail gun and glue for future ones. But, this was for my granddaughter Naomi.
Denise S. (not verified)
Thu, 01/10/2013 - 10:03
Thanks!!!!
My husband made the bed, I painted it and made the bedding and our daughter LOVES it!!! I love it too. It is super cute and perfect for her dolls. Thanks for sharing your plans.
Denise
PS-My husband did say it took him much longer to make it than you. ;)
TheReal309
Sat, 09/14/2013 - 07:01
Great Project
My wife found this project and had me build it. Very straightforward and easy. Two things worth mentioning, though. As others have said, you need four 19" cleats for the mattresses. Also, kreg joints are meant to have two holes drilled in each piece of wood to prevent rotation of the wood. This rotation can be prevented in one of four ways. Firstly, on each piece of wood requiring a kreg joint, you could drill two holes. The pieces are narrow so this is tricky at best. The next option is to to drill the hole on one end of the board closer to one edge and drill the hole at the other end of the board closer to the other edge. This way, the holes aren't in line with one another and the board won't rotate. The third option is to glue each joint before "kregging" it. The fourth option is to make use of small pin nails. Gluing each joint adds some time, but is probably the best option.
The finished bed is adorable and I can't wait to give it to my daughter for her birthday next month. Thank you so much, Ana, for a wonderful, inspirational website!
RParsons
Mon, 09/30/2013 - 06:22
I love this plan
My Wife came across your website, and absolutely loves it. I'm already in the process of making one bunk bed for my daughter, with plans to build another for my niece, as they are both getting dolls for Christmas. I did notice that others were commenting about the missing 19" lengths of 1x1 from the plans, should be 4 in total, not 2. As for material, I originally went out and bought a bunch of 1x2 pieces 8 feet long, but they weren't cheap, around $5.50 each. I've since found that I can get Knotty Pine shelving pieces from my local Kents building supplies (I'm in St. John's, Newfoundland) for around $5.27 for a 6 foot by 10" piece. Each length can be ripped down into four 1x2 pieces and one 1x1 piece, all 6 feet long. Way cheaper, and can just buy a few extra as needed :)
Schillil
Wed, 09/24/2014 - 12:08
Perfect for Christmas
I showed this plan to my dad who is the woodworker in the family with all the tools. He just put it together yesterday and sent me pictures of it today. My 7 year old is getting her first American Girl doll this Christmas. So excited.
jf646479
Sat, 01/10/2015 - 19:37
Errors in the wood required and cut list
This requires more than 3 boards of 1x2 at 8'. It requires at least another 3 feet of 1x2
Also the cut list says you need 2 of the 1x1x 19 inches but that is an error, you need 4, one for each side for both top and bottom to mount the floor of each bunk. That takes the total of 1x1 over 8 feet as well.
So buy an extra 1x2 and either use segments of 1x1 or buy another foot of 1x1 as well.
In reply to Errors in the wood required and cut list by jf646479
Ana White
Sun, 01/11/2015 - 11:15
Thanks, all fixed!
Thanks, all fixed!
starkie
Fri, 12/22/2017 - 02:10
I build this bed
Thank you for inspiration!
I liked the project. Little Emily is getting the Bed as a Christmas Gift from her Grandpa (that's me).
I had struggle with the dimensions though. 1x2 turned out to be rather 1 1/4 x 3/4 - or did i get something wrong?
anm8ed
Sat, 06/06/2020 - 18:57
Built this today. The wife…
Built this today. The wife made the mattresses for it and it came out nice. I would post a picture but I have not figured where to do that. But I great and my 8 year old loves it.