


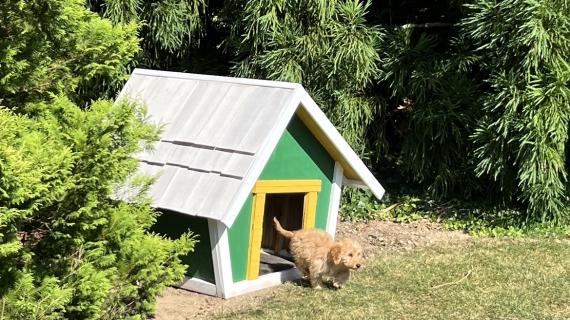
Make a crooked doghouse! Free step by step plans from Ana-White.com!


Sooooo .... my guess is today you are just going to skim what I write and skip to the good stuff ... how to build a Crooked Doghouse!
So I won't keep you - but first you have to do one thing for me.

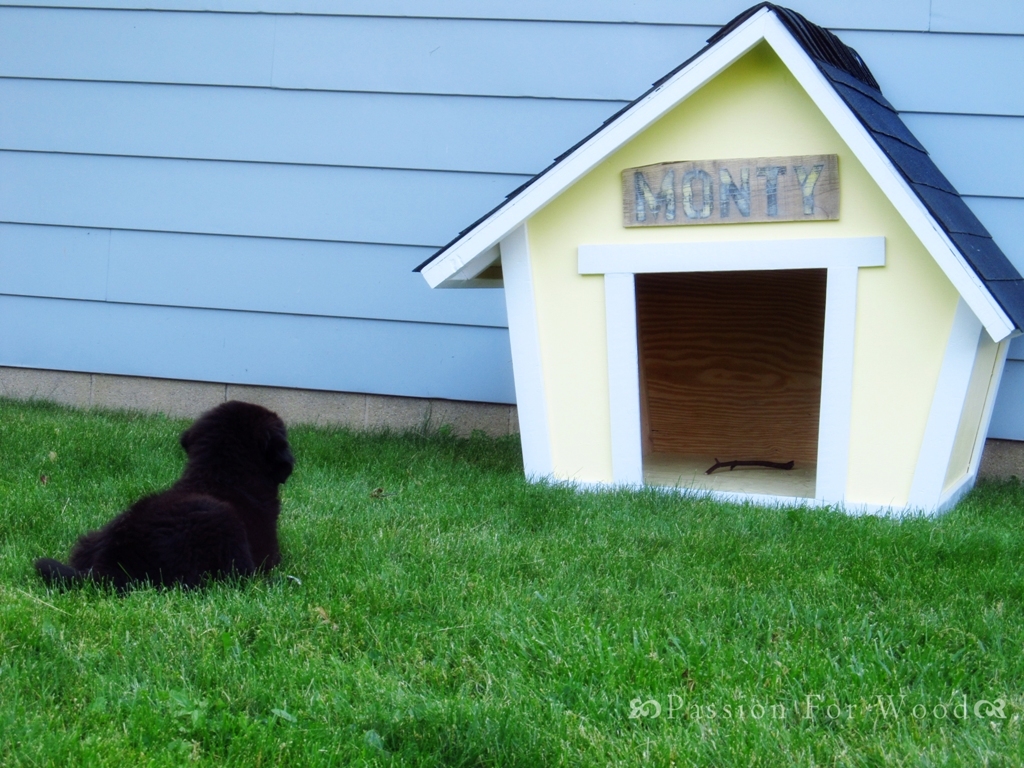
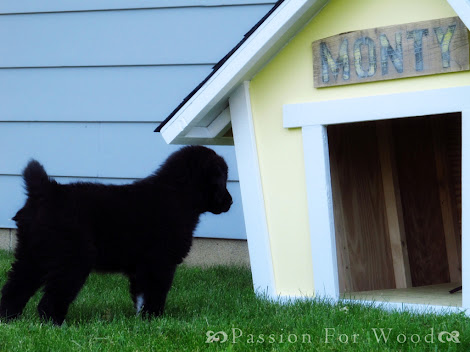
You have to go read Whitney's post on how she built this doghouse, with step by step photos and details, and you MUST go meet Monty!!!!
Thank you Whitney for working with me on this crooked doghouse. You always amaze me!!!!

Preparation
2 ½ sheets ½” exterior plywood
11 – 2x2 @ 8 feet long
4 – 1x3 @ 8 feet long
1 – 1x2 @ 8 feet long
2 ½” PH screws
1” finish nails
Wood glue
2” and 3” wood screws
TRUSSES
6 – 2x2 @ 34 ½” – top end cut at 45 degrees off square LP
6 – 2x2 @ 30 ½” – top end cut at 45 degrees off square LP
4 – 2x2 @ 29” – both ends cut at 10 degrees off square NOT parallel LP
4 – 2x2 @ 23 ¾” – 30 degrees/10 degrees LP (see in plan for more detail)
4 – 2x2 @ 21 3/8” – 40 degrees/10 degrees LP (see in plan for more detail)
1 – ½” plywood @ 39” x 29” (floor)
2 – 2x2 @ 48”
1 – ½” plywood @ 39” x 19 ¼”
1 – ½” plywood @ 39” x 22”
2 – ½” plywood @ 42 3/8” x 40 3/8” (cut shapes from these pieces)
SIDE TRIM
2 – 1x3 @ 37”
2 – 1x2 @ 18 ¾”
2 – 1x2 @ 21 ½”
FRONT/BACK TRIM
2 – 1x3 @ 29 ¾” – both ends cut at 10 degrees off square LP NOT parallel
2 – 1x3 @ 23” – 40 degrees/ 10 degrees LP (see in plan for more details)
2 – 1x3 @ 25 ¼” - 30 degrees/10 degrees LP (see in plan)
DOOR TRIM
1 – 1x3 @ 25 ¾”
1 – 1x3 @ 17 ¾” - one end cut at 5 degrees off square LP
1 – 1x3 @ 19 ¼” – one end cut at 5 degrees off square LP
ROOF
1 – ½” plywood @ 48” x 36”
1 – ½” plywood @ 48” x 32”
*LP stands for longest point measurement
MARK YOUR BOARDS as you cut!
Please read through the entire plan and all comments before beginning this project. It is also advisable to review the Getting Started Section. Take all necessary precautions to build safely and smartly. Work on a clean level surface, free of imperfections or debris. Always use straight boards. Check for square after each step. Always predrill holes before attaching with screws. Use glue with finish nails for a stronger hold. Wipe excess glue off bare wood for stained projects, as dried glue will not take stain. Be safe, have fun, and ask for help if you need it. Good luck!
Instructions
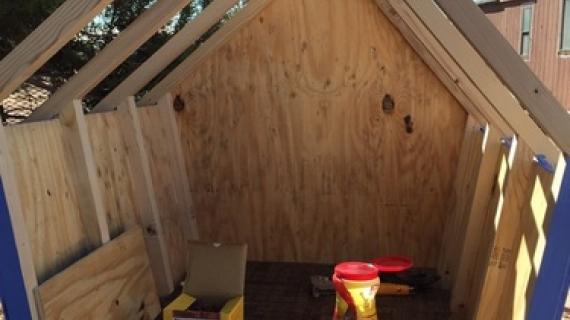
Step 1

Build four trusses. Glue and use either countersunk screws or 1 ½” PHs and 2 ½” PH screws. Note – if you do use PHs see step 3 to predrill PHs in ends before assembly.
Step 2

Mark location of trusses on floor plywood. Apply glue to tops of floor plywood. Screw down with 2” screws.
Step 3

Attach the ends as shown in diagram. Use glue.
Step 4

Next, add the side plywood. Use 2” screws and glue.
Step 5

Step 6

Next trim out the sides. Use the 1” nails and glue. Measurements shown are to center of studs for easier nailing.
Step 7

Next trim out front and back as shown in diagram.
Step 8

Then trim out the front door. Use glue and 1” finish nails.
Step 9

Add the front and back overhang trusses. Make sure you join the tops with screws and glue.
NOTE: you can add ridge poles between the trusses if you feel the doghouse needs the extra support.
Step 10

And then add the roof plywood!
Step 11

Don't forget - go visit Whitney at Passion for Wood for construction details!
It is always recommended to apply a test coat on a hidden area or scrap piece to ensure color evenness and adhesion. Use primer or wood conditioner as needed.


Comments
whitney_smith
Wed, 05/23/2012 - 12:17
Thanks Ana!
Monty would not have a home without your great plans! And now we can block off his under-deck access before he gets stuck!
pjhaan
Wed, 05/23/2012 - 14:58
Kid sized?
Any advice (or dimensions) for turning this into a kid sized play house?
In reply to Kid sized? by pjhaan
birdsandsoap
Wed, 05/23/2012 - 15:09
That's my next
That's my next question...I've been trying to wrap my head around the "crooked" playhouse design ever since the Gosselin kids got their village of tiny homes. They are adorable.
But the dog house is right up there. What a fun and whimsical treat...it's like a conversation piece for the back yard. I want to build one and put flower beds around it and little mailbox just for dog treats, haha!
Ann Miville (not verified)
Wed, 05/23/2012 - 15:36
This makes me think of Dr.
This makes me think of Dr. Suess stories!
whitney_smith
Sat, 04/20/2013 - 06:48
Link...
I just want to share the updated link as I see a lot of google searches leading to my page. Hope this helps! http://www.whitneysworkshop.com/2012/05/meet-monty.html
MaryMurray
Thu, 09/26/2013 - 05:24
Smaller version please...
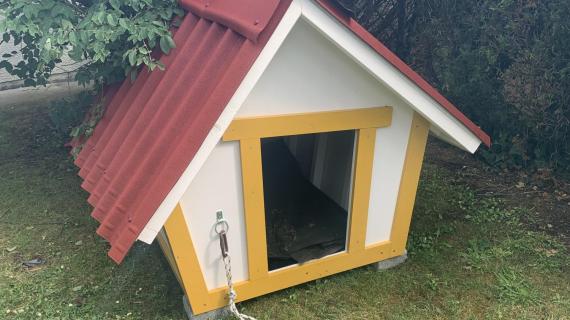
Are there any plans for a smaller version of this cute doghouse?
I would really like to build this for my Benjamin. But he is a pomeranian and would be lost in such a big space. With all the angles I am afraid to try modifying it myself. Help!
katelynlejeune
Thu, 12/12/2019 - 08:32
Where would be the best…
Where would be the best location on this plan to put a hinge system to be able to clean the inside of the house?