


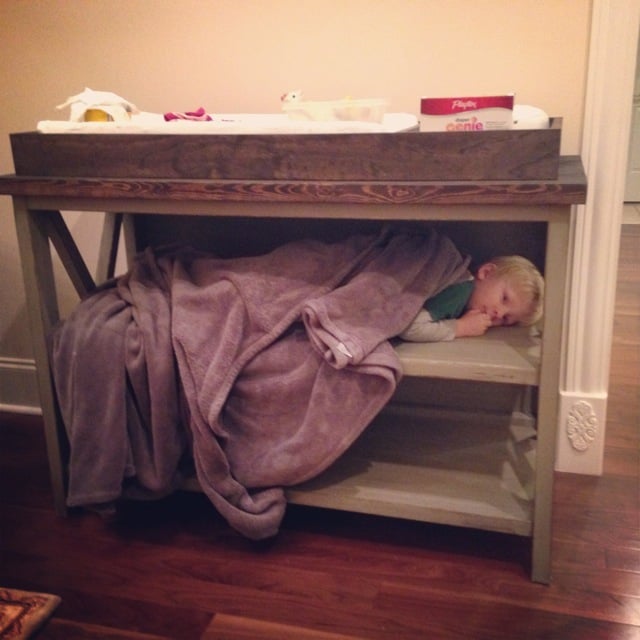
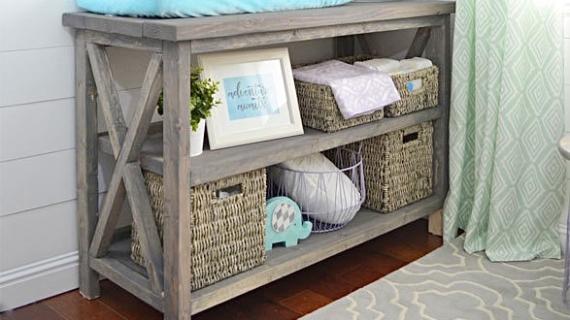
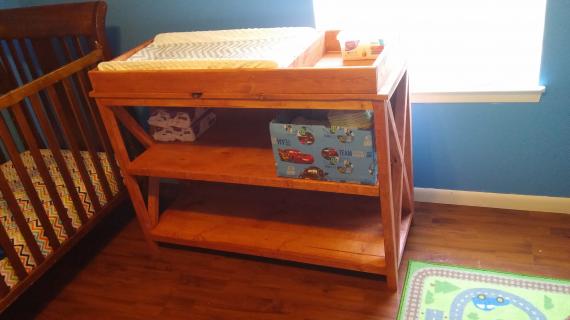
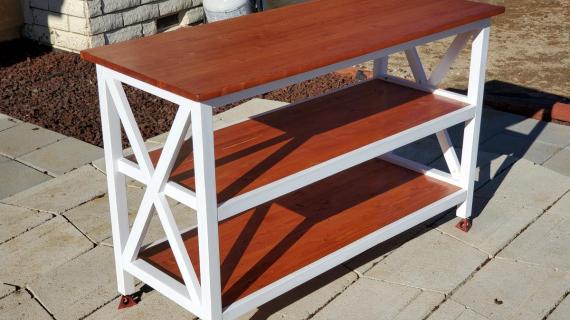
Hi, I'm Jamison aka The Rogue Engineer. With a new baby on the way the list of projects can seem to be endless. One that was at the top of the list was a DIY changing table. My inspiration for this DIY changing table came from the Pottery Barn Belmont buffet and if you want to build that take a look at Ana White’s plans for it. Below I have provided detailed baby changing table woodworking plans for you to enjoy.

Preparation
1x 1 x 4 x 8′
1x 1 x 4 x 6′
4x 2 x 2 x 8′
3x 2 x 3 x 8′
5x 2 x 6 x 8′
1x 1/4 x 24 x 48″ plywood (I went with sandply)


After cutting your wood and before assembly make sure you sand, sand, SAND!
It is best to sand all the cut wood before you start assembling. It’s so much easier to do now then once its assembled especially with all the tight corners. Please know that this kills me too, but I promise its worth it and you’ll be thanking me in the end. For a more in depth instructions take a look at our how to sand whitewood post.


Please read through the entire plan and all comments before beginning this project. It is also advisable to review the Getting Started Section. Take all necessary precautions to build safely and smartly. Work on a clean level surface, free of imperfections or debris. Always use straight boards. Check for square after each step. Always predrill holes before attaching with screws. Use glue with finish nails for a stronger hold. Wipe excess glue off bare wood for stained projects, as dried glue will not take stain. Be safe, have fun, and ask for help if you need it. Good luck!
Instructions
Step 1
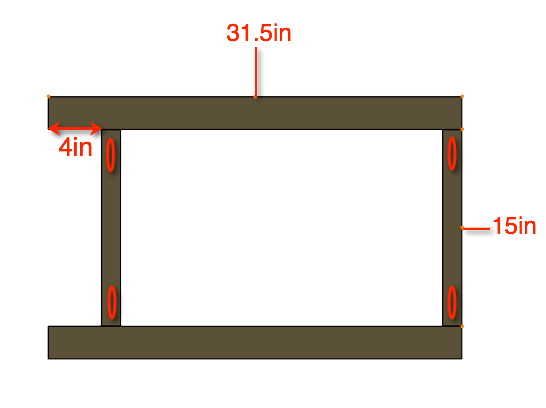
Drill pocket holes in each end of the 15in 2×2′s. Next, screw and glue them to the 31.5in 2×3′s as shown in the picture. Remember, we need two of these.
Note: Know that the pocket holes will be on the inside of the changing table, therefore, you should choose the uglier sides of your wood to be on this side.
Step 2
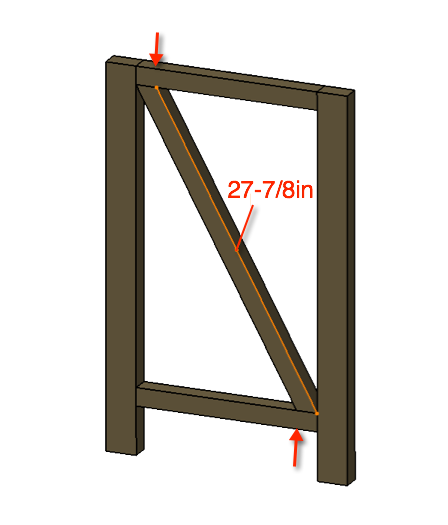
Attach the longer angled 2×2 with 2″ wood screws from the top and the bottom as shown. Make sure to glue these joints as well.
Step 3
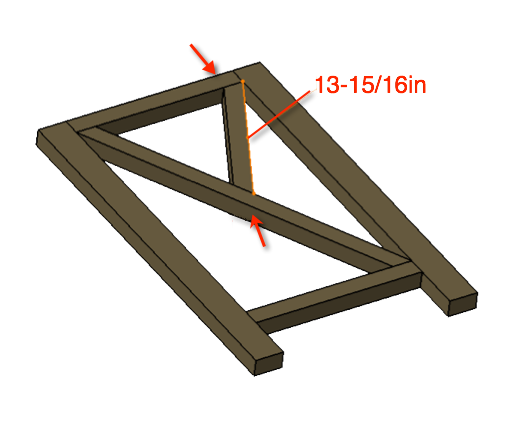
Screw and glue the smaller angled 2×2 in the upper right position with 2″ wood screws. As shown, place the lower screw slightly off from center and at an angle of the 2×2. (As you can see in the next step we will be coming right behind it with a pocket hole screw.)
Step 4
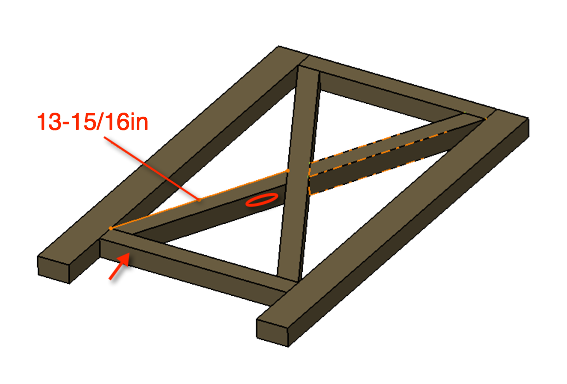
Using the Kreg jig, drill a pocket hole in the remaining smaller angled 2×2′s as shown in the picture. (Make sure you pocket hole is in the correct side)
Screw and glue the lower slat of the X in with one 2″ wood screw and one 2-1/2″ pocket hole screw, as shown.
Step 5
Step 6
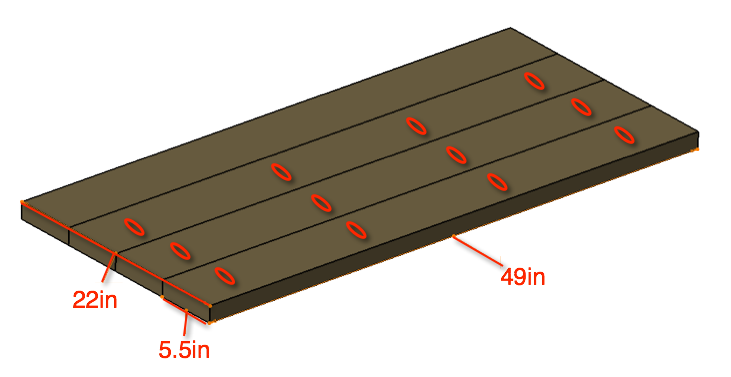
Drill pocket holes, evenly spaced, in the three 44 inch 2×6′s as shown in the picture. You should choose the uglier sides of your wood to be on this side.
Clamp to maintain a flat surface and screw and glue the three 2×6′s and two 2×2′s together, as shown, with 2-1/2″ pocket hole screws.
I suggest giving this another sanding to smooth the top once assembled.
Step 7
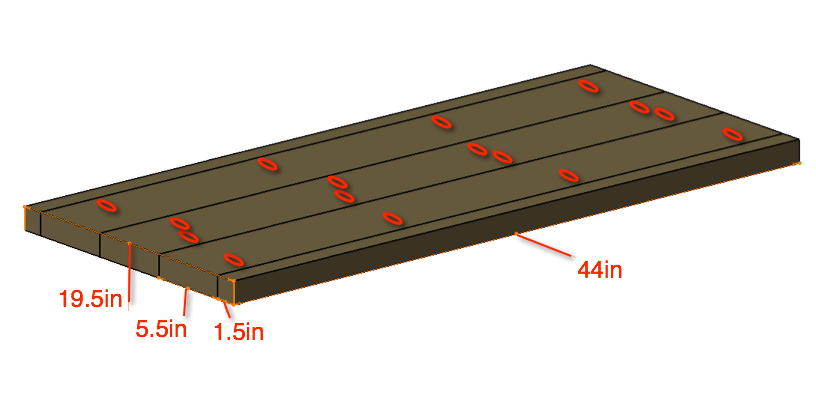
Drill pocket holes, evenly spaced, in the three 44 inch 2×6′s as shown in the picture. You should choose the uglier sides of your wood to be on this side.
Clamp to maintain a flat surface and screw and glue the three 2×6′s, sandwiched between the 2×2 and the 2×3, as shown, with 2-1/2″ pocket hole screws.
I suggest giving this another sanding to smooth the top once assembled.
Step 8
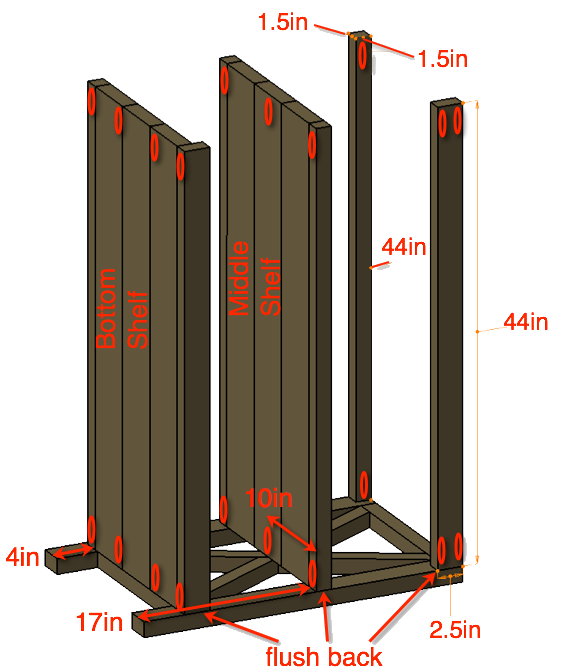
Drill the pocket holes, as shown in the shelves and upper rails. Make sure to notice that the middle shelf has three pocket holes, one at each end and one at the middle of the X (this is not the center). Make sure the back of the shelves are flush with the back of the side first and mark where your pocket holes should go.
With the top rails flush with the outside top corners of the side panels, attach with 2″ pocket hole screws as shown. Assure that your shelves are square and attach with 2″ pocket hole screws as shown.
Step 9
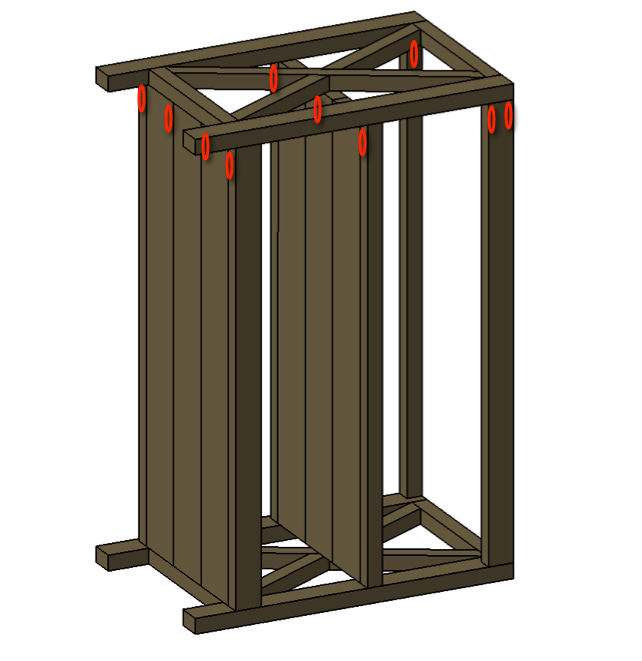
With the top rails flush with the outside top corners of the side panels, attach with 2″ pocket hole screws as shown. Assure that your shelves are square and attach with 2″ pocket hole screws as shown.
Step 10
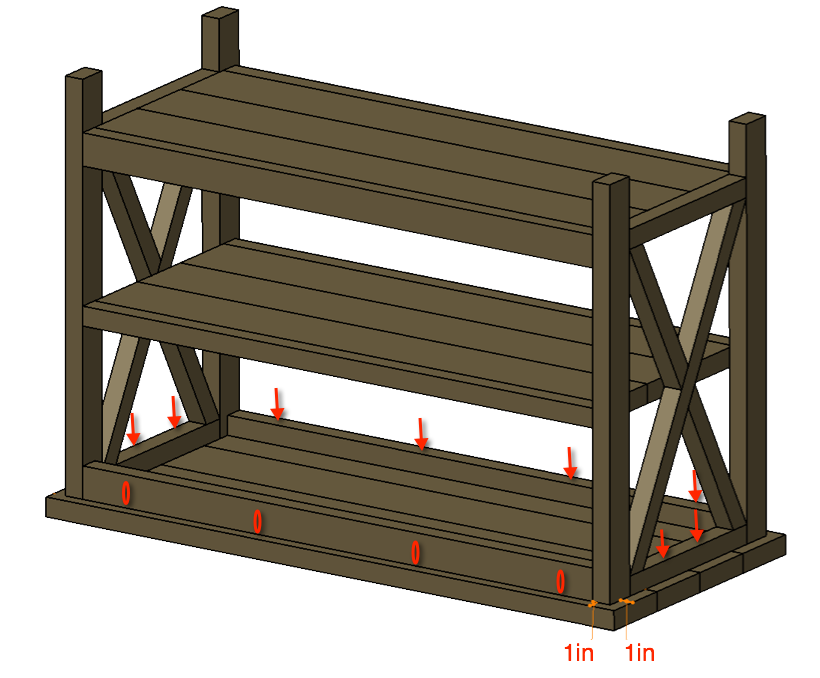
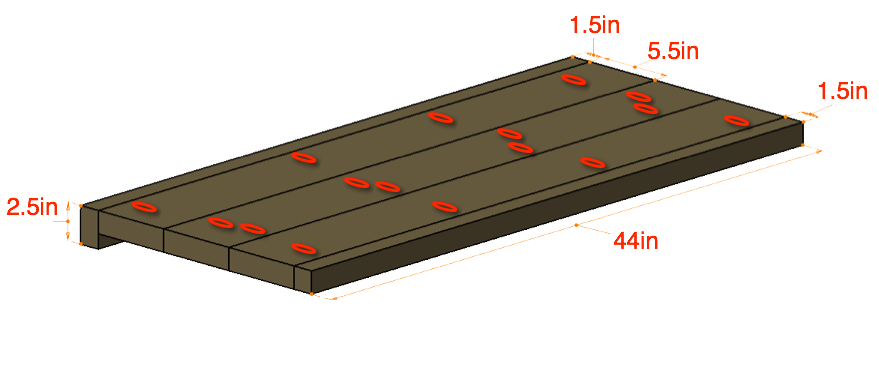
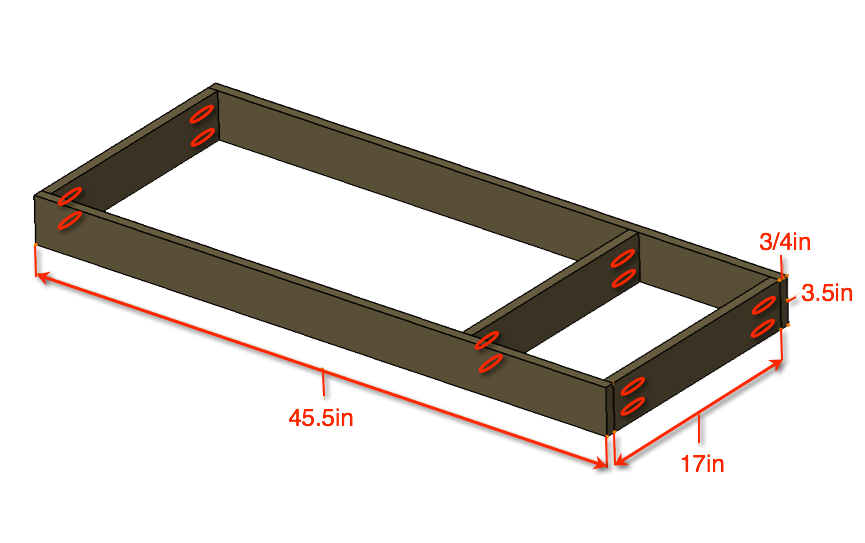
Finish off your table by adding the top. To do so you should drill four pocket holes in the back rail (2×3), as shown.
Attach the top with four 2″ pocket hole screws in the back rail and 2″ wood screws through the 2×2′s as designated by the arrows in the picture.
Step 11
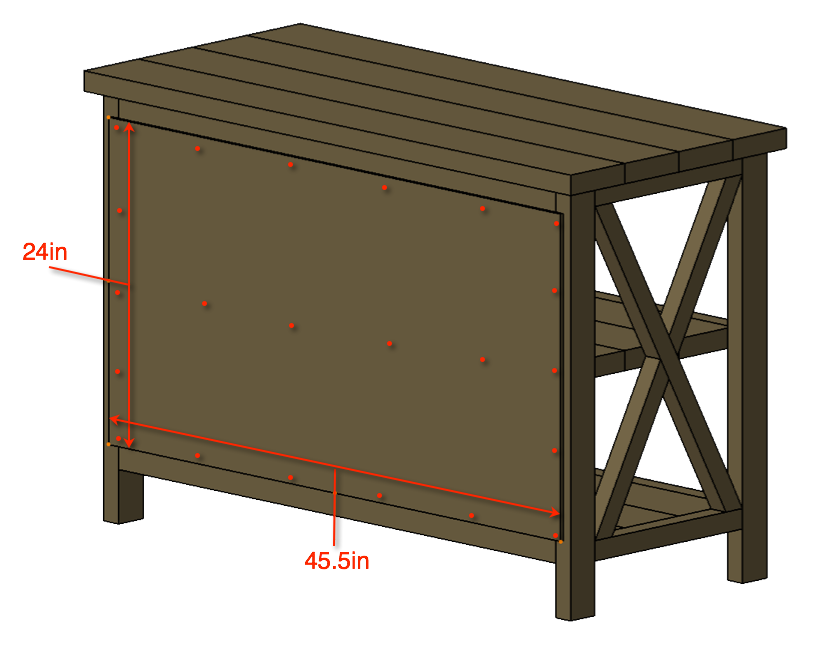
Cut your 1/4″ plywood to 24×45.5″ and nail or screw it to the back as shown in the photo. It is wise to draw a line across the back to show you where to nail.
Note: I used a finishing nailer for this with 1-1/4″ brads but if you don’t have a nailer you can just as well use screws. (They’ll be on the back anyway. Just don’t mess up :) )
Step 12
Drill your pocket holes at each end of the 1x4x17″ boards. (Make sure to adjust your jig for 1″ material).
Make sure to place your pocket holes where they will be the best concealed. The two boards on the right in the picture should actually have the holes on the opposite side (But I can’t show that now can I?). Assemble your topper as shown with 1-1/4″ pocket hole screws, making sure to glue the joints.
Important Note:
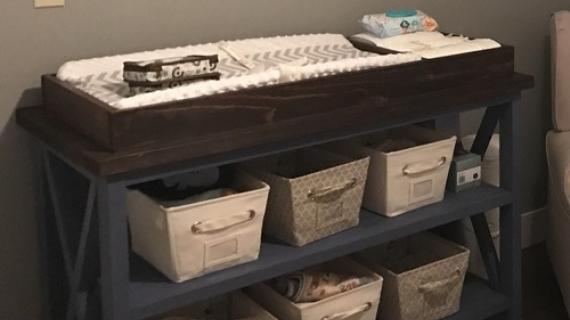
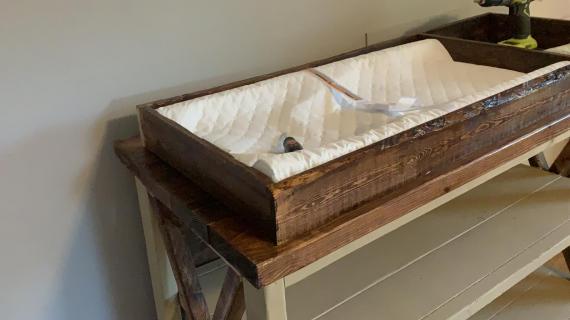
If your going to stain the top like we did then now is a good time to do so. Make sure to stain both the top and the topper prior to installing the topper.
Step 13
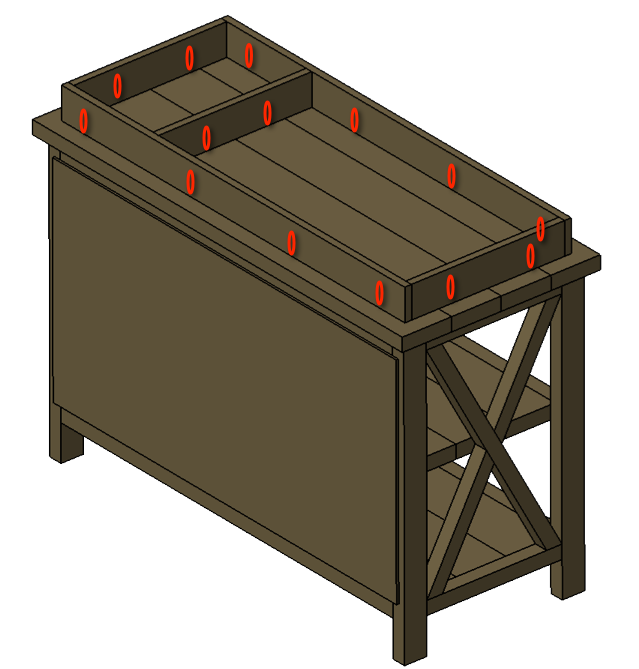
Drill the pocket holes as shown, except for the right hand board, those should be on the opposite side to best conceal them.
Attach the topper with with 1-1/4″ pocket hole screws.
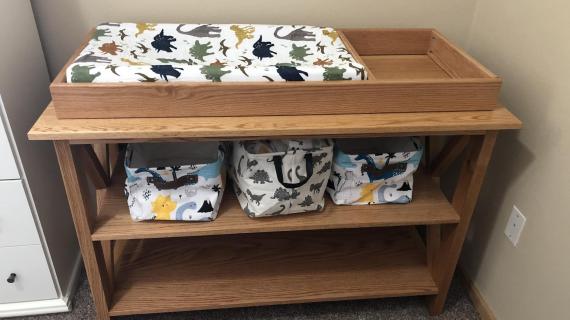
Step 14
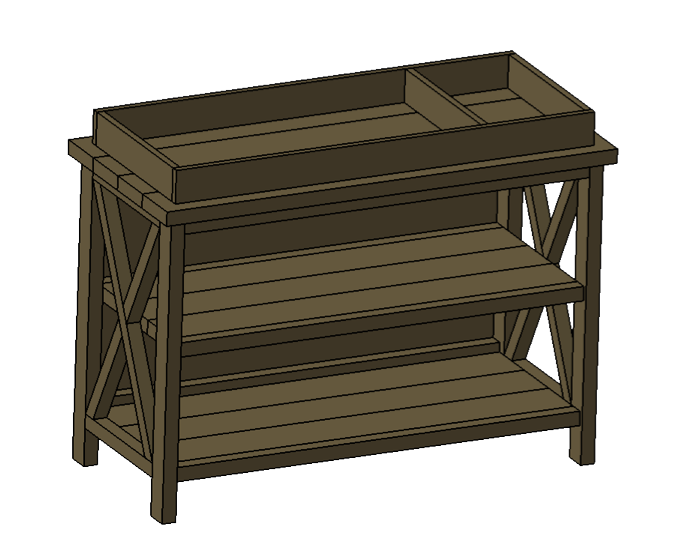
Complete
It is always recommended to apply a test coat on a hidden area or scrap piece to ensure color evenness and adhesion. Use primer or wood conditioner as needed.
Step 1: Pre-Stain Wood Conditioner
Step 2: Minwax Dark Walnut Stain
Step 3: Minwax Finishing Wax
Table Base
Step 1: Pre-Stain Wood Conditioner (edges)
Step 2: Minwax Dark Walnut Stain (edges)
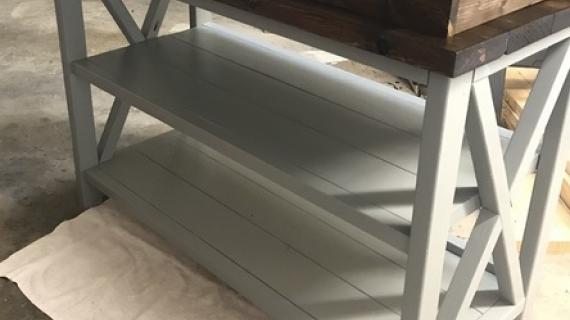
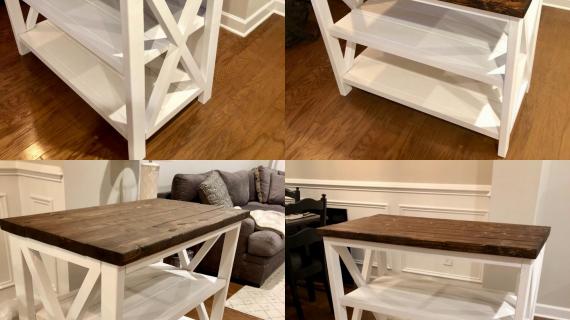
Step 3: Mix of paint samples we had laying around
Step 4: Minwax Finishing Wax

Comments
balloongal247
Tue, 03/25/2014 - 09:48
Plan Format
I like how you displayed these plans. Especially the visual breakdown of the cut list--what cuts should come out of what boards. I also like that the kreg holes (and nail holes) are more visible, since they are red overlays. Sometimes looking at plans I have to strain to figure out where the kreg holes are hiding.
Some of those last diagrams must be at a strange angle though! When I first looked at them, they made me think the table was at a slant.
RogueEngineer
Tue, 03/25/2014 - 17:51
Thanks
Thanks ballongal1247! Coming from an engineering background I am use to using different tools to get the same job done as Ana so that's why this plan looks a little different. With any luck maybe one day I have as awesome of a following as Ana!
Note: Sometimes when I take screenshots I get excited and if its not aligned just right it can give you that slanted look. Sorry :)
Thanks again.
bp1108
Thu, 03/19/2015 - 19:29
Awesome
Just built this and it looks awesome. My wife loves it. Thanks!!! Just curious how much weight the middle shelf can hold with only 3 screws in each side. By the pictures on this page it can hold at least a toddler.
I also really like the cut list. Really easy to follow. Also the least amount of scrap I've had on a project.
stephenislegend
Fri, 02/03/2017 - 06:03
Materials question
Great plans, def gonna be making as I have a new little one coming in about a month and a half. My only question is, where in the world are you finding 2x3 material? Are you just ripping 2x4 down on the table saw? I cannot find it at big box home improvement stores. If you are ripping the material from 2x4, are you ripping it to an even 3 inches width, or to 2-1/2 inches. (nominal vs actual width) Any pointers would be appreciated. Thanks! And keep the great plans coming.
Stephen C.
ThePhillip
Sun, 07/28/2019 - 11:43
Some steps don't specify…
Some steps don't specify what size pocket hole/screw to use. How can I know?