


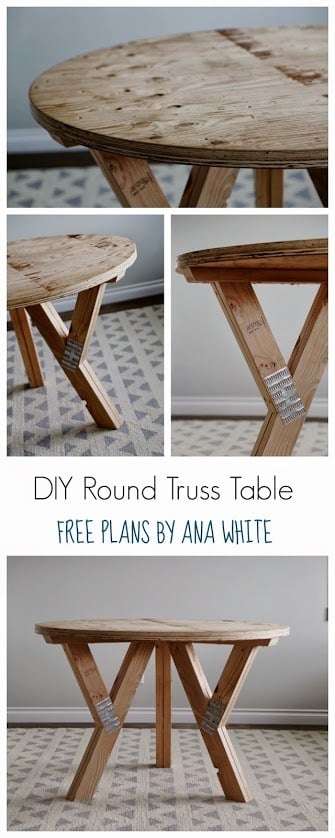
DIY wood truss table from ana-white.com

One sheet of plywood. Six mending plates. A 2x4. Two 4x4s.
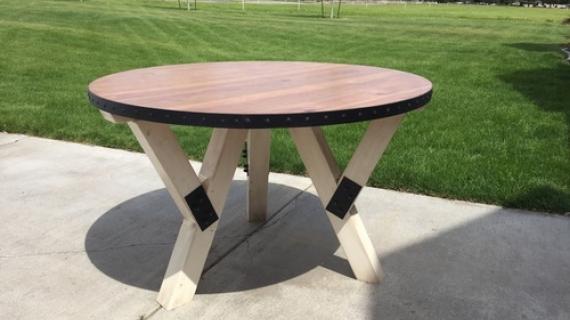
This table.
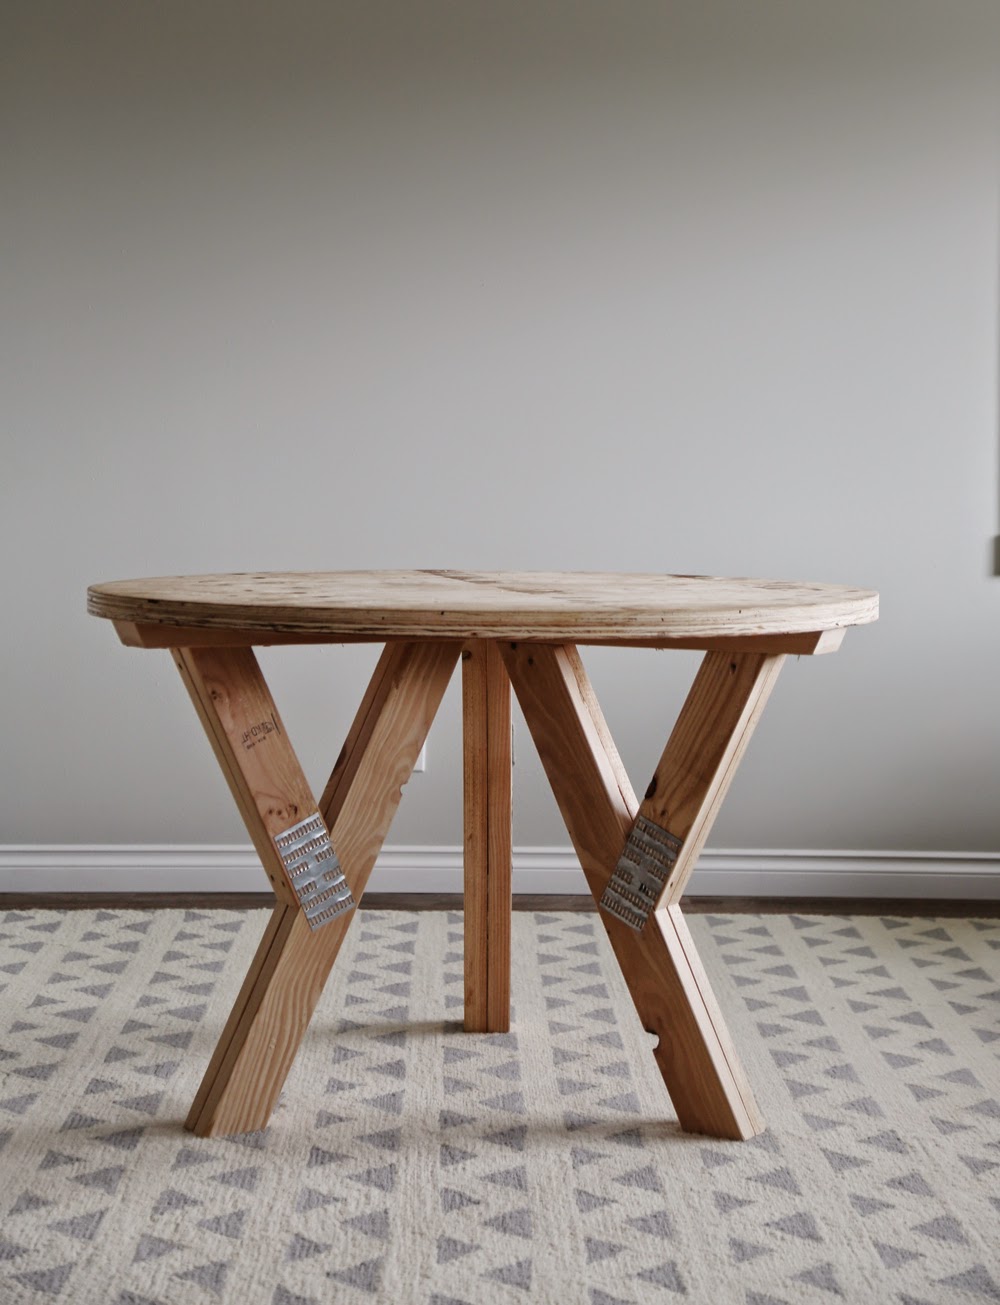

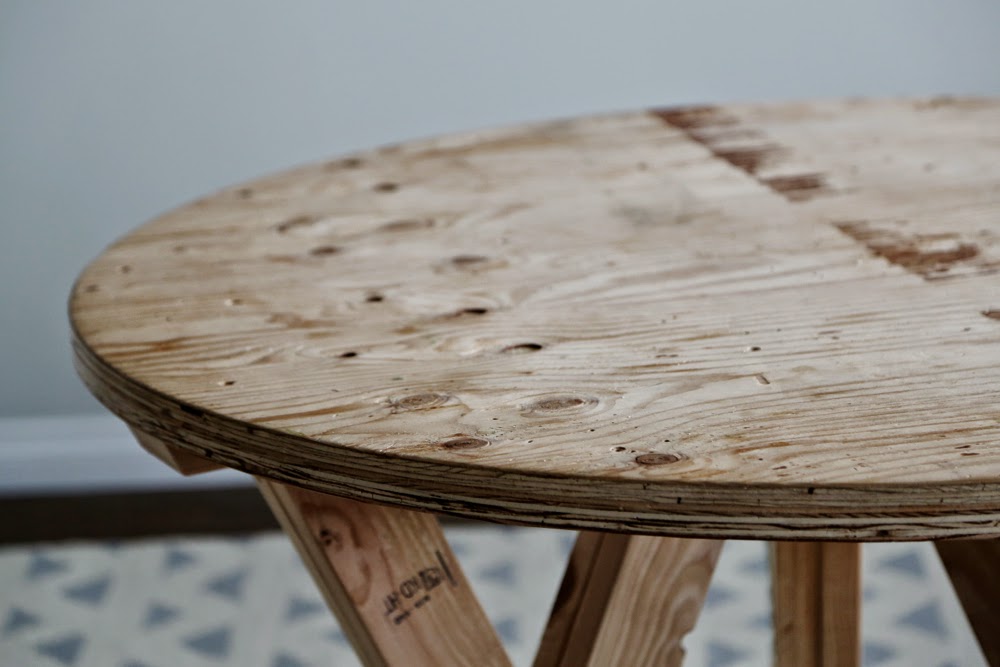

Who knew framing materials could be so beautiful.

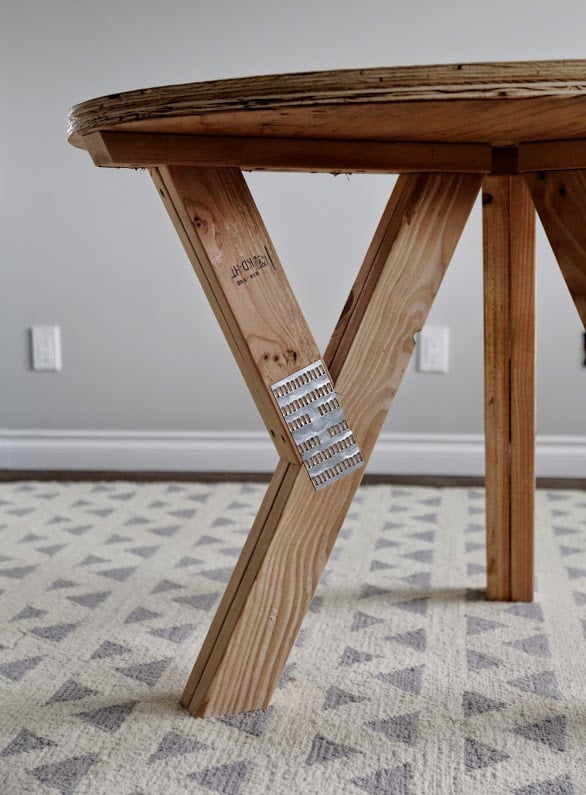
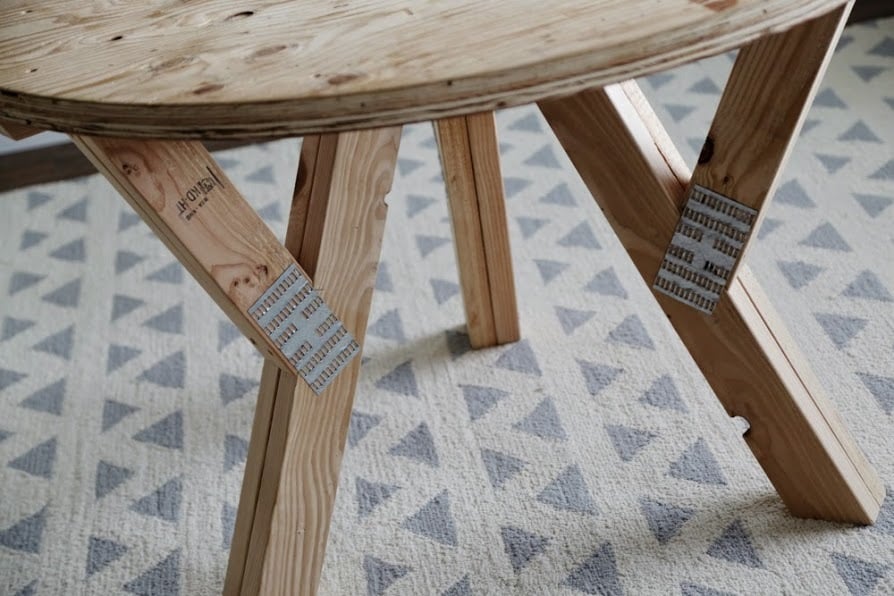
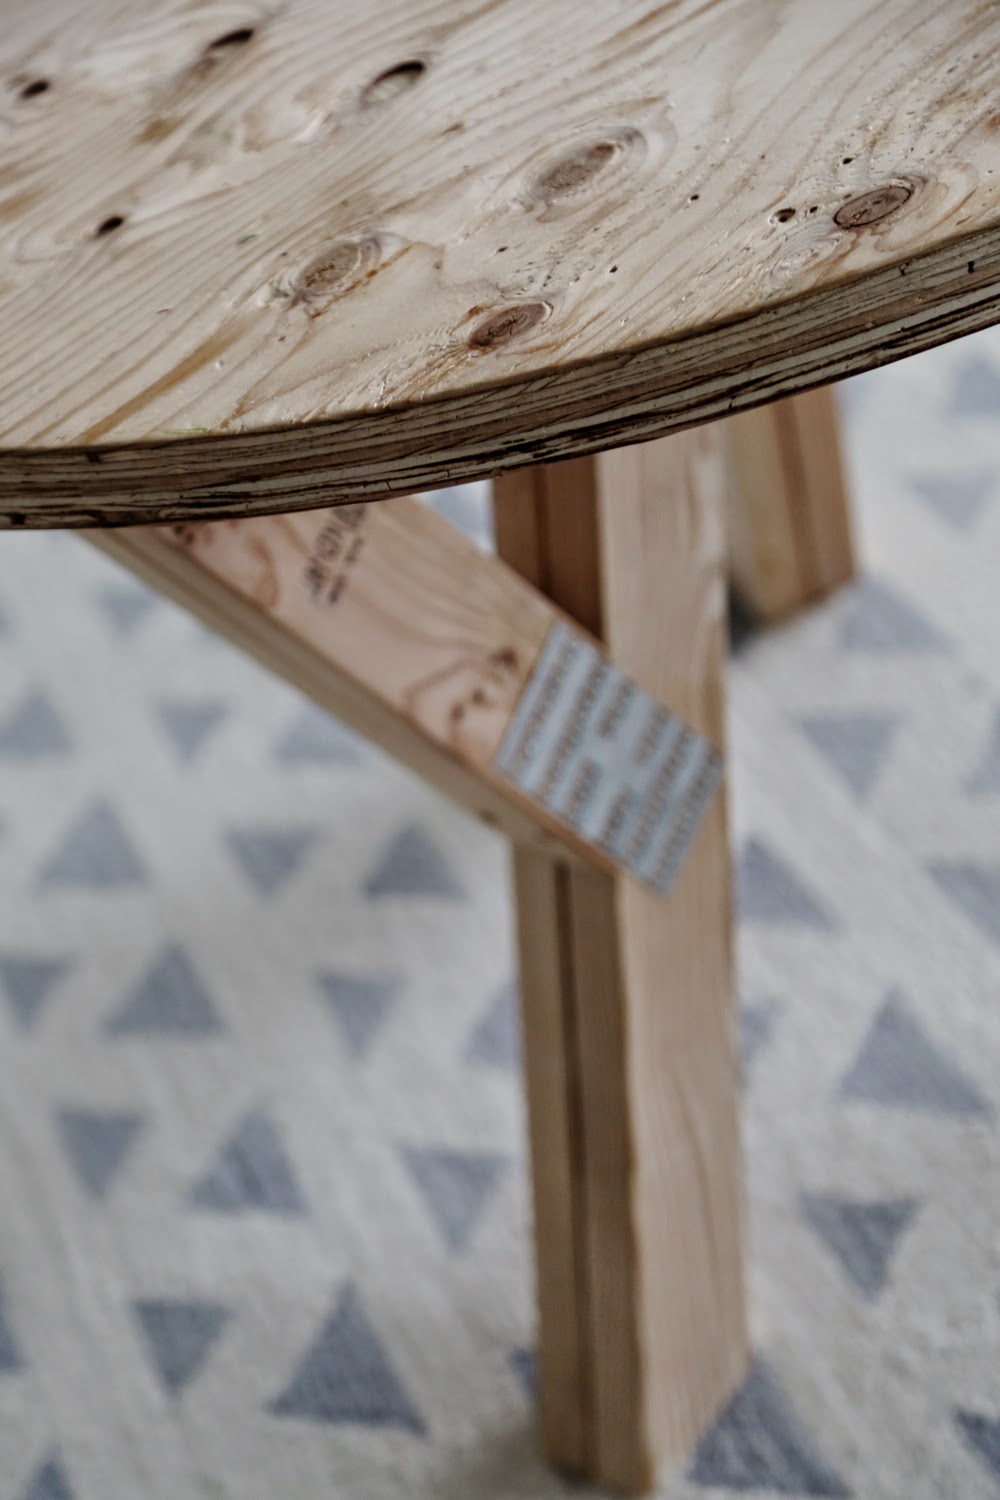
This was a very easy project to make. The legs are tied together with Simpson Strong Tie MendingPlates, about a buck each.
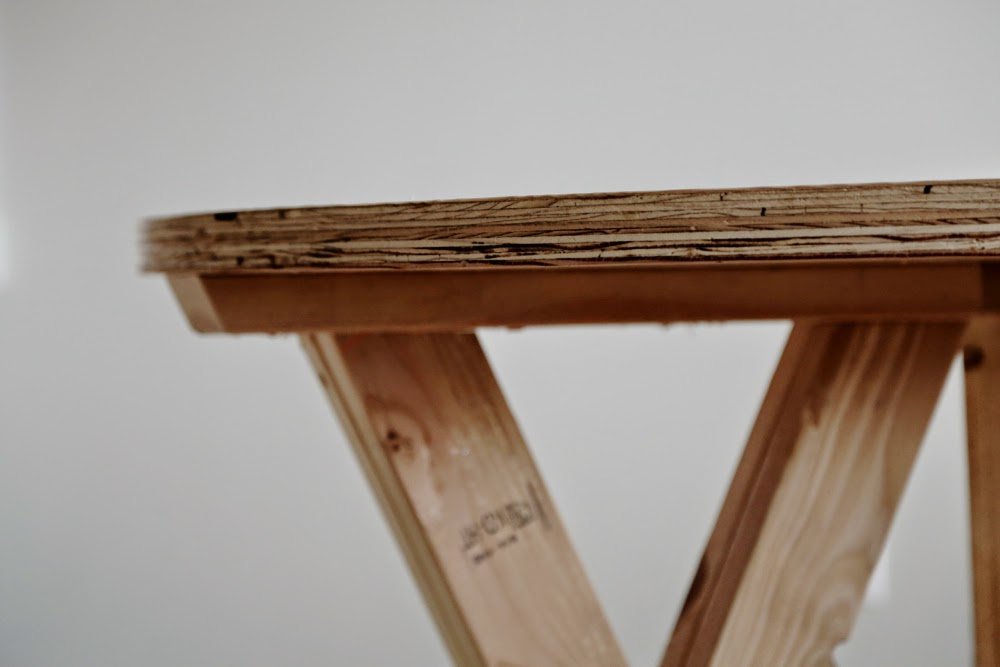
You probably also noticed that my table is made with 2x4s for the legs (instead of 4x4s). You can do this too - just double up 2x4s.
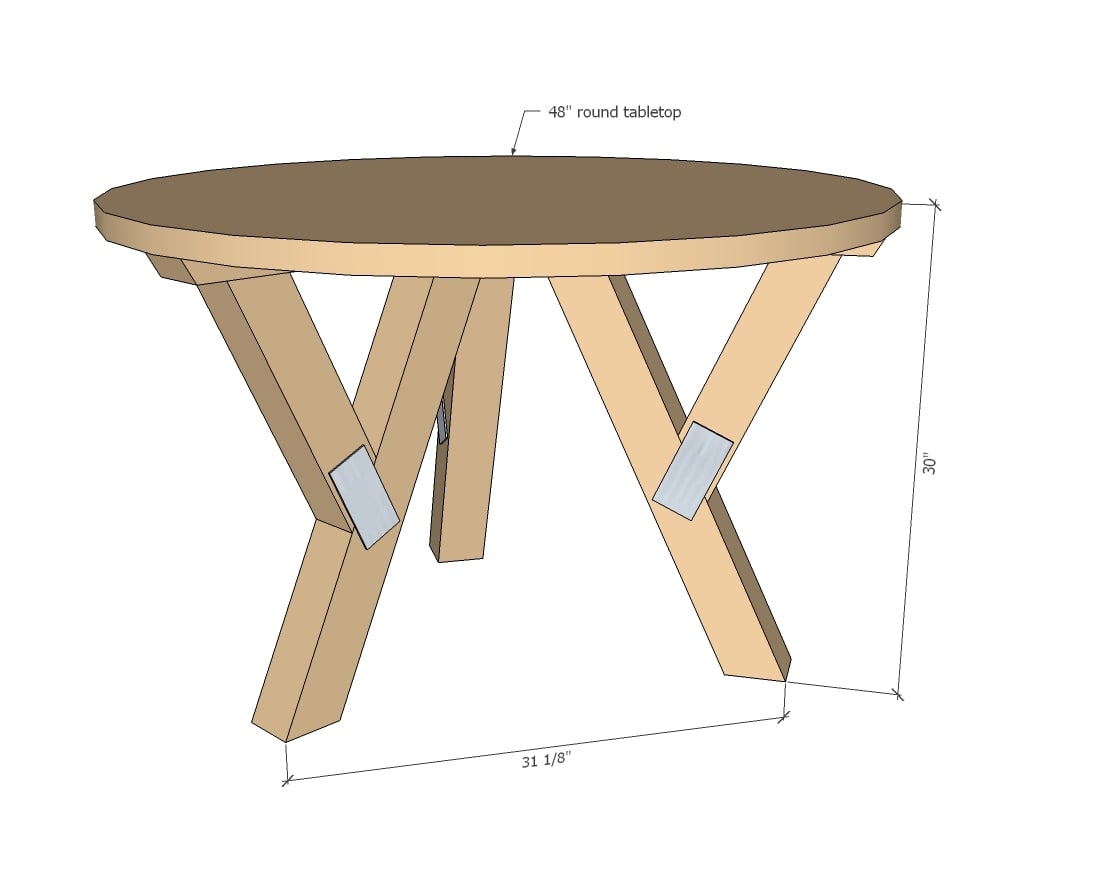
This base is designed to fit a 48" round tabletop, that could be purchased off the shelf at a hardware store.
I choose to make my own with a piece of 3/4" plywood, laminated together with glue and screws from the underside to get the 1-1/2" thickness.
Here's how I cut the round table on my tablesaw:
Enjoy the plans following, and if you happen to make this table, please share.
Ana

DISCLOSURE - I partnered up with the folks at Simpson Strong Tie to bring you this project plan.
Preparation
1 - 2x4 @ 8 feet long
2 - 4x4 @ 8 feet long (or 2 more 2x4 boards)
6 - Simpson Strong Tie Mending Plates
1 - 48" round tabletop (we used a full sheet of 3/4" plywood and made our own)
3" and 2-1/2" Self tapping wood screws
6 - 2x4 @ 22-1/2" LONG (To long point, one end cut at 25 degrees off square)
3 - 4x4 @ 29-3/4" LONG (Long point to short point, both ends cut at 25 degrees off square, ends ARE parallel)
3 - 4x4 @ 17-1/8" LONG (Longest point measurment, one end cut at 25 degrees off square and the other end cut at 40 degrees off square)
Make sure your miter saw will cut the 4x4s. If not, you may consider doubling up 2x4s as I did.


Please read through the entire plan and all comments before beginning this project. It is also advisable to review the Getting Started Section. Take all necessary precautions to build safely and smartly. Work on a clean level surface, free of imperfections or debris. Always use straight boards. Check for square after each step. Always predrill holes before attaching with screws. Use glue with finish nails for a stronger hold. Wipe excess glue off bare wood for stained projects, as dried glue will not take stain. Be safe, have fun, and ask for help if you need it. Good luck!
Instructions
Step 1

Attach the two 4x4 pieces first to the top 2x4 with 3" screws (you could also use 2-1/2" screws here too to match the ones you'll use to attach to the tabletop) and glue. Use the measurements in the diagram to place the pieces.
Then hammer the mending plates to join the two 4x4 pieces together (the mending plates are backed with spikes that you just pound into the wood) Flip over and repeat on opposite side.
Once one leg is done, use it as a pattern to make remaining legs.
If use doubled up 2x4s instead of 4x4s, I recommend first joining the boards with 1-1/2" pocket holes on the inside, making six of the leg sets up, then screwing them together with 2-1/2" screws, and finally adding the mending plates.
Step 2

With tabletop face down, position legs on underside and glue and screw down.
It is always recommended to apply a test coat on a hidden area or scrap piece to ensure color evenness and adhesion. Use primer or wood conditioner as needed.

Comments
sro
Sun, 12/28/2014 - 18:12
Do you think this would work
Do you think this would work for a larger top? I have a zinc top that's a 63"x40" rectangle but I need to build a base for it. Or do you have a good way to calculate what size of pedestal base is needed for different sized tables? Thanks in advance.
odeeodum
Tue, 01/13/2015 - 15:35
Would this work with a 60" round?
I would like to make the top 5-feet round, any changes you think I would need to make to the pedestal?
Ana White Admin
Wed, 01/14/2015 - 10:42
60"
It would actually work better in 60" just need to bring legs out toward edges instead of keeping in middle