Hi there! Thank you for following along on our cabin build process!
A little while back, I posted about how we built the decks for the cabin -
As you can see, this is definitely a deck that should be covered. Our cabin is in the mountains, so several feet of snow each winter can be expected.
Knowing this, from the beginning, I designed covered decks into the cabin plans. You can go back and add covered decks, but it's always easiest if you plan for them from the beginning.
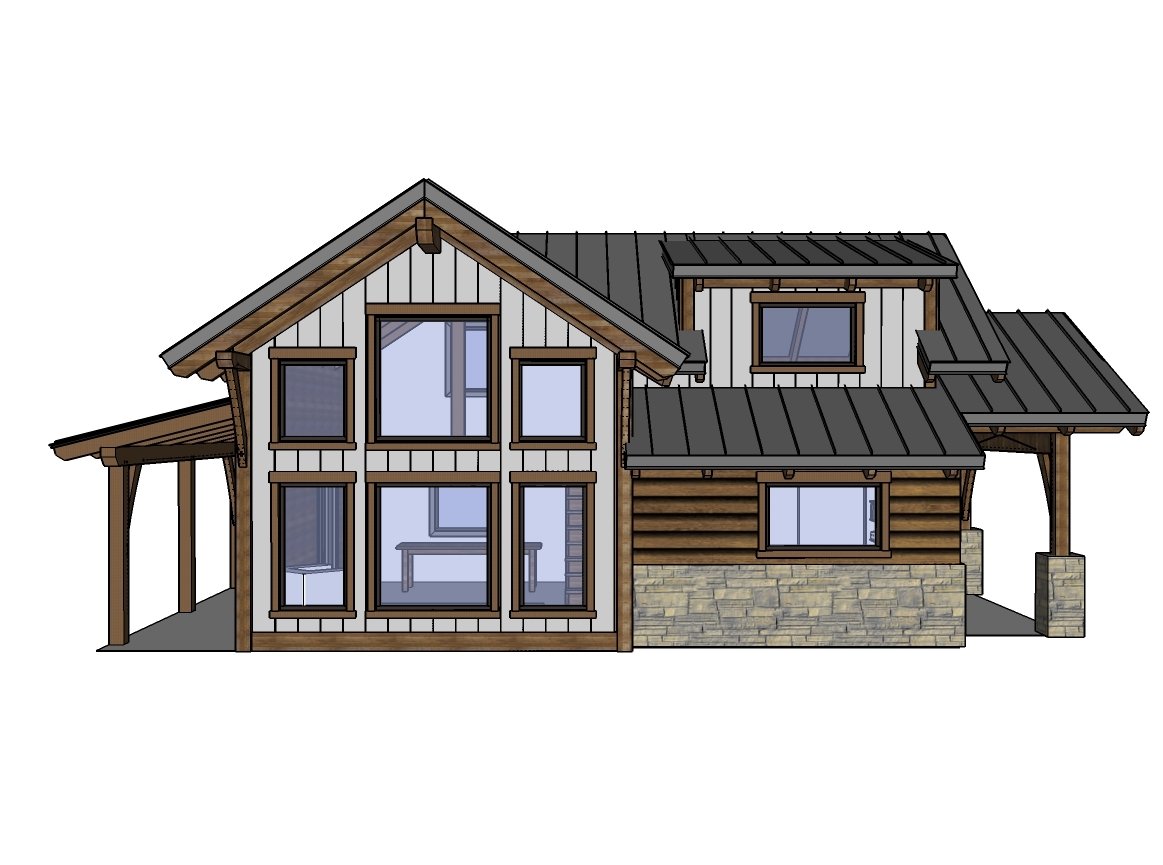
I also felt the covered decks added to the design by making the cabin more balanced. That, and our 24x30 cabin looks huge when you add the decks on the sides. Outdoor spaces should never be overlooked or underdesigned.
My favorite of the covered decks is the north deck, with the simple shed roof. I know the front porch has a much fancier roof line (and I'll be showing you soon how we made that too), but the simple design of the back deck steals my heart.
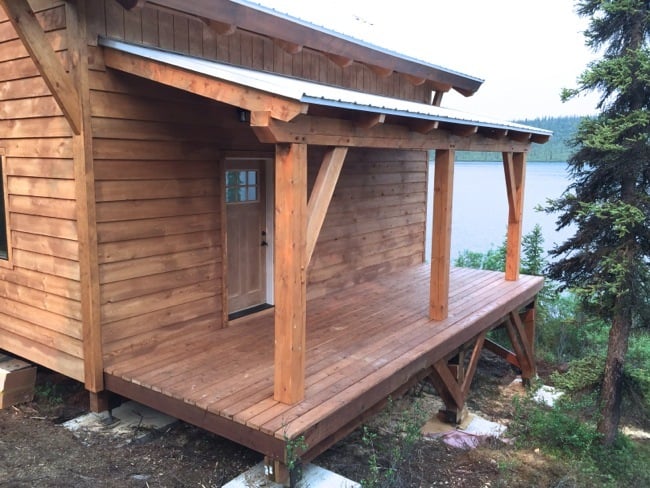
These photos just don't do it justice - I wish you could see it in person!

And there's something about the lower roofline (as opposed to the tall cathedral height of the front deck) that makes you feel warm and cozy all over, and just want to hang out and relax. It's also cooler and provides more shade.
We'll get to the front deck soon, and it's definitely a statment making entryway, but today, I want to share with you how we built the timberframe shed roof over the back deck.

When we framed up the walls for the cabin, on the north wall we notched in a 2x8 where the shed roof will tie into the wall.

When we handcut the timberframe for the cabin, we put together the support wall for the shed roof out of timbers.

The final step in framing the shed roof is to stack rafters also cut from 4x8 beams on top of the notched in 2x8 and the timberframe wall. We precut the rafters at home as well.
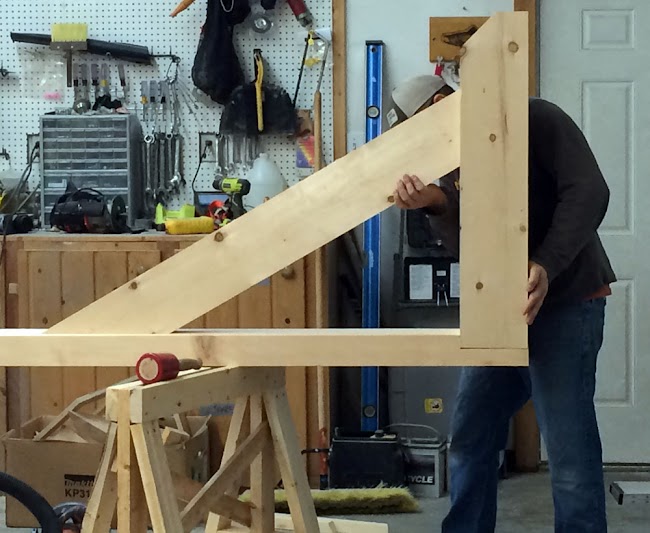
In the garage, six weeks before we were scheduled to start building on site, we started cutting the timberframe. The raftes go pretty quick -
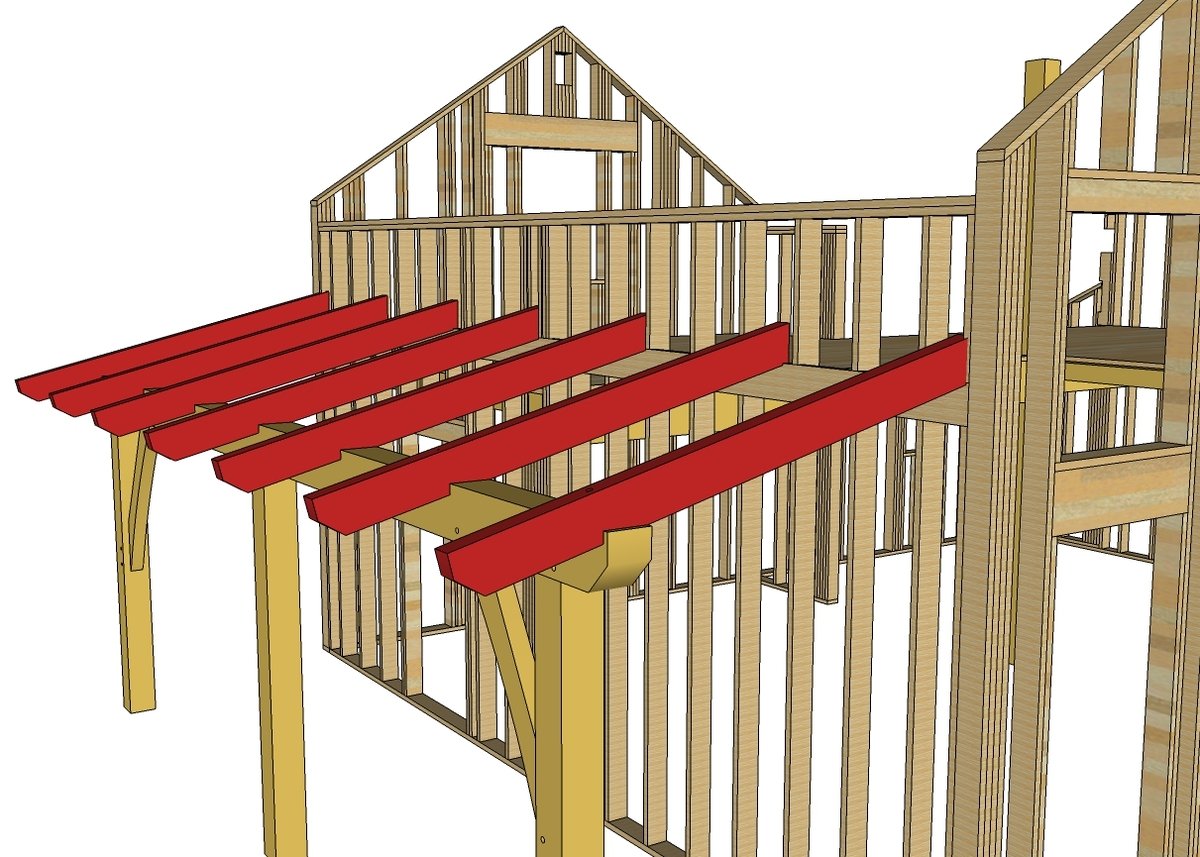
The ends are just cut at the roof pitch, and birdsmouths are cut out where the rafter sits on top of the 2x8 notched into the wall and over the beam on the open side.
It's the beam wall that takes the time.

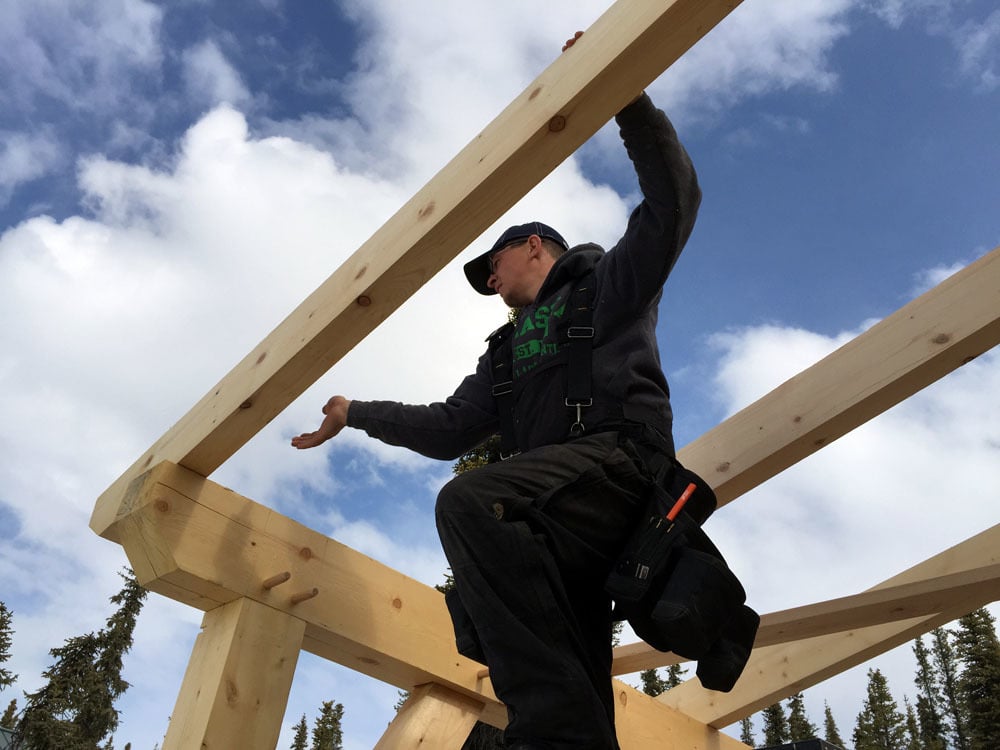
The beams are extremely heavy, especially the main beam that runs the entire length of the porch. So just manuevering them by hand is a huge task.
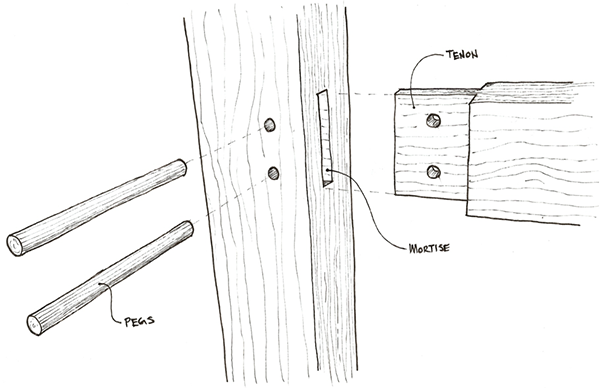
In this timberframe, we will have no exposed fasteners except for wood pegs, using a mortise and tenon joinery systems.
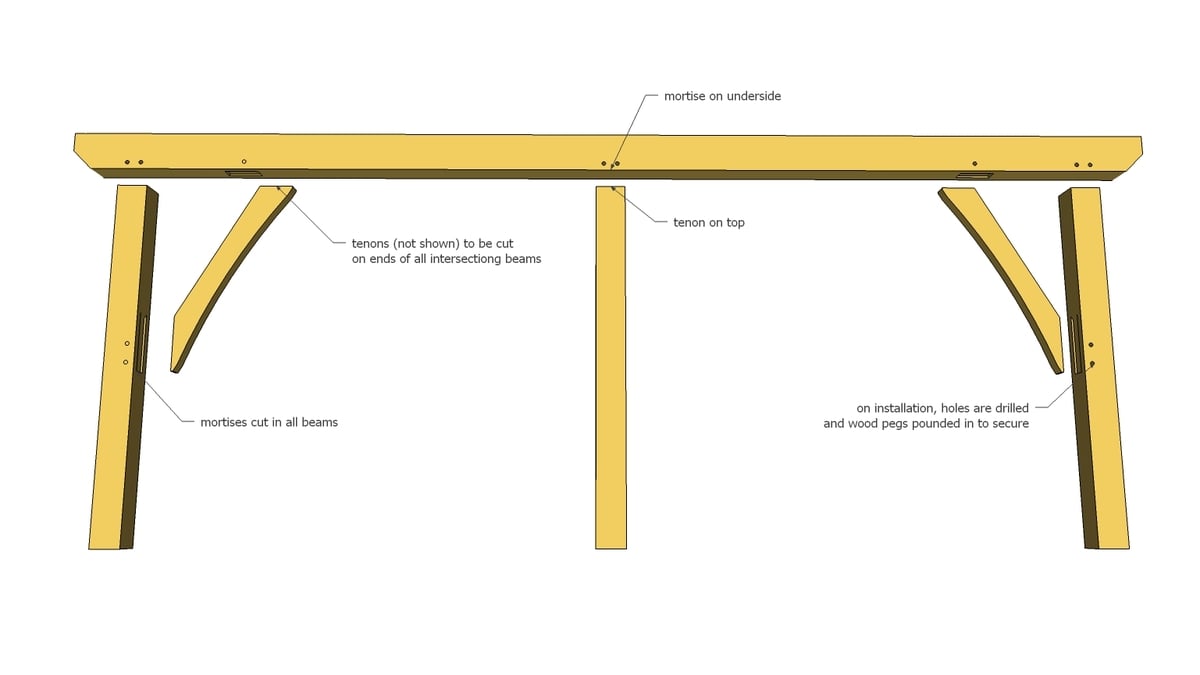
That means tenons are cut on all the ends of the intersecting pieces and mortises notched into the beams.

The tenons are relatively easy. You use a circular saw, set to the depth of wood you want to remove, and make cuts every 1/4" or so, and then finish the cut with a chisel. Since you are cutting against the grain, the wood breaks off easily. Even angled tenons like these are just a matter of marking and cutting.
It's the mortises that take the time and work. You can buy a mortiser, but we don't have one, so we just used basic carpentry tools - a drill and a router.

We start by marking out where the mortise needs to be cut. Since we are working with rough cut beams that can vary in width by as much as 1/8", we found the center and worked out from there using our Kreg Multi-Mark tool - that tool was invaluable for marking out the timbers.

Because wood will shrink and warp, not only are we cutting a pocket for the tenon to fit inside, but we are also removing material to embed the entire end of the intersectiong beam. This will hide any changes in the wood at the joint, inside the beam.
So to start, we set our drill for the depth of the tenon, plus about 1/2" -

And then drill holes where the tenon will ultimately go -
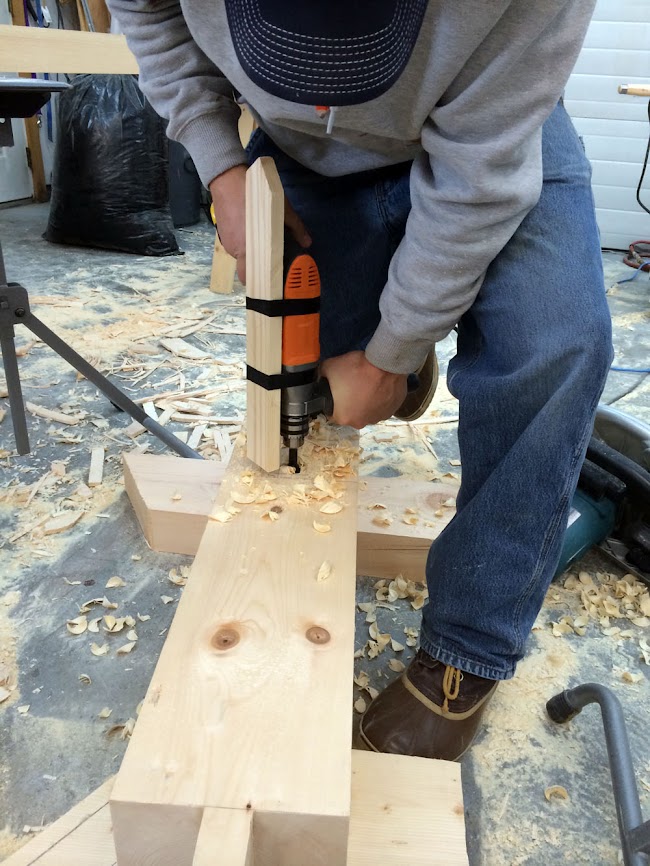
The drill bit is the same size as the tenon we will be cutting.

That removes the bulk of the material, and then we can just finish the cut with a chisel.
This part is easy because the drill takes out most of the material, and you can drill deeper than you need to.
It's the shallower cuts that are harder, since you have to take out a specific depth of material.

We tried cutting with a circular saw like we did for the tenon, but since this time we are cutting with the grain, when we went to chisel out the wood, it didn't give at all. So we purchased a large router with a bit, and went that route. That worked alot better.

Then the cut can just be finished up with a chisel.

We used a special corner chisel to clean the corners up.
On this particular pocket, we need to also take out the bottom portion at an angle to allow the cross brace to fit inside.

The best way to do this that we found was to cut a block of wood at the desired angle and use it as a guide to chisel out the pocket.

Taking the pockets out was very time consuming and labor intensive,

This one especially.

We fit all the joints for the porches in the garage, numbering each one and custom cutting until each fit perfectly. We figured it would be much more sensible to do this in the garage, than in the field, working remote, outdoors in the Alaska weather.

It took a bit of fitting, chiseling, re-fitting -
Finally they fit square!
It was a few weeks between when we cut and when we started assembling, so were were nervous when it was time to start errecting the porch timbers on the project site. Will they still fit? Did the wood warp or dry on us?


All that extra work in the garage definitely paid off. The pieces fit together like Lincoln logs!
I can't believe I don't have a photo of the back deck all put together (I got called away on baby duty and the next thing you know the porch was up -

But what we did was assemble the entire "wall" upside down, an then flip it over and place it in position.

We then added temporary bracing to the top, tied into cleats added to the exterior framed walls, to hold the timber wall in place so we can start setting rafters.

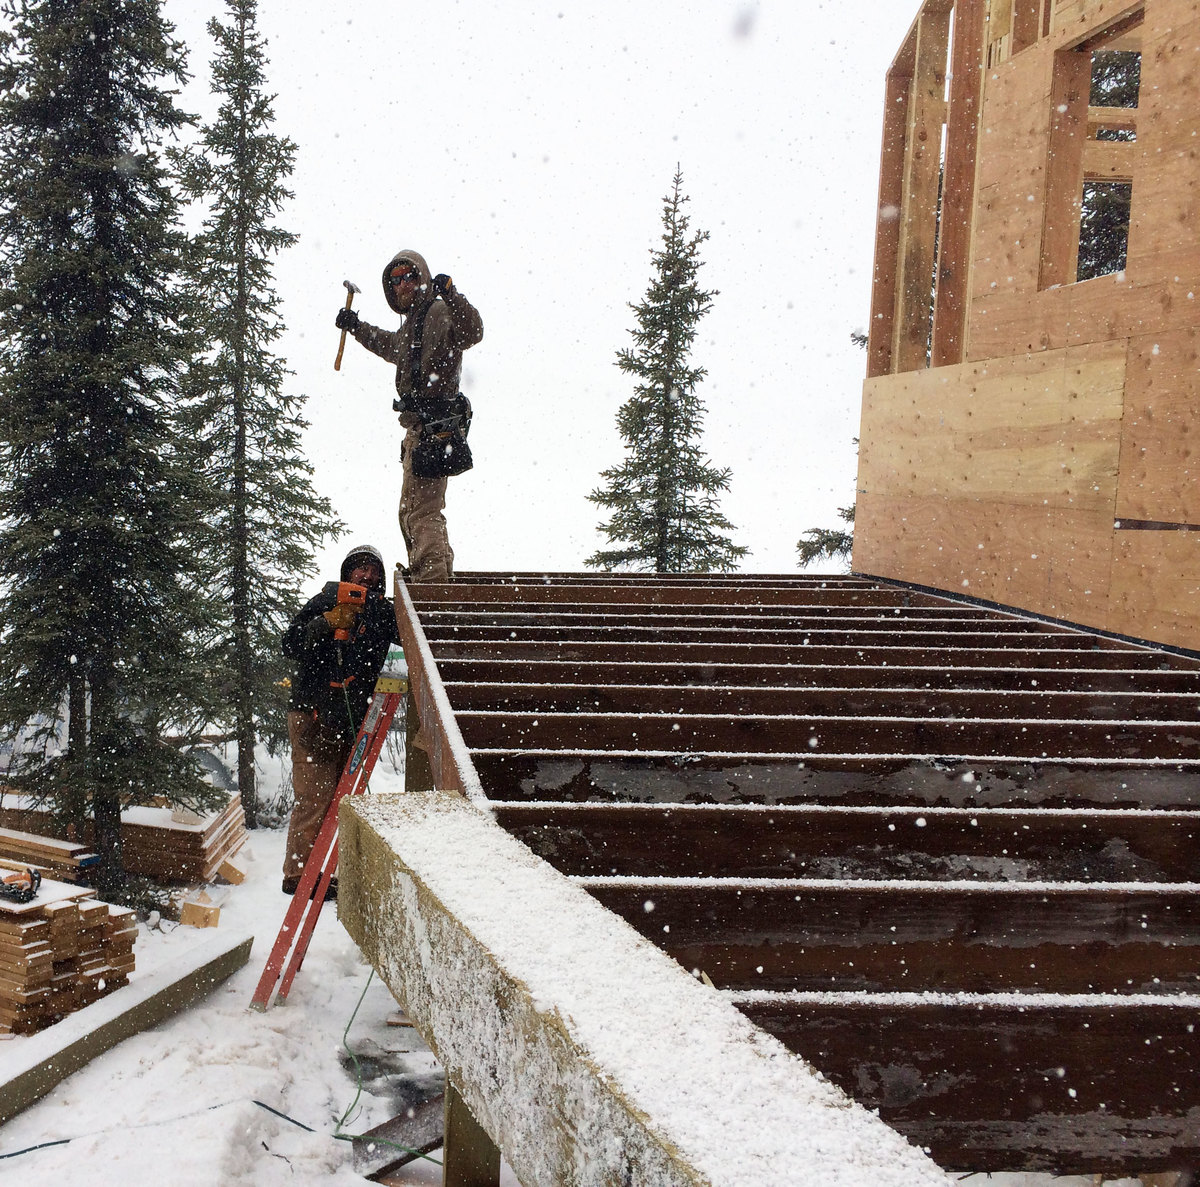
Then it was just a matter of hauling rafters out to the deck,

Up a ladder,

Into position on one end,

All the way on top,

And then in position on the wall and beam.
And that's it. Each rafter is tied in with screws hidden on the tops.

It was exciting seeing the progress of the roof happening so fast. That's the thing about timber frame - it's alot of work up front, but pretty much instant gratification on site. This really worked well for us, since we could do most of the work in a heated garage, leaving just assembly for field work out in the elements.

Can you see why this little shed roof is one of my favorites? Someday, I'm going to do a pergola like this roof!
And here's what the deck looks like today.
Easy? No. Worth it? A thousand times yes.
Thanks so much for reading and following along on our cabin building journey!
XO Ana + Crew
Comments
Lady Goats
Wed, 07/08/2015 - 19:06
I can absolutely see why it's your favorite!
I do love what I've seen of the front porch, but this one calls for a cup of coffee and a good book
Rebecca@TheFam…
Thu, 07/09/2015 - 06:49
Beautiful!
Your property is beautiful and so secluded. I love the details on the cabin build also. This surely takes talent.
kariusername
Thu, 07/09/2015 - 12:20
Set back Beams
Surrounded by such gorgeous scenery you will enjoy that covered deck so much! I am enjoying watching your cabin being built and learning lots along the way! Question - why did you set the beams back what looks like about a foot from the edge of the deck? My novice brain would have thought they would go over the piles to help support the weight and cover the complete deck? I am designing my own covered deck right now and included a bit of an overhang on the roof too and contemplating foregoing the eavestrough by doing that too. Will you add eavestrough to that deck roof? Thanks Kari
NerdyGirl
Mon, 01/09/2023 - 10:35
Timber frame/ Post and beam
Wow! Absolutely beautiful. Any chance you will be creating timber frame or post and beam garden structure plans? I haven’t found any plans for sale similar to the gabled roof arbor benches I fell in love with on Pinterest.