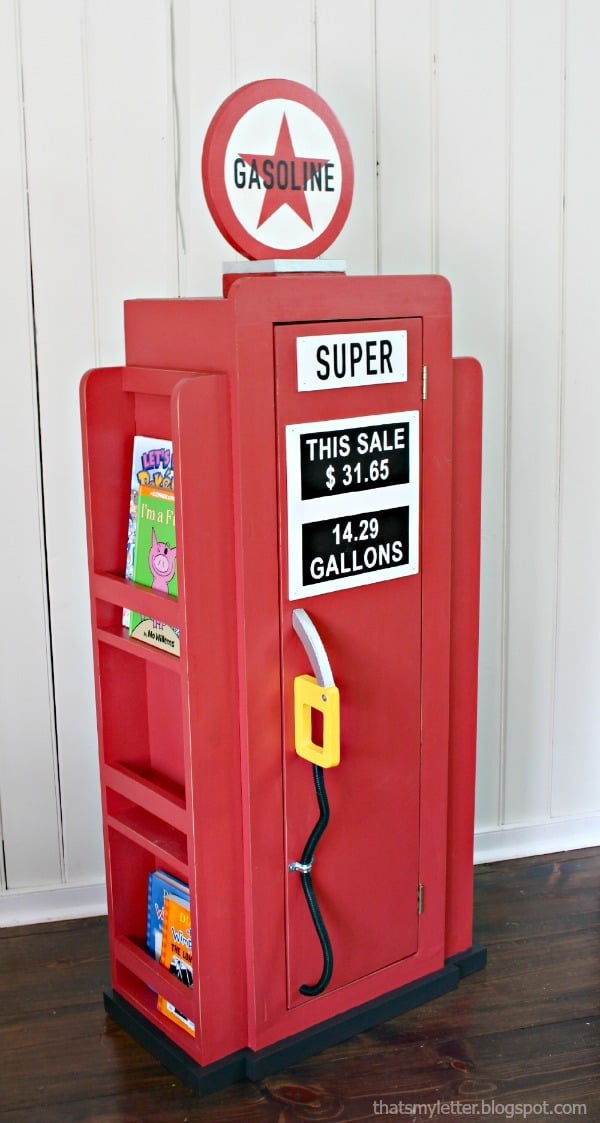

For the cutest boy car room ever! DIY plans for a vintage wood gas pump bookshelf!
Hi there, and Happy Friday! Happy Handbuilt Holiday too!
For those of you who may be new here, each year, Jaime from That's My Letter and I put on a series of new, free gift plans every Friday in the weeks leading up to Christmas.
I adored last weeks project plan -
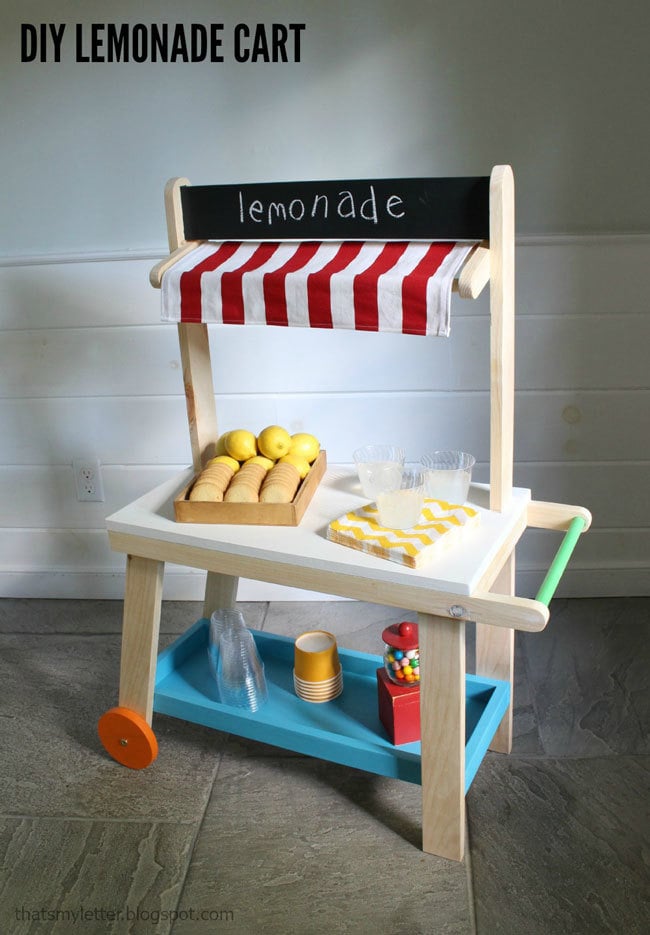
This little DIY Lemonade Cart that you can make with scrap wood! There's tons more gift ideas too here, so please do take a second to browse through and create your Christmas build list!
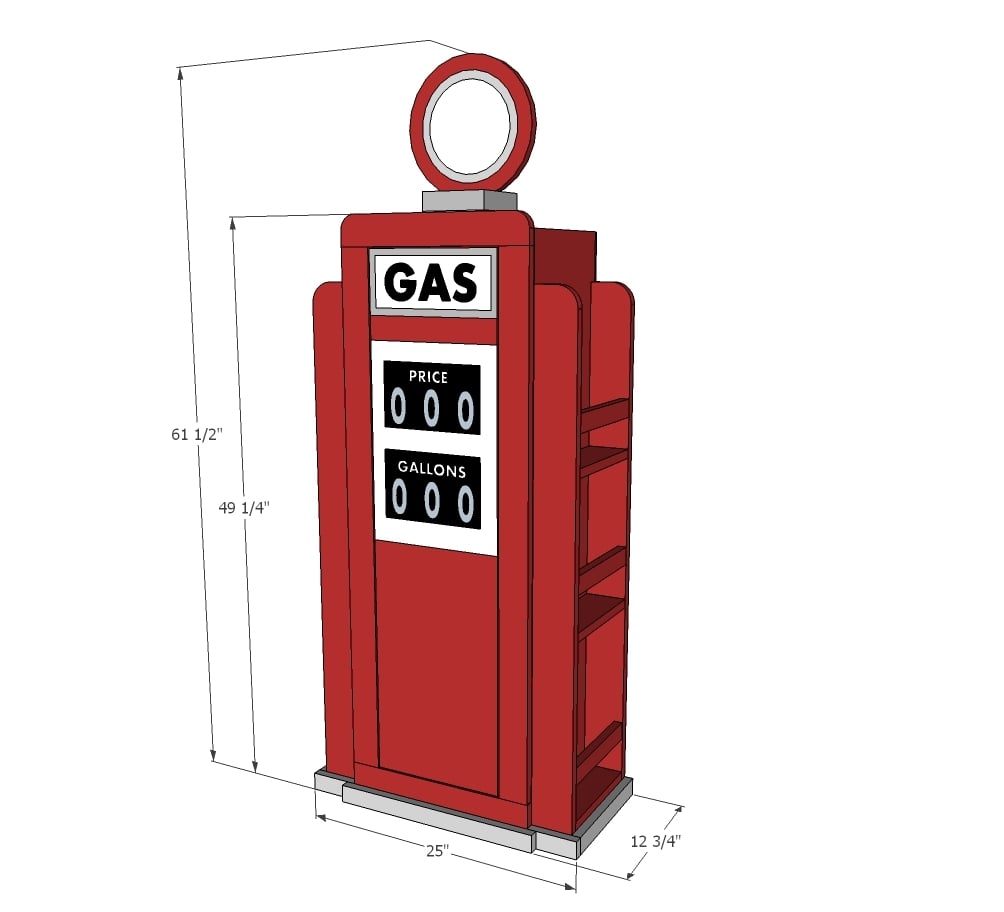
I'll have to admit, I was a little hesitant about this week's Handbuilt Holiday gift. Jaime wanted to build a vintage gas pump bookshelf.

As in convert this into a piece of furniture for a kids room. Hmmmmm ...
Well, we went back and forth a few times with design ideas, and finally came up with this -
And this is what Jaime built from the plans!

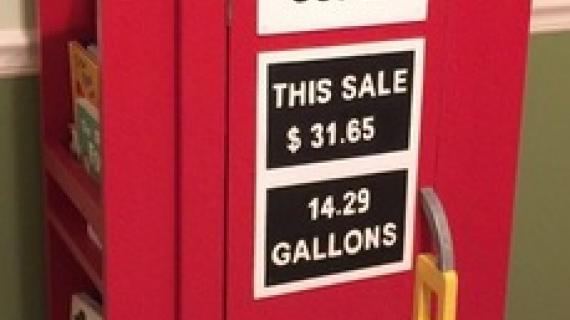
Whoa!!! The gas pump handle really took this one over the top!!!
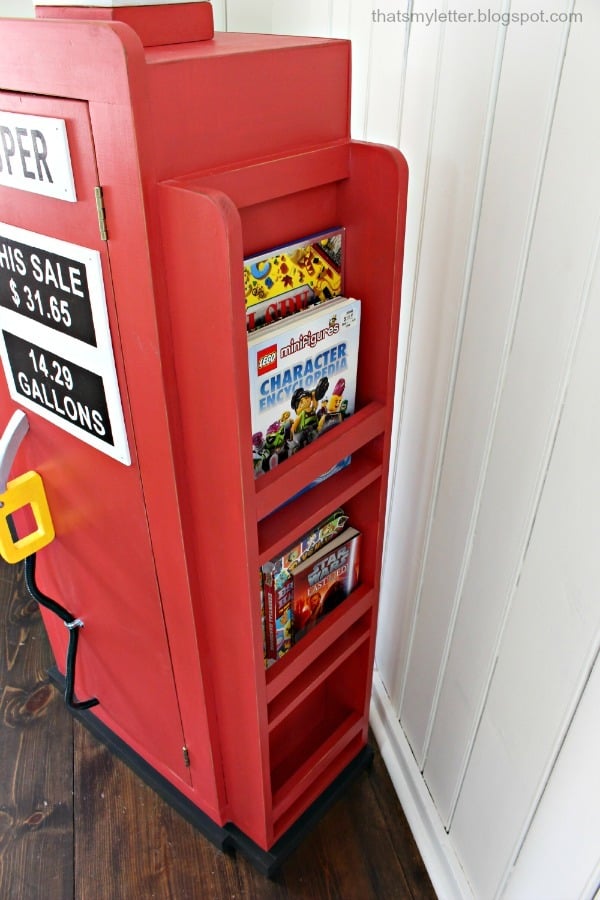
To exaggerate the shape of a vintage gas pump, but in such a way that adds functionality without creating building complexity, we added flat bookshelf ledges to the sides. It's maybe my favorite part of this project!
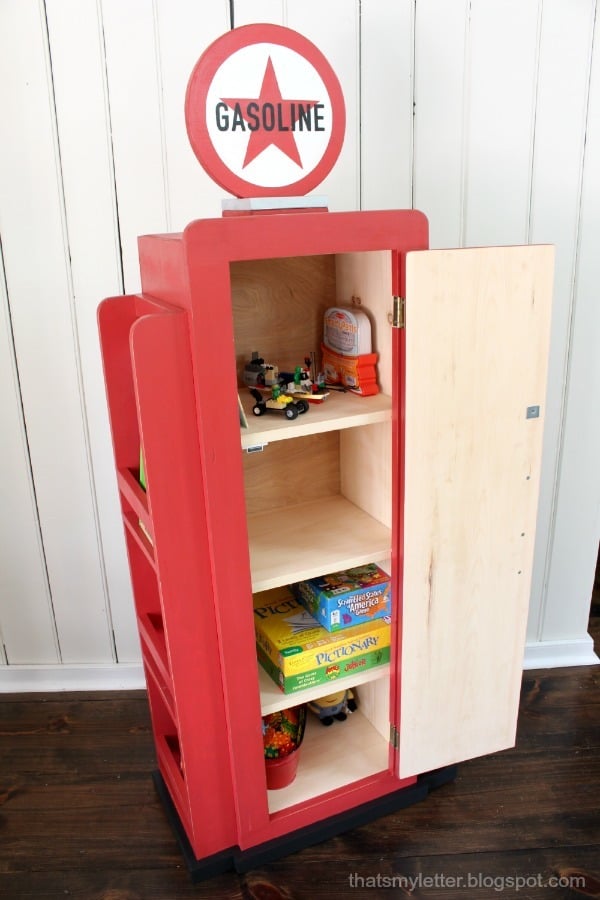
Inside the project is four shelves to hide bigger or less attractive toys.
This project would be so perfect for a boys room! My son loves cars, With a fun play rug -

And some fun sheets -

All you'd need is a car themed bed!

Photo uploaded to Pinterest via Kristine Miller
We gotta do a car bed sometime soon! I so wish my boy had his own bedroom. I'll have to build and decorate vicariously through you until we get a bigger house.
The plans follow, but make sure you take a second to check out Jaime's building post with lots more photos and details on how she built and painted this beautiful vintage gas pump bookshelf cabinet!

Have an awesome, enjoy the plans (if this is the homepage you'll need to click READ MORE below)!
XO Ana + Friends
CLICK HERE TO READ JAIME'S BUILDING POST AND FOR MORE PHOTOS

Preparation
2 – 1x12 @ 8 feet long*
1 – 1x12 @ 4 feet long*
1 – ¼” plywood @ 24” x 48”
1 – 1x3 @ 10 feet long
3 – 1x4 @ 8 feet long
2 – 1x2 @ 8 feet long
2x6 or 2x4 scrap wood
1 set of hinges and magnetic clasp
Wood filler
1 - 2 hole strap (1/2”)
3’ - 1/2” black flex tubing (http://www.homedepot.com/p/
*1x12s MUST be 11-1/4” wide
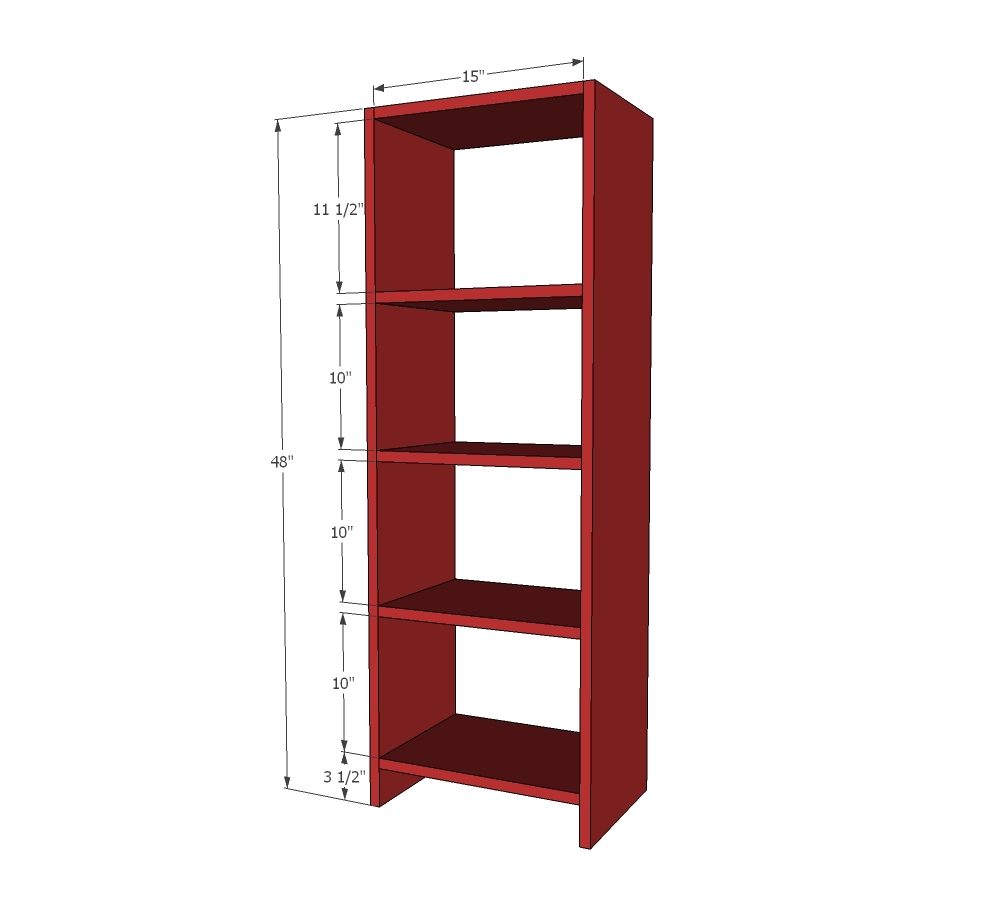
Main Bookshelf
2 – 1x12 @ 48”
5 – 1x12 @ 15”
1 – ¼” plywood @ 16-1/2” x 48”
1 – 1x3 @ 16-1/2”
1 – 1x4 @ 16-1/2”
2 – 1x3 @ 43-1/4”
Side Bookshelves (build 2)
4 – 1x4 @ 44”
6 – 1x4 @ 9 – 3/4"
10 – 1x2 @ 9-3/4”
Trim (cut to fit)
2 – 1x2 @ 11-1/4”
2 – 1x2 @ 4-1/4”
1 – 1x2 @ 18”
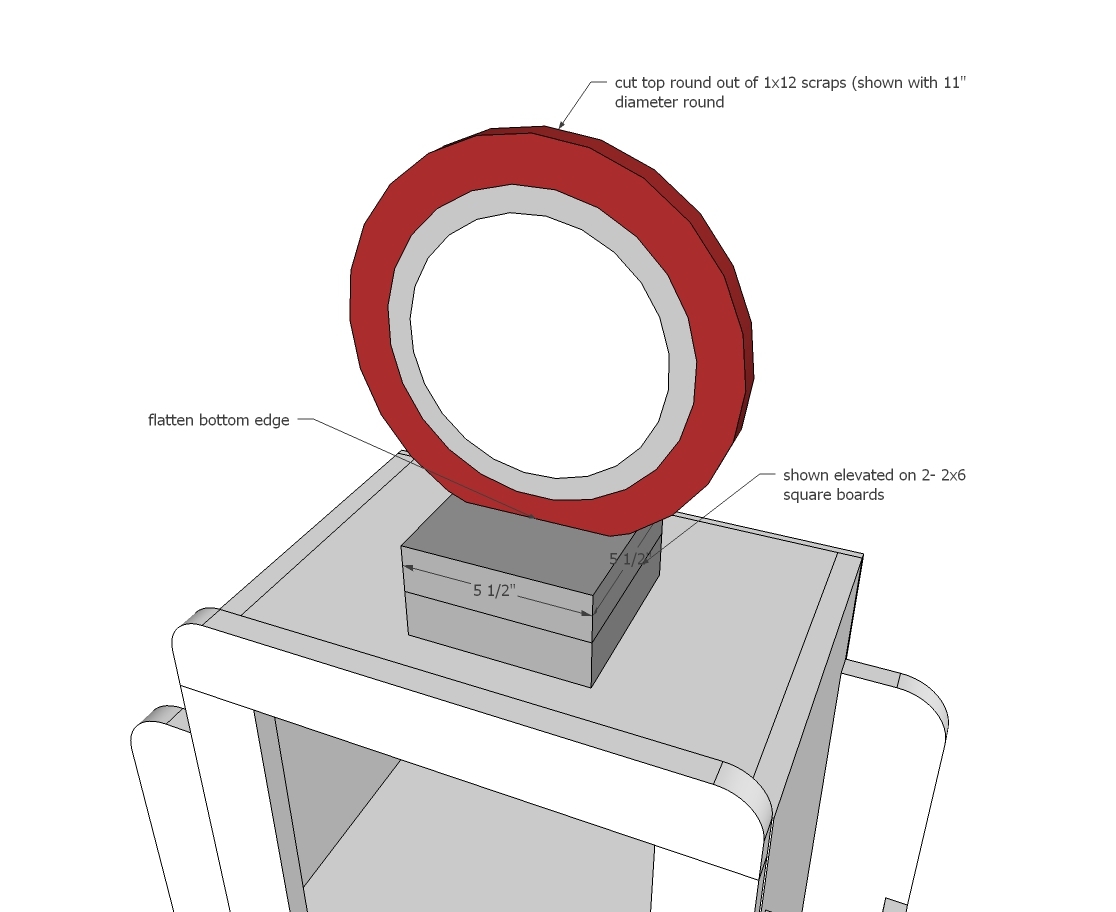
2 – 2x6 @ 5-1/2” (can use other scrap wood here)
1 – 1x12 @ 11” cut into circle
Door
1 – 1x12 @ 43”


Please read through the entire plan and all comments before beginning this project. It is also advisable to review the Getting Started Section. Take all necessary precautions to build safely and smartly. Work on a clean level surface, free of imperfections or debris. Always use straight boards. Check for square after each step. Always predrill holes before attaching with screws. Use glue with finish nails for a stronger hold. Wipe excess glue off bare wood for stained projects, as dried glue will not take stain. Be safe, have fun, and ask for help if you need it. Good luck!
Instructions
Step 1
Bookshelf can be built with pocket holes or nails with glue since both front and back joints will be reinforced.
Step 2
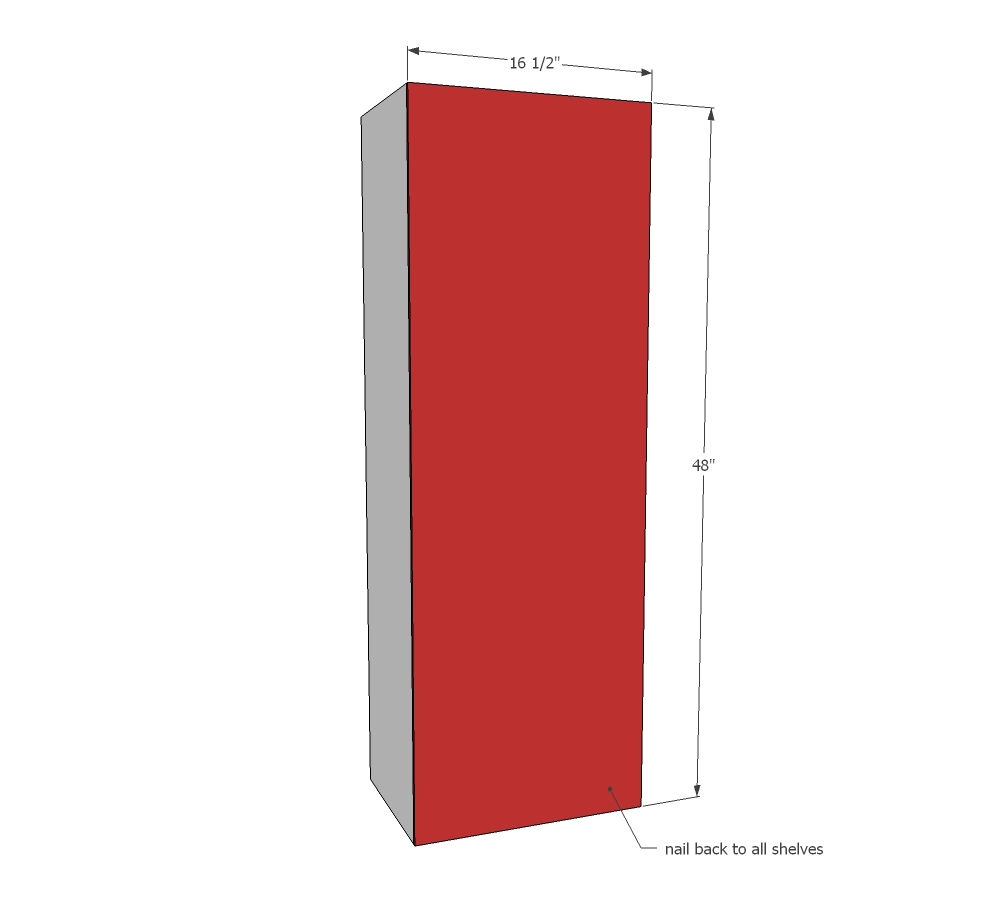
Attach back with ¾” nails and wood glue, nail to all shelves as well.
Step 3
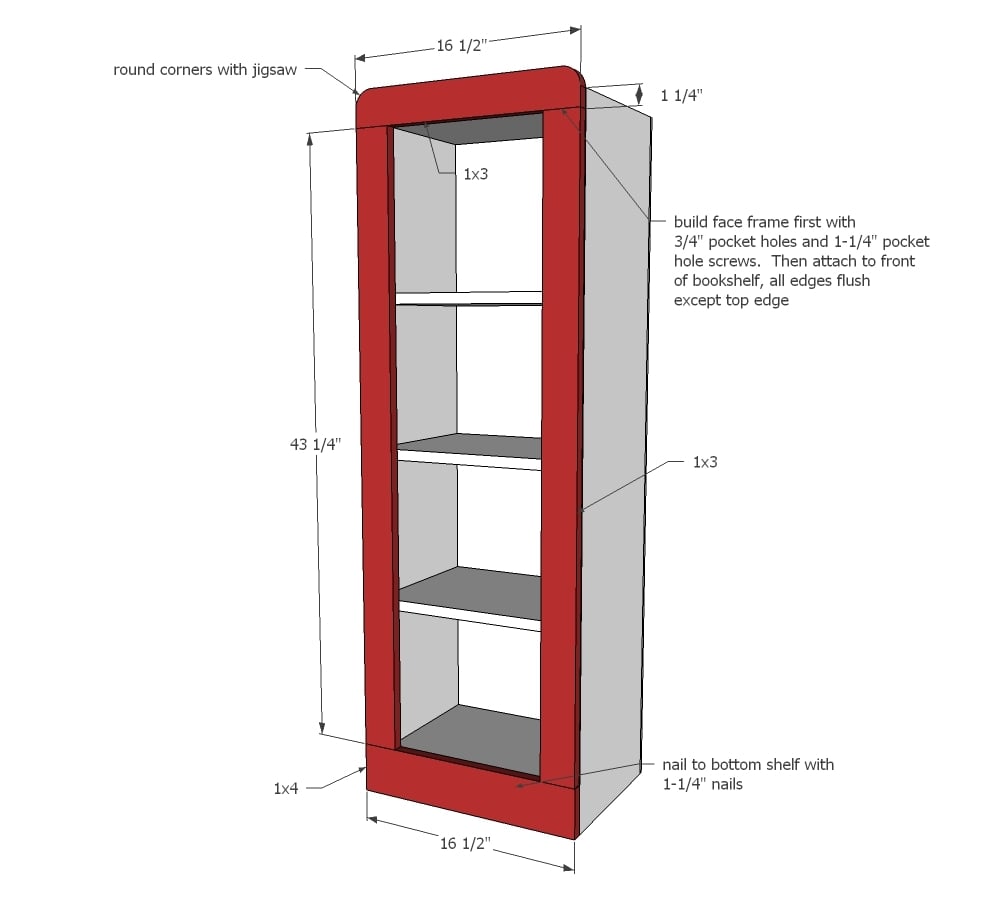
Build face frame separately, then attach completed face frame to front of cabinet. Nail on with 1-1/4" brad nails with glue.
Step 4
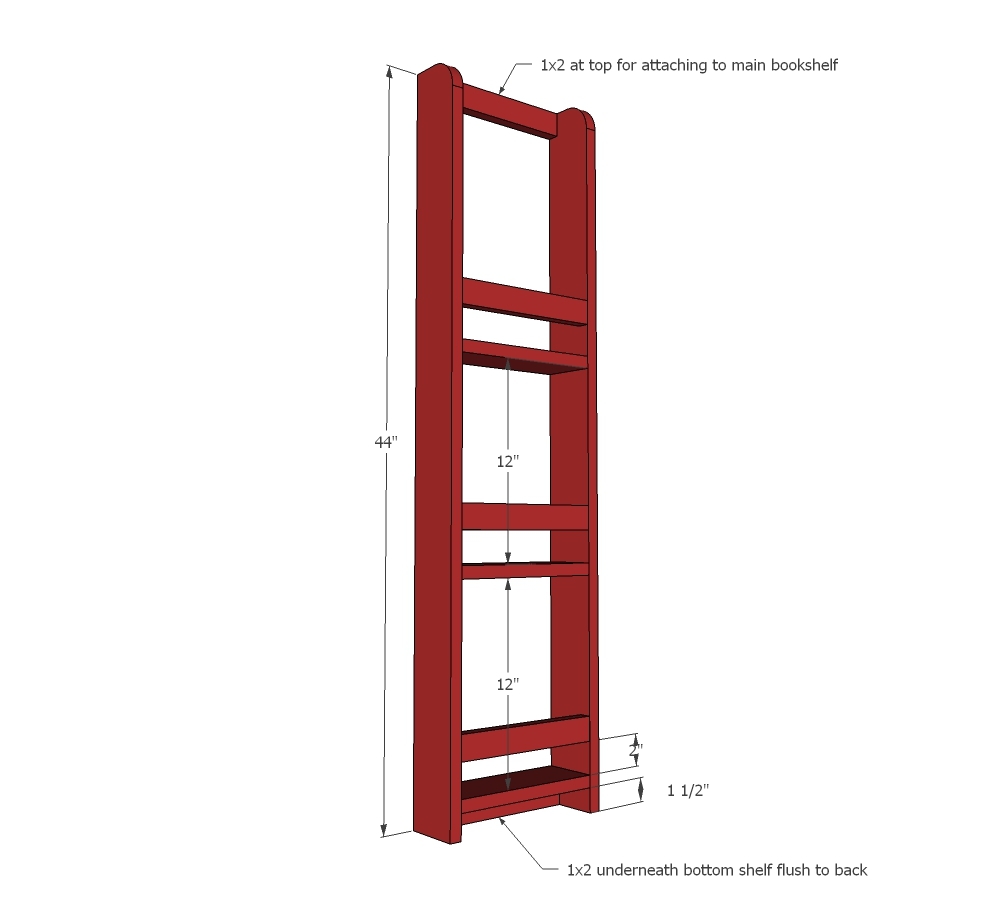
Build side bookshelves separately – can be nailed and glued since will be reinforced by main bookshelf but some pocket holes are preferred (ie on top and bottom 1x2 back).
Step 5

Step 6
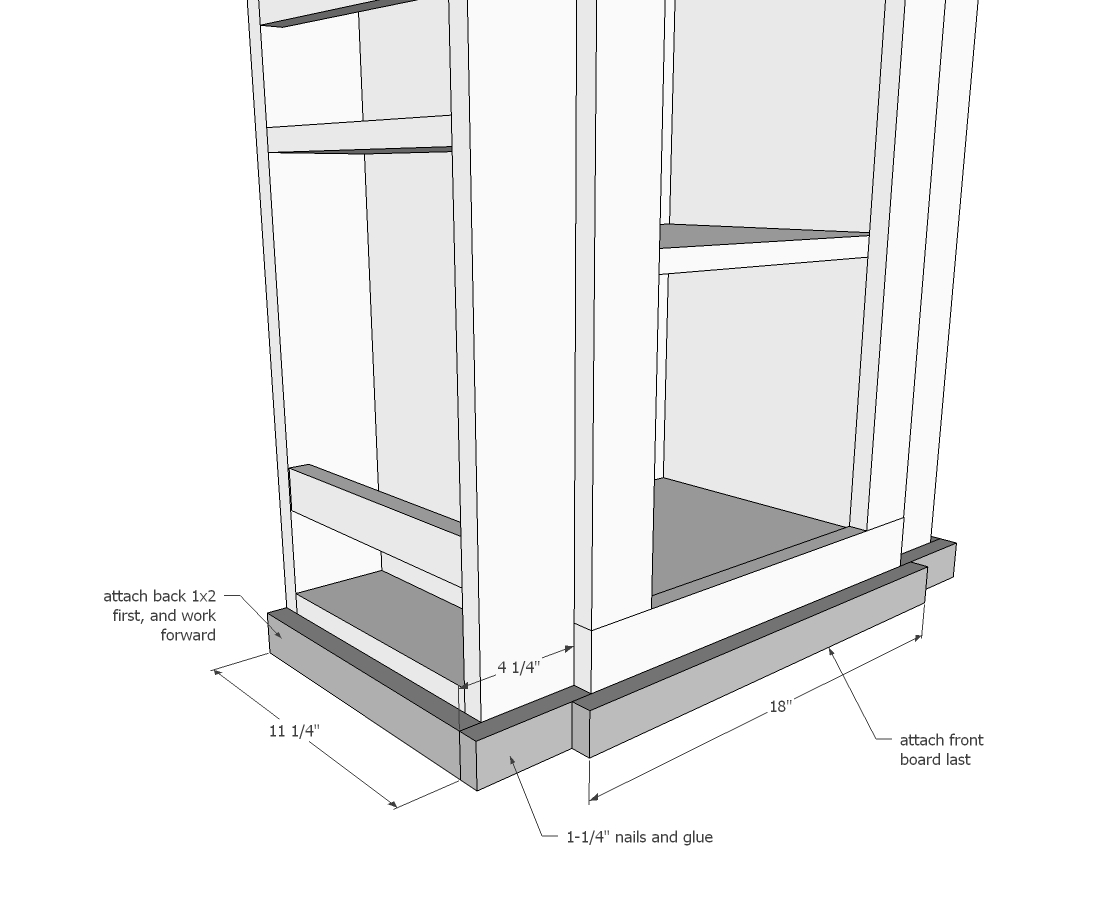
Start at back, cut as you go and work forward. Nail on with 1-1/4" nails and glue.
Step 7
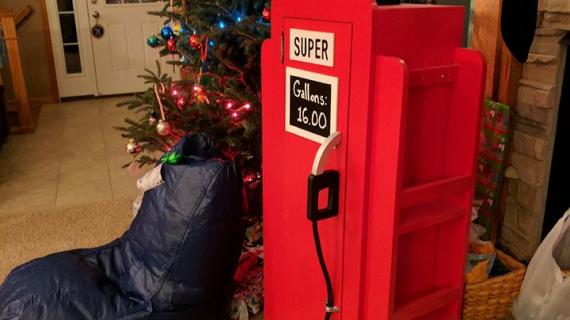
Jaime provides a really good tutorial on how she did the sign on top. Would love to see it lit up with lights too!
Step 8
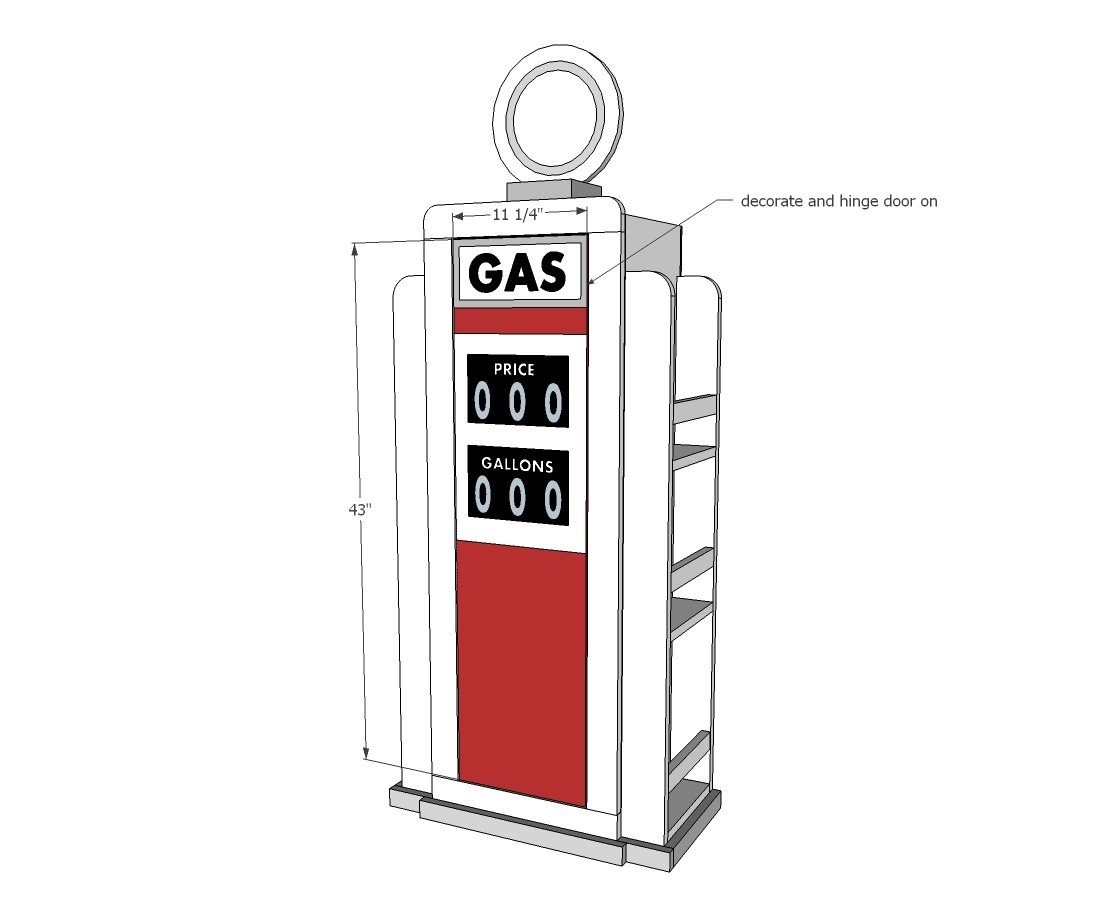
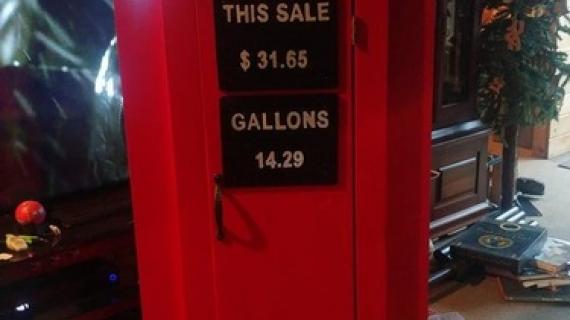
The door is just a 1x12 board. Decorate and hinge on! Jaime provides a good tutorial on how she decorated her door here.
Step 9

Use a 1x4 scrap to cut out the handle. Paint and attach to door. Thank you Jaime for designing the handle, it really took this project over the top!
It is always recommended to apply a test coat on a hidden area or scrap piece to ensure color evenness and adhesion. Use primer or wood conditioner as needed.