
DIY tabletop play kitchen that folds up into a small storage box. Free plans by Ana-white.com
Happy Friday building friends!!!

Fridays in the weeks before the Holidays are the best ... because I get to work with Jaime from That's My Letter and deliver you free gift plans! Every Friday is truly like a mini Christmas morning!
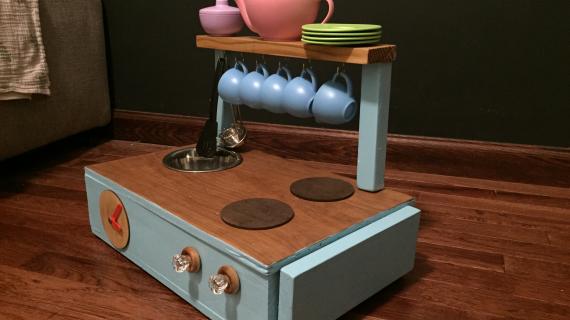
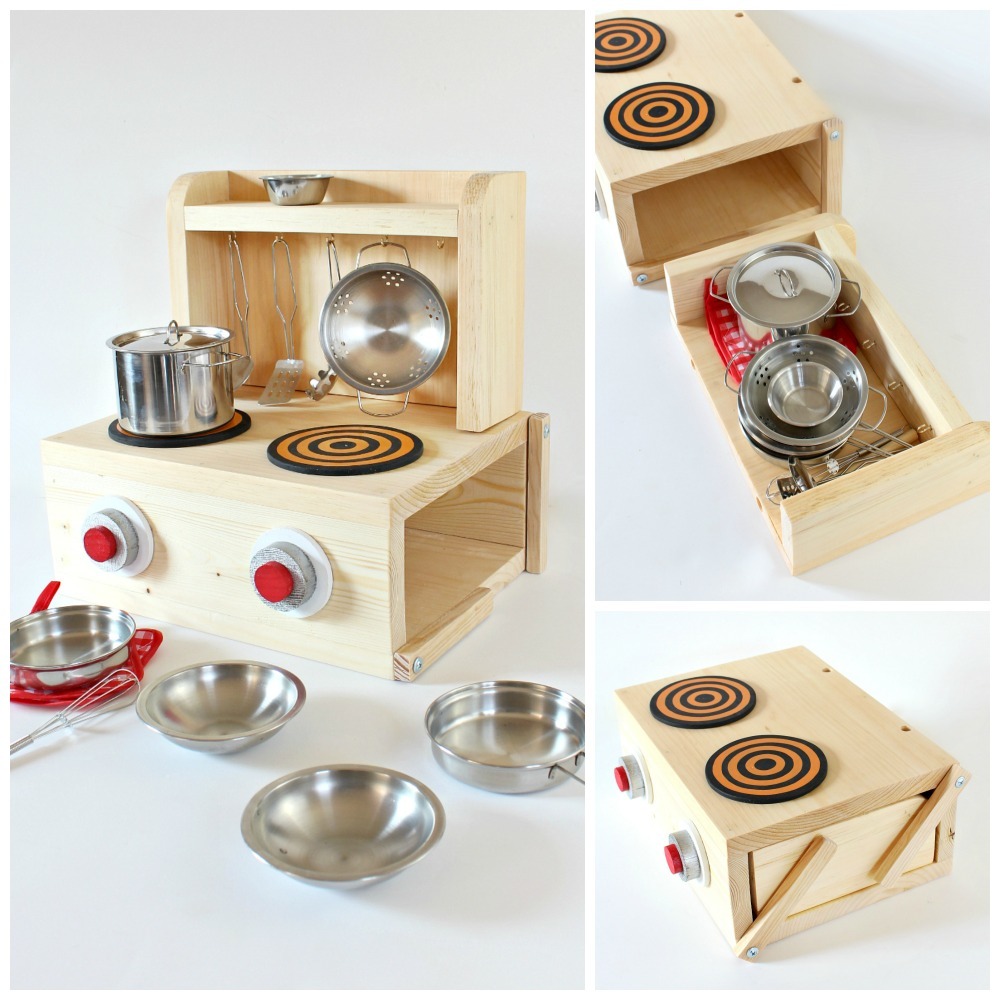
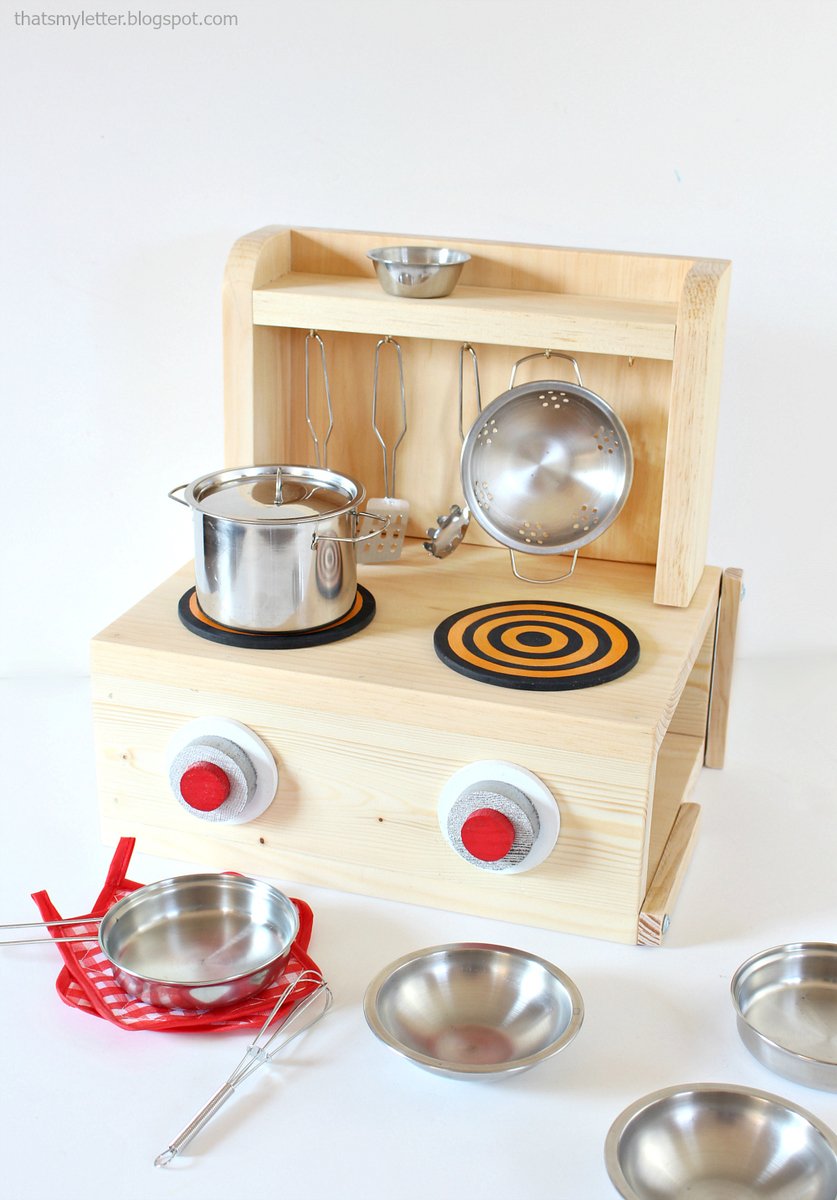
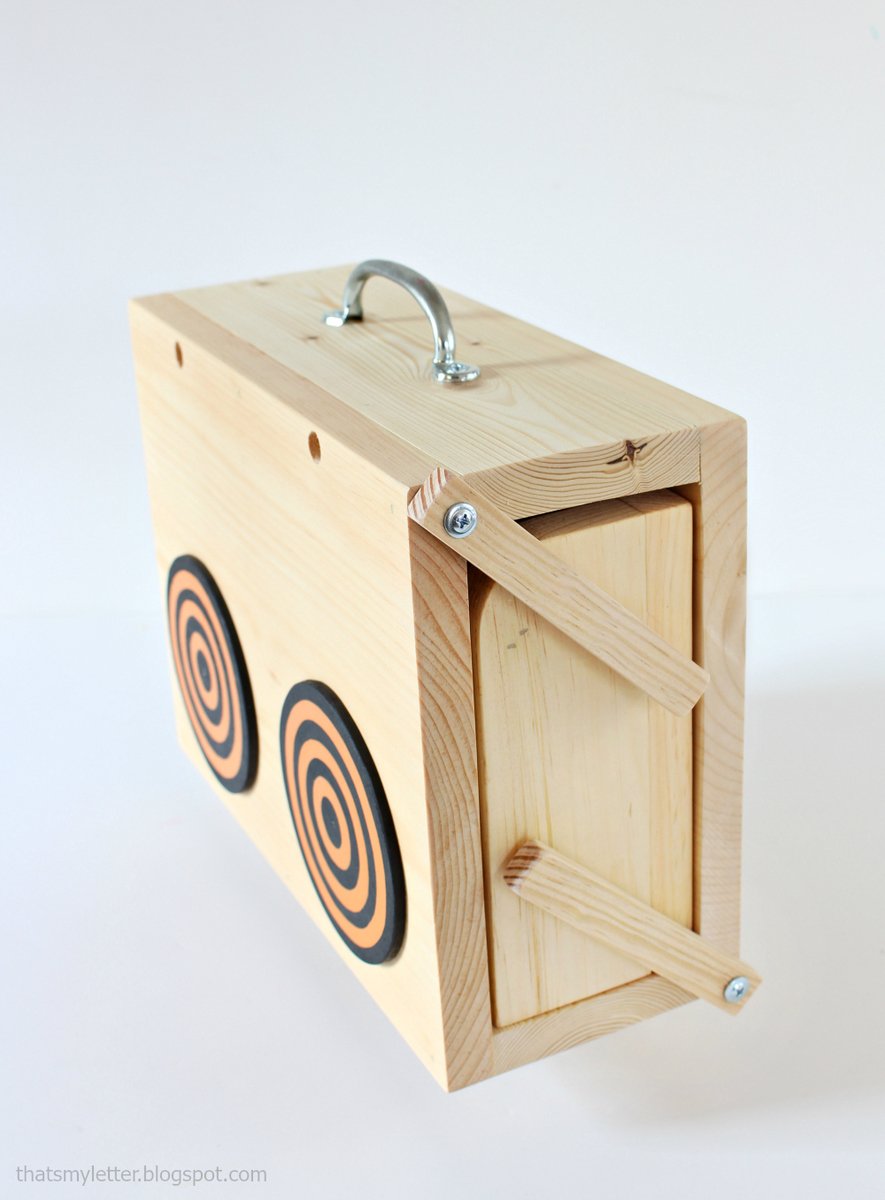
Speaking of mini ... Jaime and I wanted to do a mini play kitchen for the littles to tote from room to room, especially useful in a small or tiny house where regular sized play kitchens are just too big.
So ... we came up with this for you guys!

It's a little itty bitty tabletop play kitchen.

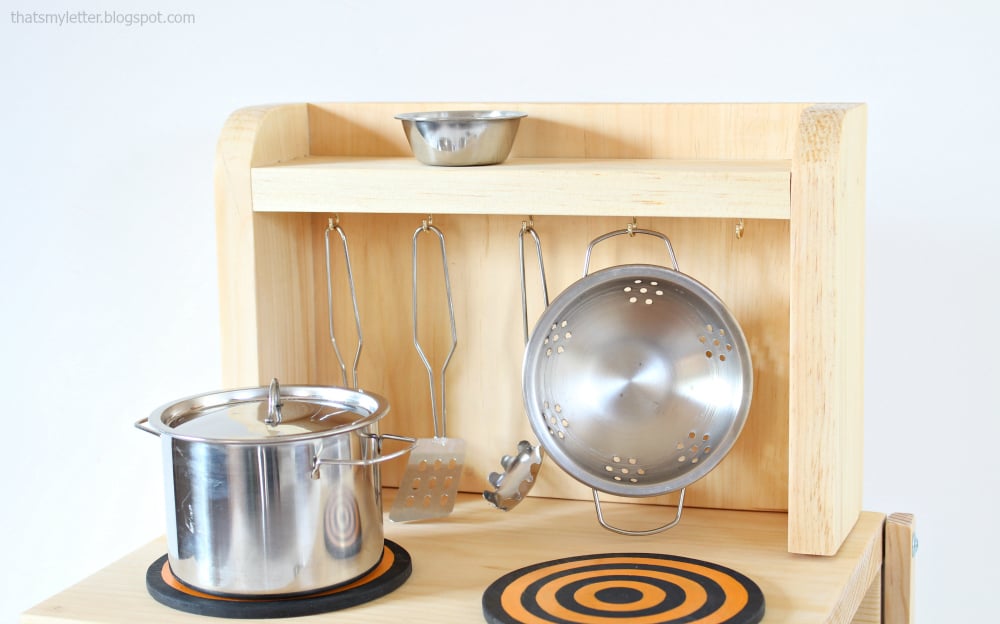
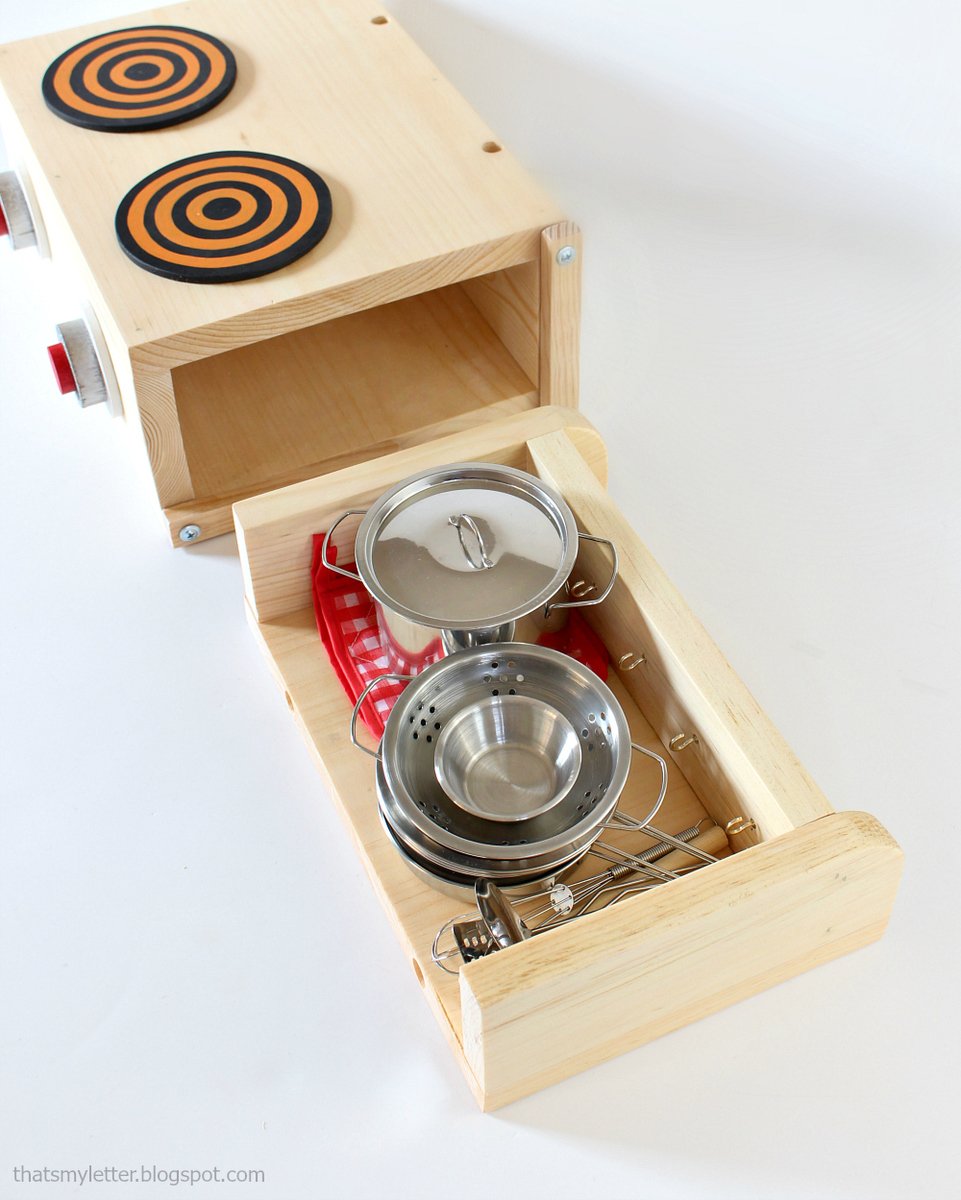
Complete with a little play hutch that you hand hang utensils from.

But then when playtime is over, all the pots and pans (Jaime shares where she got hers here), utensils, hutch - it all fits inside the hutch,

And stows away inside itself!
We both love how this project turned out, and can't wait to see how you modify yours! We've got you covered with the free plans following (click READ MORE if this is the homepage).
But first, go check out Jaime's build post for lots more photos and build details.
XO Ana
CLICK HERE FOR MORE PHOTOS AND BUILD DETAILS FROM THATS MY LETTER

Preparation
28" of 1x4s
25" of 1x3s
24" x 24" piece of 1/2" plywood (or scraps in smaller pieces)
Dowels for securing hutch to the base
1-1/4" brad nails or 2" wood screws (self tapping, smallest possible size)
BASE
2 - 1x4 @ 12"
1 - 1x4 @ 7-1/2"
2 - 1/2" plywood @ 12" x 9"
HUTCH
2 - 1x3 @ 7-1/4"
1 - 1x3 @ 9-3/4"
1 - 1/2" plywood @ 11-1/4" x 7-1/4"
Dowels for securing hutch to the base
28" of 1x4s
25" of 1x3s
24" x 24" piece of 1/2" plywood (or scraps in smaller pieces)


Instructions
Step 1

Attach the 1x4 boards together, with either wood screws (2" length self tapping or predrill to prevent wood splitting) or with brad nails (1-1/4" or longer) with wood glue.
Step 2

Attach top and bottom plywood to the 1x4s with brad nails.
Step 3

The hutch is built using same construction techniques as the base. Always use glue with nails.
Step 4

Jaime recommends dowels to be used to keep the hutch in place on the base. Drill the dowel holes a little larger than the dowels so it is easy for little hands to assemble all by themselves.