Community Brag Posts
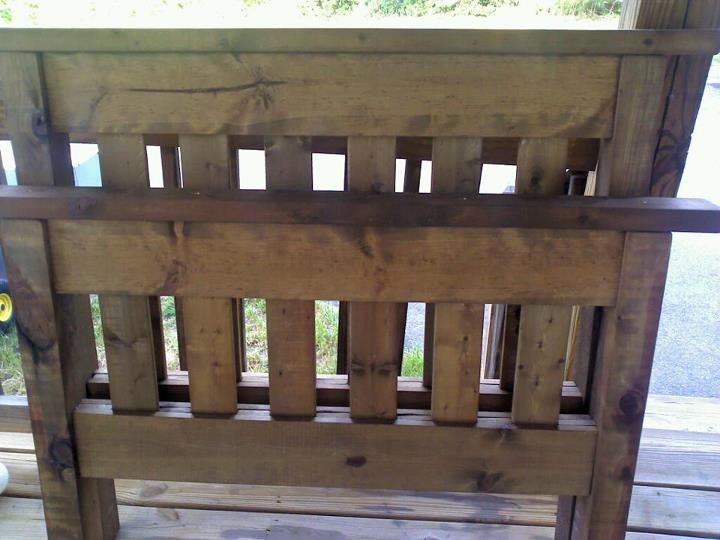
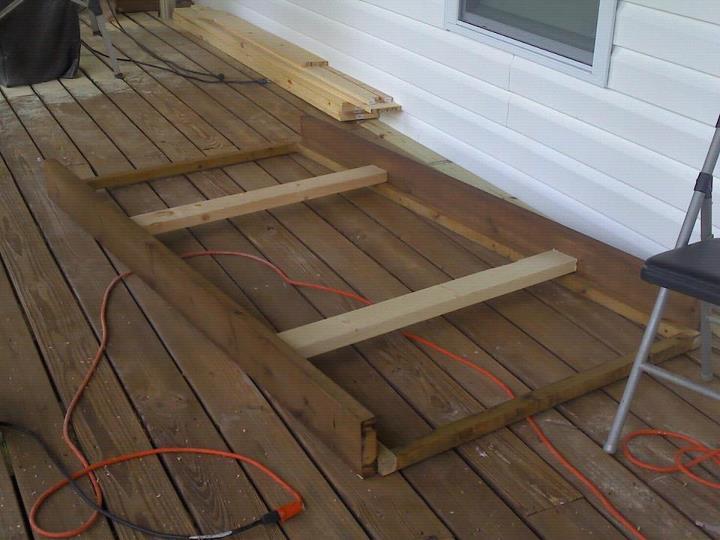
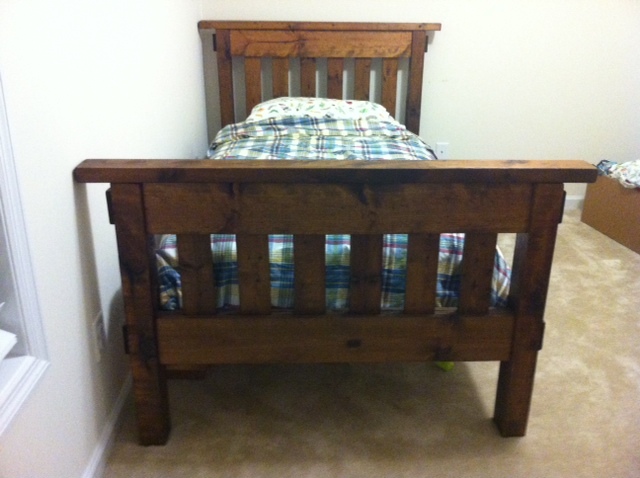
Simple Twin Bed
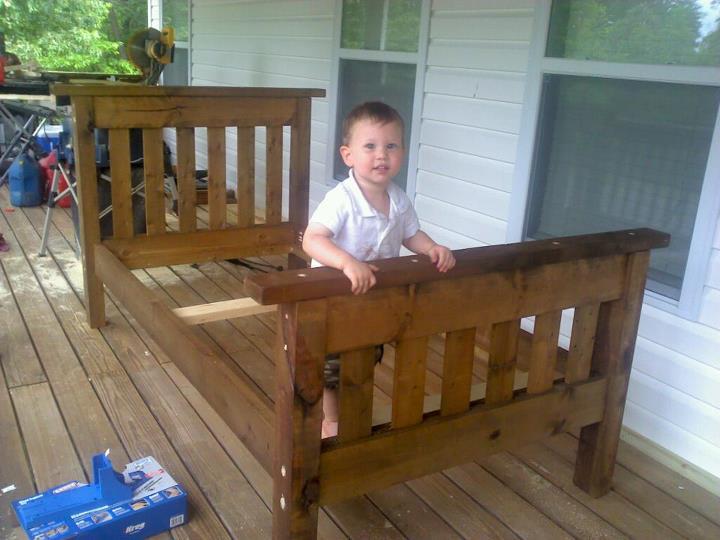
This was my first Ana White project! There was a learning curve so it took longer than it probably should have but over all the build went pretty fast. The finishing was the part that seemed to drag forever! I used a tea followed by vinegar/steal wool treatment to make it look rustic. Finished with a wipe on poly that looks great but smelled atrocious for weeks! Looks great and smells fine now. The bed is super heavy and sturdy, which shocked everyone. Not only did I build something, I built something really well and its all thanks to these awesome plans that made it too easy!
Built from Plan(s)
Estimated Cost
60.00
Estimated Time Investment
Weekend Project (10-20 Hours)
Finish Used
Antique treatment of tea bath followed by vinegar/ steal wool bath. Finished with wipe on poly.
Recommended Skill Level
Beginner
Rocking moses basket stand
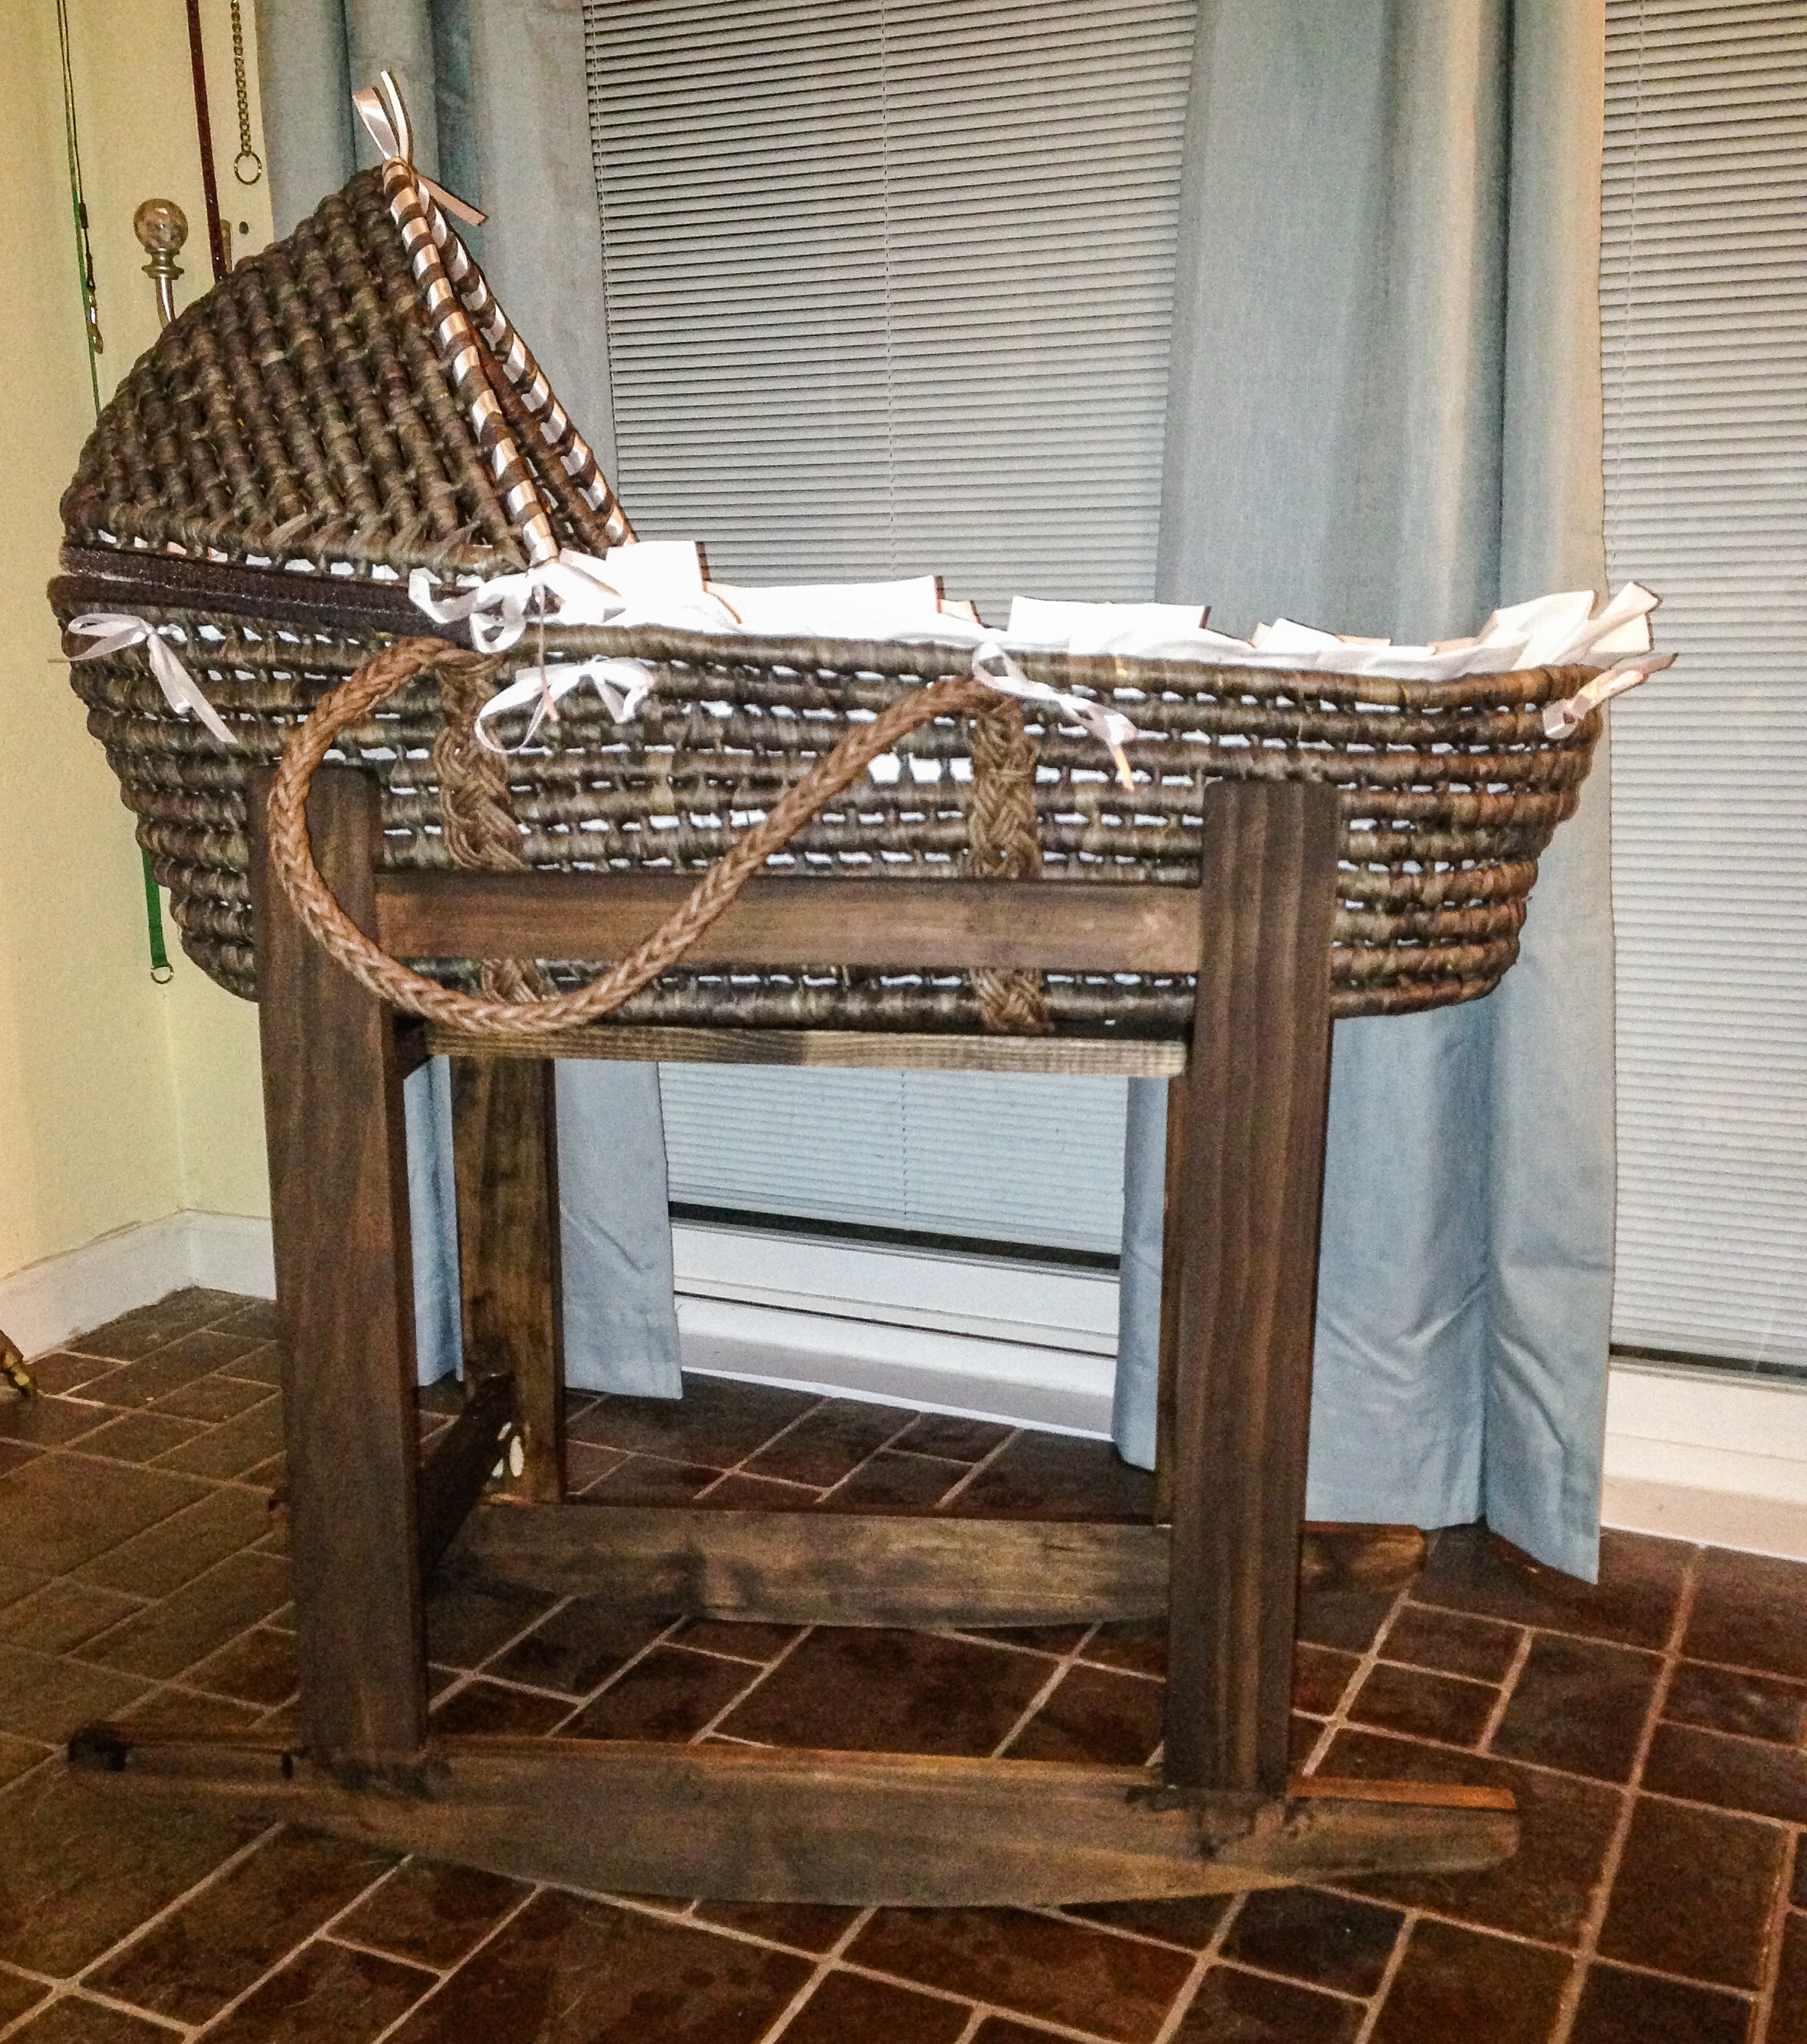
This is the third project I've built from Ana's blog, and my husband and I just LOVE it!!It was very easy to build, even six-months pregnant. I lucked out in that I had everything I needed for this project on hand with the exception of one 1x3 (and the basket, of course), making it a super affordable and much nicer-looking alternative to purchasing a portable bassinet.
I used pine for this build. The only modification I made to Ana's original plan were the rockers. I couldn't find the pattern for her rockers, so I took a rocking chair we had, laid it on it's side and traced its rockers onto a large piece of craft paper. I just used the sander to round off the corners on the top so that the legs would be easy to attach.
I built this in an evening and my husband was able to stain it that night as well. (He's not great with stain, so I had to clean it up a bit after this picture was taken and before the poly was put on.) Had I started earlier in the day, this would have easily been a one-day project including our trip to the store for the 1x3.
Estimated Cost
$7 (Plus $30 for the basket)
Estimated Time Investment
Afternoon Project (3-6 Hours)
Finish Used
Minwax stain in kona
Recommended Skill Level
Intermediate
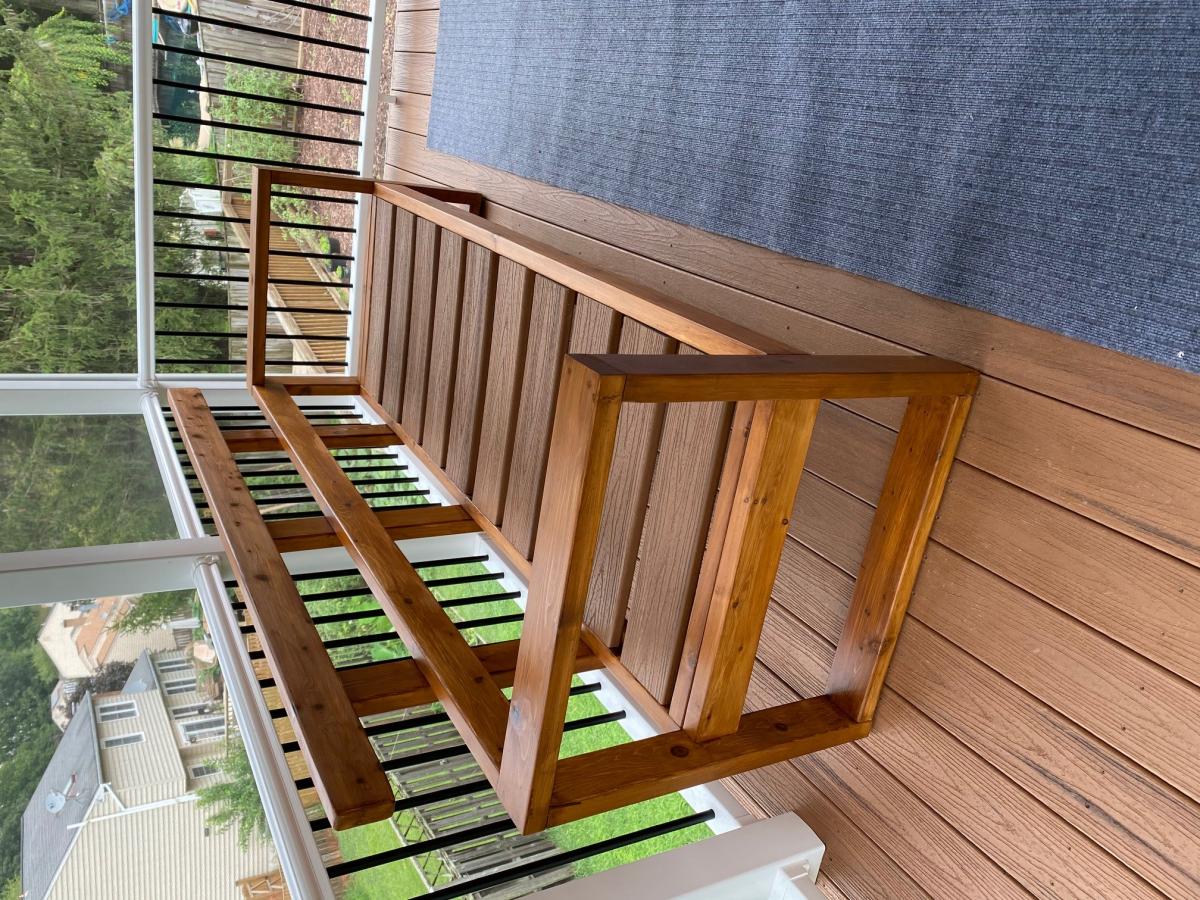
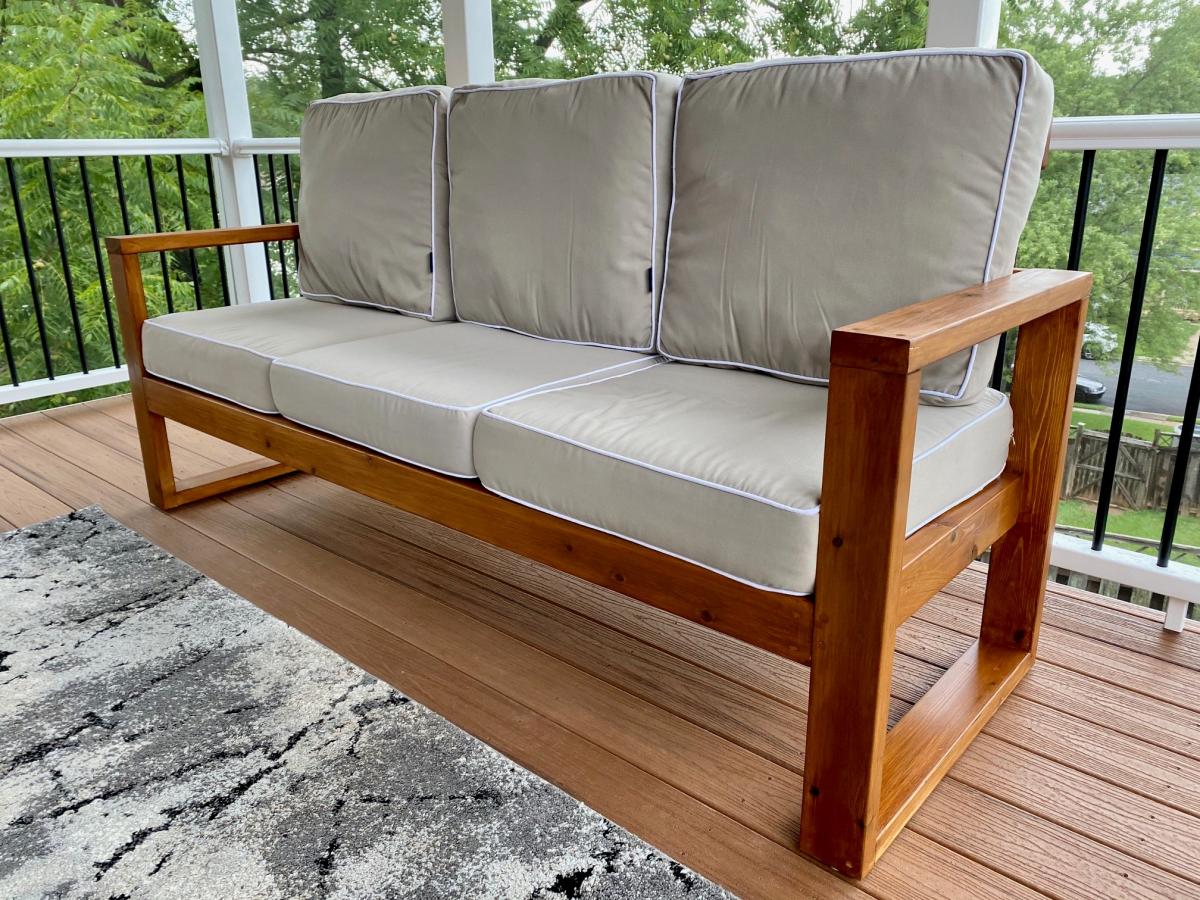
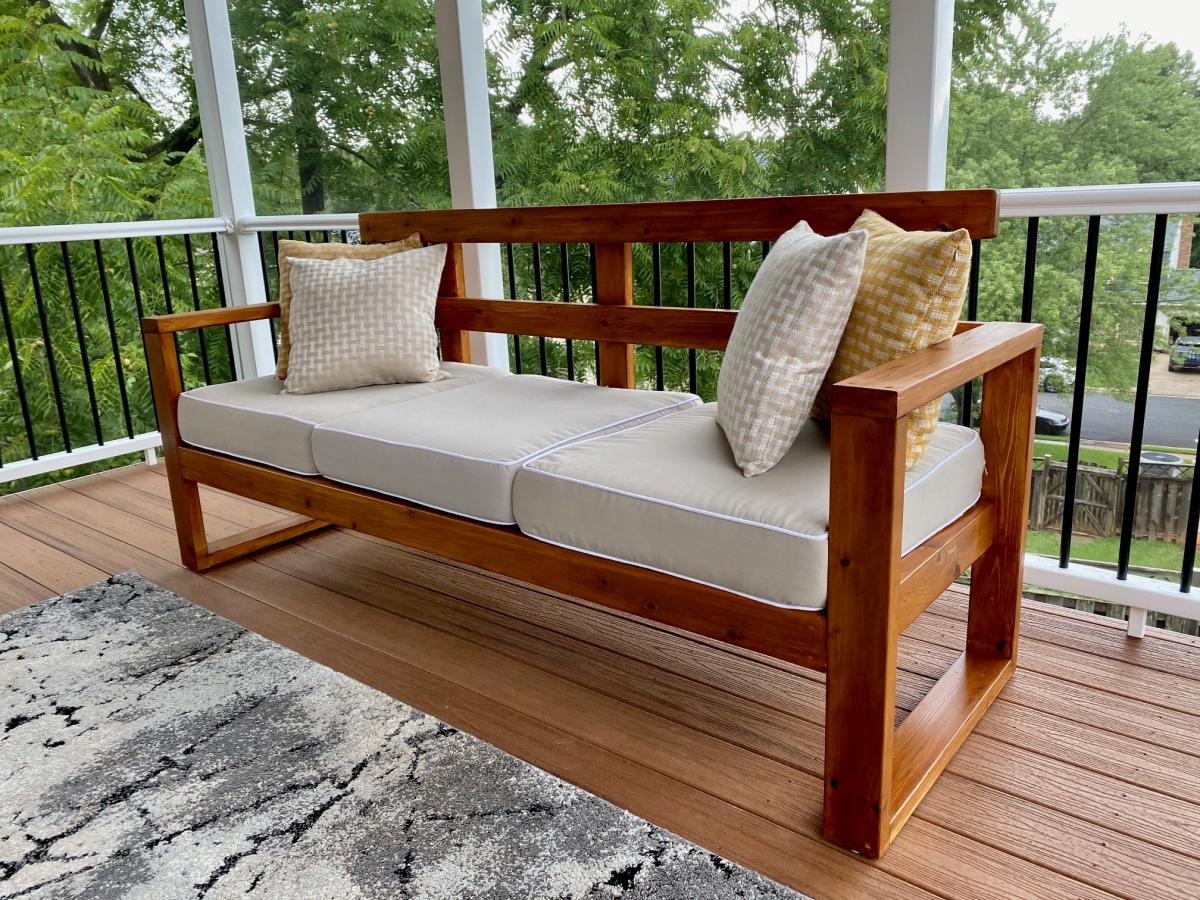
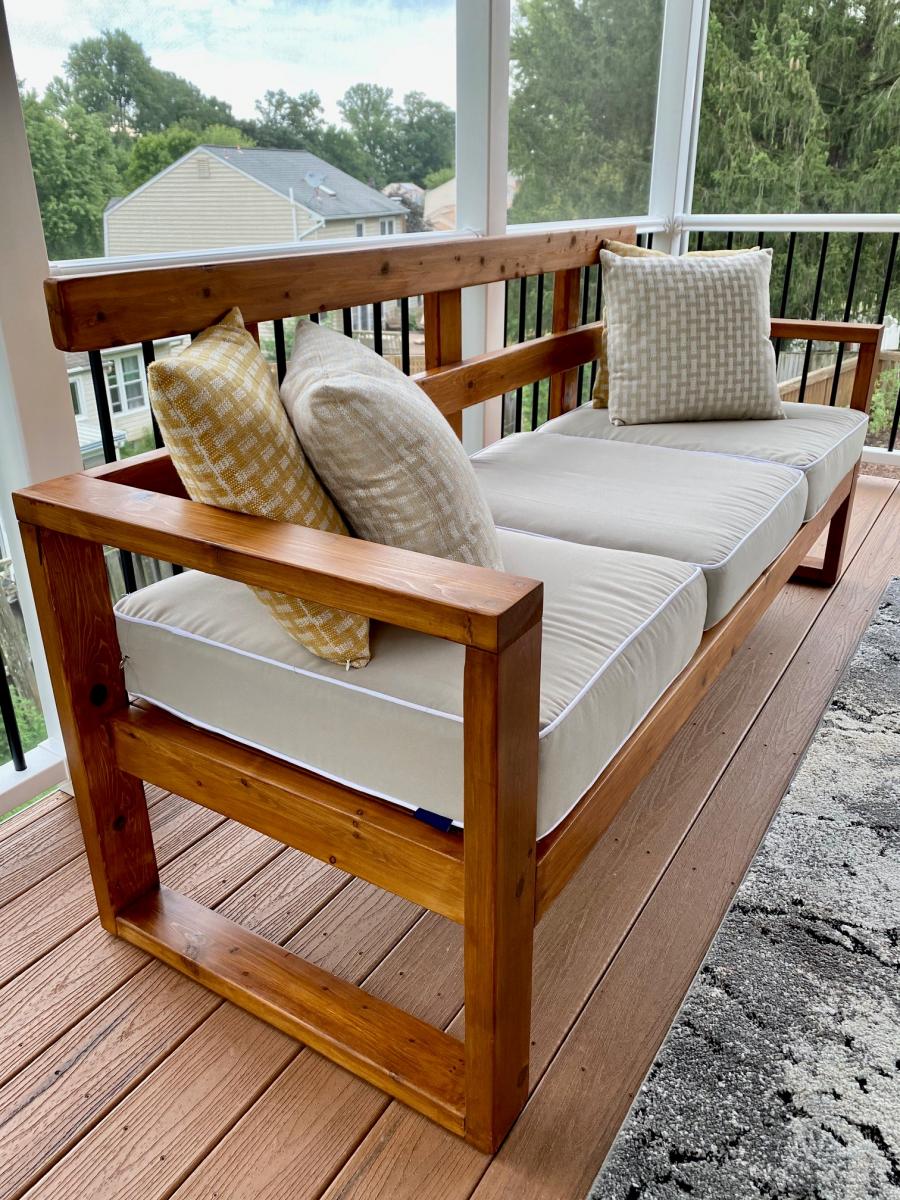
Outdoor Sofa using left over Trex material from my Deck.

Built this beautiful Sofa from Ana White's Plan, had to modify a bit as I had left over small pieces of trex from my Deck , and the back rest cushions were higher.
Built from Plan(s)
Estimated Cost
300
Estimated Time Investment
Weekend Project (10-20 Hours)
Finish Used
Olympic Elite, Cedar
Recommended Skill Level
Beginner
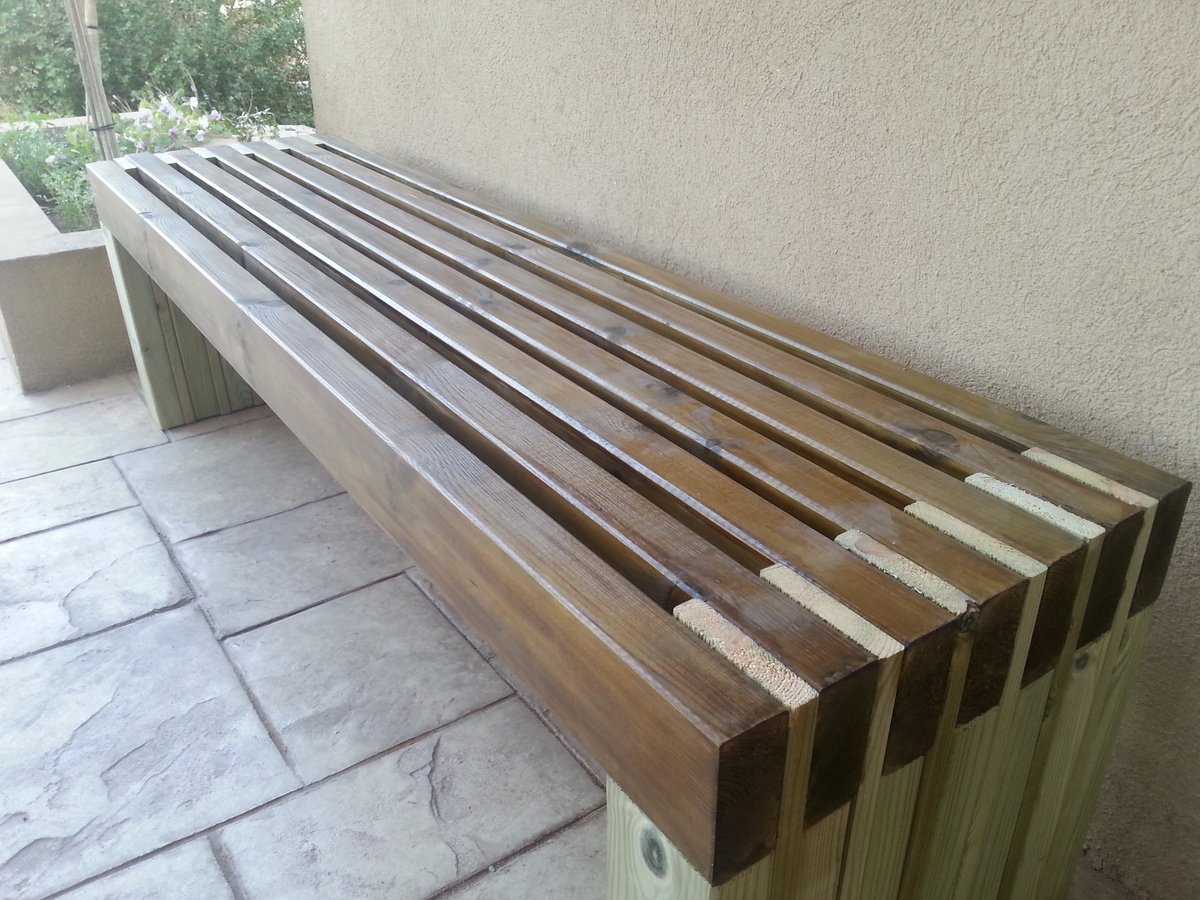
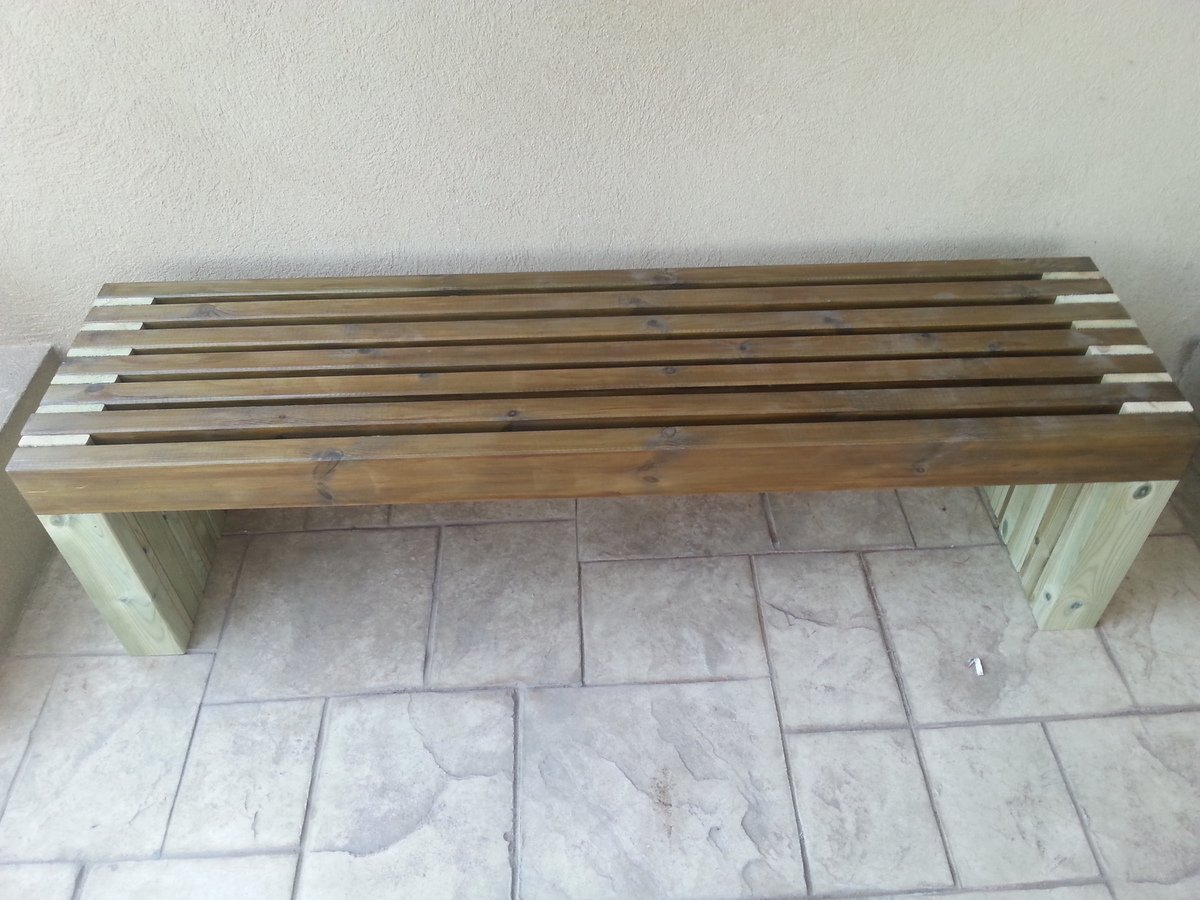
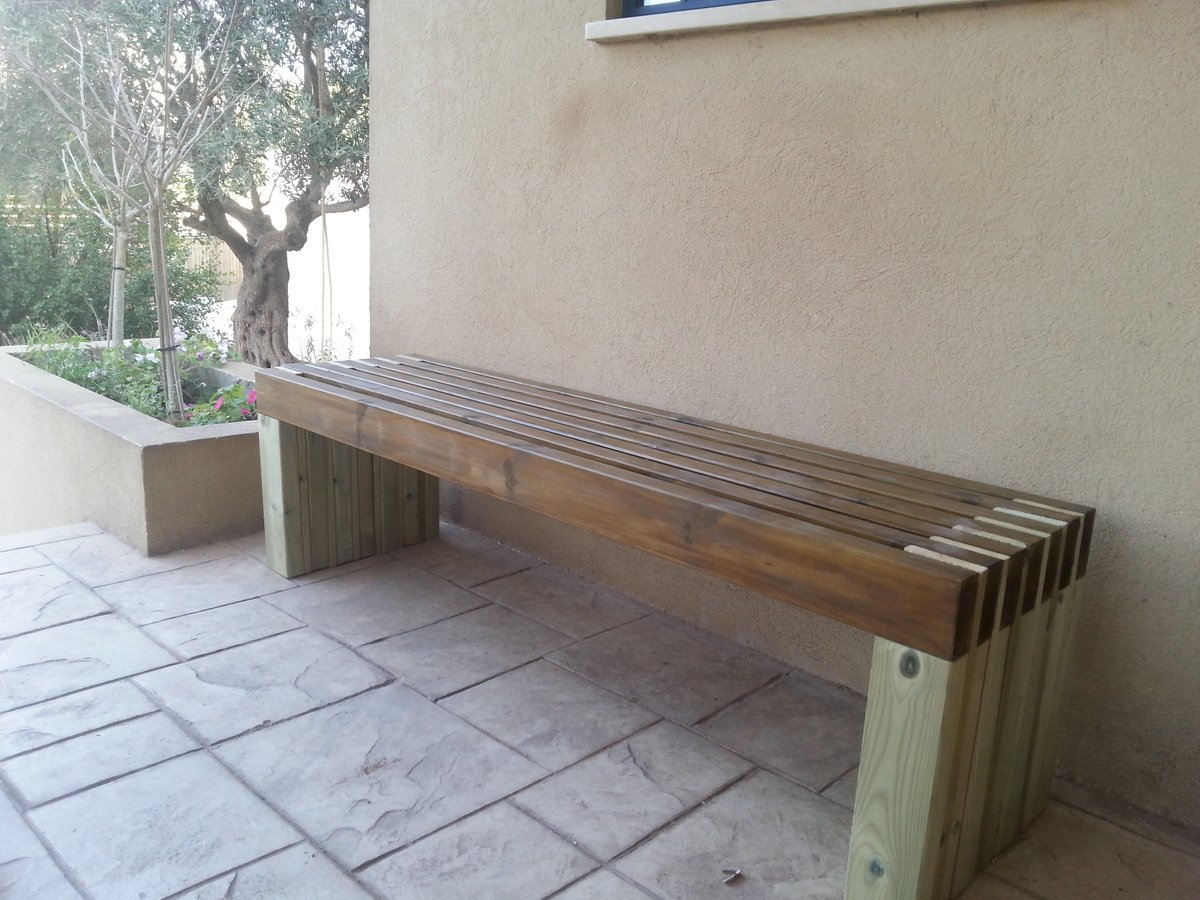
My new and amazing outdoor bench

Thank you for the easy and fun bench plan.
It was really easy to install.
Even my 2 little daughters had fun (-:
Built from Plan(s)
Estimated Time Investment
Afternoon Project (3-6 Hours)
Finish Used
Bondex walnut
Recommended Skill Level
Starter Project
Comments

Thu, 04/24/2014 - 08:06
Love the finish!
I love the finish you did on the bench. Thanks for sharing!
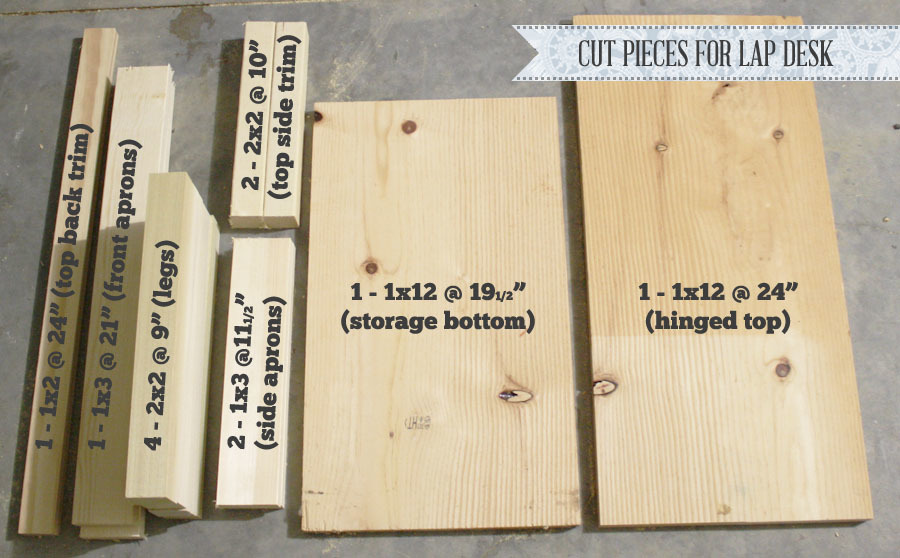
$2.00 Scrap Lap Desk

This was a really quick and easy build. I built it with two bucks and two hours with some scrap wood I had laying around. The only thing I bought was a package of 2 standard hinges ($2). Also, I deviated from the plan a little by not including the lower storage compartments (didn't want it to get too heavy), making the legs 4" shorter (so it's more comfortable to use in bed), and not building the storage dividers under the flip-top lid. Check out more info by clicking my blog link!


Built from Plan(s)
Estimated Cost
$2.00
Estimated Time Investment
An Hour or Two (0-2 Hours)
Finish Used
A quick sanding and a coat of Rustoleum Ultimate Wood Stain in Dark Walnut.
Recommended Skill Level
Beginner
Comments
Farm Fresh Egg Stand

Nothing fancy but my daughter loves it for the house.
Jeff May
Built from Plan(s)
Reclaimed Wood Headboard, Double Size (Cedar Siding)
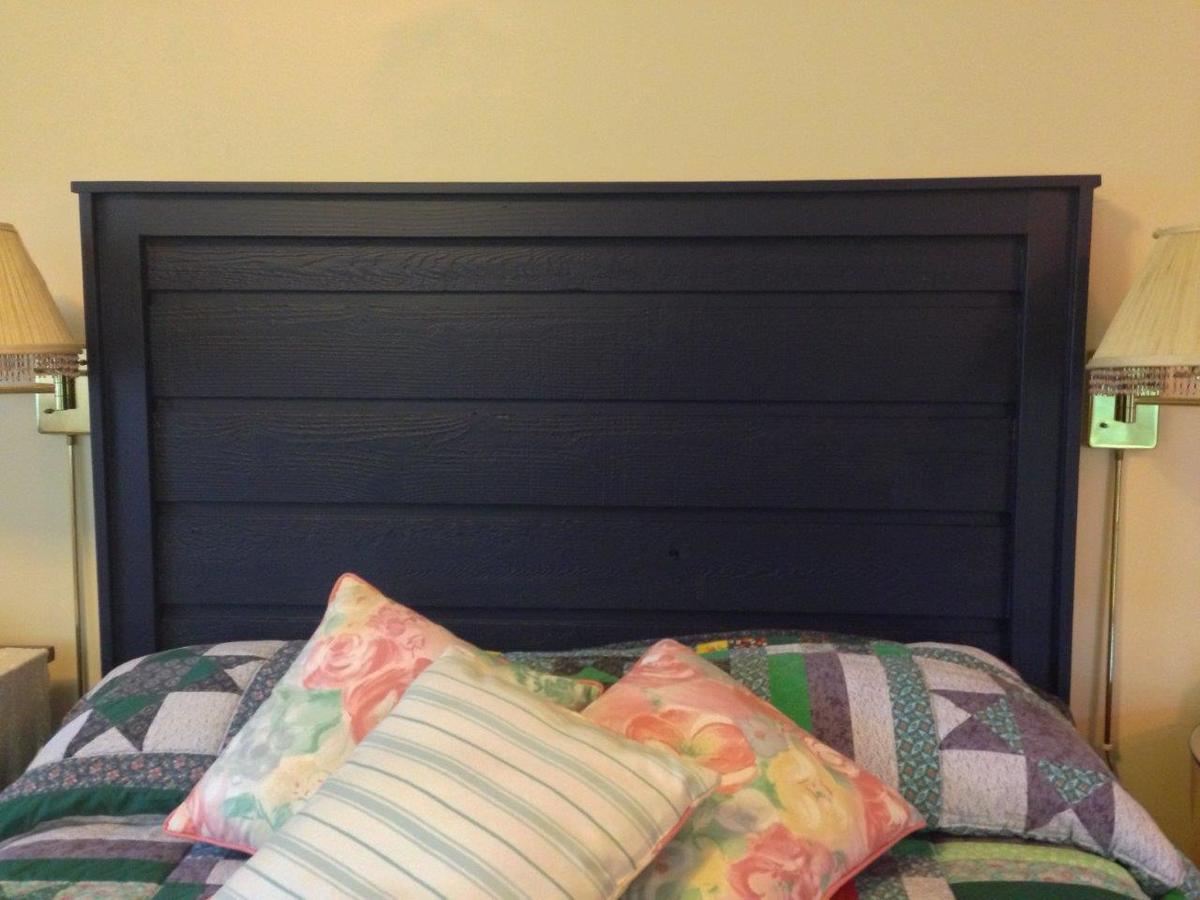
Made with leftover lapped cedar siding from our woodshed, plus a few pieces of reclaimed 1x4 and some new 1x3. Wanted it to be navy, and it is.
Built from Plan(s)
Estimated Time Investment
Day Project (6-9 Hours)
Finish Used
Navy blue satin paint. Don't - I repeat - don't prime with white primer, if painting a final dark color! It took 4 coats of navy to completely cover the primer. Either skip primer or have it tinted closer to the final color. Should have known better.
Recommended Skill Level
Beginner
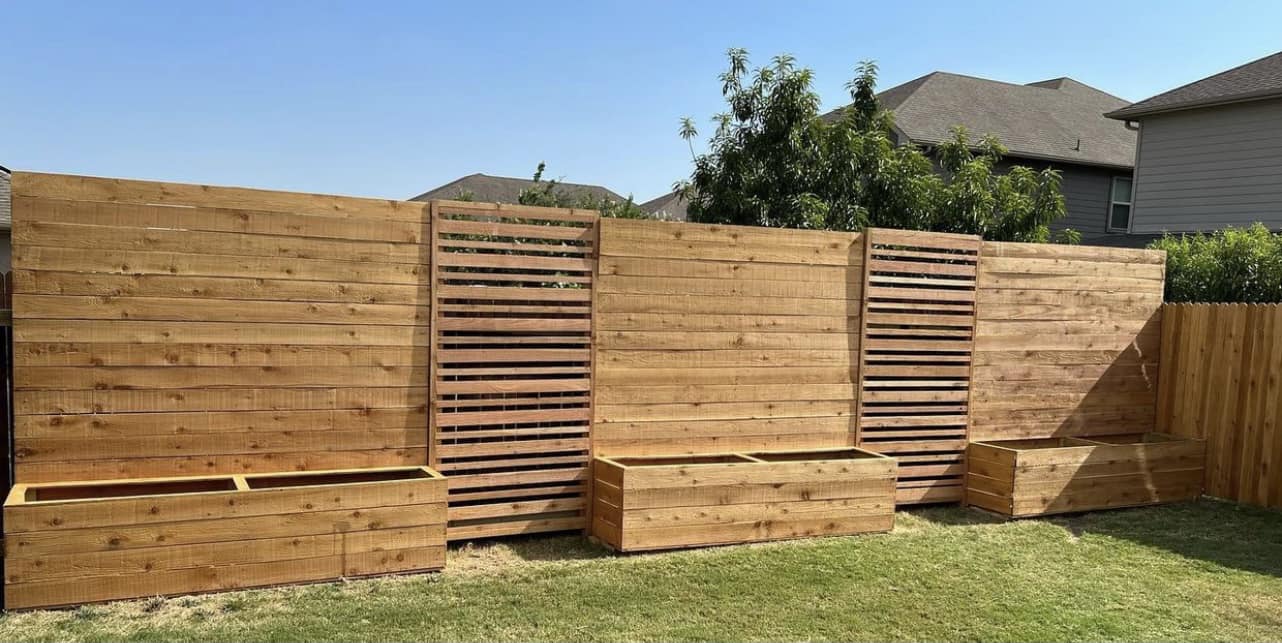
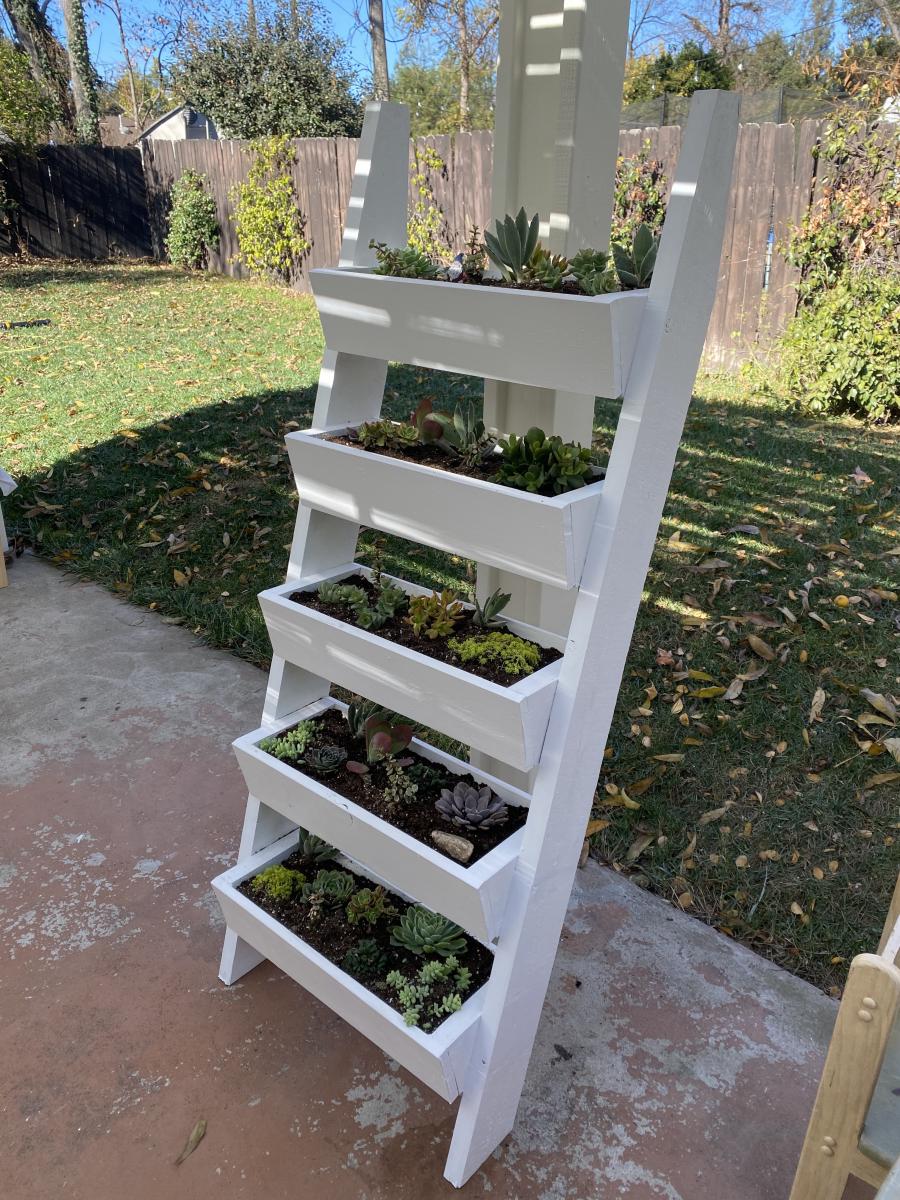
Vertical Planter w/ Succulents + White Opaque Stain
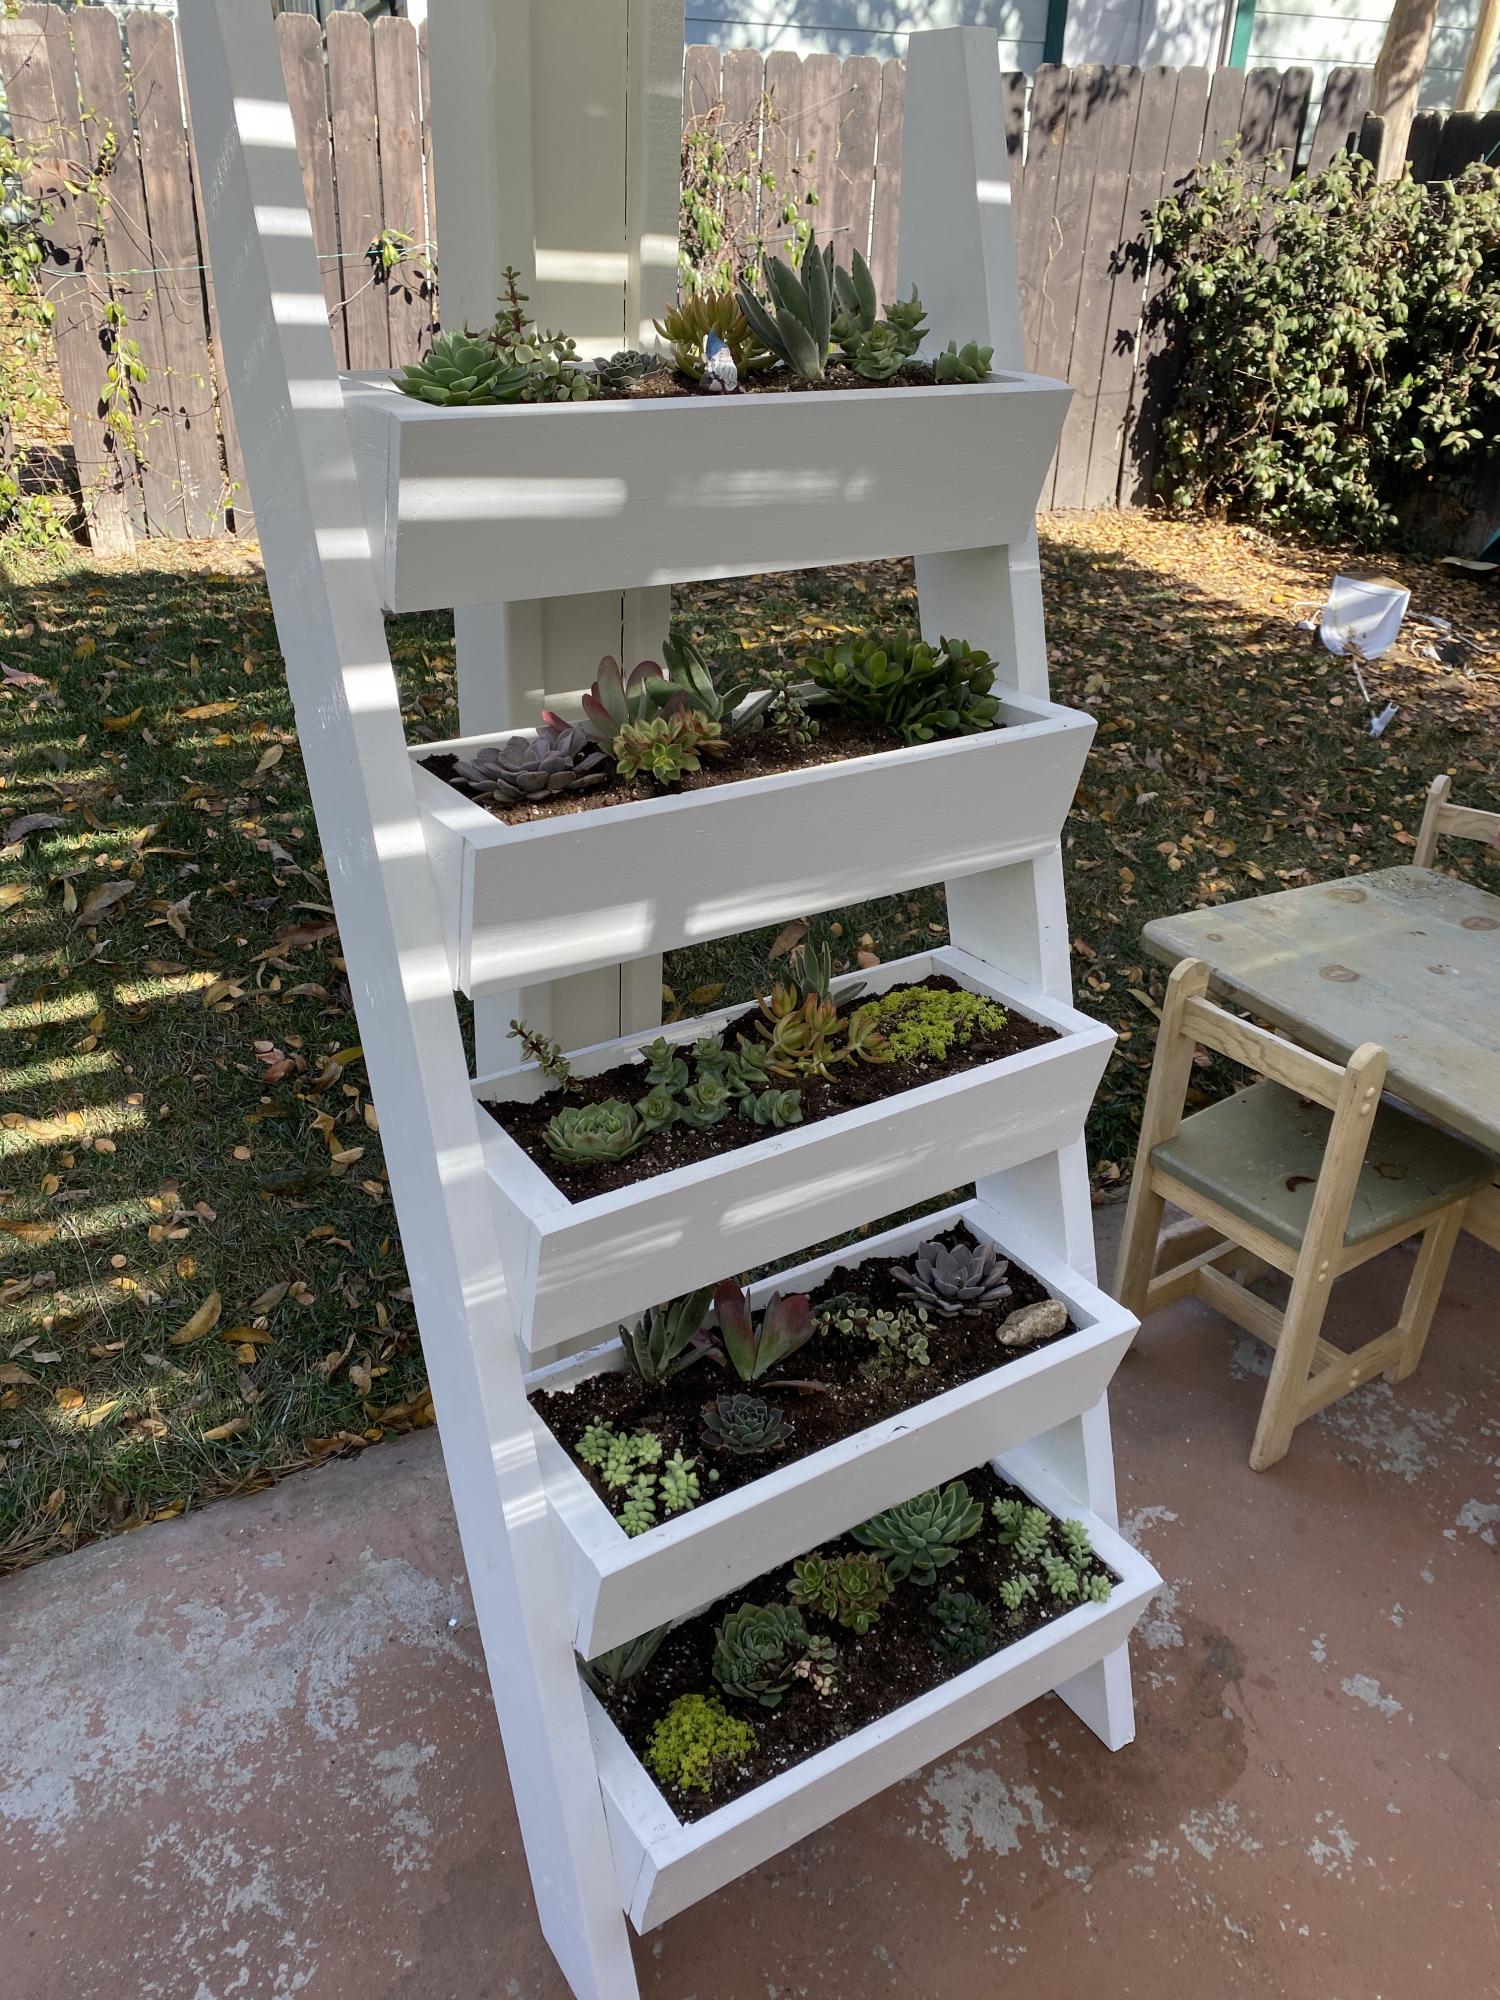
Made this over a few afternoons during the interesting year that is/was 2020! First DIY project and really enjoyed it! I used an opaque white stain and it's filled with succulents from our local nursery (Lincoln Nursery in Pasadena, CA). Painting took the longest as one coat of the stain still let some of the knots in the wood show through. Thanks so much for the plan and inspiration!

Built from Plan(s)
Estimated Time Investment
Day Project (6-9 Hours)
Finish Used
Opaque white Behr outdoor stain
Recommended Skill Level
Beginner
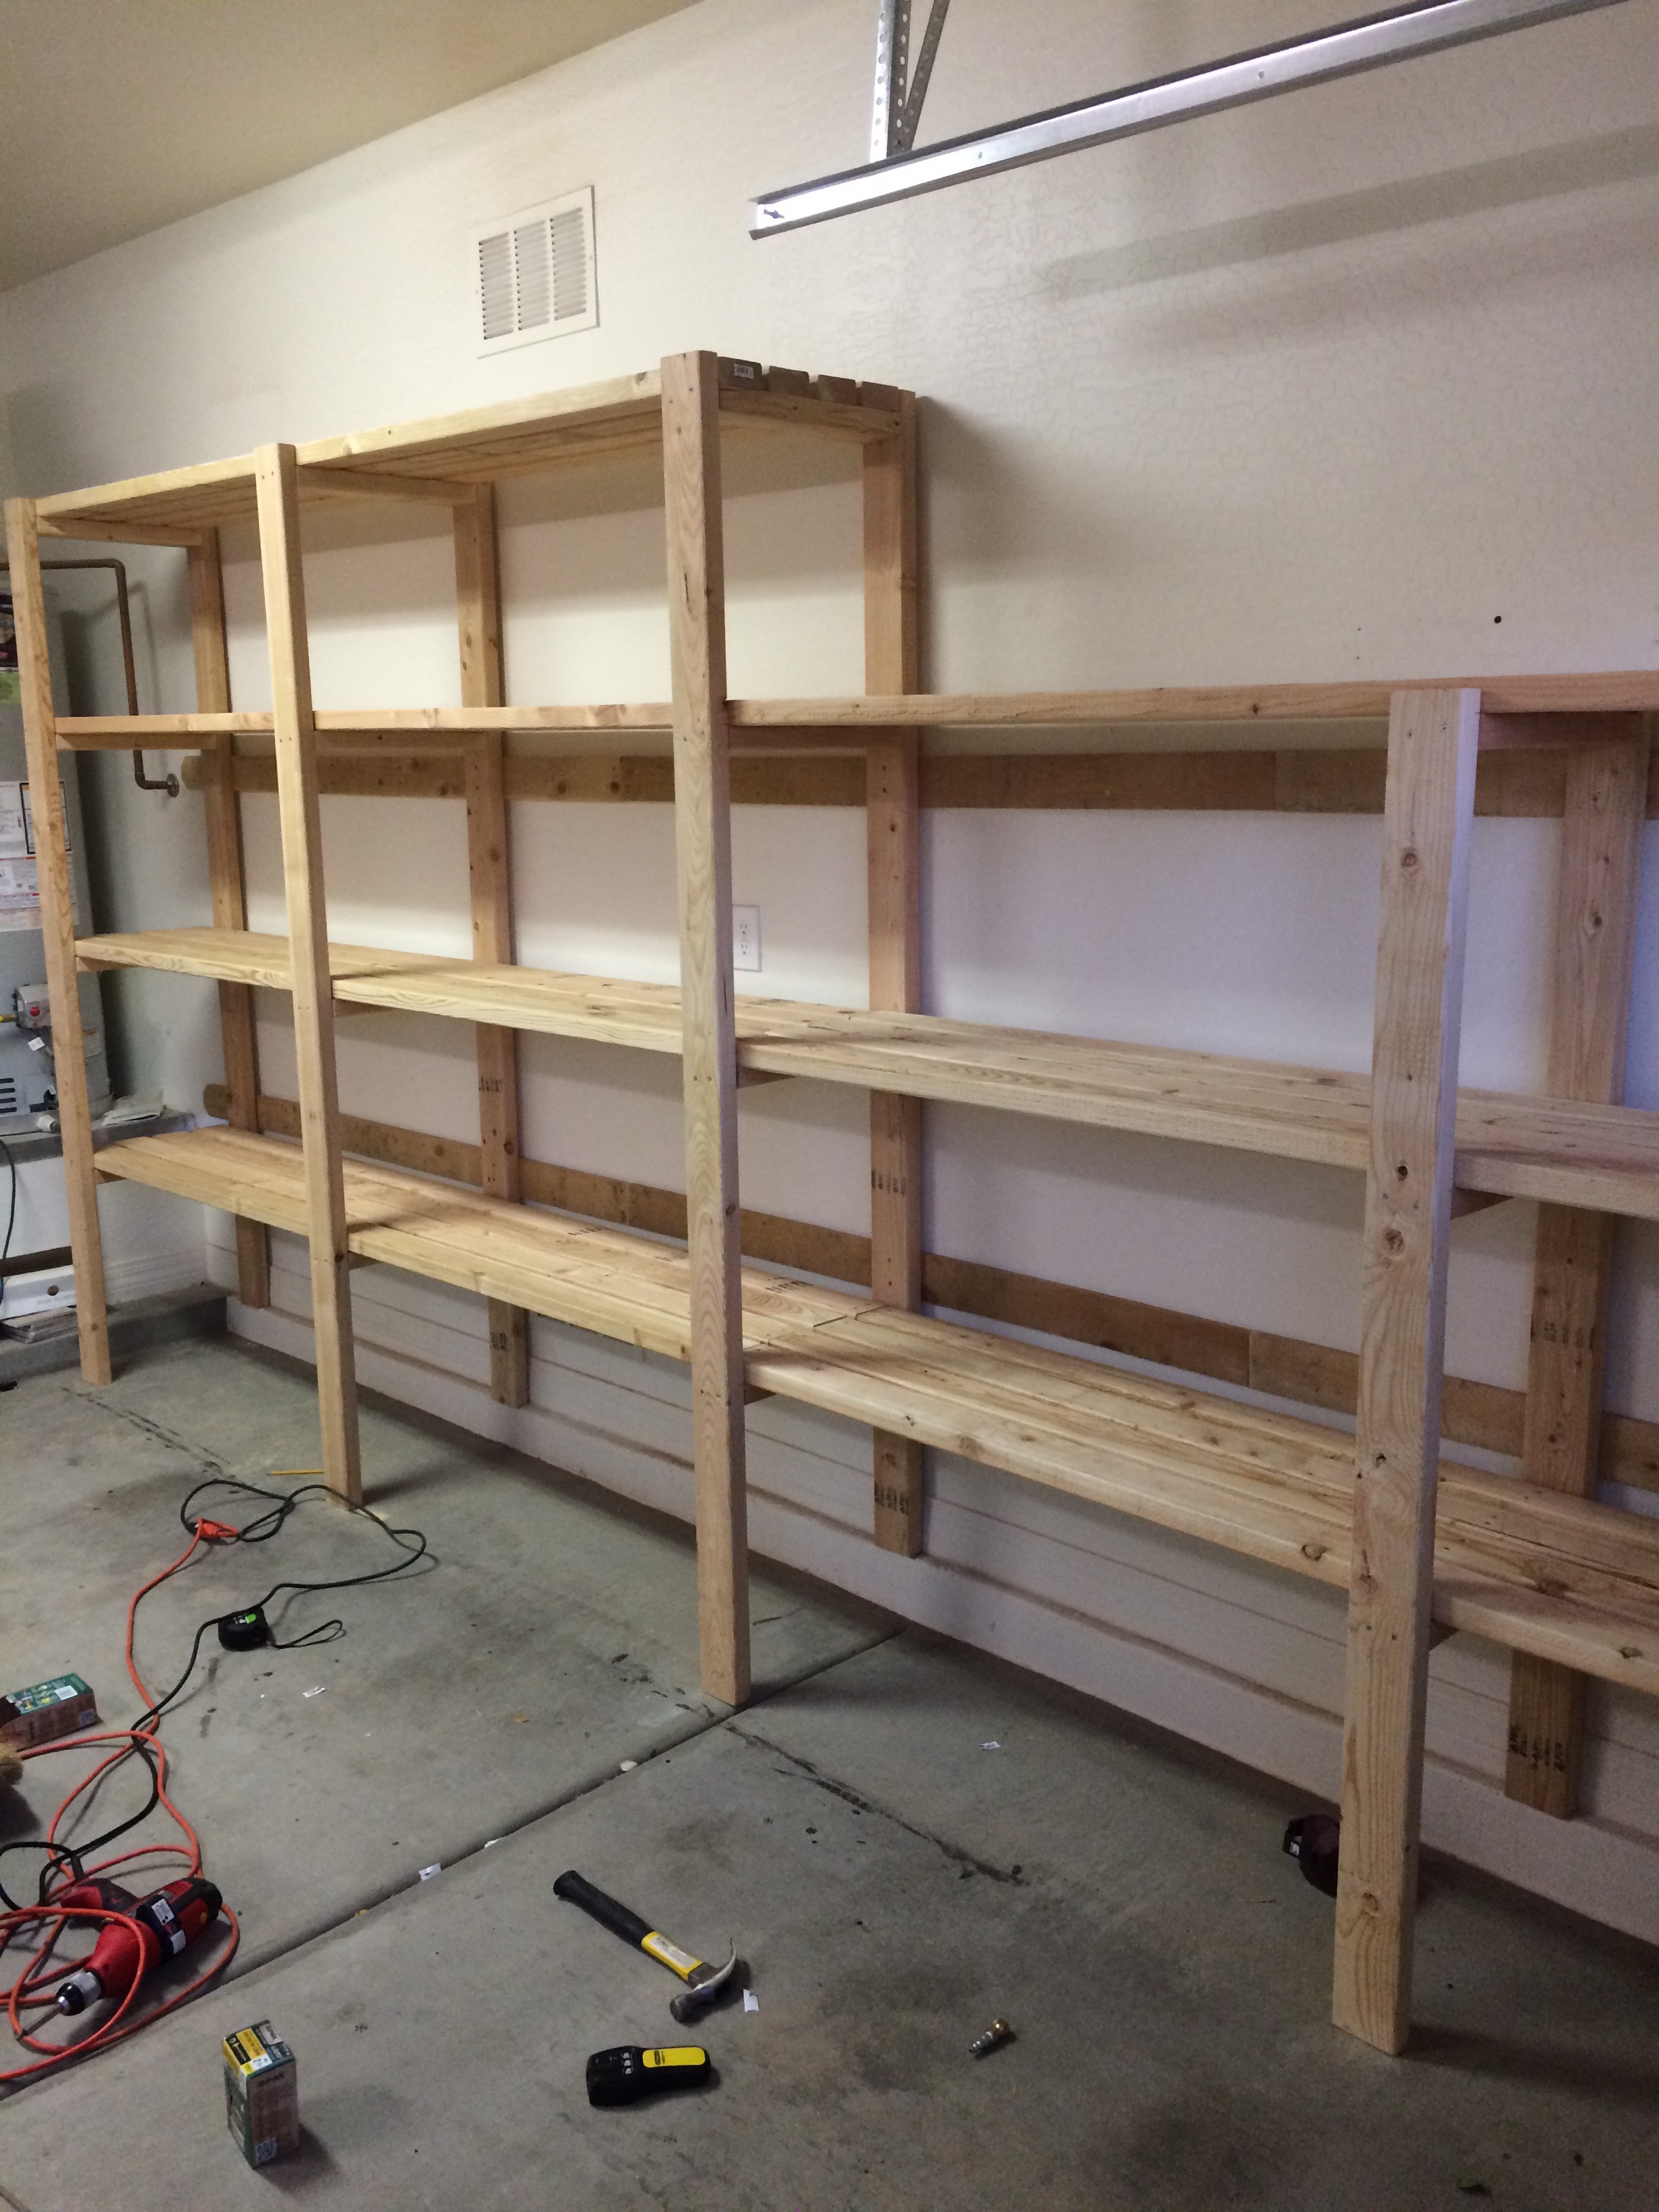
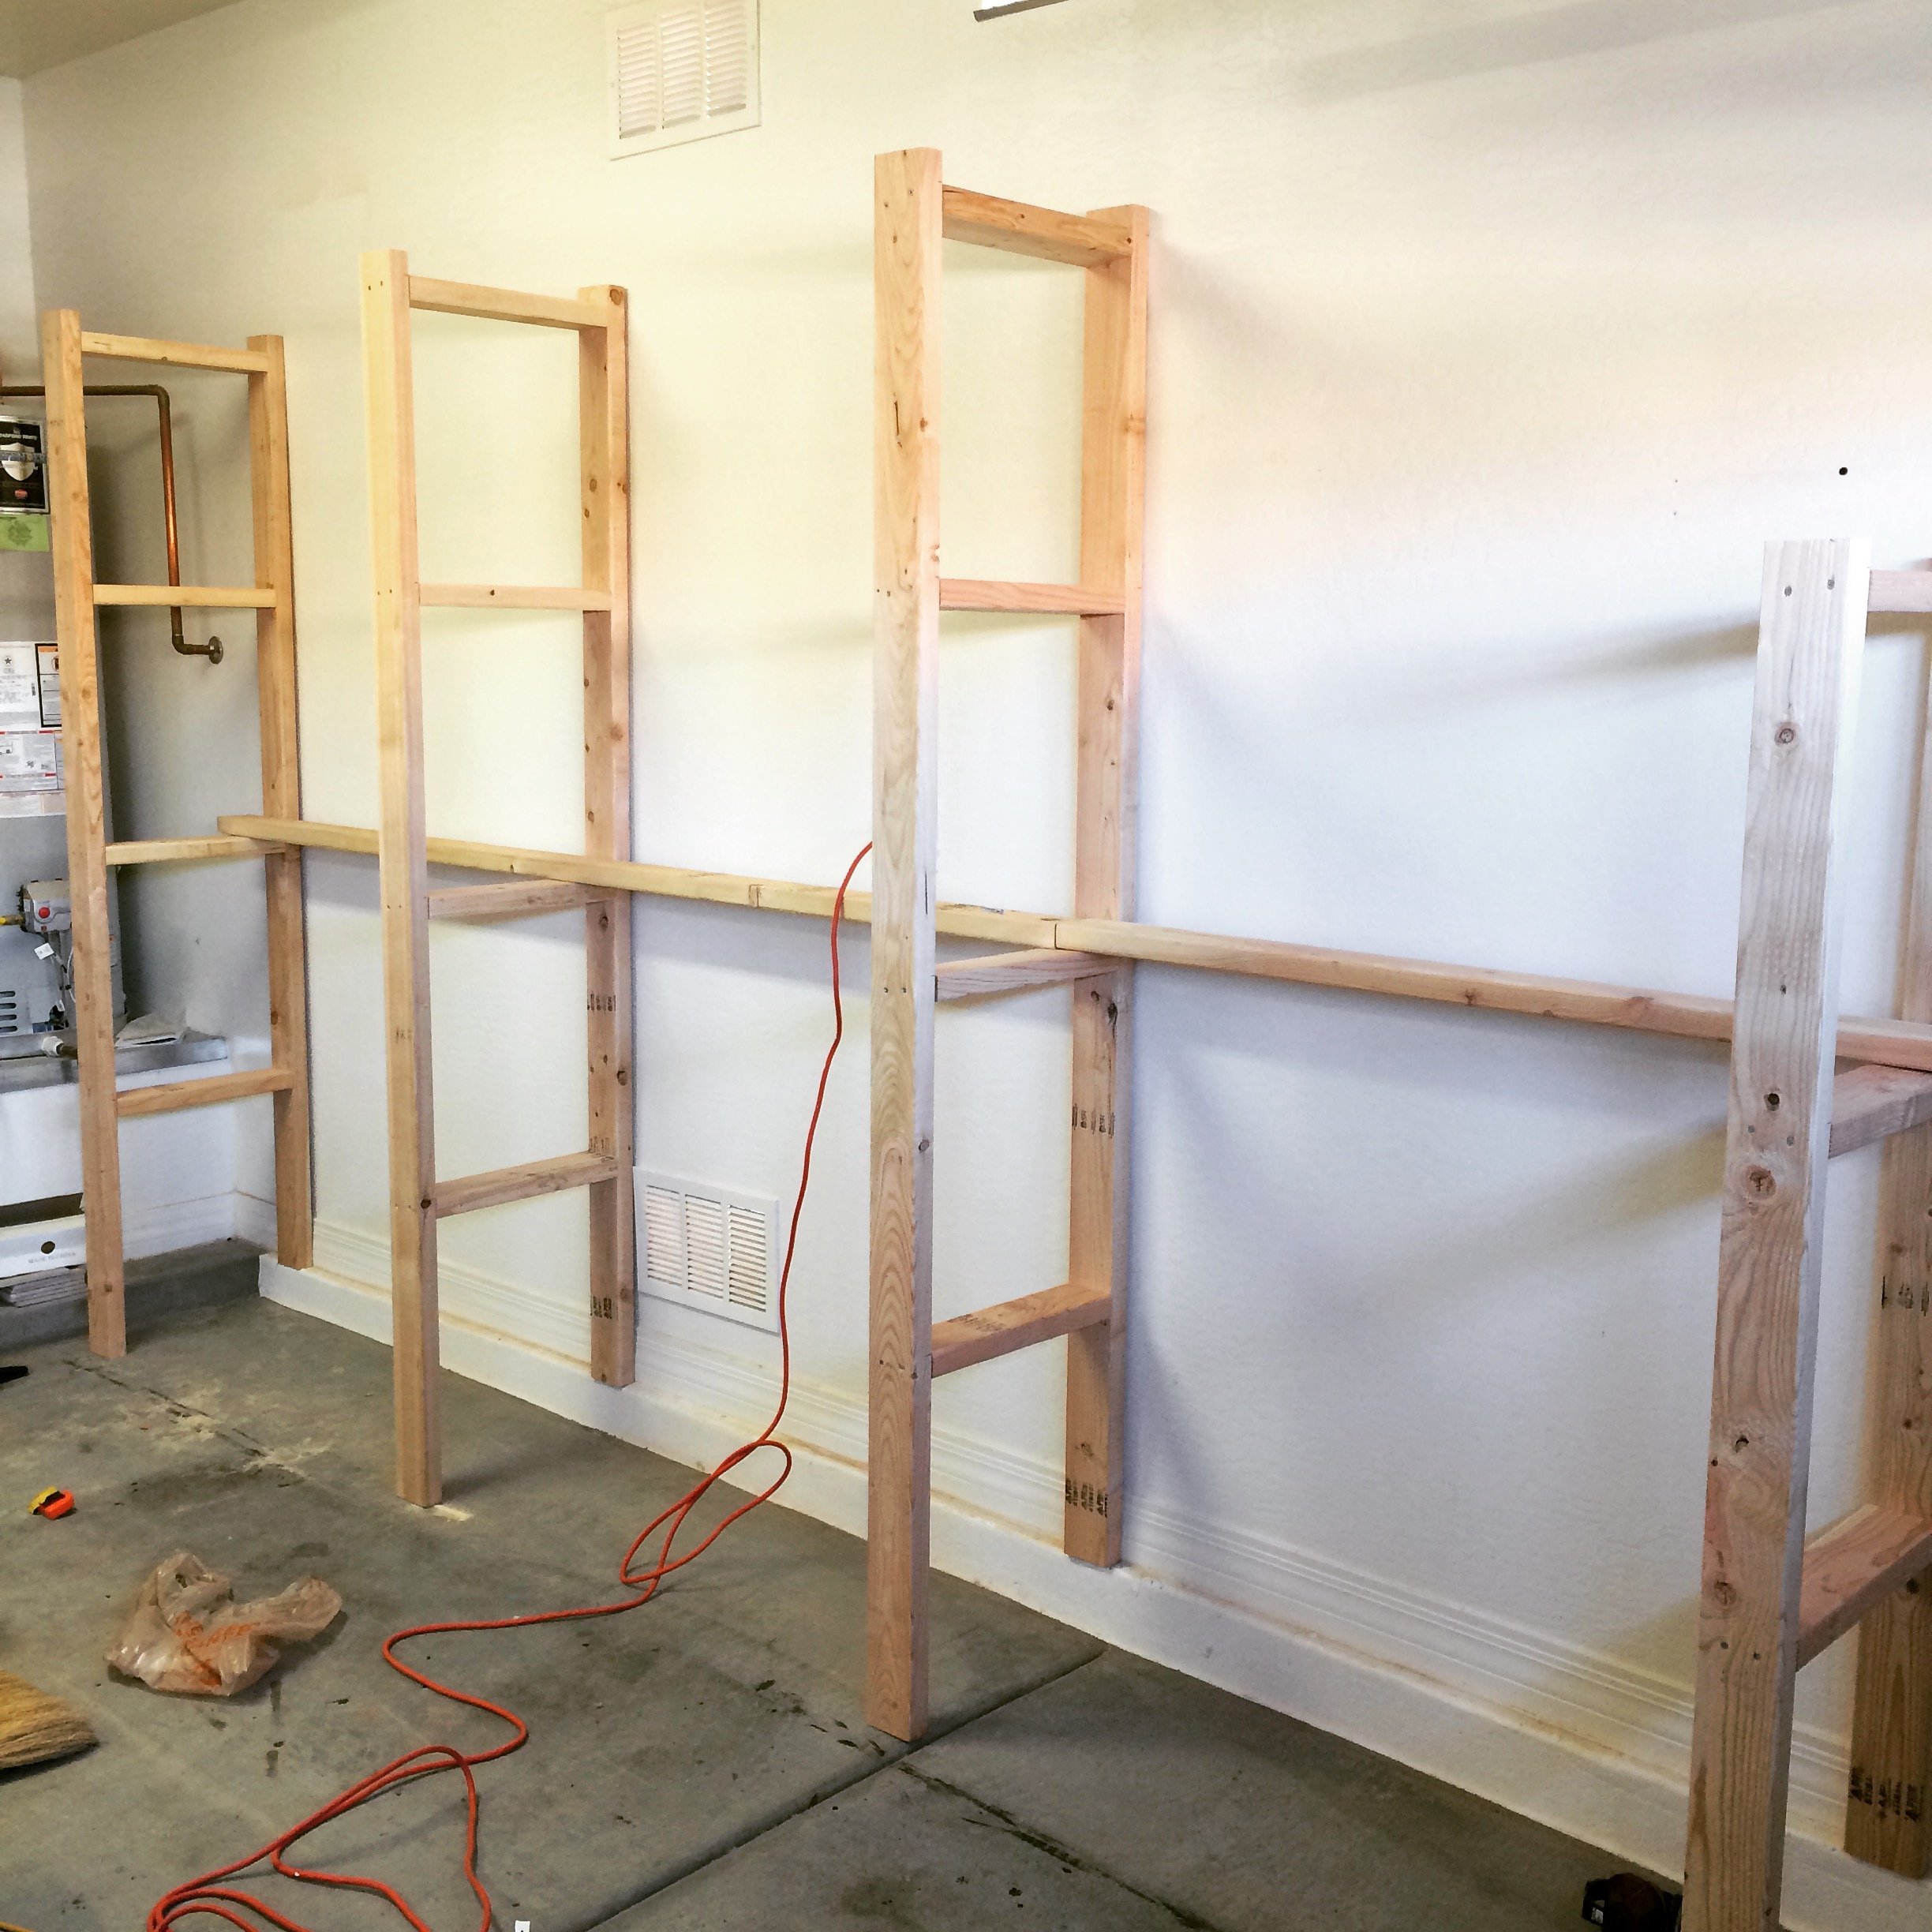
Loving These Shelves
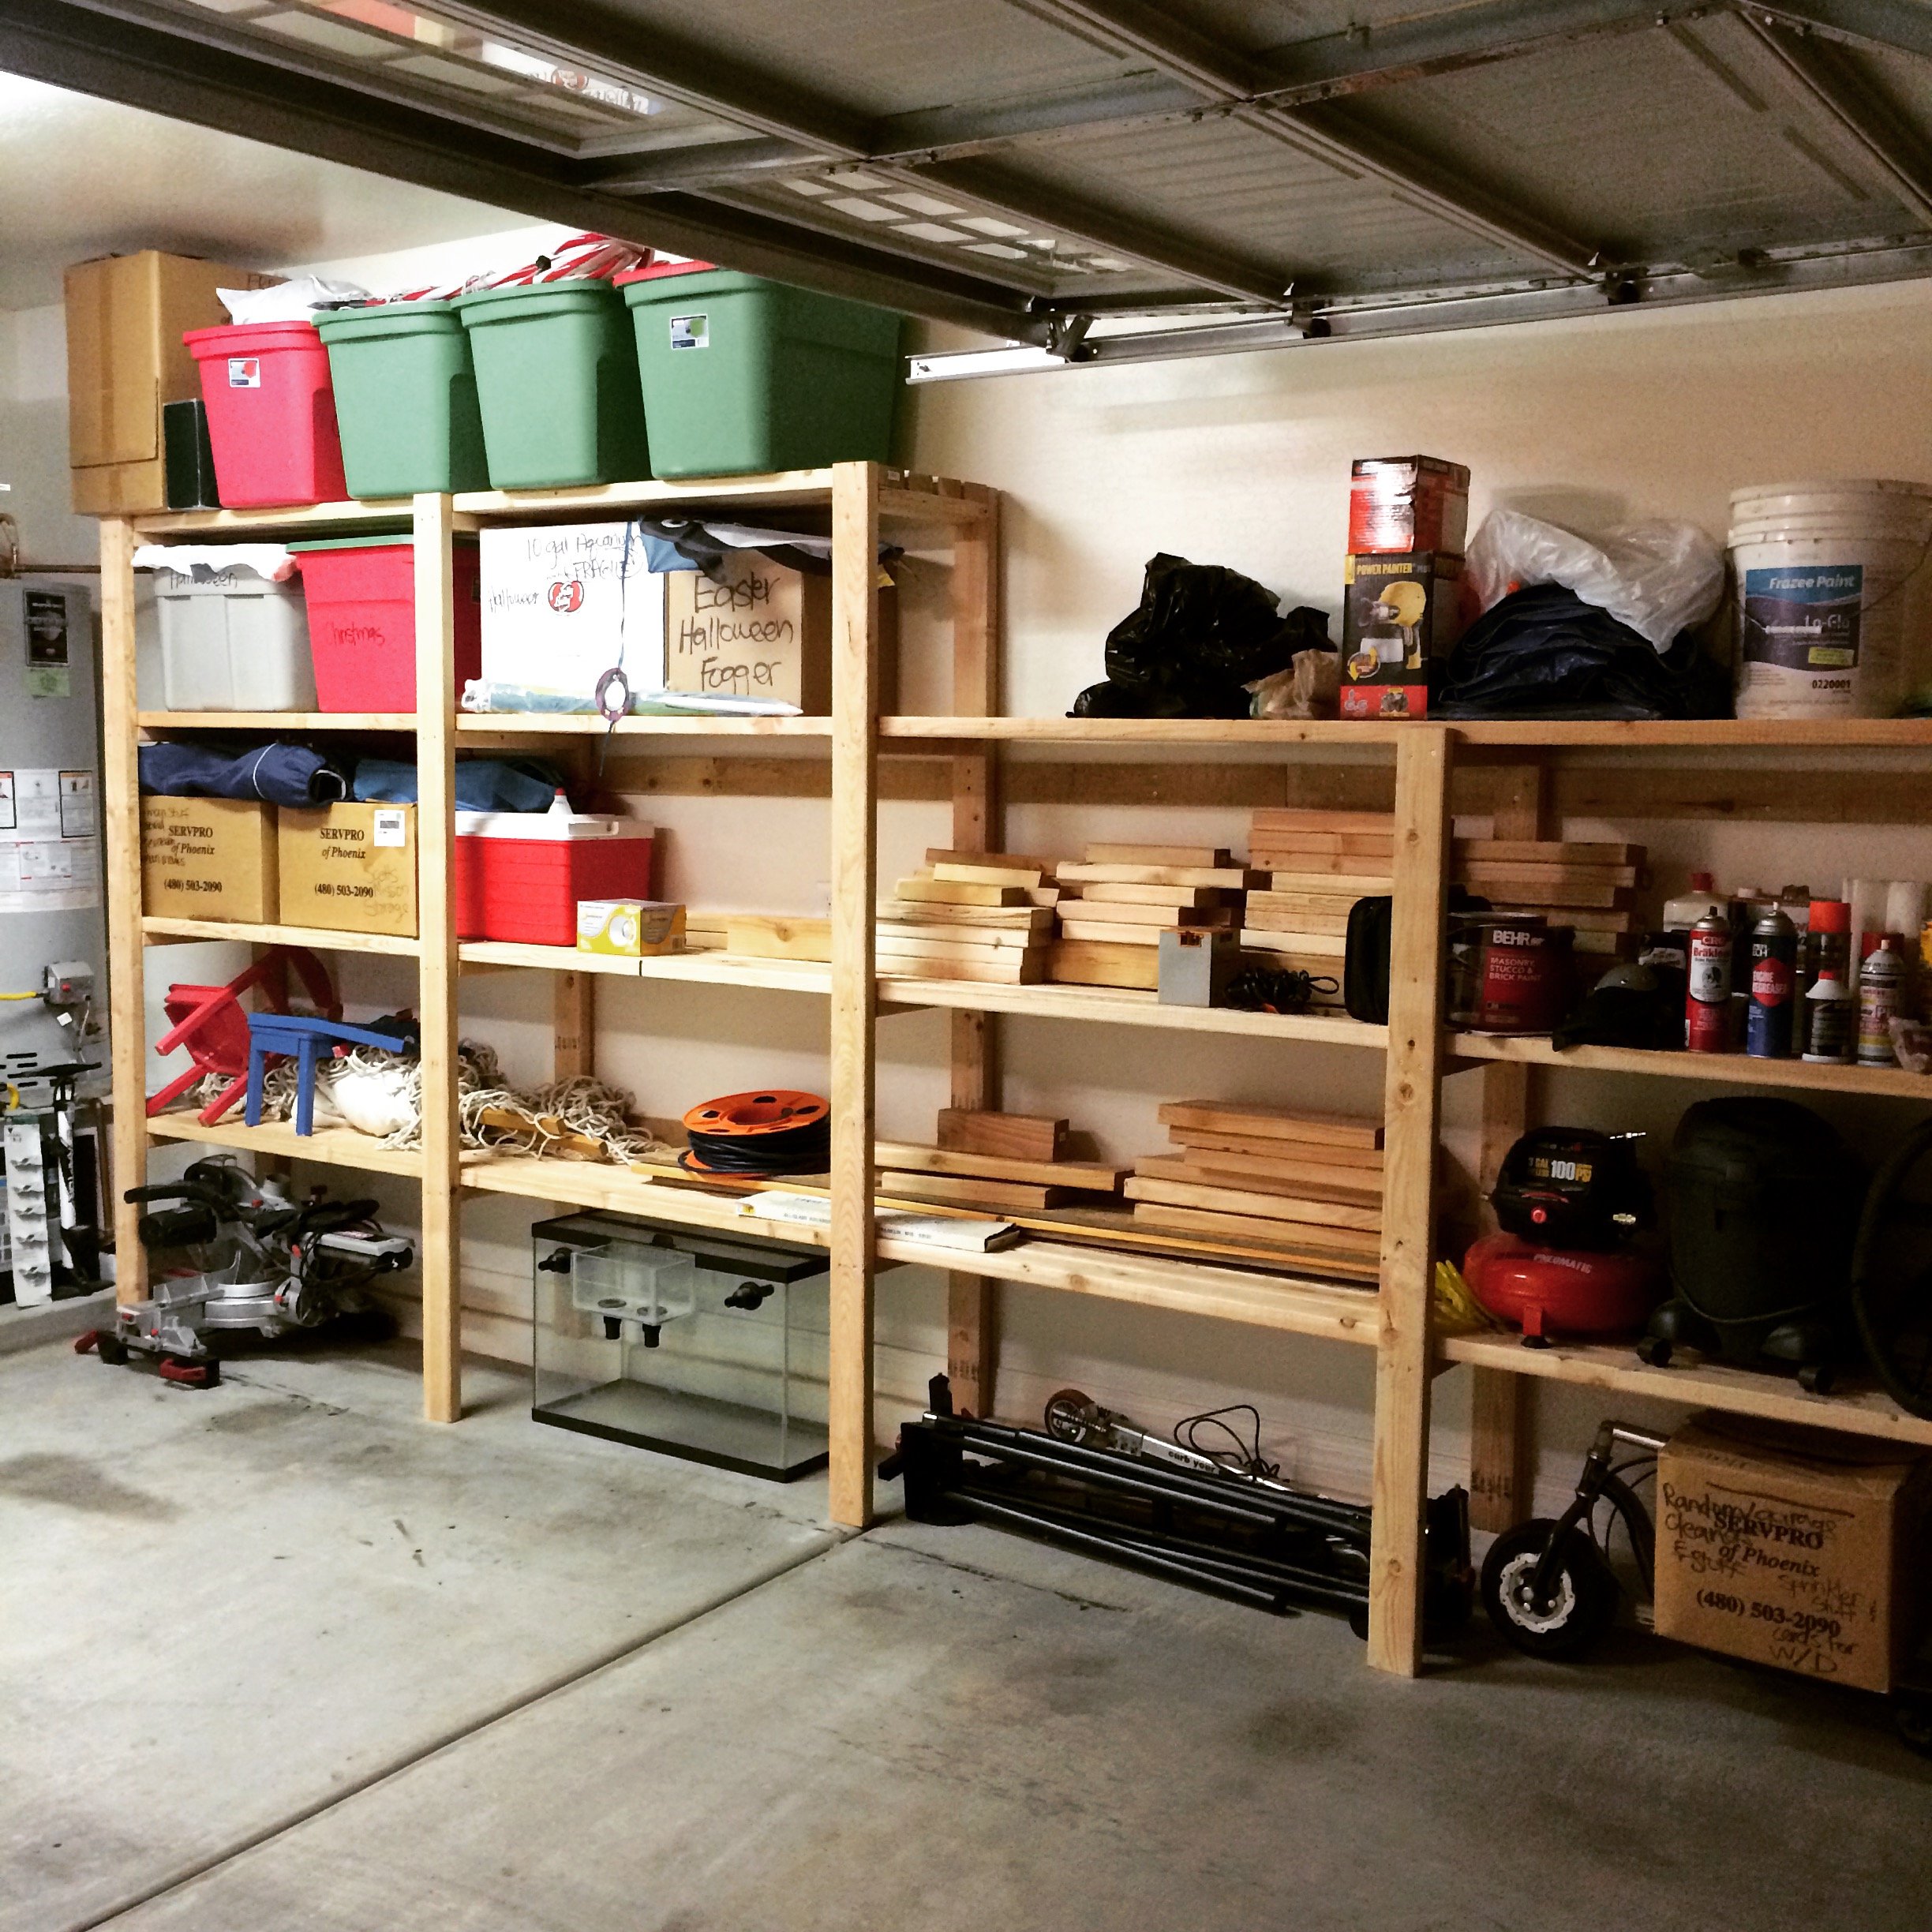
I changed the plans a little bit to add on the extra shelf on top as well as making the shelves an inch narrower than the plans. The project was actually pretty easy and really only took me about a days worth of work.
Built from Plan(s)
Estimated Cost
$160
Estimated Time Investment
Day Project (6-9 Hours)
Finish Used
None
Recommended Skill Level
Beginner
Comments
Big Kids Picnic Table
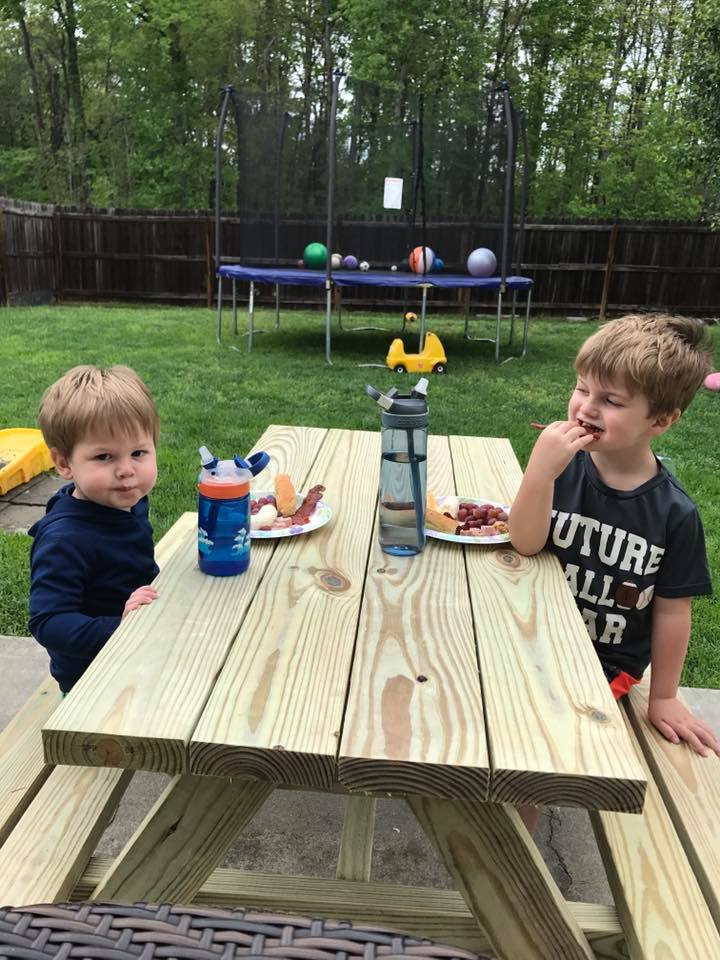
My son and I made this table this weekend in just a couple of hours with no problems. The directions were clear and easy to follow. Thank you for sharing them with us.
Built from Plan(s)
Estimated Cost
$40
Estimated Time Investment
An Hour or Two (0-2 Hours)
Recommended Skill Level
Beginner
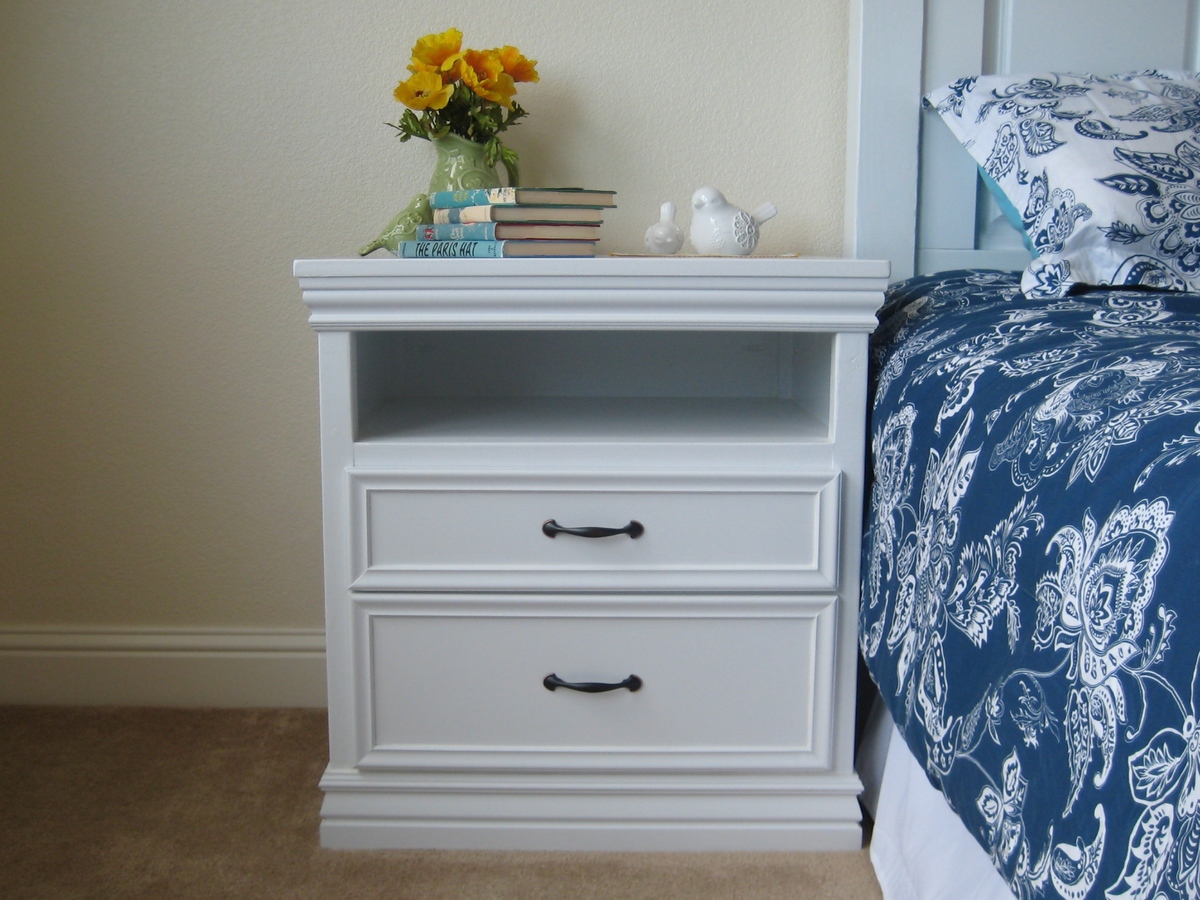
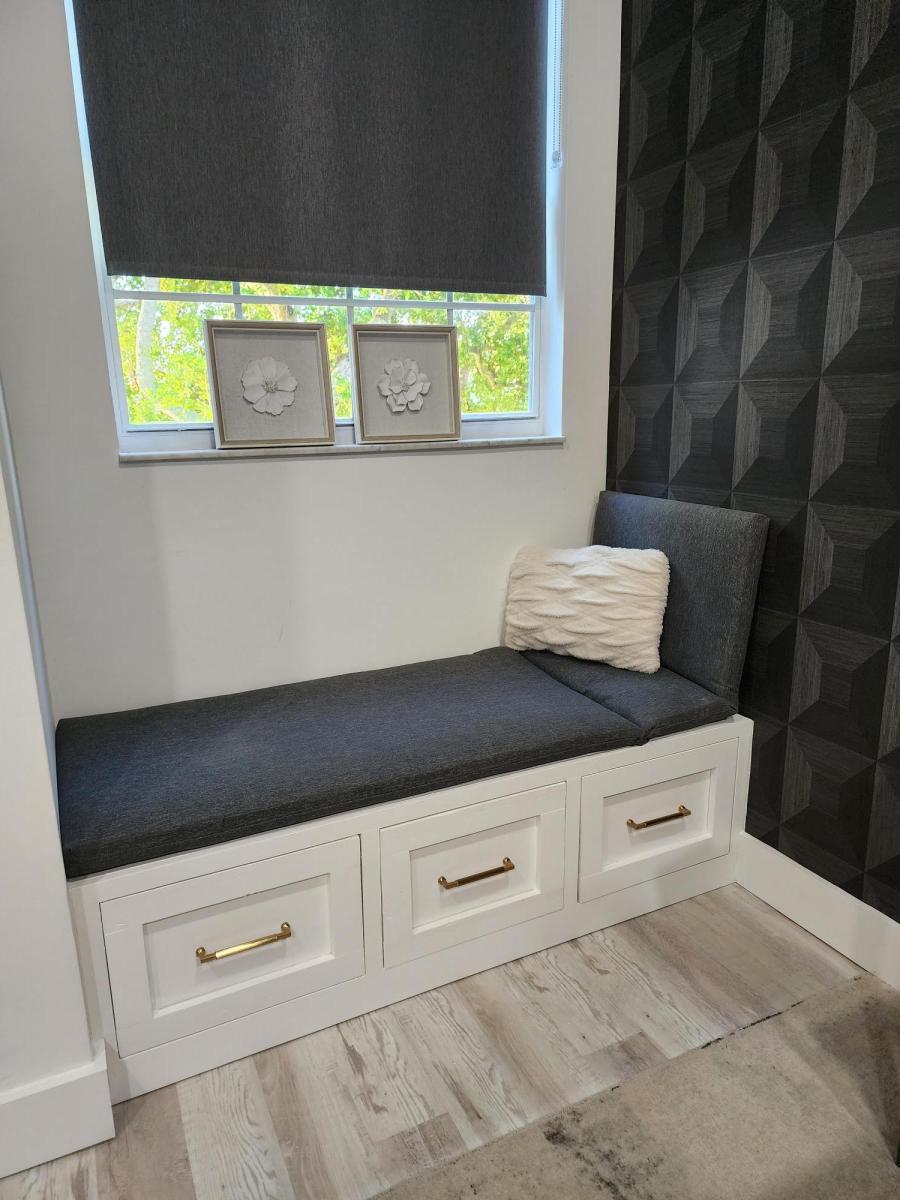
Not so "Rhyan" Nightstands
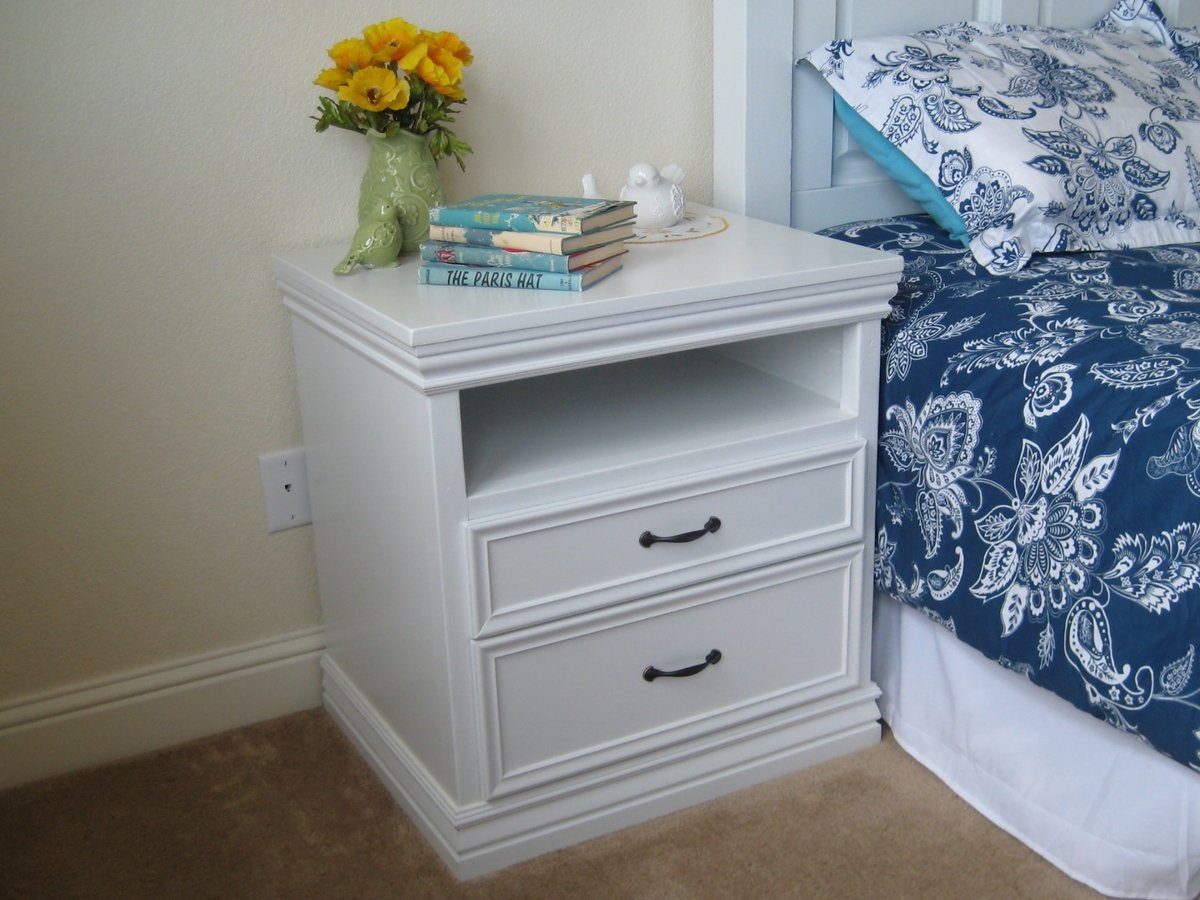
I used the Rhyan end table plan (with a few alterations) to make my nightstands. I changed the dimensions so mine turned out to be 20”D, 25”W, 27”H, I extended the side and back panels all the way to the top to close in the shelf and I made the bottom drawer larger. I decided to use under mount drawer slides but I think I will try out the side mount slides in the future though.
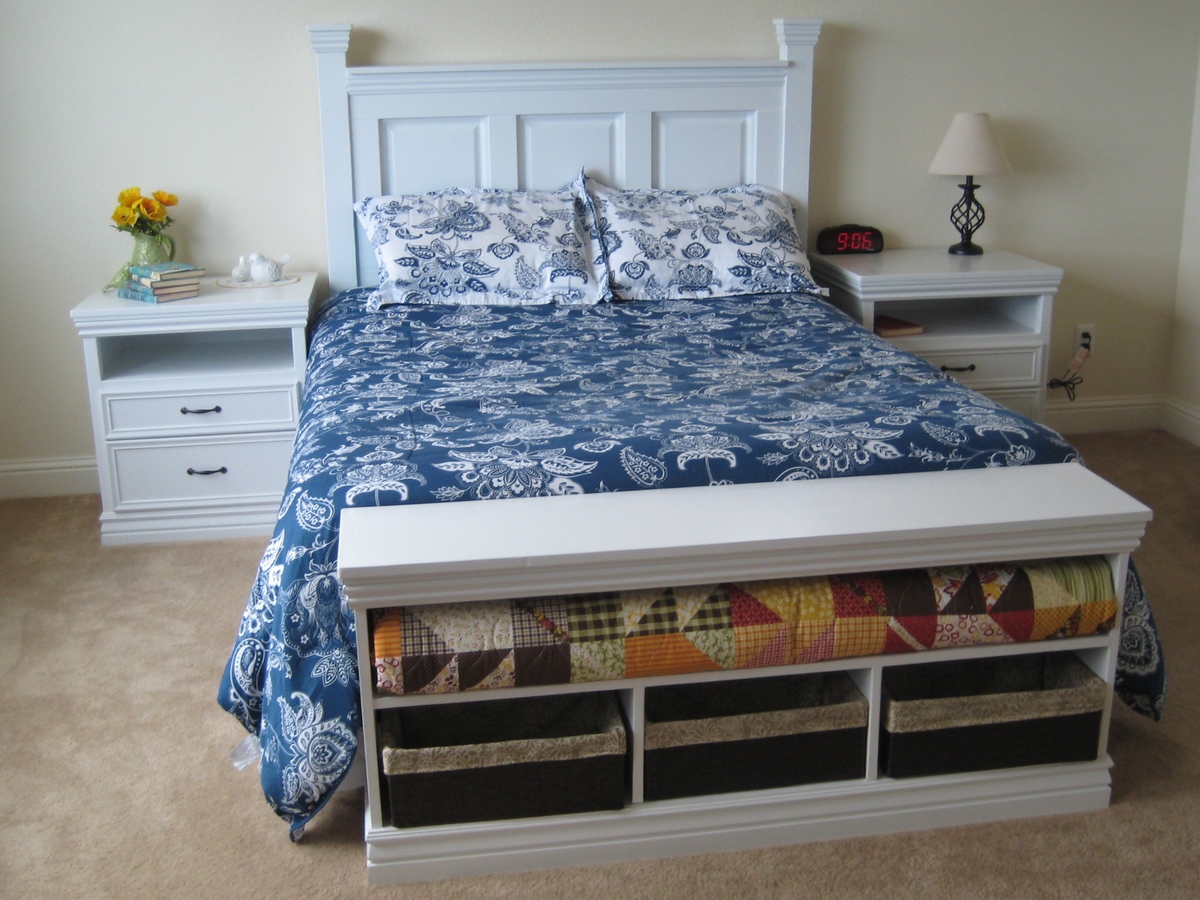
I wanted them to match the headboard and bench that I made for my bed so I added the same molding that I used on those pieces to finish it off.
I pre cut every piece for the main body of the nightstand and predrilled all of the Kreg holes which made it a really quick piece to put together! I purchased the Mini Kreg jig for this project and am so glad I did. Totally worth the money!


Built from Plan(s)
Estimated Cost
About $80 For 2 Nightstands
Estimated Time Investment
Weekend Project (10-20 Hours)
Finish Used
I painted with Rust-oleum painters touch semi gloss white and then sprayed a few coats of polyacrylic on the top.
Recommended Skill Level
Beginner
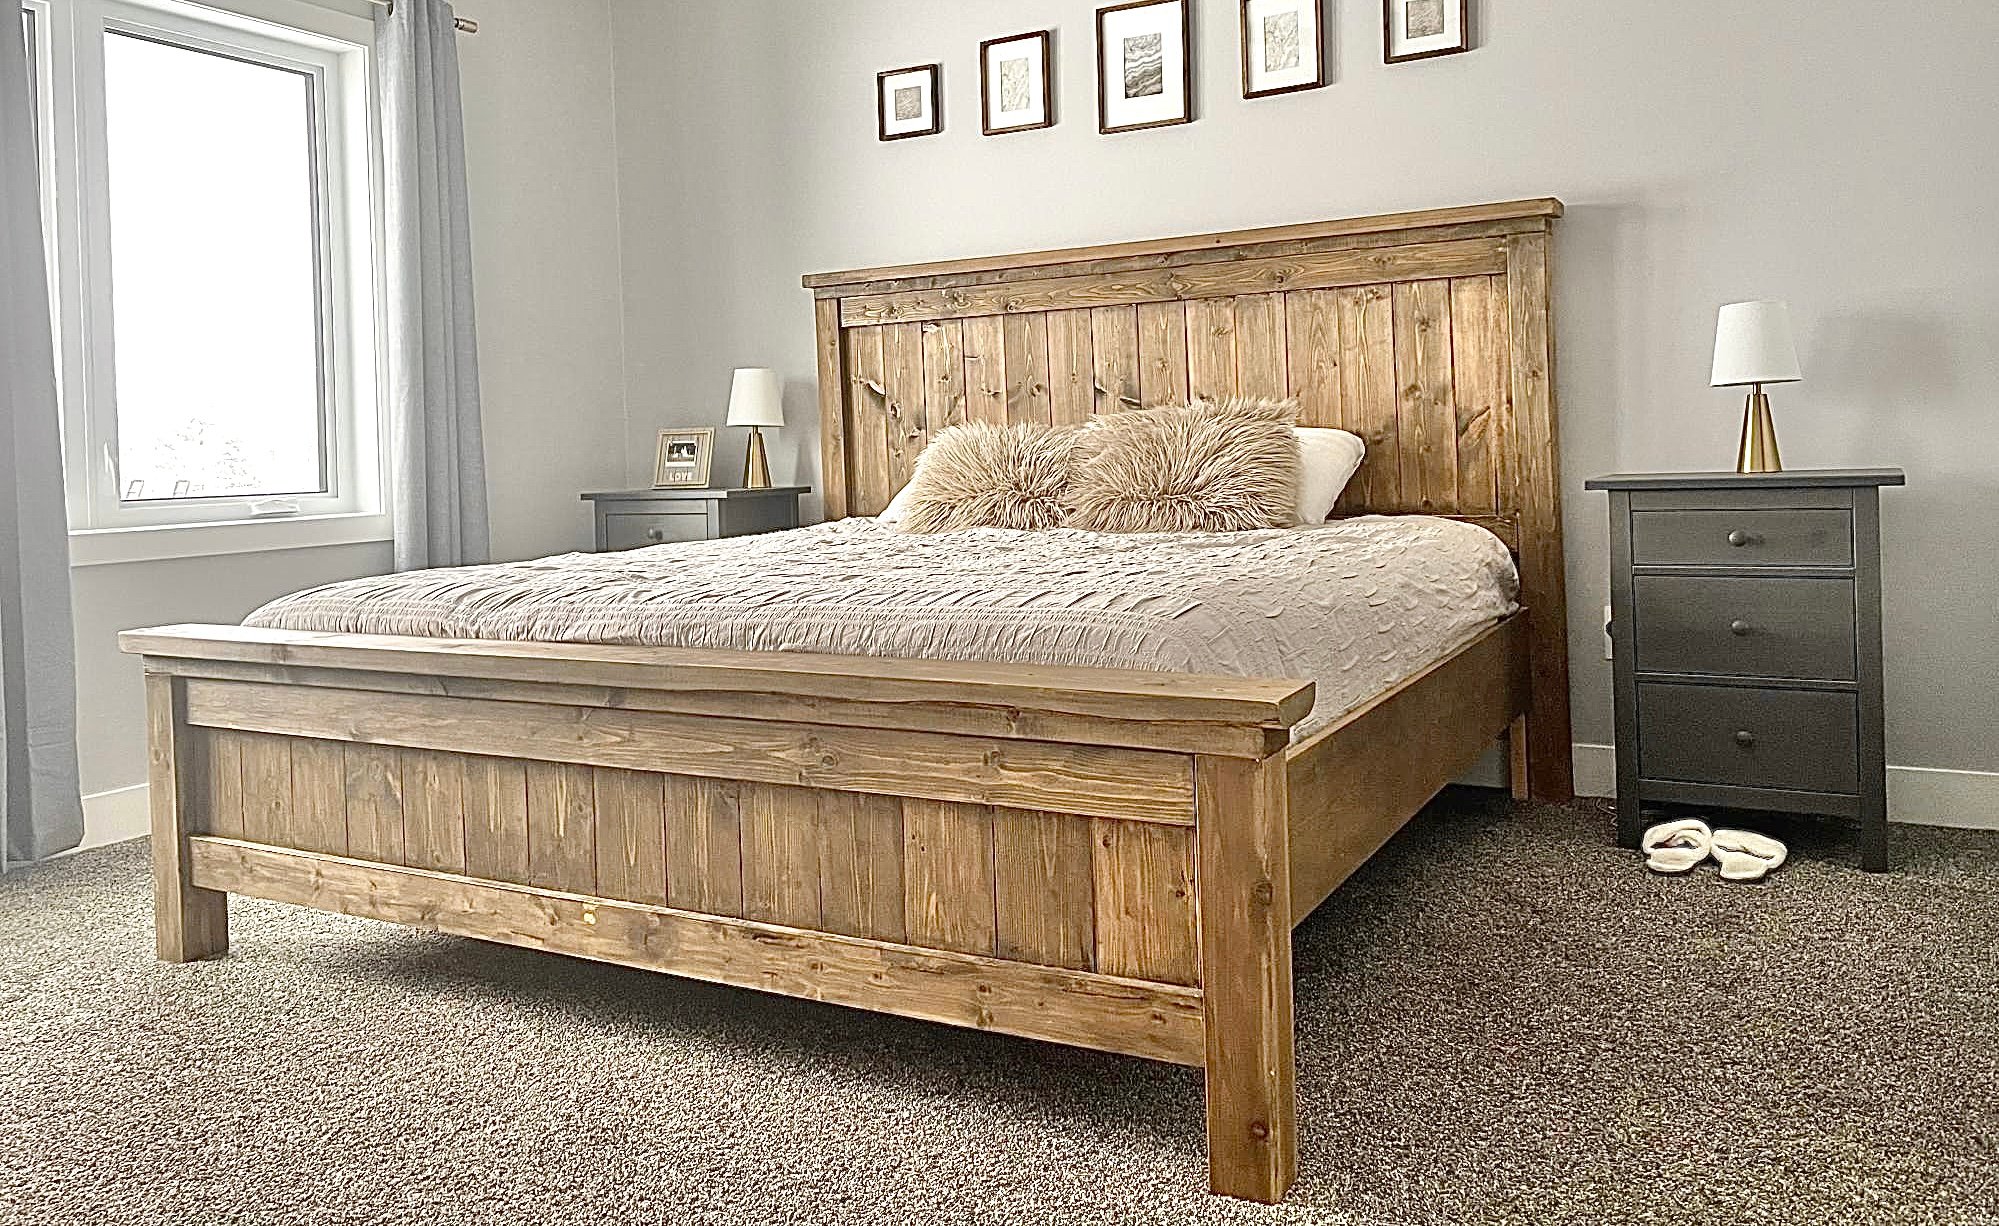
Modern Farmhouse Bed Frame

I love how this bed frame turned out! Everywhere that has stain is cedar and the rest is all scrap spruce. Thanks for another great plan Ana!

Built from Plan(s)
Comments
Farmhouse bed
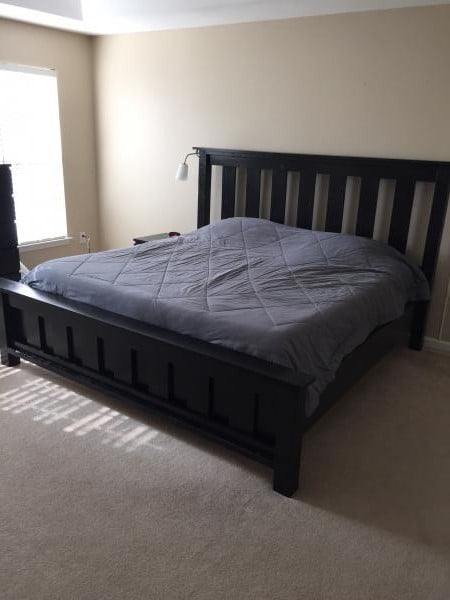
The project went relatively well. Had to readjust in order to fit our king. I used 2x4s and 2x4 joist hangers to support the mattres.
Built from Plan(s)
Estimated Cost
300.00
Estimated Time Investment
Week Long Project (20 Hours or More)
Finish Used
Rustoleum ebony stain and satin polyurethane.
Recommended Skill Level
Beginner
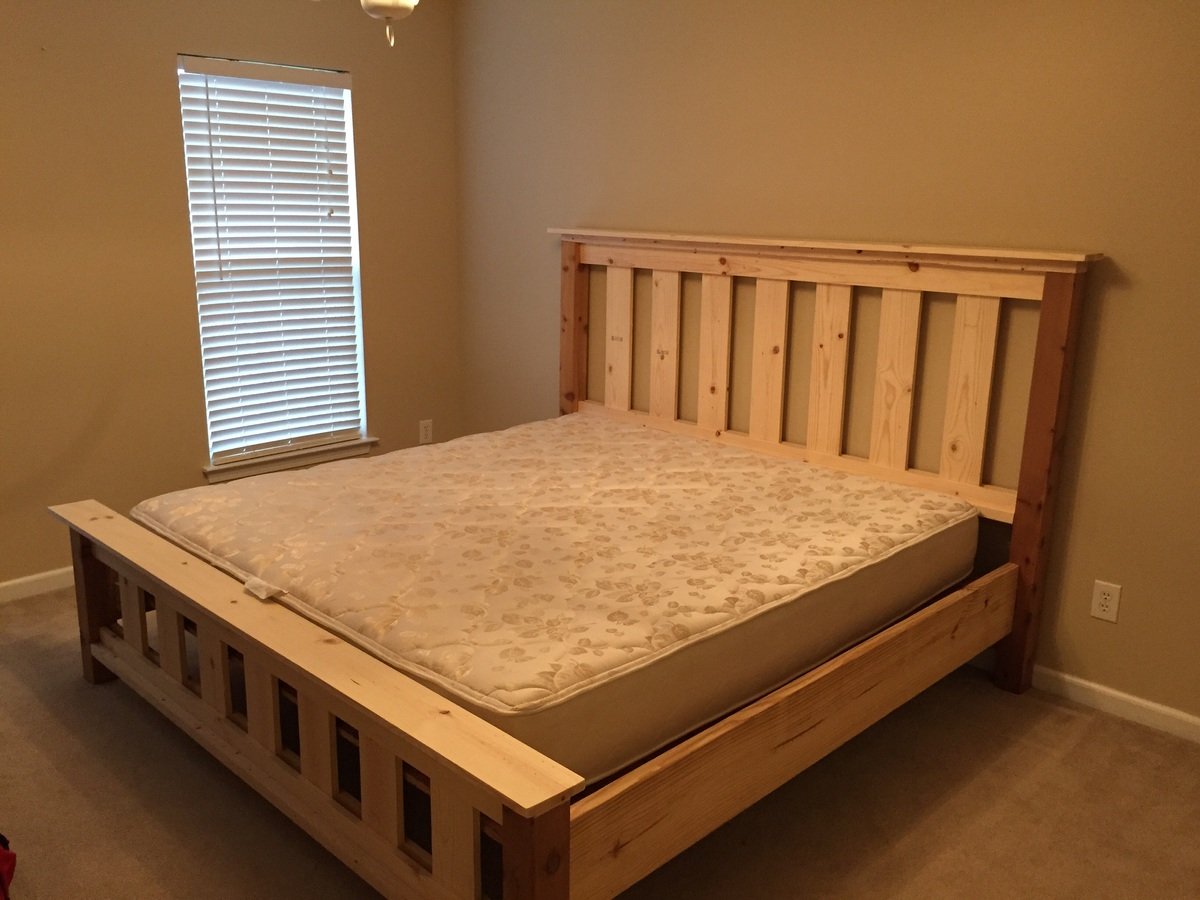
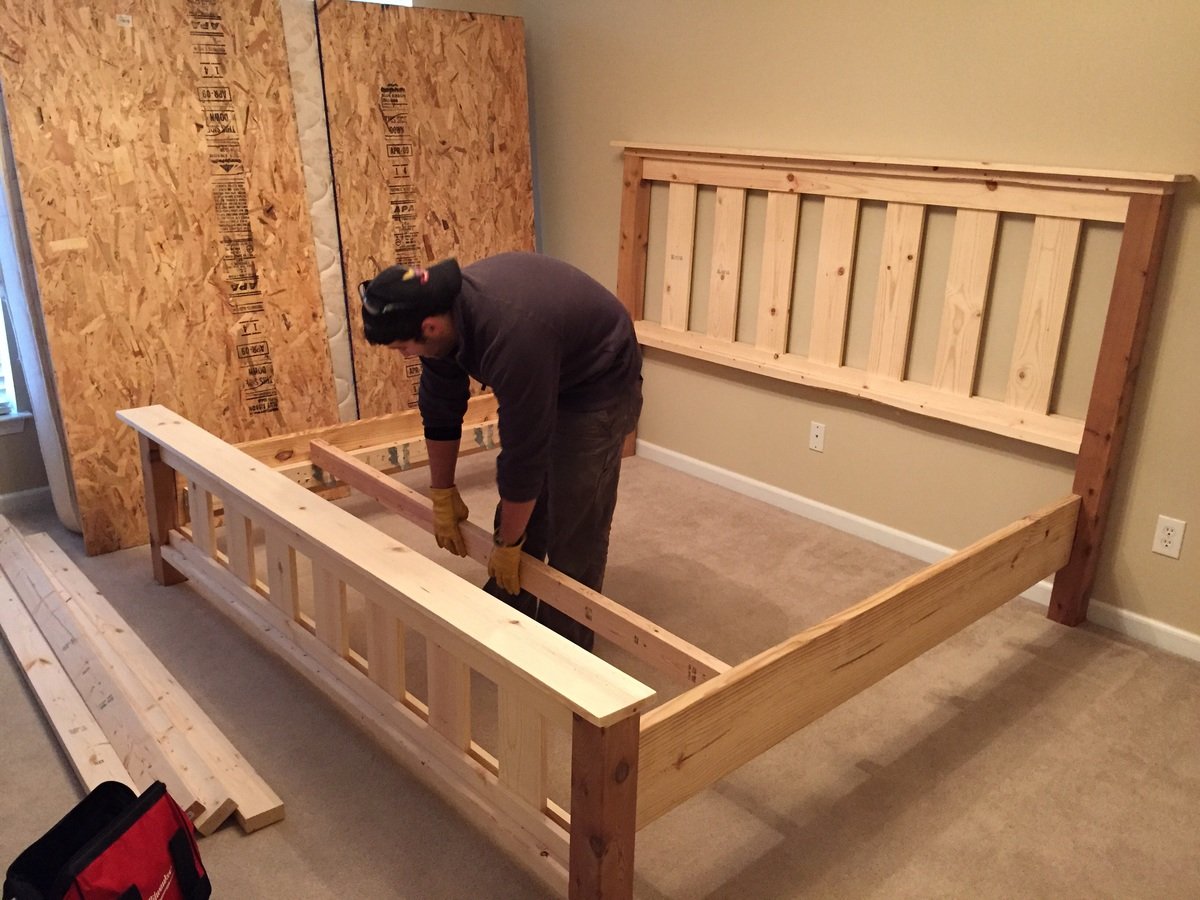
Modern Farmhouse Bed
My husband and I had worked on this bed together, and we are so happy with it! We went with taller side tables that we purchased, and just stained the wood instead of painting it.
Built from Plan(s)
Comments
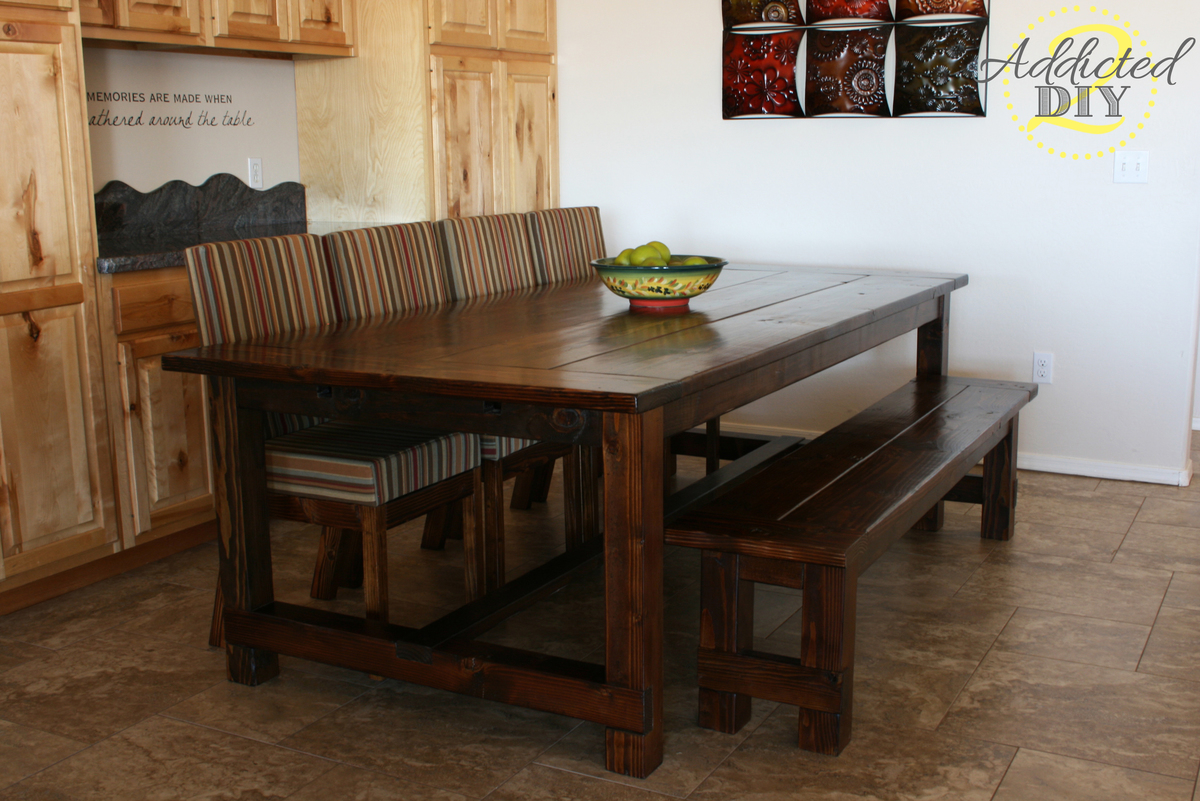
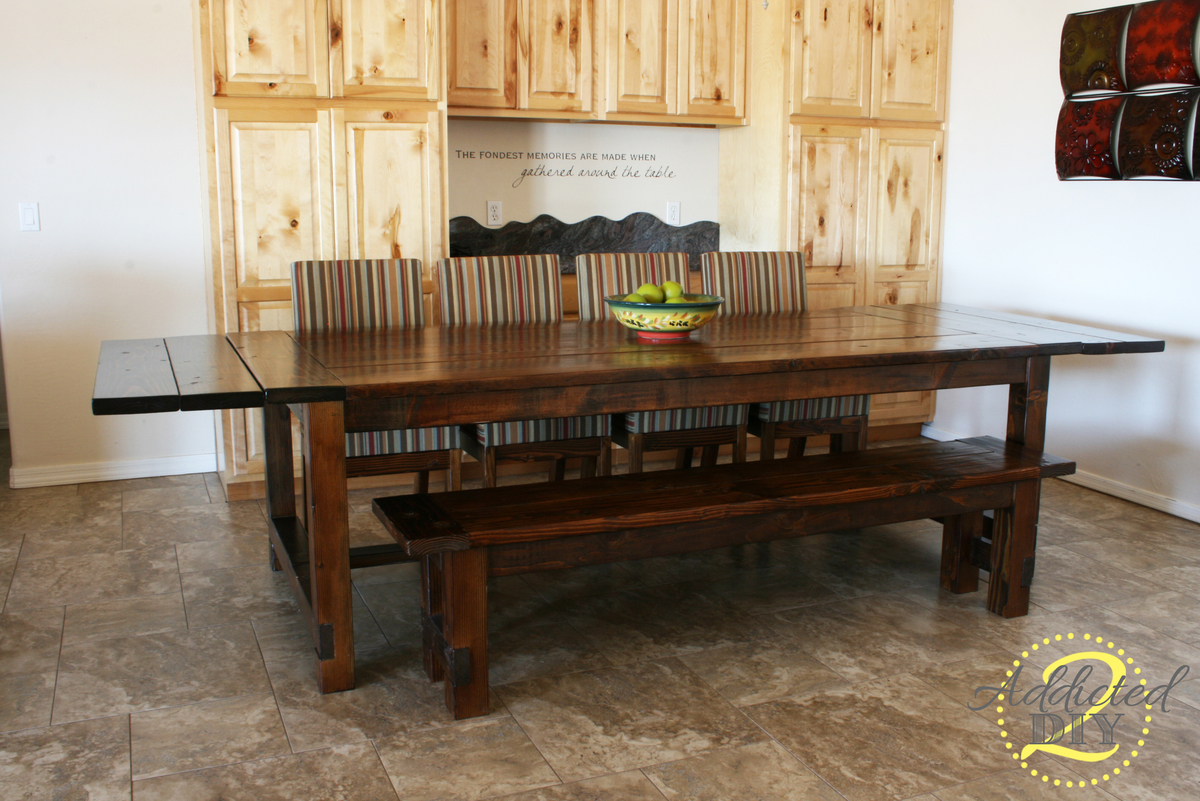
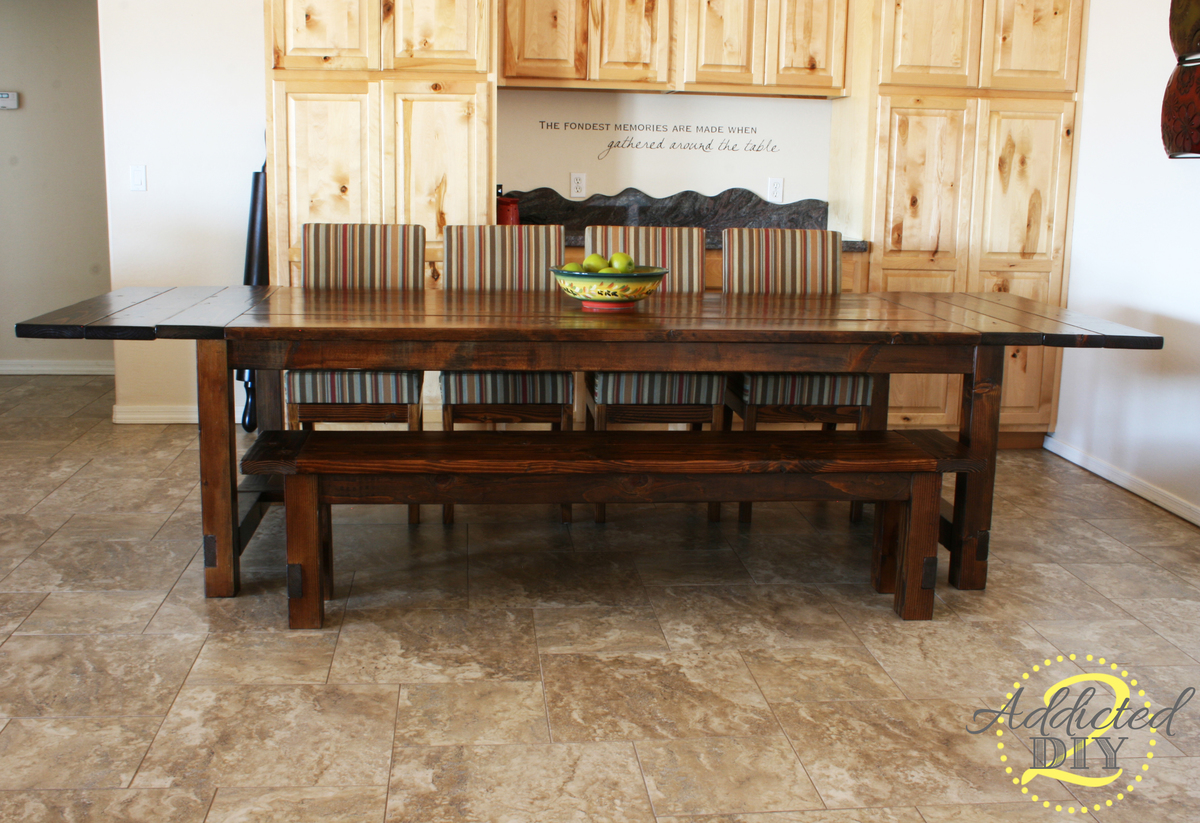
DIY Farmhouse Table with Extensions

We built this farmhouse table a few months ago and absolutely love it. We modified the plans a bit based on another brag post and went with a replica of the Restoration Hardware table. I also built the chairs for the table based on the Parsons chair plans
Built from Plan(s)
Estimated Cost
$300+
Estimated Time Investment
Week Long Project (20 Hours or More)
Finish Used
Minwax Provincial
Minwax Polycrylic in Satin
Minwax Polycrylic in Satin
Recommended Skill Level
Intermediate
Comments

Tue, 11/05/2013 - 17:59
Impressed!
Really nice job! This was quite an accomplishment, especially given that you guys did additional chairs (that look fantastic). Also, great job documenting on your blog.
My First Project
My very first woodworking project and could not have done it without you!!
Mistakes were made and lots was learned but pretty happy with how it turned out in the end.
Built from Plan(s)
Comments
Wed, 05/24/2023 - 19:54
Fabulous First!
Absolutely beautiful, can't wait to see what you build next!


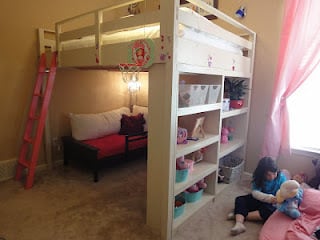
Queen Loft Bed

I made this bed for my 6 year old daughter. I loved Anna's Loft Bed plans, but she wanted a bigger play area underneath. So I modified the twin loft bed plans to fit a queen mattress. I also added extra supports for the mattress, and I used PureBond plywood on top of the supports for the mattress to sit on.
That's the Farmhouse Toddler Bed underneath. My younger daughter inherited her big sister's twin bed, so the toddler bed was put to use in the new "playhouse."
Built from Plan(s)
Estimated Time Investment
Week Long Project (20 Hours or More)
Finish Used
I sanded the wood and primed it. Then I sanded (lightly) again and painted it with Valspar latex enamel in Gloss Almond.
Recommended Skill Level
Intermediate
Comments
Wed, 02/09/2022 - 15:31
We’ve been looking for…
We’ve been looking for exactly this!! Can you share your modified plans and the list of lumber and supplies needed?
Sun, 09/02/2012 - 12:45
Modified Queen Size
I think it's great that you modified it to a queen! I live a studio and NEED something like this. Could you share the modifications? It looks beautiful = )
Sun, 09/02/2012 - 20:58
The changes I made were: End
The changes I made were:
End planks cut to 63"
Top back guard and front and back rails cut to 87"
The top guard rails on ends cut to 66"
I measured for the mattress supports and the front guard rail after the rest was completed.
You should also measure for the bookcases after the rest is completed, but each of mine wound up being about 31" wide.
Everything else was pretty much the same.
Hope that helps.
Thu, 11/01/2012 - 08:24
Thank you!
This is wonderful - I've been looking to make something like this for an urban efficiency (adult) apartment! Thanks so much for sharing your modifications!
Mon, 07/29/2013 - 14:08
queen loft for adults
Will the height of the bed allow for adults to stand under it? If not what modifications should be made to make the height fit a standing adult? (the highest being 6'1" male) Thanks! =D

Double Door Barn Greenhouse
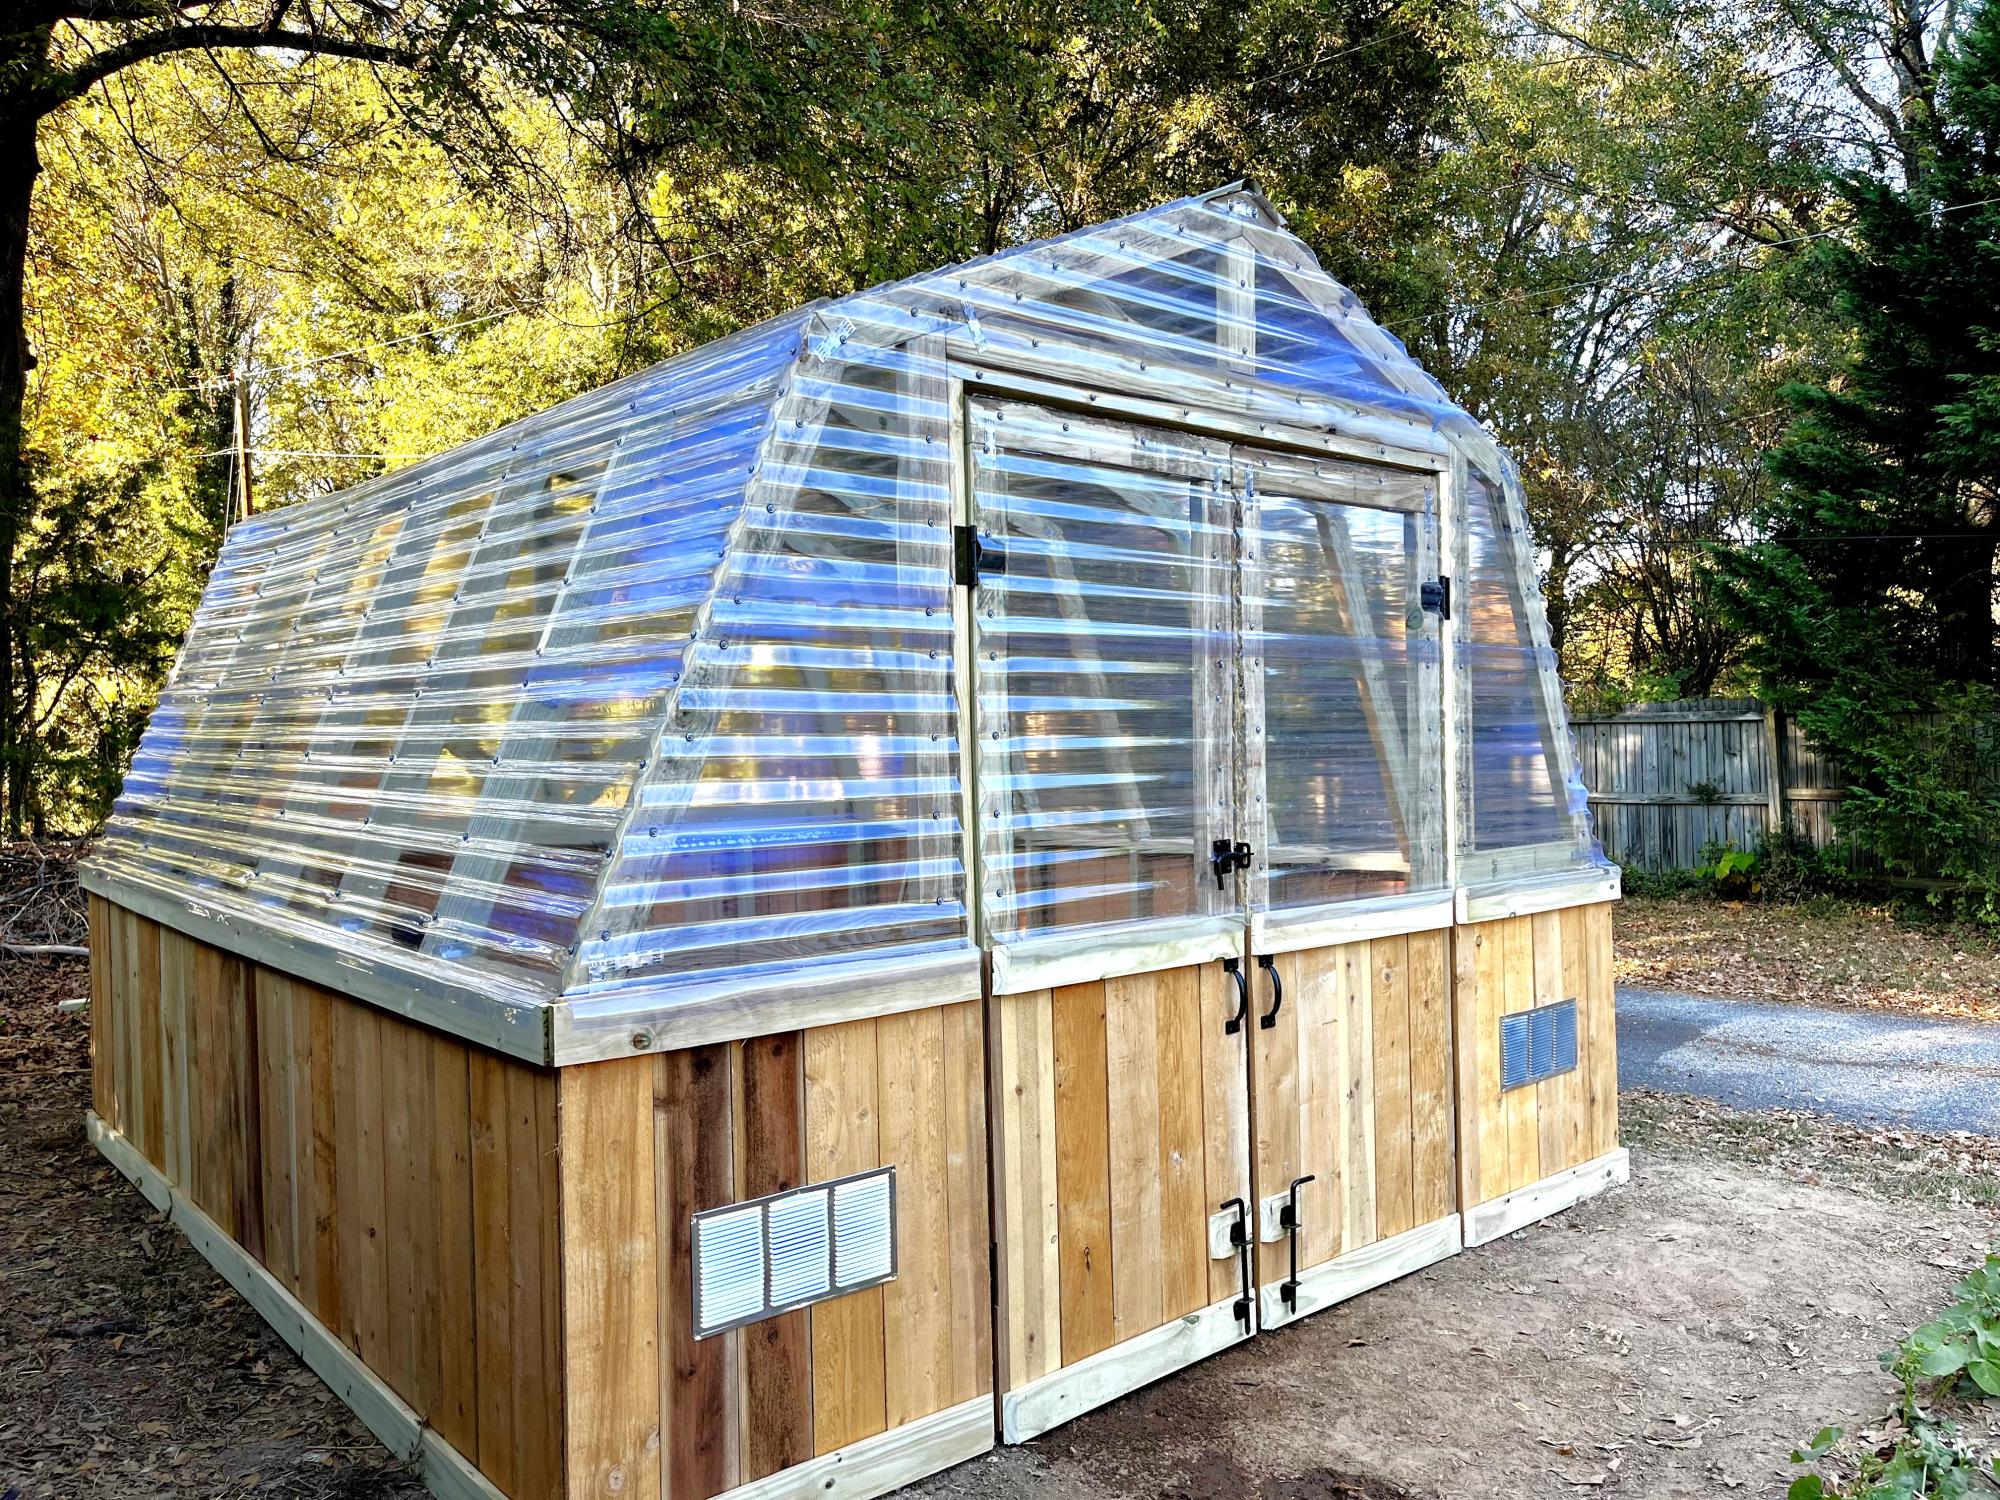
I loved this plan so much but I really wanted double doors so we made a few modifications to fit them. Can’t wait to build out the interior and start growing! Thank you for the amazing plans!
Built from Plan(s)
Seasonal And Holiday
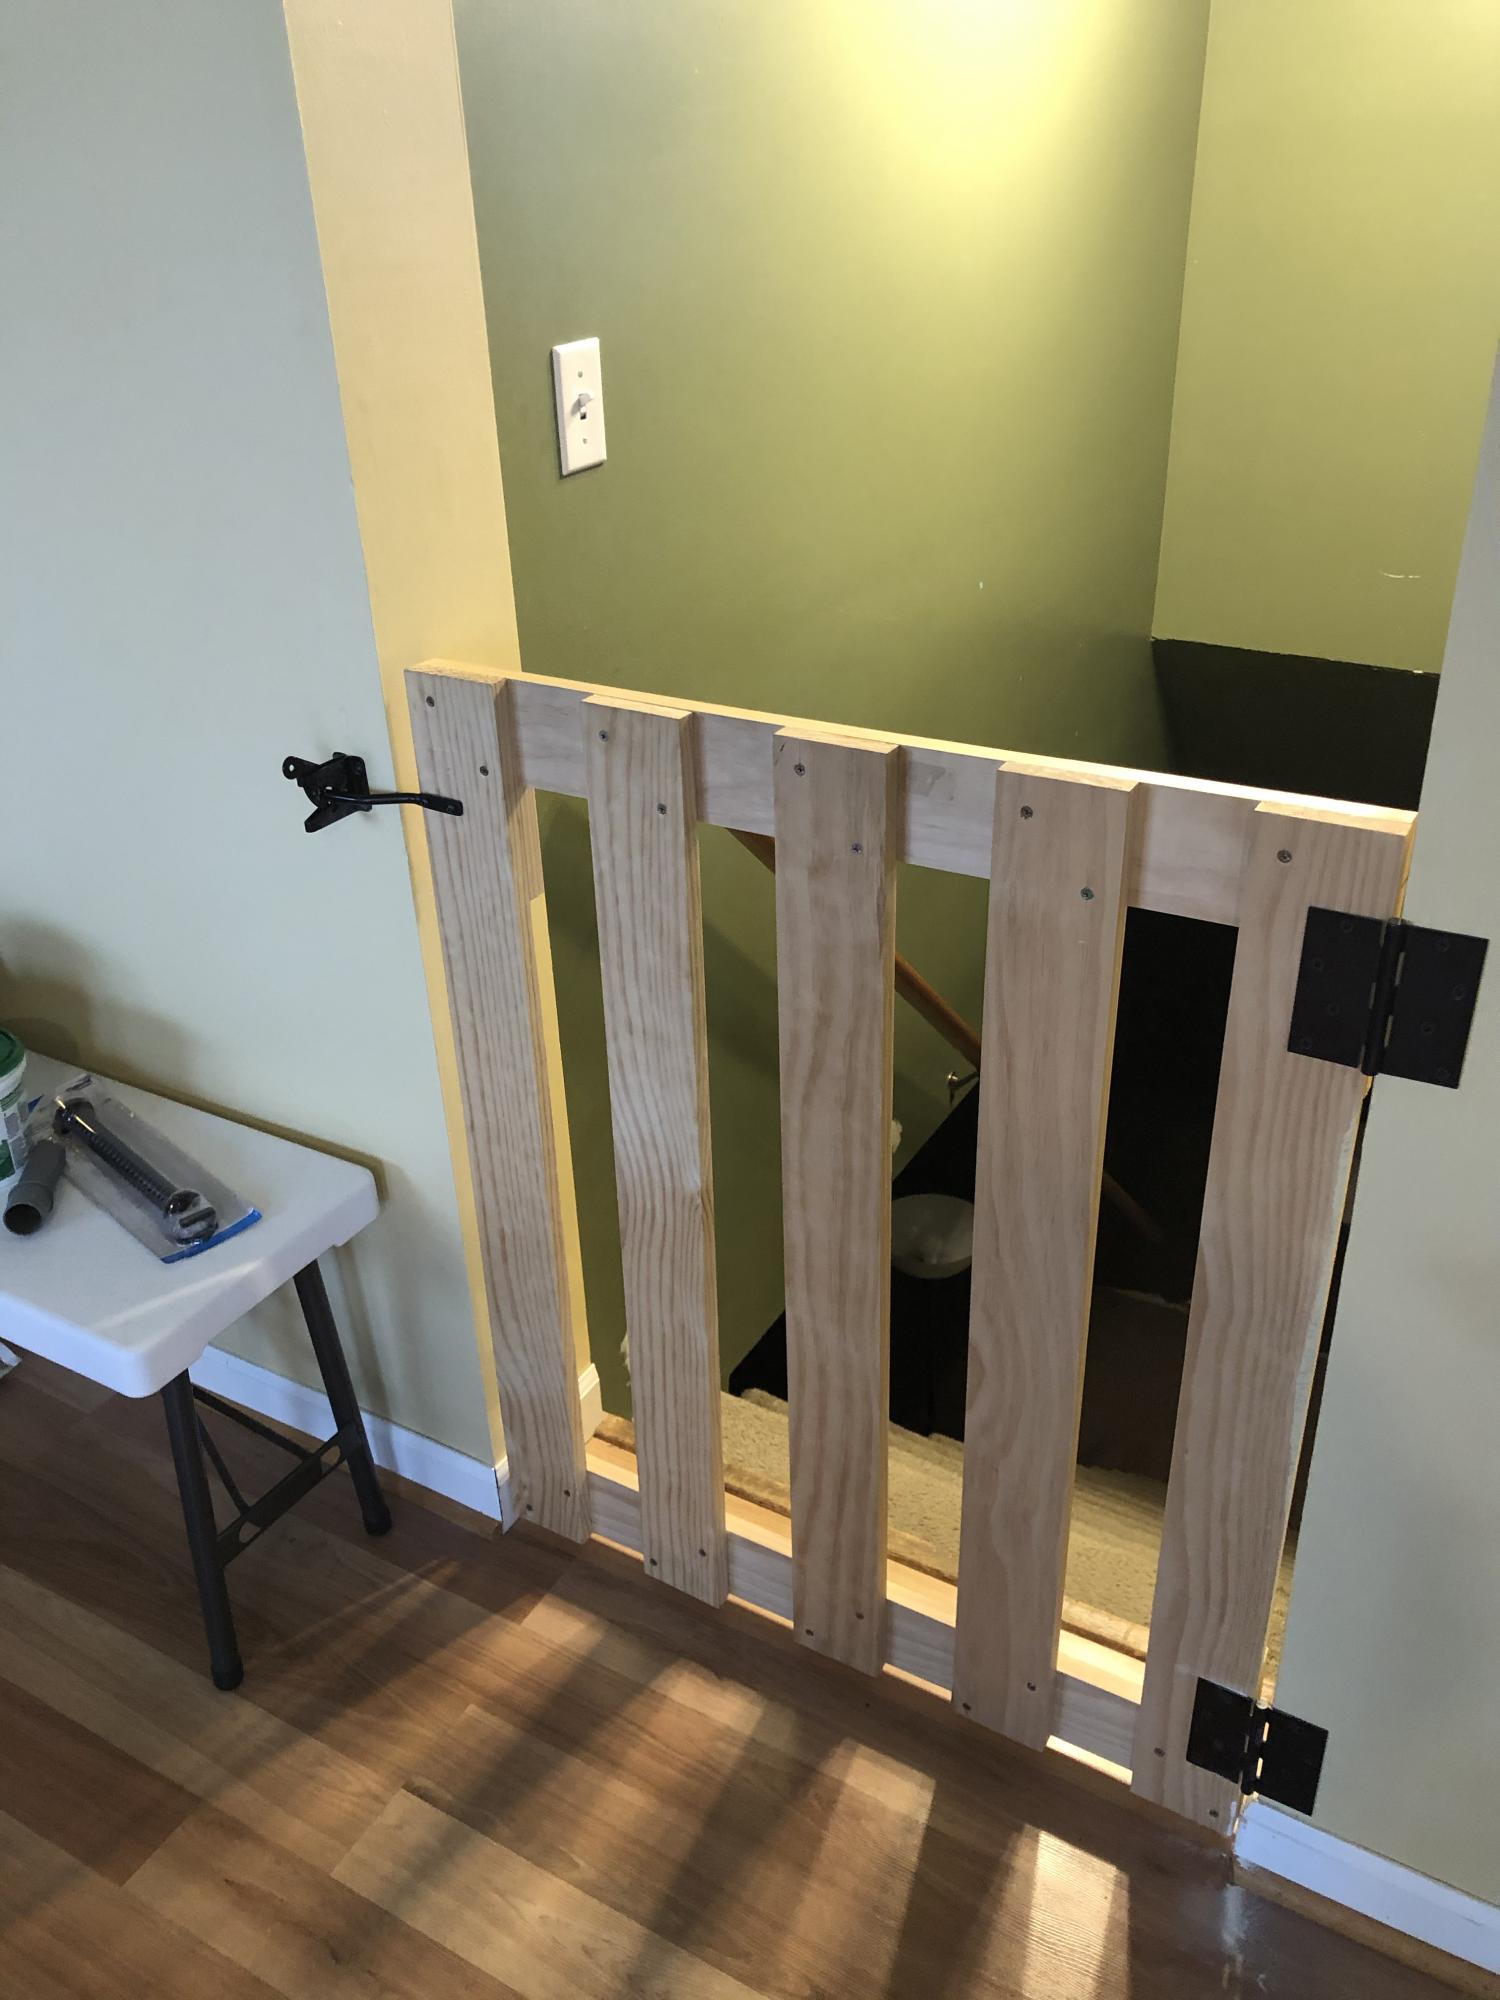
Dog/Baby Gate
Inspired by Ana White's $25 Wood Baby Gate (https://www.youtube.com/watch?v=cPV6XfheqgA), I needed a gate for my miniature schnauzers. They loved going into the basement unattended ... and well ... potty accidents happen without me being the wiser. So, I modified the hardware used, and so far so good! The puppies and my little nieces and nephews are protected.