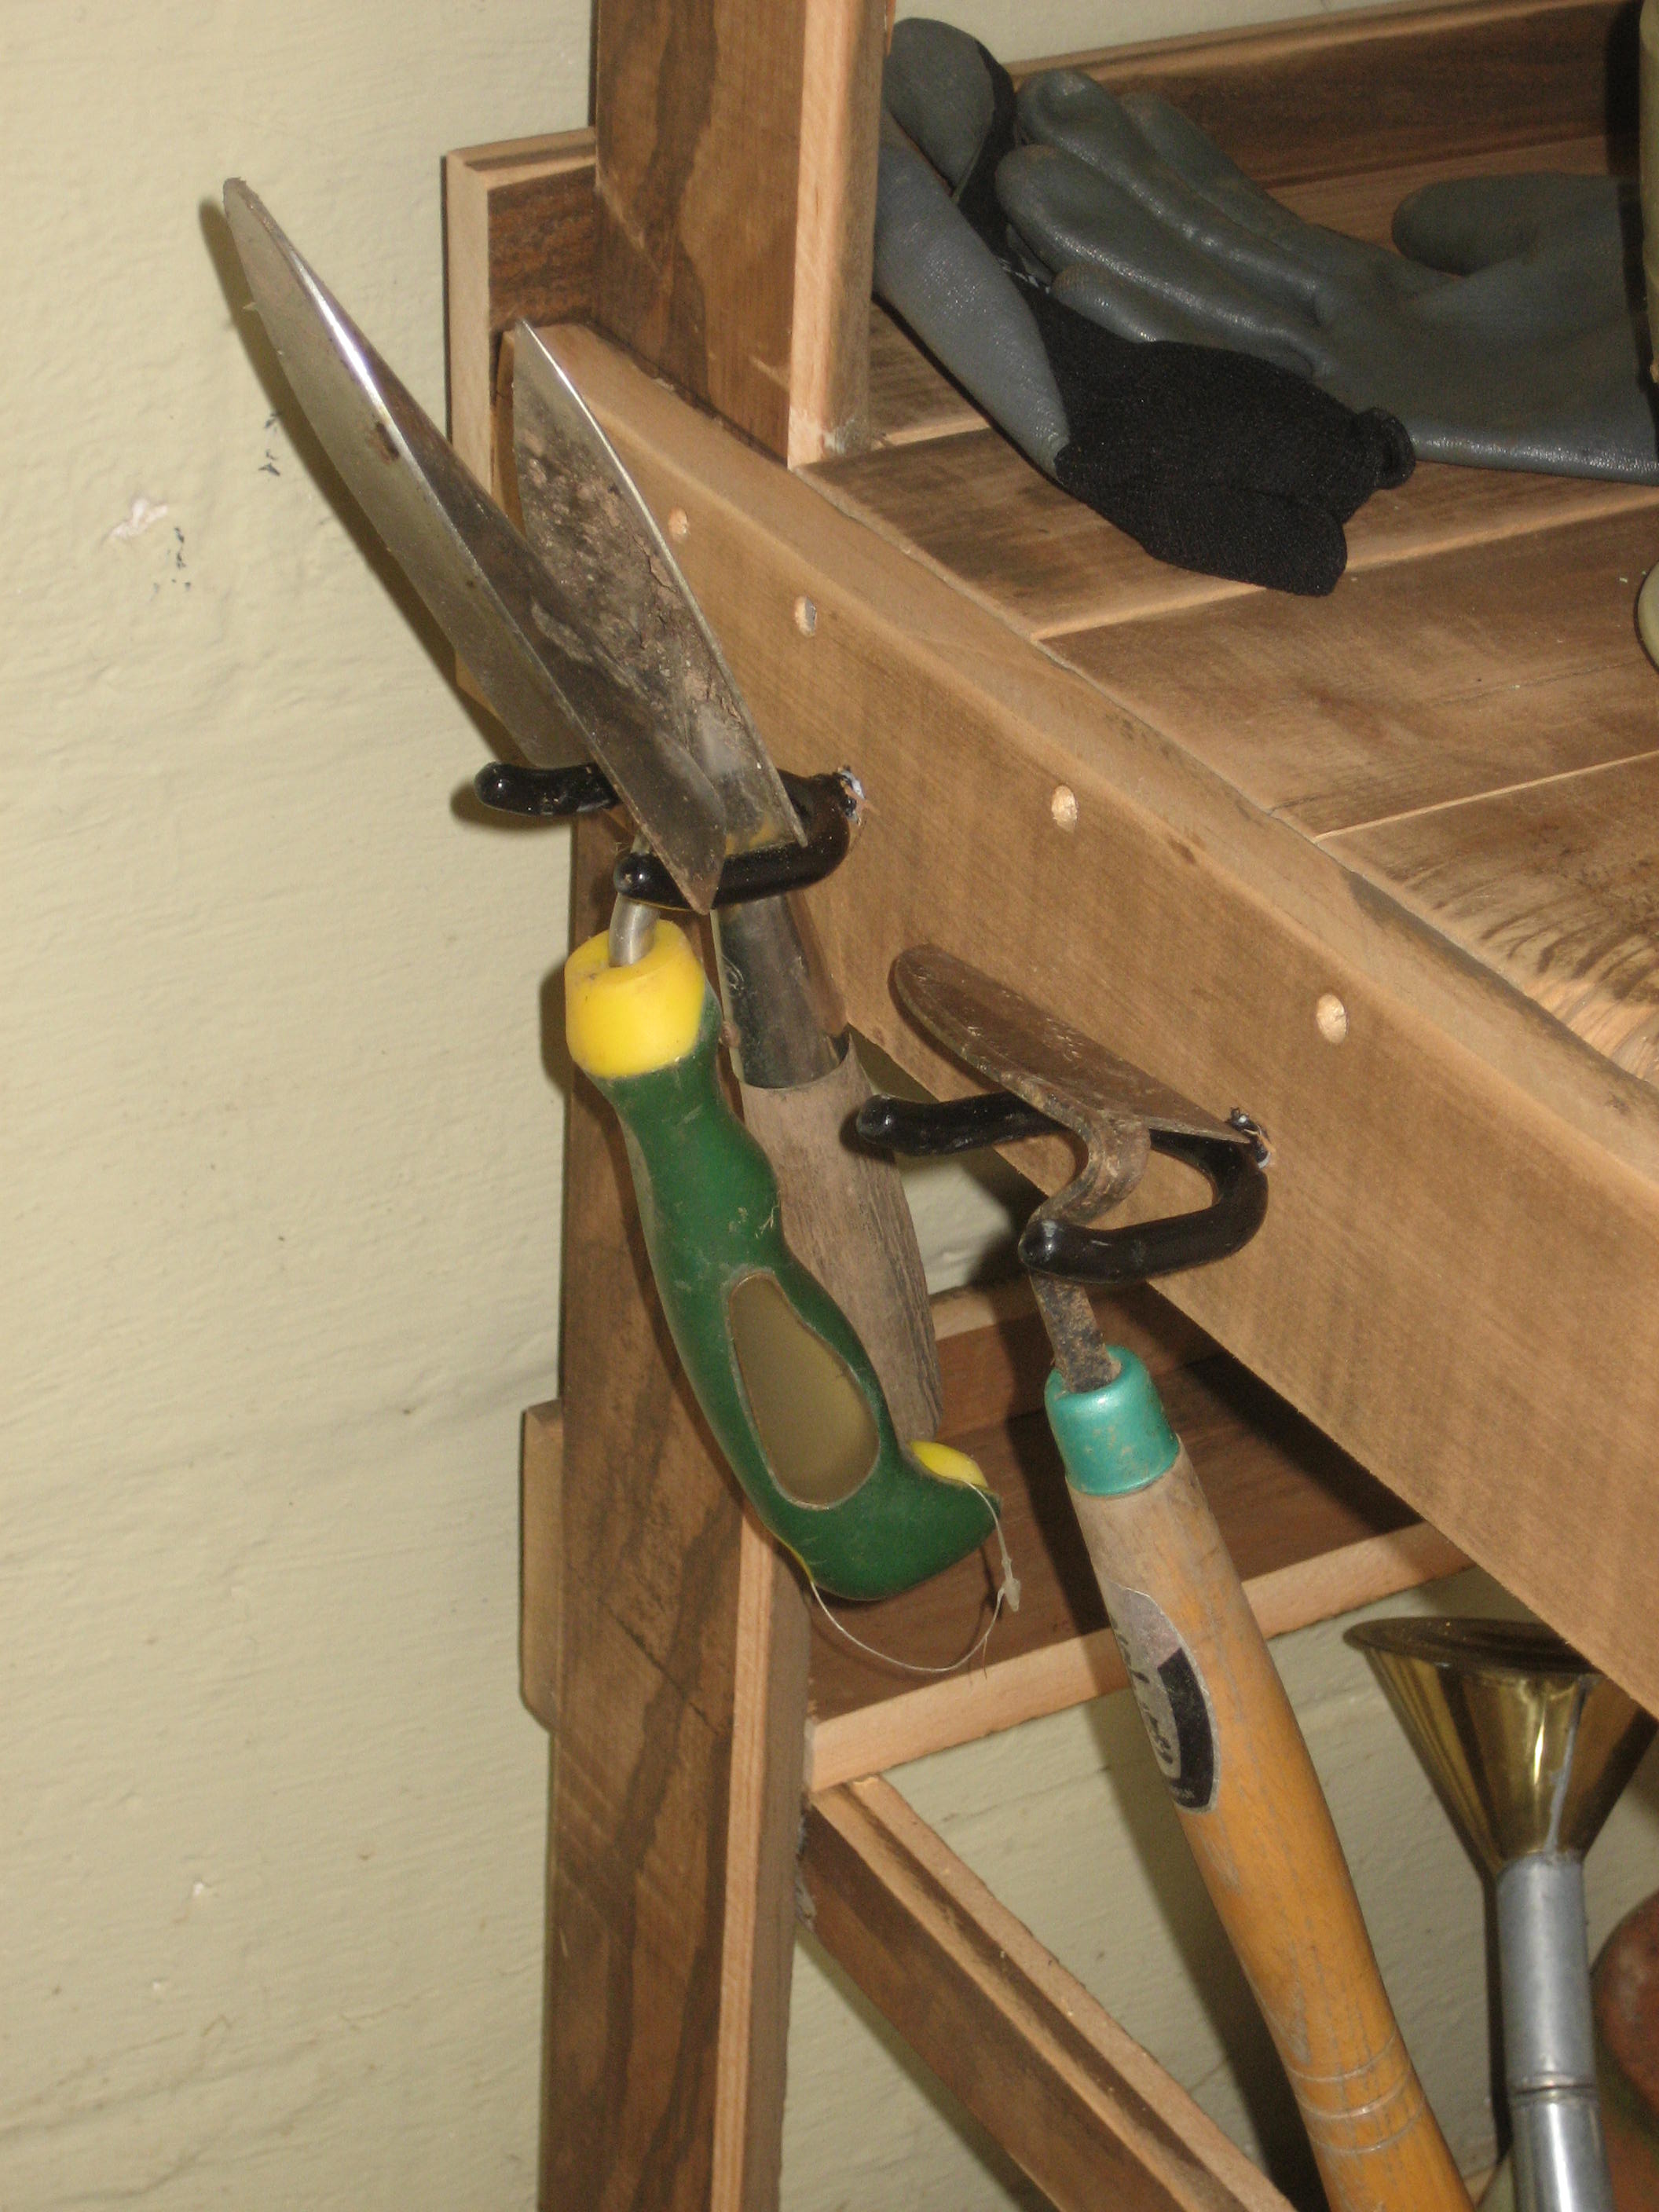
Potting Bench
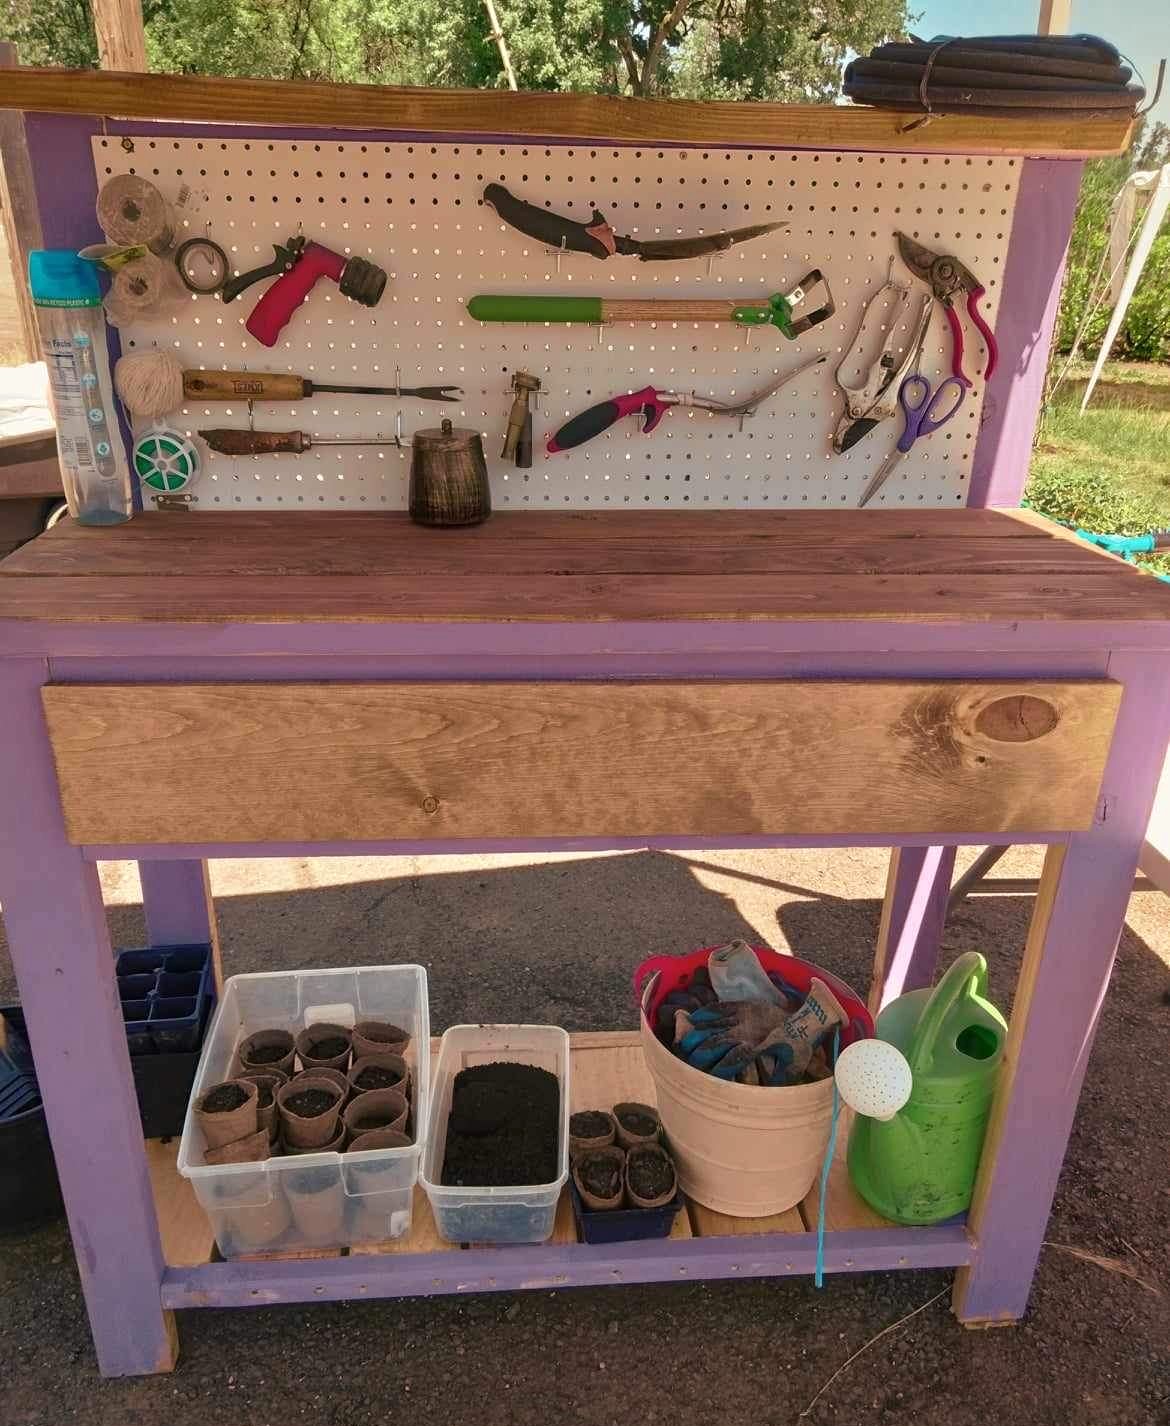
Your potting table is/was a hit and is used weekly with great love.
Darren S.
Built from Plan(s)
Your potting table is/was a hit and is used weekly with great love.
Darren S.
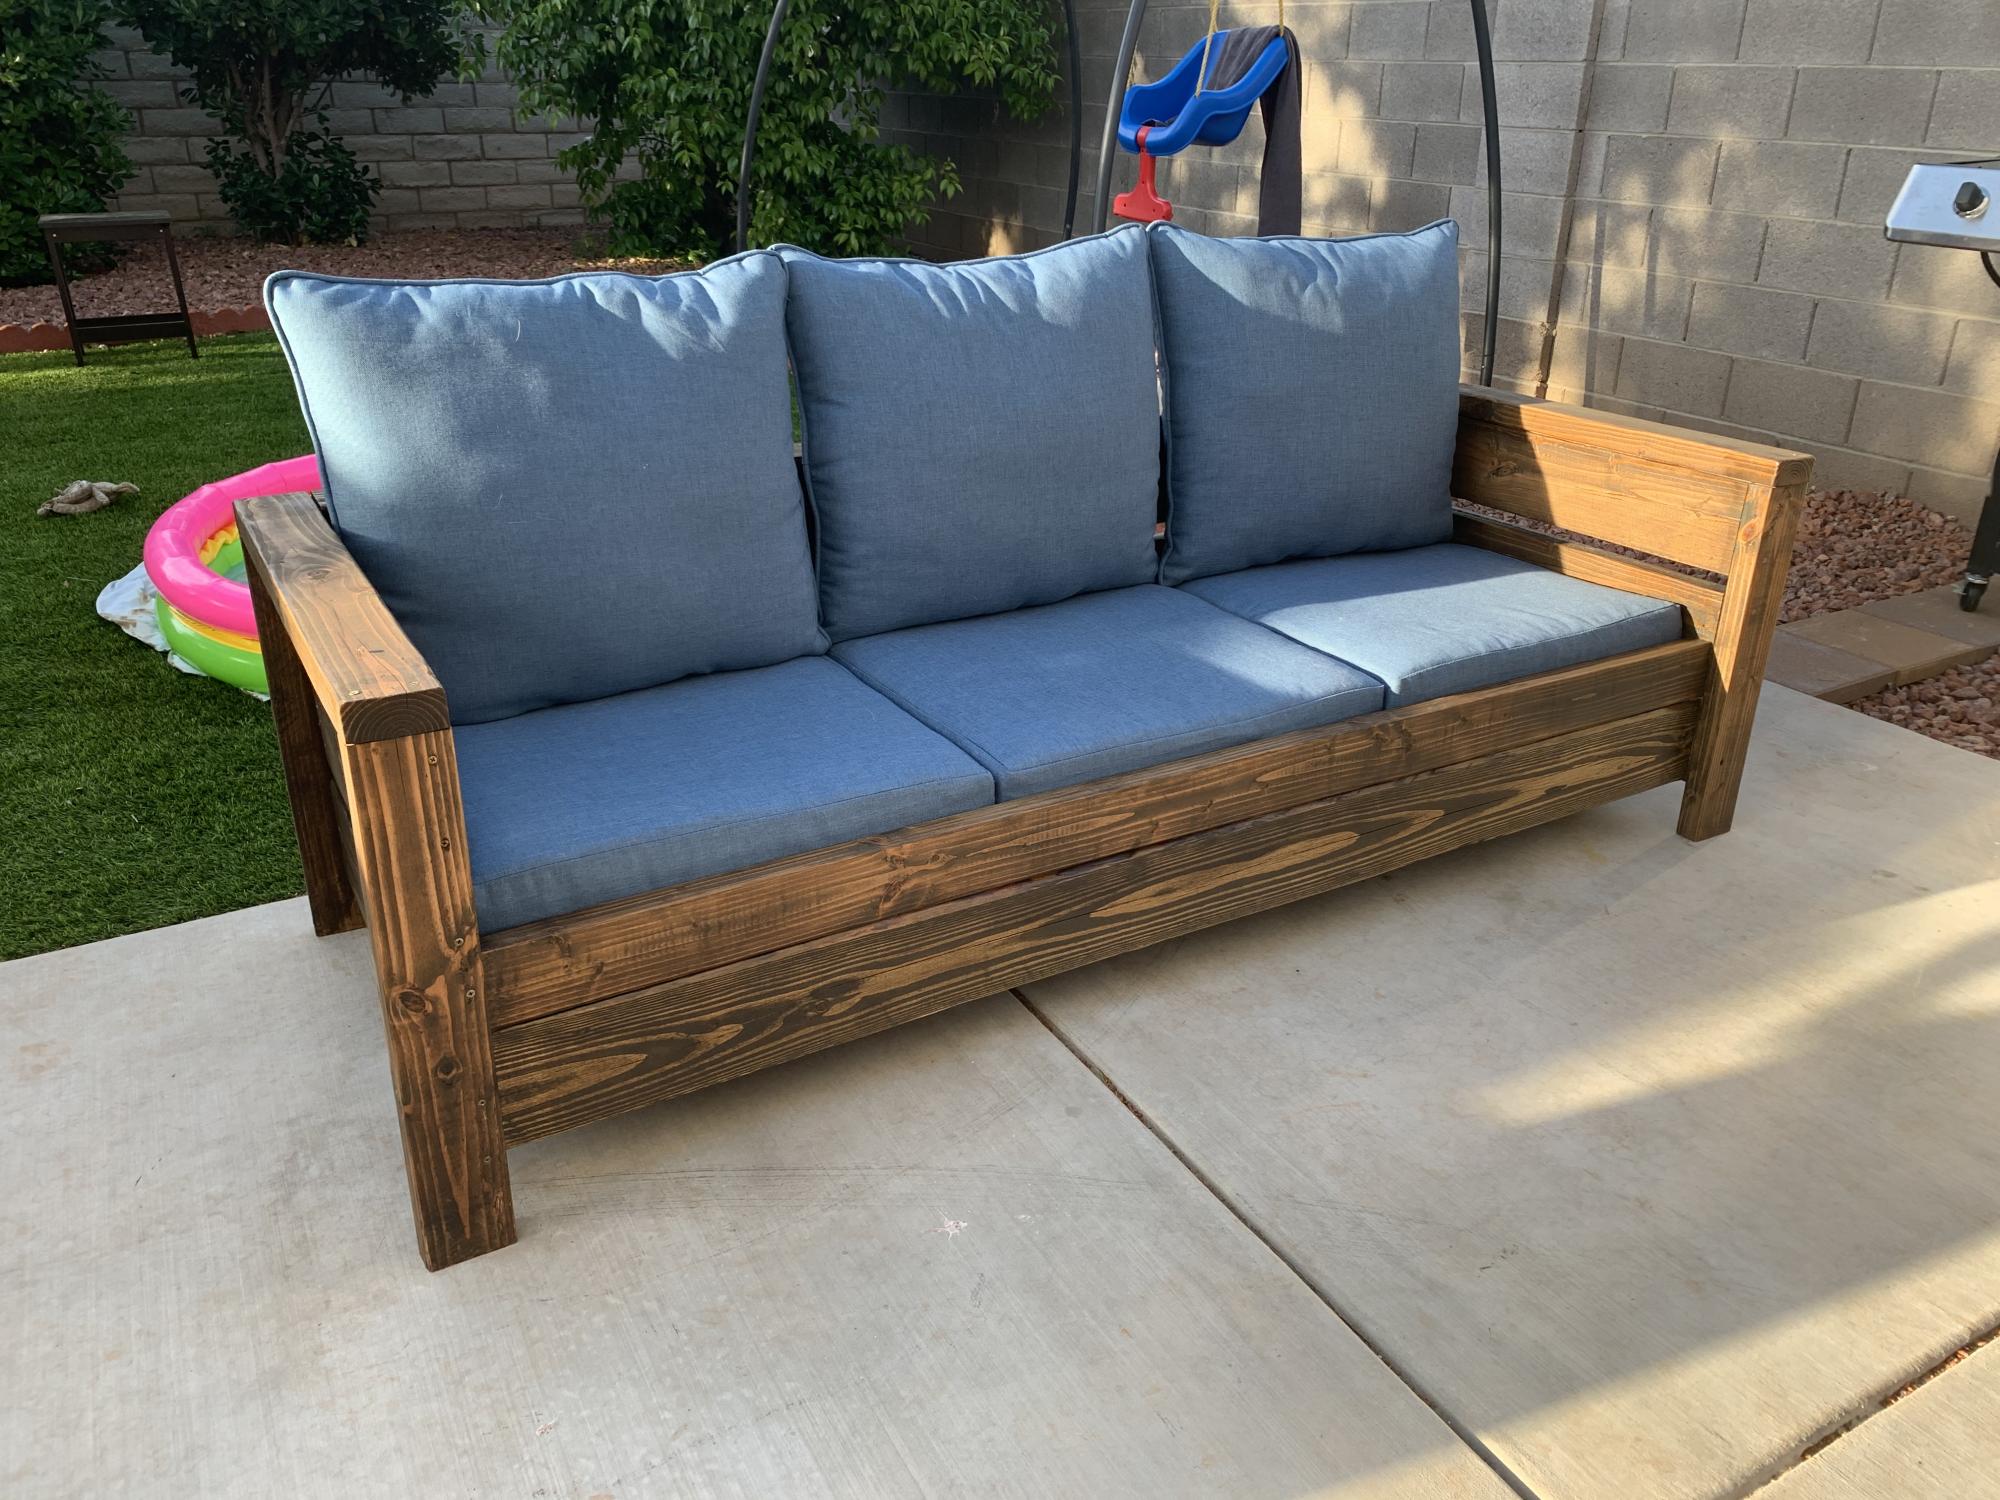
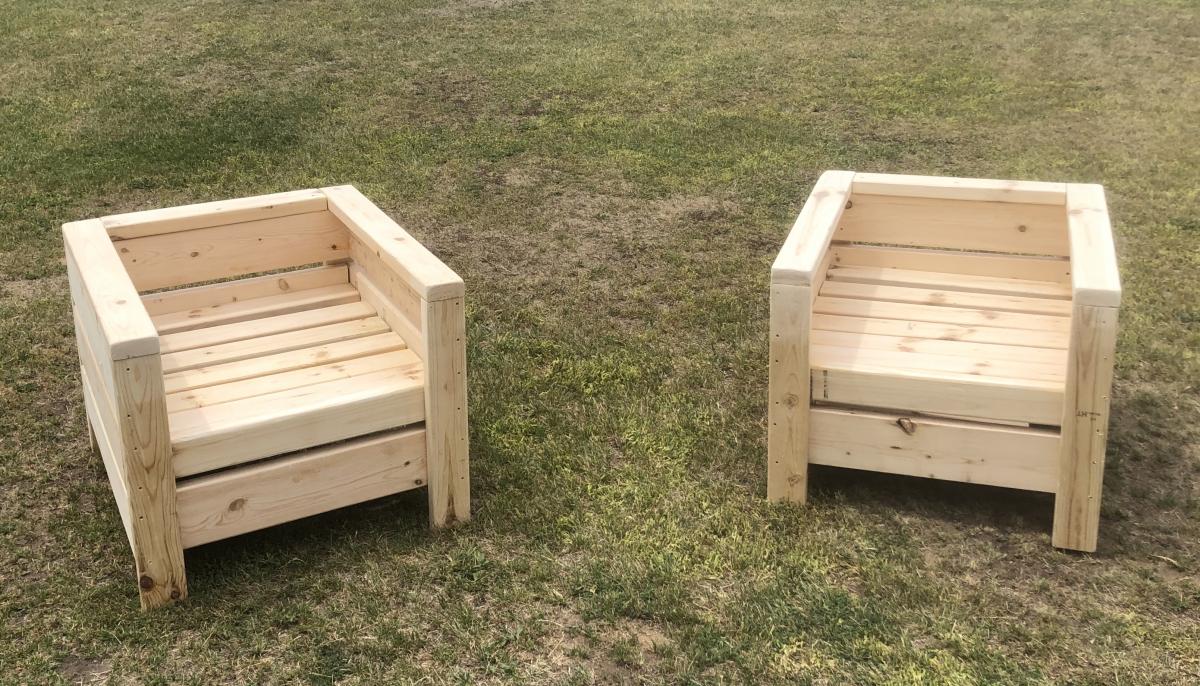
I used the Modern Outdoor Chair from 2x4s and 2x6s plans and slightly modified then to make a 3 seater couch. My cushions(most expensive part) were 24 in x 24 in and purchased from Lowes for $40 per seat. The couch is 79 inches in total length. I also dropped the seat down to the lower level to allow more room for my cushion backs to sit further down into the seat.
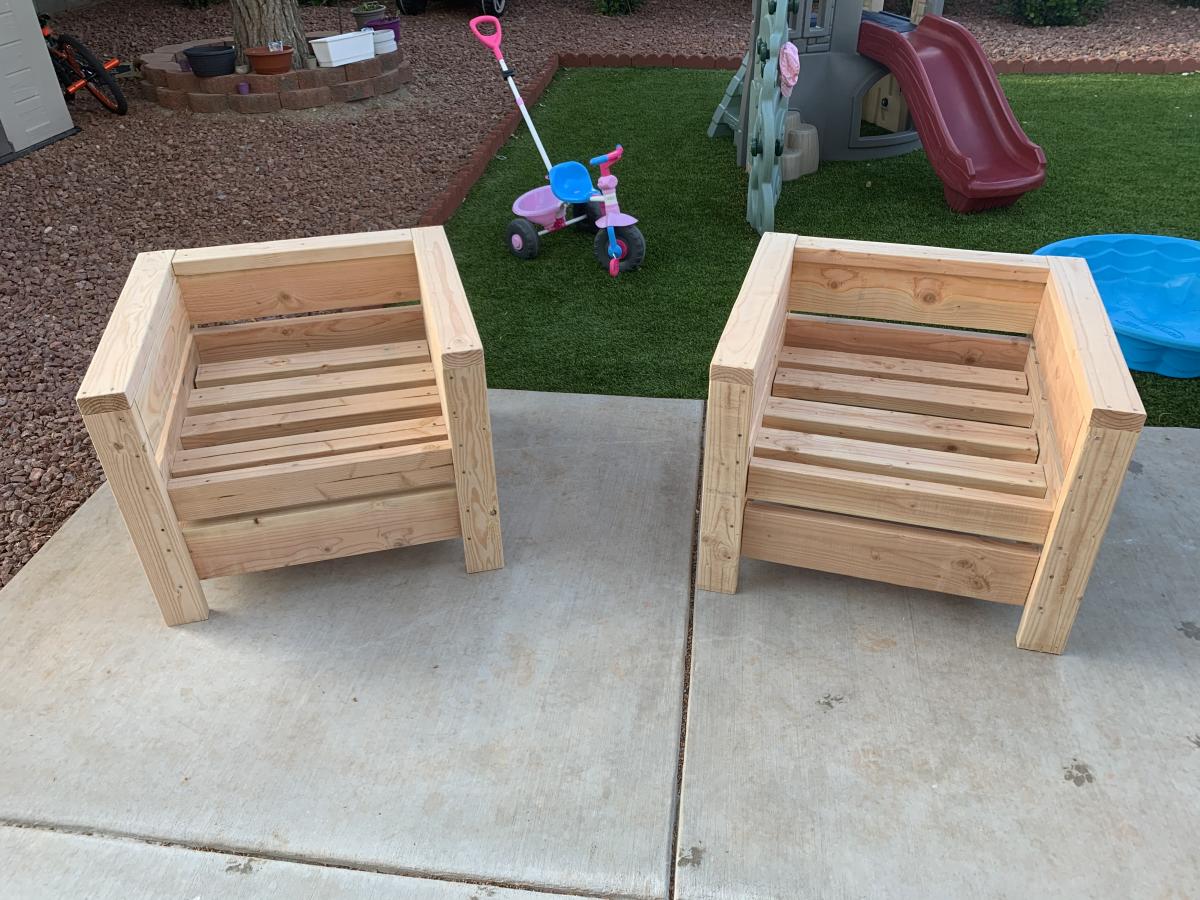

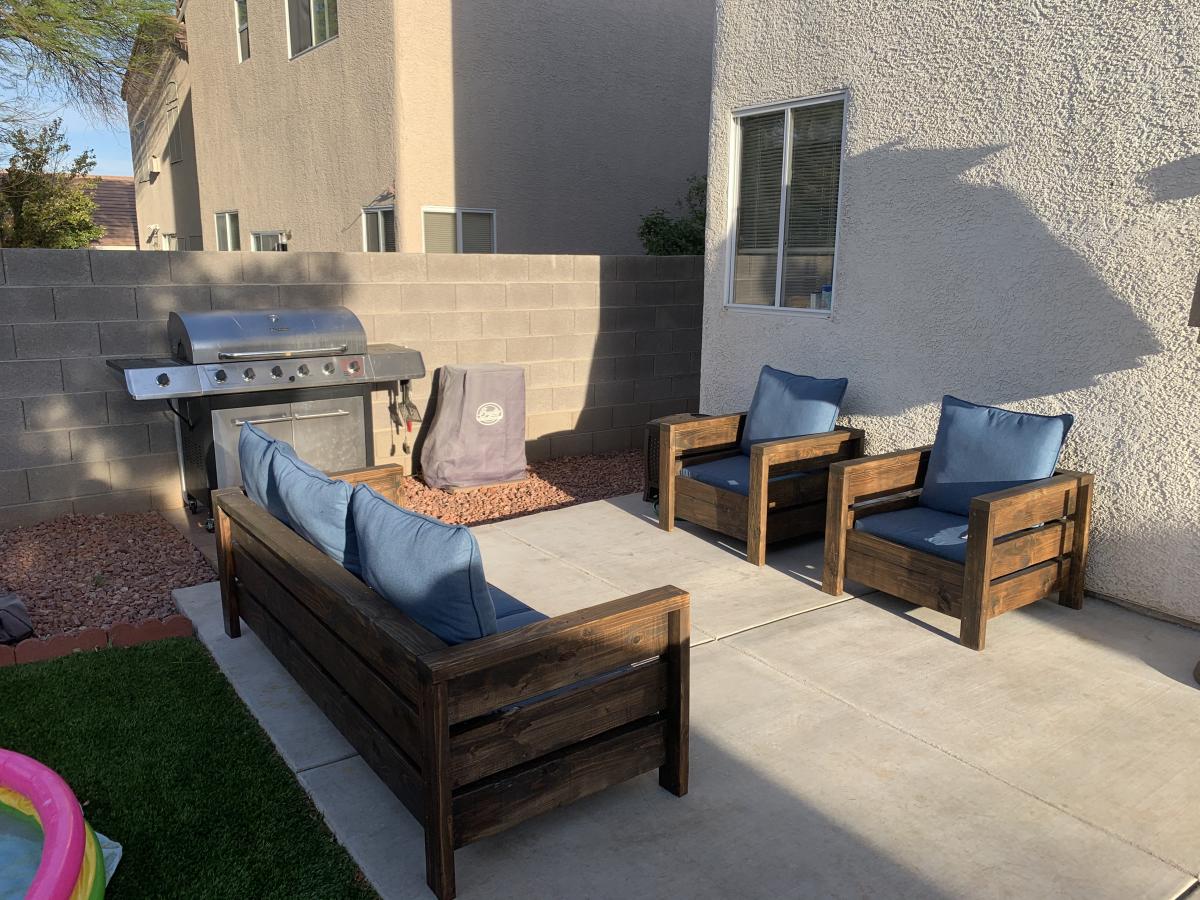
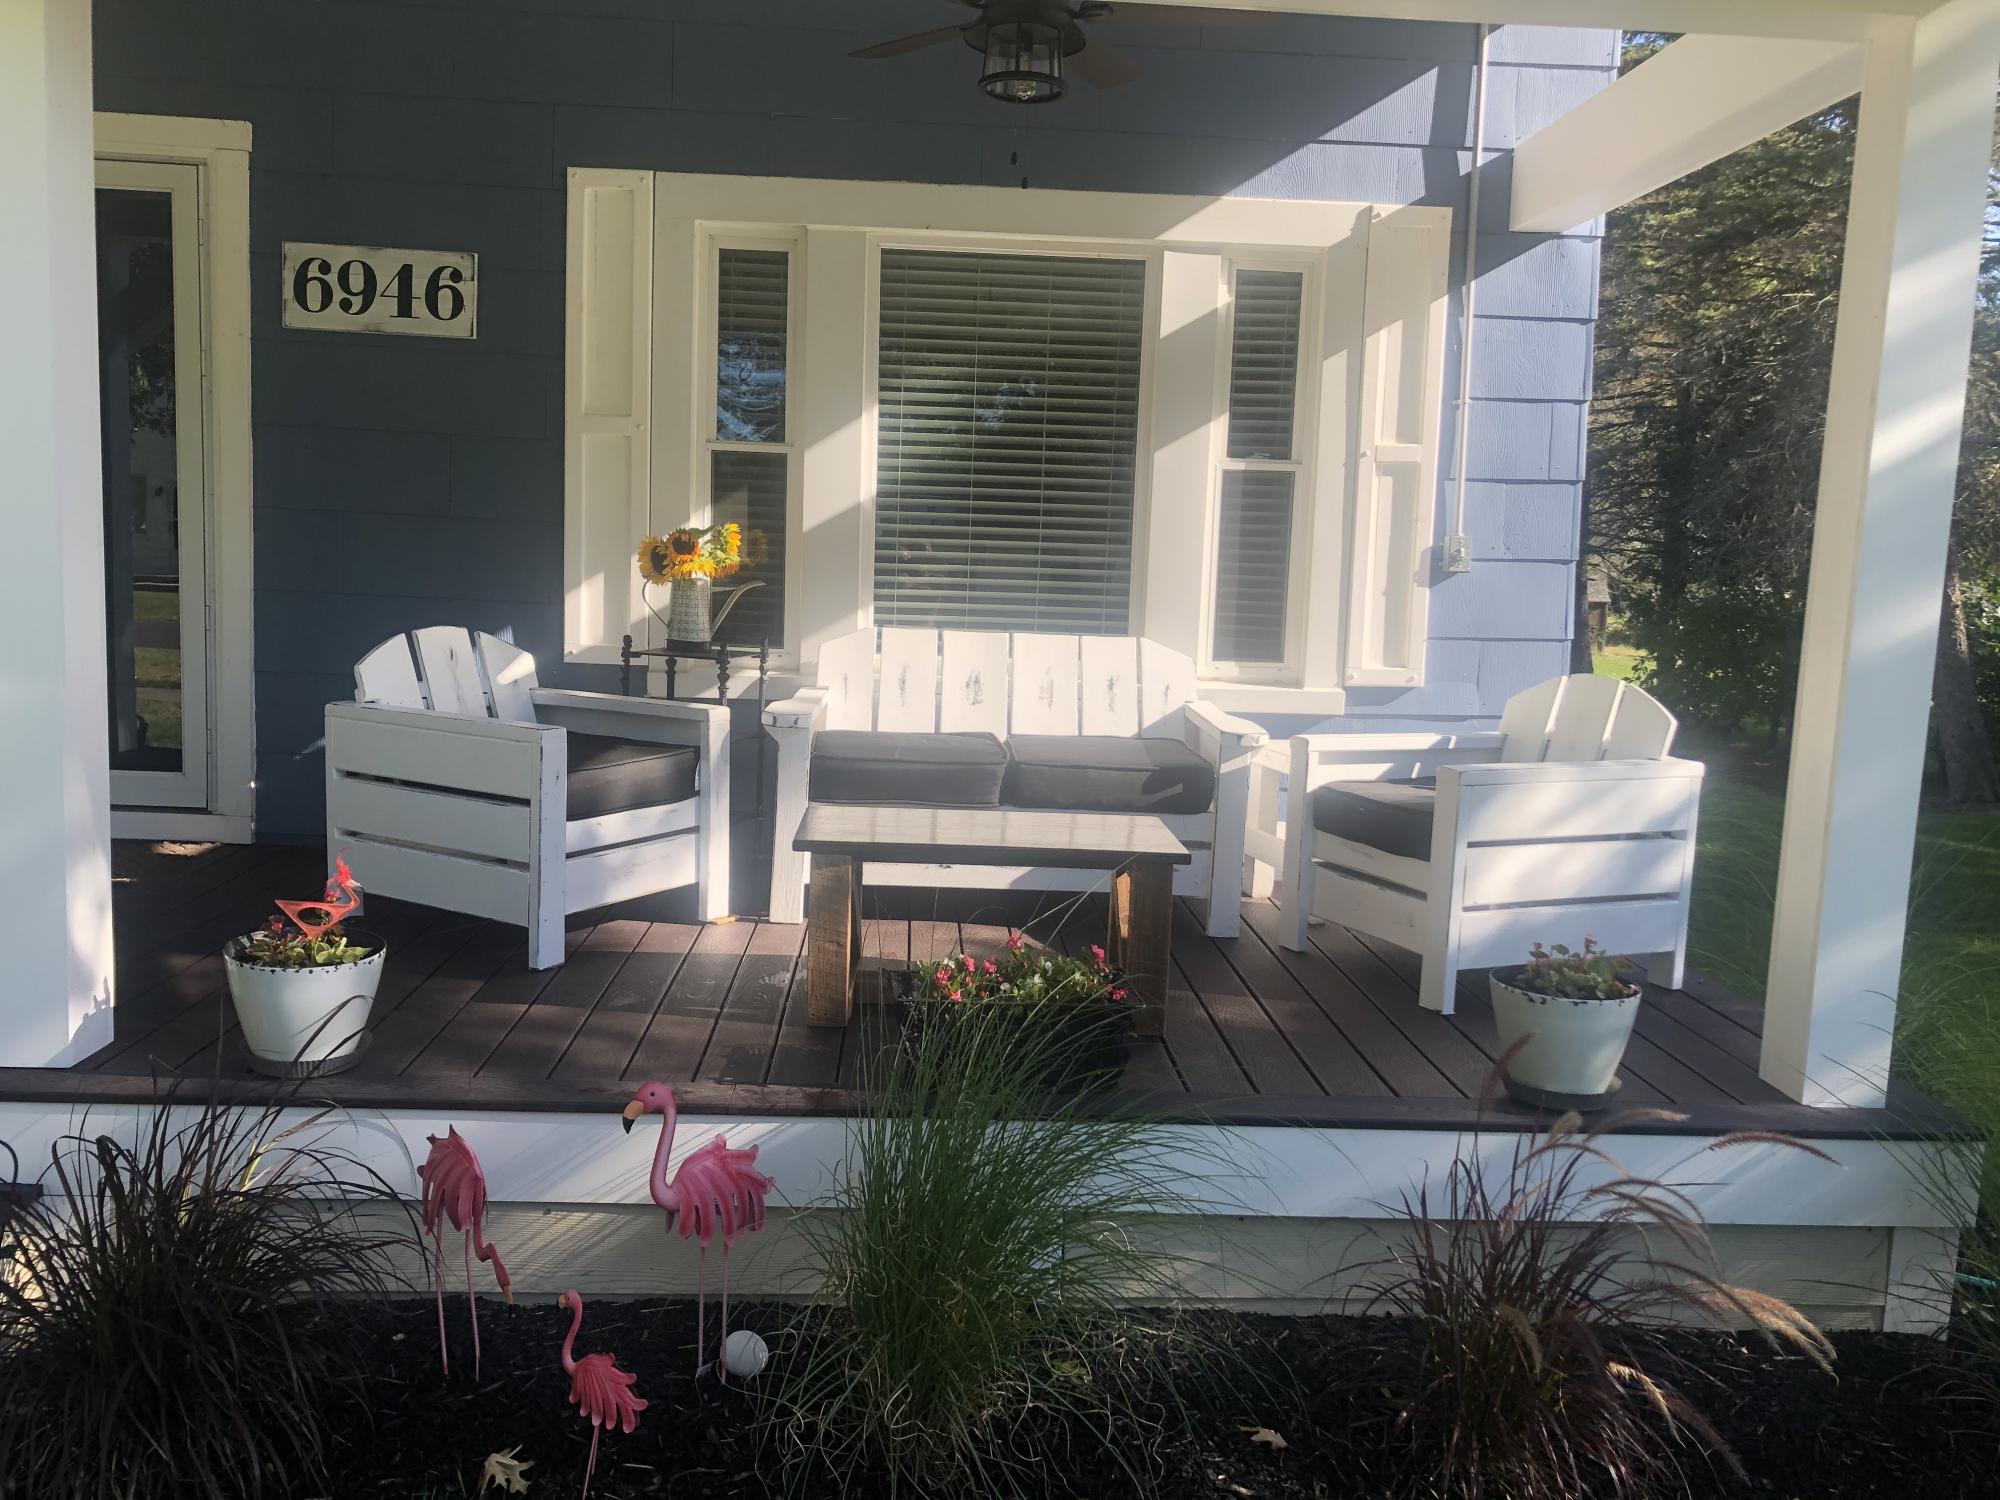
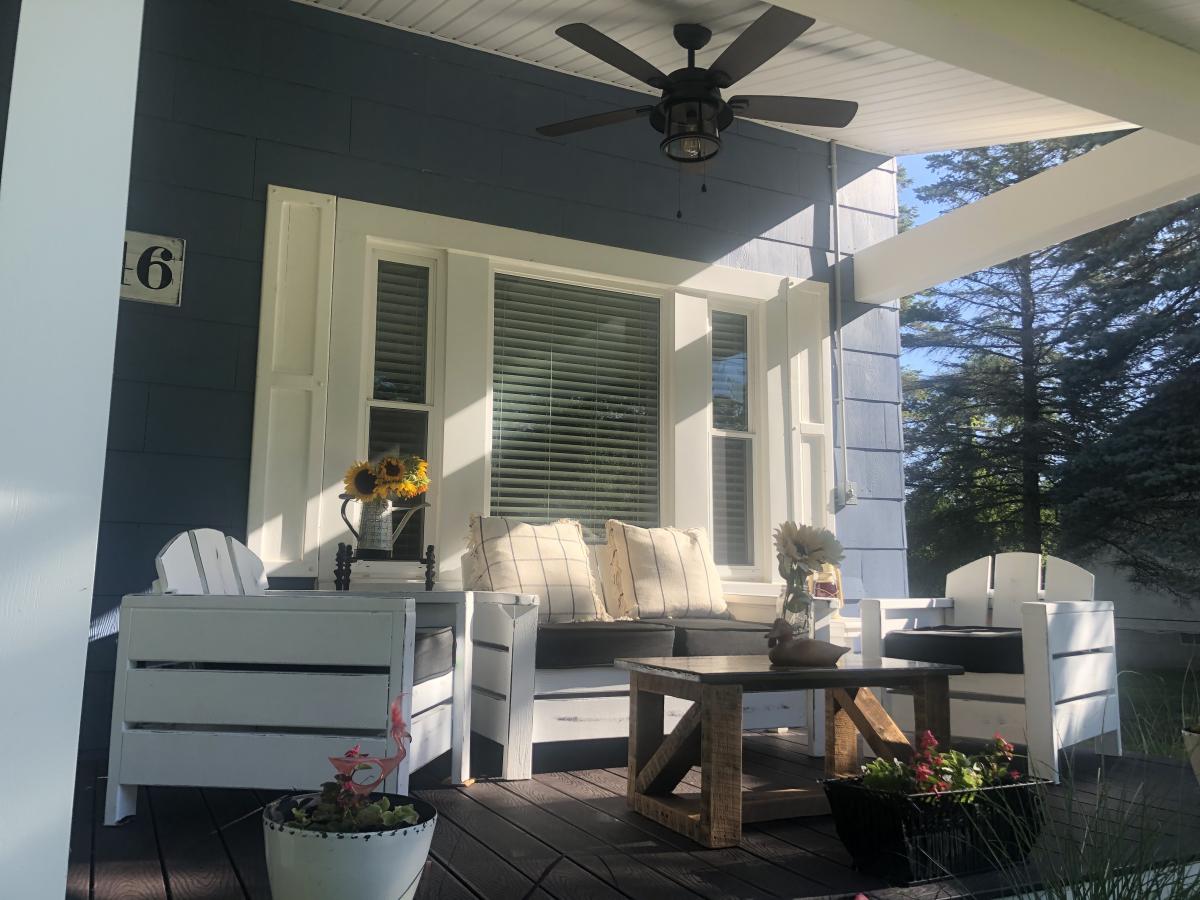
The Anna White patio set (2 chairs & love seat combo).
I added seat backs for comfort, painted them white and distressed the edges…
They are perfect for lake front-windy areas… They are heavy duty and will never blow away!
Tue, 10/05/2021 - 09:52
Love the curved backs, looks like a wonderful relaxing spot to be! Thank you for sharing:)
Thu, 02/29/2024 - 07:29
I absolutely love the curved backs! I live in a semi-windy area and really like this look and the idea of more durability. Did you just add three vertical 1x6's and use a jigsaw to round them? Please advise as I would love to use this technique.

I saw the Ana White Farmhouse king bed and used it as inspiration. I made a few modifications and adjusted the measurements to fit a queen bed.
Thanks for the inspiration!
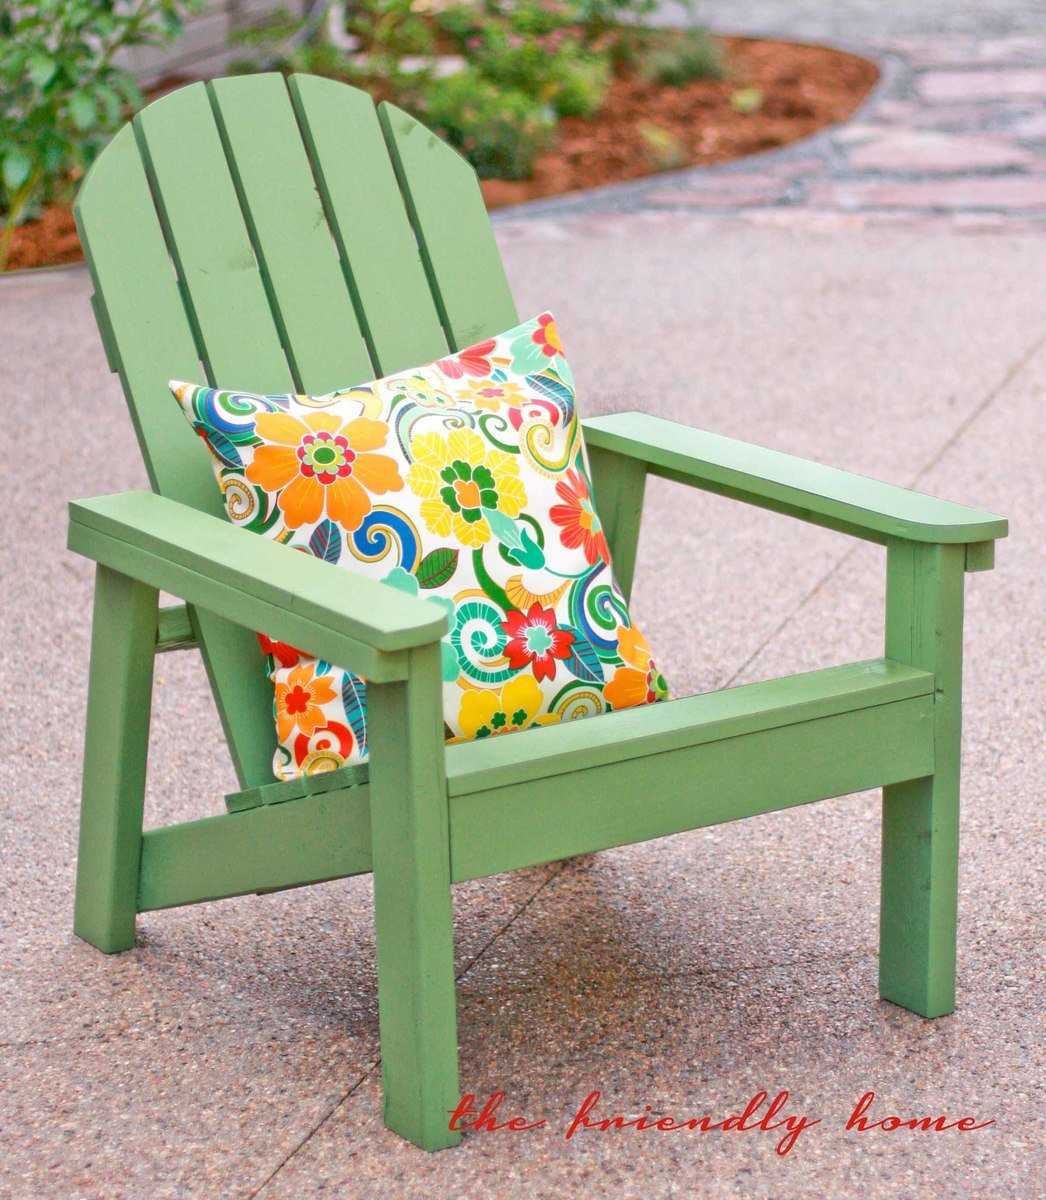
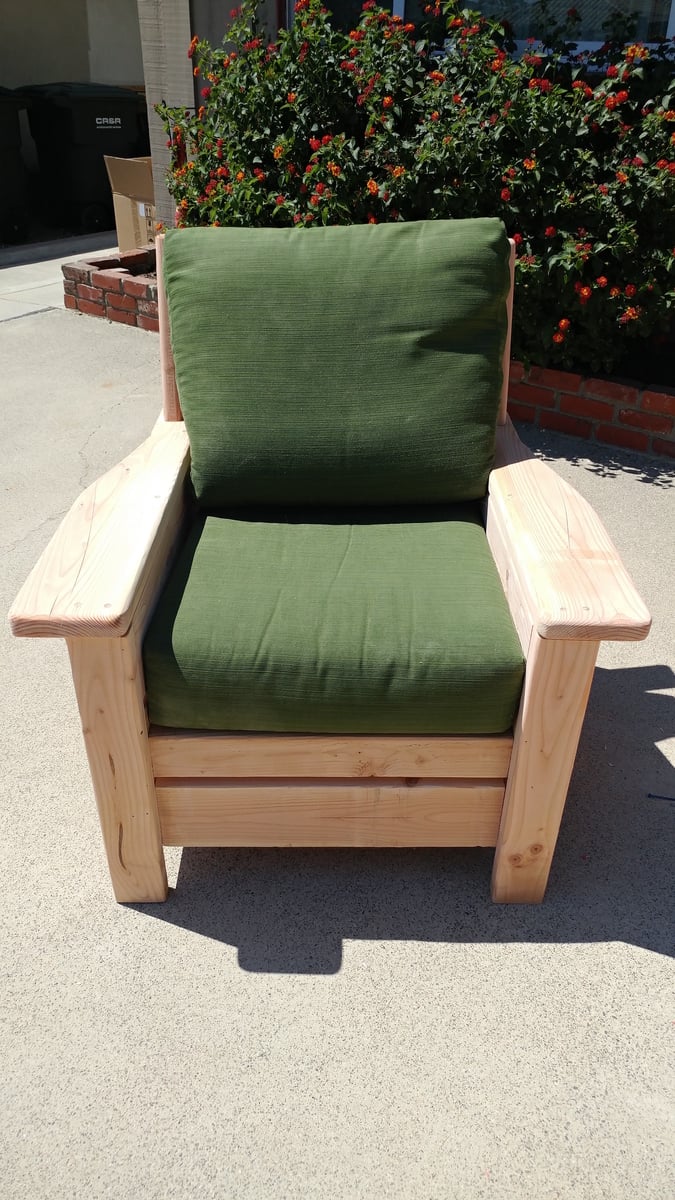
These are great chairs! Easy to build, comfy to sit in. Check out my blog post for more info.
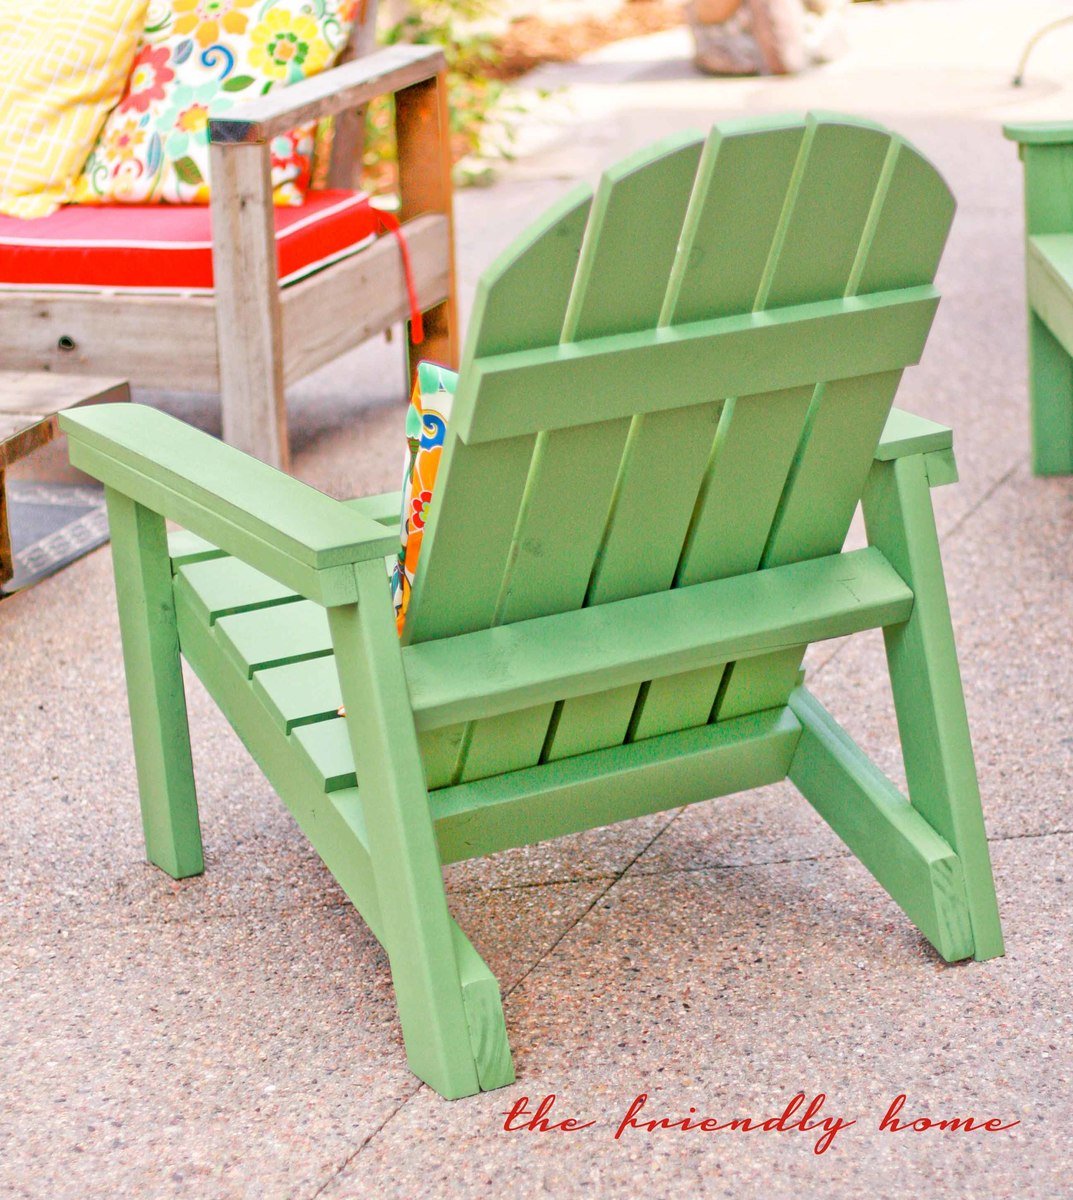

Mon, 06/24/2013 - 10:59
Beautiful chairs Hillary!!!! I love the green!!!
Thanks so much for building and bragging!
Ana
Fri, 06/28/2013 - 15:58
I'll be making four of these this week in turquoise to match the little ones I made for the kids. Yours is an inspiration!
Sun, 05/10/2015 - 05:17
Are these kid size or adult, and where are the plans for them....
thanks bunches,
Debbie.
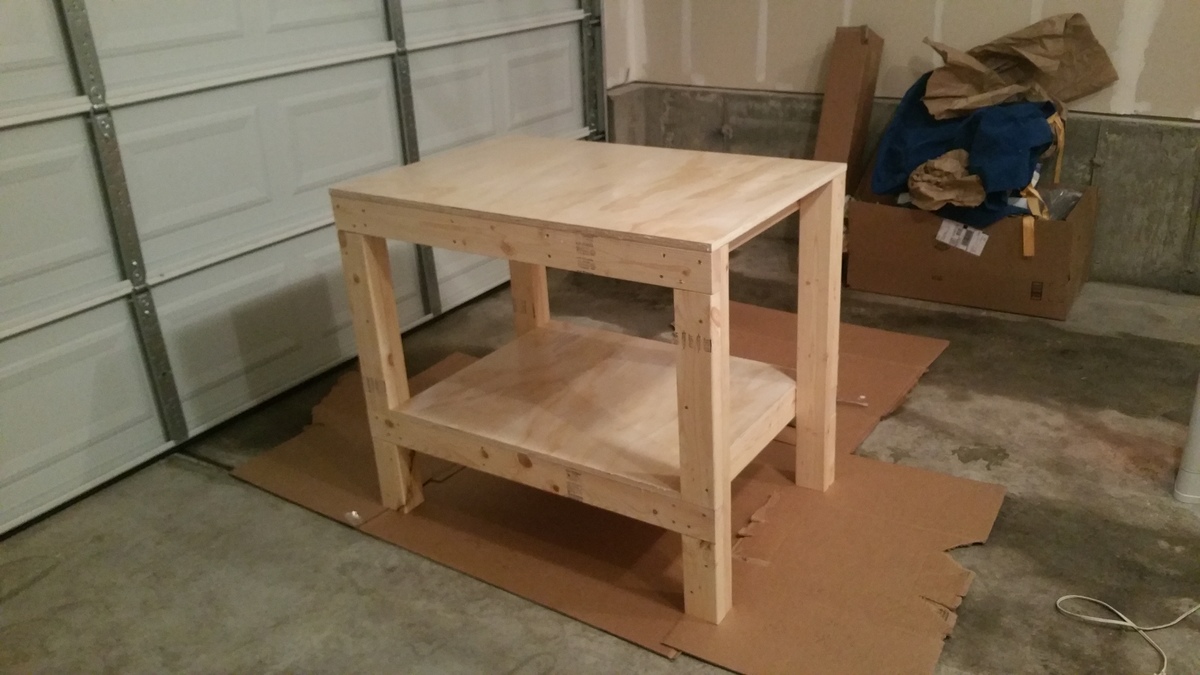
Easy project. I needed this bench a bit smaller due to space constraints so this is 28" x 42". I kept the height the same and finished the surfaces with some thick polyurethane. It should be noted my cost was a bit higher due to buying a sanded plywood, coated self-tapping screws and a more expensive polyurethane. I also went a bit slow on this project and it took about 2.5 hours including application of the single coat of poly.
Sat, 12/19/2015 - 09:10
Very nice job and great looking workbench! Thanks so much for taking the time to share!

I built the faux fireplace from your plans and wanted to share it with you. Thank you and God bless you. - Joe


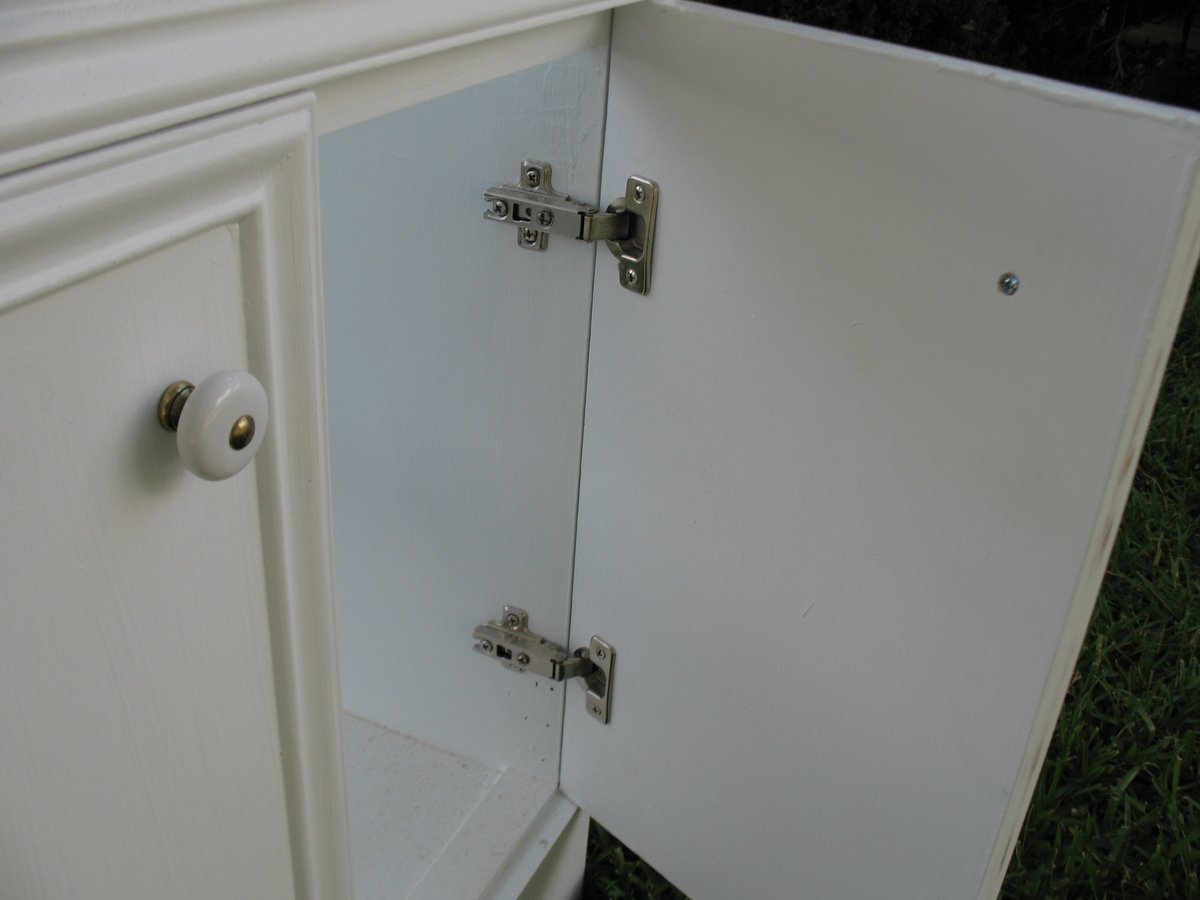
Great and easy build from Ana. I made it to replace a vanity made of fake wood that falls apart when it senses water. No changes to the design. I used the "European" hinges and all I can say is that they are great but it is learning experience getting them to work properly. Thank goodness for the adjustments the hinge allow.

Wed, 10/24/2012 - 16:33
Wow, this looks great! And for $35, that can't be beat. I may need to build some of these for my bathroom too
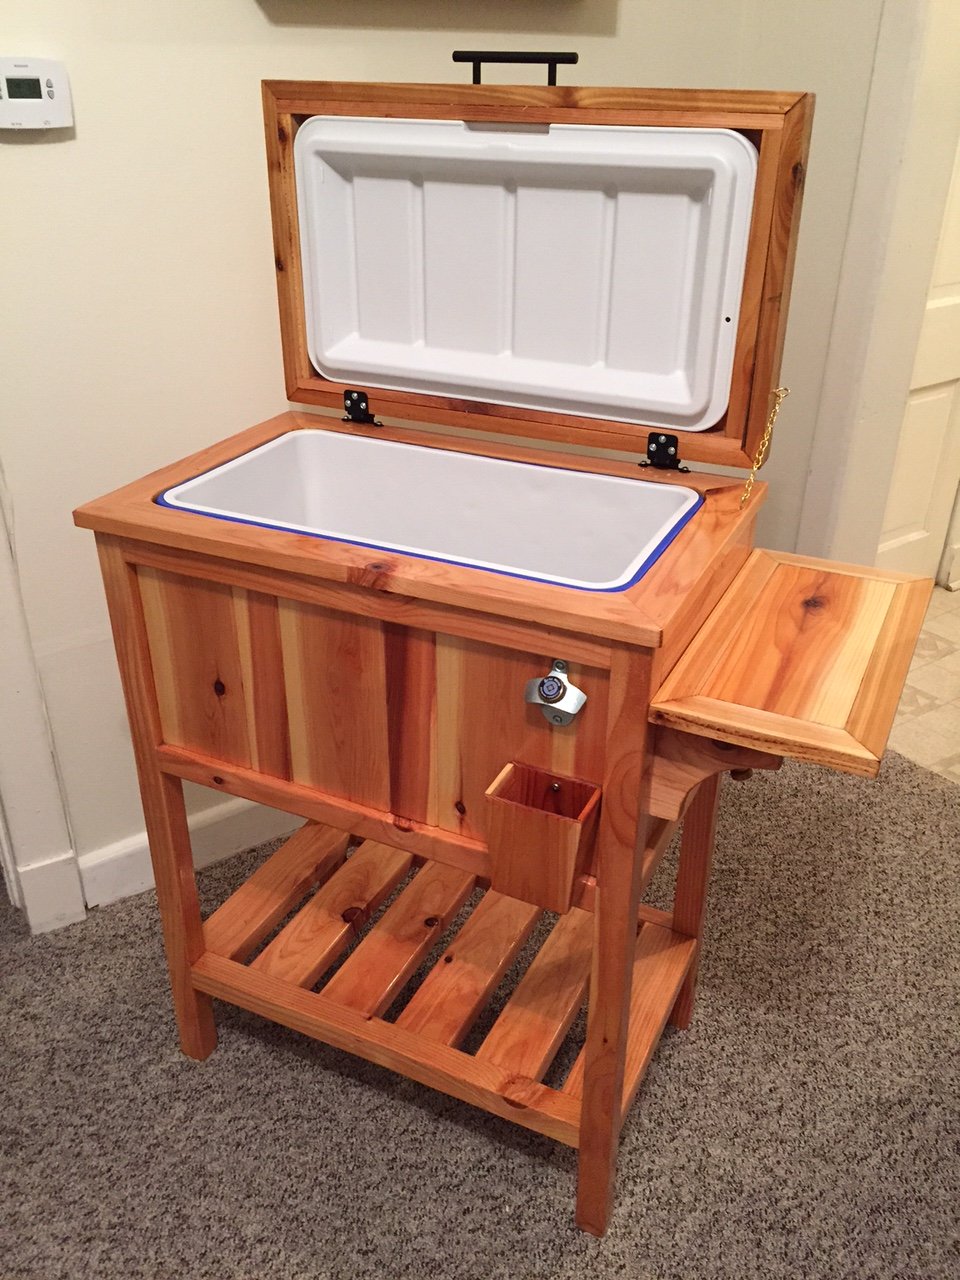
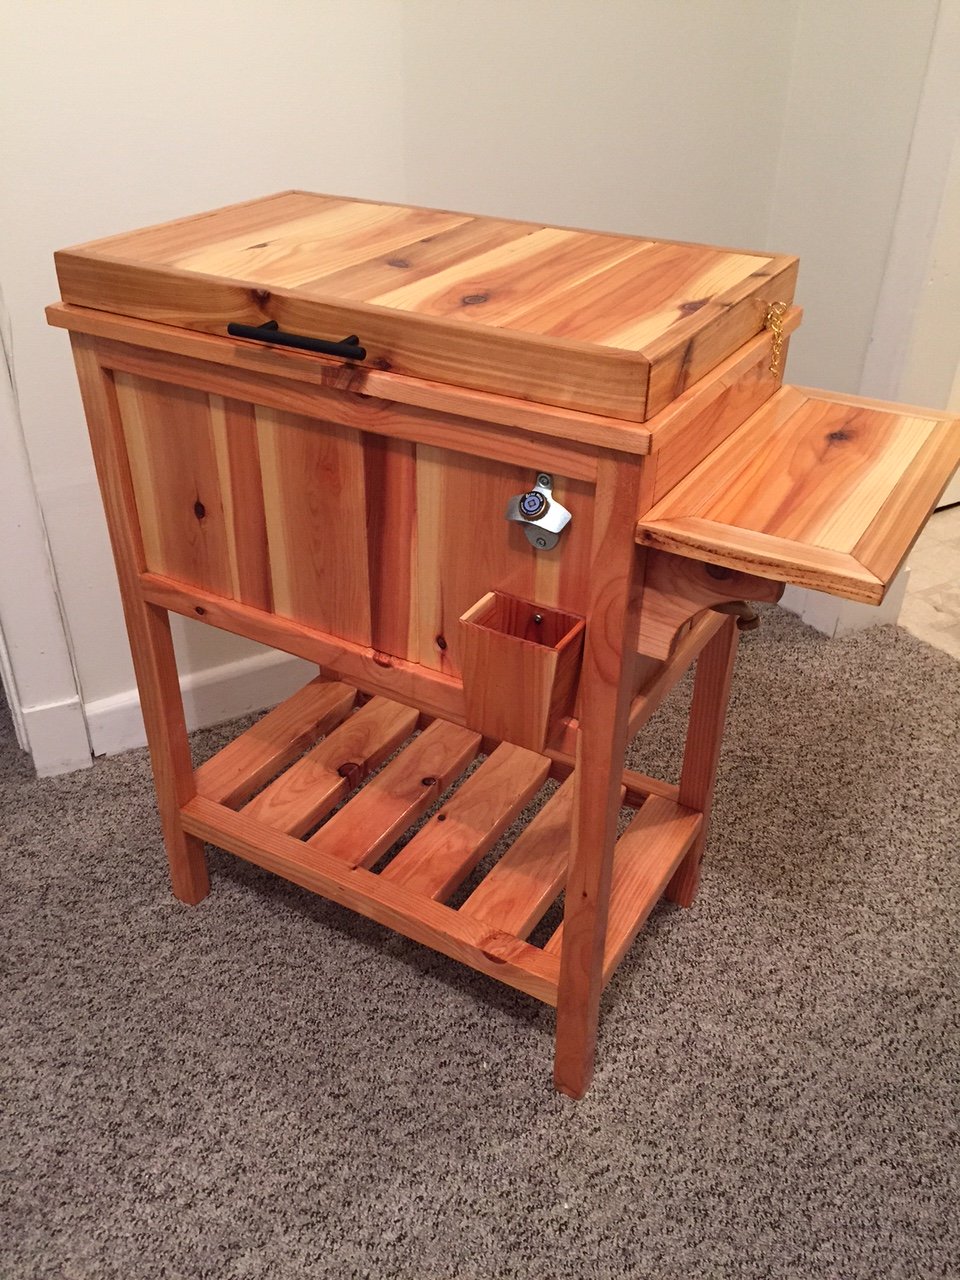
This is the cooler stand presented by Jenny from Birdsandsaoap. Very easy to build and always ends up with someone asking to buy it or have you make them one.
Wed, 06/10/2015 - 11:34
The plans for this can be found at the following web adress: http://ana-white.com/2013/06/plans/wood-cooler-birds-and-soap
Hope this helps
Wed, 09/21/2016 - 08:07
New to this site. How do I get the plans for the Wooden Cooler Stand?
Thank you!
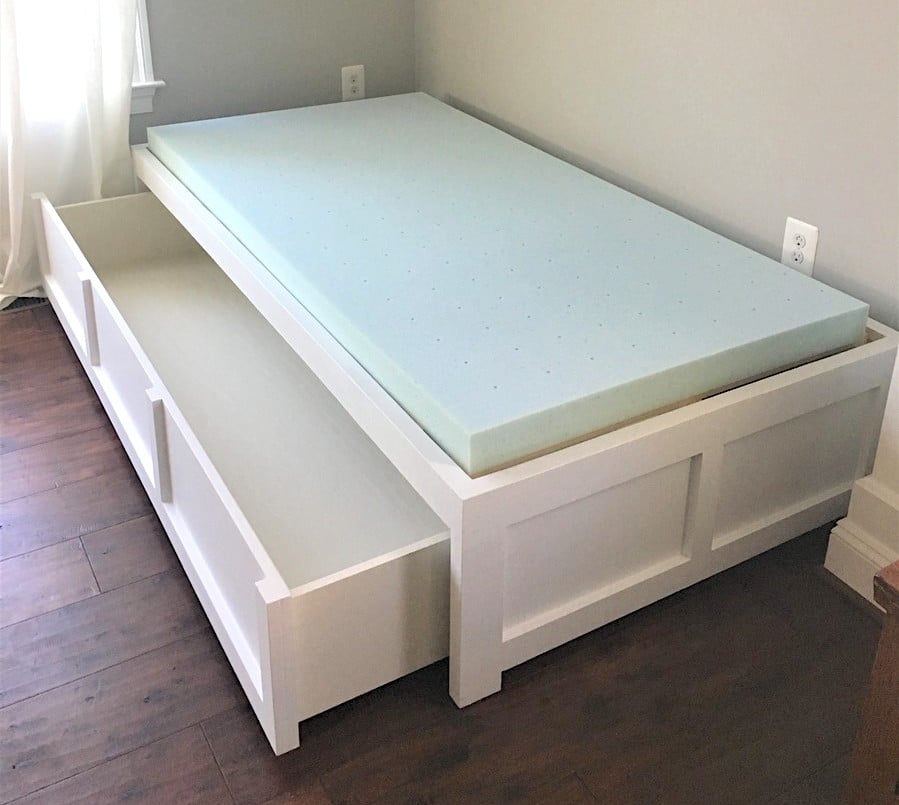
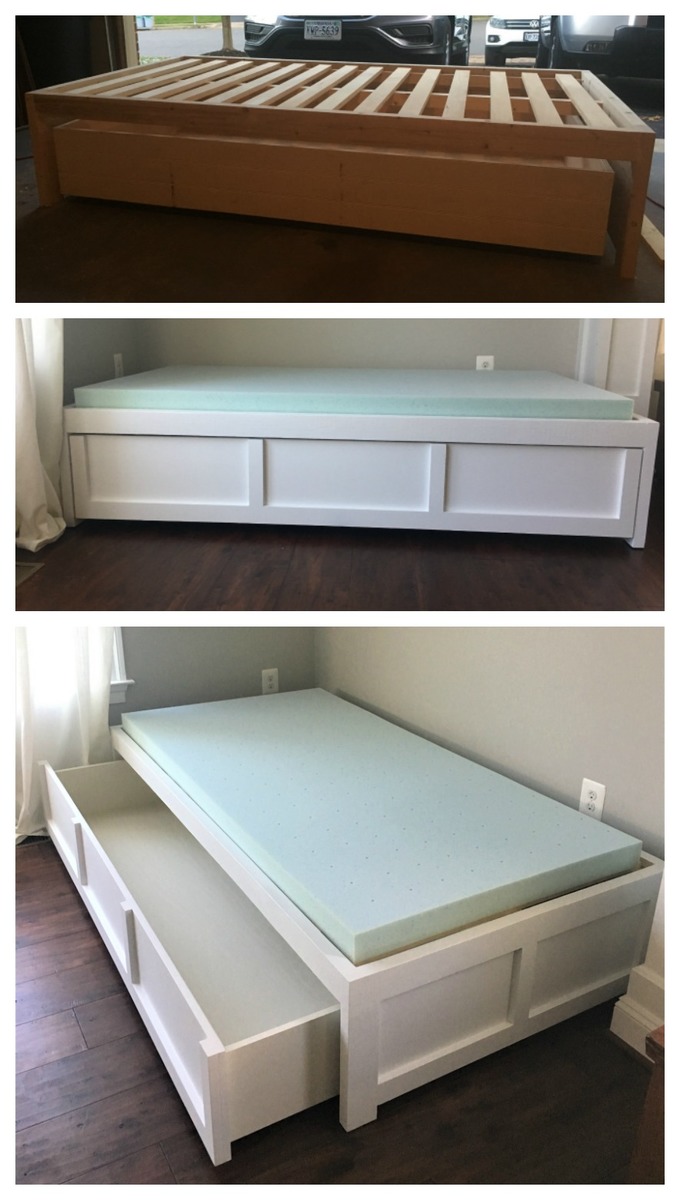
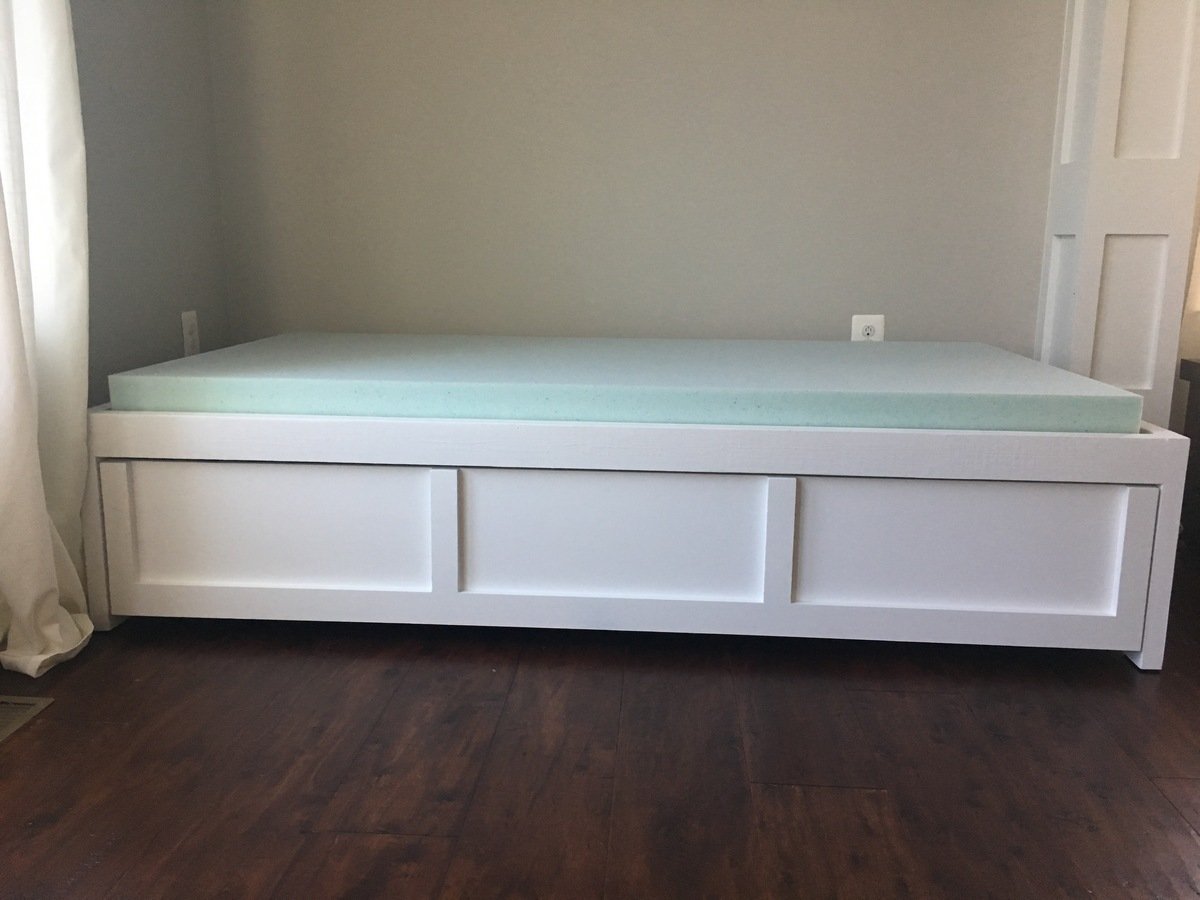
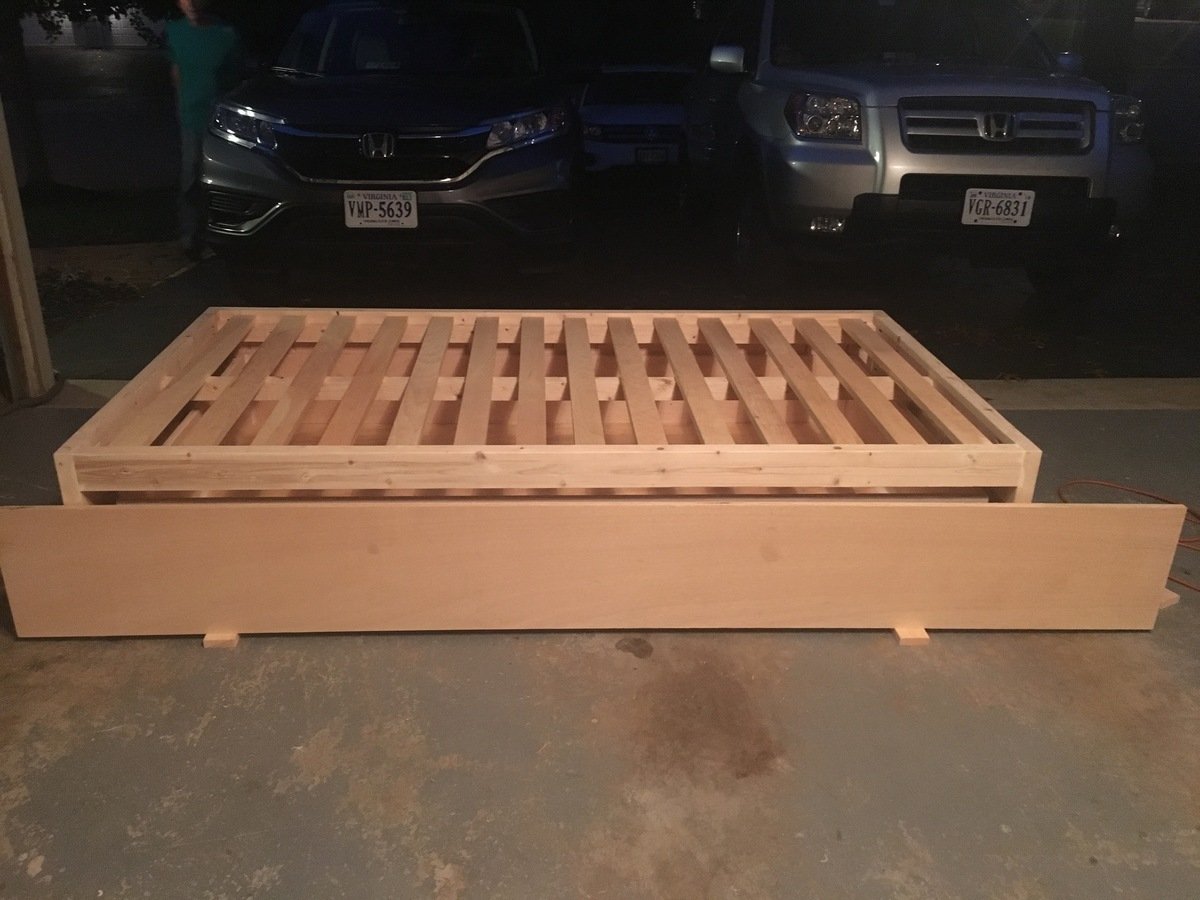
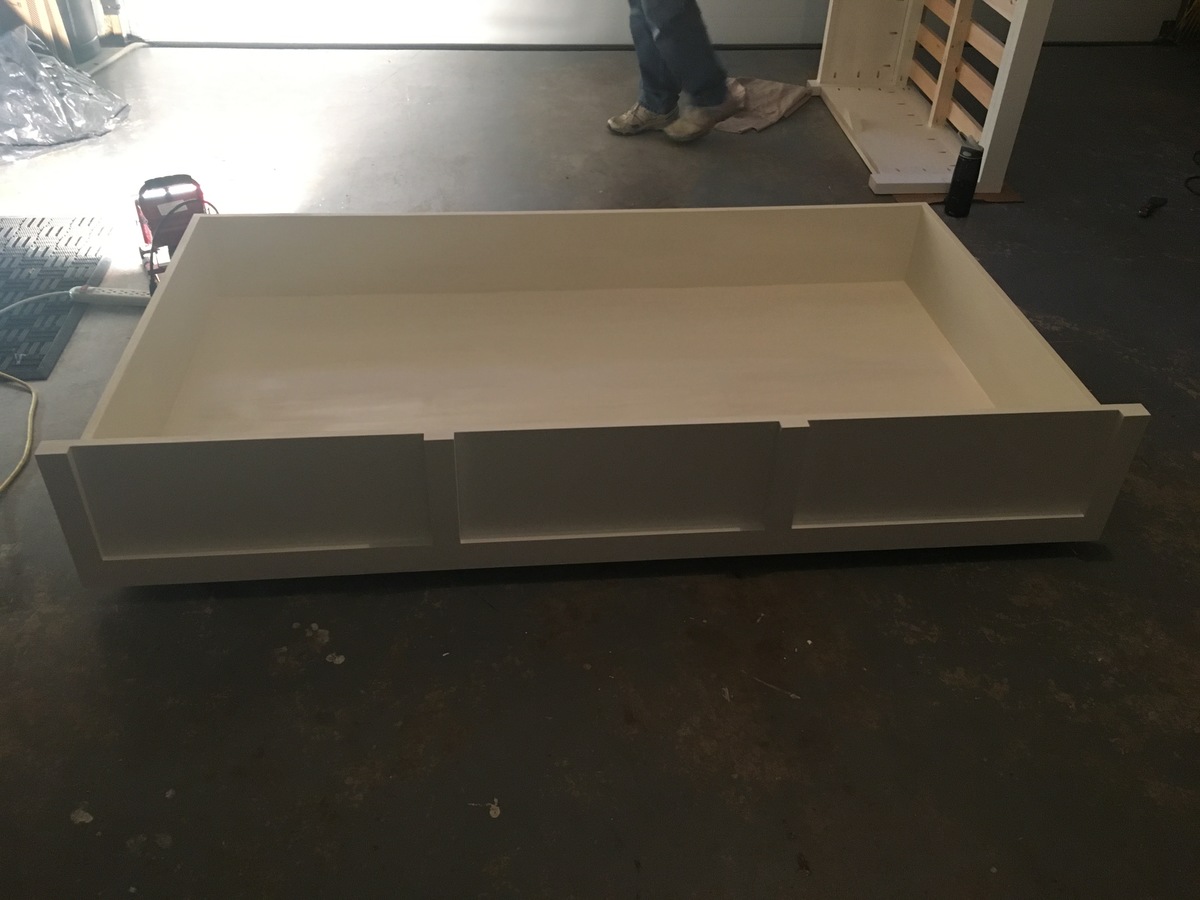
This was my first project from Ana's website and I'm hooked! I'm a beginner, but thank goodness for my Dad's help because I have a lot of learning to do!
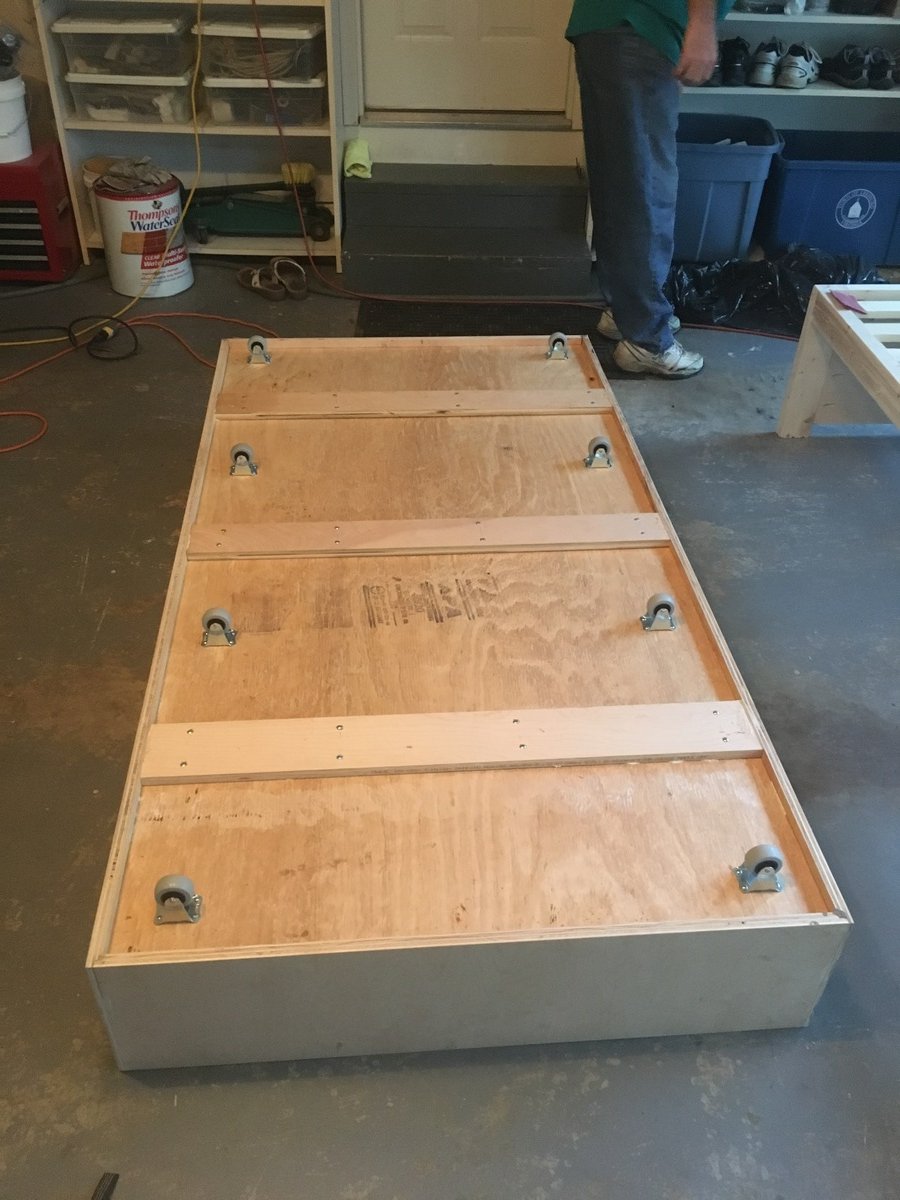
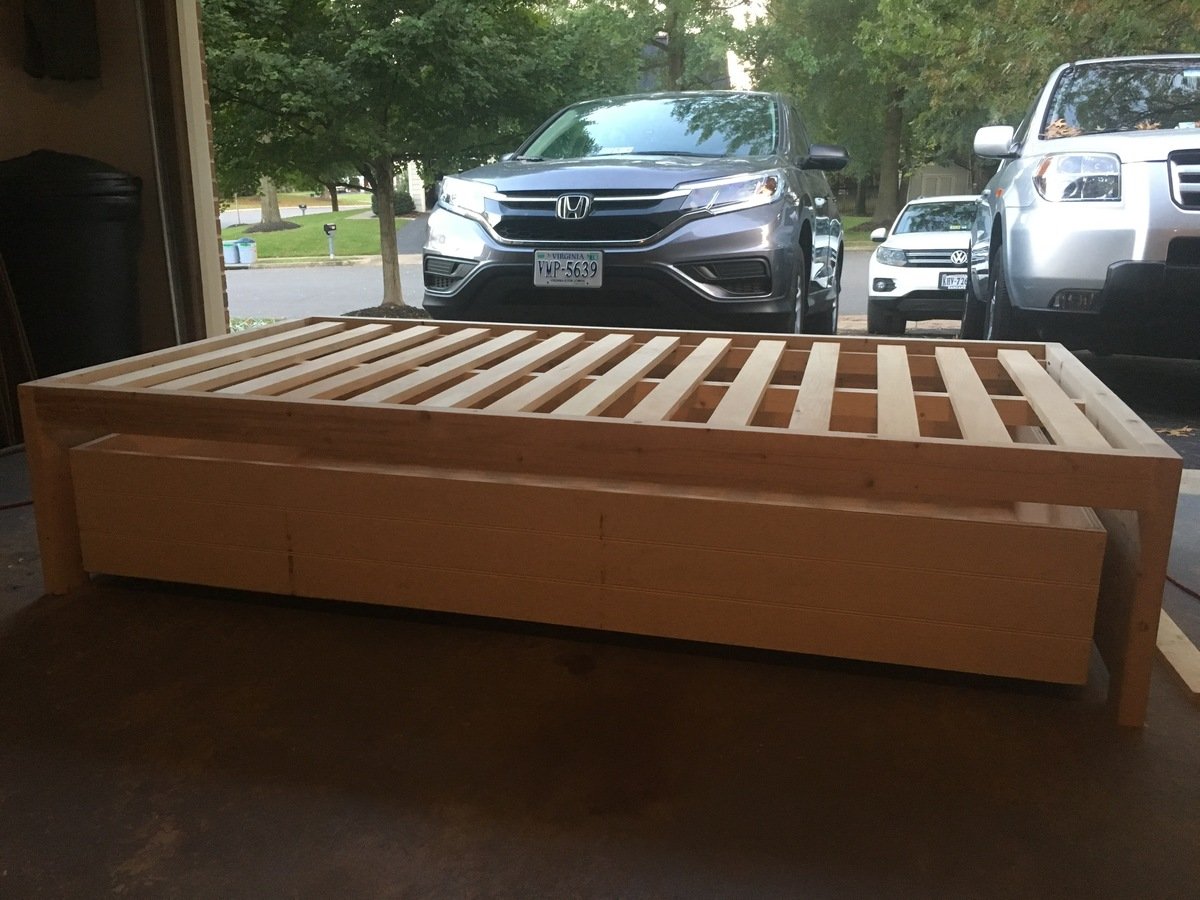
I wanted the drawer to be 1 drawer instead of 3. I feel like it looks cleaner (without having to adjust 3 drawers constantly to make it look good when you push them in). I was thinking the bed could actually be used as a trundle bed in the future too! I use this to store toys right now and it is Awesome!
I increased the bed size to fit a twin mattress and increased the height of the bed slightly so that the drawer would be a little bit deeper. We also added a back to the bed and carried around the trim to make all sides look the same. We added a bumper to the back and sides of the inside of the bed so the drawer is easy to push in and fits in snug. Finally we reinforced the bottom of the drawer with more 1x4 boards so that if a child does sleep in it, it would be more sturdy. I now have kids come over and jump into the drawer (literally) and I'm glad we reinforced it.
The changes we made did add to the cost and our time (as well as being newbies), but I think it's worth it and the bed turned out beautiful!
Sat, 01/15/2022 - 08:02
Any chance you have your cut list for this? Will the trundle storage drawer fit a twin mattress in it? Also, you say you increased the bed size to a twin, was the original not a twin too?
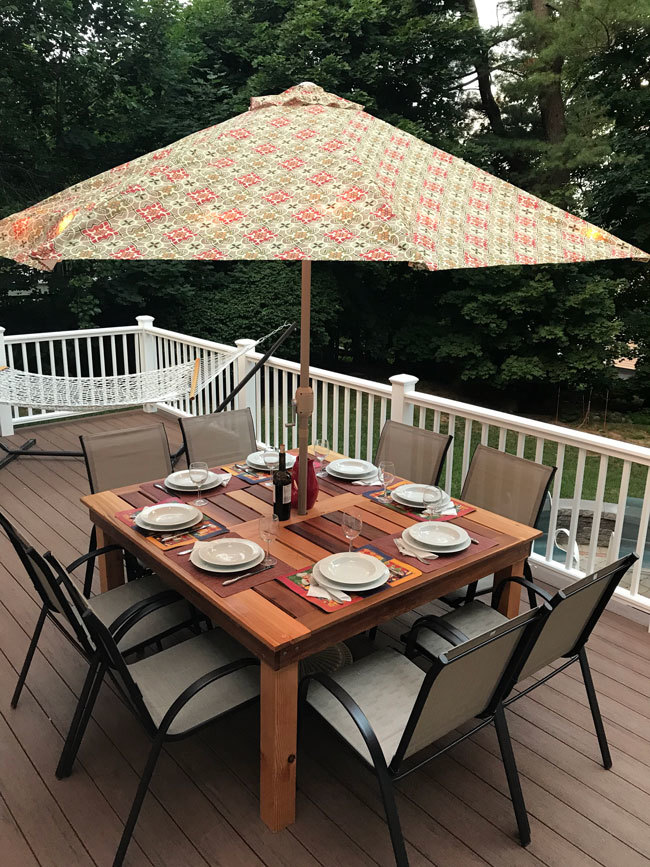
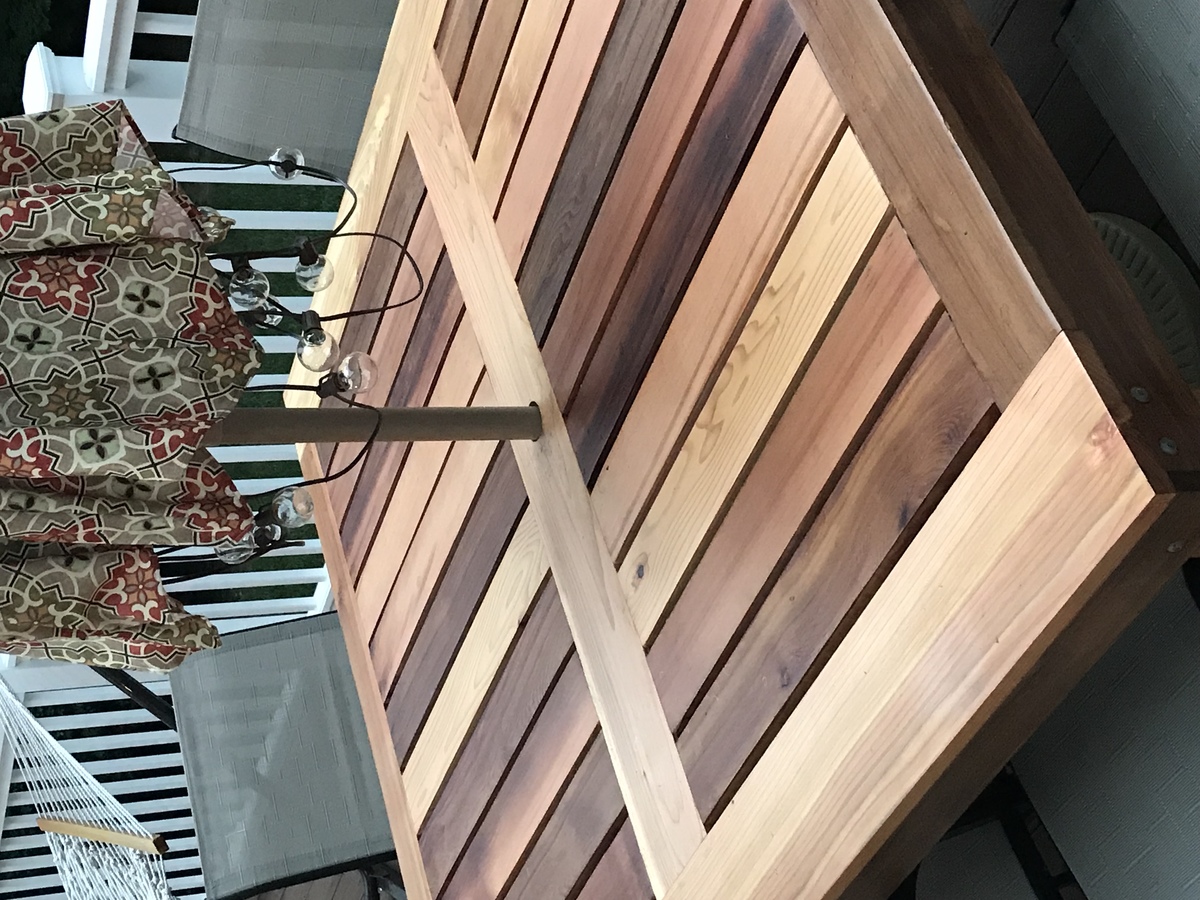
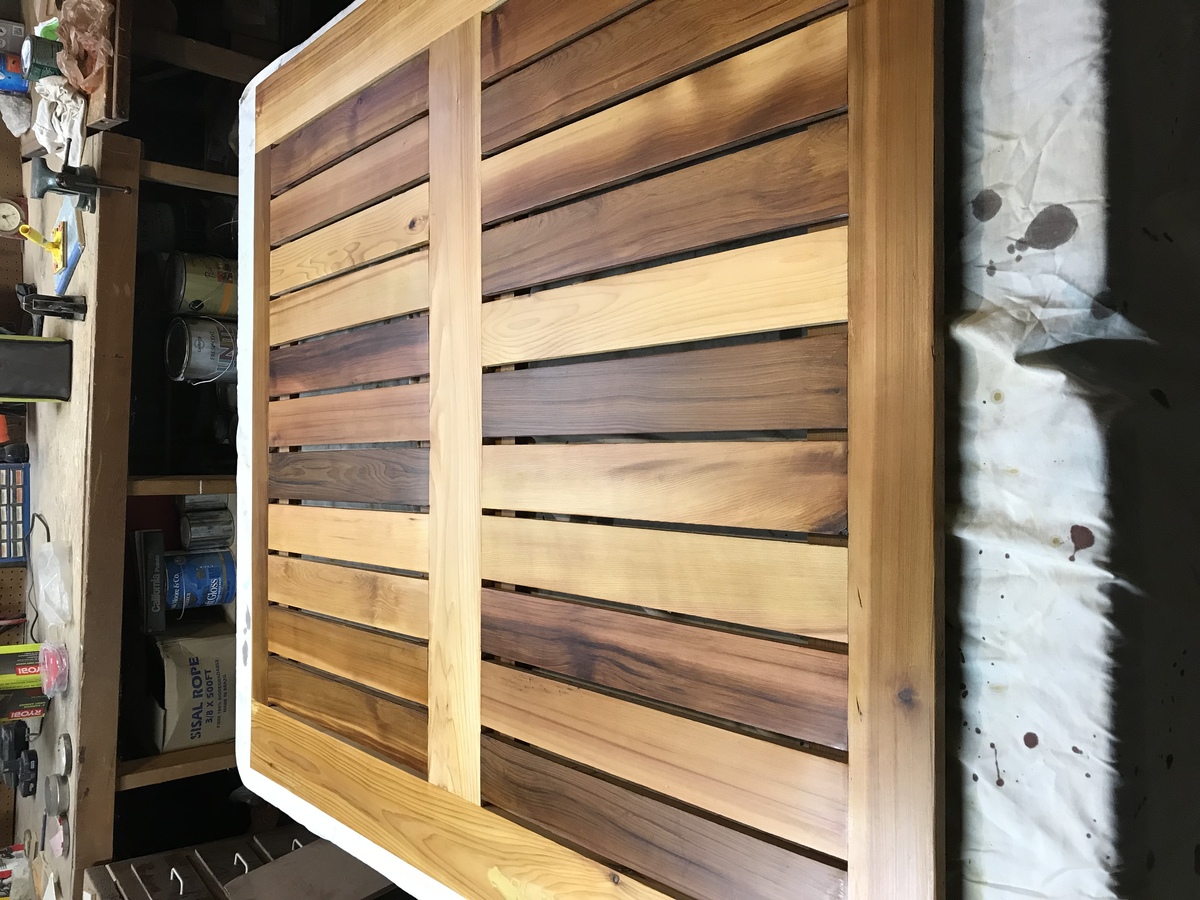
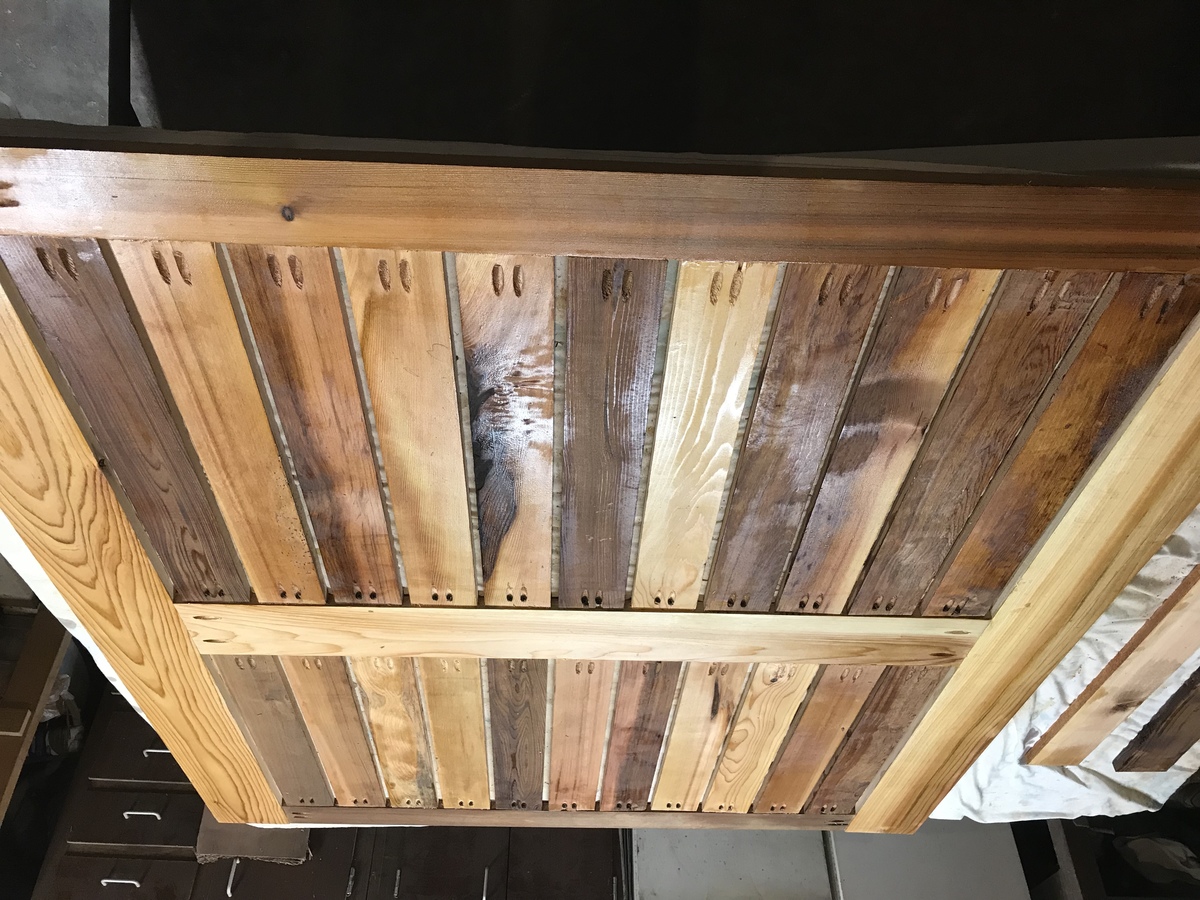
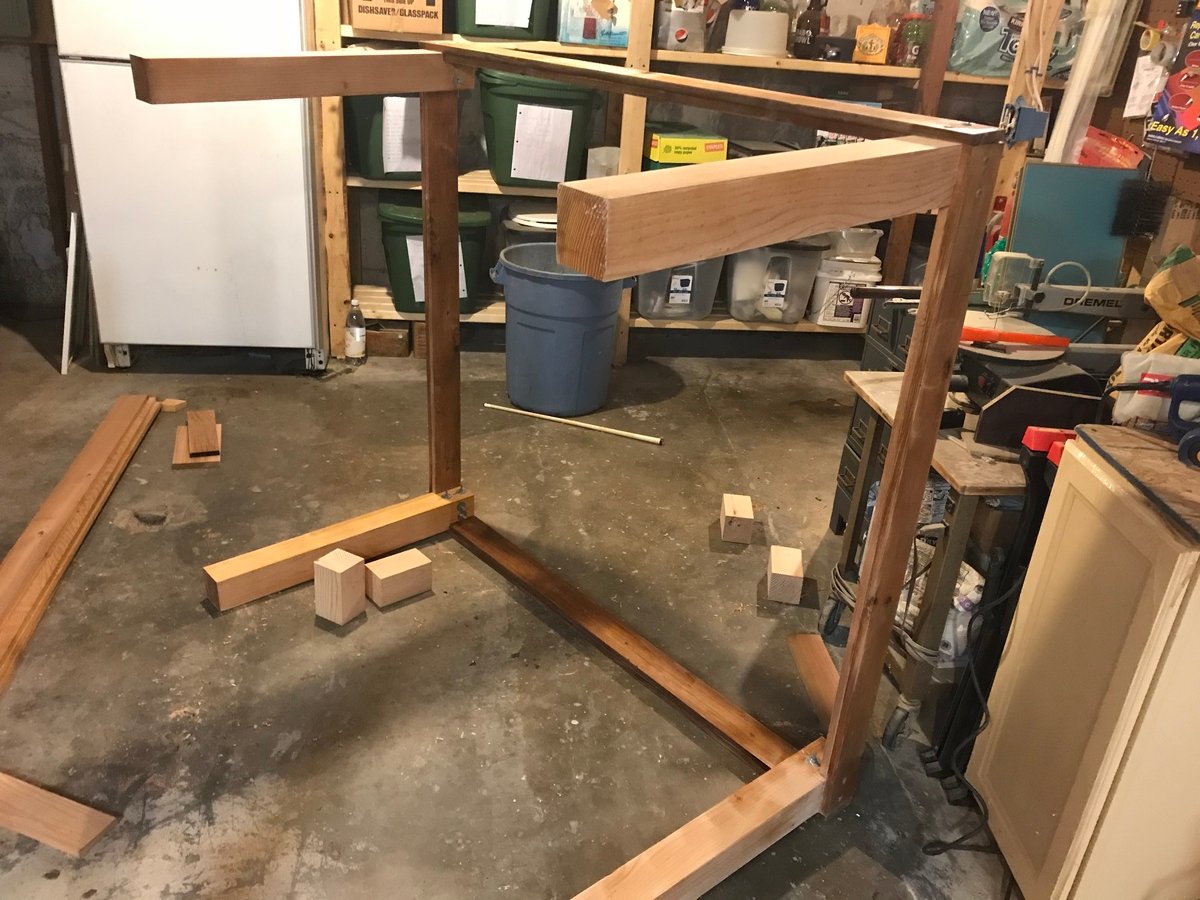
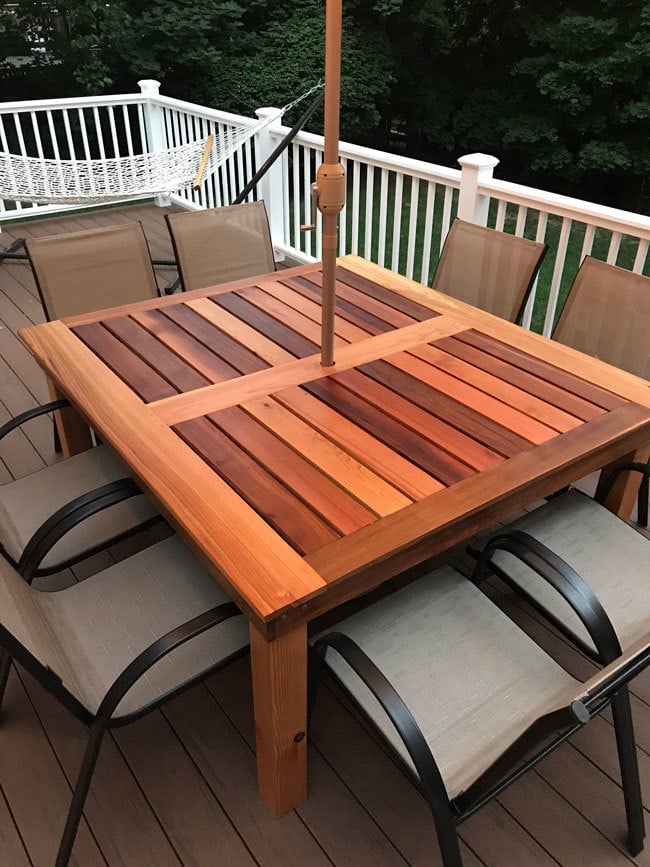
Modifications to the simple outdoor table plan thanks to Finn’s dad.
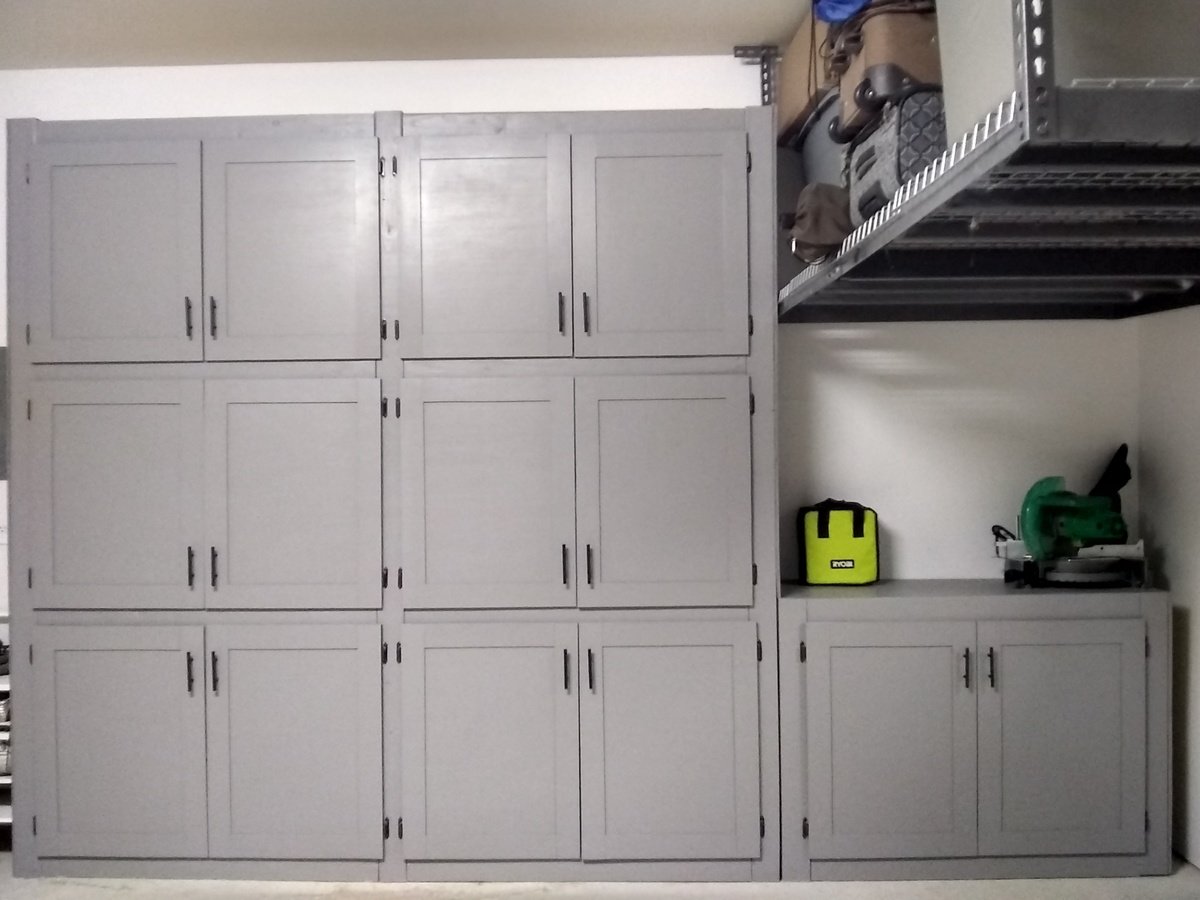
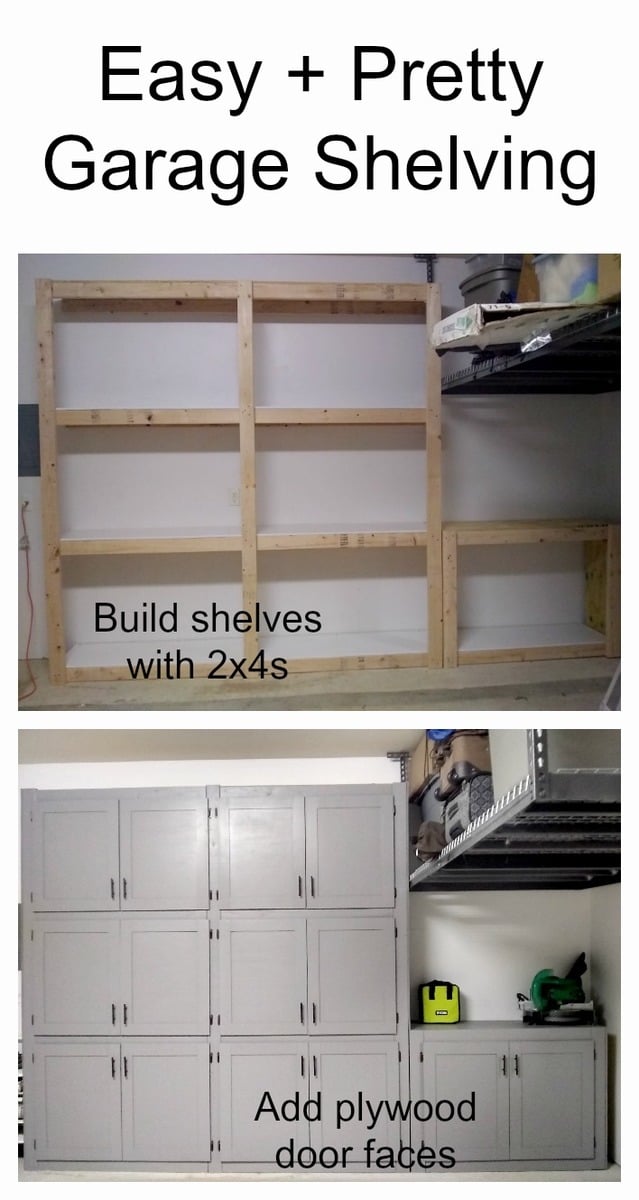
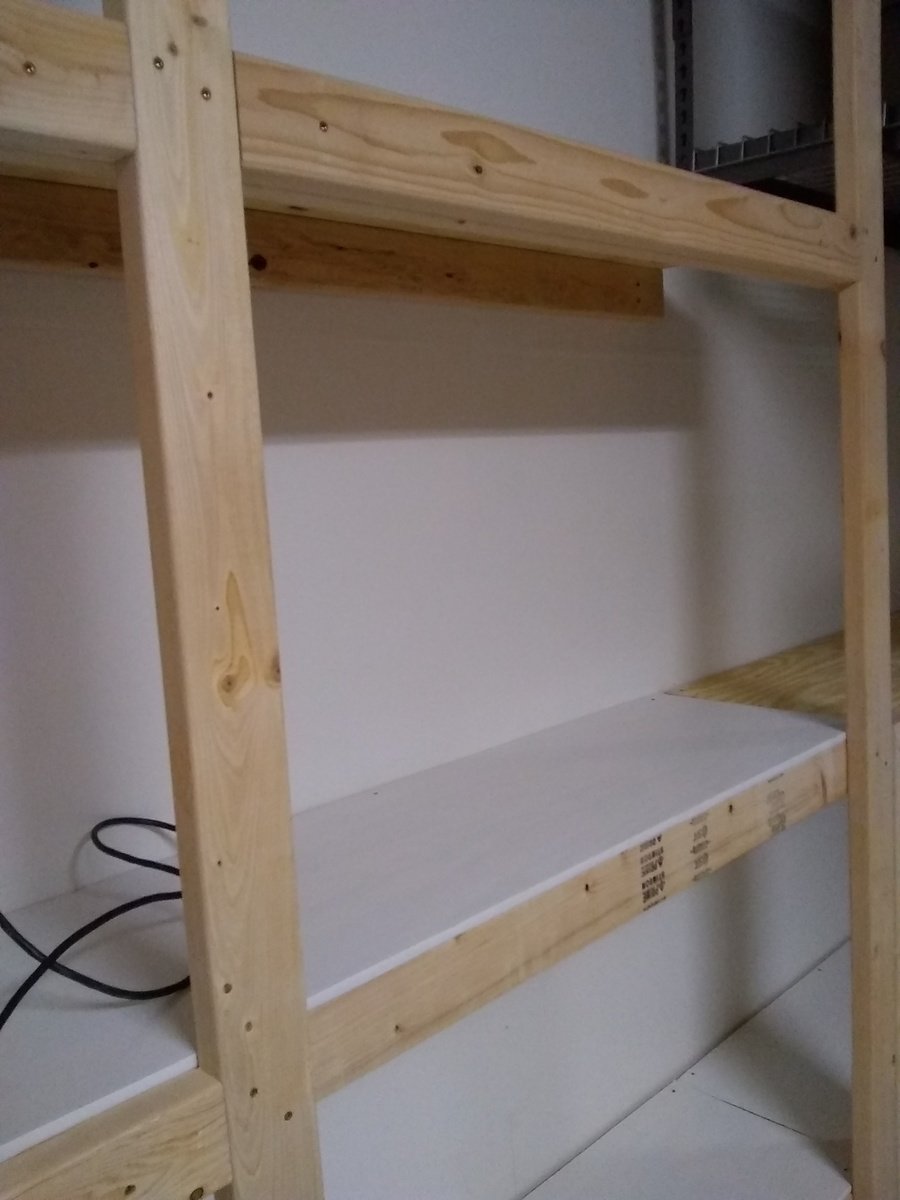
I have been wanting garage cabinets for a long time but couldn't afford them. When I saw these shelves I knew it would be easy to add side panels and create doors for the sections. The size is 8'x8' with the 4'x3' under the ceiling rack. I put a 2"x4" in the middle to divide each section, measured and cut doors from 5mm lauran plywood. I also cut the stiles and rails from the same material to give it interest but mainly to make it thicker to avoid warping as much as possible. I added 2"x4" to create a facing for the doors to rest on. Also used overlay hinges to simplify the hanging as much as possible. I was able to follow the design plan and the only thing I did was add a shelf at the bottom. The cleats were definitely not necessary, it's very sturdy.
Making the doors
The first thing is to learn how to measure for cabinet doors. There are plenty of sites and YouTube videos showing how to correctly measure. If you are doing the same type of doors like I have, with no middle divider, then be sure to pay attention how to correctly measure for those instead of a single door.
The easiest way to make the doors will be getting 1/2 in sanded plywood and use a table saw to cut each door to size. Skip the shaker style trim and put the hardware on and be done. Make sure the hinges will be able to hold the weight of the door.
Unfortunately, I didn't have a table saw but I did have a router and a jig saw, and found a great video on YouTube on how to use a router to cut straight edges without a table saw. I measured out one door and used that outline to cut two identical doors. It turned out that each section was slightly a different width so I had to do two at a time. However, if you have a circular saw you can rig it to make a table saw and make a guide to rip the doors. It all depends on what tools you have available to you.
I have a compact plunge saw and was able to cut the 3 inch strips for the shaker style with it. Honestly, that was the most tedious part and most time consuming by far. That also had to do with the fact that because the plywood is only 5mm thick I cut strips for both the front and the back to make it over 1/2 inch thick to help minimize warping and give the hinges something to grab.
I used the miter saw to cut the stiles and rails to size and a 23 gauge nailer with 1/2 nails and glue to get them on the door. I glued and nailed the front and the back of each side at the same time because the nails are a bit longer than two pieces of plywood. I then turned it over and nailed the other side. The great thing about using a 23 gauge is that I didn't have to fill any holes because they are so small you can hardly see them at all.
The last thing is to use your sander to ensure all of the pieces are even. I used a 60 grit and then followed it with a 220 where needed.
If you want to avoid cutting the strips but still want to have the shaker style, Home Depot sells 1/4 thick Polystyrene flat moulding that will add vertially no weight to the door but the cost can easily add up if you have a lot of doors.
Lastly, if you are wondering why I got such thin plywood that ended up creating more work. The reason is because I wanted to save money on hardware and I didn't trust the inexpensive hinges I got off eBay would hold a heavy door for many years.


Wed, 06/19/2019 - 13:20
What kind of paint did you use? Looks really nice, the whole thing!
Thu, 07/18/2019 - 10:28
This is amazing! Thank you for sharing so much detail on your project too.
Wed, 06/10/2020 - 13:14
Can we get detailed plan of how you made this from the start to end like a material list and cut list.
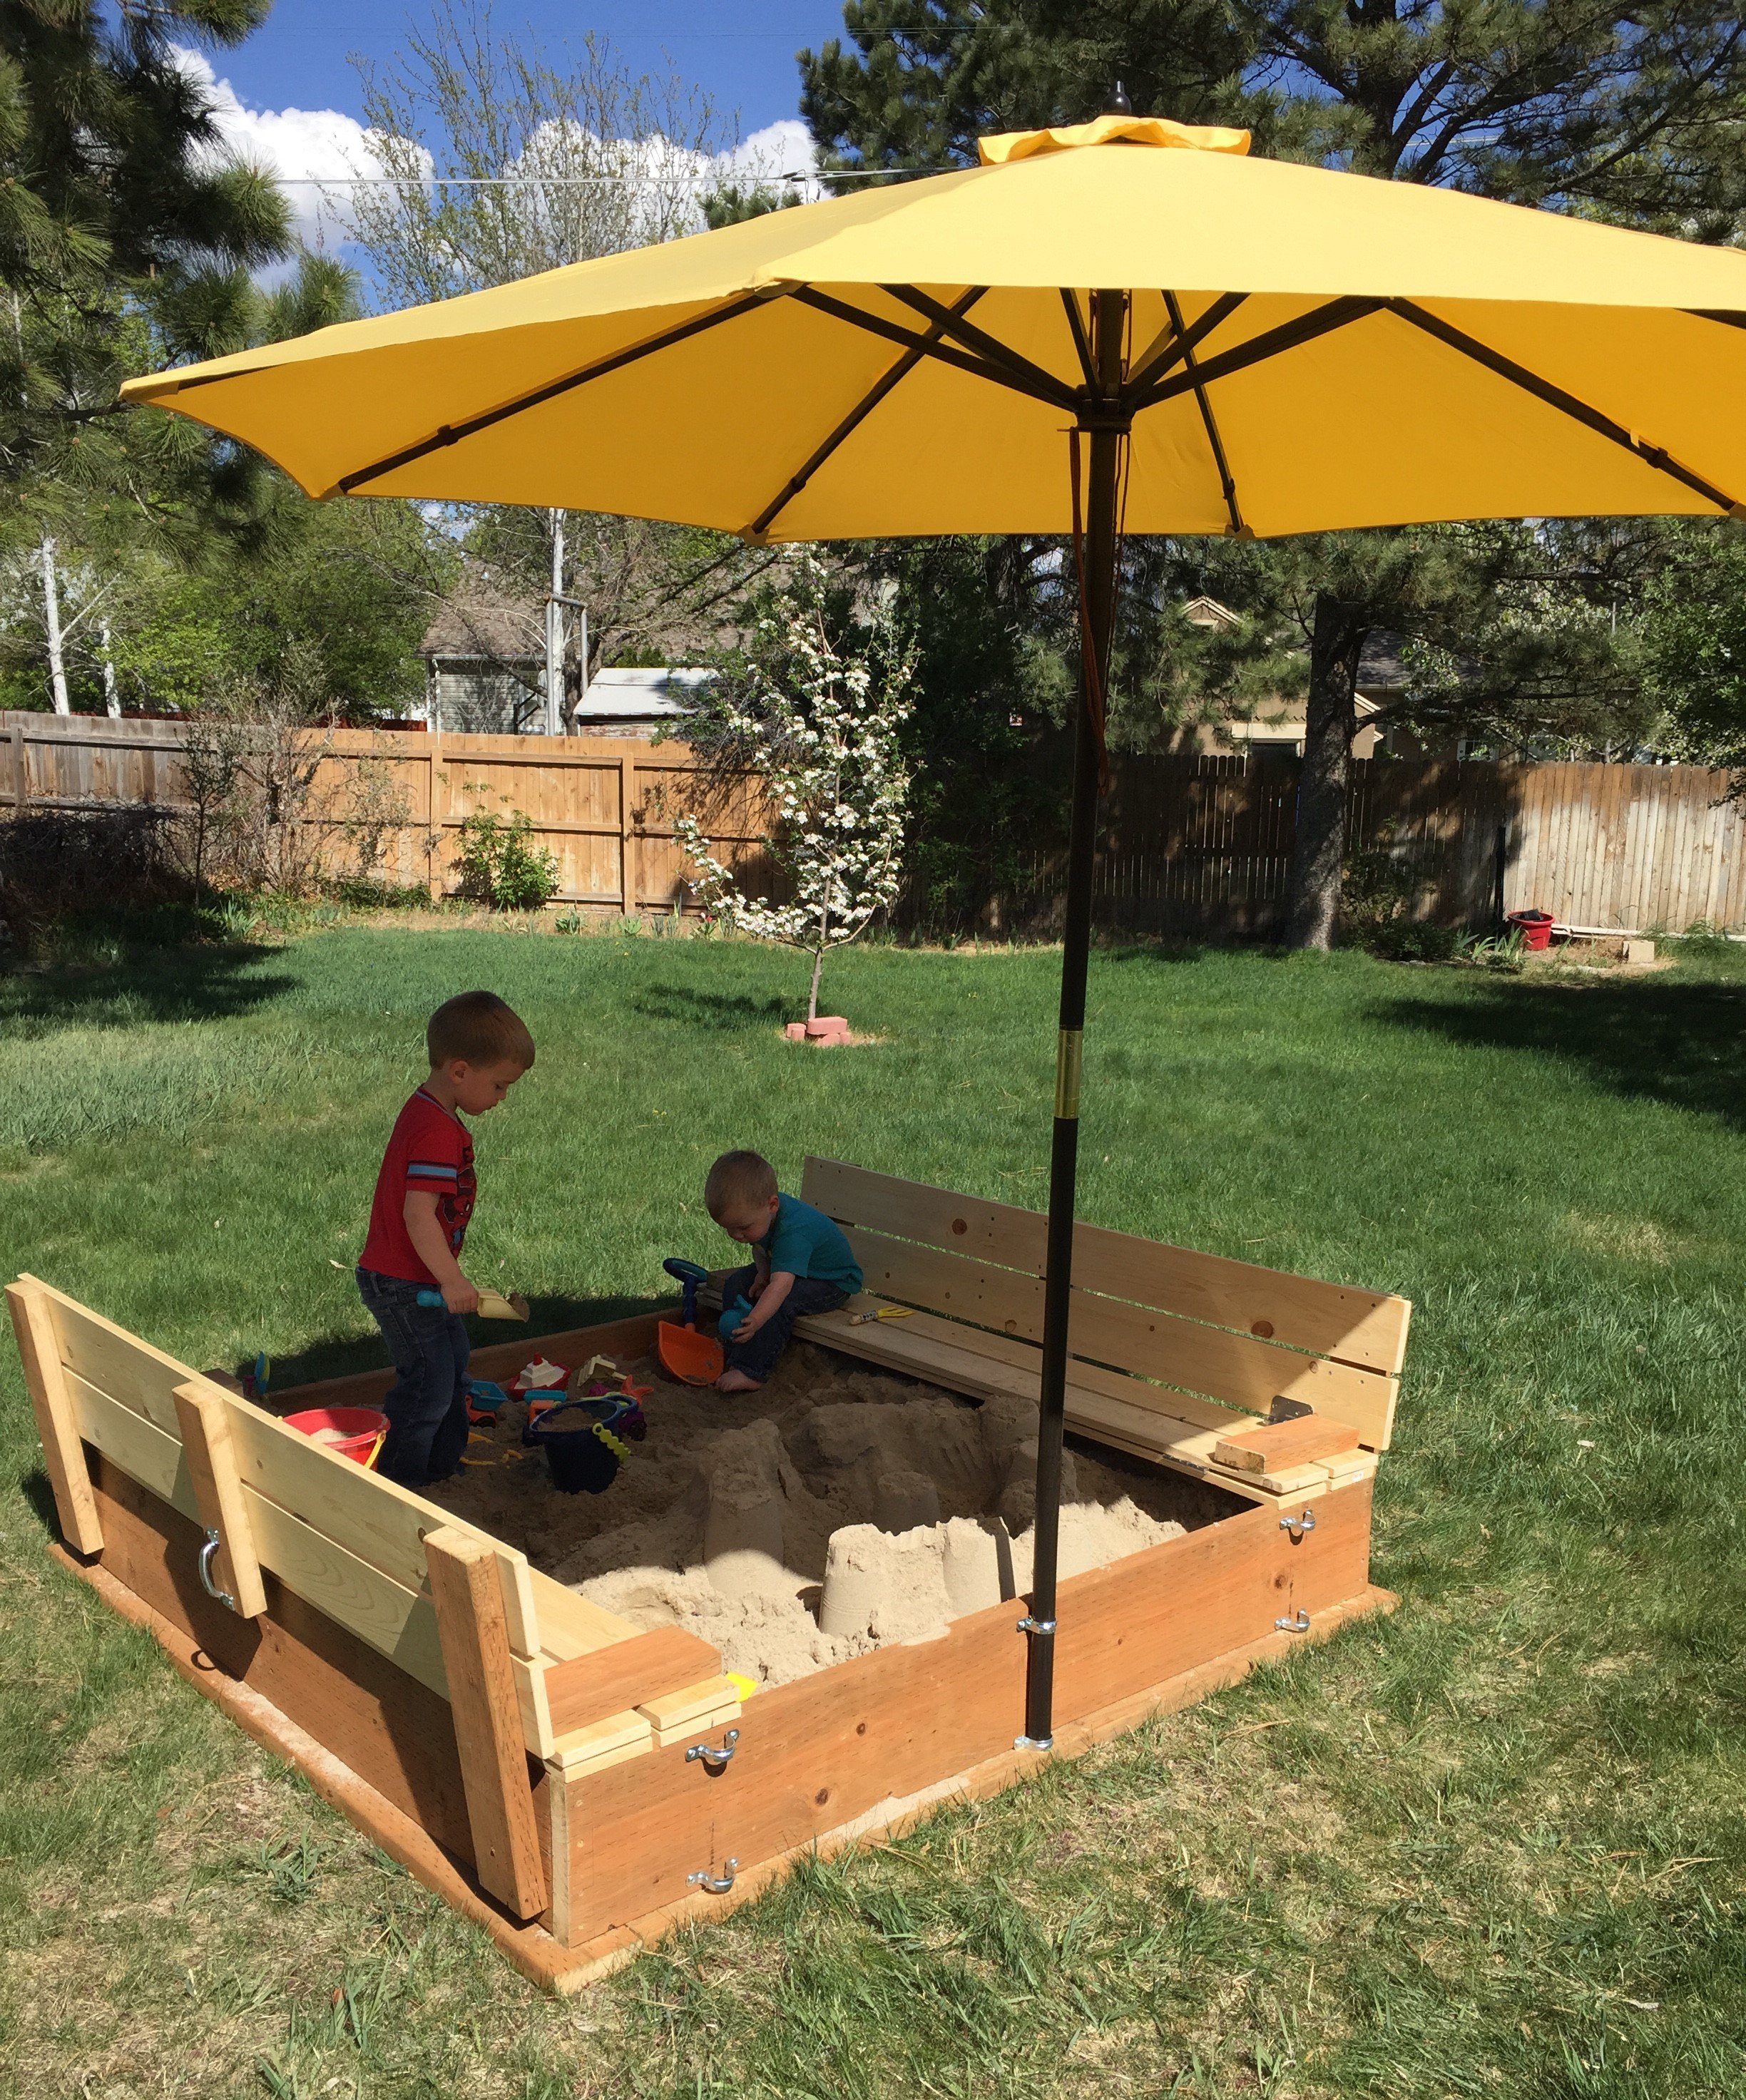
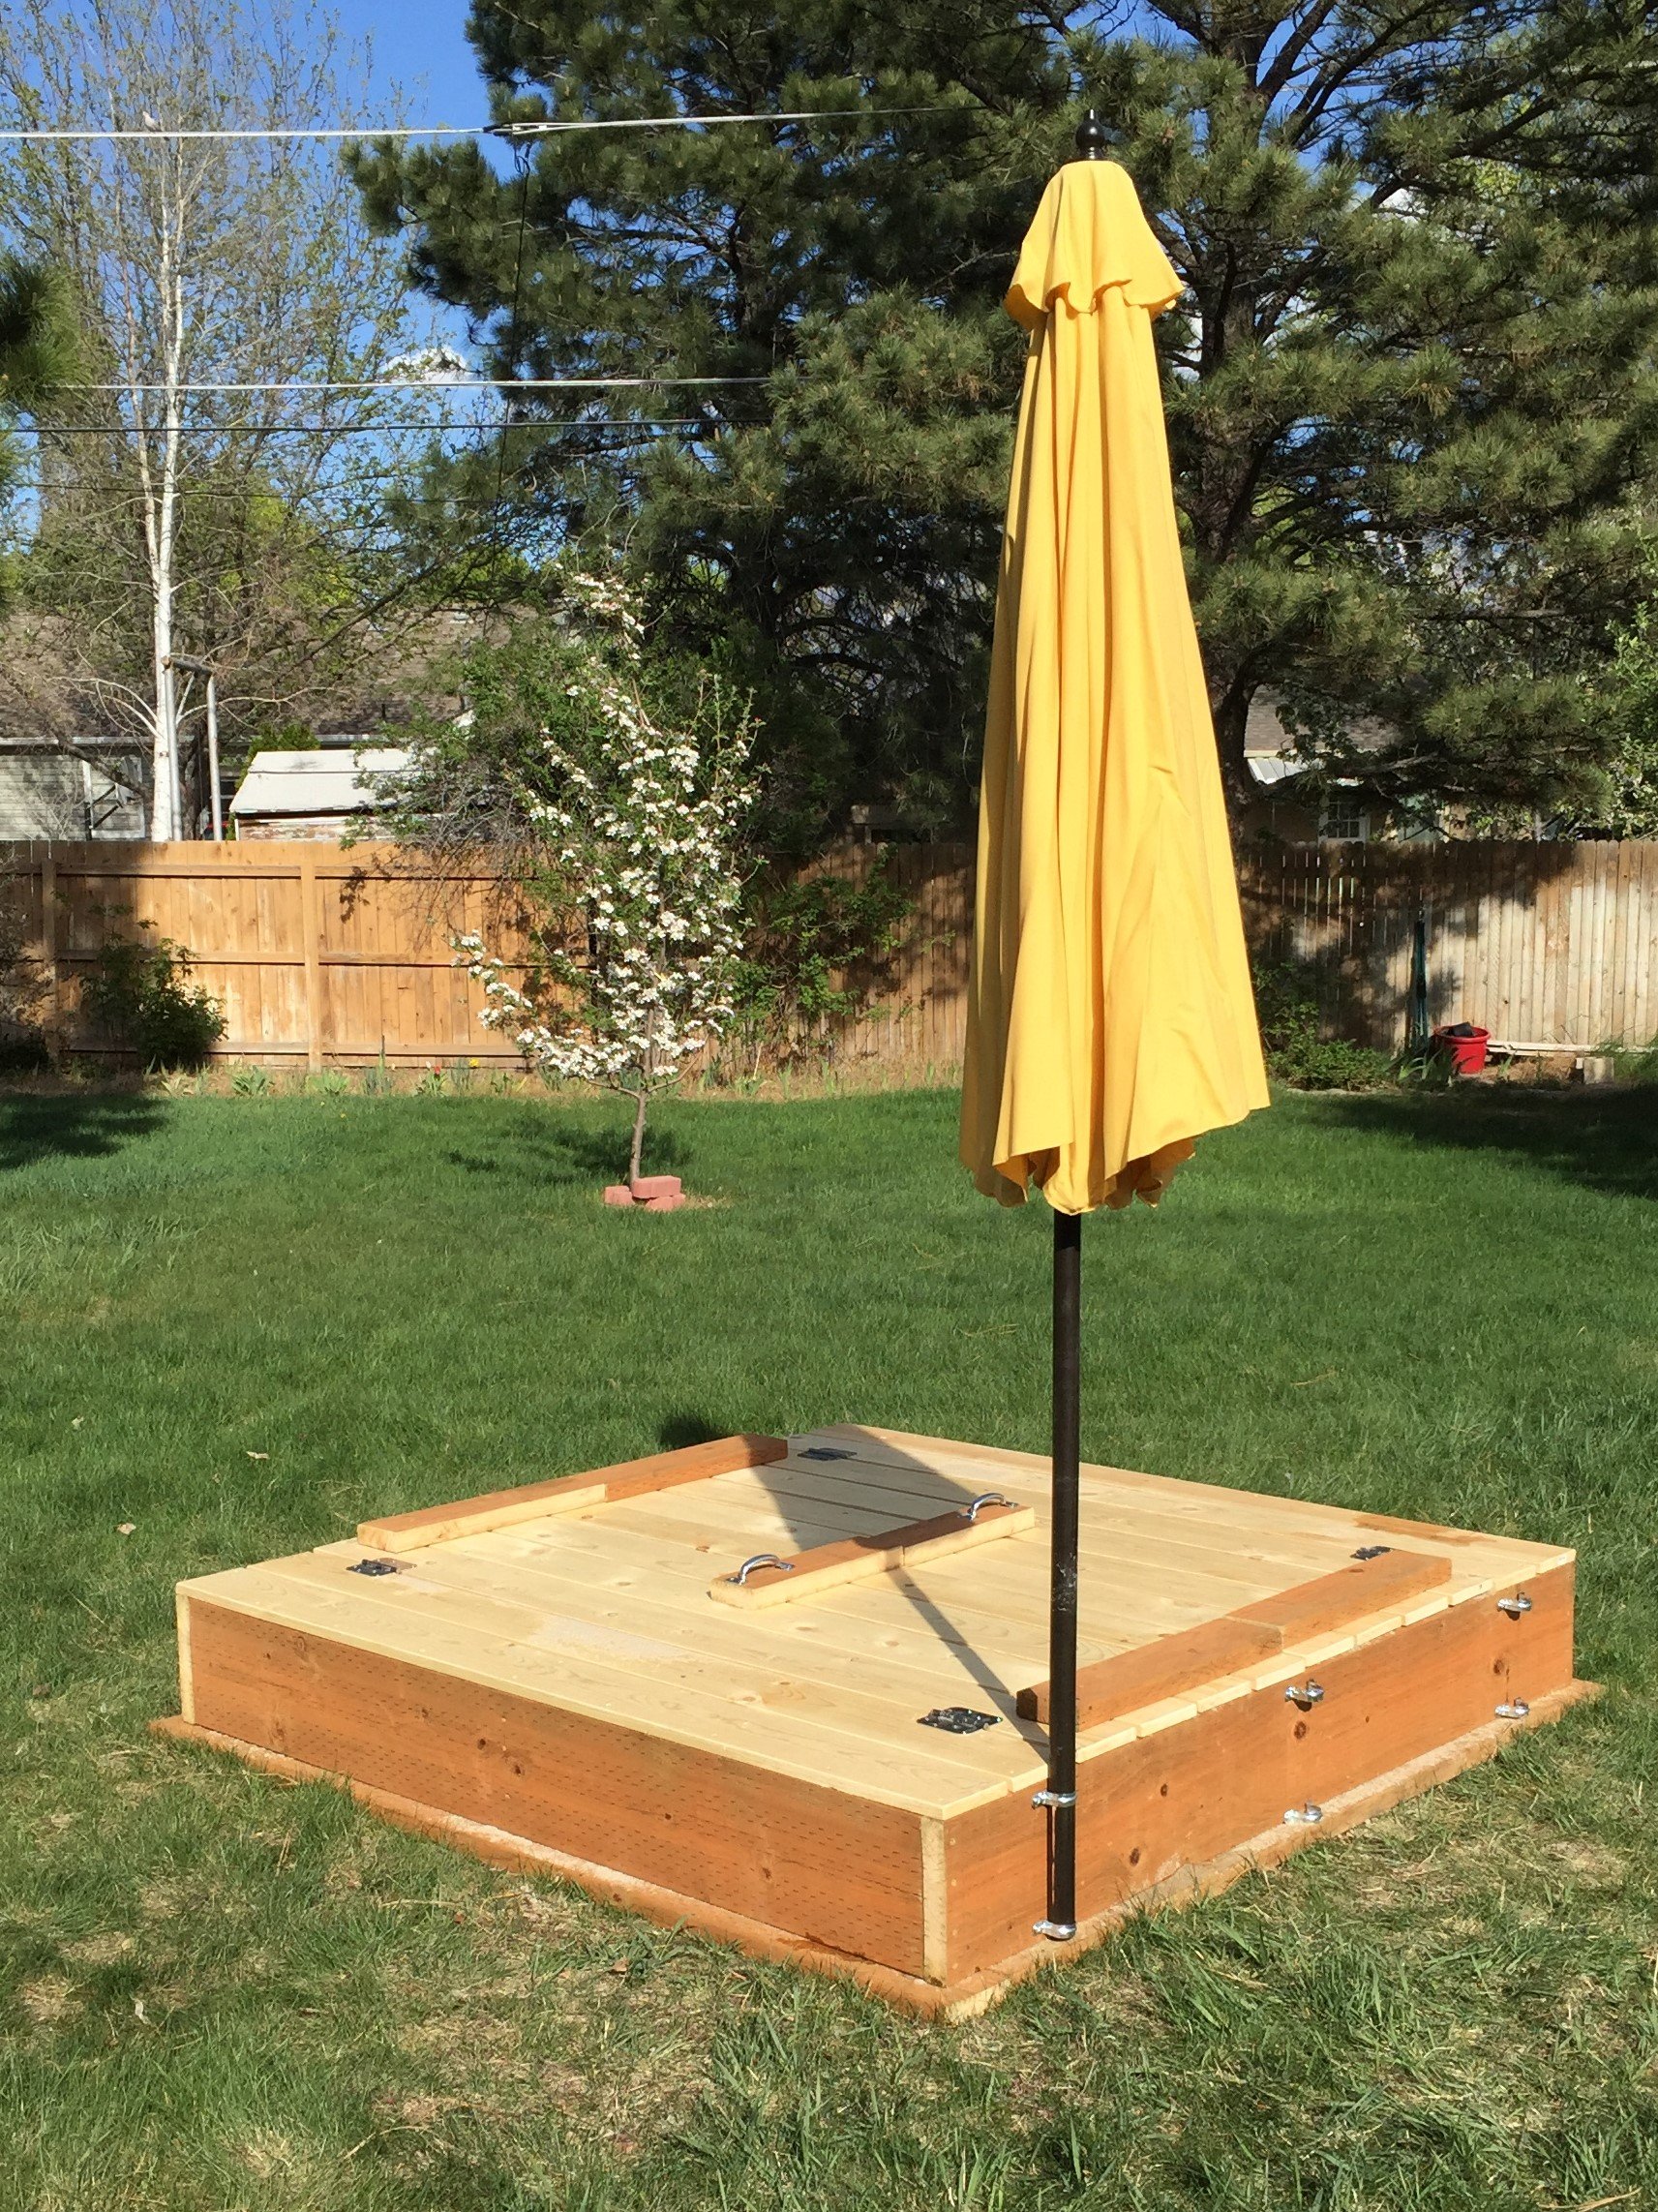
I found these plans online and was just waiting for the kids' grandpa to come out and build it. Could be built in one afternoon (depending on how many trips to your local Home Depot, and availability of the correct tools)
Modifications from original plan:
6x6 instead of 4x4
Brackets to hold patio umbrella for shade
Added seat gussets for additional support
Added "wooden flange" around bottom of box to run lawnmower on
One additional center back support on each bench
One centered handle (instead of a handle on each end)
Stapled landscape weed barrier fabric onto the bottom
Sanded all exposed edges
Materials:
4@2x10x8'
12@1x6x6'
2@2x6x12'
8 hinges
2 handles
3 1/2" decking screws (for attaching 2"x boards)
1 5/8" decking screws (for attaching 1"x boards)
2+ 1 1/4" 2-hole straps for metal conduit (for attaching patio umbrella*)
*Our patio umbrella pole was 1 1/2" diameter, but 1 1/2" straps had too much play, so we used 1 1/4" straps and misc flat washers to adjust the snugness to the pole
Cut lengths:
2@2x10 cut to 72" (long sides of the box)
2@2x10 cut to 69" (short sides of the box)
Cut one each of the following out of a 12 footer:
2@2x6 cut to 75" (long side "flange")
2@2x6 cut to 64" (short side "flange")
No cuts were made to the 12 1x6's
Used one leftover 2' from the 2x8x10's ripped in half cut to 11.5" for arm rests
Used two leftover 2' sections from the 2x8x10's ripped in half cut to 21" for back supports
Used the last 2' cutoff to make two seat gussets (cut about 9 1/2" off and then ripped it at 45 degrees)
Used the remaining piece (ripped in half length-ways) to attach to the center of the backrest for additional support and as the attachment point for our handles
We decided to do one handle in the center of the backrest so one reasonably strong adult could open the lid
The bottom "flange" was assembled with the box upside down. Basically a 2x6 screwed to the bottom edge of the box allowing 1 1/2" overhang all the way around
After making cuts, but before assembly, we recommend using a quarter-sheet pad sander (or similar) with 60 grit paper to break all of the edges and round over any ends or corners that will be in contact with sandbox users
Followed other general assembly instructions
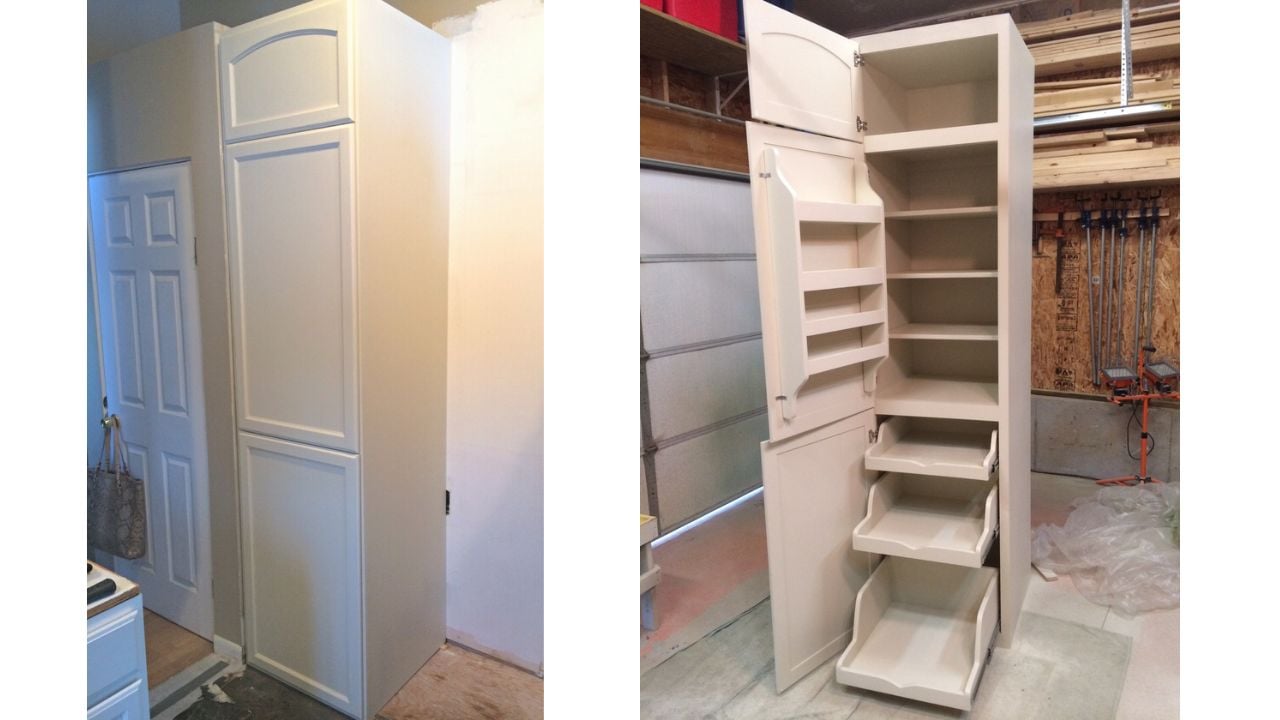
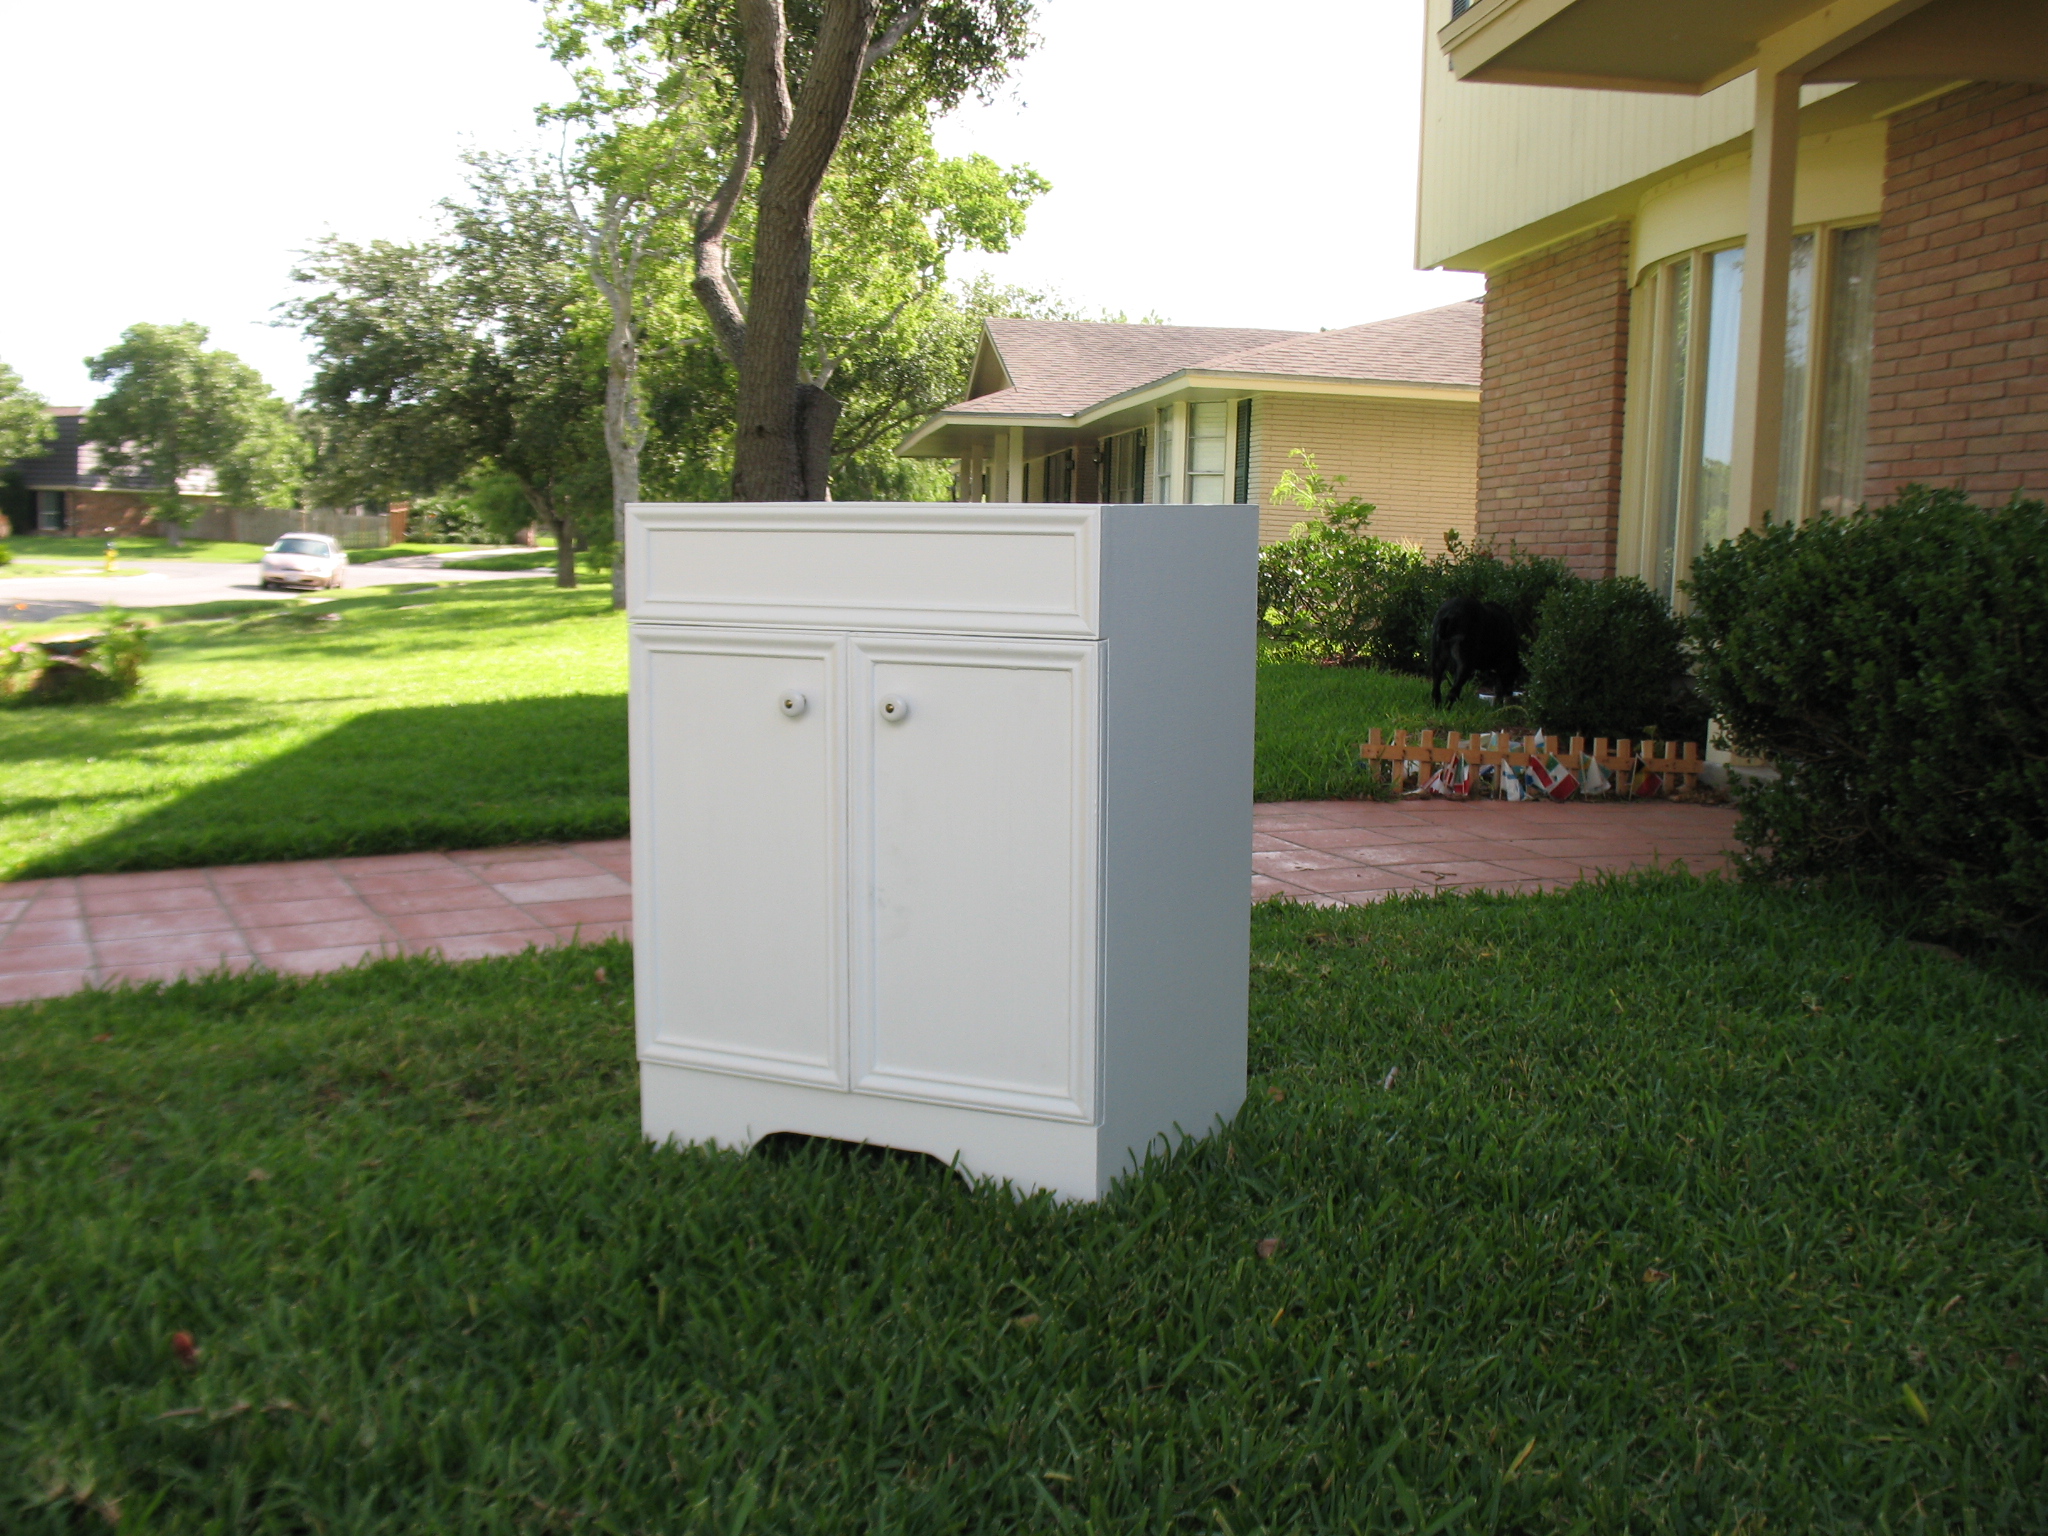
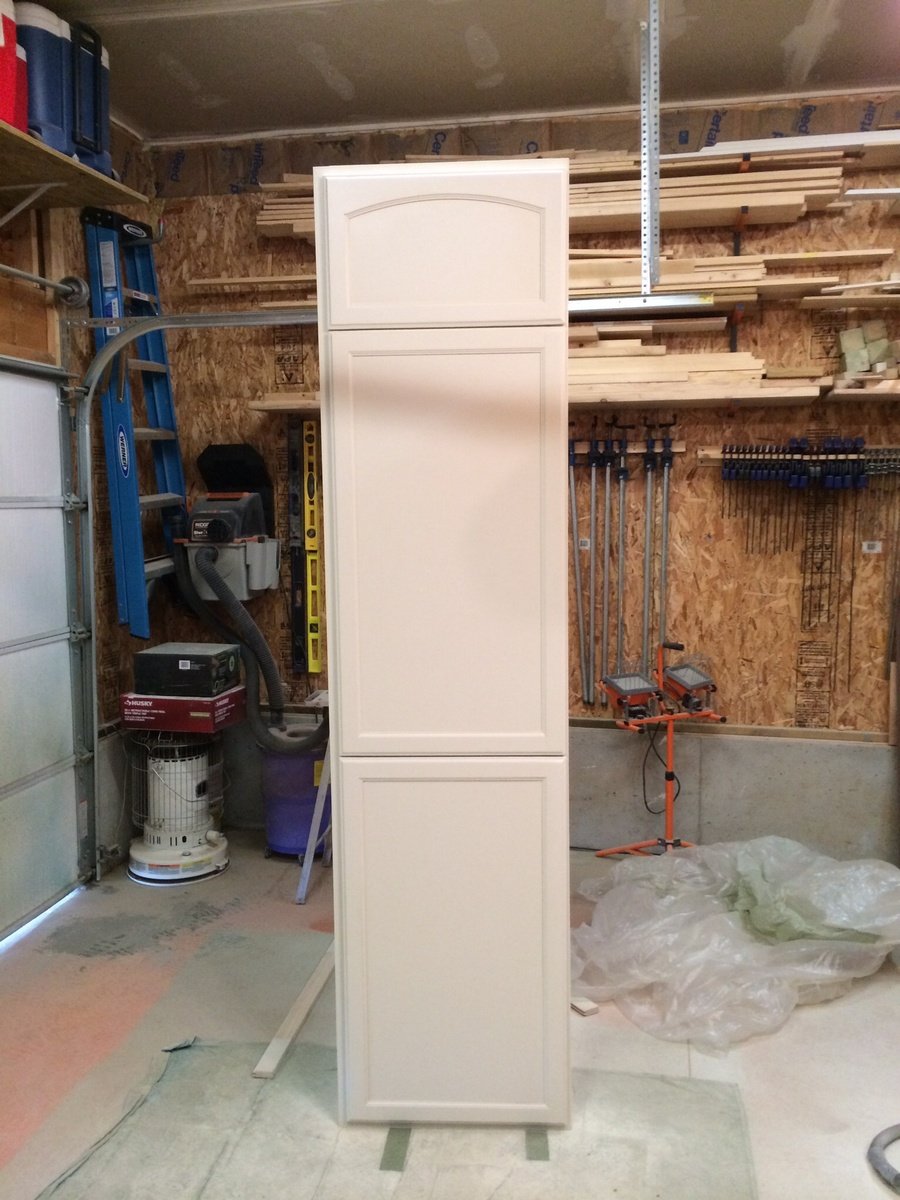
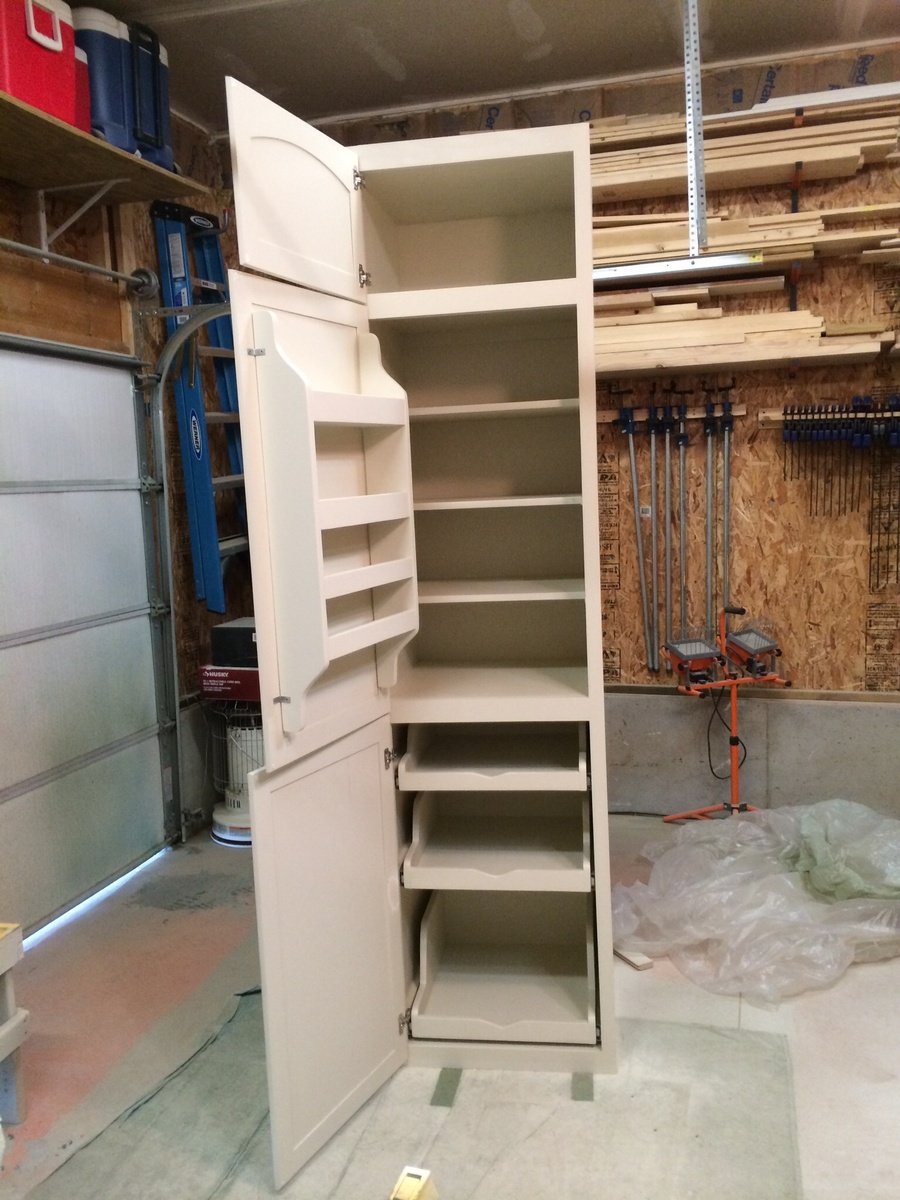
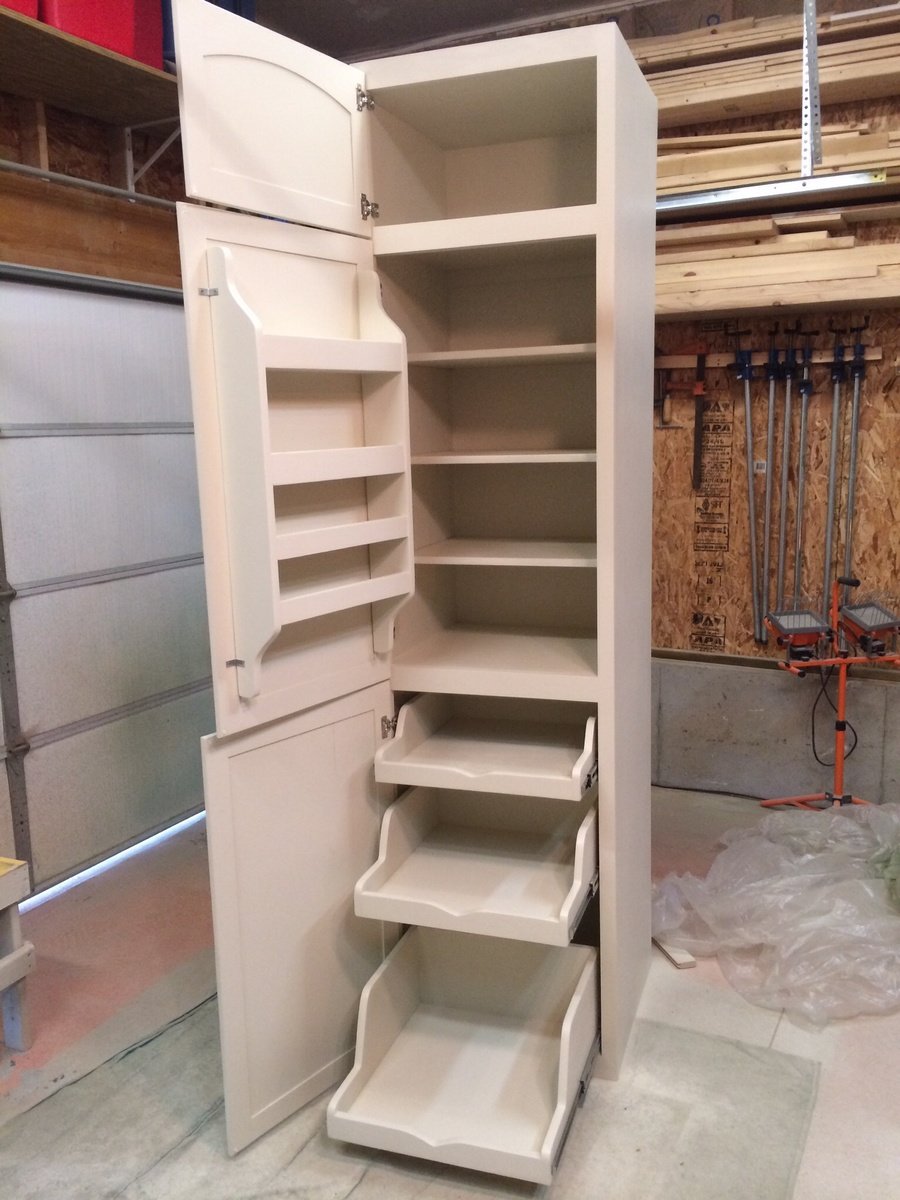
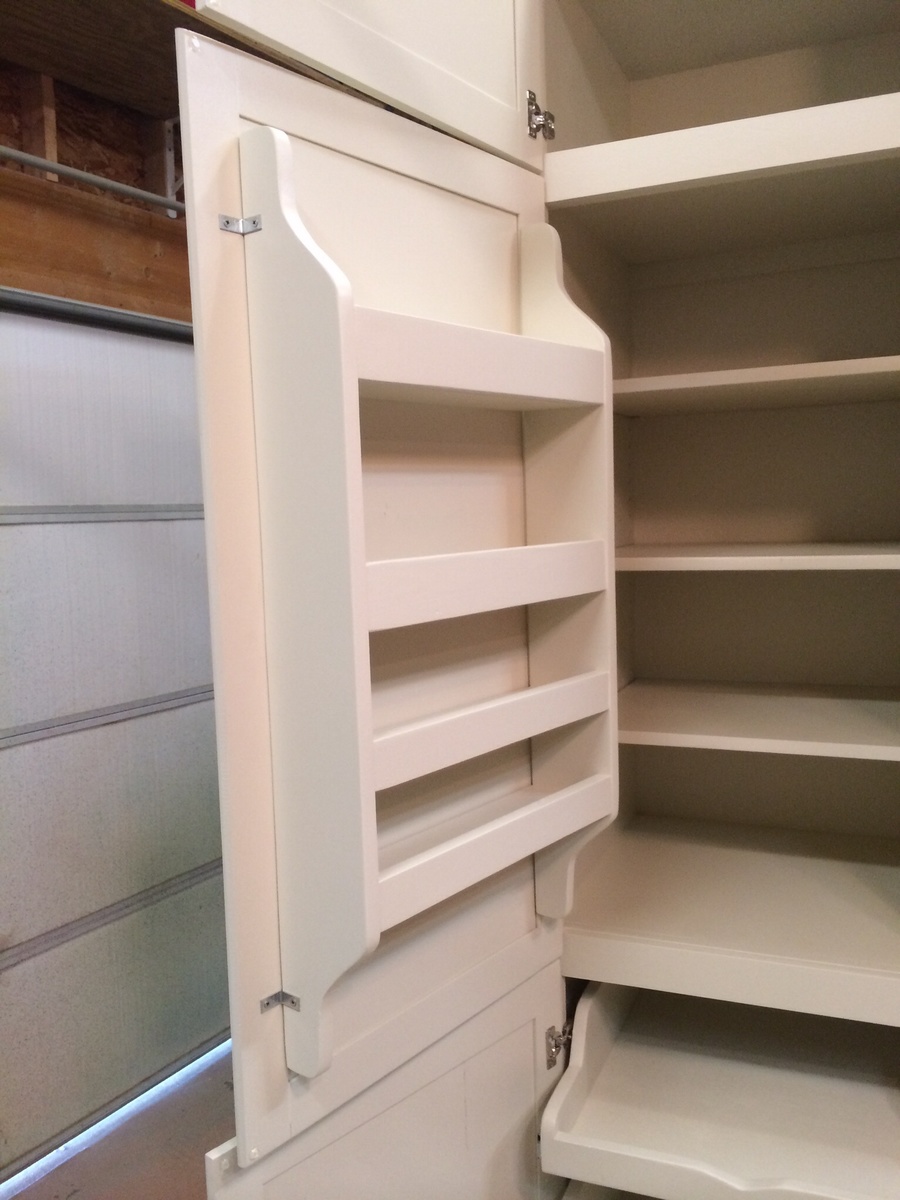
I made this pantry to match some new kitchen cabinets that my friend ordered from lowes. He wanted me to make all of his cabinets but unfortunately I didn't have enough time, it was kind of one of those things hey I'm redoing my kitchen can you make this. This was all built and designed from a picture his wife found on pinterest with just the measurements for the space it needed to fit in.

Mon, 02/10/2014 - 10:25
Great job! We're planning a pantry build in the near future and yours is just lovely! I love the pull out drawers!
Mon, 02/10/2014 - 10:25
Great job! We're planning a pantry build in the near future and yours is just lovely! I love the pull out drawers!
Fri, 06/17/2016 - 18:39
HI -
My husband and I have been trying to find a DIY Pantry for our kitchen. We've looked everywhere and finally came across this! We love it and would like to try and build it. Do you have the plans available to share? I look forward to hearing back from you.
Fri, 11/27/2020 - 21:33
I tried the link for crafted perfection in attempt to get the plans for this. It led me back to this website. Is there ANY chance of getting the plans for this pantry PLEASE?
Thu, 12/24/2020 - 07:18
Where can I get the plans for this pantry -- Please advise.. Love your work..
Fri, 08/06/2021 - 14:55
Please send me the plans for the kitchen pantry!!
Wed, 09/01/2021 - 13:59
Okay, Ana, where are the Plans? You're killing me with this teaser! I'm not smart enough make something this great without serious plans like you usually produce. Help this old guy, please.
Wed, 03/23/2022 - 12:03
I would love to get these plans. We are in a new house and I need extra storage and this is perfect.

Thu, 08/11/2022 - 18:08
Hi Ana! Do you have plans? My daughter is moving and could always use more kitchen cabinets. She loves kitchen gadget everything!
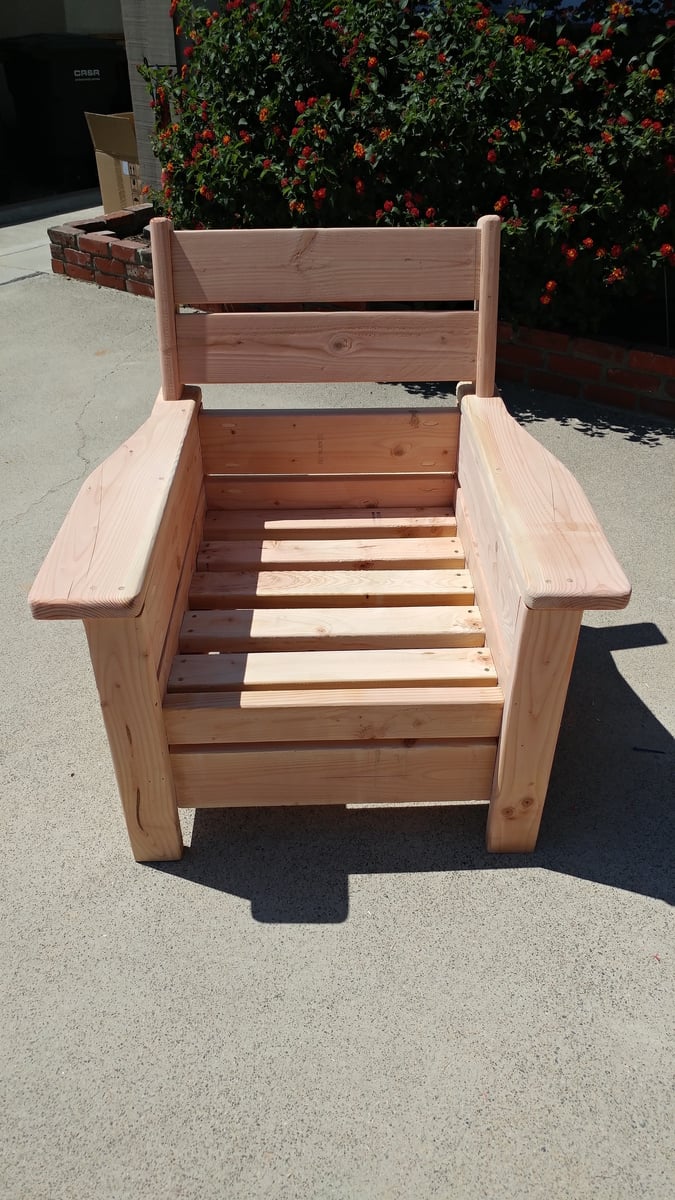
Taken from the Modern Outdoor chair project and added a back. Then decided that I love the andorak style chair arms and thus the Andrmodern chair was born..
Mon, 08/03/2020 - 09:02
I’d love to know how you made the changes, love it!

Thu, 03/18/2021 - 09:20
Could you please share how you added the back and arms to the modern chair plans.

I made this coop twice as wide like Ana suggested since I have 4 chickens and wanted to make sure there was some extra wiggle room in case “chicken math” got the best of us. I made a nesting box to mount on the outside. I also used plywood for the sides like Ana did in the video. I installed a Run Chicken automatic door that opens at sunrise and closes at sunset. I added some hasps and clasps to make sure all my doors would close tightly. I put hardware cloth across the top before installing the roof panels. I stapled and buried hardware cloth around the perimeter for predator protection. I also spray painted the hardware cloth flat black so that it would be easier for us to see inside the coop. I stained the rest of the wood with Varathane Semi-Transparent stain, color “Carbon Gray.” I also added some roosts and cedar shingle siding for some extra protection during our New England winters at to match our house. Working 2-4 hours a day, off and on, with a bum shoulder and weak hands, this took me about a week! Thanks for the great plan, Ana!


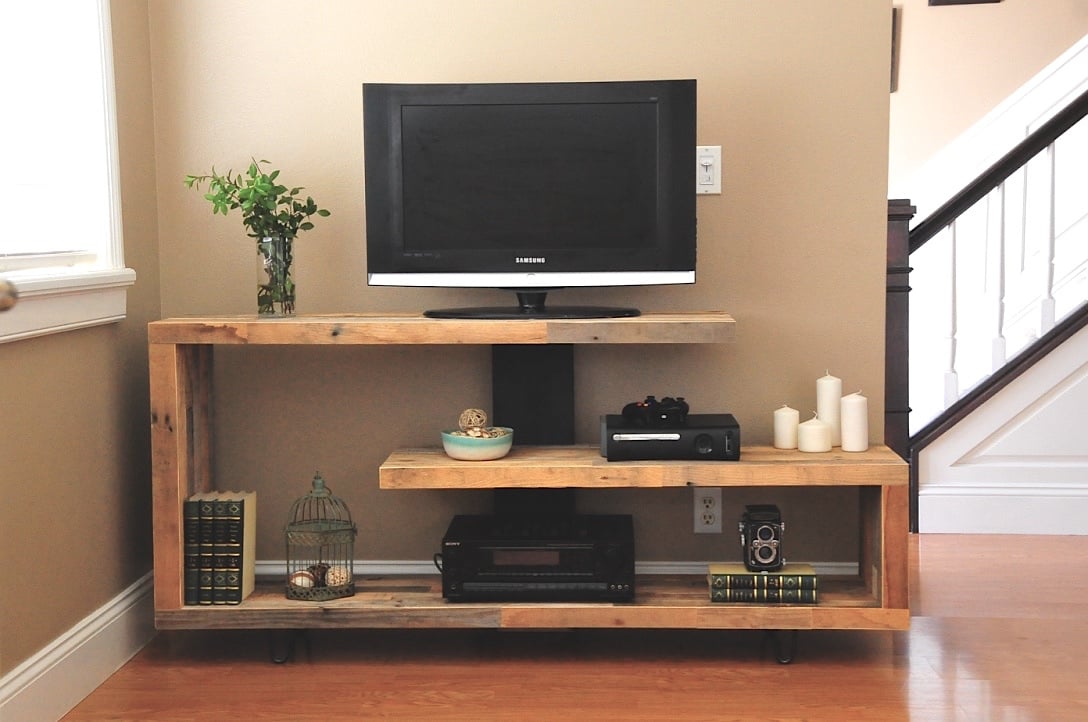
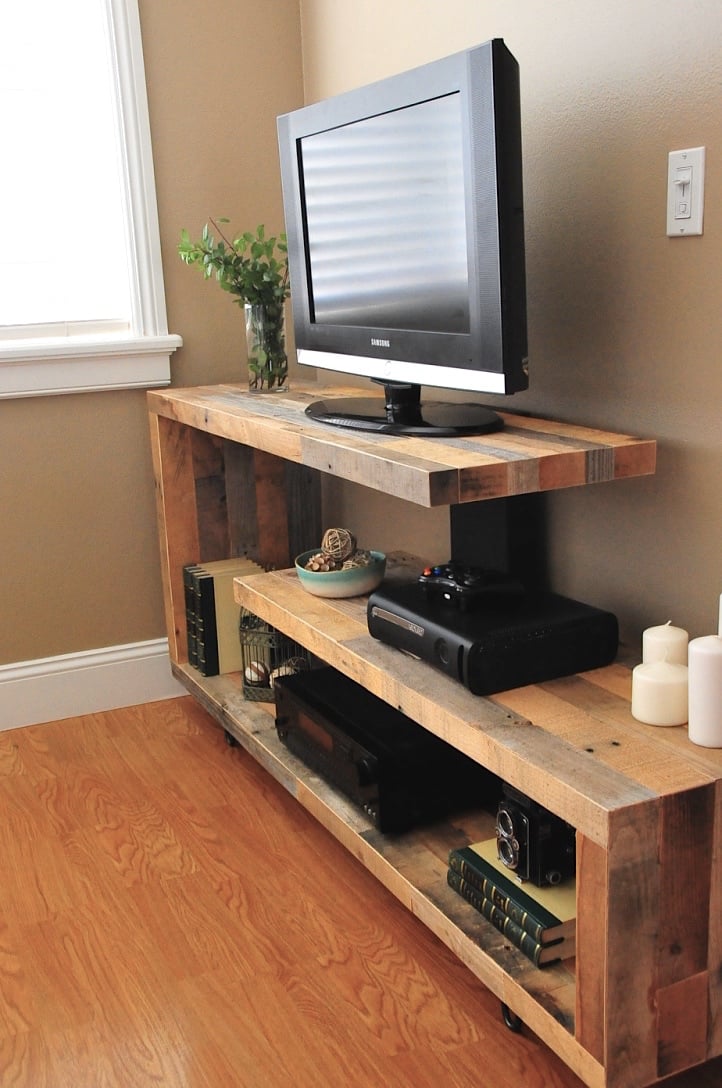
Just finished up this unique TV console. Built from reclaimed pallet wood.
Mon, 12/02/2019 - 22:10
Hi there Im new to site and also have the issue of not seeing the plans for this Rustic Modern TV Console. Are they available and Im doing something wrong or??
Sat, 06/27/2020 - 05:03
I am logged in and I do not see the plans for the "Rustic Modern TV Console"
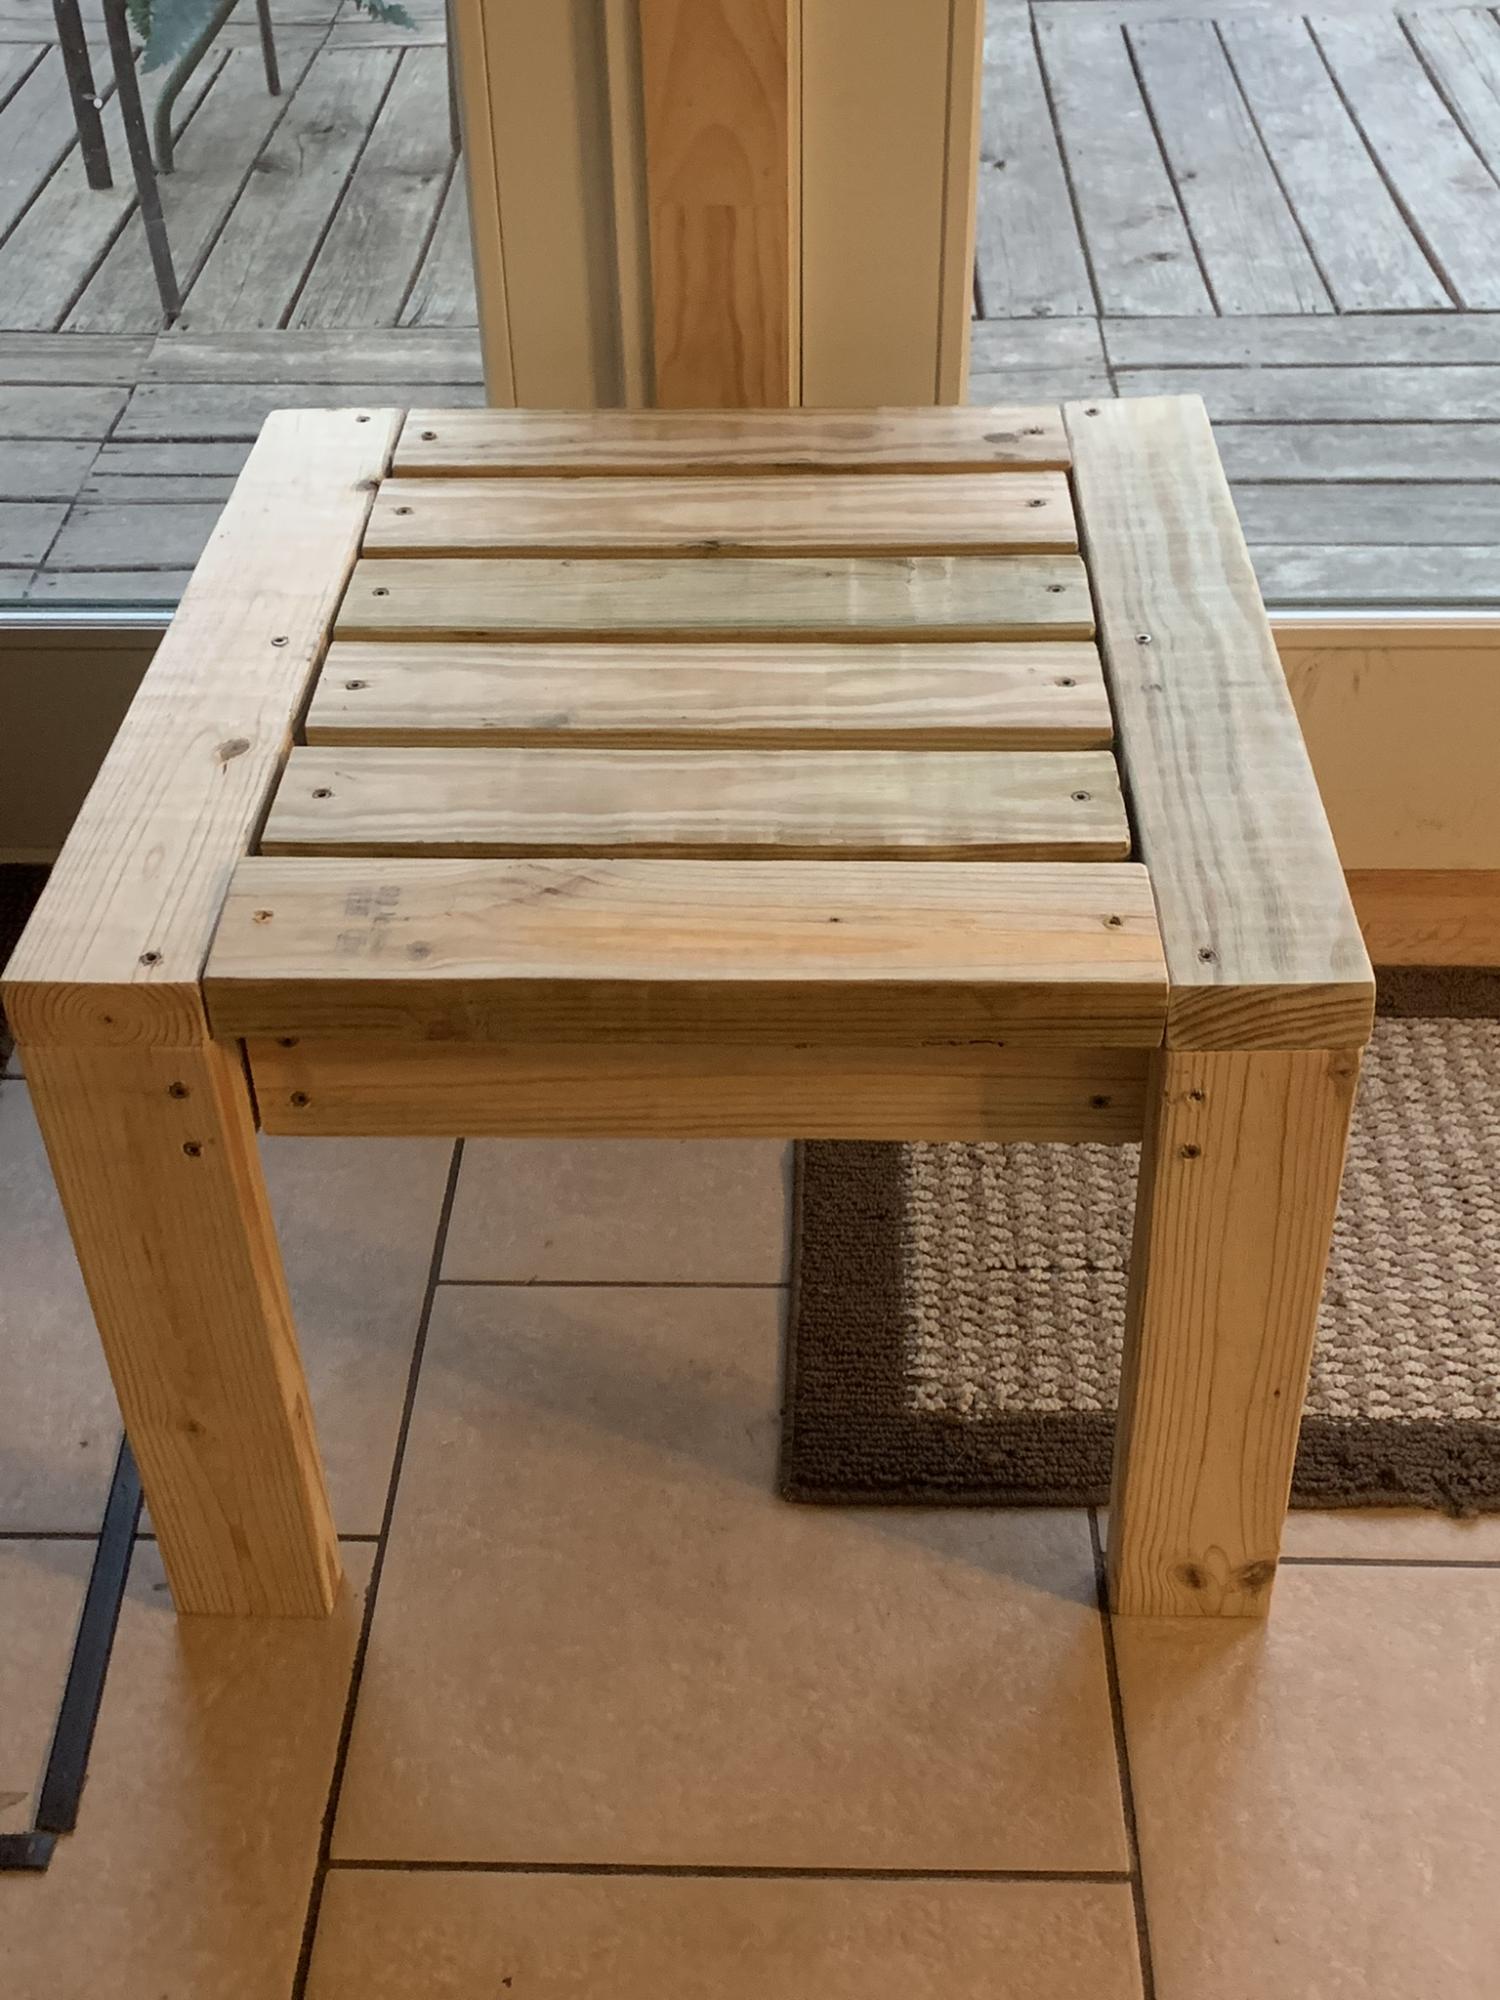
I made these two Ana White outdoor end tables for my patio. Next up will be the matching coffee table
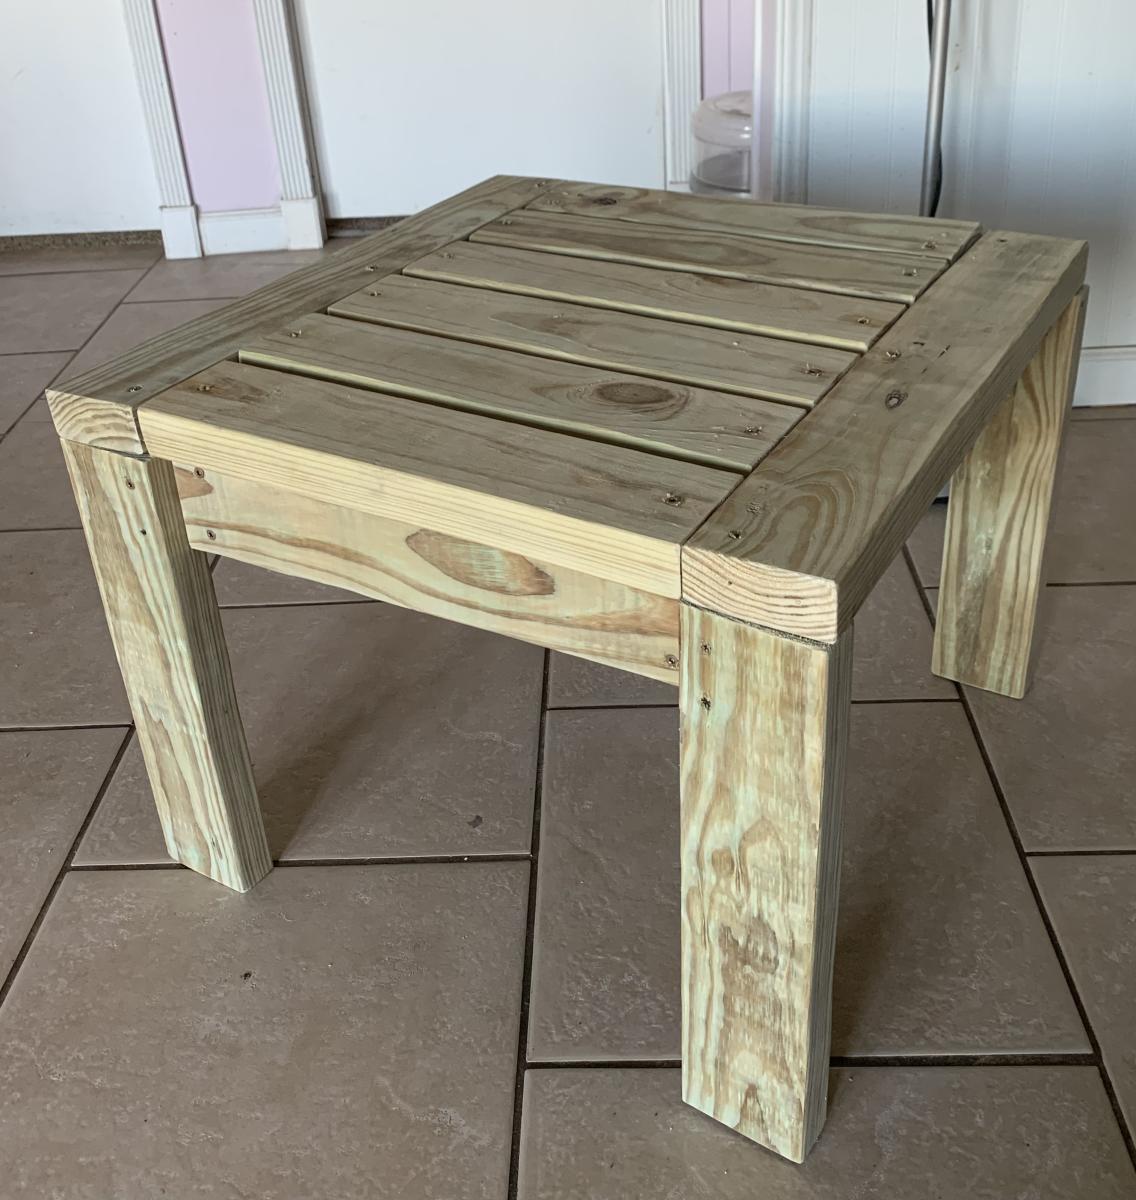
Sun, 01/29/2023 - 16:04
Thanks for sharing, they will be a nice outdoor additon!
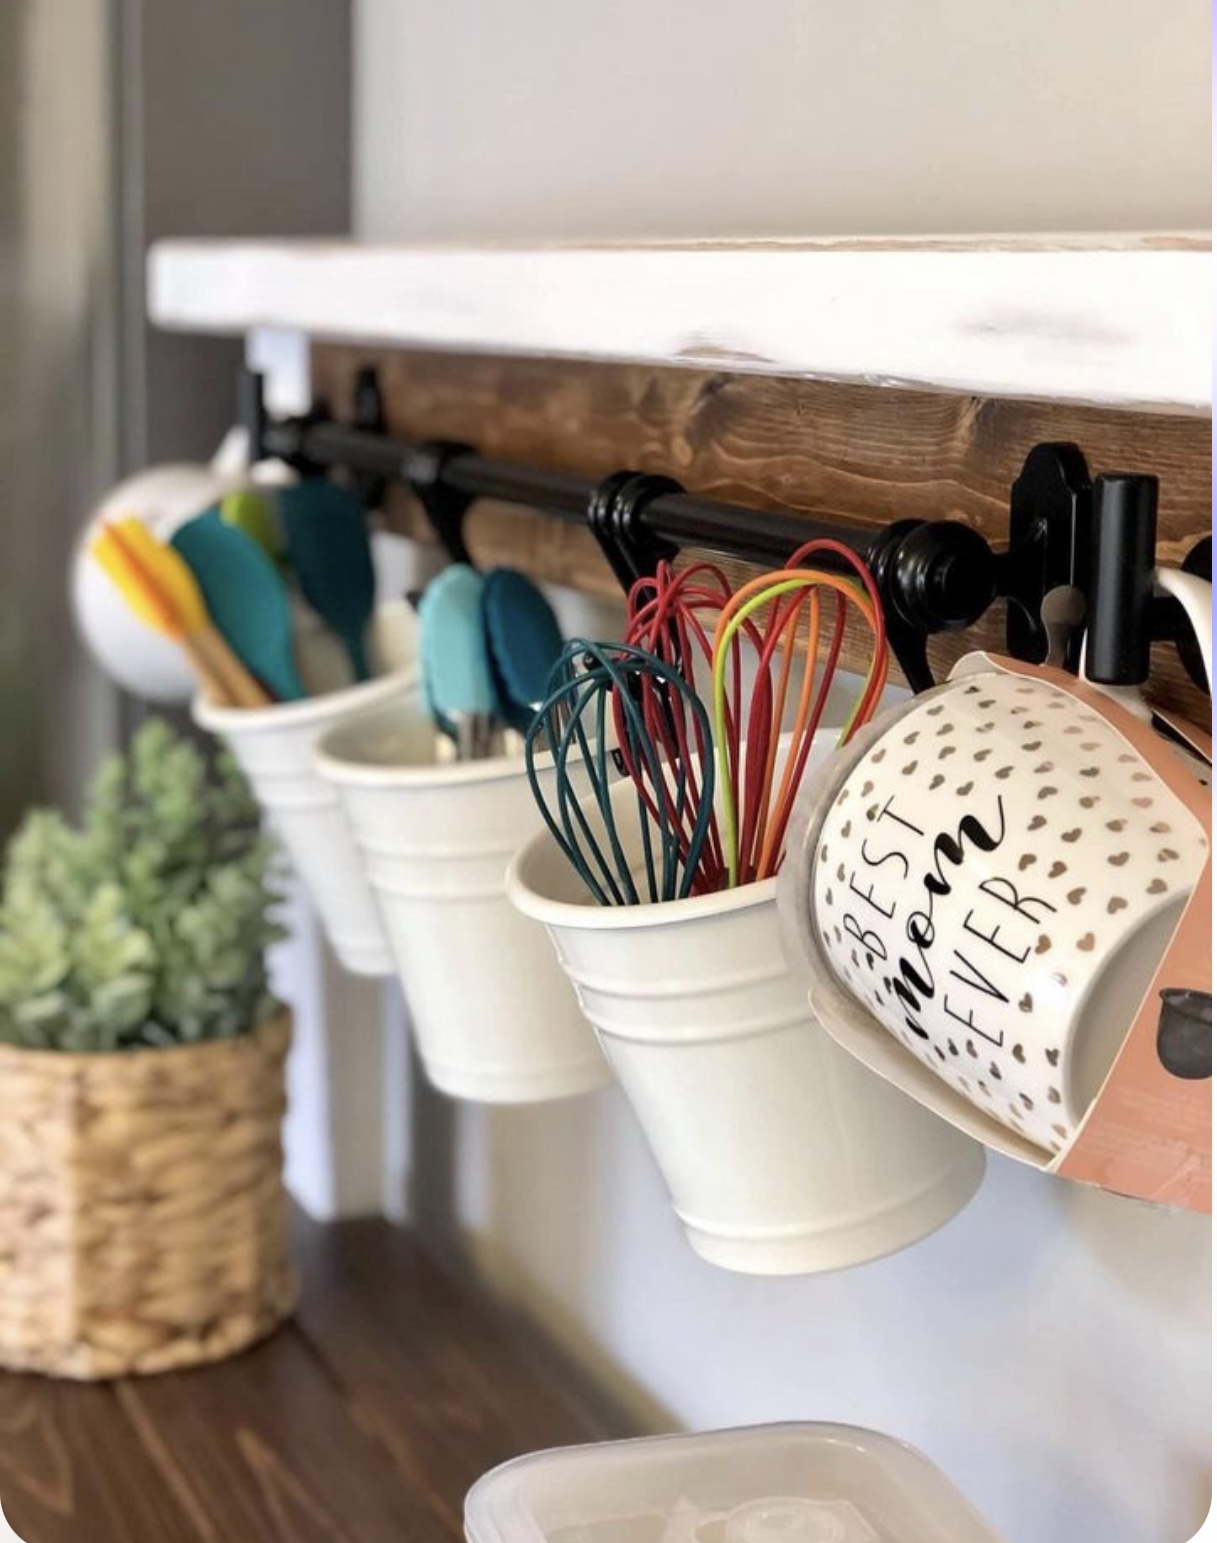
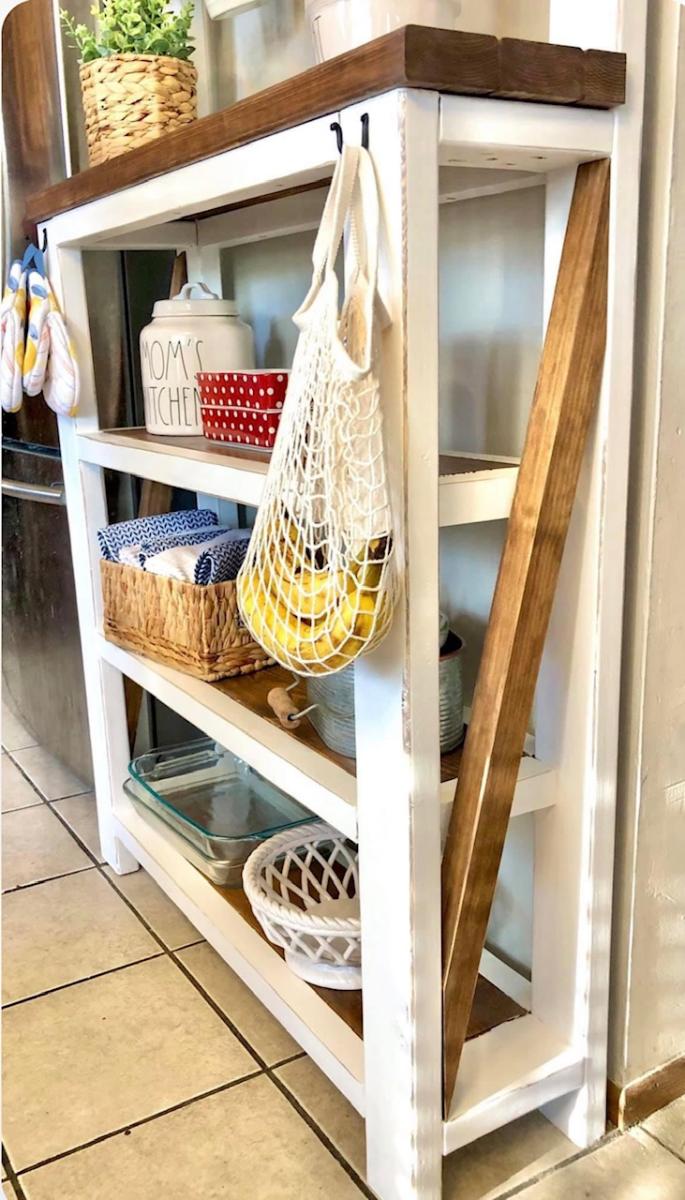
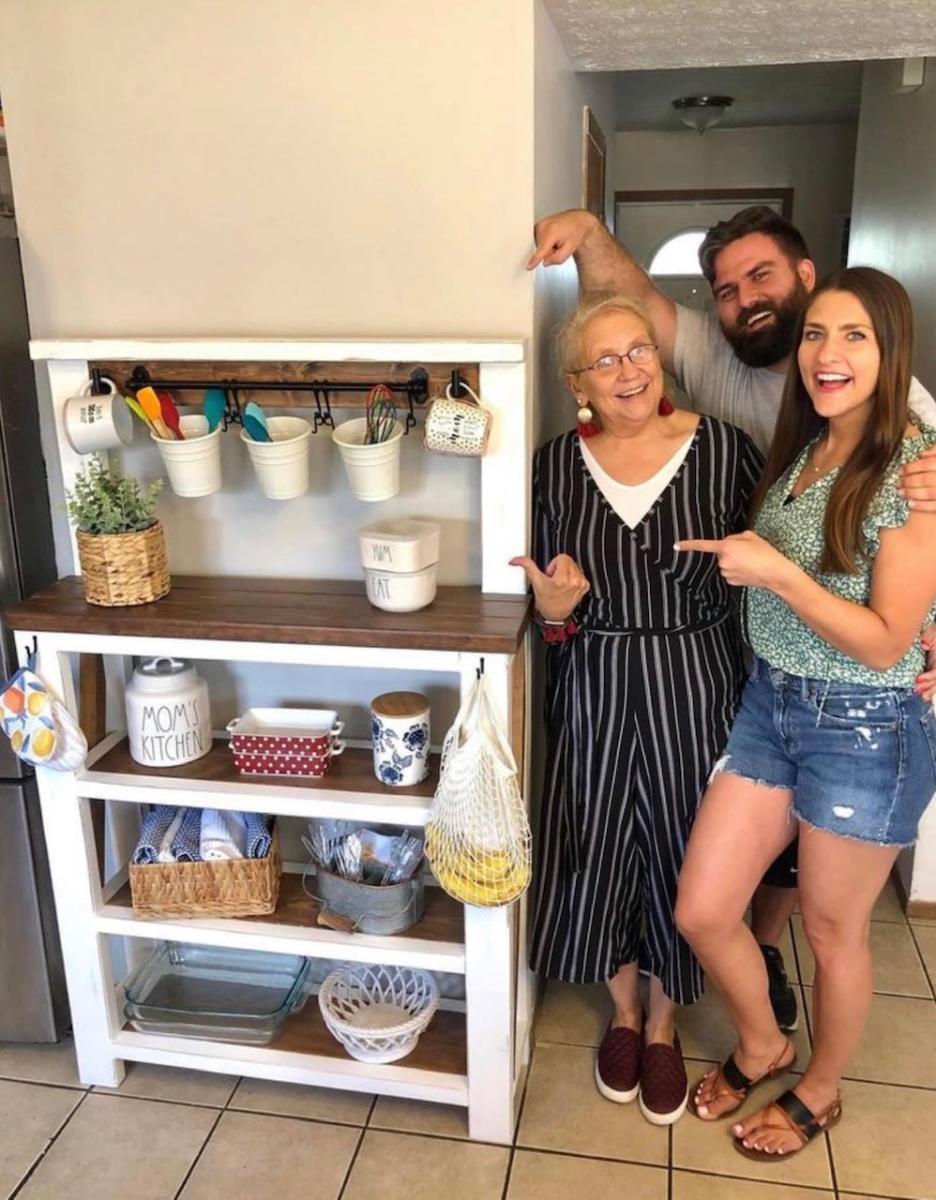
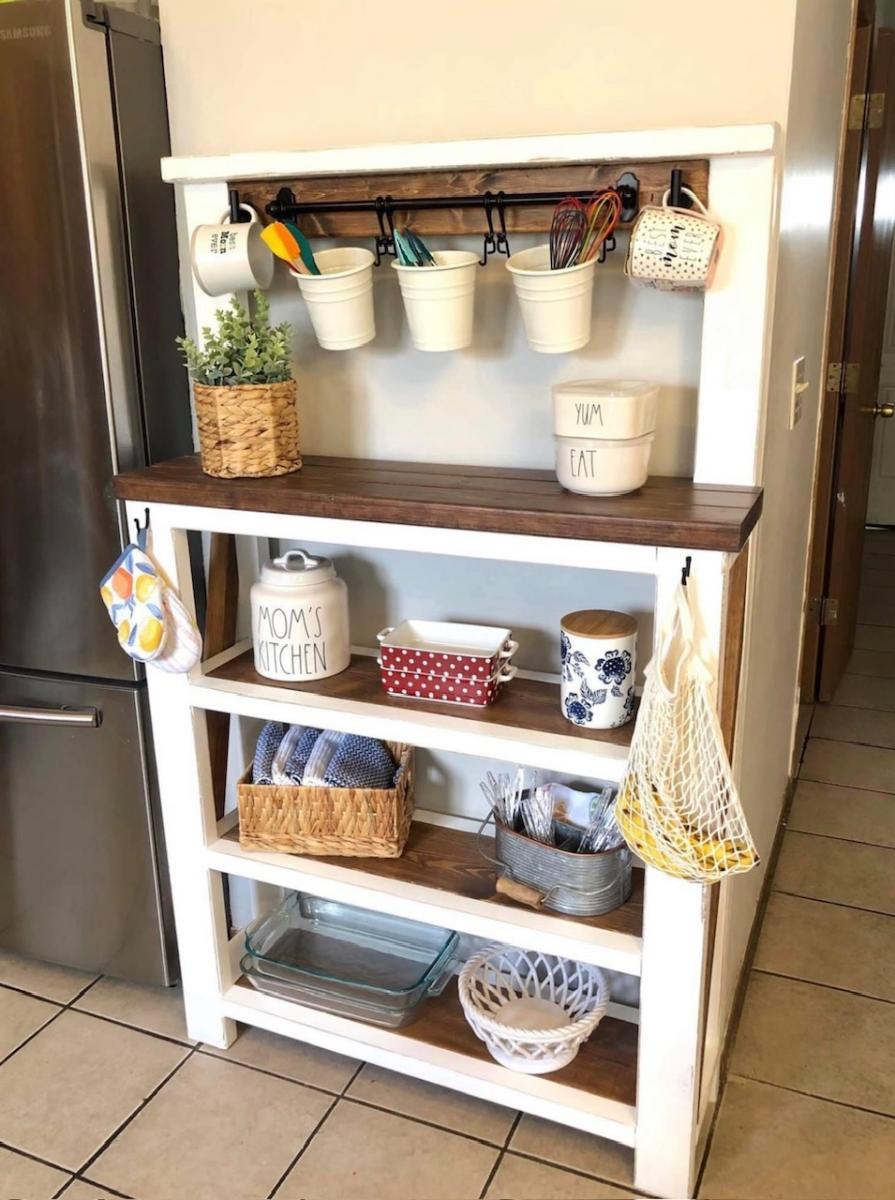
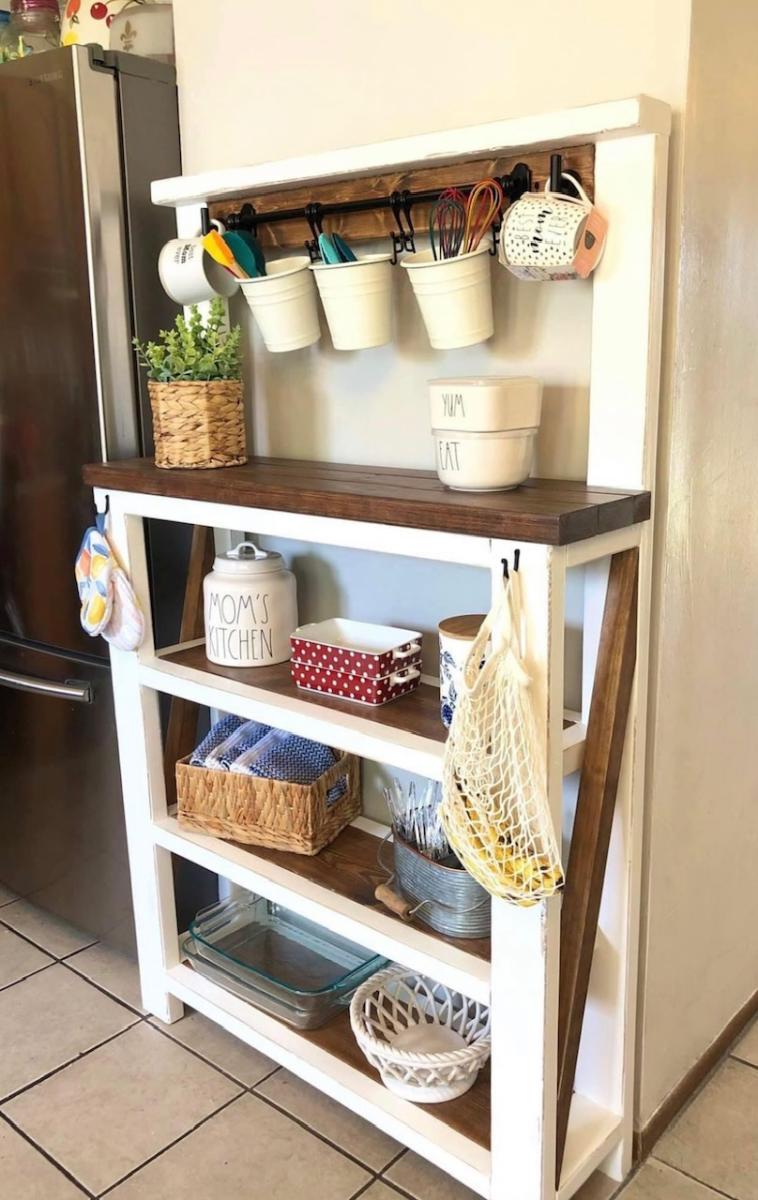
Thanks to you we were able to build my mom a shelf for her kitchen with a combination of two of your plans! My mom loved the top of the “Farmhouse Potting Bench” but also wanted shelves like the “Rustic X Console Table”. We combined the two and adjusted measurements to fit our wall space. We didn’t do a complete X on the side because we wanted it with one slant, but loved how it turned out over all!
Kayla
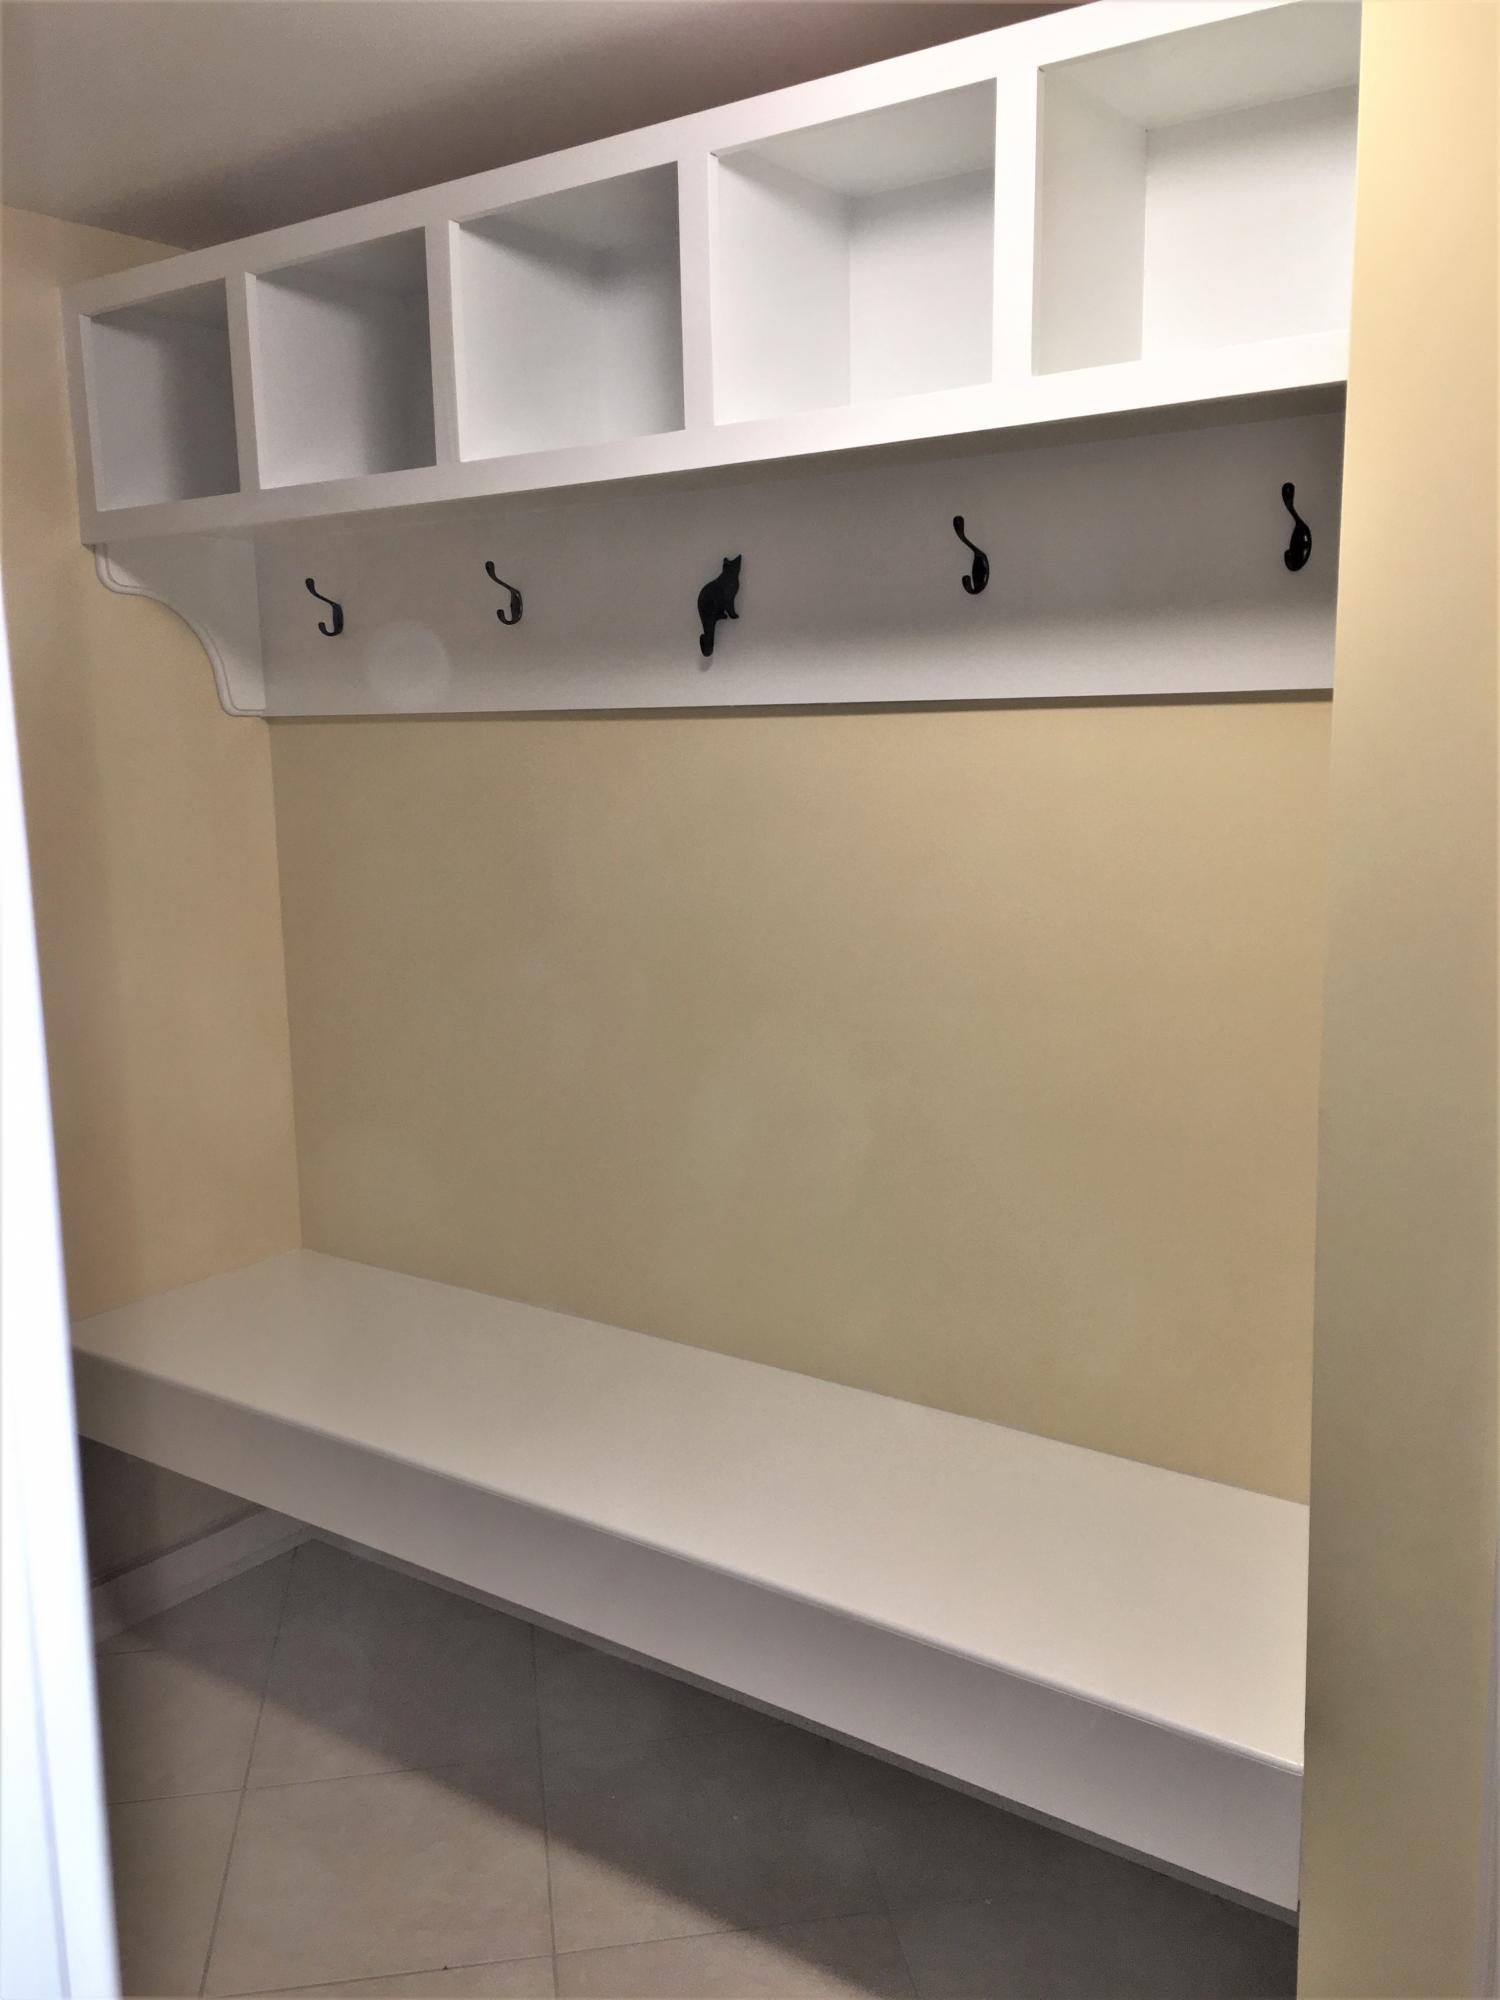
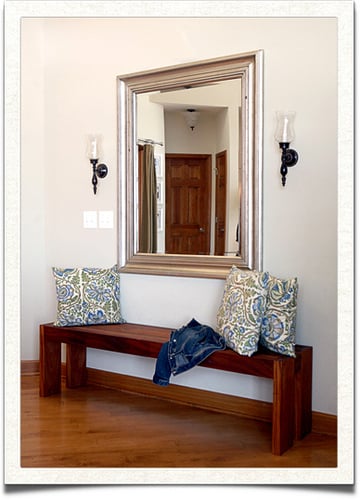
Mudroom bench and organizer.