Laundry Tower

Reader submitted photo
Built from Plan(s)
Reader submitted photo
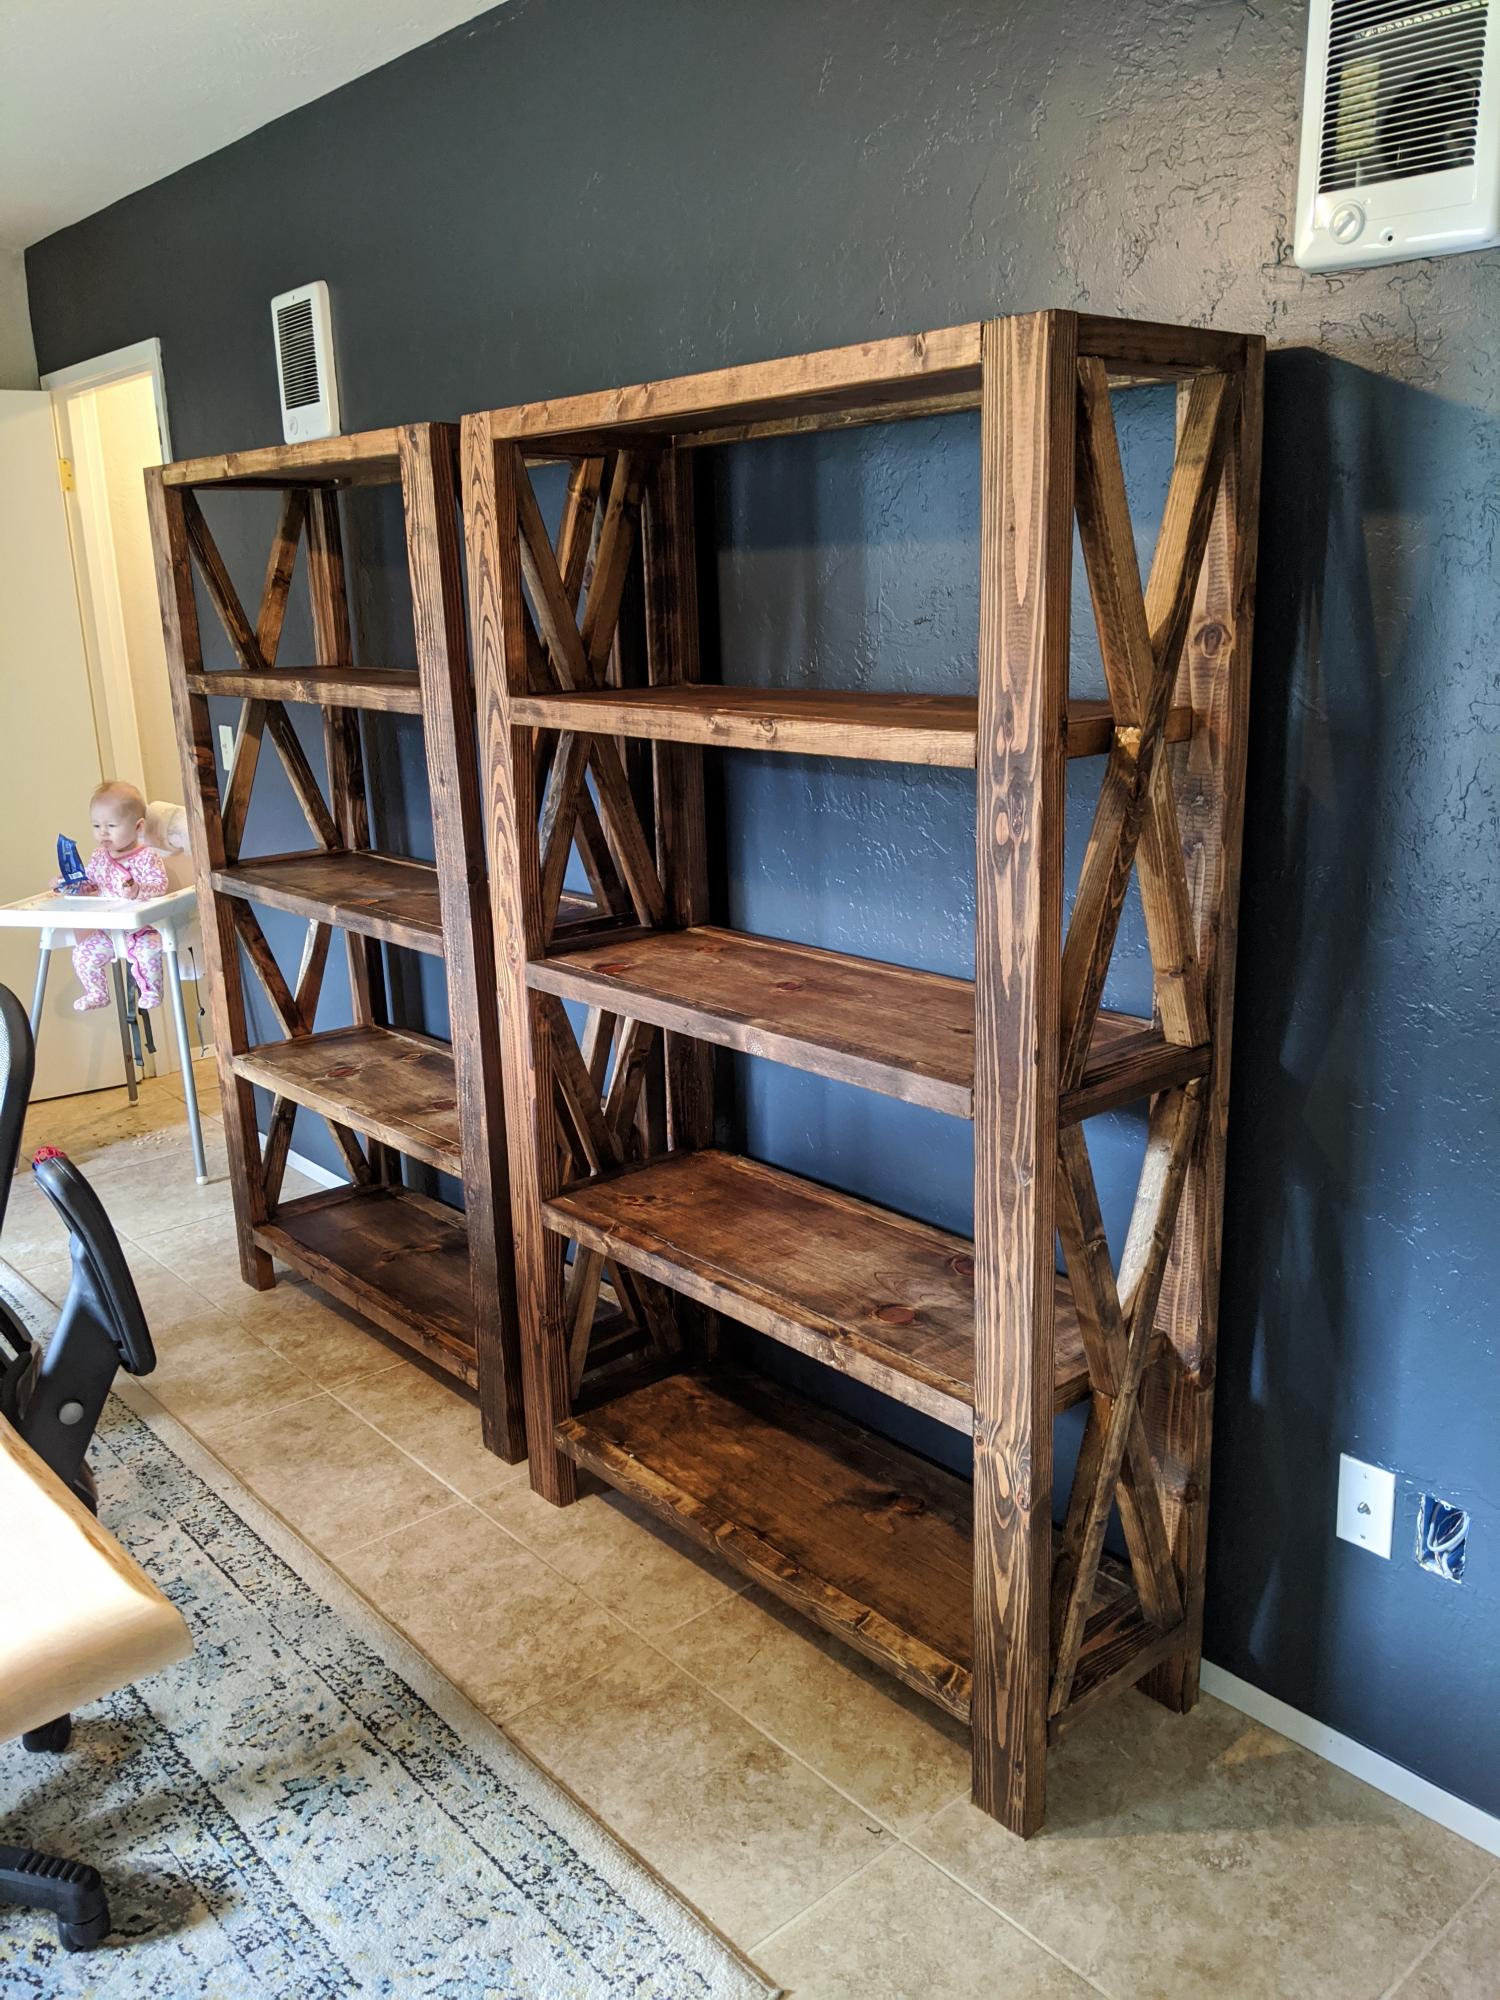
I followed the Rustic X Tall Bookshelf plan to make a set of bookshelves for my husband for Christmas! It was my second ever woodworking project. The plan was really easy to follow and so fun to make! I ended up using an additional shelf piece on the very top for a more modern spin on it. I also bought a pocket hole jig to use on this project. I'm happy with how it turned out!
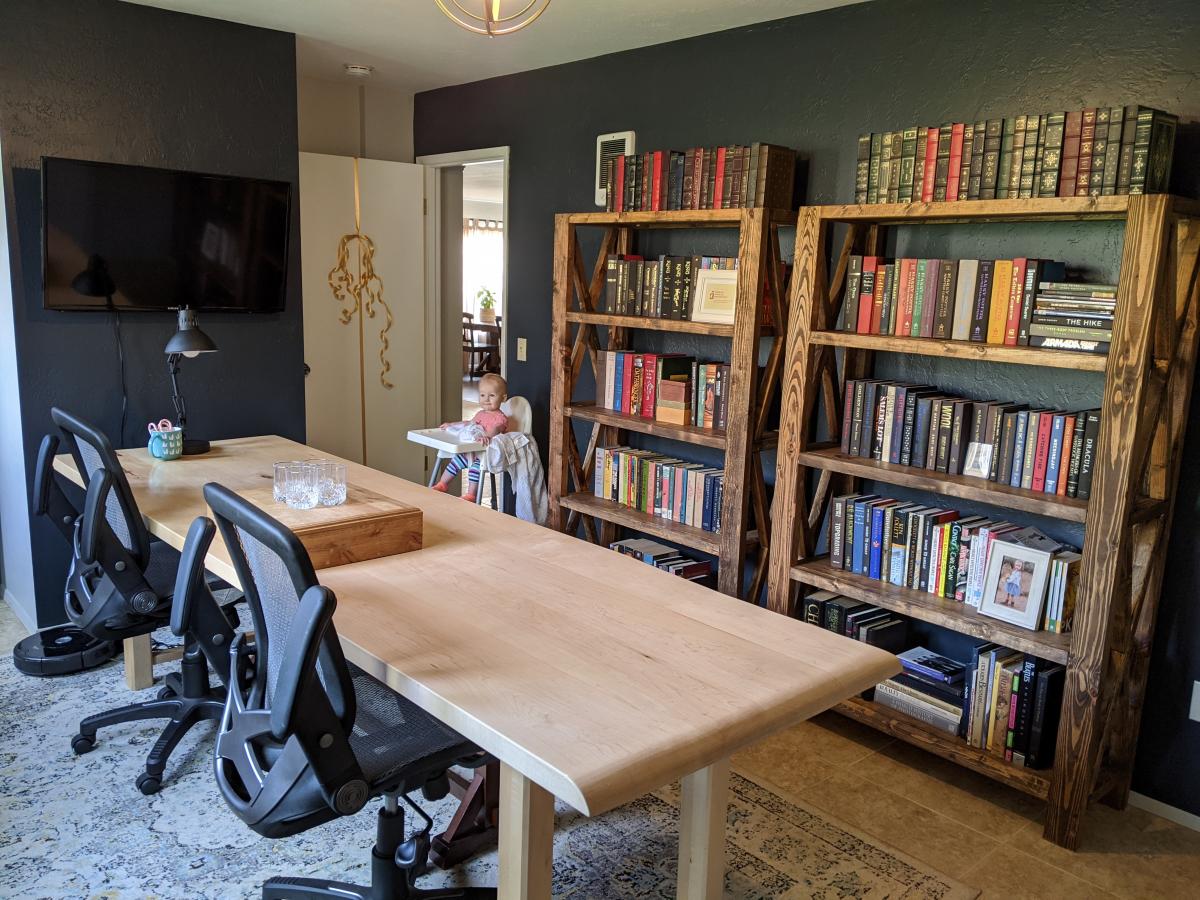

SUCH a great project for my first ever build! The plans were so simple and fun to follow. I altered them slightly to measure 50" long so it would fit perfectly in my entry way. I used the Varathane wood stain in Dark Walnut. Can't wait for my next project! Ana, thank you for giving first time builders the tools and confidence to build beautiful furniture!

Great Plan! Loved how easy it was to build and how little the cost was.
Tue, 07/28/2020 - 09:52
Did you use decking screws or pocket holes for the visible portion of the couch?
Sun, 08/01/2021 - 18:40
Looks amazing! What method did you use (pocket holes, dowels, deck screws, etc) to join the visible portions like the arms?
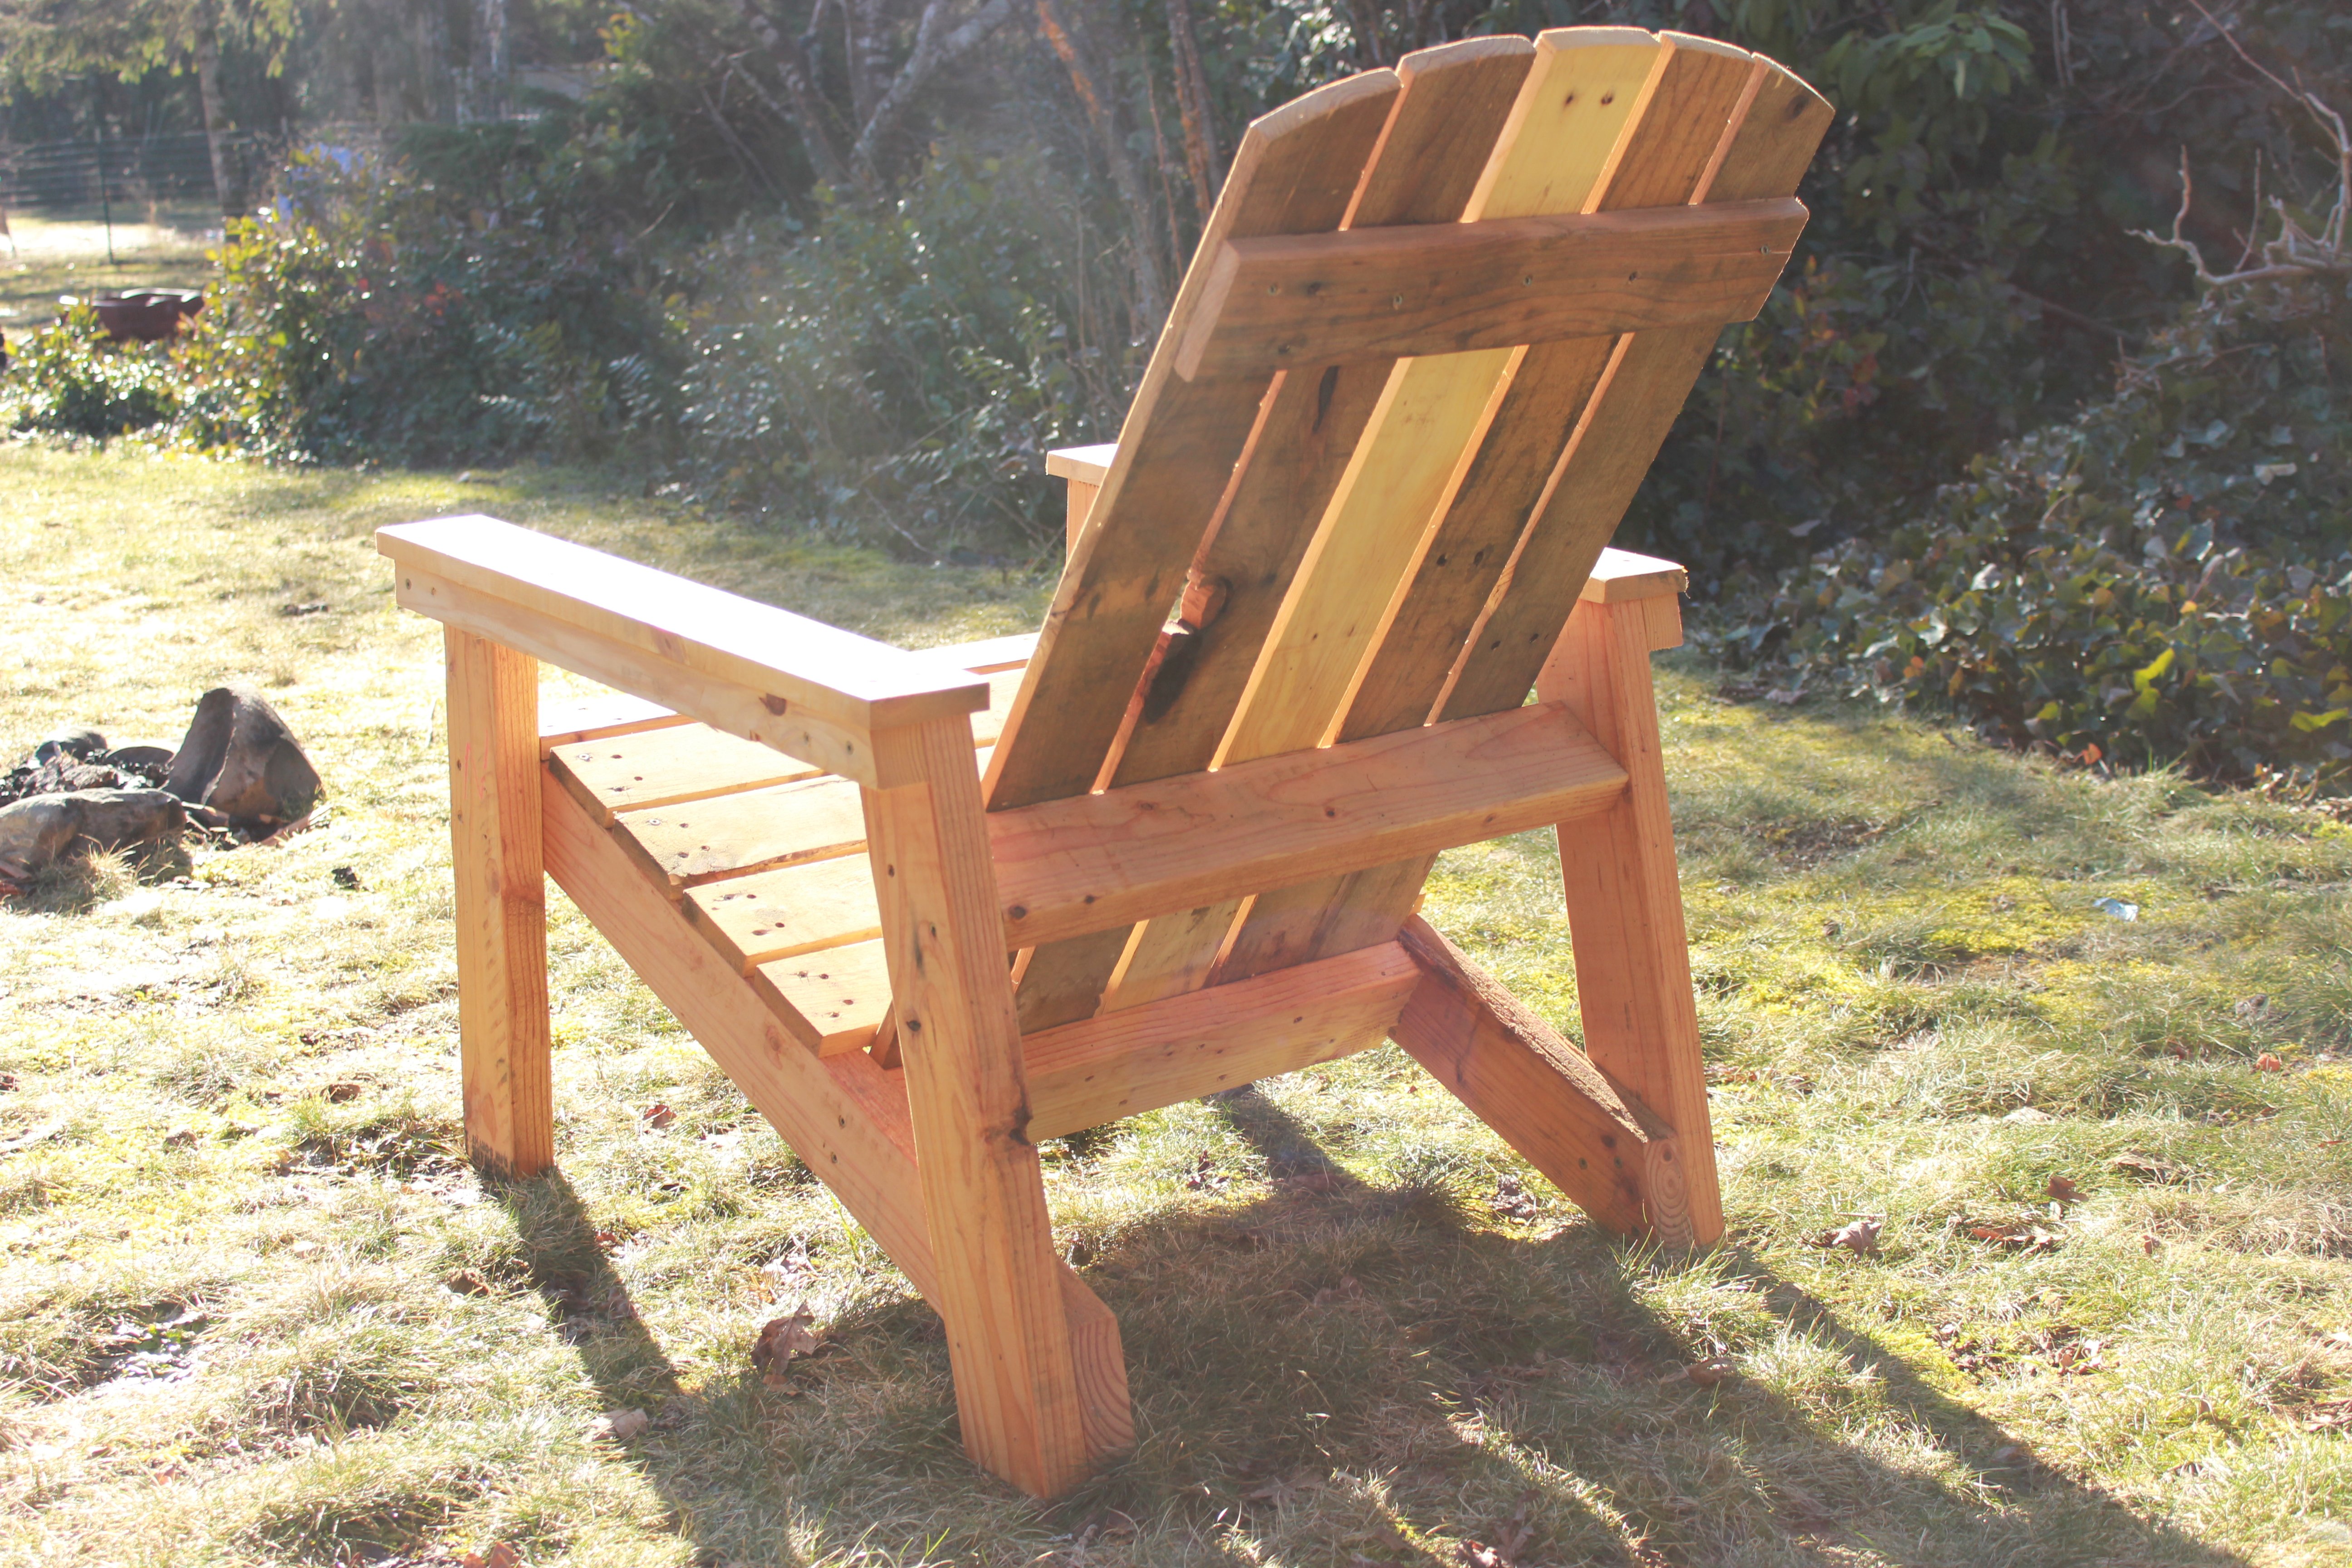
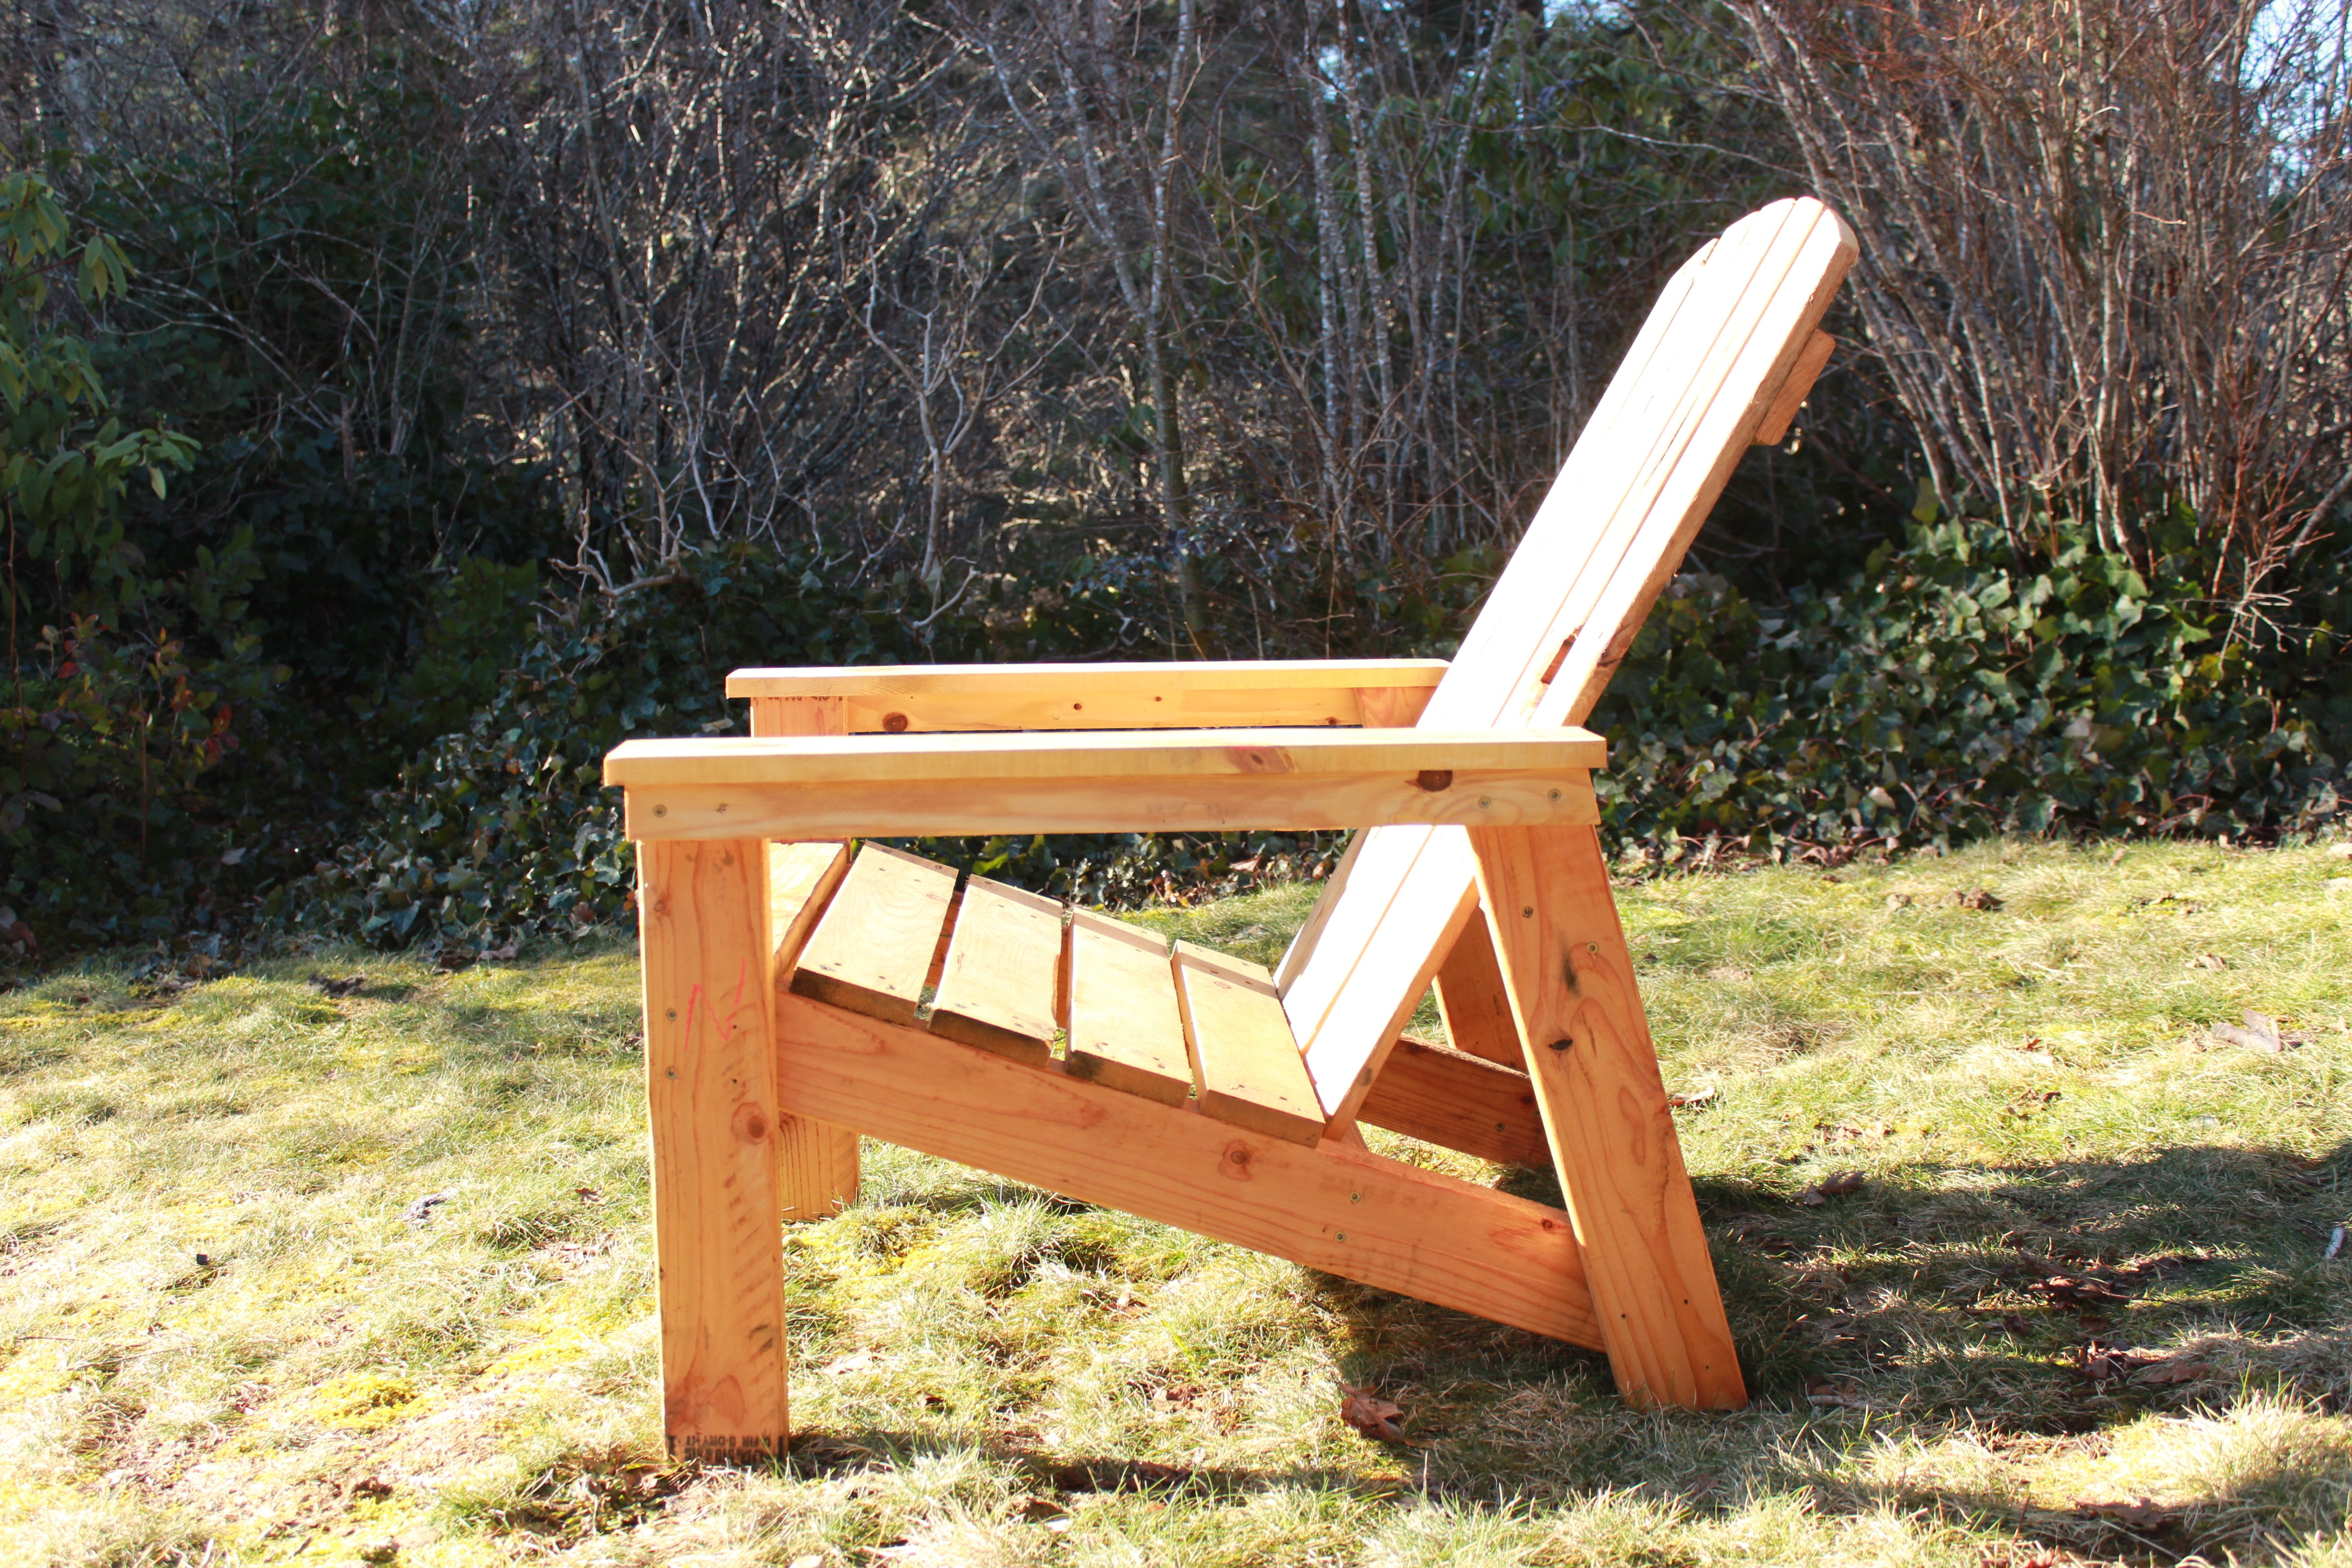
I decided to try and use the plans on Ana's site but with a twist. I wanted to limit myself to using only pallets. I think it turned out great! I can't upload all the photos because they exceed the maximum size limit. If I was able to you could see how each chair is slightly different and has a lot of character. I finished them with a waterproofing oil which I highly recommend over other finishes.

Mon, 04/10/2017 - 08:51
This is exactly what I'm looking for !! Fantastic build and re-purposing is always better.
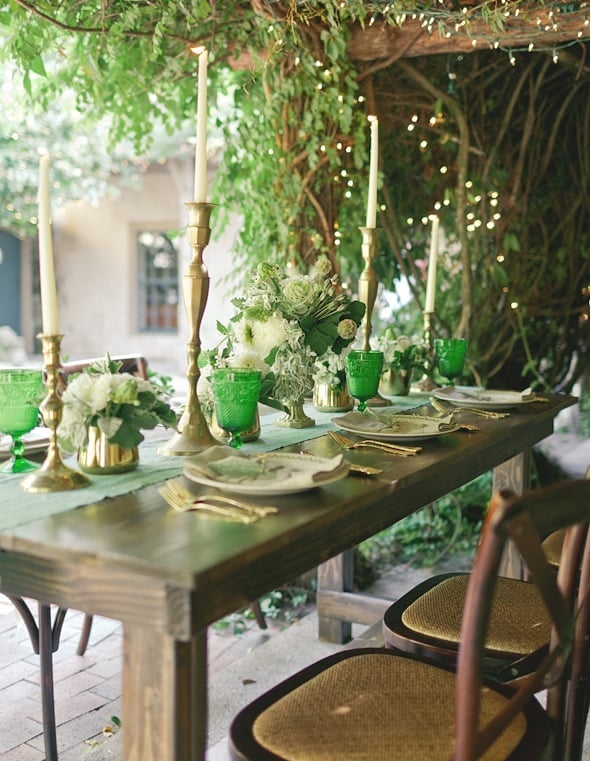
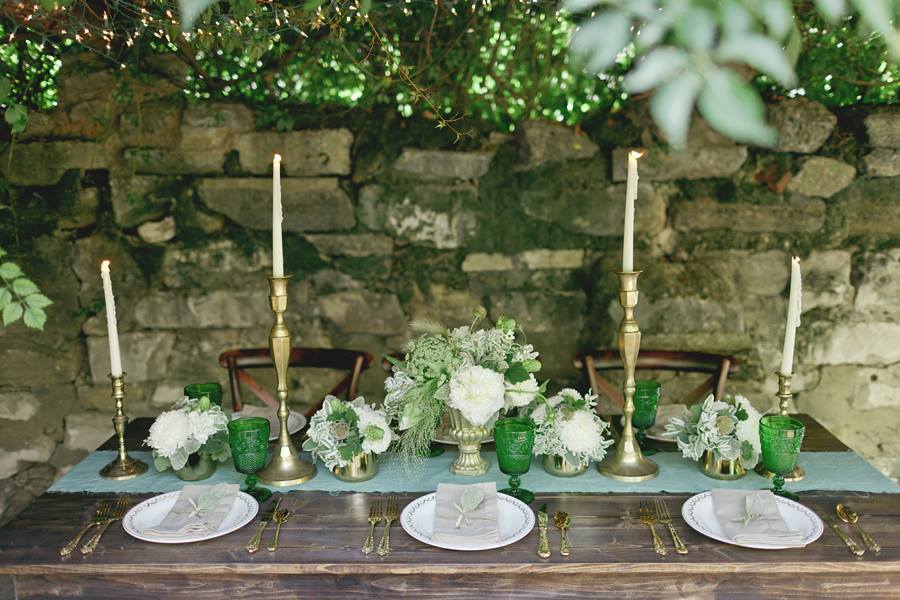
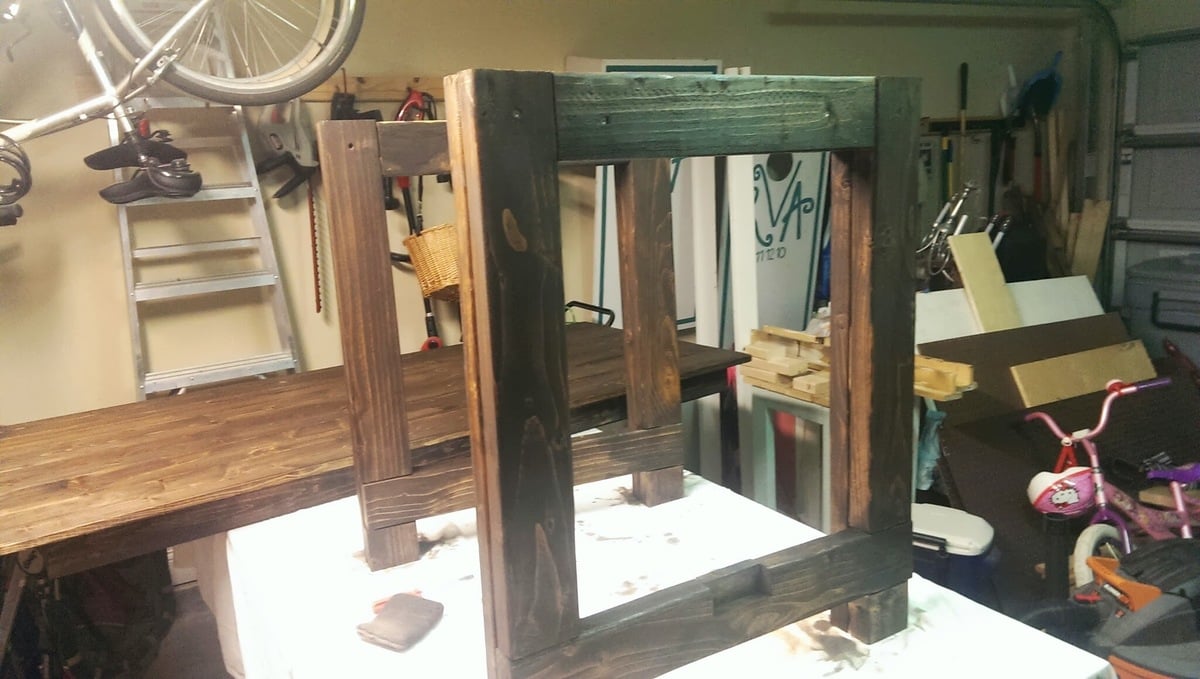
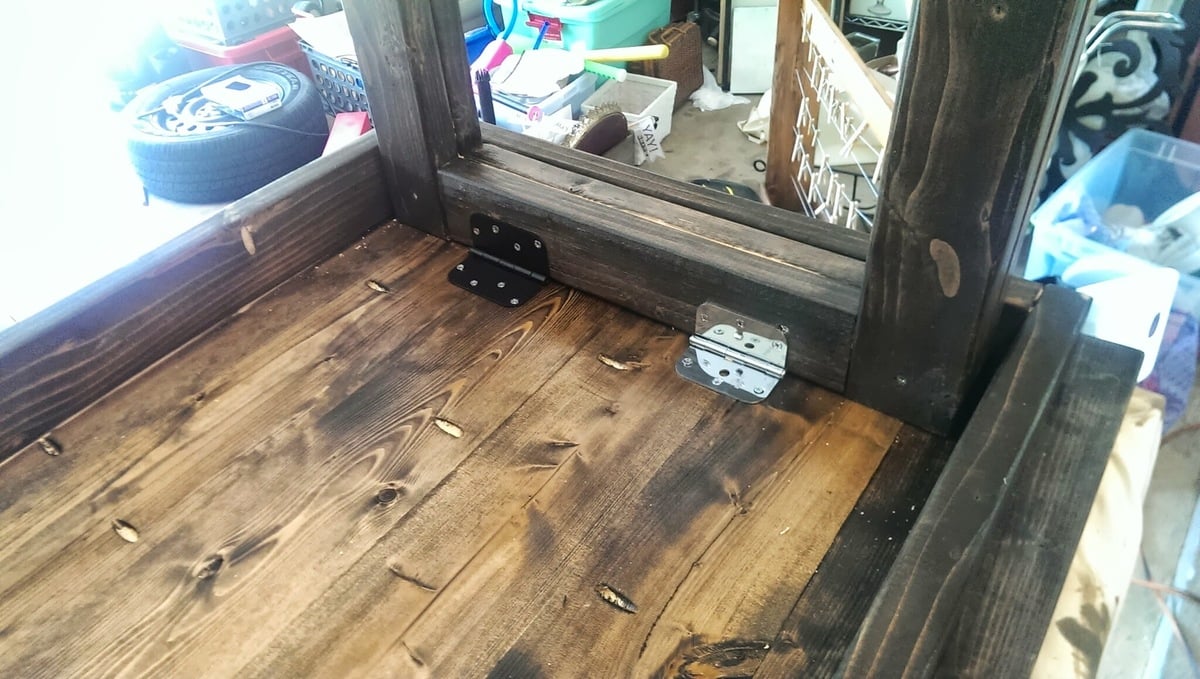
I recently published my first foldable farmhouse table last week here: http://ana-white.com/2013/06/foldable-farmhouse-table The first one I made was very heavy because I used 2x6 tops and 4x4 legs. I decided to make another one that would be lighter and easier to transport. The plans are basically the same just instead I used 1x6 for the top and put 2x4s together for the legs. I also shorted the length by about a foot. The only issue with making the table shorter length is that the legs don't fold completely flush. You could easily make the legs short enough to fold flush, but then the table was a little too short from the ground up for us. The same as before I simply used kreg joints to join the top boards together. I then made a 2x4 frame and attached it to the bottom. I made each of the legs separately by joining 2x4s together and sanding everything down. Everything was stained before putting the legs on using Miniwax Dark walnut stain. I used 2 coats of Miniwax water based clear coat to seal it. A notch was cut out on each of the bottom 2x4 supports on the legs and I glued in a small piece of wood cut to size. These are so I can put in a 2x4 support board under the table so that the legs do not fold in on themselves when it is standing up. The legs are just attached using door hinges you can buy in packs in the hardware section. Be careful when screwing into the 1x6 top not to use too long of screws or else you will over screw and have them come through into your table top. Table design was by Amber Veatch Designs and photographed by Andi Mans Photography
Tue, 07/07/2015 - 06:41
We have built something very similar and we have a good bit of wobble at the top, even though the stretcher down the center of the table is holding solid in there and secred with clasps. Were thinking of some sort of sliding pin into the top of the leg to the apron. Anyone run into this before?
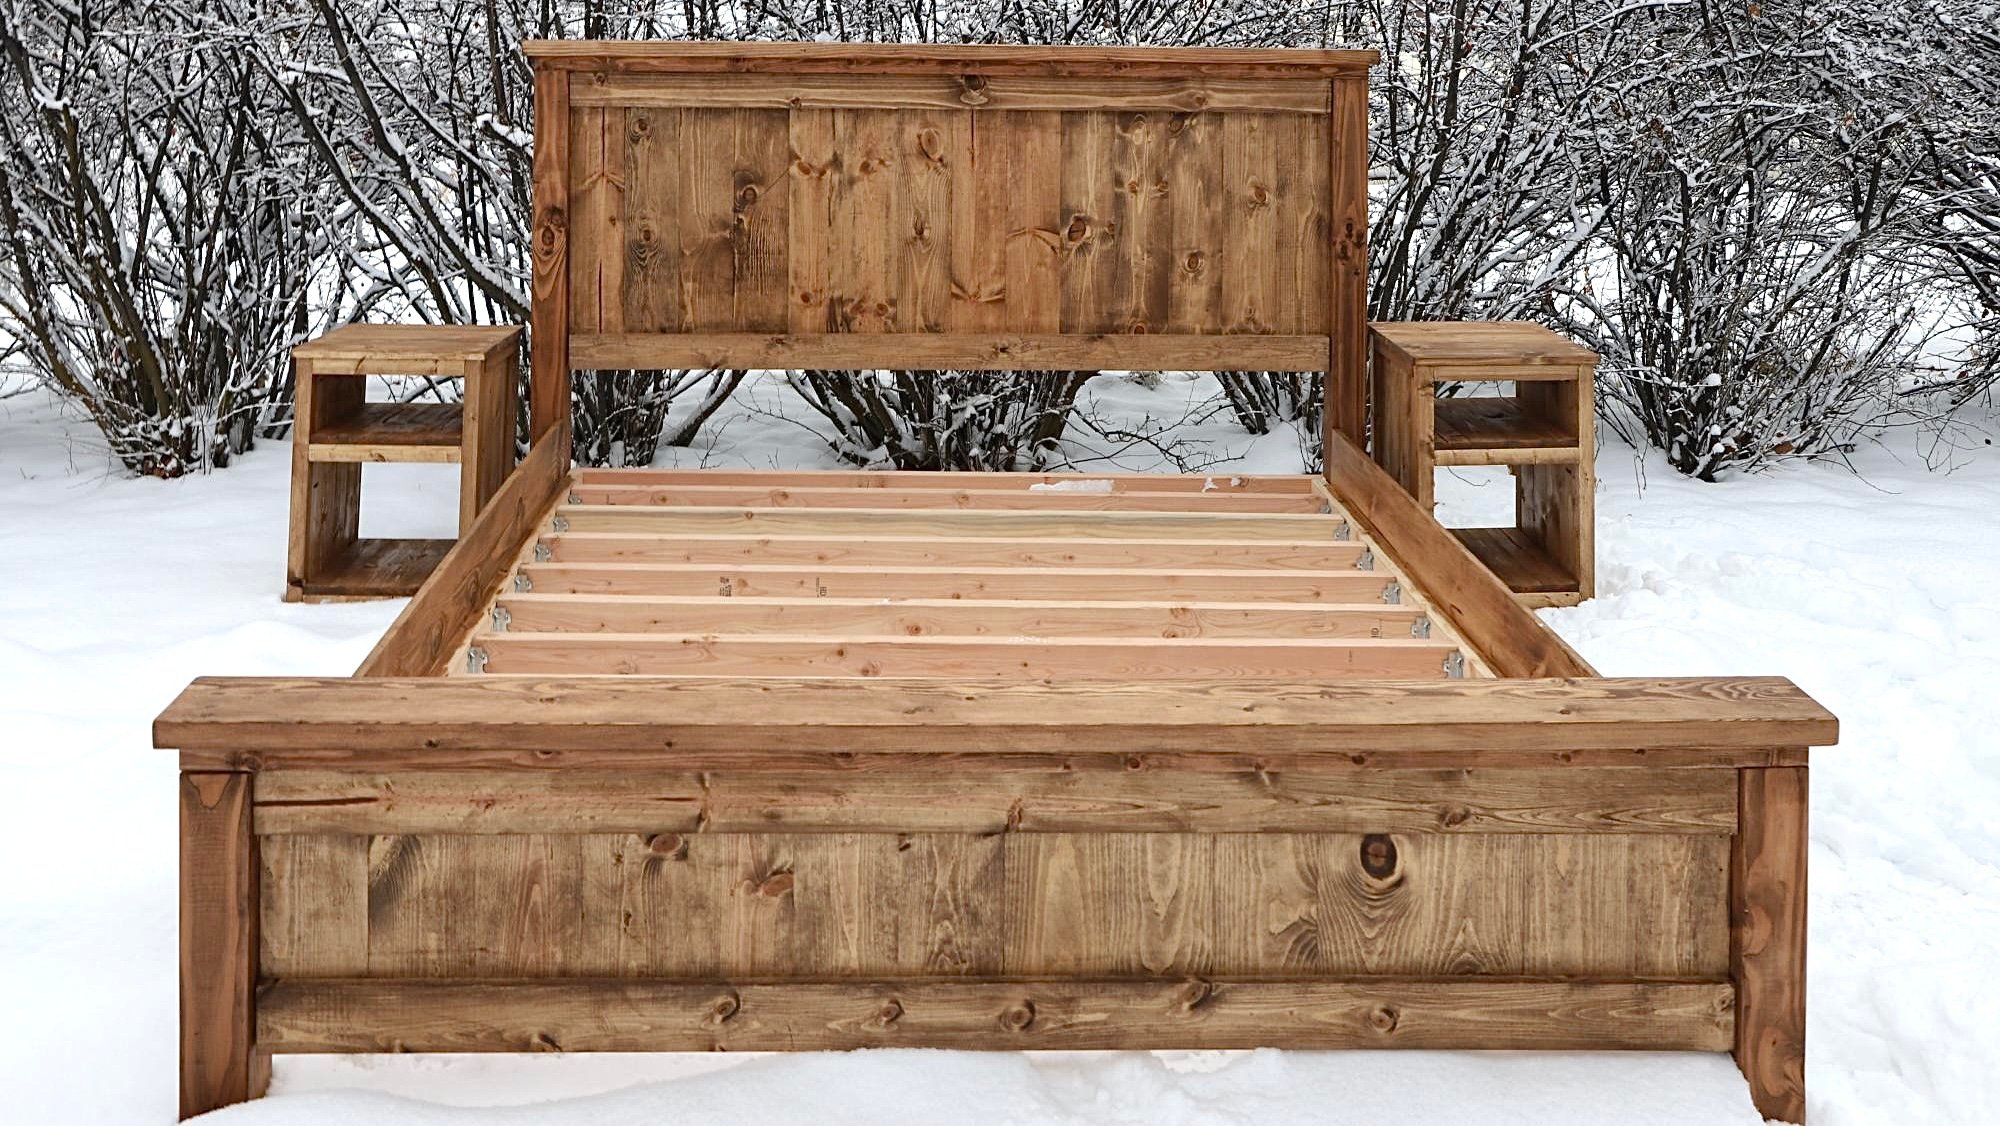
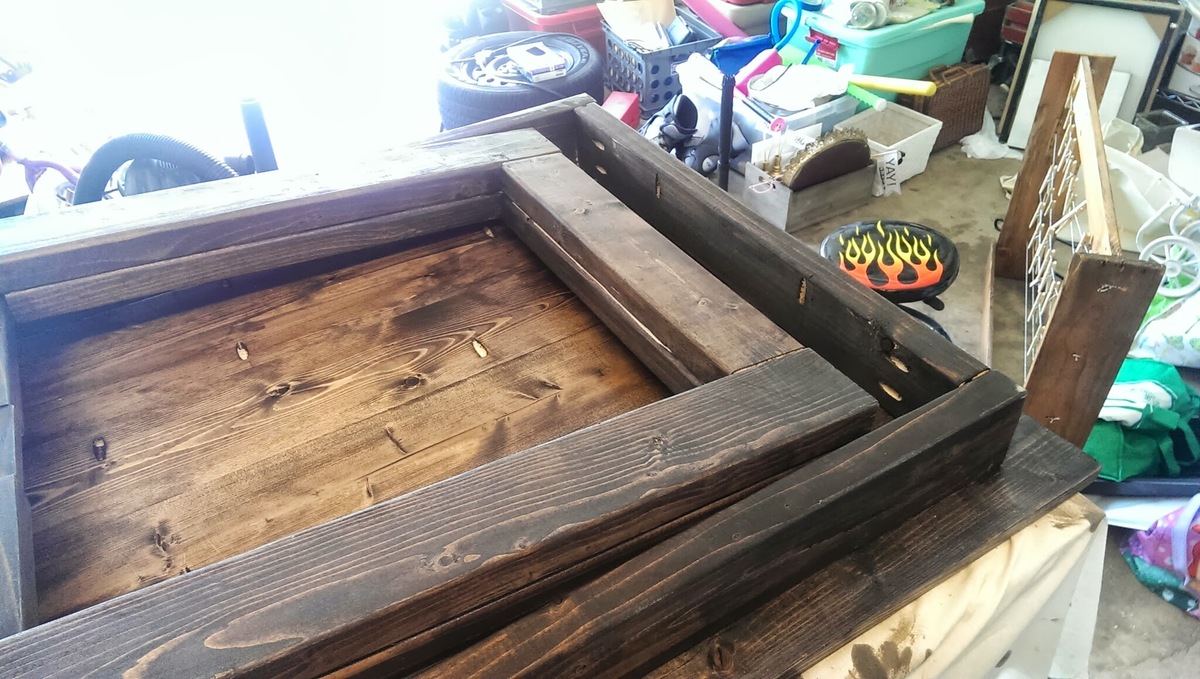
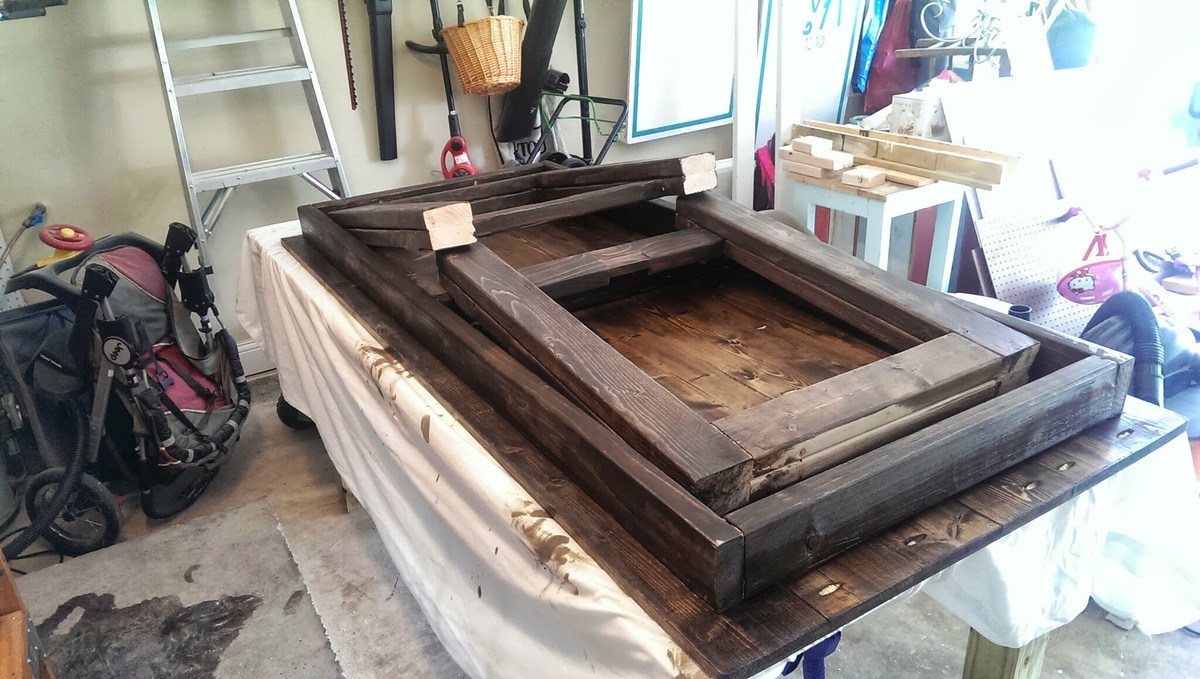
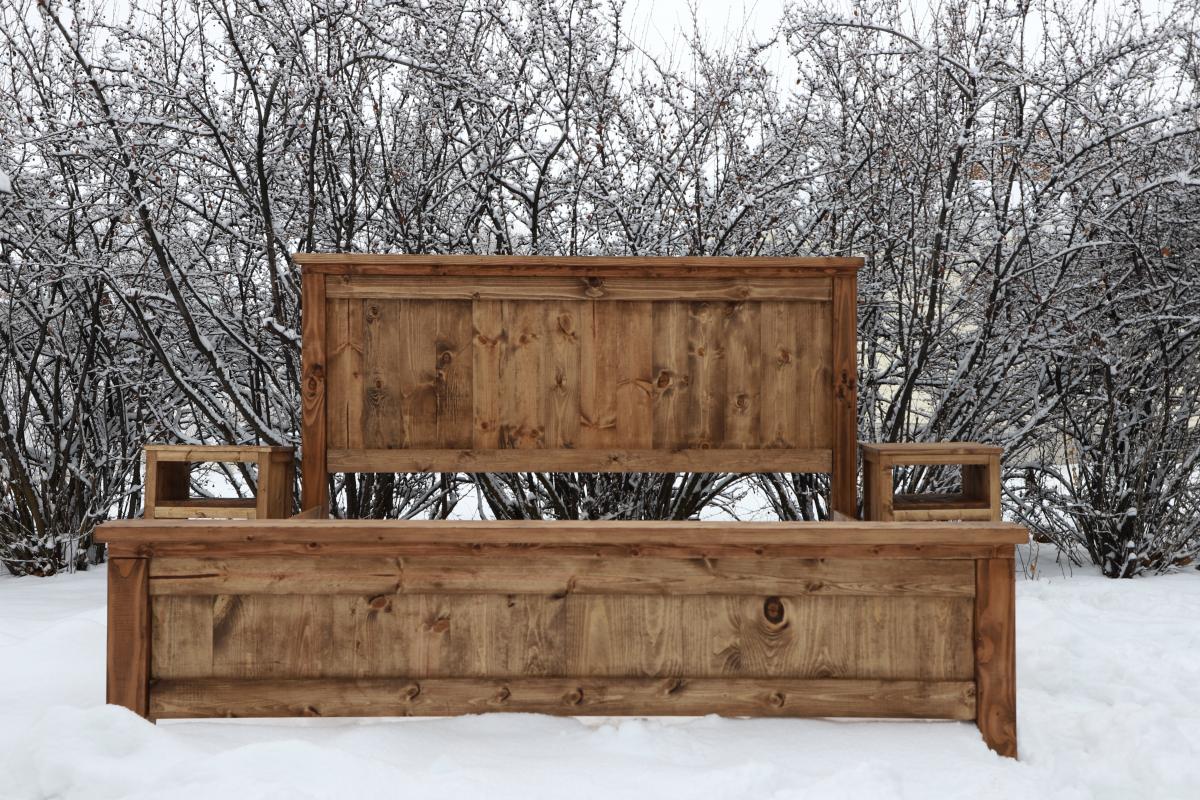
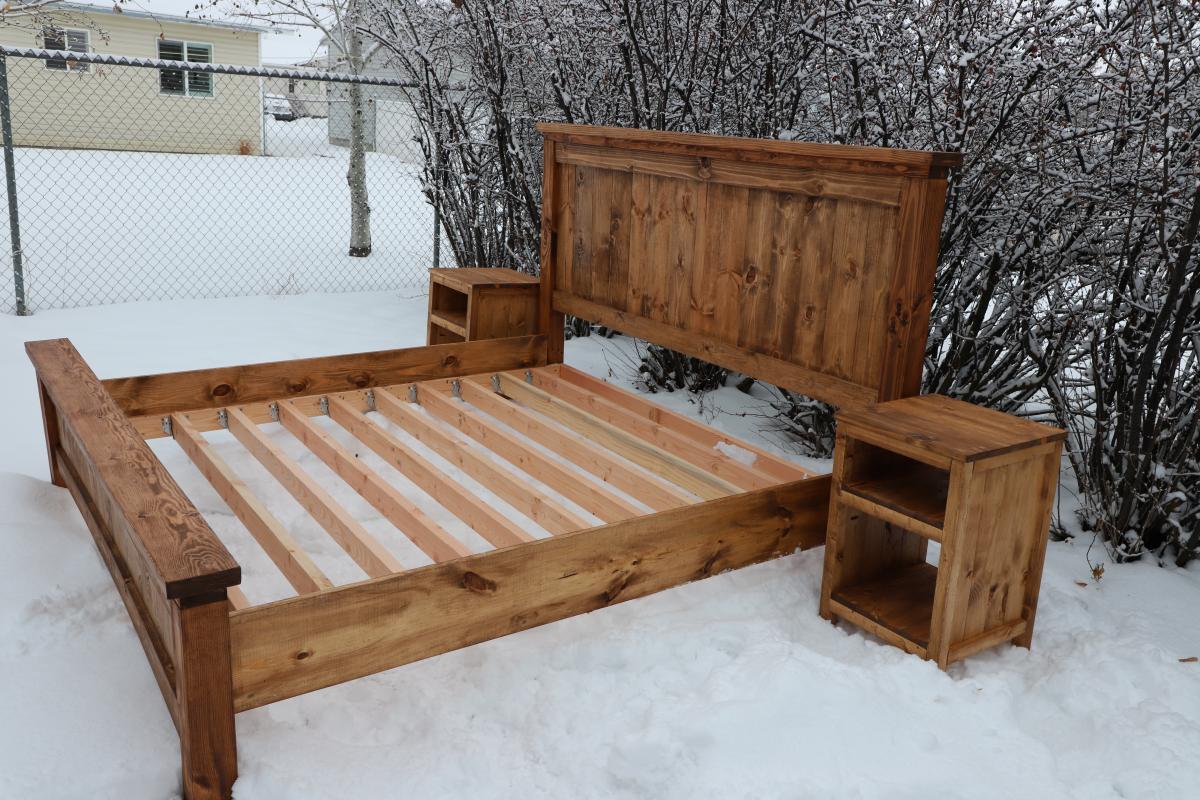
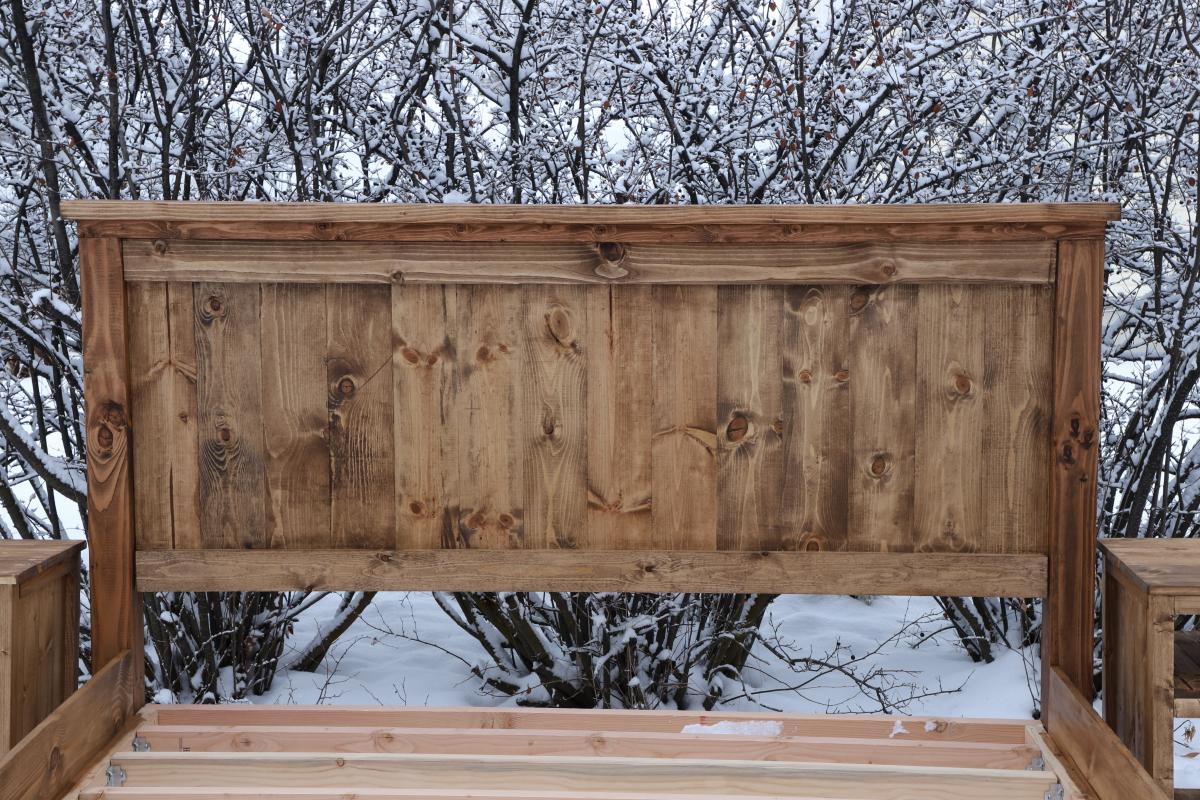
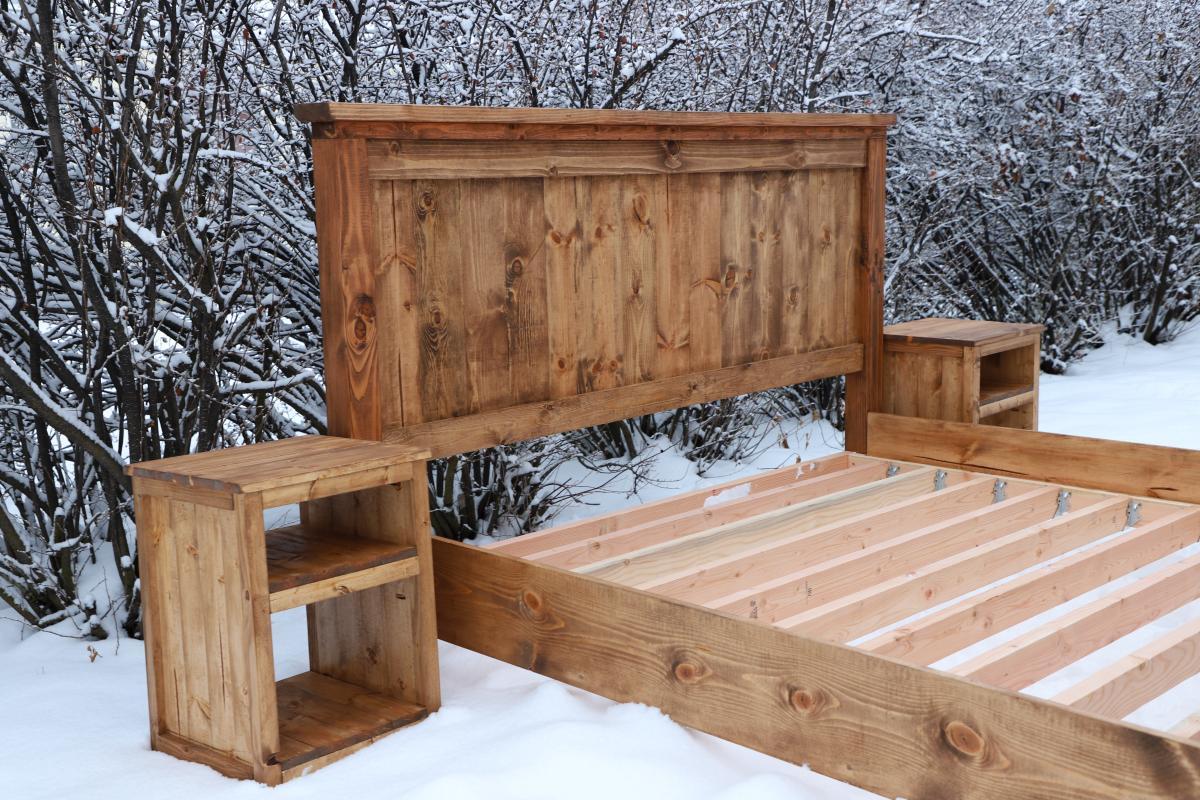
Since developing a love for woodworking I’ve began building things for other people. This particular bed frame I built for a couple who are rebuilding their home after it unfortunately burned down. It’s a beautiful farmhouse home out in the country, and this bed frame fits perfectly in their new home.
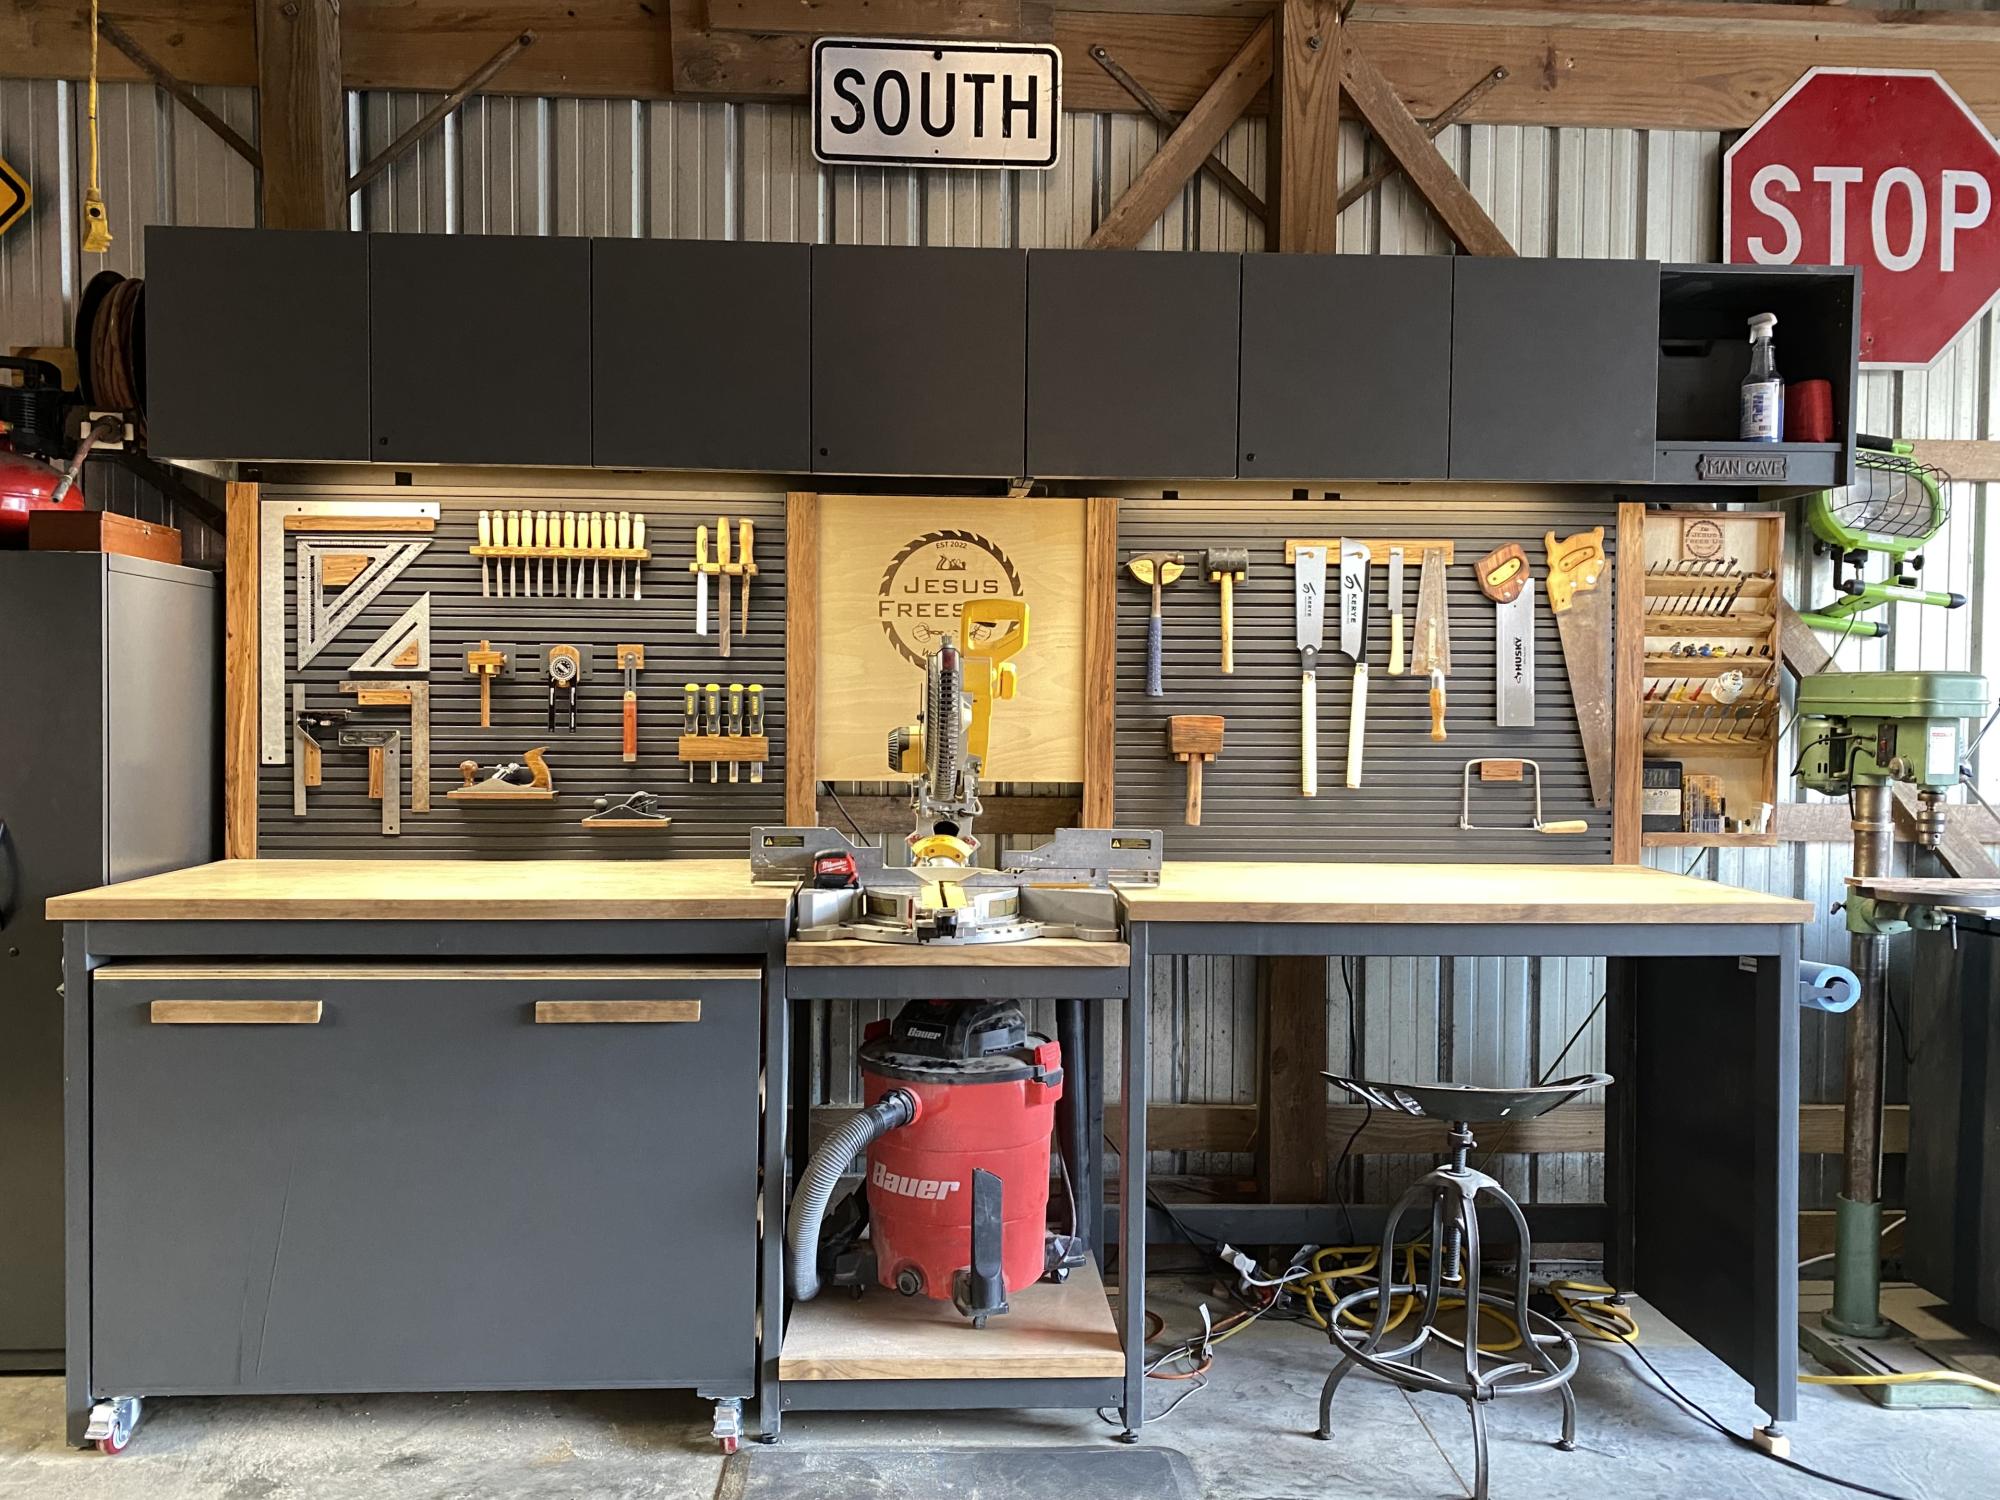
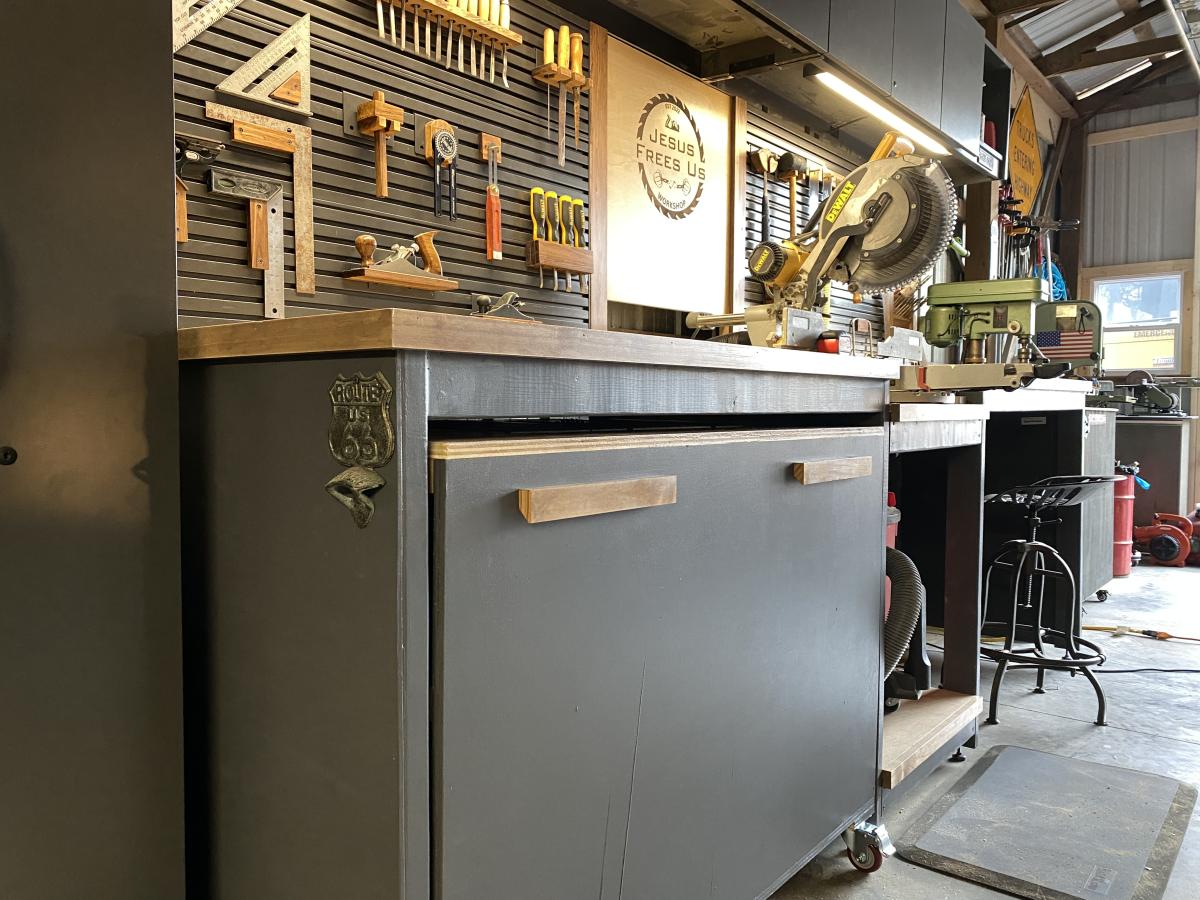
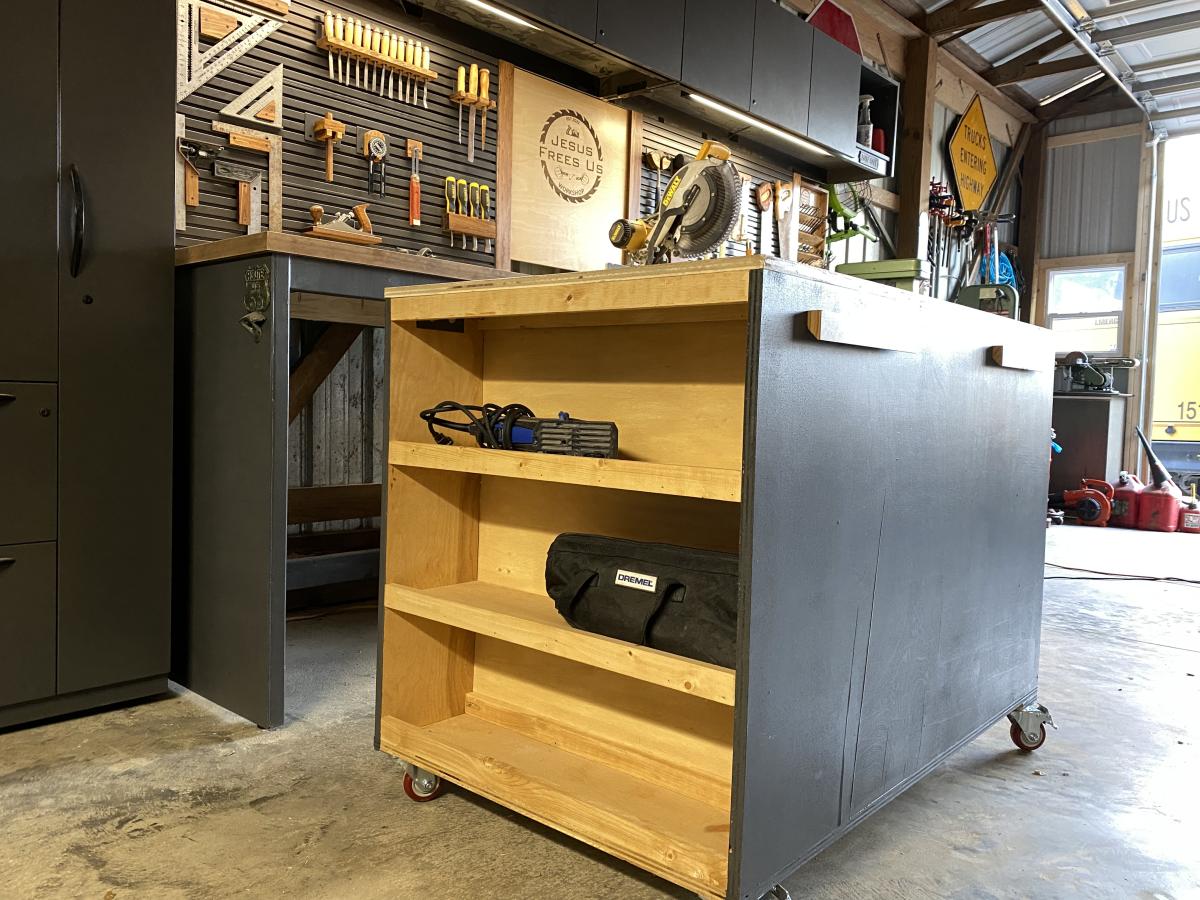
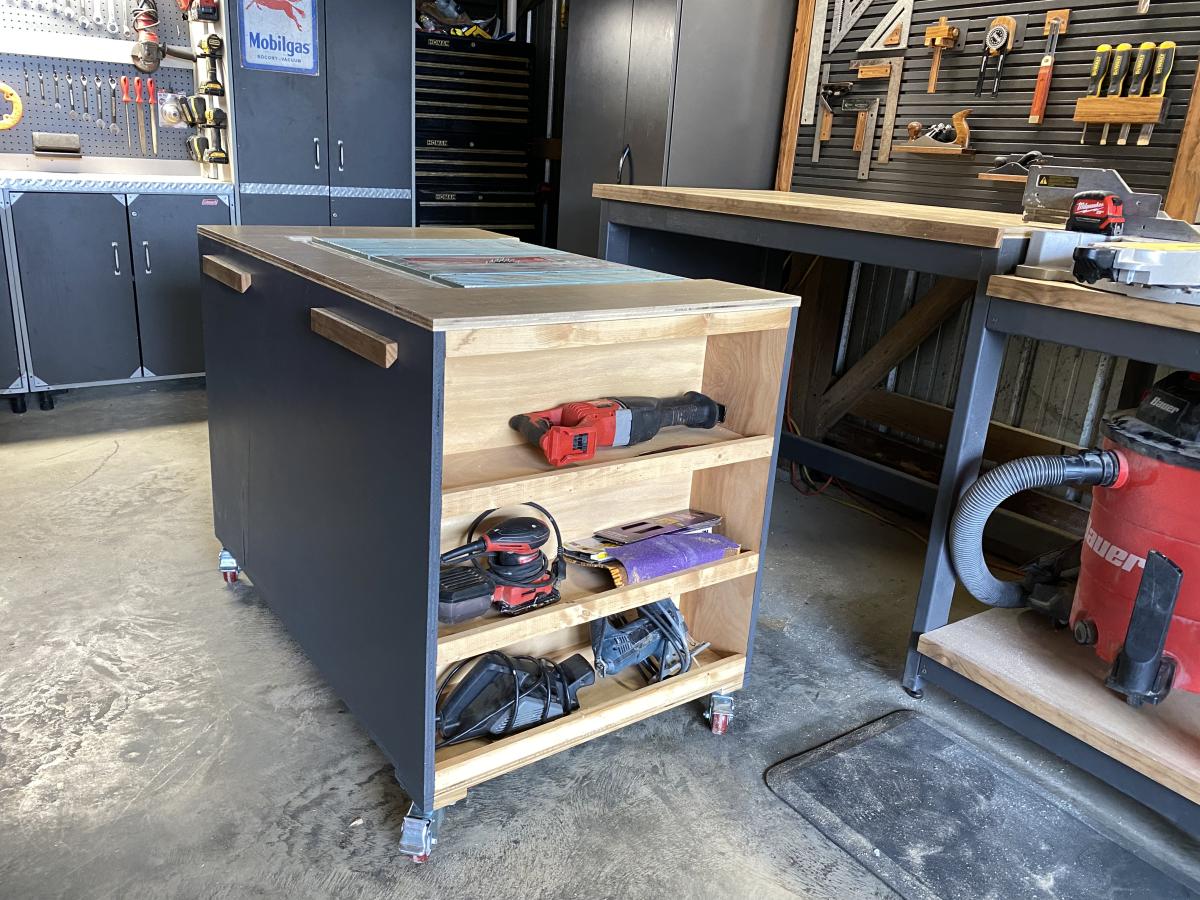
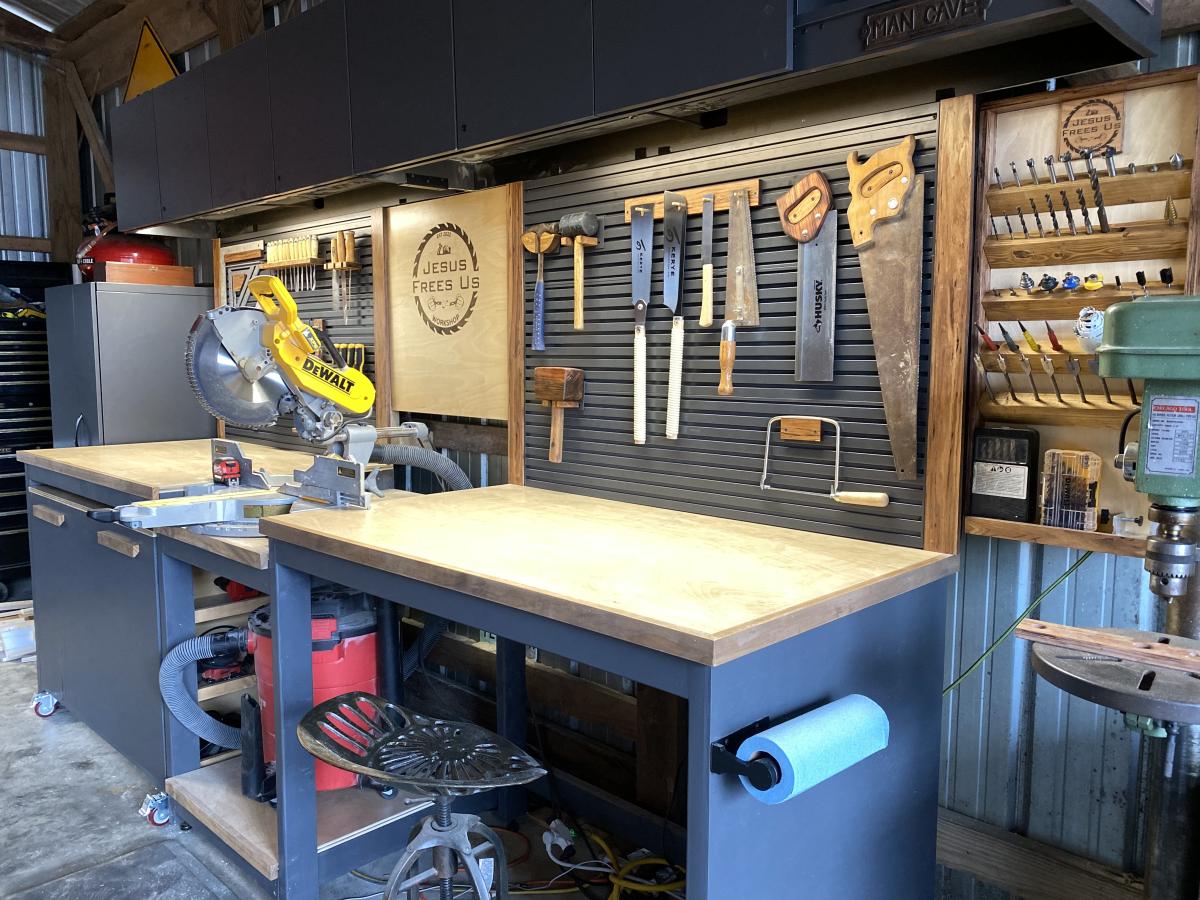
This plan is exactly what I needed for my workspace. I ended up adding some slat wall pieces and cabinets above from cubicles in an old office nearby that closed down for a tool wall and storage. I left the right opening empty due to how unlevel my floors are. I may close it in later with drawers or cabinets, but it will be my sitting workspace for now. I trimmed out the edge with 1x2s and painted and stained everything for aesthetics.

Mon, 03/06/2023 - 17:36
WOW, this looks so good! Thank you for sharing your amazing work.
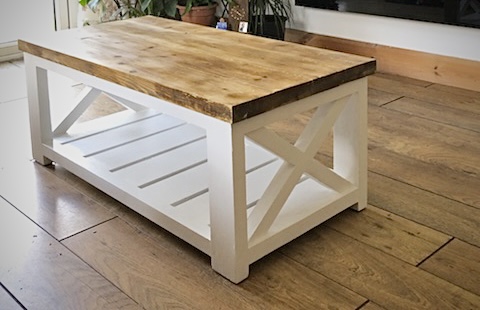
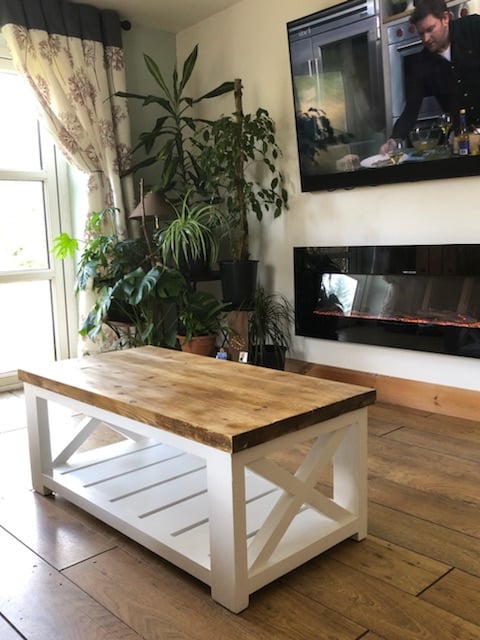
Than you Ana, My first time ever that I have made anything - my coffee table taking pride of place. Looking forward to making my next project from your plans.
Sat, 03/25/2023 - 09:24
WOW! This is beautiful, can't wait to see your next project. Thanks for sharing:)
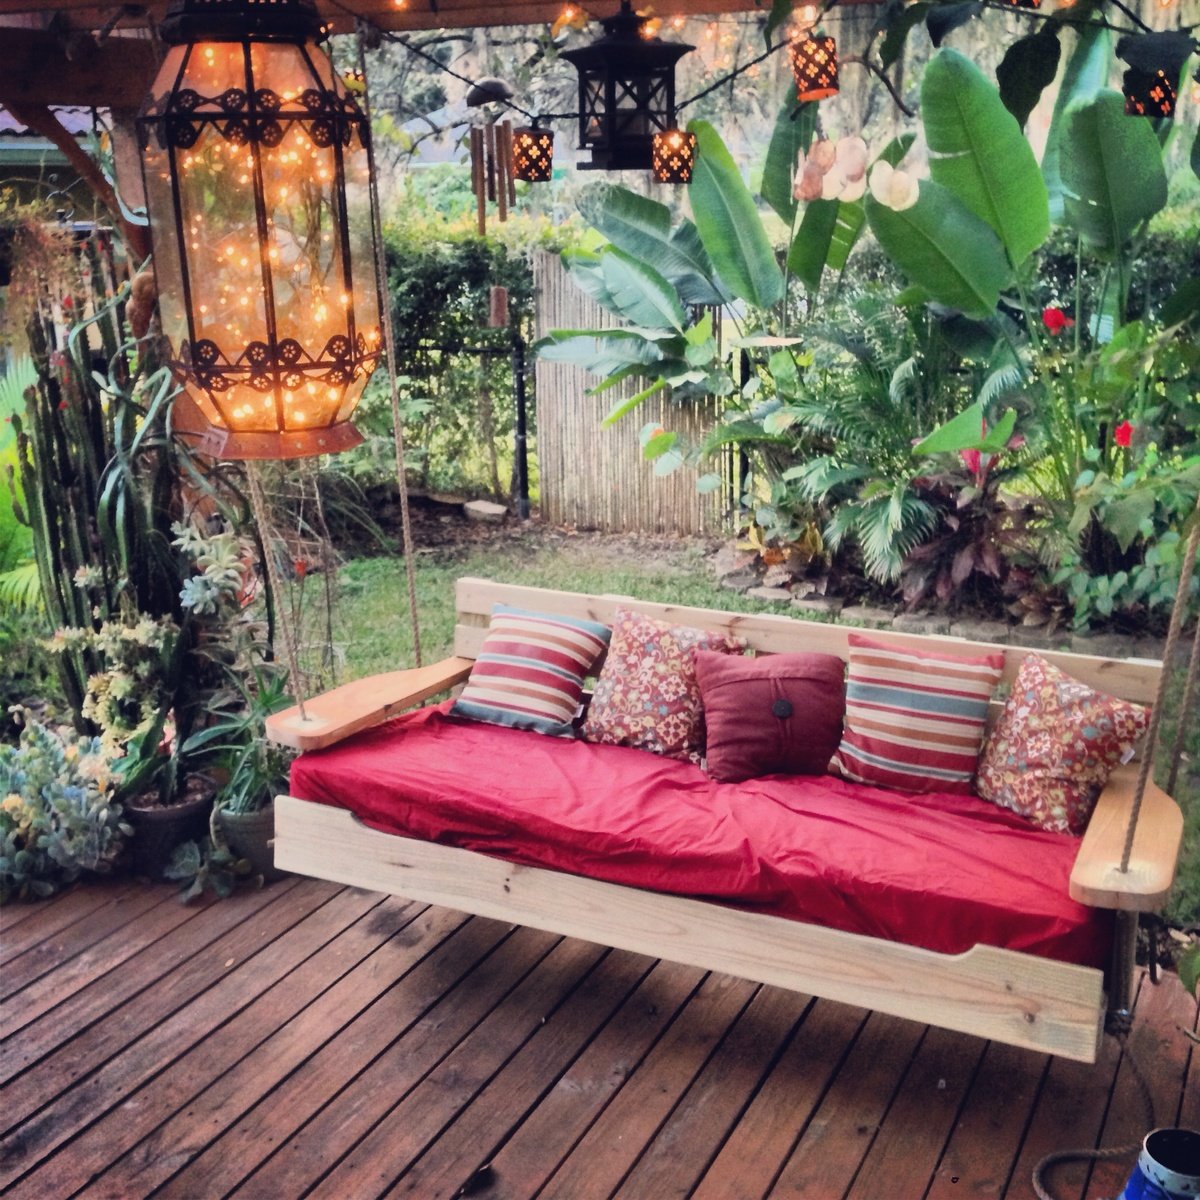
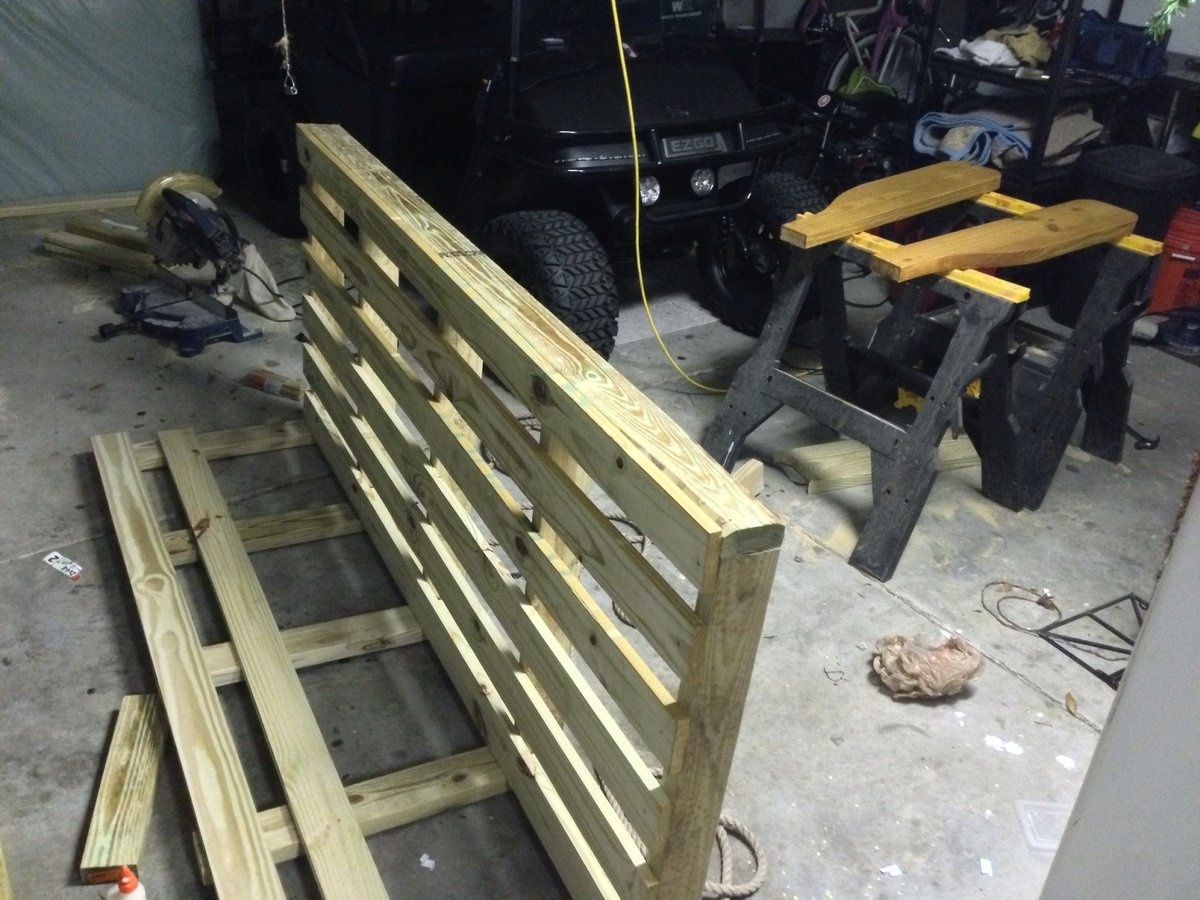
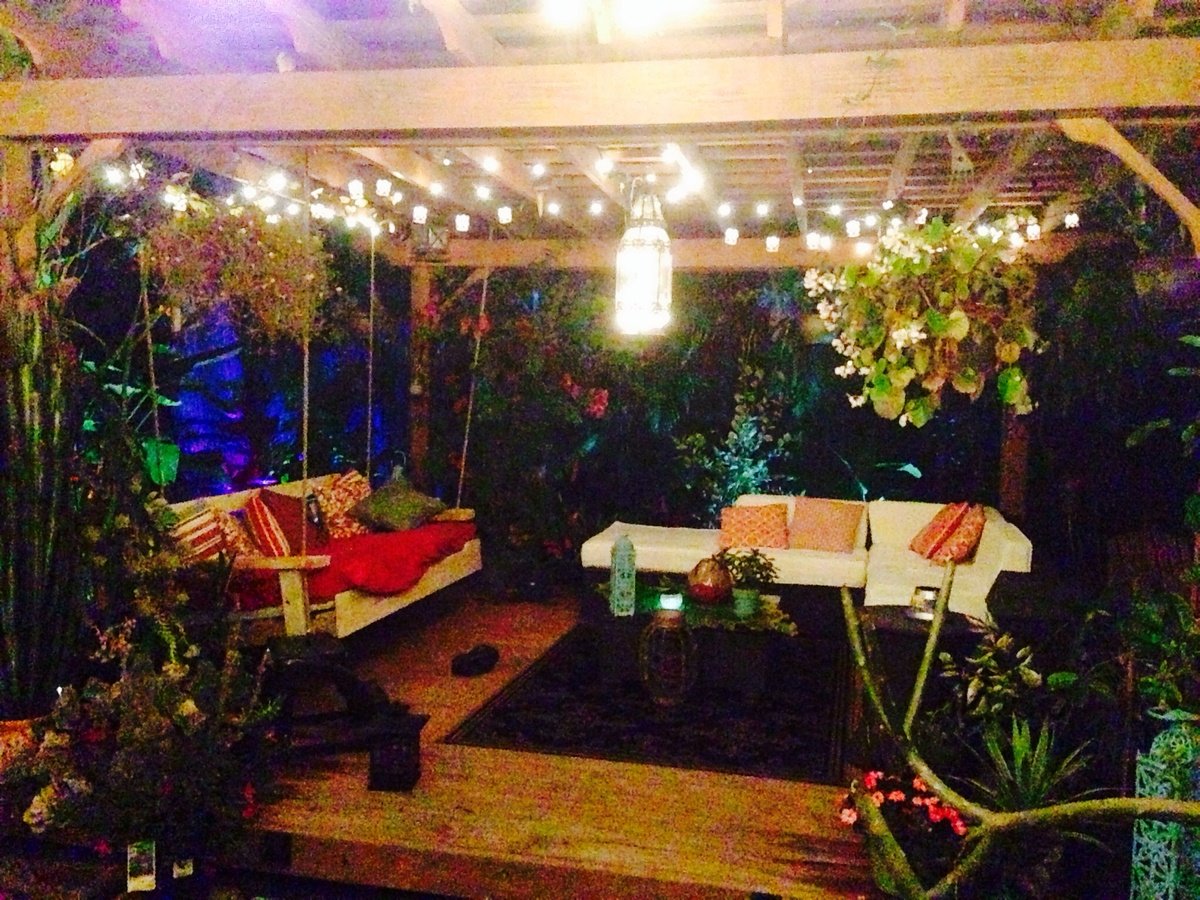
Started off with the original design but enlarged it to fit an oversize single mattress. The mattress cost me $35 from a local faith farm, while the materials came in around $200. I decided to hang under my backyard pergola. Fun and easy project.


Tue, 01/28/2014 - 21:10
Wow this looks so inviting I might just have to make one too! Nice work-- it looks great!
Mon, 04/07/2014 - 22:49
Really lovely! Great job! This will be one of your favorites spots all summer long.
Mon, 07/27/2015 - 22:45
I want this! I just made a couple of plant stands for my front porch. My husband asked me what my next project was, why, a swing bed. (This was only my second project!) I want to put cup holders in those big ole arms! We have a house at the beach in South Alabama, so, you gotta "hydrate." This is an awesome swing. I can't wait to do mine...pillows to rest on, one foot on the concrete pushing me in a slow swing. Cold beverage in my hand or in my cup holder. Yep, southern girl has a new project. Love it!

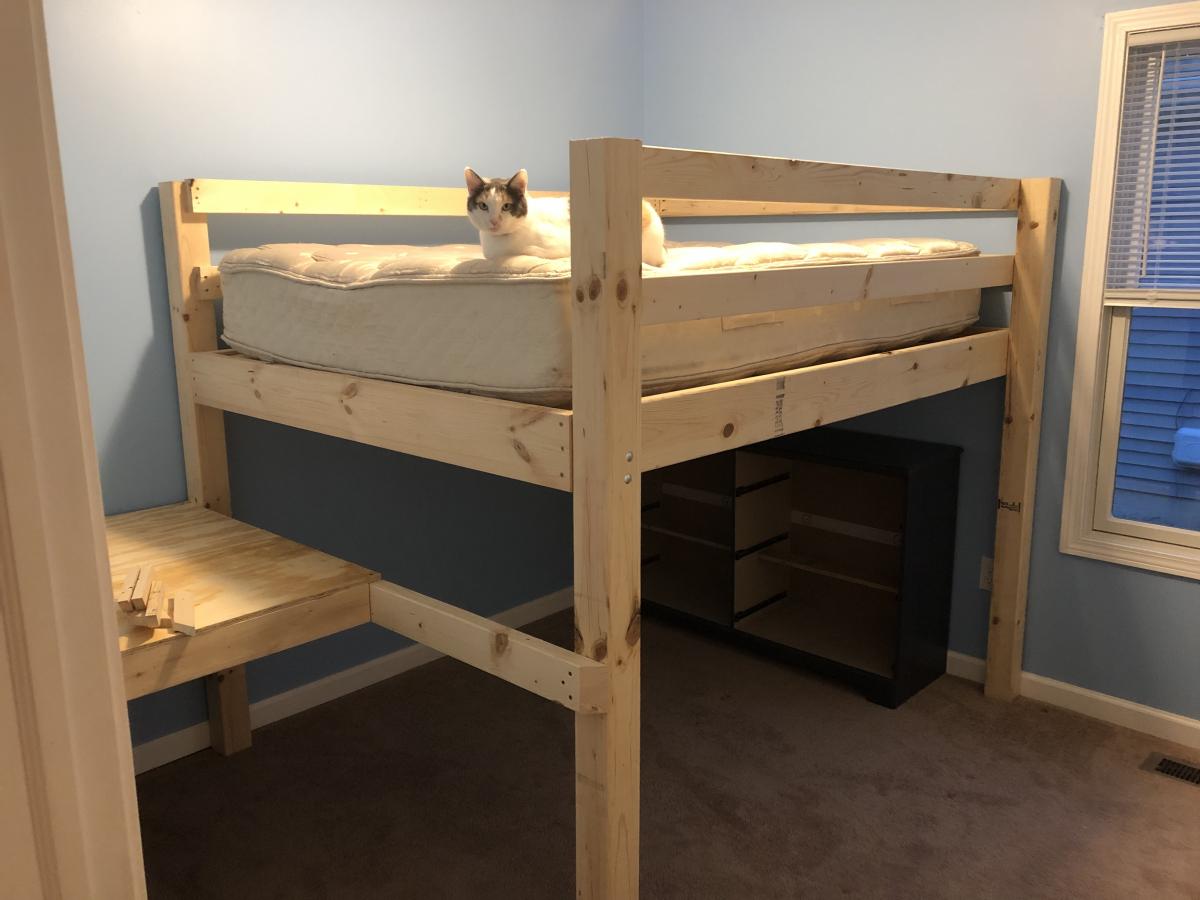
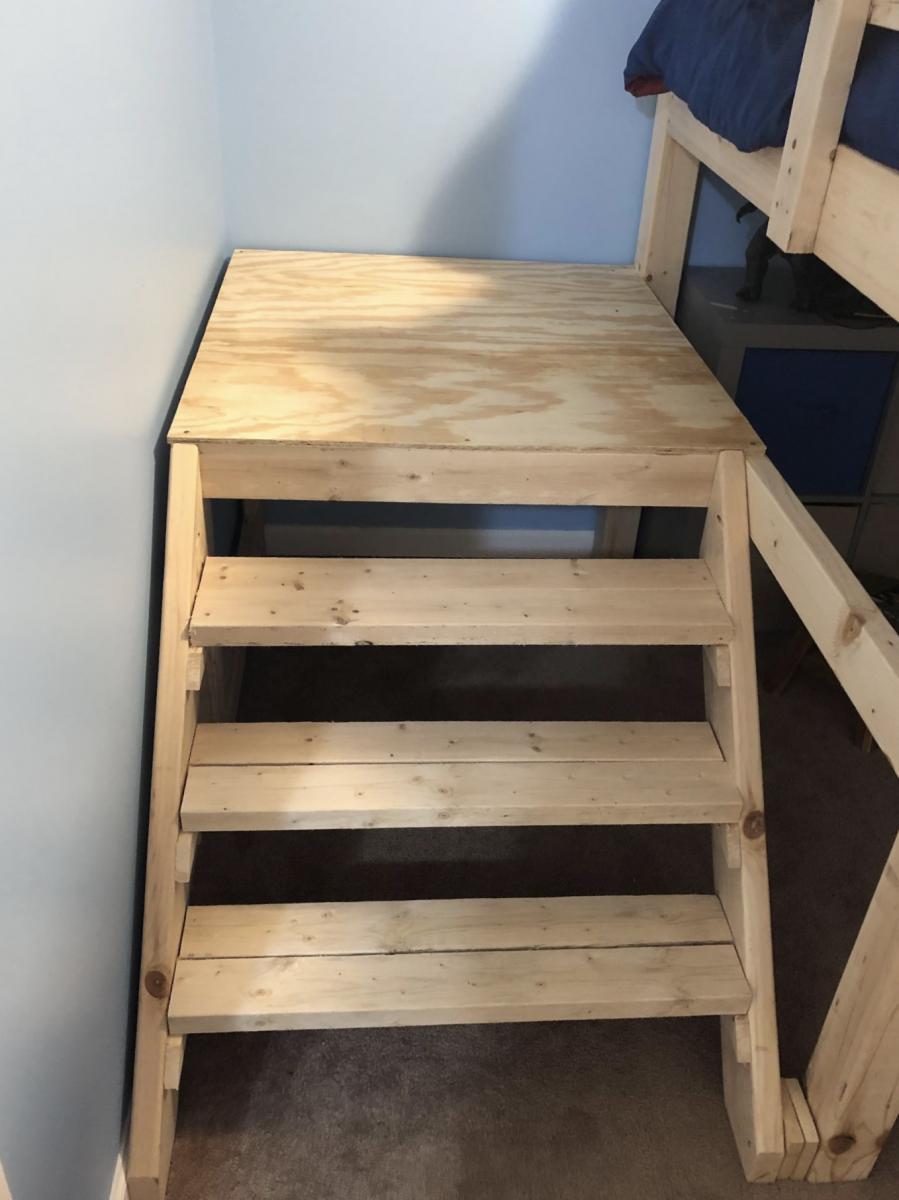
Built a full size loft bed for my kids but wanted something safer than having them climb up and down a ladder so used the Camp Loft Bed plans to add the platform and stairs. It is much easier for the kids. Going to finish by covering the platform and stairs with carpet.

Wed, 10/02/2019 - 09:51
I really like how the platform is only half way so the stairs are inset, this is very smart and good use of space.
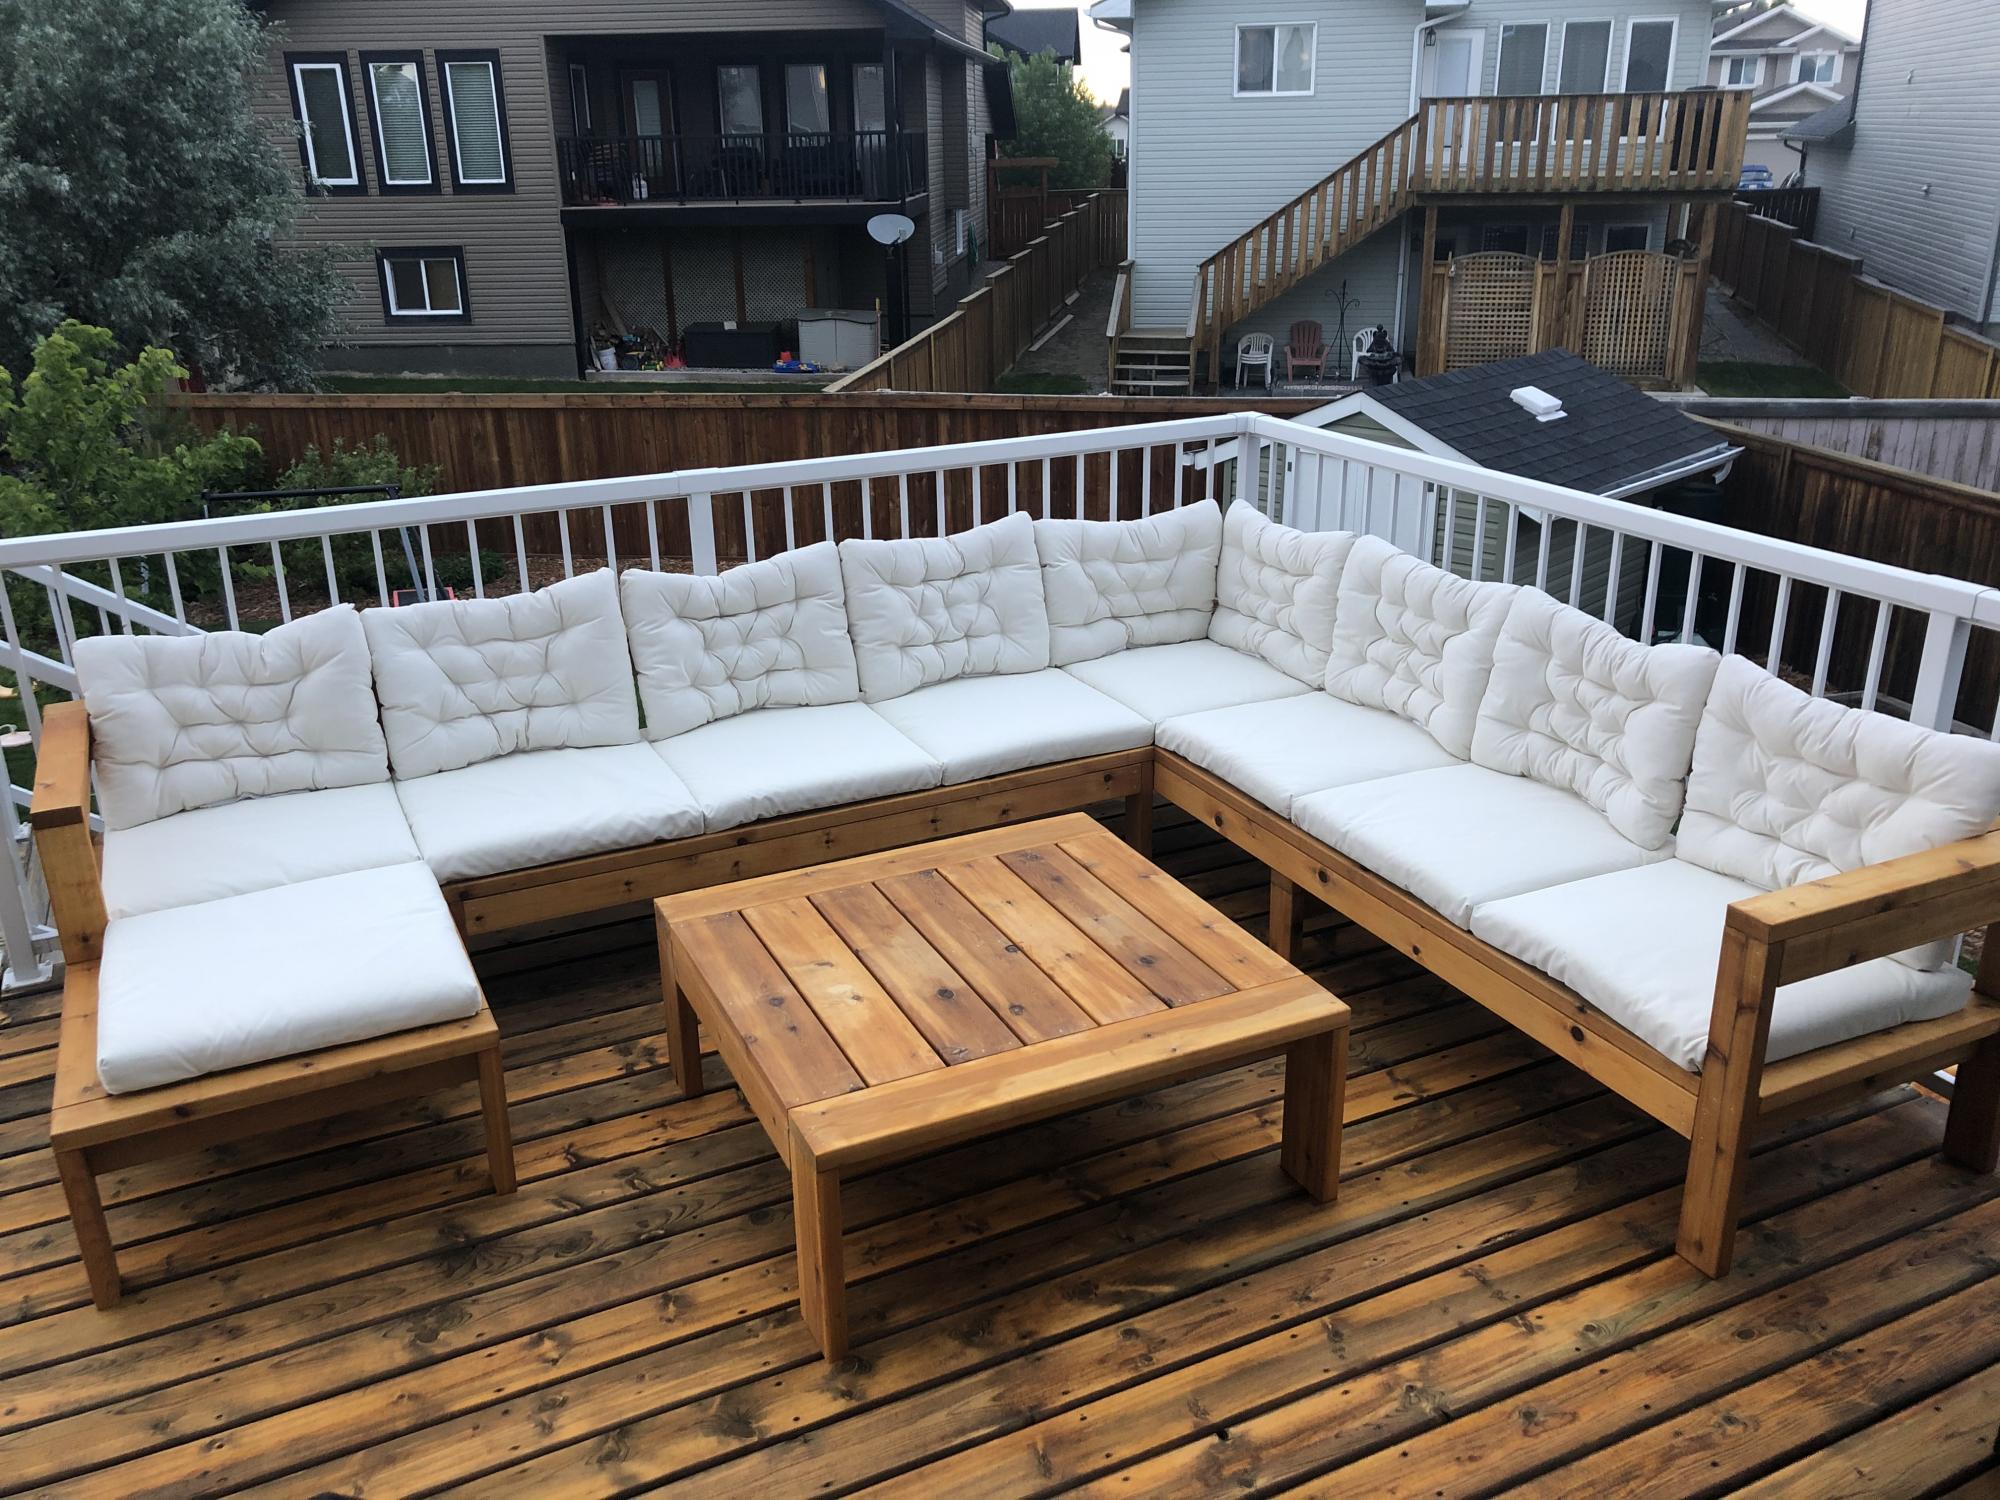
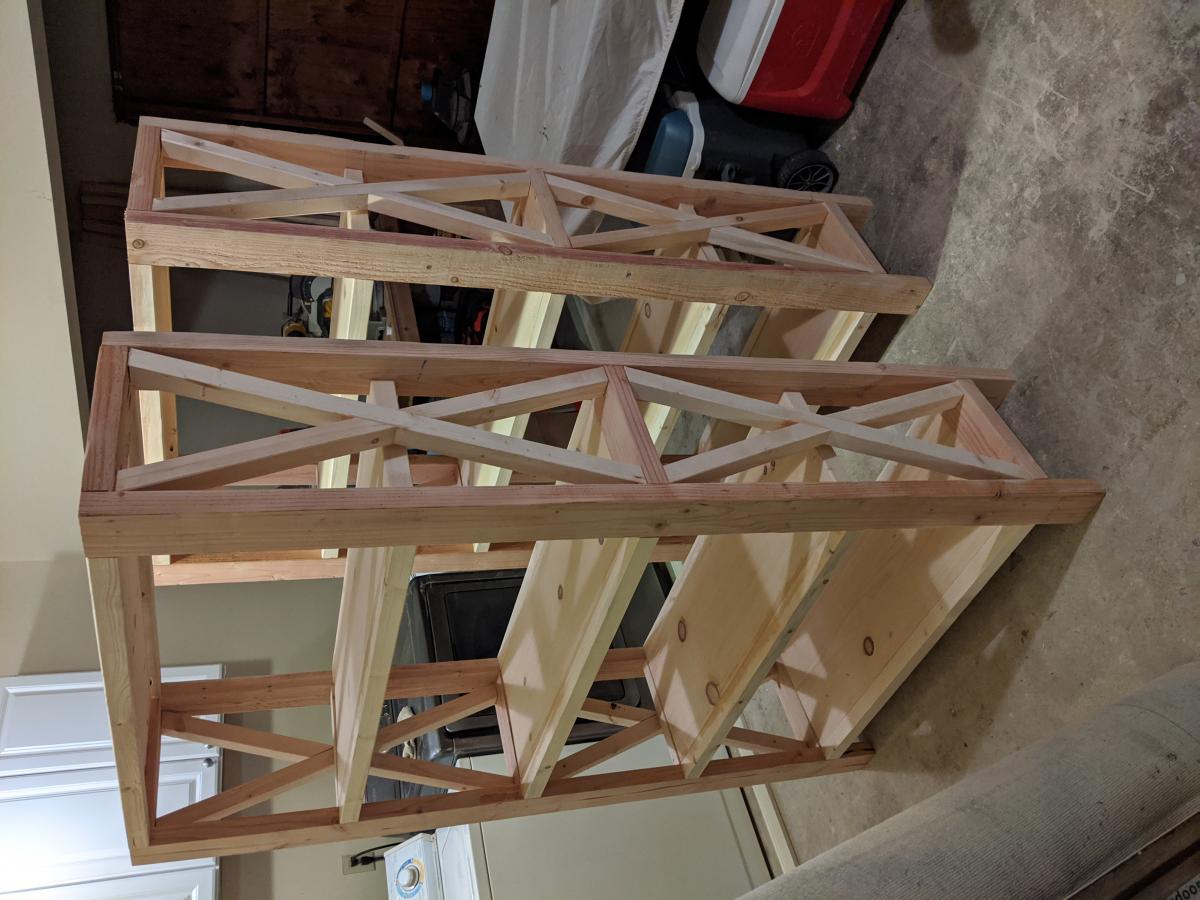
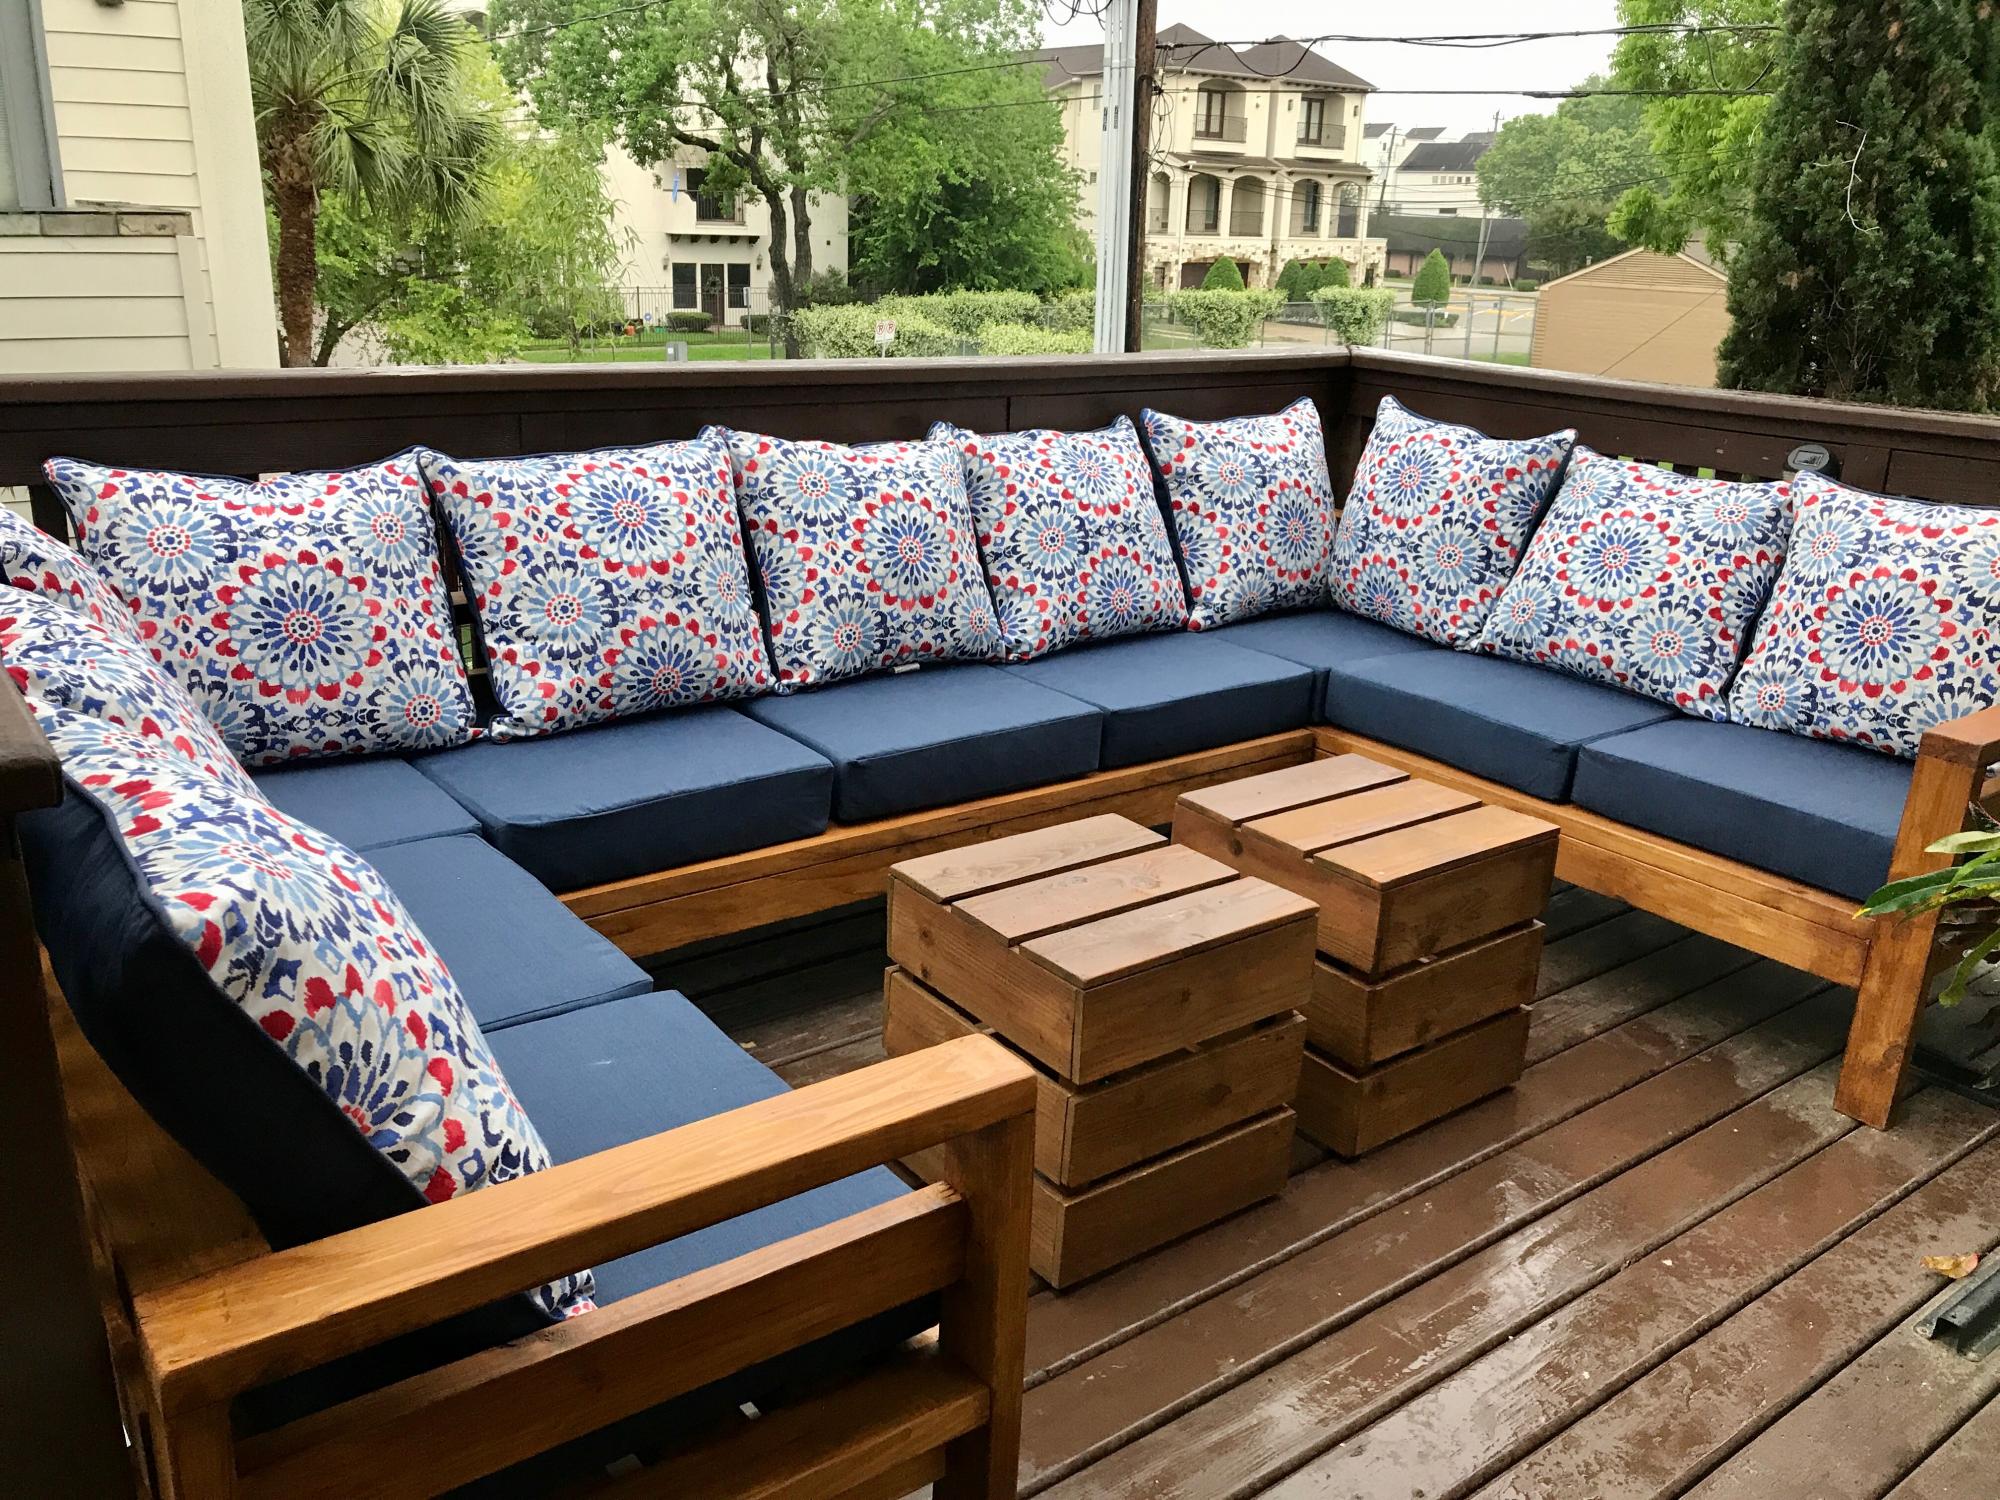
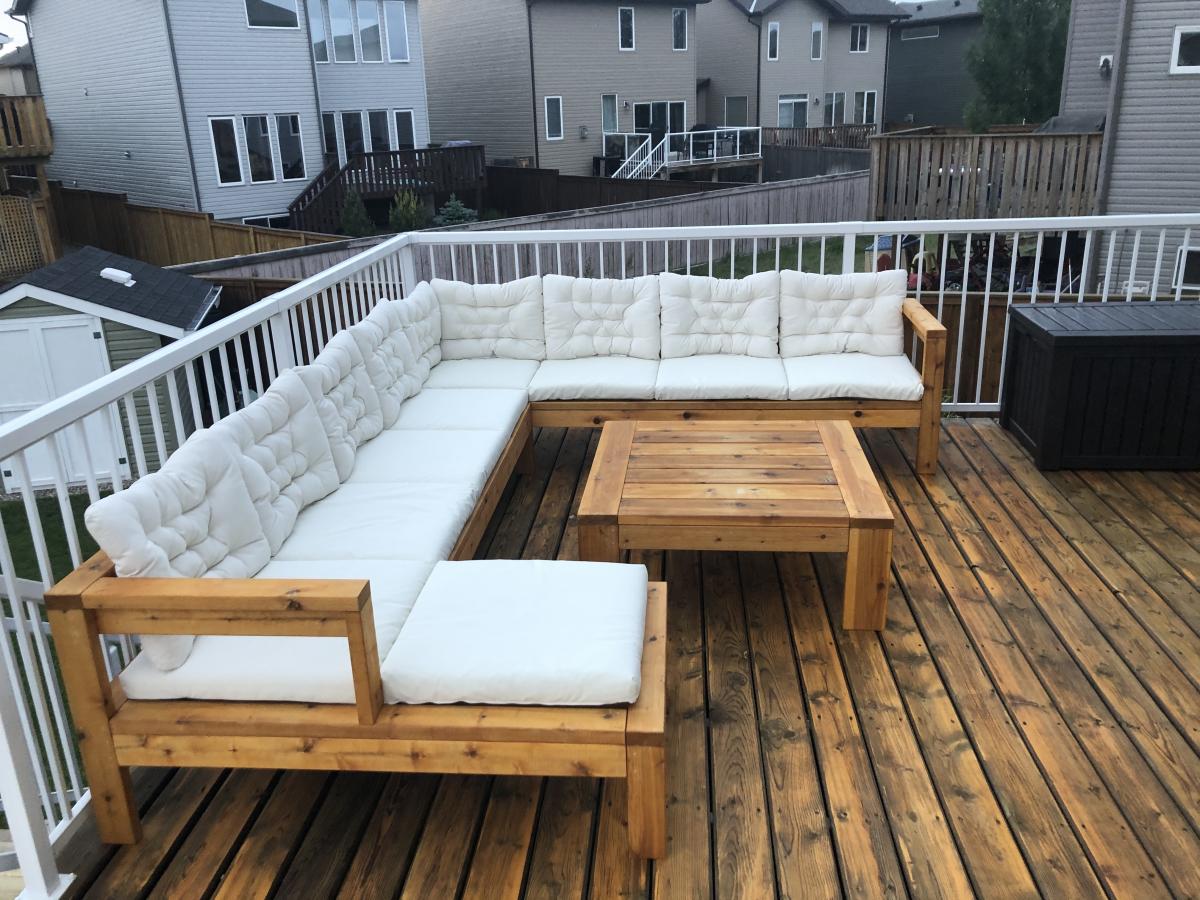
Modified the plans of the outdoor sofa and sectional piece to create this set, then added cushions from IKEA.
Wed, 02/21/2024 - 10:27
I'm building the sectional this weekend, and saw your addition to the end piece and am going to steal your idea. Very nice.

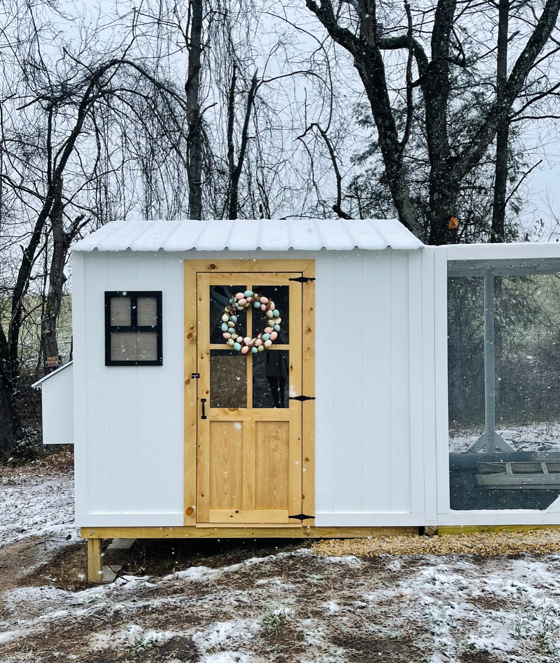
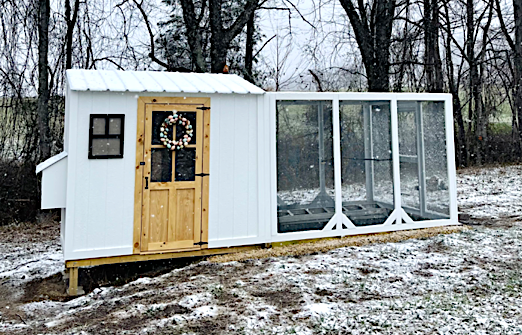
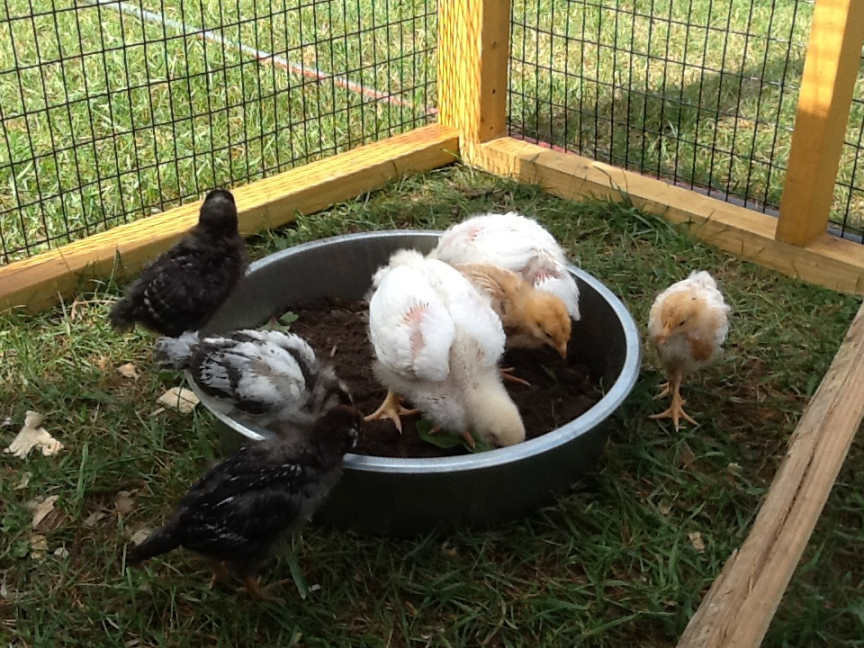
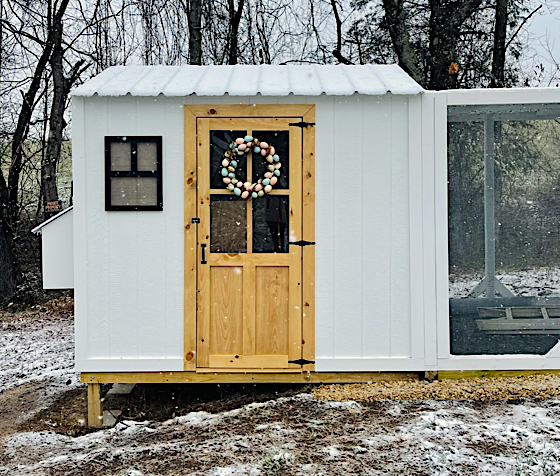
New to raising chickens, but eager to jump right in to it.
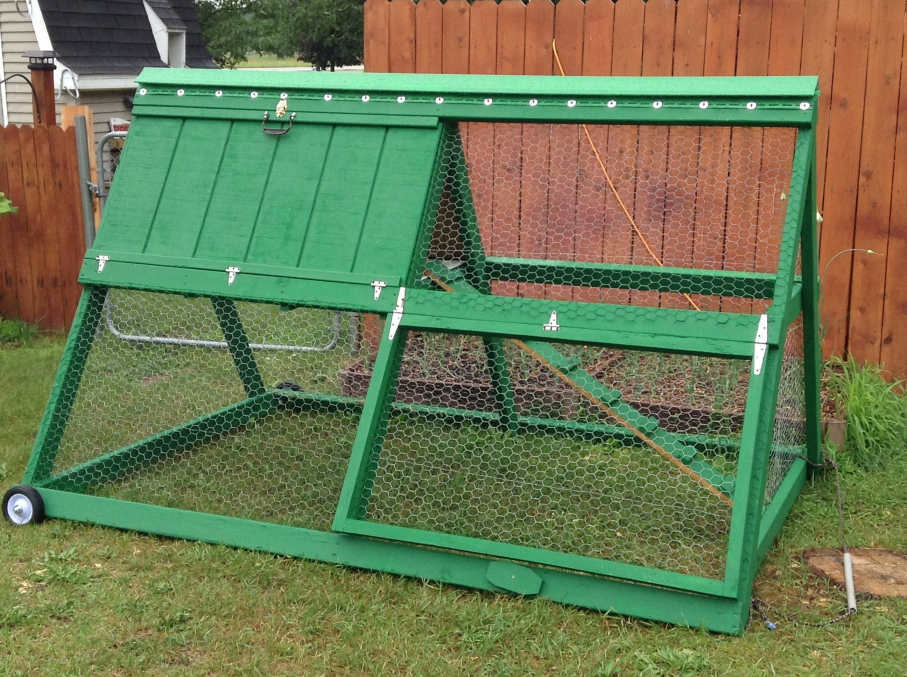
We bought a pre-made coop for the main home for our new chicks and it's very nice, not something I could do myself since I'm not yet at that level, but I saw this chicken tractor and thought it would come in handy for what I have in mind so I made up my mind to build it.
The lumber, chicken wire, staples, and wheels are all store bought new and came to about $75. The materials we had on hand were the screws, hinges, plastic coated metal shelving (used in the nesting area, I thought that would make it easy to clean), paint, and the corner piece of vinyl siding for the roof cap (hubby's brilliant idea, and I painted it green with spray paint for vinyl).
I did not try to build it quickly, I don't really know how much time it took me, but if I had to guess I'd guess total time would amount to about 3 afternoons, by myself.
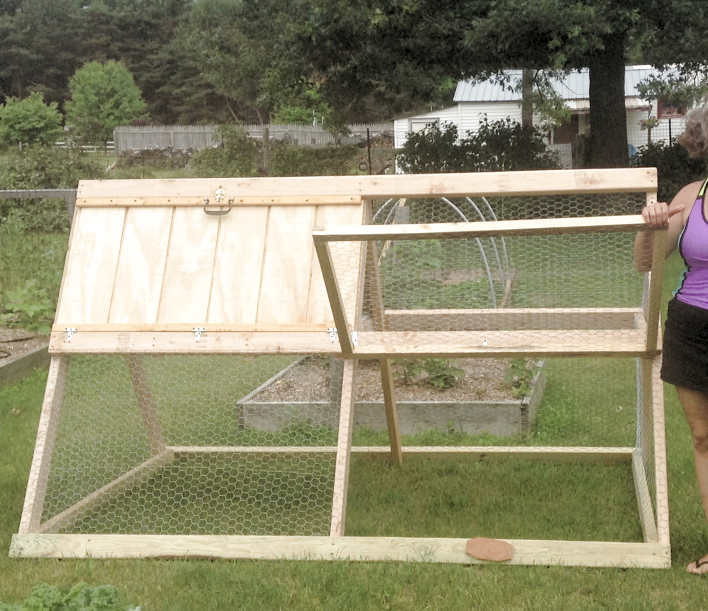
I wanted to leave the top on the one side open with the option to slap on the other boards if/when the need arises. I have the other t1-11 panels that can sit right in those areas because I stapled the chicken wire in a way that would allow it.
I also added a flip up panel as seen in the pictures for access. I didn't want a small door that I would have a hard time getting to things in there. I'm so glad I added this feature, it sure gives plenty of room for me to maintain the food and water dispensers as well as get in there and catch the little chickies :)
I wanted it green to blend into the wooded background in our backyard. I didn't want to take any beauty away from the cedar greenhouse and fencing we added last year, and this tractor would be moved from time to time and I felt this green that we had on hand was perfect to help it blend in rather than stand out.
This thing is heavy! I have a hard time moving it around and usually need my husband to move it so I won't hurt myself. I am considering some options... I don't like the rope I have on it to pull it, any suggestions would be appreciated.
As with the other items I've made with Ana's plans, this was fun and pretty easy to make. I love this site! Soon I will take on my next project, I've bought and gathered the materials, I'm anxious to get started :)
Thank you for looking :)


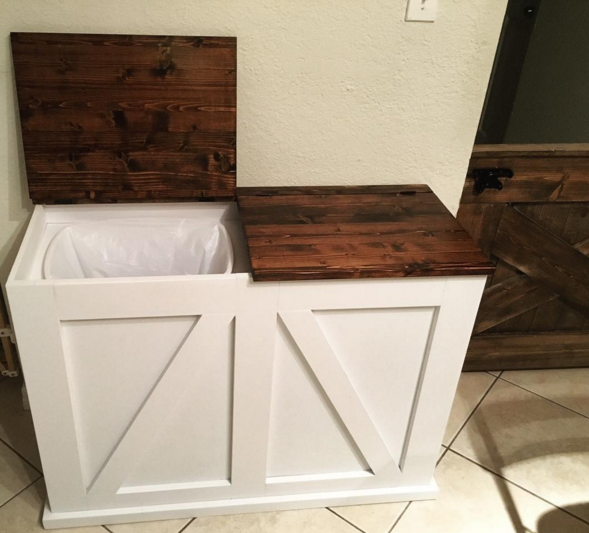
Modified the design a bit to be lift up lids instead of tilt out.
Fri, 02/16/2018 - 17:18
Can you post the specific plans for the lift up trash and recycle bin??
Sun, 05/26/2019 - 18:28
If you could post the plans for this, It would be nice. Great job!
Fri, 01/10/2020 - 05:16
I just love this and would love to have the specific plans for this project!!!

Fri, 01/17/2020 - 20:23
Thank you for the great idea. I’m going to add a third bin and use it for laundry in my bedroom.
Sat, 03/07/2020 - 02:29
I’d be grateful for details, plans, measurements for this project. This is an amazing build, nicely done.With green top looks fantastic and complements the white very well.
Thu, 01/11/2024 - 20:31
To everyone asking for the plans, it's a modified tilt out. It states right there under the pics that it was modified and the original plans are there in red, under "Built from plans"
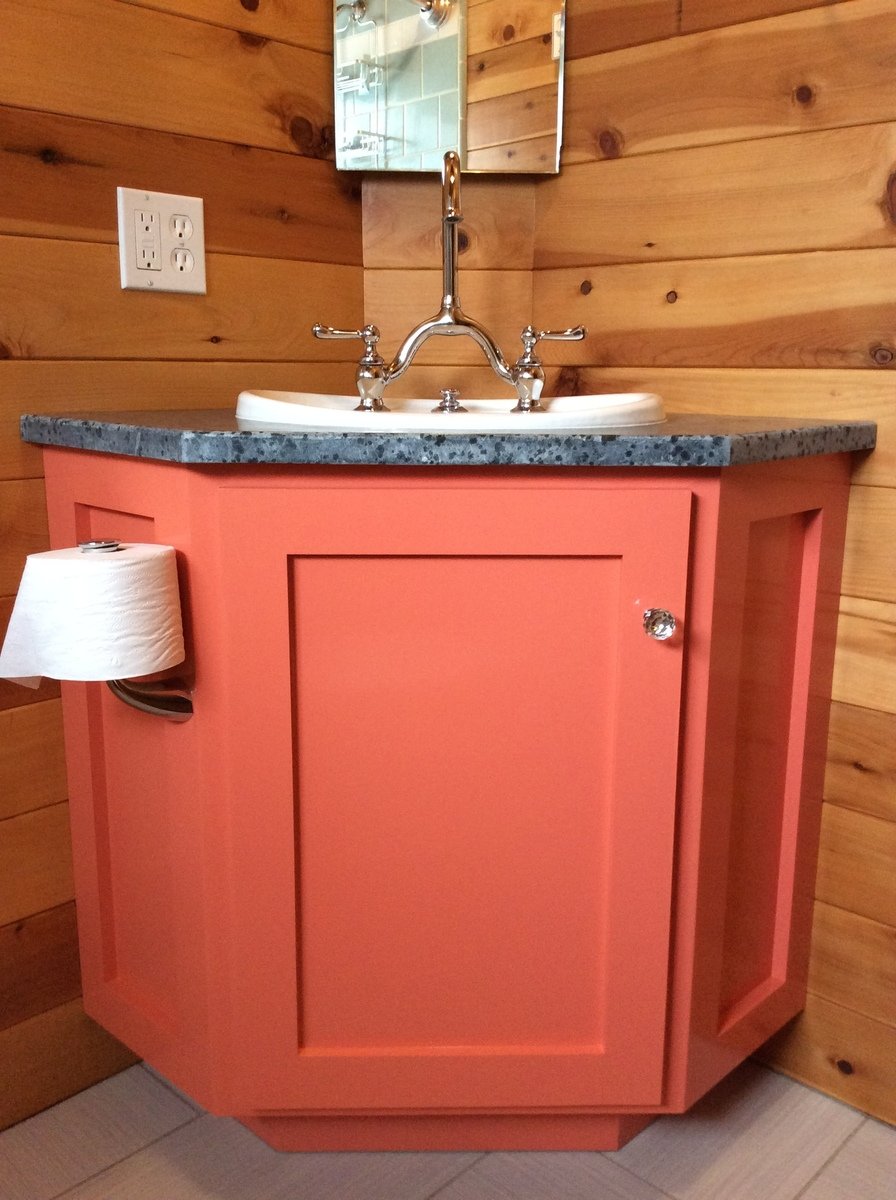
This project started because a corner bathroom vanity that fit my space requirements and budget did not exist. A plan specific to what I exactly needed also did not exist. After combing through what plans I found online, the Wall Kitchen Corner Cabinet best matched what I wanted. I modified it with the Momplex Sink Base Kitchen Cabinet in order to turn it into a sink base.
But, there was a problem. I hadn't actually built anything before. In order to get at least one project under my belt, I built the Vintage Step Stool. It turned out great, so I figured I was ready to go! Strangely enough, after spending about $100 and several weekends picking away at this project, it was done! It looked great, even. Then, I moved the vanity into the bathroom and realized that, while it may have looked great, it wasn't very square. Lesson learned was that this is a two person project. It is too difficult to keep things square and screw at the same time when there is only one person.
At this point, everyone was tired of having to use the kitchen sink to brush their teeth and wash their hands, so we needed to get this project done. $100 later, we had more material. Since I had figured out what needed to be done with the first vanity, let's call it our prototype, the second vanity went together REALLY quickly.
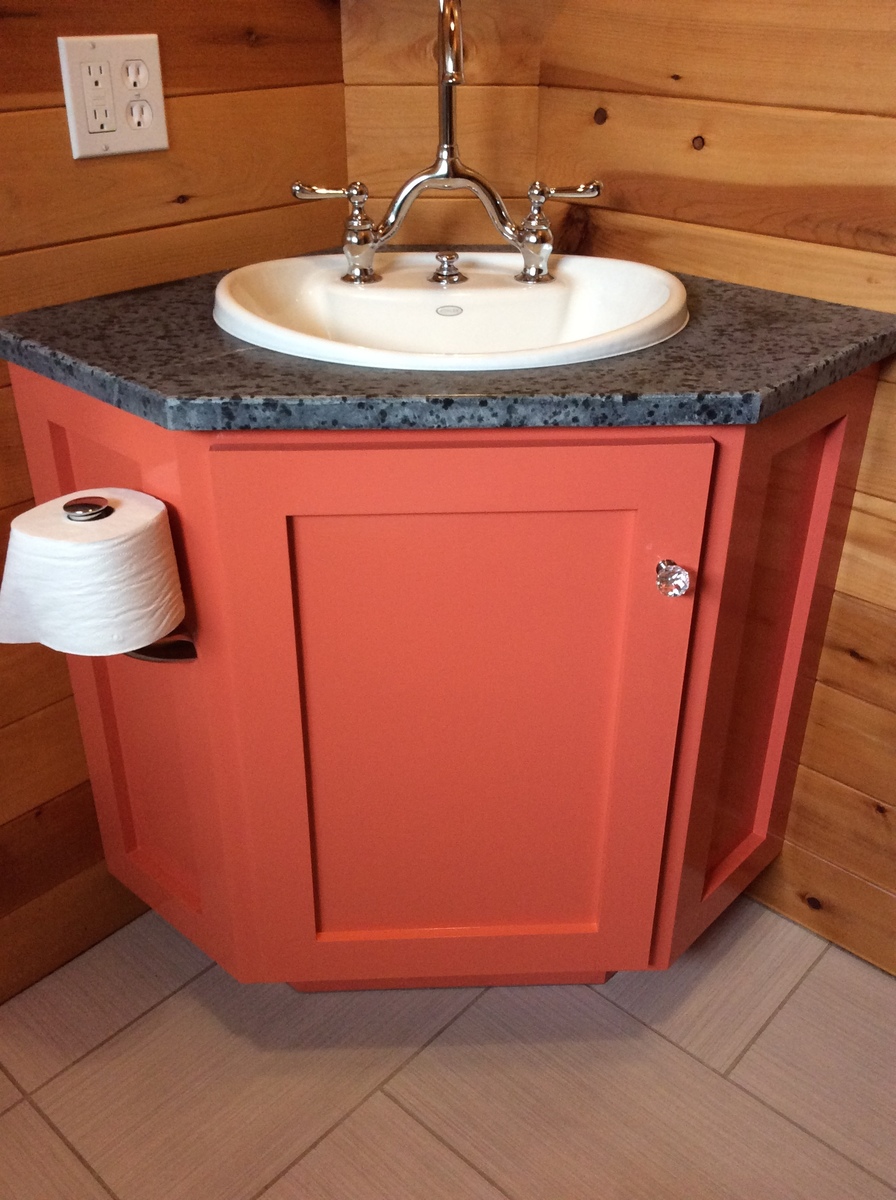
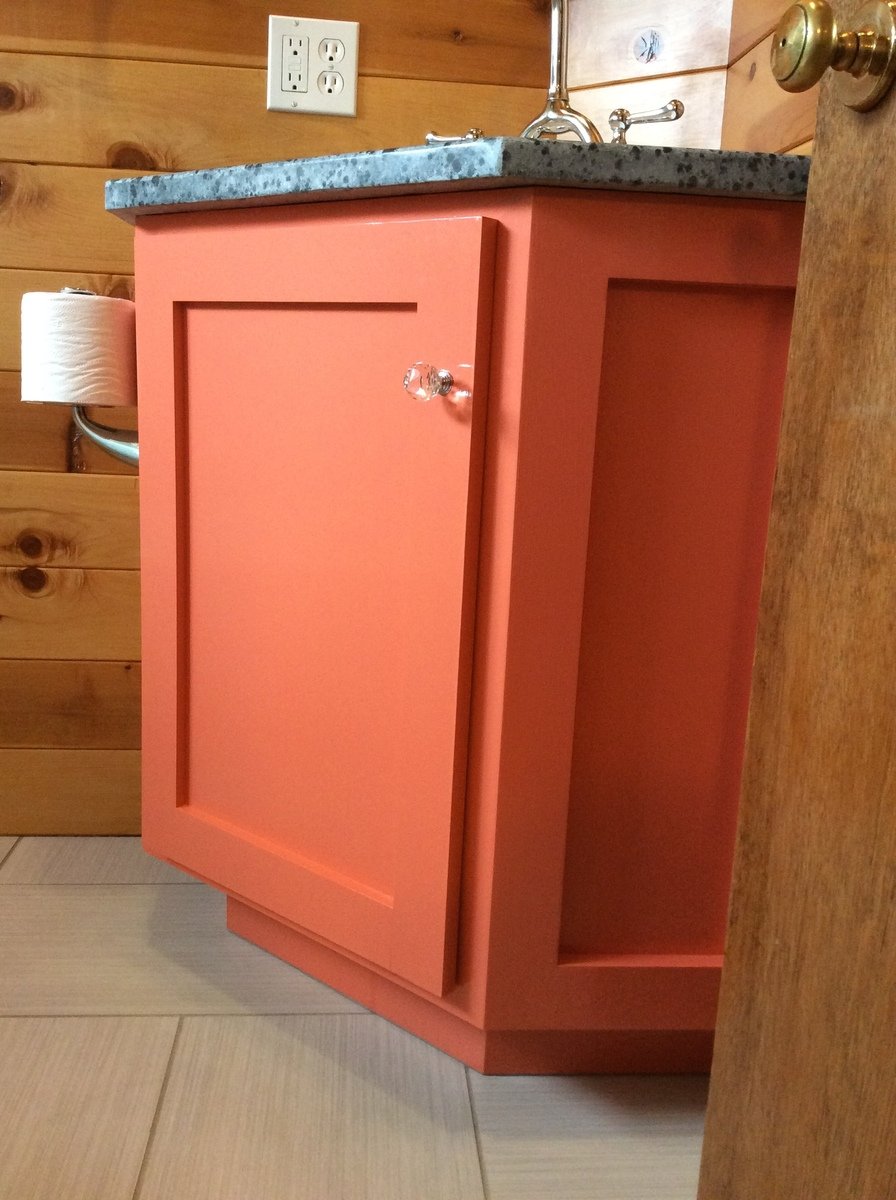
Within a few hours, it was pieced together. Since it was going to be painted, we used Bondo to cover up our imperfections. Yes, of course there were imperfections. While much better than the prototype, it still was only my third woodworking project. Sanding, caulking, and priming took another hour or so. A few coats of the finish paint went on, followed by a couple more coats of a clear sealer, and it was done.
We moved it into place, screwed it to the wall, put the soapstone countertop on along with the sink and faucet, and it truly was complete. Sink is Kohler, faucet came from our local Habitat for Humanity store and I'm not sure what brand it is, and the soapstone came from soapstones.com. If we had oiled the soapstone with mineral oil, it would be a very dark gray.


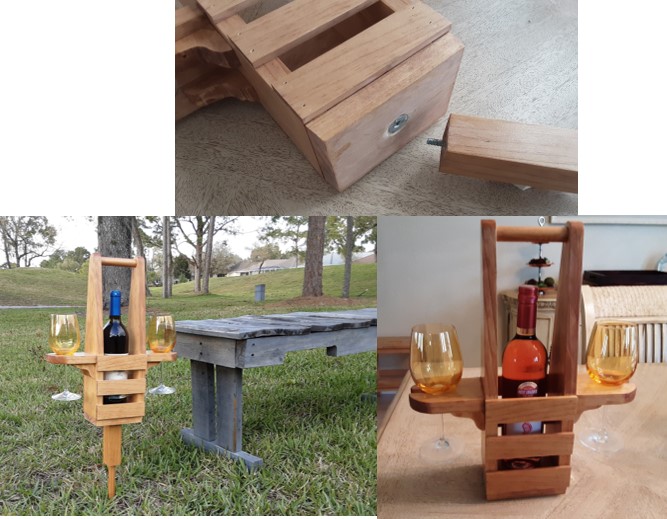
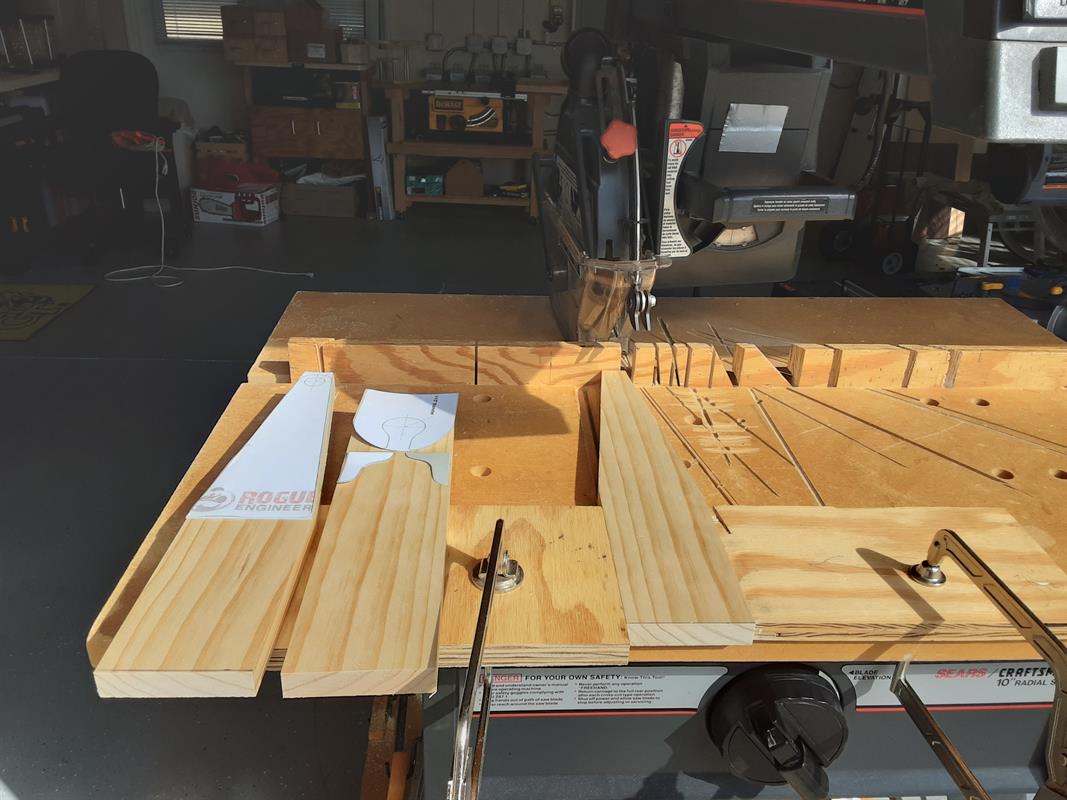
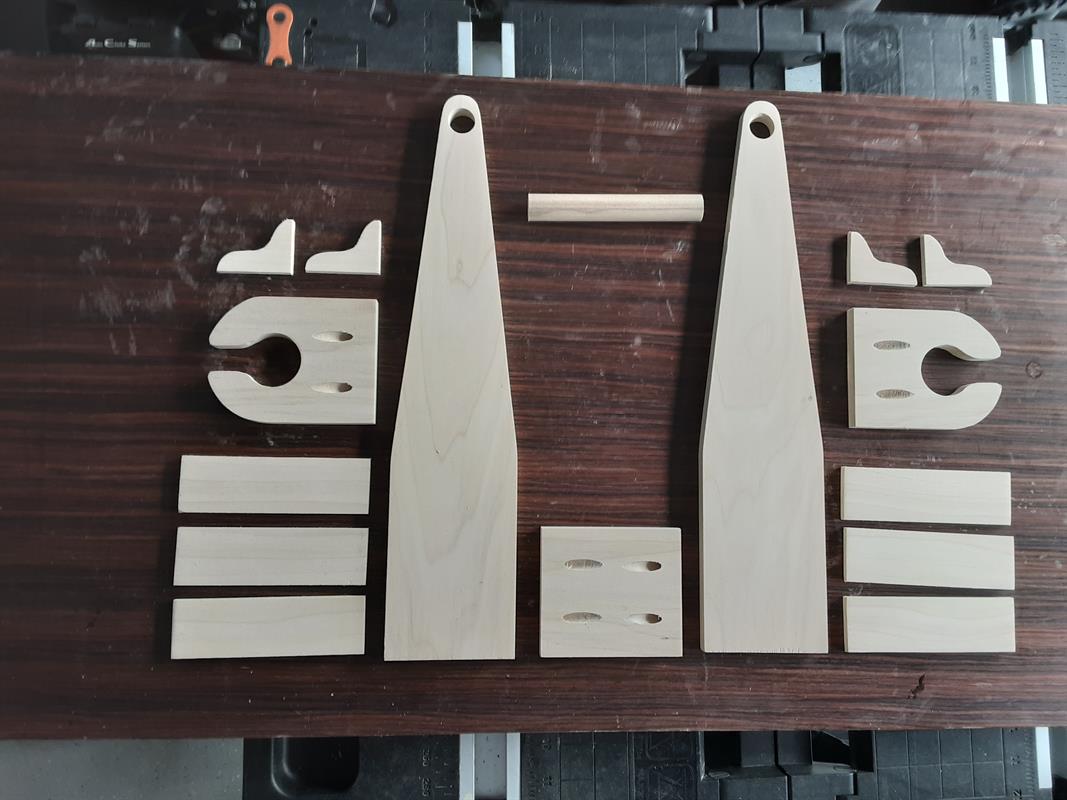
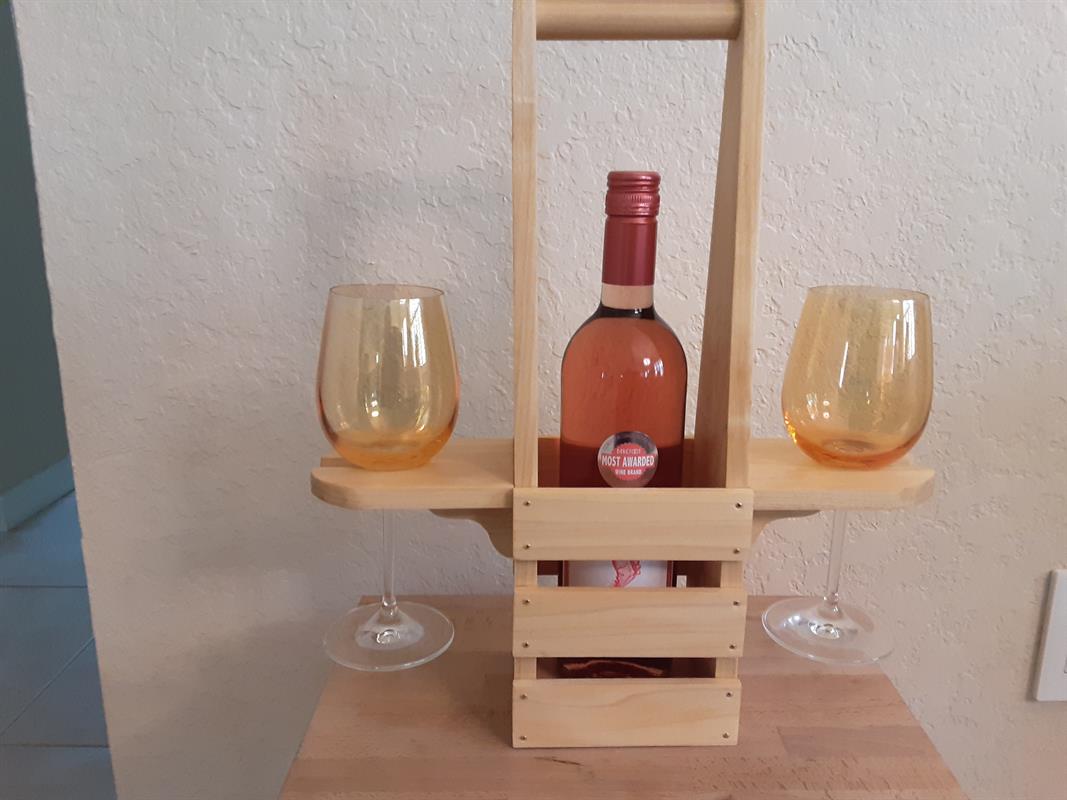
Built a number of wine caddies with/without the stake. Stake useful for an outdoor environment, yet not useful for an indoor table top setting. Provided a simple alteration by inserting a t-nut into the bottom of the caddy & a hanger bolt screwed into top of stake. Simply screw in stake as needed.

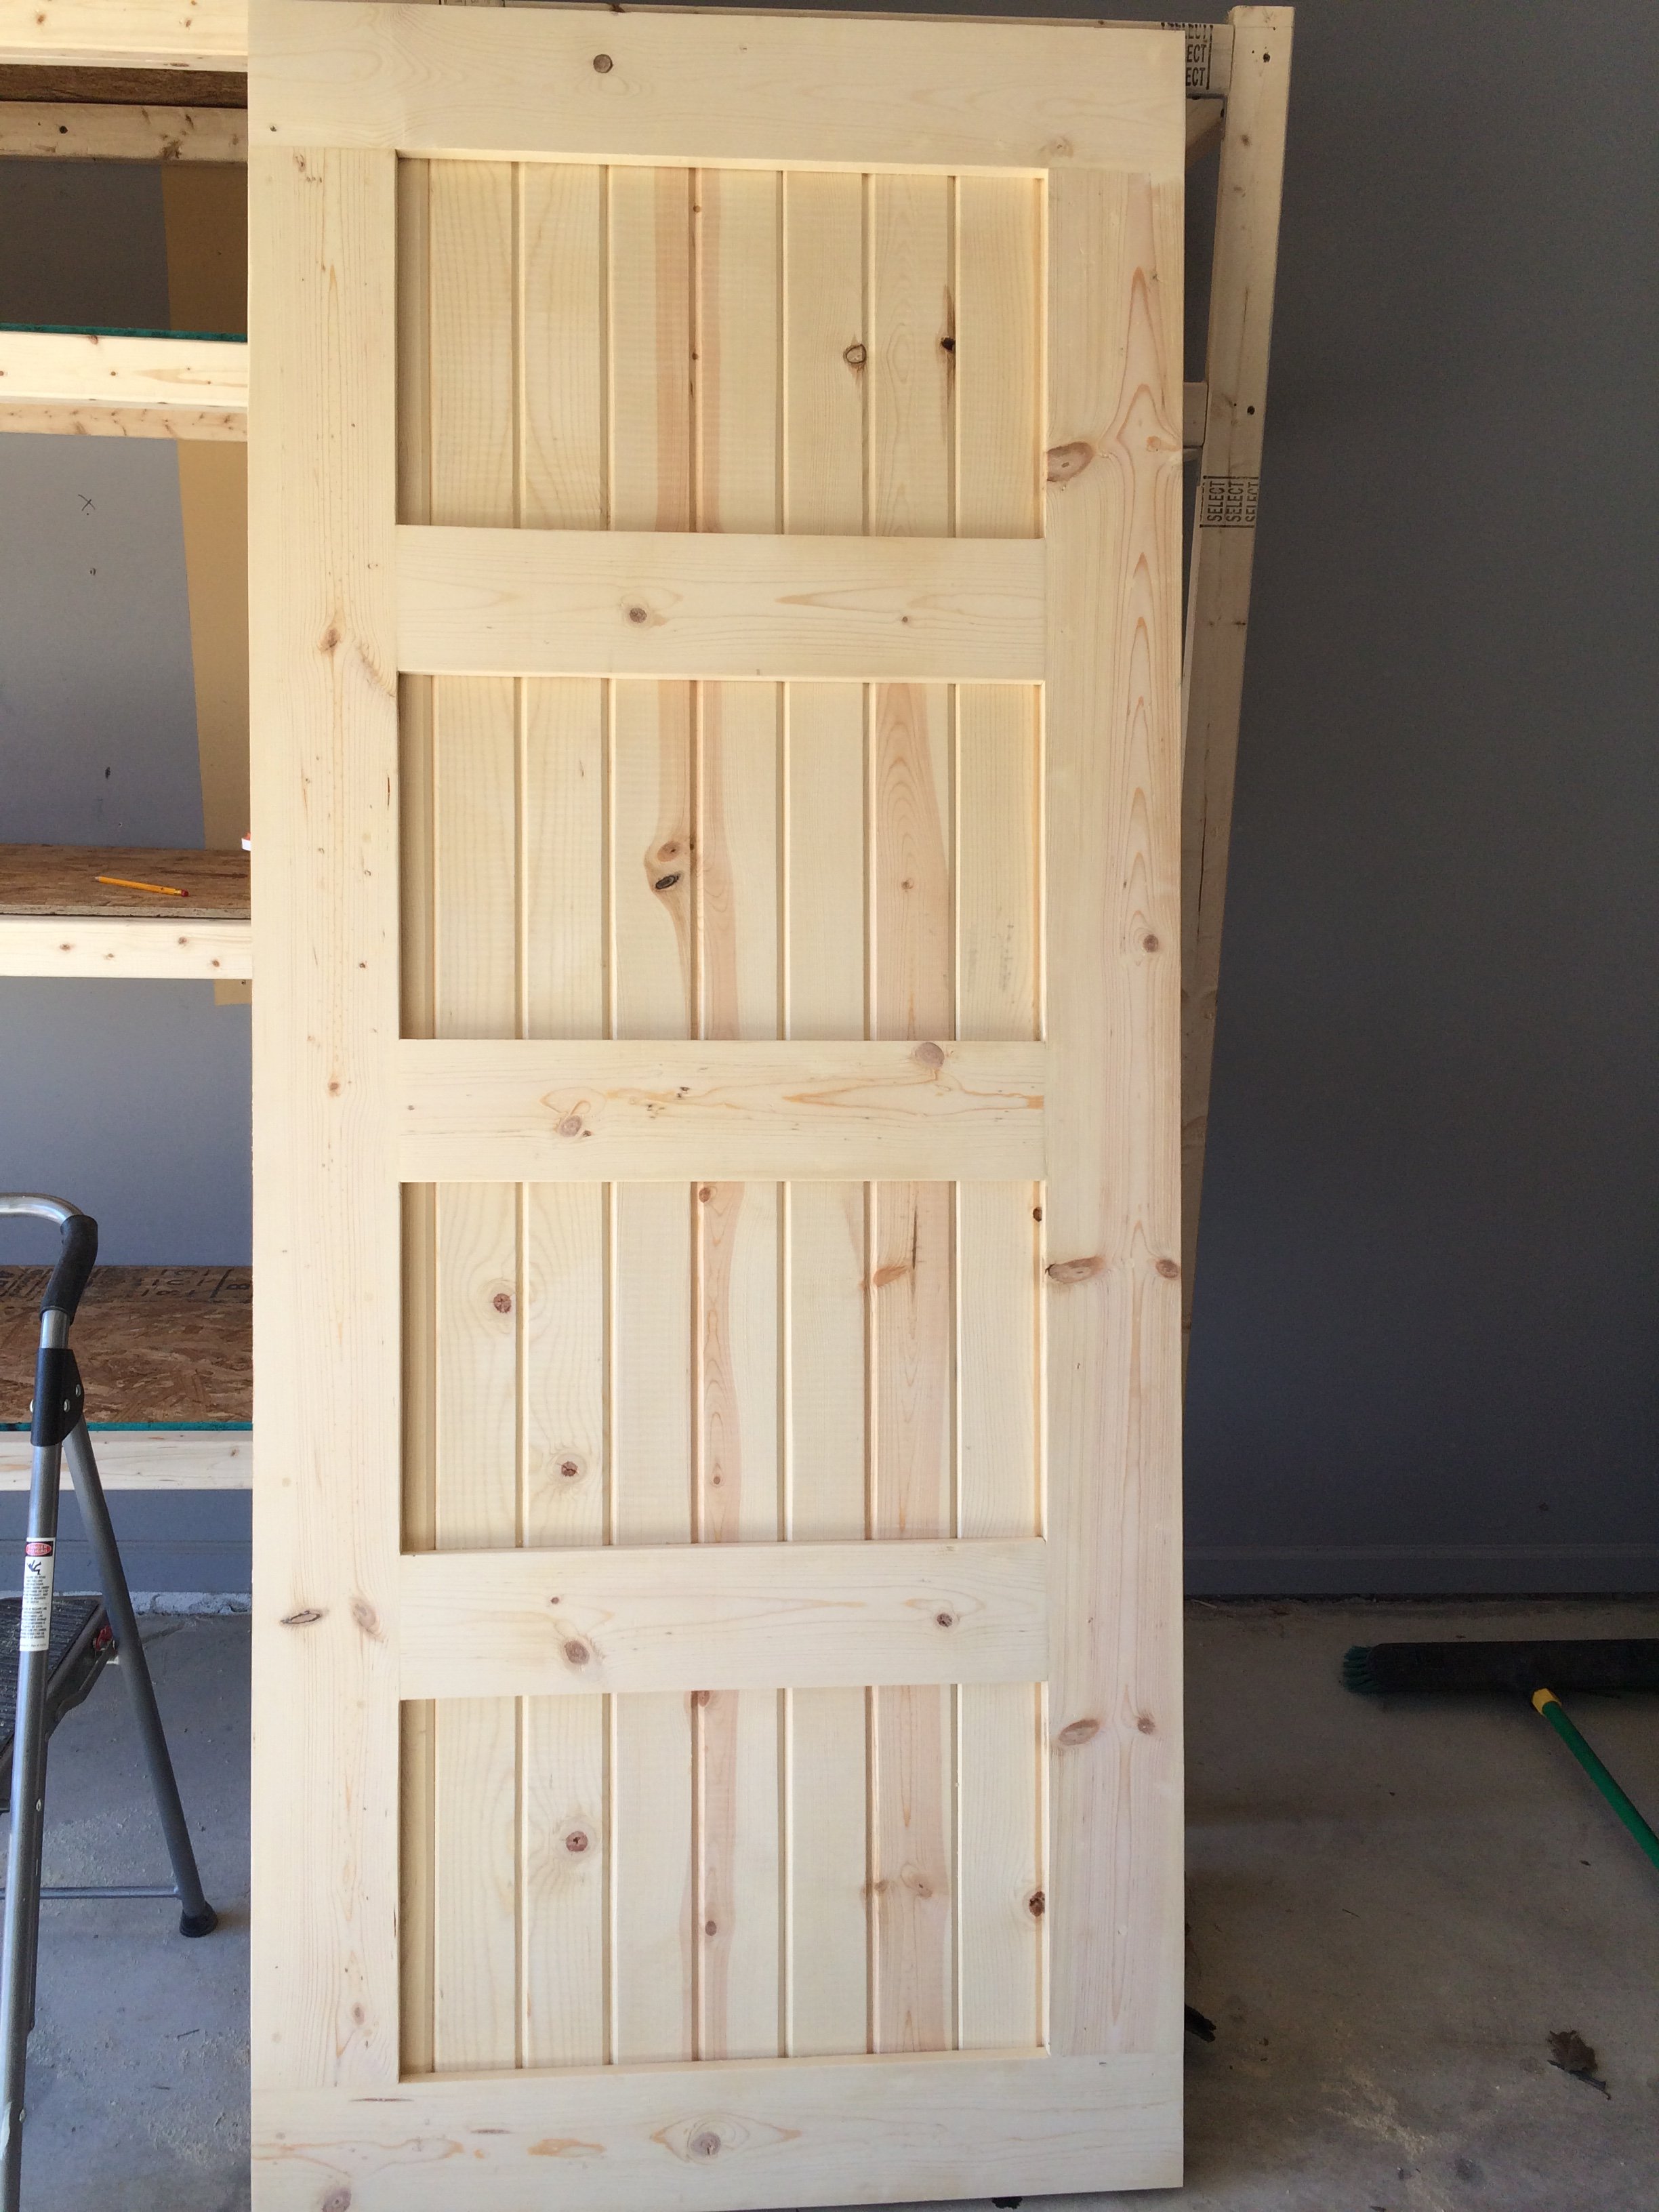
Created this door with pine wood tongue and groove lumber and pine wood planks. Purchase barn door hardware / track from Jet.com and door handles from Hobby Lobby.
This replaced my Master bath door and I think came out pretty good. Thank you for the ideas!!! Jeff M. Brownstown, Mi

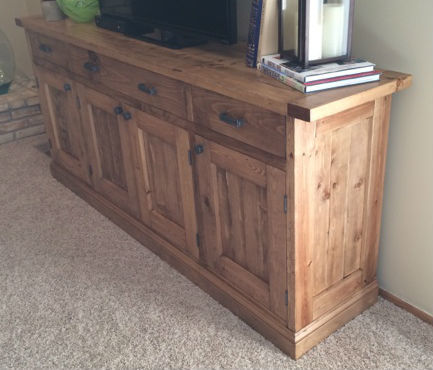
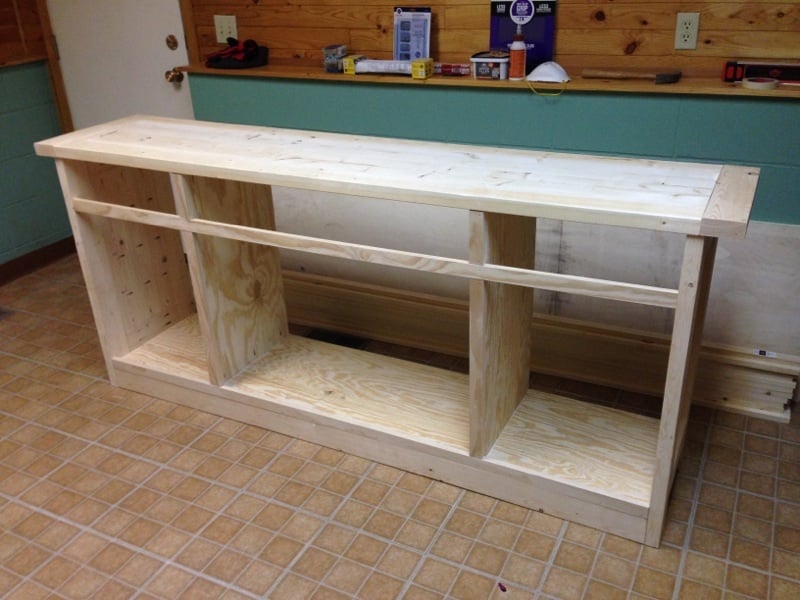
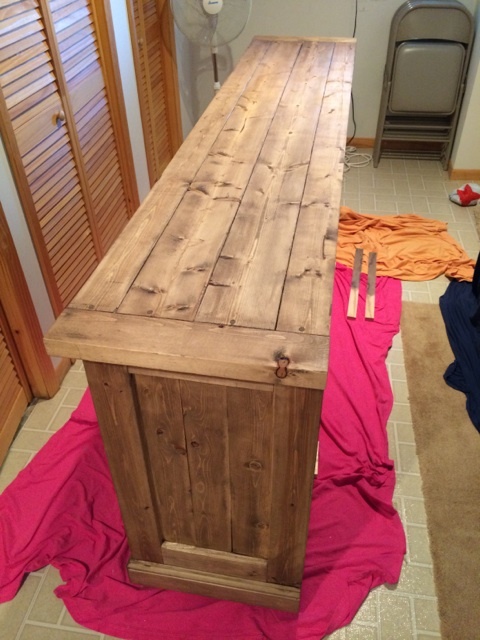
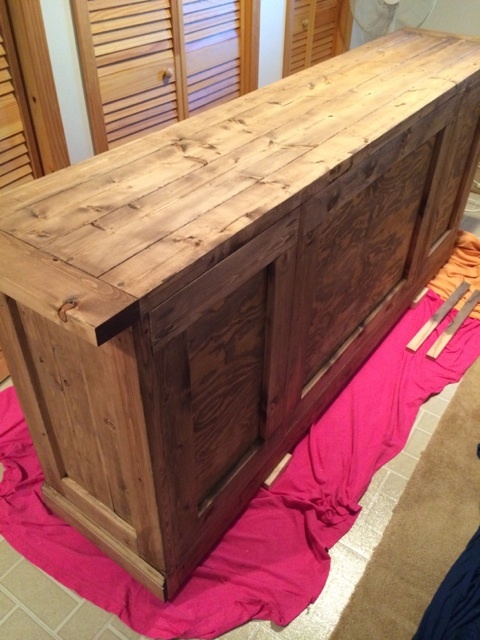
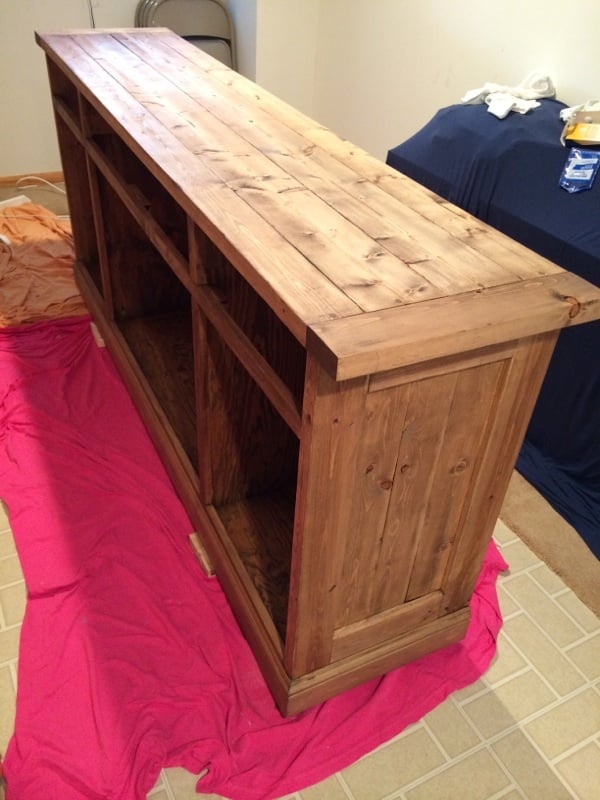
This was my first finished project using plans from Ana's site, and I am very pleased with the finished product. Every aspect of the finished sideboard is based on something from the site. I started with the plans for the Planked Wood Sideboard, and made no modifications as the dimensions were perfect for our basement family room. I decided to inset the back (http://www.friendly-home.net/2012/02/gigantic-rustic-sideboard.html) as Ana explained that Hillary had done, and love the final result. This will allow us to use this to potentially divide a room in an open concept space at some point in the future.
For the finishing process, I decided to follow the "Rustic Yet Refined" finish tutorial highlighted on both the Ana-White site (http://ana-white.com/2013/08/rustic-yet-refined-wood-finish) and Jen Woodhouse House of Wood (http://jenwoodhouse.com/blog/2013/06/07/diy-dining-table/). I fully intended to complete the 9 step process, but found that after we applied the Minwax pre-stain wood conditioner, followed by Minwax special walnut stain and wiped it off within 15-30 seconds, the finish mirrored the restoration hardware finish that we were going for. We decided not to proceed with layering on the weathered oak or applying the whitewash, and went straight to the spar urethane satin coats.
Overall, the project was a success, but was difficult to finish during the Minnesota winter as it was unbelievably cold and was forced to complete the finishing process in our basement/laundry room, which extended the length of the project. I am very excited to begin building other pieces from Ana's plans.

Mon, 03/03/2014 - 10:01
Absolutely beautiful! Thank you for all the details on how you did this!
In reply to Absolutely beautiful! Thank by moosmani
Thu, 03/13/2014 - 07:09
Thank you so much for your kind words. I am extremely impressed with your brag posts as well, and you may have been inspired to take on the picket storage shed project as soon as the snow melts.

I scaled back the length of the sofa by a few inches and I made the sectional only one seat to fit my space on the deck. This was my first woodworking project that I did by myself. I got the cushions for more than 1/2 off at Ikea so the whole project cost about $150 ($80 for the cushions). It took me about a week to complete but the total time was less than 10 hours to build and stain. I'm pretty happy with how it turned out.

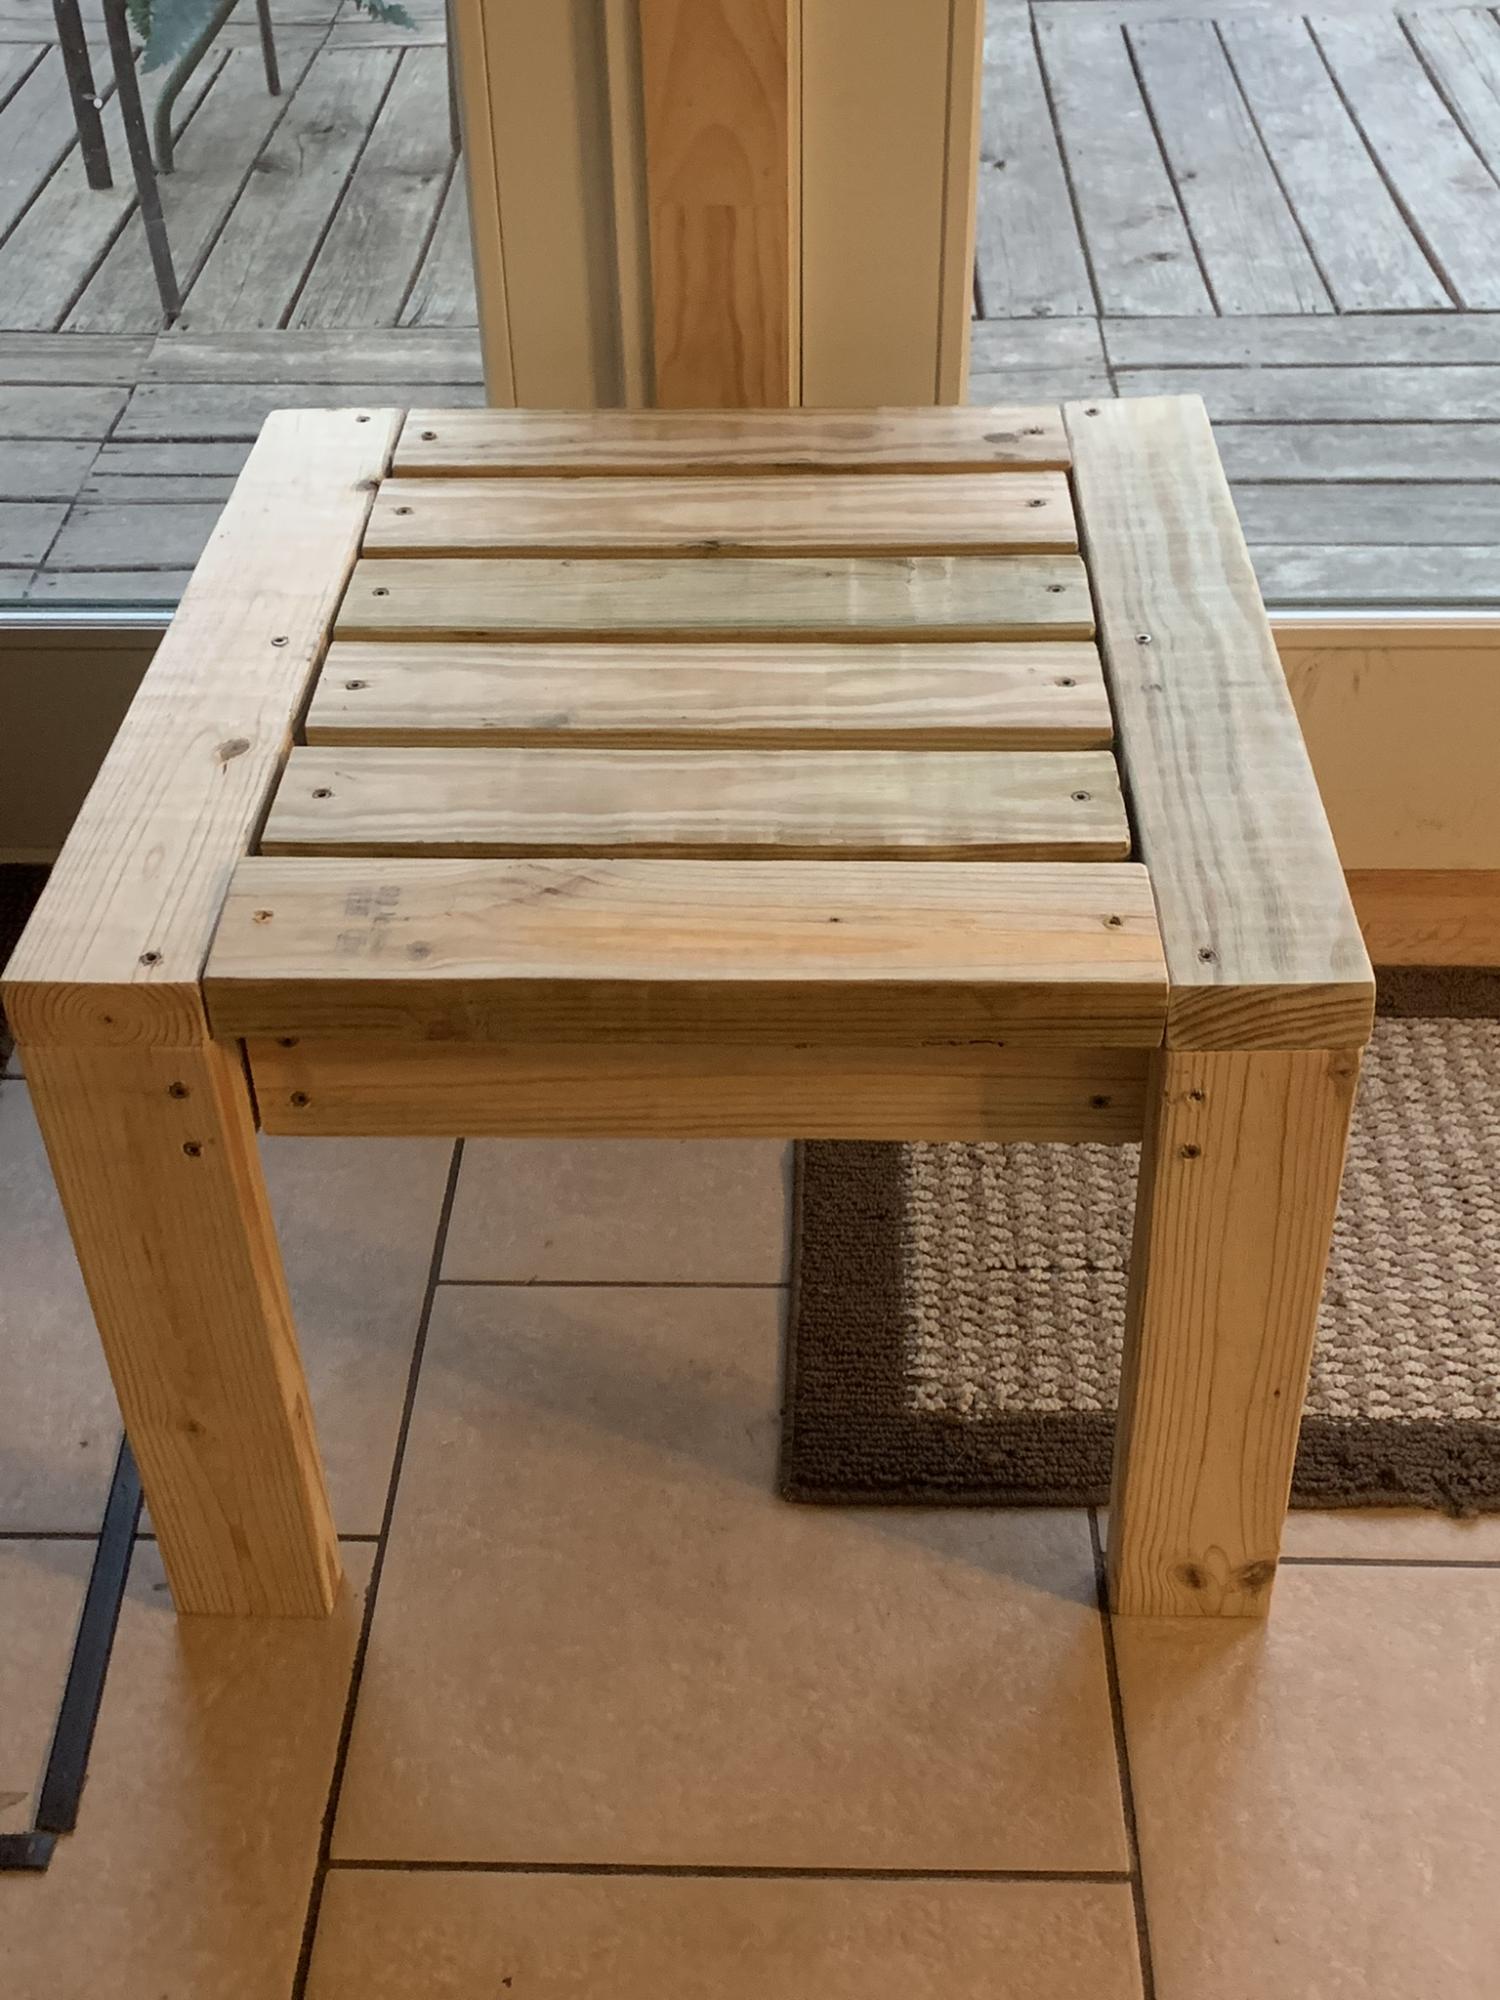
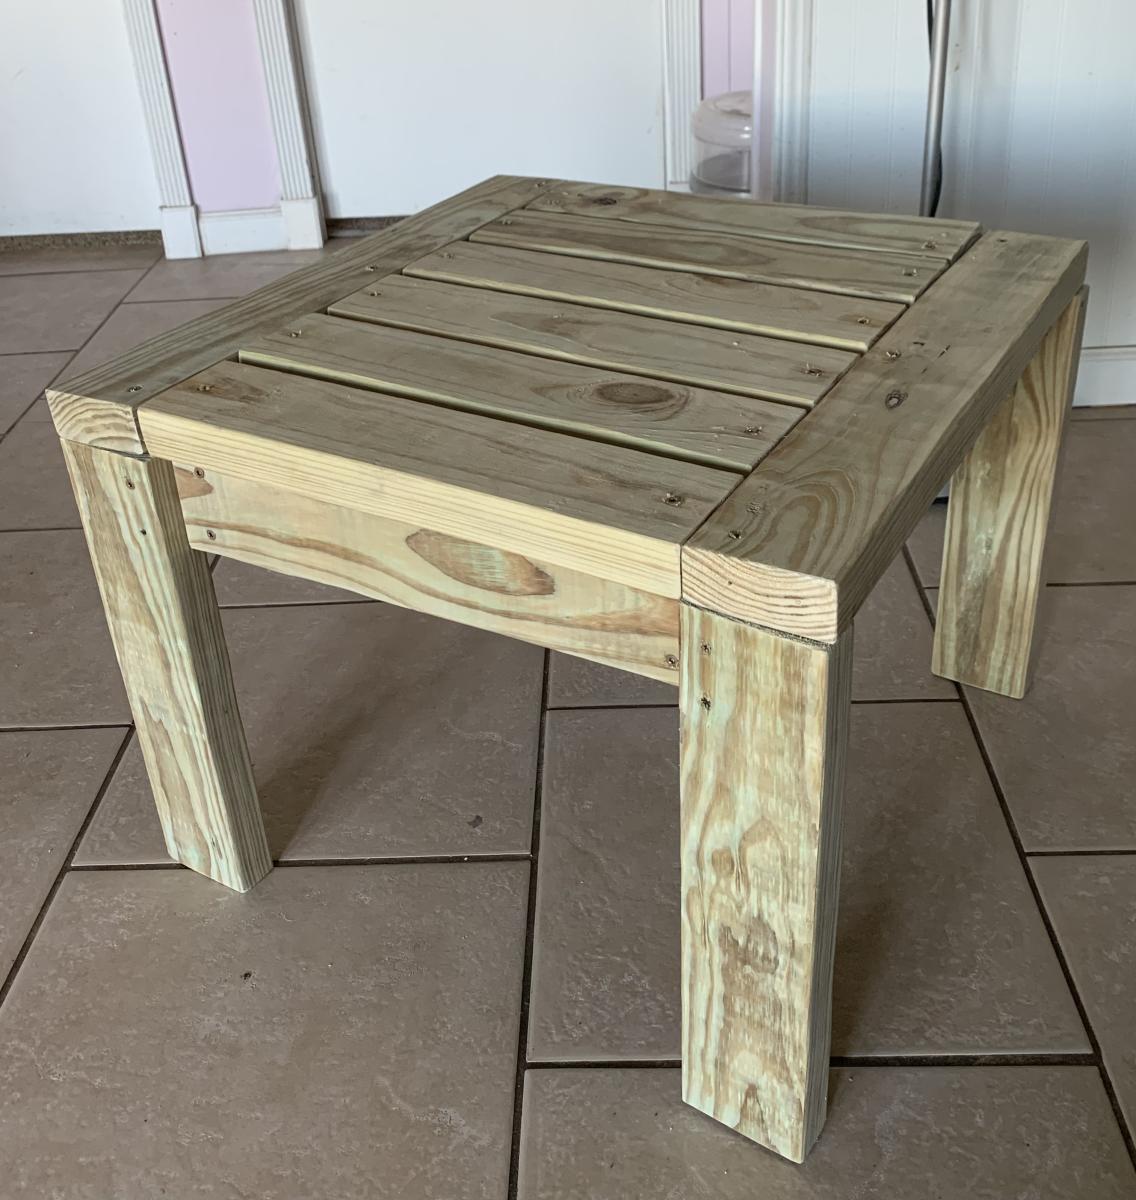
I made these two Ana White outdoor end tables for my patio. Next up will be the matching coffee table
Sun, 01/29/2023 - 16:04
Thanks for sharing, they will be a nice outdoor additon!
"I don’t consider ourselves experts at all and your plan was so easy to follow. We can’t wait to introduce our chicks when they’re old enough to transfer outside."