We had this extra room that was sort of a "catch-all" room. We never used it, except when William wanted to play his guitars he went in there. There was an old, dated college-style desk and bookshelf in there (particle board) an old couch and a chair.
I figured that if I gave this room a purpose, it might actually stay clean and "catch-all"-free. To add to my decision making process was that around Xmas time, we didn't really have anywhere besides 1 guest bedroom for people to sleep. None of the couches are pull-out couches and I don't really like when people sleep on couches. The 1 guest bedroom has a queen sized bed in it, but my sister usually crashes in that room with her 2 dogs, leaving no other place for say, my mom or gramma if they wanted to stay, too. So I thought this new room could be another guest bedroom.
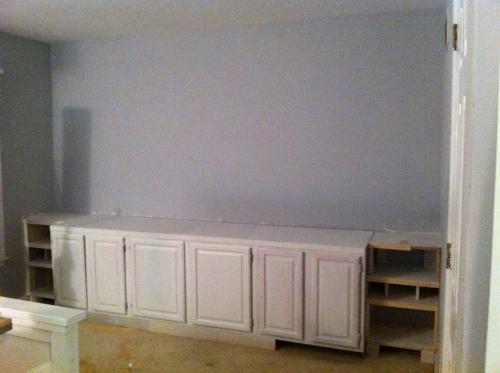
I decided I wanted to go with a minimalist look in the room, opposite of its cluttered origins. I had finished building a reclaimed/recycled wood queen size farmhouse bed for in there and wanted nothing else really besides William's chair to play guitar, but I did need to address storage in the room. There IS a closet, but it's also the attic access and I want to keep it clear of anything so we can get into the attic if we need to... sooo... When William redid the guest bathroom, he didn't throw out the old vanity, and when we re-did our master bath just recently, we kept the vanity from there too. One is a single vanity and one is a double vanity.
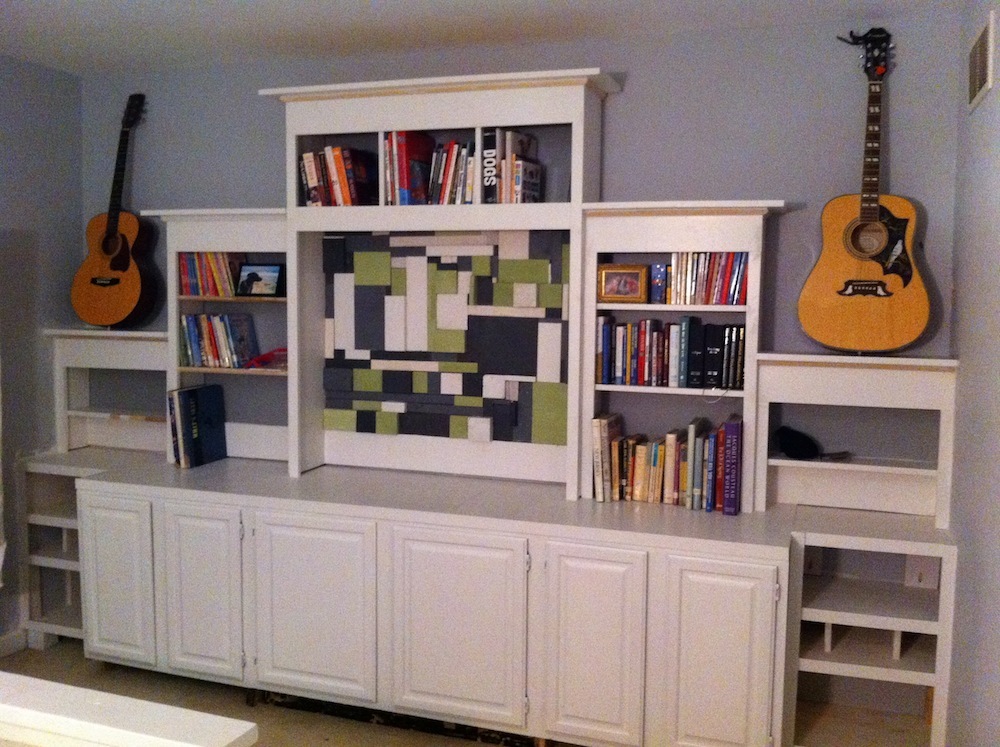
The cabinet bases are solid wood except for the sides which are paneling or something very thin. I definitely wanted to continue the recycled theme of the room so I decided to use these cabinets. Only problem was that the double vanity had 2 sets of smaller doors than the single vanity's wider 1 set of doors. If i placed them side-by-side, it would look weird. So, I sawed the double vanity exactly in half and then flanked the single vanity with them. It actually looked really good. I took the tops off of the vanities and decided to build a new top using left-over plywood we had laying around in the garage. I painted everything white to match the farmhouse bed and I centered the cabinets on the back wall of the bedroom - they don't quite reach from 1 side to the other, so i decided to fill those 18 inches with shelves I built.
I wanted to go with a mid-century-modern look for the room, so that's the design I made for those side shelves... now, looking at it, I kind of want to put doors on them, because it looks a bit odd to have the cabinets and then those shelves without doors. I'll have to figure that out. Anyway, now that I had a base, I wanted to build the built-in hutches to add shelf/storage space and to make a striking piece in the room, since there's so few other things in it.
I used the TOMMY plans to build the center hutch and side hutches, not realizing that the base cabinets for those plans are different heights, so my side hutches ended up being MUCH lower than the center hutch, but it's not the end of the world. Then I just mimic'd the same design of the side hutches to make 2 MORE side hutches to flank them. I just made them even lower in height than the first 2 side hutches. I accidentally forgot to measure the guitars before this last step and ended up building the last 2 hutches 6 inches too high to display the guitars and had to take them back apart and re-build them. It took me about 5 hours to completely build the hutches. It took a few more days of sanding, hole filling and painting, though.
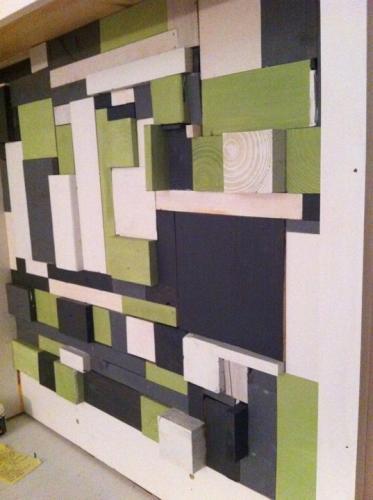
Finally I got it all up and painted and I decided to not use the crown moulding, and instead just used the same moulding that we put on the changing table we built - I didn't want anything more fancy than that. I still have to put some of that same trim on the shelf fronts, as you might be able to see from the photo, but otherwise, it's done. I used all of my scrap pieces of wood to build an artwork piece in the empty space of the center hutch. I painted it the colors of the room (green, gray and white) and I just glued them all in place. A TV will sit on the unit in the middle section.


