Garage Shelves Plan with Added Doors - Built and shared by Jeremy Doyle
Garage Shelves Plan with Added Doors - Built and shared by Jeremy Doyle

Built from Plan(s)
Garage Shelves Plan with Added Doors - Built and shared by Jeremy Doyle
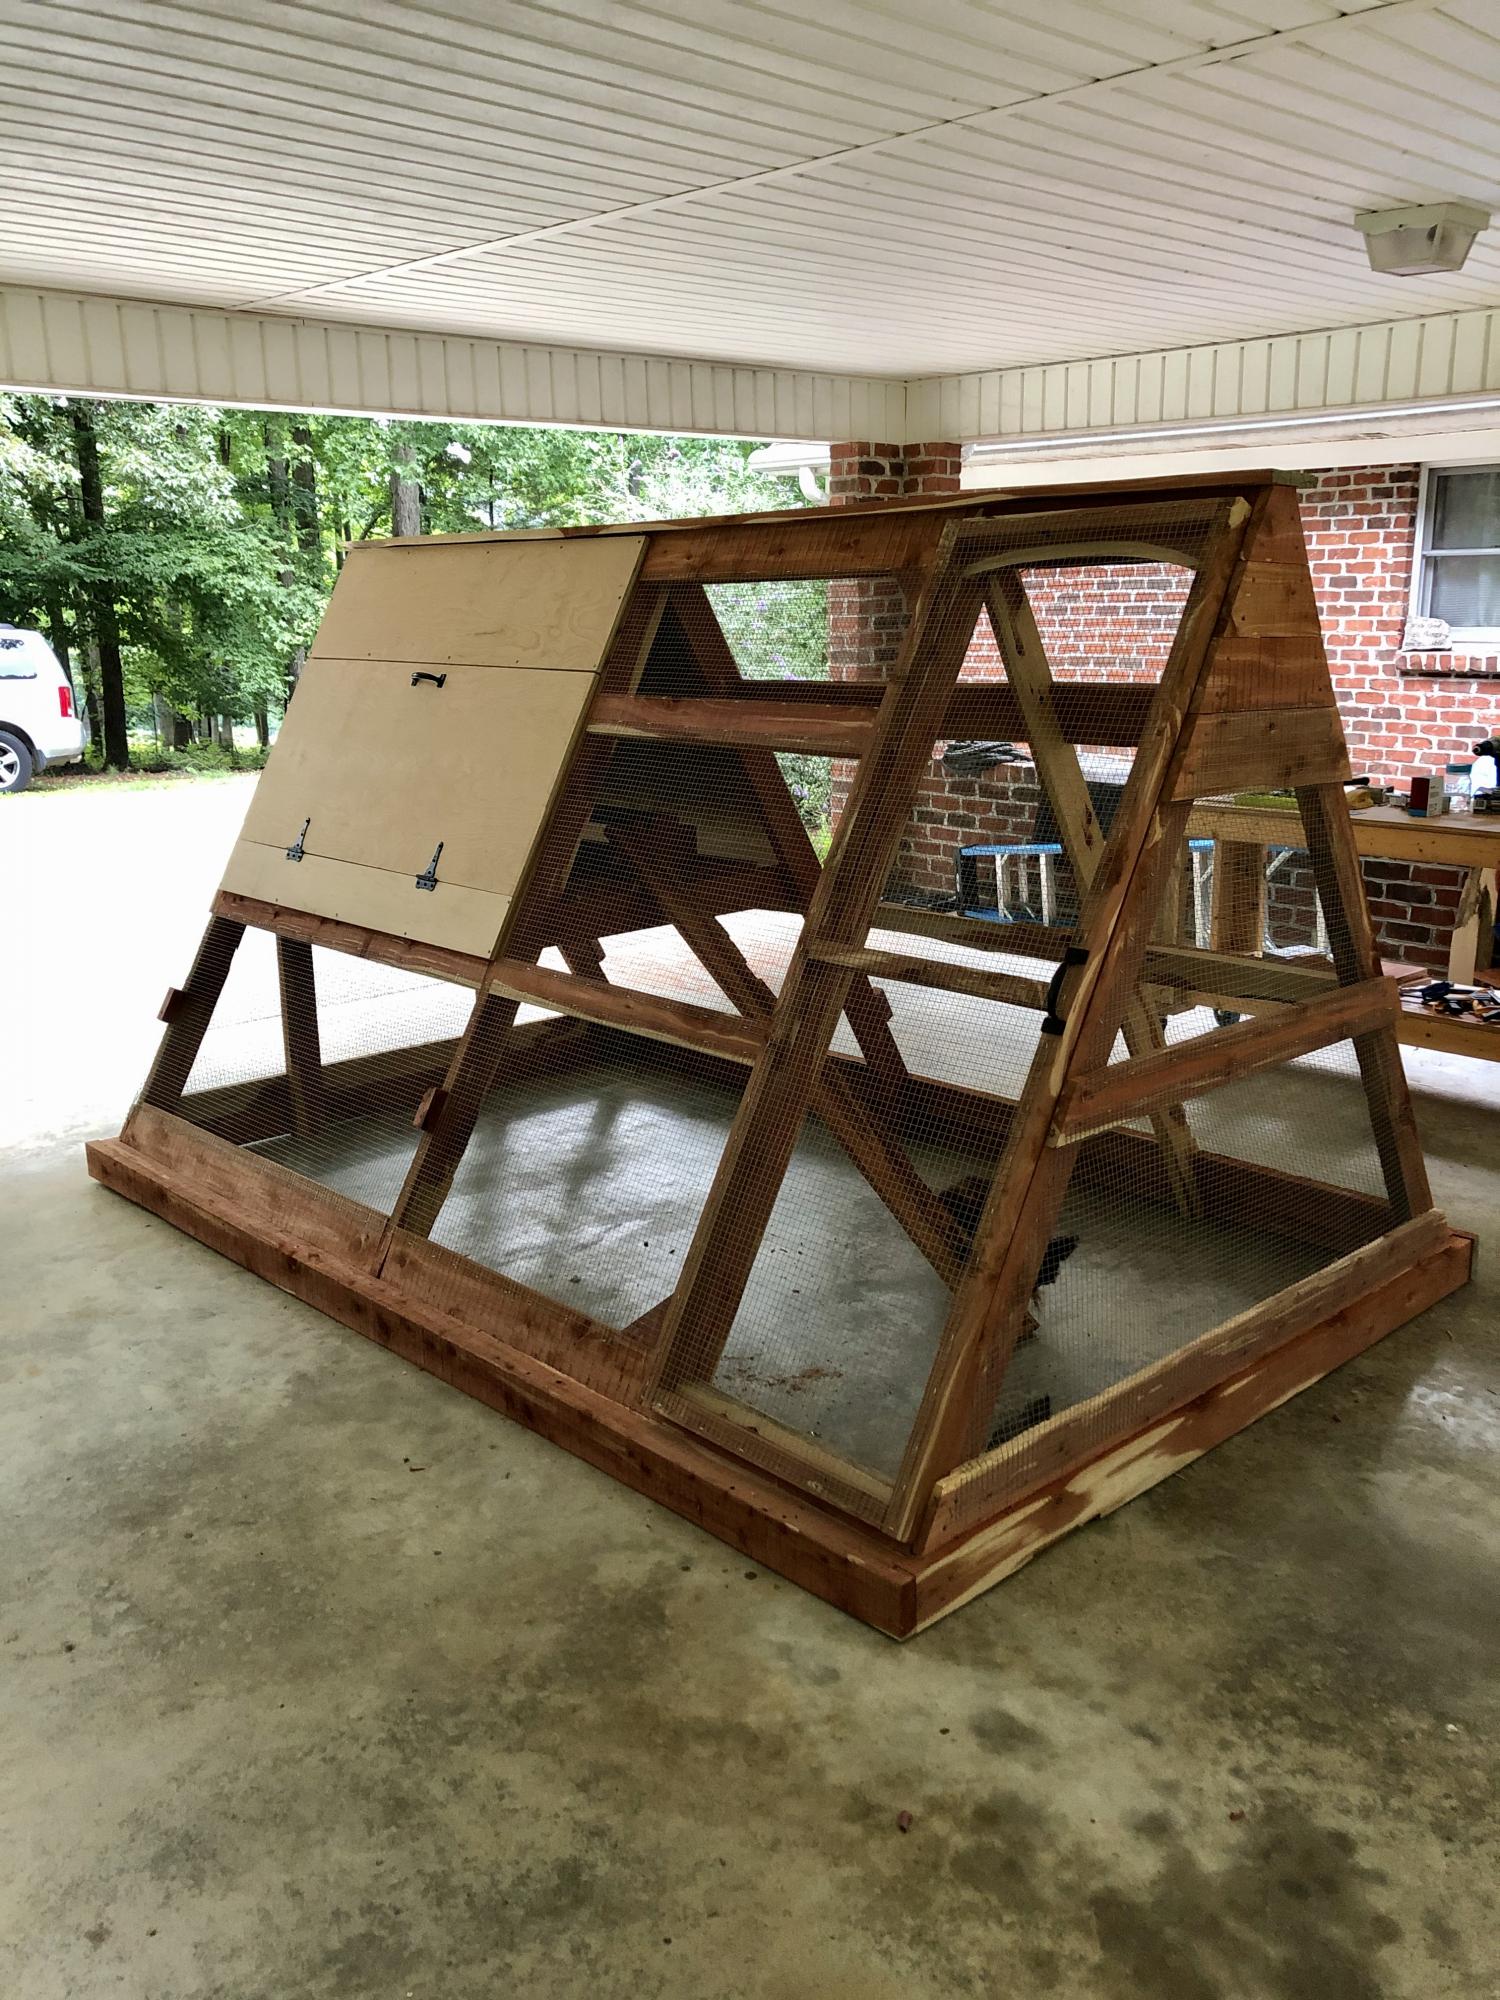
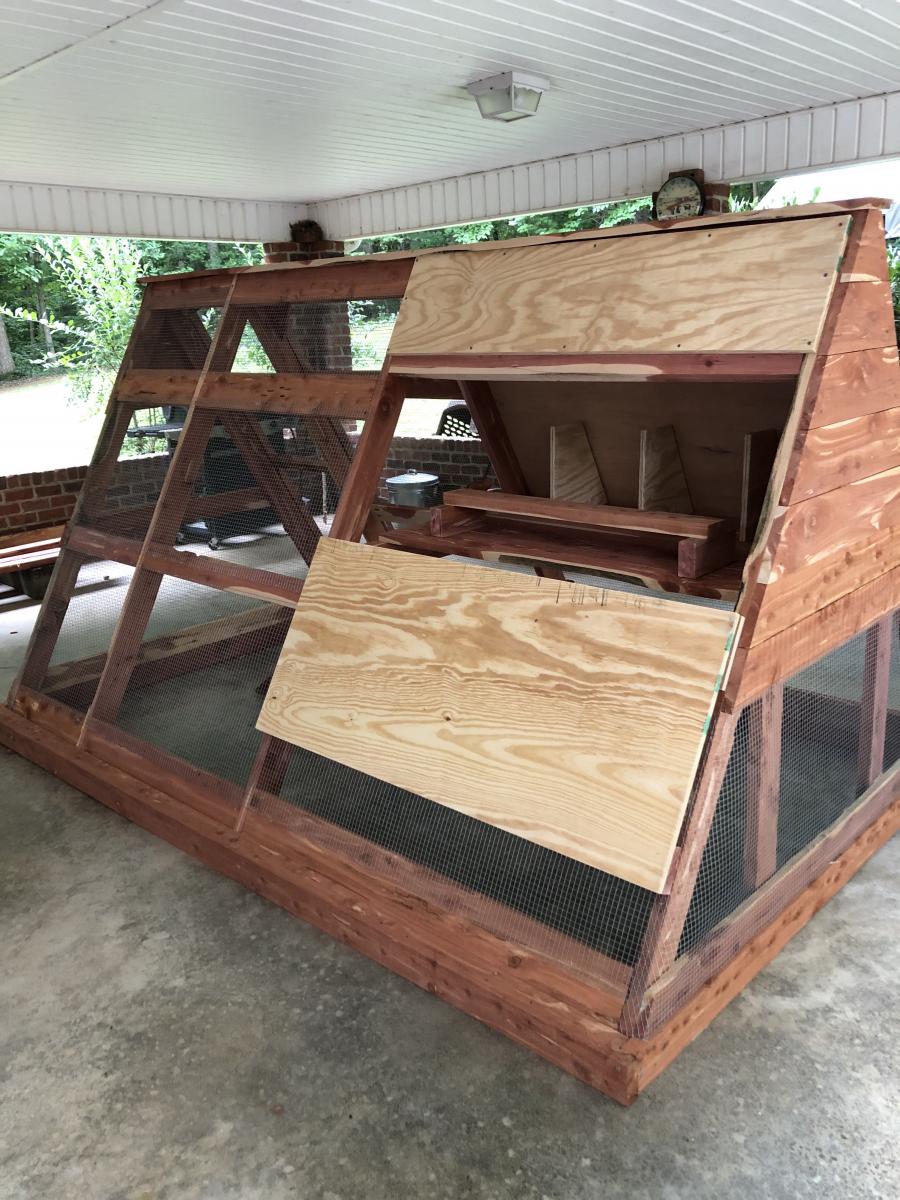
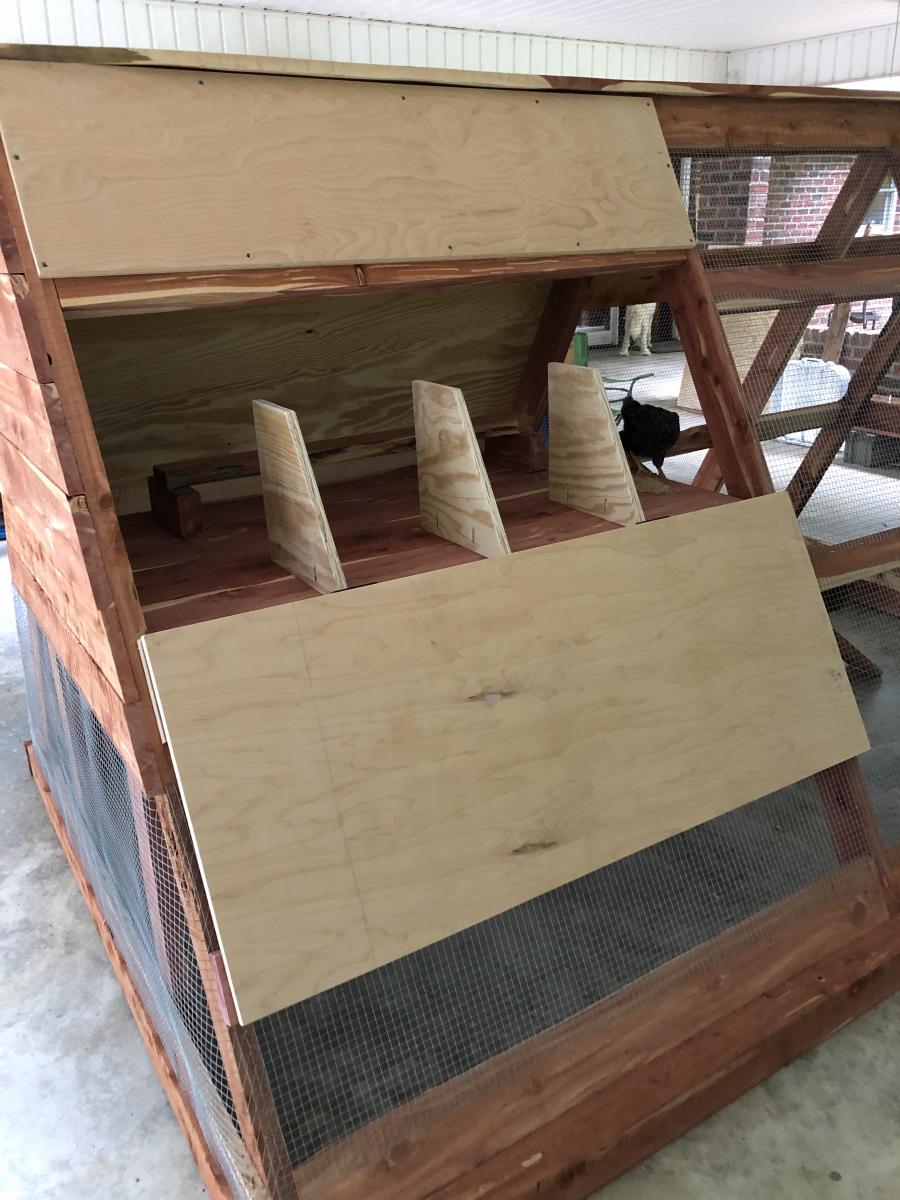
This was my biggest build yet and these plans along with being able to see a few brag posts with modicifactions made this project less intimidating. I extended the coop in order to add a walk in door. The drop down doors on both sides will give plenty of access and help with cleaning. I've added door latches to all the doors since putting it in place. My dad provided the cedar so that greatly reduced my costs. This project took about six days to complete. The fun part was getting it out of my carport : ) This was built for my daughter's chickens and she is thrilled with it. So am I! Thanks for the plans Ana!
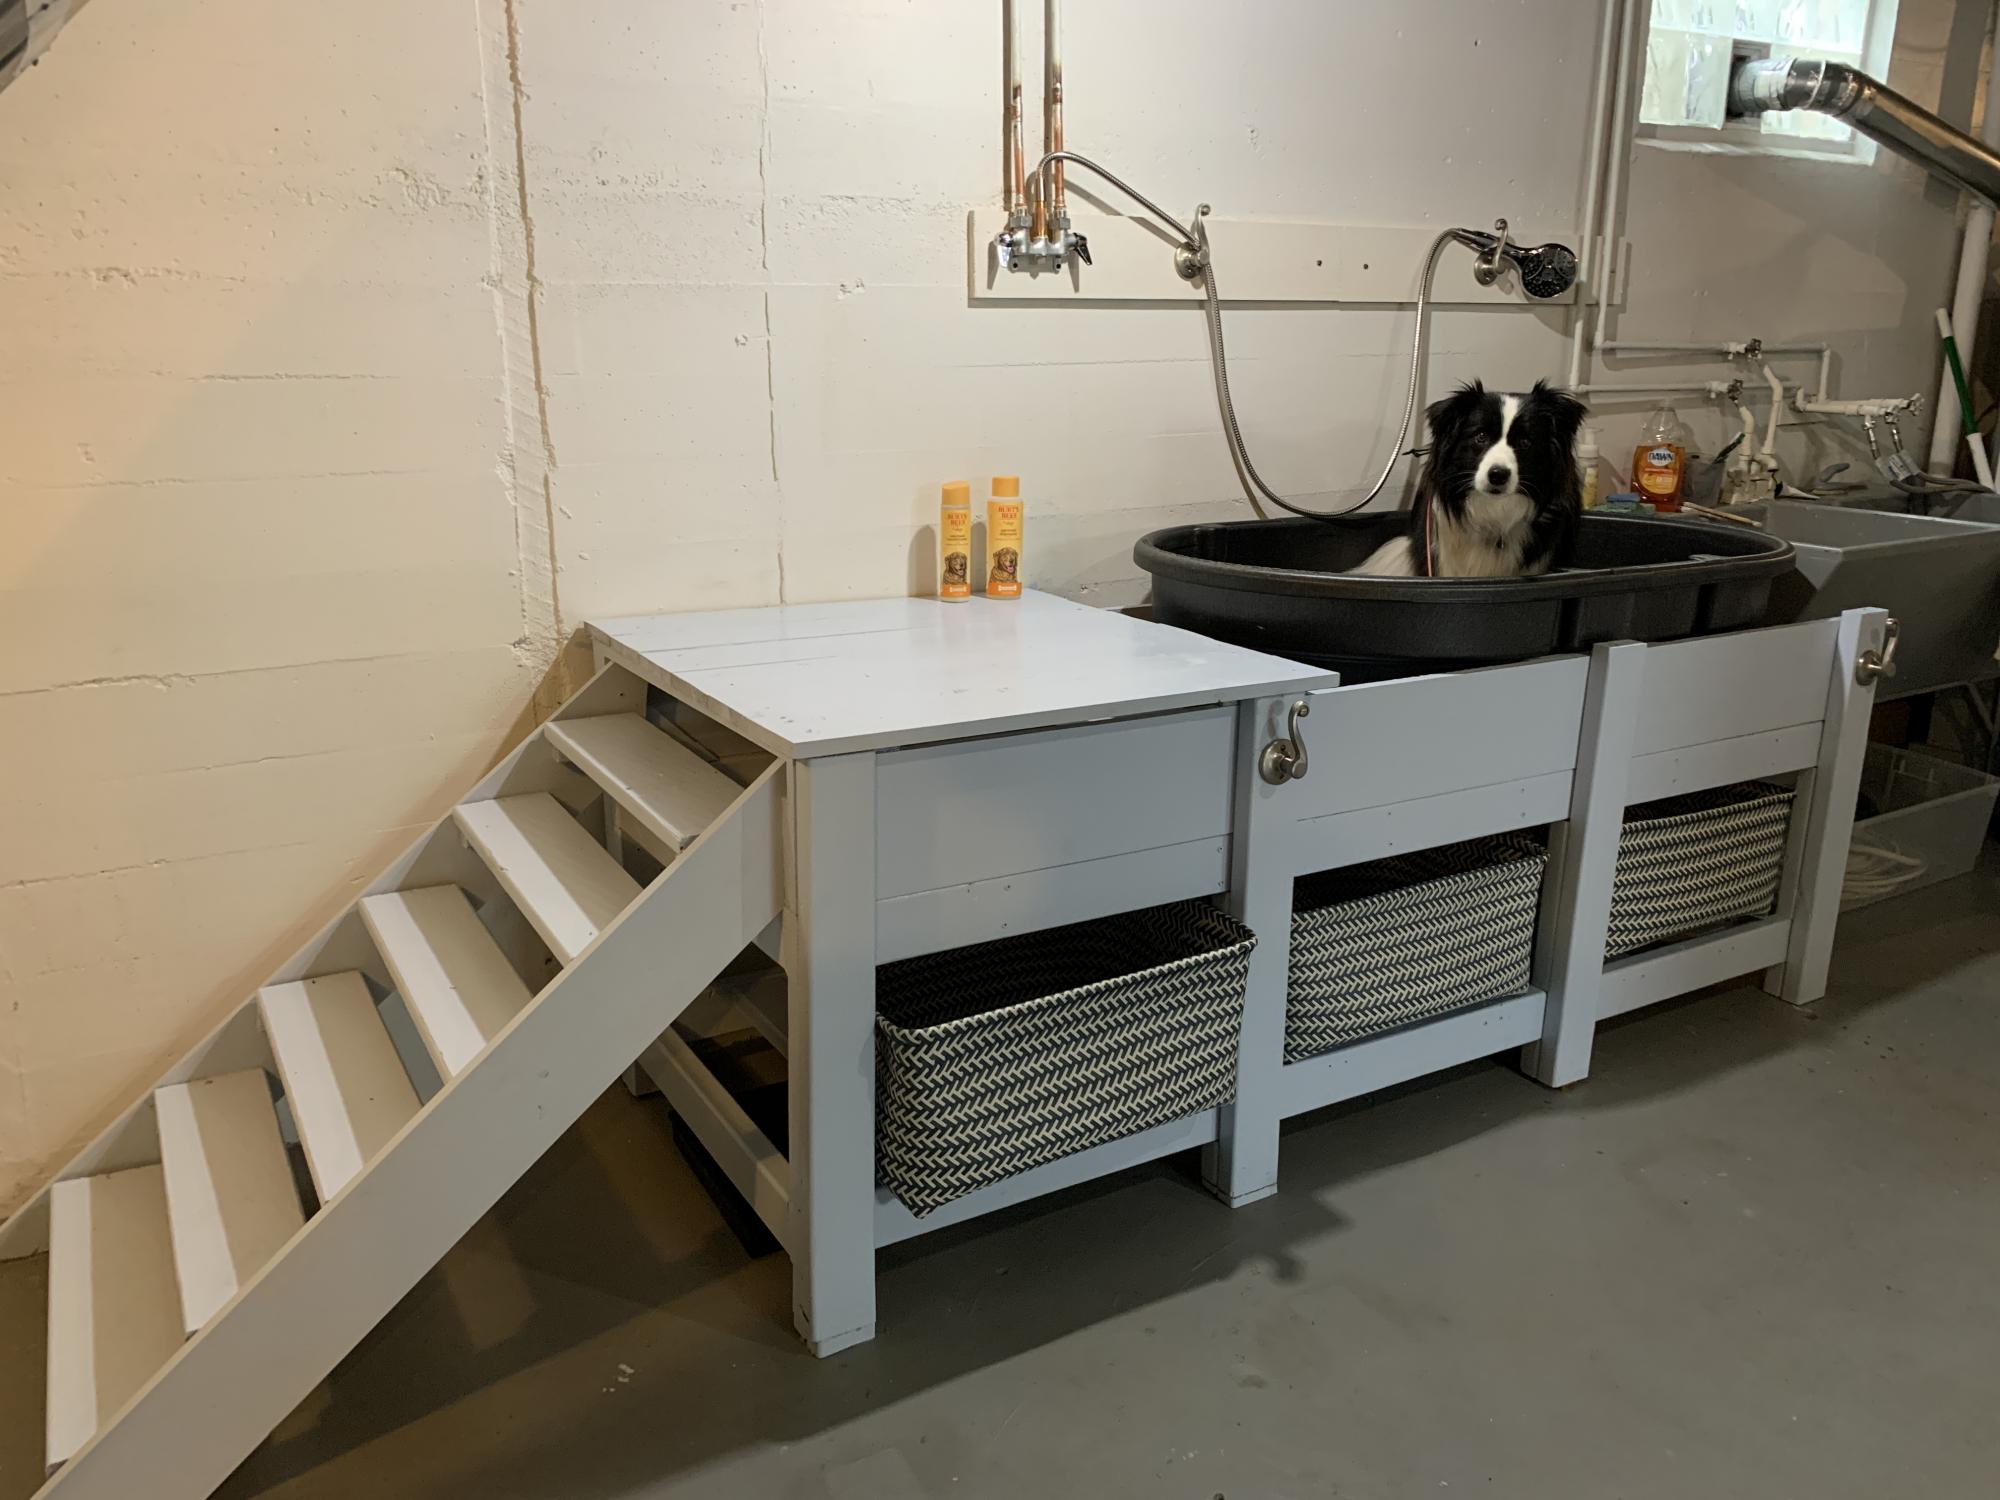
Tego needed a raised dog bath. No, I needed a raised dog bath. Specifically, my knees needed a raised dog bath for Tego. So, after looking at Pinterest and Ana's plans, I decided what I really wanted to do was customize something to fit my needs (and knees) and build it myself. Overly ambitious for a first-time woodworking project, but hey, raise the bar.
I started by reading and rereading Ana's beginner's woodworking guide (very informative). I also learned so many other things along the way. There's a reason, besides looks, you need flat boards (they need to screw together tightly). Unfinished basement floors are so not level (especially near the walls). Screw lengths matter (need shorter ones for thinner boards). The big-box store doesn't make precise cuts (but they can make a lot). Planning for the finishes will save you time (know your basket sizes). Just to name a few.
It's going in an unfinished basement, so I wasn't going to tile and add glass doors. I wanted to keep it relatively simple, basic.
The stairs were the hardest to measure and build (math matters) - and I might re-do. I made the steps smaller, dog-sized, but she finds them awkward. I'd stick with typical riser heights, but it depends on the size of your dog.
Plumbing to link the tub drain to the utility sink drain was the most expensive. Probably I could have done it myself, but I decided not to learn both plumbing and woodworking for one project.
Overall, I'm pleased with the result - and Tego is learning to love it.
Thu, 07/22/2021 - 12:38
Love it, you and Tego are AMAZING! Thank you for sharing your custom build:)
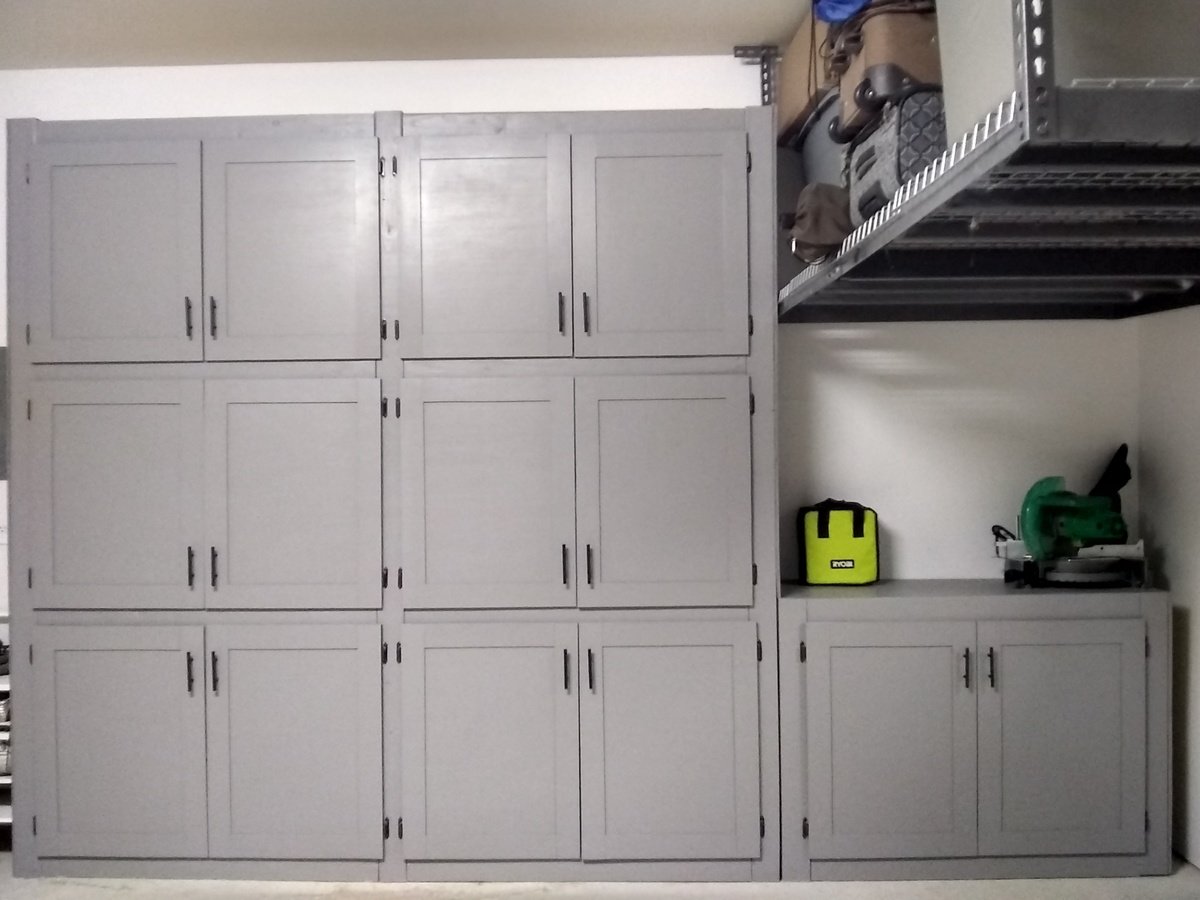
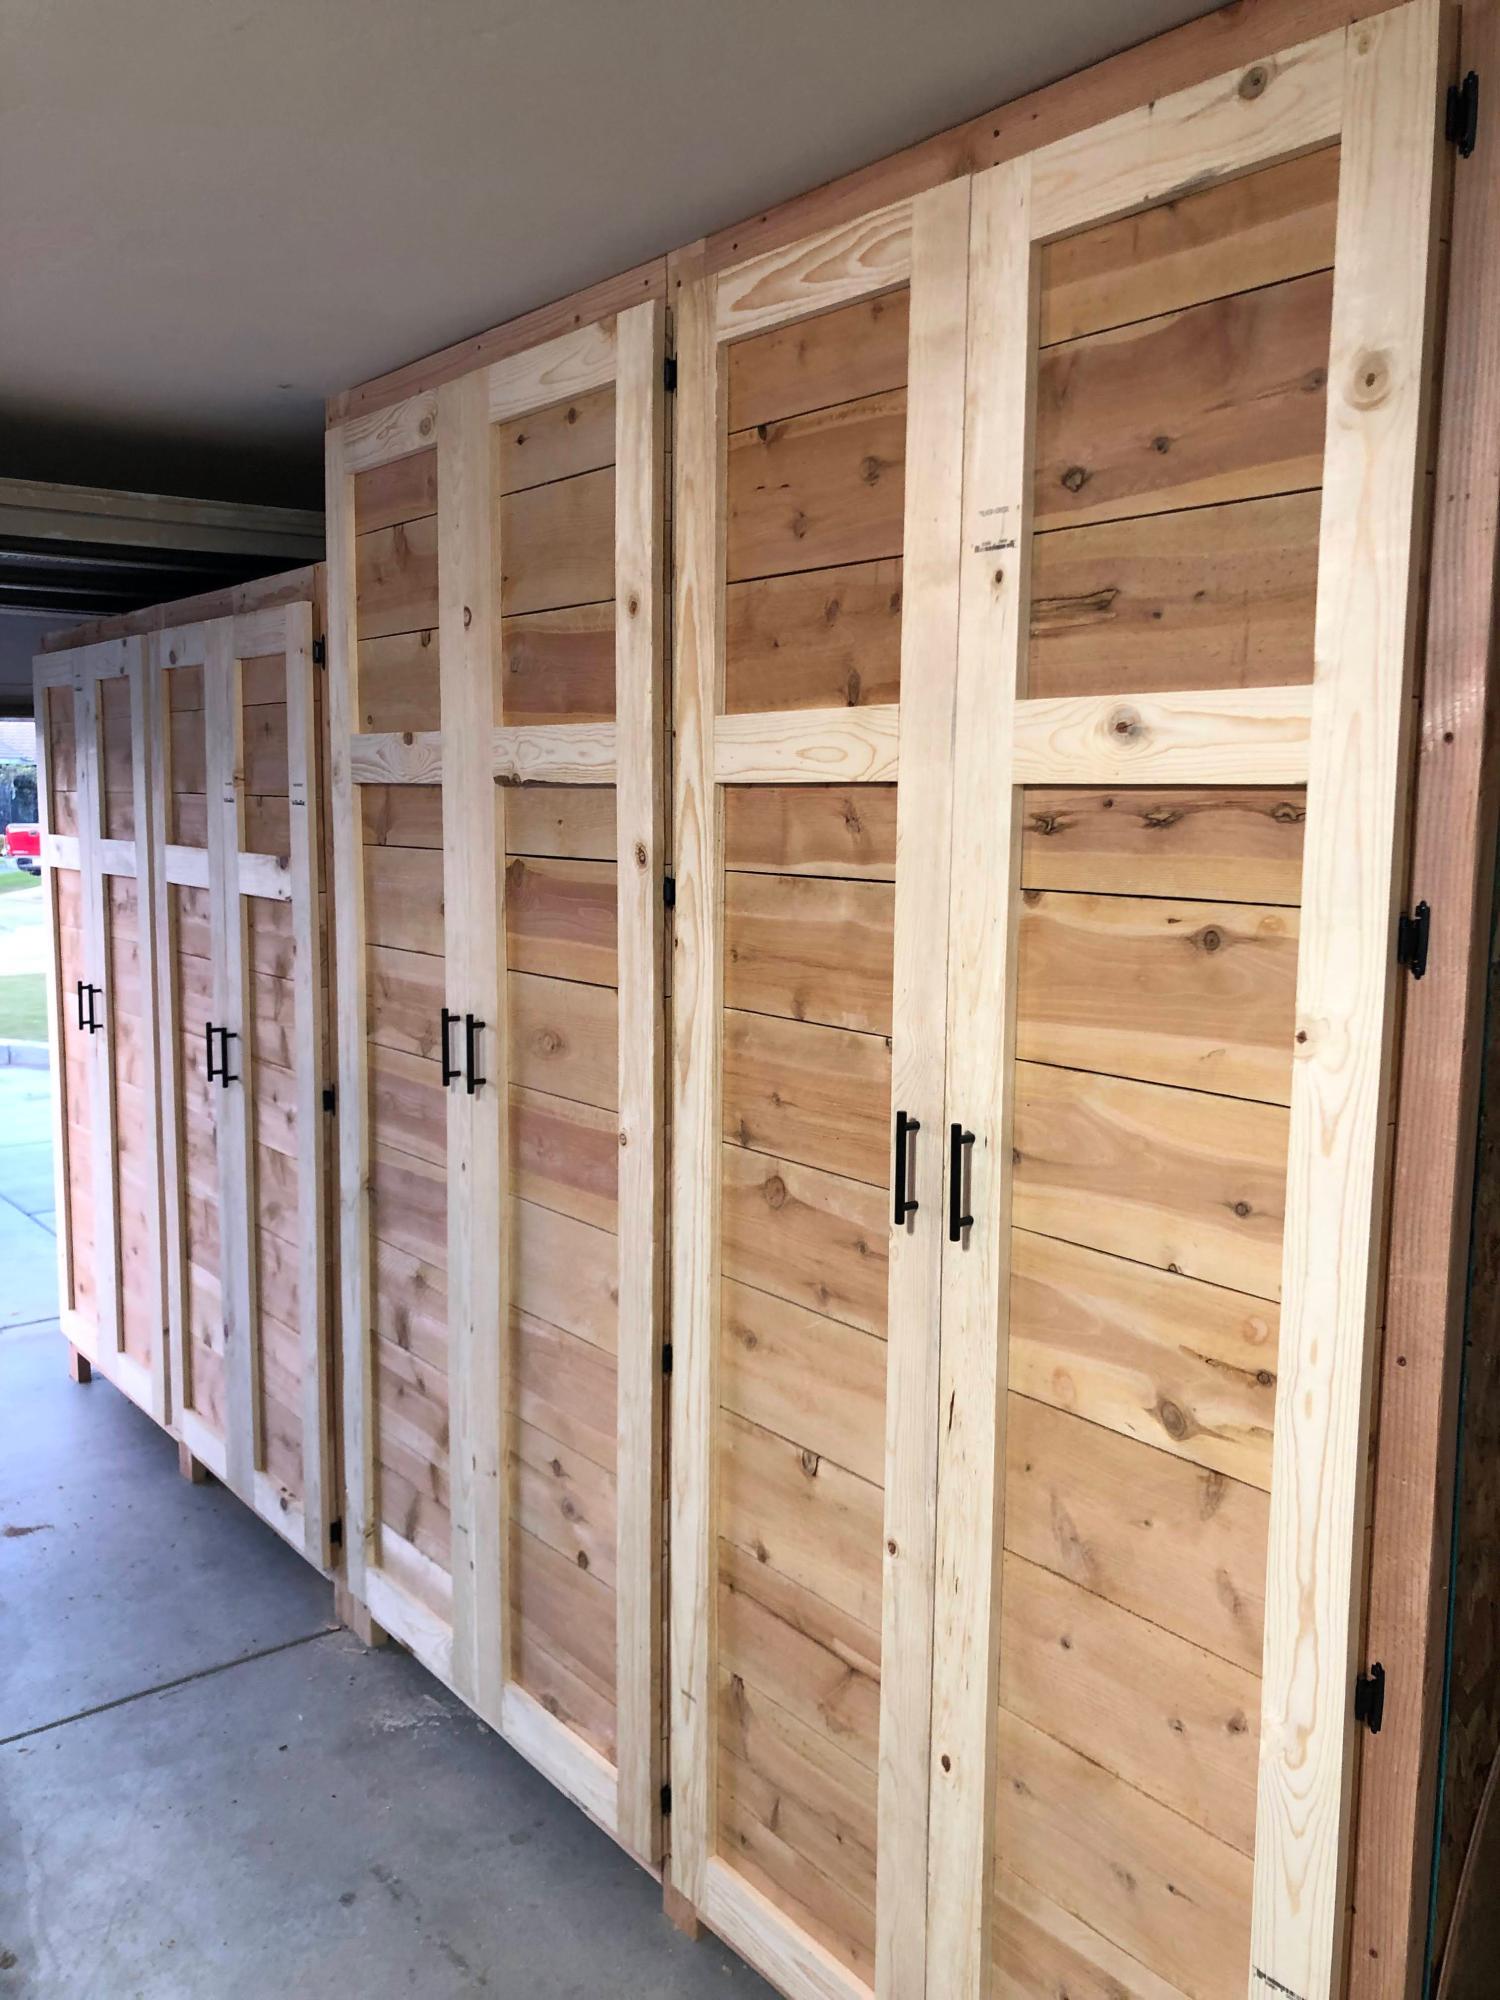
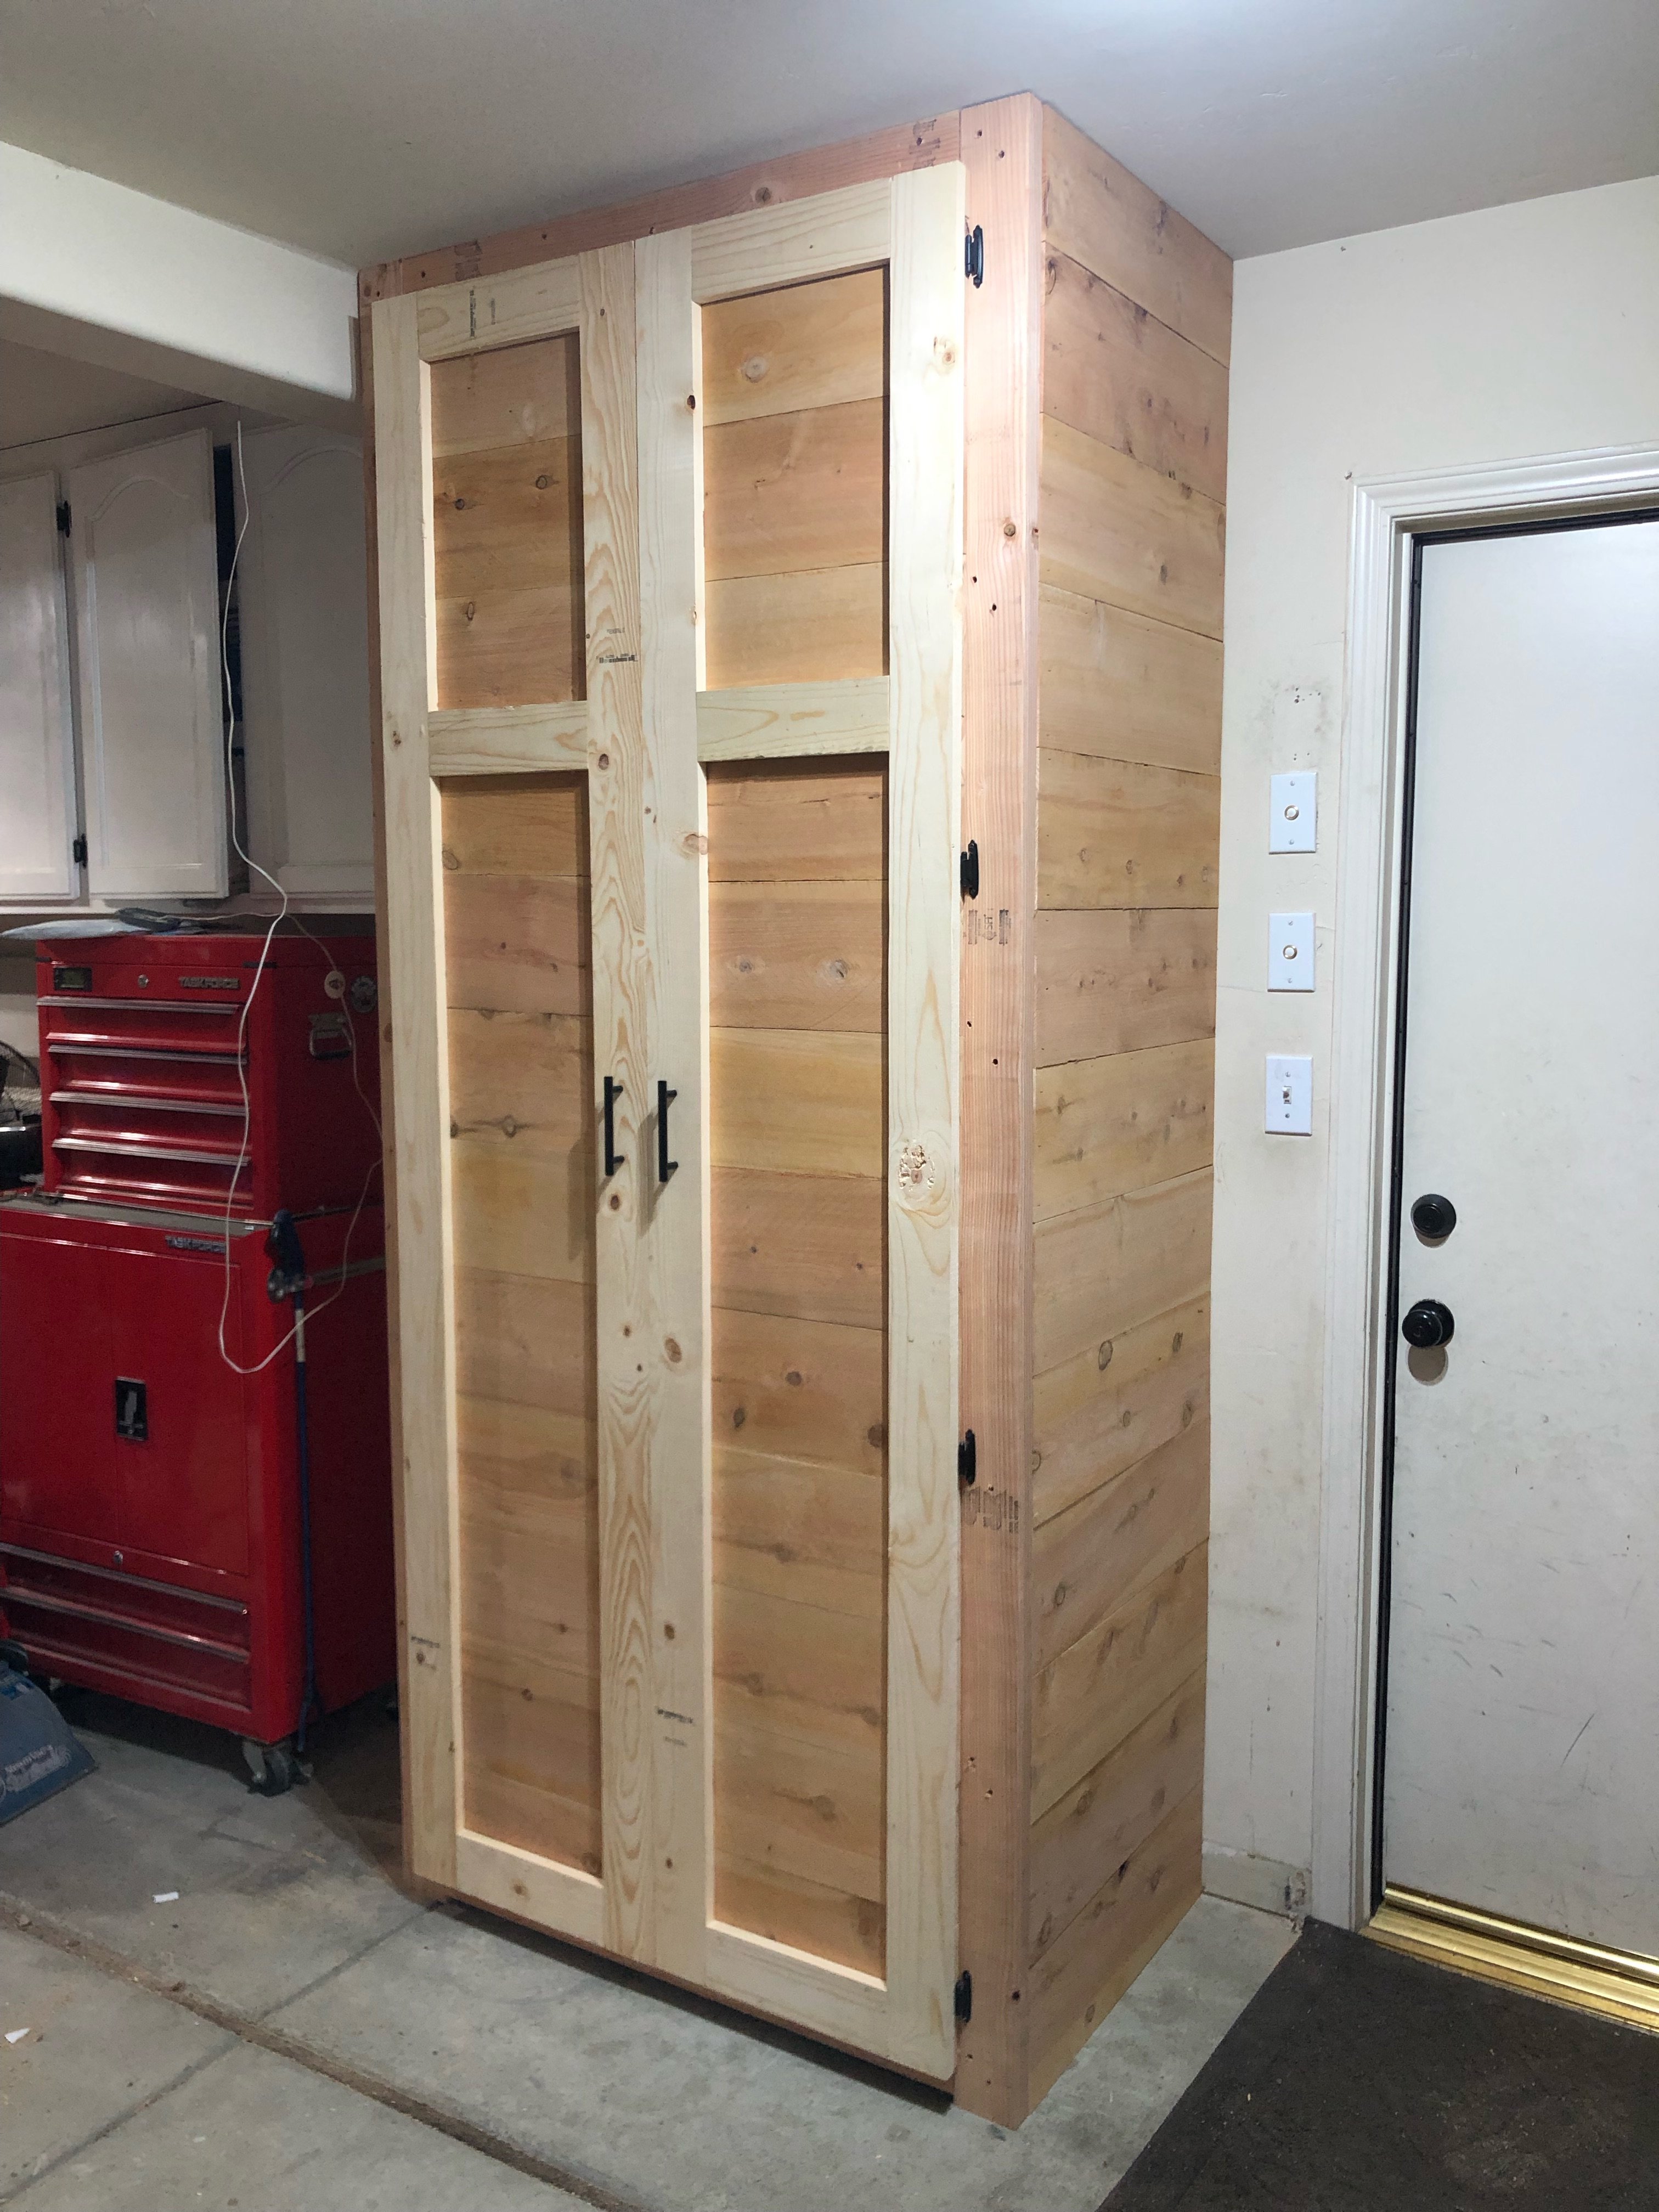
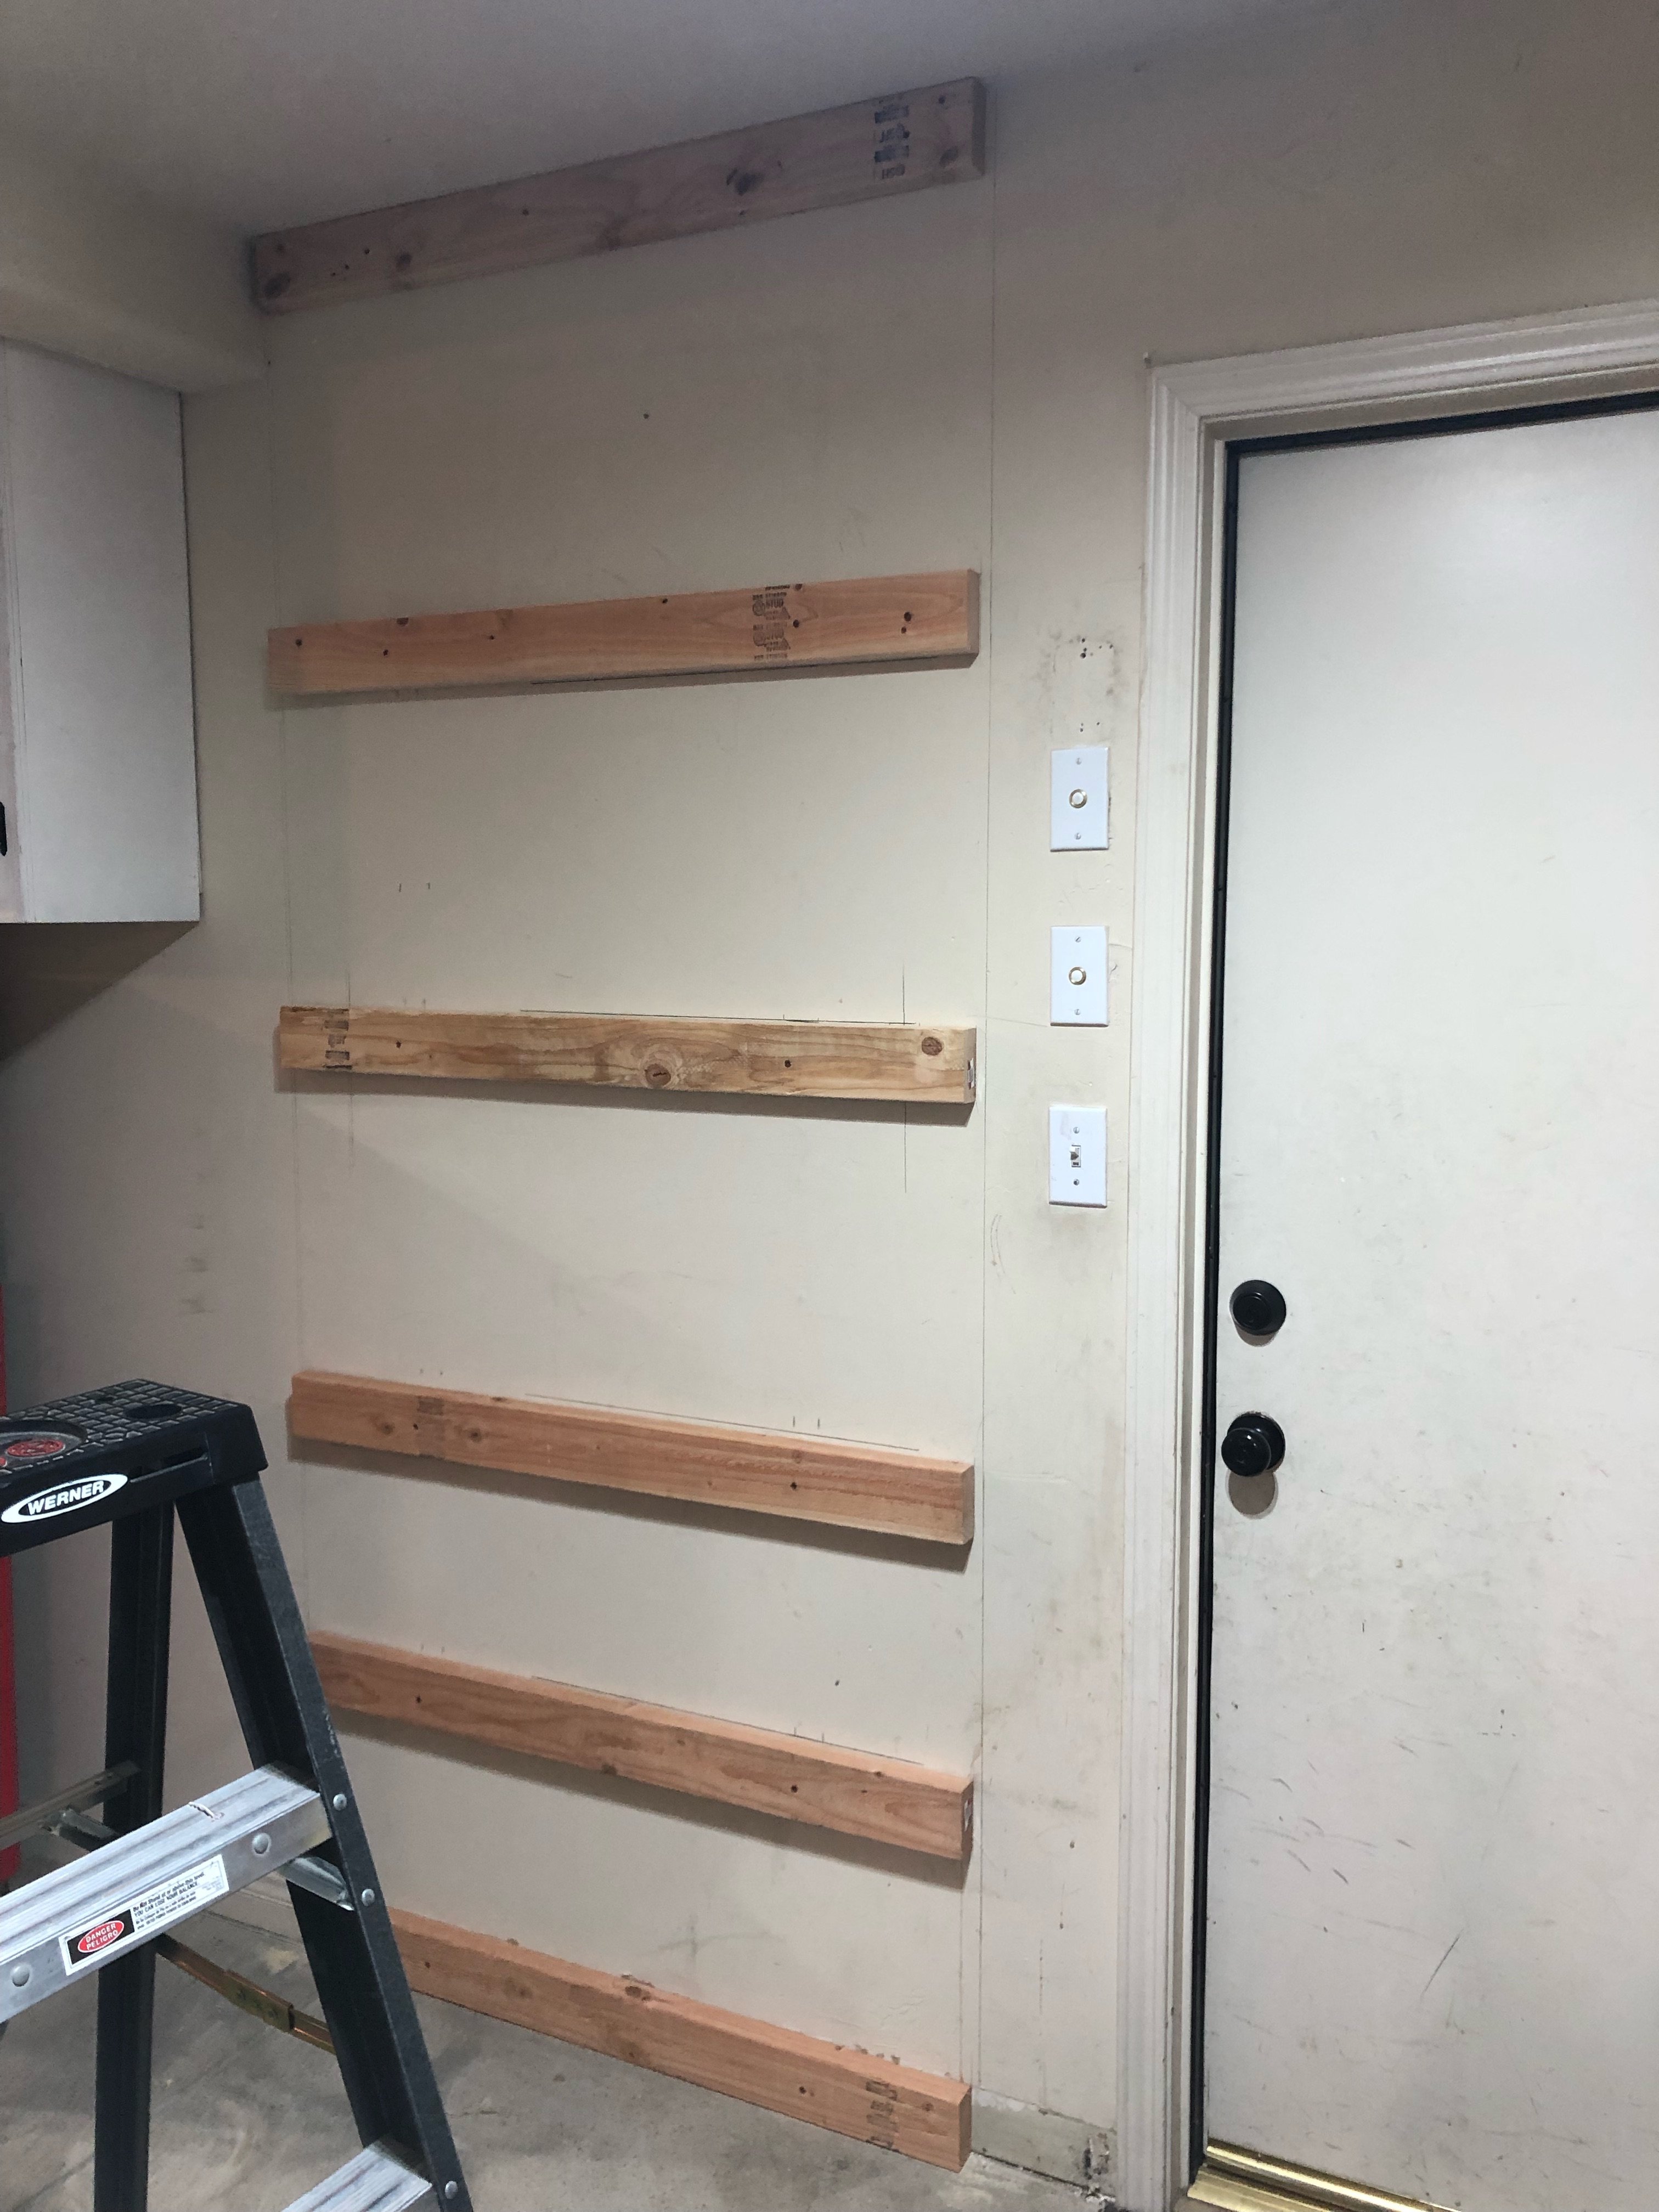
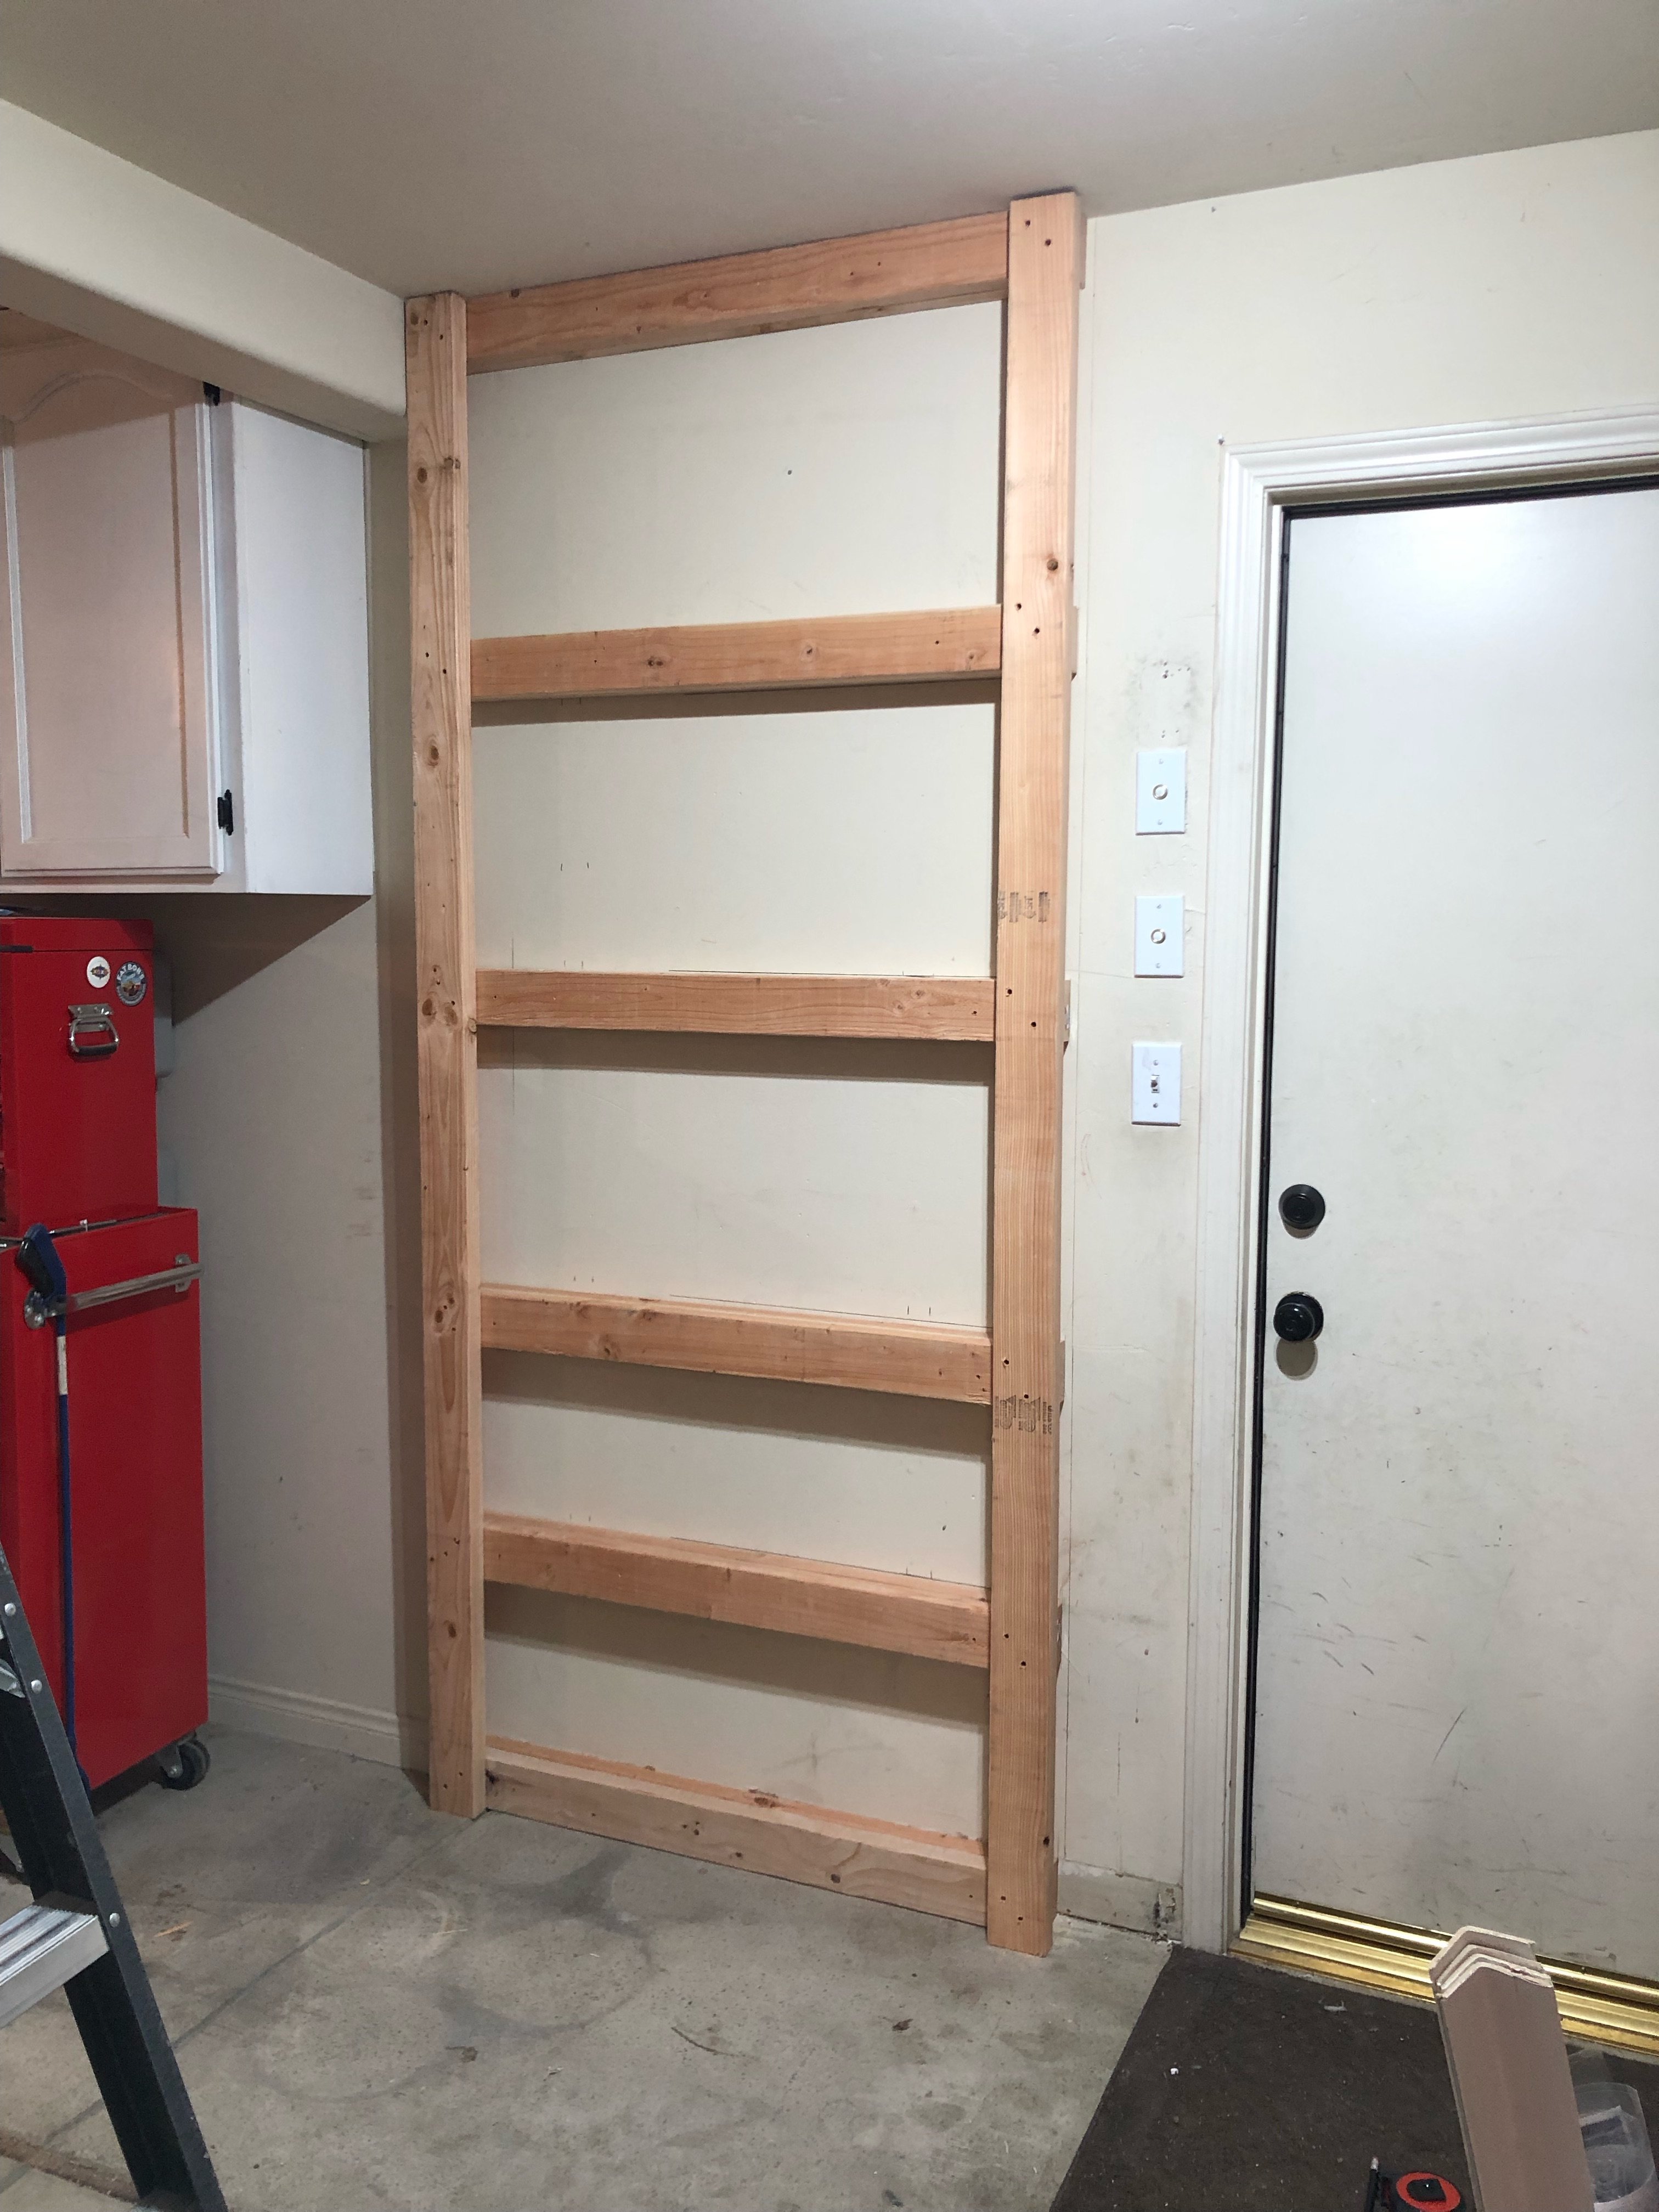
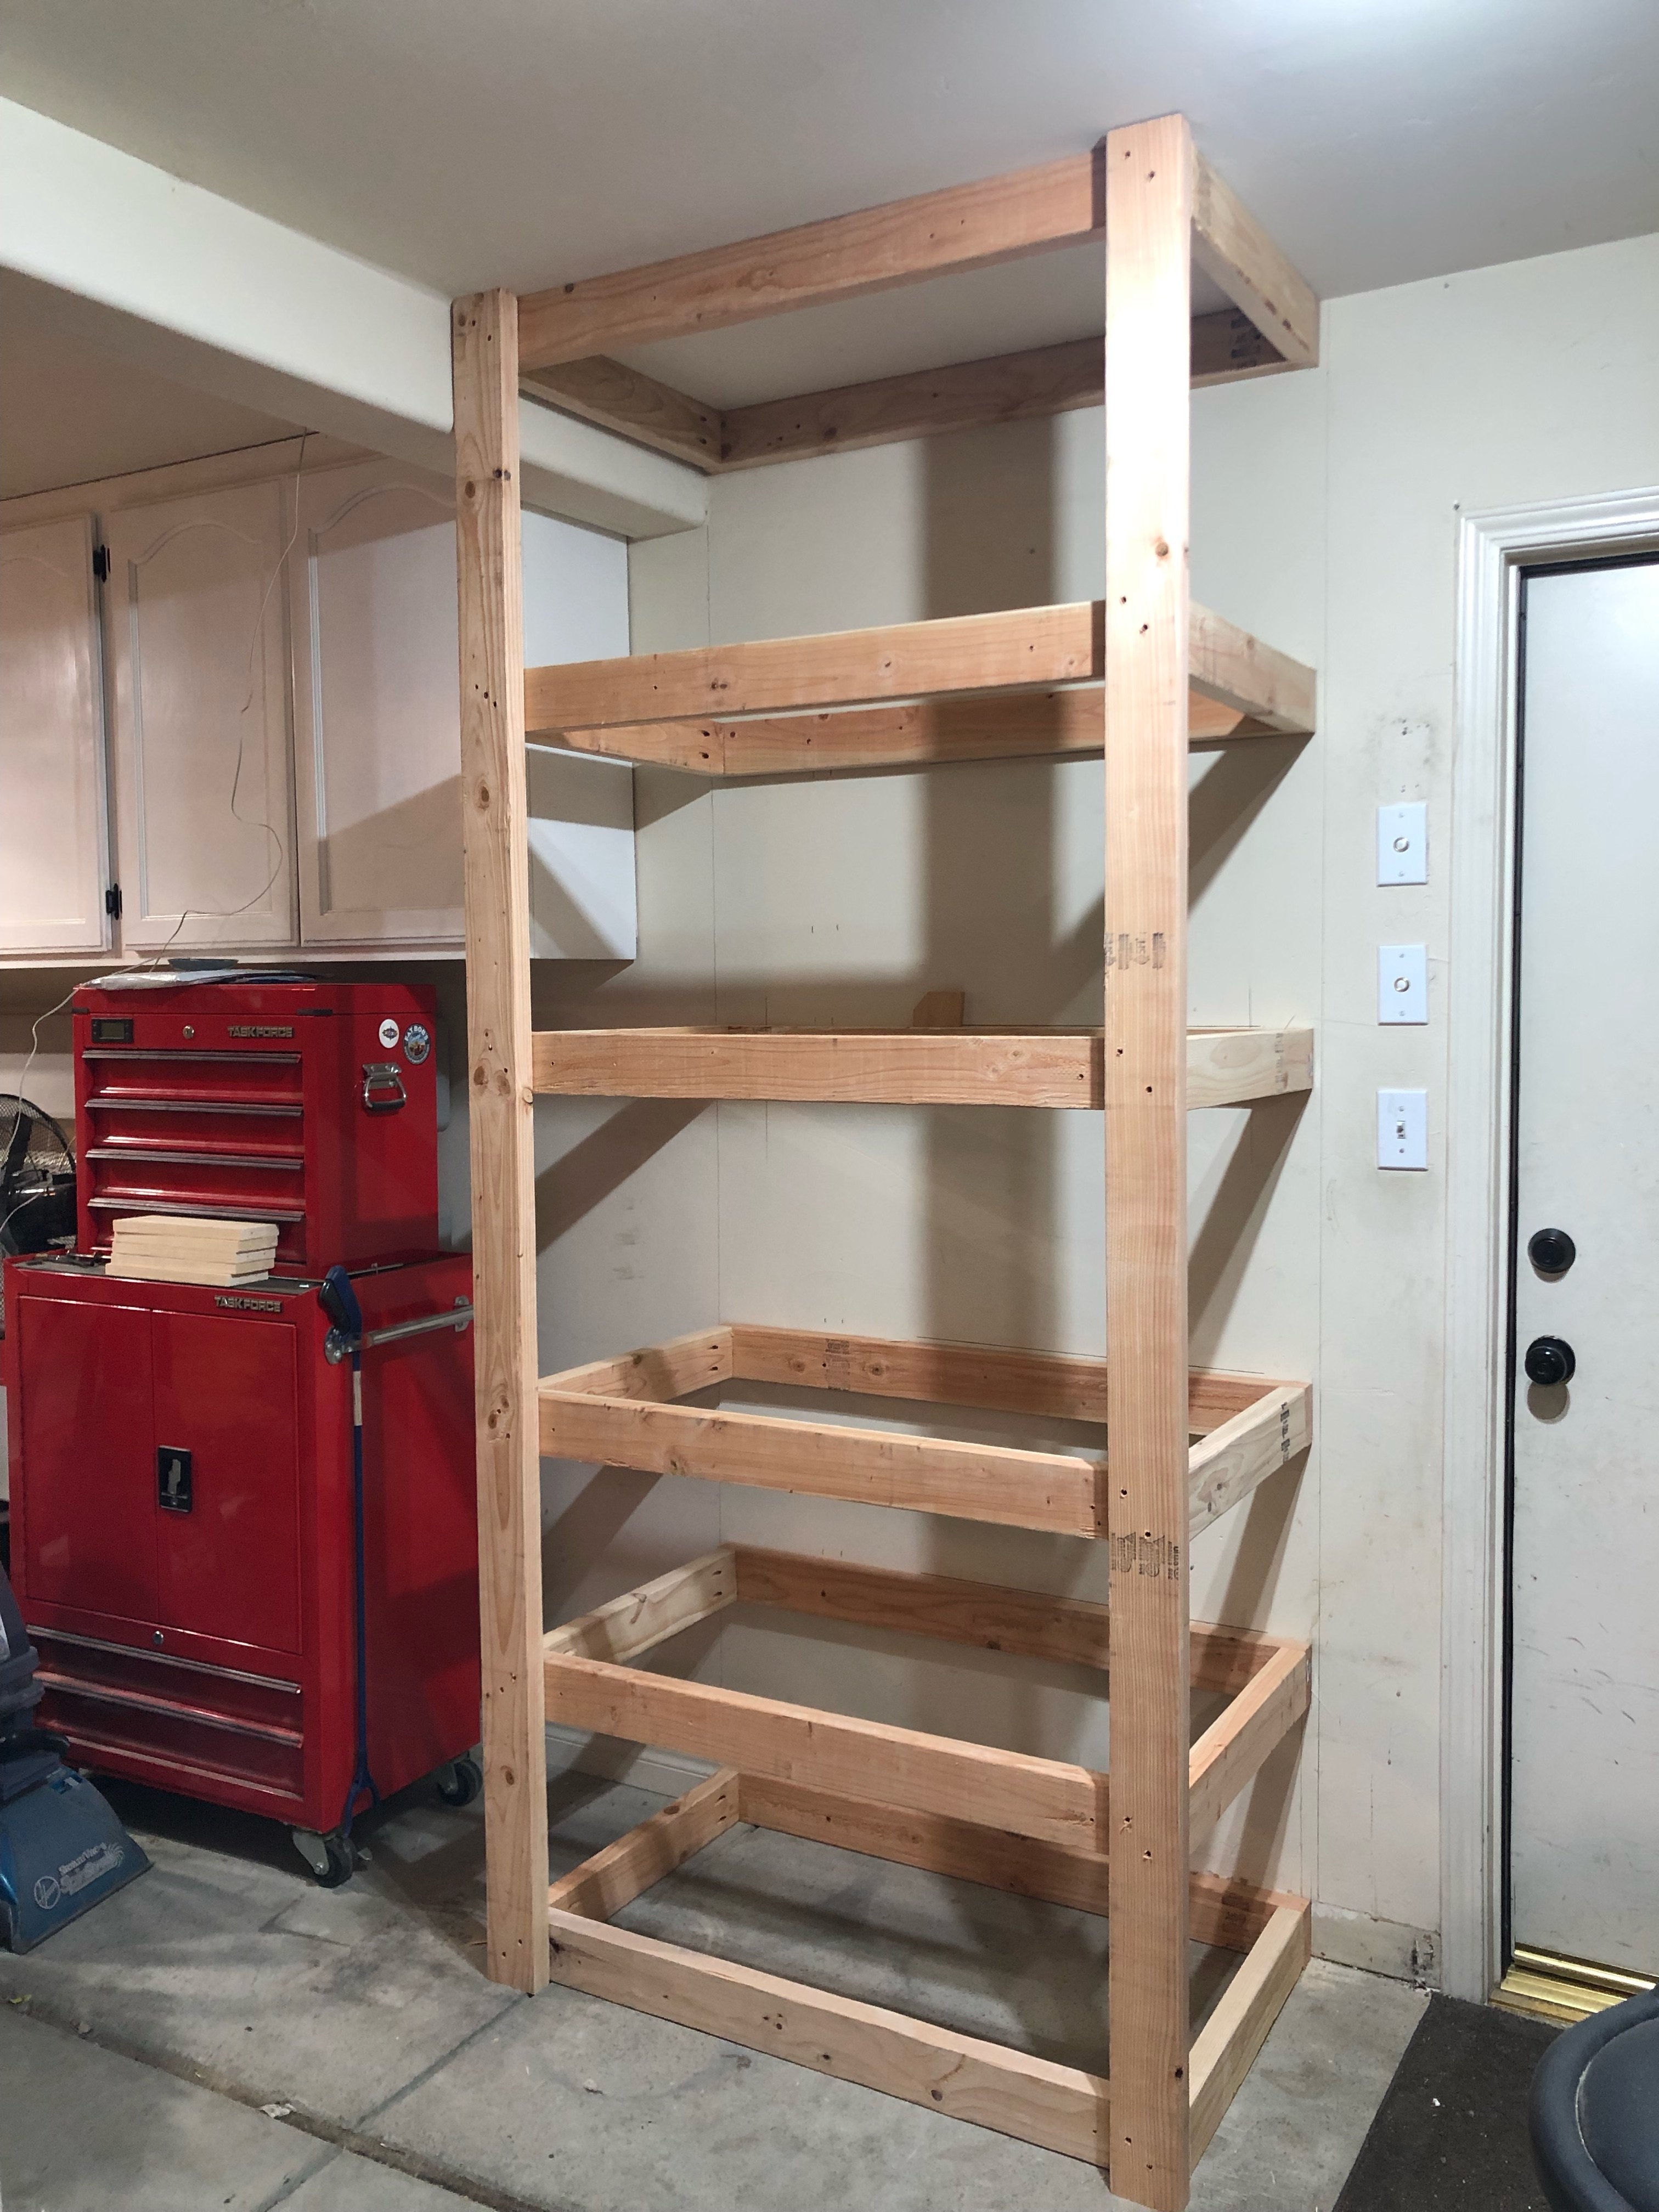
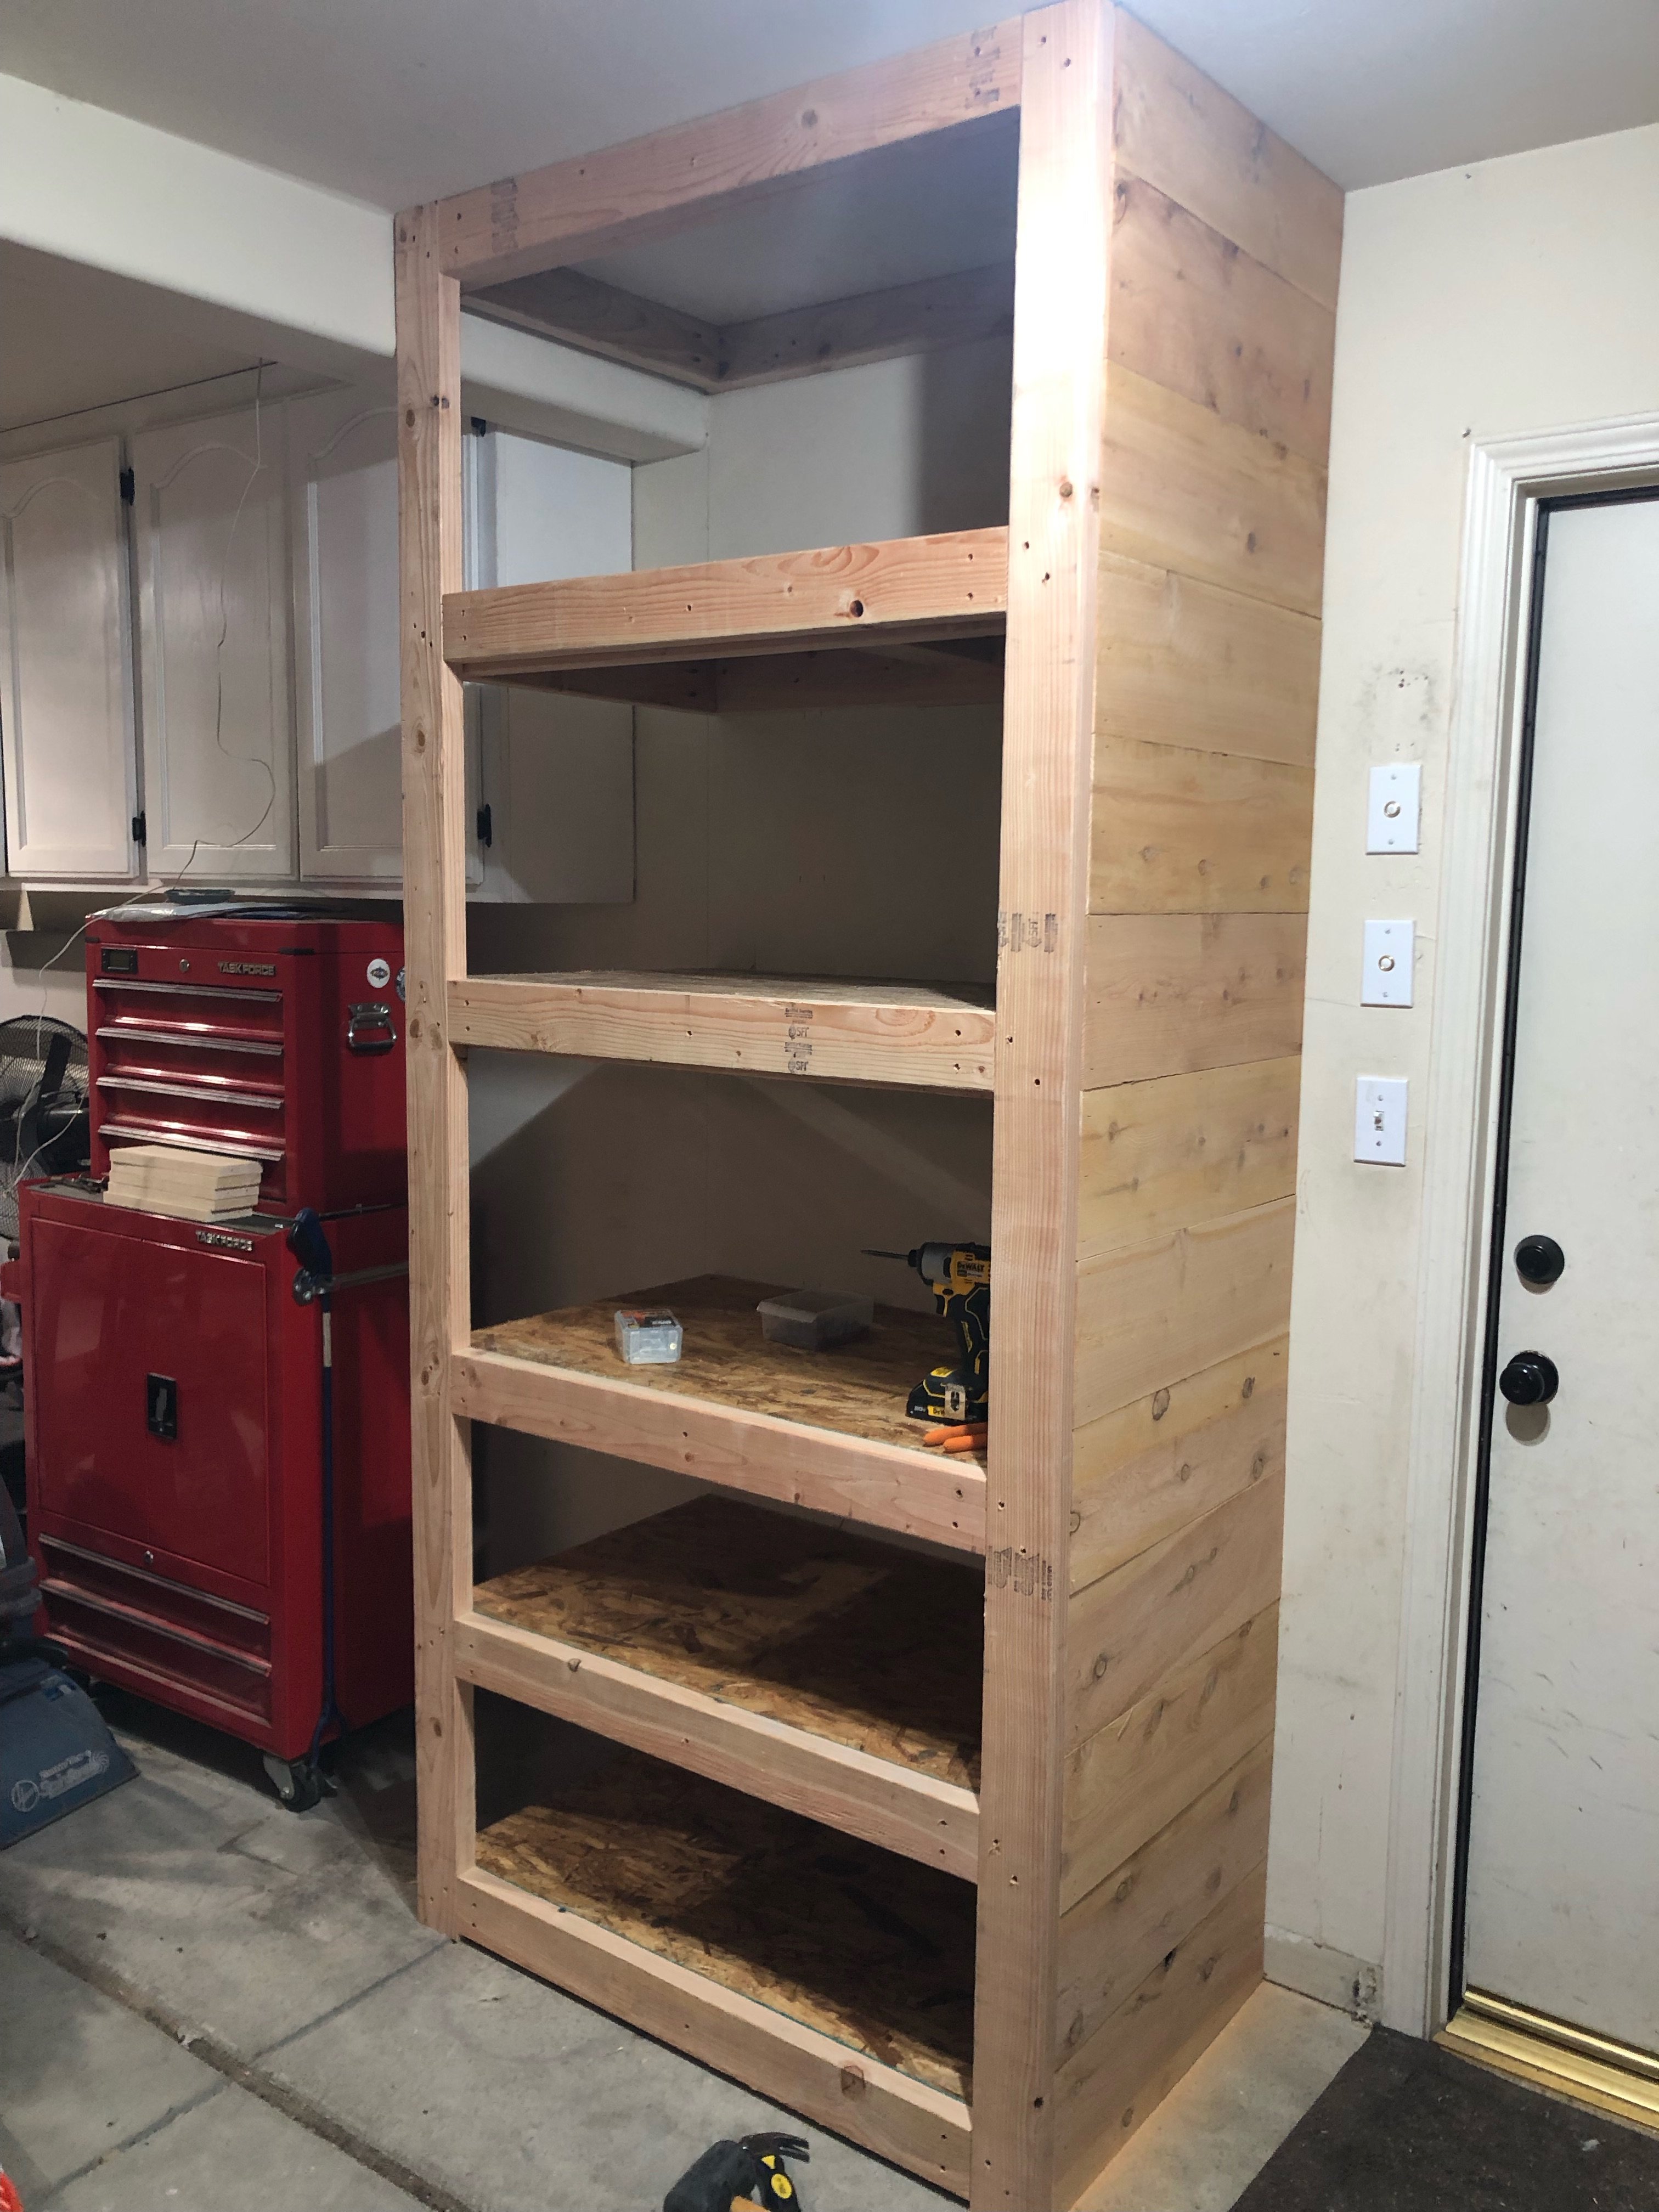
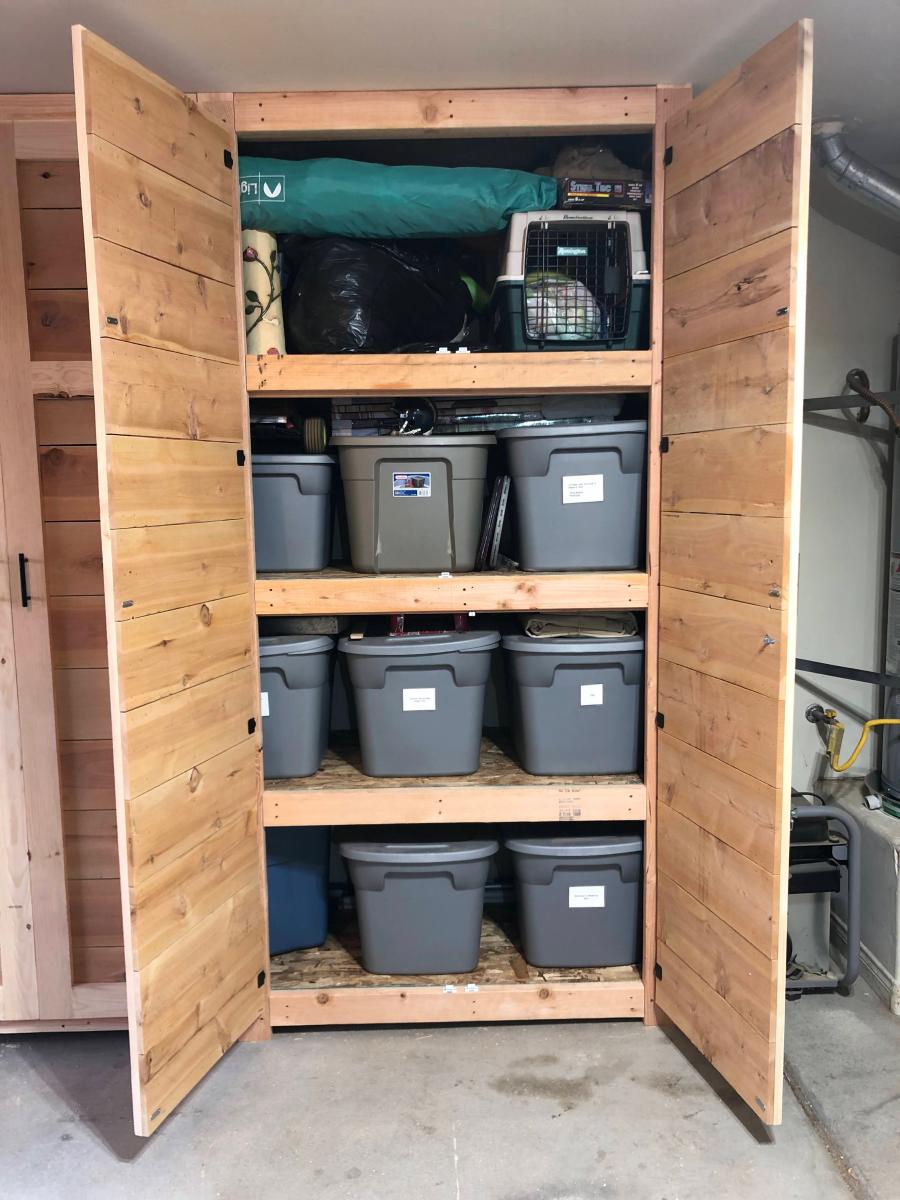
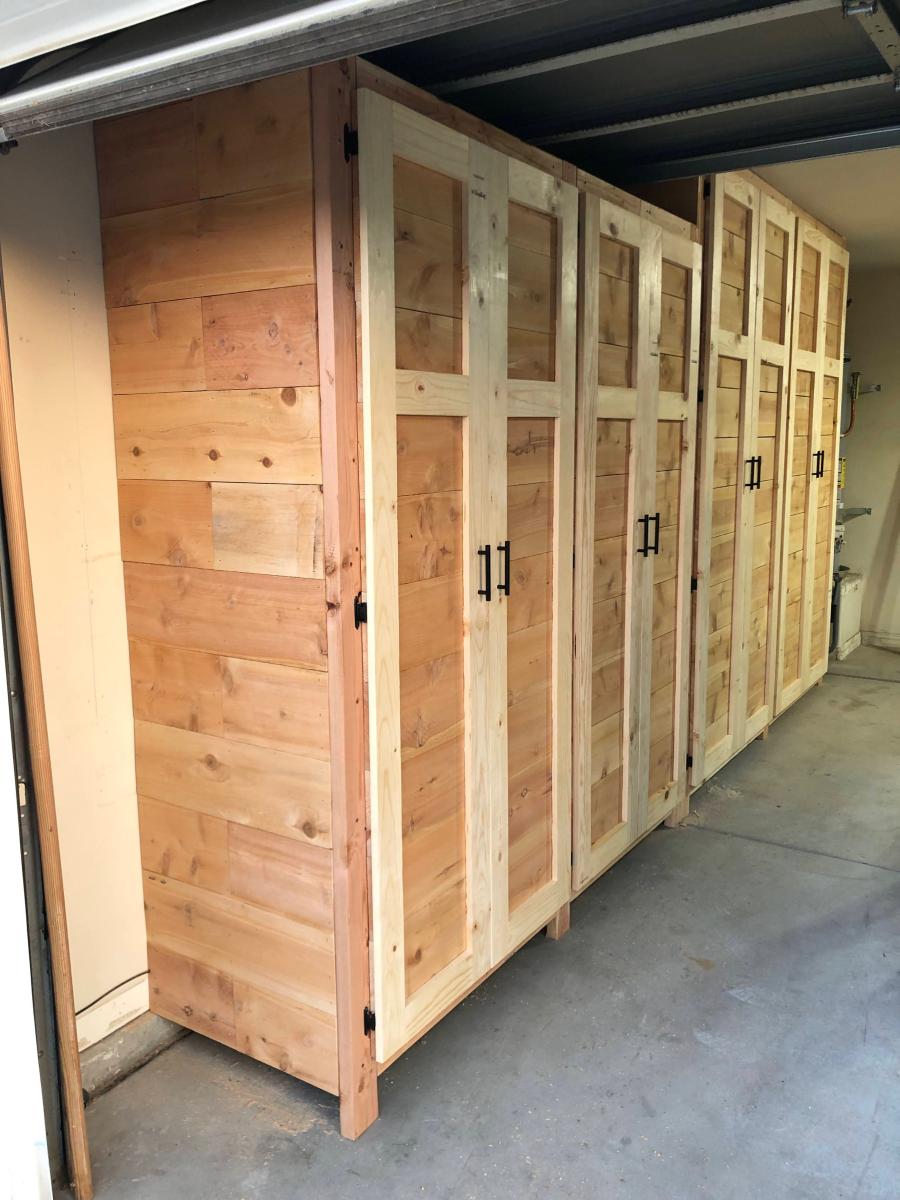
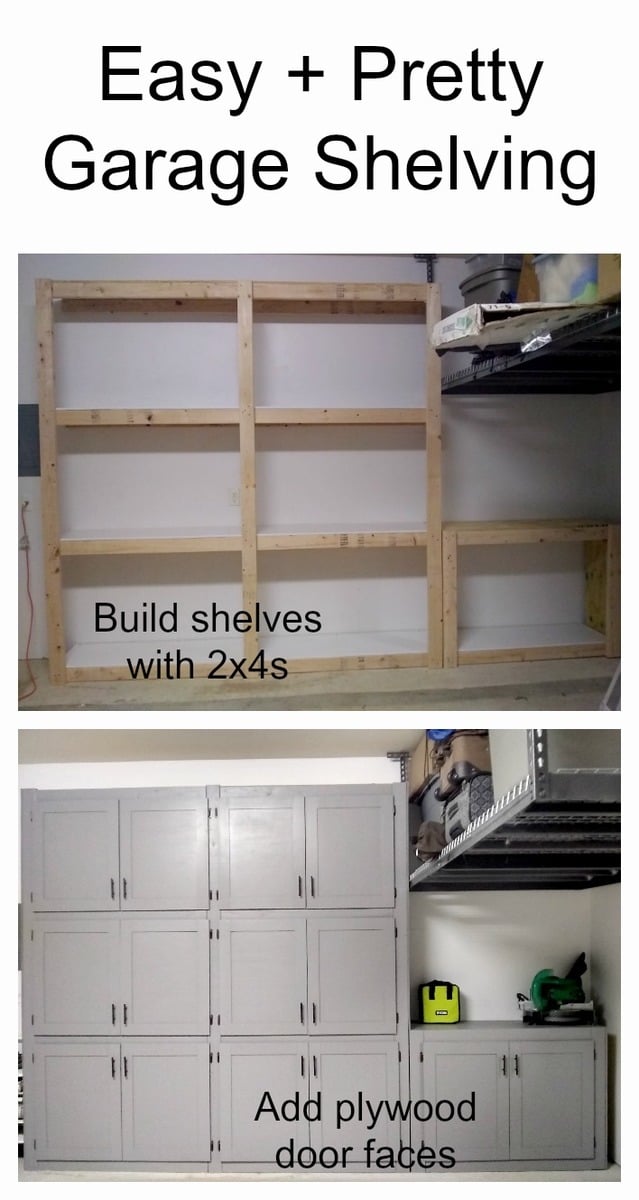
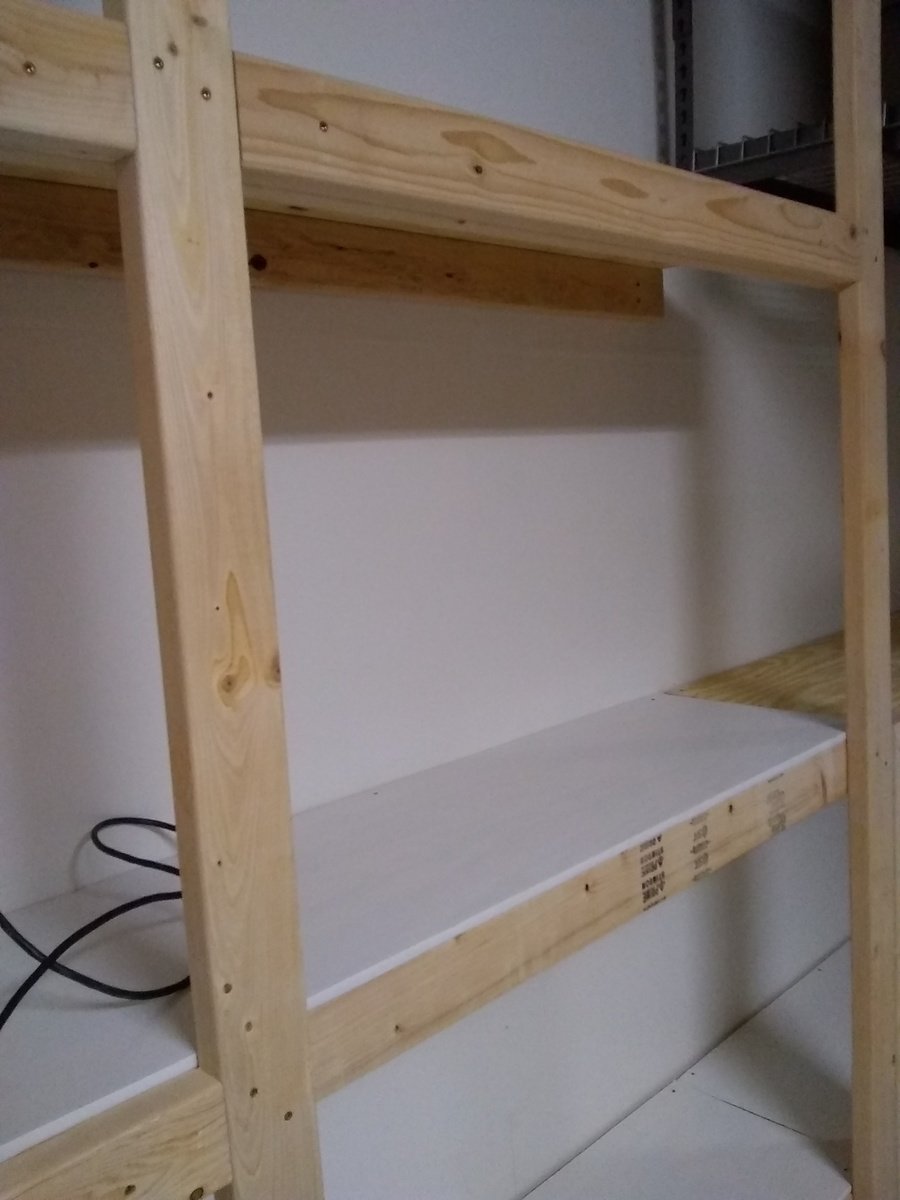
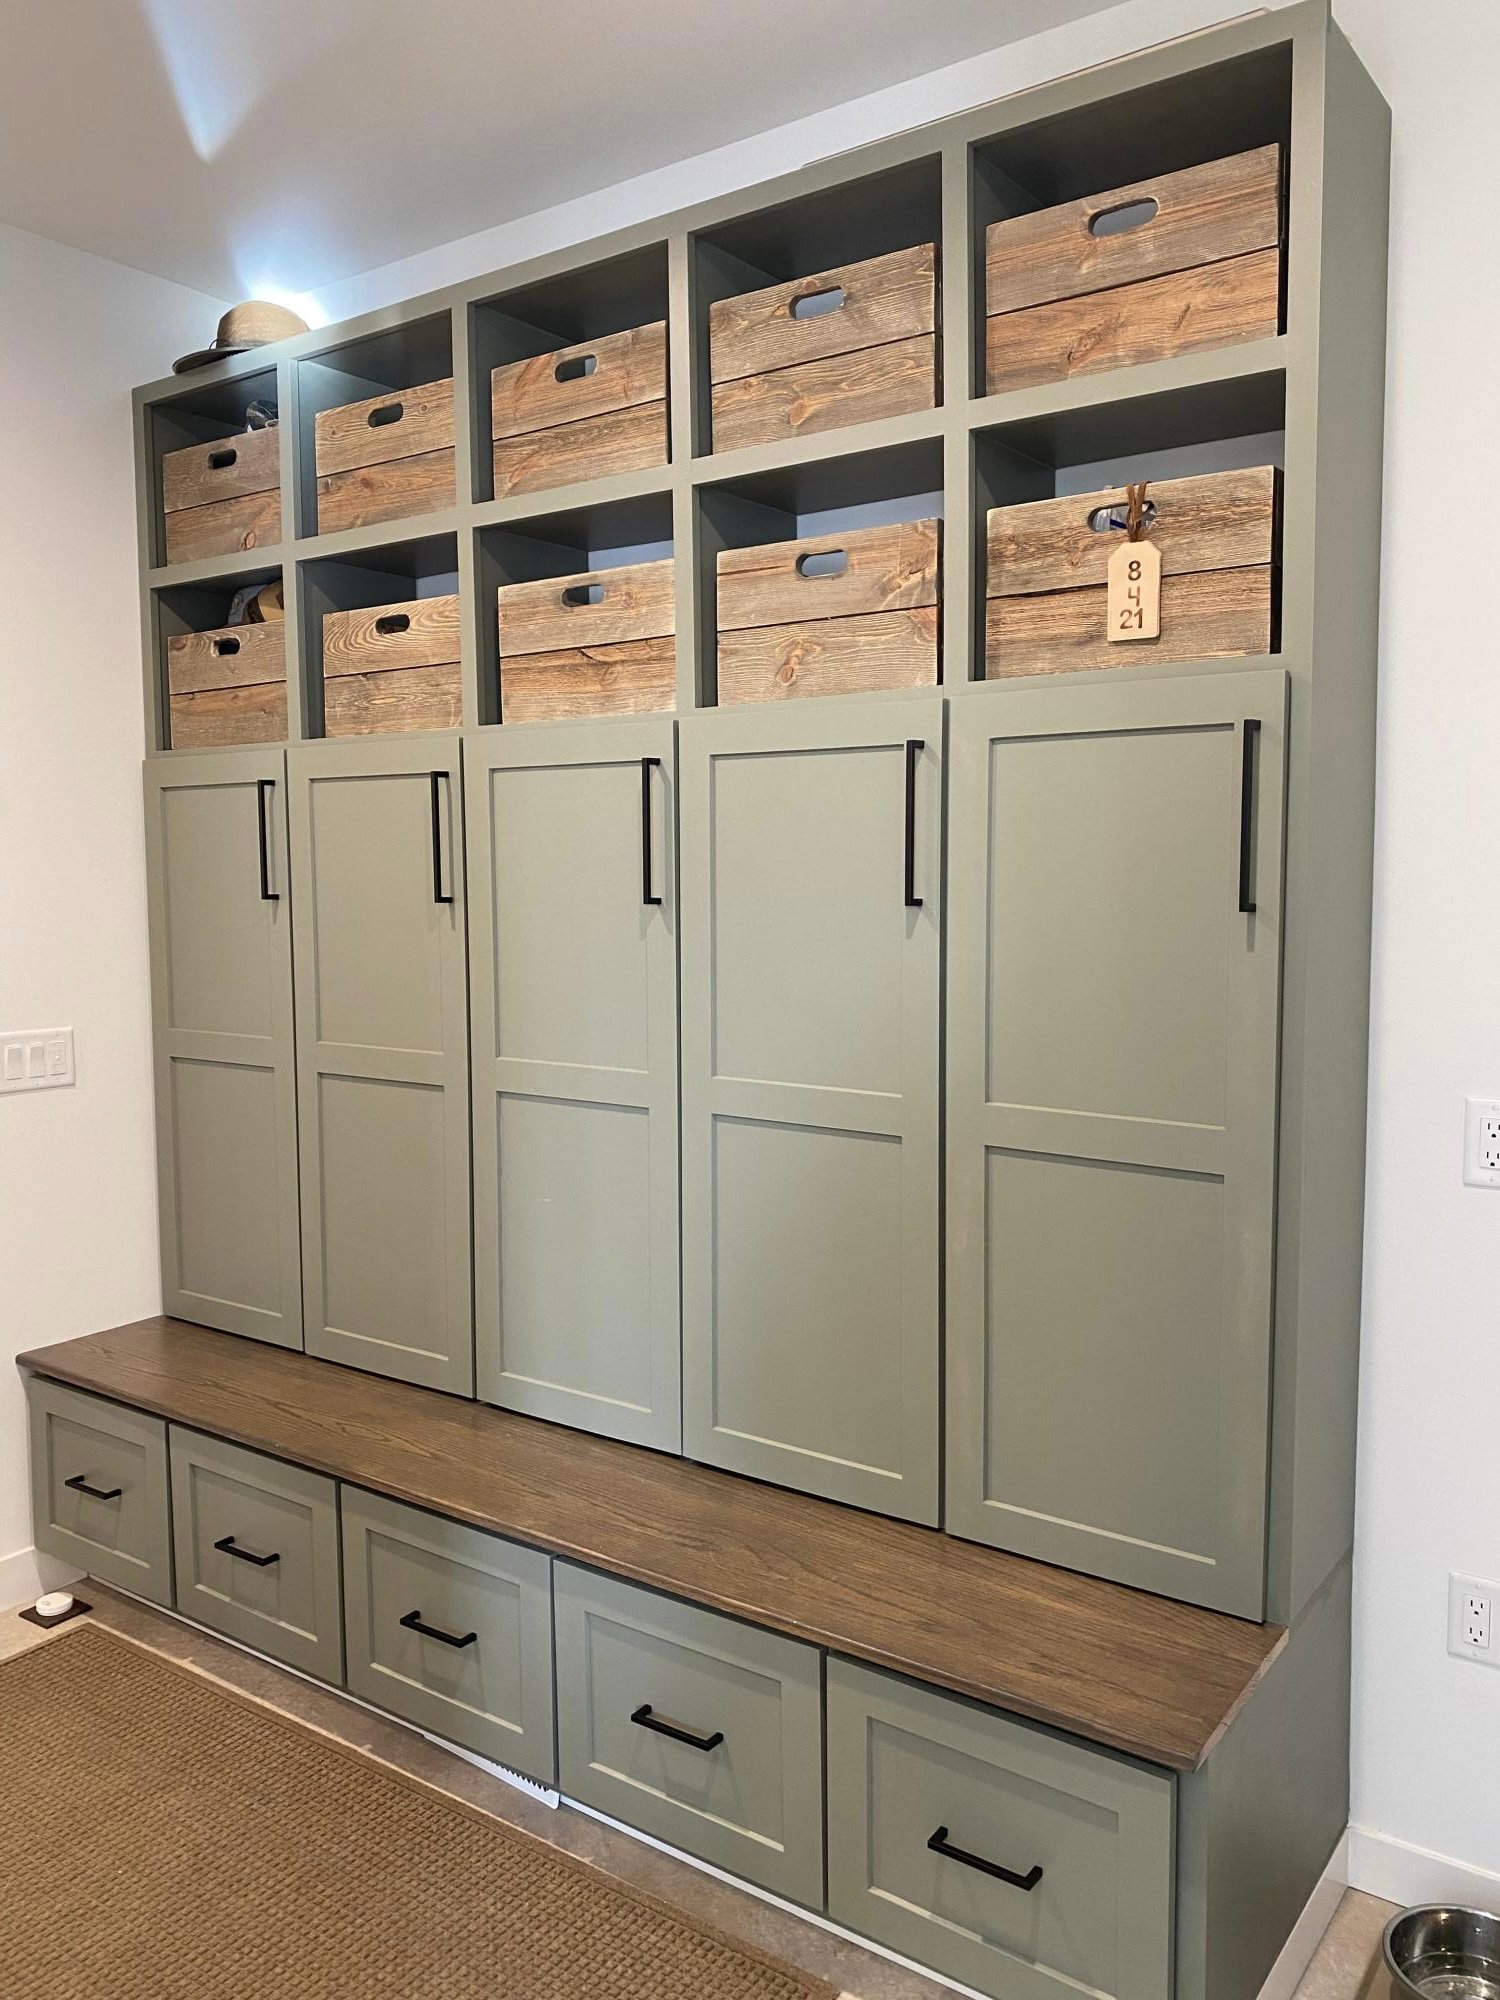
I have been wanting garage cabinets for a long time but couldn't afford them. When I saw these shelves I knew it would be easy to add side panels and create doors for the sections. The size is 8'x8' with the 4'x3' under the ceiling rack. I put a 2"x4" in the middle to divide each section, measured and cut doors from 5mm lauran plywood. I also cut the stiles and rails from the same material to give it interest but mainly to make it thicker to avoid warping as much as possible. I added 2"x4" to create a facing for the doors to rest on. Also used overlay hinges to simplify the hanging as much as possible. I was able to follow the design plan and the only thing I did was add a shelf at the bottom. The cleats were definitely not necessary, it's very sturdy.
Making the doors
The first thing is to learn how to measure for cabinet doors. There are plenty of sites and YouTube videos showing how to correctly measure. If you are doing the same type of doors like I have, with no middle divider, then be sure to pay attention how to correctly measure for those instead of a single door.
The easiest way to make the doors will be getting 1/2 in sanded plywood and use a table saw to cut each door to size. Skip the shaker style trim and put the hardware on and be done. Make sure the hinges will be able to hold the weight of the door.
Unfortunately, I didn't have a table saw but I did have a router and a jig saw, and found a great video on YouTube on how to use a router to cut straight edges without a table saw. I measured out one door and used that outline to cut two identical doors. It turned out that each section was slightly a different width so I had to do two at a time. However, if you have a circular saw you can rig it to make a table saw and make a guide to rip the doors. It all depends on what tools you have available to you.
I have a compact plunge saw and was able to cut the 3 inch strips for the shaker style with it. Honestly, that was the most tedious part and most time consuming by far. That also had to do with the fact that because the plywood is only 5mm thick I cut strips for both the front and the back to make it over 1/2 inch thick to help minimize warping and give the hinges something to grab.
I used the miter saw to cut the stiles and rails to size and a 23 gauge nailer with 1/2 nails and glue to get them on the door. I glued and nailed the front and the back of each side at the same time because the nails are a bit longer than two pieces of plywood. I then turned it over and nailed the other side. The great thing about using a 23 gauge is that I didn't have to fill any holes because they are so small you can hardly see them at all.
The last thing is to use your sander to ensure all of the pieces are even. I used a 60 grit and then followed it with a 220 where needed.
If you want to avoid cutting the strips but still want to have the shaker style, Home Depot sells 1/4 thick Polystyrene flat moulding that will add vertially no weight to the door but the cost can easily add up if you have a lot of doors.
Lastly, if you are wondering why I got such thin plywood that ended up creating more work. The reason is because I wanted to save money on hardware and I didn't trust the inexpensive hinges I got off eBay would hold a heavy door for many years.


Wed, 06/19/2019 - 13:20
What kind of paint did you use? Looks really nice, the whole thing!

Thu, 07/18/2019 - 10:28
This is amazing! Thank you for sharing so much detail on your project too.
Wed, 06/10/2020 - 13:14
Can we get detailed plan of how you made this from the start to end like a material list and cut list.
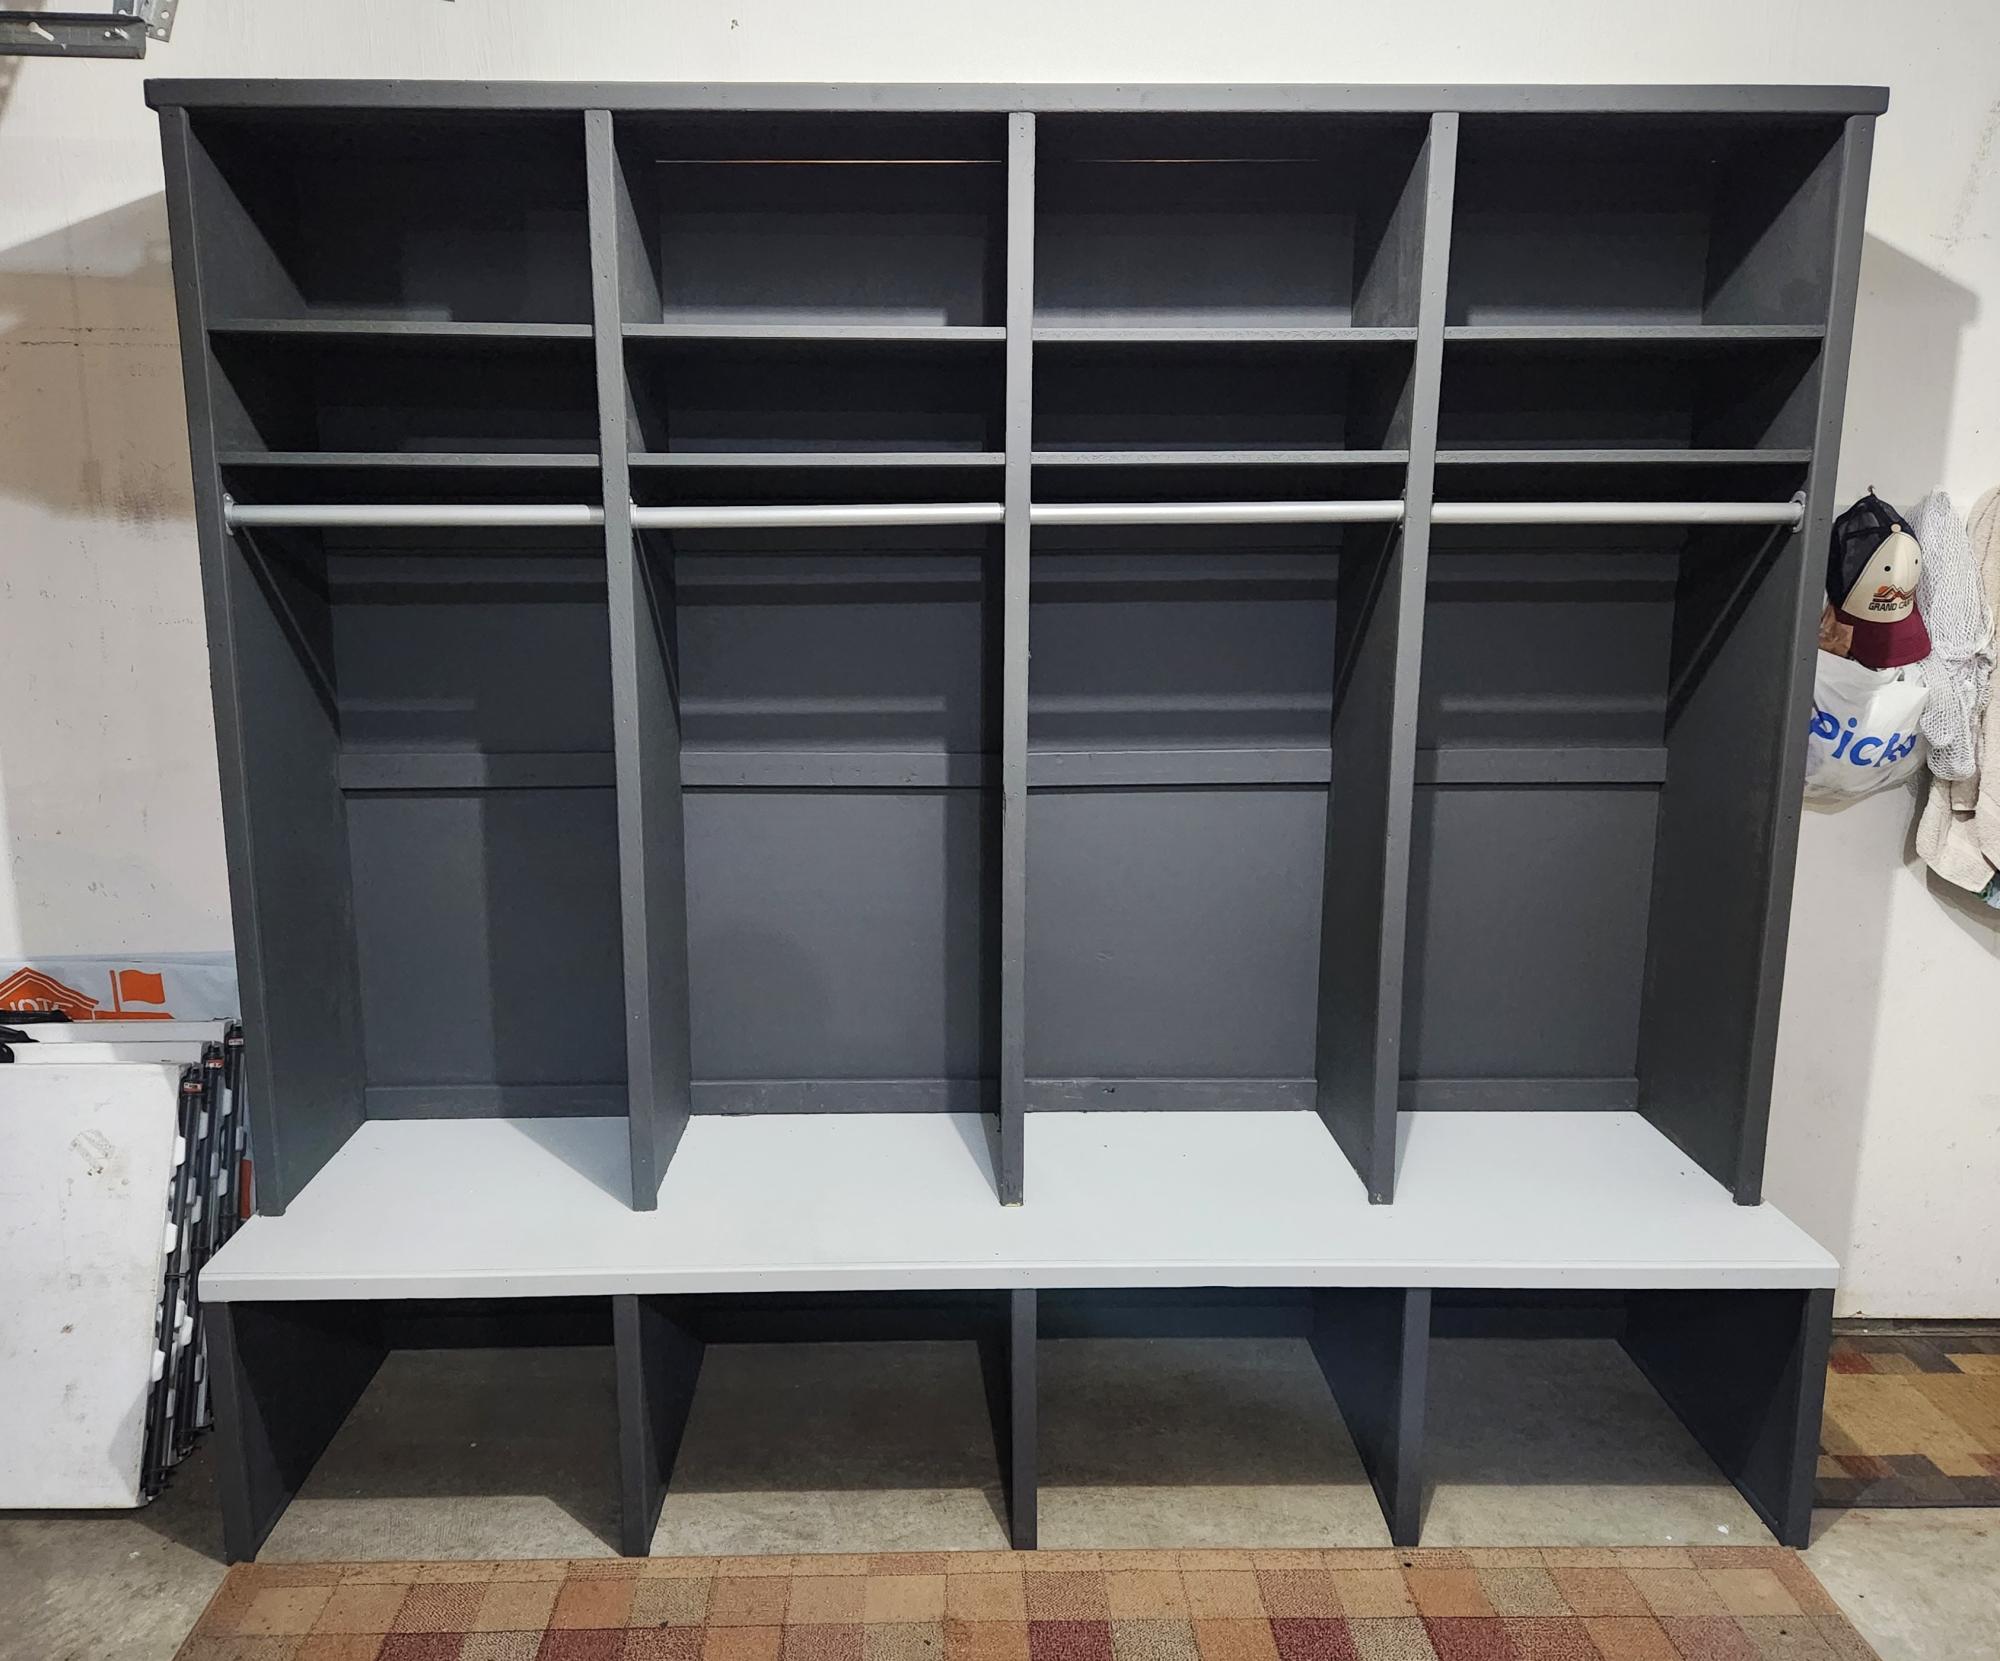
Garage bench with lockers. Plans and videos provided great inspiration and proves most anyone can do it.
Steve L. in Ohio
Fri, 09/08/2023 - 08:42
You did a fantastic job, love the added hanging option! Thanks for sharing.

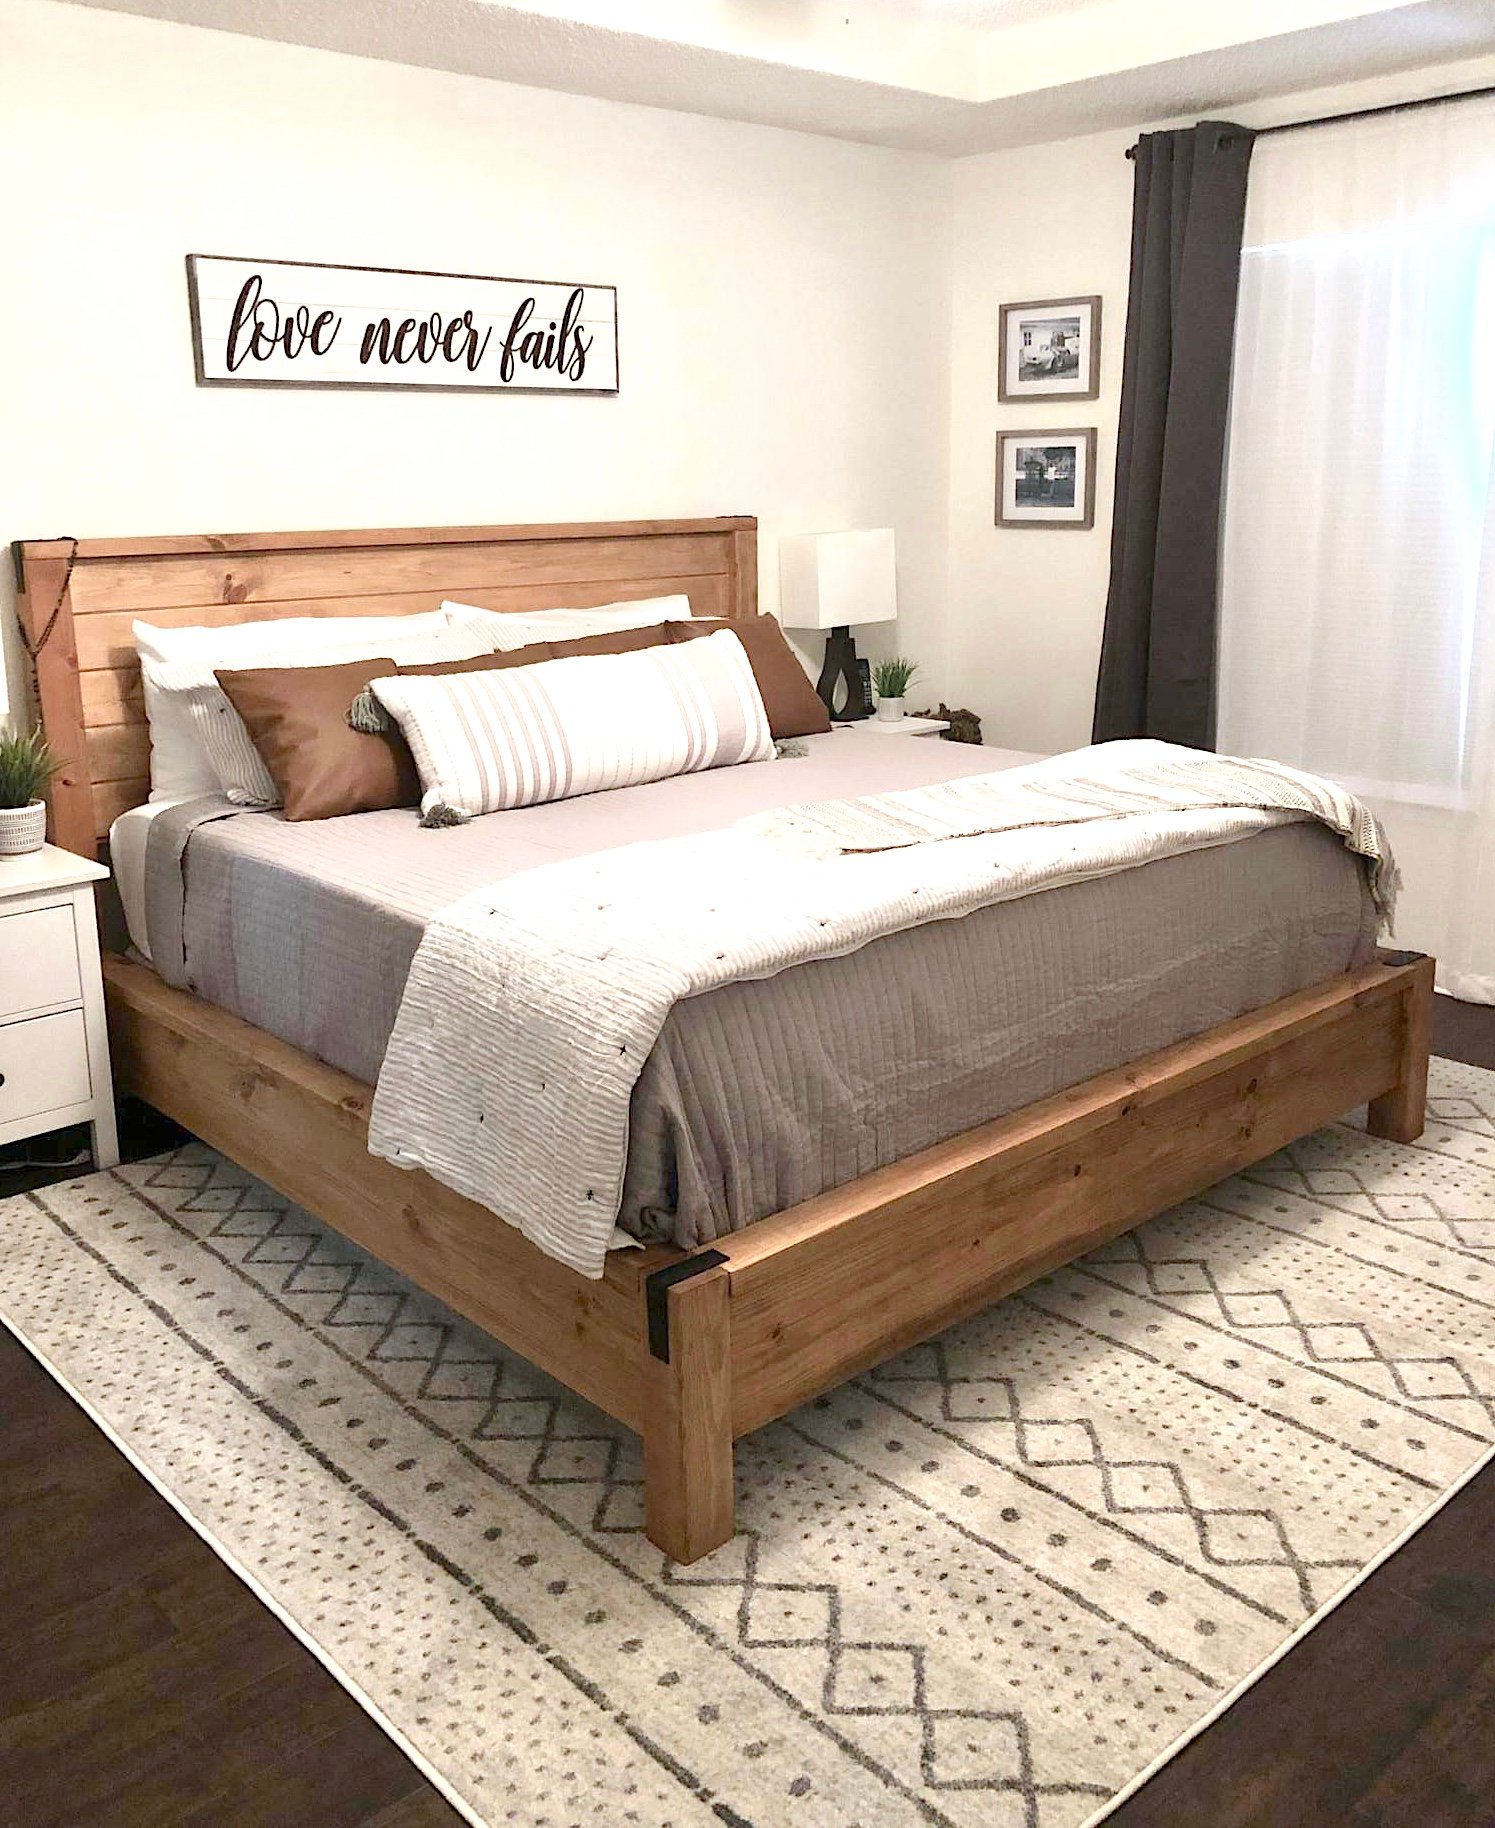
I love how this bed frame turned out! Everywhere that has stain is cedar and the rest is all scrap spruce. Thanks for another great plan Ana!


We needed shelving in our backyard shed. It’s really small so getting the plywood shelving in was a challenge, but I put the ol’ baron in and figured it out. Turned out pretty nice!!
Mark
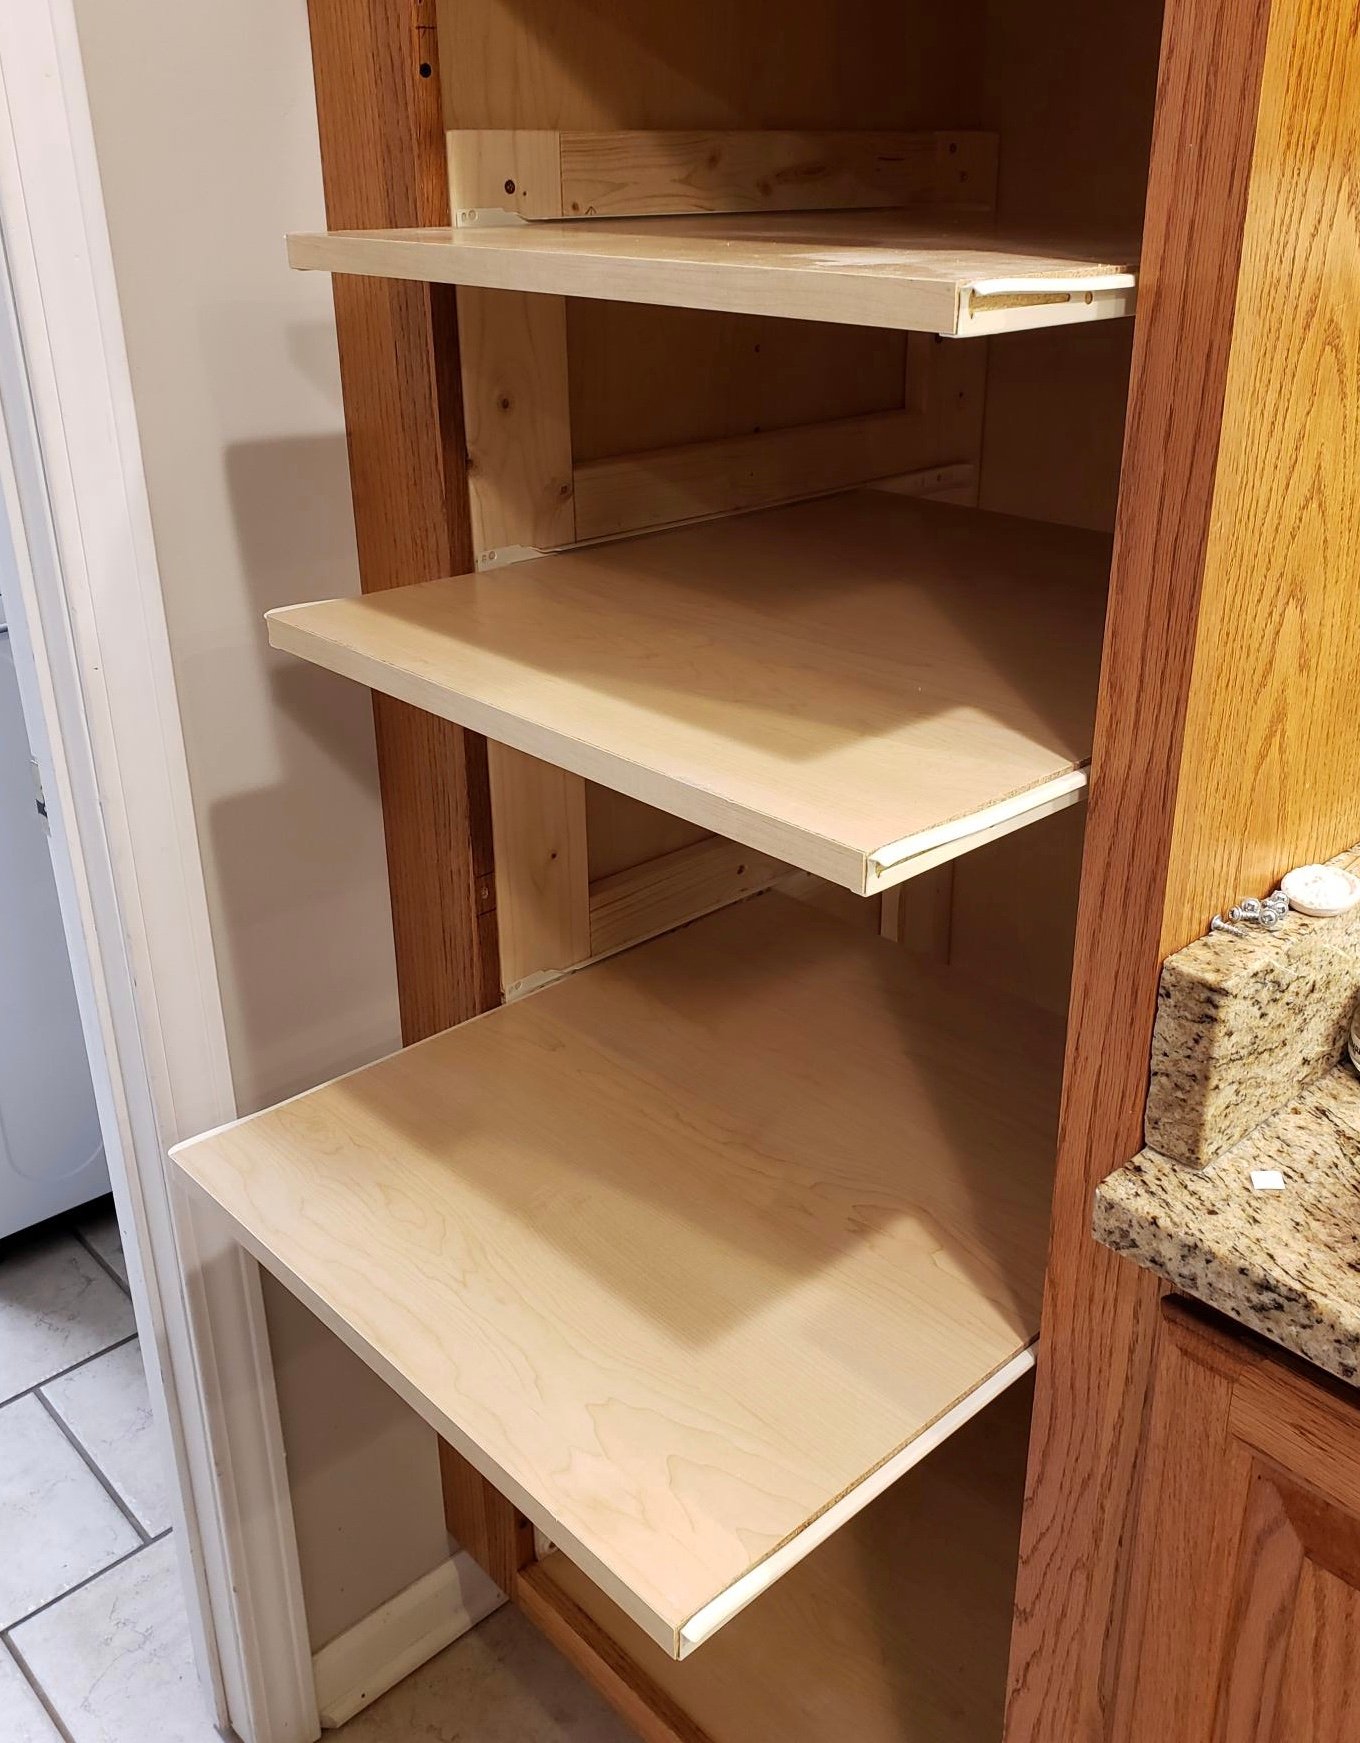
Stationary shelves are such a hassle, especially in a deep pantry cabinet! Now I can actually SEE the contents of my pantry cabinet. Thanks for the inspiration and tutorial to get it done!
Made this bed from Ana's plans. Modified it with rail so I can add my box spring. Cost was approximately $160 for lumber, screws and stain. Absolutely loved the plans and easy to follow or modify if needed.


Tue, 02/23/2021 - 20:12
This is gorgeous! Is there anyway you could post your modifications? Very nice work!!!
Thanks to Ana White we learned how to make these cubbies. The wood for the stained bench is from trees milled from my husband’s family farm.

Yes, really a bed in a day! It took 24 hours from the time we bought our supplies to completion. So much nicer than any store bought we looked at, these plans are really a breeze even though I had never tackled a project like this before.


This was a great last minute Christmas gift. Took me a little over two hours. Made completely out if pallet wood.
Sun, 12/26/2021 - 13:19
It looks great, I'm sure the recipient loved it! Thanks for sharing:)
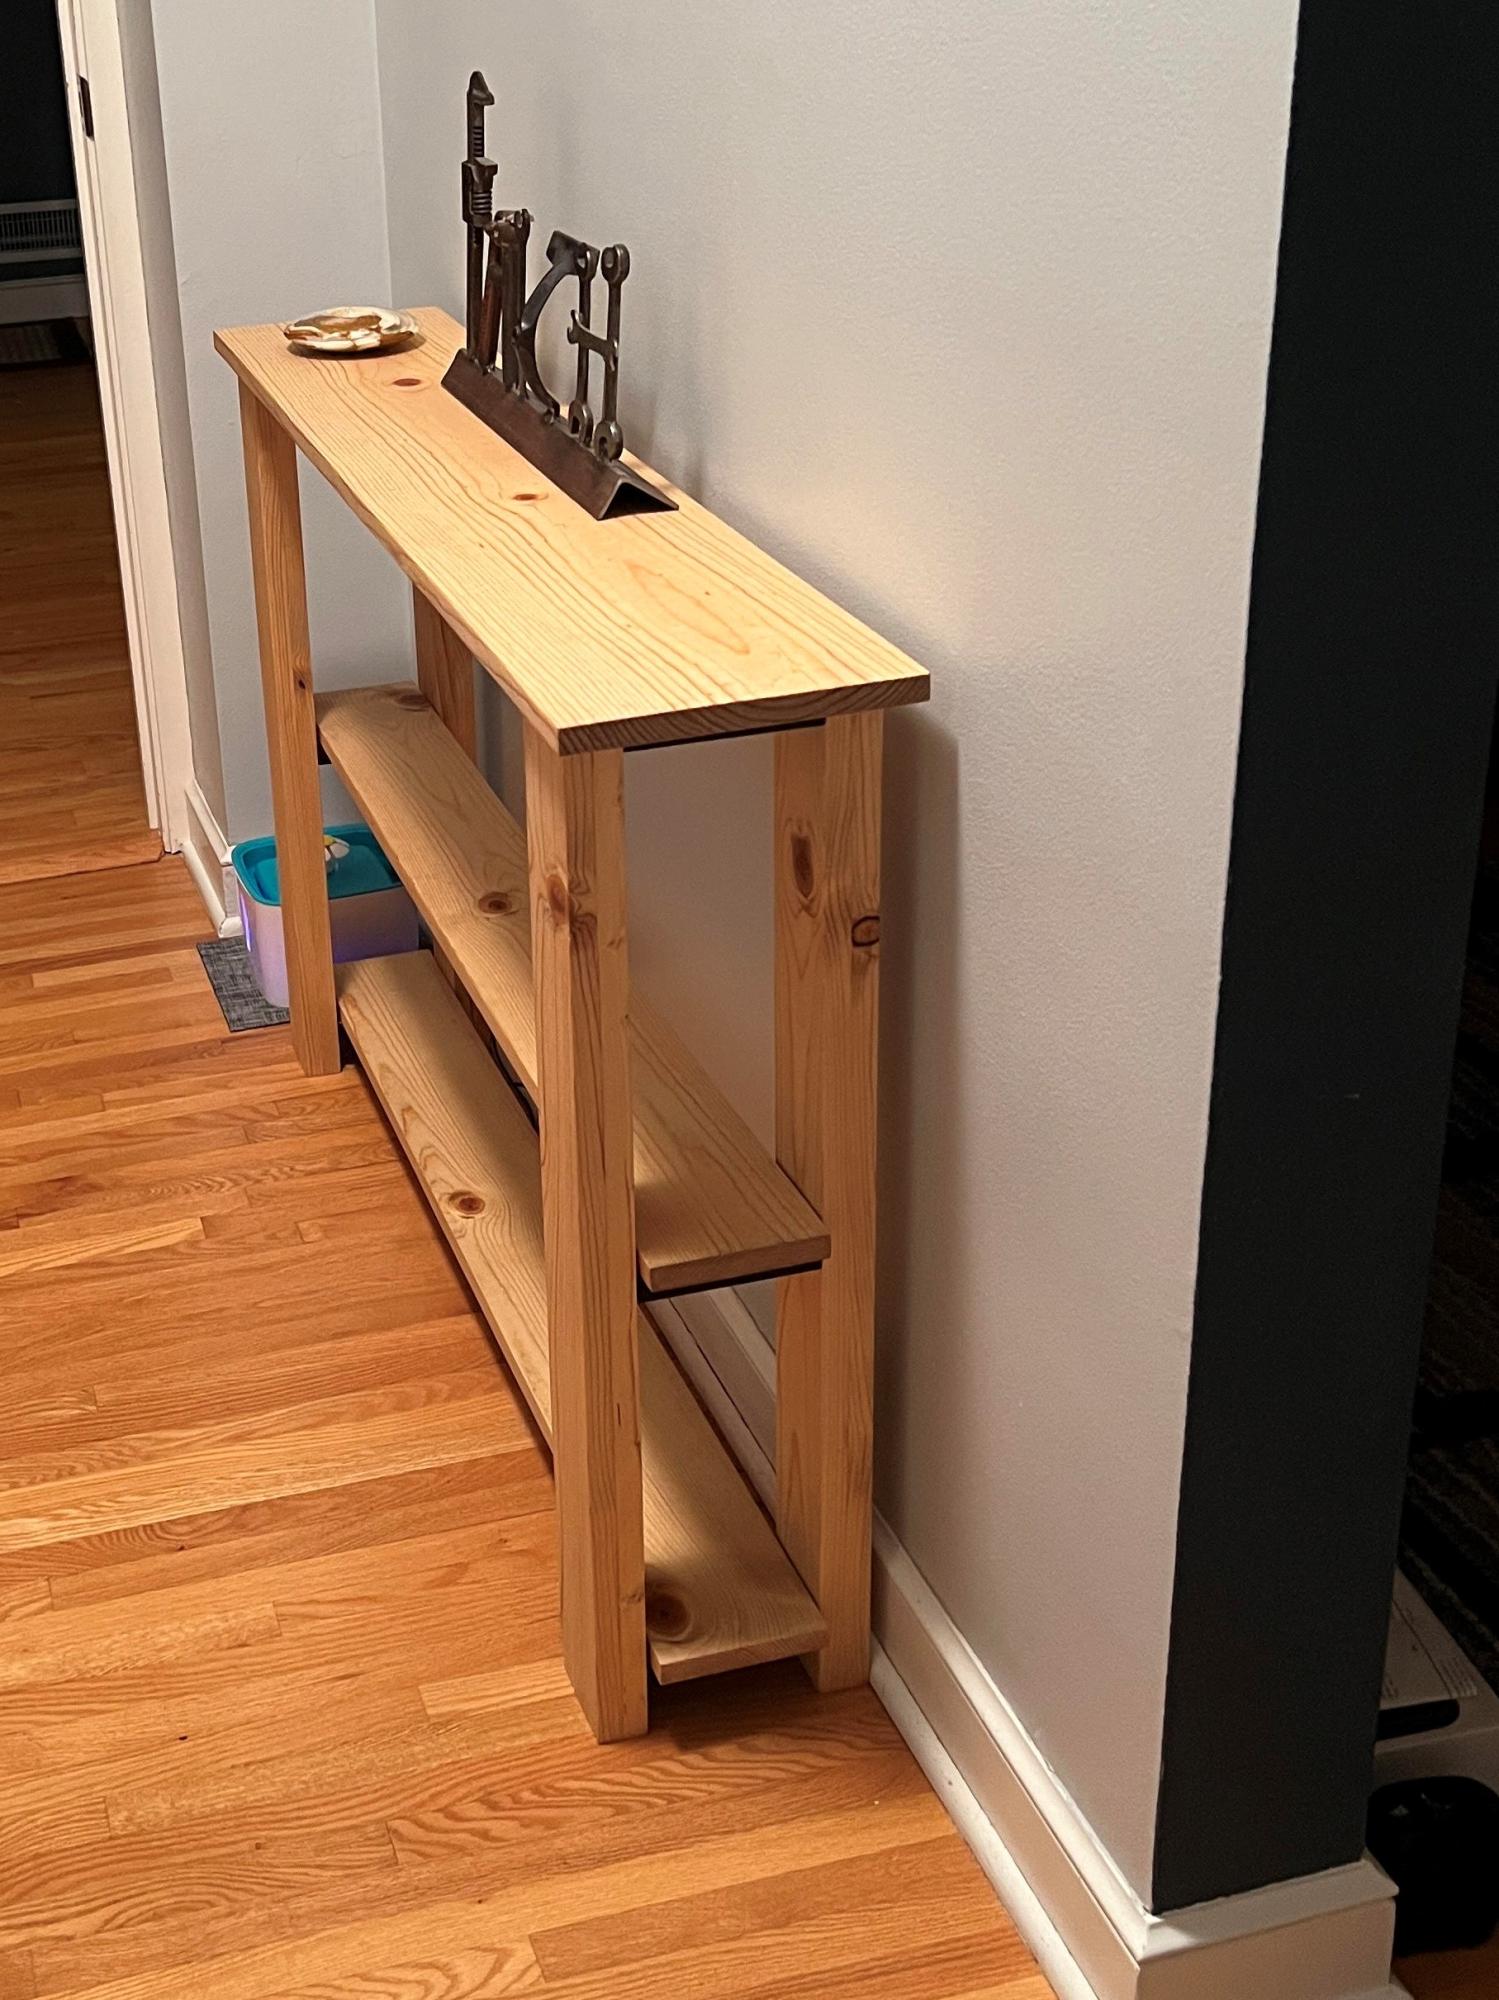
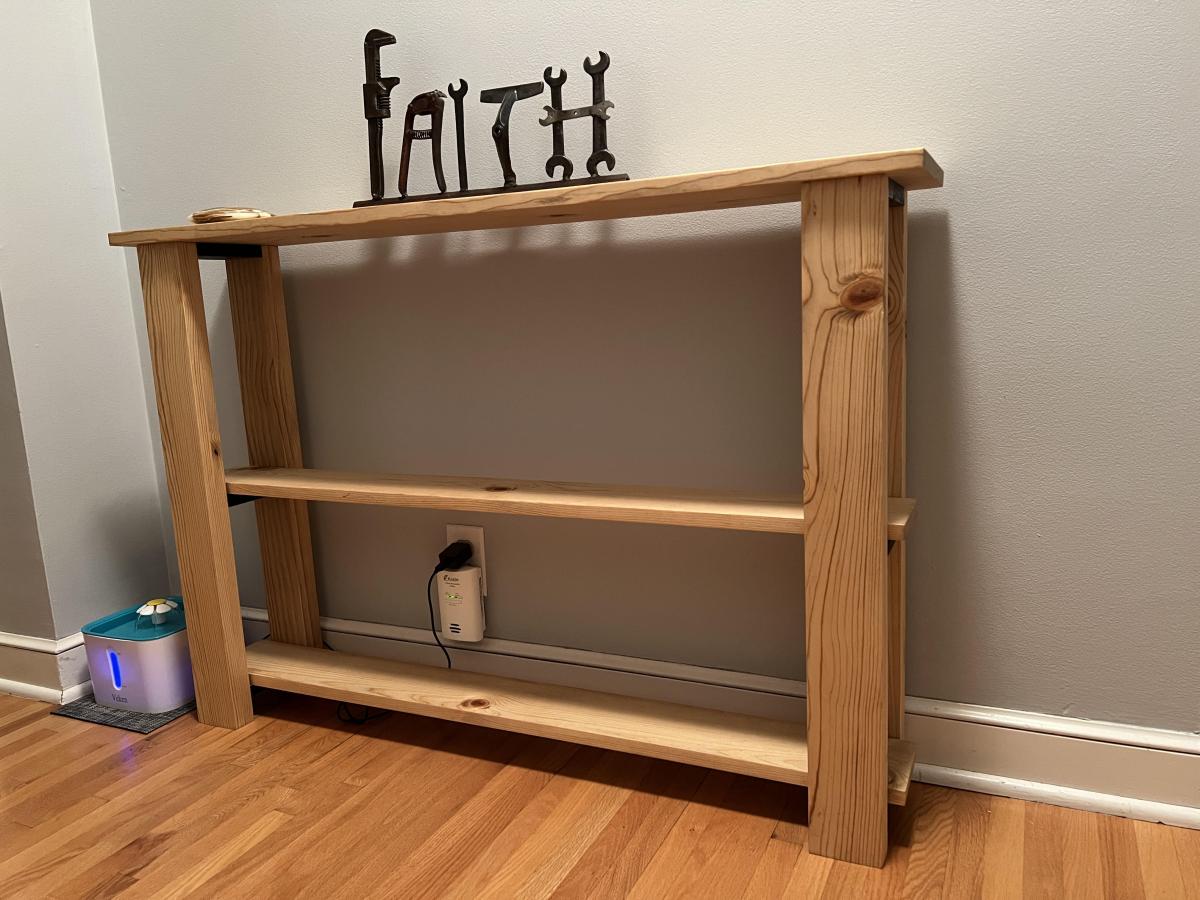
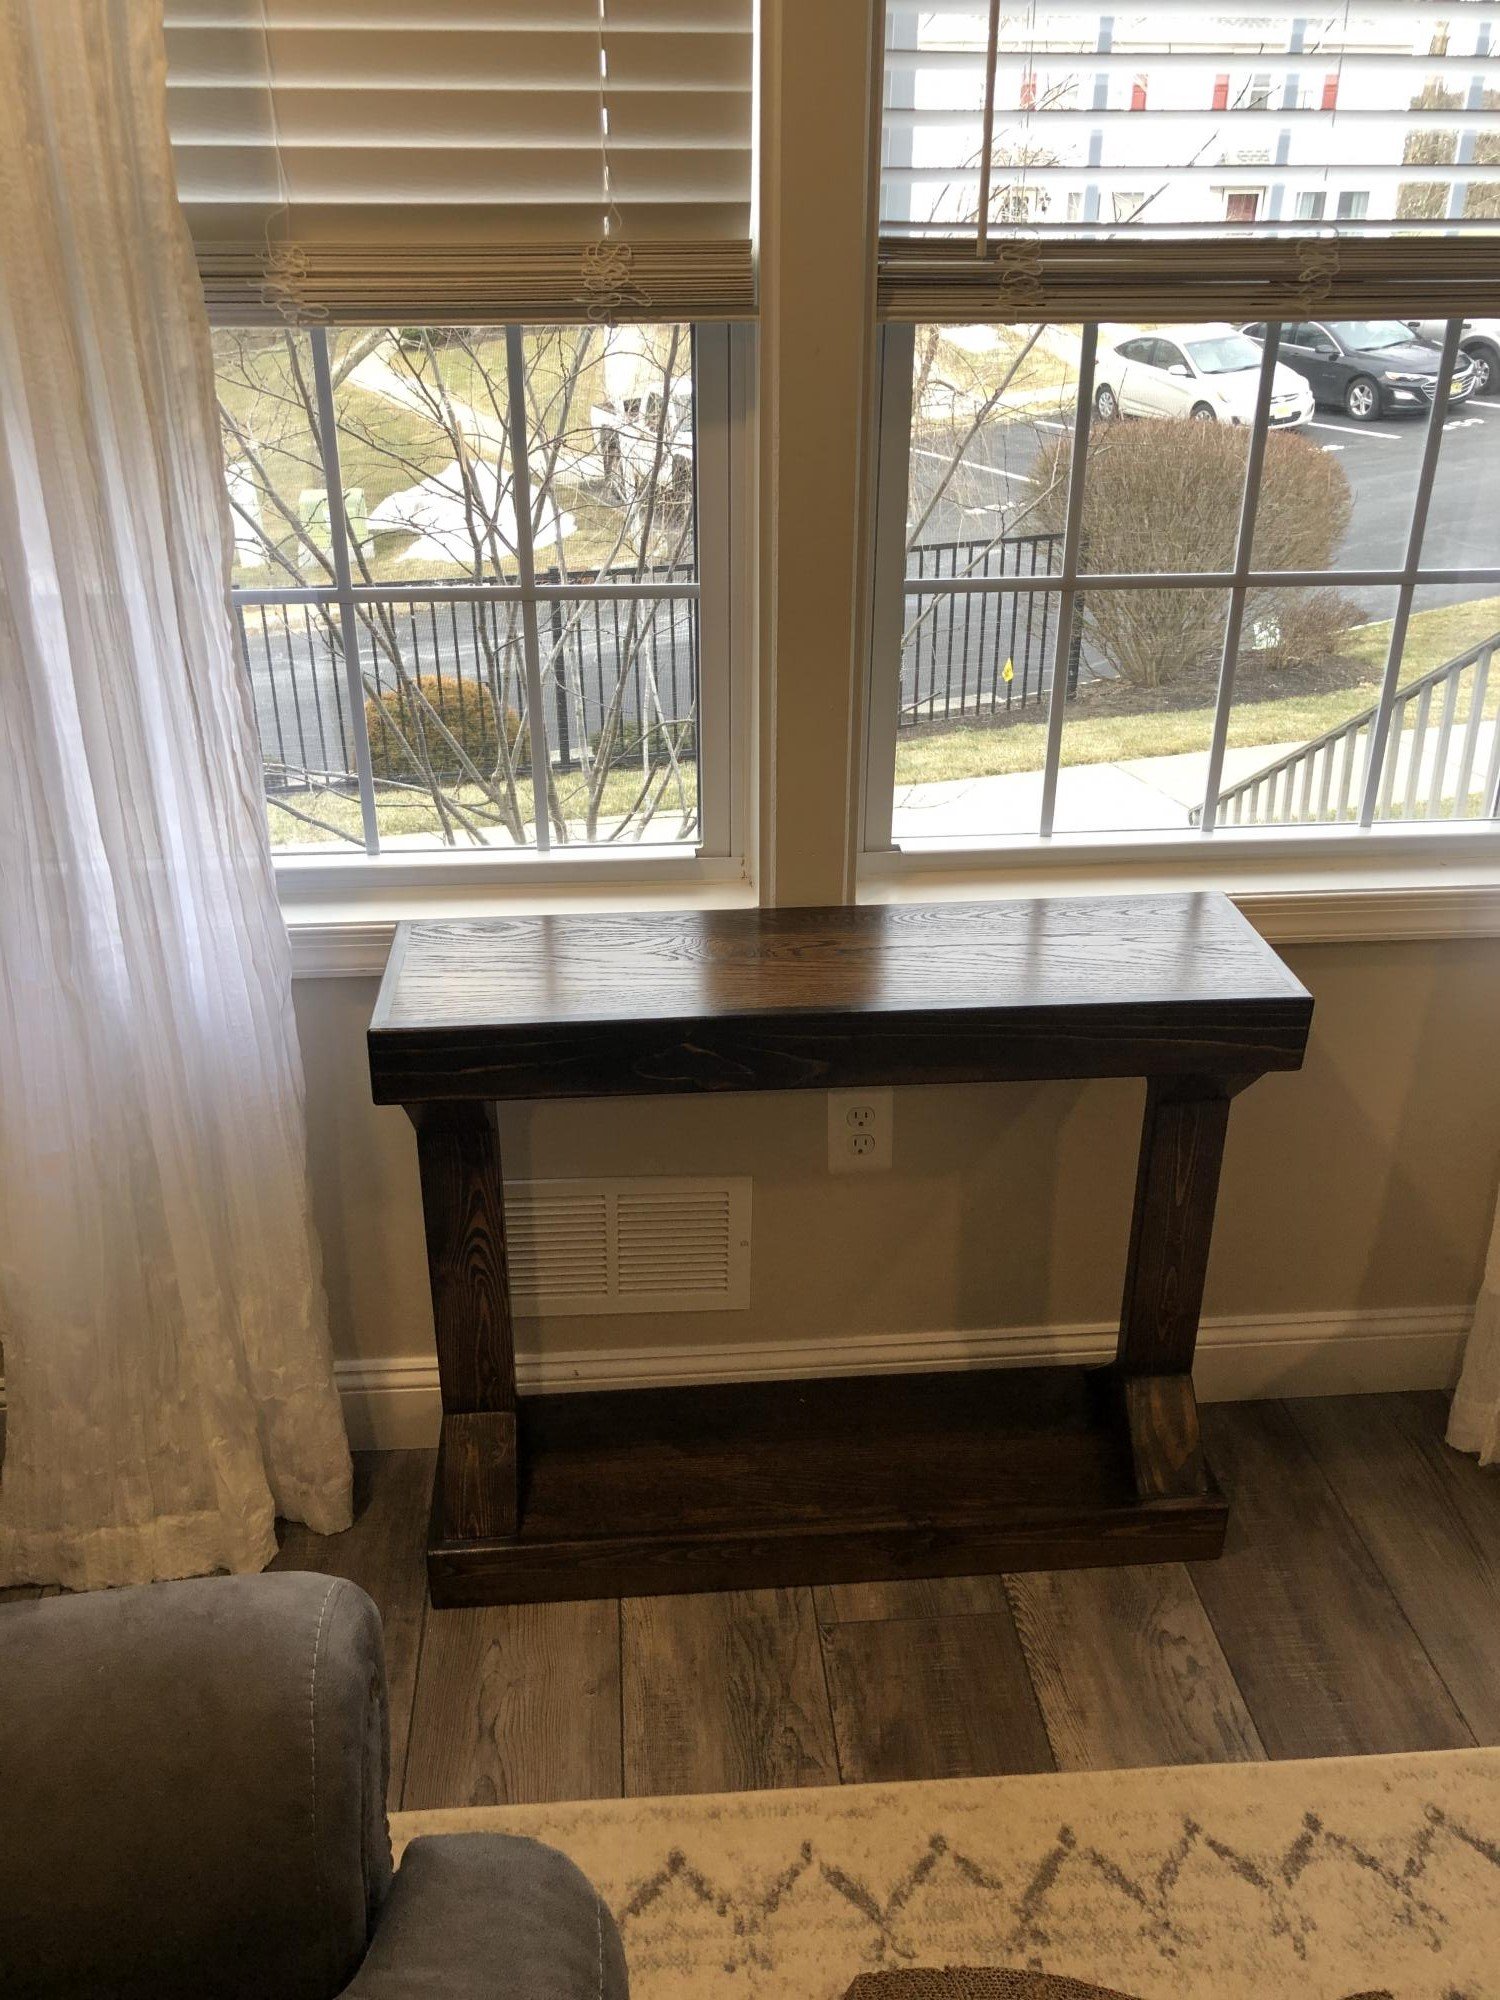
I used dimensional lumber for a little nicer look and laminated two boards for the legs. I used light walnut danish oil to finish. I adjusted the width and got It the perfect width for my hallway.

I have used so many of Ana's plans, I decided to design my own chair! I wanted a high top patio style chair that the back was angled and had a footrest. This is perfect for my outdoor patio. I think I need to update the plan already to include a cup holder! Appreciate any feedback or comments.
I modified this a tad from the original plans to suit my needs. I will eventually be adding a platform with attached slide and swing set.
Plans were easy to follow. My store didn't have 1x8's so I stacked 1x4's and used my Kreg jig to join them together and then I added extra bracing.
I had seen this on Pinterest a couple years ago and thought it was the coolest thing! Io excited I was able to build it myself!
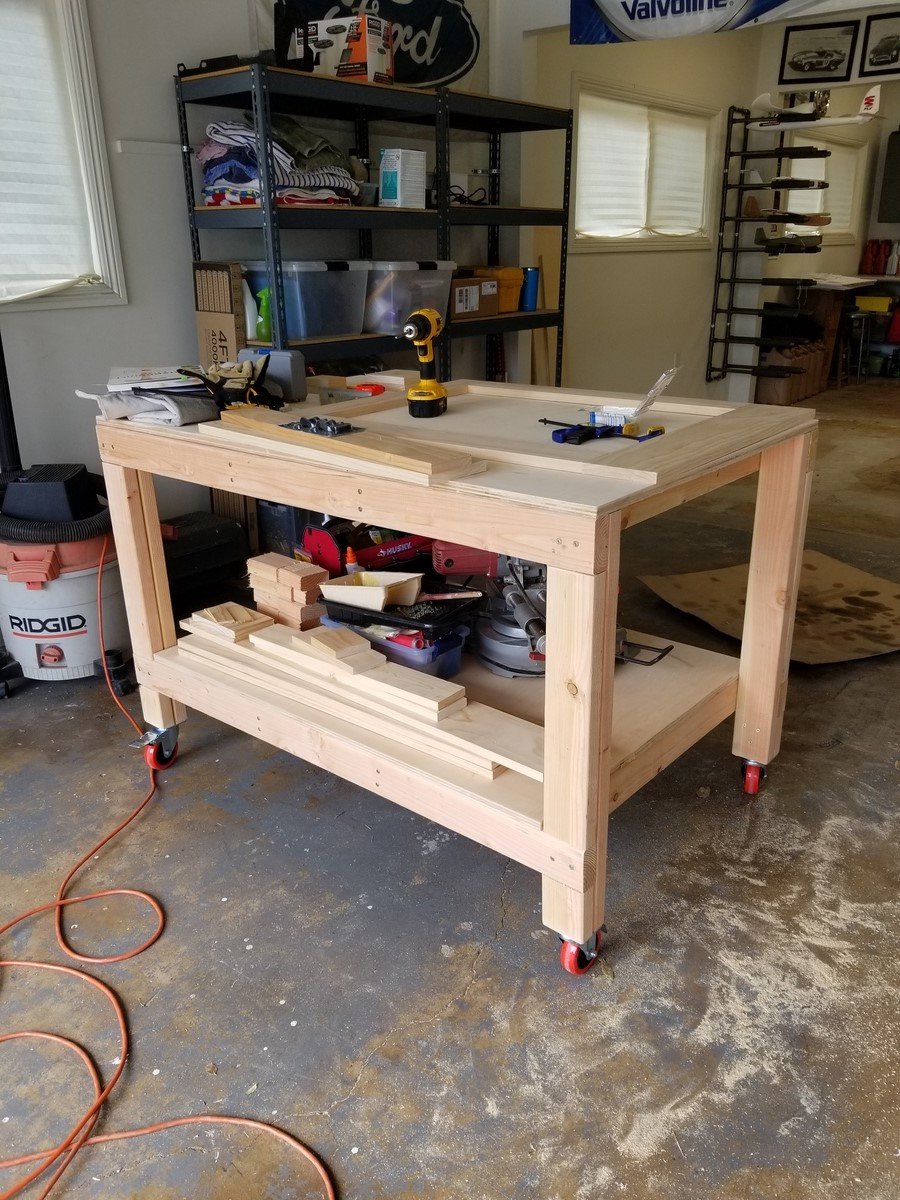
I love this workbench! I added casters so I can move it around the garage, outside, wherever it's needed. I just took 4 inches off the bottom of the legs. My hubby is admiring my handy work and planning on making one for himself.
Wed, 01/25/2023 - 14:31
Love this with the casters! So beautiful. I'm new here and wondering at what point you took 4 inches off the legs. Did you build the table and then just cut off the legs? Or did you adjust the measurements of the cuts? Thanks in advance! :)
Mon, 01/30/2023 - 02:32
The overall height of a 4-inch caster wheel is a little over 5 inches with the mounting bracket, so that also needs to be taken in to consideration. 2nd photo shows the overall dimensions, but to me the bracket and brake area appear to be a bit more than 1.03 inches. https://amzn.to/3DkMKzB
I think the best bet would be to have and measure the overall wheel height, prior to measuring and cutting the lumber.
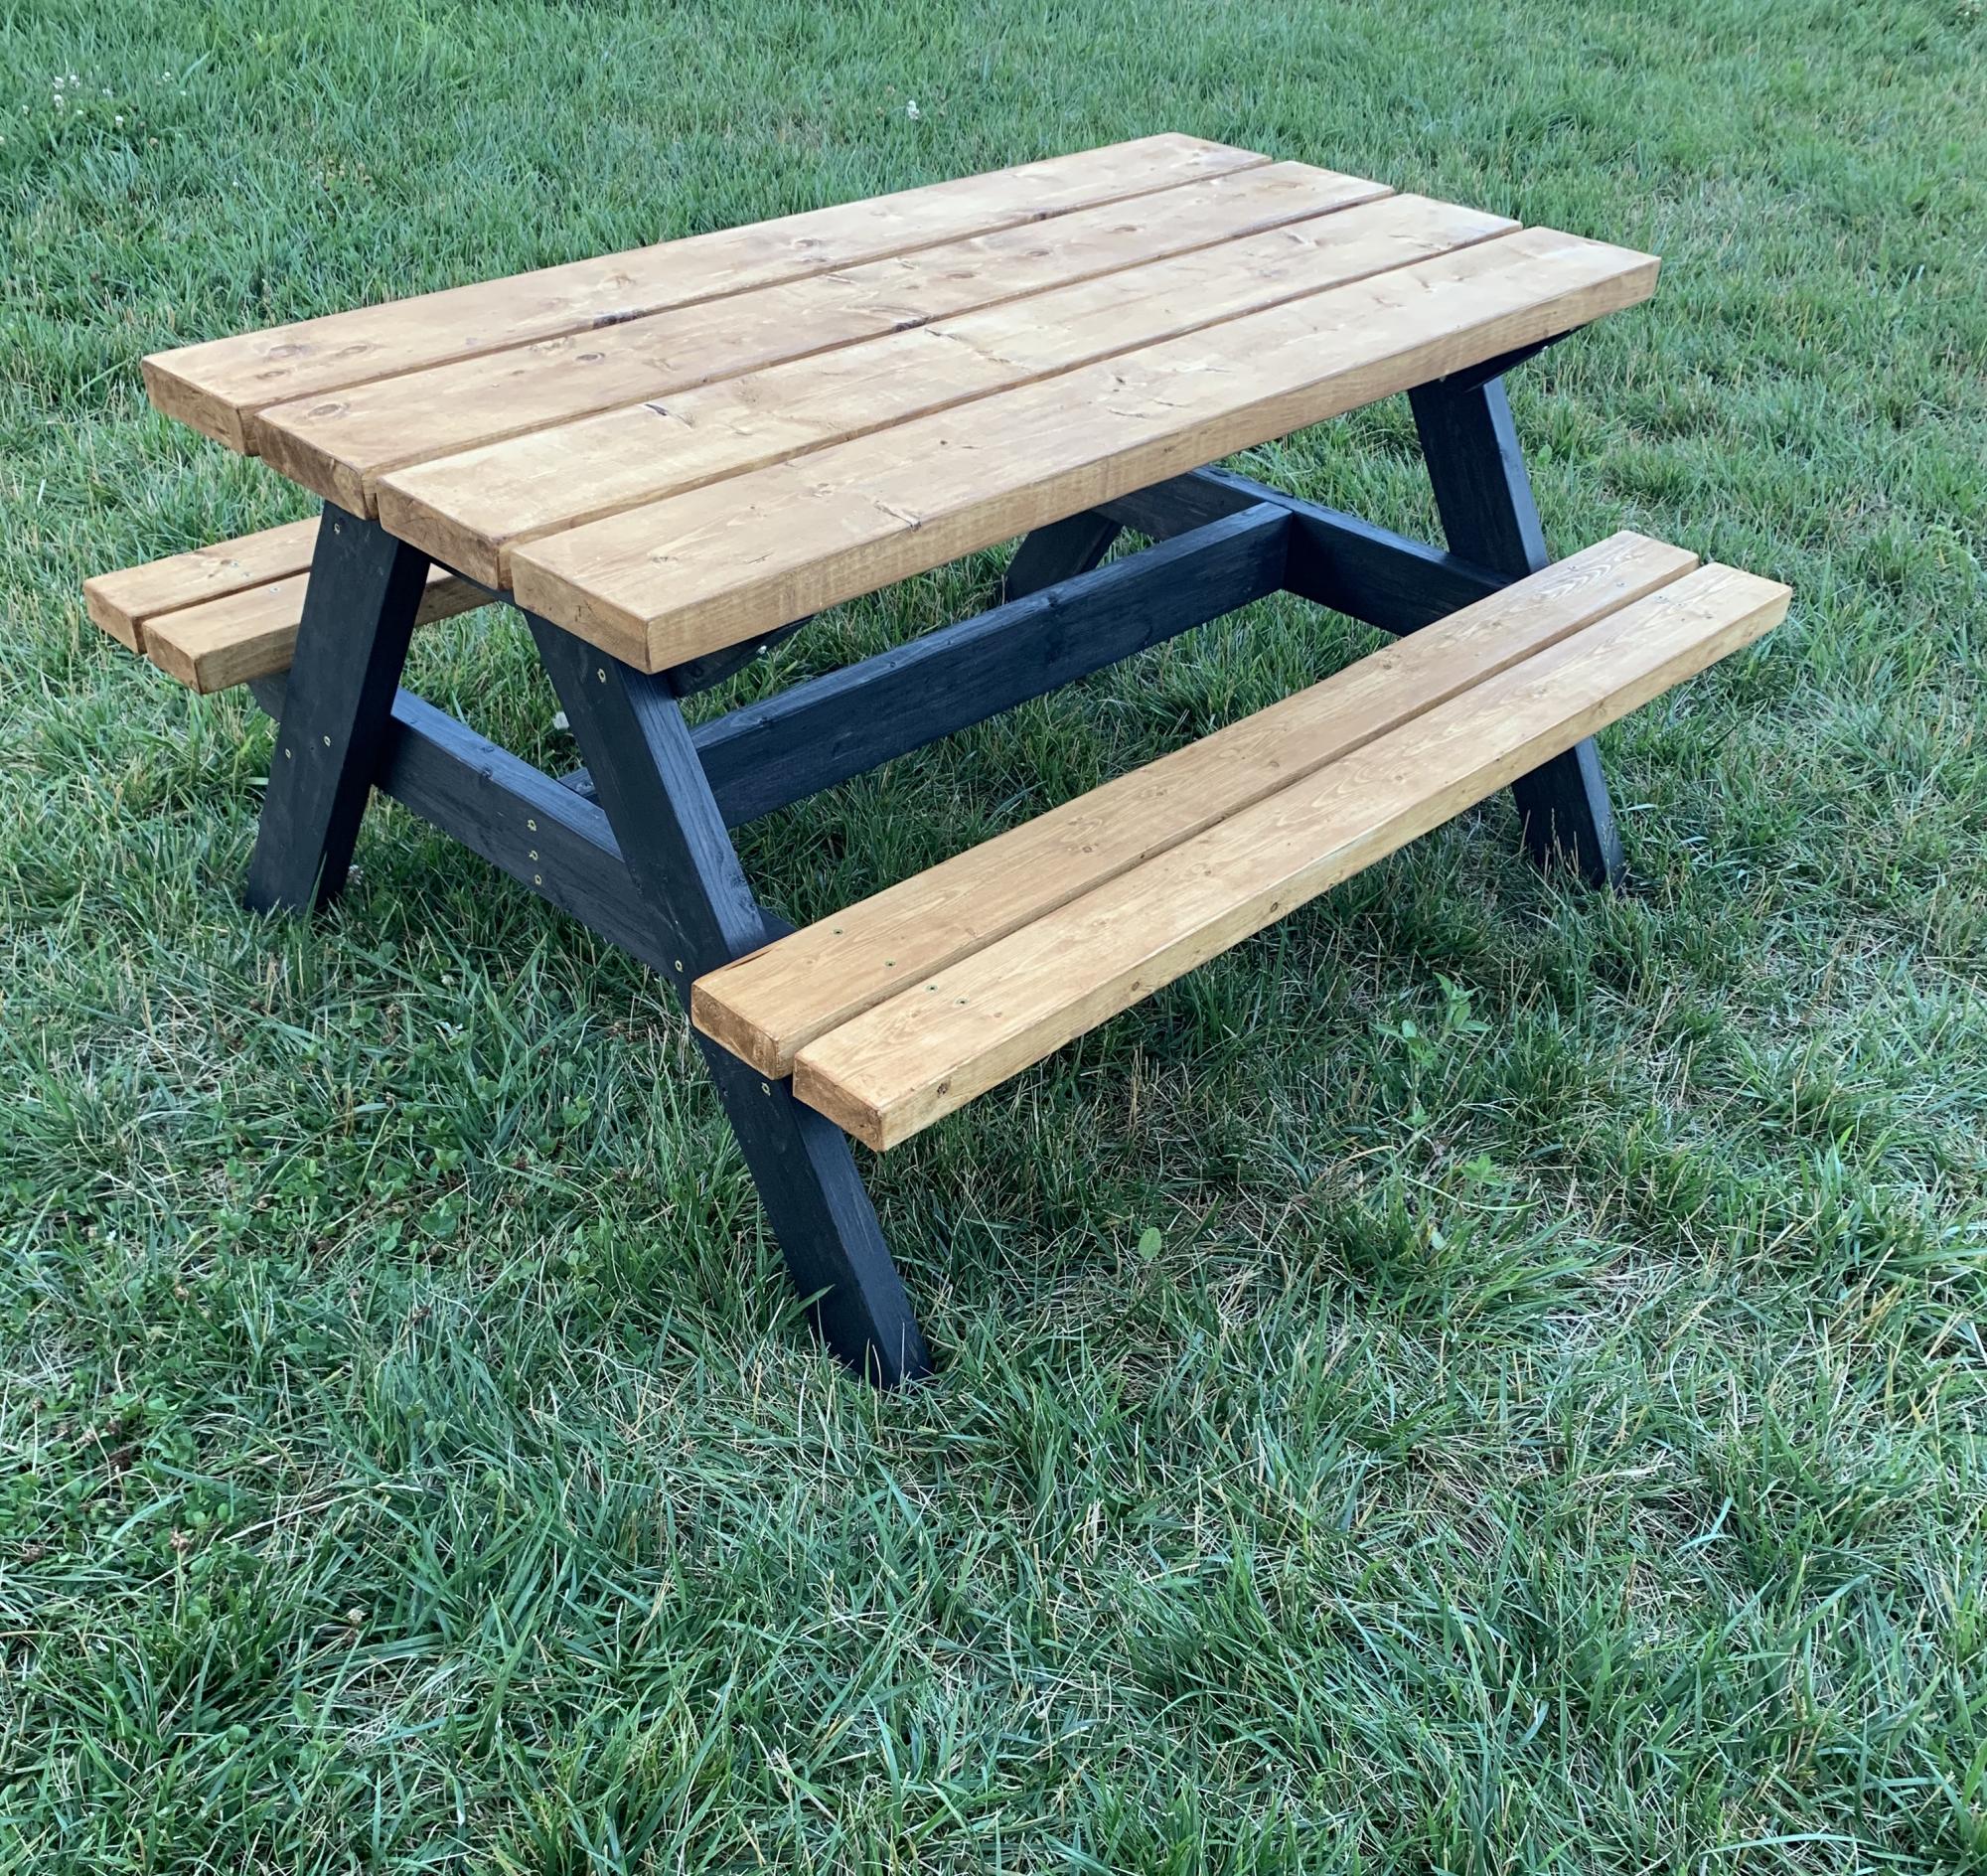
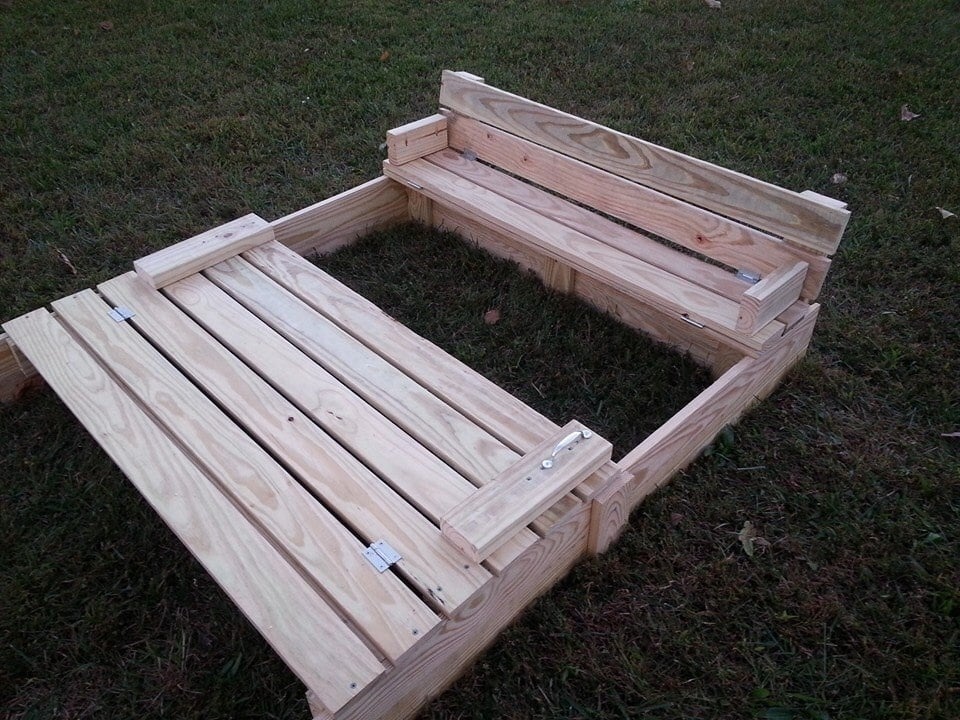
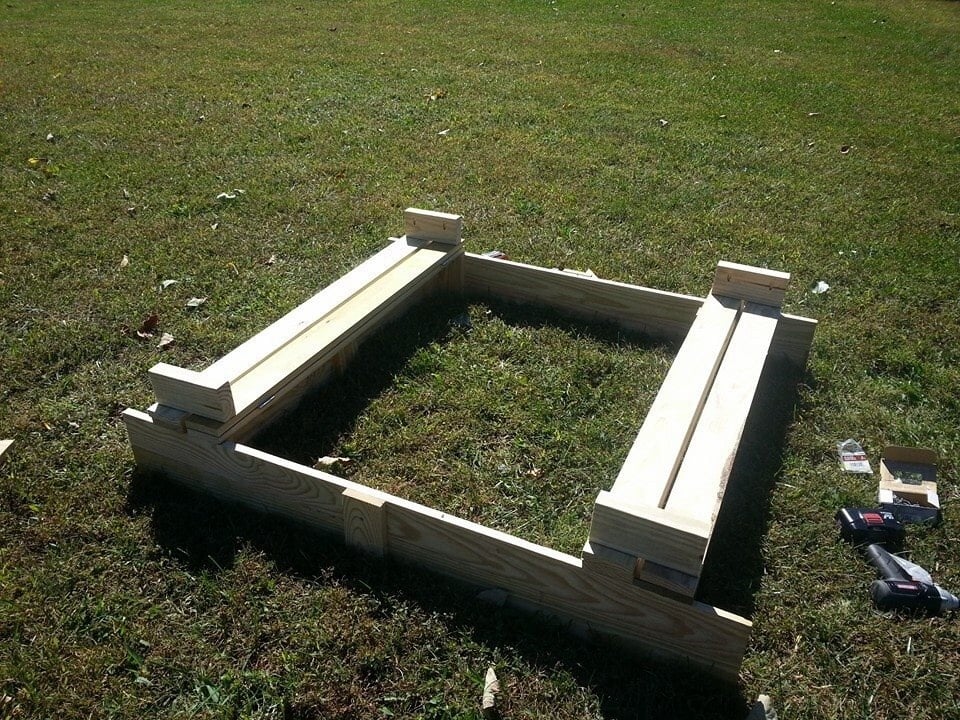
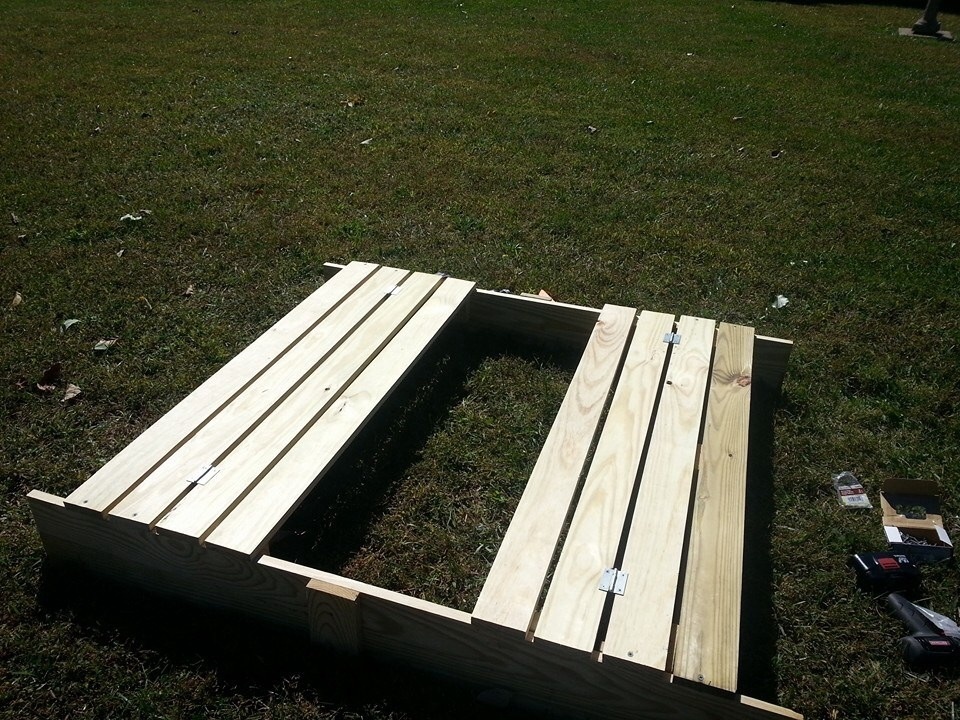
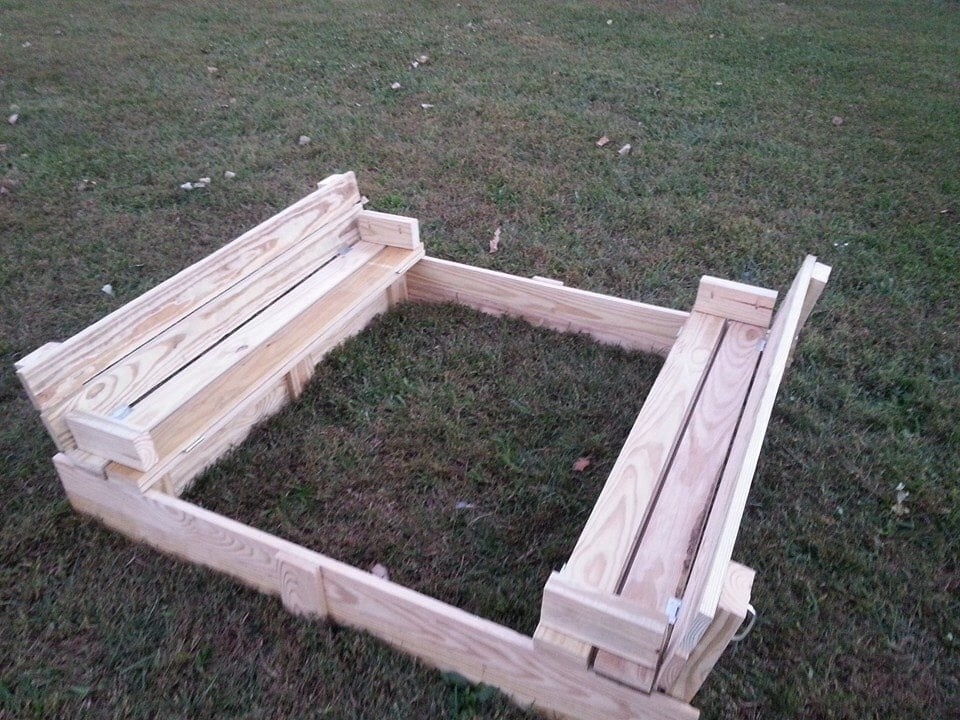
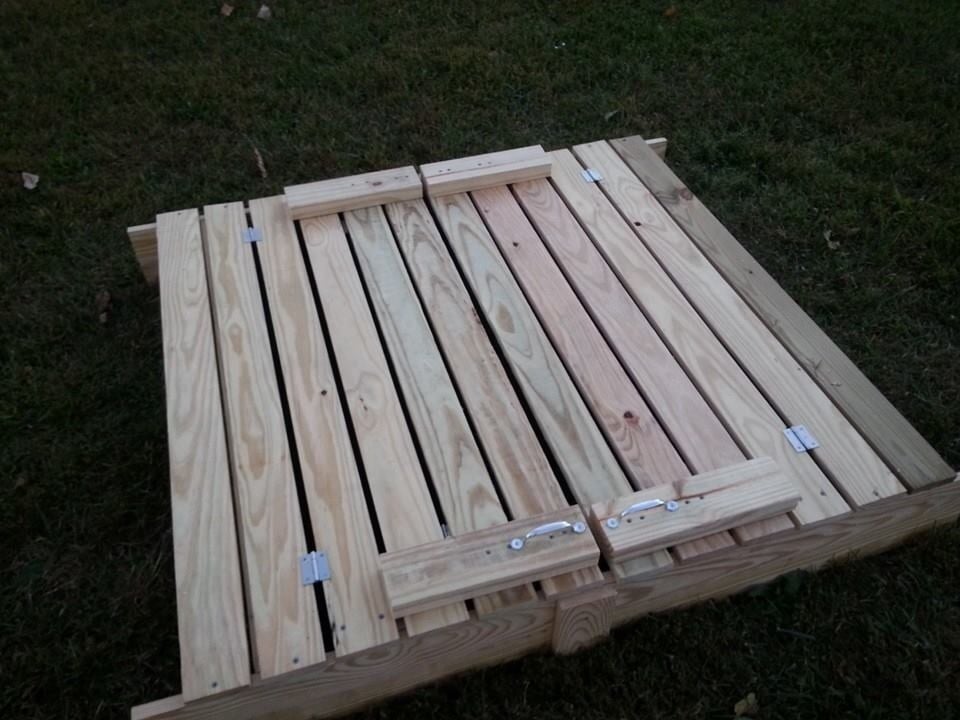
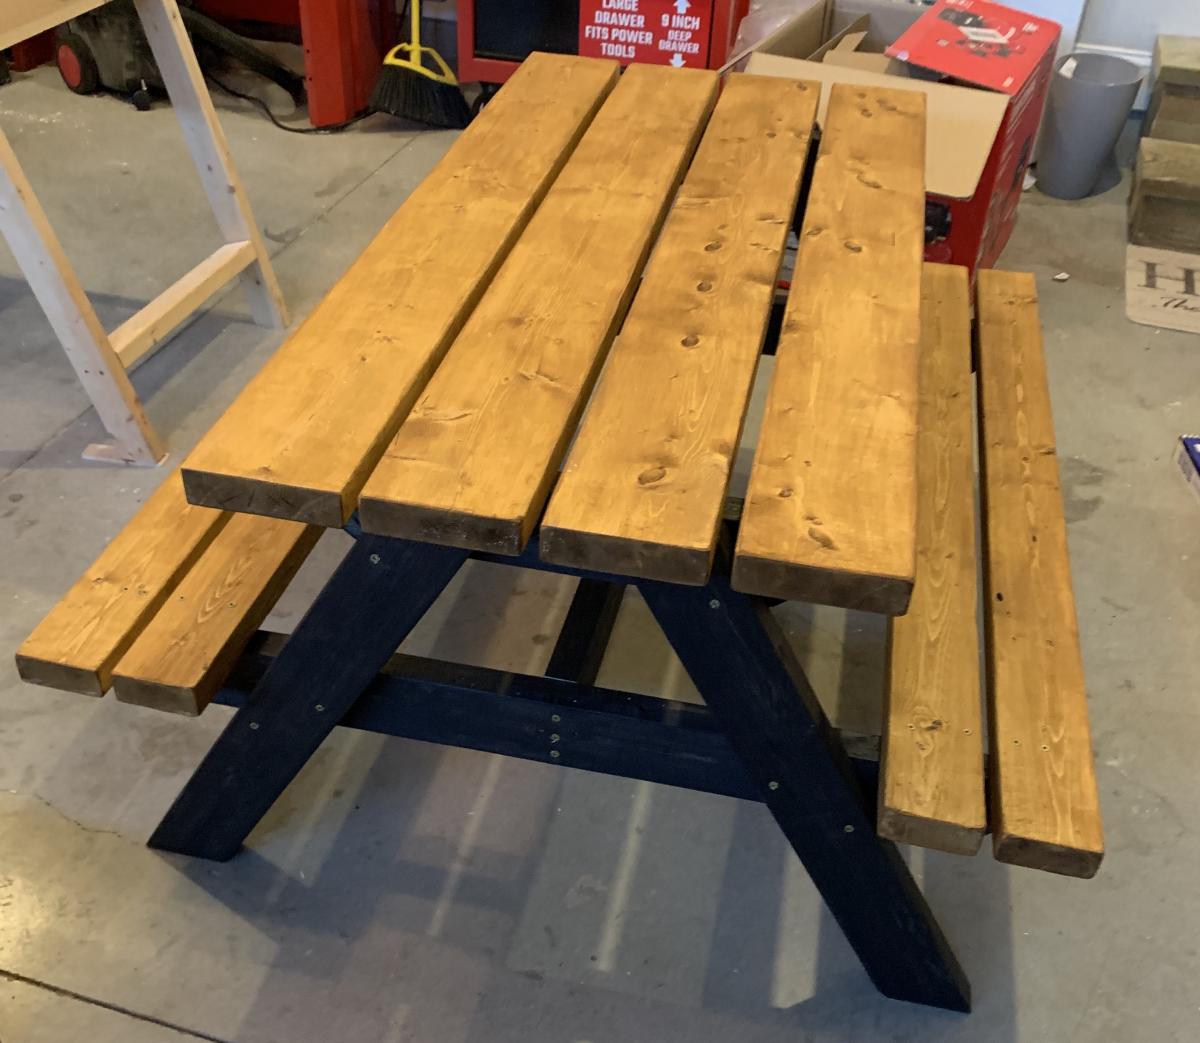
This was a easy build and is super strong . ITs built for a kid sized picnic table but I tested It with my weight to see how it holds up and (200 lbs) didn’t hurt it or even make the seat budge.

This was my first project..took me a week but I loved creating this!! Got plans for more! Love your website
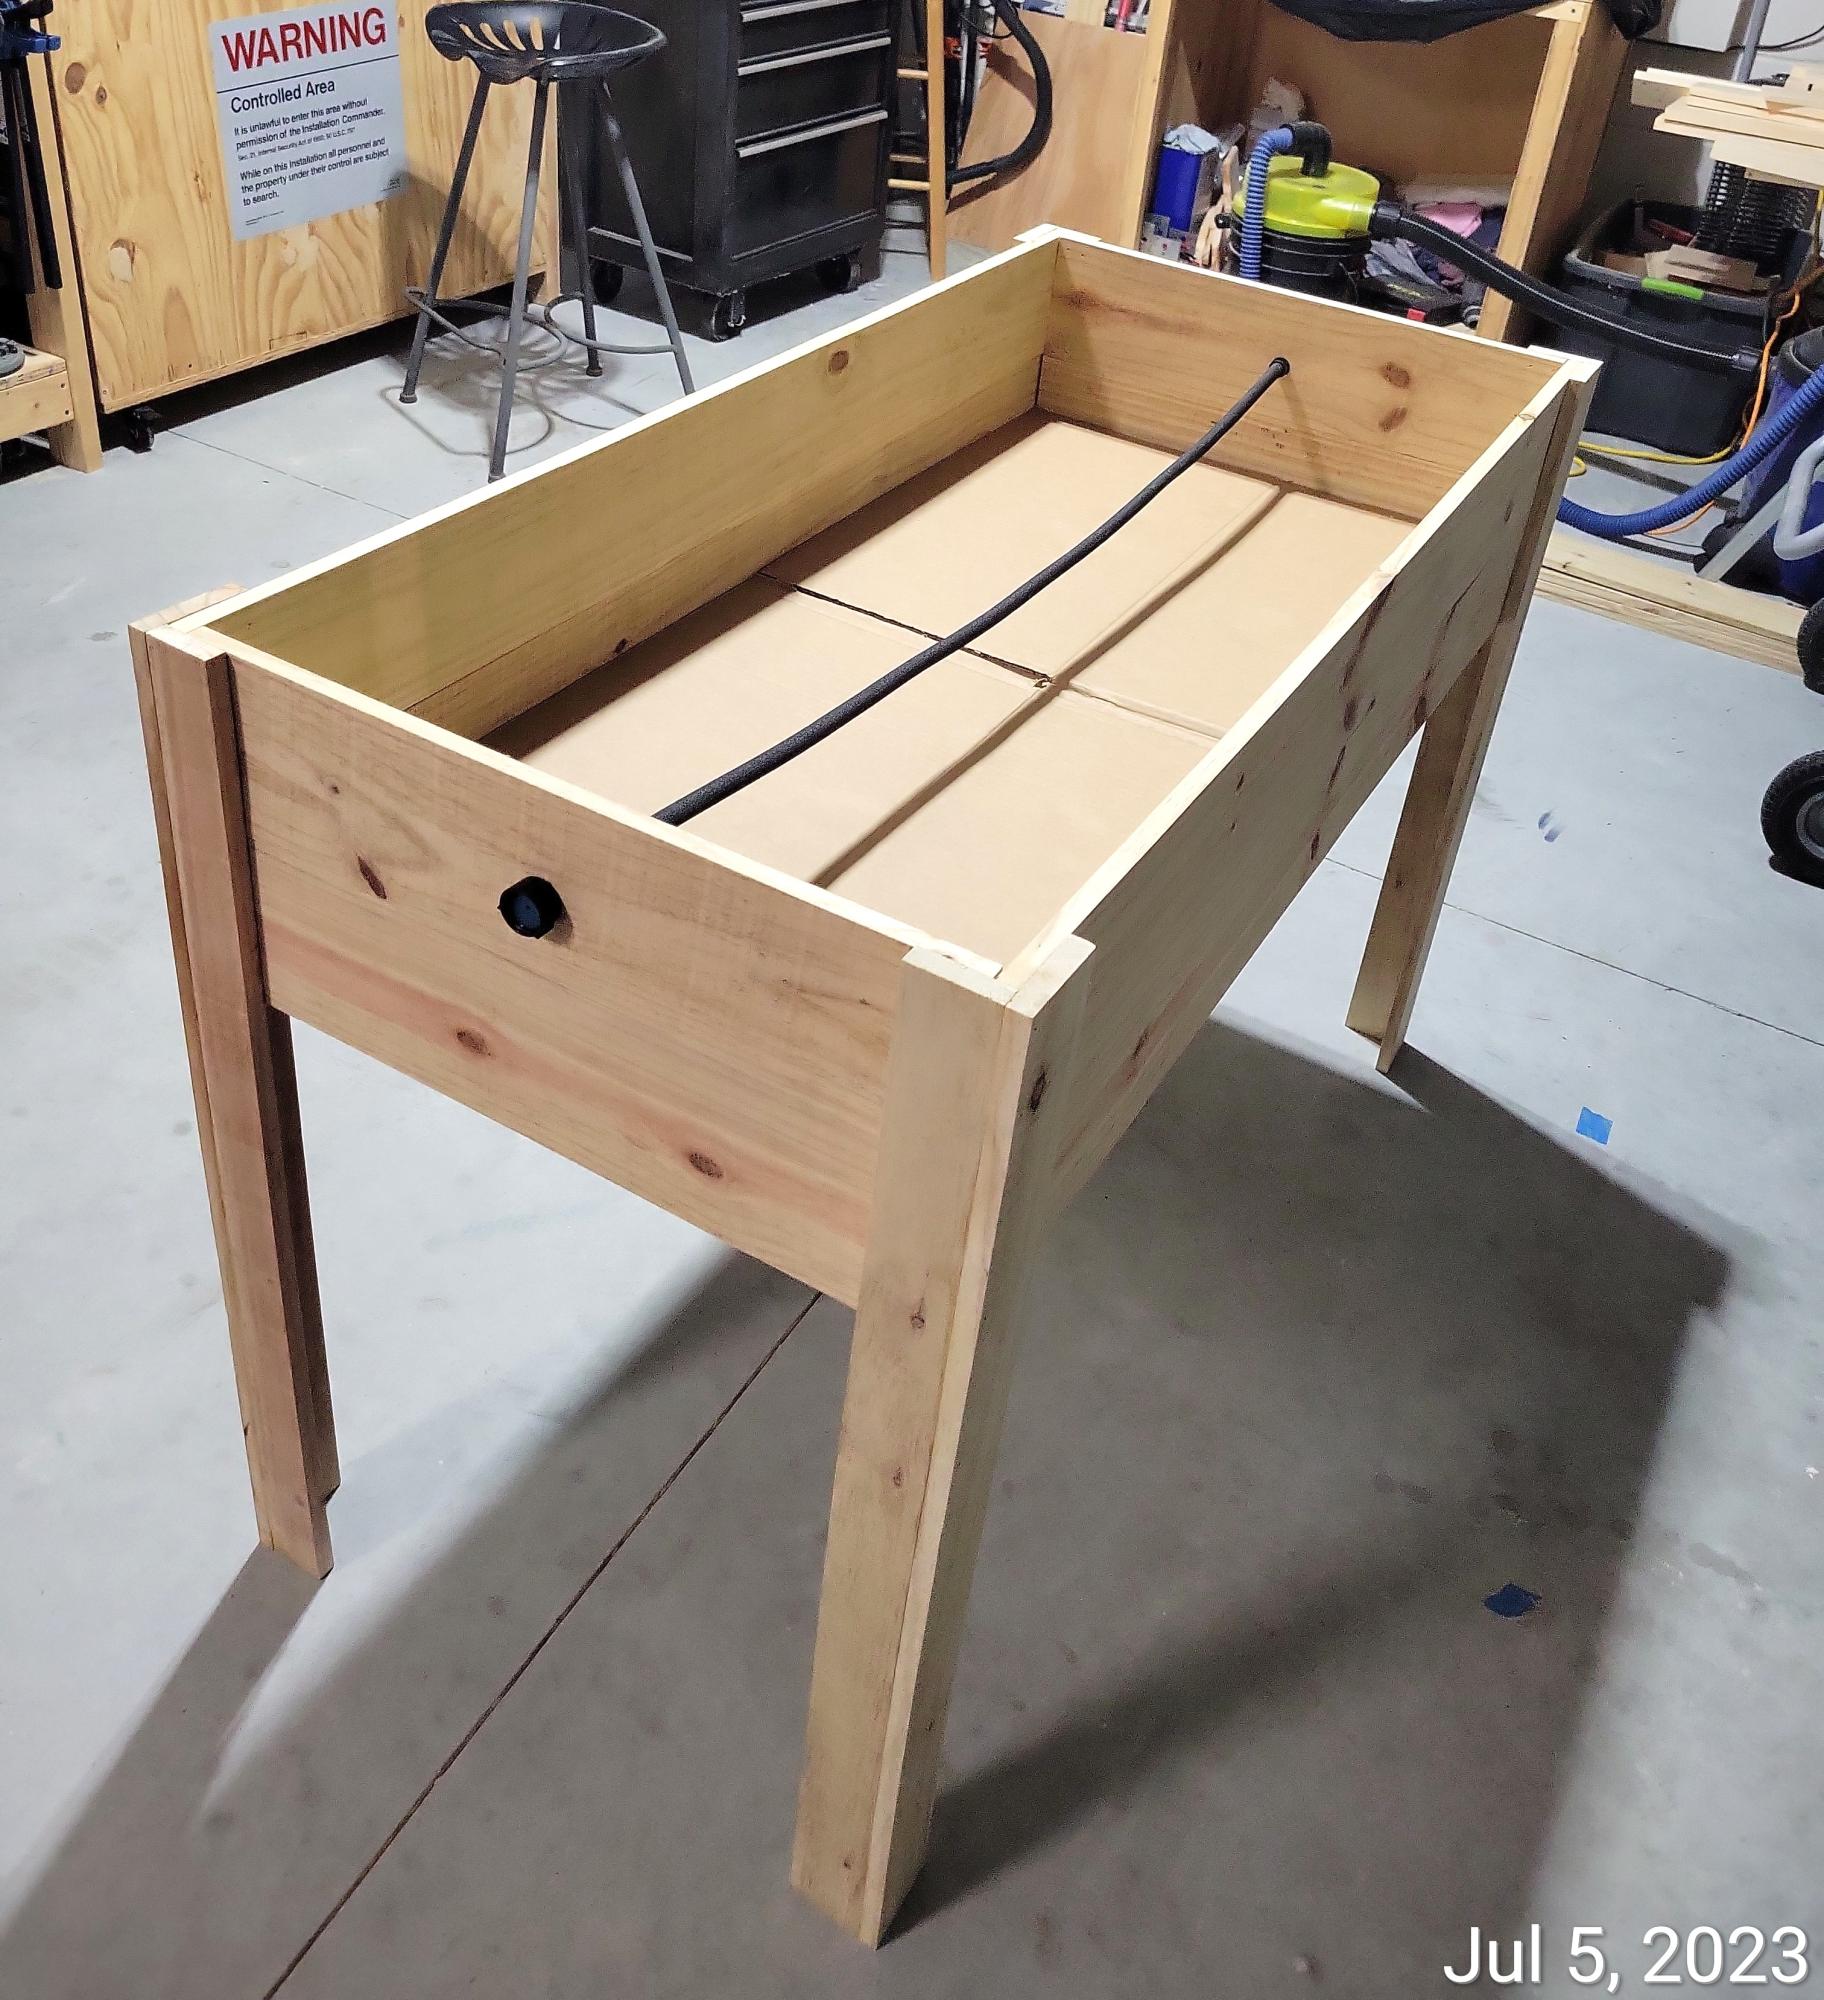
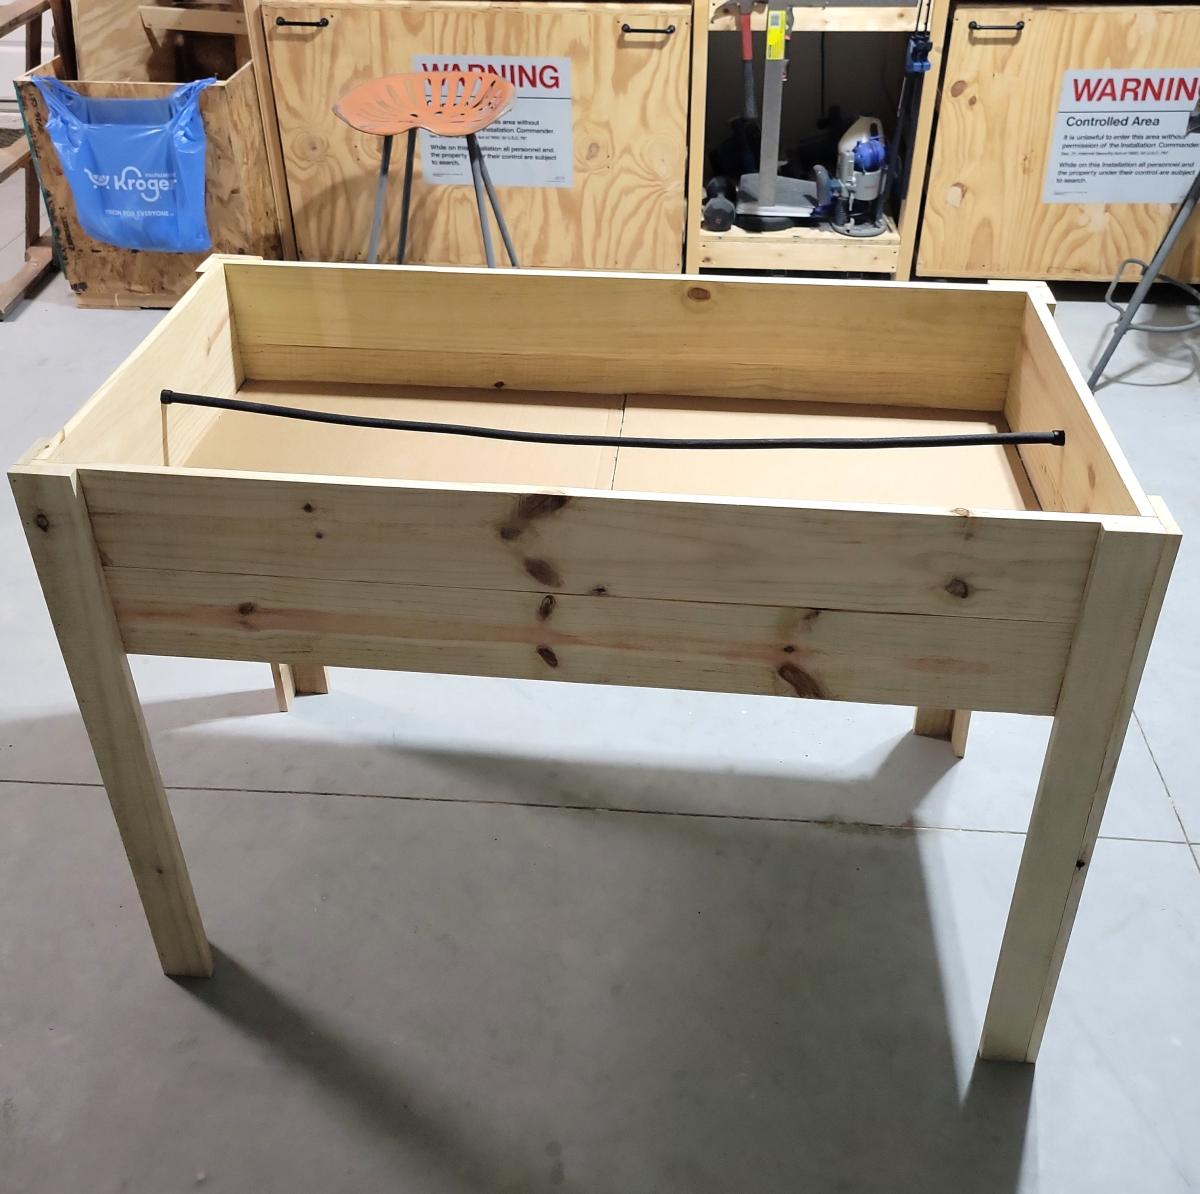
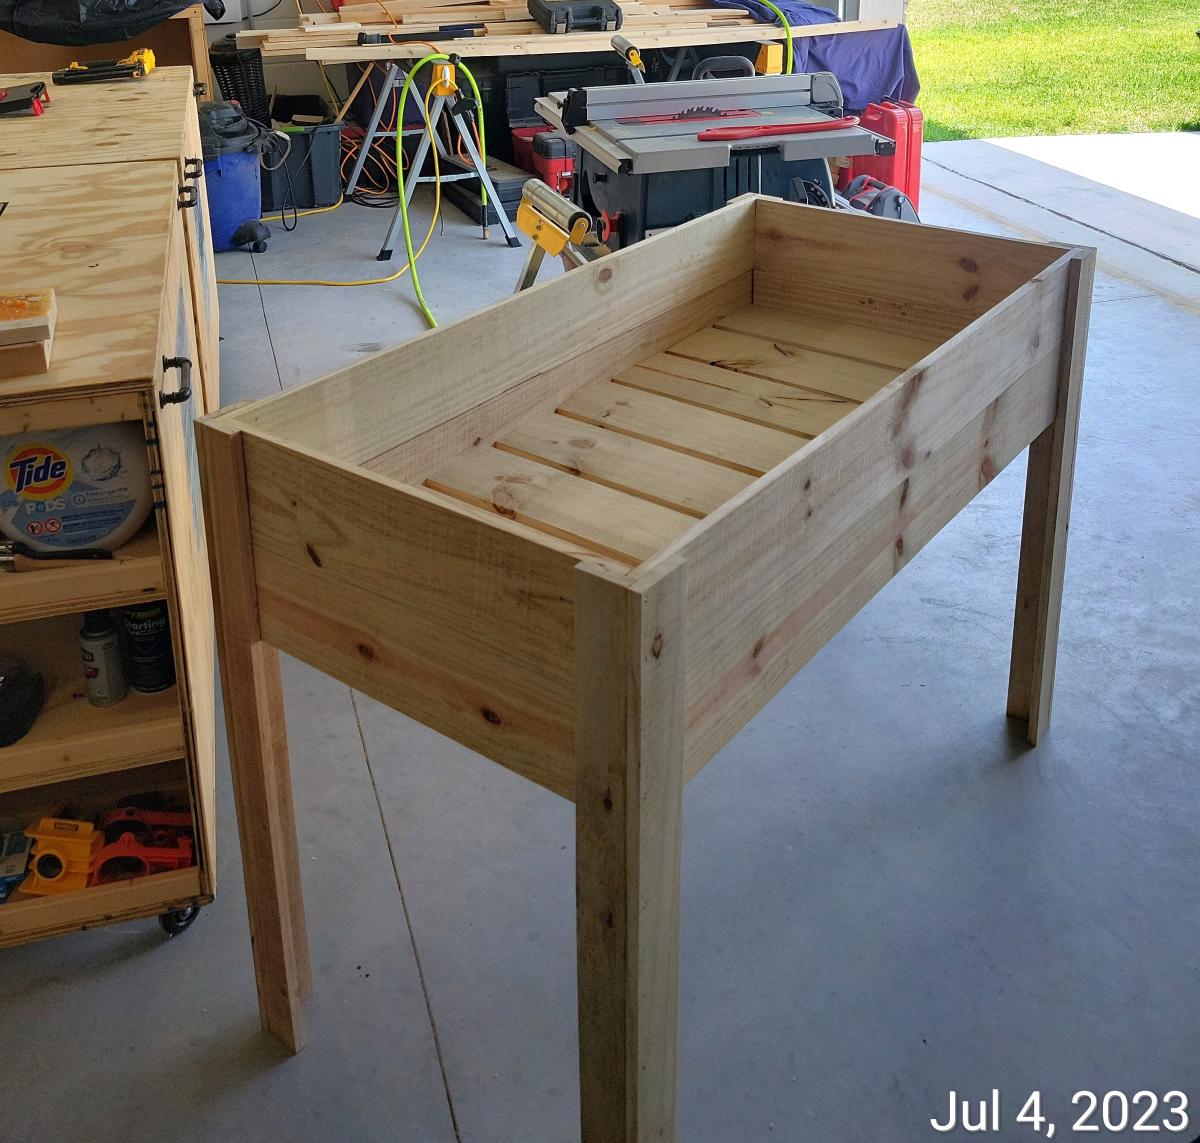
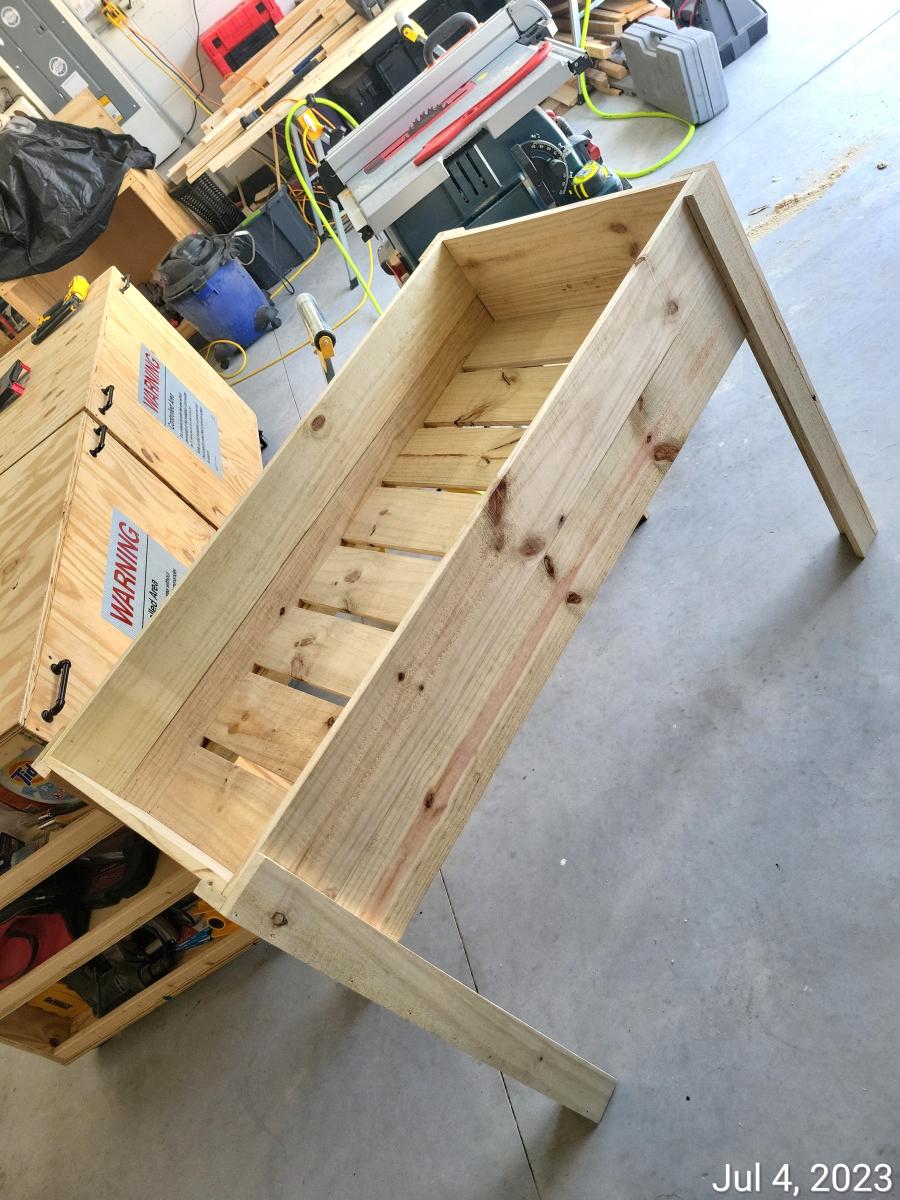
Raised planter with water hose.
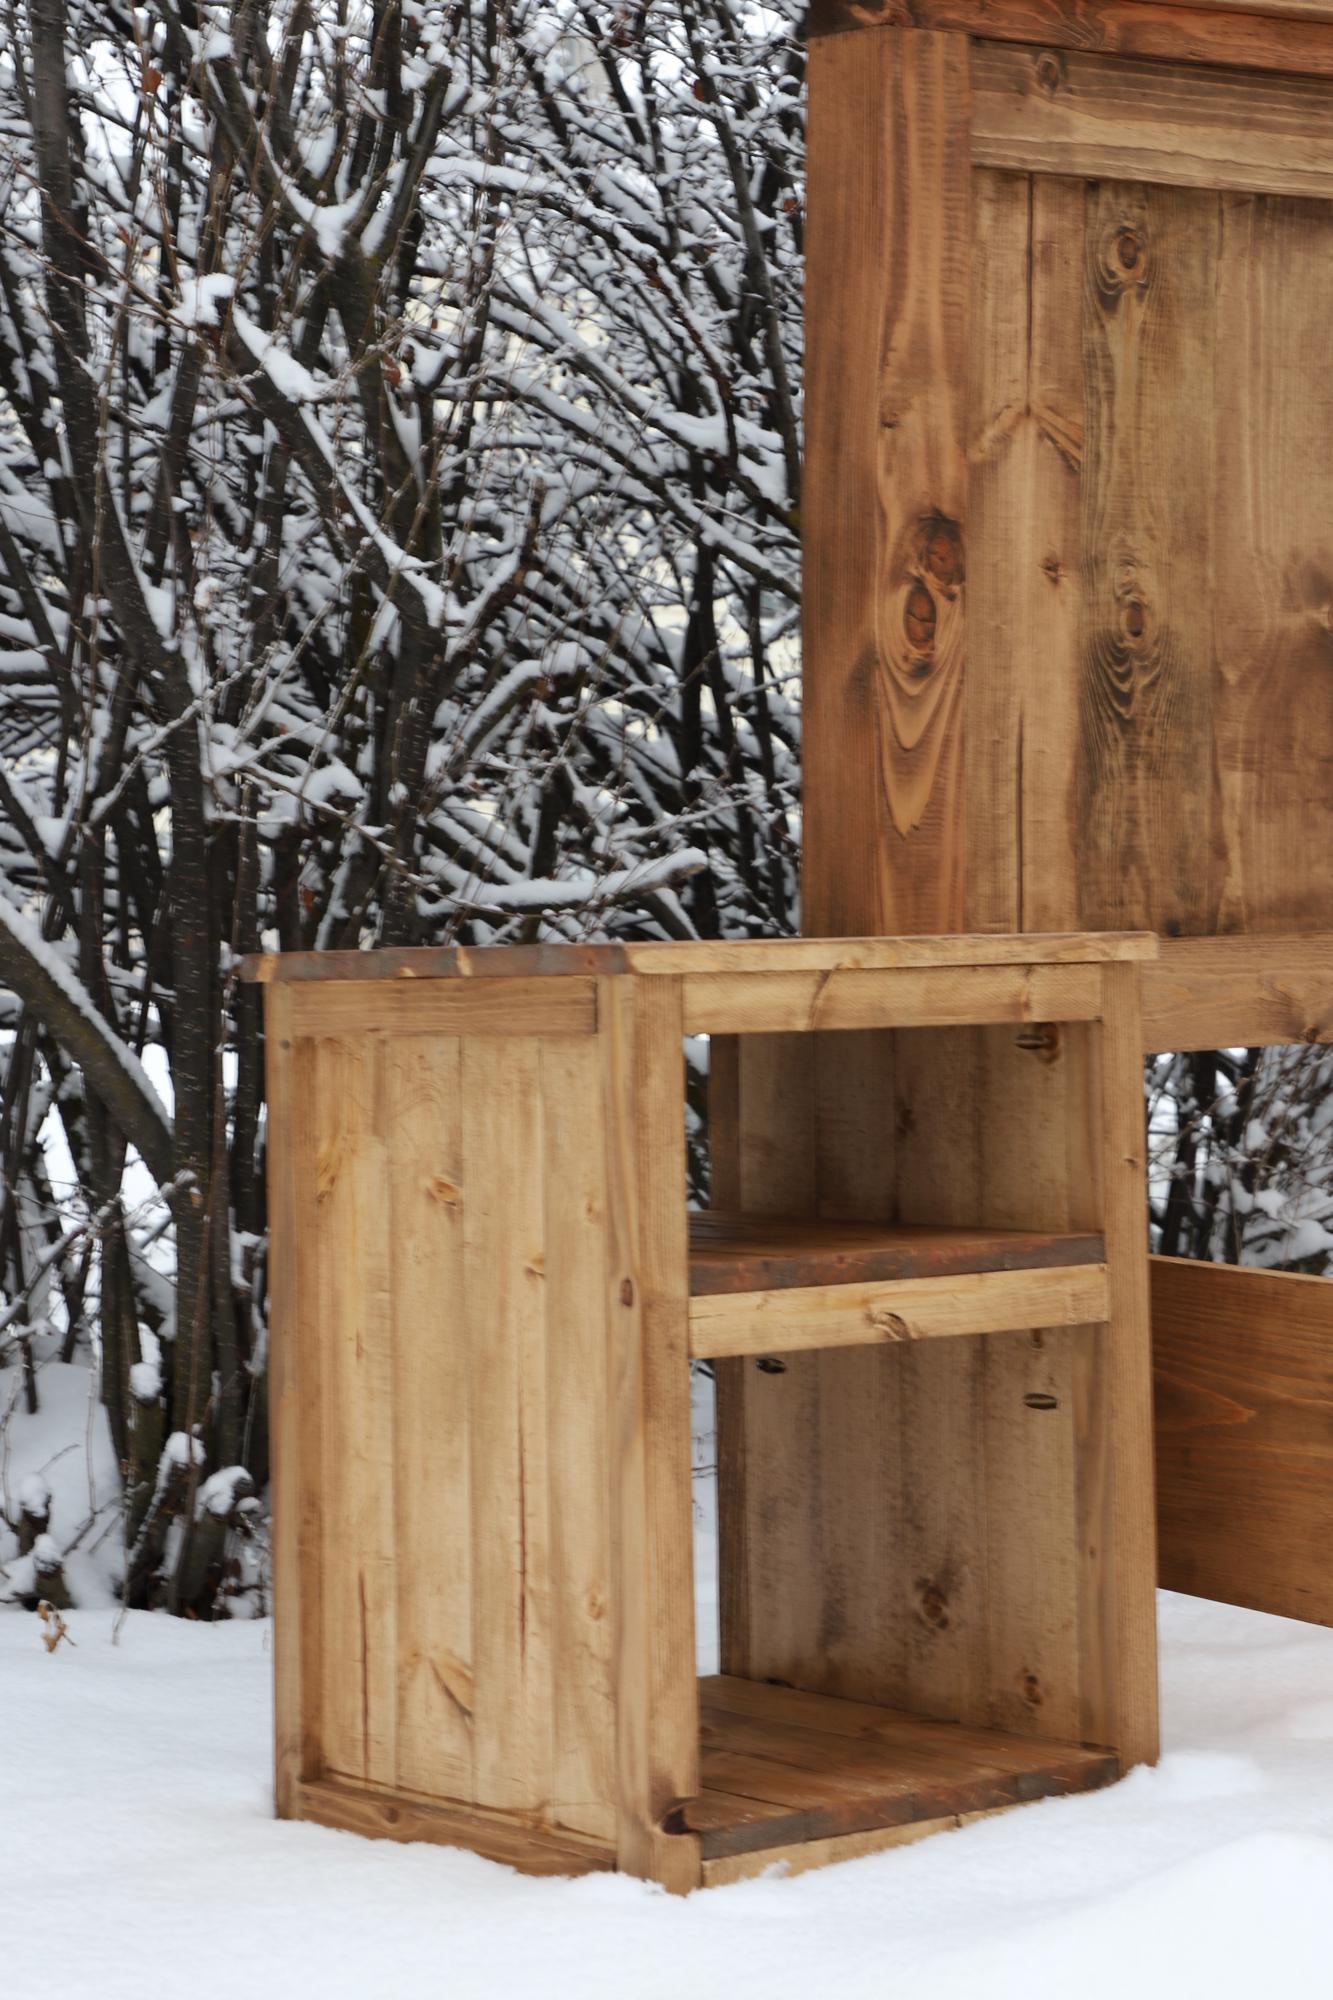
I built these matching nightstands to go with a king bed frame I built for a couple whose rebuilding their home that burned down. They were pretty simple to put together, but despite their simplicity, they are gorgeous.


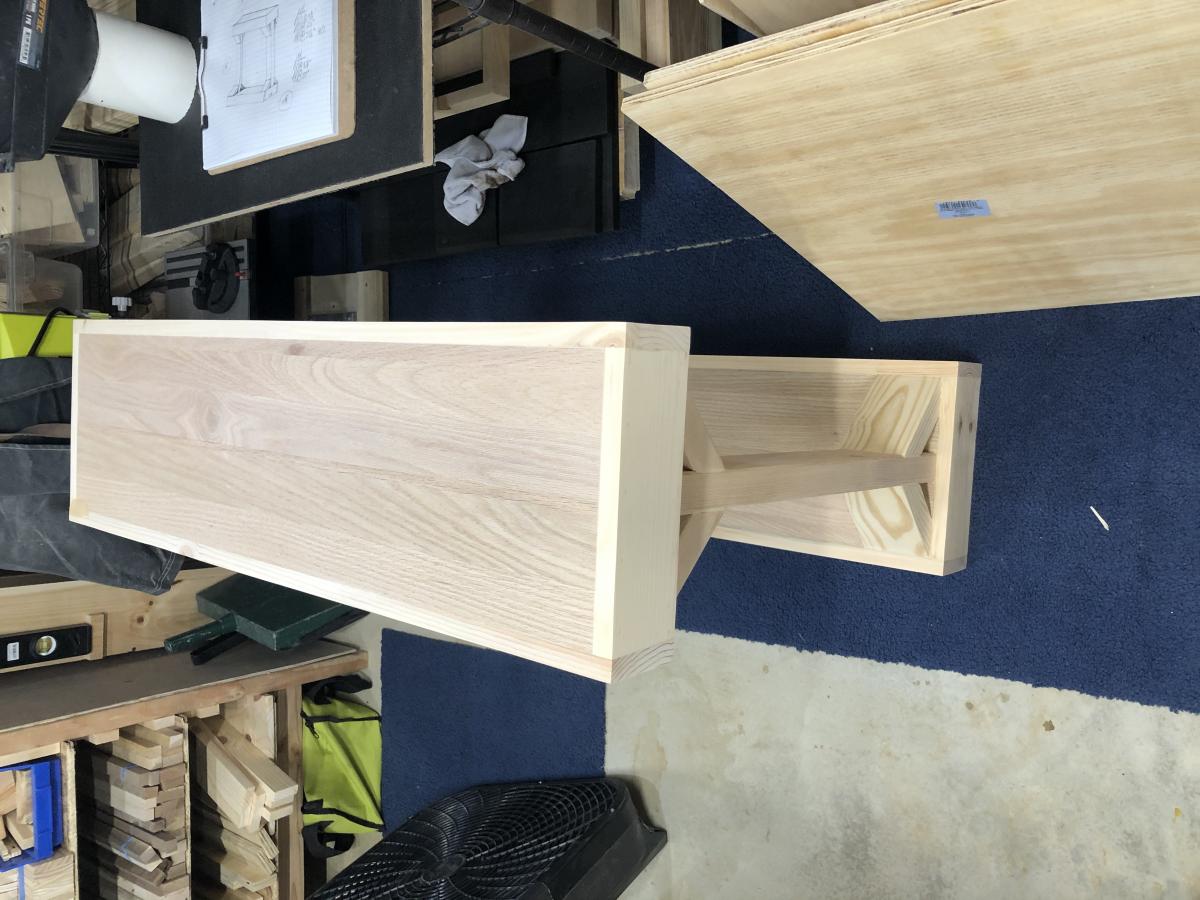
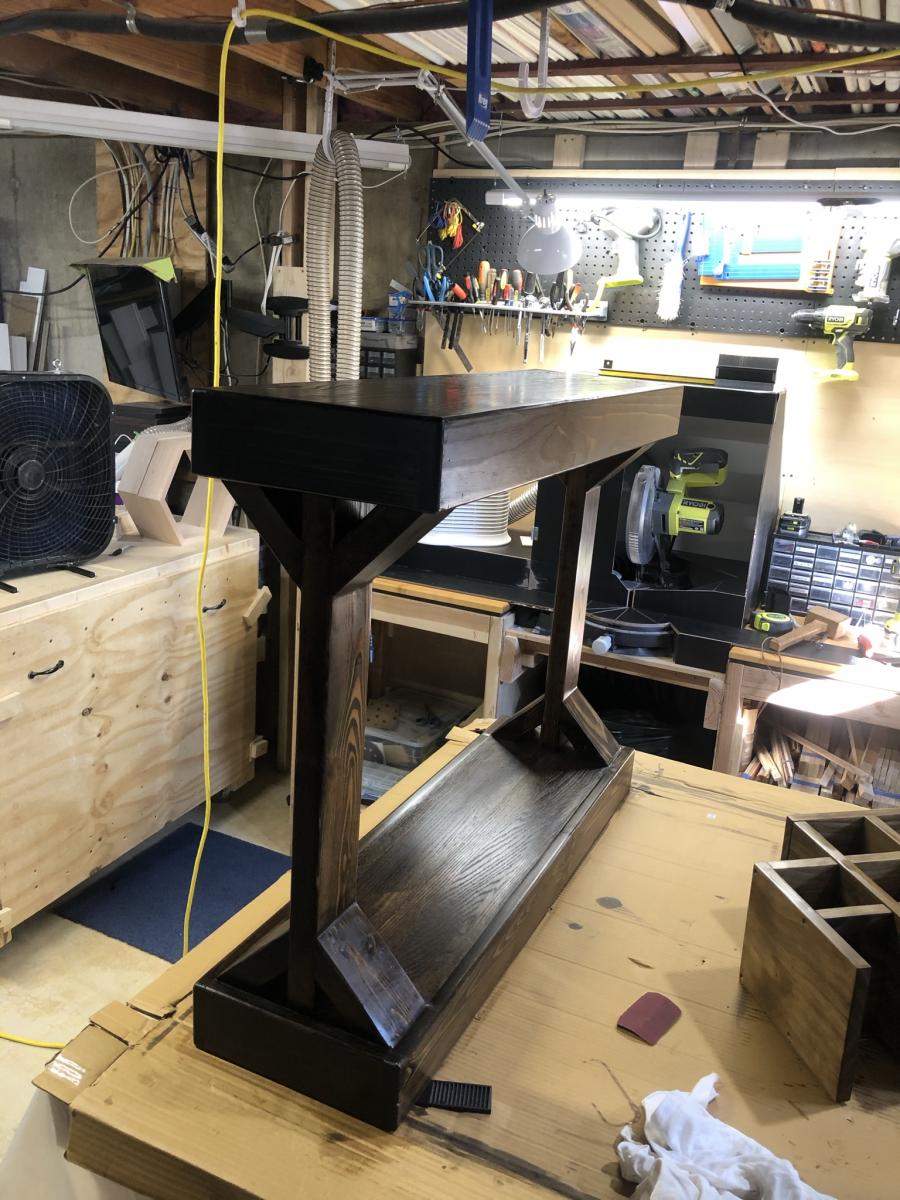
This table was very easy to build and a lot of credit has to be given to how in depth the plans were! So much detail.
I wish my 2x4’s weren’t twisted because now I have to shim one side so it doesn’t rock but that’s all on me lol.
Great plans and I plan on making more of these! Thanks!