Daughters blue Playhouse
I used the basic framing plan for the project, but extended roof overhangs, added engineered siding / trim and cedar shake roofing. I put 2x4 bracing on for the platform.
Love this! The farm house table and bench (1st photo) were my first 2 wood project ever. They came out great so I decided to make a coffee table using modified dimensions (2nd photo) and used poplar for the table top instead of pine. Poplar took to the stain I used really well. The farm table is Danish Oil, Light Walnut and the coffee table is in Danish Oil Dark walnut. I used wipe on Poly to finish both tables and I used matte black wood screws for an accent on the base of the coffee table. Everything else was assembled with a compact circular saw and pocket holes w/ a Kreg Jig. Thanks for the plans!
Mon, 10/19/2020 - 23:48
Ana white is a superb personality. She is doing a superb job in the agricultural field. I want to know more about the farmhouse table but now it's easier to finish the assignment at https://ifpnews.com/how-to-finish-your-dissertation-during-lockdown and get all the help about. Even I am more interested in vertical farming. Please guide me in this regard.
I built this Toddler picnic table from reclaimed 2x4's
I recently had a workshop built and I have been trying to now work on the furniture for it. My first project was this workbench inspired by the plans "garage workshop workbench". I added drawers on each side and will probably end up adding a shelf in the open area as well after letting my kids finish decorating the top. It's already a nice addition and I may build a smaller version for my garage. I added casters and have the option to roll the table around or have it stationary.
Tonie
Loved these easy to follow plans and love our outdoor living room!
This was a build from a picture and made to fit into a space we have in the laundry room. Used the Kreg jig for much of it.
Tue, 06/05/2018 - 14:52
Awesome laundry sorter! Can't wait to see the paint/stain!
Thanks so much for sharing a brag post - much appreciated!
Ana
I tackled the Farmhouse Table over a long weekend while my boyfriend was away - he was surprised needless to say!
I have not attempted any woodwork projects since grade 8, but this was alot of fun - I did not find it very difficult and loove using power tools :)
I made the matching bench, however I guess I did not stir the bottom of the can well enough and my bench is now red :/ soo I am going to either stain it dark or paint it white and use it as a mudroom seat!
*I also made mine shorter - 7ft long to fit in our dining room and adjusted the bench to fit.
Fri, 10/07/2011 - 17:15
Thank you so much Ana! We are in the process of renovating our house and your website has inspired me to take on so many more projects now!! :)
Wed, 11/02/2011 - 04:52
I built a similar table and I am having problems with my kids getting food in between the pieces of wood. Do you have this same problem, is anyone having this same problem? Does anyone have any suggestion as to how to fix it, how to keep food and other particles from getting trapped between the cracks? Thanks! You did a great job!!
Wed, 11/23/2011 - 15:00
I am building this table as we speak. The thought occurred to me as well concerning the cracks attracting crumbs. I believe using clamps to make the fit as tight as possible will help. Also some poly finishes may be appropriate with children which may even seal the cracks... if sanded and clamped well.
Wed, 11/23/2011 - 15:11
I did try my best to clamp the wood together as tight as possible - due to the pieces of wood not being completely straight, they are there.
I haven't had this problem yet. I do use place mats when eating at the table, that generally stops any crumbs etc.That's probably the easiest way to avoid it :)
Thank you for your comments!
This is the perfect workbench for my needs.
I upgraded the casters to bigger ones as my shop's floor is in rough shape.
I also added storage under the two work surface next to the miter saw. This was just a matter of closing under the 2X4 frame and making the two sections on casters a little shorter. The only downside for that mod is that the plywood can bend a bit since it is not screwed to the frame. I don't mind since it falls flat as soon as there is weight on it. Also, this mod makes it hard to include fence system (it would need to be removable, like fixed with dowels only, no glue) and almost impossible to include a precise fence system since it would need to be removable. In my case, I do rough, non-repetitive cuts, so there is no need.
TIP : Pay a little extra for smooth plywood. I lost a lot of time sanding mine :(
Tue, 02/04/2020 - 08:21
Awesome! Do you have pictures/info for the cart that has the Dewalt table saw? I have the same one and would love to build the cart for it.
We used the plans from the Garden Enclosure, but built the sides twice as high to make for less bending. The only problem was this made our wire come up higher so we had to adjust the door height. We haven't produced too much yet, but hoping next year brings a quicker yield. The plans were so helpful and easy to use for us novices. *Sorry I couldn't get the pictures to rotate.
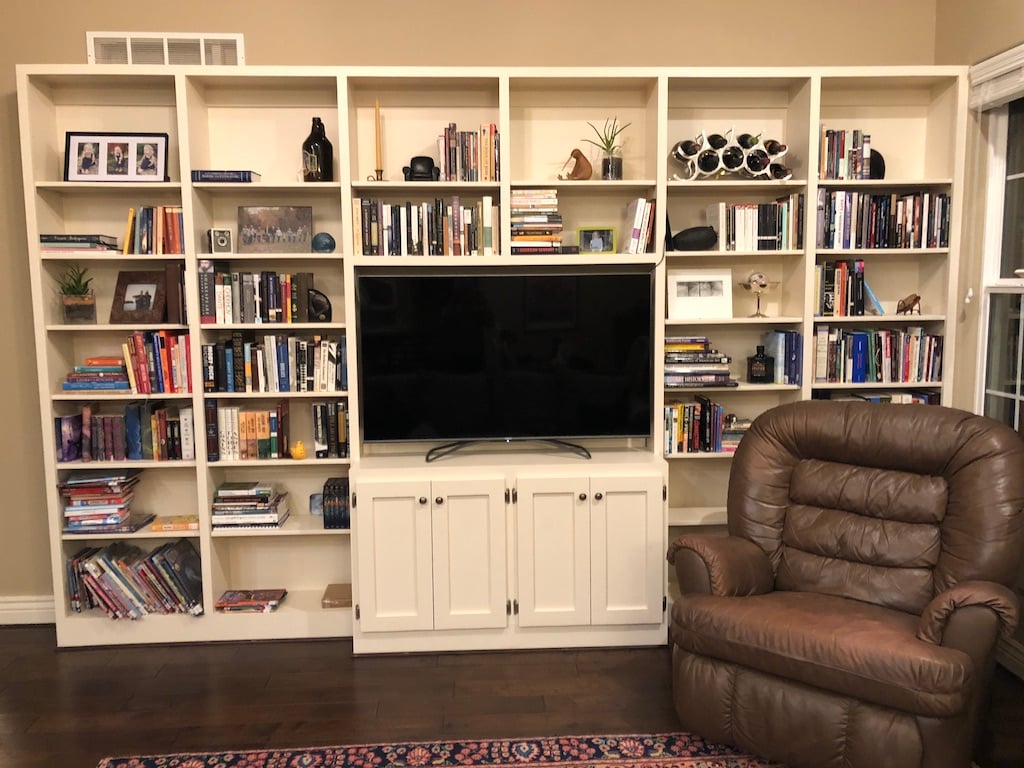
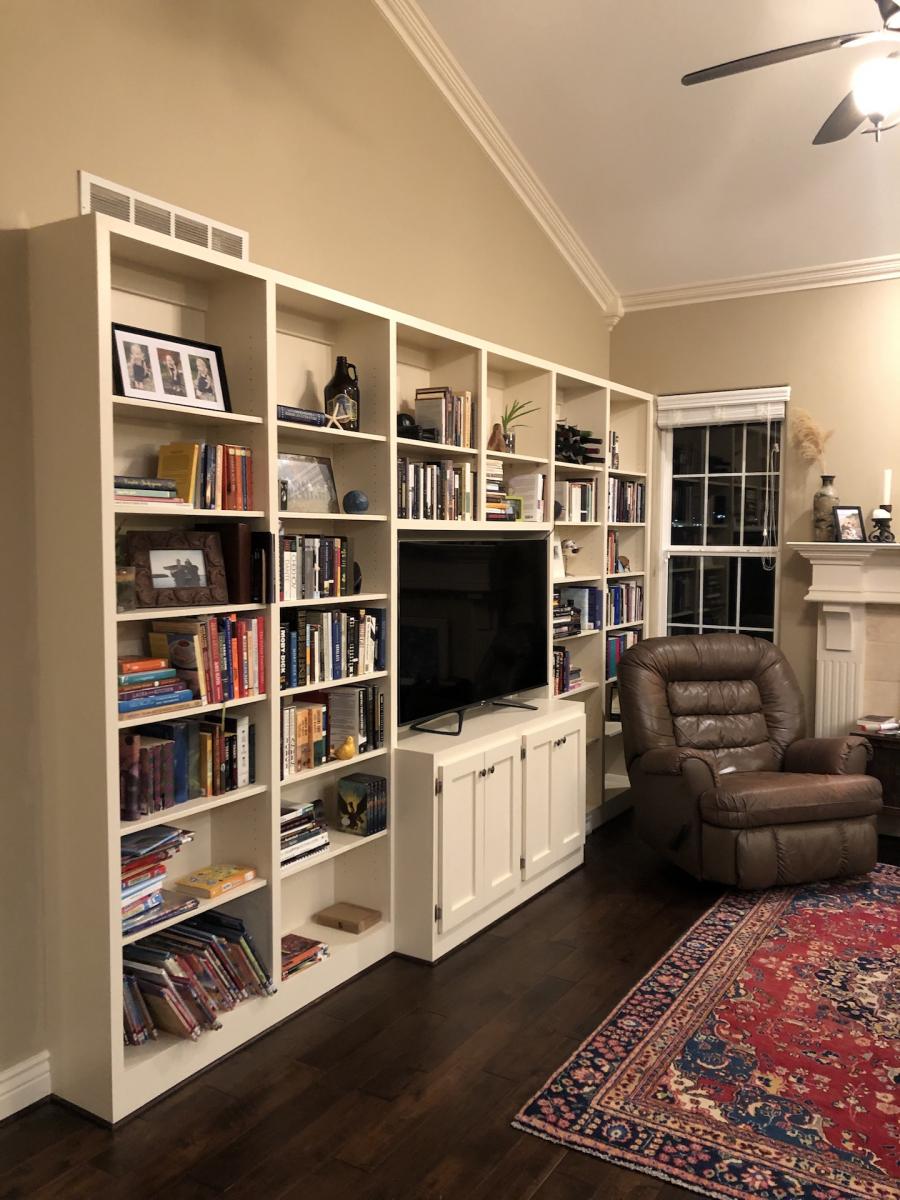
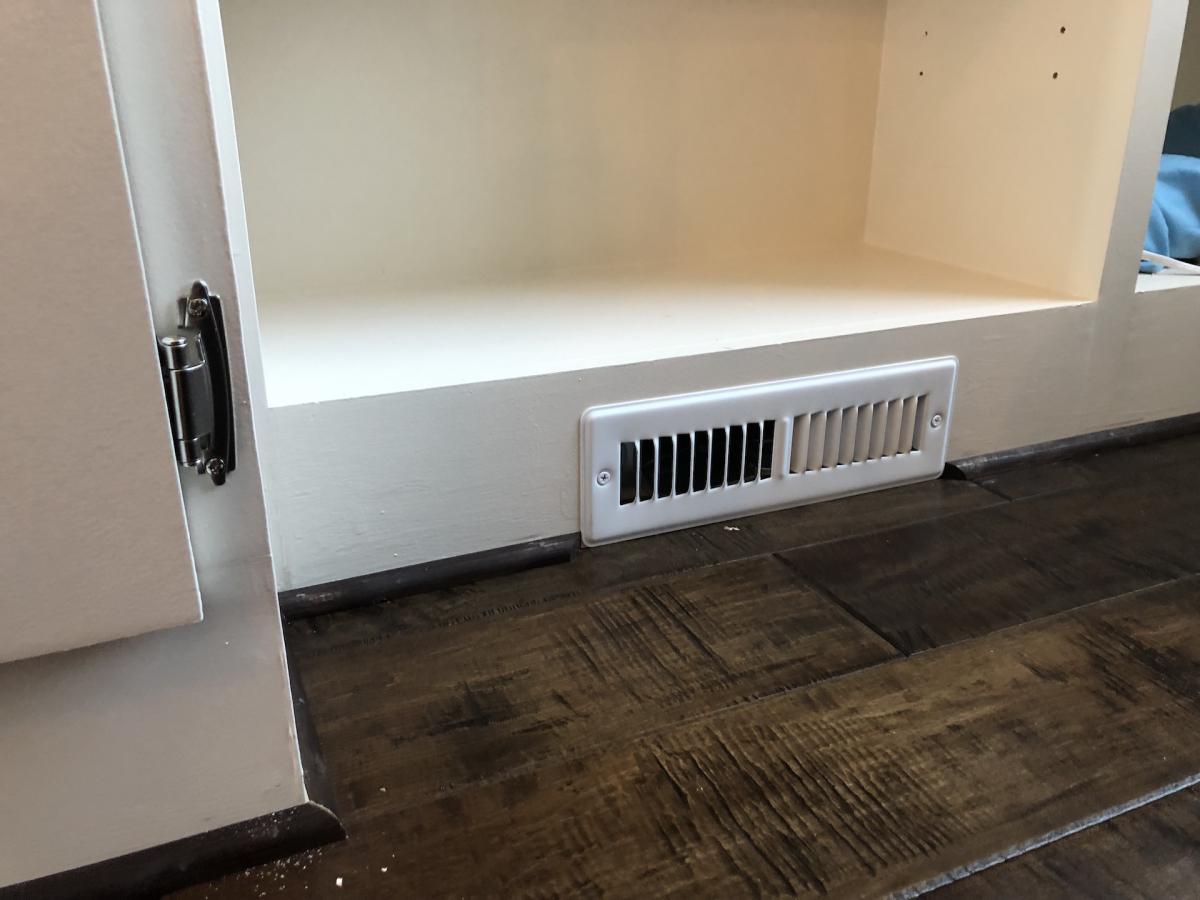
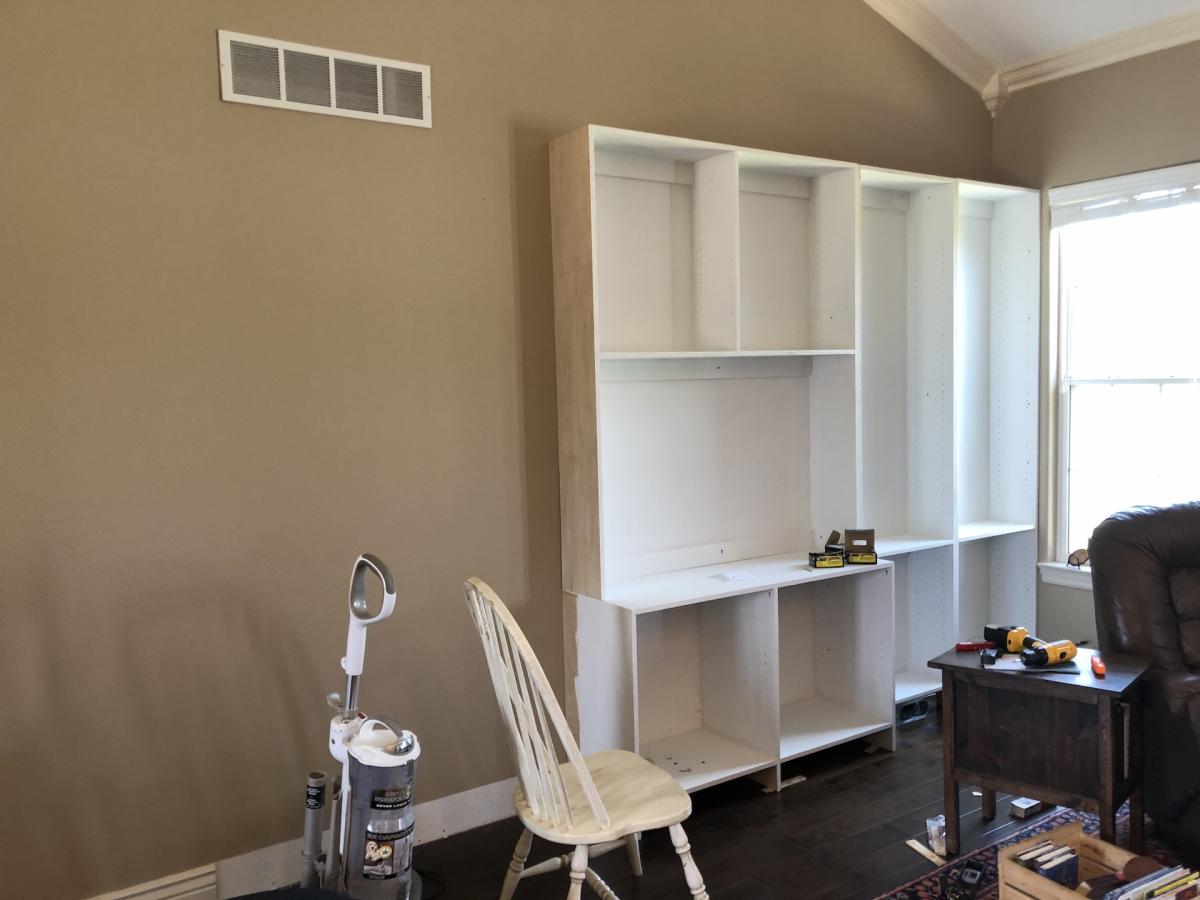
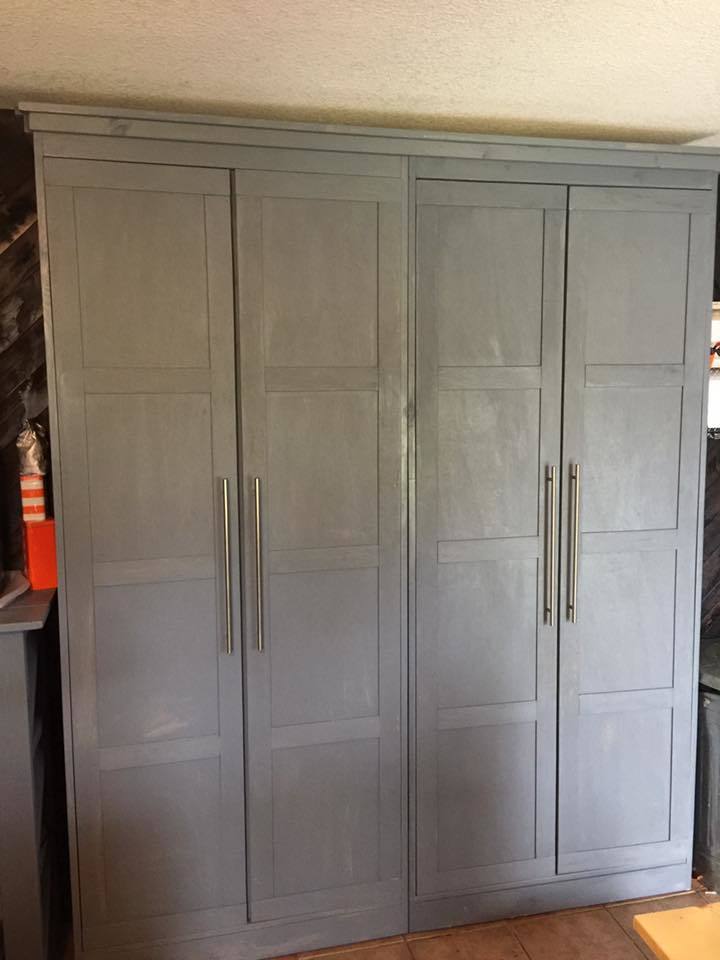
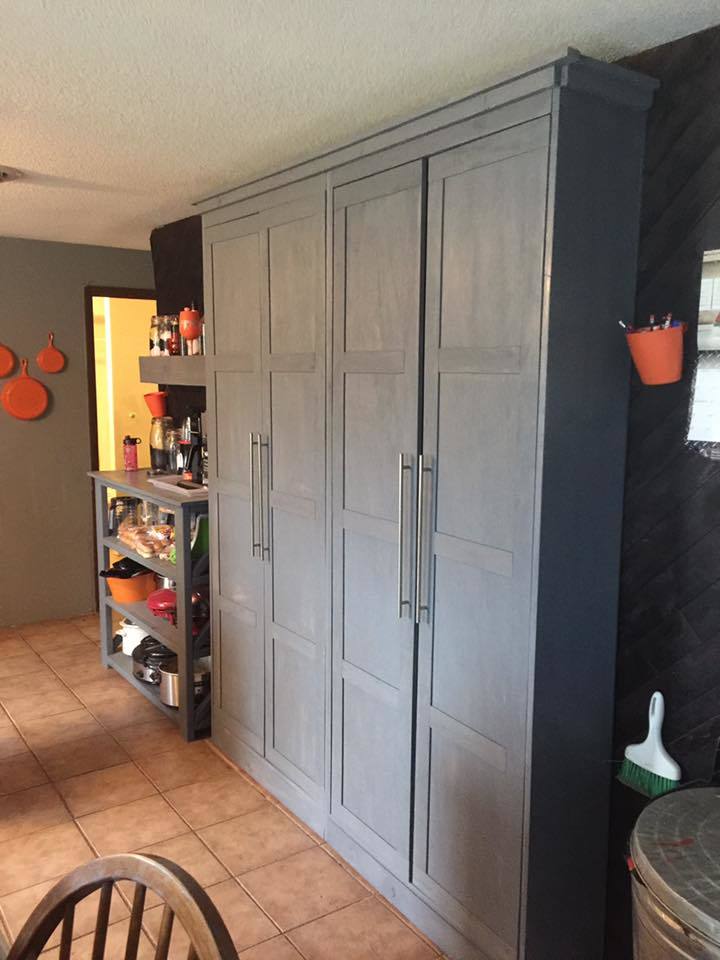
I built this project in 6 separate pieces before installing it in our home. I pulled the baseboard and attached it to the wall to give it a built-in feel. For the majority of the project, I used 3/4" plywood with the exception if 1/4" plywood for the back of the shelves as well as the centers of the cabinet doors. For the trim, I used select pine boards. I had to work around an airconditioning vent that was in the floor. I was able to divert it to run out the bottom of the bookcase.
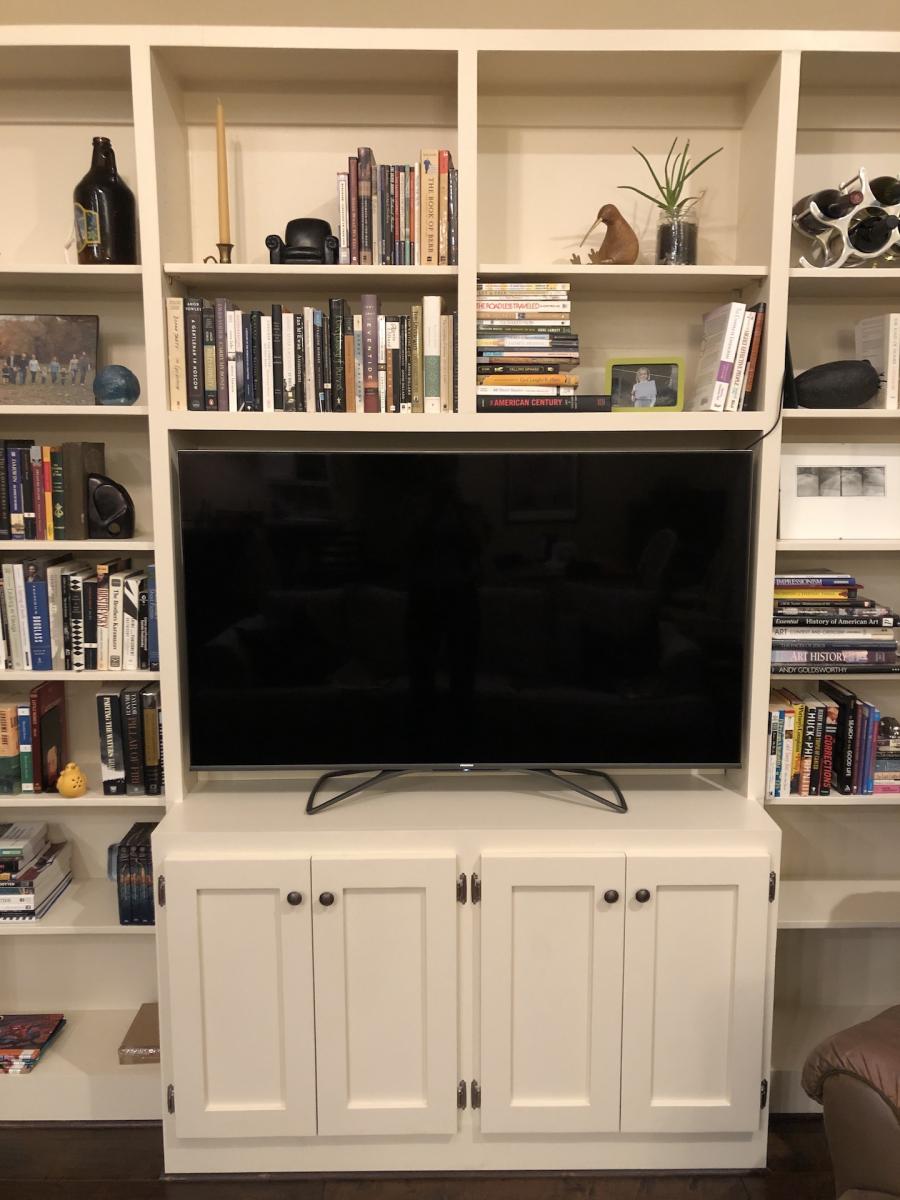
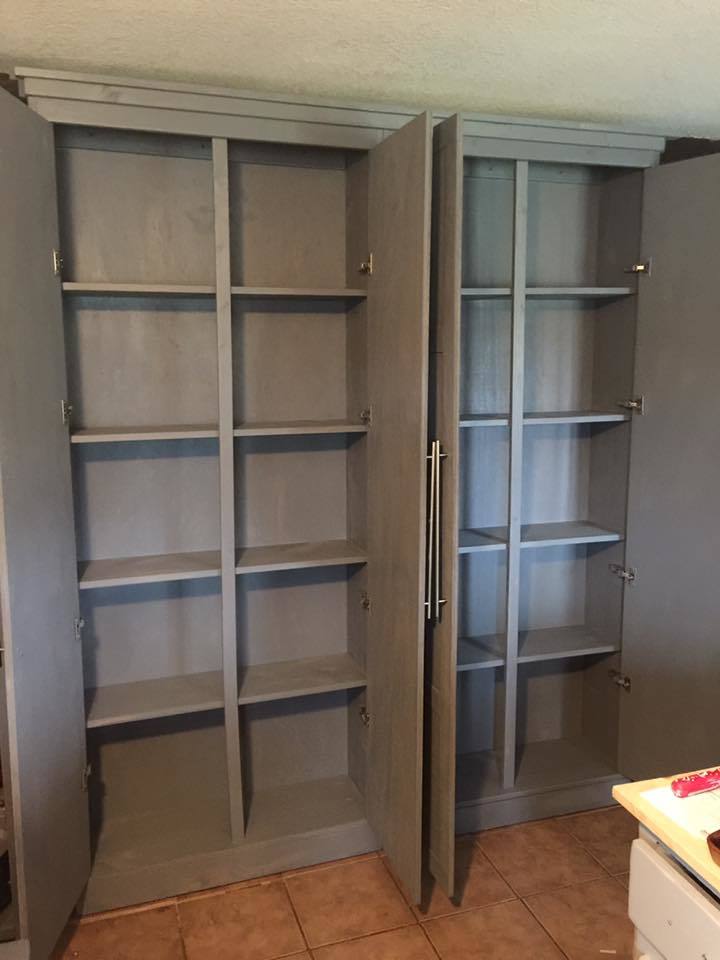
This build is loosely based on the Willy Bookcase. I actually found another brag post on the Willy Bookcase that was immensely helpful in constructing my project. I'm so grateful for the brag boards! Instead of fixing all of the shelves like the Willy, I used a Kreg shelf pin jig to make the shelves adjustable. The shelf that lines up with the TV is fixed for stability.
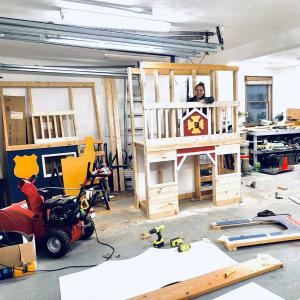
The estimate below covers all of the wood, paint, screws, hardware, etc. For fun, I'm including an in progress photo to illustrate the process. Thanks for looking!
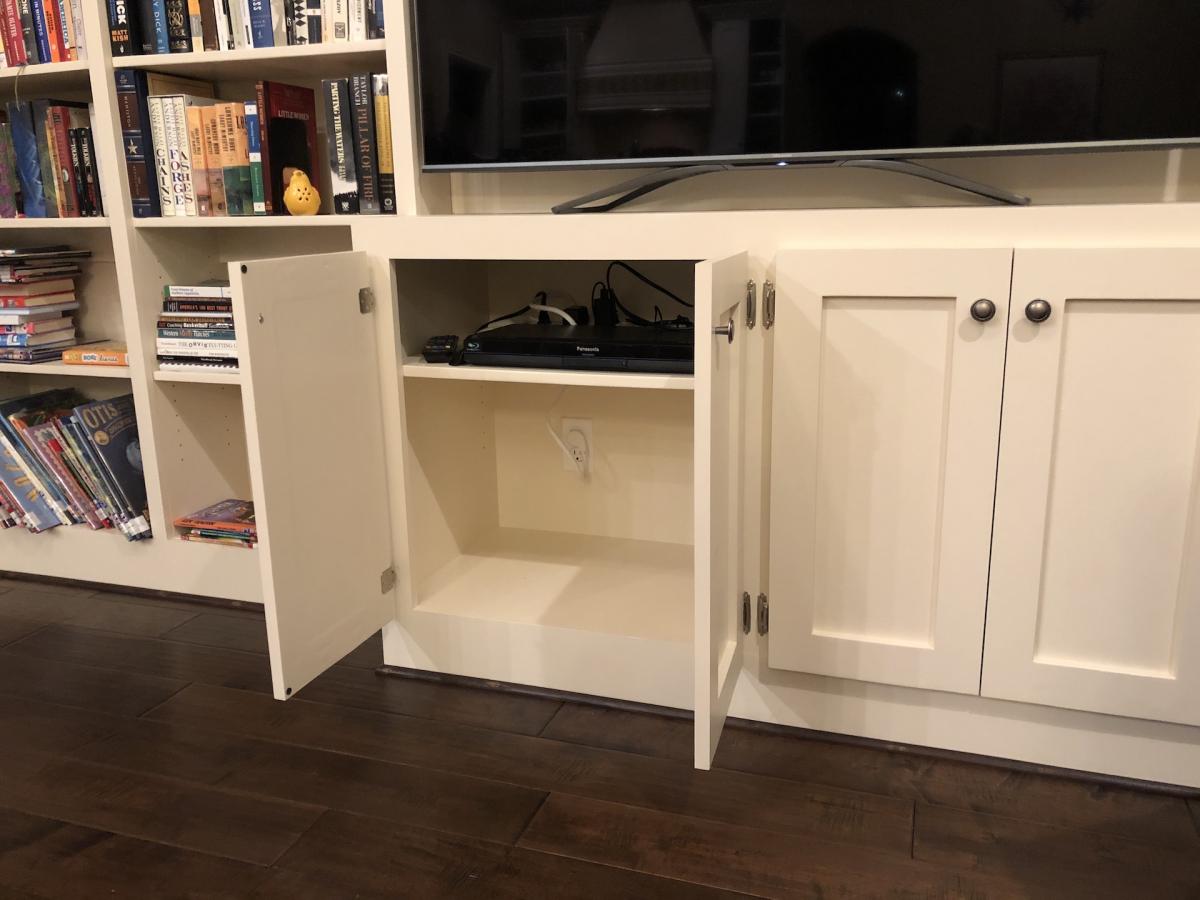
Also, a note - this is a relatively easy project, however, I listed it as "intermediate" because of the cabinet doors. They definitely made it more complicated!
Awesome and easy build! Thank you!
My 1st coffee table and I'm in love with how this came out. Really proud of myself for this one!
Mon, 01/18/2021 - 11:09
Gorgeous, thank you for sharing your first coffee table, it turned out amazing!
Well this was first project my hubby and I tackled together. He actually let me use the power tools. The plans were great! Loved having a shopping list! I made the cushion s myself. I have to say, I wish I had made the couch and chairs the size of cushions available at Lowes . AFt e r you buy foam batting fabric and chording I found set at lowes for a lot less but I am so happy how it all turned out . Thks for providing plNz!
I wanted to build an L shaped outdoor bar with a 2 post pergola over the grill. I couldn't find any plans online that would fit the space I had, so I decided to build it myself with custom dimensions. The top bar is approx. 7'3" across, and 15" wide, while the distance from the right edge (next to the house) to the end of the bar is approx. 9'1".
I framed it with PT lumber and the 2 pergola posts are sitting on top of the pavers and supported internally within some of the framing studs. Since the pavers sit on top of concrete, I didn't feel the need to dig up the existing pavers and achor them in the ground.
I used hardiboard for the exterior and tiled the lower section of the bar.
For the actual high bar top, I wanted to do something unique, and found a 900 year old scrap slab of Cypress at a local lumber yard. One side was smooth, but underneath was gouged out from different saw cuts and very uneven. I screwed a piece of 3/4" PT plywood underneath and trimmed it with 1-1/2" Cypress. I stained the whole thing with a dark honey colored stain and put a generous amount of poly on it once it was dry. There are a few cracks and nicks on it, but once it was stained, it looked awesome.
Wed, 06/19/2019 - 13:23
Looks awesome. I have been wanting something like this for a while now. Where can we can plans for this?
I used 8 ft precut boards for shelves and modified the design so there was enough room for two racks on each side. In addition I screwed 1x4 to the studs to secure the shelving to the wall. I have a 5 year old climber so it was best to be proactive and secure it. It was easy project took about 4 hours to complete. I plan to paint the vertical boards a medium gray and stain the shelves a dark coffee color.
I used dowels in the screw holes.
Mike Kimble
With Christmas approaching and the realization that my three young boys had way too much “stuff”, I enrolled the help of my dad to build this amazing basement play area. When I found Ana’s plans for the play gym with monkey bars, I knew we were in business. I modified the design to fit our space and we were off. Such a fun build and my boys absolutely love spending time down there. Thanks so much for your continued inspiration and the confidence you give us mamas to build with the big boys, Ana!!
In reply to Fabulous! by Ana White Admin
Fri, 01/08/2021 - 16:23
Thank you so much!! 🙏
I was inspired by DIY Pete's Double bench seat but wanted more of the traditional adirondack look, so I kind of combined 3 plans together to get this! For my first attempt at these chairs with a few of my own tweaks I think it turned out pretty darn well. Changing the legs to extend out the back and curve out the front posed small challenge and then mounting the chair backs at a comfortable angle. There are some imperfections that probably only I would notice but I can correct it for next time. This photo was taken just after staining when I noticed that I missed sanding some wood filler on the front of the seat. Building these chairs only took about 6.5 hours before the finishing process but the next time would go faster. I am currently in the process of adding a protective varnish to give it a semi-gloss finish. All together it cost me under $100 CDN or $80 USD.
I modified the origianl plans by making the cabinet taller. I also built 2 cabinets and trimmed them both together to make it appear as if it is 1 giant cabient. It measure over 7 feet tall and just over 6 feet wide. I did add an additional 1x2 brace in the center of the cabinet to help support. I also cut an additional 1x4 to use a brace when anchoring it to the wall. I also chose to add an additional 2 trim pieces to each door because they are much taller than the original plan doors.