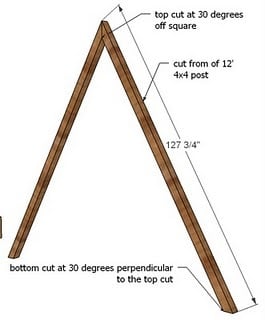
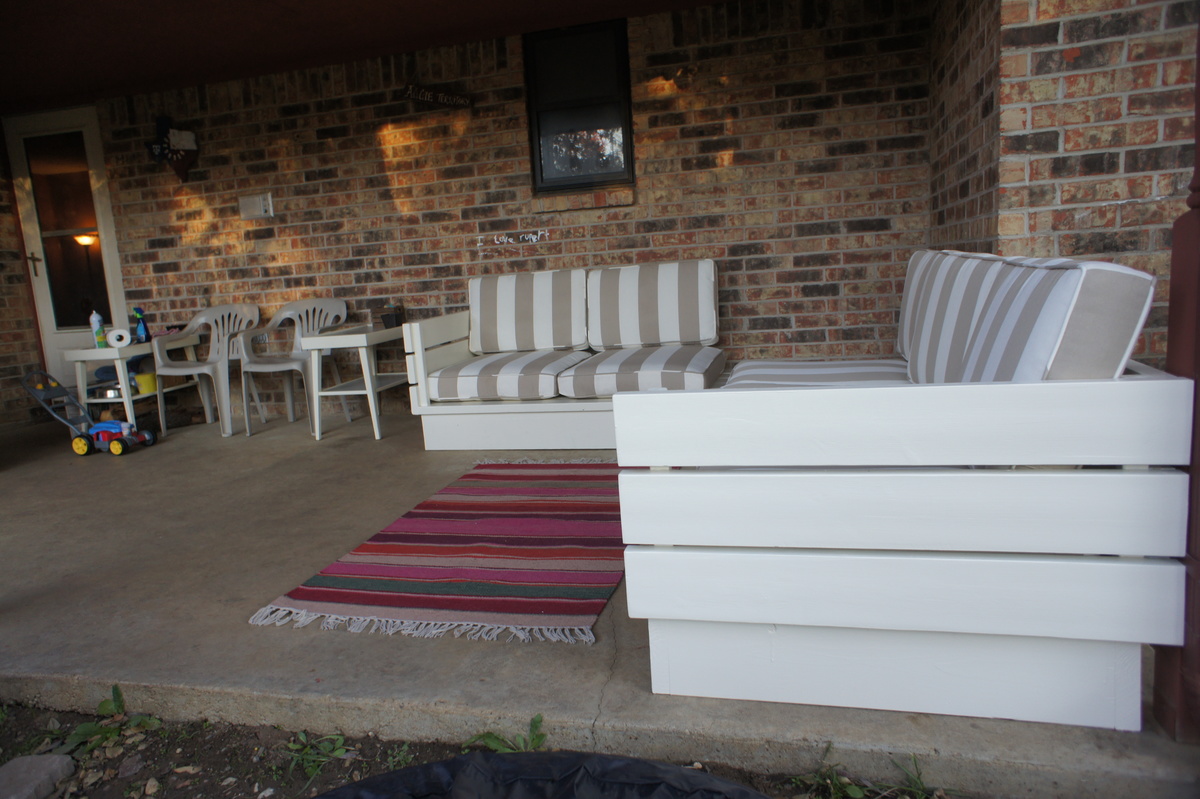
Community Brag Posts

Got my confidence in building back!!!!
I woke up one morning and decided this space couldn’t go on without a day bed. One week later I am standing tall. This is my first intermediate build. Excited to jump into the next project!
Built from Plan(s)
Comments
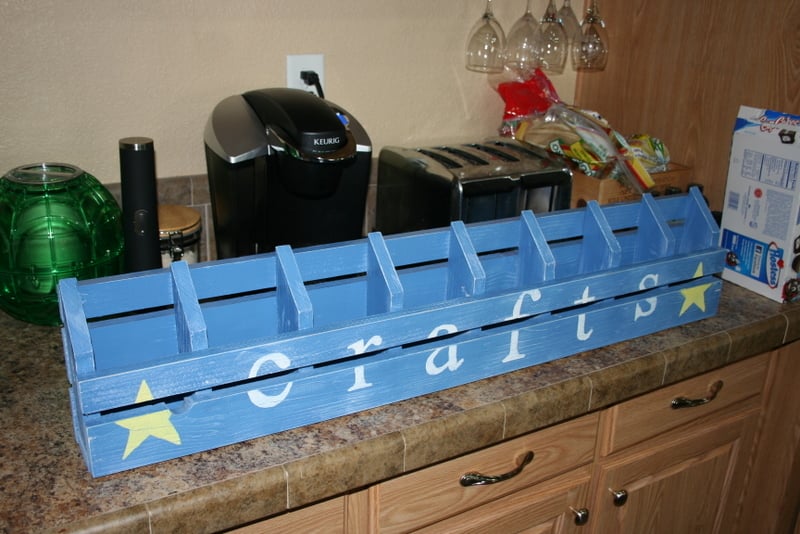
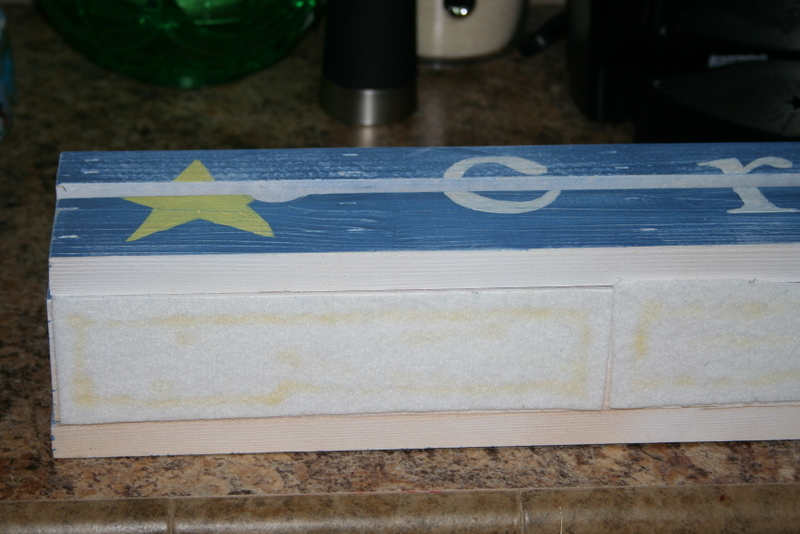
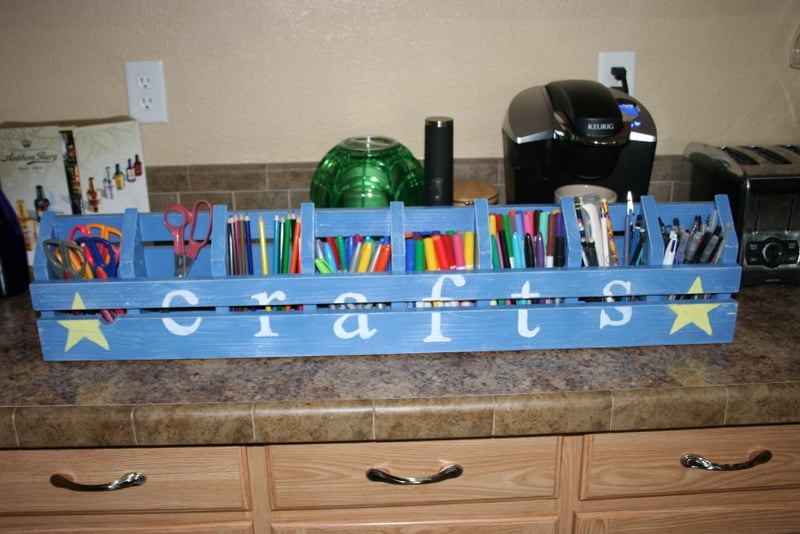
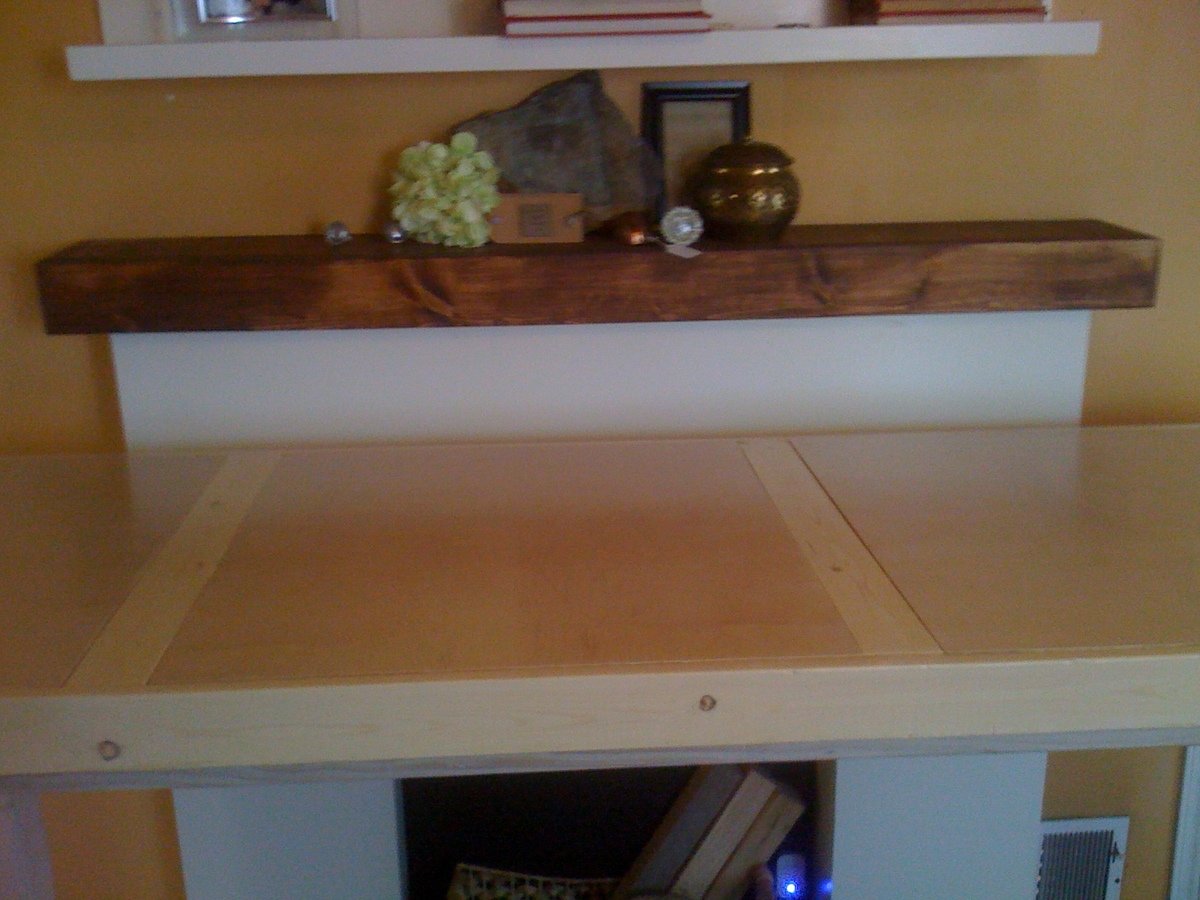
Numbered Cubbie Modified
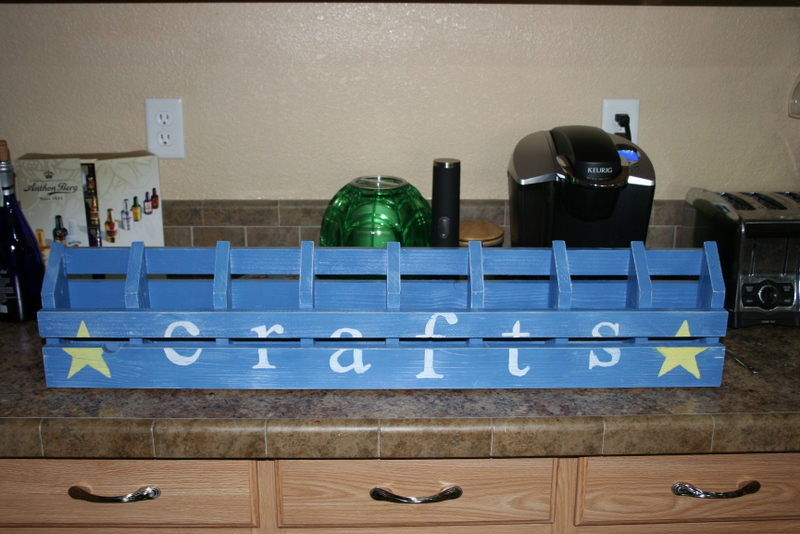
This is my first woodworking project ever. I didn't like the numbers in Ana's plan so I changed it up a little for my taste. I also made this to sit on my desk and added felt to the bottom so that it wouldn't scratch the surface when my kids moved it around. It probably should have only taken me an hour but I was having issues with the brad nailer and not nailing straight.
Built from Plan(s)
Estimated Cost
$5 for the furring strips, I had the nails.
Estimated Time Investment
Afternoon Project (3-6 Hours)
Finish Used
1 coat white spray paint, 1 coat blue spray paint, I used acrylic paint for the letters and then sanded the edges and over the letters when they were dry.
Recommended Skill Level
Starter Project
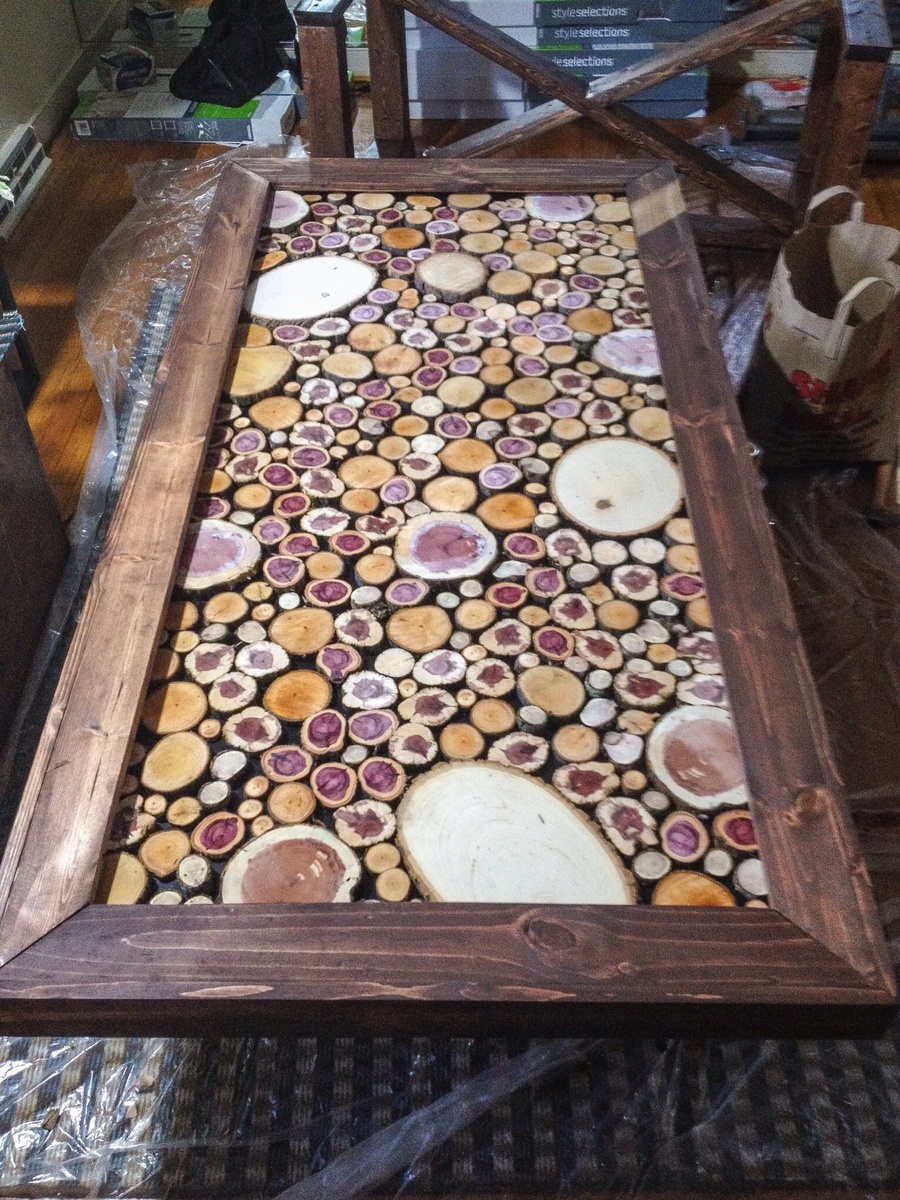
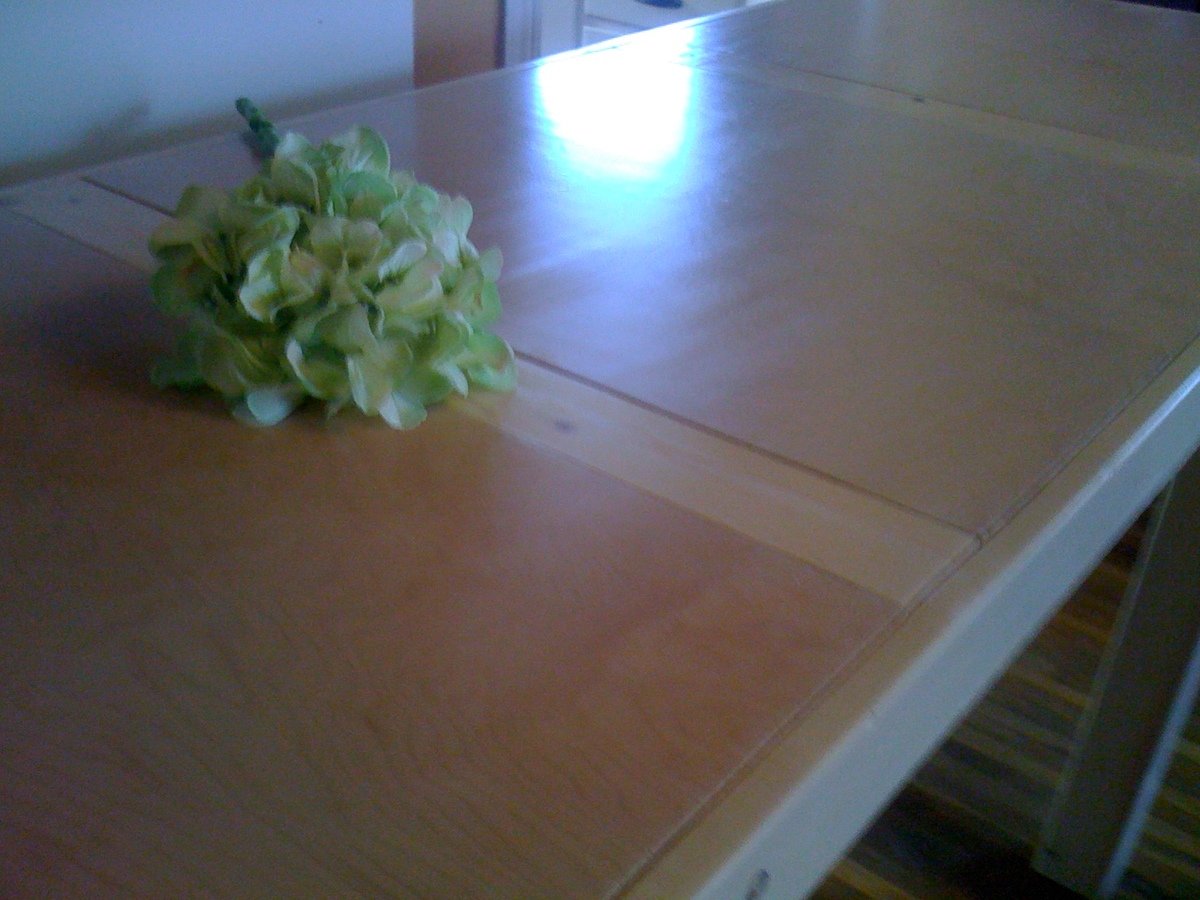
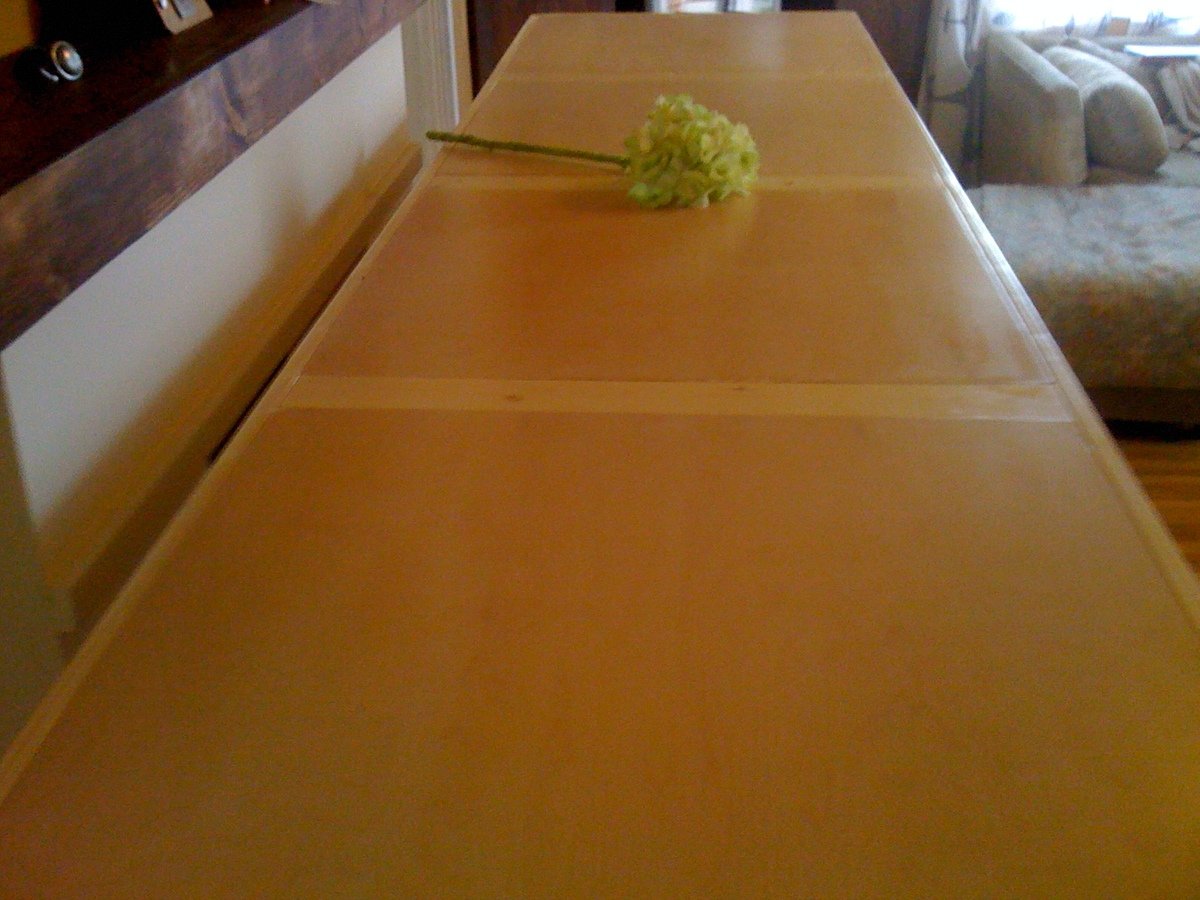
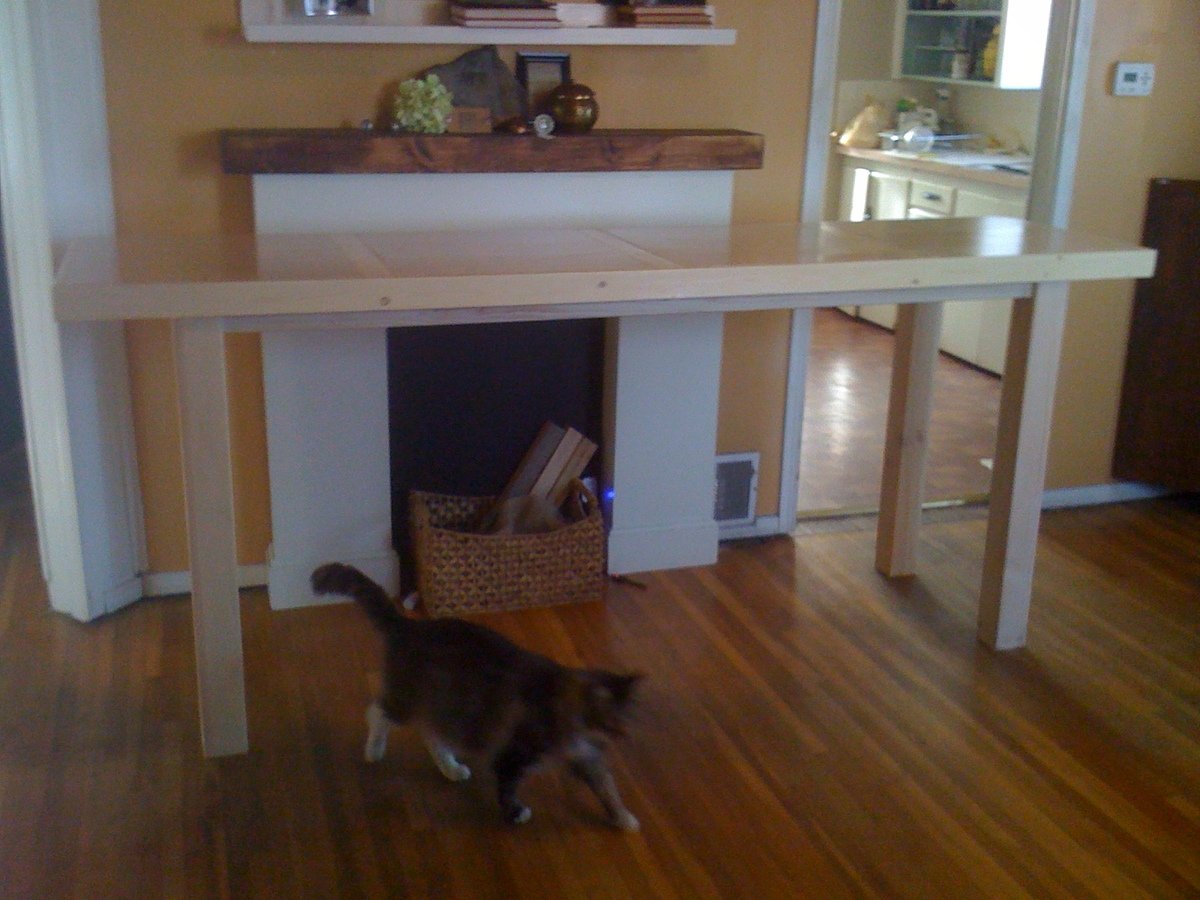
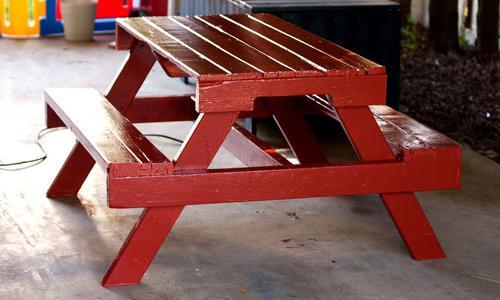
Dinning room table
Needed something I could put together between work in a few weeks to serve thanksgiving on. The base of the table is modified from Ana's build and the table top is a frame I built and filled with log slices and clear epoxy resin
Built from Plan(s)
Estimated Cost
100 for lumber.
Estimated Time Investment
Weekend Project (10-20 Hours)
Finish Used
Dark walnut then red oak
Recommended Skill Level
Intermediate
Comments

Farmhouse Table for Thanksgiving

My husband and I bought our first house back in October and wanted to build a table so we could host Thanksgiving dinner at our new place. With the help of my dad and his collection of tools, we were able to use the farmhouse table plans from Ana-White which turned out nicely. We used a dark walnut stain and a couple coats of MInwax Helmsman Spur Urethane.
Estimated Cost
$130
Estimated Time Investment
Weekend Project (10-20 Hours)
Finish Used
Dark Walnut Stain
Minwax Helmsman Spur Urethane
Minwax Helmsman Spur Urethane
Recommended Skill Level
Intermediate
Side Table
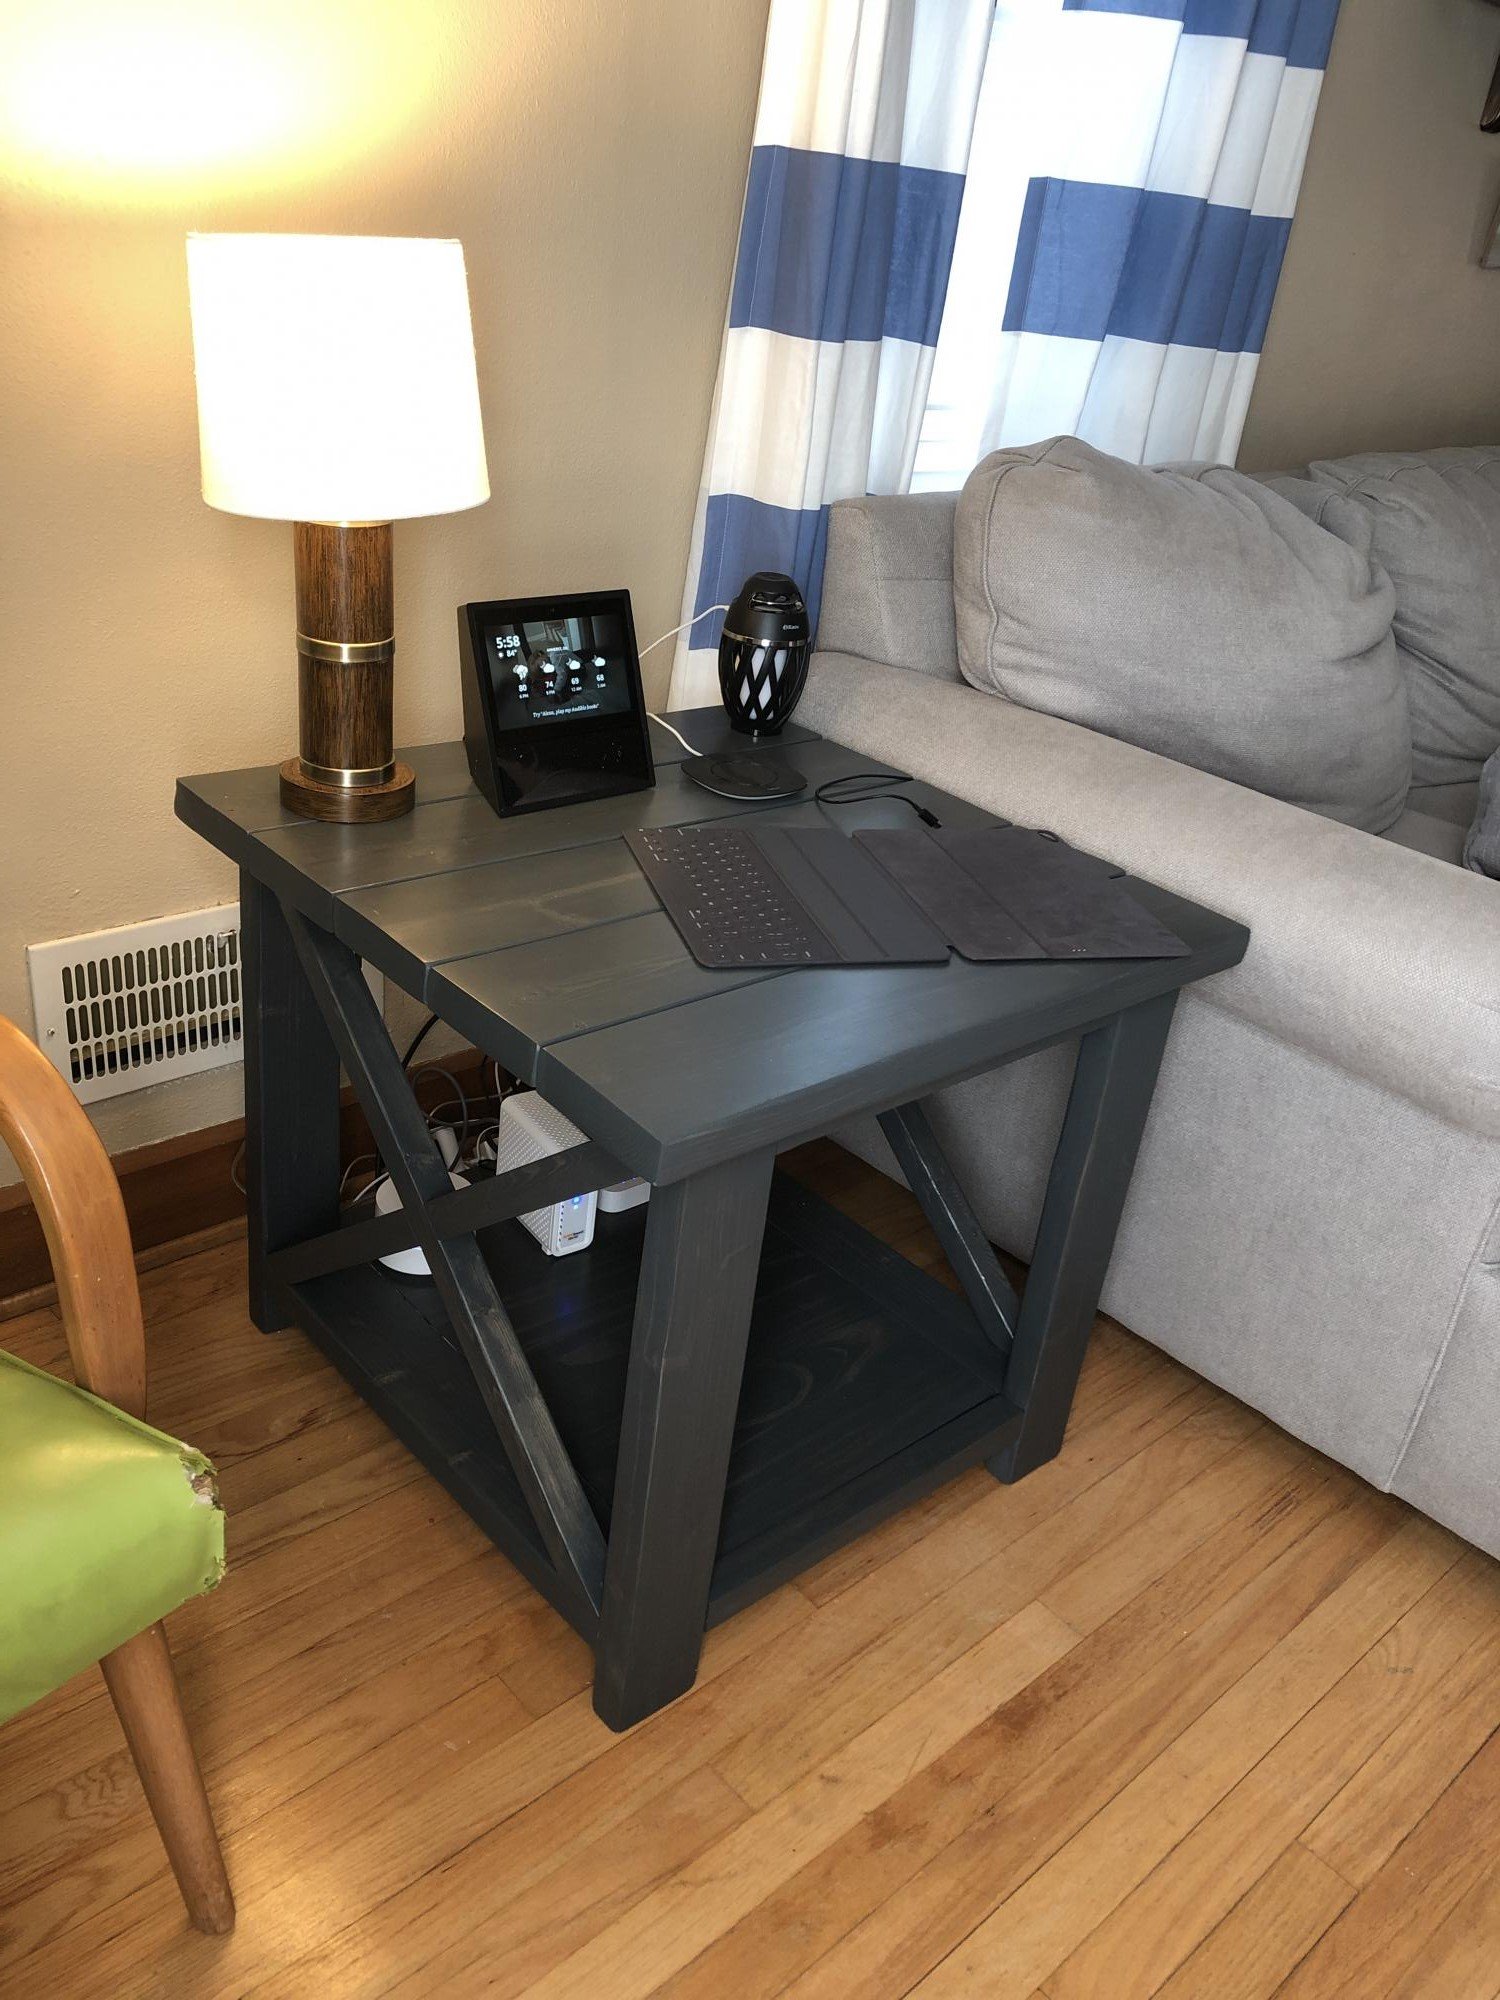
First thing my husband has ever attempted to build and I love it! Thanks Ana!!
Built from Plan(s)
Comments

Sat, 08/31/2019 - 11:20
What a beautiful first…
What a beautiful first project. I love the dark stain or paint? It's gorgeous!
Can't wait to see more projects from you!
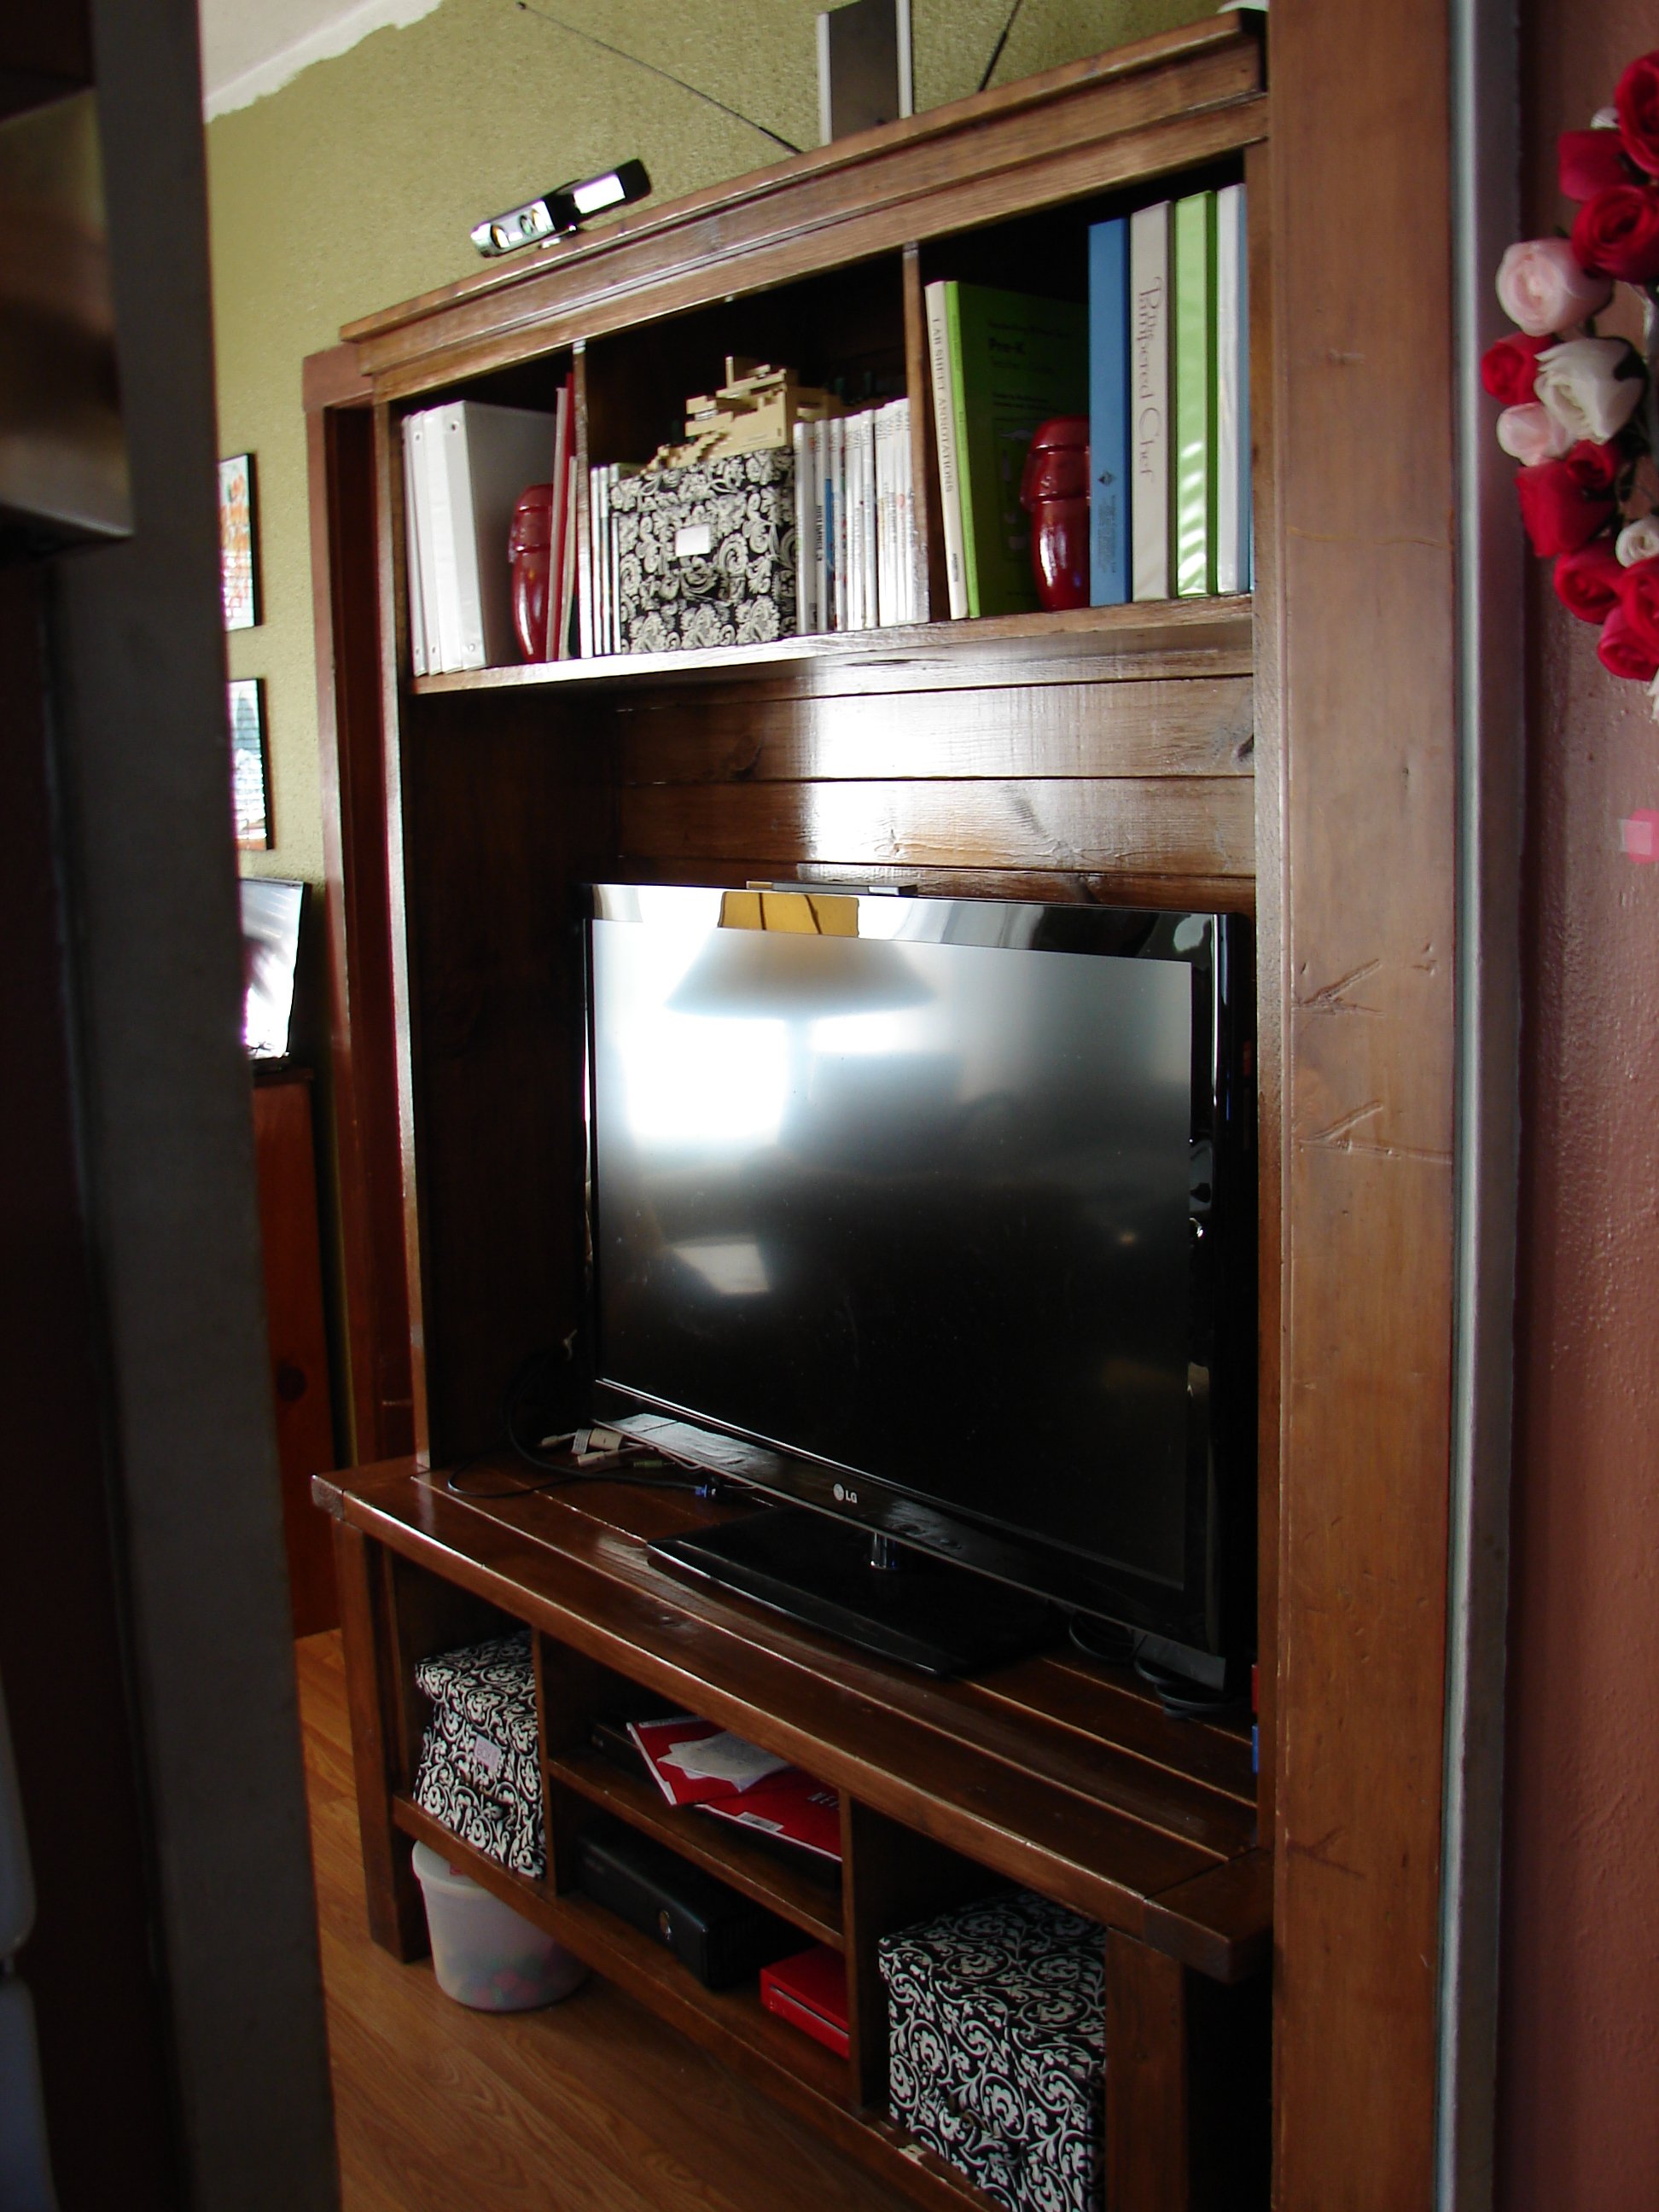
Tryde Media Hutch
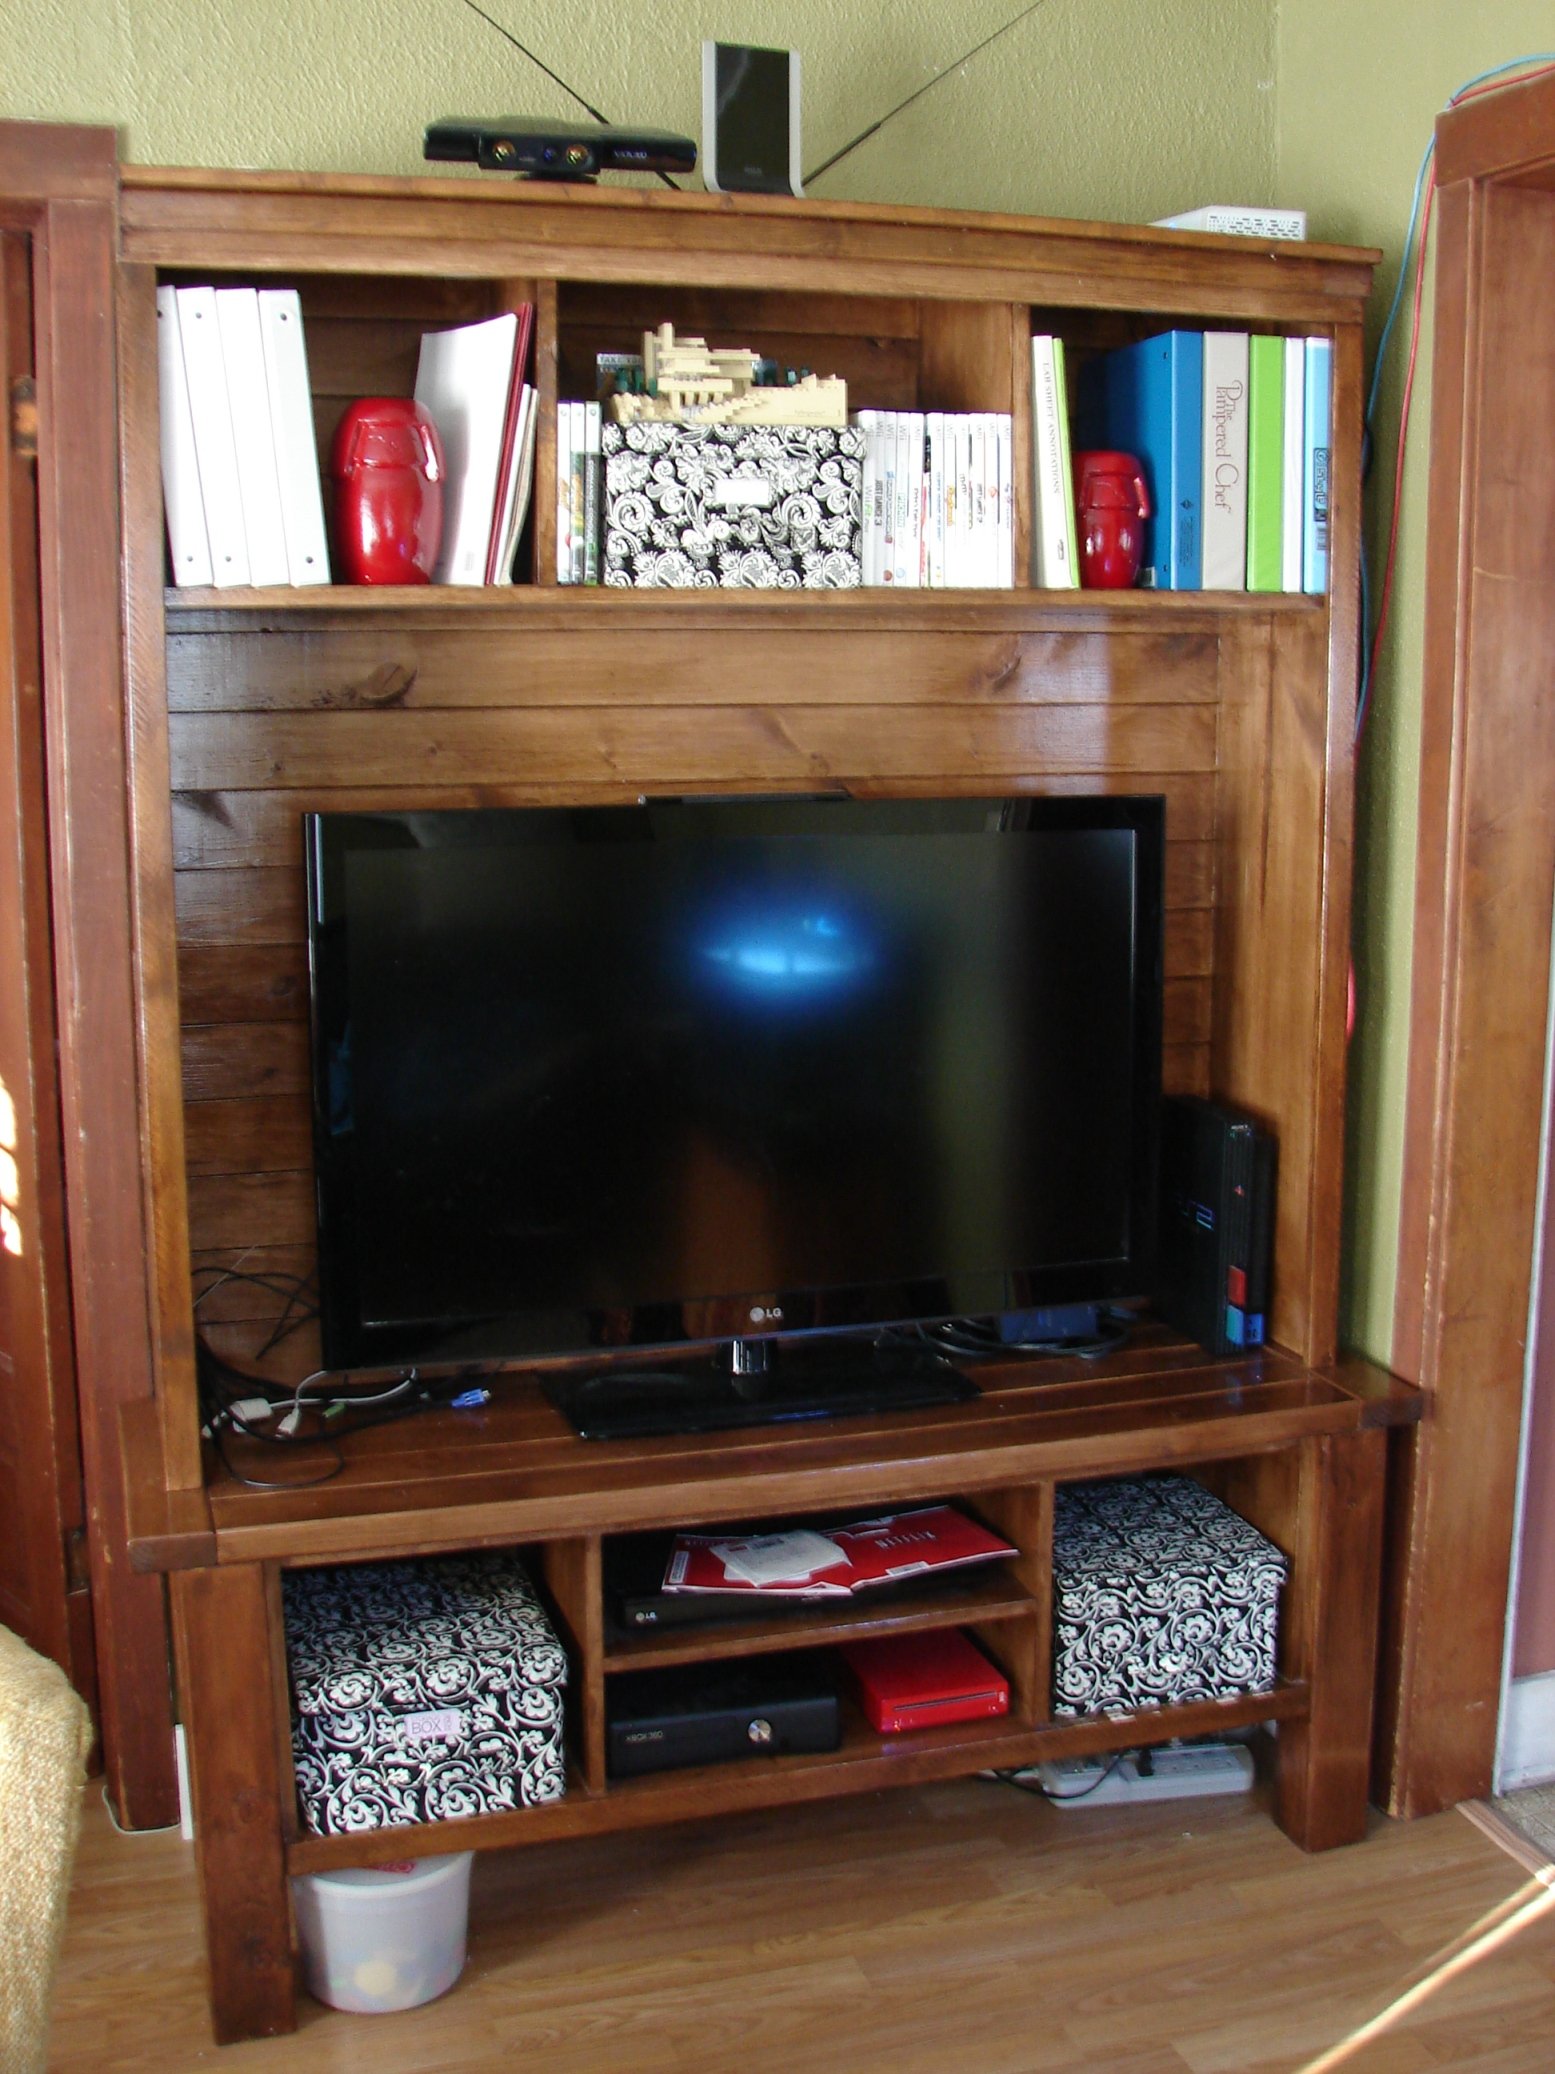
My husband and I worked together to build this project. We built the bottom in November 2010, then built the top hutch in January 2012. The project itself was easy to understand, but holding everything together and getting it square took a bit of work. We do not have a Kreg Jig or clamps, either of which would have been very helpful. However, we were able to complete it using our own best efforts, and we are very pleased with the results.
Built from Plan(s)
Estimated Cost
$125
Estimated Time Investment
Weekend Project (10-20 Hours)
Finish Used
Minwax Pre-Stain Wood Conditioner
Minwax Polyshades in Antique Walnut
3 coats with old brushes, lightly sanded with steel wool between applications. Next time, I'll use foam brushes. The conditioner was a great choice, I think it really improved coverage.
Minwax Polyshades in Antique Walnut
3 coats with old brushes, lightly sanded with steel wool between applications. Next time, I'll use foam brushes. The conditioner was a great choice, I think it really improved coverage.
Recommended Skill Level
Intermediate
Comments
Sun, 01/08/2012 - 10:27
Thank you. :)
I regularly sit on the front of it when our living room gets too crowded. I'm sure I wouldn't do that with a store bought flat pack tv stand!
8 Foot Standing work table for trade
We built this 8 foot long standing work table in trade for a friend. It turned out great! We had some scrap 2'x2' pieces of white maple plywood that we used for the top and framed them out with 1x3's. Then we made a simple base of 4x4s and 2x4s. It is a super simple table but it's so pretty!
I've been eyeing Rustoleum's new wood stain called "Willow" so I decided to give it a try for this project. It is sooo pretty. It lightens the wood almost like a white wash but it has this pearlescent quality to it and I'm swooning for it! Then we put 2 coats of satin poly over the top and legs. I prefer to use wax but he is using the table as a work surface and needed something a little stronger.


Estimated Time Investment
Day Project (6-9 Hours)
Finish Used
Rustoleum "Willow" and minwax satin Poly
Recommended Skill Level
Intermediate
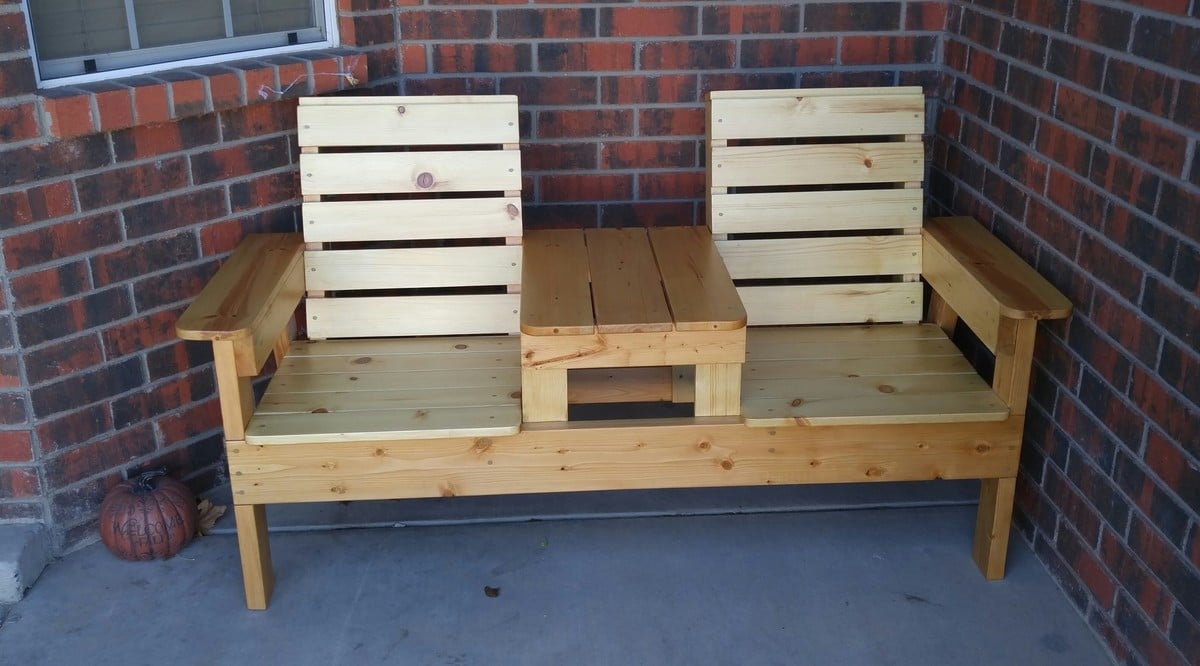
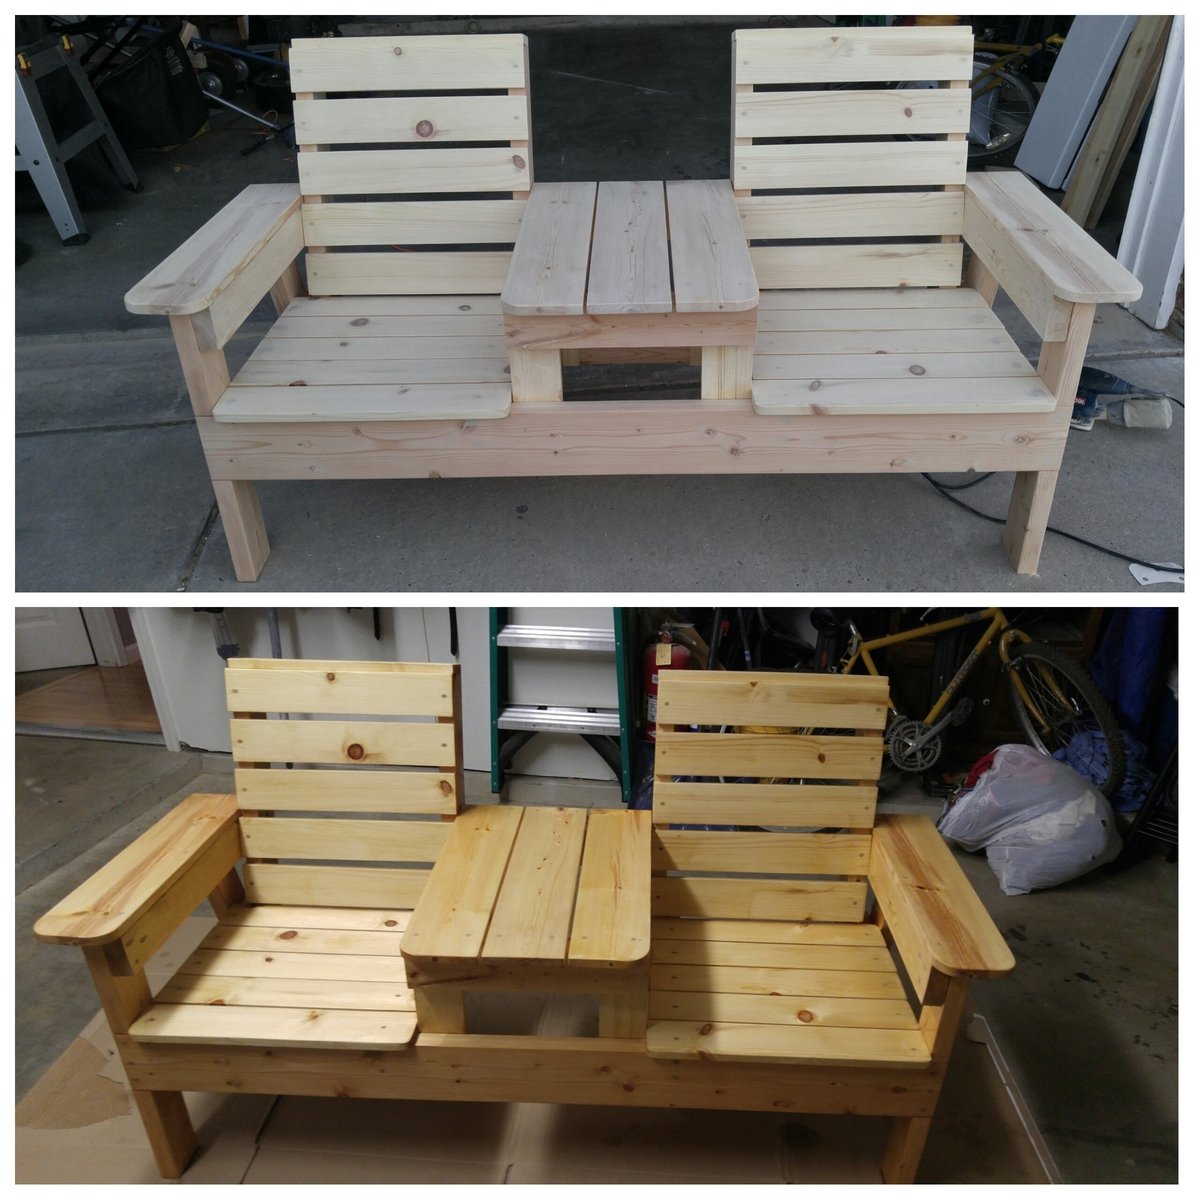
Double Chair with Table
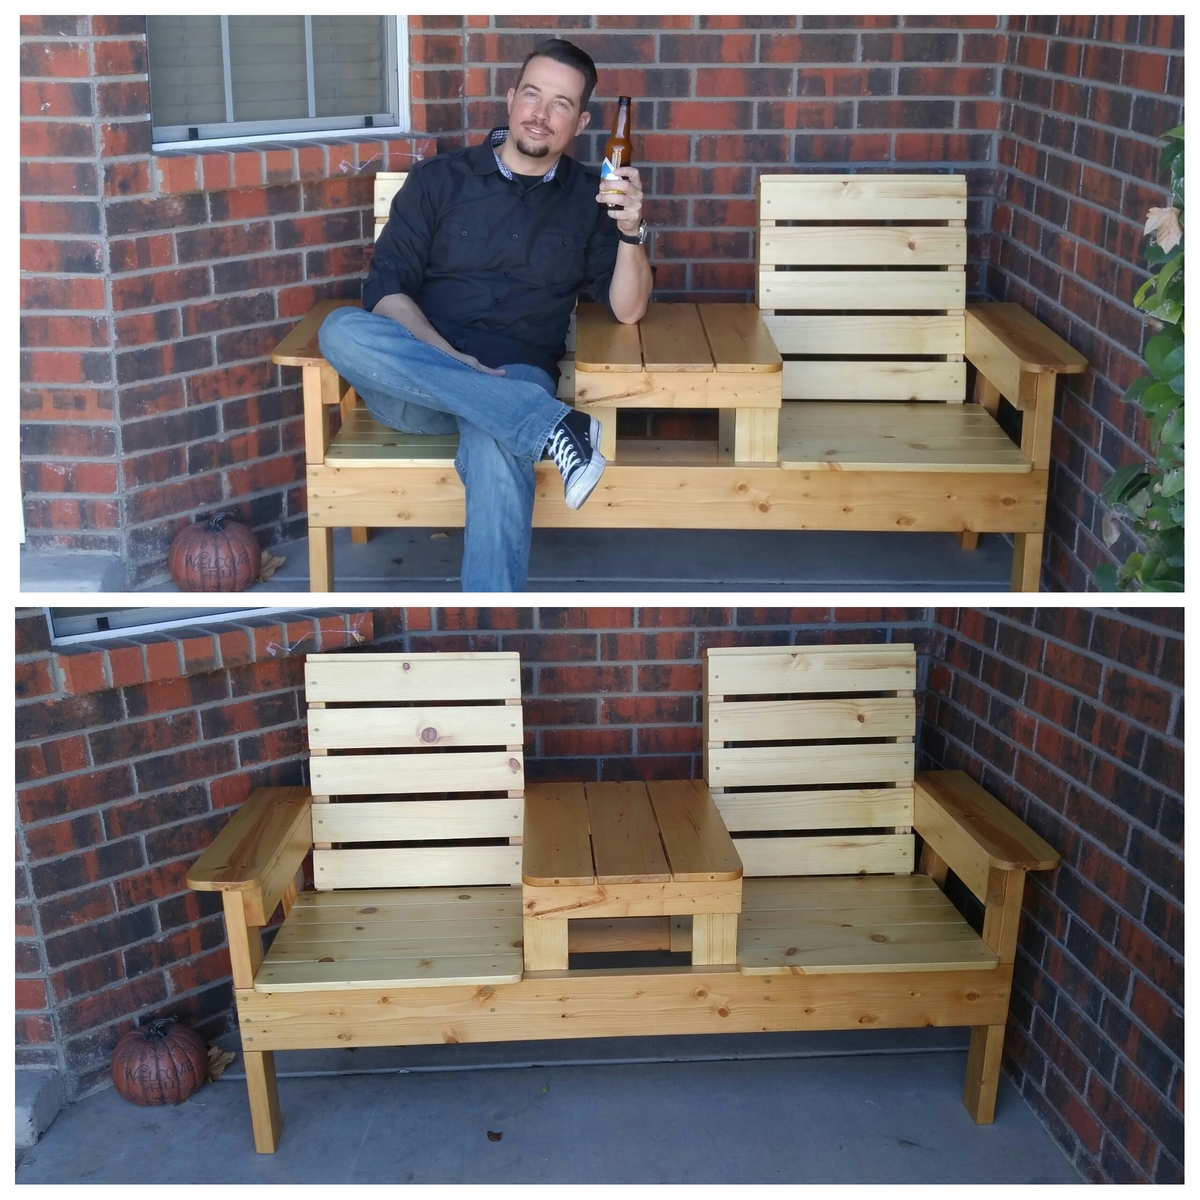
This was a fun project for me and my son. Total time was probably a weekend, including finish. I used Douglas Fur, and spent around $100 including finish and nails ect.
Built from Plan(s)
Estimated Cost
$125 including conditioner, finish and hardware
Estimated Time Investment
Weekend Project (10-20 Hours)
Finish Used
Conditioner and Spar Urethane (2 coats)
Recommended Skill Level
Beginner
Comments
Farmhouse Bed
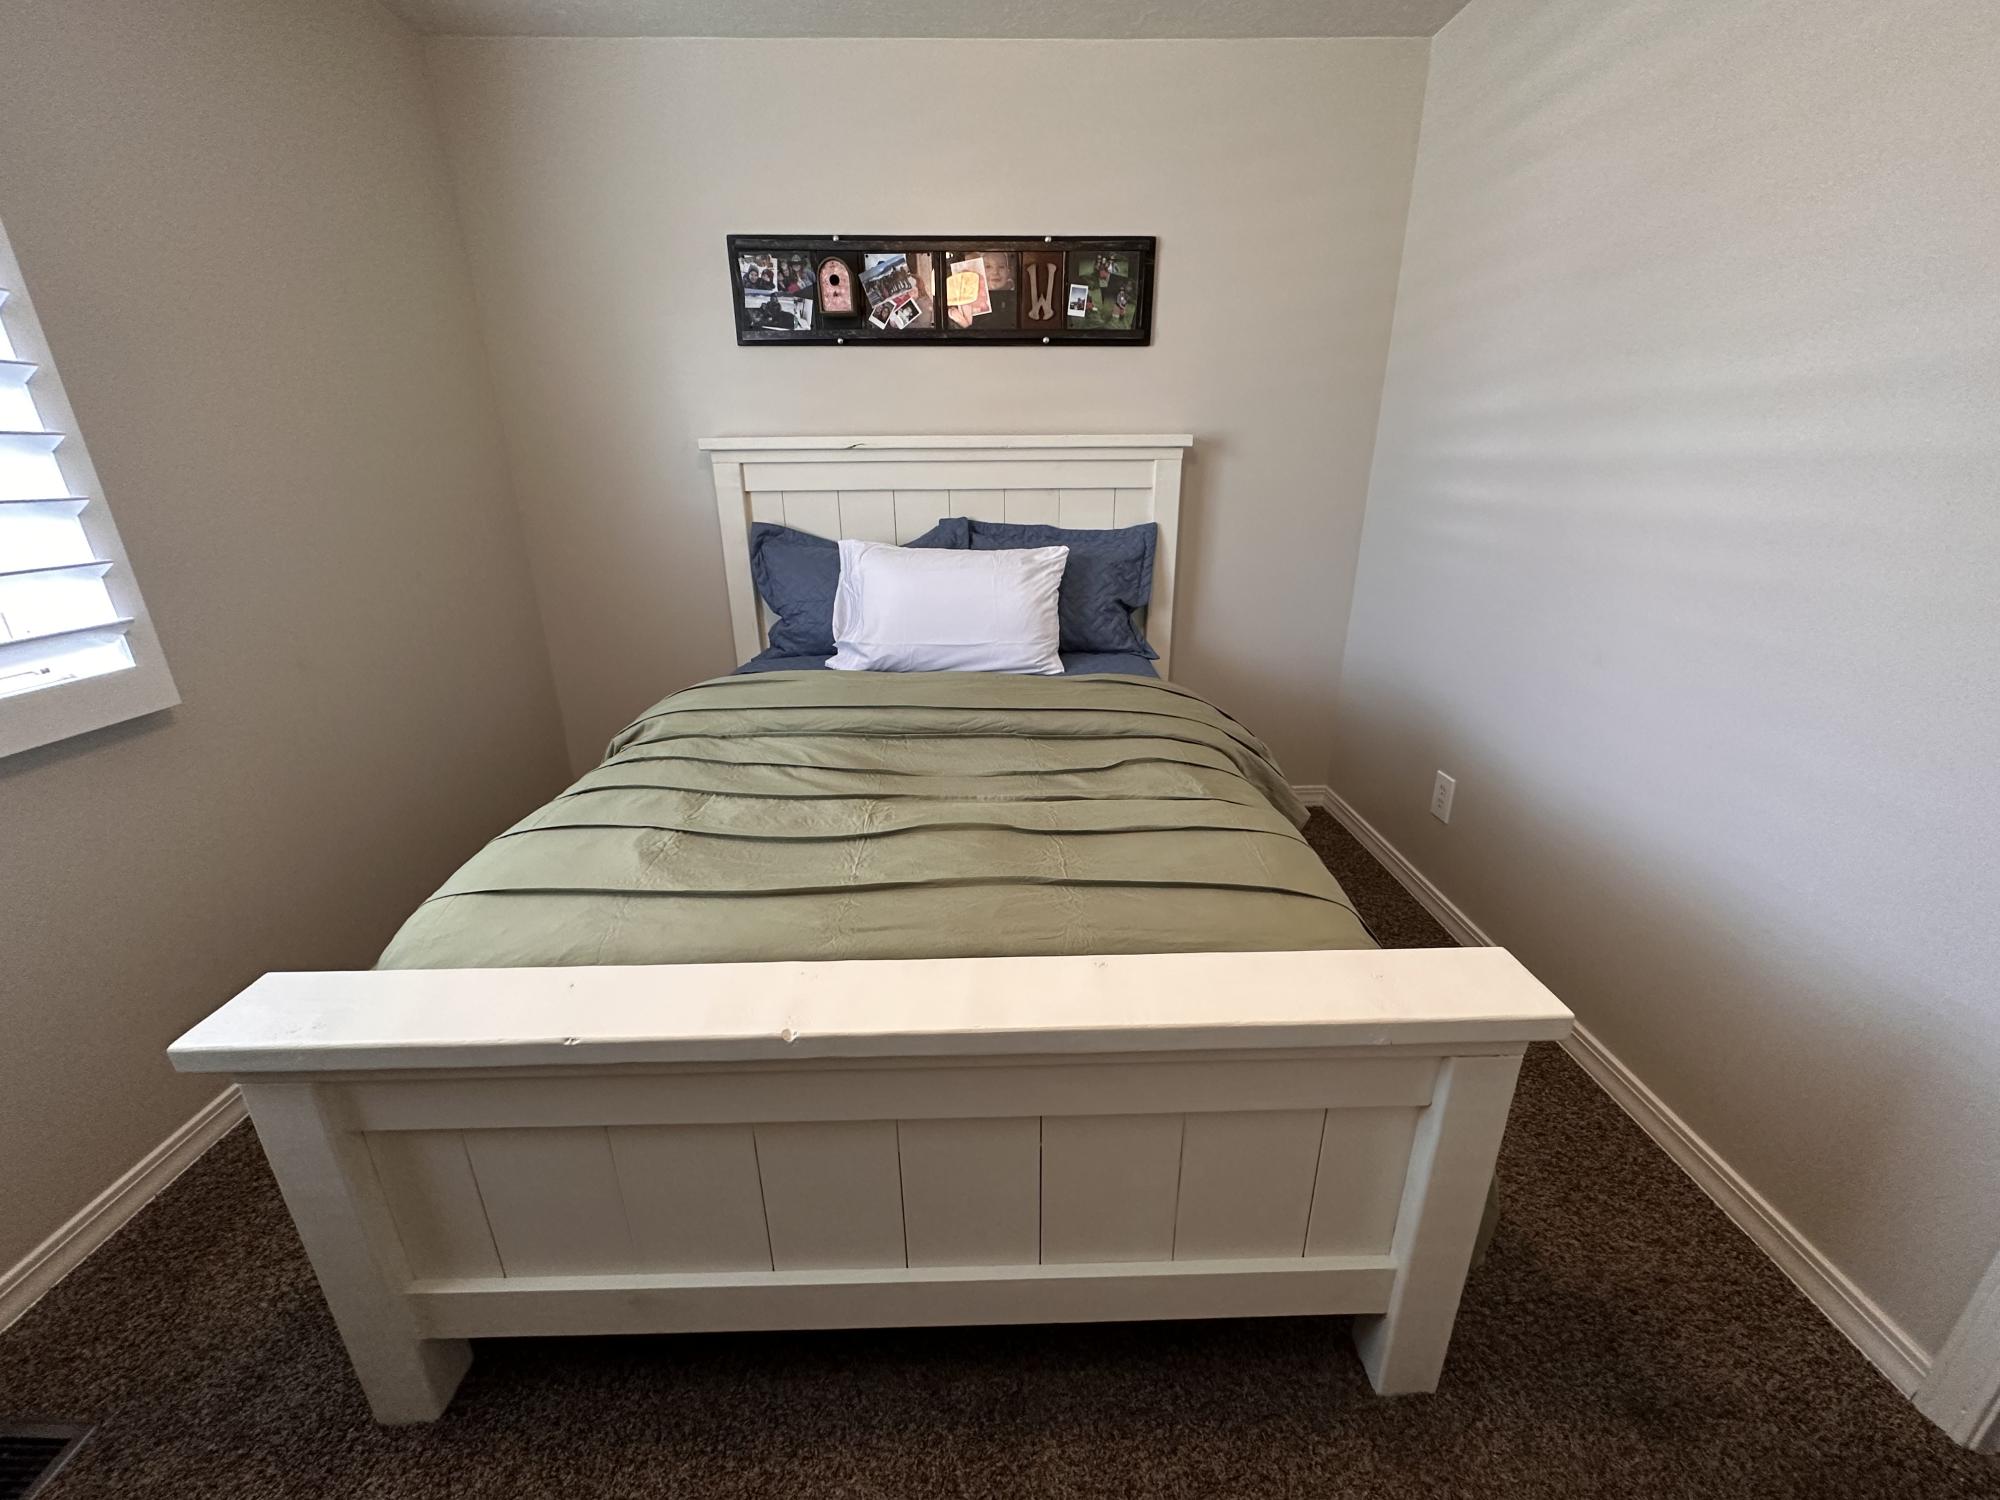
Easy to make. I’m in love. Thanks for the super simple plan to follow.
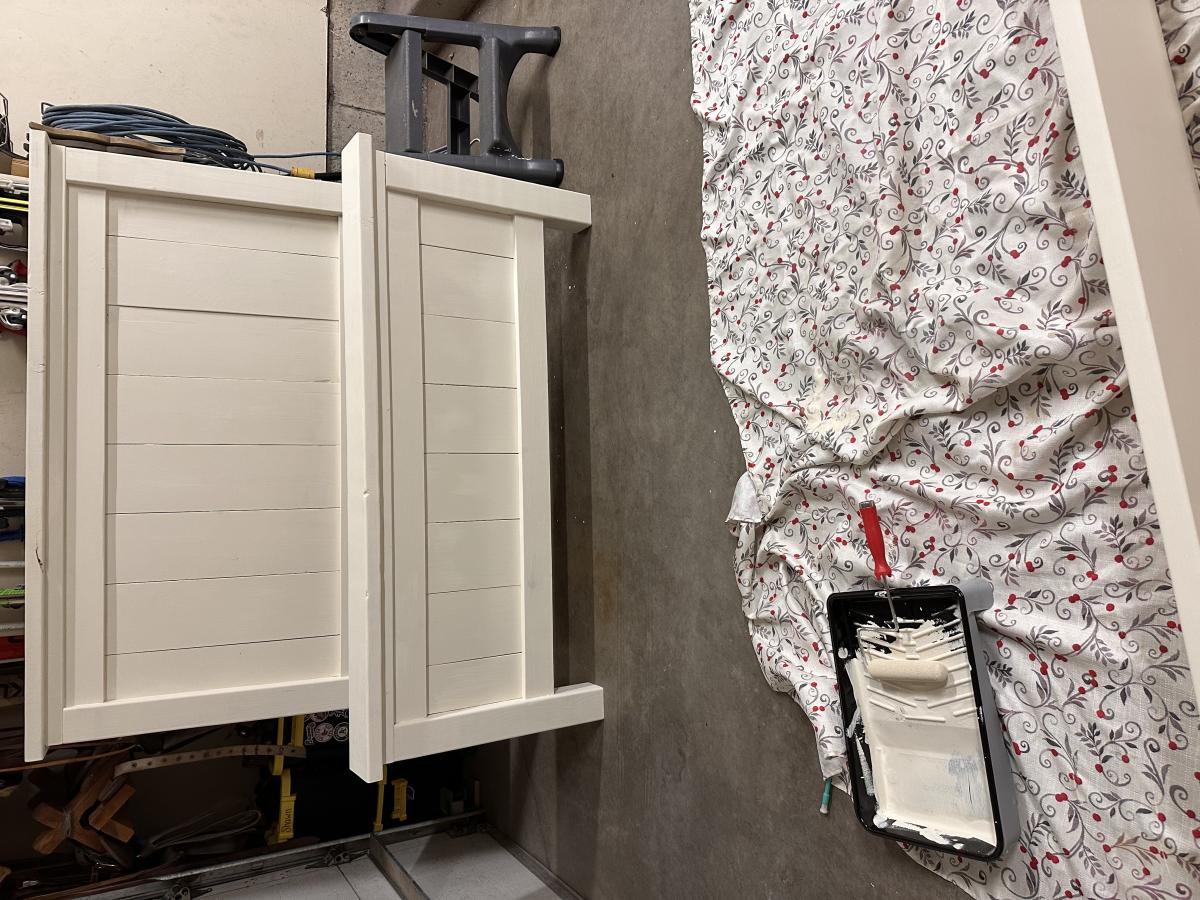
Built from Plan(s)
Comments
queen bed frame
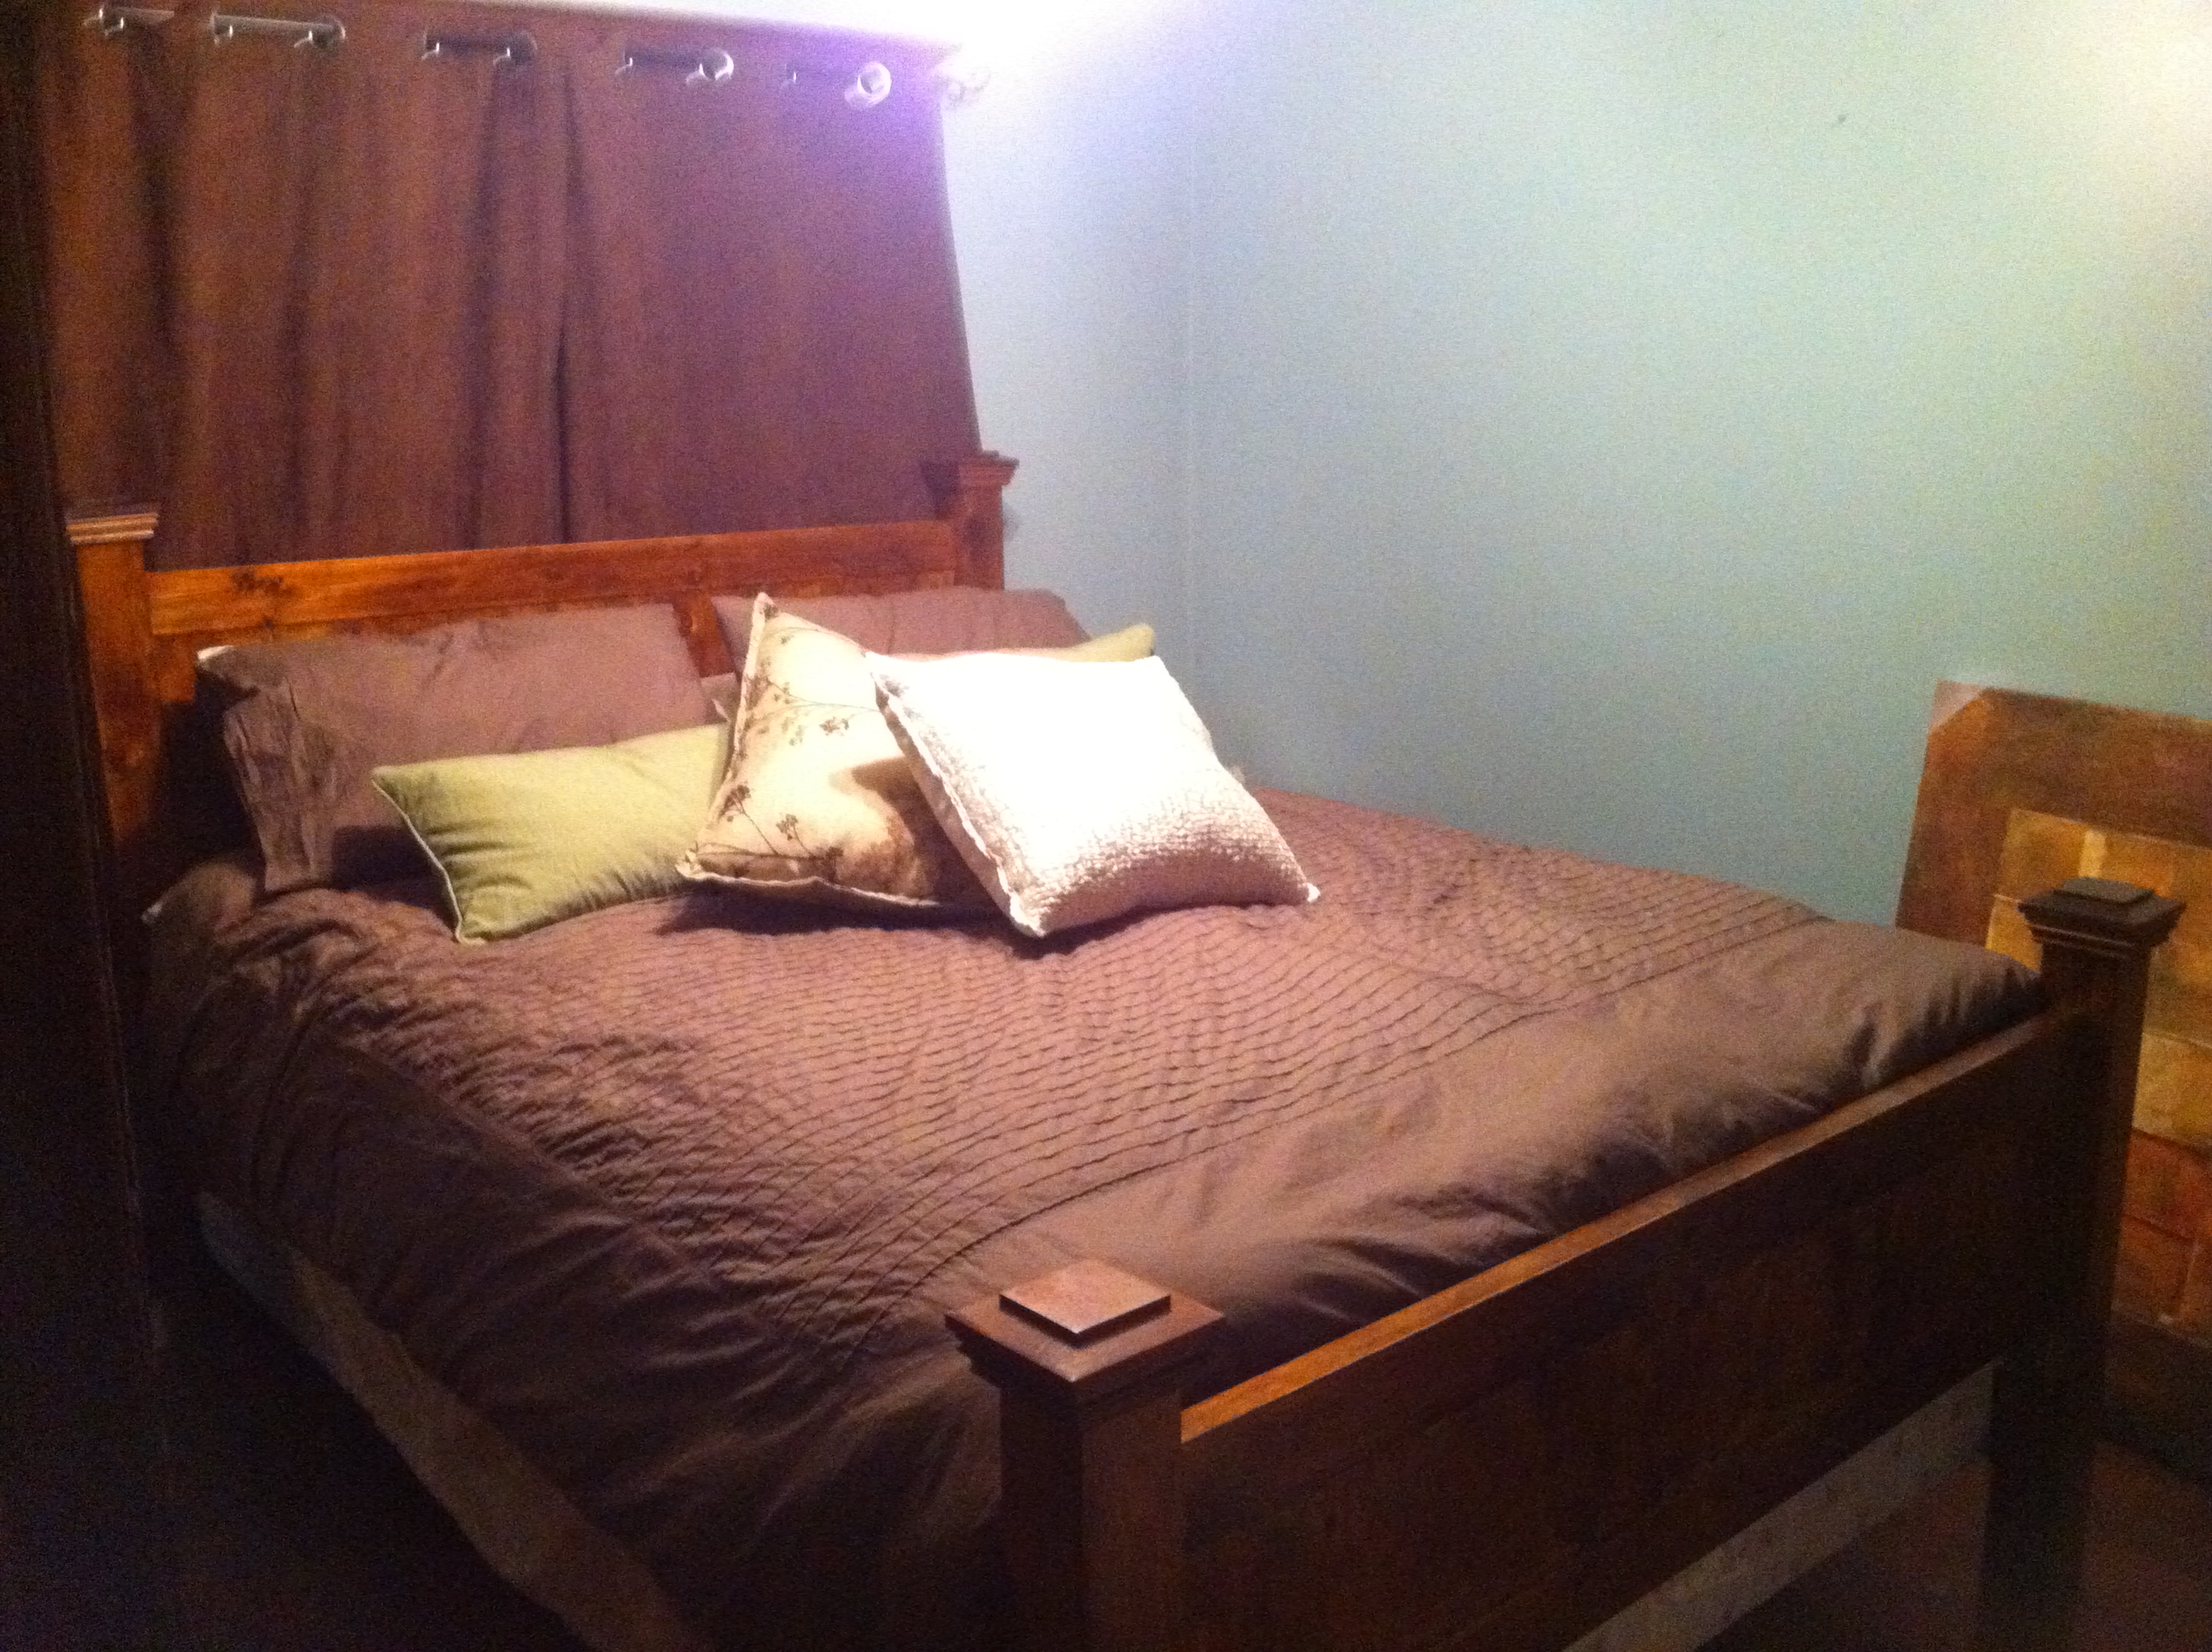
This was my first build! I do enjoy this bed unfortunatly i found ana's blog just after i had built it. next time i build a bed i am totally building the farmhouse bed to match the farmhouse nightstand i also just built and will post. hopefully ana in her busy life will find time to post a plan for a farmhouse tallboy dresser to match!
Estimated Cost
$100
Estimated Time Investment
Week Long Project (20 Hours or More)
Finish Used
two coats of minwax mission oak polyshades followed by a coat of minwax semi gloss poly
Recommended Skill Level
Intermediate
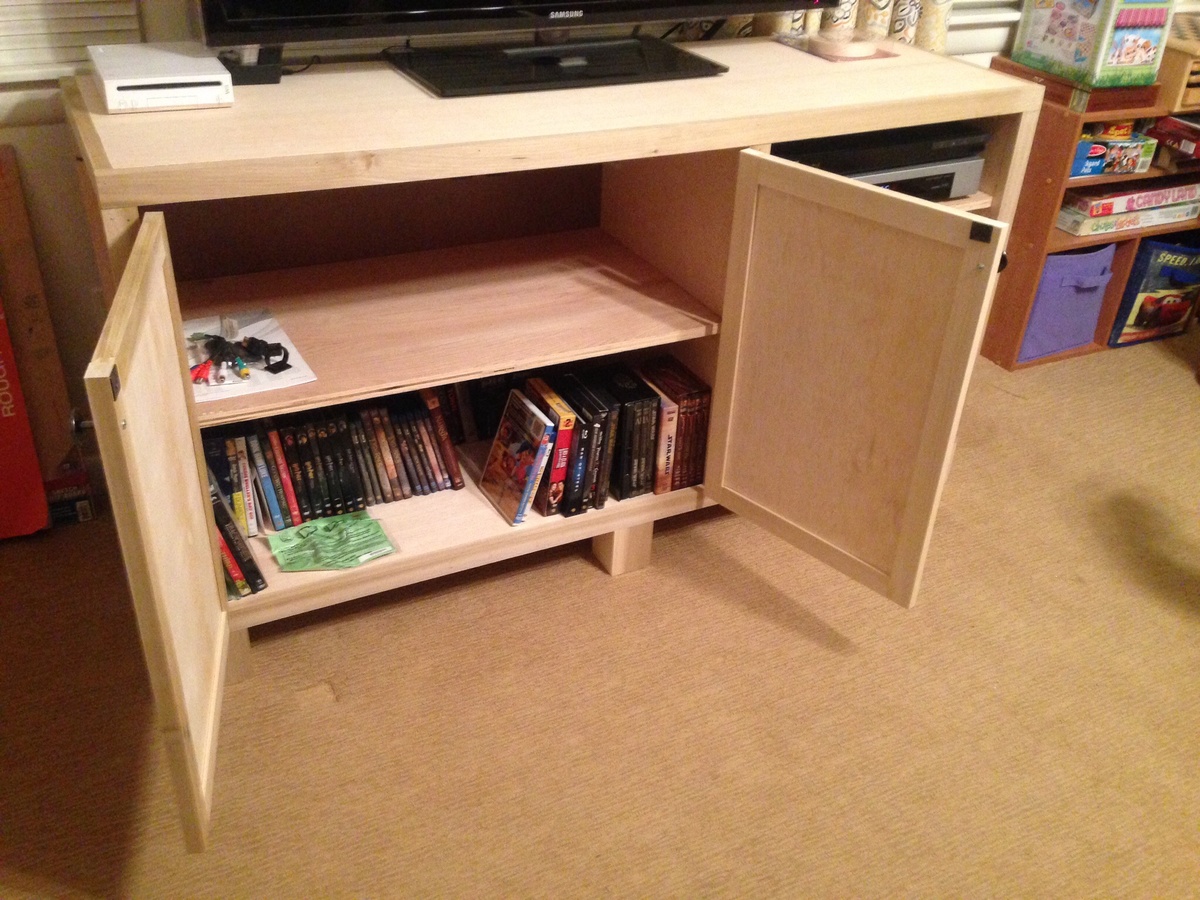
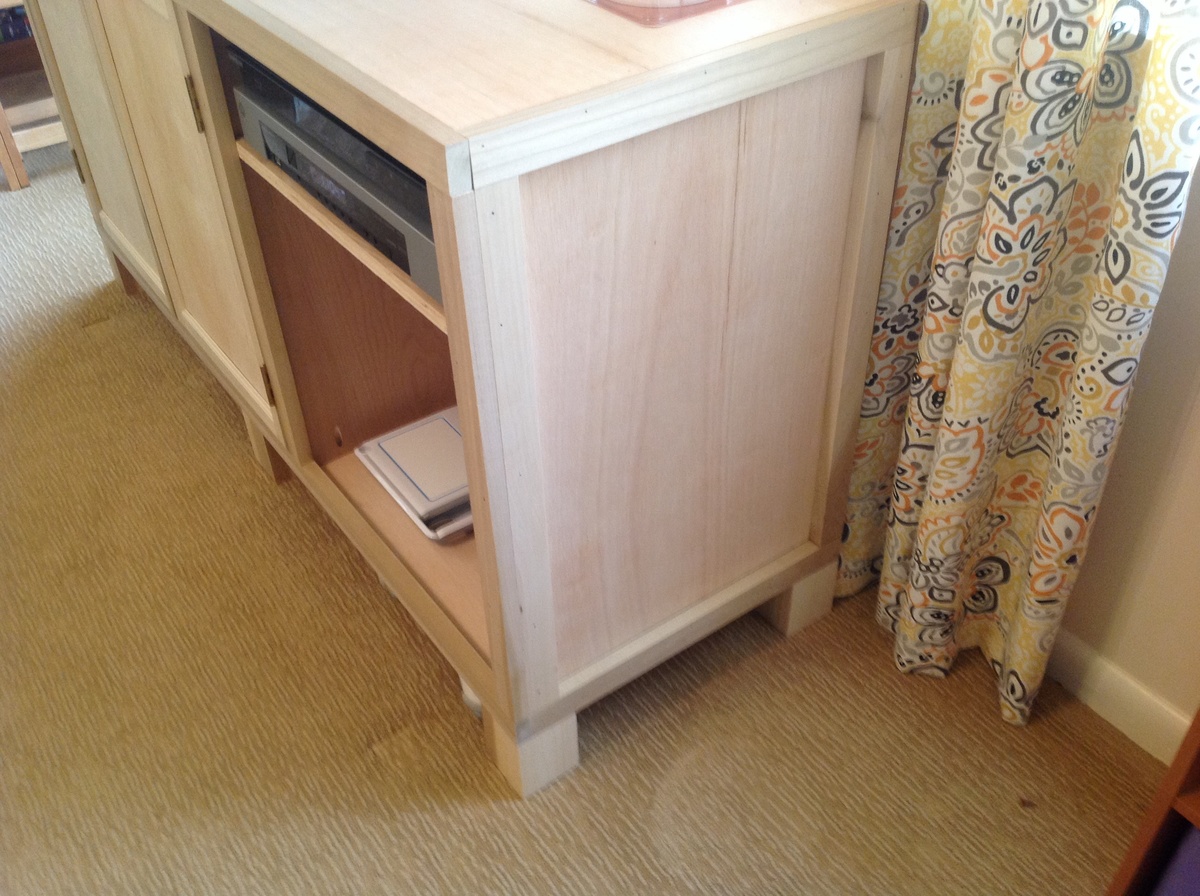
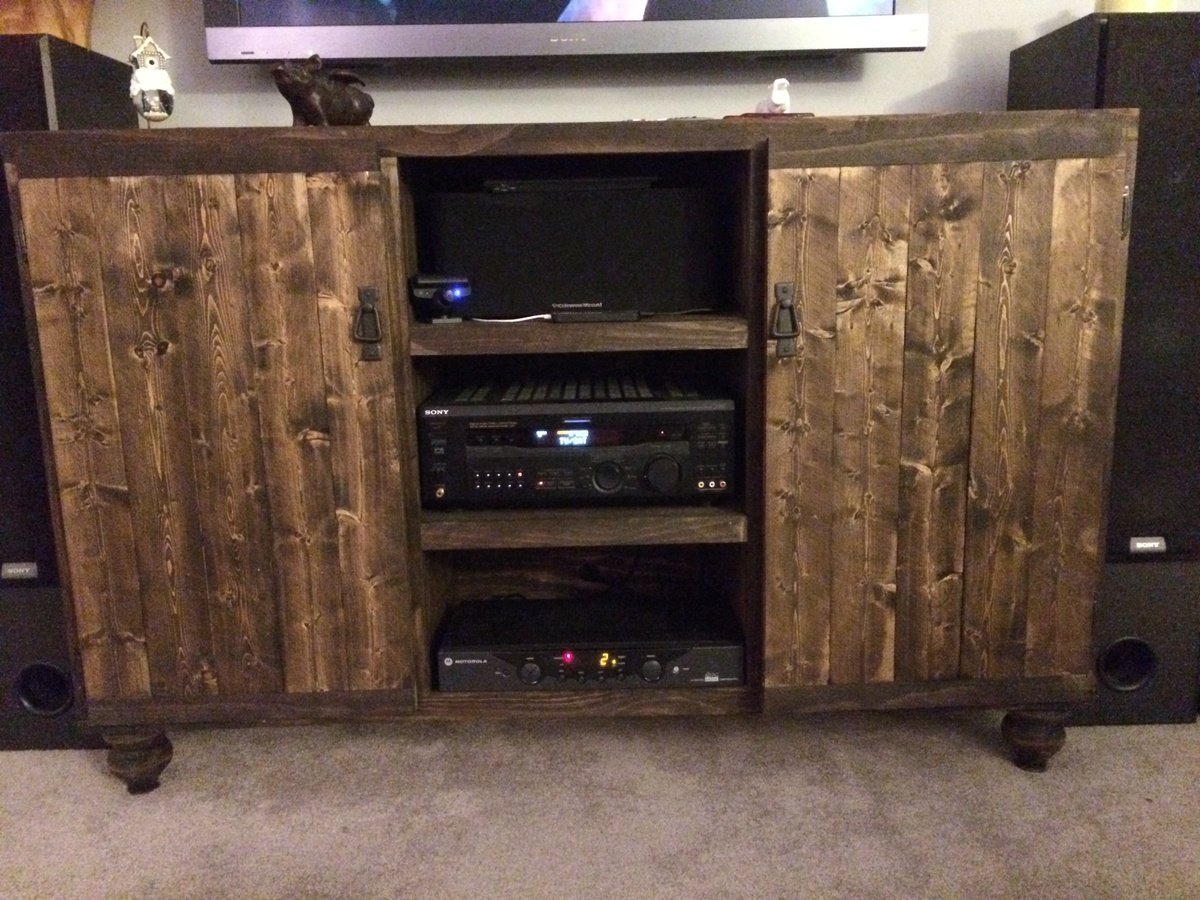
Entertainment console
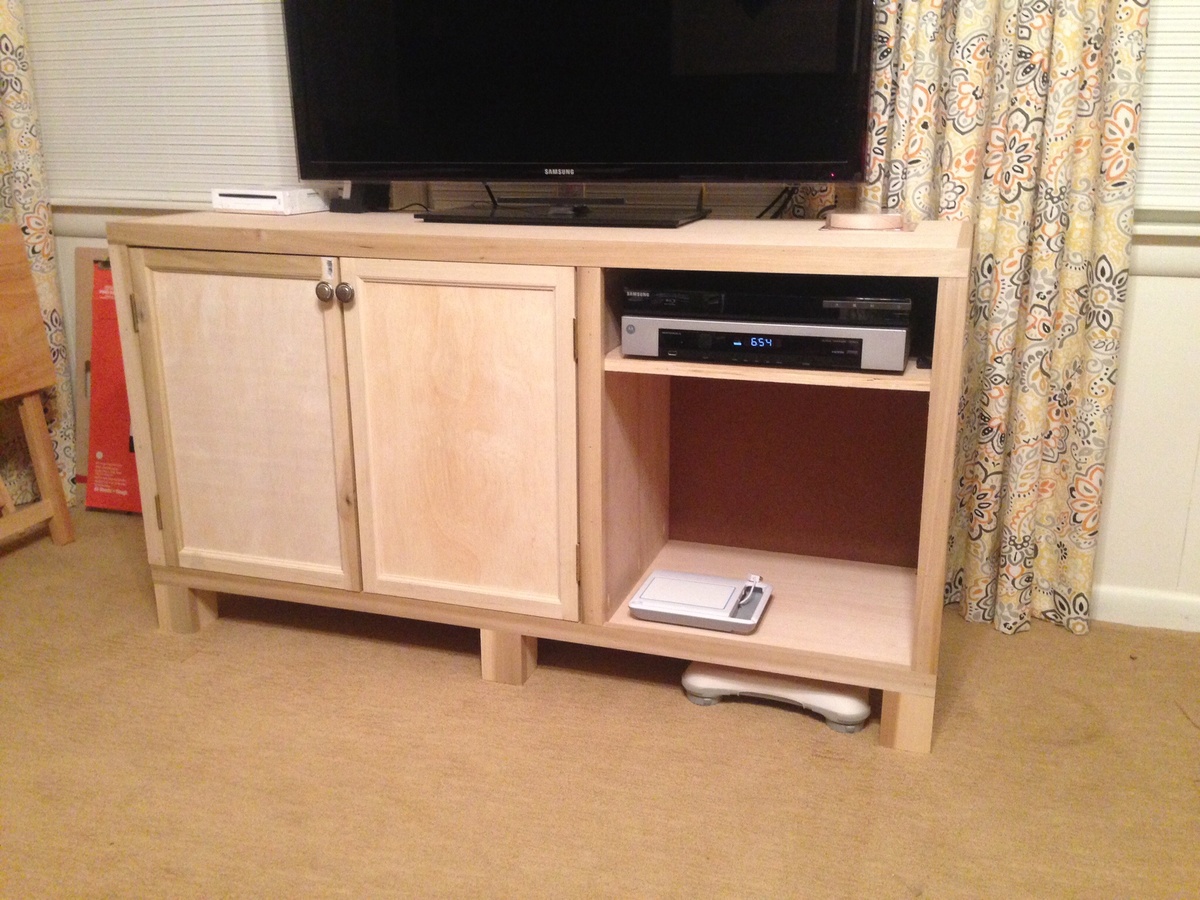
Modified by making 18" deep, right side is 20" wide (inside dimension) to accommodate cable box. I also trimmed out the side panels with 1x2 not just the front.
I used a rail and stile router set to make the doors. To do it again, I would have selected maple, as it routes better than the poplar. I would also consider overlay doors, made from 1x3. The inset doors leave little room for error - the frame must be square!!! You also have more hinge options with overlay hinges.
I also used 3x3 for the legs, I think their weight adds to the piece. The original base looked too small and fragile for the rustic upper half.
Some work still remains, staining as well as placing the veneer step on the shelf edges to give it a nice edge to stain, but I needed the space back for Thanksgiving dinner tomorrow!
Built from Plan(s)
Estimated Cost
$150
Estimated Time Investment
Week Long Project (20 Hours or More)
Finish Used
Final finishing not yet applied, will eventually be a dark walnut stain.
Recommended Skill Level
Intermediate
Rustic weathered gray bed
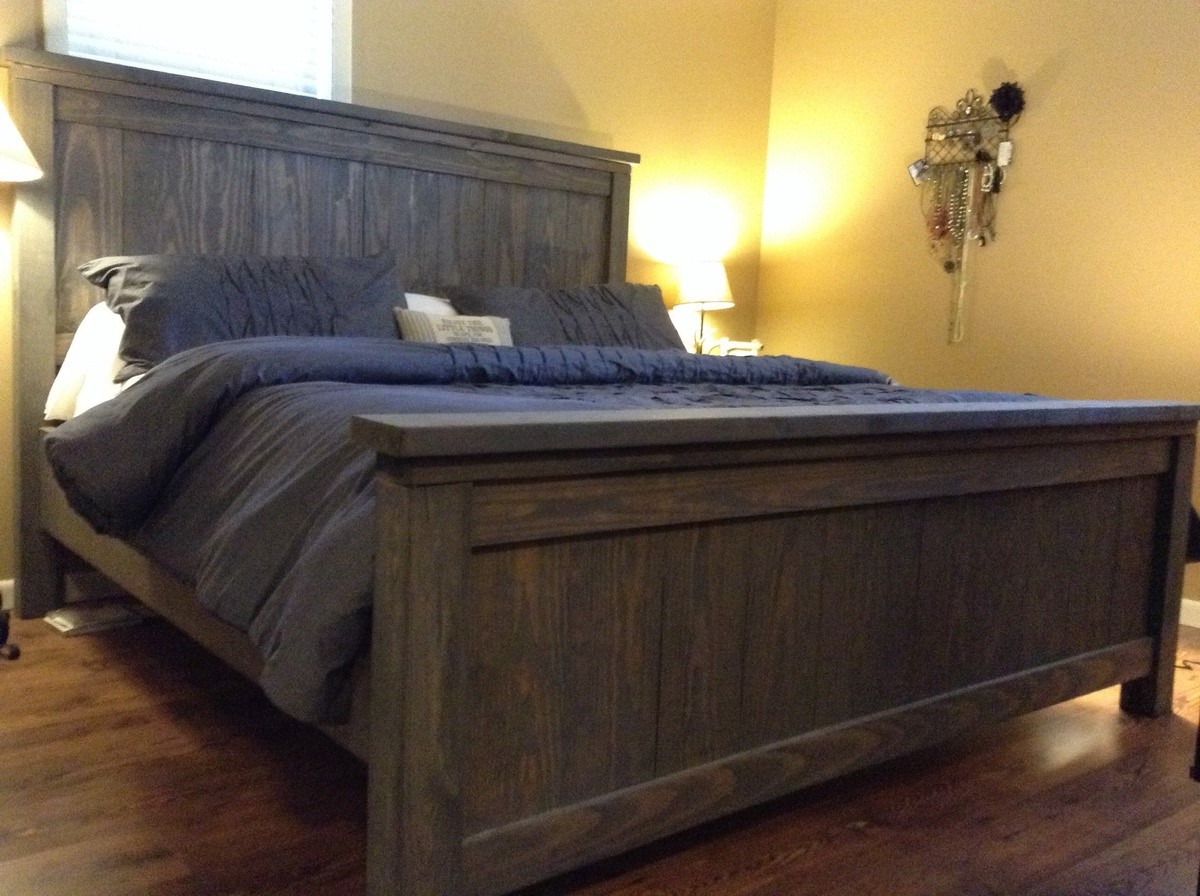
My husband and I built this for our first furniture project. I have the bug! Now I must make night stands . I got the look by staining first with min wax dark walnut, followed by rustoleum weathered gray. This was my first time to ever stain anything, so this does not take much experience to do. Love it! We followed the advice to measure our mattress first, which was good because it turned out to be narrower than many kings. We built the bed custom to our mattress . We also made the height a few inches taller to have a nice tall bed. The footboard is lengthened also. I wanted it to come up above the end of our mattress. This project is easy once you get going. It is also addictive!
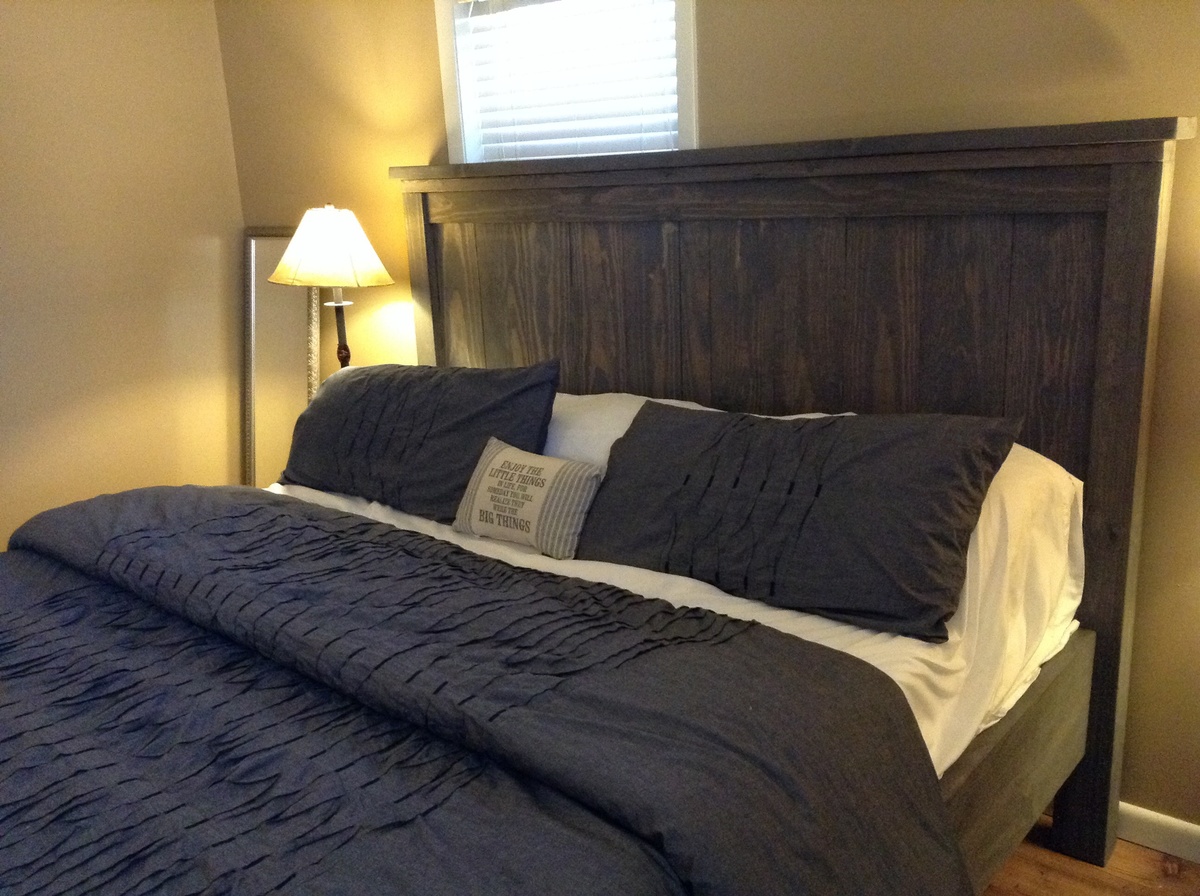
Built from Plan(s)
Estimated Cost
$350 includes the stains and all. This includes building in our own bed frame to eliminate needing box springs.
Estimated Time Investment
Weekend Project (10-20 Hours)
Finish Used
Wood conditioner, min wax dark walnut, & rustoleum weathered gray stains. In that order
Recommended Skill Level
Beginner
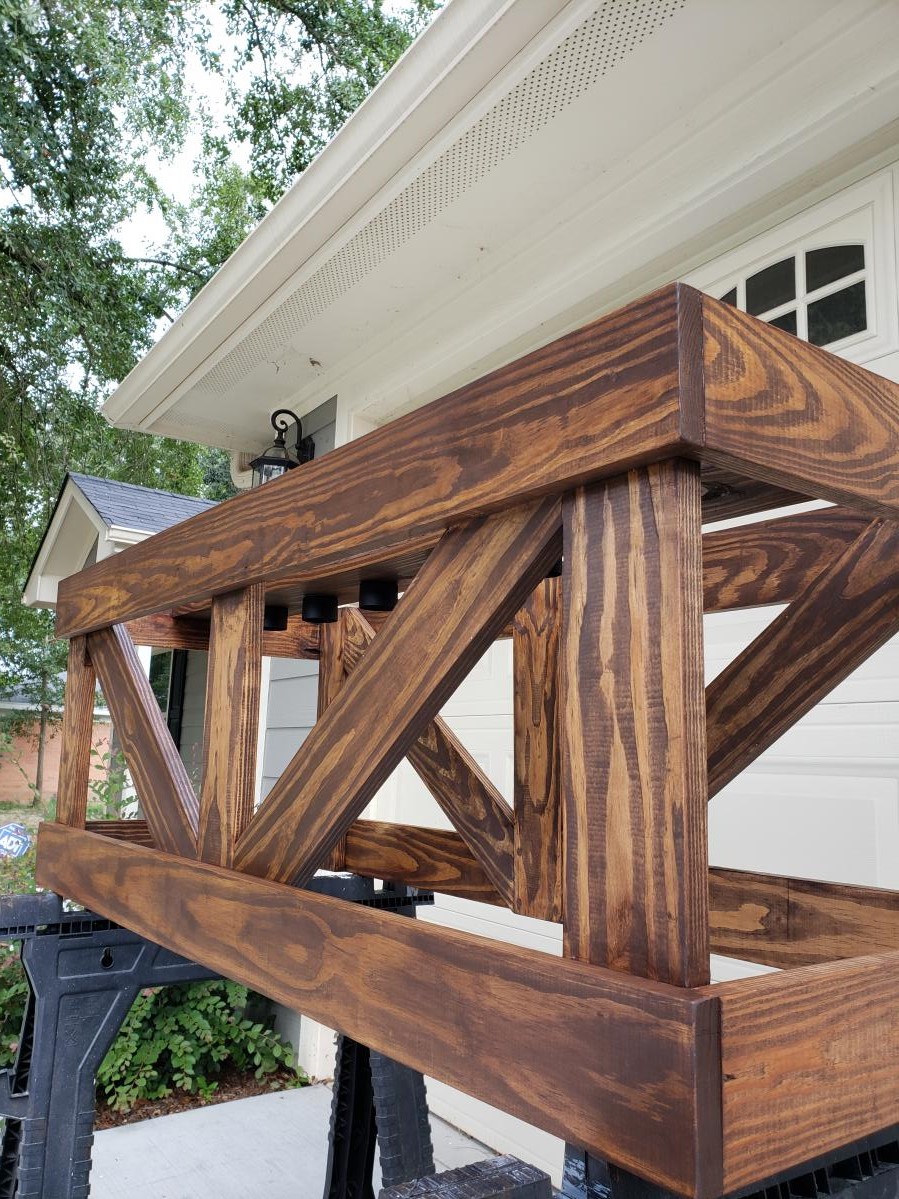
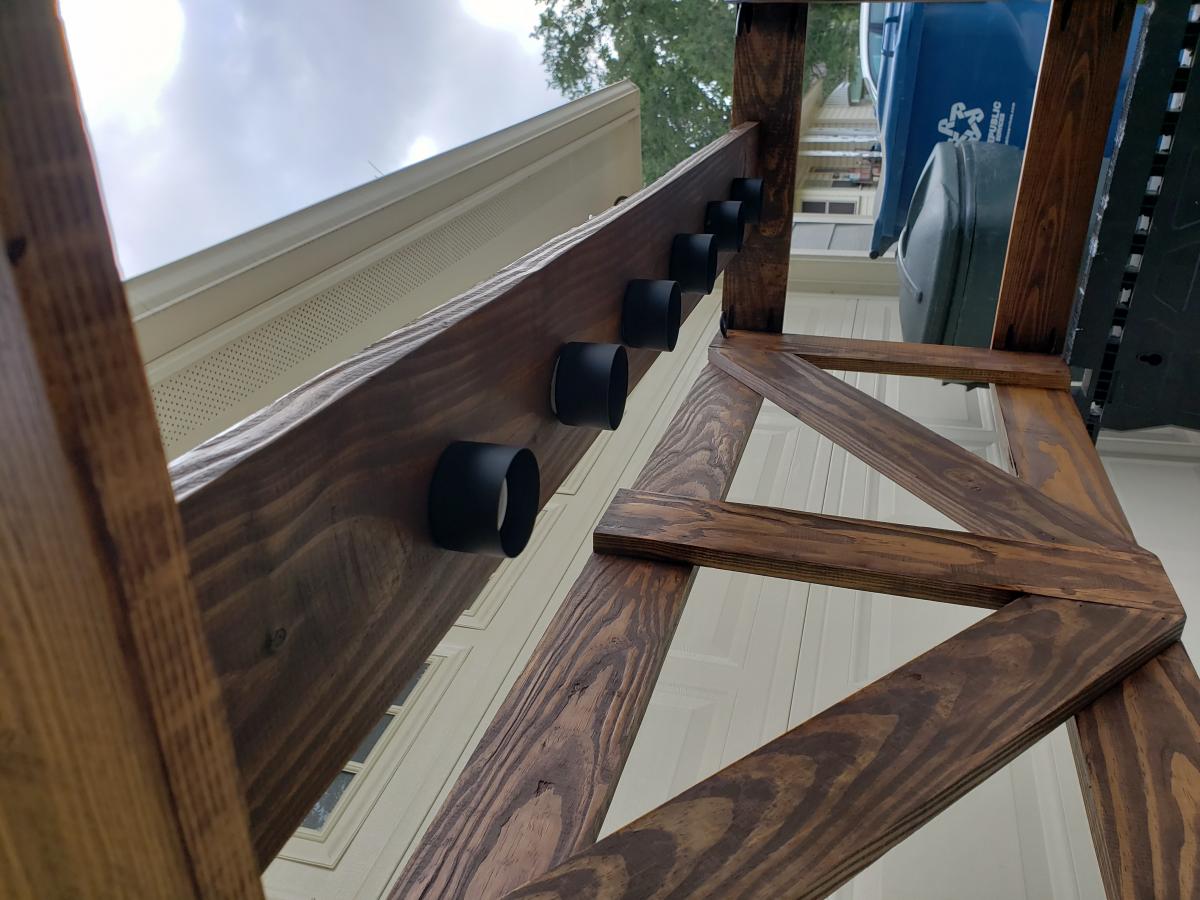
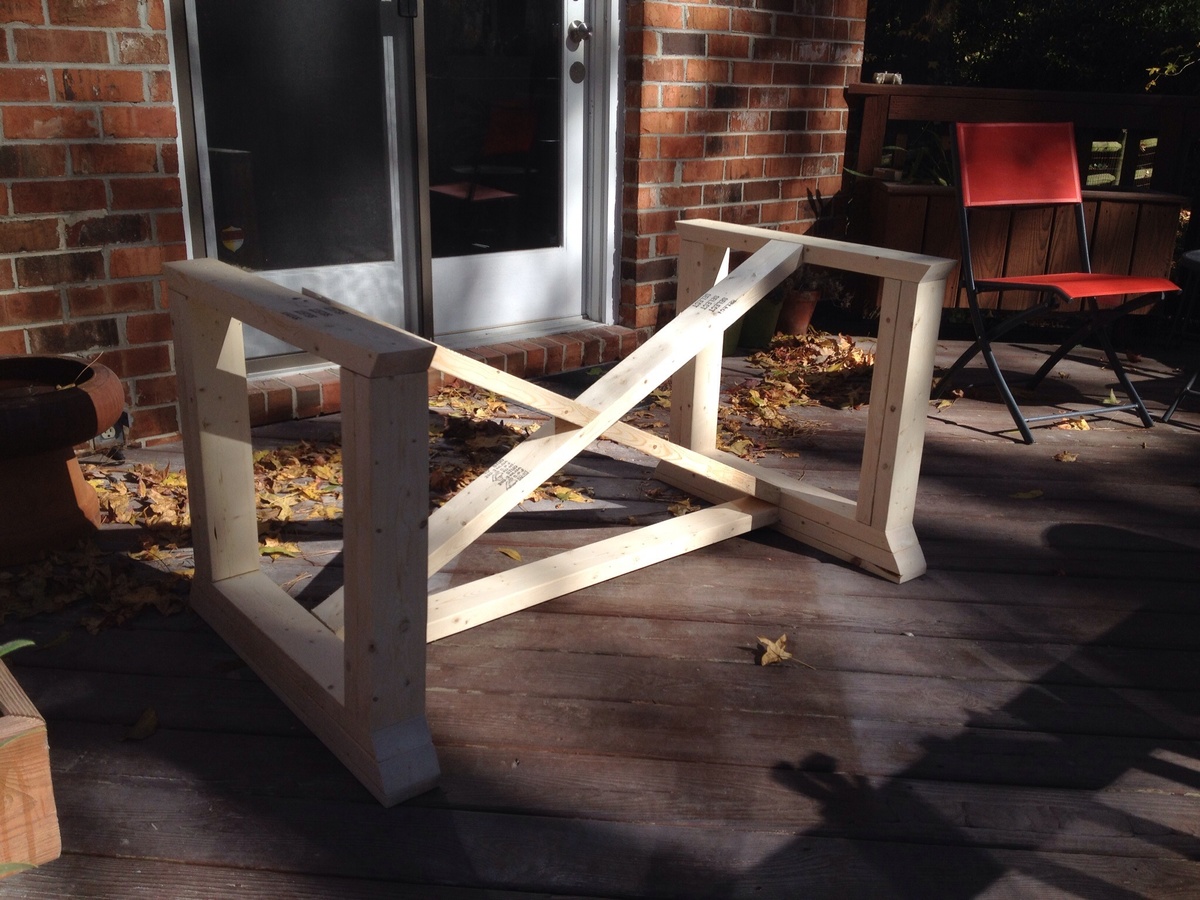
Tress Beam Table
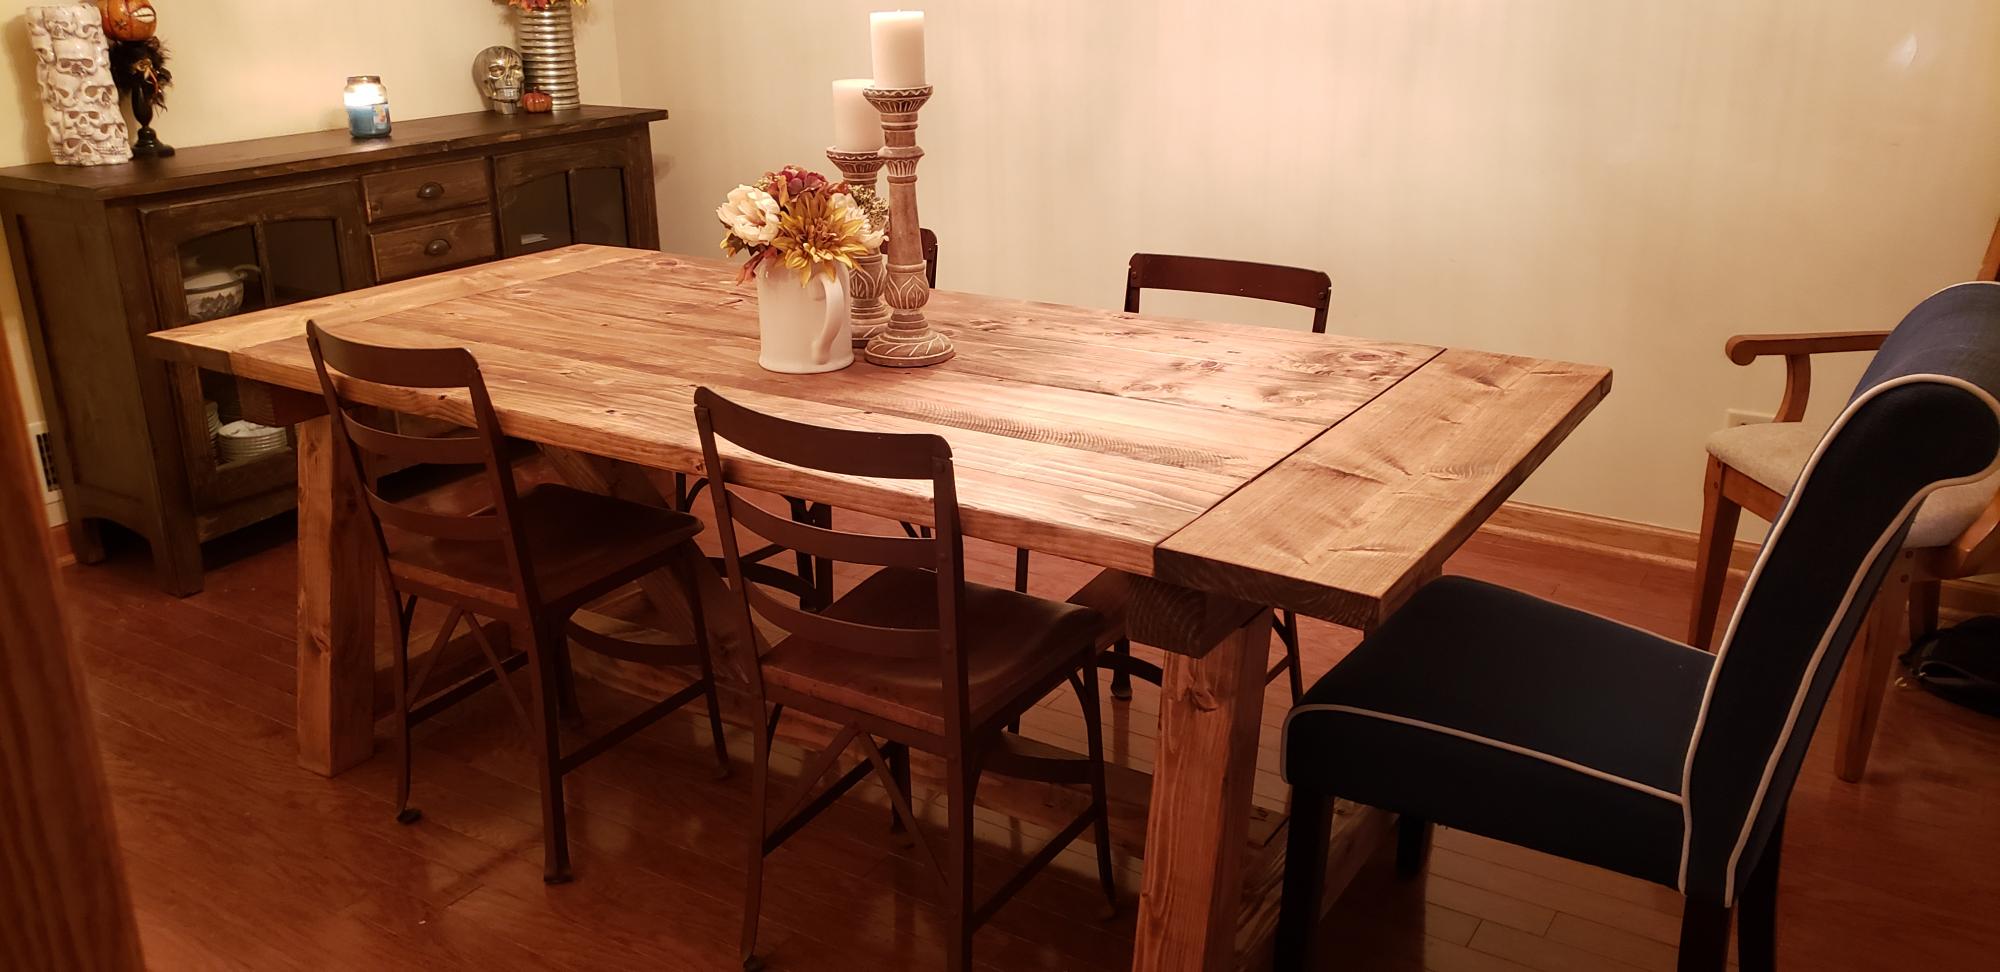
Put this baby together in 3 days and I just LOVE it! I cannot wait to pick my next project. Thank you, Ana White, for your inspiration!
Estimated Cost
$125
Estimated Time Investment
Weekend Project (10-20 Hours)
Finish Used
Golden oak
Recommended Skill Level
Intermediate
Modern Outdoor Chairs and Simple Seacoast Tables
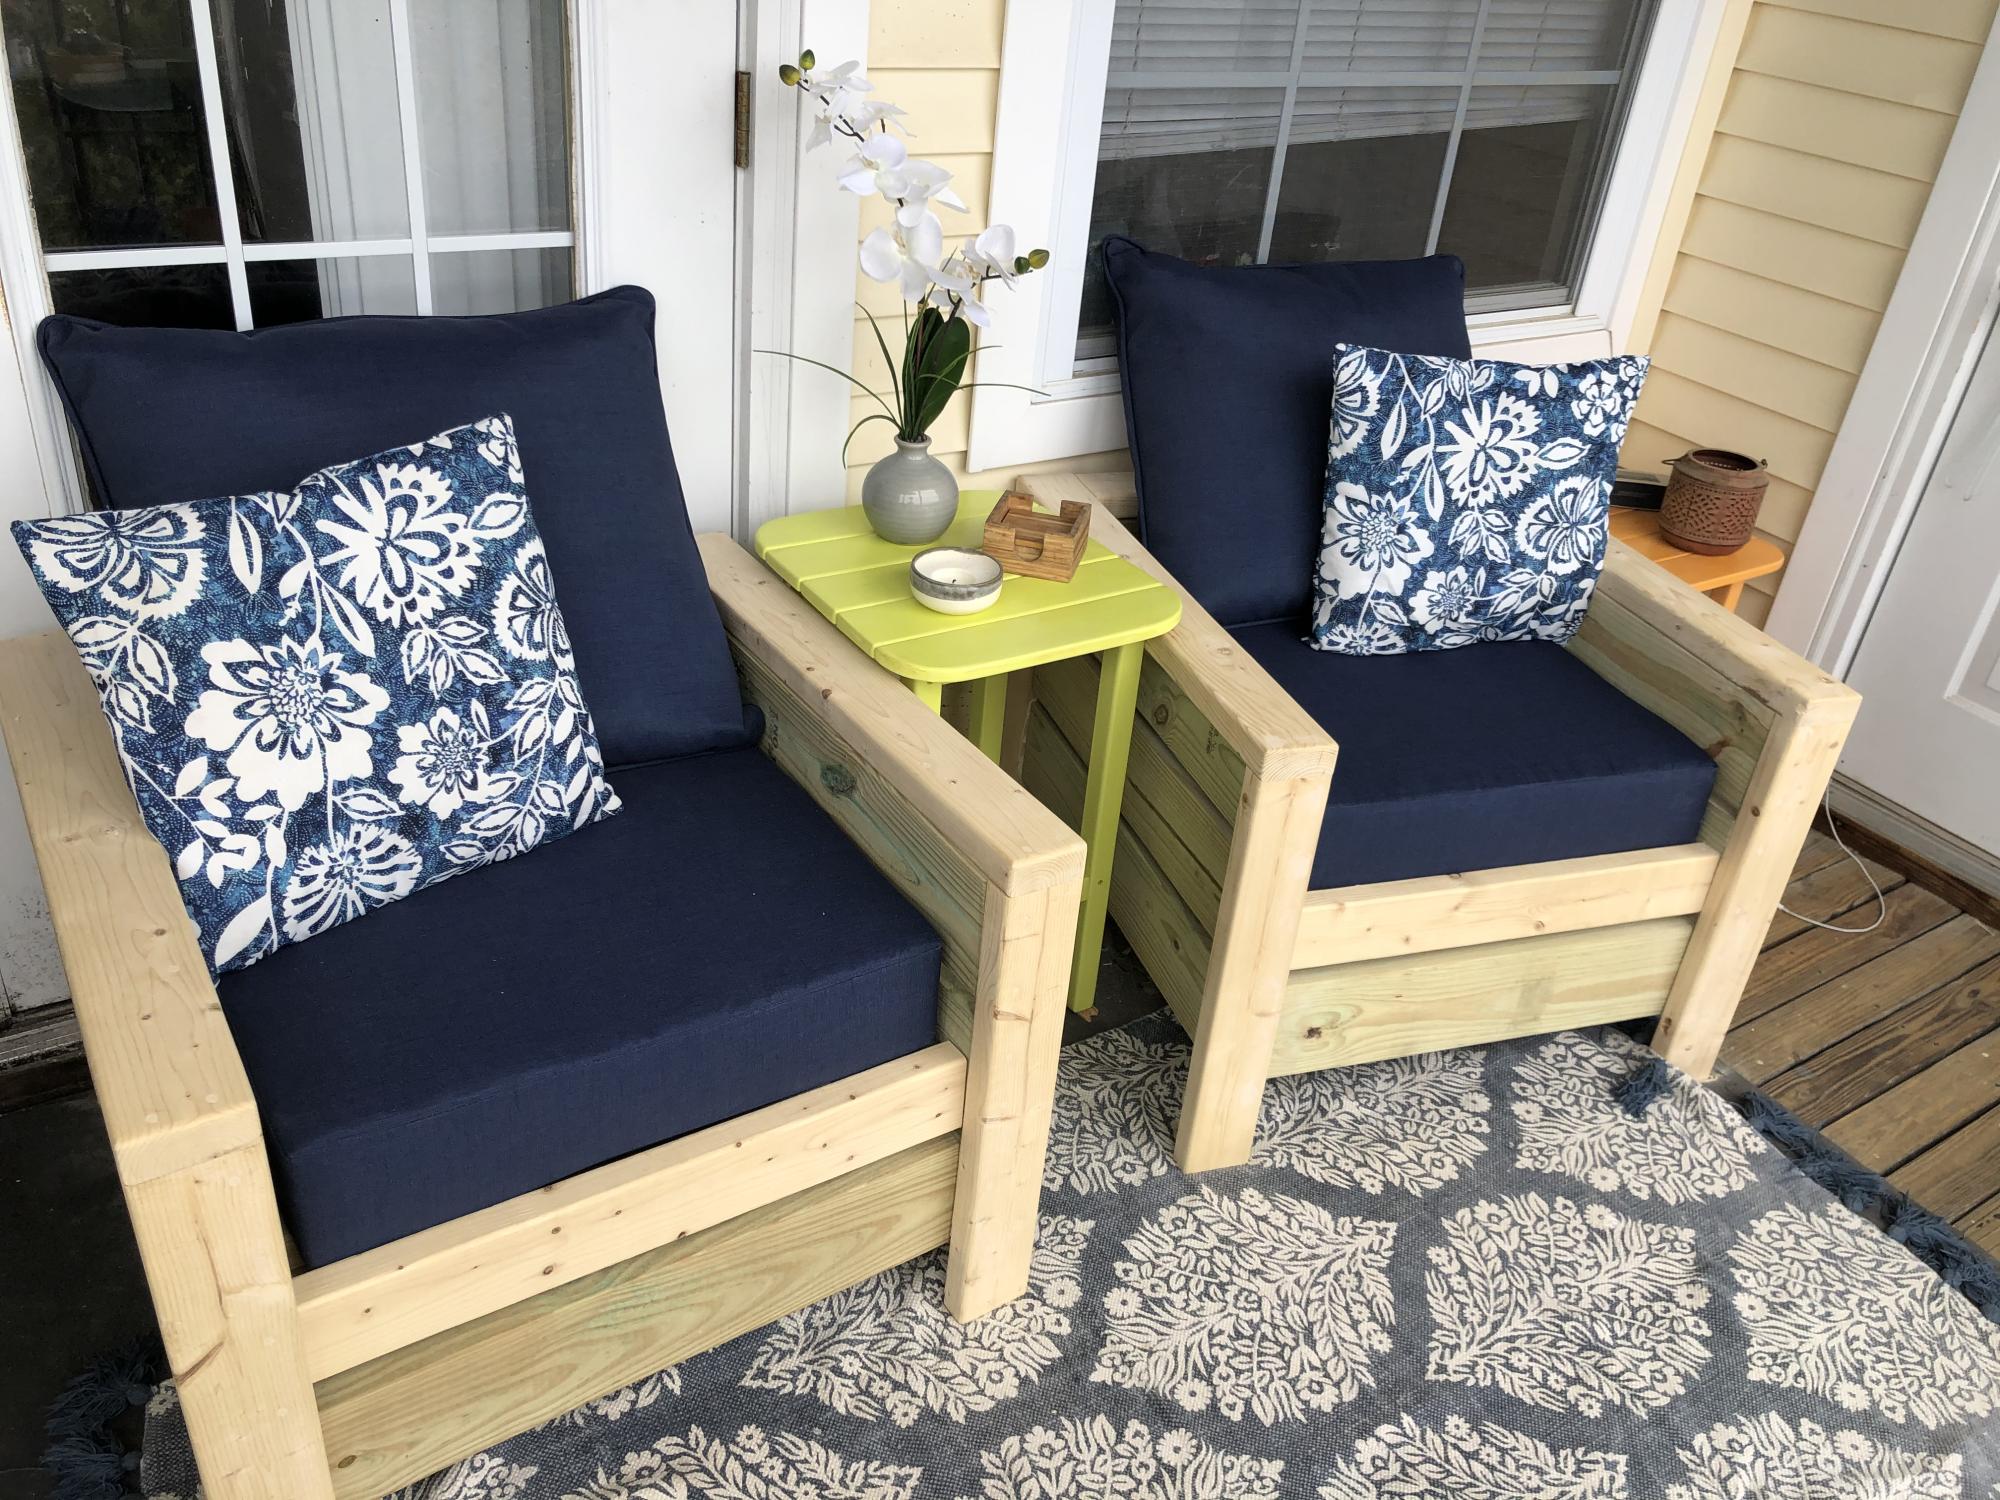
Great sturdy outdoor furniture to spruce up a small deck space with lots of afternoon sunlight and coastal breezes!
Built from Plan(s)
Comments
Mon, 05/22/2023 - 19:52
Cozy spot!
I can just imagine the relazation, it looks fabulous! Thank you for sharing.
Farmhouse Bed King
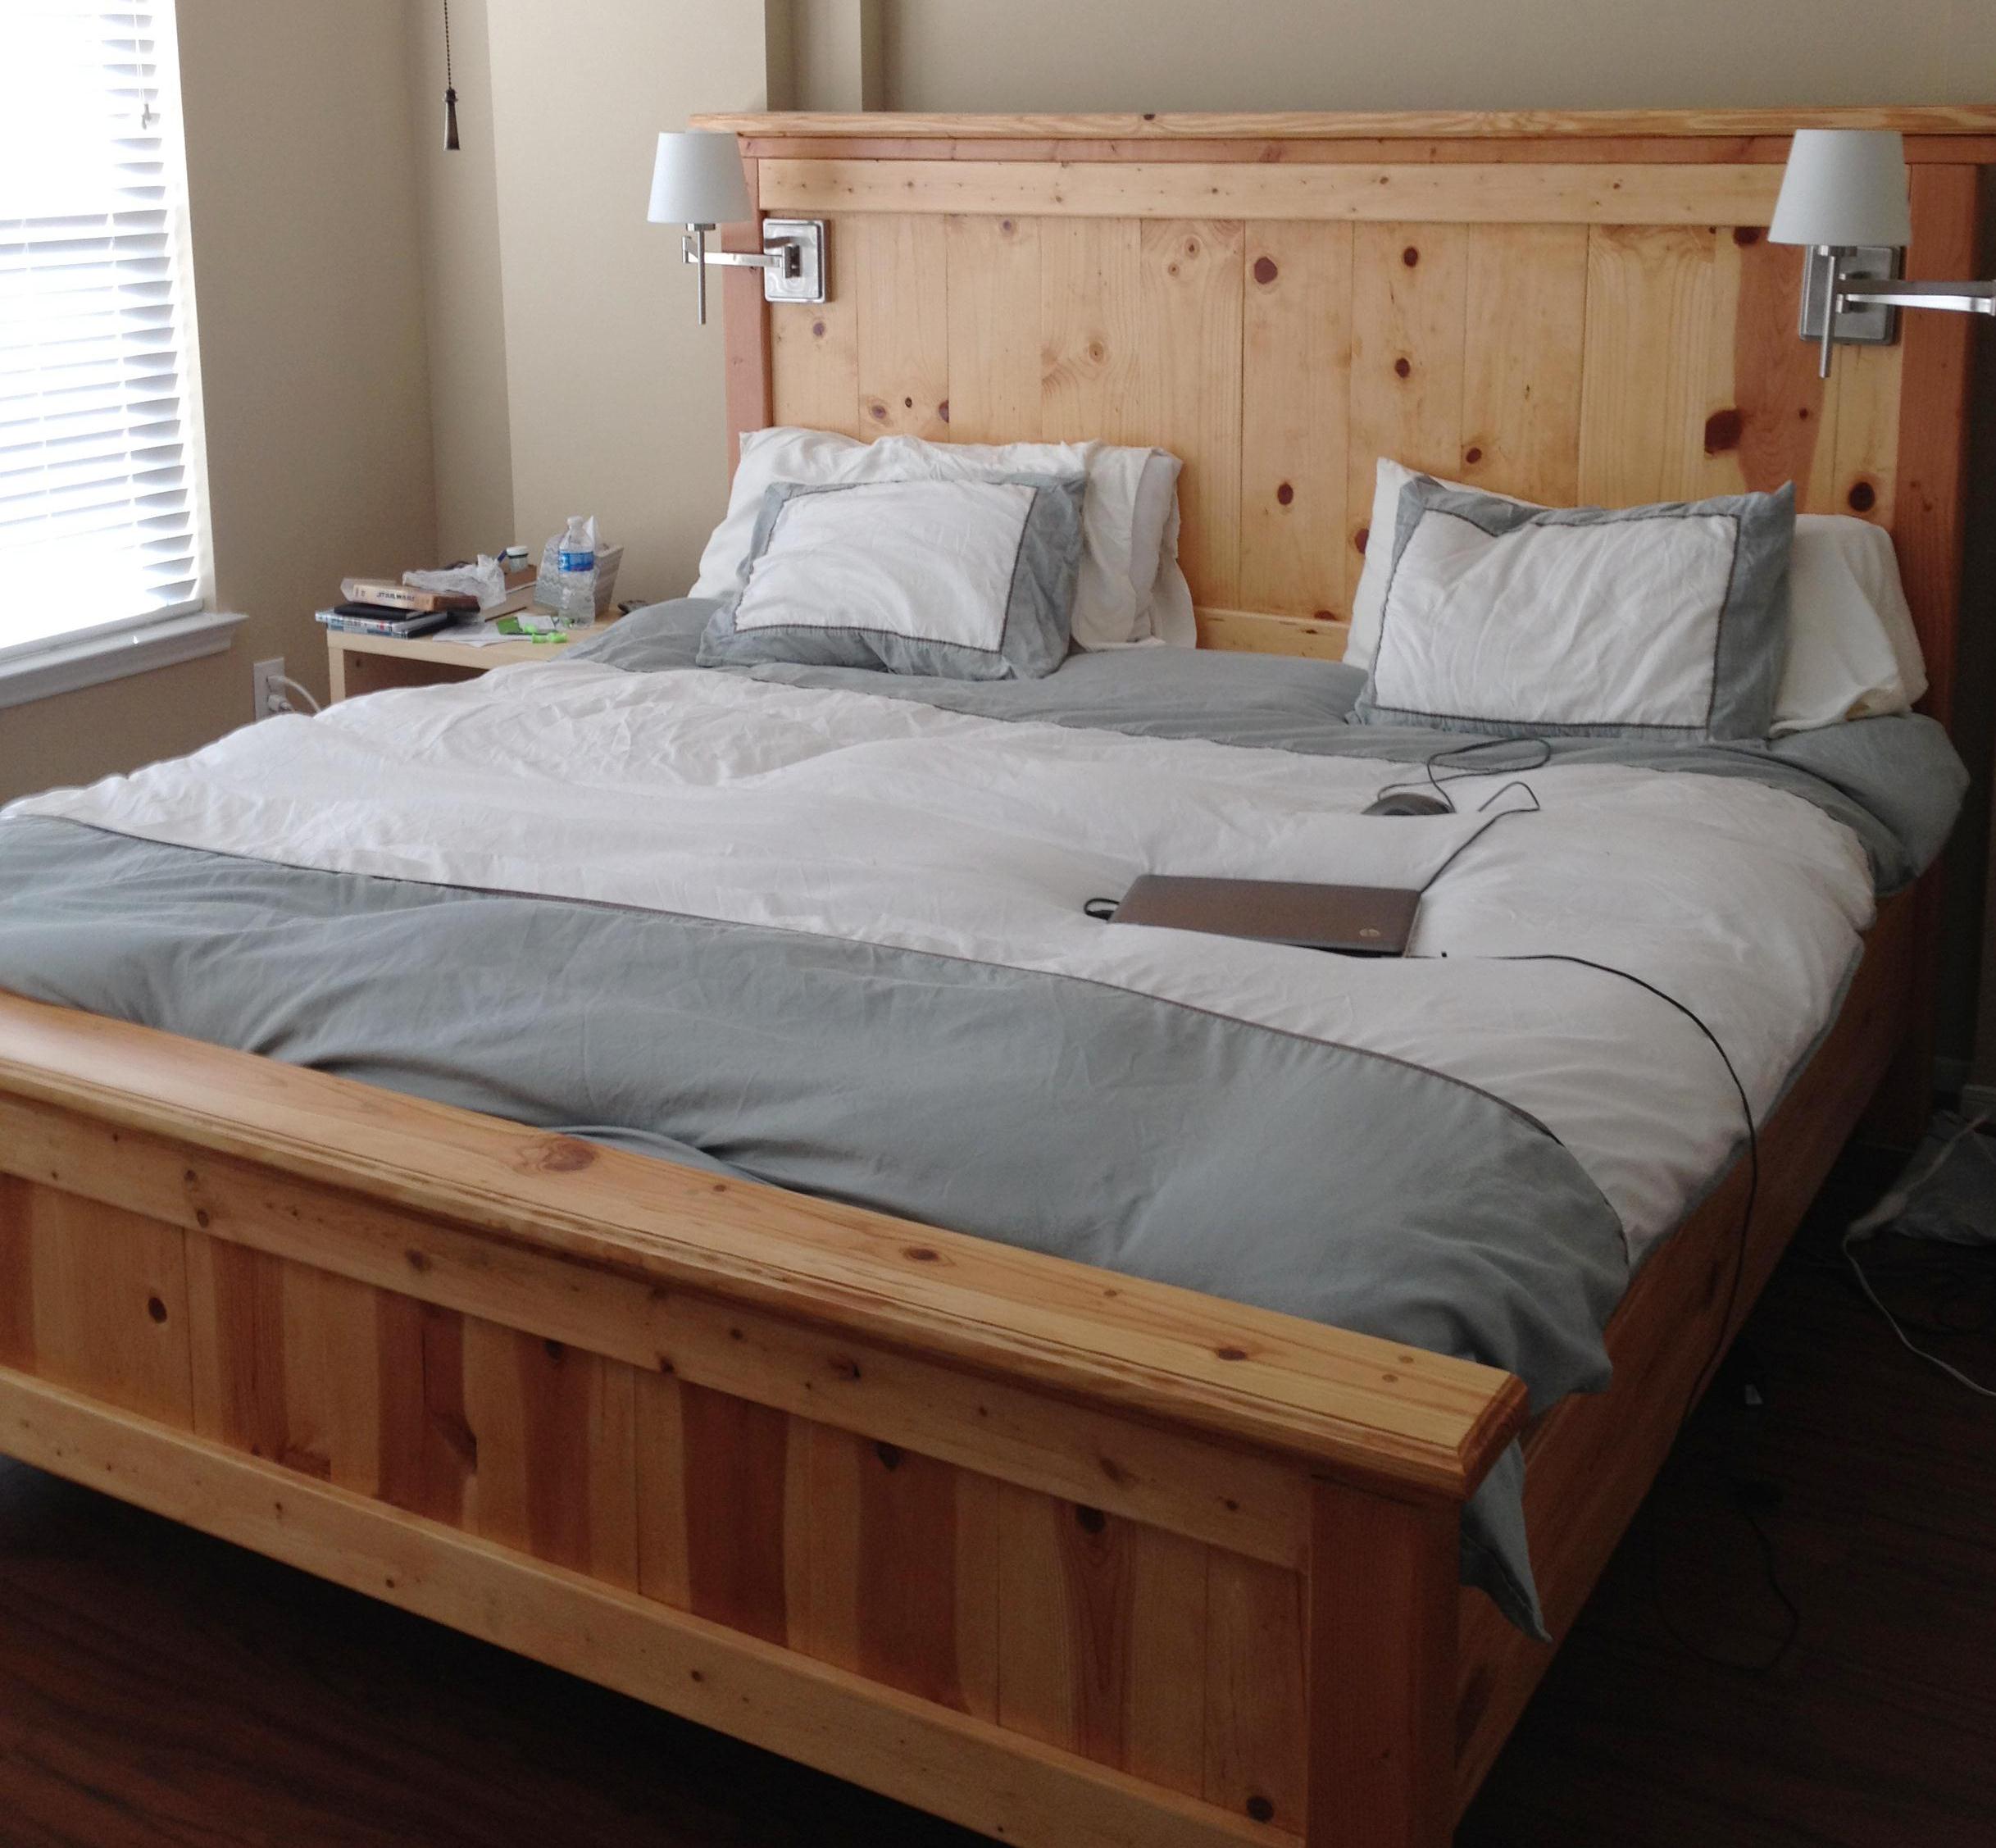
This was the plan that started my addiction! We had just gotten new mattresses, and we needed a new bed frame. All of the furniture stores have dark stains, and we wanted something natural and bright. I was searching one night found your site, and that was it. A few changes, increased the height of the headboard and footboard, wanted a slight overhang on the top of each as well. Also added an additional 2x4 between the legs of the headboard for support.
Built from Plan(s)
Estimated Time Investment
Week Long Project (20 Hours or More)
Finish Used
Natural
Recommended Skill Level
Beginner
Comments
Wed, 01/11/2012 - 17:15
That looks great! The
That looks great! The natural finish looks really great with your bedding. I love the higher headboard - we're planning to do the same with the farmhouse bed I'm planning so that my husband will be able to sit up in bed without hitting the back.
Did you end up using the boxspring, or is the mattress just in slats? I couldn't tell from your picture.
Wed, 01/11/2012 - 18:23
Box spring
Hi, thanks for the positive response :) The mattress and box spring both are on here. In fact, I kept the bed itself on the original metal frame below, and added the side rails to hide it. Purchased the hardware for the side rails from Rockler
Fri, 01/13/2012 - 08:42
the lights!
All I can say is wow. Definitely showing this to my wife today. We had plans to do something like this but yours is up up and away! Excellent job!
Fri, 01/13/2012 - 15:48
The lights
I'm glad you like the lights. I go back and forth on them. I hated that I had to drill holes into the wood to run the cord, as it does not give us the option to remove later on. Also, if you go with the lights, you might want to put some double sided tape on the back. Thanks!
Tue, 04/03/2012 - 09:41
My husband just forwarded me
My husband just forwarded me a link of your bed.
It is SO SO beautiful!!! Love the reading light. Where did you get that by the way?
The bed is so pretty. Love the natural wood look and the knots.
We too have mostly dark wood stain in the house and love this light color look. Did you stain it or coat it with something?
Sat, 04/28/2012 - 15:26
question about dimensions
Hi Moldah,
Very impressive and great addition with the lights. Can you tell me how tall your final headboard and footboard are? Thanks.
Sat, 06/16/2012 - 04:46
Farmhouse bed frame
LOVE IT! I love doing things like this and I am inspired by seeing your pictures!! I am especially impressed with the Star Wars case noted on your endtable LOL Right there I know you have great taste in films, too!!! I am going to do this project! Great job!
Wed, 09/04/2013 - 17:10
Farmhouse bed
Wow, this is so beautiful! Great Job! We are very amateur builders and I had a couple questions. Do you have a blog with more details? How did you achieve the routered edges? And also, do you mind sharing the cost of the project? Thanks!
Sun, 11/03/2013 - 08:44
Alterations
By how many inches did you increase the height of the headboard and footboard? I am thinking about doing the same when I build this bed and was hoping for some guidance.
Sun, 12/18/2016 - 06:00
Support Question
We don't have boxsprings. How would you modify this plan for that?
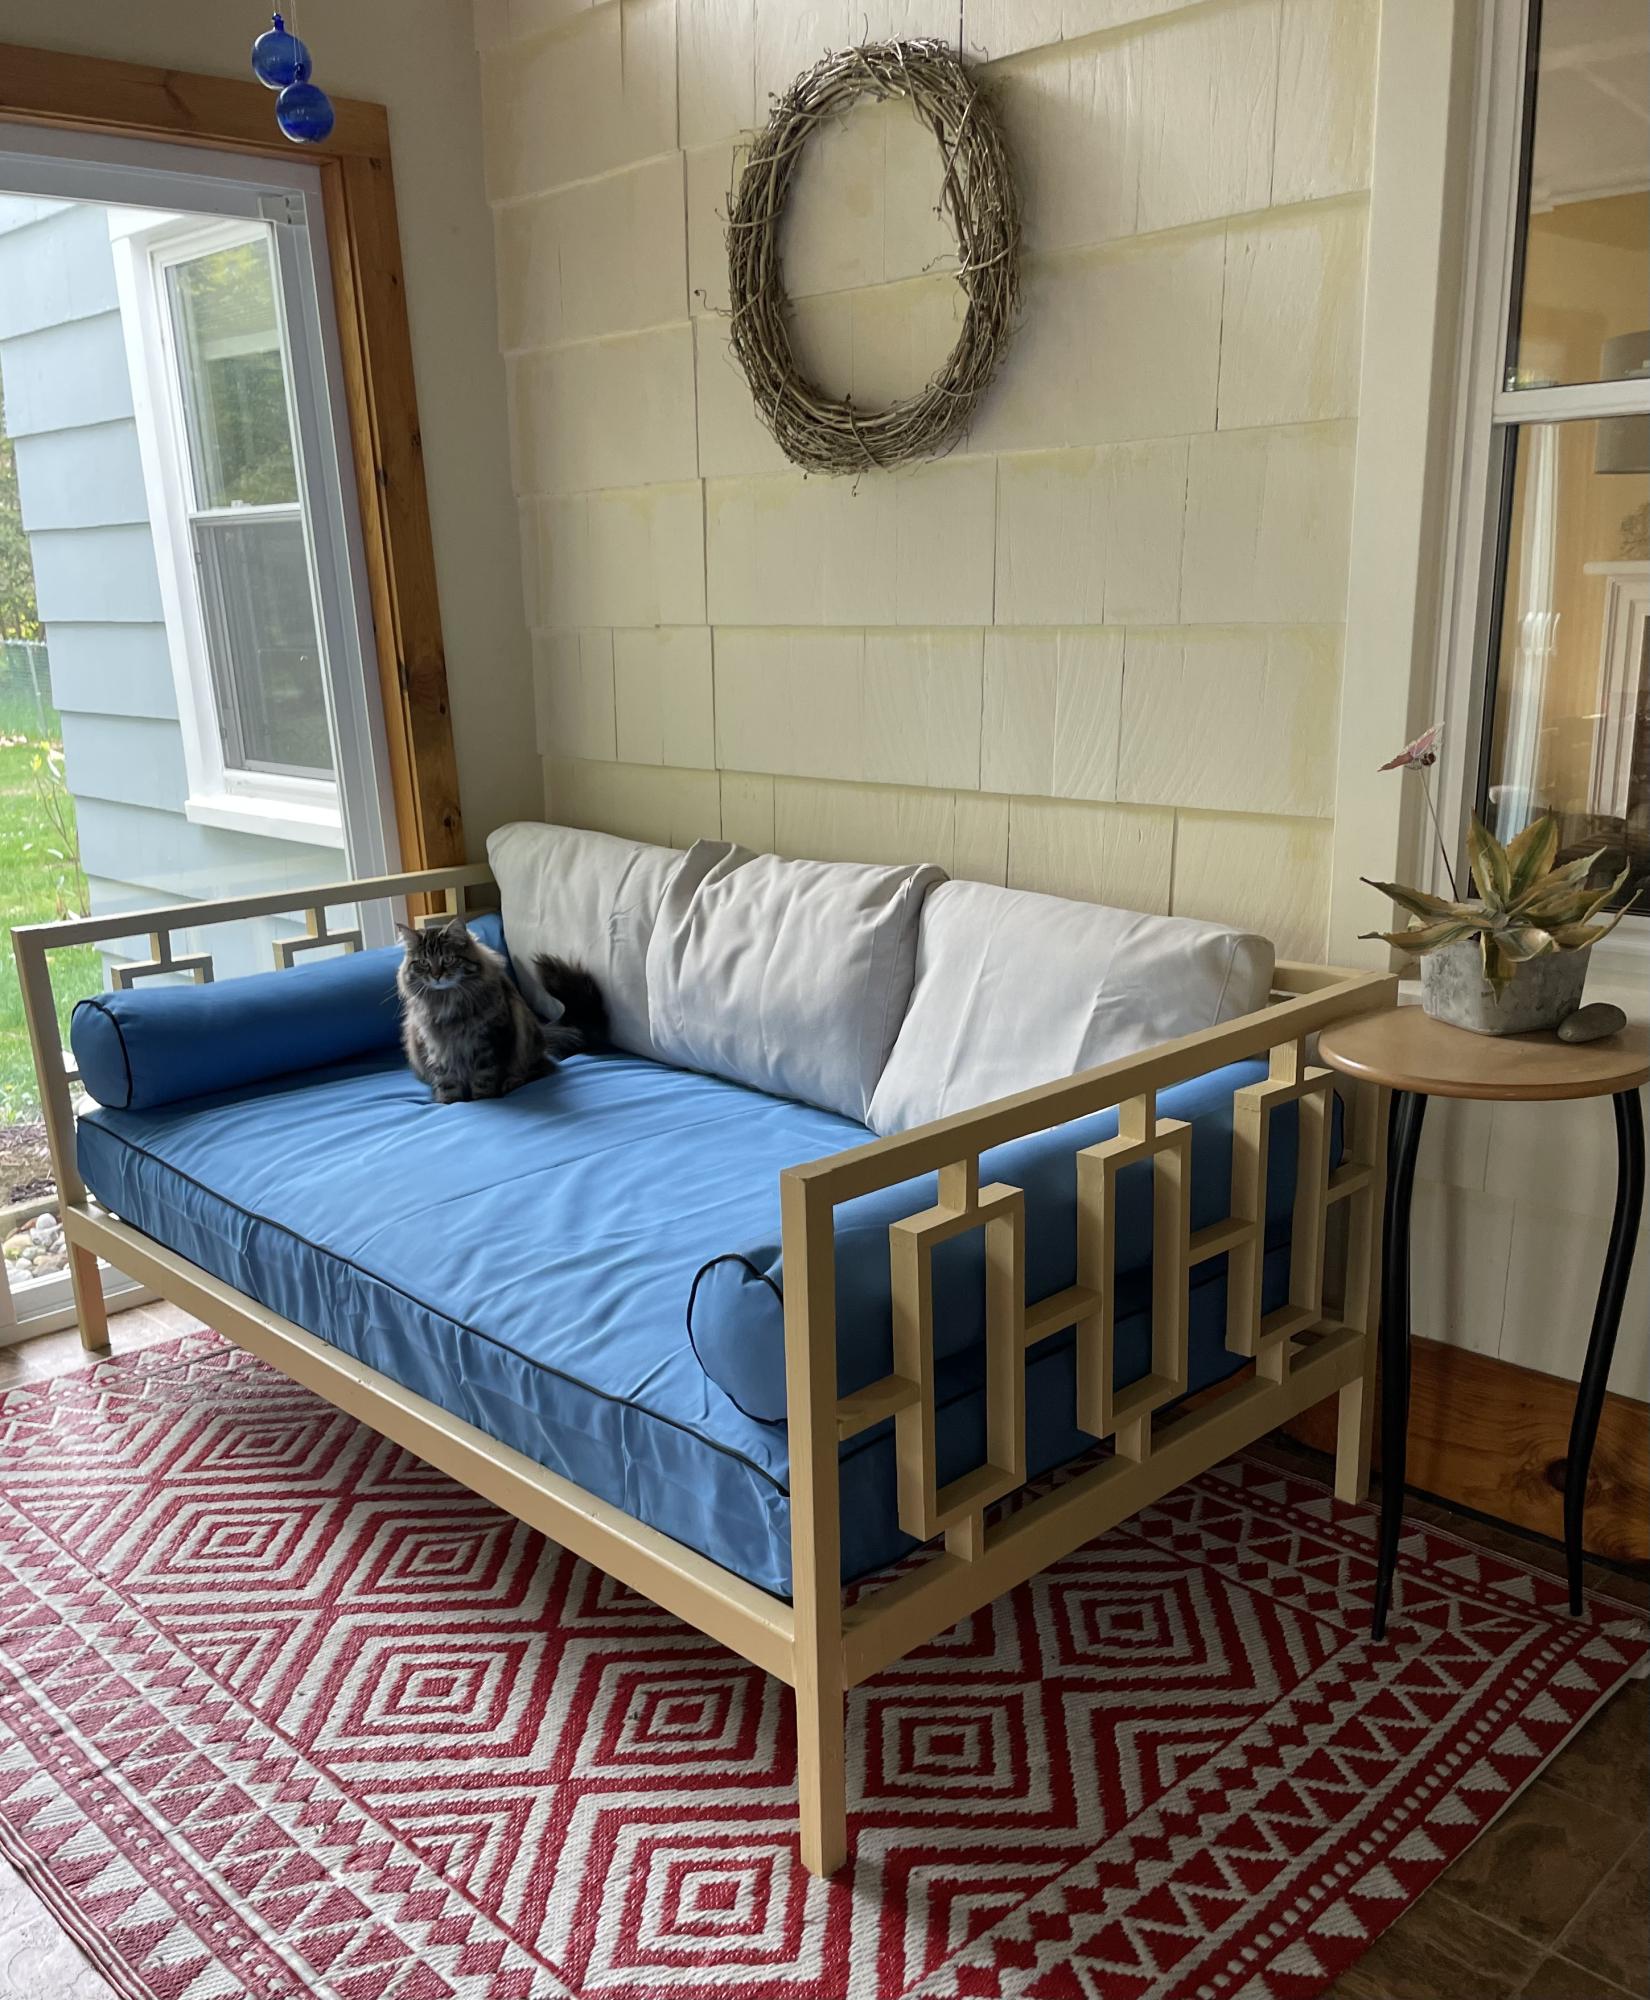
Outdoor sectional couch
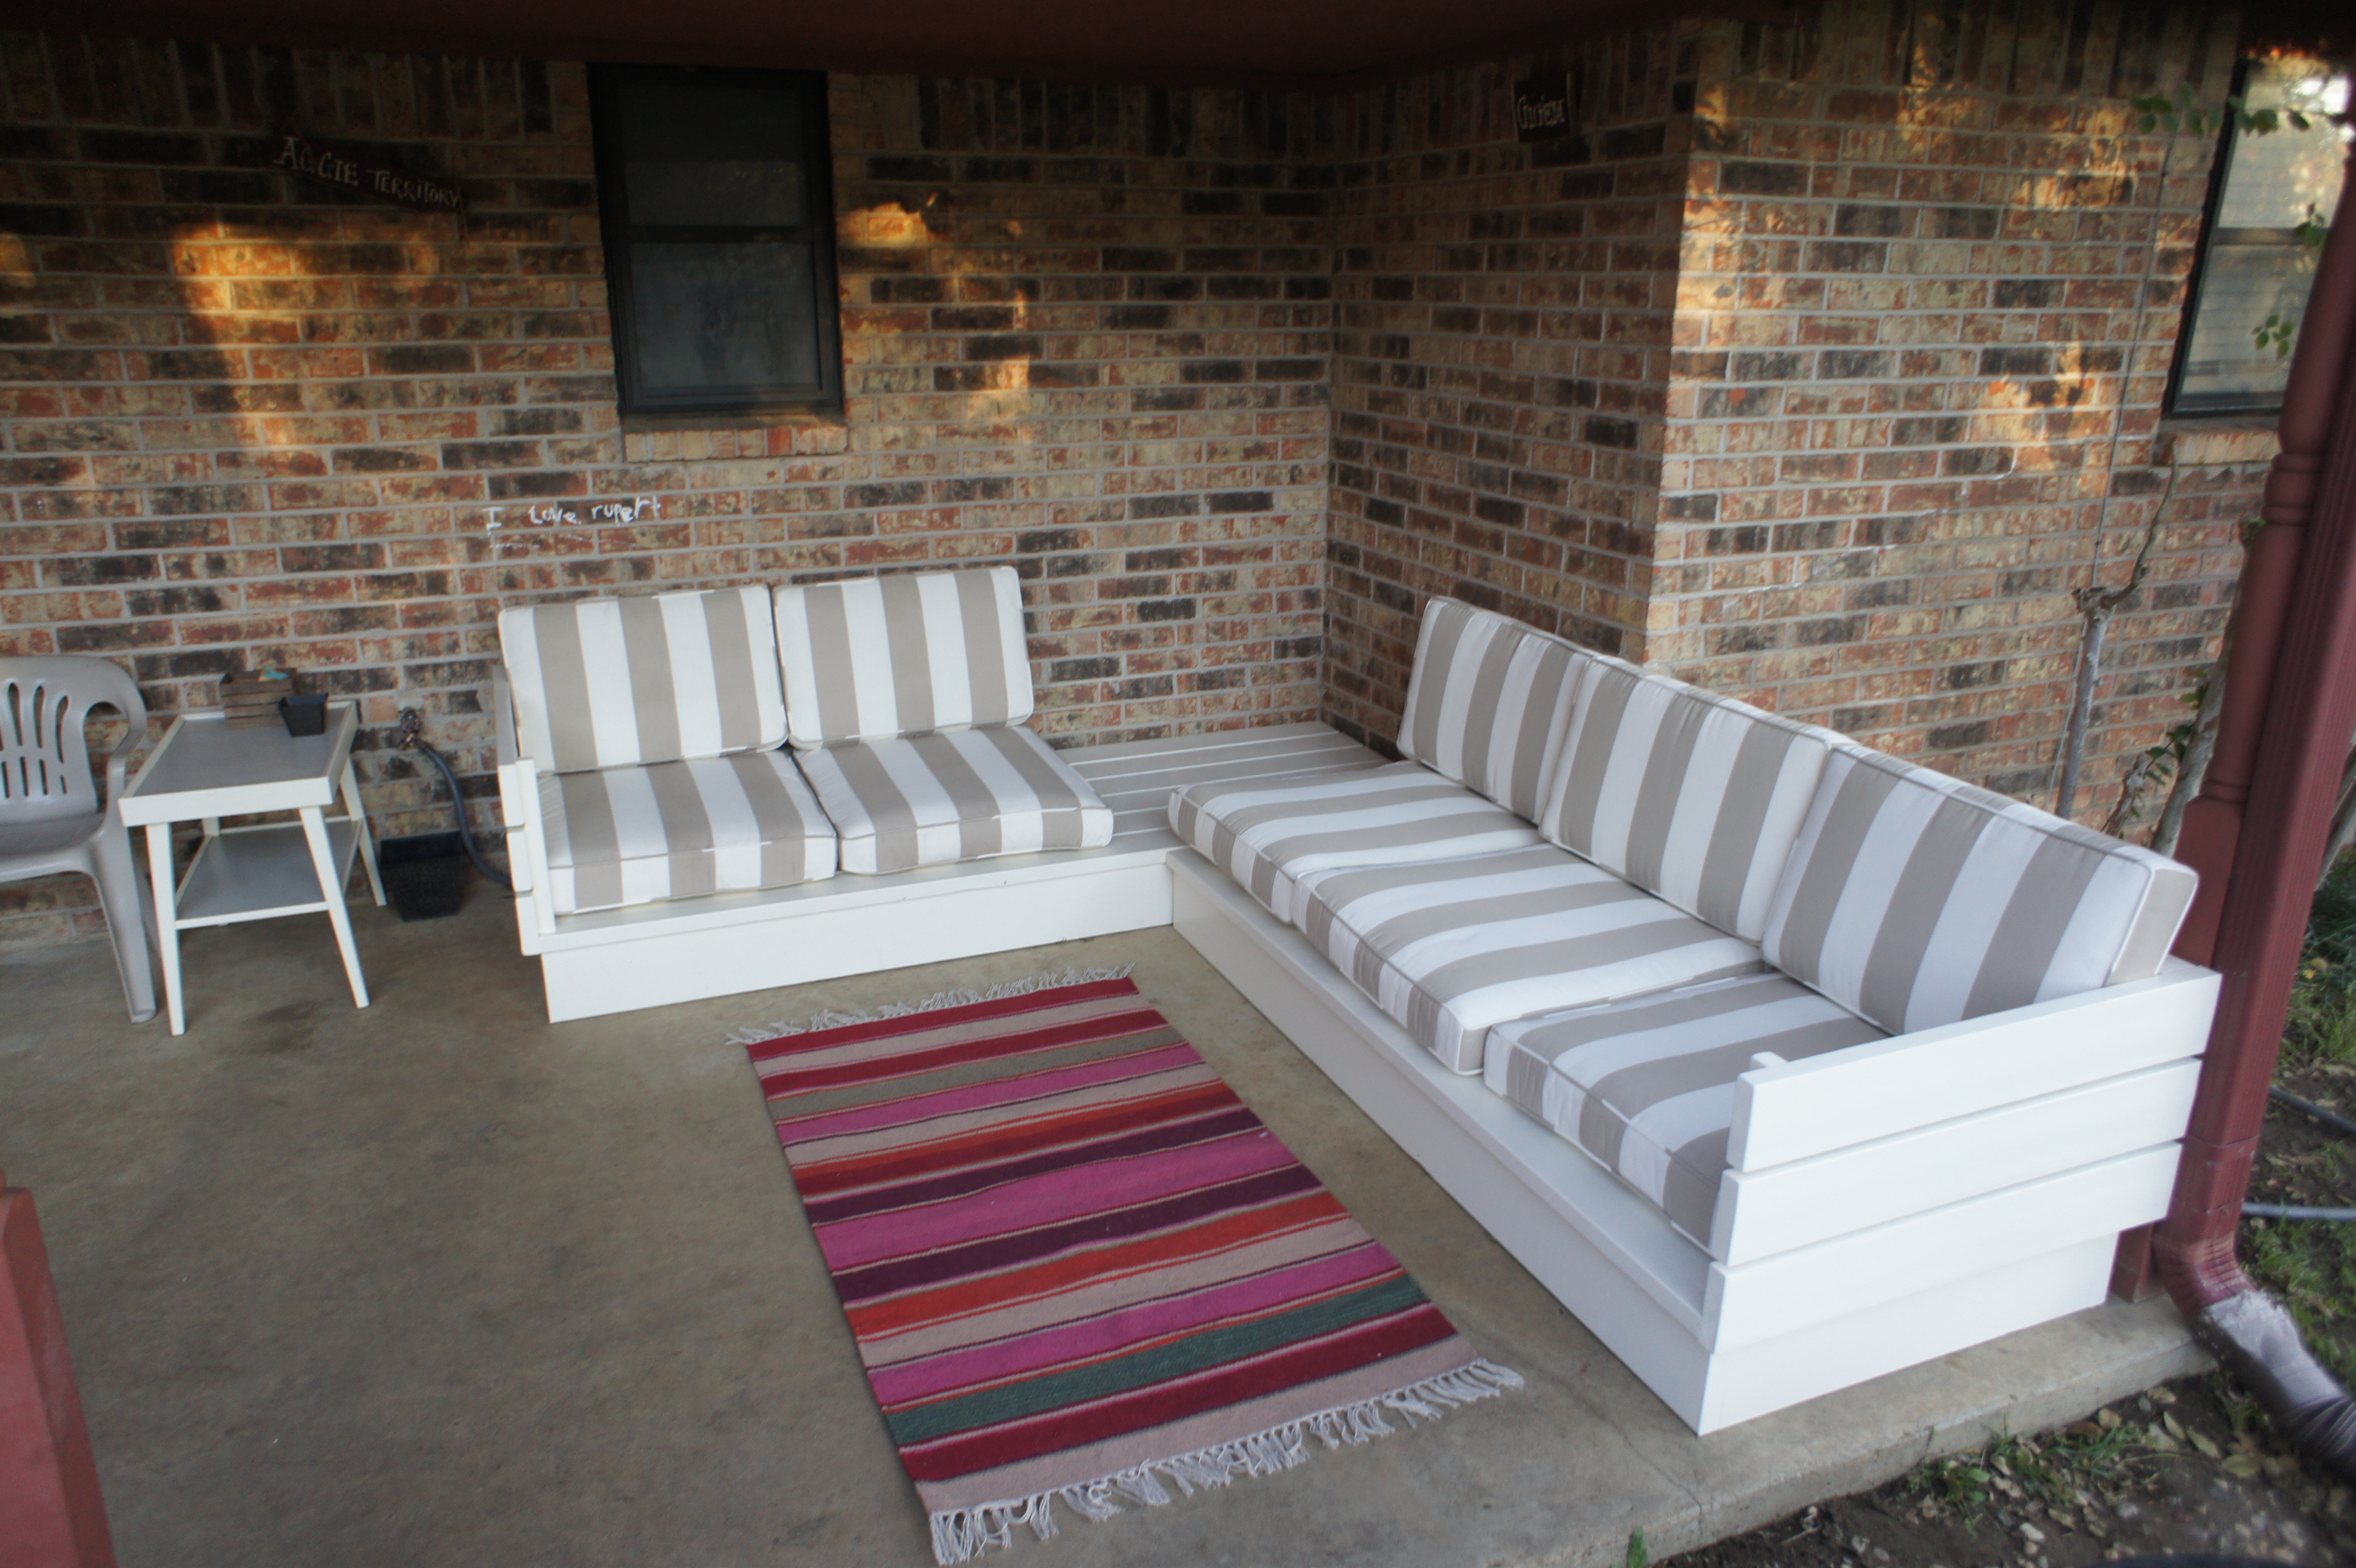
This was my second Ana White project (first was a sandbox). I made a few changes to Ana's plan so that it would better fit my porch. First, I basically flip flopped the plans so that the end table was on part 1. I also altered the length to better fit the cushions I found. Ana's plans were 24" between the 2x2. Mine ended up being 26.5". I also used 2x8's for the base instead of the 2x4 for added height.
The price of outdoor cushions was a big surprise!! We looked into buying outdoor high density foam and making our own cushions, but that seamed to be just as expensive as buying cushions. We also really had a hard time finding large cushions that actually fit this plan. Most cushions are REALLY small for this couch. we found some Pottery Barn cushions online that were on clearance.
It was a fun project and we love the couch!
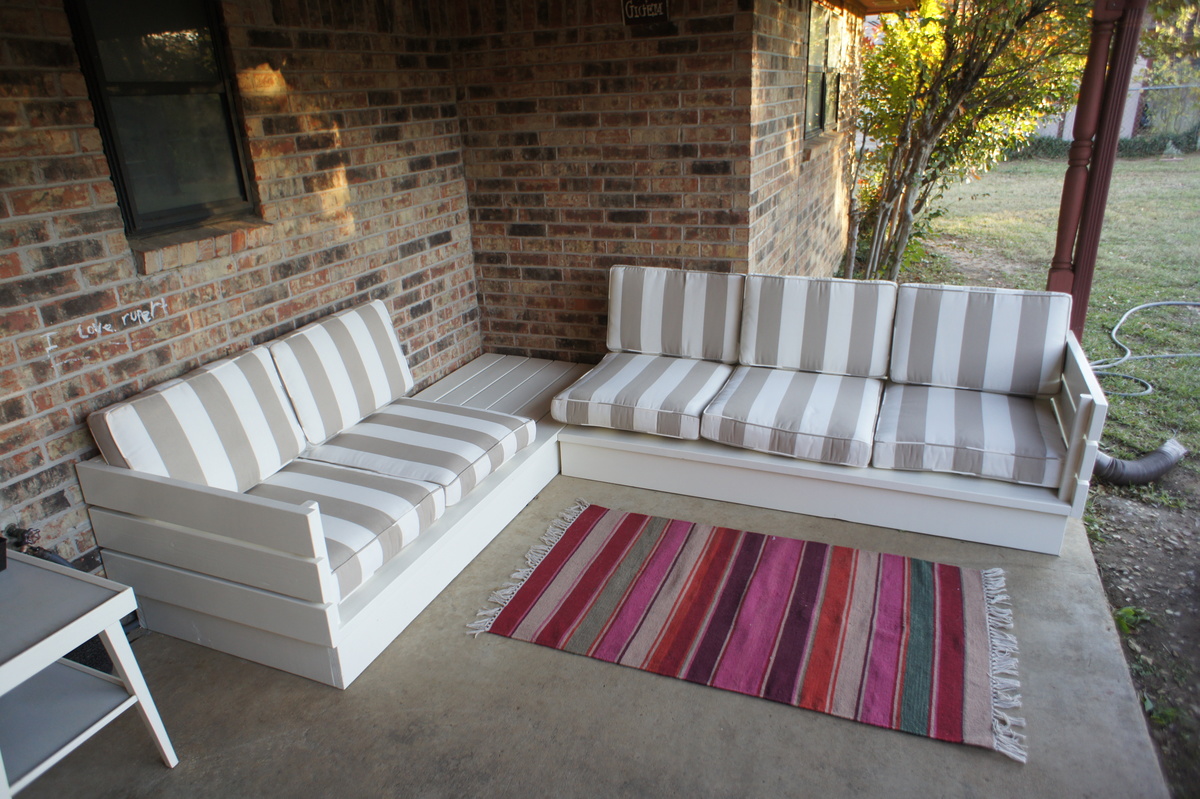

Estimated Cost
$180 not including cushions
Estimated Time Investment
Weekend Project (10-20 Hours)
Finish Used
Exterior grade white paint
Recommended Skill Level
Beginner
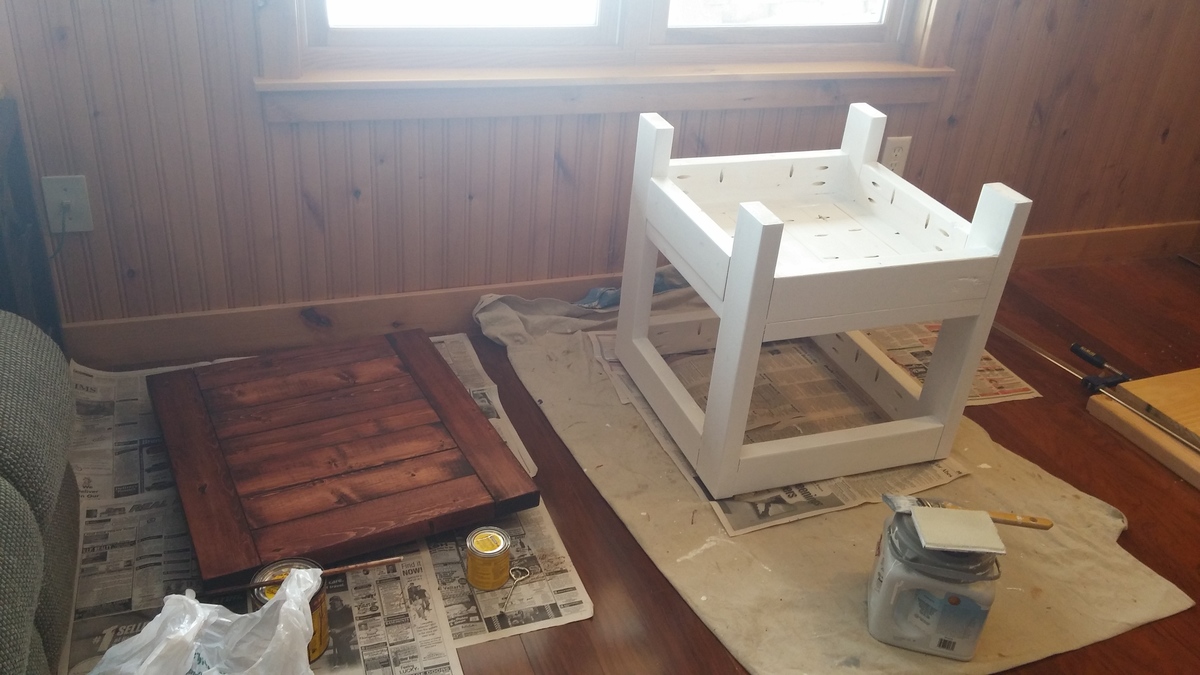
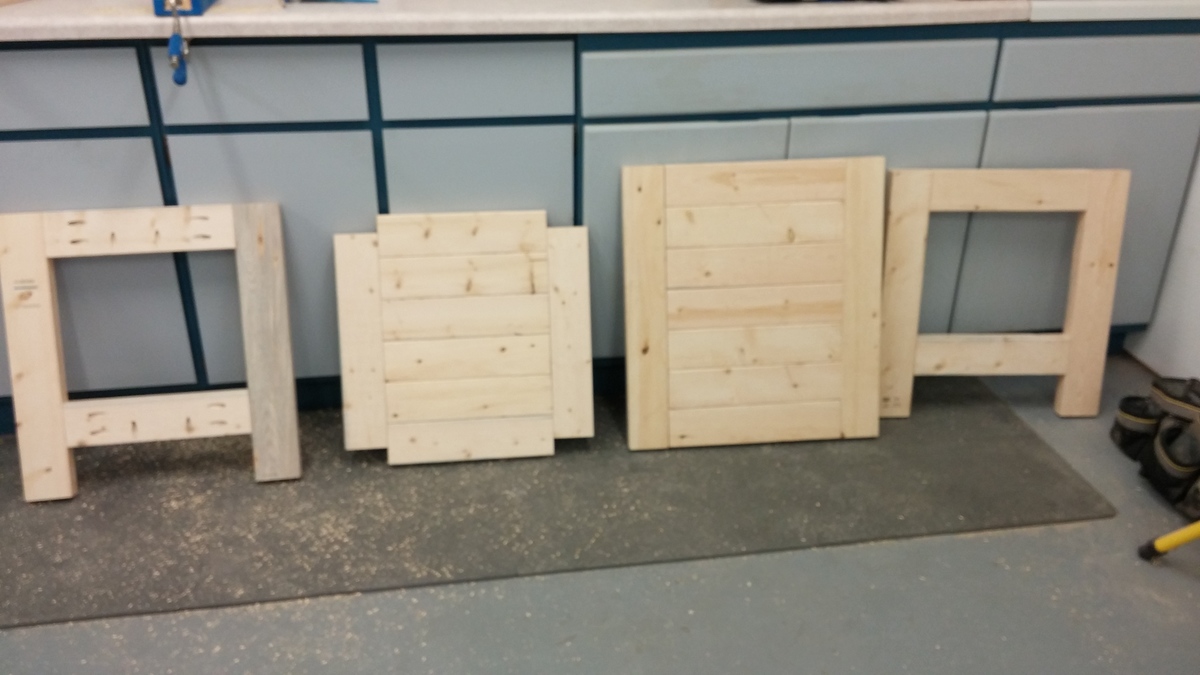
Tryed end table with shelf
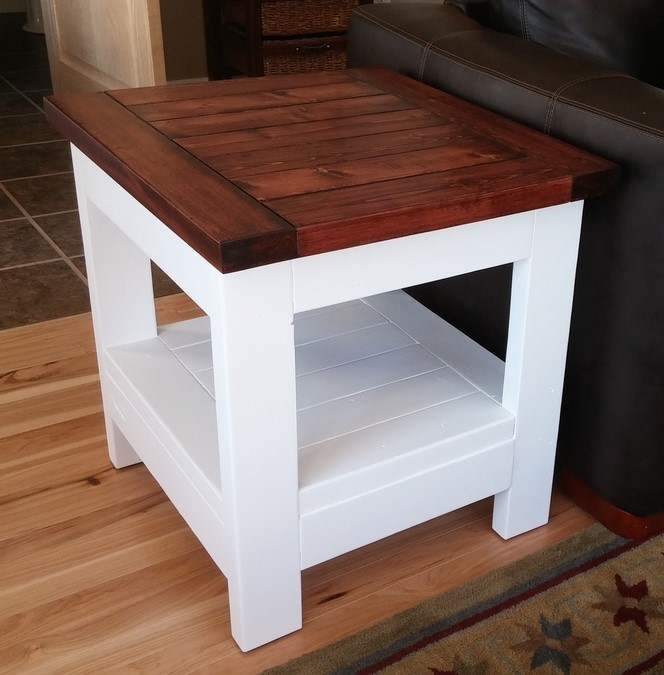
Top 22.5" x 24.5" Base 21"x21" Total height 24"
Built from Plan(s)
Estimated Cost
$25
Estimated Time Investment
Weekend Project (10-20 Hours)
Finish Used
Top finished with minwax red mahogany and polyurethane.
Base finished with Dutch boy trim paint.
Base finished with Dutch boy trim paint.
Recommended Skill Level
Beginner
Christmas Doll House for 3
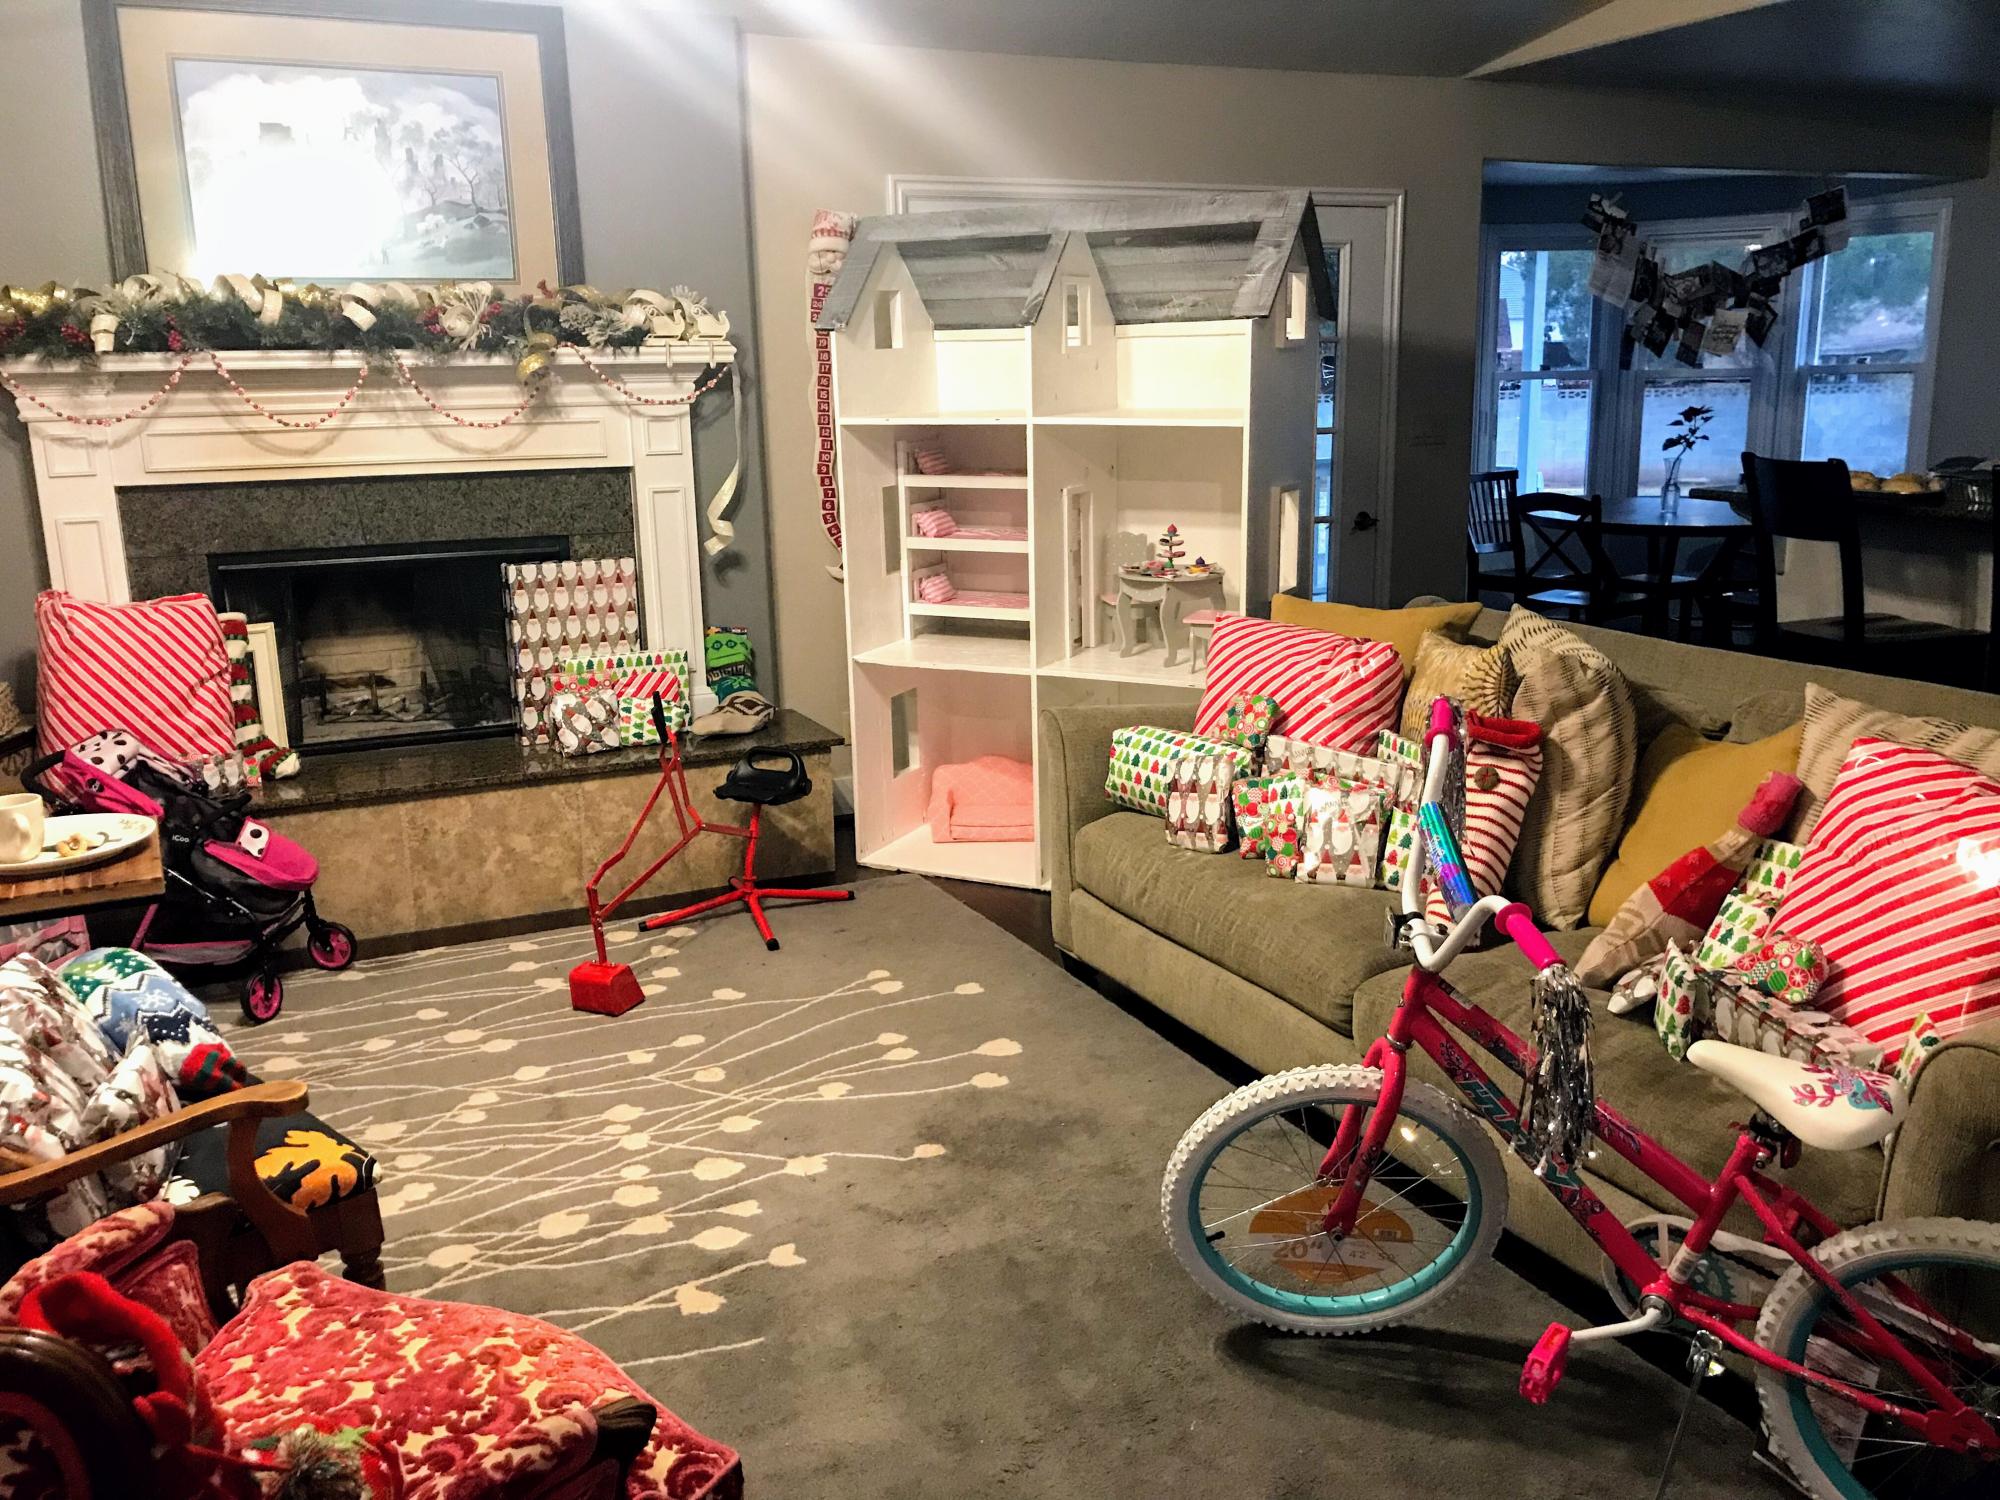
Ana, you saved us! Thanks to you, Santa’s Elf “Ralph,” whipped this up literally the day before Christmas. We have three little girls and wanted to make Christmas magical again after having survived some significant personal tragedy. Christmas has been rather difficult after loss and grief but your doll house was the perfect remedy. Not only do our girls still play with it daily over 9 months later (this has never actually happened with any other toy), but we are thrilled to use it to store all of their dolly clothes and accessories. No mess in our house and it’s super cute! People ask us all the time where we bought it. We tell them it came from Ralph the elf and his bestie Ana White.❤️
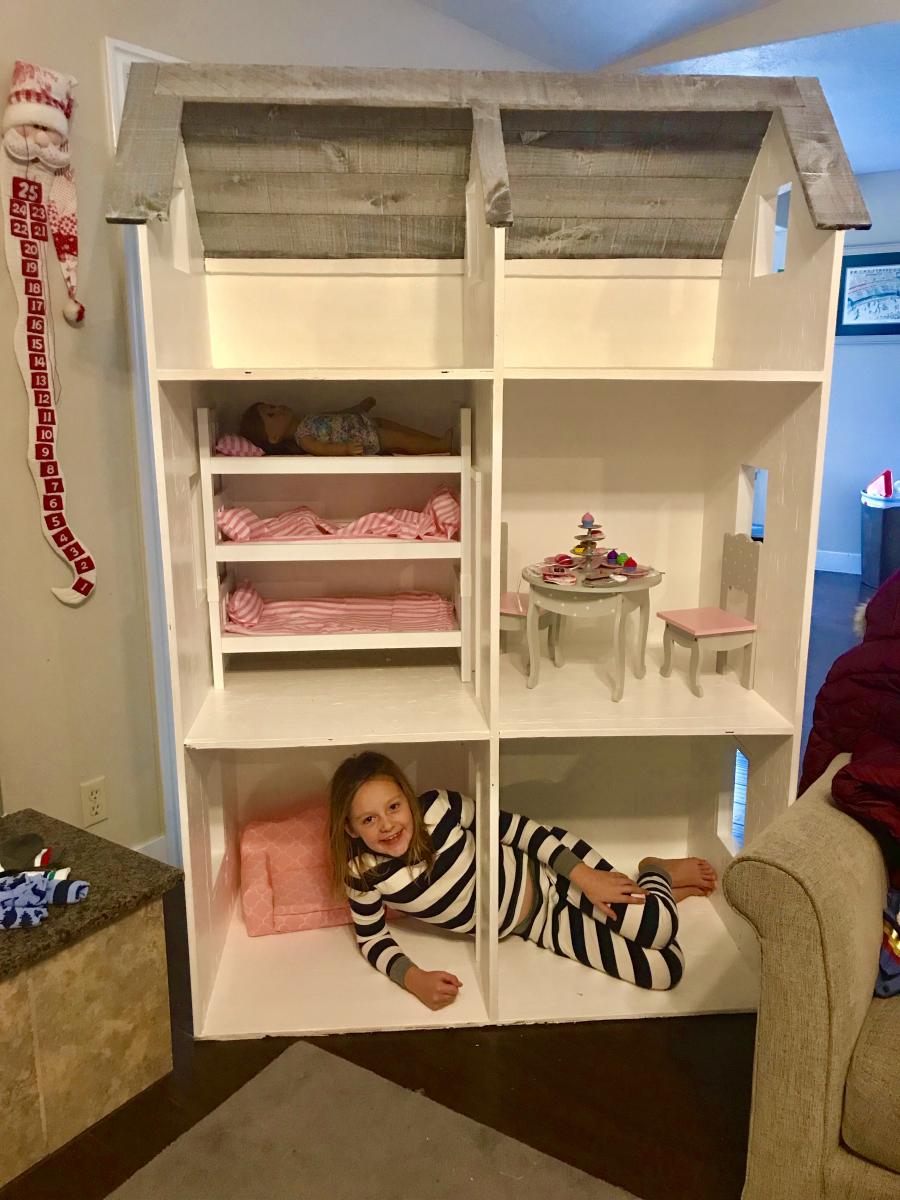

Built from Plan(s)
Estimated Cost
$80
Estimated Time Investment
Day Project (6-9 Hours)
Finish Used
Paint
Recommended Skill Level
Beginner
Comments
Wed, 10/02/2019 - 09:55
This is a gorgeous dollhouse…
This is a gorgeous dollhouse! I especially love the stained roof. And the smiles!
Land of nod knock-off bankable bookcase
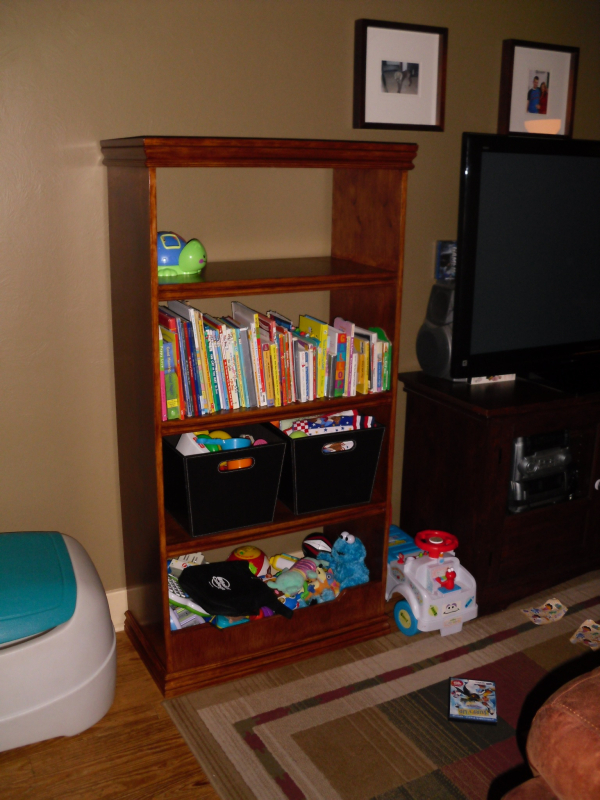
My third project from the Ana-white.com site. Our daughter's books and toys were outgrowing the toy box and small magazine rack we were using, saw this plan, no brainier. It led me the the land of nod website, to see the real deal, and I liked the version with the closed top better, so I modified the plans to fit my needs. Added some trim and oak veneer for the edges, a little stain, and waa laa... Found some boxes at lowe's, perfect fit. We'll move it into her room after I build a new media console for the living room
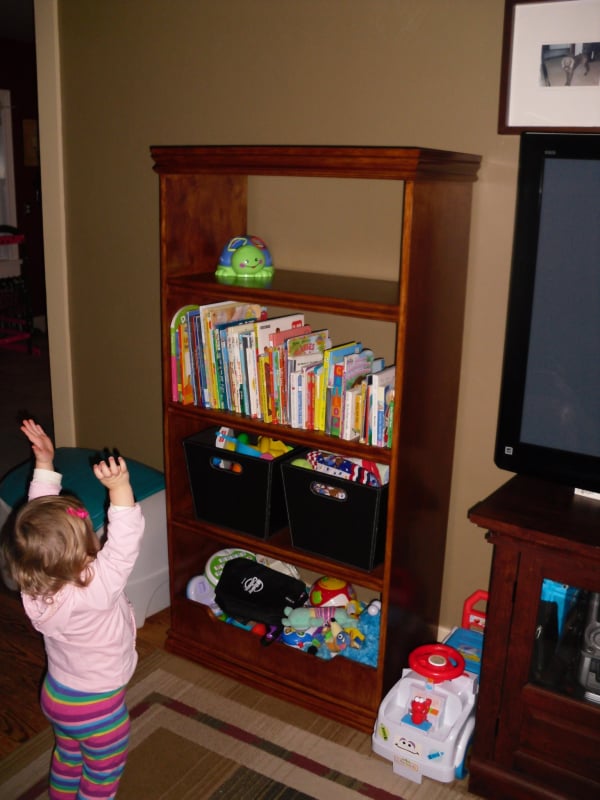
Built from Plan(s)
Estimated Cost
$100
Estimated Time Investment
Day Project (6-9 Hours)
Finish Used
Minwax poly shades antique walnut satin
Recommended Skill Level
Beginner
Comments
Thu, 01/19/2012 - 11:17
Could you tell me your exact
Could you tell me your exact modifications? I love your book case!!
Fri, 01/20/2012 - 22:18
Plans are up!
Thanks! I just figured out how to use google Sketchup today... here are the plans..
http://ana-white.com/2012/01/plans/full-toy-box-bookcase-0
Thanks to Ana as well, for her google Sketchup "How-To" article, it helped out alot.
Emerson Buffet
We made this based on the Emerson Buffet plans, but modified to fit our current TV accessories. We also added legs, instead of the framed base.
Built from Plan(s)
Estimated Time Investment
Weekend Project (10-20 Hours)
Recommended Skill Level
Beginner