Farmhouse Bed for Yurt Living
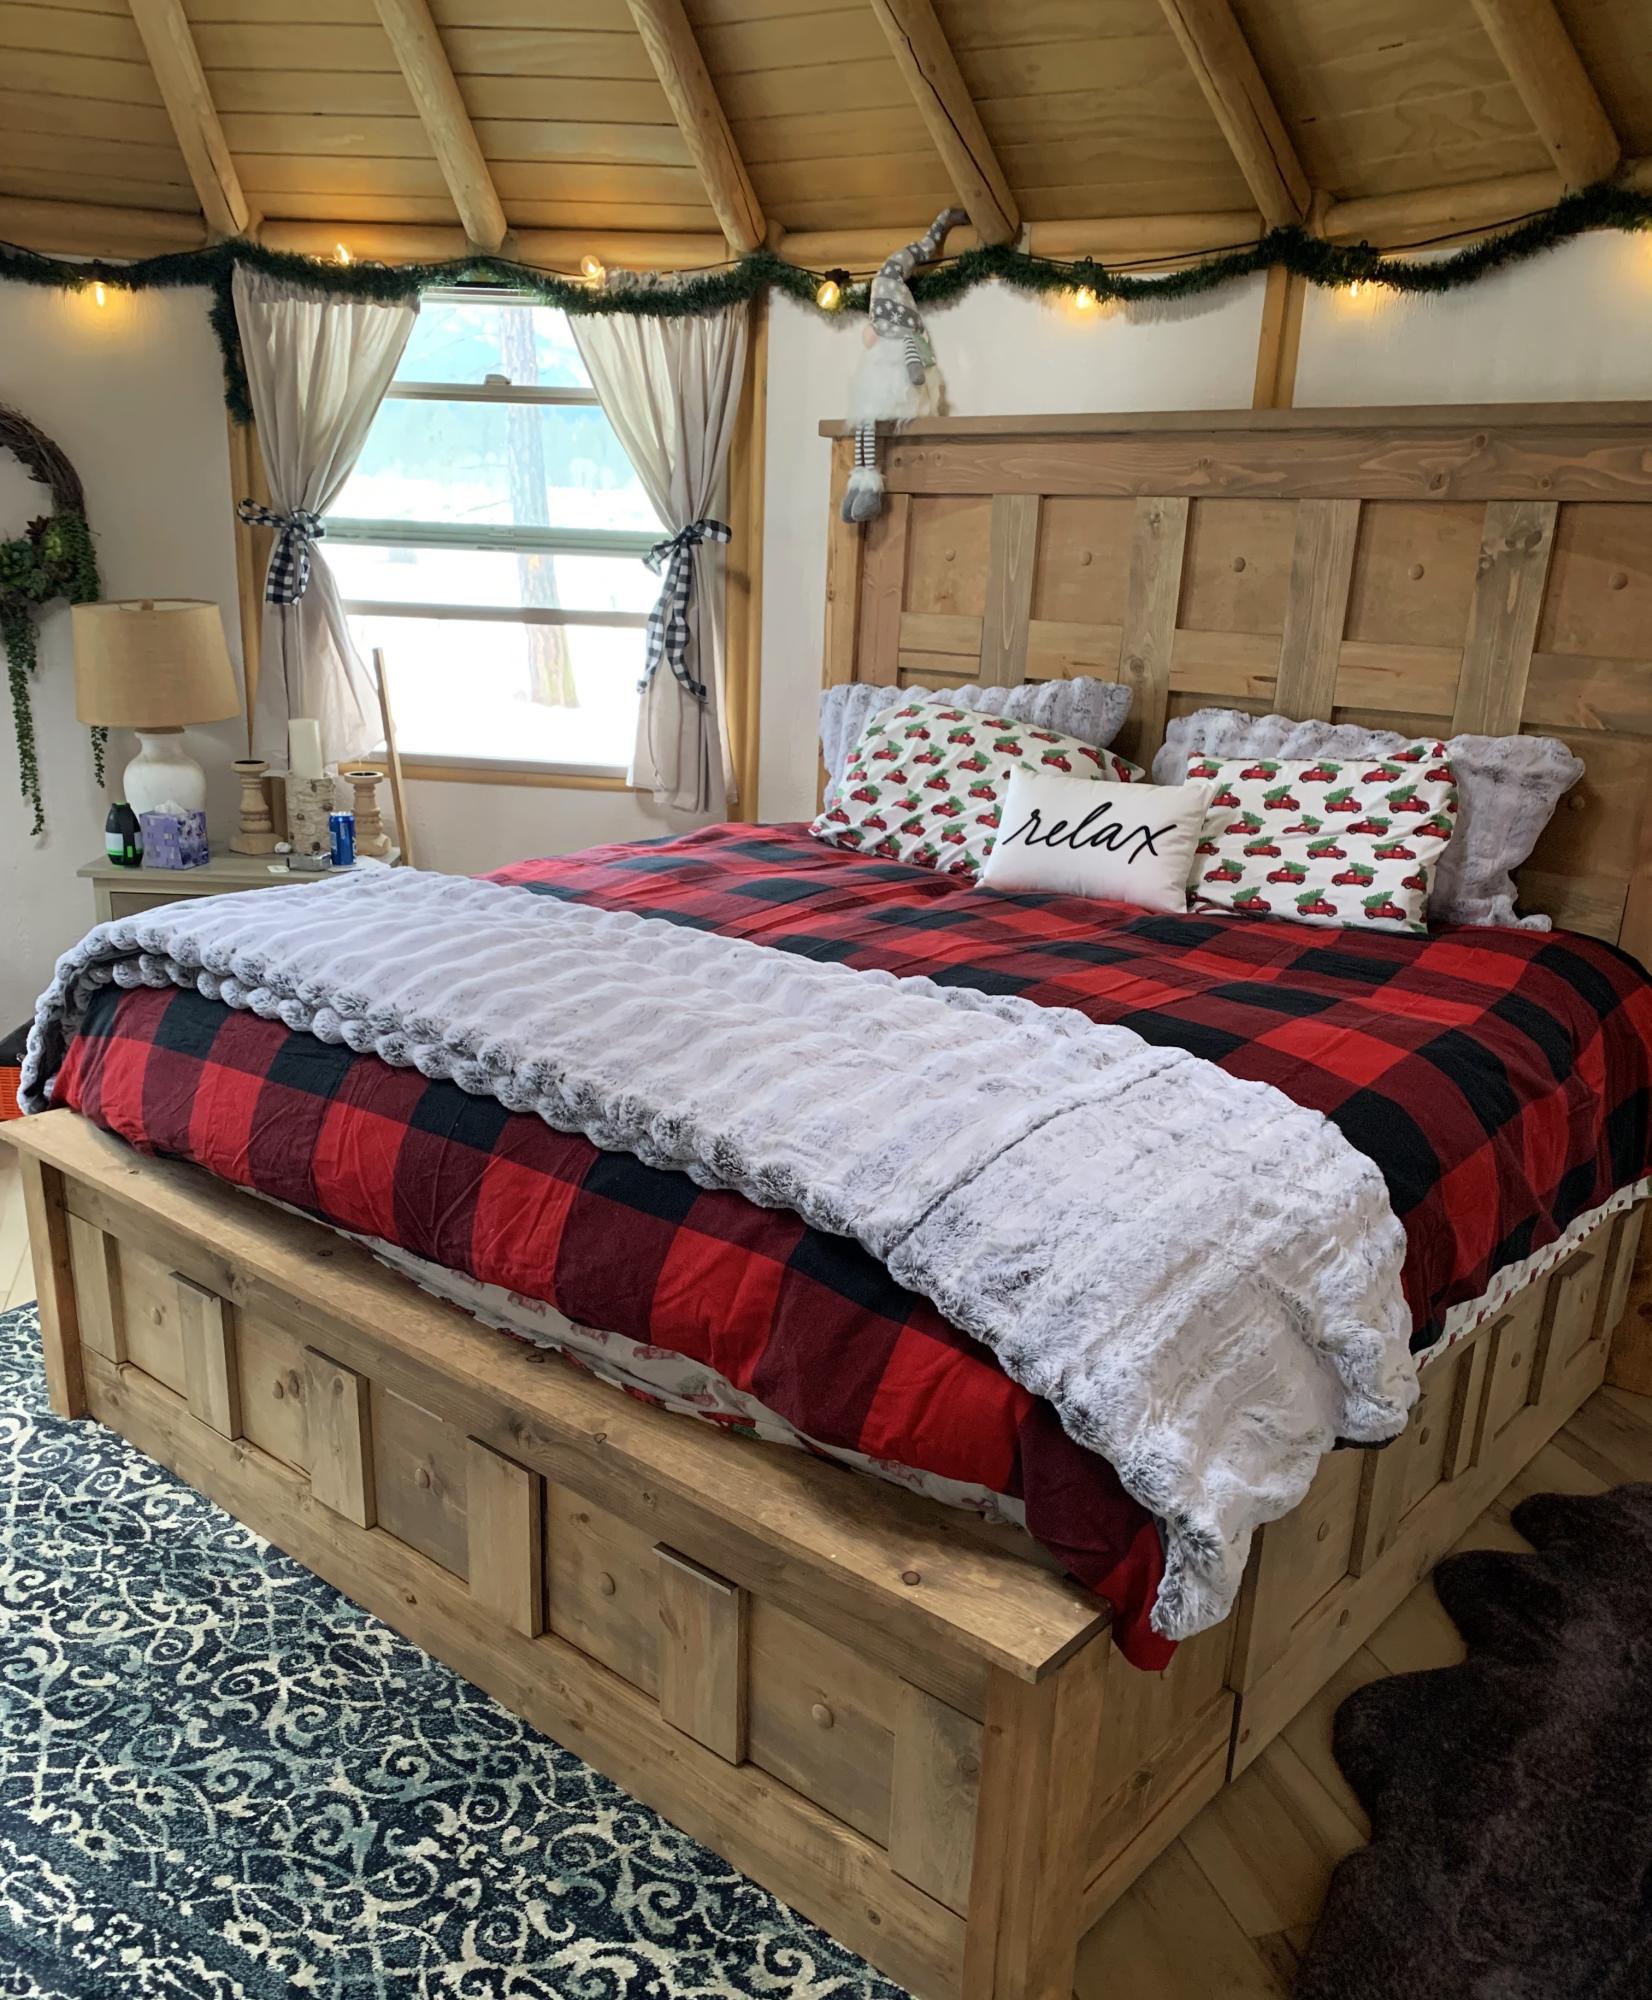
King bed with storage for yurt.
Using instructions from Ana and tweaking them a little.

Built from Plan(s)
Seasonal And Holiday
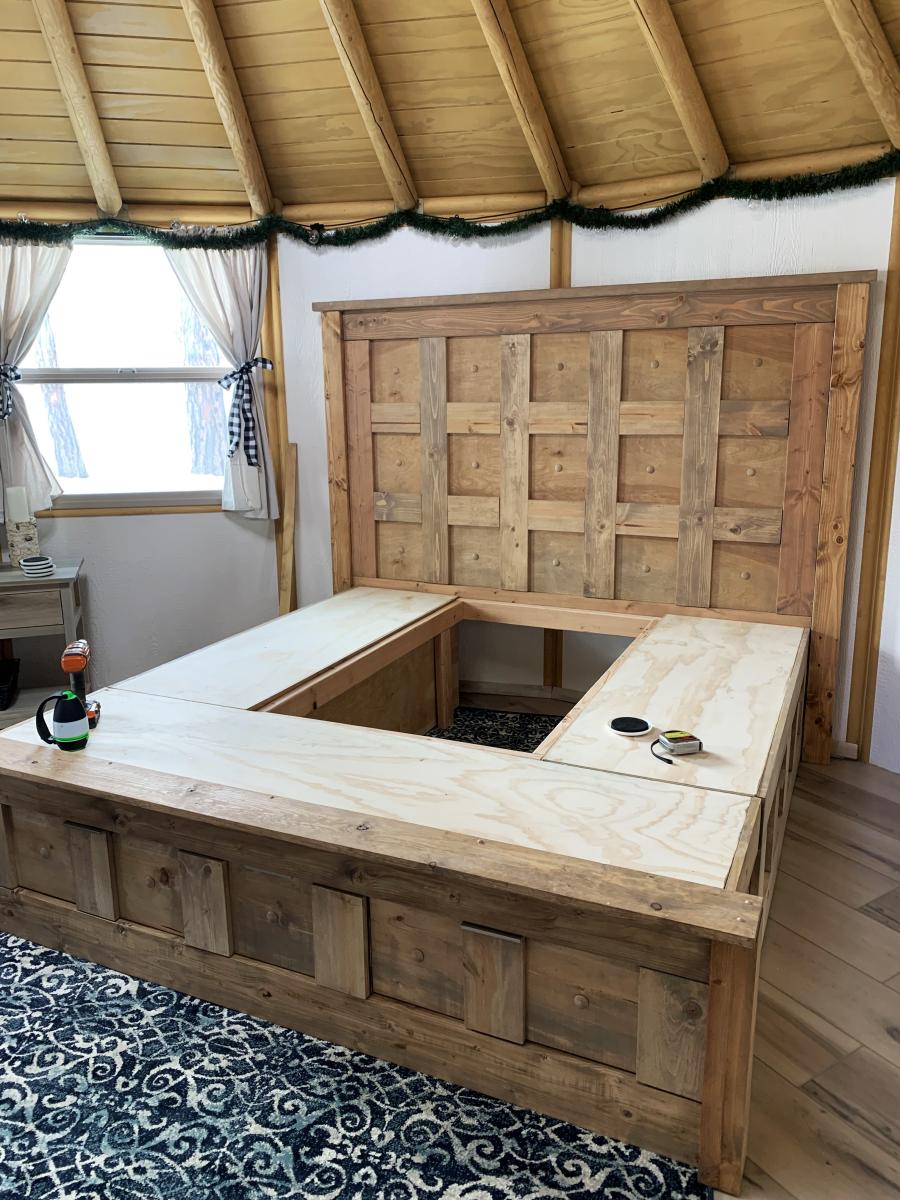
King bed with storage for yurt.
Using instructions from Ana and tweaking them a little.

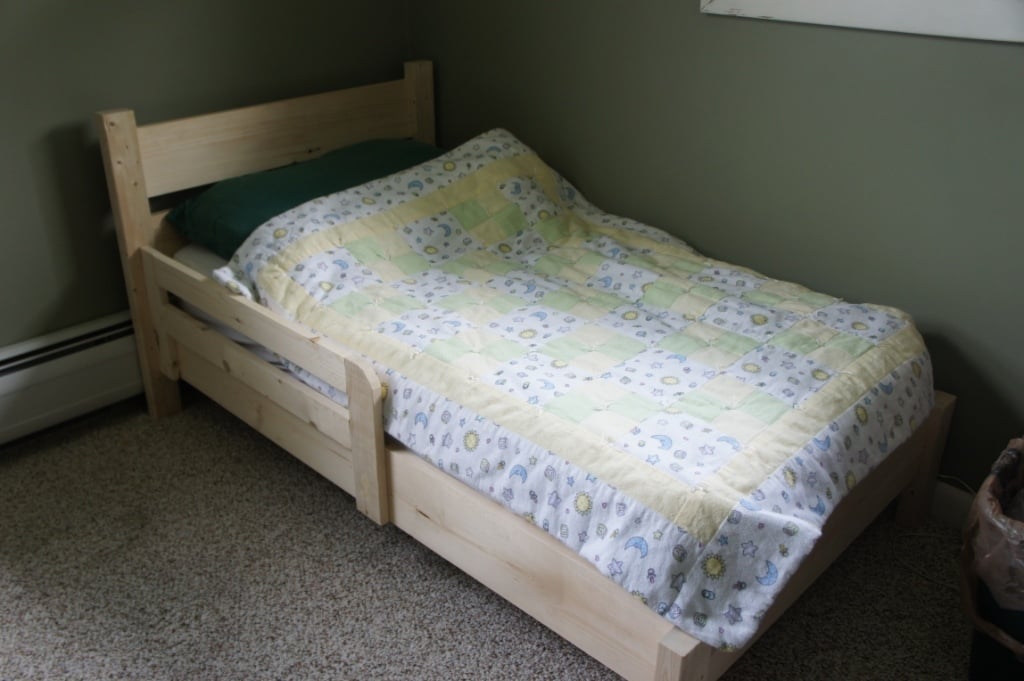
I made this bed for my daughter who is not yet two, but can climb out of her crib.
I needed to use some different lumber: 2x3's instead of 2x2's and 1x3's instead of 1x2's. I adjusted the headboard, as beadboard was not available and this simple design seemed more suitable for us. I was very pleased with the simplicity of the plan, although I wish I had read it more carefully before I began. I loved the Kreg jig also. Very easy to use.
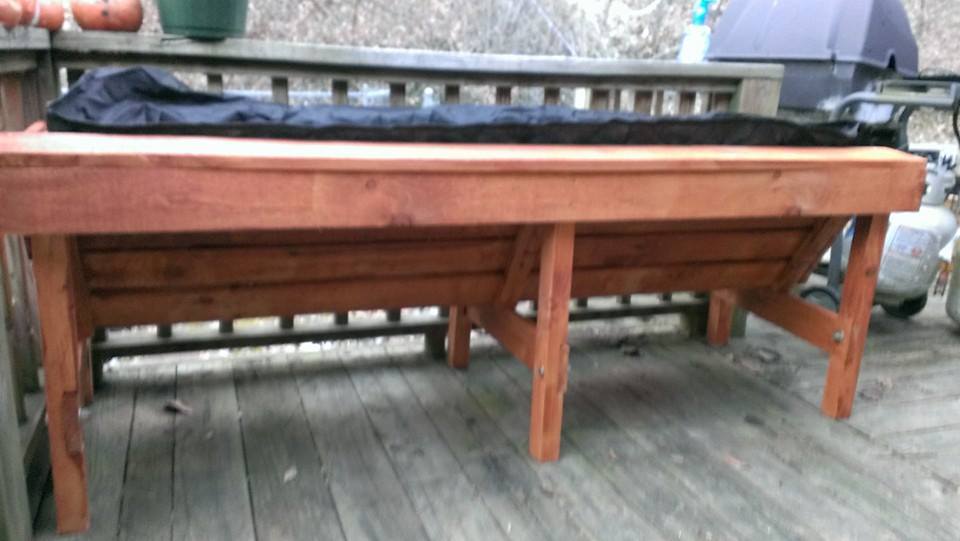
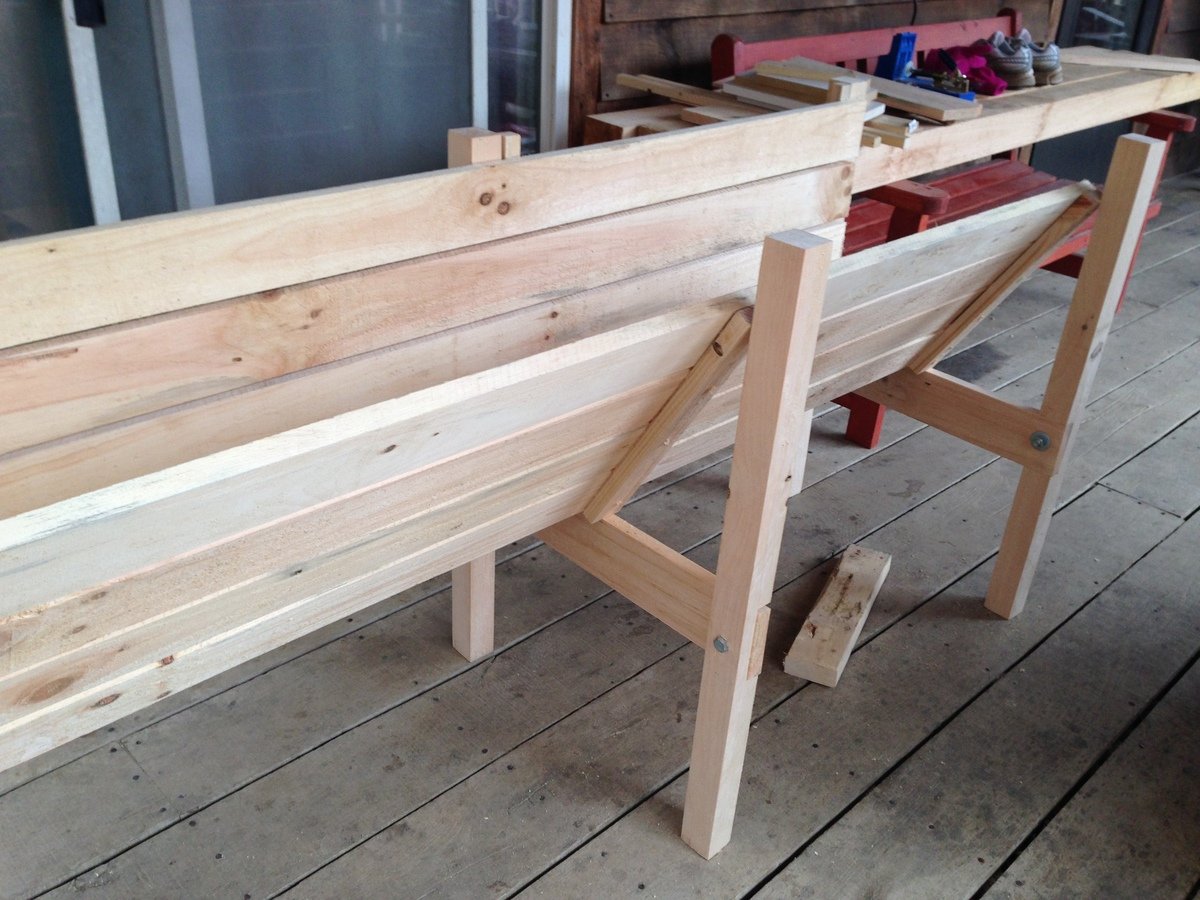
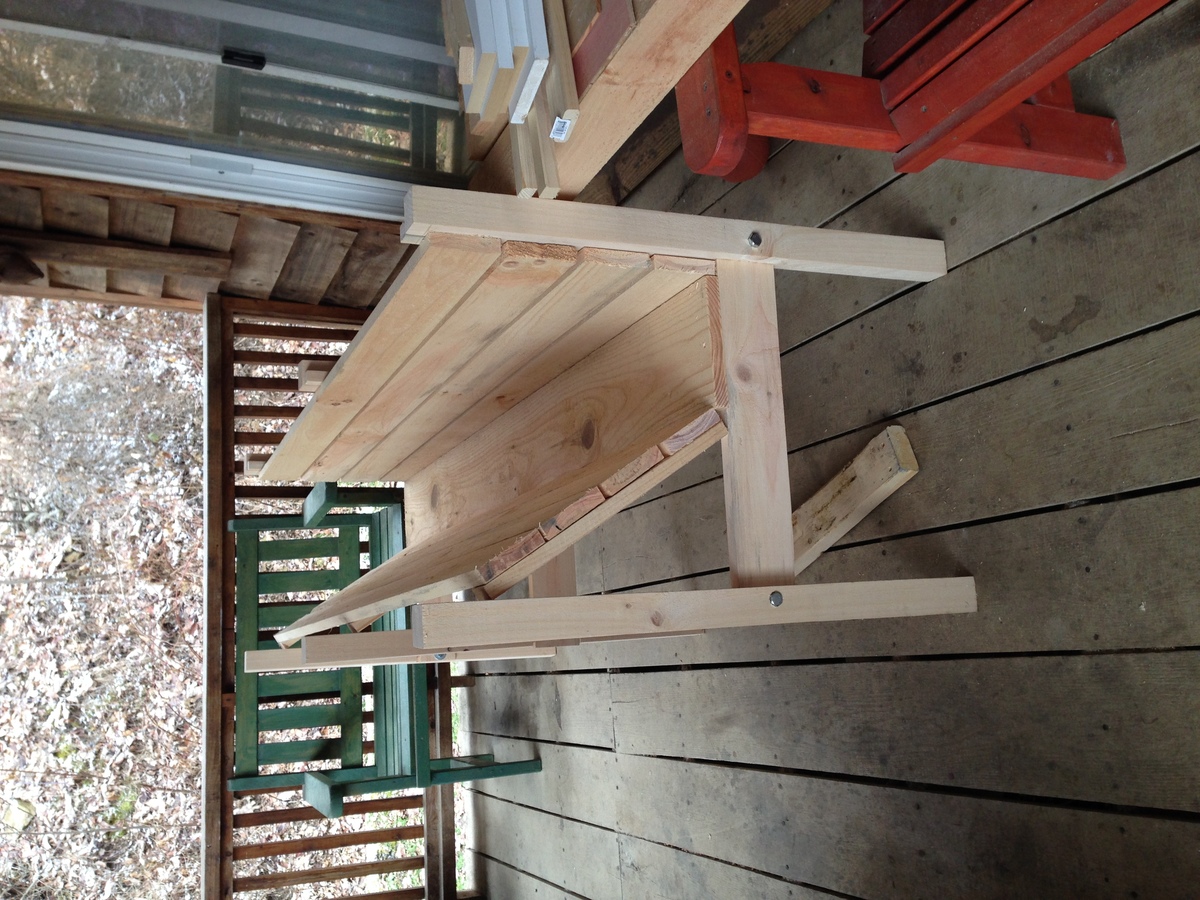
A friend needed a raised garden bed for her husband who is in a wheel chair. I searched and found the VegTrug's. It took a lot of trial and error. I based it off Williams Sonoma's pictures. I wouldn't of attempted this with out a plan if it weren't for Ana's website.
Tue, 03/11/2014 - 09:57
Dear CaronGirls, Are plans available for this?
Tue, 05/19/2015 - 06:54
This looks great - I would love to try this...are there plans available?
Sun, 04/24/2016 - 06:25
All the responses say to go to the plan catalog. Link does not work. I looked for an hour. Please help, I really want this plan!,
Wed, 05/18/2016 - 21:45
Not sure what the story is here, Maybe she got in trouble for saying Vegtrug? I would like plans for a DIY Raised planter bed like the above.
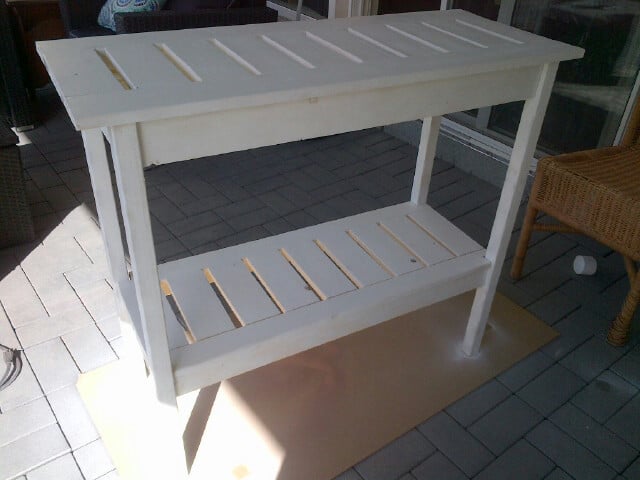
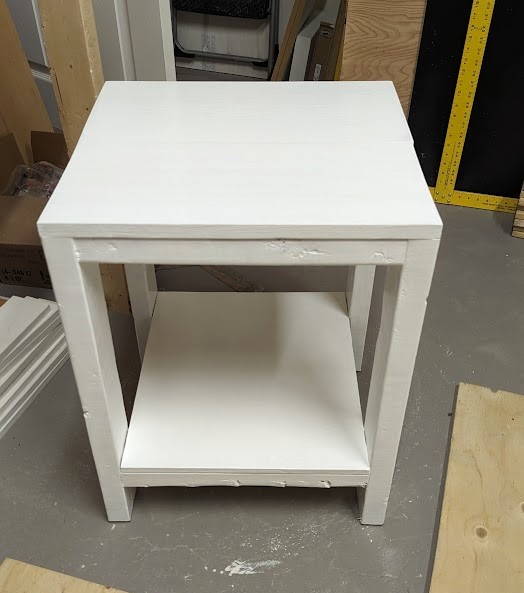
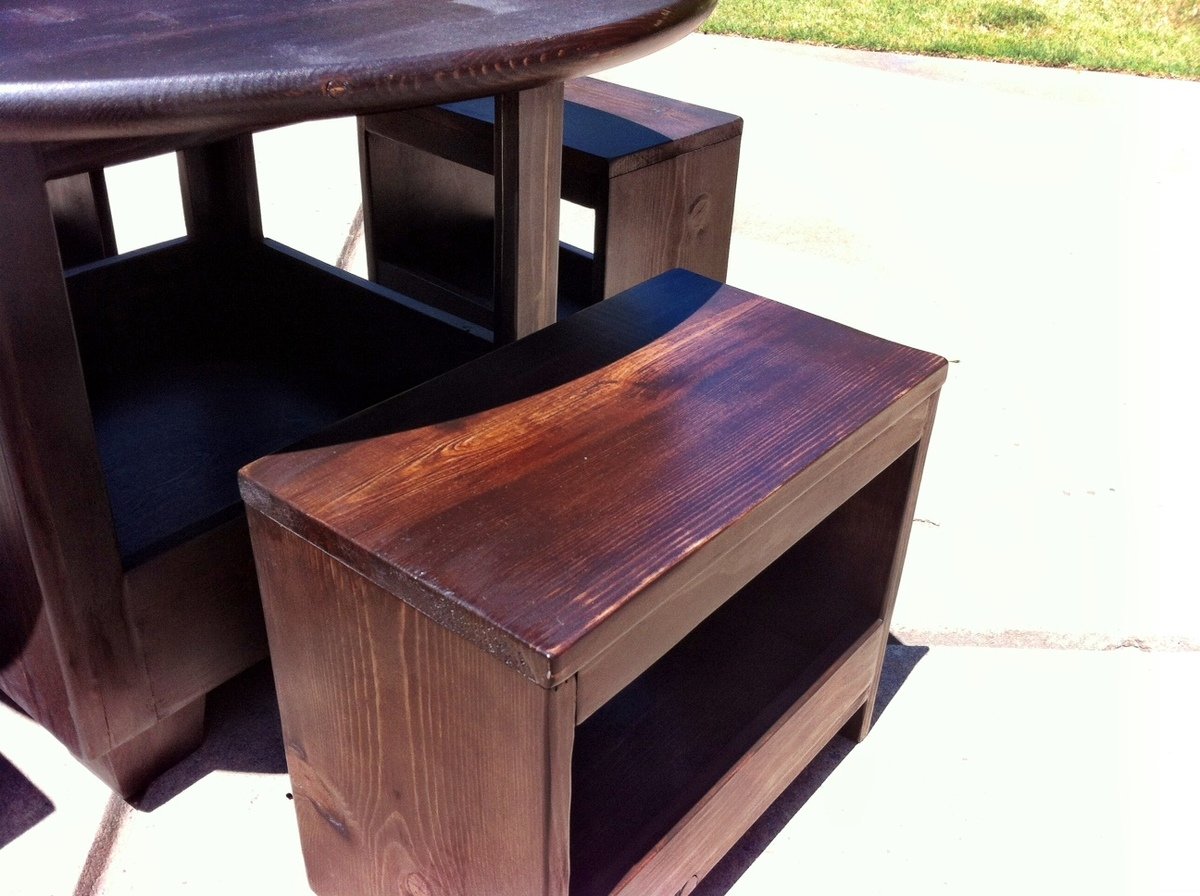
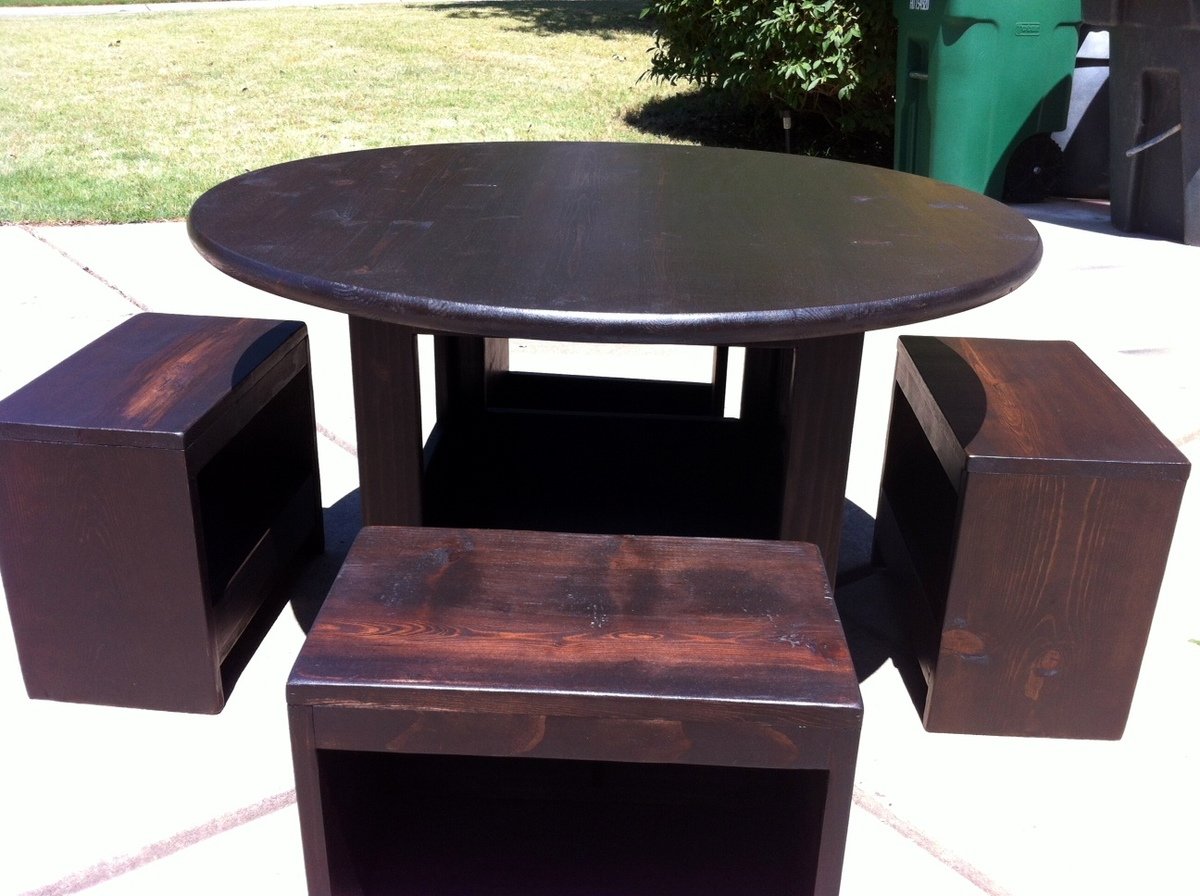
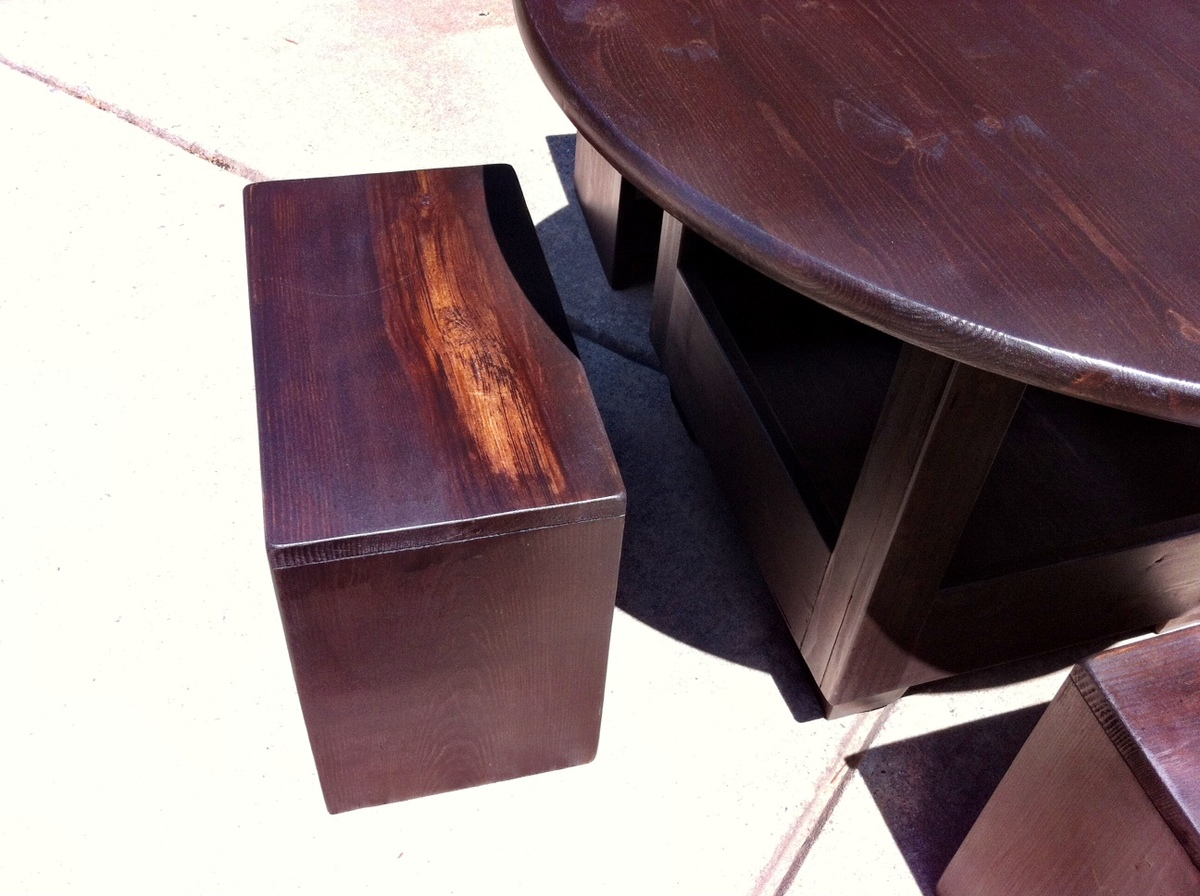
Console table with straight stair legs
Your plans are awesome!! Your YouTube videos rock!

25" height, using it as a lunch table. Did a polyurethane varnish.
Miss Isabelle

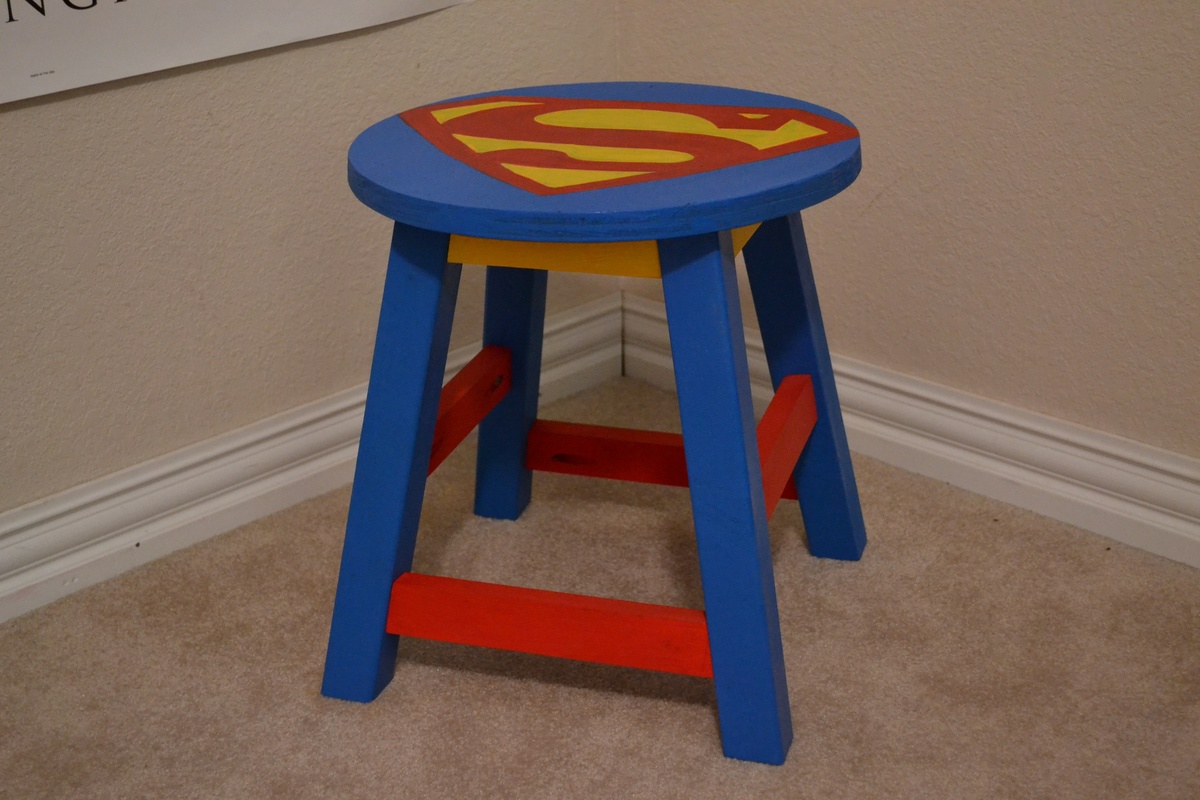
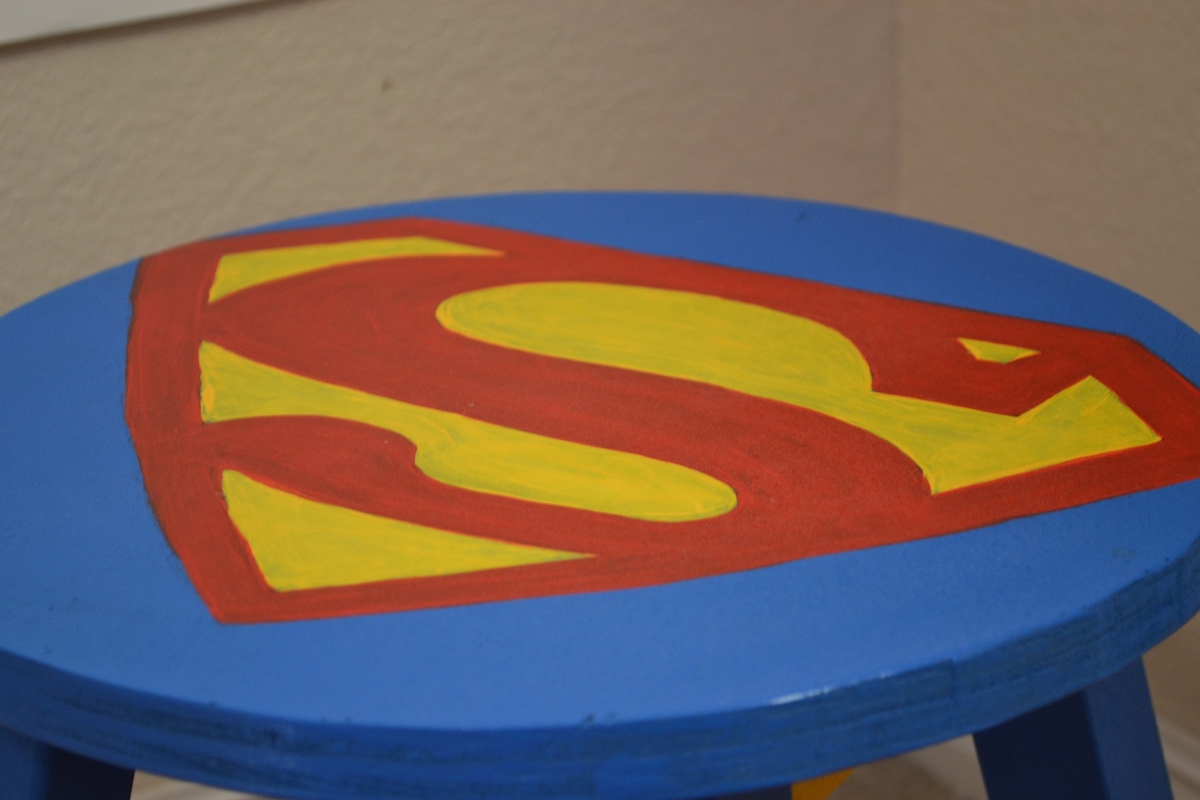
This stool is a gift for my nephew's 4th birthday!! The hardest thing about this stool is trying to get all the legs put together without having enough room to get the drill at the right angle. This time, we used an extender piece on the drill bit (duh!) and it was MUCH easier than the other stools we have built.
I used a projector to put the trace the Superman symbol, then painted it.
I hope he likes it!!!

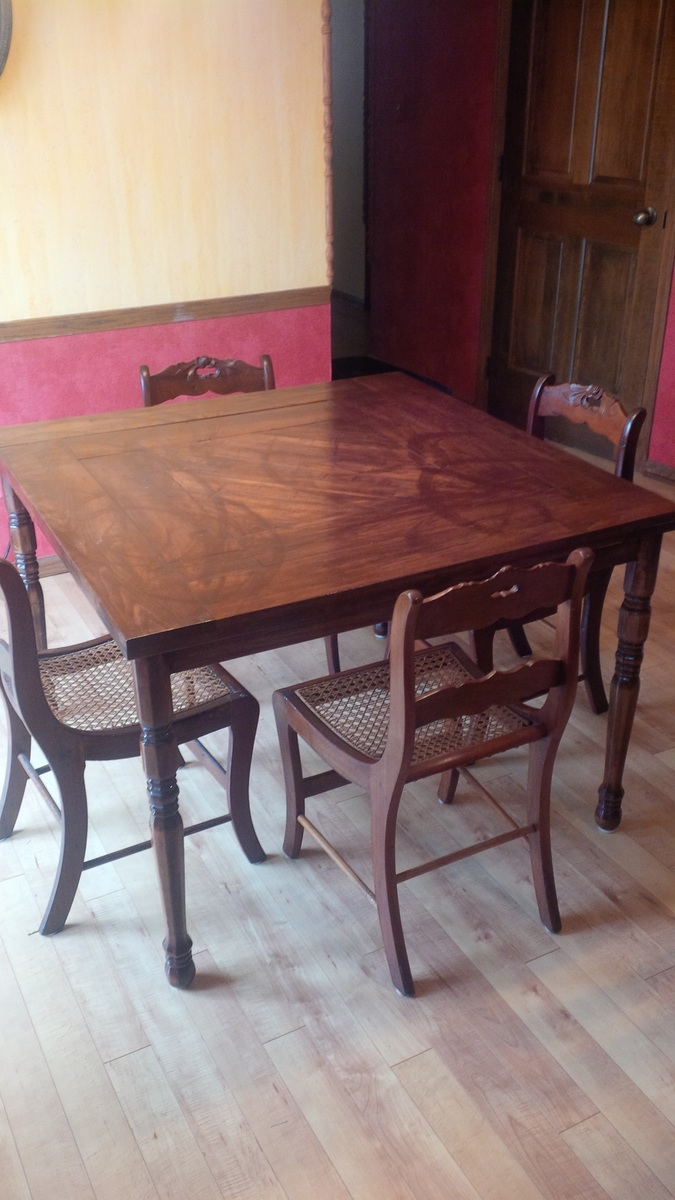
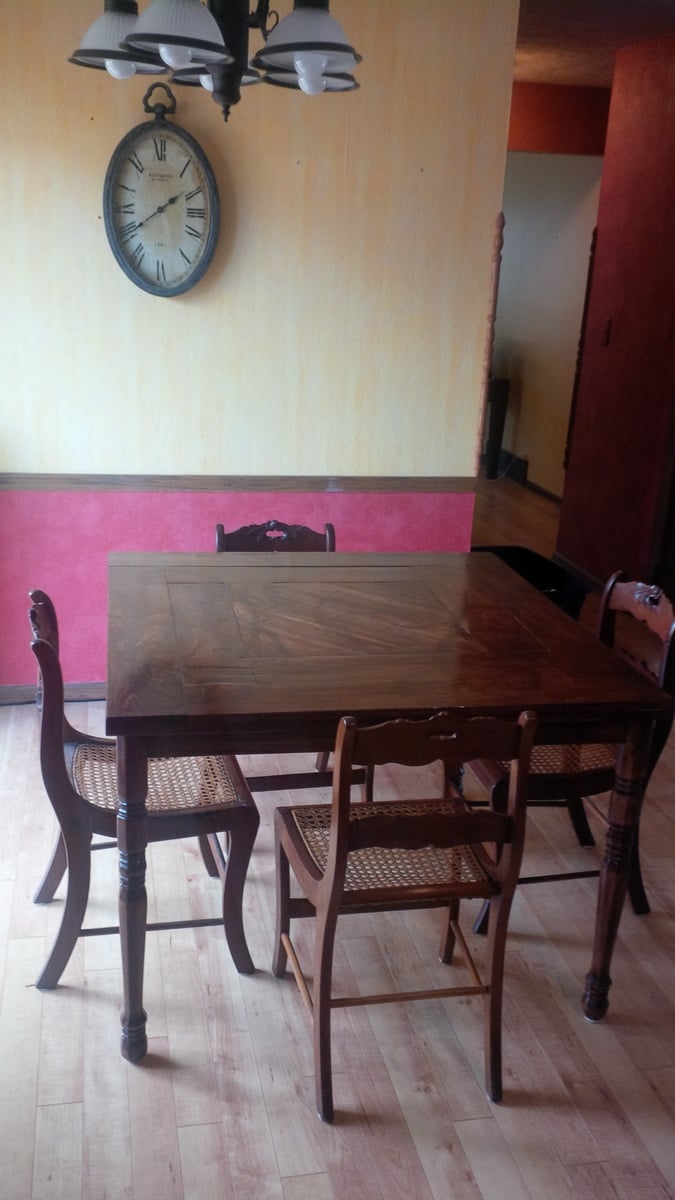
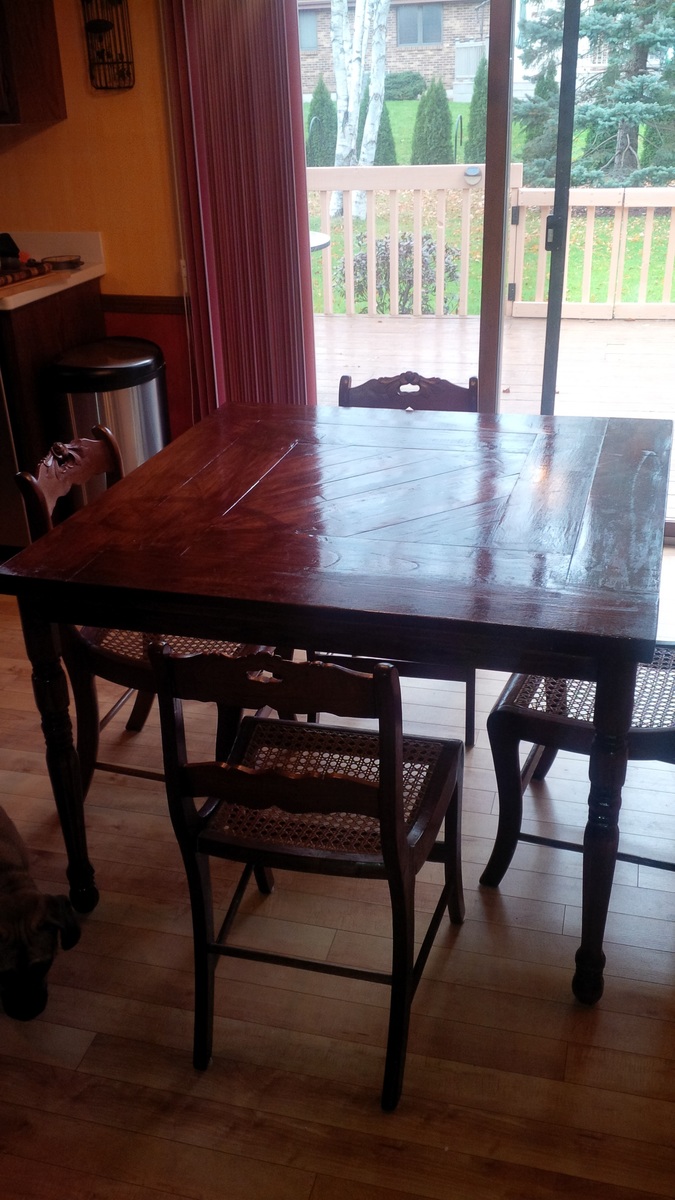
After I found these awesome walnut chairs on craigslist, I did by best to match the stain and build a kitchen table on the cheap for our new house. As you can see, I modified the design into a square to fit the space. I also attempted to create a unique design by making diagonal cuts with the miter saw and connecting everything in the underbelly with my Kreg Jig. My one regret is that after my palm sander broke, instead of buying a replacement, I got a little hyperactive with my belt sander. It ended up making a unique swirl design over the grain. A part of me thinks it looks cool and the other part thinks it looks ridiculous. The moral of the story is never use a belt sander on something you intend to stain.
Sat, 03/08/2014 - 16:33
I've accidentally done the same thing with the sander on pieces of my furniture too. I don't think yours looks ridiculous at all- it is a really beautiful table!!
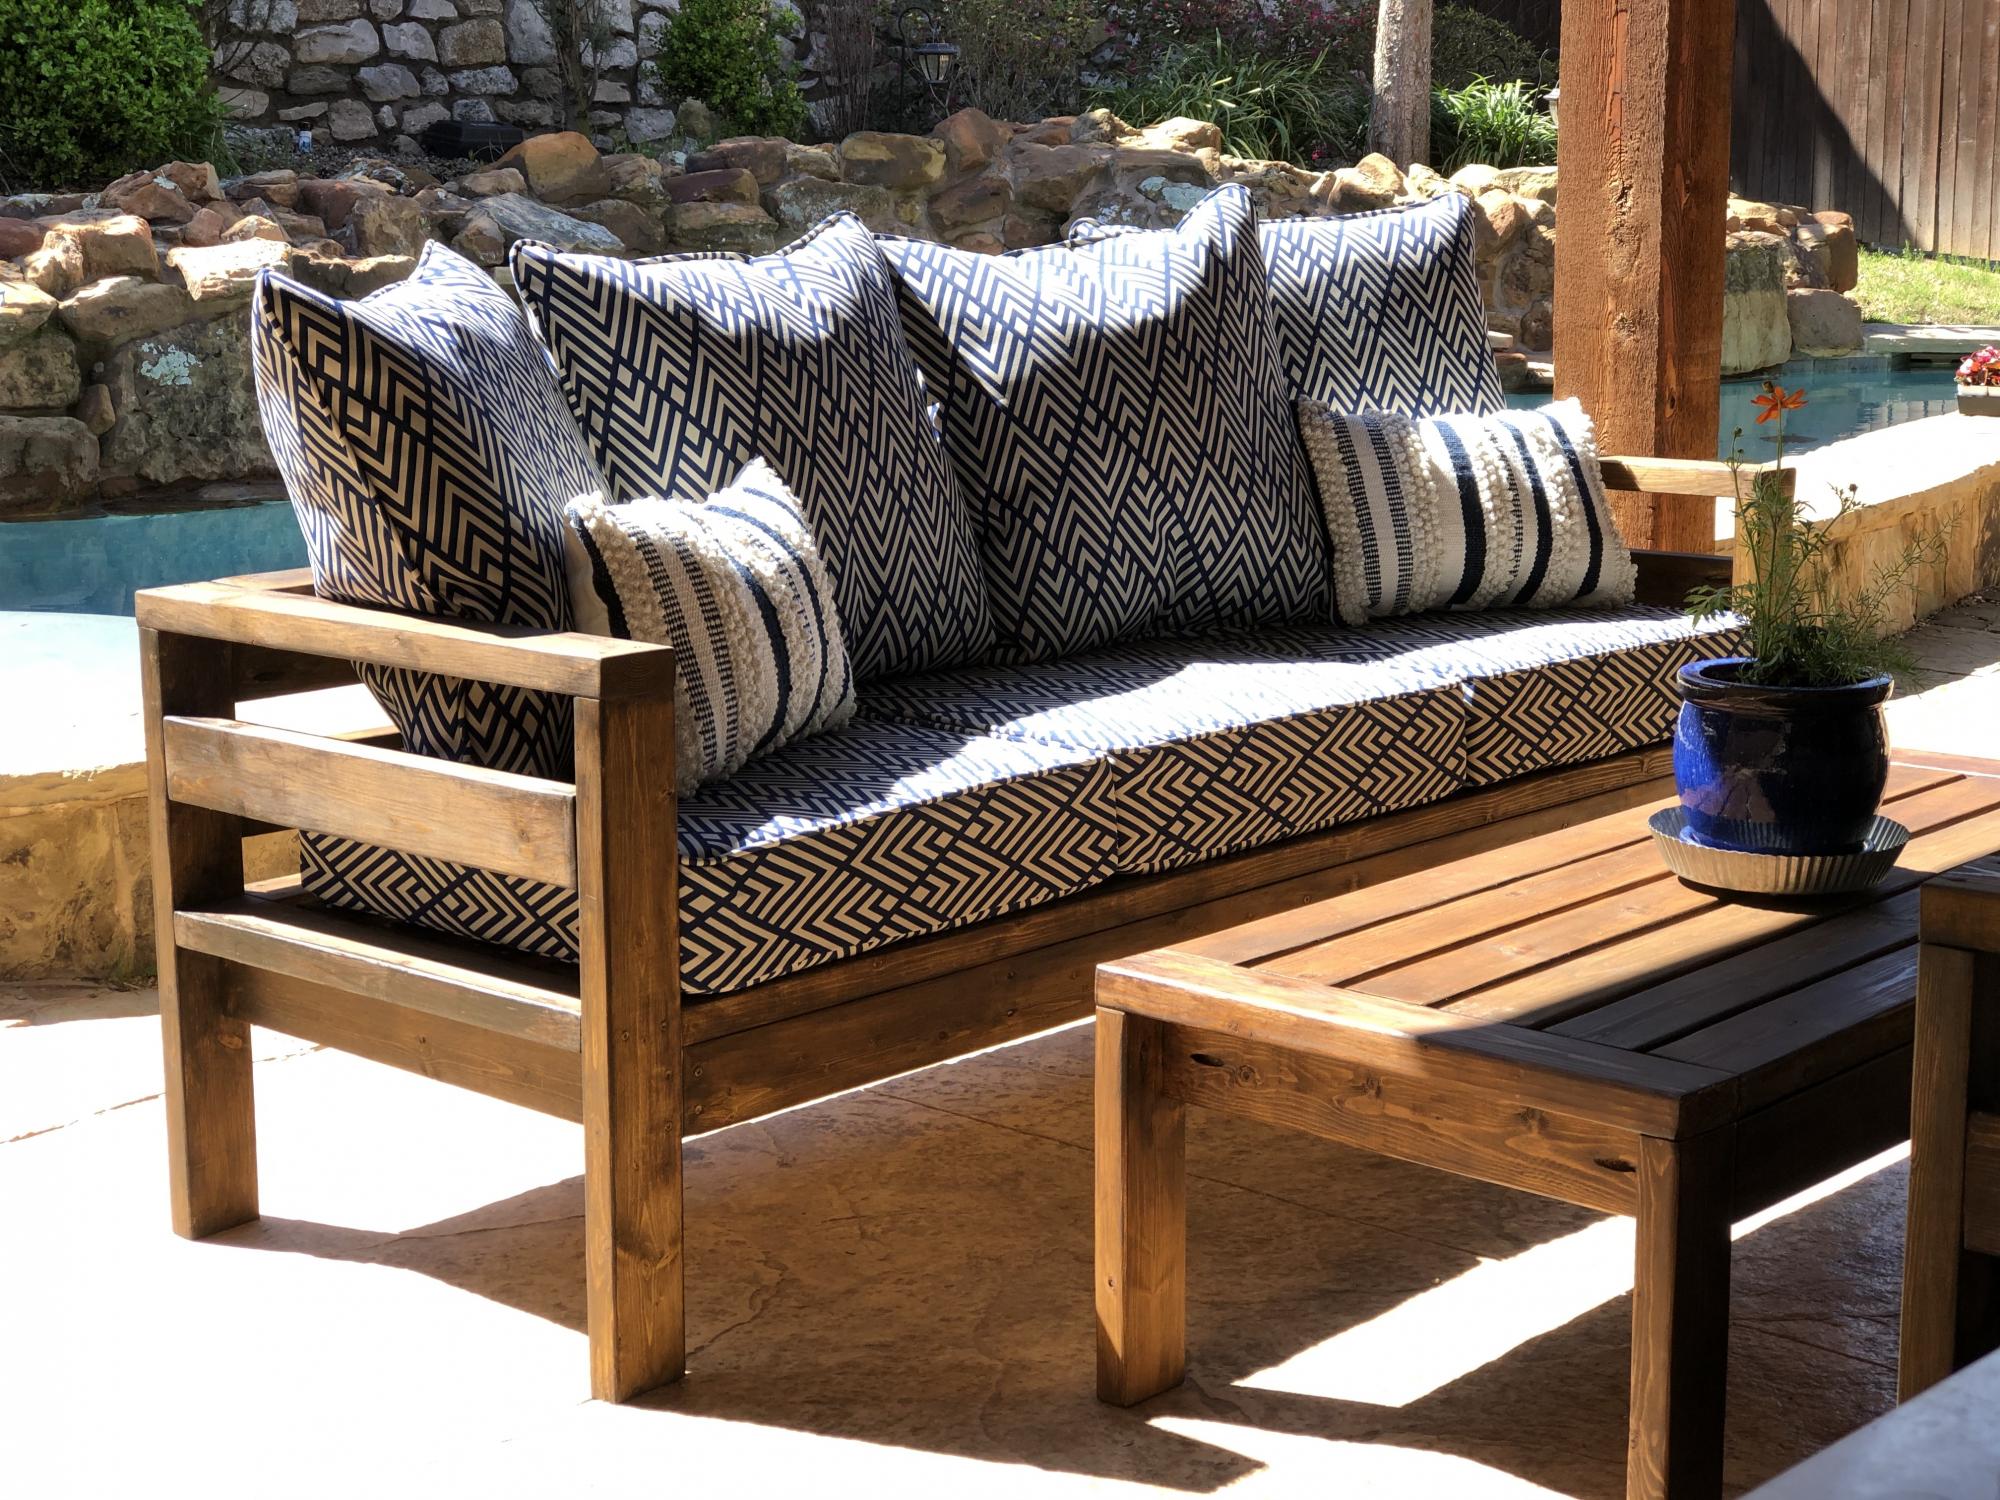
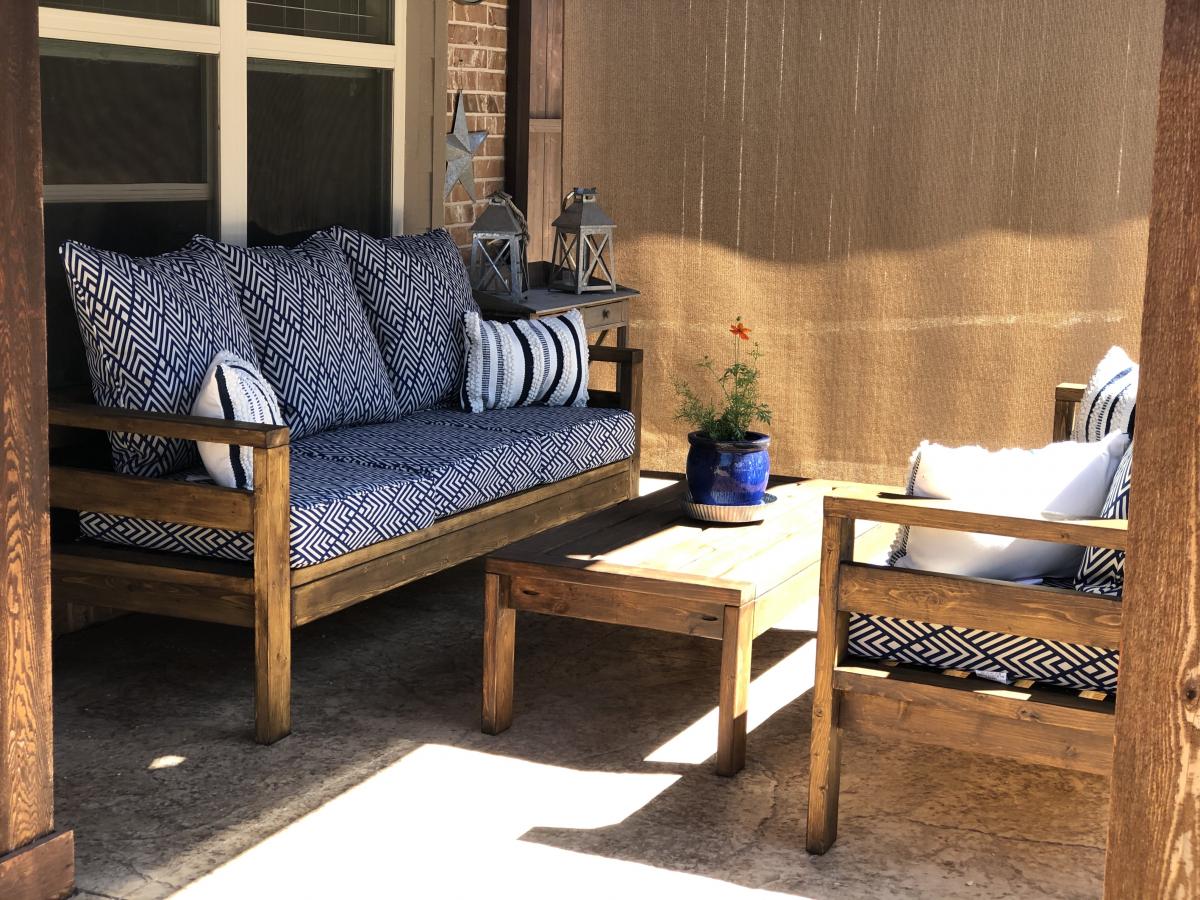
We LOVE our new patio set! Total cost of 2 sofas, coffee table and cushions: $530
Cushions B&G Retro Diamonds Deep Seat cushion set purchased from Walmart.
Thanks for sharing the plans!
Adjusted a little from the plans to fit better the space available. Also I used some scrap plywood for the bottom.
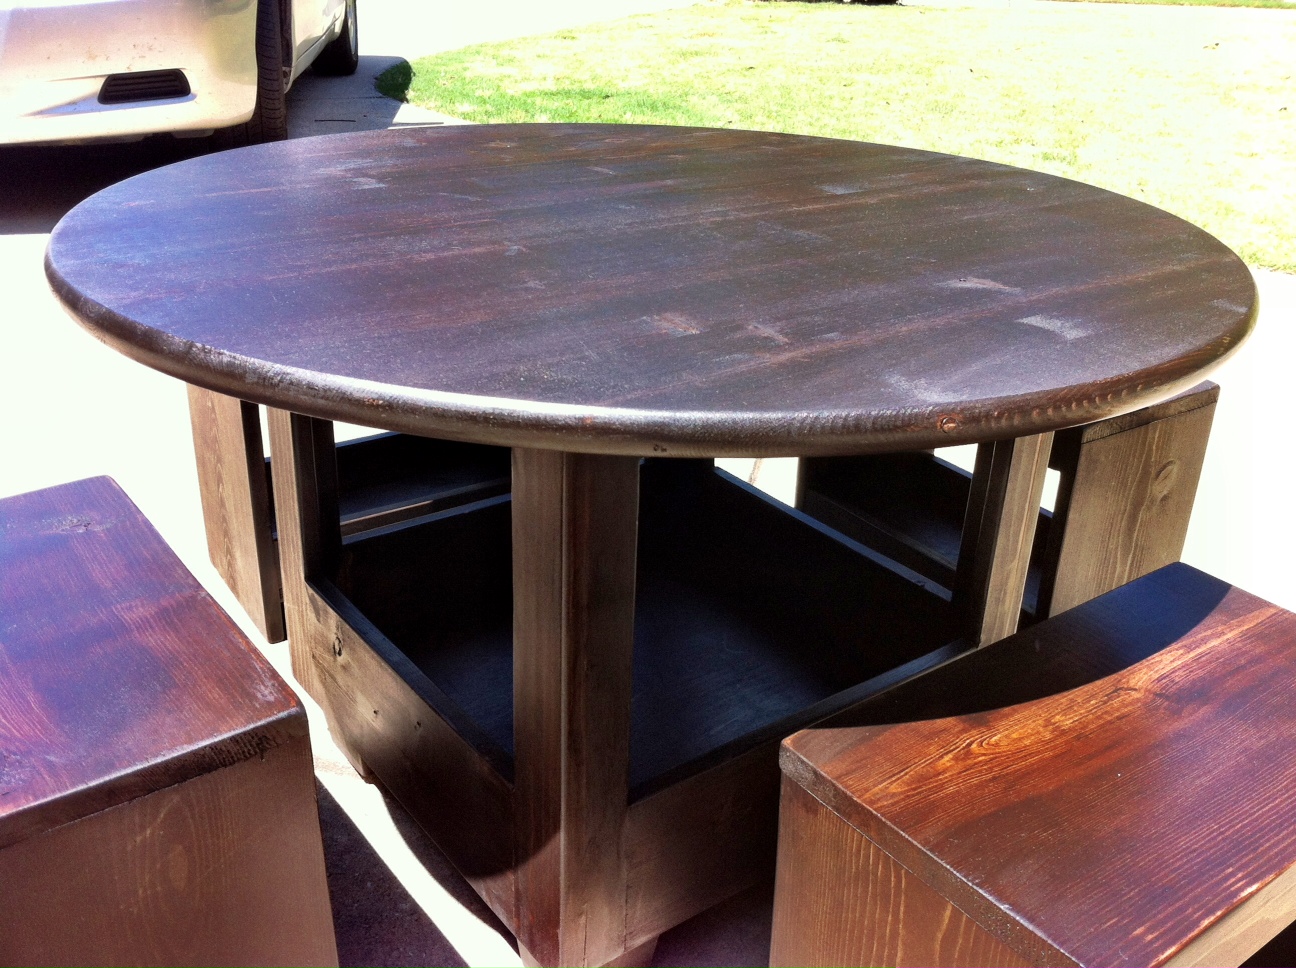
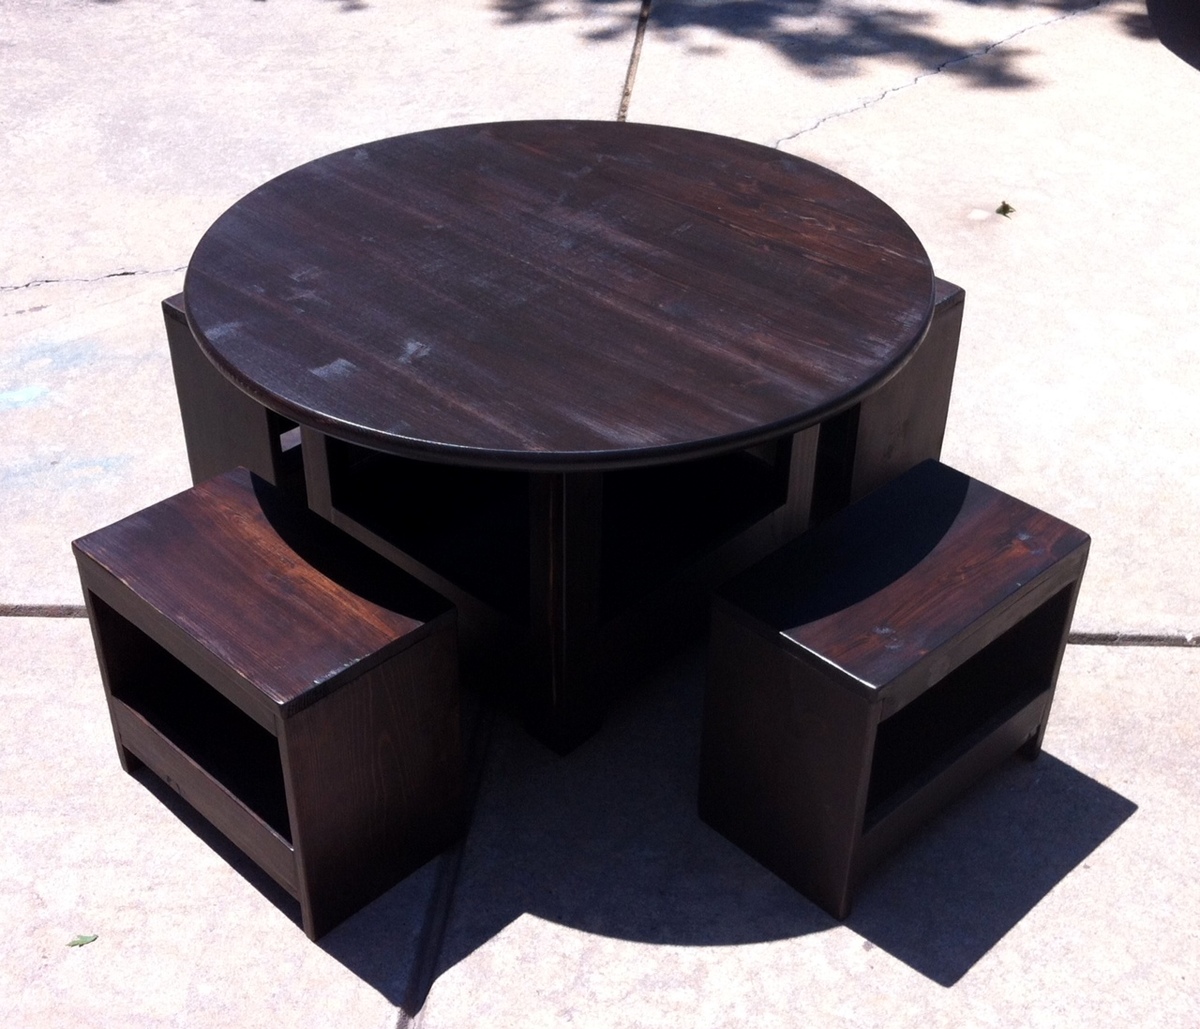
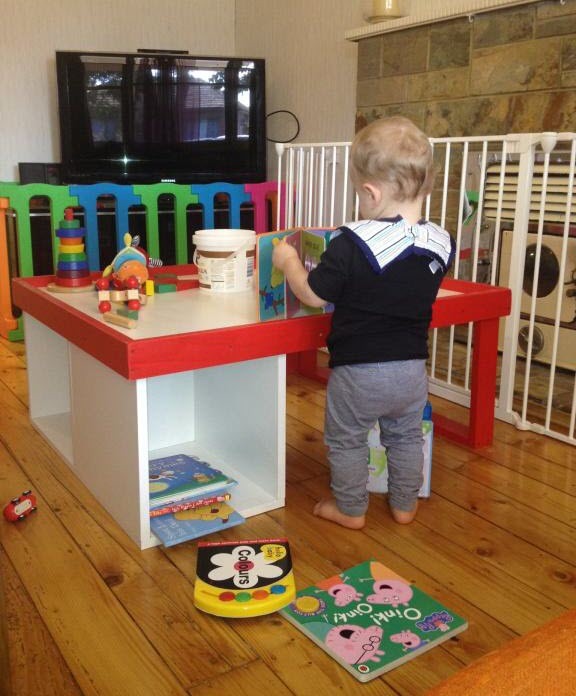
I built a storage table and stools for my son's school class project and my wife wanted a set for her mom to give to her on Mother's Day.
This was a really easy and inexpensive project. As I don't have a table saw and I'm scared to death of my circular saw, I had the laminated MDF cut to size and edged. Assembly and painting was really quick. This little man will road test it for me!
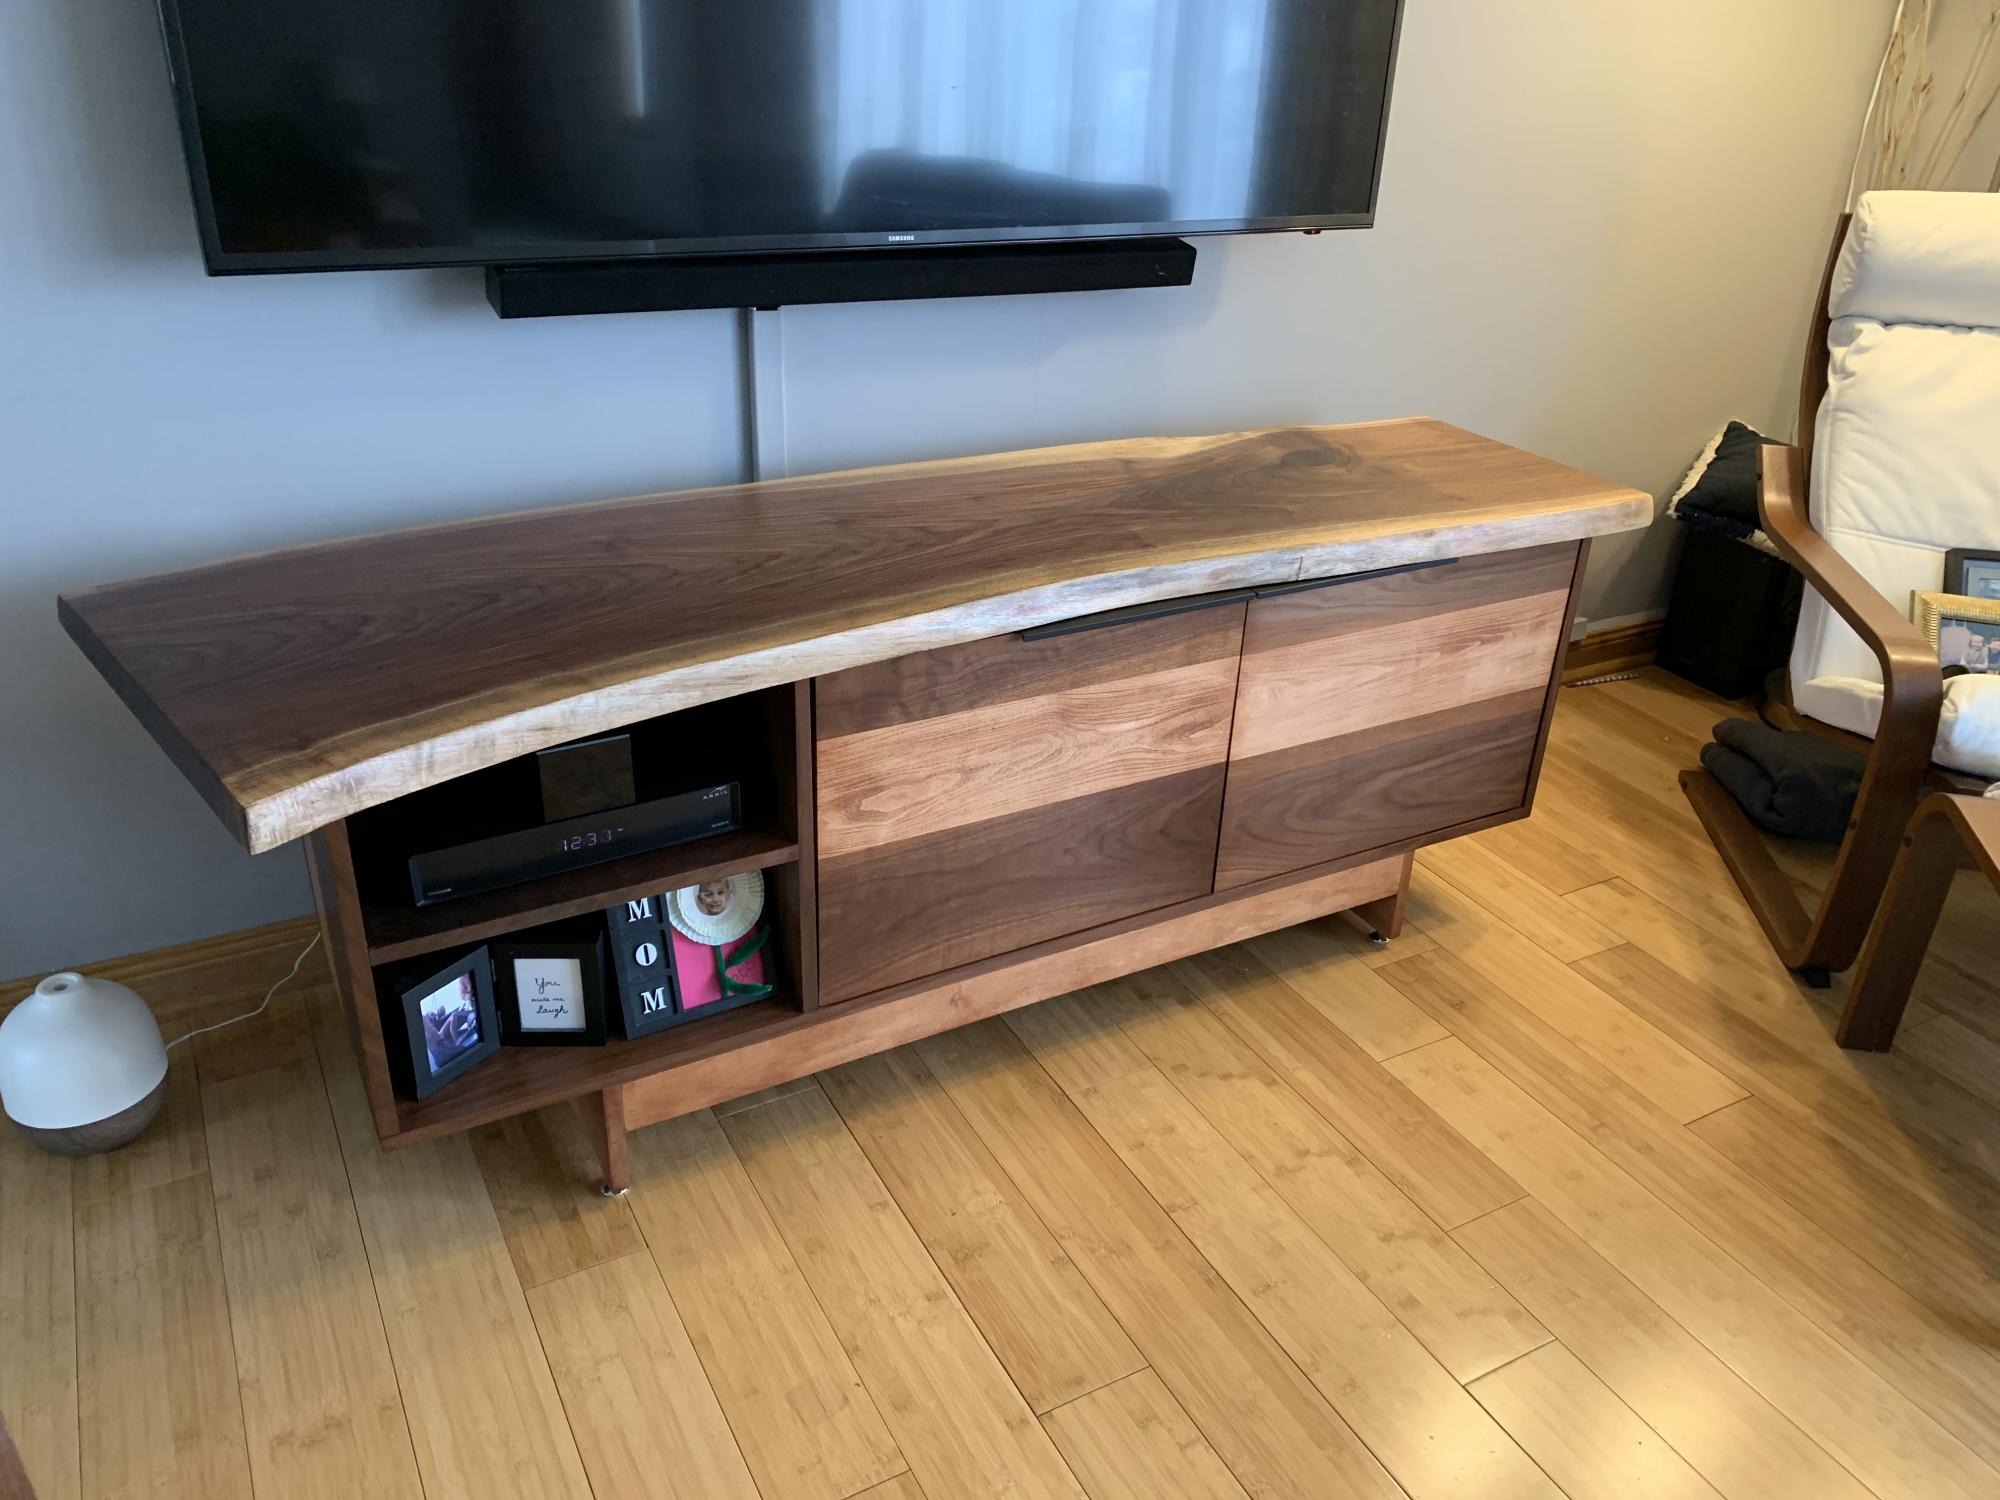
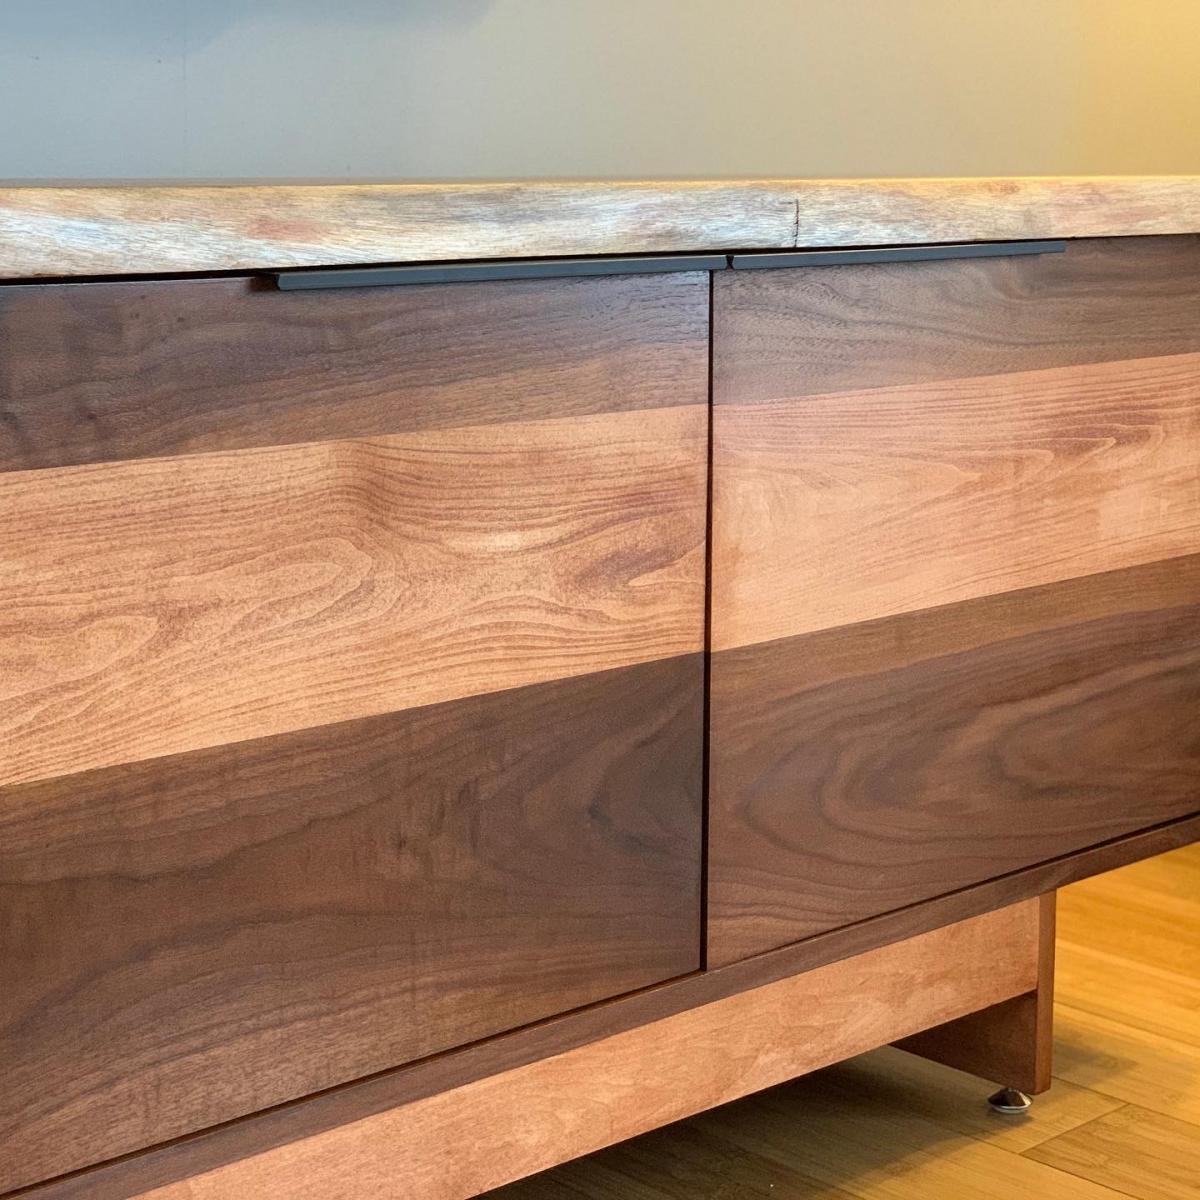
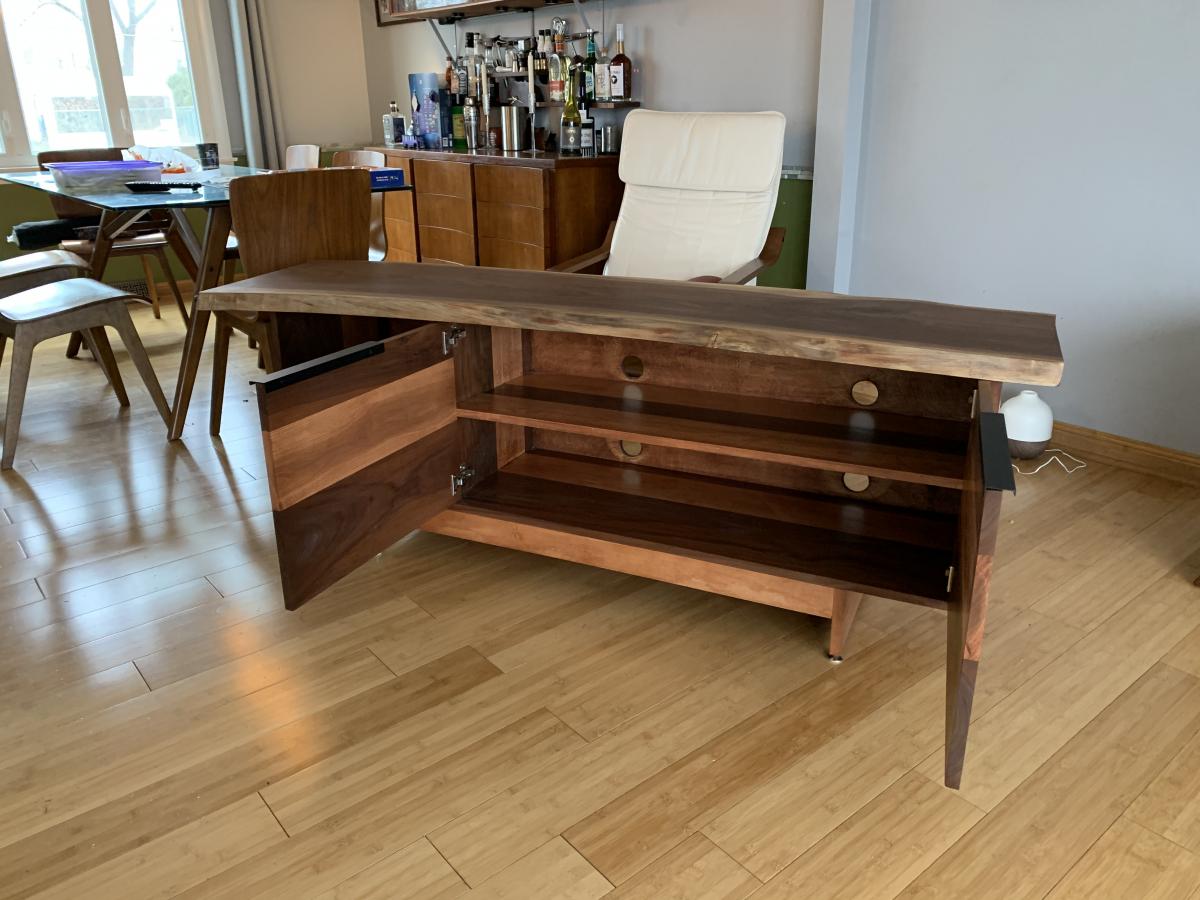
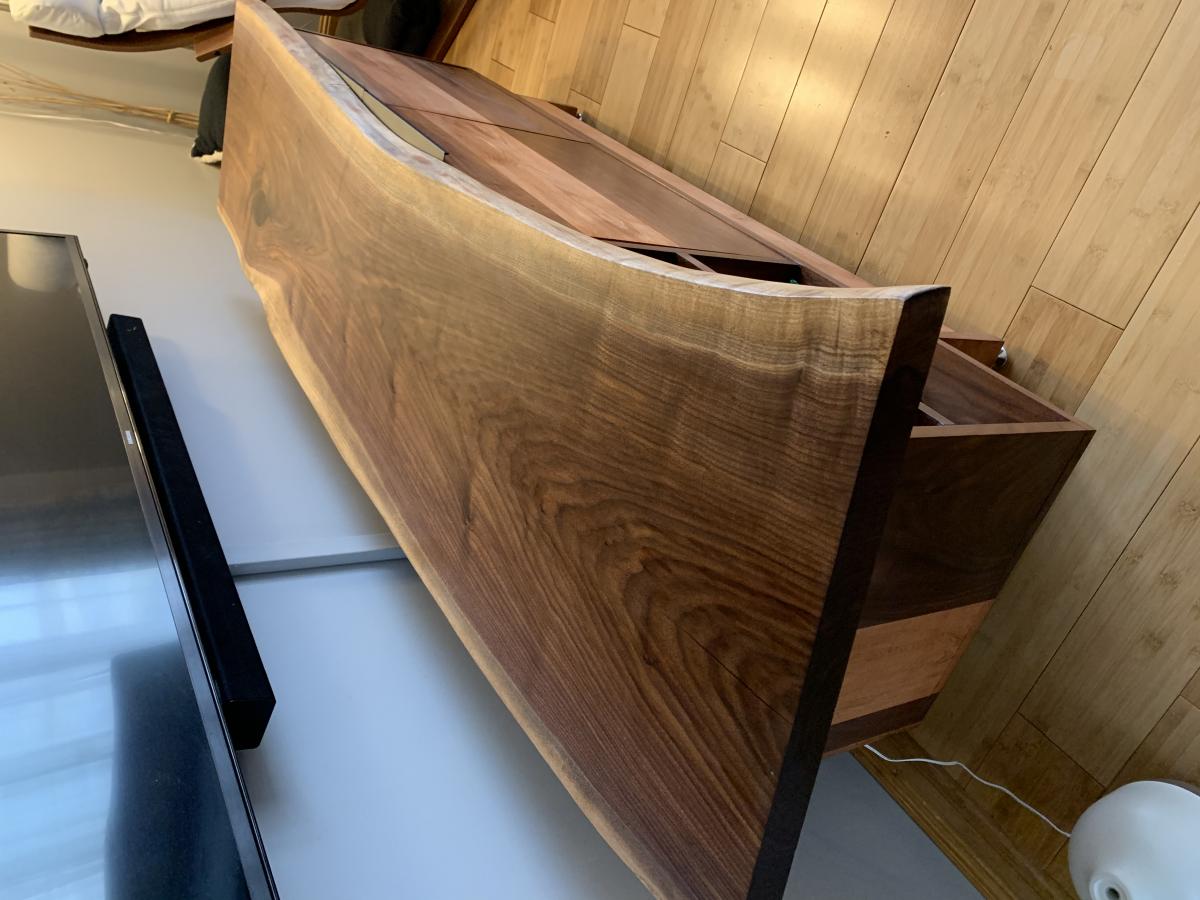
Built mainly from the Modern Media Console plan, modified in a few ways. Aside from the obvious part being the walnut slab on top, I modified the doors to be inset hinges for looks, and it’s slightly longer than the original plans. The other main modification was using the base from the Emersen Console or Buffet plan with the addition of the adjustable height leveling legs.


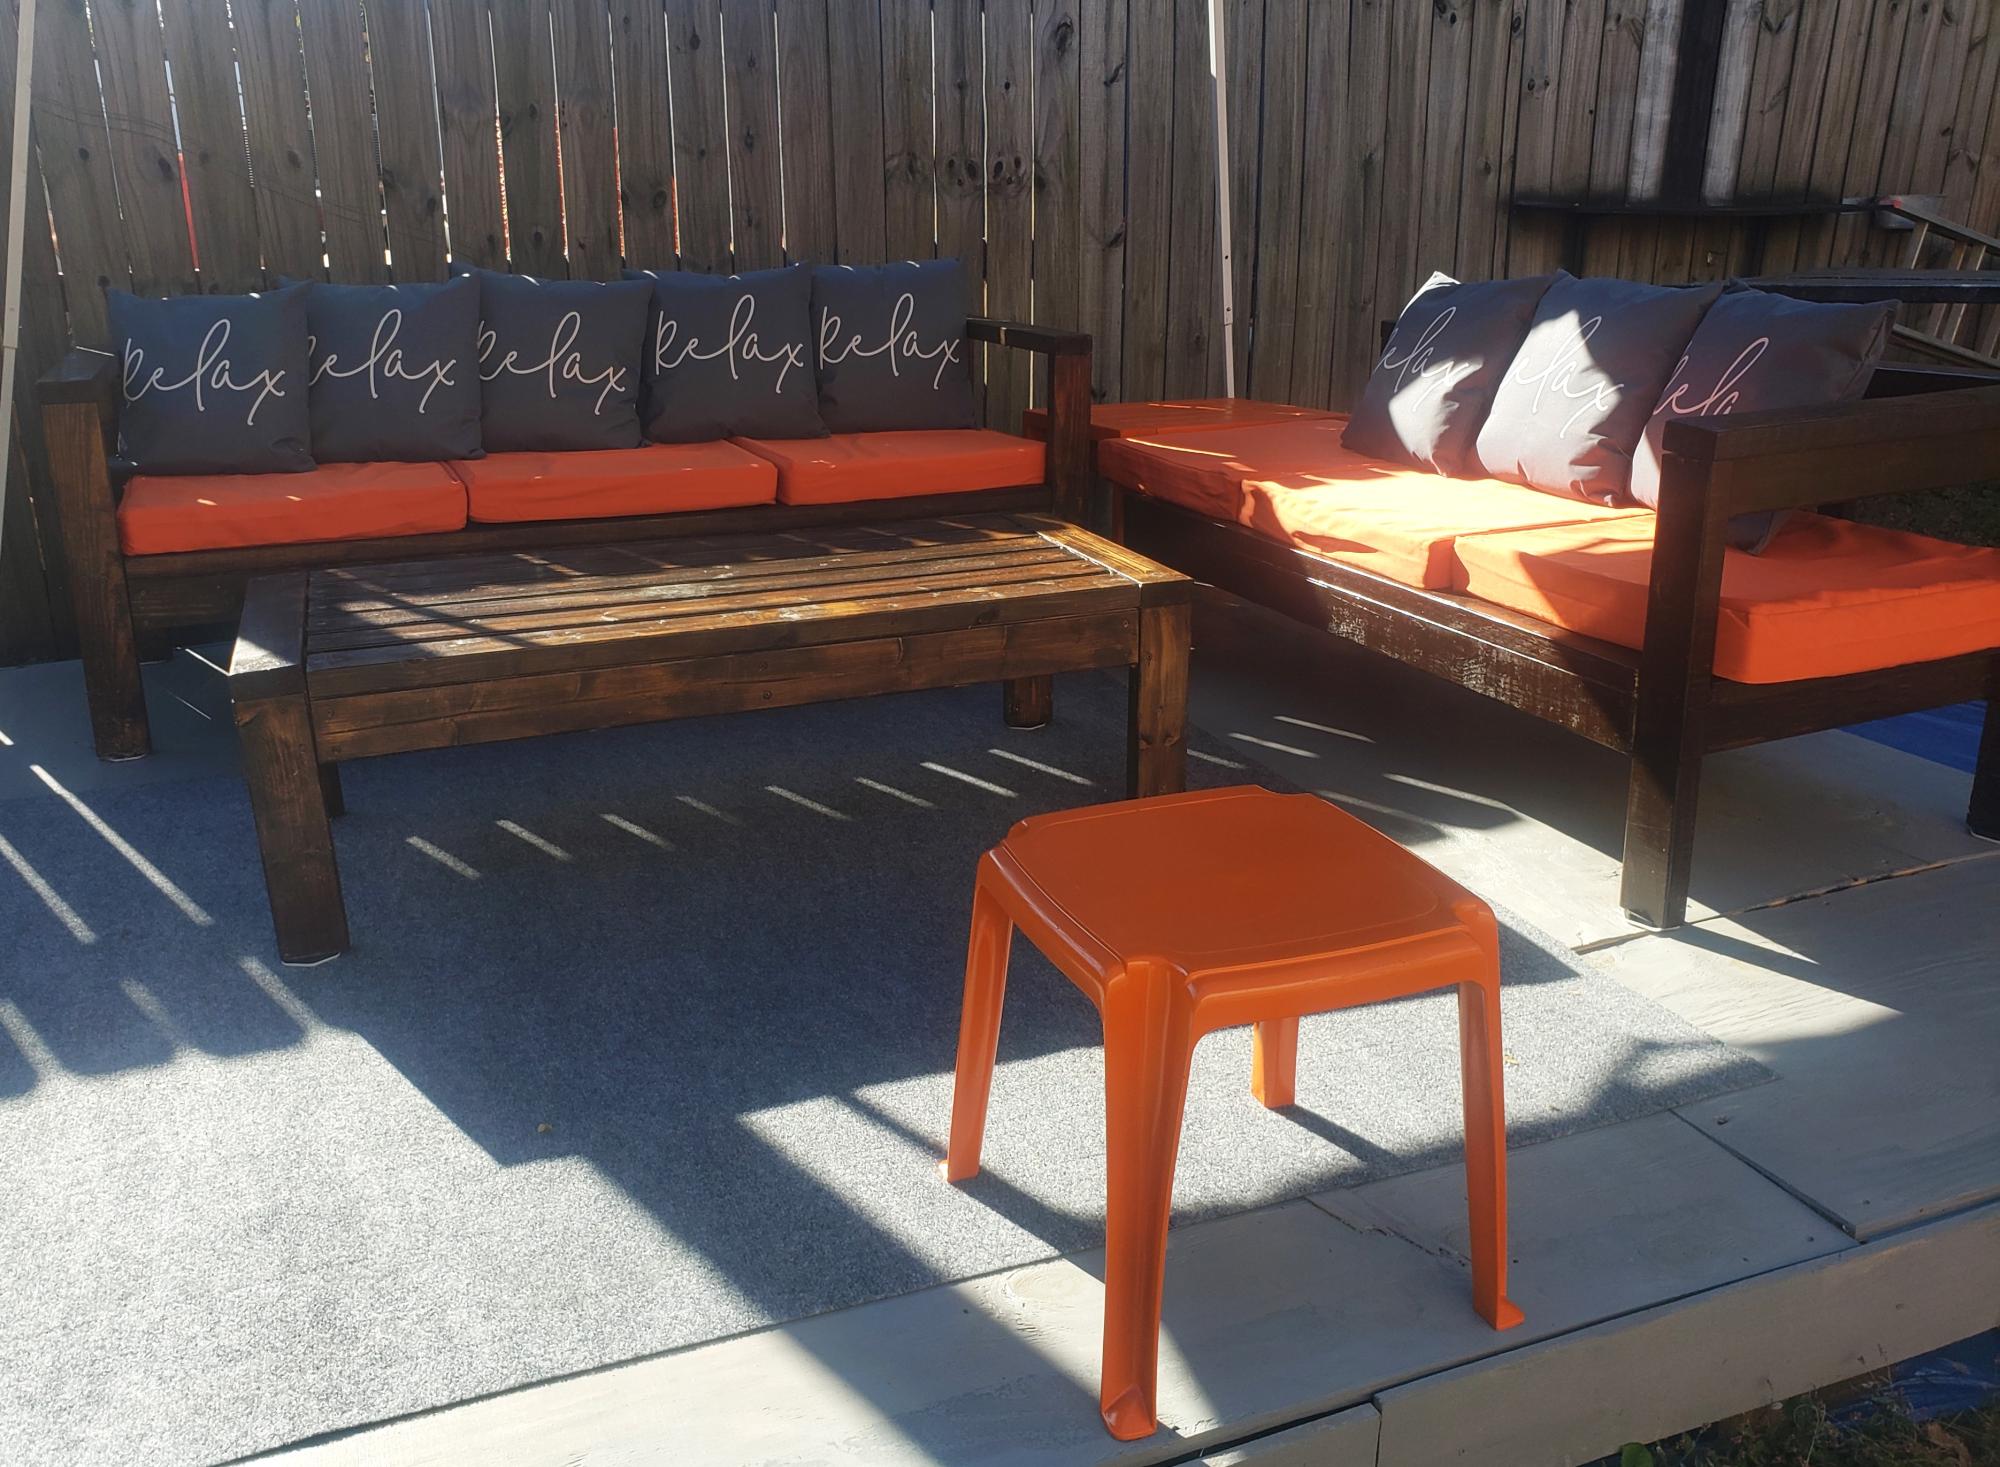
Had fun building this and and putting on the pillows and cushions.
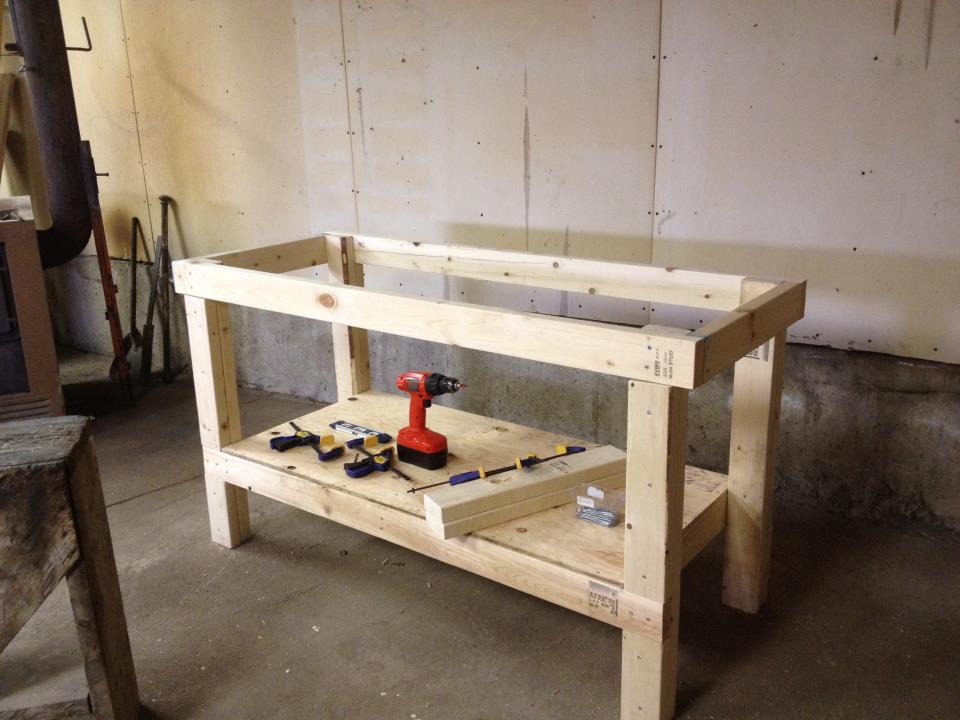
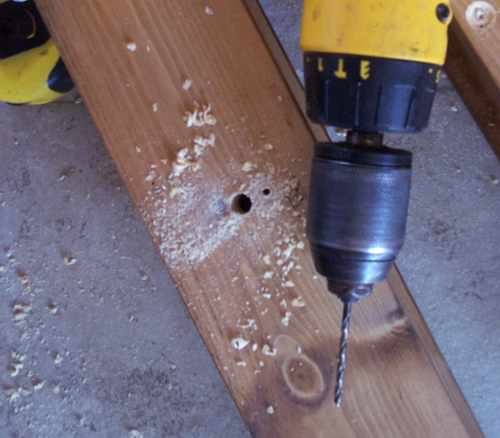
Elite Motionz Buildz
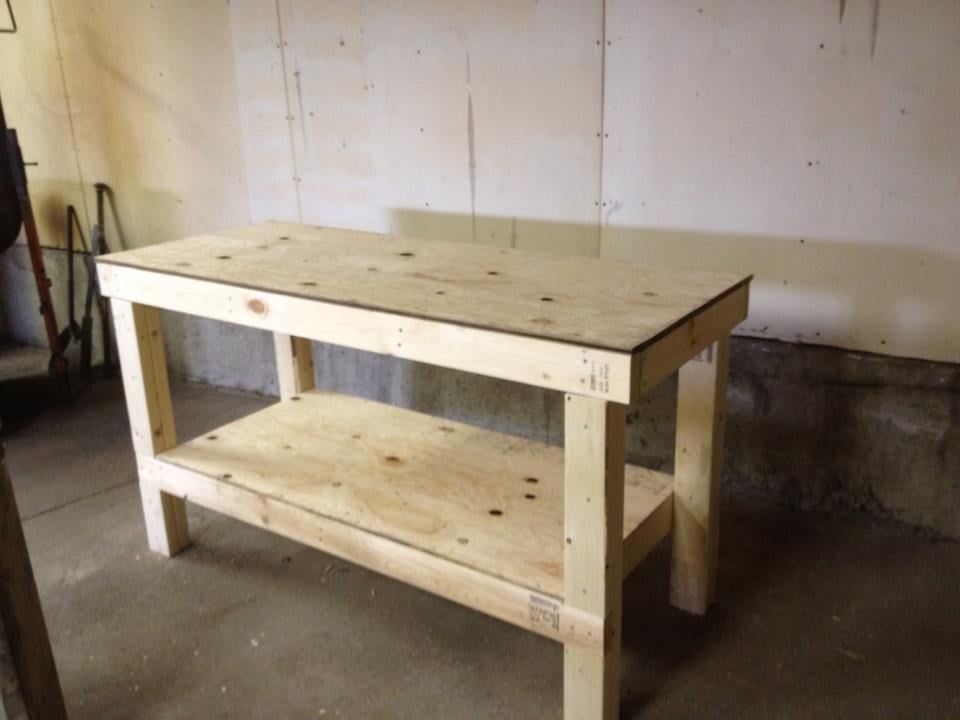
Easy to build! Took about 3 hours!


Sat, 05/19/2012 - 05:15
This is fantastic, just what I need to build. Would you mind sharing some measurements such as height, width and depth.
In reply to Great Workbench by deannaf
Sat, 05/19/2012 - 16:58
I think all the dimensions were in the pattern.
Mon, 05/21/2012 - 05:19
oops thanks I feel a bit embarrassed. Going to the plan now, thanks for sharing your awesome build
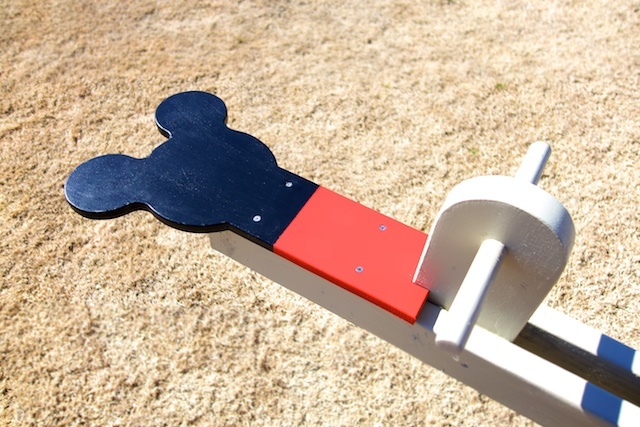
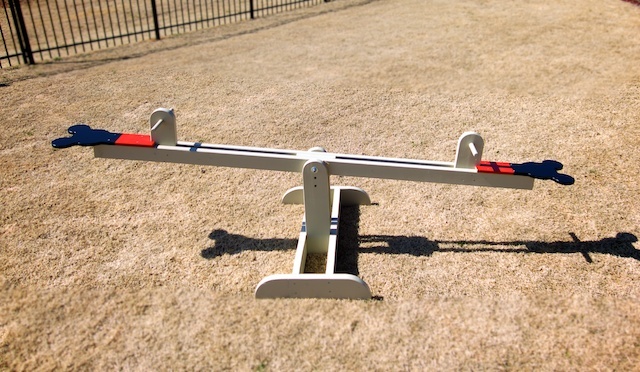
Our 2 year old granddaughter loves seesaws, so my husband built this one for her. We had just been to Disney World and decided to make the seat Mickey shaped for a little extra fun. He used his bandsaw to cut the seat.
The seesaw is plenty stable enough for us to go on it with her and has been a BIG hit with the neighborhood kids.
More pictures on our blog: http://yearoflivingdisney.wordpress.com/2014/03/03/disney-ride-at-home/
Thank you, Ana, for these plans!
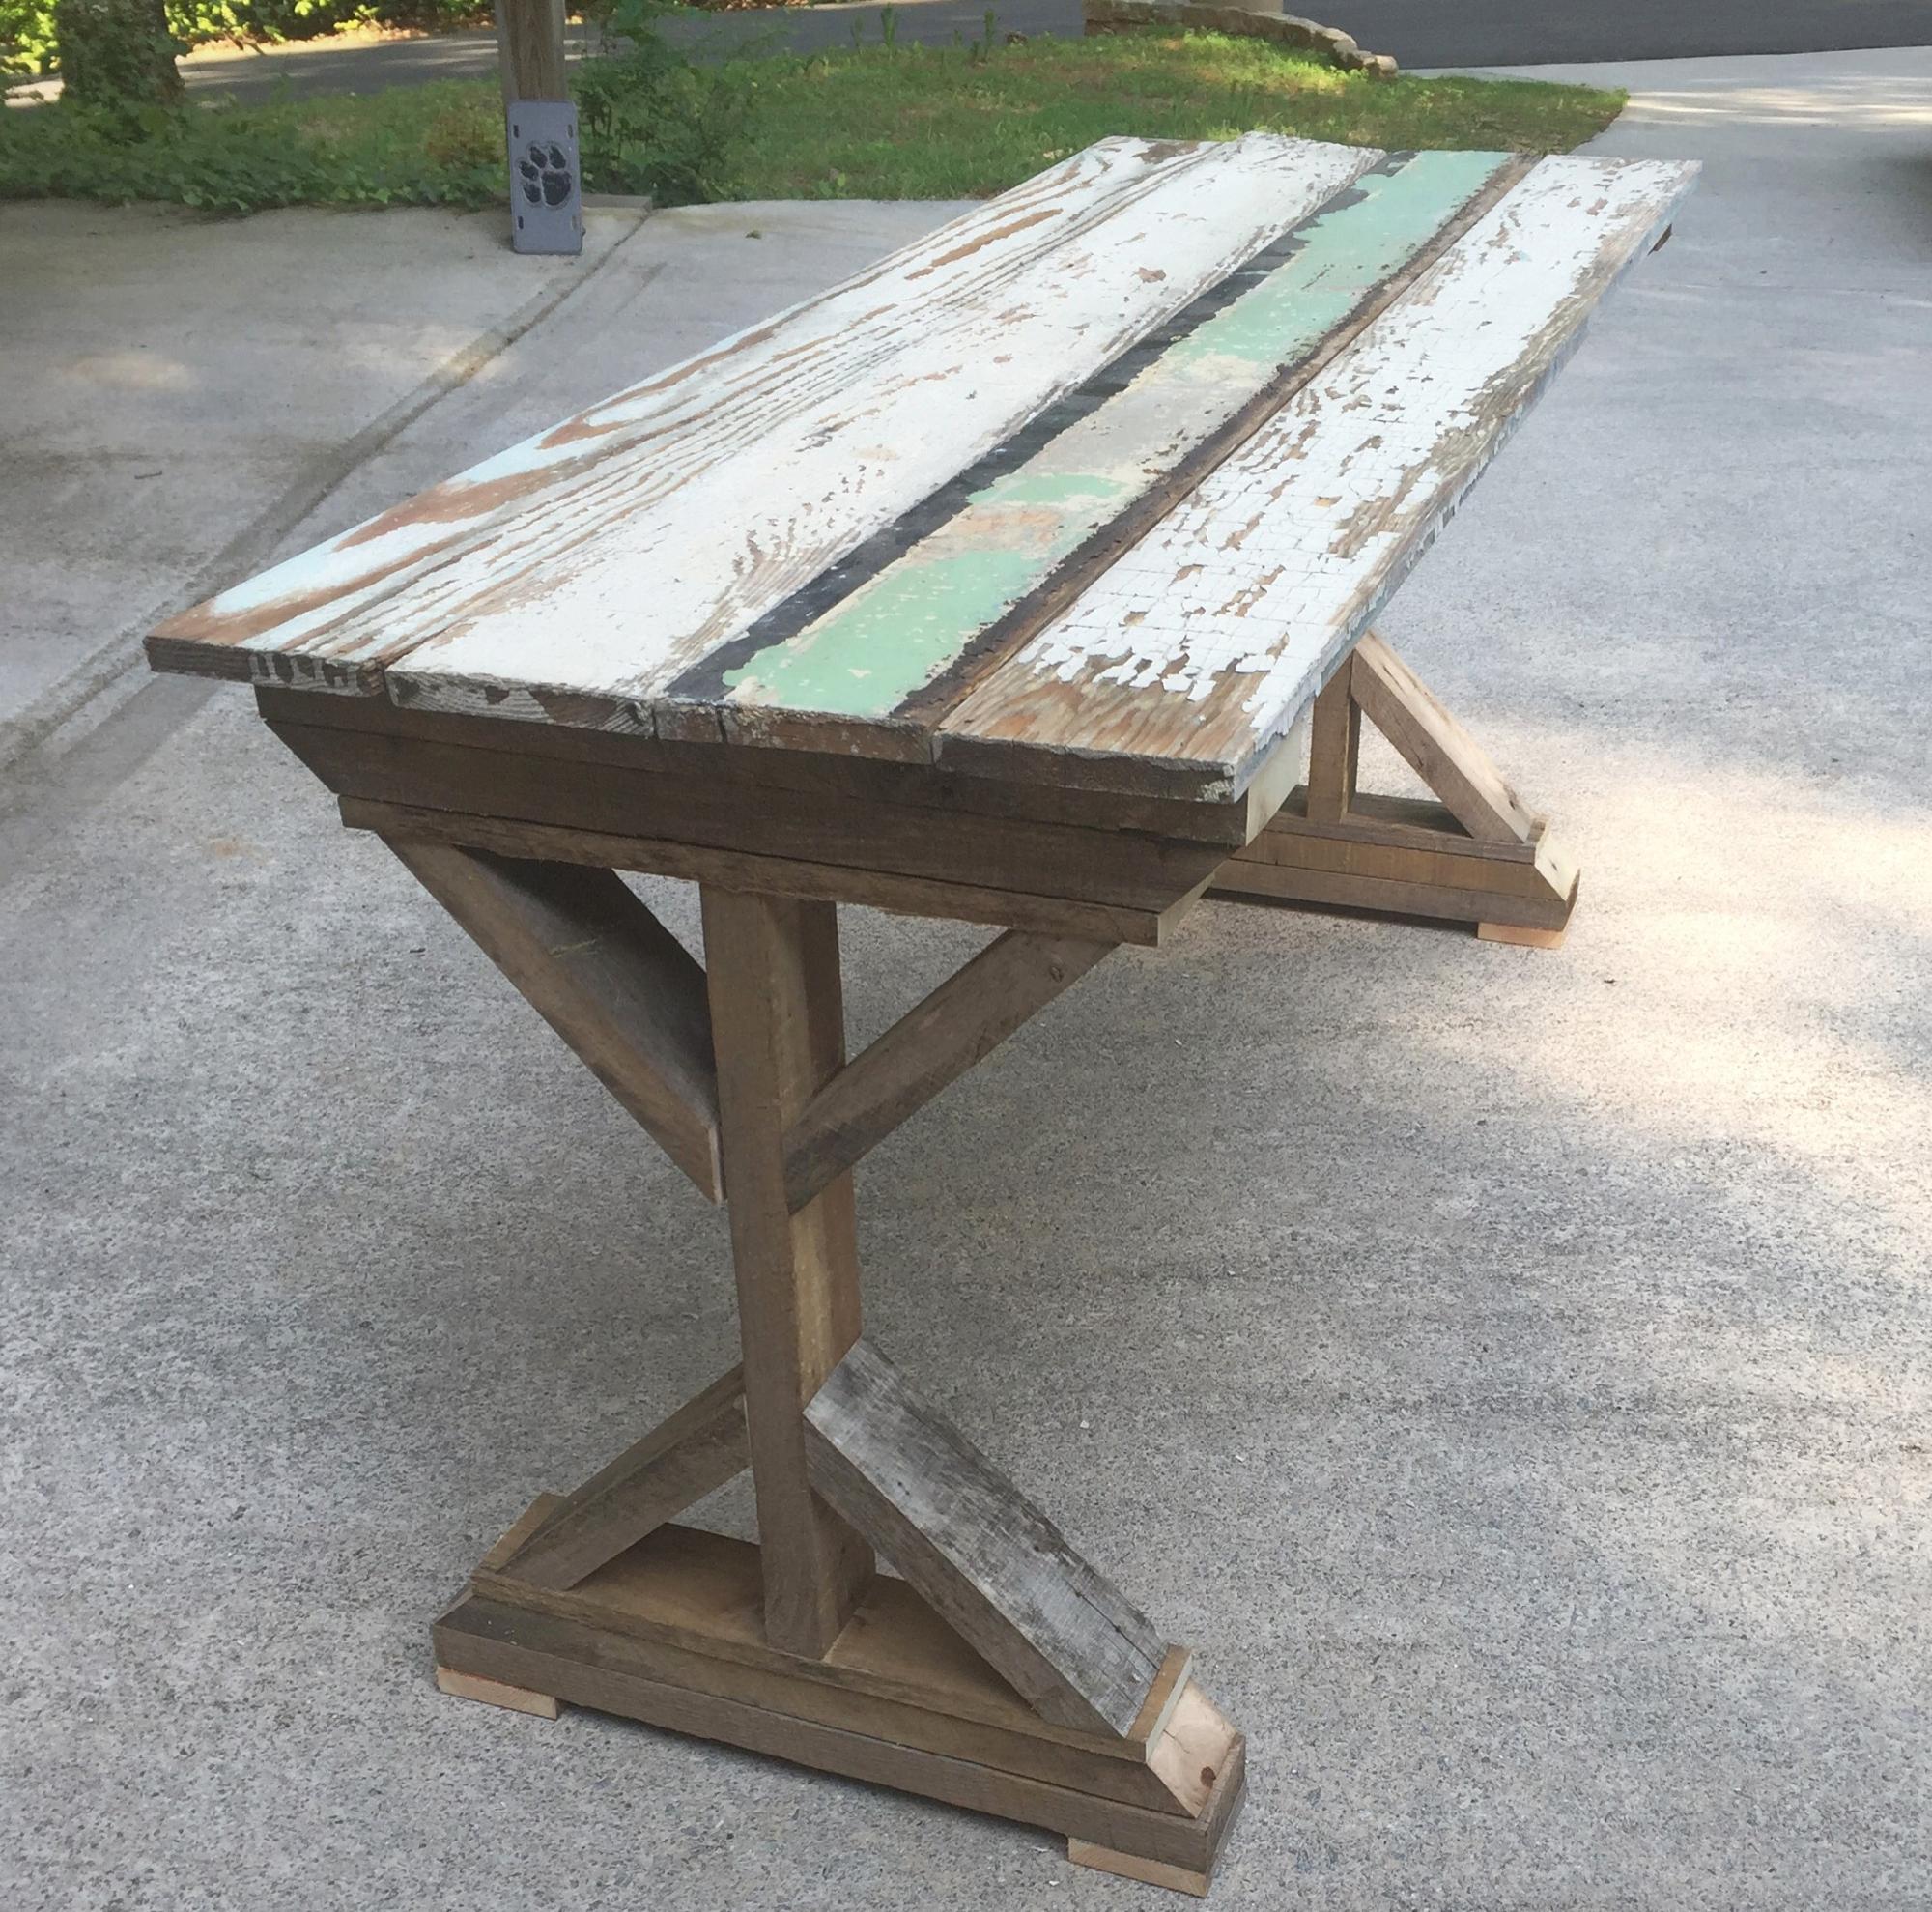
Started this project out of boredom. I had some time and some extra wood laying around. Some was from pallets I took apart, some from a salvage house, and some from an old barn. I built the table in a few hours and worked through any misshaped boards as best as possible. It was a relativley easy project and fun to see the legs turn out with each step. I plan to use cables and turnbuckles for the cross braces on the back and will update the pic when I do. I just need to find a home for it now.
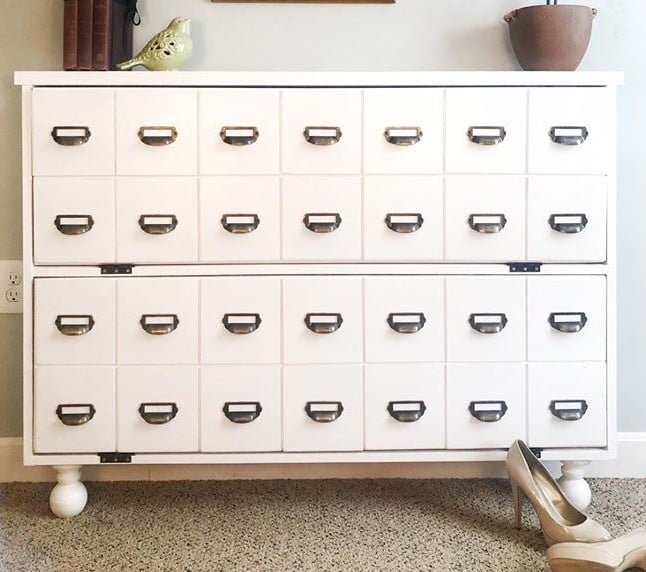
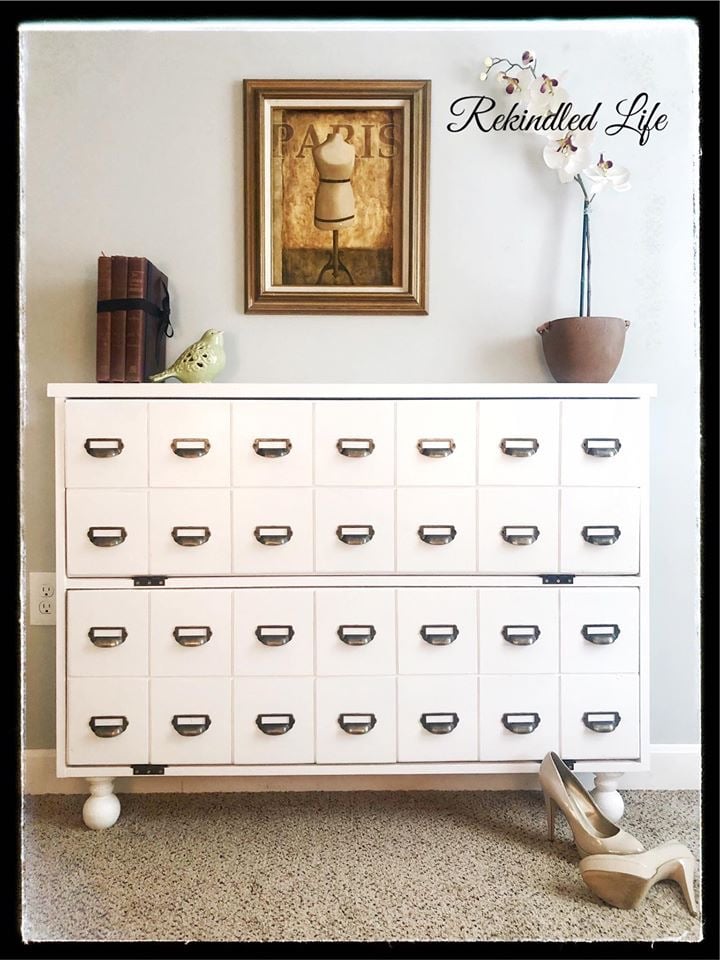
I built the shoe cabinet but added card catalog handles. Also used deck railing toppers for the feet
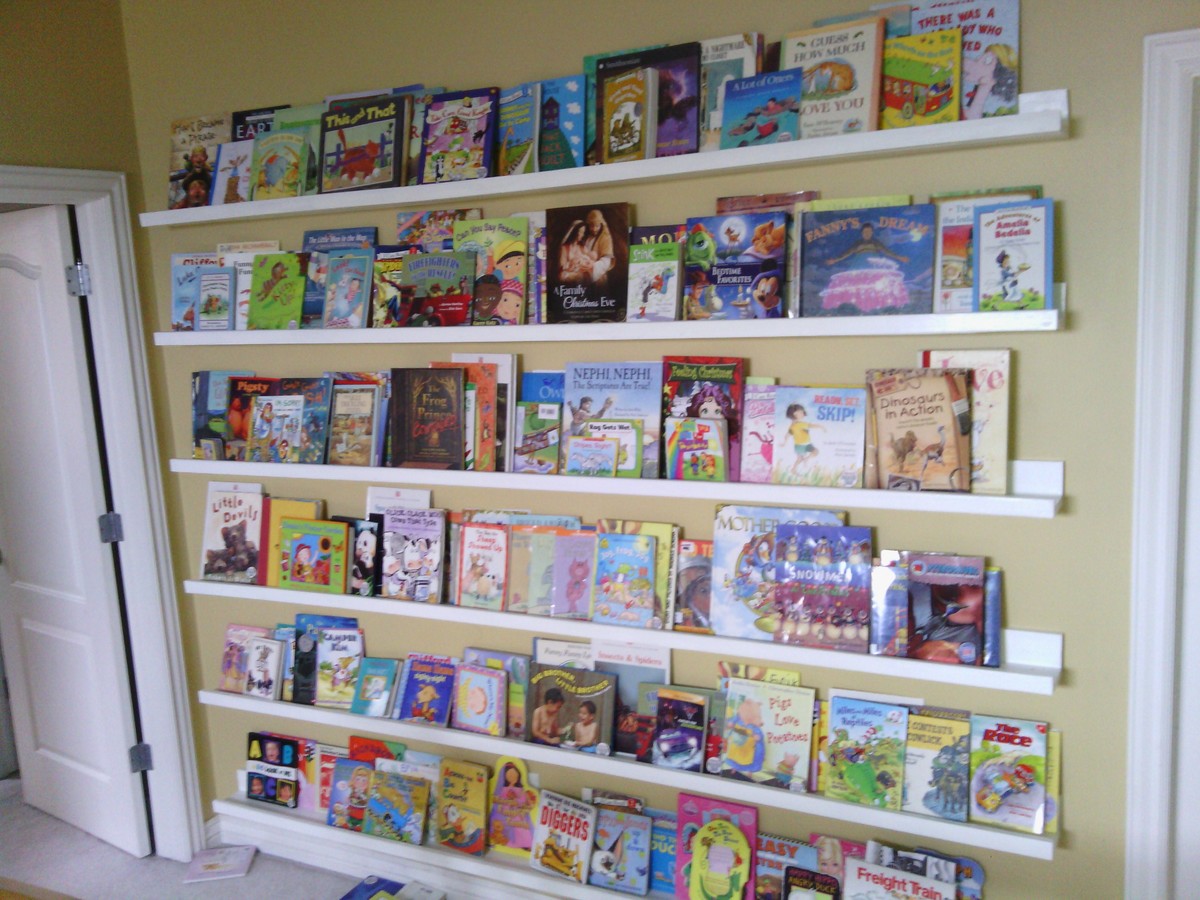
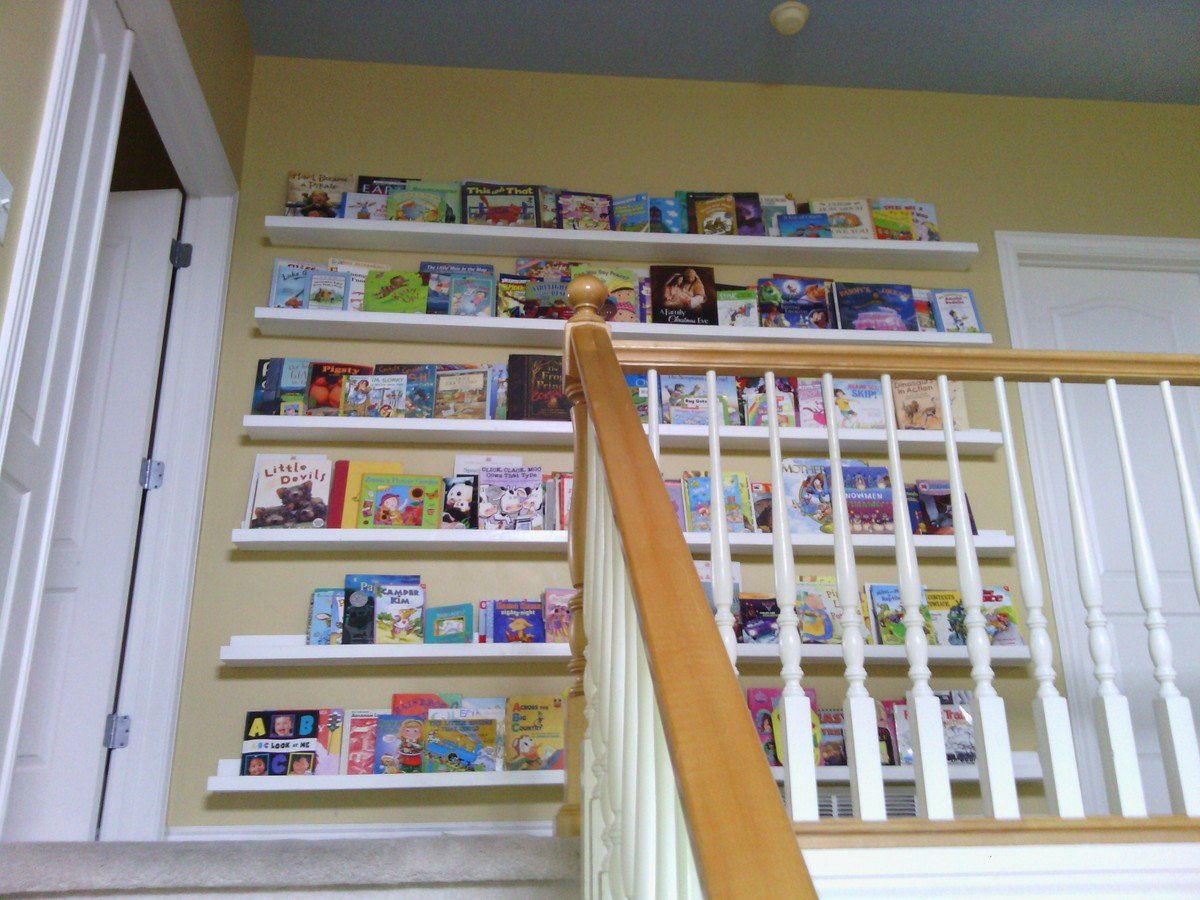
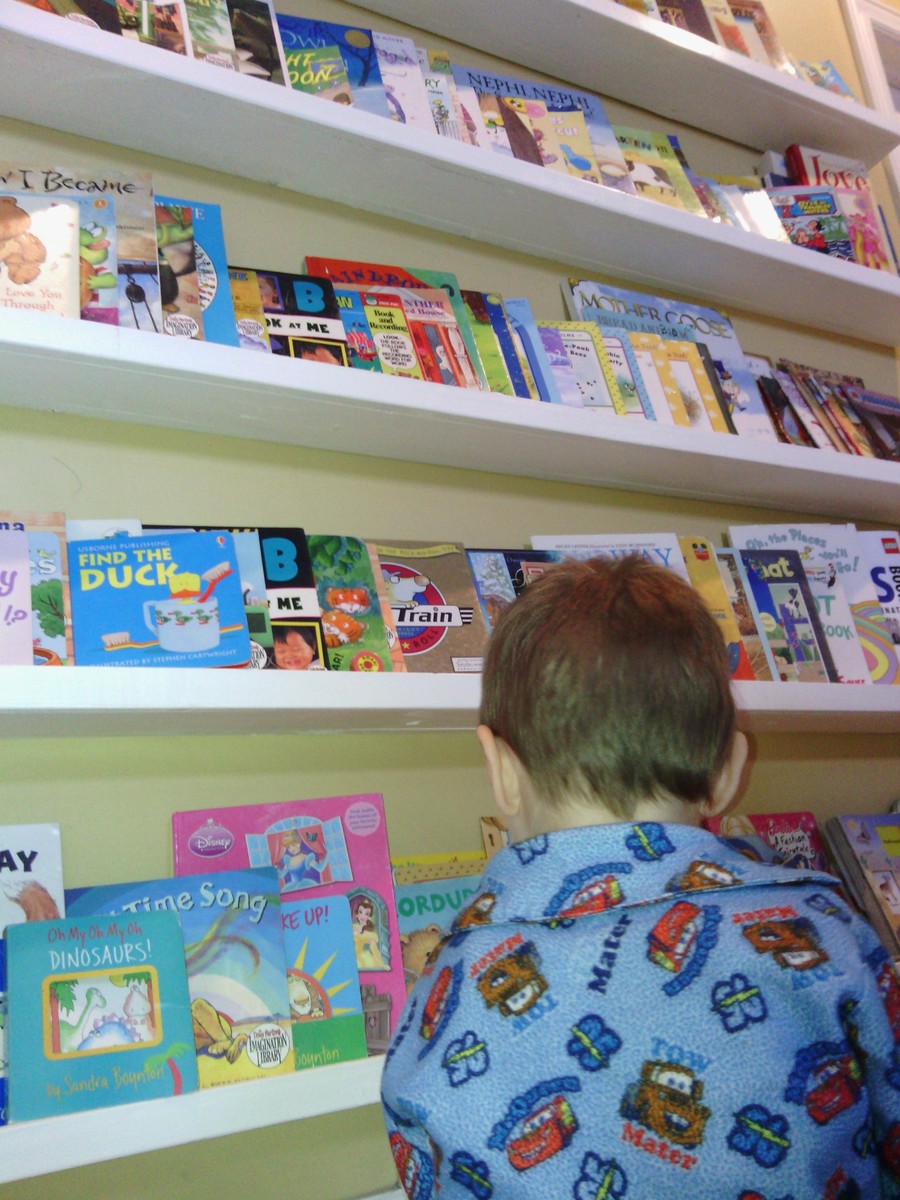
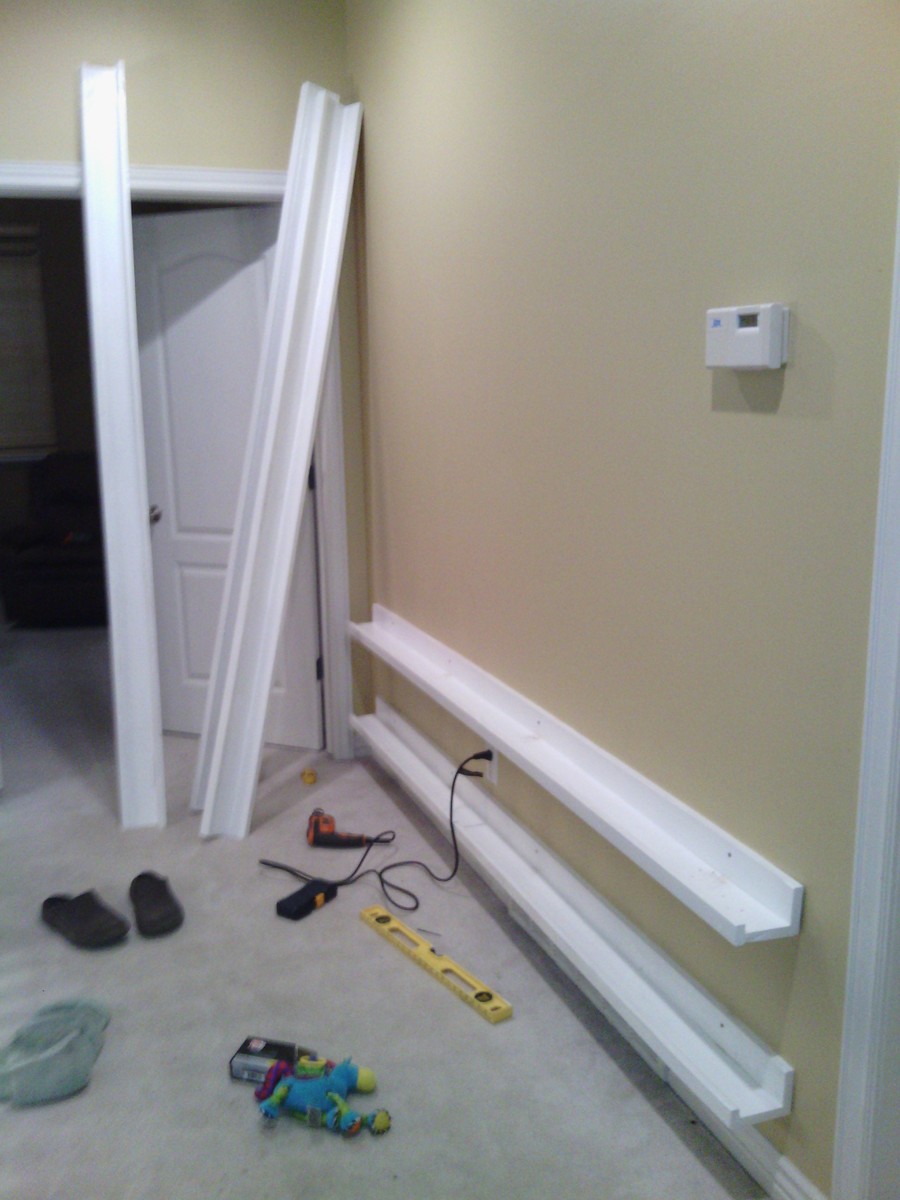
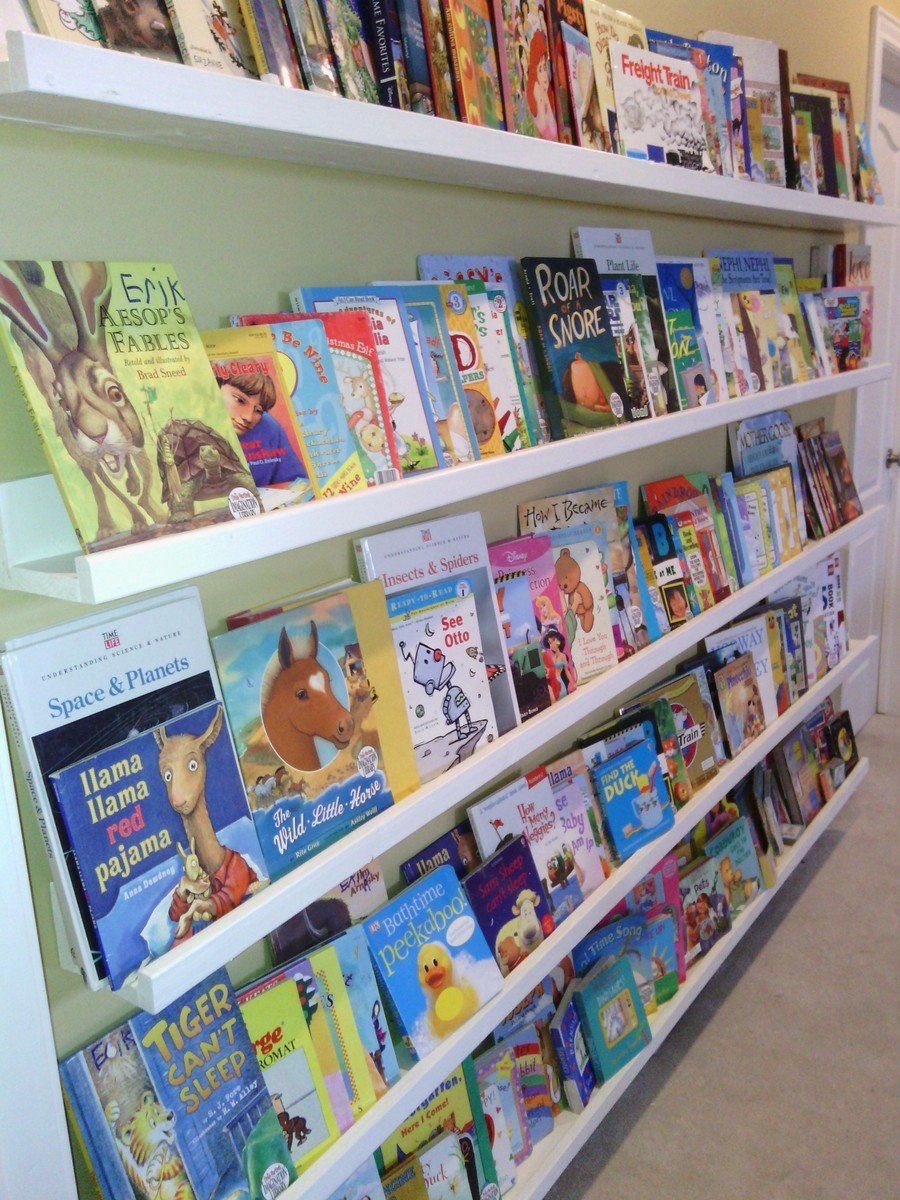
We recently created a Dr. Seuss themed reading nook on our upper level. We have one large book shelf near it, but have also wanted a way to display children's books. These ledge shelves make the books easy to access while also creating a beautiful piece artwork at the top of our stairs. Now, instead of have a long blank wall in the hallway between doors on the little landing we have a beautiful library. I have loved how they have turned out and wanted to share with others!

Wed, 03/05/2014 - 20:18
My children love these bookshelves and reach for the books easier and more often. Come see some of the other things we've made at http://myhomedonemyway.blogspot.com/
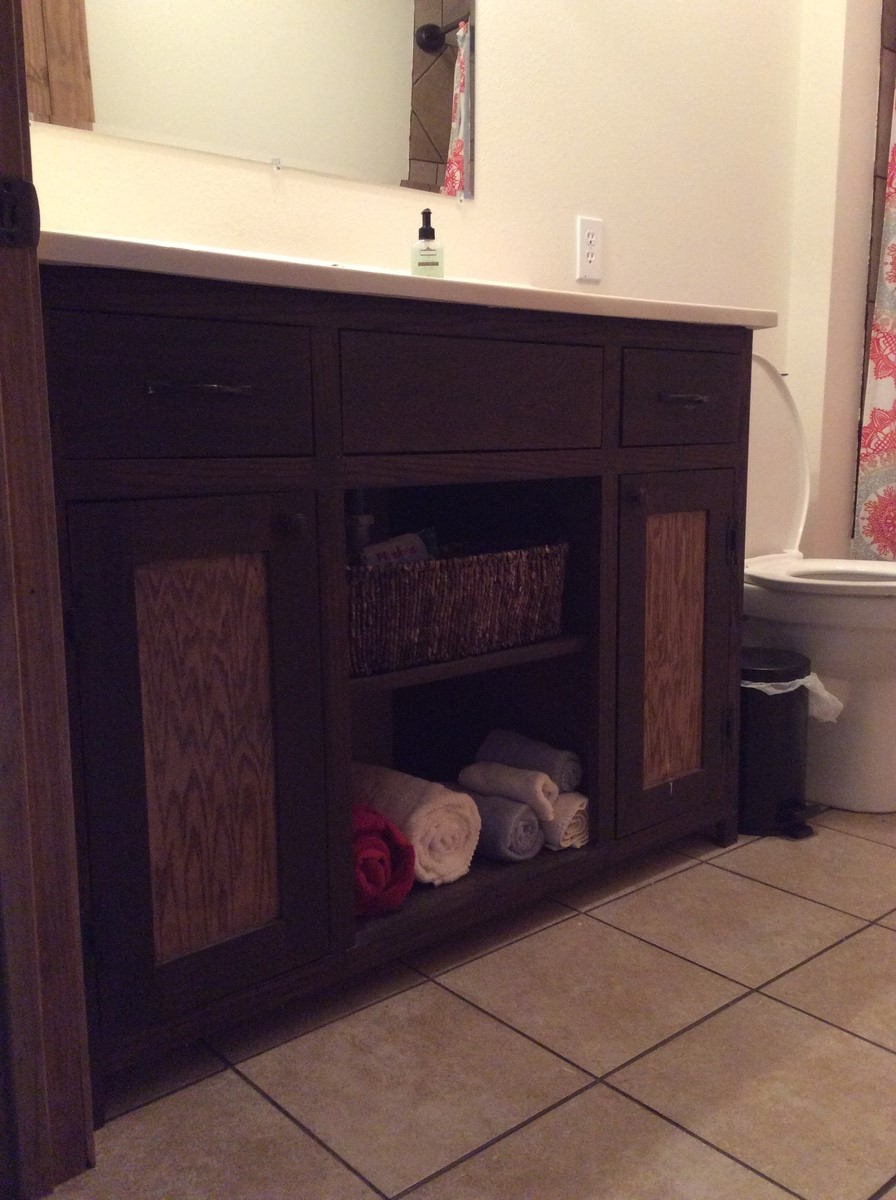
My husband and I built a house doing all the work that we could. When we started the project, I told the men in my life they were going to build the kitchen cabinets. They were pretty adamant they weren't. I started visiting with experienced cabinet makers. One kept repeating, "It's just a box. It's not that hard to build a box." With that encouragement, I found Ana's website and set about learning woodworking. First I built a step stool for my grandson, next I built some shelves for the shop, then I built this vanity. After I finally got it finished, I called an experienced woodworker to build my kitchen cabinets. Ha! I will say though, when the appraiser came out, he commented on what a nice vanity it was! Thank you, Ana, for opening up a new world to me!!