Community Brag Posts

Blanket chest

Submitted by dbizzle on Sat, 04/19/2014 - 18:51

My wife wanted a new chest to store blankets in. I saw the plans for the Becca and thought it would be perfect for what we were after.

I used some regular plywood I had laying around and some select pine for the trim. I liked the look of the top in the plan but wanted some more texture to it, so I used a solid piece of plywood for the top and layer pine for the trim features. I tested my new chisels to recess the hinges to minimize gapping under the lid.

We painted it solid black to match the rest of the basement furniture. A few coats of poly finished it off for durability.

This took about 2 months for me to get around to finishing. That's probably about...12 hours of actual work, plus finishing.

Built from Plan(s)
Estimated Time Investment
Weekend Project (10-20 Hours)
Finish Used
Valspar spray primer, Rustoleum Painter's Touch Black (2 coats), Minwax Water-based Polycrillic (3 coats)
Recommended Skill Level
Intermediate

Shiplap Bathroom - DIY Vanity

Submitted by Anonymous (not verified) on Tue, 10/11/2016 - 13:52

It had come time to renovate our powder room bathroom. We were on a tight budget so we decided to build our own vanity & add a little twist to it! We splurged on the granite countertop, vessel sink  and faucet. Thanks to Ana White we built our vanity for less than $10! The plans were easy to follow . . . .we are so proud of our wood vanity!  link to our blog: http://www.houseofrumours.com/shiplap-powder-room-diy-vanity/


Estimated Cost
$10
Estimated Time Investment
Afternoon Project (3-6 Hours)
Finish Used
none. slightly sanded and used wood oil.
Recommended Skill Level
Beginner

Outdoor Sectional

Submitted by Anonymous (not verified) on Mon, 07/27/2020 - 12:15

Modified the plans of the outdoor sofa and sectional piece to create this set, then added cushions from IKEA.

Finish Used
SuperDeck Cedar Tone Natural

Comments

Seasonal And Holiday

My version of the Small Chicken Coop with Planter, Clean Out Tray and Nesting Box -with the addition of a chicken run

I loved the design that Lady Goats and Ana had created but it wasn't quite right for me, so I used the 'essence' of the coop and tweaked it.

I had some leftover metal roofing sheets from a tool storage area I'd made so used this on the roof, and also made the roof a pent shape. I moved the doors to the side, and also reduced the size of the planter. Next to the planter I've made a lift up hatch so that I can more easily replace the water and feeders.
I've added in a 2m x 1.8m (approx. 6.5ft by 6 ft) run so that the little chicks are safe and can run about from their coop.

The whole coop is covered in stainless steel rodent mesh so not only can foxes not get in (our main predator in the UK) but also rats and mice won't be able to get in to take their food and bring their disease.

I undercoated all the wood and then double-coated in exterior weather-proof gloss. Inside the coop I triple coated (I wanted to be thorough!) and also sealed every single joint in the whole build to avoid water penetration as well as mites setting up camp. It's already very easy to clean and hopefully should last a long time.

Hope that you like what I've done here. I'm so pleased with the results but pretty tricky to do by myself.
I'm learning, learning, learning though :-)

P.S. Sorry that the pics below aren't the correct way up -I don't know how to make them appear in the right direction.....

Estimated Cost
£500
Estimated Time Investment
Week Long Project (20 Hours or More)
Finish Used
I sanded all the wood to within an inch of it's life (!) then undercoated all the wood with an exterior weathertight product (Zinnser BIN primer sealer) and then double coated all the non-inside areas with Sandtex Exterior white gloss.
The areas inside the coop were tripled coated and every joint was sealed with exterior caulk and then repainted.

It should hopefully be washable, mite-proof and last a long time now!
Recommended Skill Level
Advanced

Comments

Bi-Fold Closet Doors

We wanted to replace the vented / painted bi-fold closet doors in our Master Suite with something that was warmer and more consistent with the decorating motif of the house.  We priced out various wood bi-fold doors and were shocked at the $350 - $600 price range of what was available.   We decided that building them ourselves was a much better choice.

The frames are made from 1” Knotty Pine and the panels are from ¼” Knotty Pine.   Frames were made to fit and assembled w/ Kreg screws & Glue.  Rabbet channels were cut w/ the router and the panels were brad nailed & glued.

It was finished w/ the same stain used on our Knotty Pine ceilings / walls and finished w/ a satin varnish for a perfect match to our house.

This was a very straightforward, quick & inexpensive alternative to purchasing expensive bi-fold doors.   

The doors took about 15 hours to build / sand and 10 hours to finish.   Total cost was around $100. 


Estimated Time Investment
Week Long Project (20 Hours or More)
Finish Used
Custom stain and satin varnish.
Recommended Skill Level
Beginner

Comments

Modern outdoor chairs

Submitted by Anonymous (not verified) on Tue, 06/08/2021 - 08:01

Love these plans! Made a modification and added backs to the chairs. Also, built ottomans to match the chairs which can also be used as additional seating.
Many compliments on the set. Thanks Ana!

Comments

Patio Table with Coolers

Submitted by docfin02 on Sun, 04/26/2015 - 19:19

Basically followed the plan, but added 4x4 legs and used 2x8s for the long ends to make it a little wider.  I used the basic plans for the Farmhouse Bench (http://www.domesticated-engineer.com/2012/05/29/bench-for-farmhouse-tab…) for the bench, but tweaked it to make it match the design of the table.

Estimated Cost
$200-$250
Estimated Time Investment
Weekend Project (10-20 Hours)
Recommended Skill Level
Intermediate

Modified Indoor Clubhouse and Bed

Submitted by Anonymous (not verified) on Fri, 01/11/2019 - 21:49

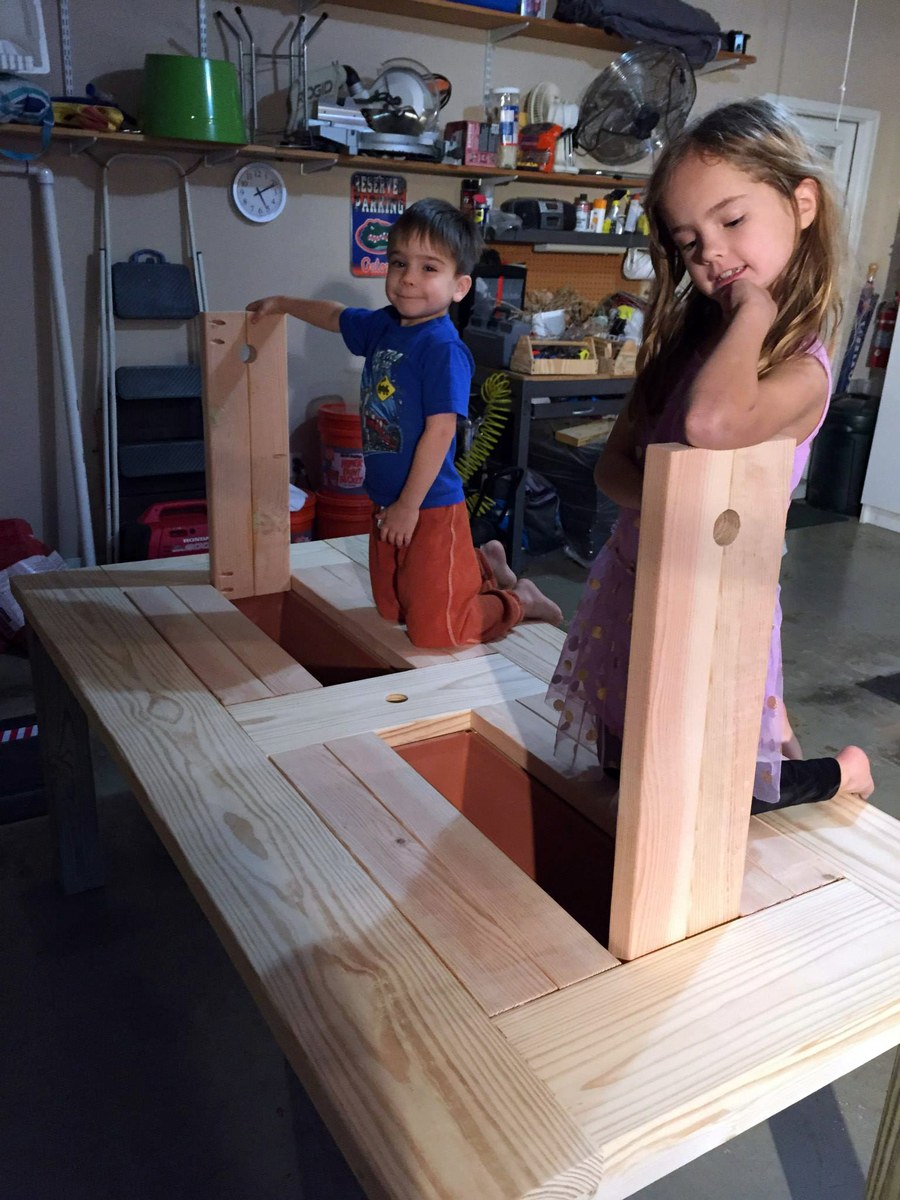
This is my first build and I had so much fun!  I am now officially addicted to DIY and woodworking!  

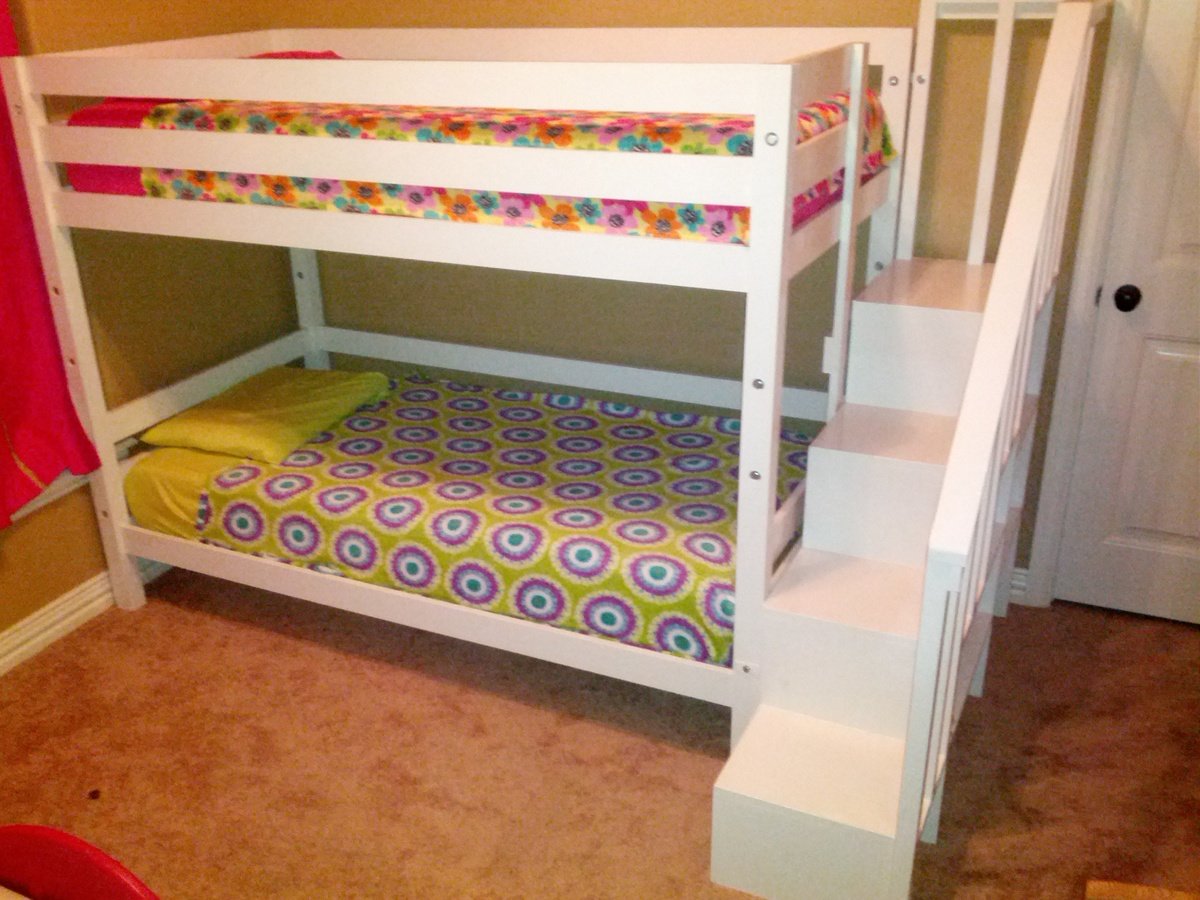
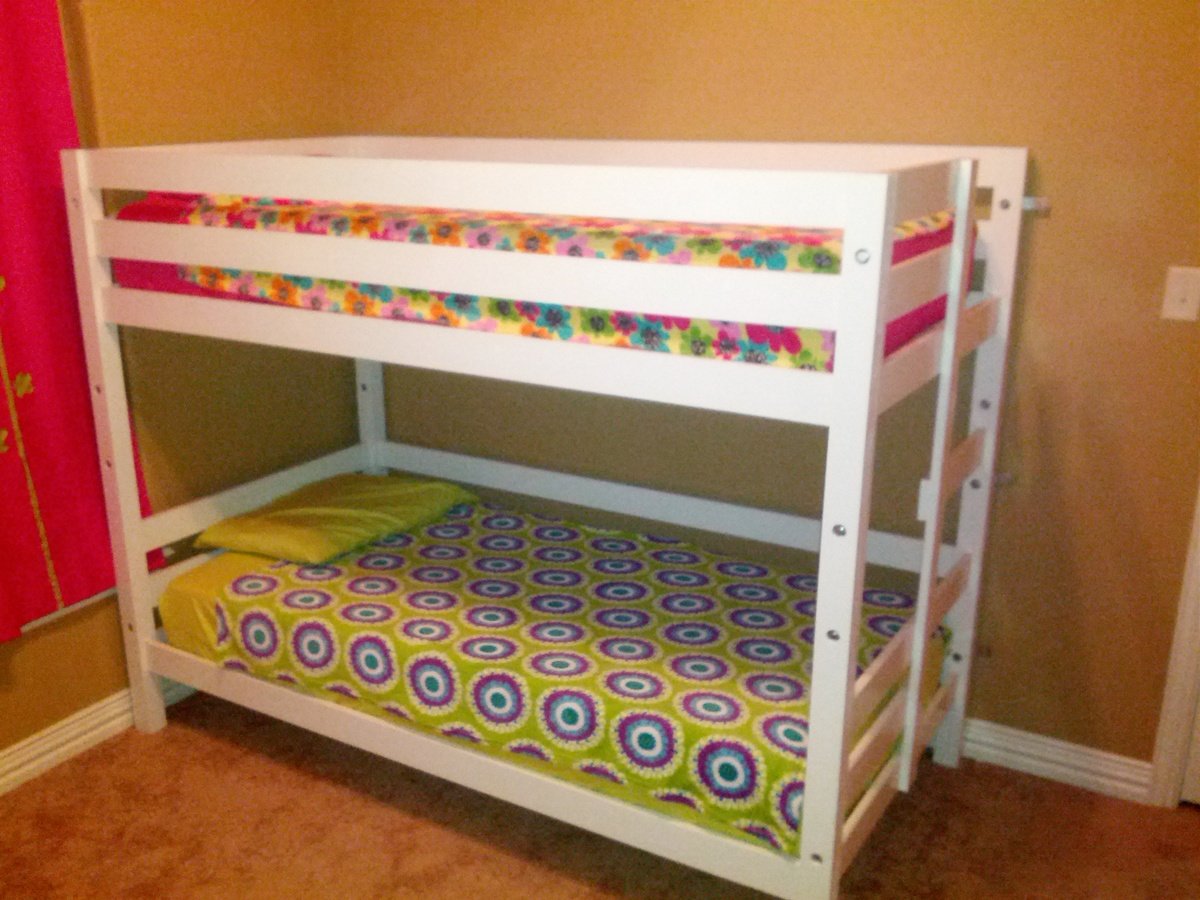
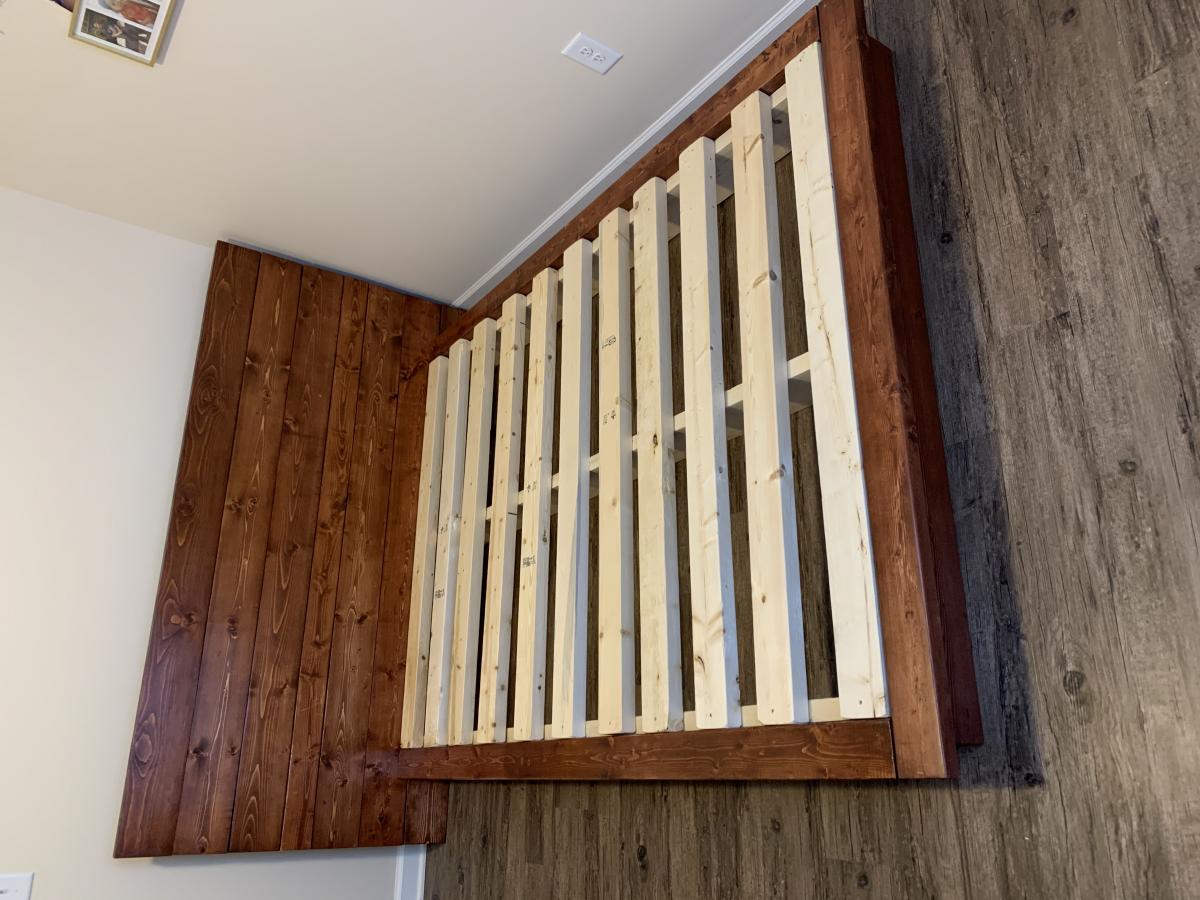
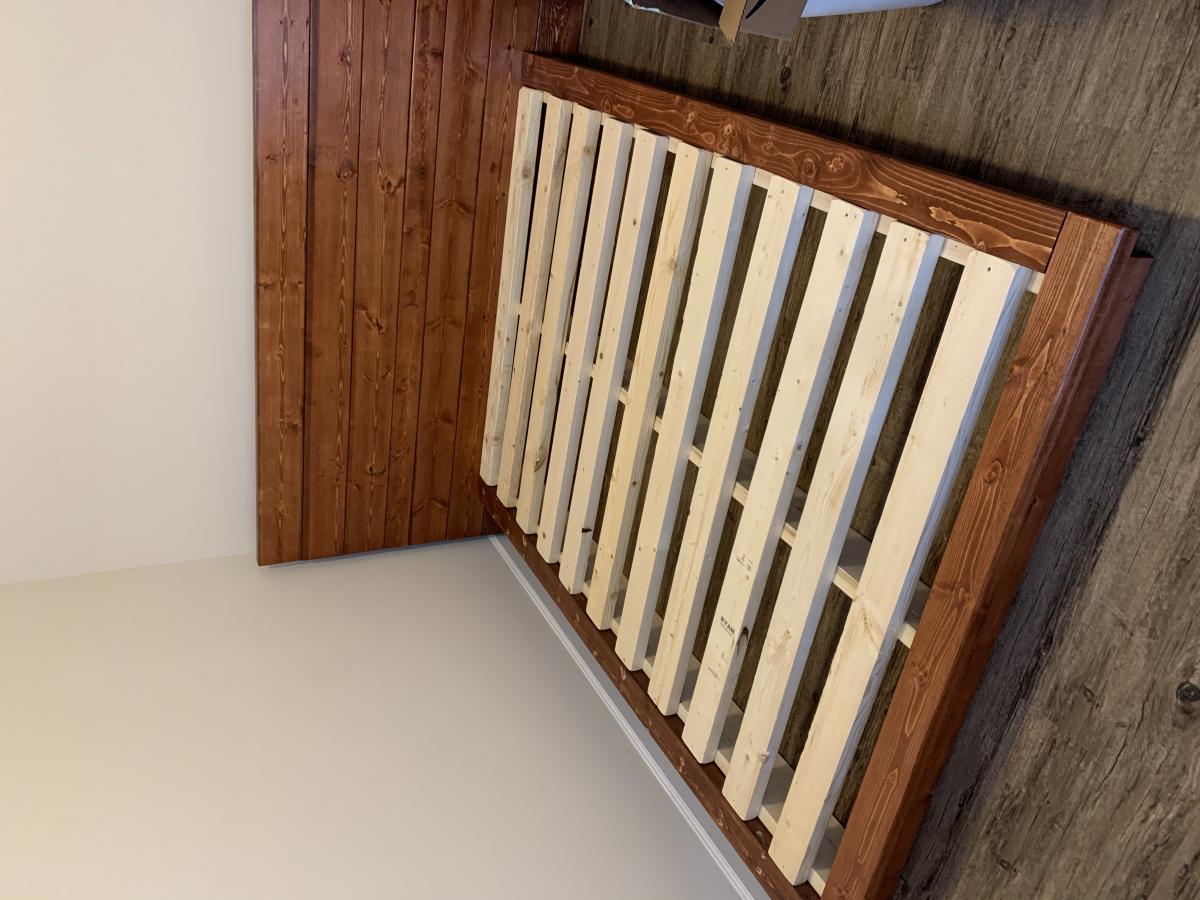
I started off with a couple of problems right out of the gate but, I really wanted to make this for my Grandaughter for Christmas.  The first problem was the ceiling in her room is 7 feet 6 inches  high.  So, if I lowered the height then the loft platform became too low to install over a twin bed.   It didn’t allow for enough headroom over the mattress.  Plus, I didn’t want her to sleep on a mattress that was on the floor. So, I raised the platform to 48 inches and modified the roof so that I would be able to fit the Alaska Cabin Twin storage bed underneath.  

I also modified the size by increasing the platform dimensions to 40”x48”.   Doing that allowed me to comfortably fit the bed underneath. 

 I was lucky to find laminate flooring on clearance at Lowe’s. I paid five dollars for an open box. I used it to cover the plywood floor. I also used it for the roof by just nailing it to the 2x4s. 

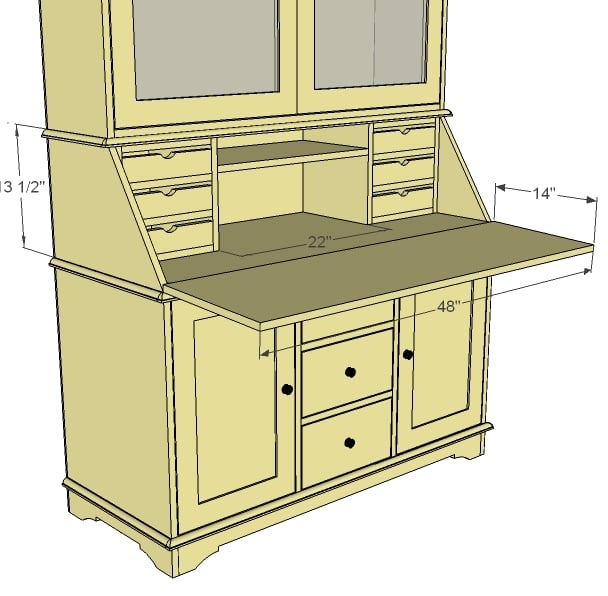
 I wanted my granddaughter to be  able to paint, use her markers, and be as messy as she wanted without restrictions.  One wall is made from dry erase board with 1x4s as shelving to frame it out.  (I used Ana’s flip down desk plans as a guide for the shelving.) The back wall is slat wall from Menards.  I just spray painted it hot pink.  The third wall is a 12 inch shelf framed out by 2x4s. The last wall is leftover 1x3 and 1x4 boards that I stained and painted. 

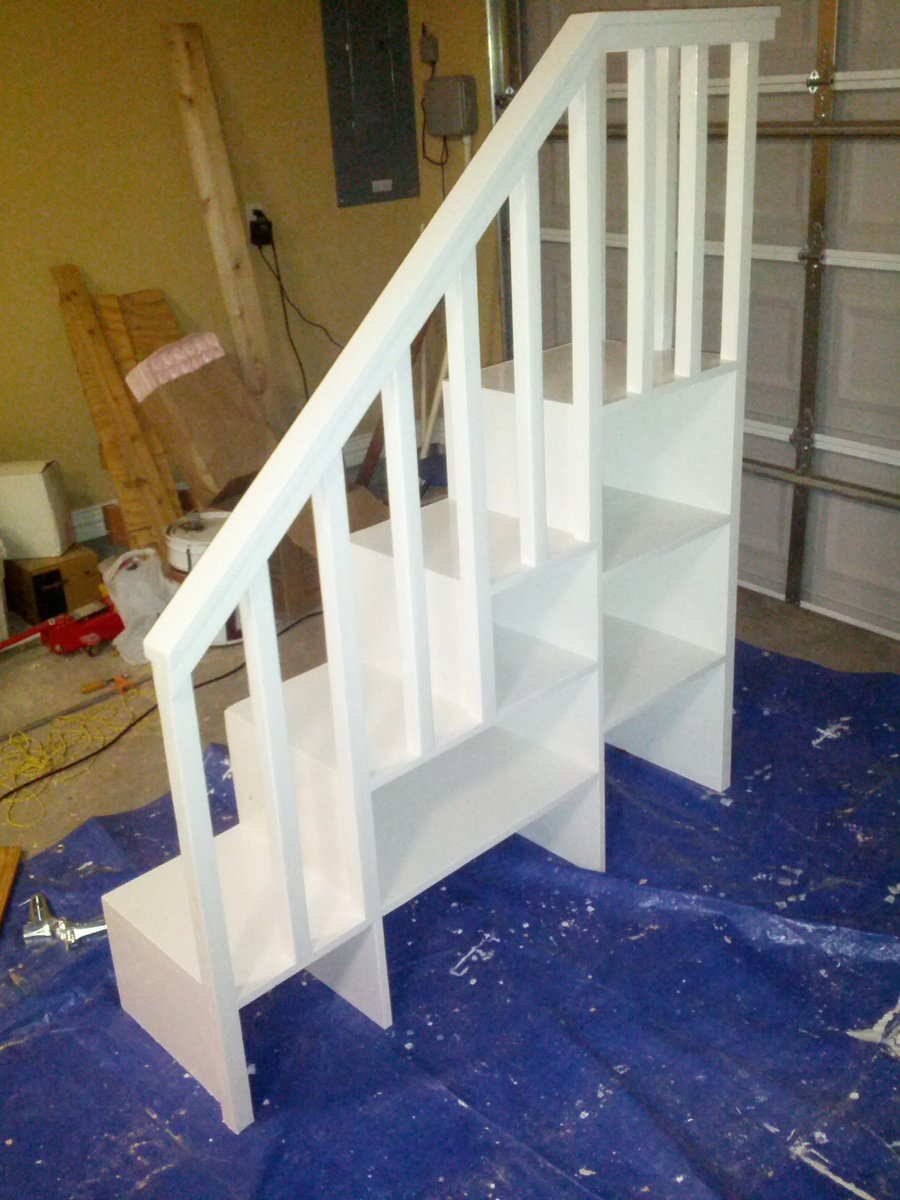
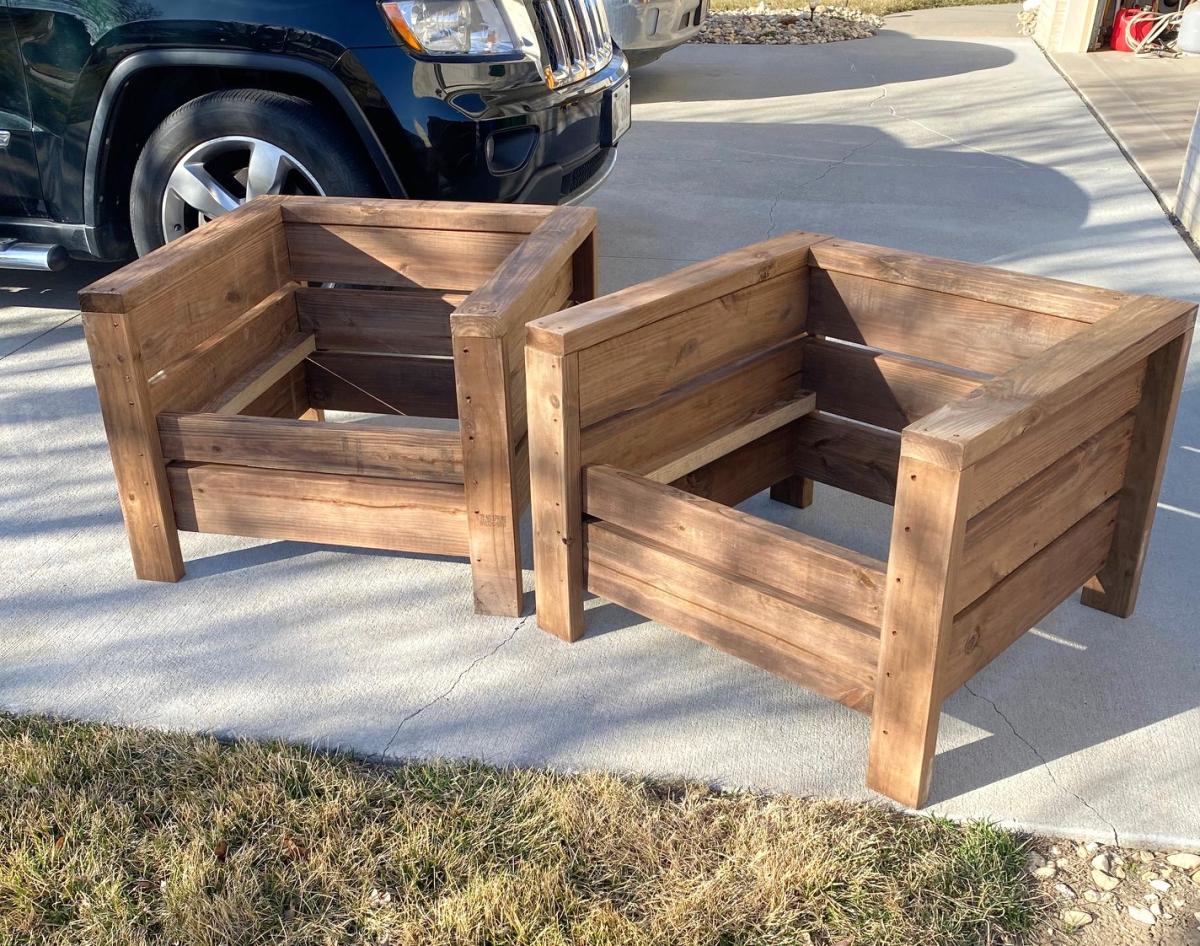
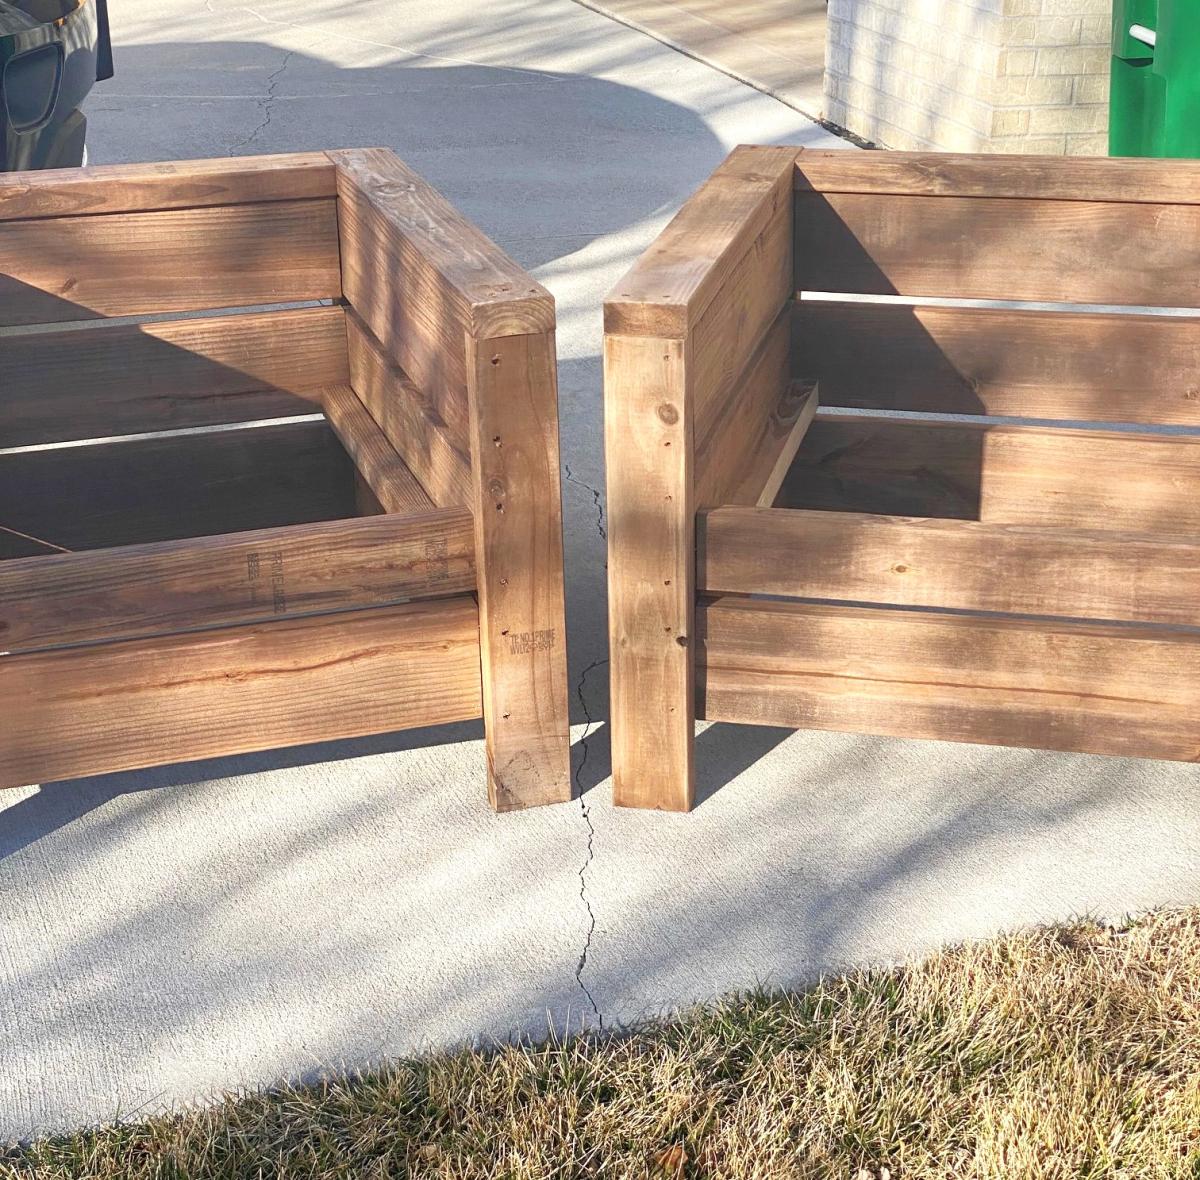
 My daughter didn’t like the first ladder so I moved it to one side. I stained the ladder with Minwax classic gray. I also used the classic gray stain for the cabin bed frame.  The pink on the cabin bed is  Sherwin Williams “hibiscus.”

 My granddaughter and I finished the bed this evening. She loves helping me “work “in the garage. We ended our build by adding a monster free zone. Monsters will be zapped if they try to enter the clubhouse or the bed! Thank you Ana! 

Mary

Estimated Cost
$150
Estimated Time Investment
Week Long Project (20 Hours or More)
Finish Used
Minwax Classic Gray
Sherwin Williams “Hibiscus”
Kilz white primer
Recommended Skill Level
Beginner

Comments

Classic Bunk Bed with Sweet Pea Stairs

Submitted by e_hutch on Fri, 01/17/2014 - 19:03

I wanted a bunk bed for our daughters, it needed to be easily moveable like the "classic bunk beds." I also wanted stairs like the "Sweet Pea Garden" bunk bed because we have toddlers in the house. I modified the classic bunk bed to put the ladder on the end, then built the Sweet Pea stairs to fit to the opening (I think the only difference in dimensions was a 20" top stair. I didn't want the unfinished ends of plywood so I got 4'x16"x3/4" pine boards from lowes which happens to be the width of the stairs in the plan. Instead of using the 1x2's as trim on the ends of the shelves I put two of them together, one all of the way down the front of each stair and one resting on the top of the stair (screwed together) so I wouldn't lose lateral stability. I then spaced 2x2's in between to keep it "simple" looking instead of the heart shaped decorations from the sweet pea bed. I used some 1/4" paintable composite board to provide a backing to the stairs. I bolted the stairs on to the bed with some flat bar stock cut to size and 3/8' in hex bolts cut to length. I used pocket hole joints wherever possible and countersunk all other screws and used 3/8" dots from lowes to fill the holes. I painted it with a coat of primer and a coat of Glidden Trim and Door paint in antique white from the Easy Vintage Step Stool project.

Estimated Cost
$400
Estimated Time Investment
Week Long Project (20 Hours or More)
Finish Used
Glidden Door and Trim, Antique White
Kilz Complete Primer
Recommended Skill Level
Beginner

Comments

zaphod

Mon, 06/23/2014 - 06:39

This is absolutely beautiful! Did you modify the size for toddler mattresses?
I would love to do the same for my kiddos - is there any way you could send me your version of the plans? [email protected]

Thanks so much!

Essential Adirondack chair

Submitted by str1523 on Mon, 05/25/2020 - 10:23

Like this chair! Changed the 3 1x10's on the back to 4 1x8's ripped down to 6 ¹⁵/¹⁶

Built from Plan(s)
Estimated Cost
40
Estimated Time Investment
An Hour or Two (0-2 Hours)

Comments

You chest

Submitted by Anonymous (not verified) on Sun, 12/26/2021 - 12:56

Ana White’s plans are the best I’ve seen. Some are easy and some are challenging builds. She’s so very encouraging in her videos. She makes me feel like I can keep on building. I’m very happy to say I started my business from her inspirations.

Built from Plan(s)

Comments

Sweet Dreams

Submitted by Tbacks on Sun, 02/02/2020 - 11:44

A lady that my husband works with just got her forever home through Habitat for Humanity.  We wanted to do something special for her and her kids so we used Anna’s platform plans to build one queen and 3 full size bed frames.  The plans were easy to follow and assembly was a snap on delivery.  

To make the fulls we took the queen dimensions and modified the cuts for the full size mattress dimensions.  
 

Thank you Anna for helping us to make 4 beautiful additions to our friends home.

Estimated Cost
$200/bed
Estimated Time Investment
Week Long Project (20 Hours or More)
Finish Used
Varathane Cognac
Recommended Skill Level
Intermediate

Rustic Outdoor Chairs

Submitted by Anonymous (not verified) on Mon, 03/04/2024 - 11:53

Seen these plans a couple years ago and finally have gotten around to making a set. This was a fun and really easy to follow set of instructions and I think they turned out really nice.

Jeff, with LaBrie Family Woodworking LLC

Seasonal And Holiday

Flip down kids table

Submitted by EDanido on Thu, 03/21/2013 - 04:22

I saw this plan a couple of months ago, and knew right away that this is what we need for our kids - their old table was always filled with papers, crayons and they never had enough space to store whatever they did.

I made the table longer so that it would be enough for both of them, and added foldable legs to support the table top.
Since I didn't find the right hinges for the legs, I used a piece of 1x1 with wood dowels which are attached to the inner side of the legs when unfolded.

Built from Plan(s)
Estimated Cost
$ 40 - but I had to buy the wood for the table top twice...
Estimated Time Investment
Weekend Project (10-20 Hours)
Finish Used
Walnut stain
Recommended Skill Level
Beginner

Comments

sawdust

Fri, 03/22/2013 - 16:08

Well, I now know what I'm doing tomorrow! I'm going to make a small hinged one to go in our entryway because we have nowhere to put stuff while we're getting our shoes on. Yours looks great!

Leaning Hall Tree

Submitted by vendo on Wed, 10/20/2021 - 12:33

I had a small piece of 2x10 left over from this plan's original post, as well as some 2x4's and a scrap 1x2 laying around, so added the top key hook and stained instead of painted. Love how it turned out. I did the top angle a little different too, so it sits a bit closer to the wall, making it awesome for a narrow entryway or space. Easy to modify for whatever the need.

Built from Plan(s)

Outdoor Sectional

I scaled back the length of the sofa by a few inches and I made the sectional only one seat to fit my space on the deck. This was my first woodworking project that I did by myself. I got the cushions for more than 1/2 off at Ikea so the whole project cost about $150 ($80 for the cushions). It took me about a week to complete but the total time was less than 10 hours to build and stain. I'm pretty happy with how it turned out.

Estimated Cost
$150
Estimated Time Investment
Weekend Project (10-20 Hours)
Finish Used
Pittsburgh Paints Stain & Sealant in One for Decks, Fences, & Siding in Walnut. I brushed on the exterior stain just like a paint. I did the top part of the sofa first, then flipped it over and stained the bottom. Read instructions on the label.
Recommended Skill Level
Beginner

Comments

Back