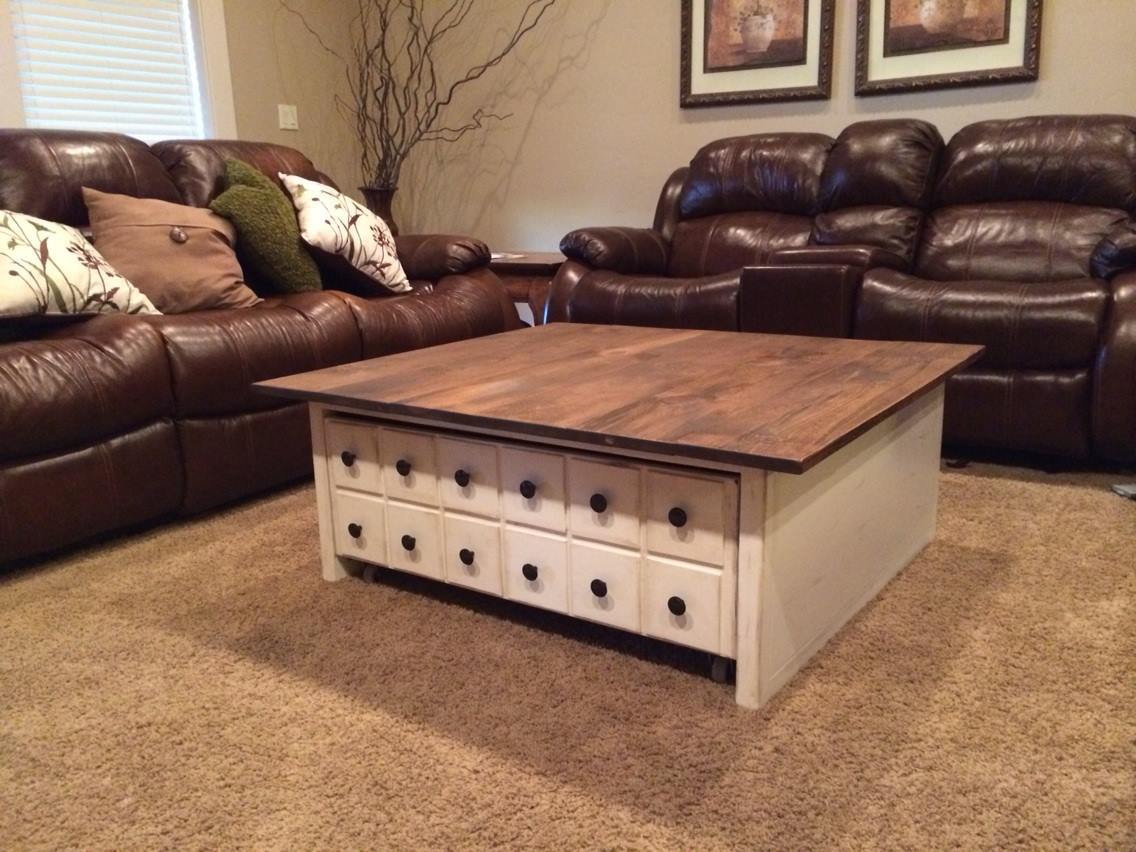
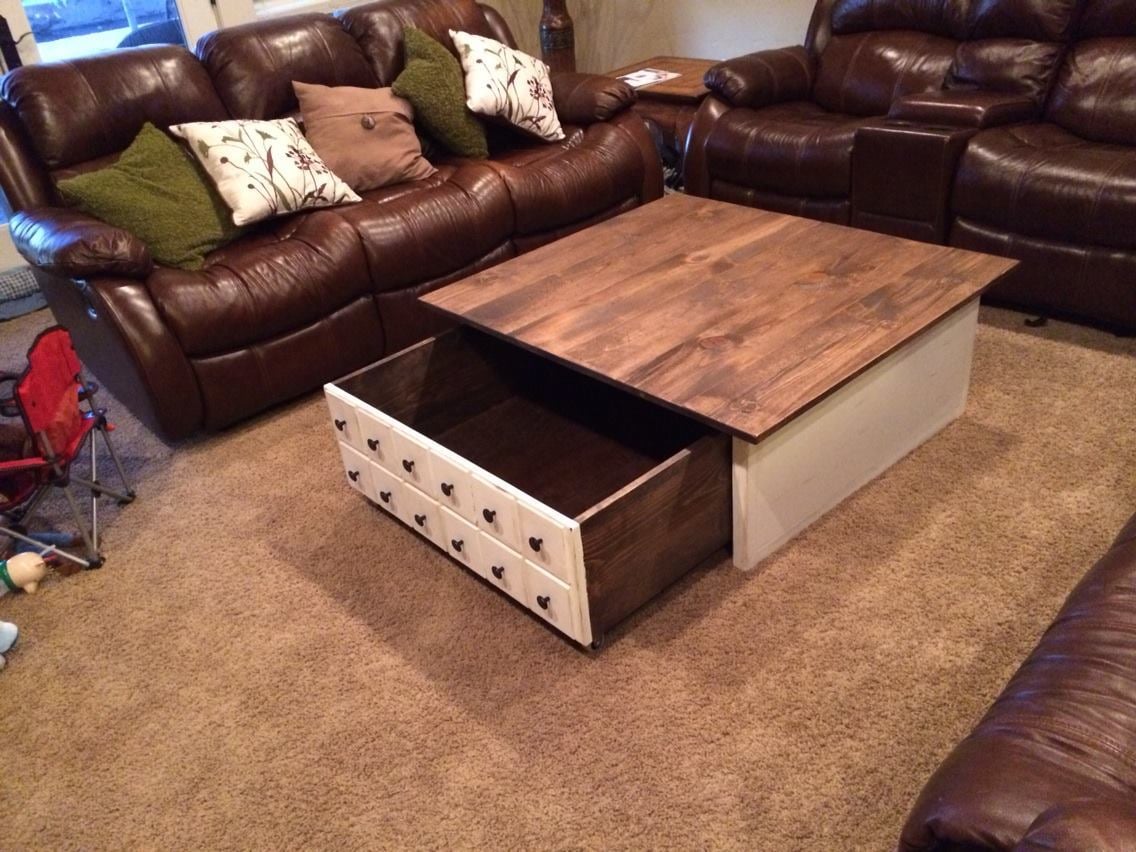
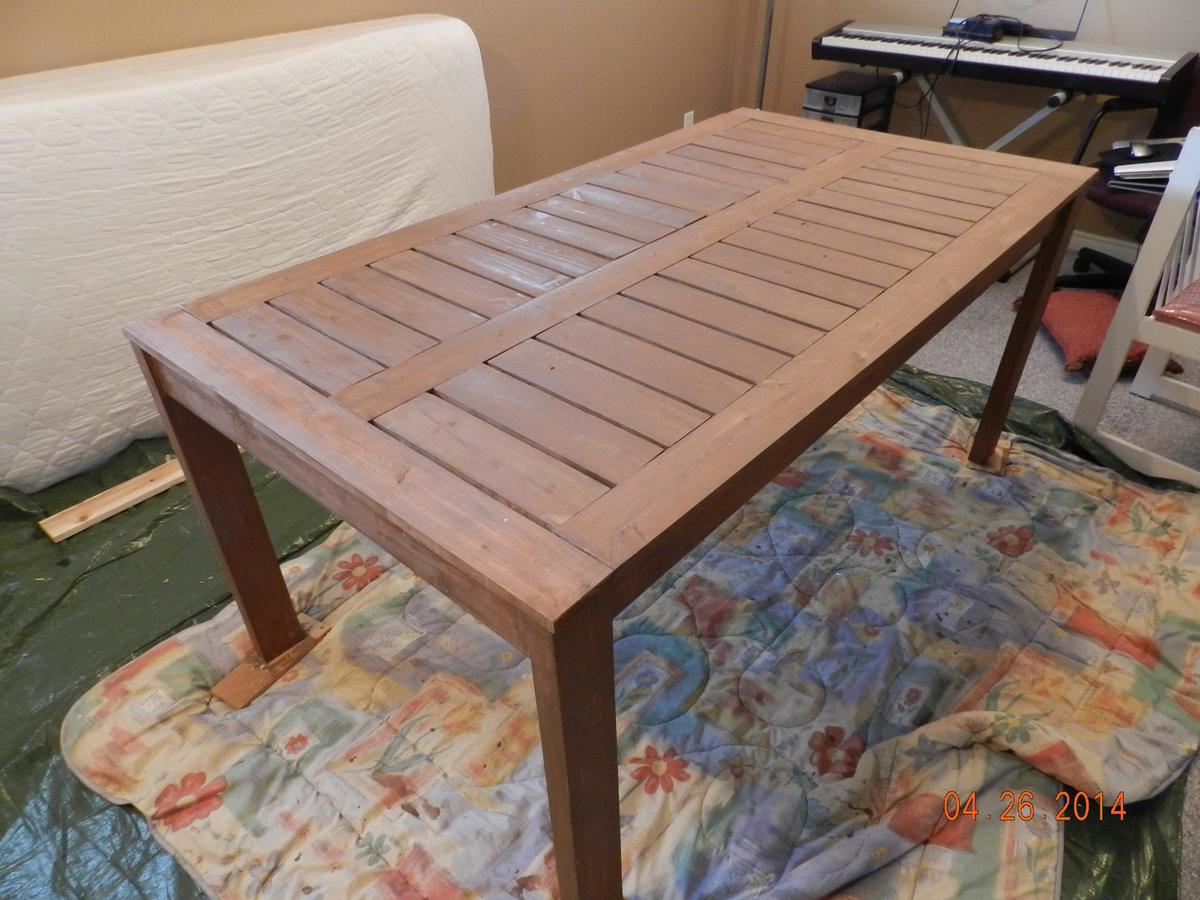
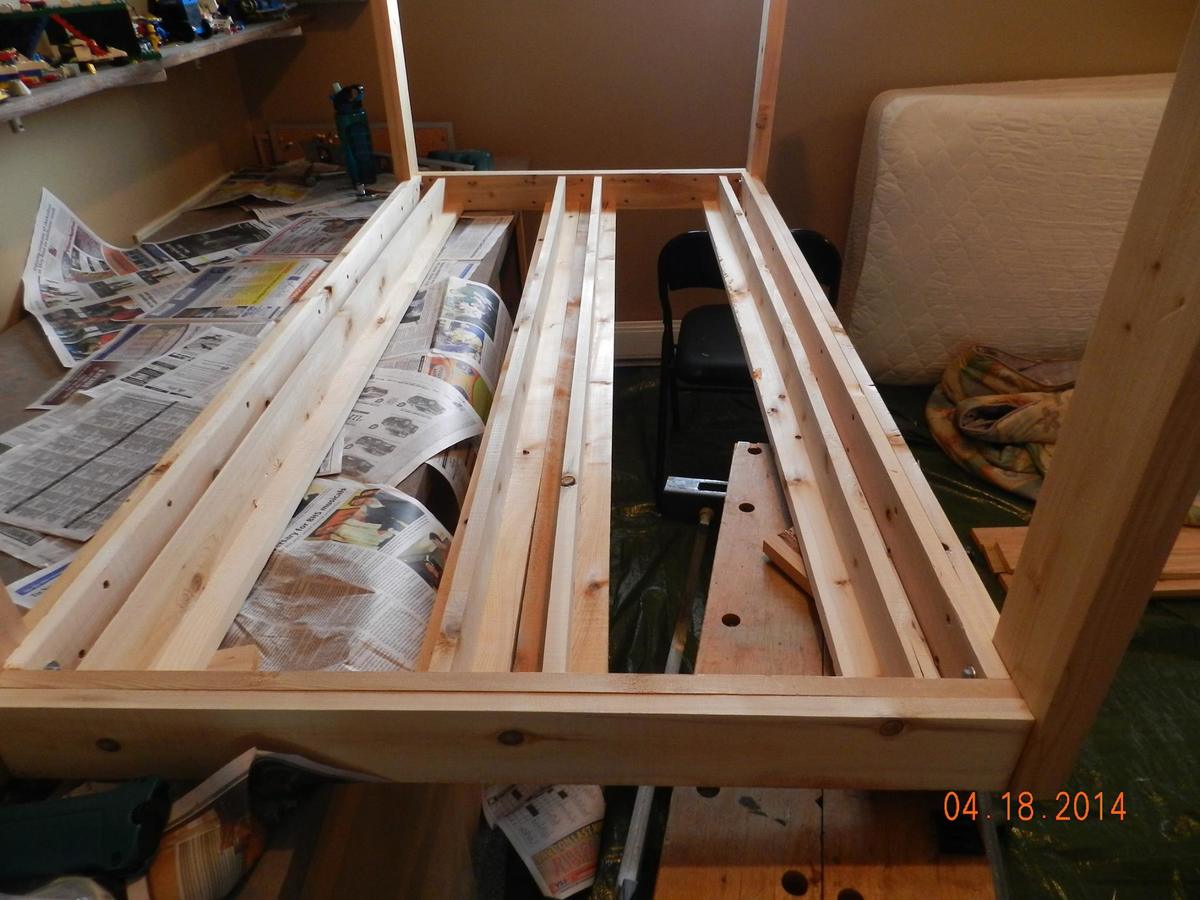
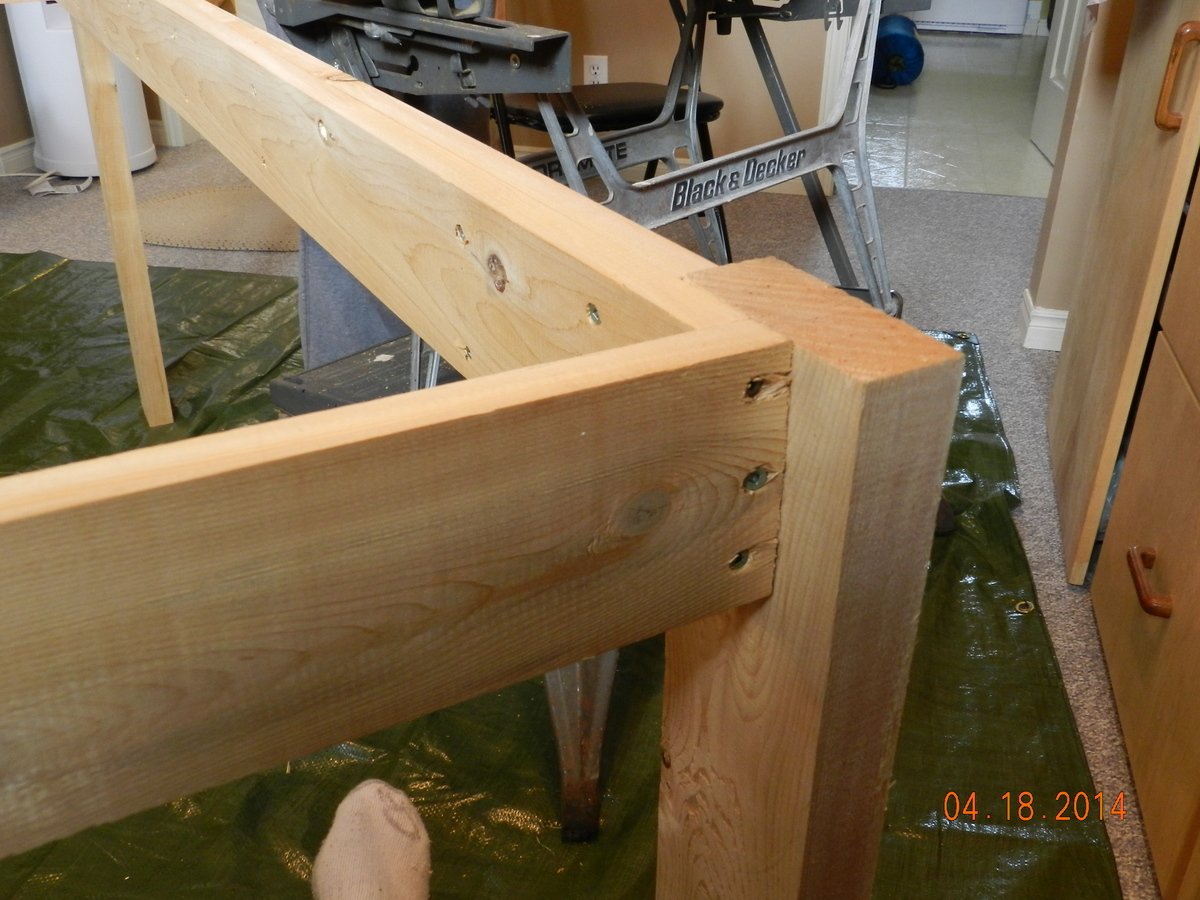
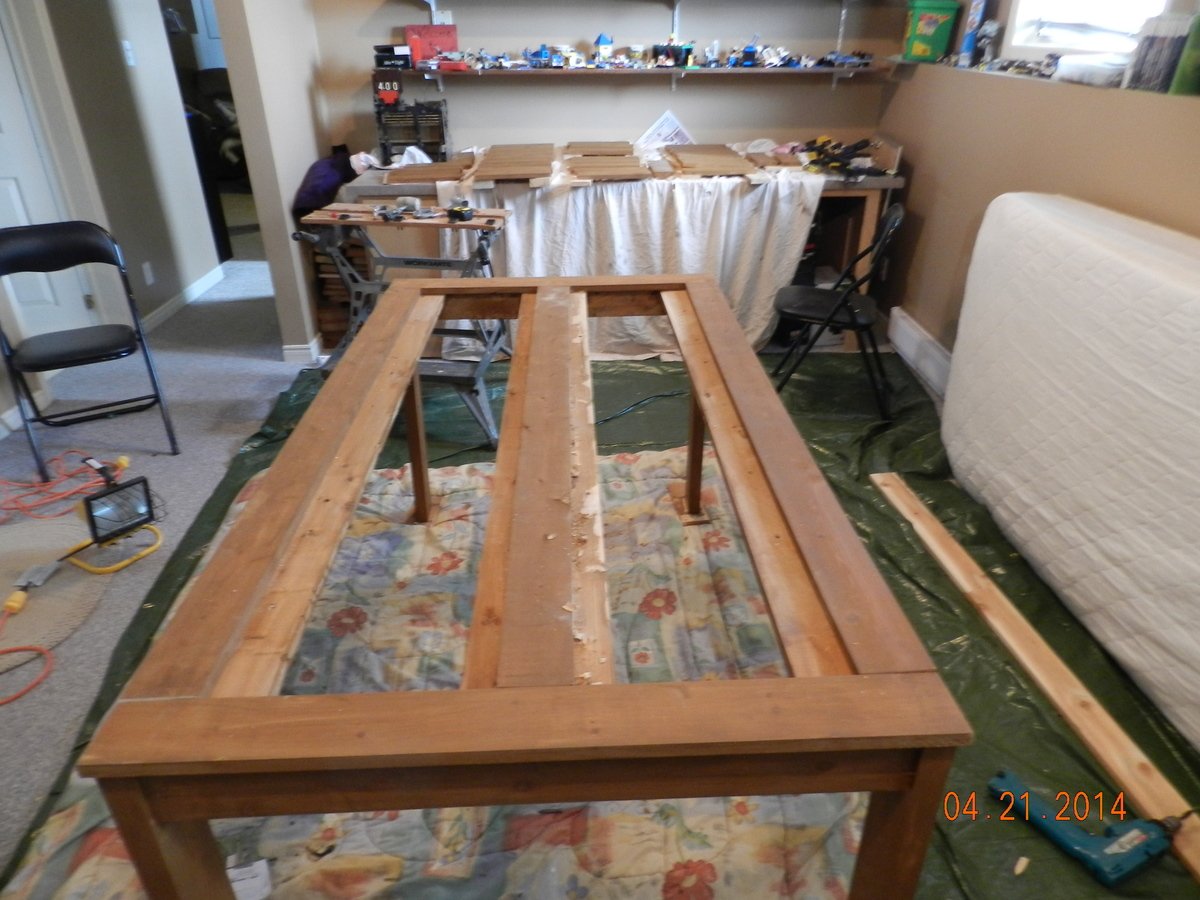
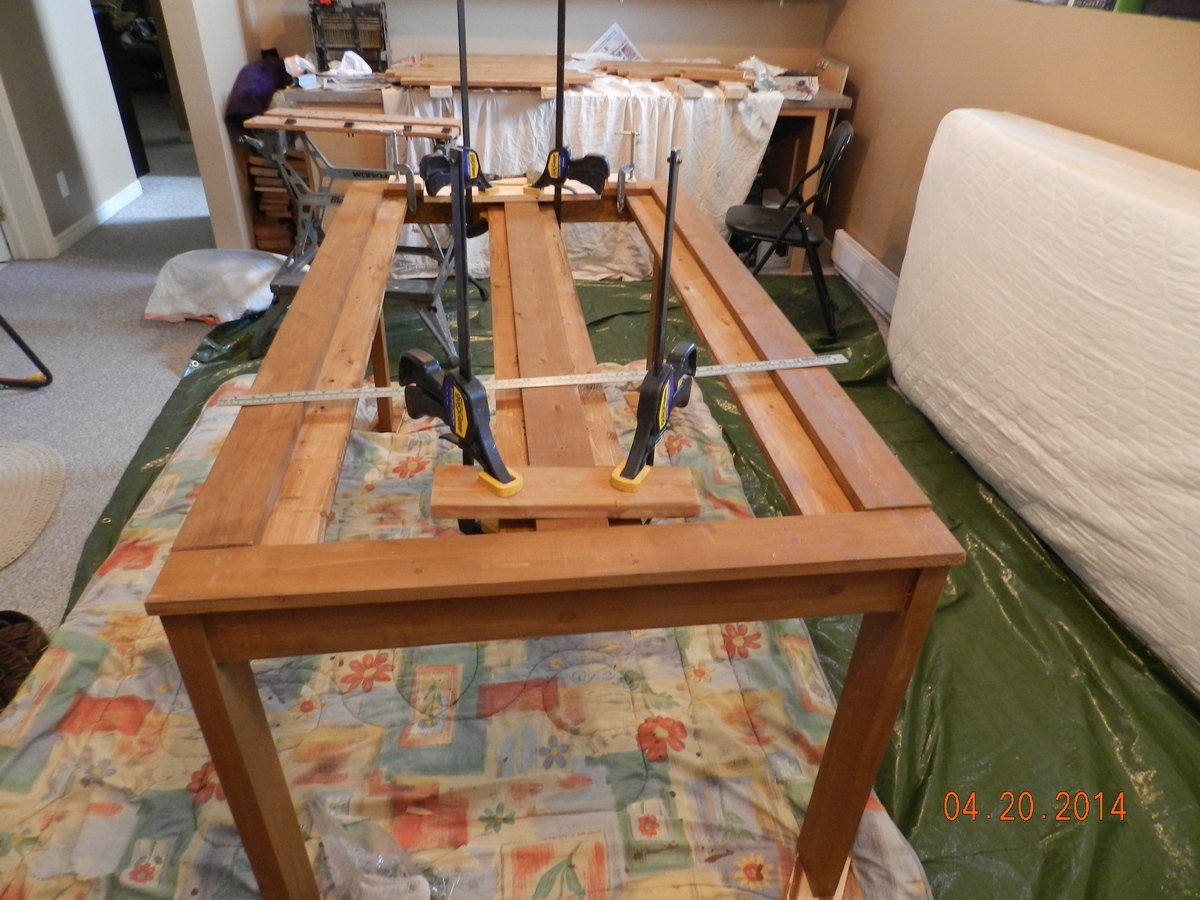
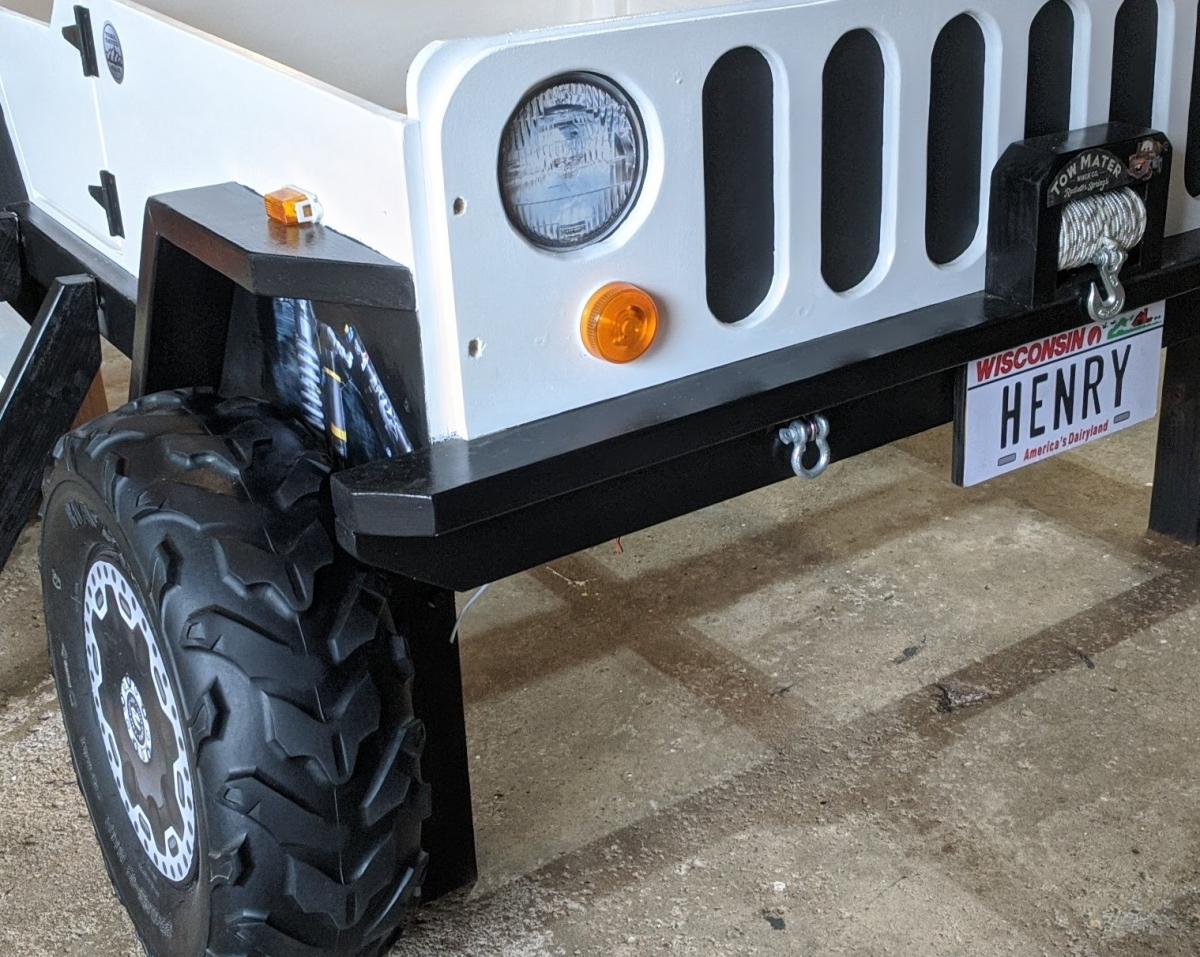
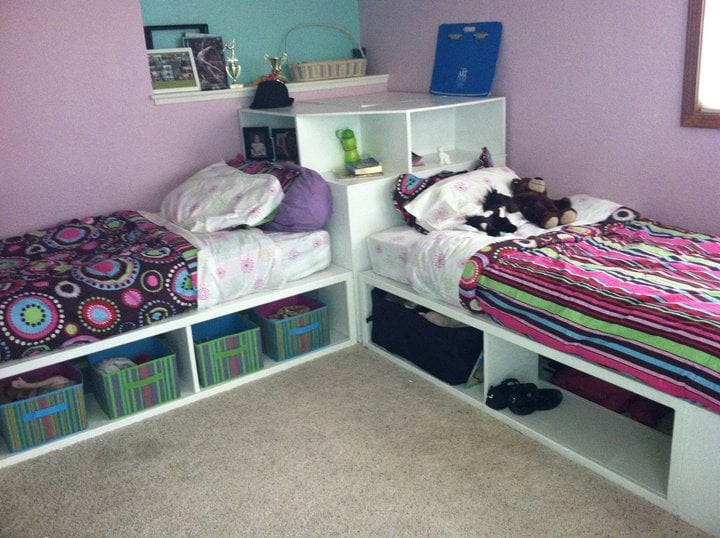
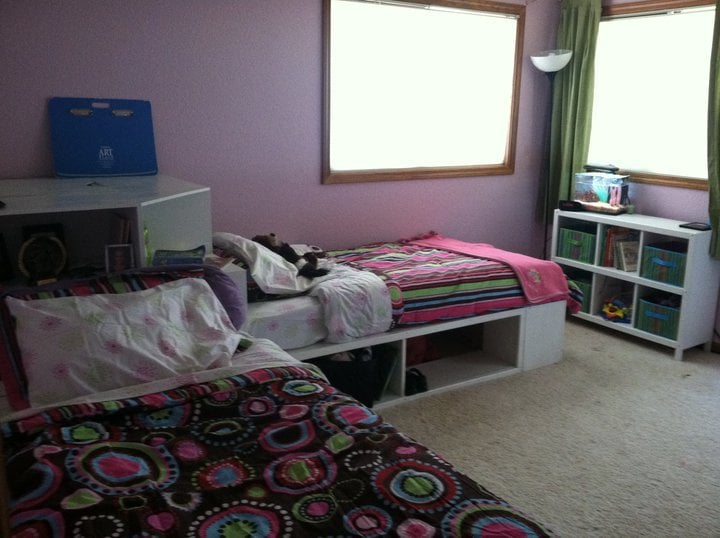
Community Brag Posts

My gigantic bed!

Submitted by ThiaD on Sun, 03/06/2016 - 07:45

Thank you so much Ana for providing such good plans! I use your Mom's Fancy Farmhouse Bed plans and added drawers underneath (a girl can never have too much storage!) using your Under Bench Trundle Drawers plans. I made it look a bit different than yours so it fits with the desk I already have in my room and used Mortise Bedlocks to assemble it, so it will be easier to take it apart when I move next time. This was my first project using your plans and my Kreg Jig and I'm hooked!

Estimated Cost
600 CAD
Estimated Time Investment
Week Long Project (20 Hours or More)
Recommended Skill Level
Intermediate

Comments

Square Apothecary Coffee Table with Toy Box Rrundle

Submitted by rebmcami on Sat, 01/18/2014 - 19:21

I loved the design of the apothecary coffee table, but knew a square table would look best in my space. I have a 15 month old son who's toys are always all over our living room so the toy box trundle seemed like a perfect secret storage solution for us. I combined the plans of the apothecary toy box trundle with the library coffee table. The 3 sides are built similar to the sides in the plans for the library table, as well as the table top. The toy box trundle was built according to the plans for the apothecary table except that I made it a very deep drawer 33"X34.5". The table top measures 43.5"X40" This was my first time building a piece of furniture (I've built a chicken coop) and first time using my kreg-jig to make pocket holes. I had a great time building learned a lot. It took me awhile to complete because I was only able to work on it when my son napped.

Estimated Time Investment
Week Long Project (20 Hours or More)
Finish Used
I used white latex paint on the base. I did 3 light coats using a foam brush and sanded lightly between coats. I distressed/aged the edges with sand paper and carefully rubbed areas with dark walnut stain. I used special walnut stain from minwax on the top and did 3 coats of spray polyurethane.
Recommended Skill Level
Beginner

Comments

Toybox Bookshelf

Submitted by Anonymous (not verified) on Mon, 09/18/2023 - 15:46

Toy bin box with cubby shelves

Caleb

Built from Plan(s)

Comments

Modified Simple Outdoor Dining Table

Submitted by DD5.1 on Sat, 04/26/2014 - 20:00

I didn't make any changes , his orginal design was great. Hope these pictures help others. I tried to link to the modified-simple-outdoor-dining-table but wasn't able too.

Built from Plan(s)
Estimated Cost
120
Estimated Time Investment
Weekend Project (10-20 Hours)
Finish Used
make sure you stain as you go
Recommended Skill Level
Beginner

Comments

DD5.1

Sun, 04/27/2014 - 14:06

Found the plans "modified-simple-outdoor-dining-table" and I built it. Very nice table, I posted more pcitures to help others

DD5.1

Sun, 04/27/2014 - 14:06

Found the plans "modified-simple-outdoor-dining-table" and I built it. Very nice table, I posted more pcitures to help others

Cedar Benches

Submitted by SaraLodise on Sun, 07/13/2014 - 20:13

Made two 48" long cedar benches that could be carried down to the firepit in our yard. They're also nice for sitting on the deck and watching the dogs play. I had to use 3 - 2x6s for the seat instead of 2 - 2x8s since 2x6 was the largest I could get in cedar. Made it a little bit wider.

Built from Plan(s)
Estimated Cost
?
Estimated Time Investment
Weekend Project (10-20 Hours)
Finish Used
none
Recommended Skill Level
Intermediate

Garage Shelves + Work Bench

I used Ana’s plans for the garage shelves, but modified them to include a work bench. A lot of you tubers have done this, built a combination work bench and shelving, but I built nearly everything according to Ana’s plans. 12 feet long, 24 inches deep. I got some LED lights (two 1600 lumen strip lights) from menards that really brighten up my entire garage and make the work bench more useful. The one thing I really wanted was to not have a supporting pillar on the work bench to keep it open, and I loved how it turned out. I went for 3/4 plywood, mostly to have a stronger work surface, and I’m glad I did. I have since added a supporting 2x6 off of the study to support the top shelf above the bench and its strong enough to do pull-ups off of, and I have reinforced the support leg under the bench with a cross bar. Thanks for the great plans!!

Estimated Cost
~$200 (lumber prices have gone up recently due to supply issues with covid)
Estimated Time Investment
Weekend Project (10-20 Hours)
Recommended Skill Level
Starter Project

Comments

Adirondack chair from Pallets

Submitted by Anonymous (not verified) on Fri, 03/24/2017 - 19:42

I decided to try and use the plans on Ana's site but with a twist. I wanted to limit myself to using only pallets. I think it turned out great! I can't upload all the photos because they exceed the maximum size limit. If I was able to you could see how each chair is slightly different and has a lot of character. I finished them with a waterproofing oil which I highly recommend over other finishes. 

Estimated Cost
$10 for screws.
Estimated Time Investment
Afternoon Project (3-6 Hours)
Finish Used
Cabot oil
Recommended Skill Level
Beginner

Comments

Jeep Bed

Submitted by papamike on Mon, 07/05/2021 - 17:15

I hope this is OK to add here. It's not an Ana White plan, so moderator please delete if it is not allowed. I made this bed for my grandson. I bought a plan online and modified it from a twin to a full size bed. The dome light and running lights work as night lights. A motion sensor light activates if he crosses the door to illuminate the ladder. Front tire is made as a step so his parents can climb in and read to him. The whole thing is on EZ Sliders so they can move it away from the wall to make the bed.

Estimated Cost
$150.00
Estimated Time Investment
Weekend Project (10-20 Hours)
Finish Used
Latex paint.
Recommended Skill Level
Beginner

Comments

Eagle Project Workbench - Ultimate Roll Away Workbench with Miter Saw Stand

Submitted by nelsoncc on Mon, 10/18/2021 - 11:32

My son chose to make a workbench for his high school theater for his Eagle Scout project, and selected the Ultimate Roll Away Workbench with Miter Saw Stand as the basis for the project. The theater teacher wanted pegboard for tool storage, so we extended the rear legs on each workbench and notched the top to allow them to pass through. We built two frames from 1x3s to fit inside the rear legs, then put a pegboard inside each one.

To secure the extended legs, we added a riser shelf from 1x8s. We put a storage station for drills at one end of the riser shelf.

We also made all the cart shelves adjustable and added an adjustable shelf under the miter saw, and added lighting and power strips.

We left out the panels at the end of the workbench to allow access to the shelves there without having to remove the carts. Once we had constructed it, we added a brace at each end of the workbench to better support the outside front legs.

This plan was the perfect one for the theater, giving a stable work area for the miter saw and allowing for tool and materials storage. The carts can be rolled around to where a work surface is needed. This will come in handy for years of set construction in the theater. So proud of my son and all the leadership and hard work he put into this project!

Comments

Storage beds (twin) with Corner unit

Submitted by Dinabu on Tue, 05/03/2011 - 08:48

We made these beds for my daughters, who were ready to pass on the bunkbeds to their little sisters. We have 4 girls in one room, so use of space is crucial! I originally wanted the hutch as well, but as you can see in the picture, we had to work around a wall cut out, so we modified the corner unit to have a larger shelf area to fit the space. We also left the sides open to be able to slide containers in to store out of season clothes and blankets, though the ends have a backing.

Estimated Cost
$250-$300.
Estimated Time Investment
Weekend Project (10-20 Hours)
Finish Used
Gloss white paint.
Recommended Skill Level
Beginner

Special Teacher Gifts

My son Jack, has Down syndrome. He's had the same preschool teacher for the last 3 years, and now it's time to move on to kindergarten. Not only does he have a dedicated teacher, but he has two paraprofessionals (teacher's aides) that take turns in helping him 1:1 all day long. I figured that it was time for all three of them to relax this summer. So, in appreciation, I made three of the adult sling chairs so they can enjoy their much deserved relaxation.

Estimated Cost
$25 - $30
Estimated Time Investment
Afternoon Project (3-6 Hours)
Finish Used
Since I used cedar, I didn't want to do anything to it except put a coat of Thompson's water sealer on it.
Recommended Skill Level
Beginner

Comments

mamma_joy

Tue, 06/21/2011 - 00:00

As an OT in the schools, I can understand your connection to the dedicated teacher and staff that work for your son. I'm sure that these gorgeous chairs will show your appreciation! What great choices in fabric, too!

marlaandwilliam

Wed, 06/22/2011 - 14:17

thanks!! i just love fabric! but mod-ish colors and designs really are so striking to me - LOVE it! :)

Sherry (not verified)

Fri, 09/23/2011 - 19:31

Would you mind sending the instructions for these chairs. I think this is something that I could do and would love to make a set for my husband for Christmas. We are all about homemade. That would be so great!

debandtom25

Wed, 09/28/2011 - 20:05

Hi Sherry. To find the page where I got the plans, just click on the words "Wood folding sling chair - adult" next to the bolded "From Plan" listed above. That will take you directly to Ana's plan.

Seasonal And Holiday

$25 2x4 Hall Tree

Submitted by Anonymous (not verified) on Sun, 10/21/2018 - 15:39

Our small entryway was in need of some sort of bench or coat rack. Since the space is on the smaller side, I was looking for plans that were simple and would not overwhelm the area of the house.  When I came searching for plans on Ana White’s website, these plans were JUST posted! It was meant to be! This was my second build ever. Very simple and straight forward. I used Special Walnut for the stain and a satin polyurethane for the top coat.

Built from Plan(s)
Estimated Cost
$25
Estimated Time Investment
Afternoon Project (3-6 Hours)
Finish Used
Special Walnut & satin polyurethane
Recommended Skill Level
Beginner

Fancy X Farmhouse Table

Submitted by Anonymous (not verified) on Sun, 09/08/2019 - 11:35

Fancy X Farmhouse table for the wife. Modified to 8ft table with 2x 4Ft benches and 1x 8ft bench. Used bolt screws to diagonal slats for looks and pipe horizontal support vice the 2x4. Top is Dark walnut stain and an egg shell Chalk paint with outdoor clear coat. Kids had a blast distressing the table and benches for an older look. Not a bad weekend project.

Estimated Cost
$300
Estimated Time Investment
Week Long Project (20 Hours or More)
Recommended Skill Level
Intermediate

My Simple Outdoor Lounge Chair with 2x4 modification

I modified this chair with 2x4's as the base and 2x2 for decoration on arms, this is prior to sanding and finishing

Built from Plan(s)
Estimated Cost
$15-$20 dollars, depending on local lumber prices and finishing options.
Estimated Time Investment
An Hour or Two (0-2 Hours)
Finish Used
Unfinished
Recommended Skill Level
Beginner

Comments

RandyW

Sat, 06/13/2020 - 16:33

I always take my sander to the sharp edges and round them off

Garden Enclosure

Submitted by Anonymous (not verified) on Thu, 06/04/2020 - 17:29

My chickens took over my garden area and being the voracious raptors they are, I needed to build a garden enclosure to keep my veggies safe. I modified a little, making my beds deeper. I also had to stretch chicken wire over the top to keep the great flyers out. I also used it as a way to organize my garden tools (which is possible because I live in Southern California with moderate temperatures and little rain. Thanks for the plans! Yvonne

Built from Plan(s)
Estimated Cost
500
Estimated Time Investment
Weekend Project (10-20 Hours)
Finish Used
Deck on the outside. Clear coat on the inside. I also added chalkboard paint on the inside so I could fill in what I’m growing and erase it after.
Recommended Skill Level
Beginner

Utility Room Shelves

Submitted by Anonymous (not verified) on Tue, 09/13/2016 - 20:58

I'm so grateful for these plans! Since we were building in a basement against a concrete wall, we just made each side with the vertical 2x4 supports, then anchored the shelves to the exposed studs on the side walls for safety. This project was so fast and easy -- I put them together one night after the kids went to bed. They're 8' long and 2' deep, very sturdy, and they were highly economical to build. I love that the shelf is smooth and flat, too, as this makes it easy to store small things as well as large totes.

Estimated Cost
$70
Estimated Time Investment
An Hour or Two (0-2 Hours)
Finish Used
None
Recommended Skill Level
Starter Project

Cedar planter and 3 tier planter

Submitted by Anonymous (not verified) on Tue, 08/04/2020 - 17:48

My very first attempts at wood working. My new COVID-19 hobby 🥰

Estimated Cost
20.00
Estimated Time Investment
An Hour or Two (0-2 Hours)
Recommended Skill Level
Beginner