Community Brag Posts

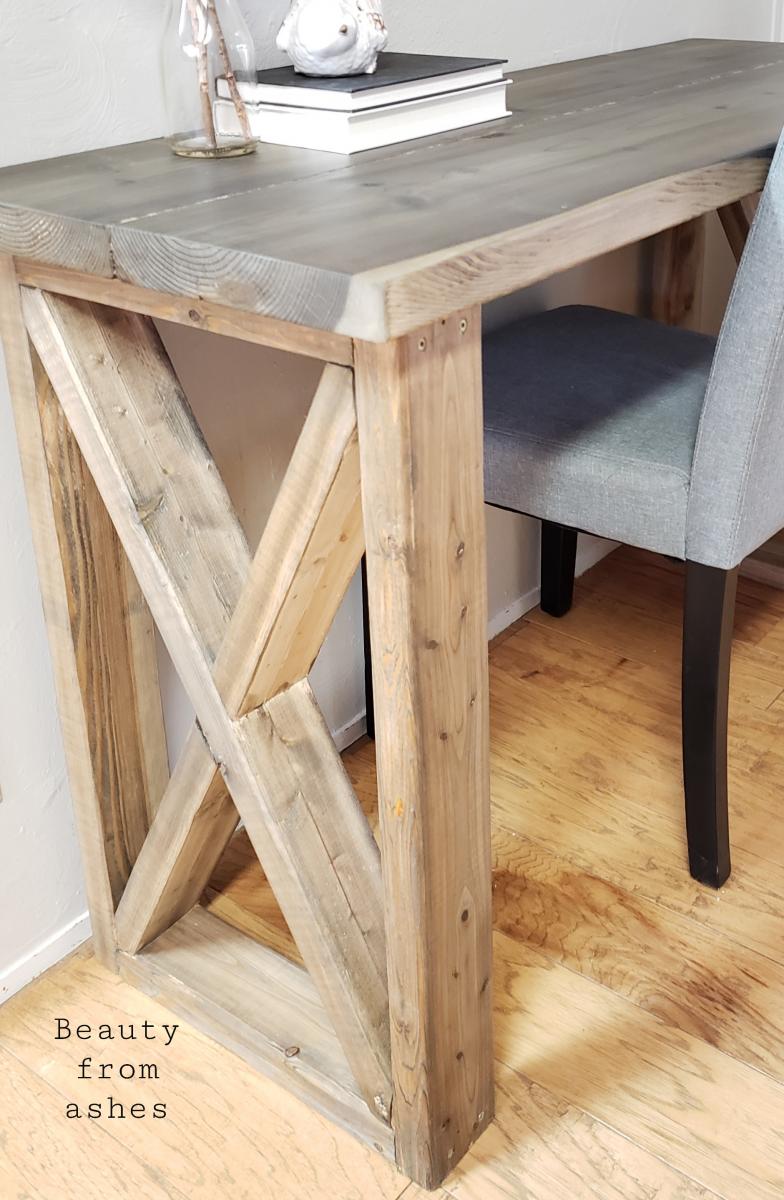
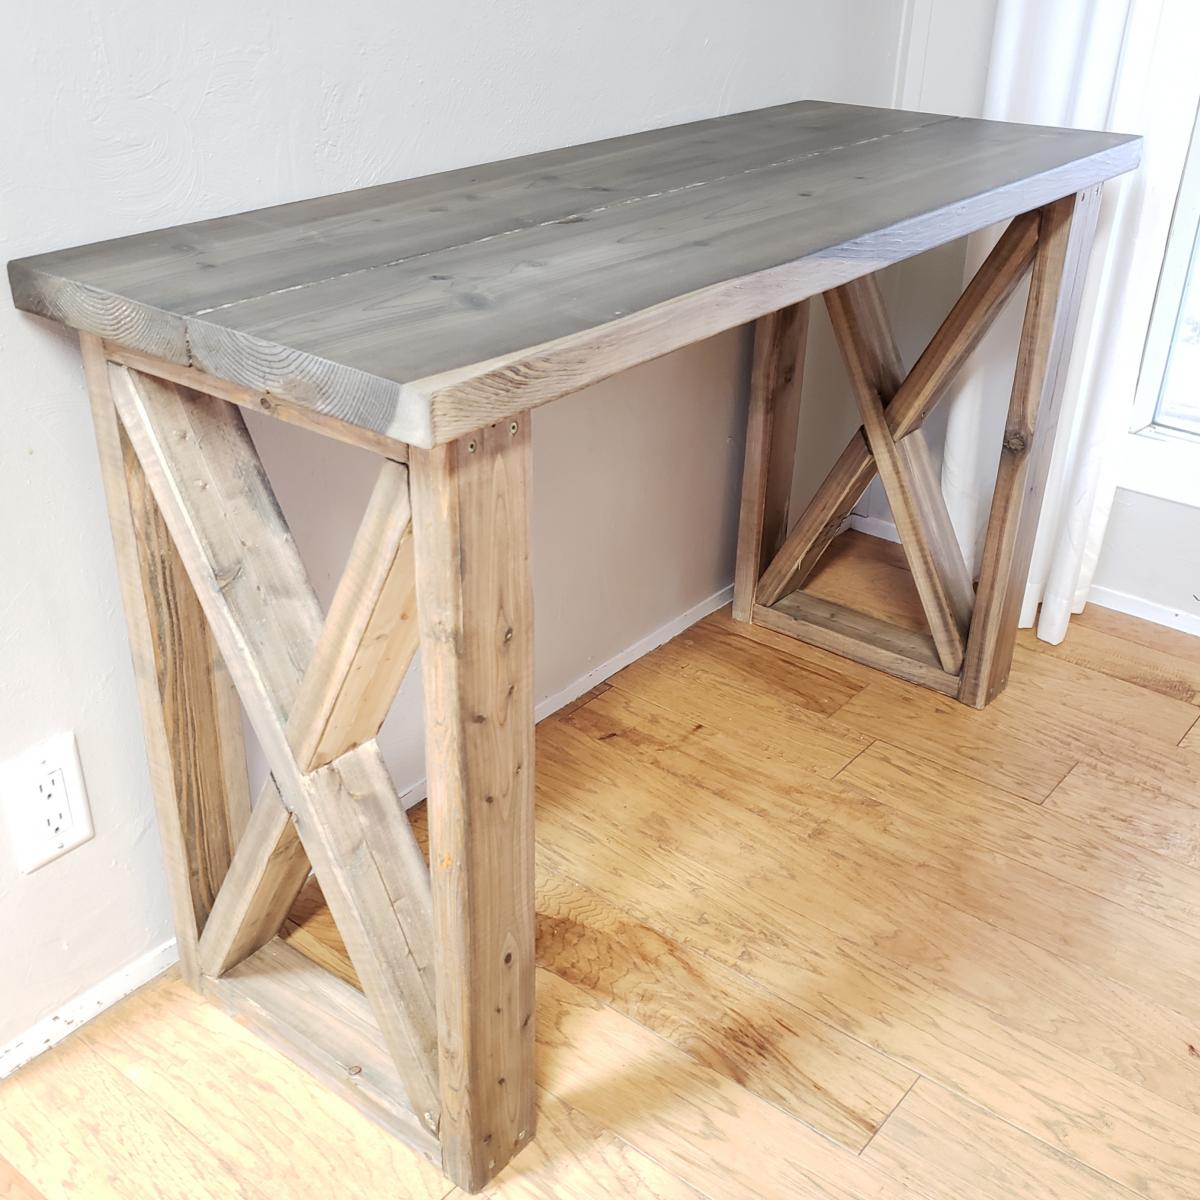
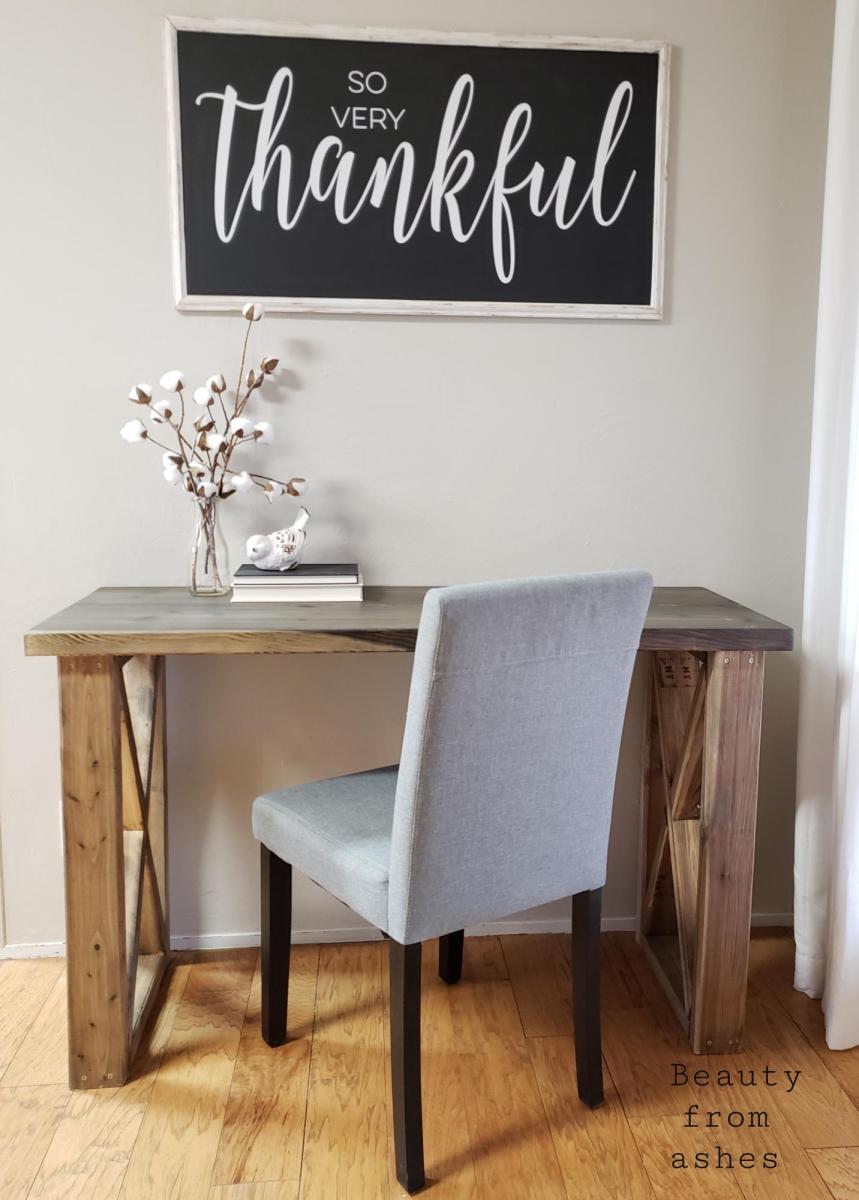
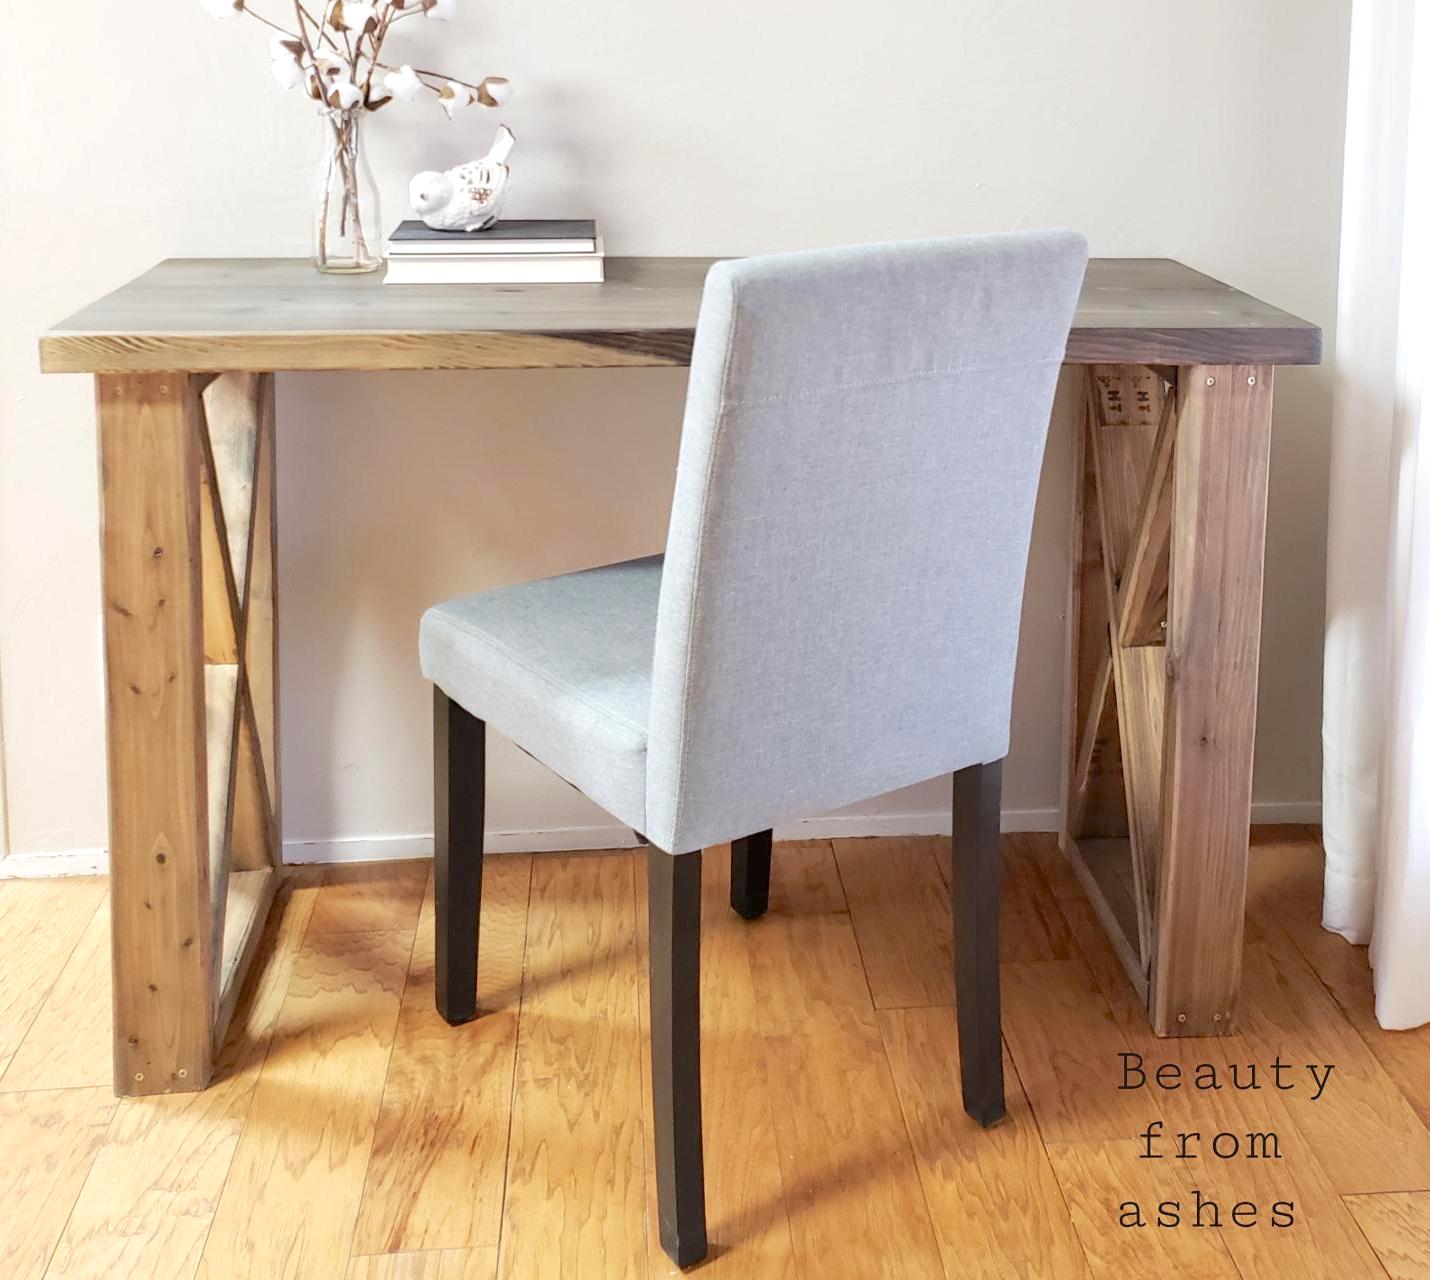
Desk featuring "X" legs - farmhouse style

Submitted by Anonymous (not verified) on Fri, 12/27/2019 - 07:20

I built this table for my son to use as a "Lego building station" in his room. I made it narrower (18" deep) x 4' long to fit along three wall in his small room. I had some trouble chiseling out the piece for the "X" part to interlock and ended up just cutting the piece through like Anna does with her "$40 farmhouse coffee table", which worked well. I sanded and then stained using homemade vinegar and coffee stain and sealed with water based polyurethane in matte finish.

Built from Plan(s)
Estimated Cost
$35
Estimated Time Investment
Afternoon Project (3-6 Hours)
Finish Used
I mixed up a homemade batch of coffee stain (vinegar, coffee, steel wool) and top coated with Matte polyurethane.
Recommended Skill Level
Intermediate

Comments

Adjusted Counter Height Farmhouse Table

Submitted by rahurtado on Mon, 05/04/2020 - 23:26

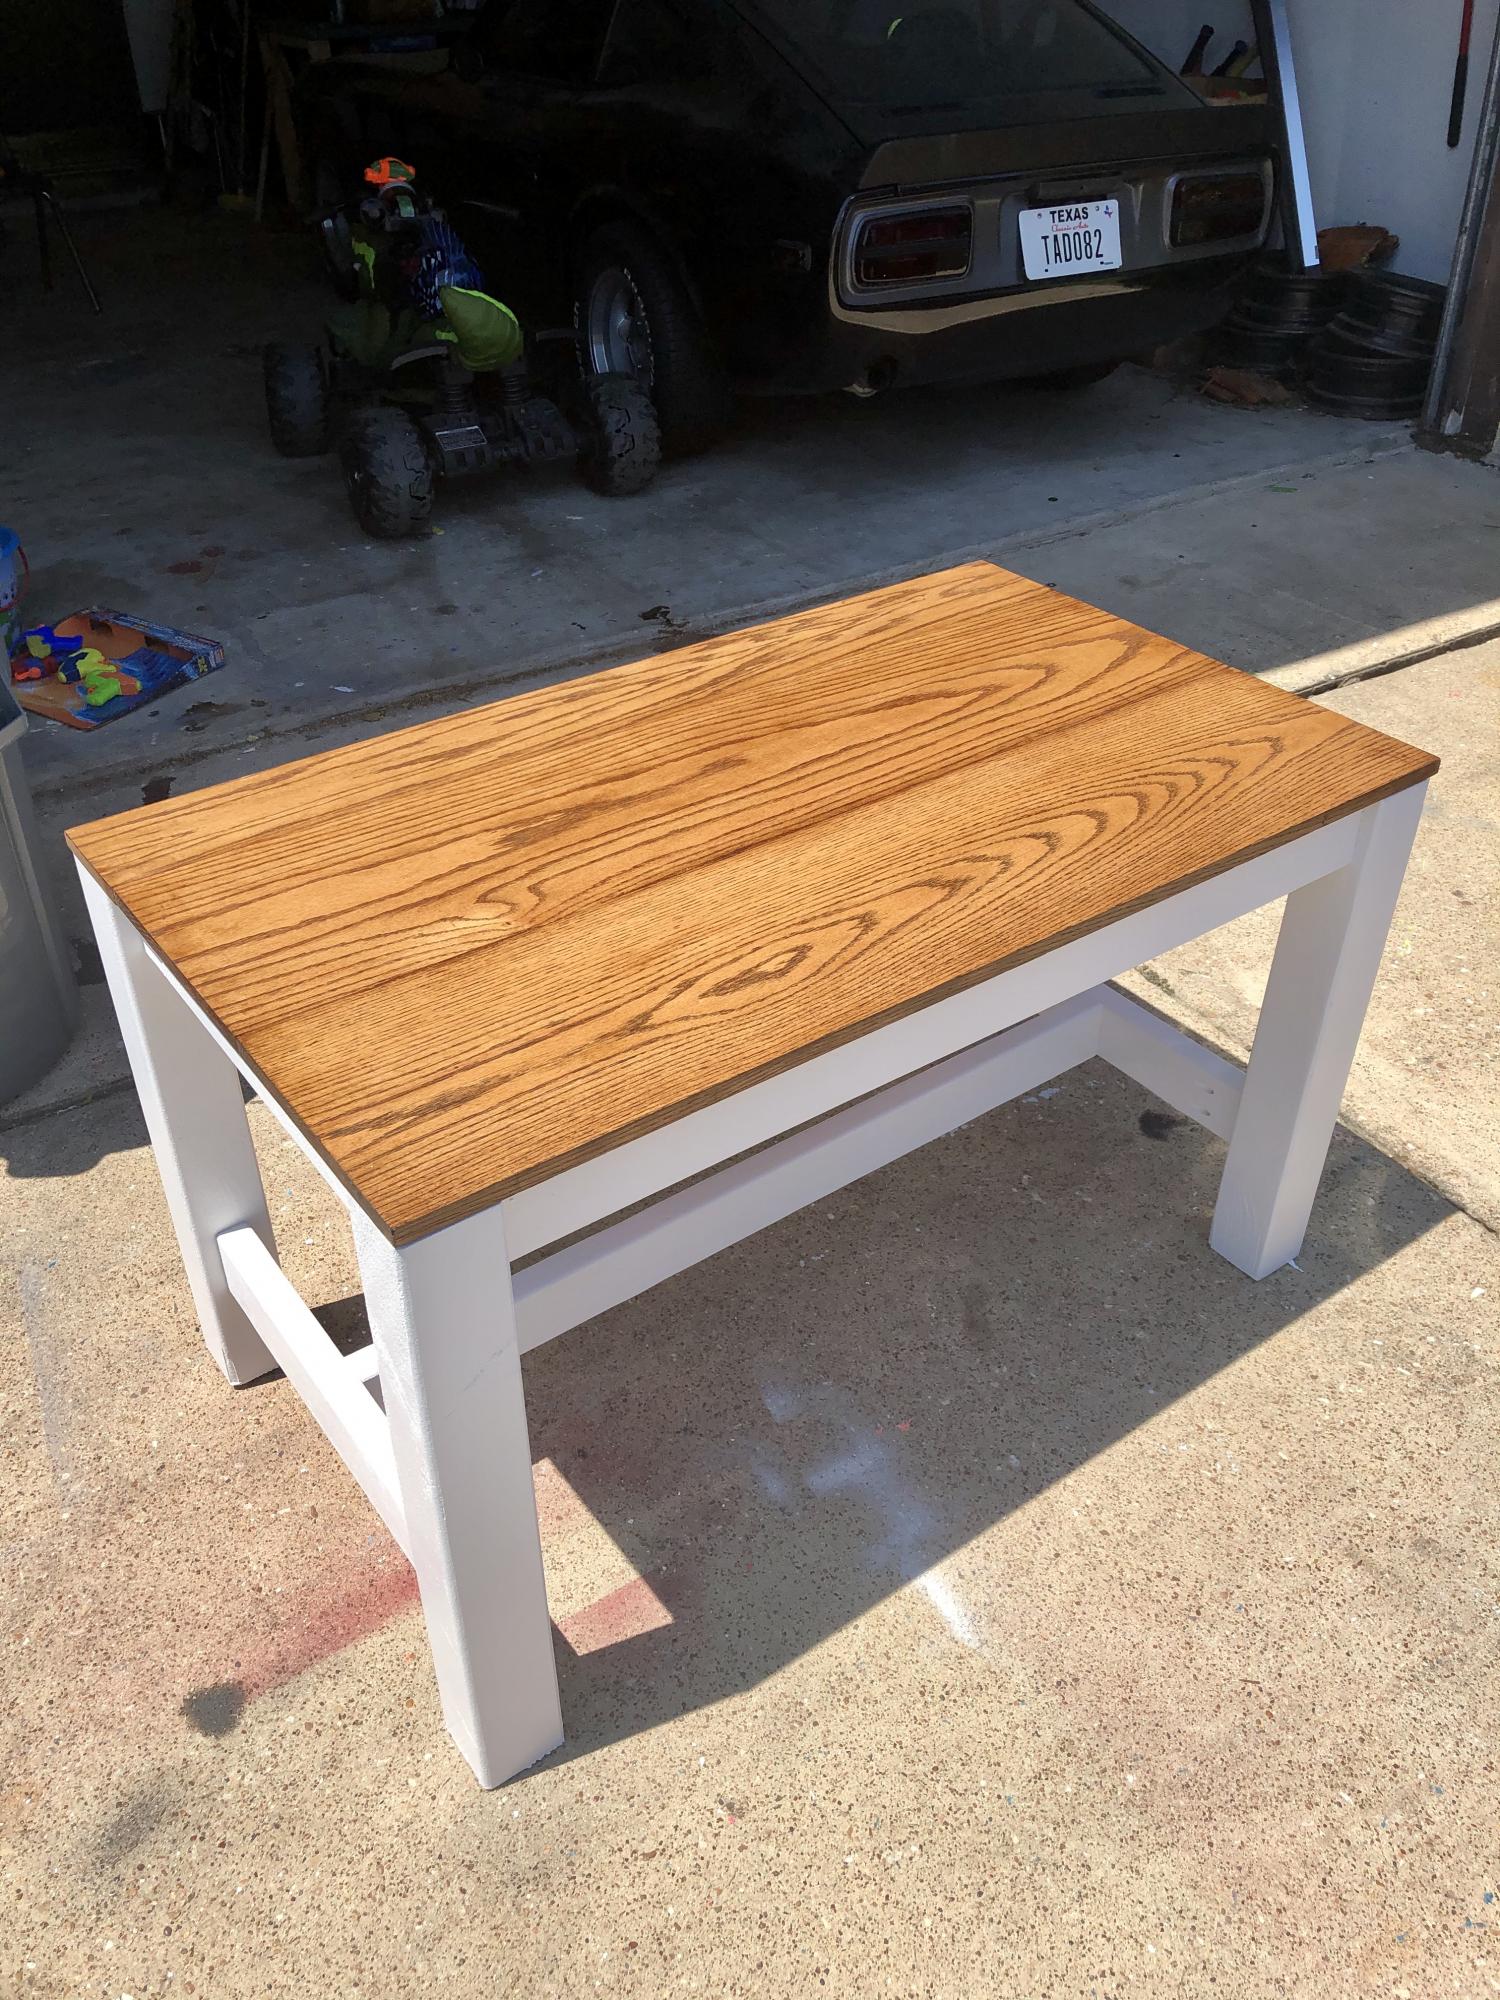
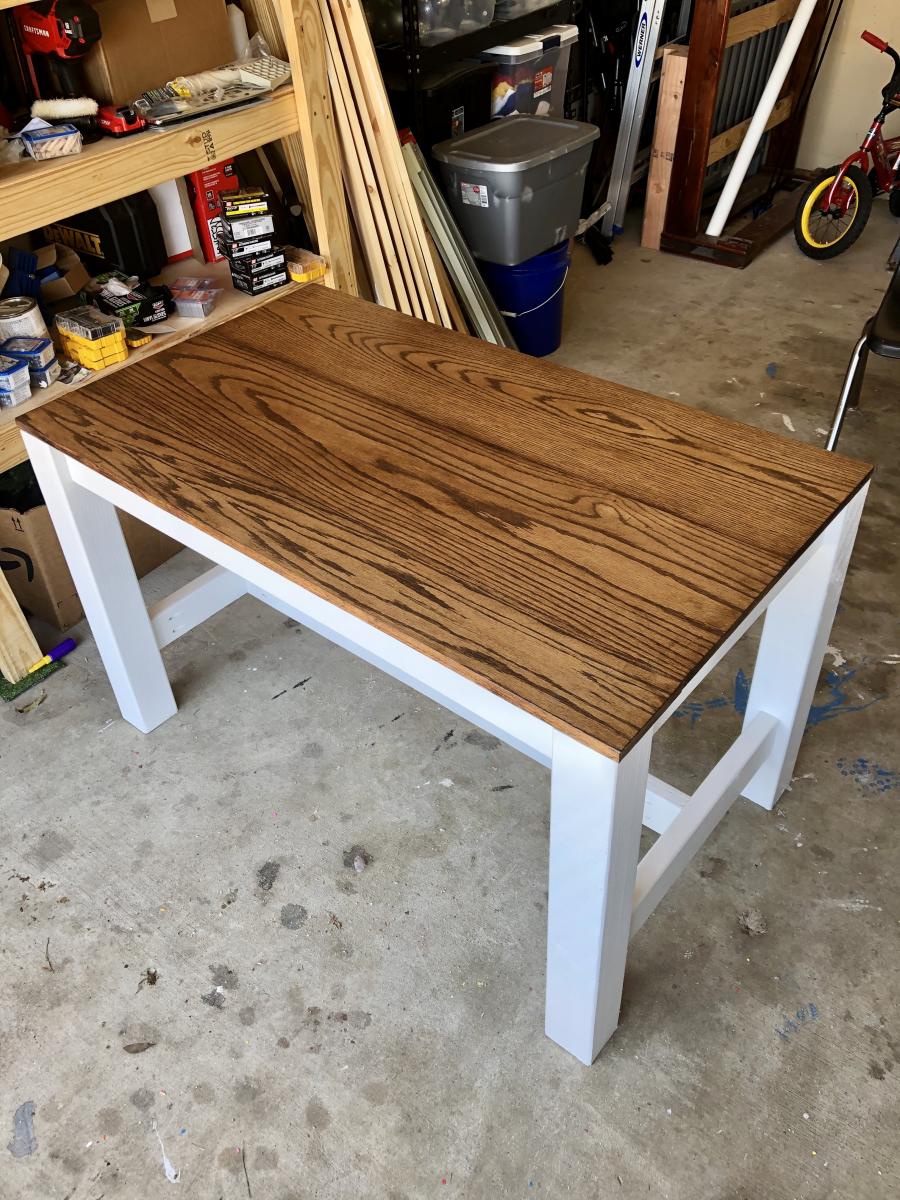
I liked the look of the “counter height table” and adjusted the height to make it a table for an office. I used 4x4s for the legs and oak for the top.
I used a biscuit joiner to join the top, a Dremel tool to carve grooves in the frame so I could attach the top with figure 8 fasteners (allows wood to move as it expands and contracts).

Recommended Skill Level
Intermediate

DIY Garden Box with Trellis

Submitted by JenFarrell on Mon, 06/30/2014 - 07:13

We wanted a small garden to fit on the back patio stones and this plan fit well. We reduced the height because we have 3 small children to "help" water the plants. The trellis was hoping that we could extend the amount of produce we could grow. They're very heavy, sturdy and straightforward to build. Thanks very much!!

Estimated Cost
$120
Estimated Time Investment
Weekend Project (10-20 Hours)
Recommended Skill Level
Beginner

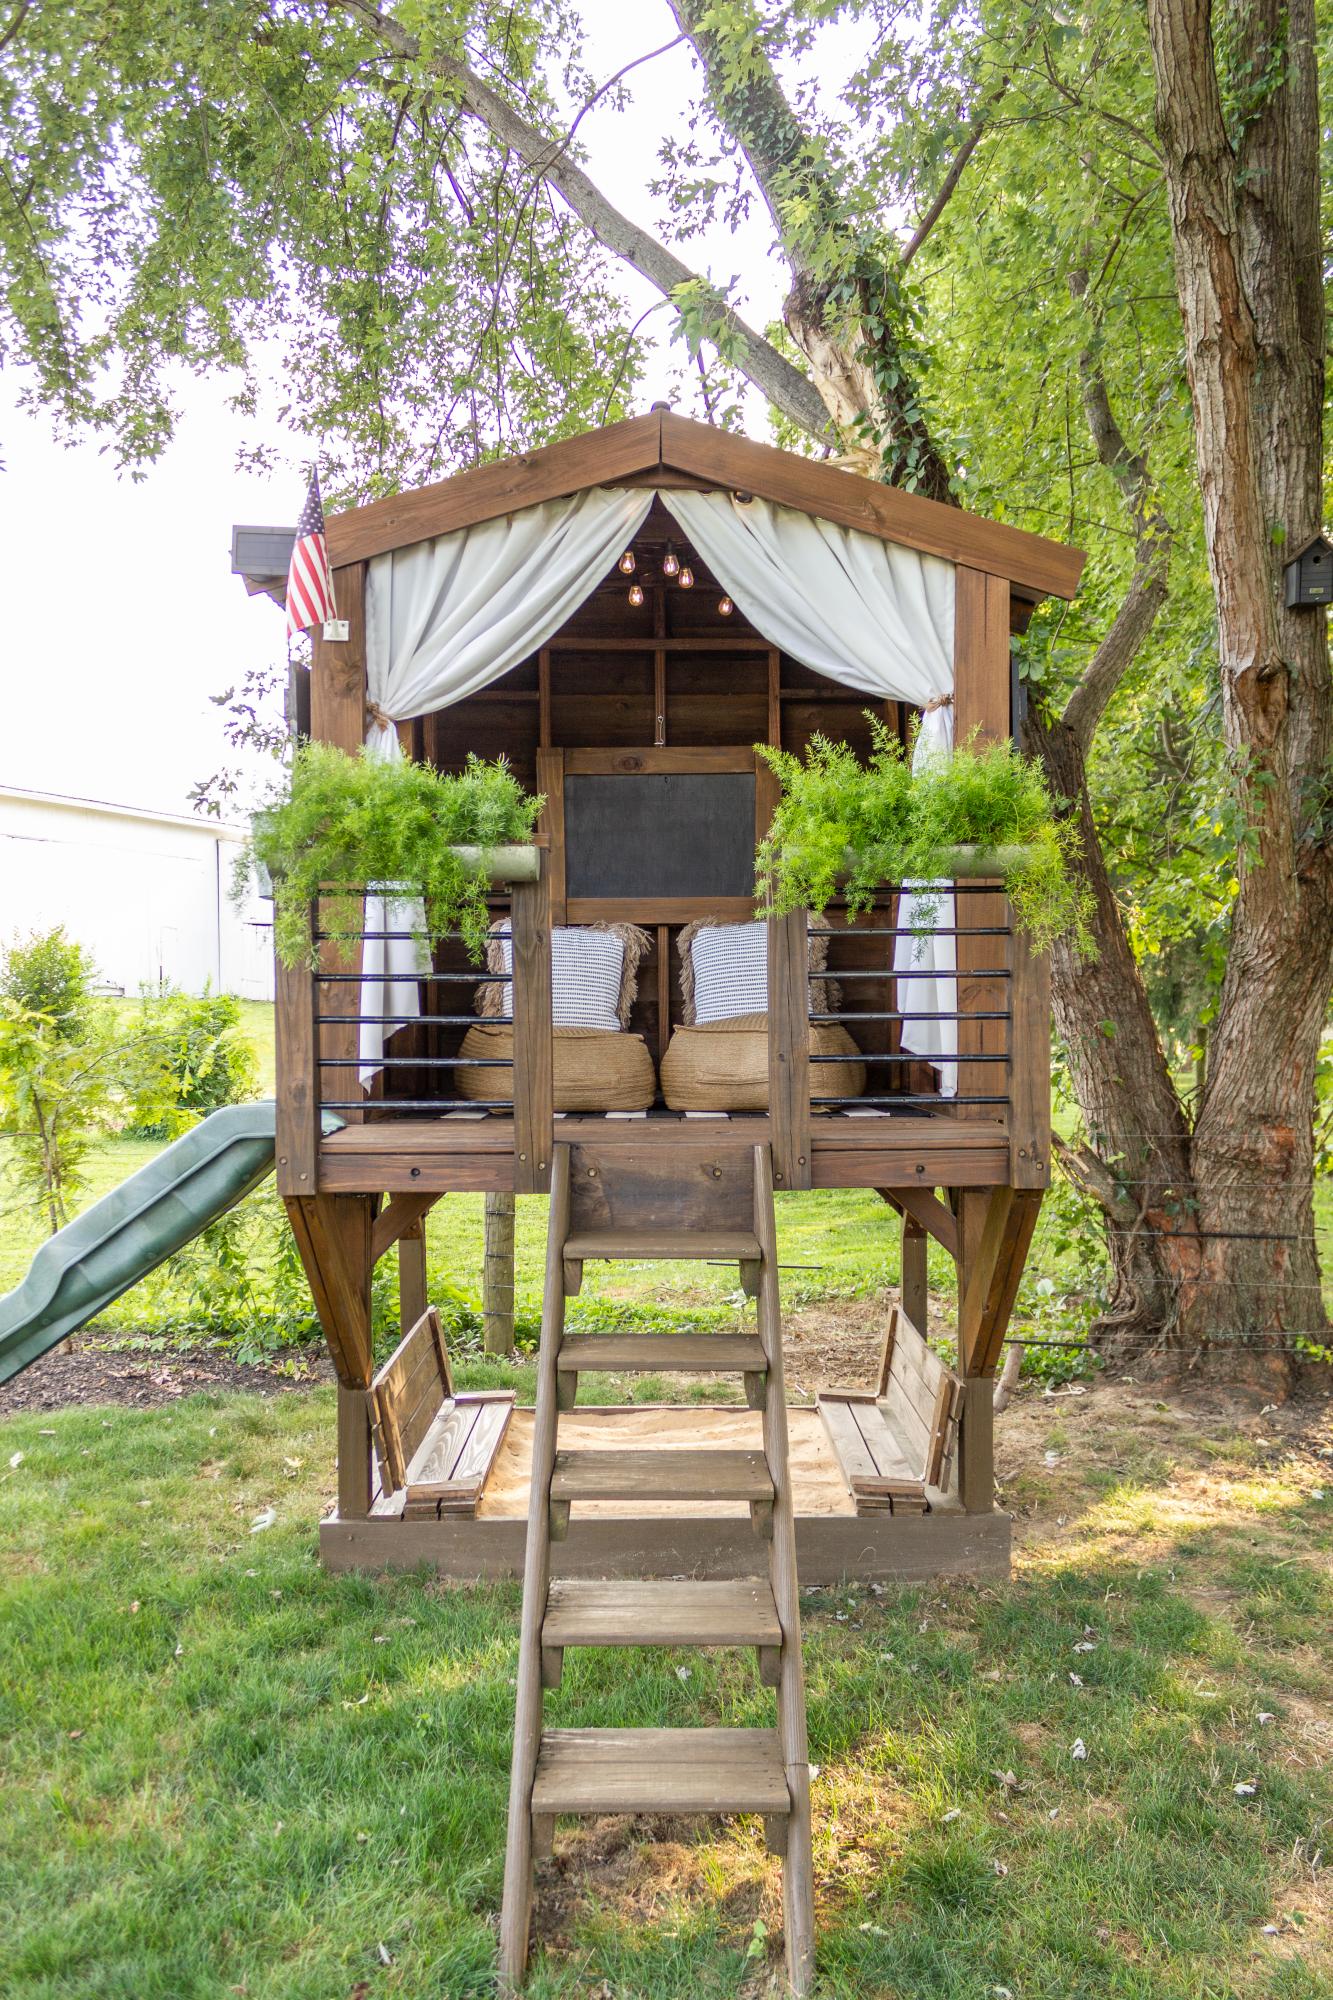
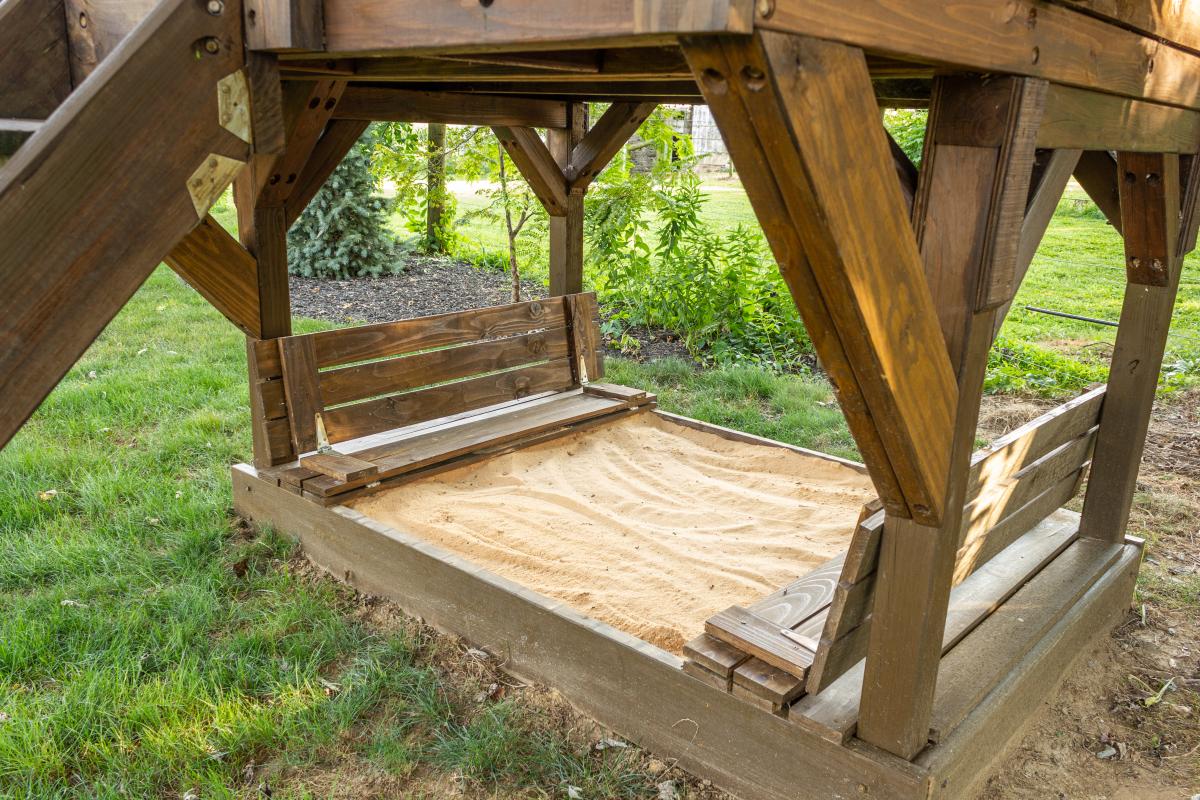
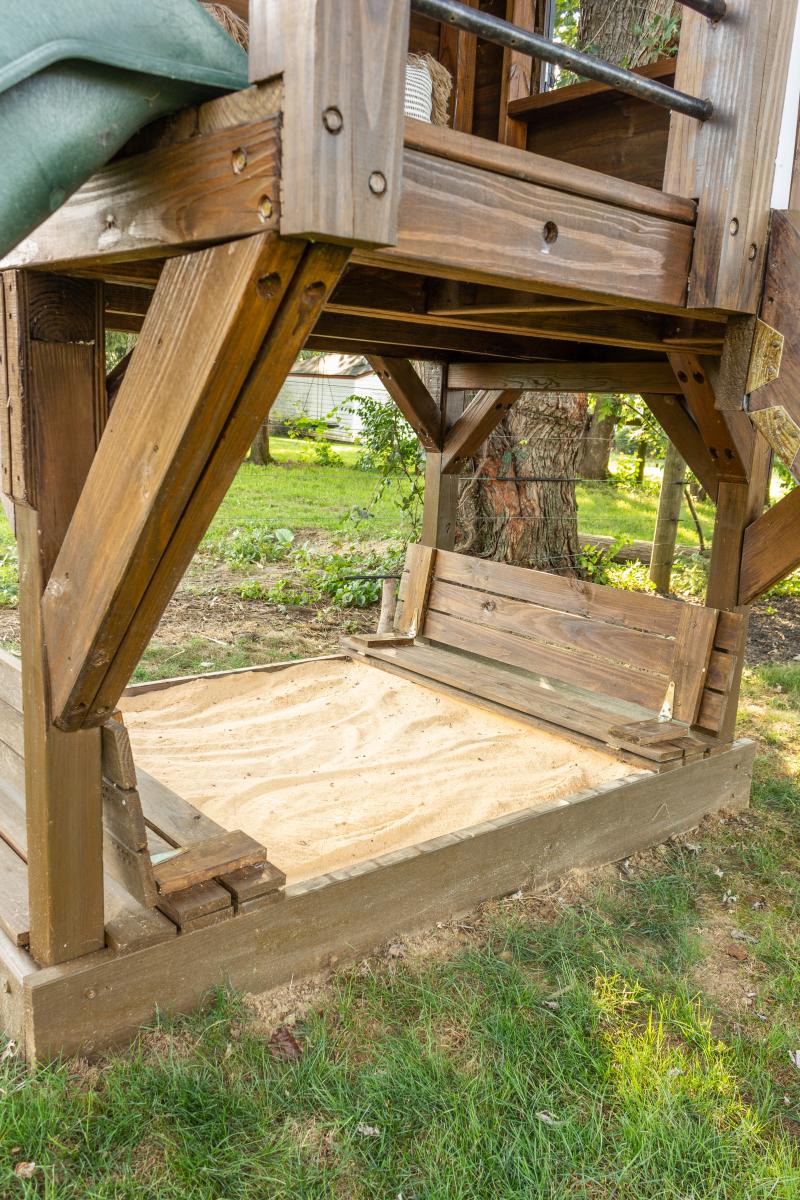
Sandbox with built-in seats in our playhouse

Submitted by Anonymous (not verified) on Thu, 09/10/2020 - 10:55

The base of our playhouse felt like the perfect spot to use the sandbox plan with built-in seats. The bench seats actually fold flat to create a lid for the sandbox when it’s not in use. I followed Ana’s plans exactly and used the list of materials she provided. The only modification I made was eliminating the back supports. It was not necessary for me to add the back supports since we have the playhouse posts to support the back of the bench.

Built from Plan(s)
Estimated Cost
$60
Estimated Time Investment
Afternoon Project (3-6 Hours)
Finish Used
Stain
Recommended Skill Level
Beginner
Seasonal And Holiday

Garage Shelves + Work Bench

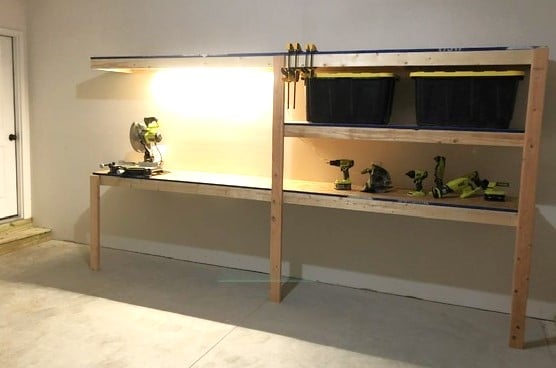
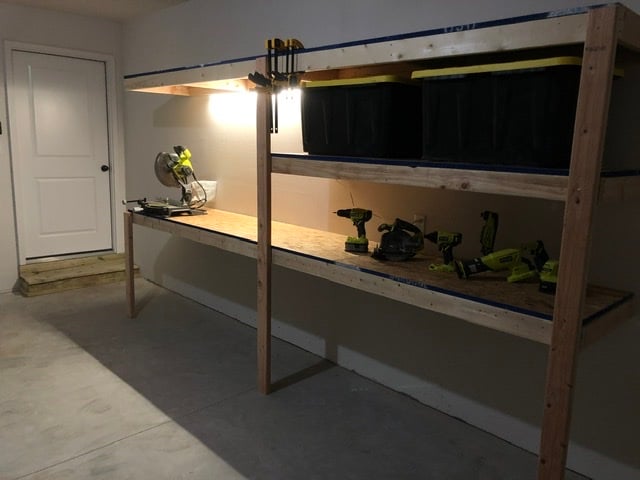
I used Ana’s plans for the garage shelves, but modified them to include a work bench. A lot of you tubers have done this, built a combination work bench and shelving, but I built nearly everything according to Ana’s plans. 12 feet long, 24 inches deep. I got some LED lights (two 1600 lumen strip lights) from menards that really brighten up my entire garage and make the work bench more useful. The one thing I really wanted was to not have a supporting pillar on the work bench to keep it open, and I loved how it turned out. I went for 3/4 plywood, mostly to have a stronger work surface, and I’m glad I did. I have since added a supporting 2x6 off of the study to support the top shelf above the bench and its strong enough to do pull-ups off of, and I have reinforced the support leg under the bench with a cross bar. Thanks for the great plans!!

Estimated Cost
~$200 (lumber prices have gone up recently due to supply issues with covid)
Estimated Time Investment
Weekend Project (10-20 Hours)
Recommended Skill Level
Starter Project

Comments

Kid's Playhouse and Slide

Submitted by docfin02 on Mon, 03/28/2011 - 18:56

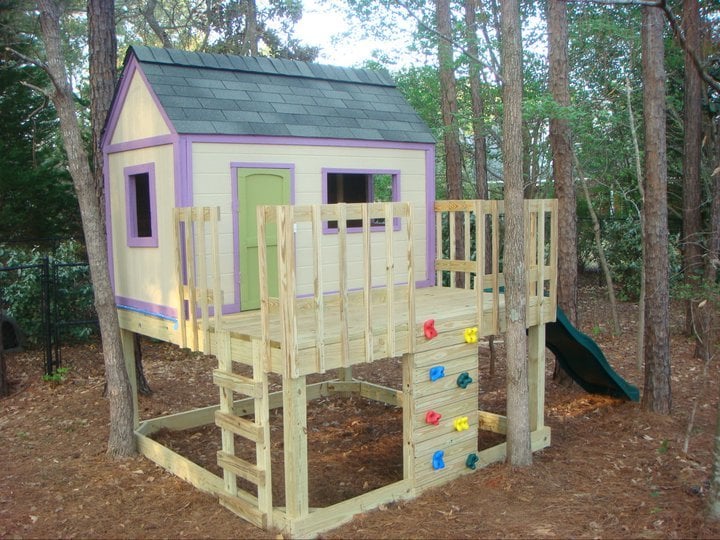
I LOVE these plans. This was my first project, and although it was a big one to start with, the plans were easy to follow. If I can do it, anyone can. I added the rock wall. My kids and I love it. Total cost for me (including all lumber, nails, paint, slide, etc.) is about $850.

Estimated Cost
$850
Estimated Time Investment
Week Long Project (20 Hours or More)
Finish Used
1 coat primer, 2 coats paint
Recommended Skill Level
Intermediate
Seasonal And Holiday

Cedar Boxes

Submitted by drowland on Sat, 07/09/2011 - 07:18

We built these before we saw these plans, but they are pretty much the same... We added the chicken wire to keep the rabbits (and our dog) out of the garden. We added the owl to keep the birds out. We've gotten a ton of tomatoes, onions, and bell peppers so far. Next year, we'll add a few more beds. We also added the verticle garden to take up less space, but its not deep enough. We'll make the next one deeper.

Estimated Cost
$30
Estimated Time Investment
An Hour or Two (0-2 Hours)
Finish Used
none
Recommended Skill Level
Starter Project

Comments

KatieO (not verified)

Sat, 07/09/2011 - 20:11

Wow! LOVE IT! I love the taller posts so you can incorporate the chicken wire! I SOOOO needed to do something like that this year. Also, the vertical garden boxes are BRILLIANT! LOVE IT!

drowland

Thu, 11/17/2011 - 07:59

We ended up getting a ton of tomoatoes and green peppers from the garden boxes. We've actually built a couple more. We'll probably double again before next spring. We're looking at adding more veggies.

We now have ton of stuff planted for the fall...

Guest (not verified)

Tue, 03/13/2012 - 10:46

How did you build the upright planter boxes? Do you mind explaining the building process/design? I really want to plant this in my yard!

colton's mom (not verified)

Tue, 04/03/2012 - 06:19

i love the vertical boxes. I am just trying my hand at the world with a green thumb and could use as much advice as possible about how to make as well as to line the boxes or not to line them. All advice appreciated!

berman (not verified)

Fri, 11/23/2012 - 21:53

Hi, my name is berman. I found you pin from my pinterest and your box garden is so great. I am a newbie in this field and so interested to build garden in my house. If i can ask you some question, could you please to answer that?

cheers,
berman

Seasonal And Holiday

Workbench modified with casters

Submitted by ogie287 on Tue, 04/02/2019 - 20:06

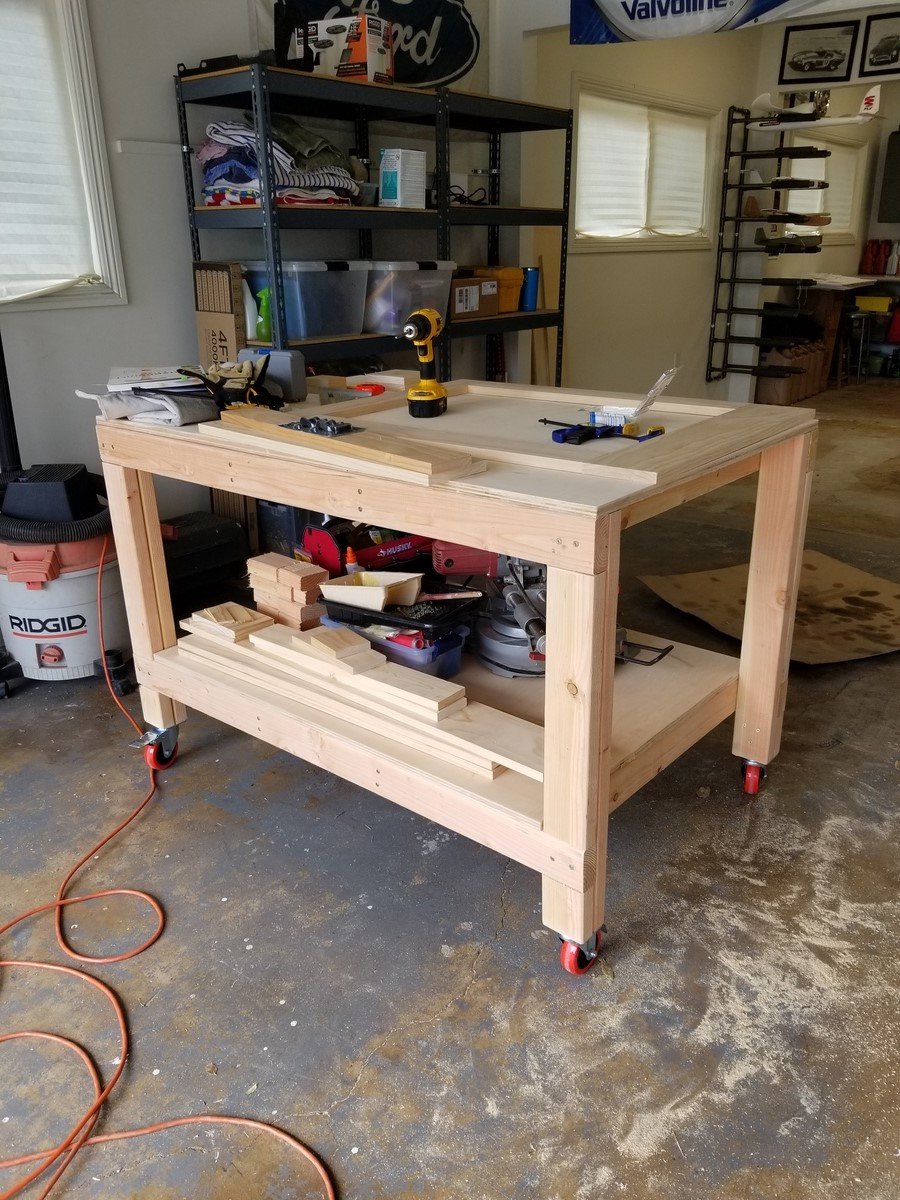
I love this workbench! I added casters so I can move it around the garage, outside, wherever it's needed. I just took 4 inches off the bottom of the legs. My hubby is admiring my handy work and planning on making one for himself.

Estimated Cost
$130
Estimated Time Investment
Afternoon Project (3-6 Hours)
Finish Used
None
Recommended Skill Level
Beginner

Comments

JBeecher

Wed, 01/25/2023 - 14:31

Love this with the casters! So beautiful. I'm new here and wondering at what point you took 4 inches off the legs. Did you build the table and then just cut off the legs? Or did you adjust the measurements of the cuts? Thanks in advance! :)

JimCoz516

Mon, 01/30/2023 - 02:32

The overall height of a 4-inch caster wheel is a little over 5 inches with the mounting bracket, so that also needs to be taken in to consideration. 2nd photo shows the overall dimensions, but to me the bracket and brake area appear to be a bit more than 1.03 inches. https://amzn.to/3DkMKzB
I think the best bet would be to have and measure the overall wheel height, prior to measuring and cutting the lumber.

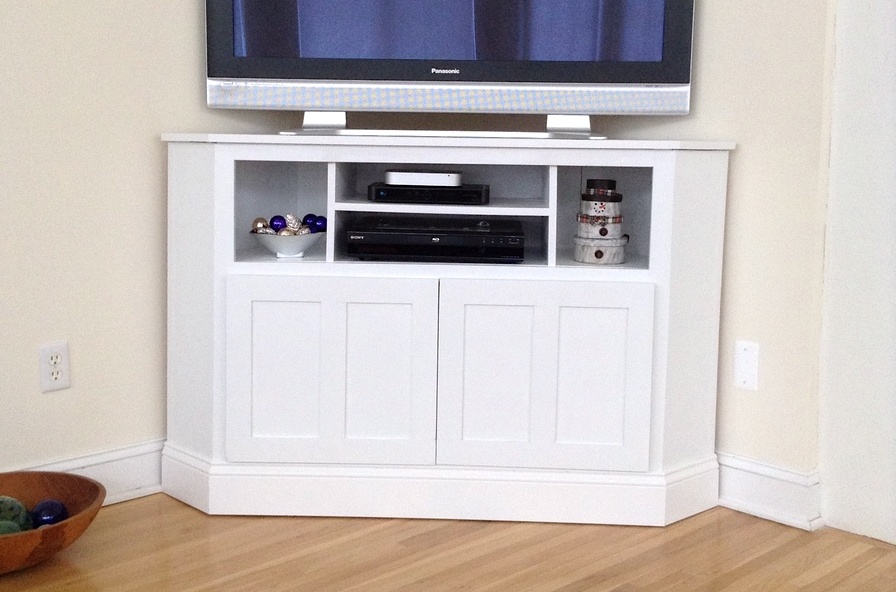
Corner TV stand

Submitted by TBarn on Tue, 01/21/2014 - 12:41

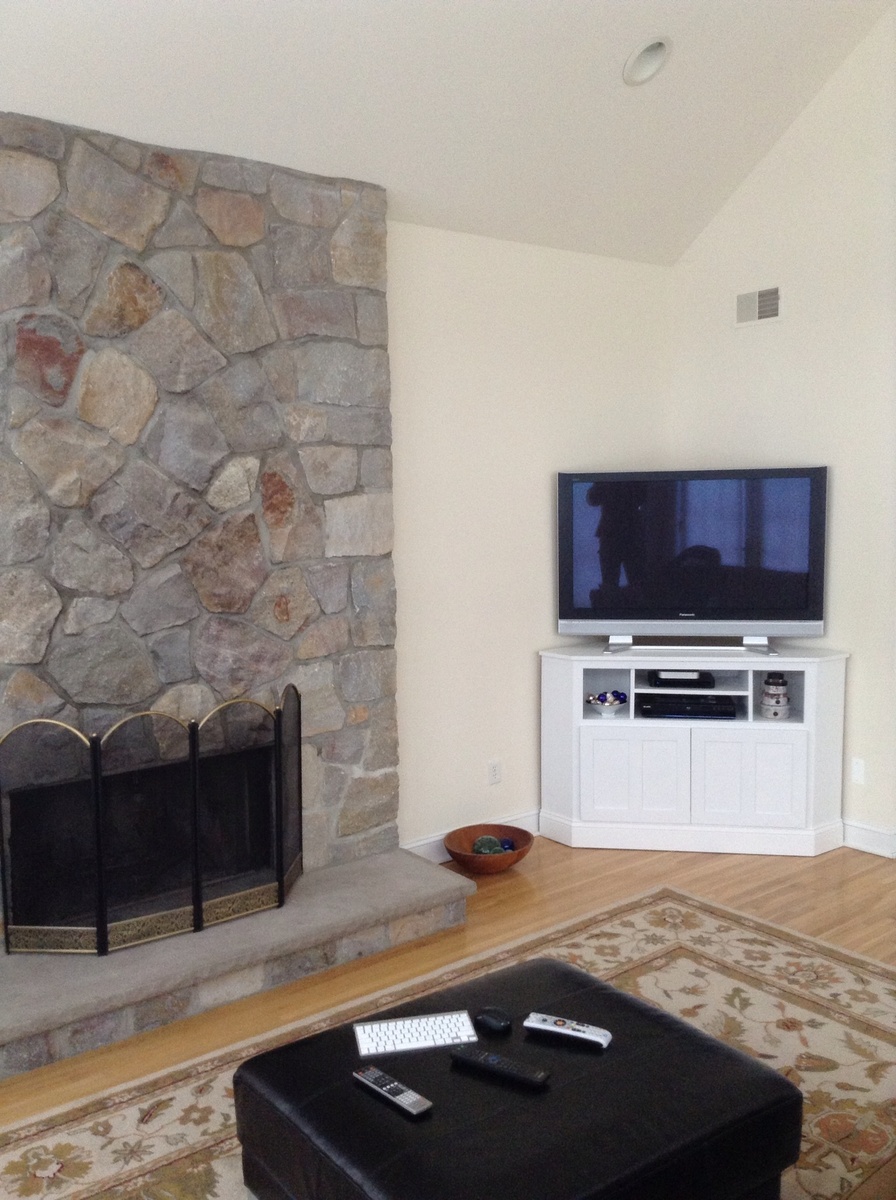
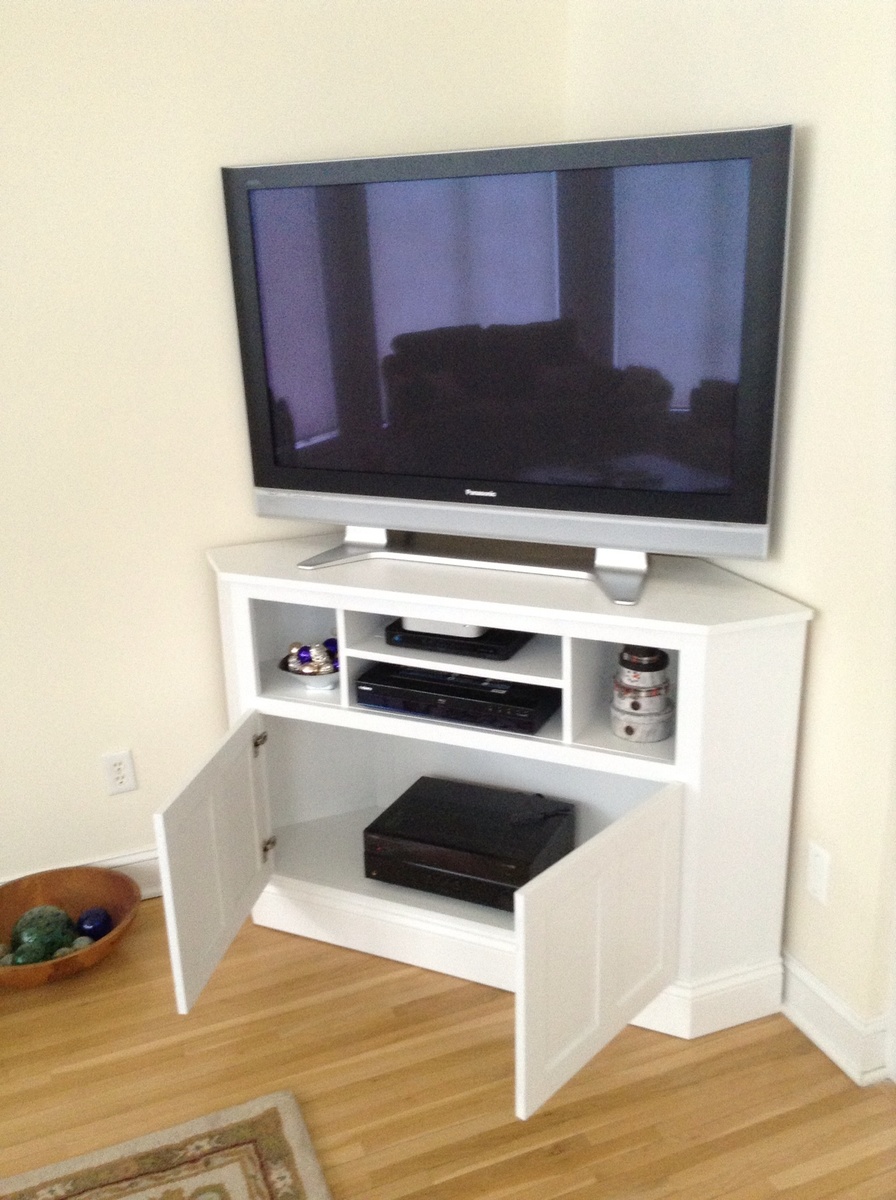
After a promise to get a new carpet and TV stand as an anniversary gift, I began a search for a corner stand that would fit a 50" flat screen and hid all of those ugly wires. Craig's List had nothing and the retail options were either cheaply made, ugly or crazy expensive. I stumbled upon Ann's page, and since my son has a wood shop in the basement, I figured why not try to build something. I used the original plan, but borrowed ideas from other brag posts to create a 36" tall model with overlay doors that we think looks great. Next project: bar stools for the kitchen island.

Built from Plan(s)
Estimated Cost
$200
Estimated Time Investment
Weekend Project (10-20 Hours)
Finish Used
Zinder Primer and Gidden (America's Finest) Semi Gloss
Recommended Skill Level
Intermediate

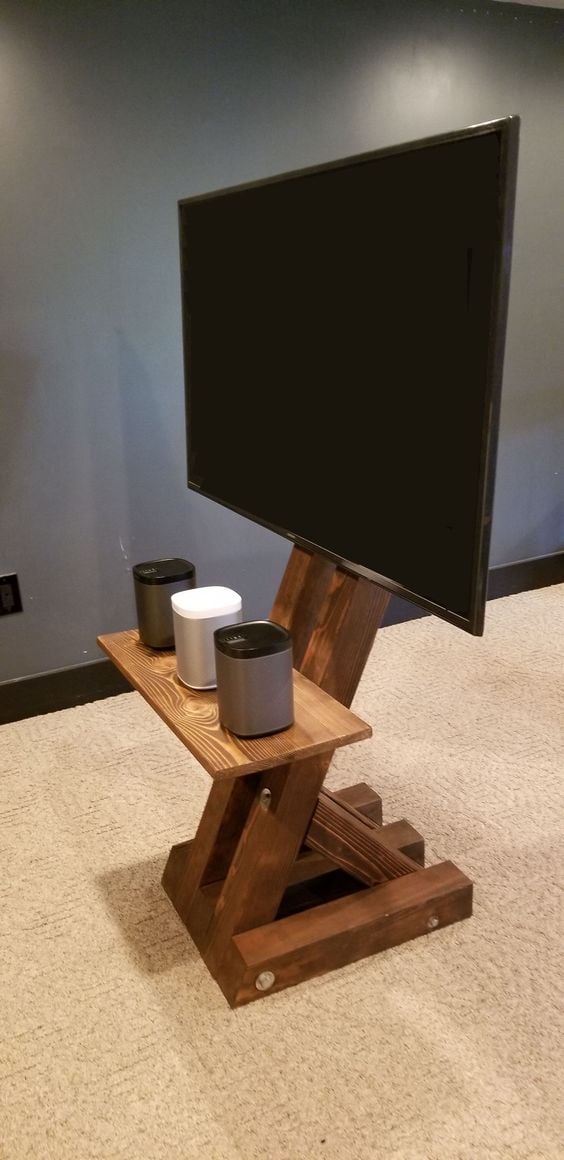
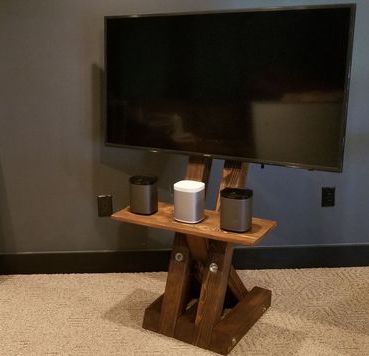
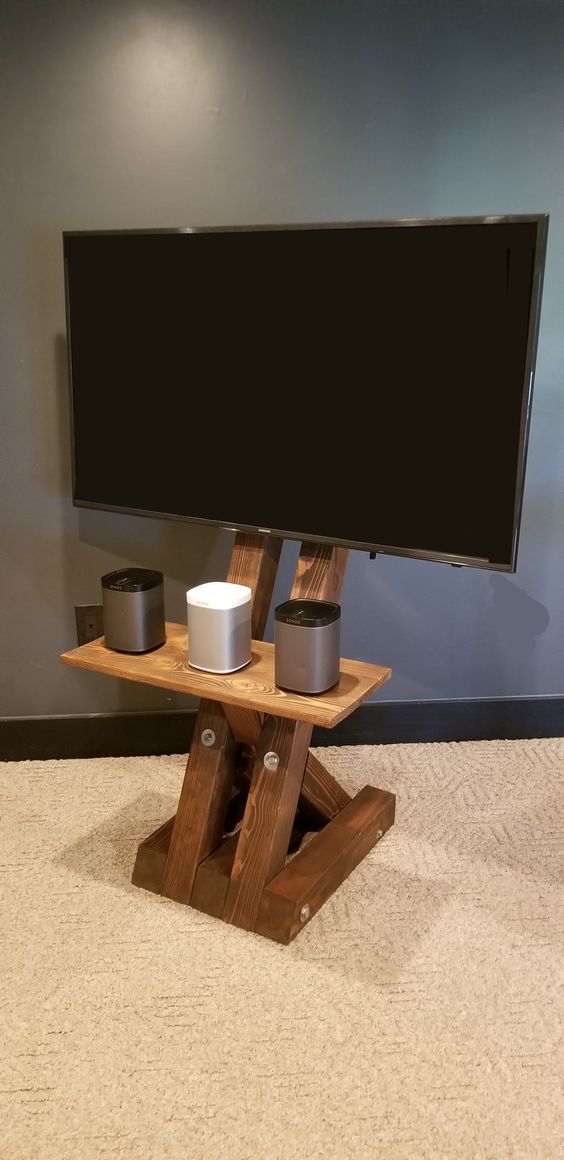
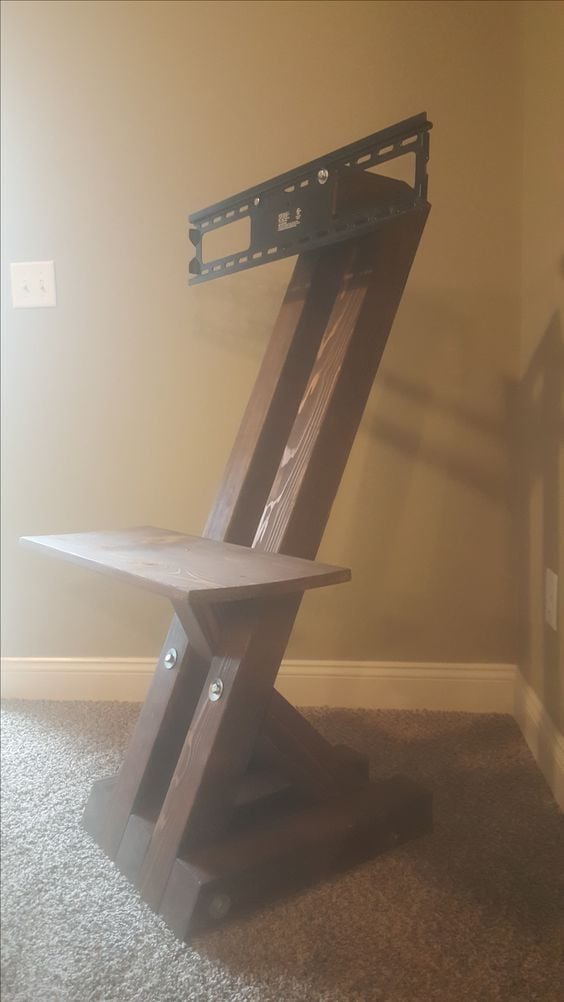
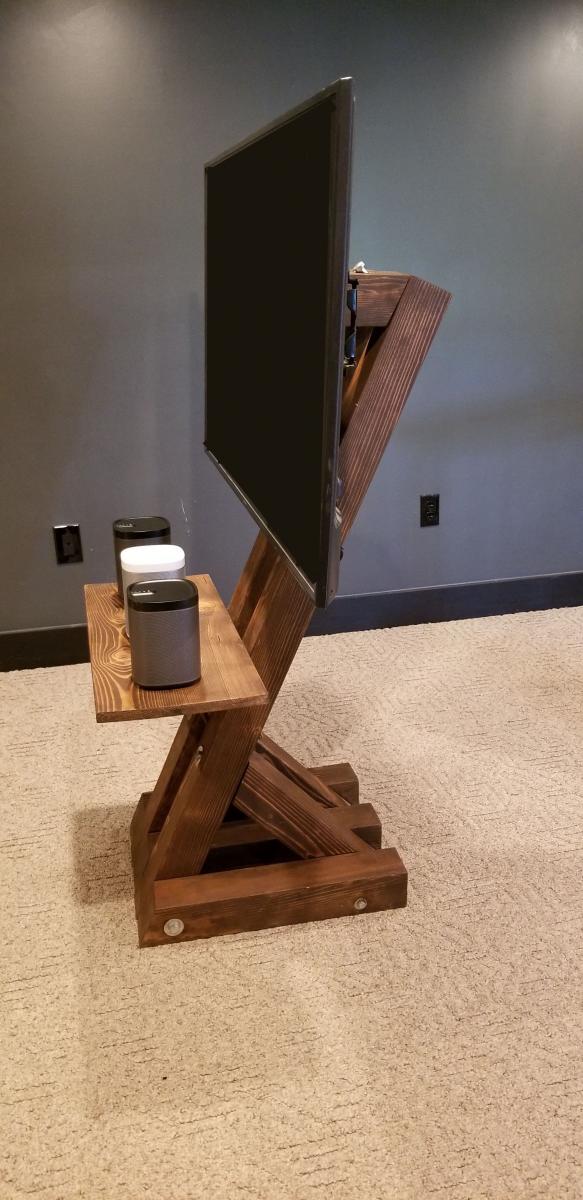
The Gíaffe TV Stand

Submitted by Anonymous (not verified) on Thu, 02/06/2020 - 09:55

The Gíaffe Free Standing TV Mount. Handcrafted and engineered to use its center mass to deliver strength and balance for tv sizes 30-60". Display your television without detracting from your home's decor. The Gíaffe Free Standing TV Mount is the perfect solution and its rich finish will be perfect for any house/office room.

Estimated Cost
$109
Estimated Time Investment
Day Project (6-9 Hours)
Finish Used
Stain - Dark Walnut - Varathane - 2 Coats
Finish - Water Based Polyurethane - Varathane - 3 Coats
Recommended Skill Level
Intermediate

Comments

Doggie Daybed

Submitted by MurdaRae on Wed, 06/06/2012 - 10:16

I've thought for a while about building a bed for our dogs, but wasn't sure where to start. We had an extra crib mattress so I set out to find a toddler bed that would work. I decided the Lydia Toddler Bed plan would work best. It doesn't look anything like it, but it was a great starting point.

First, I got rid of the canopy and the decorative side pannels. I also raised the bed 12 inches. (The hope is to add a rug on the floor underneath as sort of a "bottom bunk") The lumber store didn't have 2x2s so I used 2x3s for the legs. I also only used two 1x6s at the head and foot of the bed. They are seperated by 1" because when I got home, I realized they were actually 1x5 (RUDE).

All in all, it turned out exactly as I had hoped and the dogs love it! GOODBYE stinky dogbeds!

**Photo 1: Just finished building--the slats weren't screwed down yet.
**Photo 2: Deacon is testing out his new digs! See the stinky dogbed underneath?YUK!
**Photo 3: Dog Bed Completed! Mac & Deacon love it!

Built from Plan(s)
Estimated Cost
$38
Estimated Time Investment
Day Project (6-9 Hours)
Recommended Skill Level
Beginner

Comments

Kids Bookshelf

Submitted by Anonymous (not verified) on Sat, 04/27/2024 - 11:21

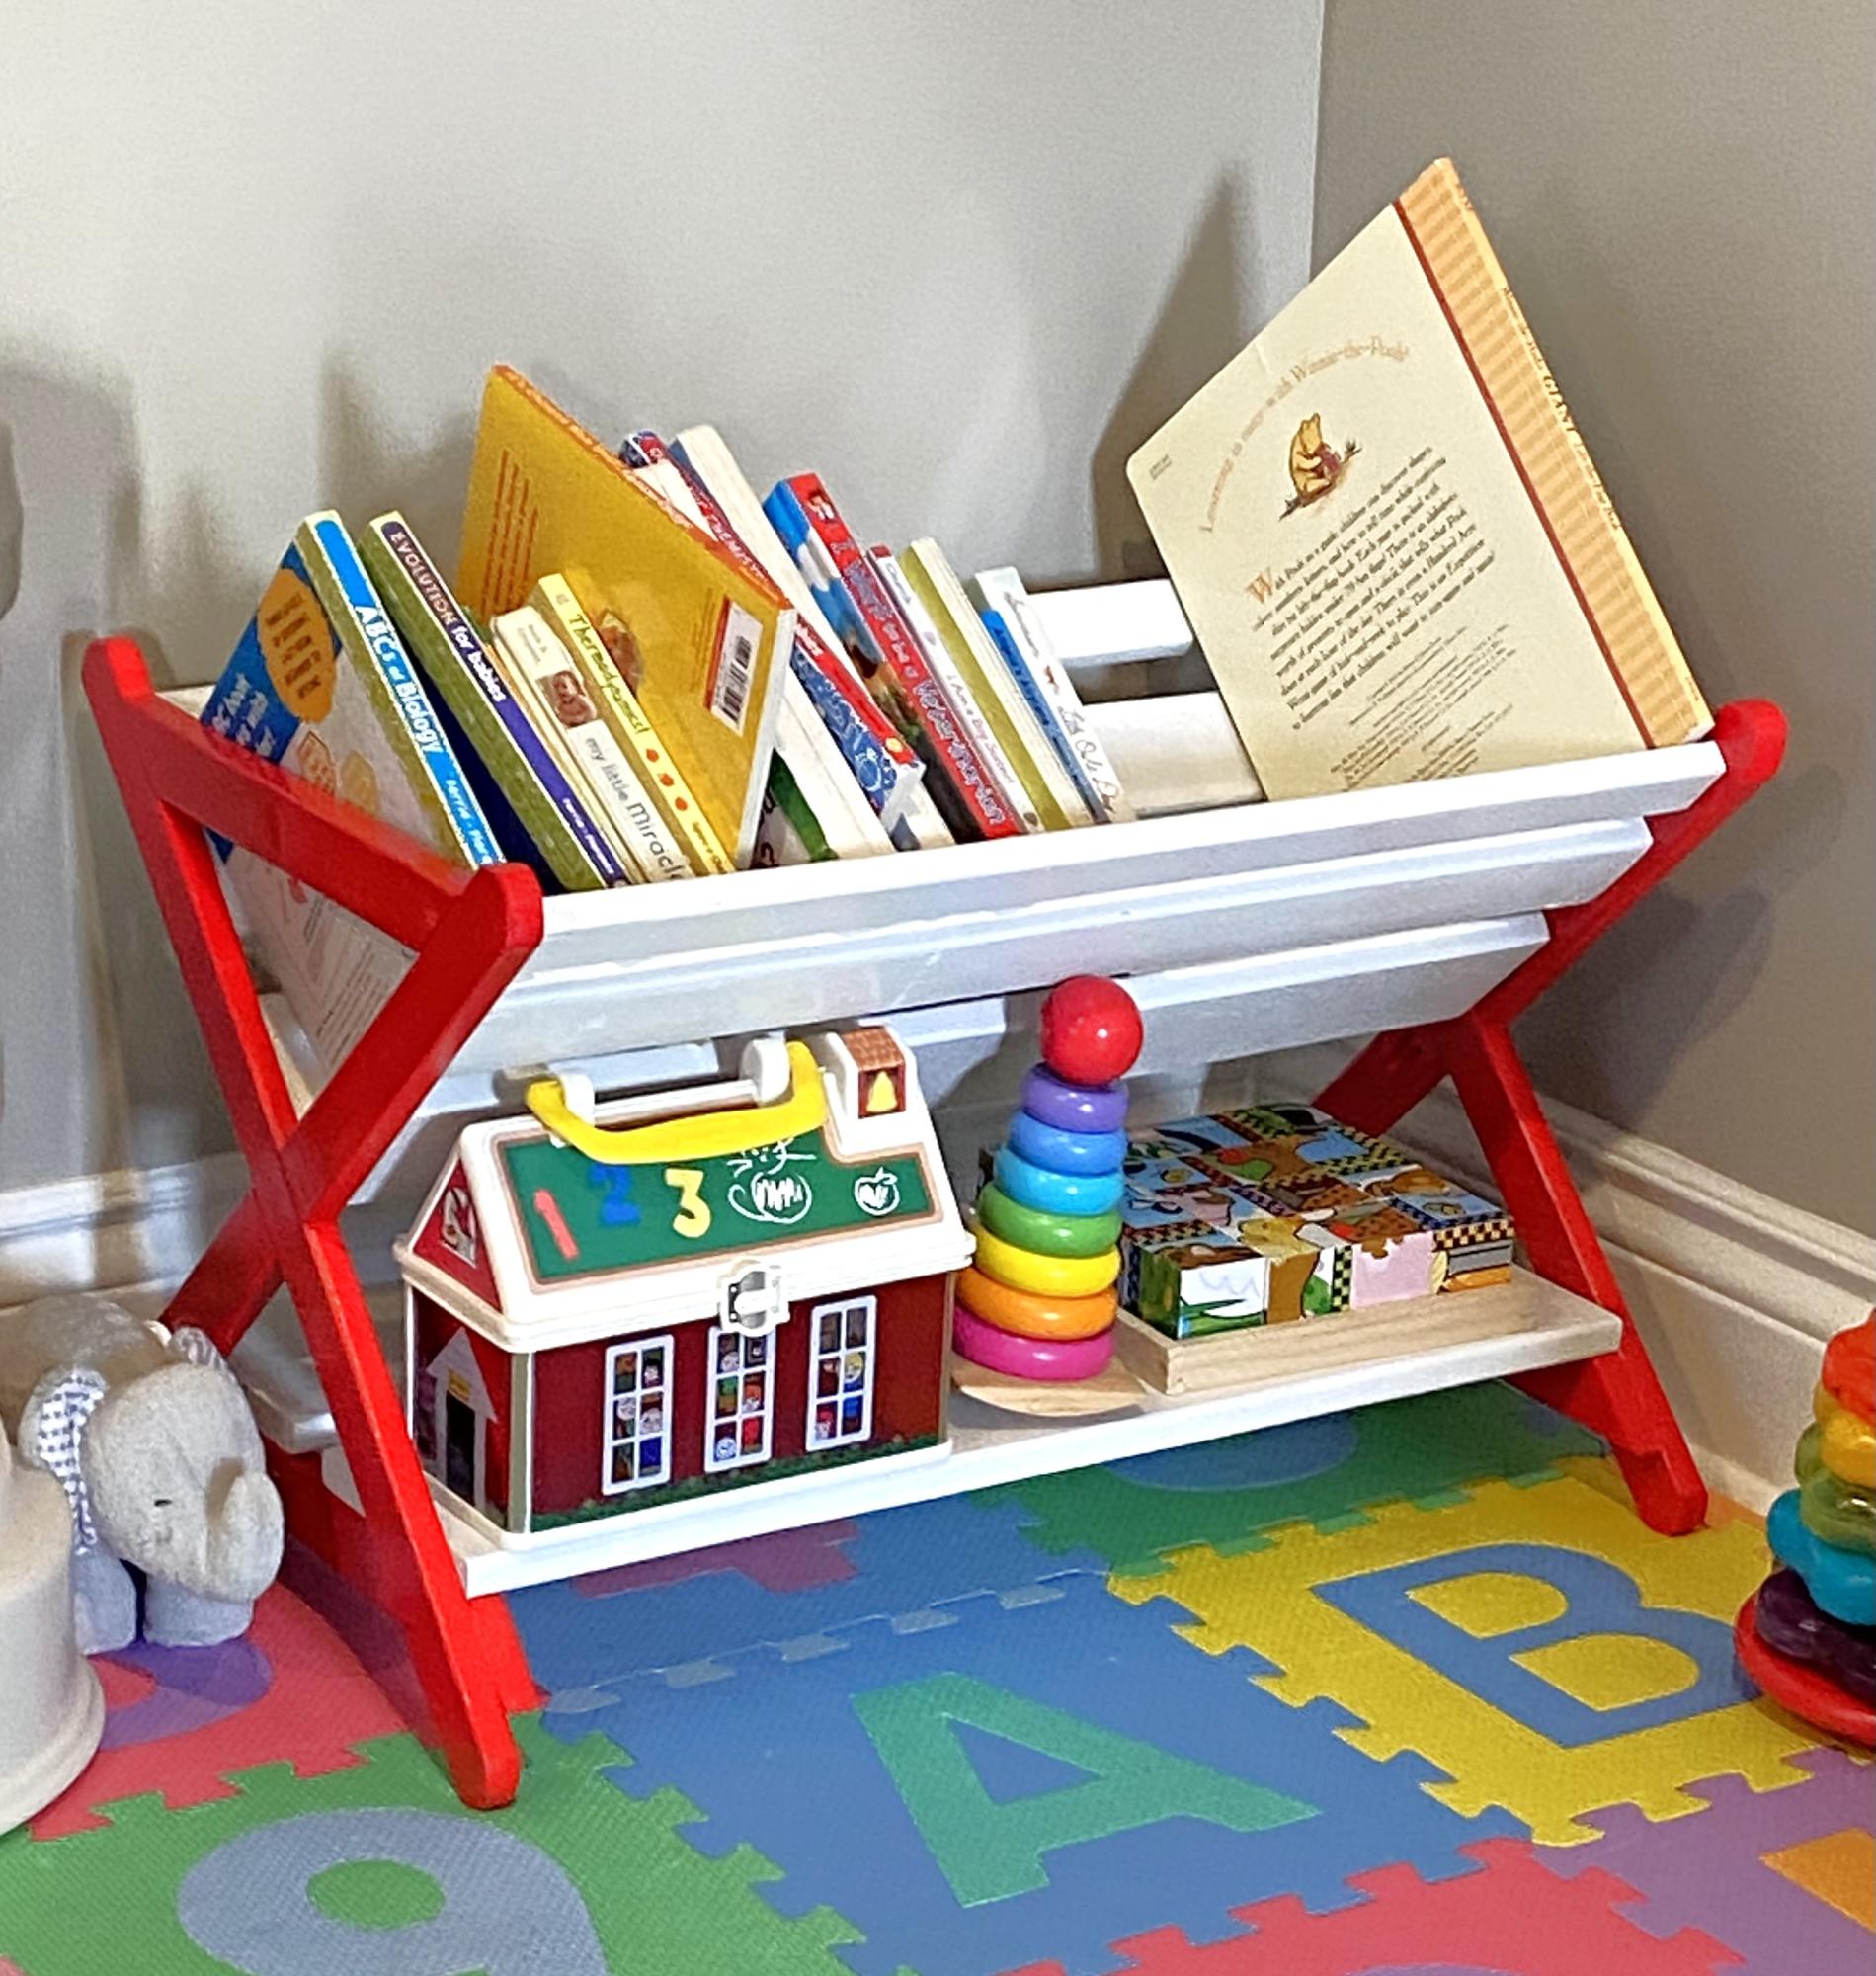
Perfect size for my granddaughter and her growing book collection. Turned out great! Thx so much.

Trevor

Built from Plan(s)

Economical Basement Shelving

Submitted by Veronica P on Tue, 12/09/2014 - 07:17

I needed something to get the camping stuff, toys, strollers and everything else organized and up off the floor of our unfinished basement so my boys can ride their trikes inside over the winter. This was perfect! Just changed it slightly (made it deeper) to accommodate some larger items. Thanks again Ana!

Estimated Cost
$100
Estimated Time Investment
An Hour or Two (0-2 Hours)
Finish Used
None
Recommended Skill Level
Starter Project

Large Entertainment Center

Submitted by rmseama on Sun, 01/24/2021 - 17:28

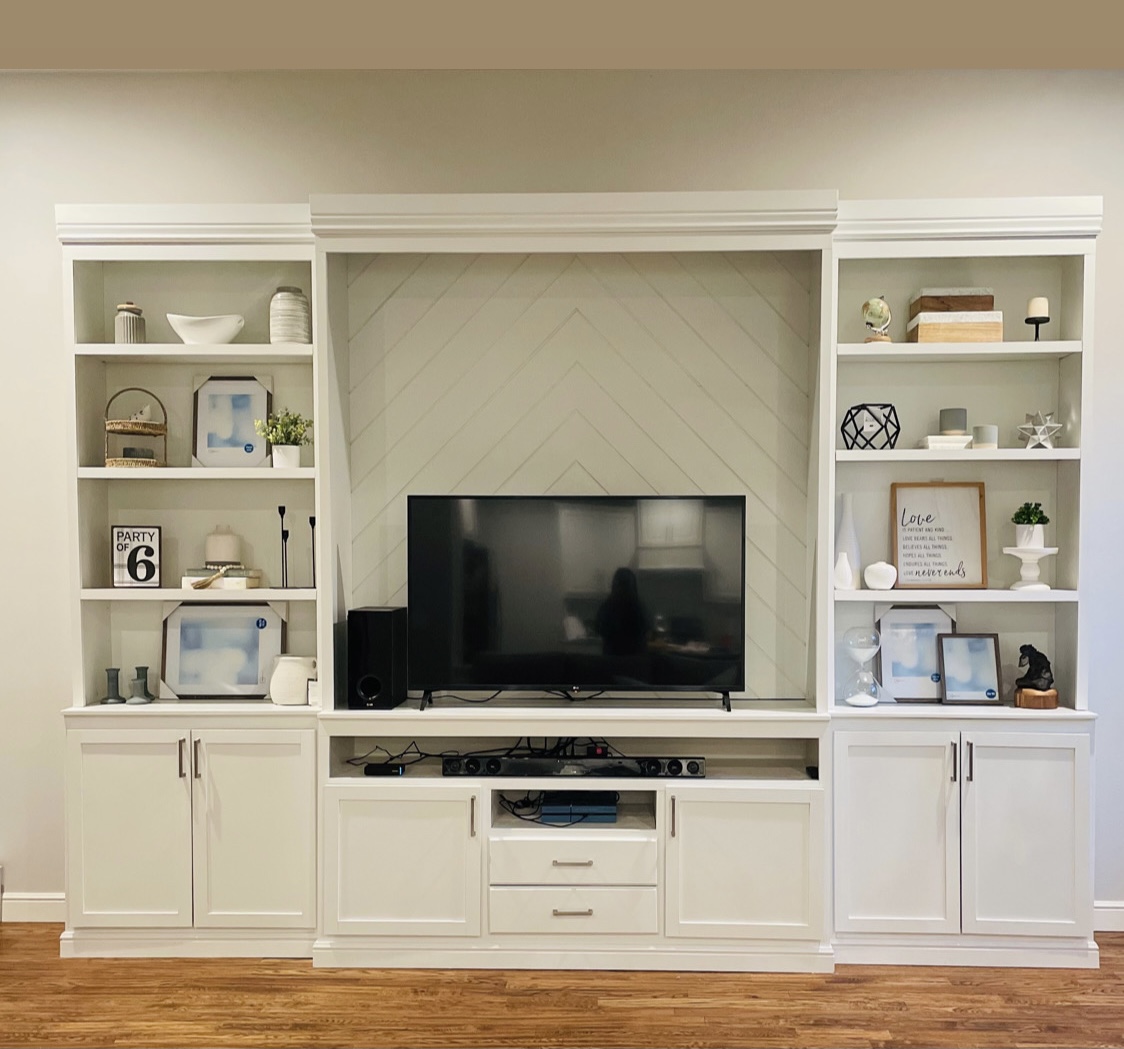
My Biggest build so far. We have a large living room and needed something large for that wall. I really had fun on this one. It took longer than I wanted but in the end, I’m really proud I finished. This was my first time to use the router and learned how build shaker style doors. -Instagram.com/theorthfam

Estimated Cost
1000
Estimated Time Investment
Week Long Project (20 Hours or More)
Recommended Skill Level
Intermediate

Truss End Table

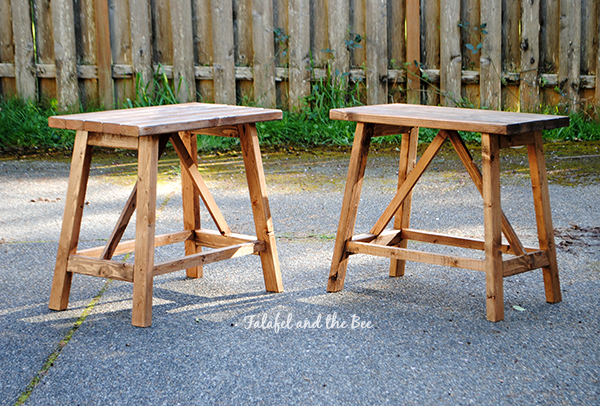
My husband and I built these end tables together. The construction took about 3 hours.

Built from Plan(s)
Estimated Time Investment
Afternoon Project (3-6 Hours)
Finish Used
Minwax Special Walnut 224 stain
and Polycryllic
We only used these because the stain matched the table I built. The off-gassing takes a little too long for me (because I am chemical sensitive). I have used Saman products for other projects and liked them much better.
Recommended Skill Level
Intermediate

Comments

Washer/Dryer Platform Pedestal

Submitted by Dimarc67 on Fri, 04/17/2015 - 10:45


THE MOTIVATION
After a recent washer outage (that I was ultimately able to repair myself), my wife and I talked about eventually replacing our front-loading washer/dryer set.  One of the bullets I hate biting is paying the exhorbitant prices for the matching pedestals for new washer/dryer sets.

Having just bought a good set of cordless powertools, and having watched my father when I was a kid build countless household fixtures, window dressings, furniture pieces, etc., I decided to try my hand and construct a permanent platform for our current washer/dryer set, thereby eliminating the need to ever buy manufacturer pedestals again.

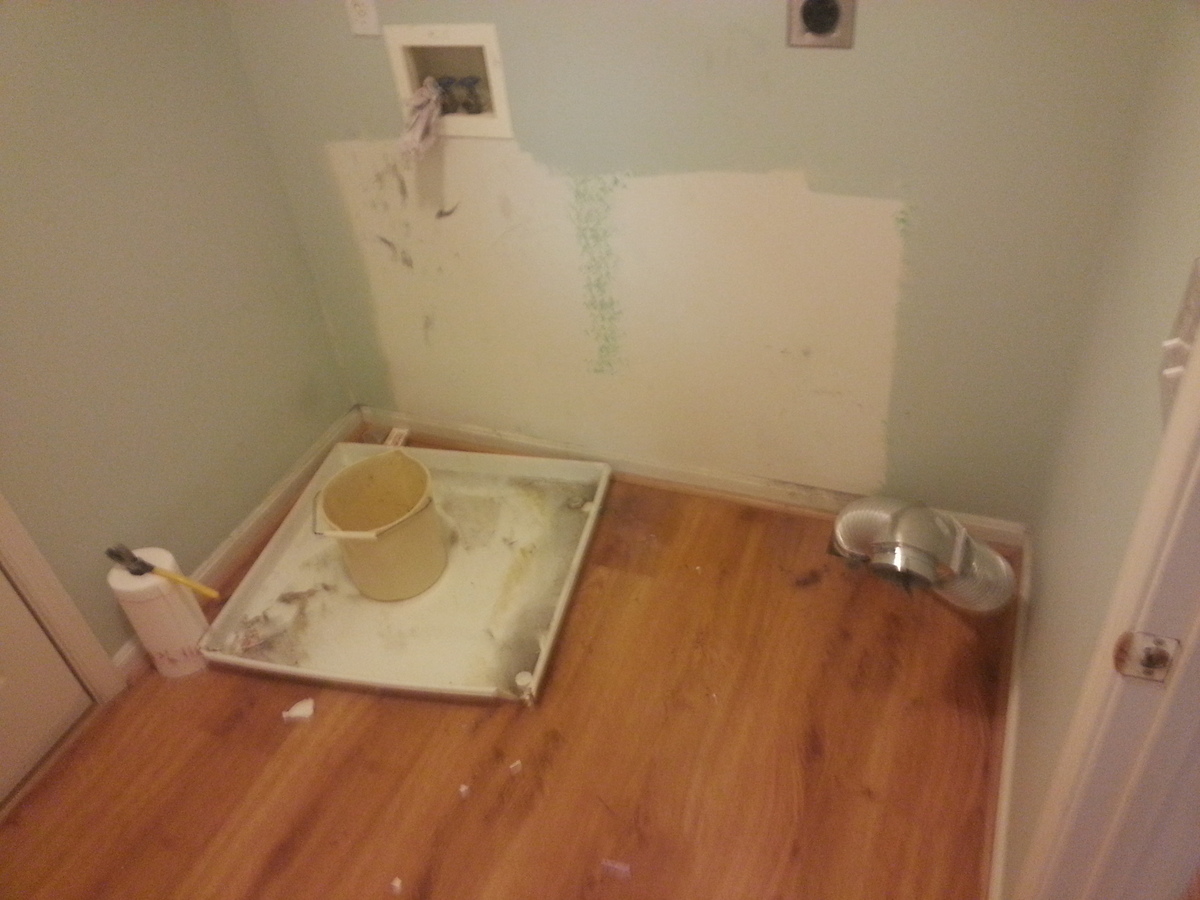
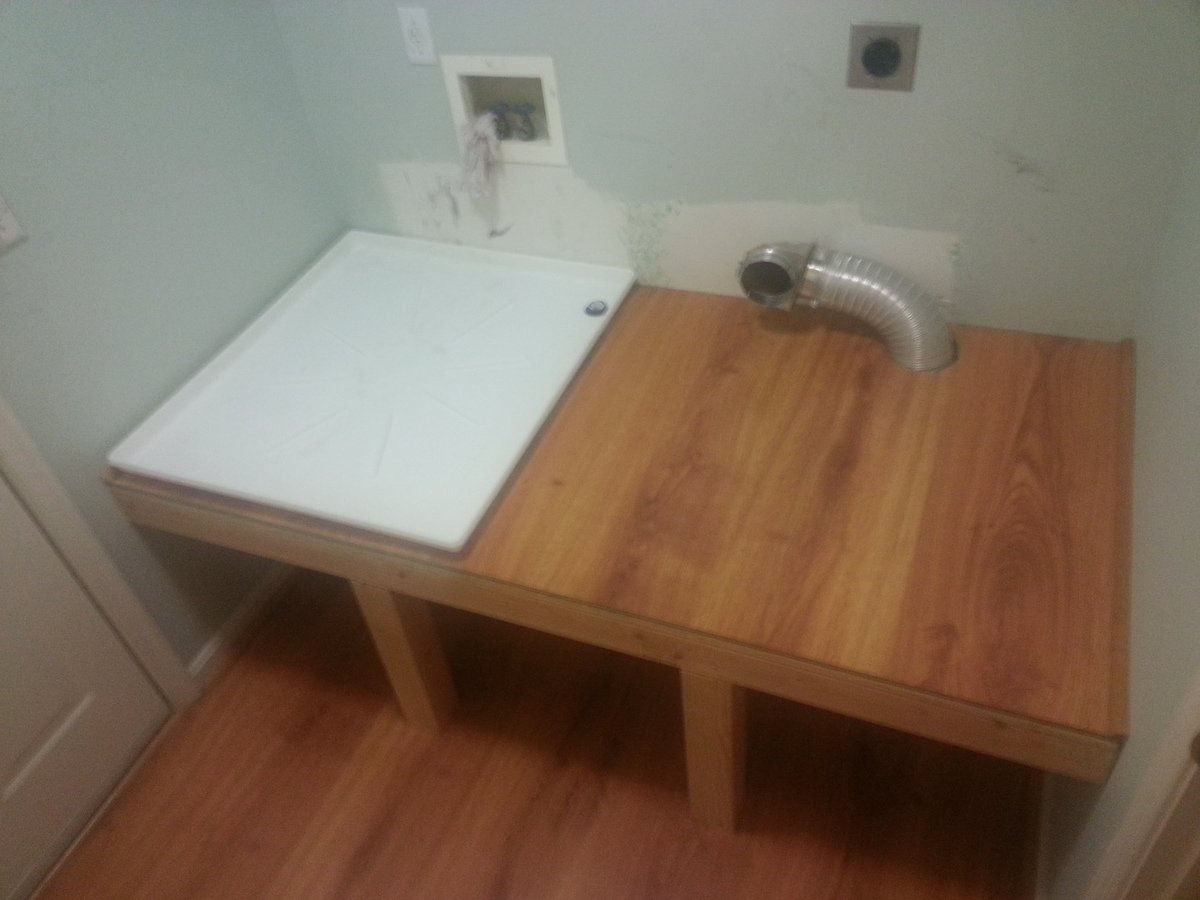
The existing pedestals were a standard 15" high, with a storage drawer, which we felt was still not high enough for comfort.  And, the washer pedestal drawer was entirely inaccessibl due to the 2" walls on the washer drain pan, so its drawer was totally useless, wasted space.

And, lastly, we really wanted more space for clothes baskets full of laundry, which we generally stacked (full and haphazardly) on top of the machines.


THE CHALLENGES
The largest challenges were mainly logistics, and gravity.  The washer/dryer would have to be unavailable for at least 2-3 days while they sat disconnected in the next room waiting for their new home.  So I coordinated with the family so they'd know when they needed to have their laundry done, or tough it out until I was done.

There was no way to know for sure what the drain connection for the washer pan looked like until I got the washer out.  So it was a small gamble that I'd be able to get the parts needed to extend the drain pipe up to the new platform right when I was ready for them.  Fortunately, this was no issue at all.

The biggest challenge turned out to be toward the end when it came time to lift our 230-lb. washer onto the new platform.  I seriously considered disassembling the washer to the point that I could remove its molded concrete counter-weights, but instead (and arguably stupidly) elected to use a large hydraulic car jack to raise the washer.  This ultimately worked, but I have to STRONGLY ADVISE AGAINST trying this.


THE SPACE
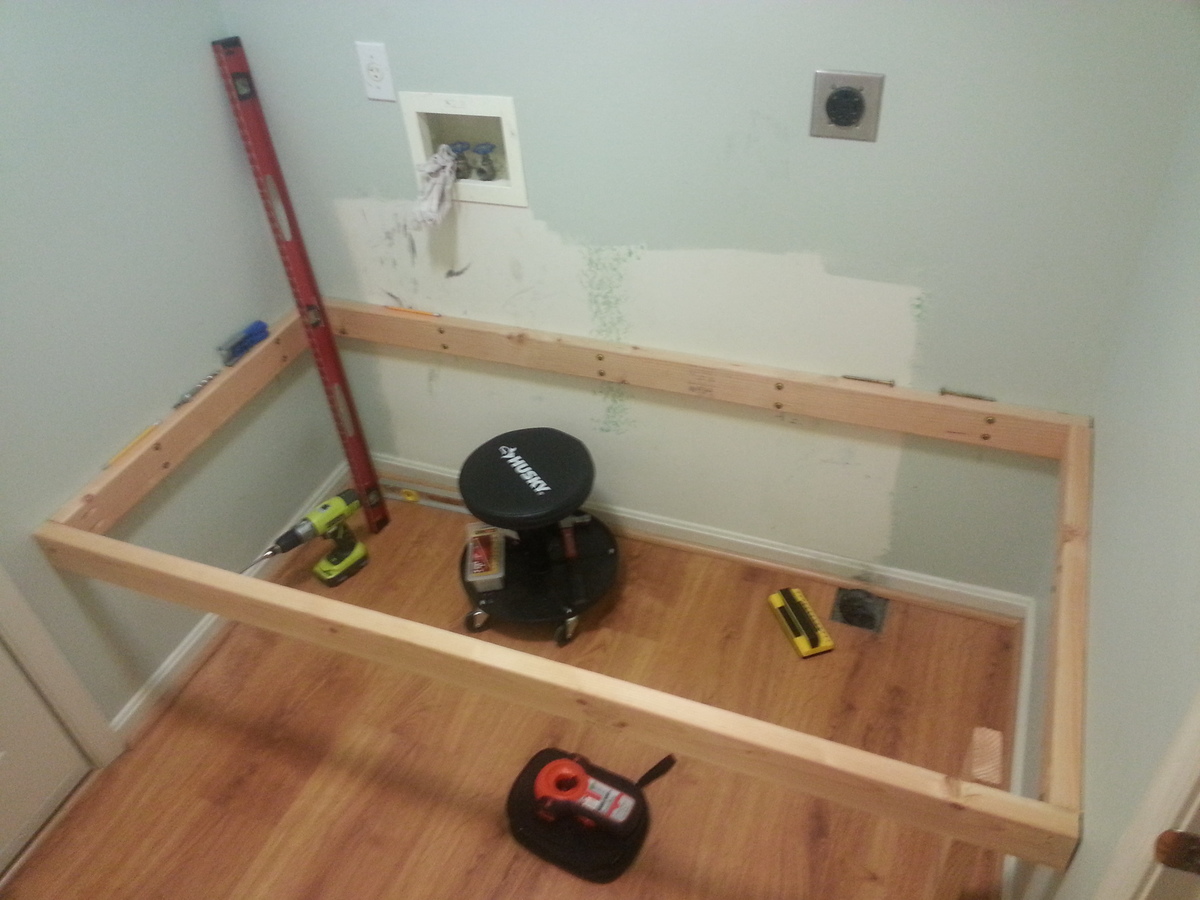
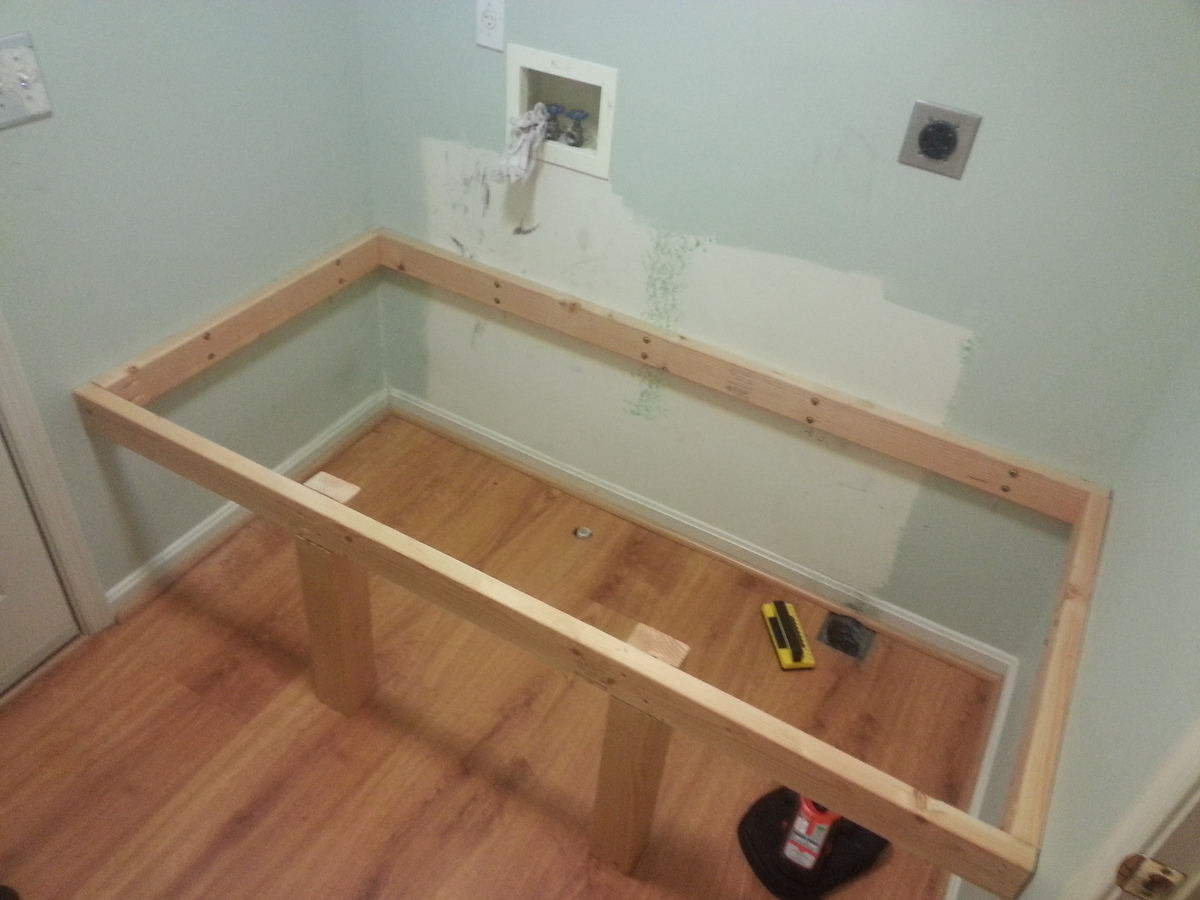
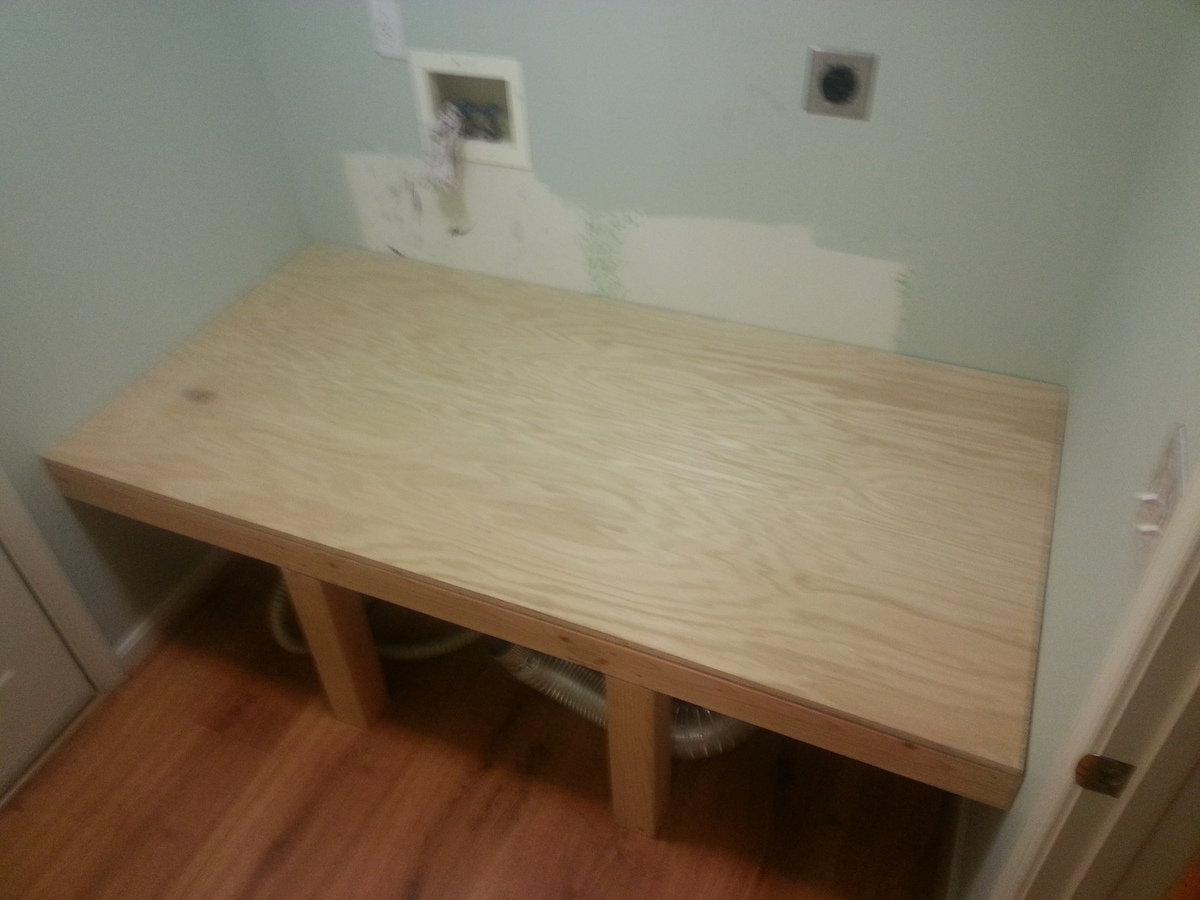
Our laundry room is also the "mud room" between our kitchen and the garage.  It is only large enough for the two machines, and the walk way between the two doors--in total, about 70.5" square.  Building the platform from wall-to-wall made the most sense, and minimized framing by fastening edge framing directly to the wall studs. 


THE PLAN
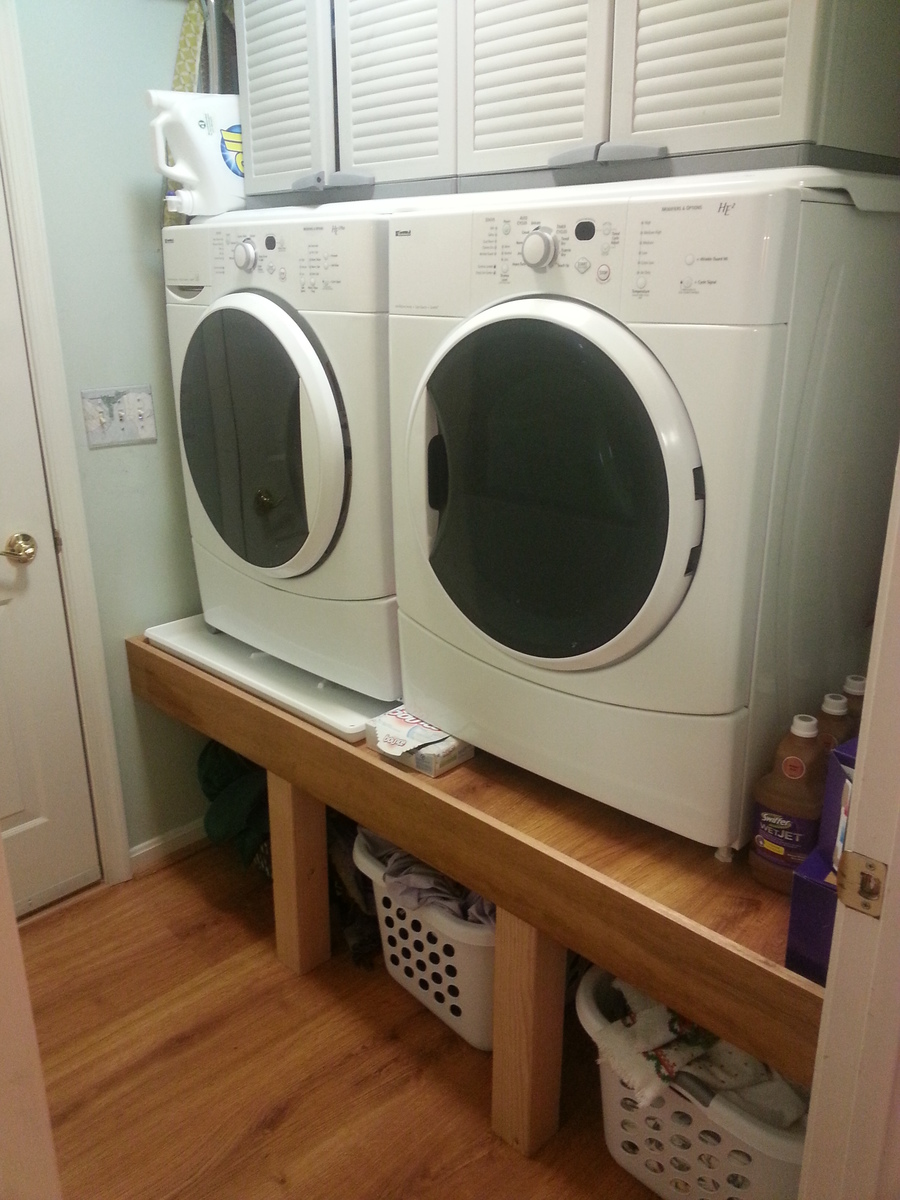
Pretty basic:  2x4's all around for the edge framing--back and sides fastened directly to the wall studs, and front 2x4 supported by two, notched 4x4 legs.  3/4" plywood for the subsurface, and 1/4" laminate faux-wood flooring on top (left over from reflooring, so it matches the floor below).  Bore holes for the washer pan drain and the dryer vent.  1" quarter-round molding on the sides, and 5.5" face piece flush with the top of the molding across the front (spare lauan I had looks perfect).  I also made a point of putting the machines on the platform before the face piece since it might have been in the way or damaged.

Anyone will tell you that it's best to at least sketch out what you want to do so you can minimize surprises, forgotten parts, etc.  I, of course, did virtually none of that, and made several course changes and corrections along the way.  For this project, I was lucky that I didn't need to backtrack at any point, and probably won't learn this lesson any time soon anyway.  However, you SHOULD.


TAKE-AWAYS
The main mistake I made was while gathering the platform dimensions for cutting the plywood.  It was only blind luck that kept me from having to do it more than once (and having to buy more than one 4x8 sheet).  I know that it's actually very unlikely that two adjacent walls are perfectly square, so I made a point to measure the width between the walls at the back and at the front--and, sure enough, found a 1/8" difference--wider at the front.  But when I measured and marked the plywood for cutting, I measured both distances from the precut edge, and then cut.  By doing this, I inadvertently assumed that one of the back corners was perfectly square. 

What I should have done was used a carpenter's square in each back corner to extend a square line from the back edge to the front, and then measured from the square lines to their respective side wall.  This would have accounted for neither back corner being square.

Fortunately, my mistake wasn't big enough to keep the plywood from fitting, but it was very, VERY close.


GIDDY
I honestly couldn't be happier with the finished project (or more smug).  We've raised the washer/dryer 9" higher than they were (24" off the floor), and we now have basket storage underneath all the way across.  I placed two 24" plastic cabinets on top, which still leaves room for the detergent right over the soap inlet on the washer.

And, most importantly, I got to use every powertool I own.  Kinda beats "the quick brown fox jumped over the lazy dog" thing, huh?
 

Estimated Cost
Most of my project made use of spare lumber and materials I've had on hand forever. The 4x8 sheet of plywood was about $30 at Home Depot.
Estimated Time Investment
Weekend Project (10-20 Hours)
Finish Used
Natural. No finishing, staining, or painting. Lauan has a natural stained oak coloring, so it was perfect for the facing. (A soft wood, Lauan--"lao-AHN", also sometimes called "Philippine Mahogany" simply for the darker color--used to be as readily available as pine, but I haven't seen it in stores for many years.)
Recommended Skill Level
Intermediate

Comments

Storage Step

Submitted by sophie on Wed, 10/12/2011 - 01:38

I built the storage step using my own measurements as it's designed for adults. It is used for reaching the very highest shelves in my floor-to-ceiling wardrobe system.
It was my first project using my jigsaw and am very happy with how it turned out.
I added some rubber non-slip mats stuck down so no one goes flying when stretching for clothes!
Have a look at my blog for more pictures and information.

Built from Plan(s)
Estimated Cost
€20
Estimated Time Investment
Afternoon Project (3-6 Hours)
Finish Used
Turquoise and white paint
Varnish top coat
Recommended Skill Level
Beginner
Back