L Shaped Patio Couch

One day project with hubby! Wanted a wood set, but couldn’t find a reasonable price. Bought tools, wood, supplies, and cushions for under the cost of one online!
Built from Plan(s)
One day project with hubby! Wanted a wood set, but couldn’t find a reasonable price. Bought tools, wood, supplies, and cushions for under the cost of one online!


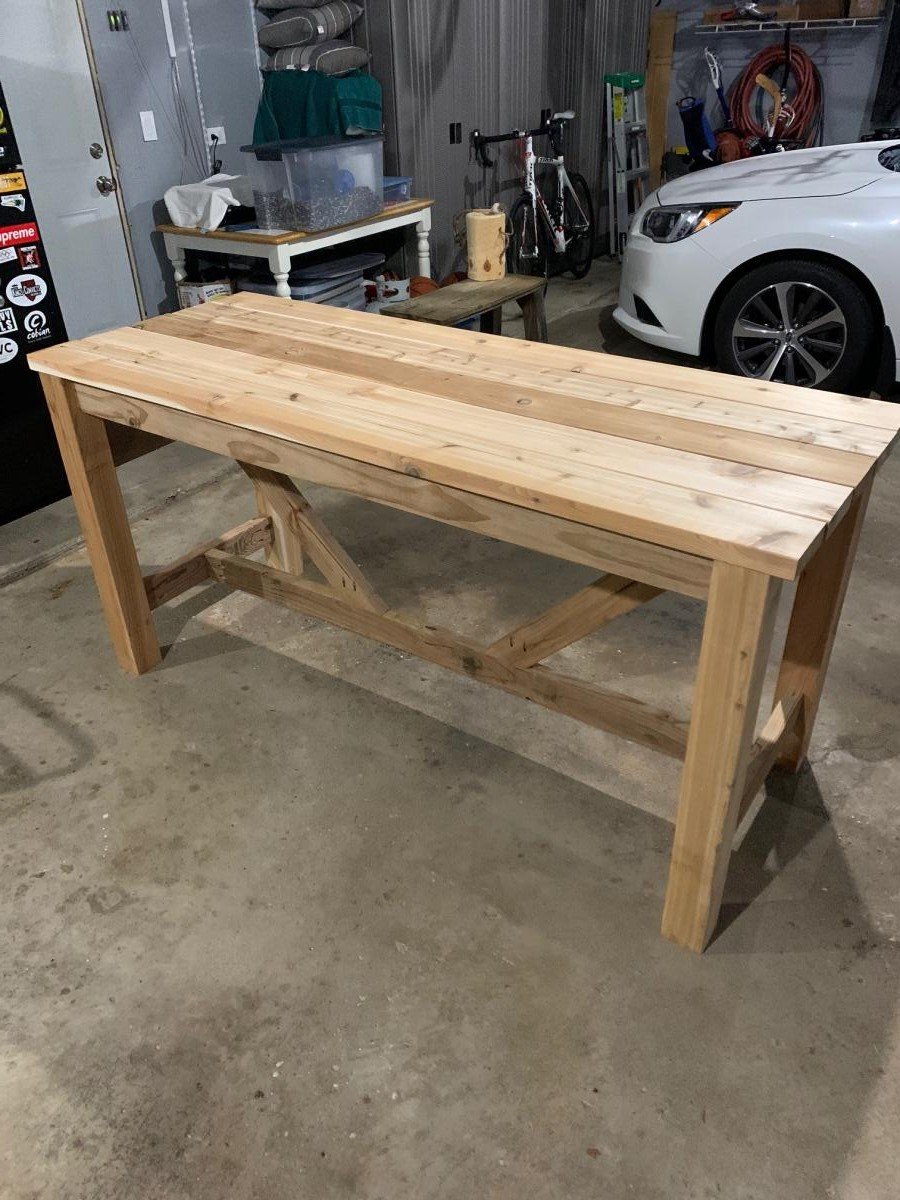
Not quite finished but love the table already. Trying to decide how to stain/paint it. The Kreg jig was a must for this project. It was my first of hopefully many! I used cedar for the 4x4s and 2x6 top pieces. The 2x4s are treated lumber (only because there were no more cedar ones....apparently lumber is getting hard to get lately!!!). Anyway....thanks for the great plans and motivation for this project.

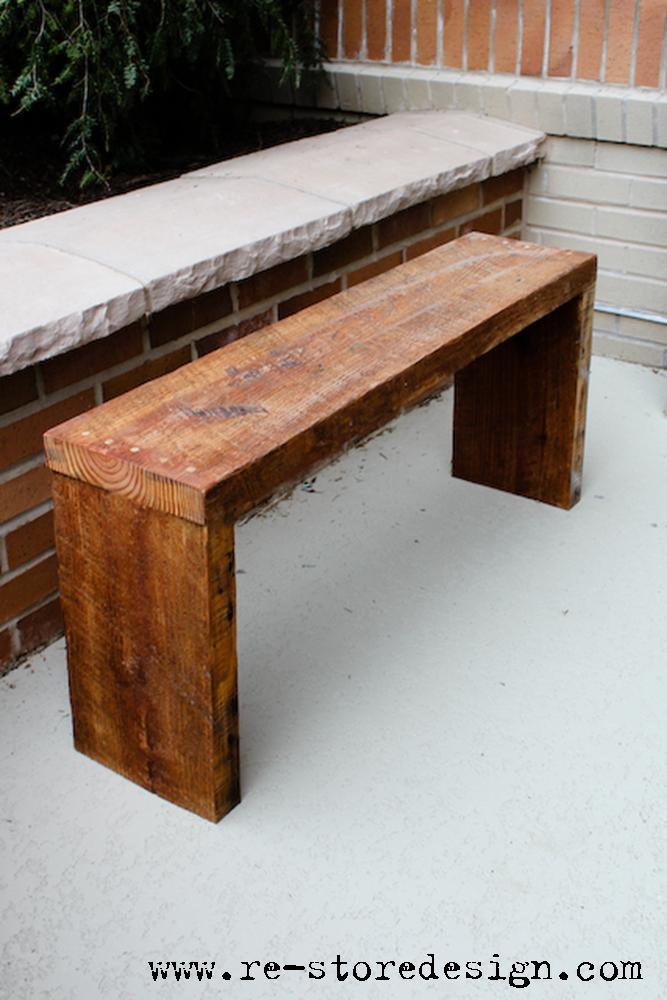
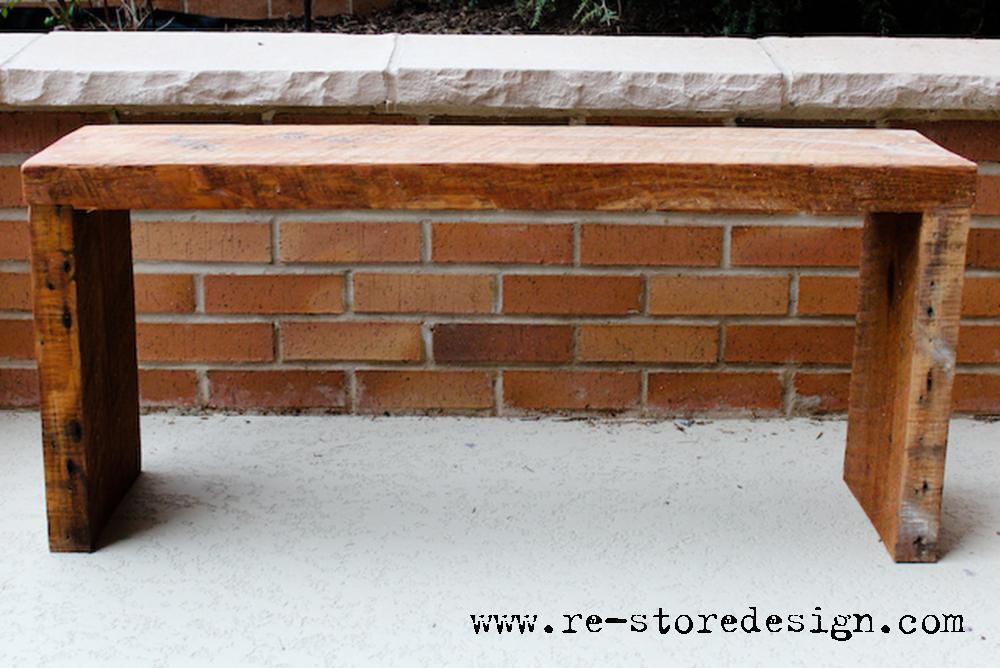
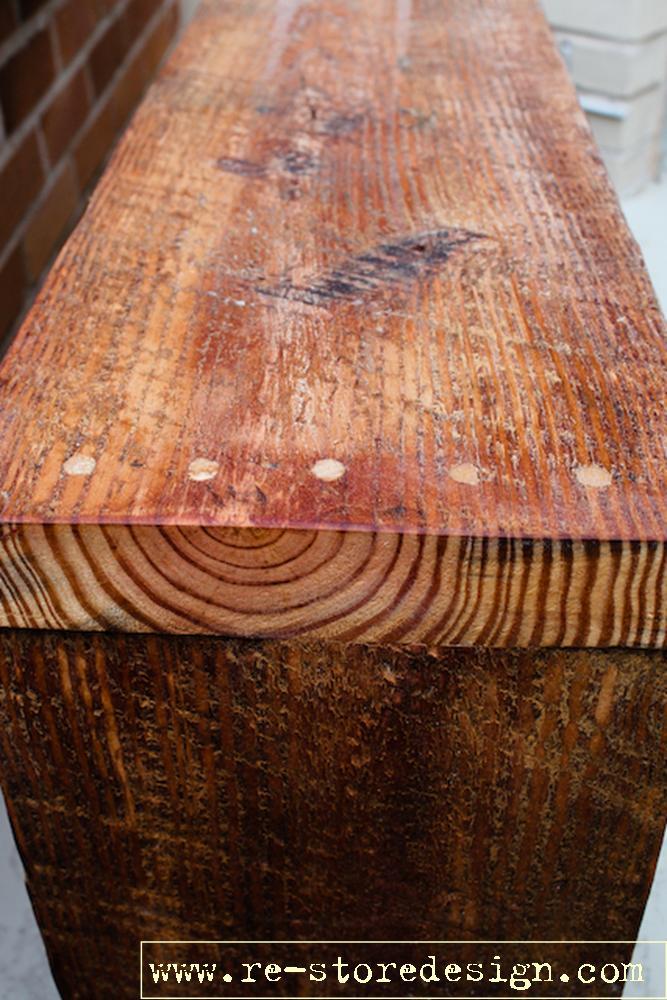
I built a couple benches to go with the reclaimed wood farm table I recently built. They are made out of hard to find 2″ reclaimed rough sawn lumber. The benches would also make a great coffee table or side table. Each bench is 36″ long and 18″ tall and 9″ deep.
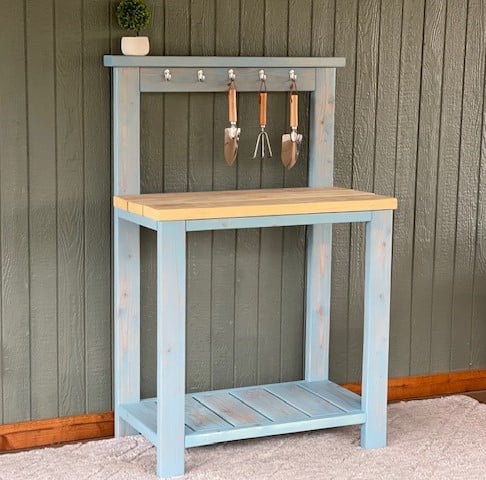
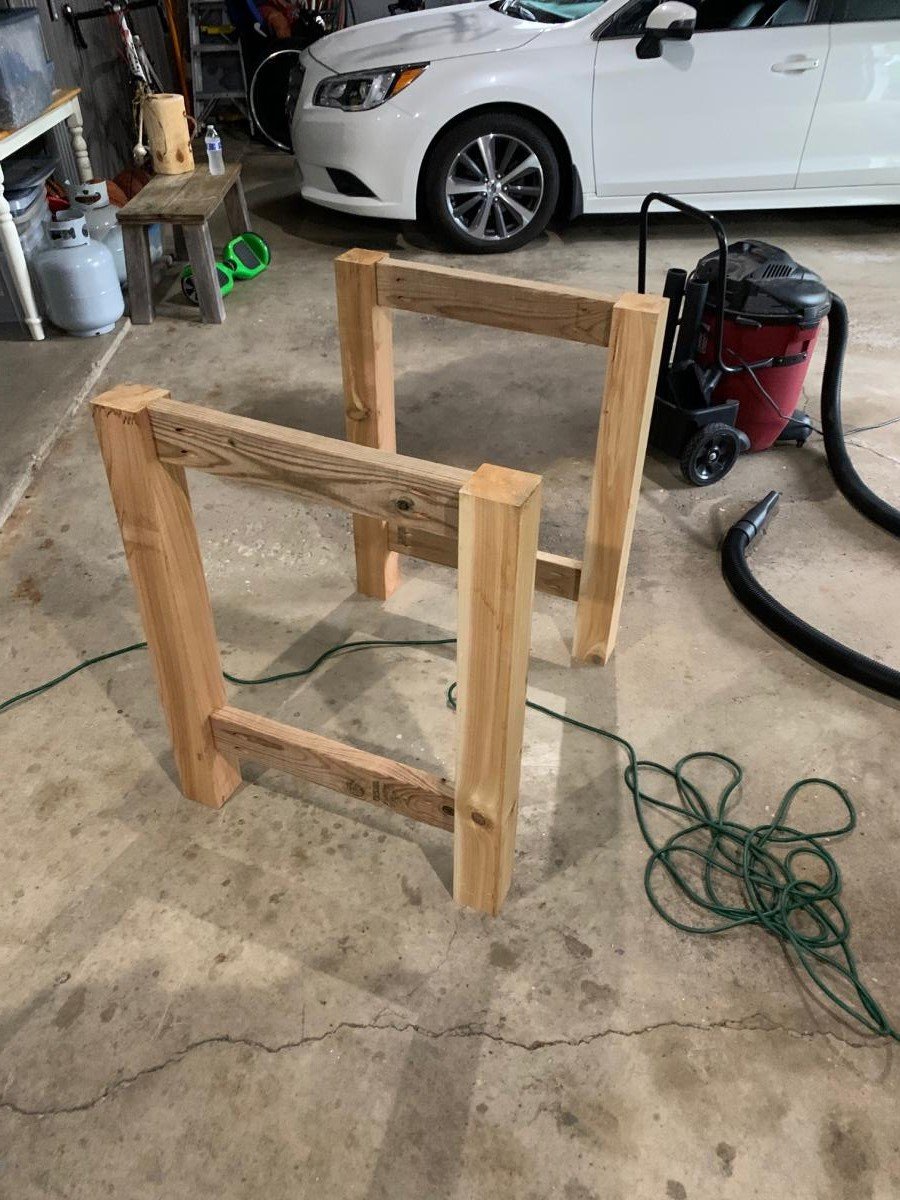
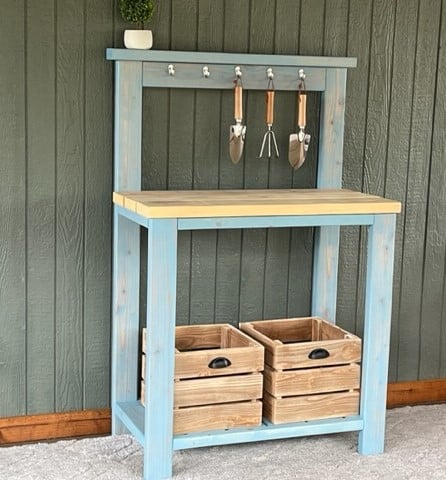
I used Ana's Farmhouse Potting Bench plans and modified it to be more compact and left out the x detail. I built it for under $40 in material.
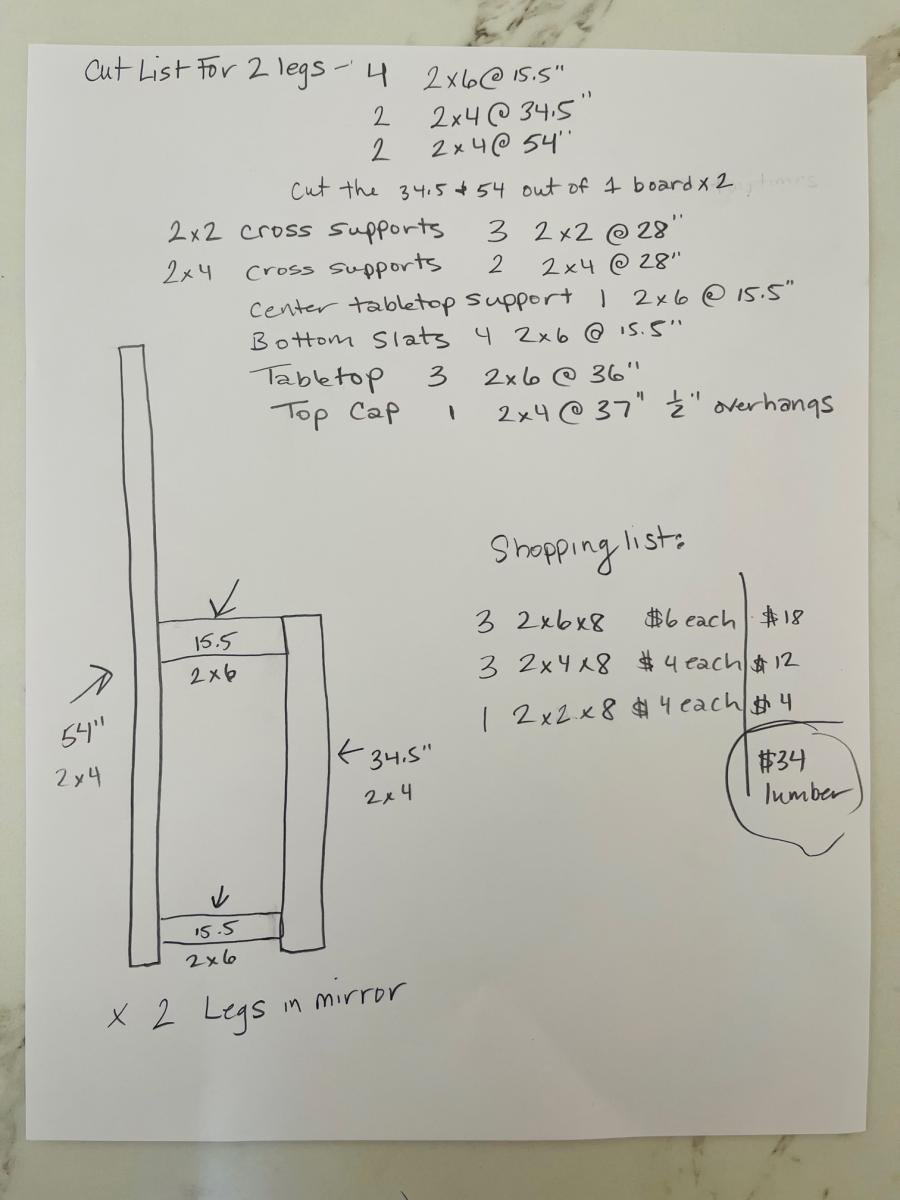
Modifications for Shopping and Cut List - Construction and placement is same as Ana's original plan, so make sure you look that over.
3 - 2x6x8
3 - 2x4x8
1 - 2x2x8
FOR 2 Legs
4 2x6 @15.5"
2 2x4 @34.5"
2 2x4 @54"
(cut the 34.5 and 54 out of 1 board and repeat)
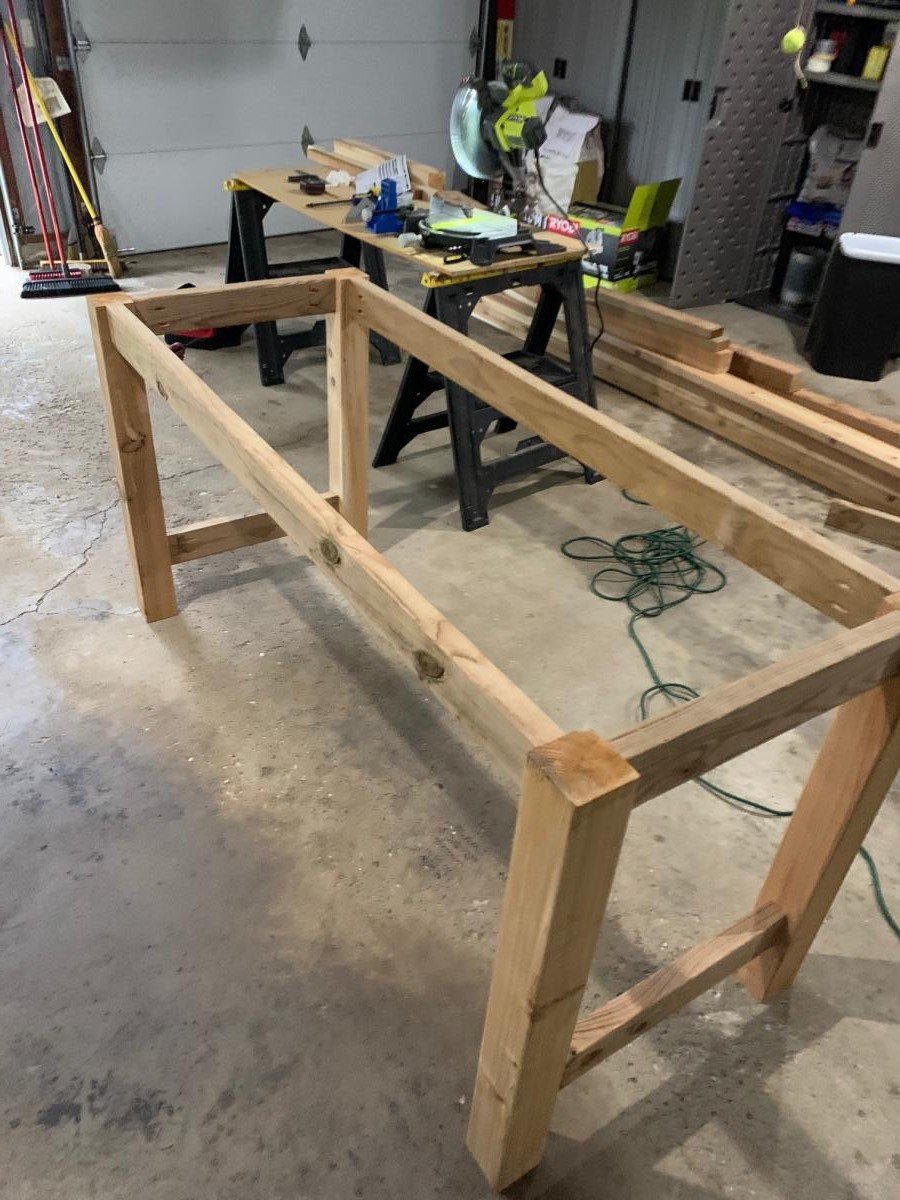
2x2 Cross Supports
3 2x2@28"
2x4 Cross Supports
2 2x4@28"
Center Tabletop Support
1 [email protected]"
Bottom Slats
4 [email protected]"
Tabletop Boards
3 2x6@36"
Top Cap Board
1 2x4@37" leaving 1/2" overhangs
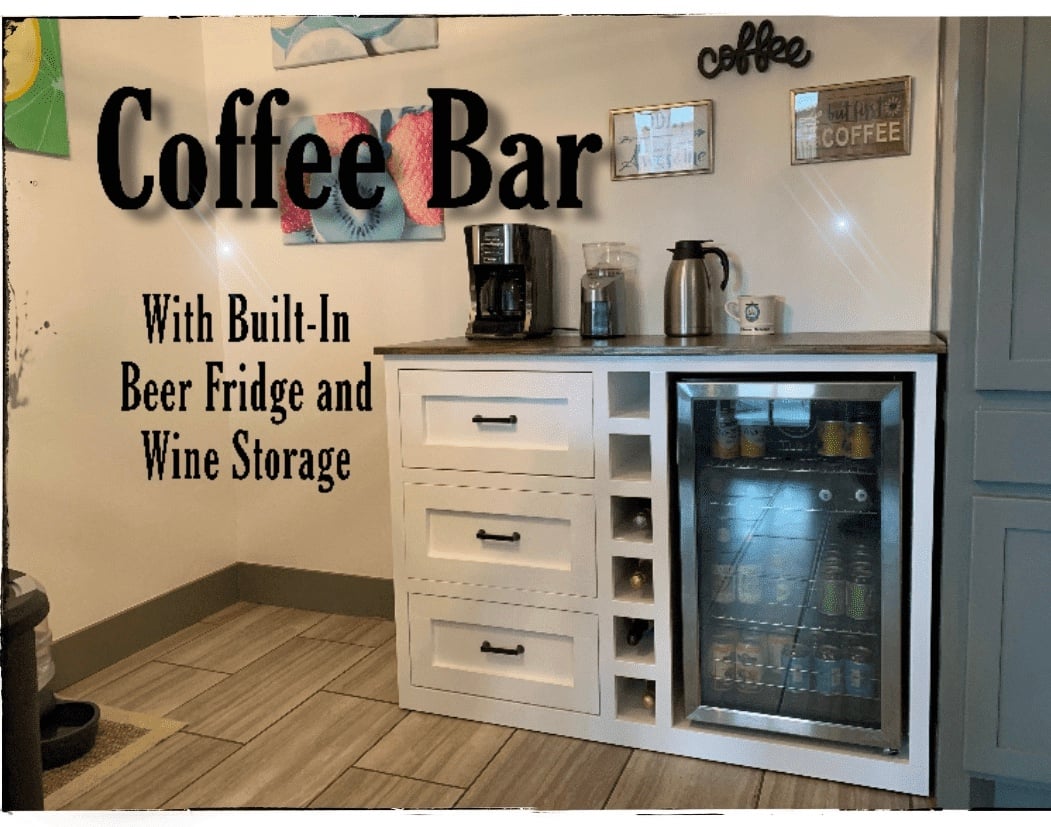
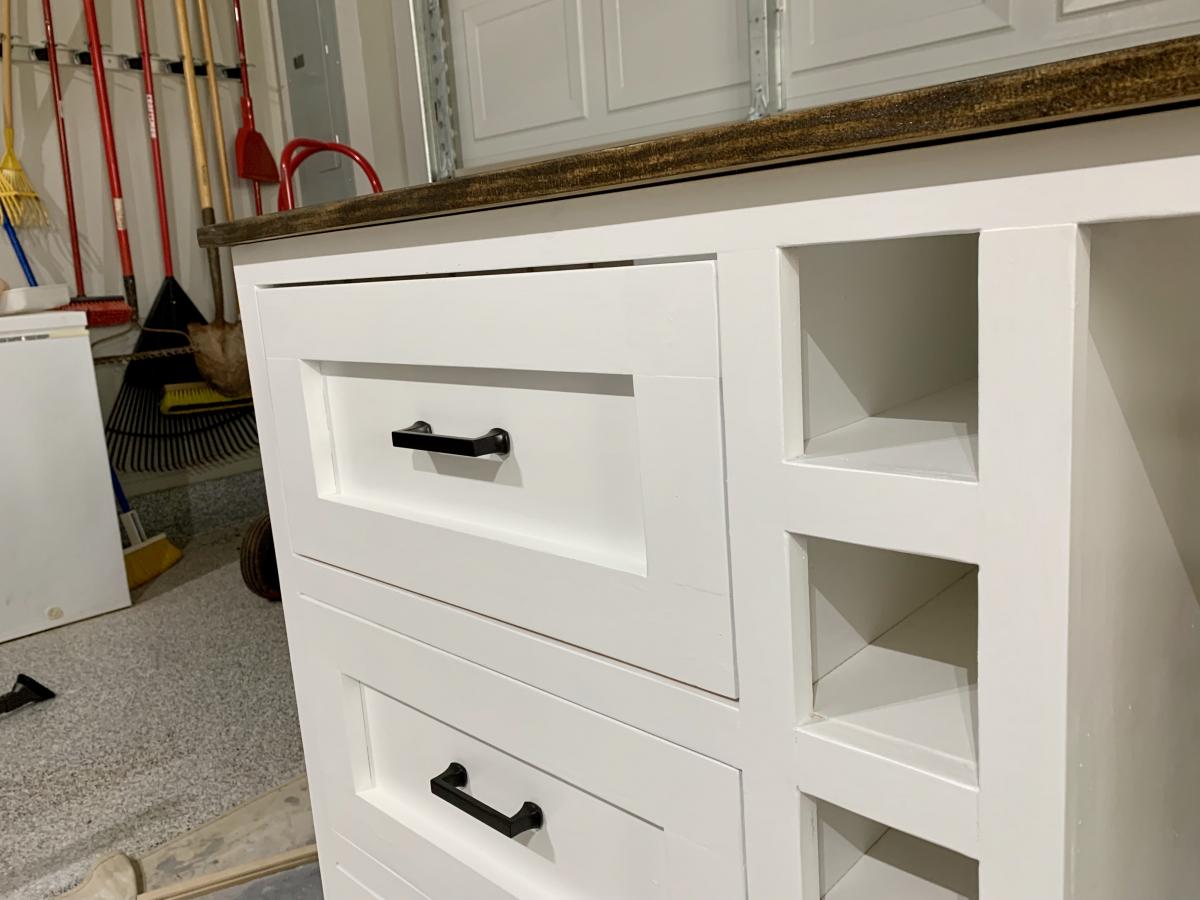
We made a beverage station for the corner of the kitchen!


Mon, 07/08/2019 - 10:46
We didn't use a plan for this but, if someone wants to build it, check out the linked YouTube video.

Tue, 07/09/2019 - 11:11
Amazing! Thanks so much for adding a brag post and linking to your video!
Fri, 07/31/2020 - 09:43
Hello! Was looking to see if this is something you would be interested in building for us? We are in love with this project but don't have the tools or means to do it ourself..
Can talk about pricing / size etc.
Thanks!
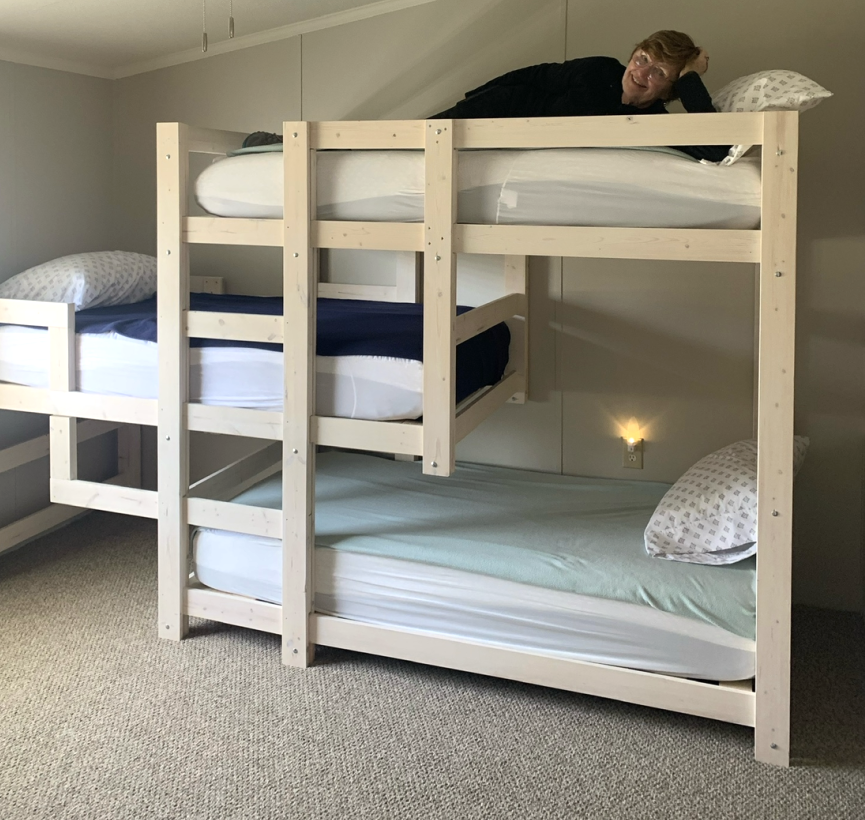
I needed to find a way to conserve space for 3 children to sleep in a very small home. I used an adapted pattern from Ana White. It turned out perfectly!
Sat, 04/29/2023 - 09:22
WOW, this is great, you fit a lot of sleeping in a small space!
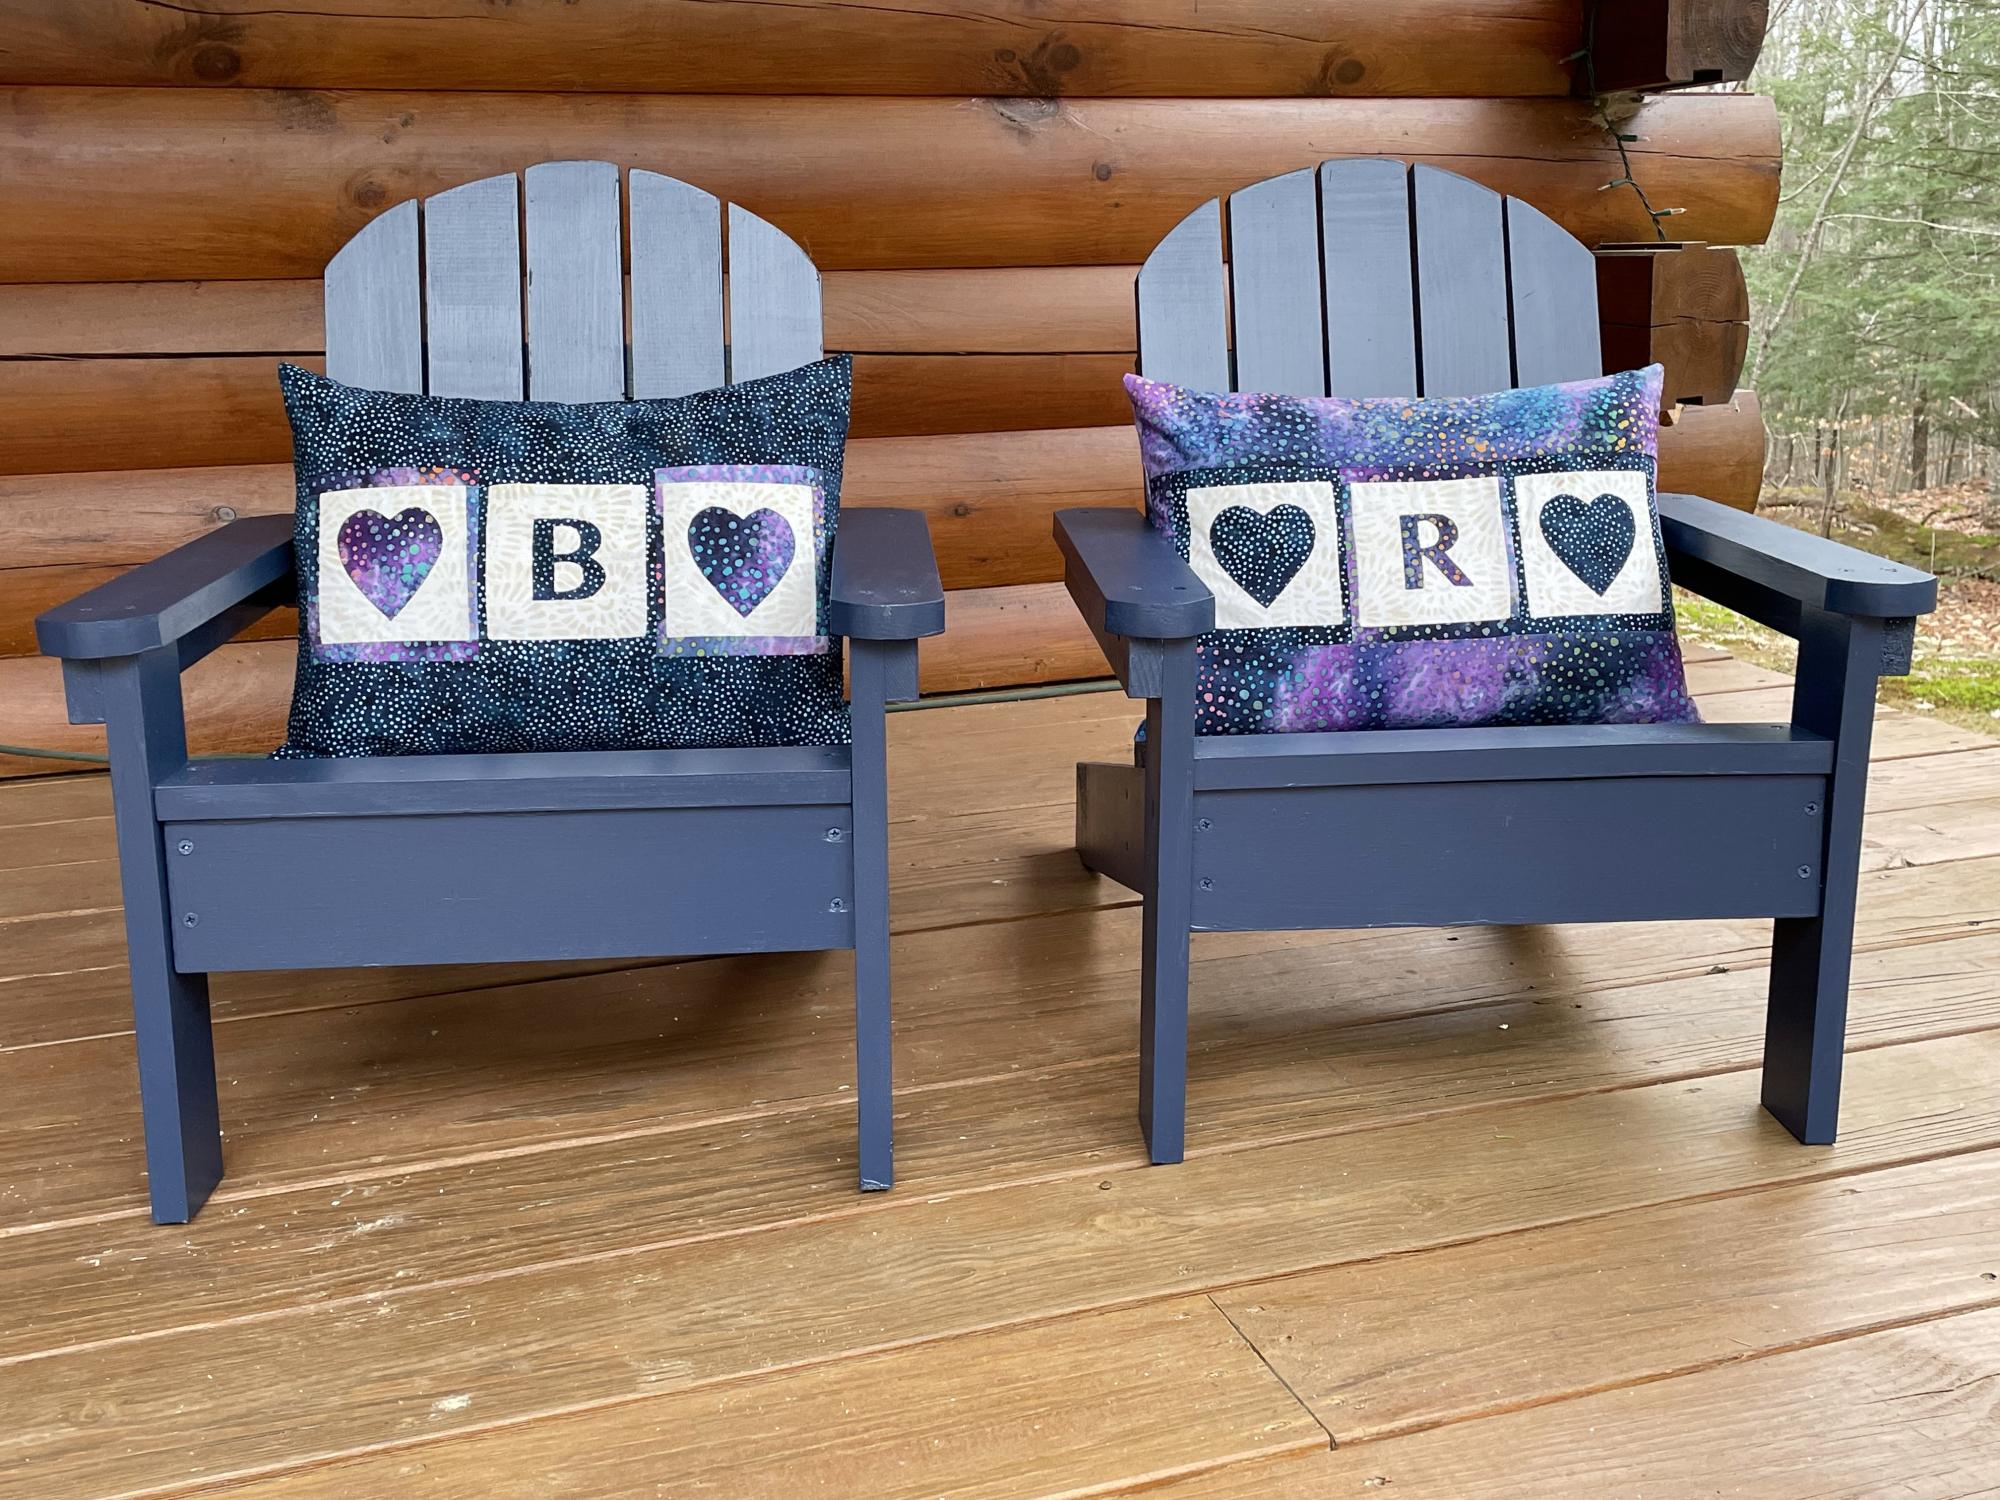
I used your plans to create this pair of grandchild Christmas gifts. They were a huge hit!
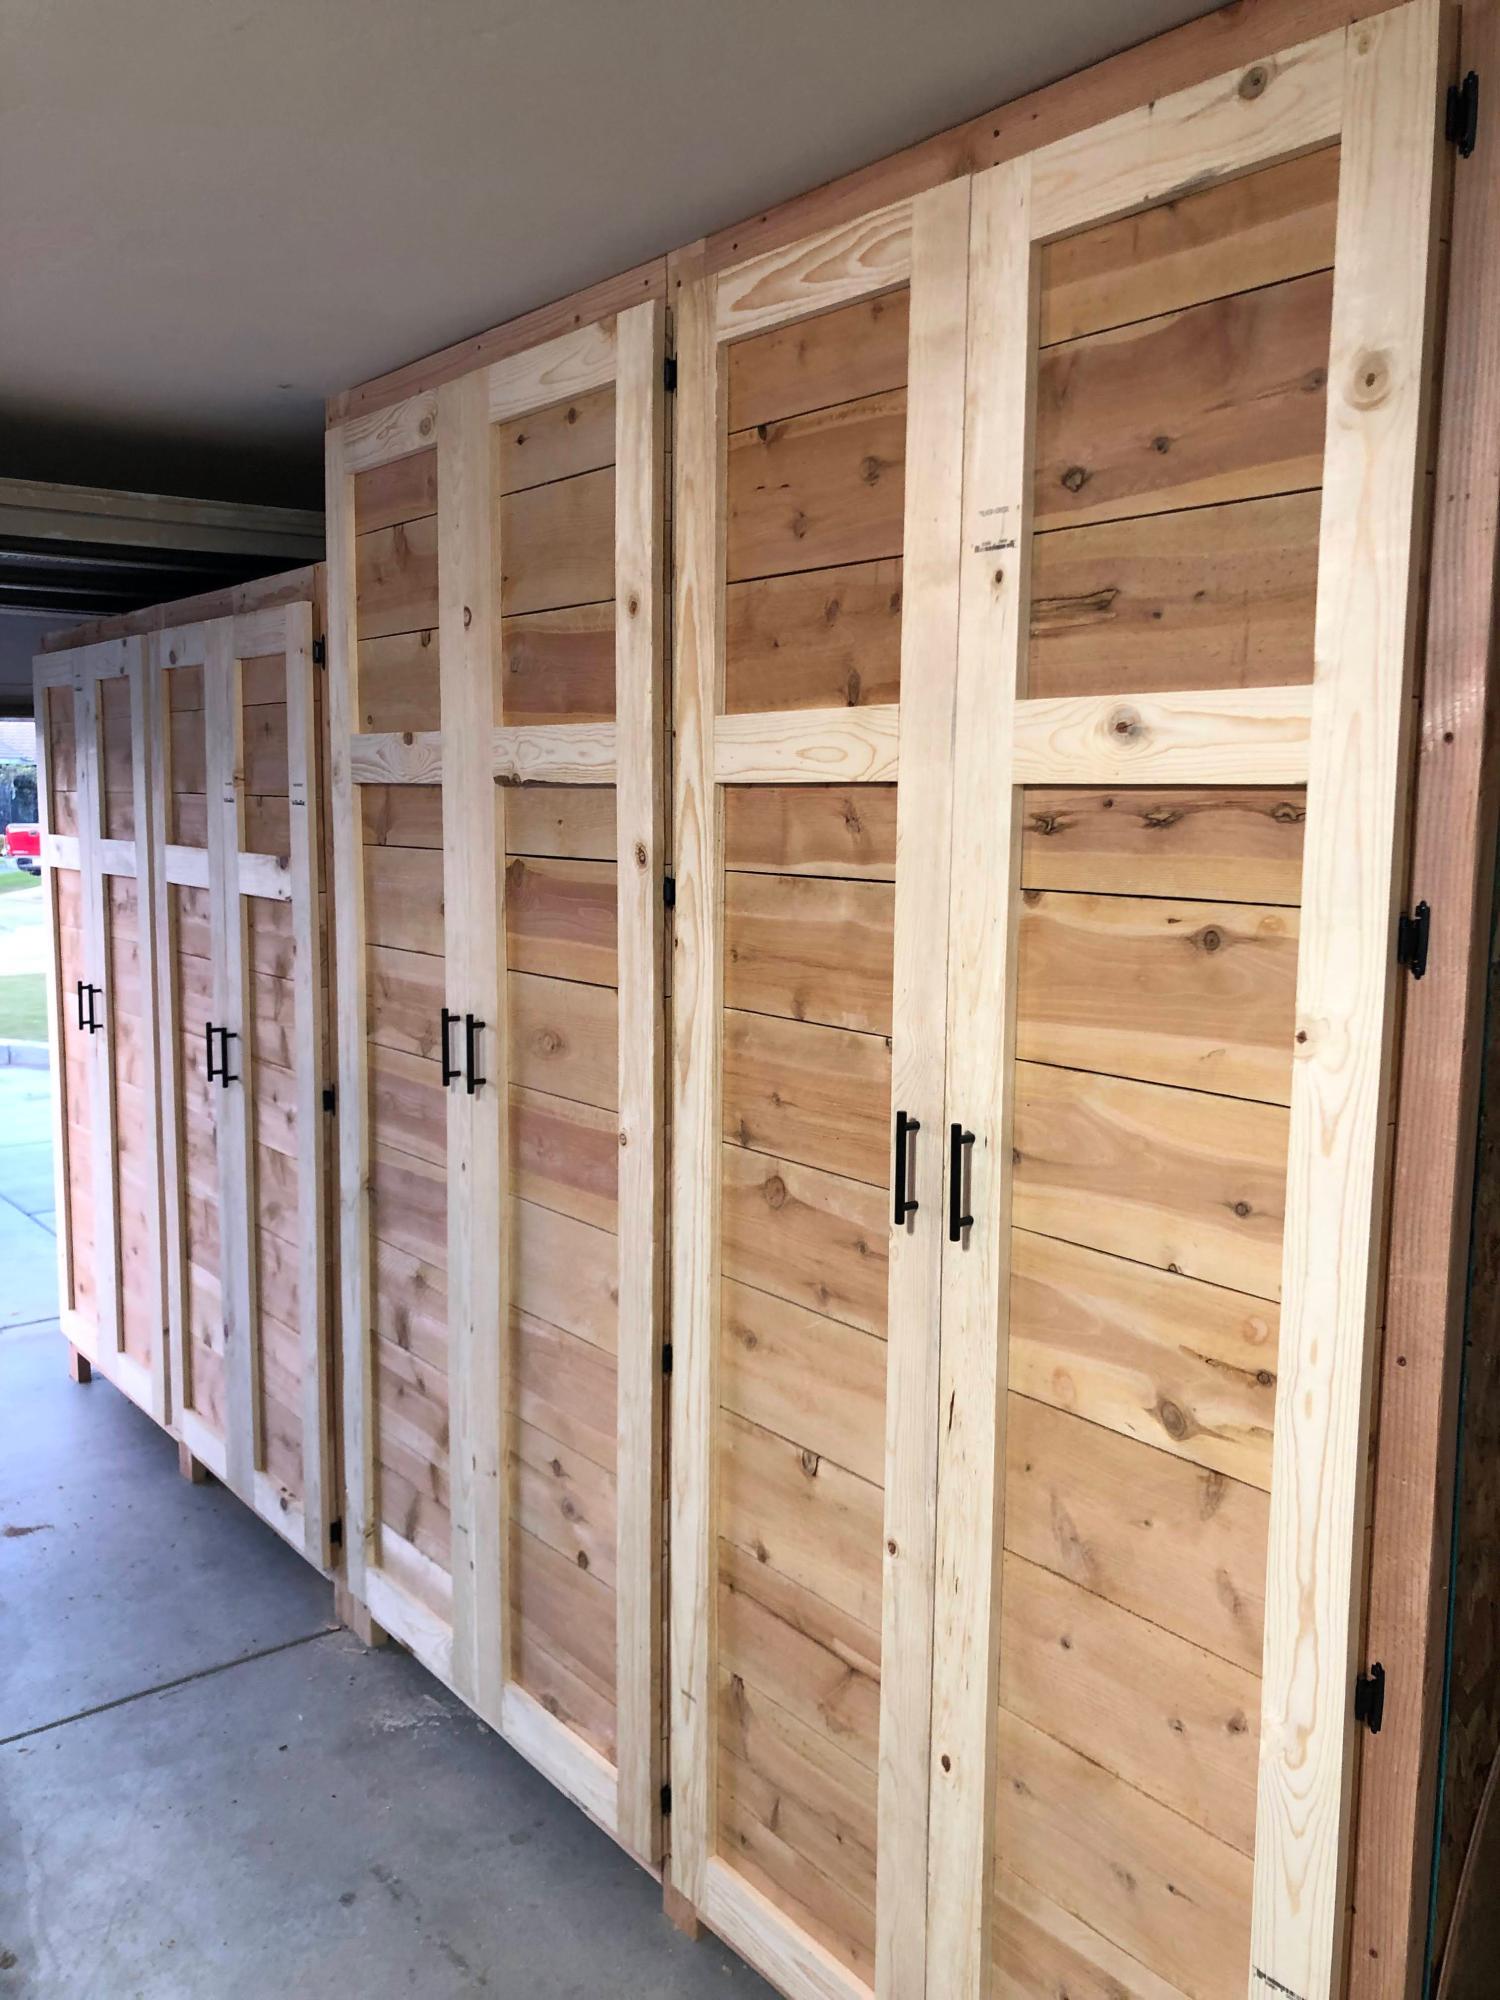
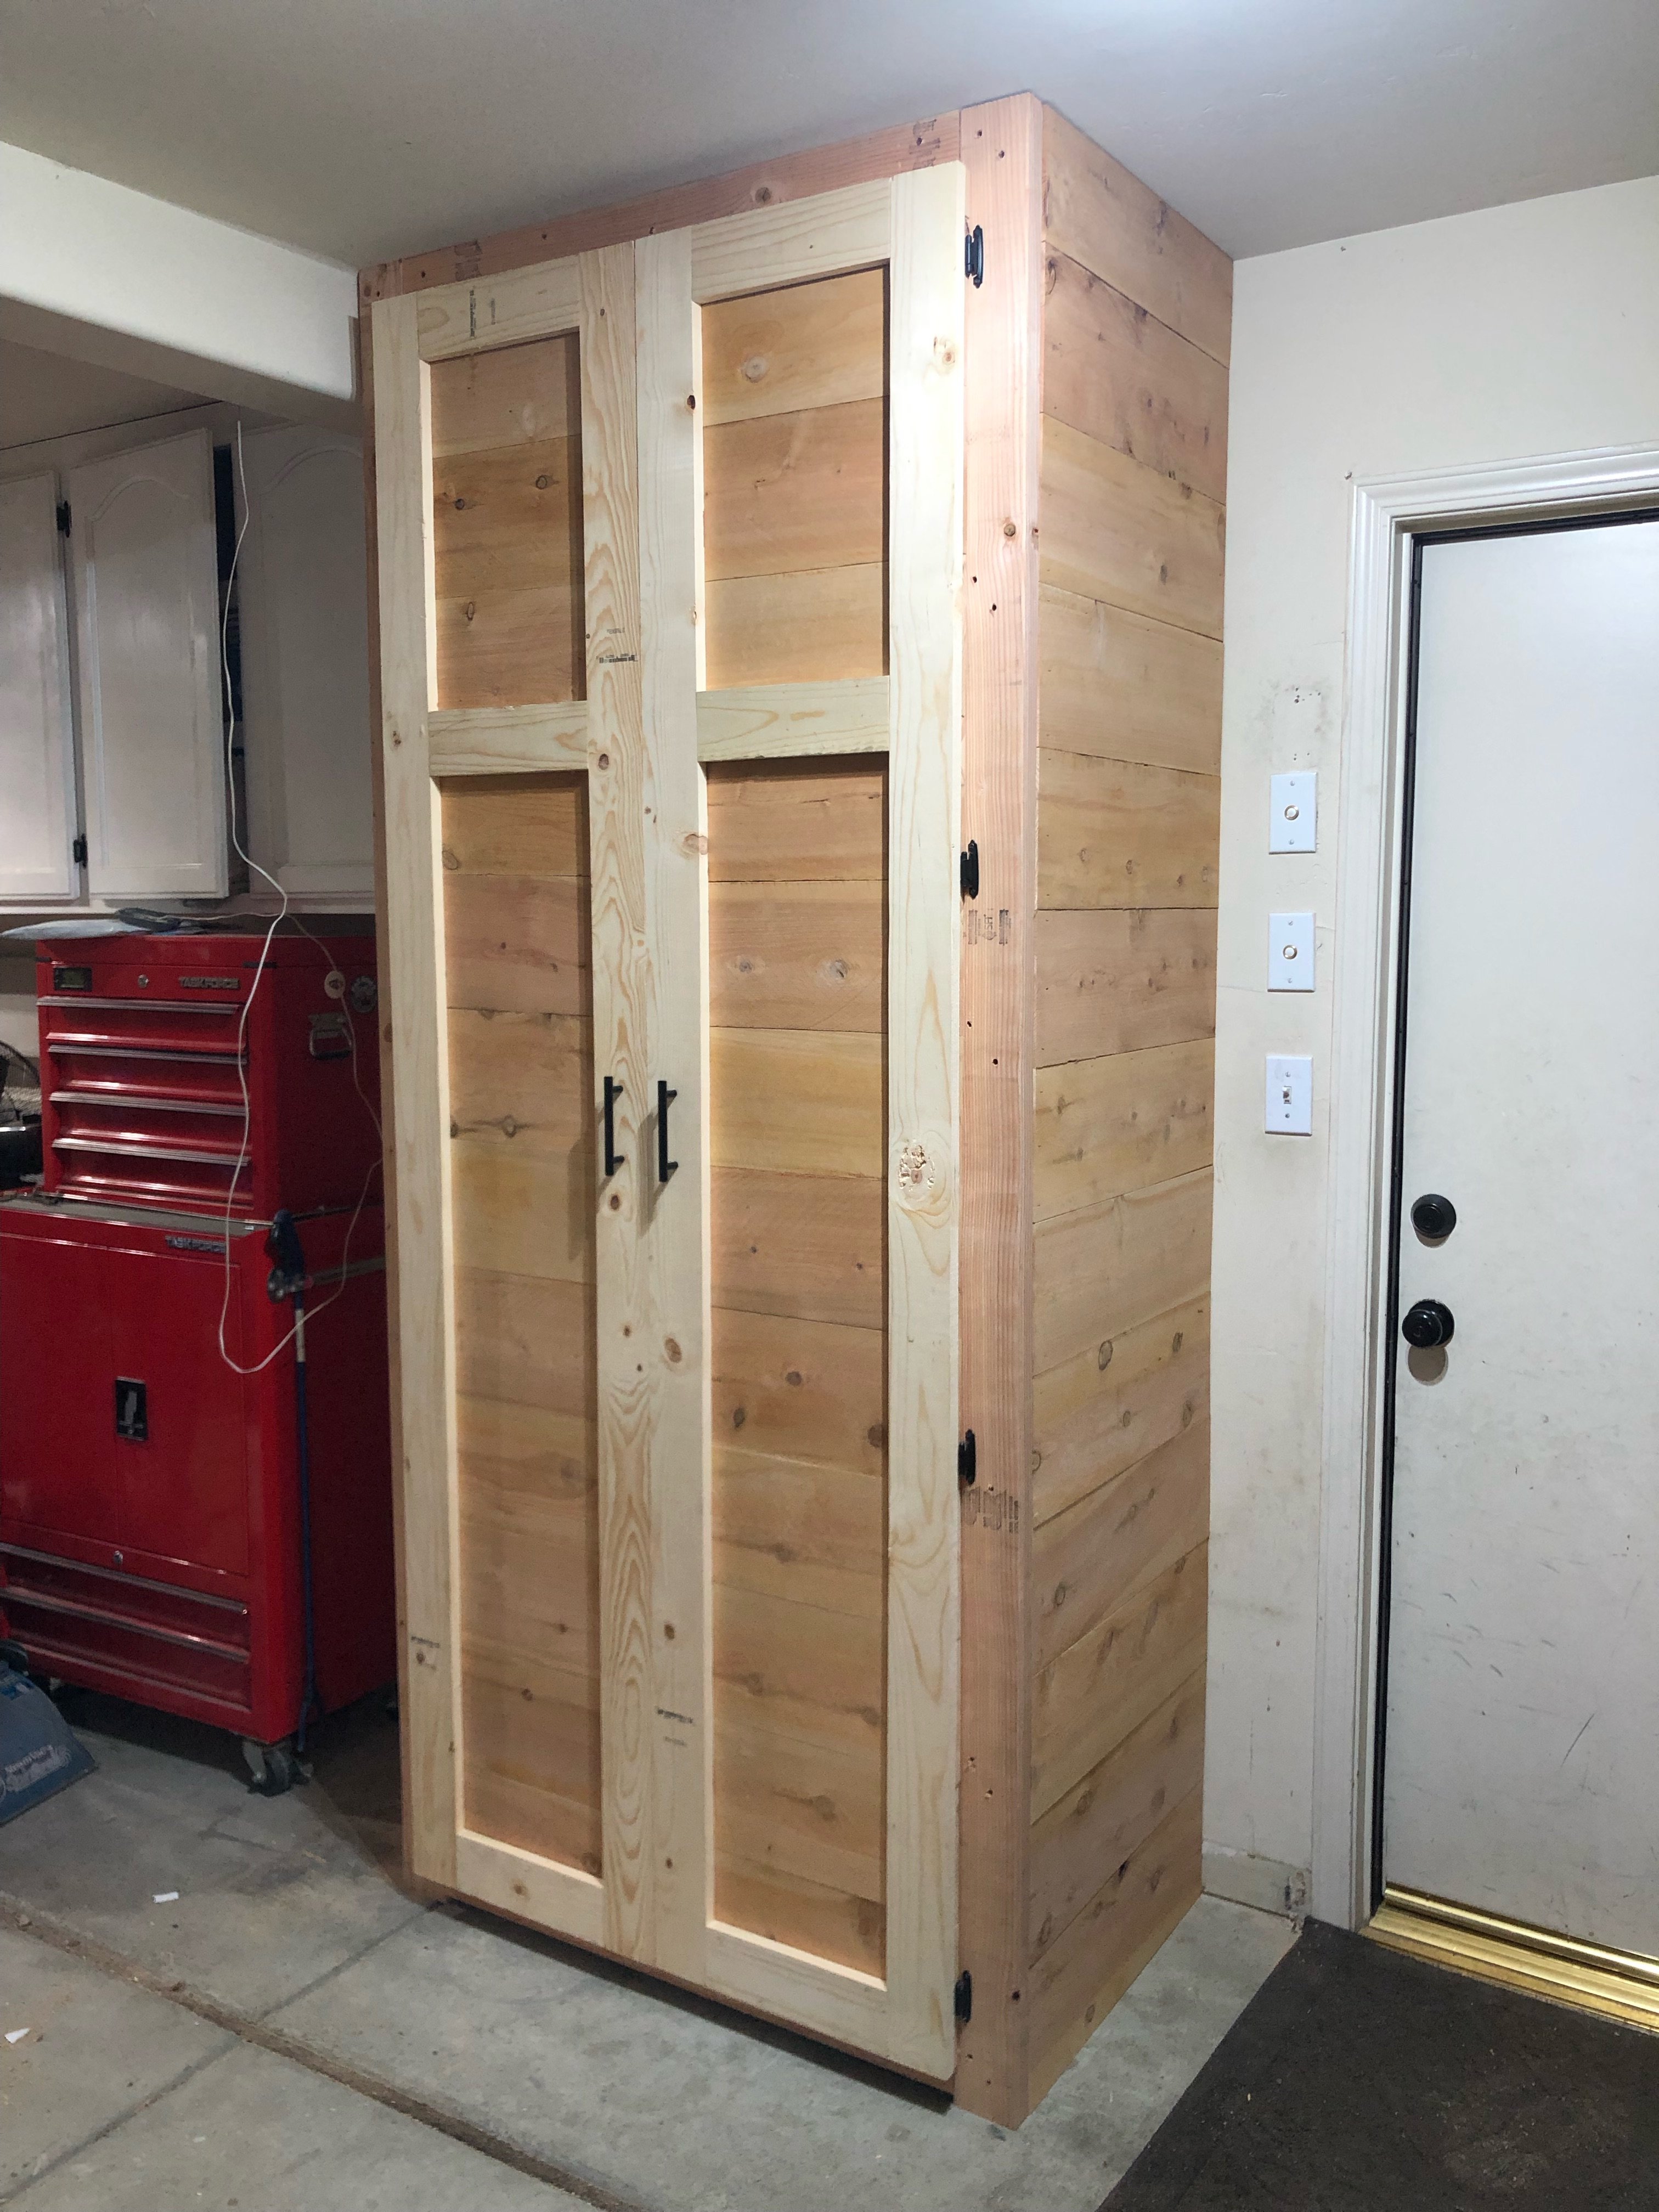
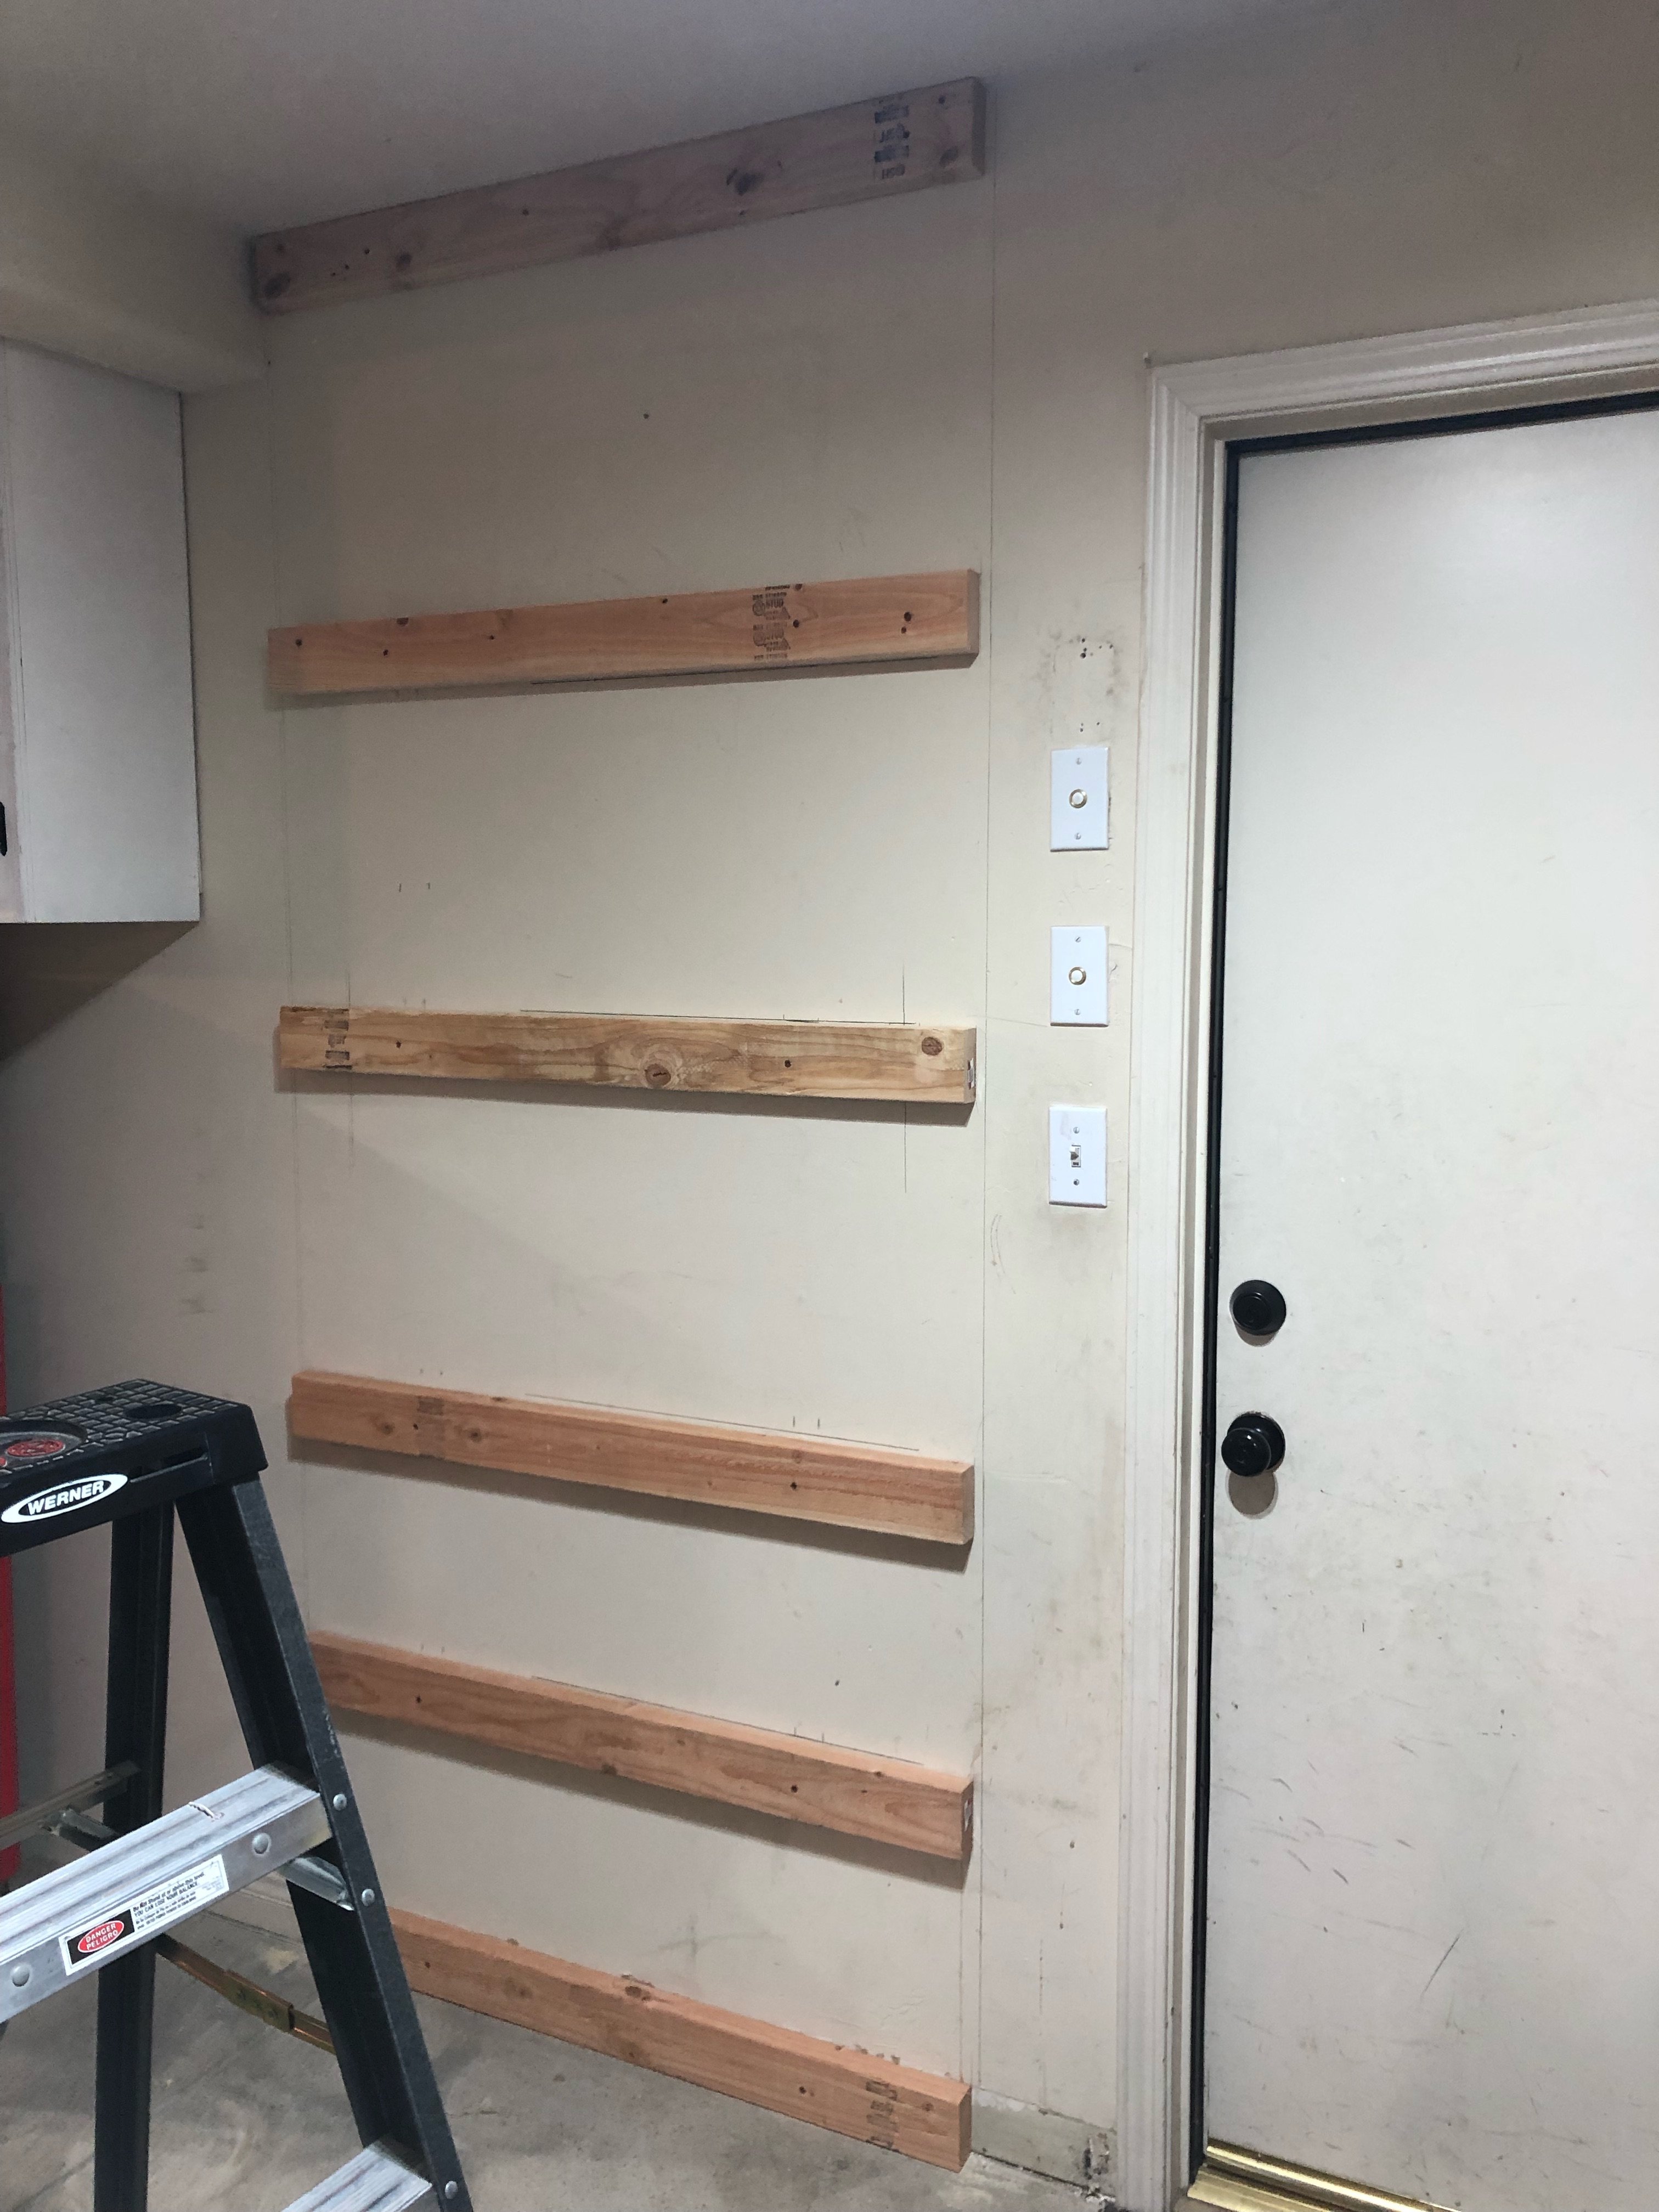
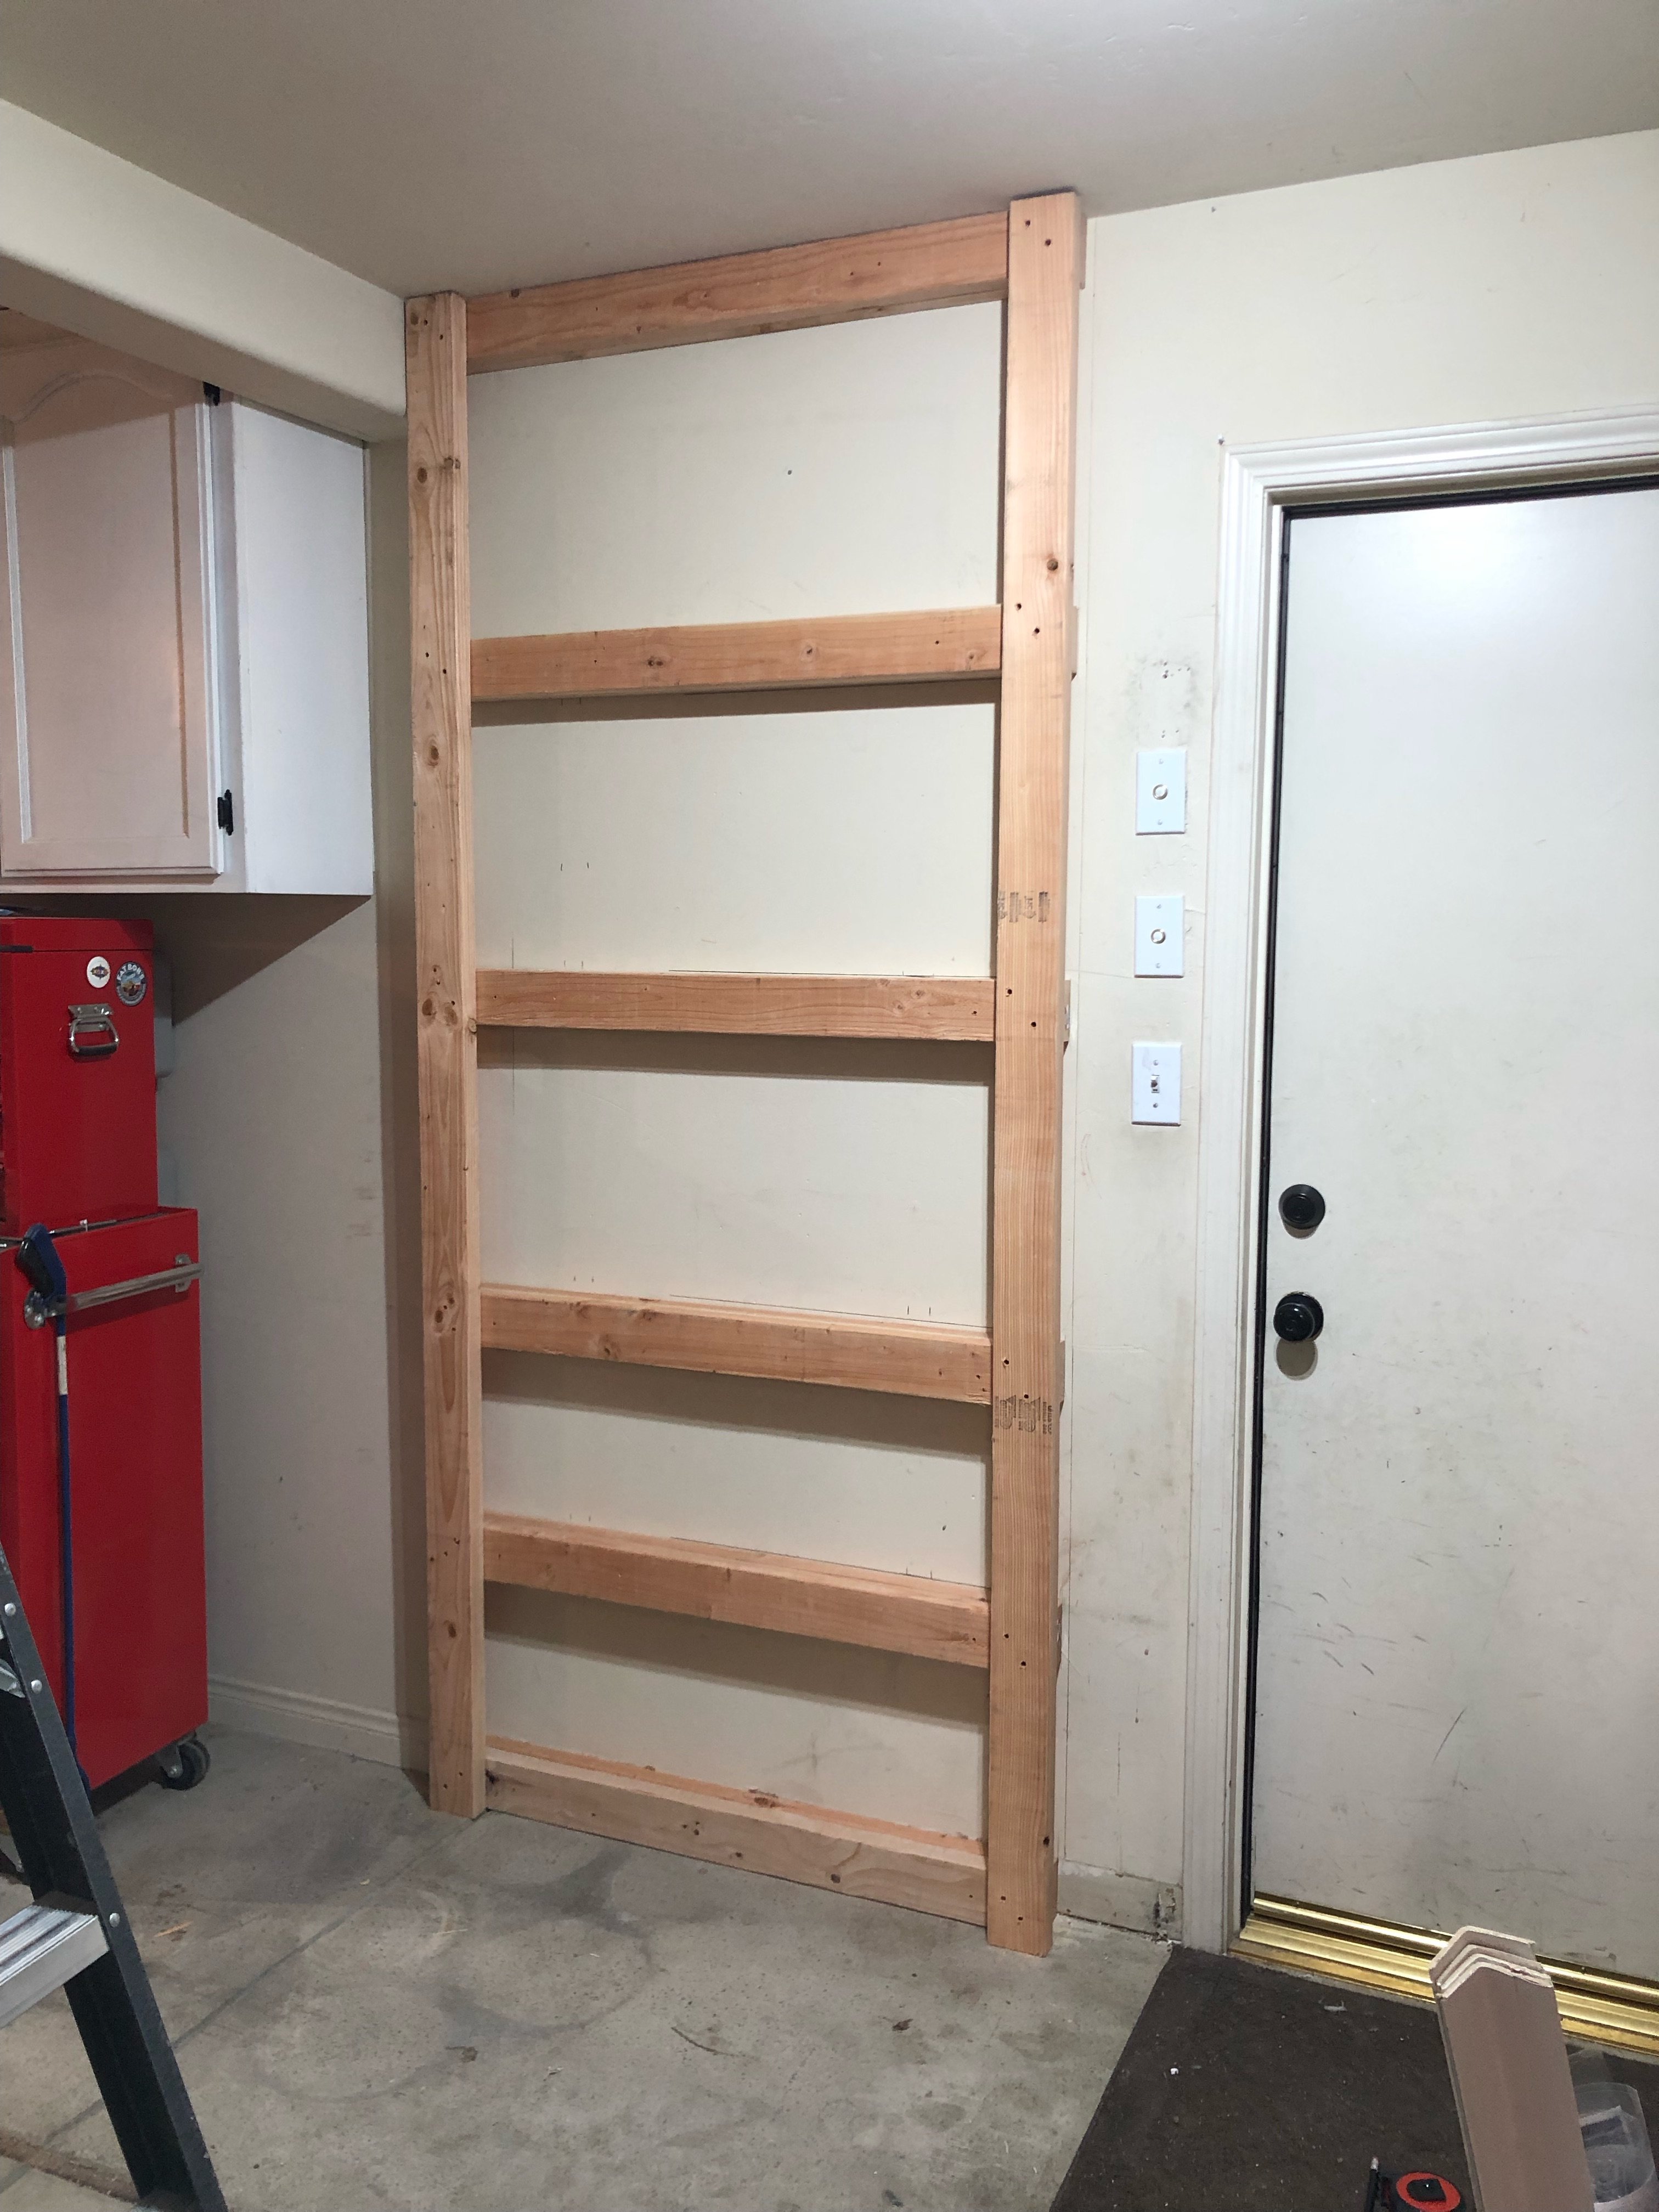
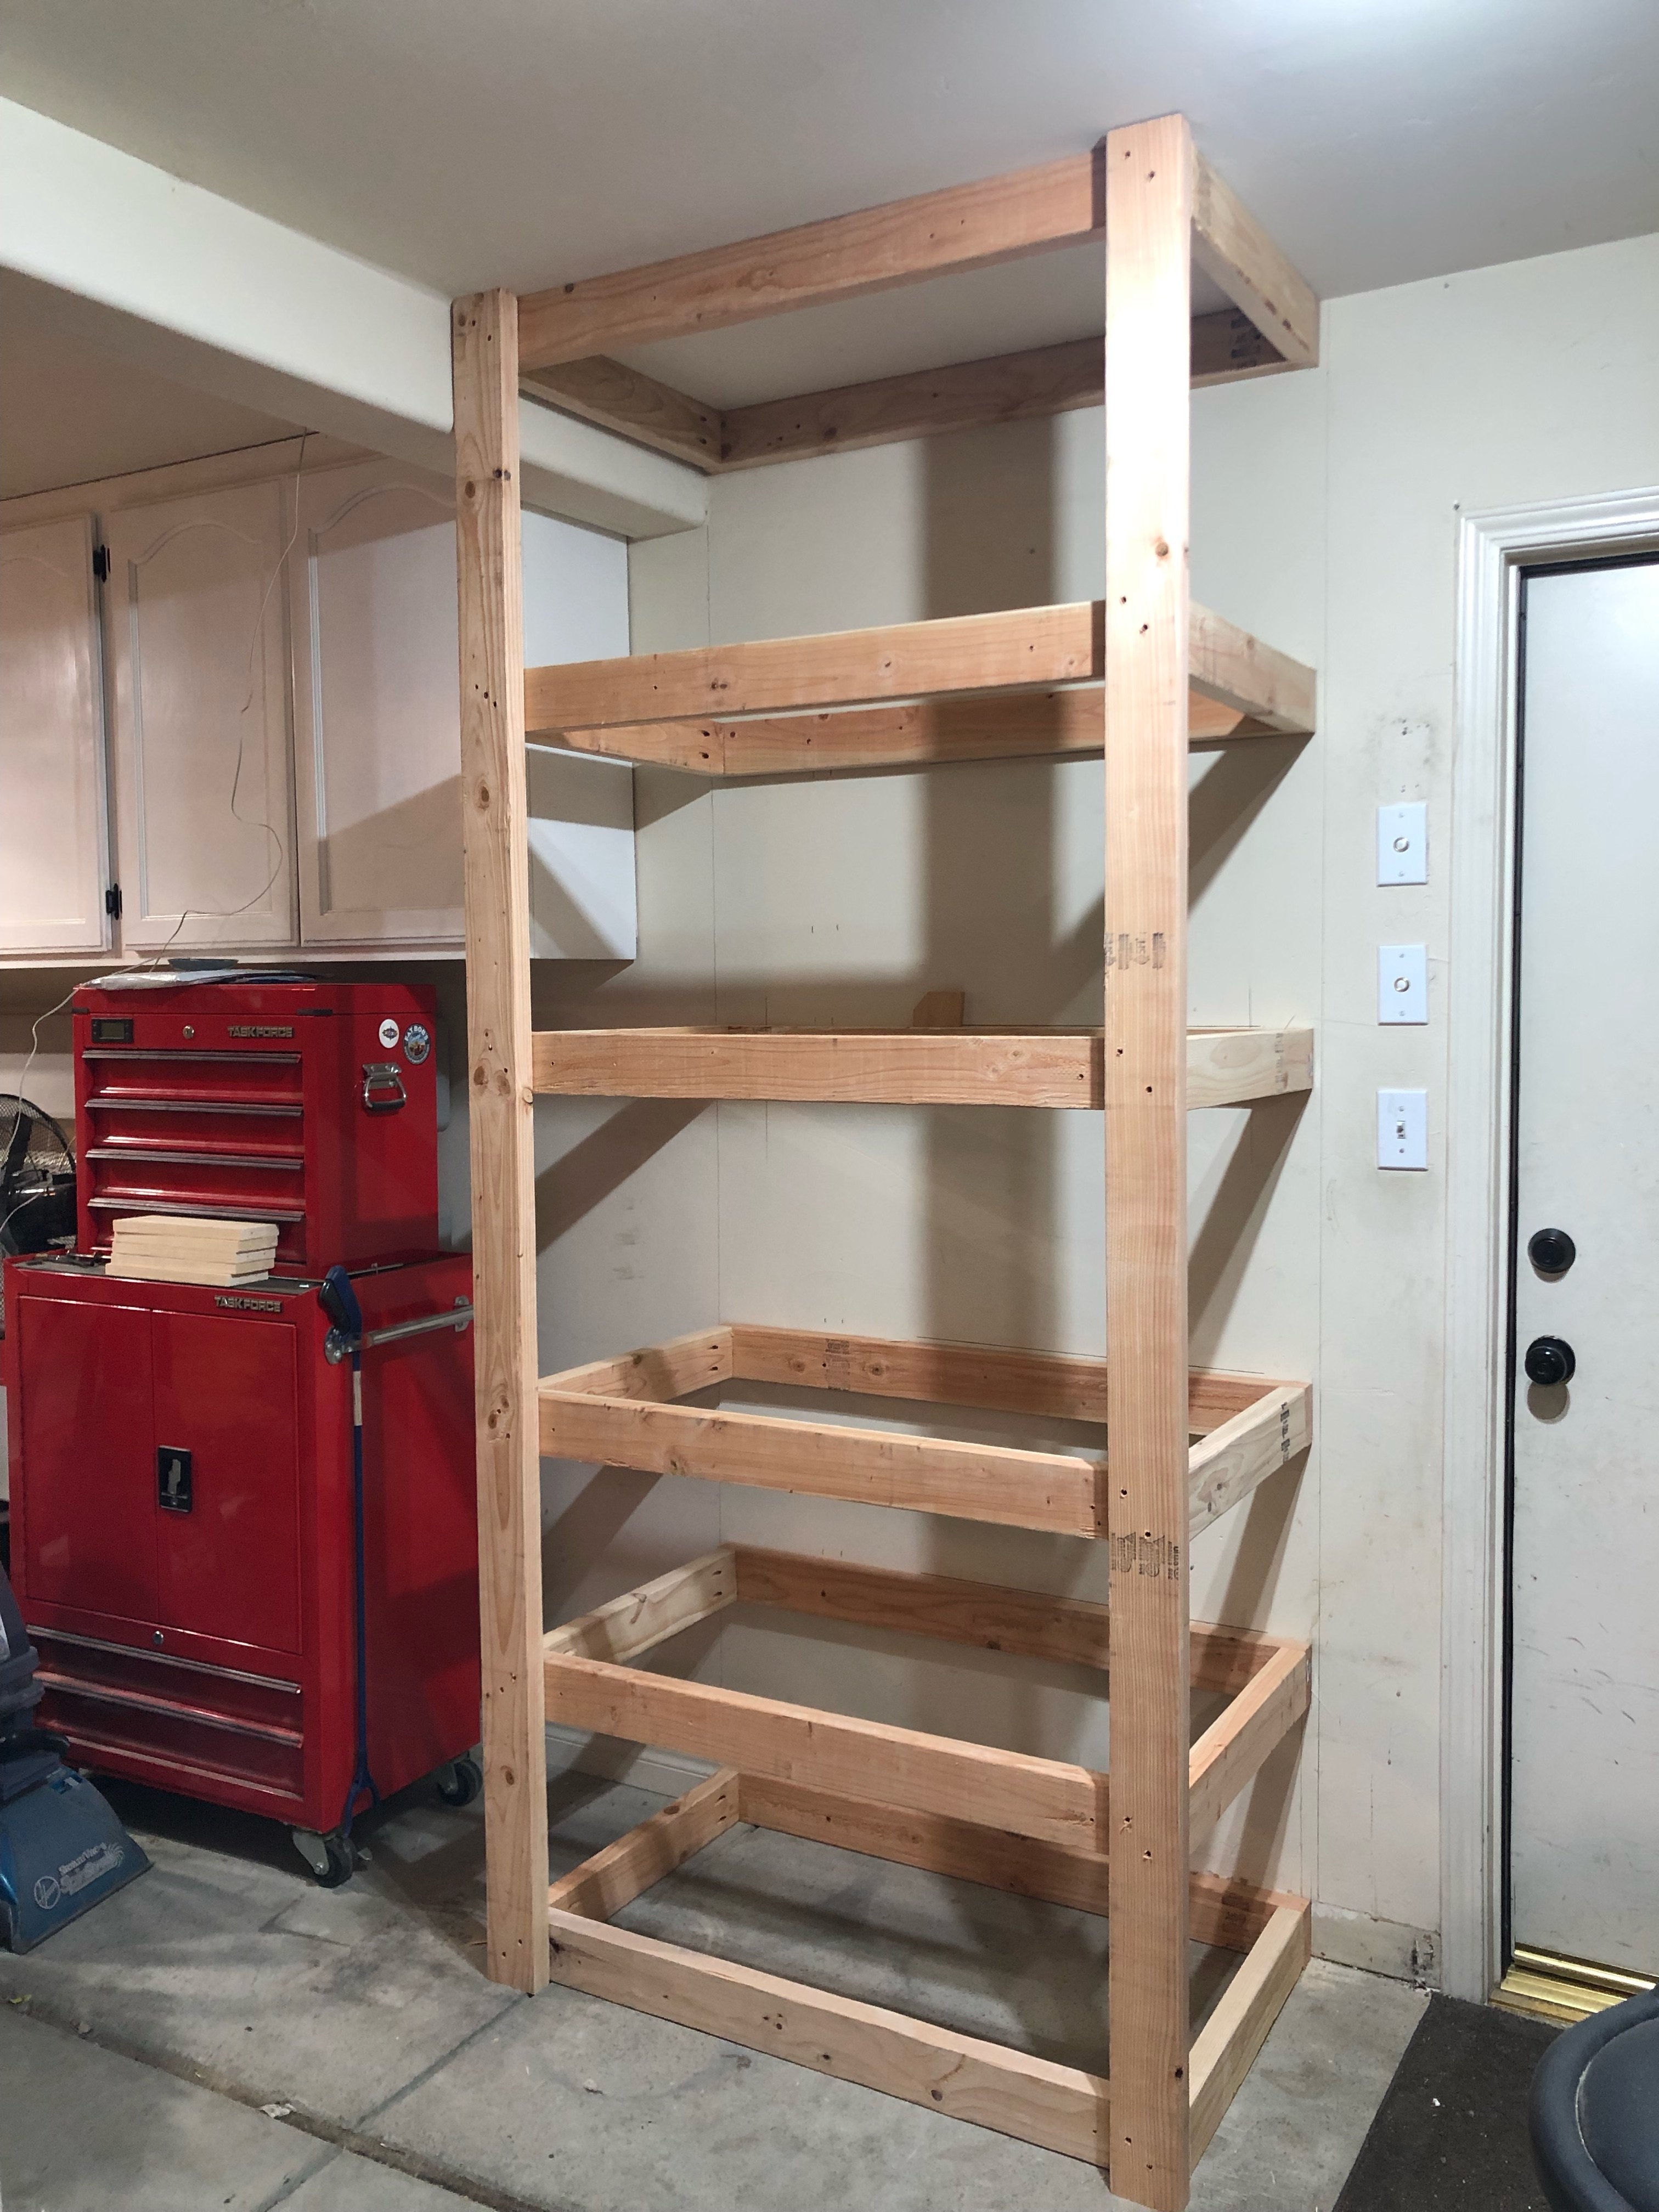
Garage Shelves Plan with Added Doors - Built and shared by Jeremy Doyle
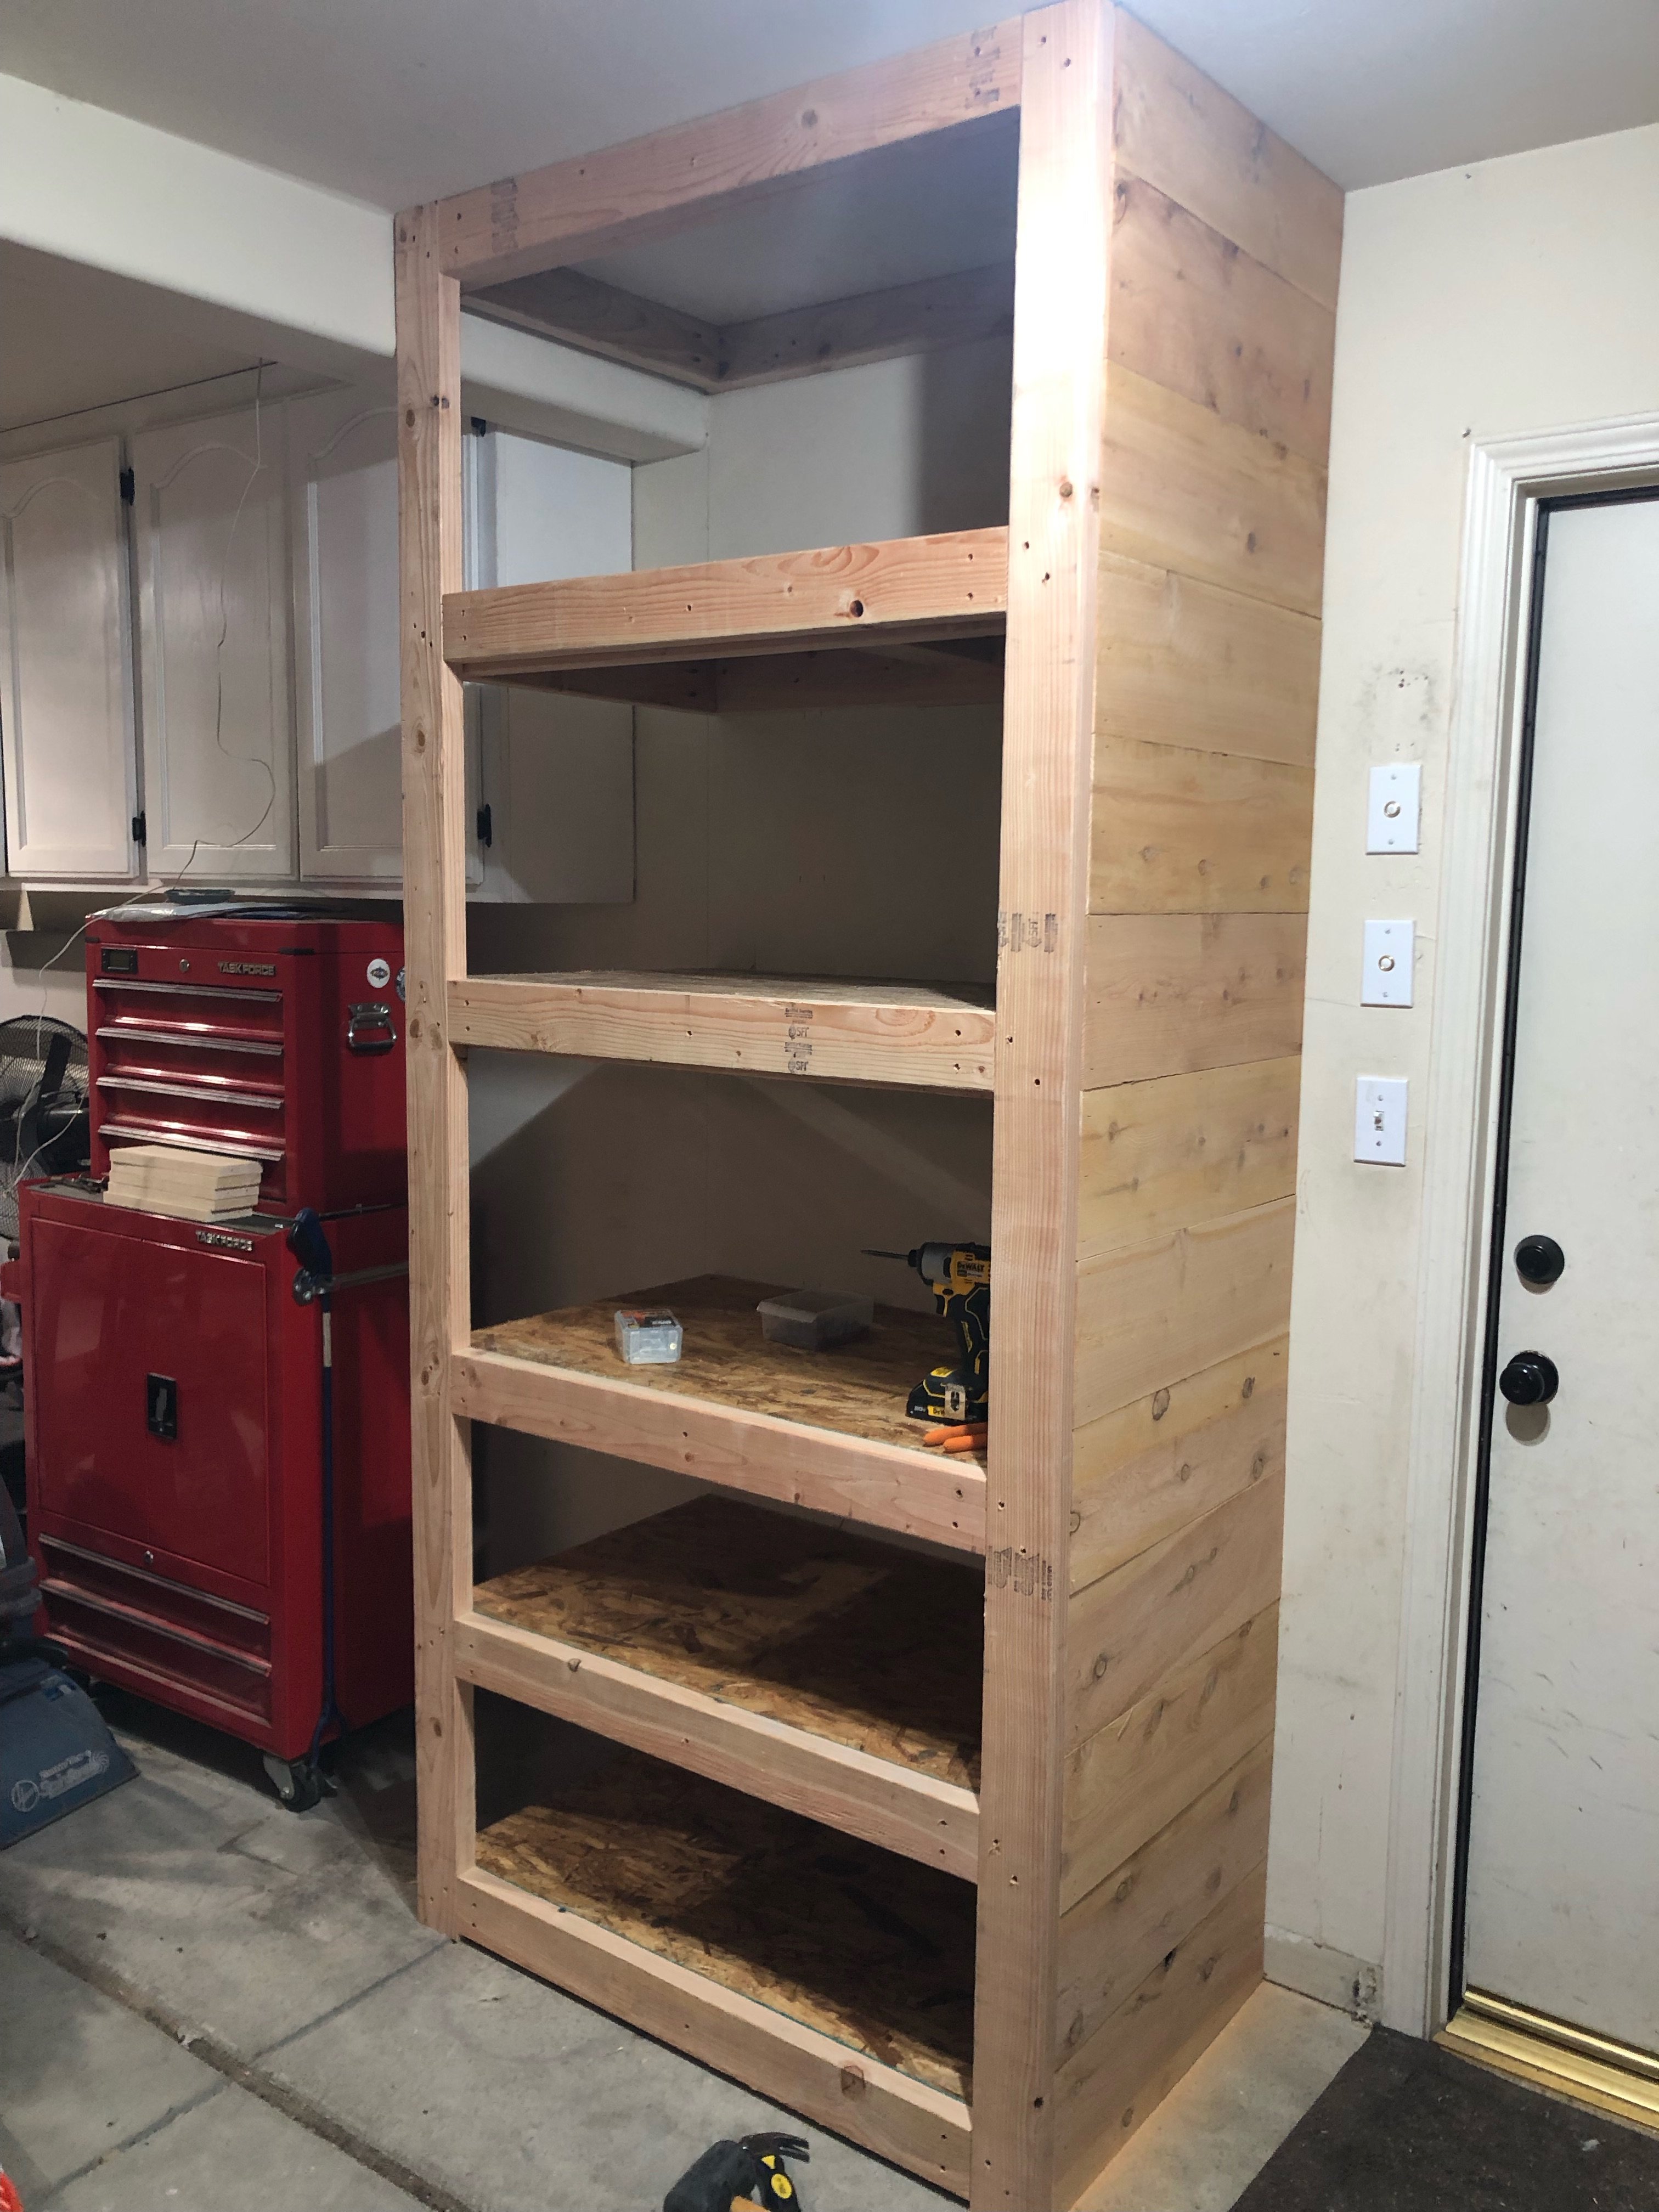
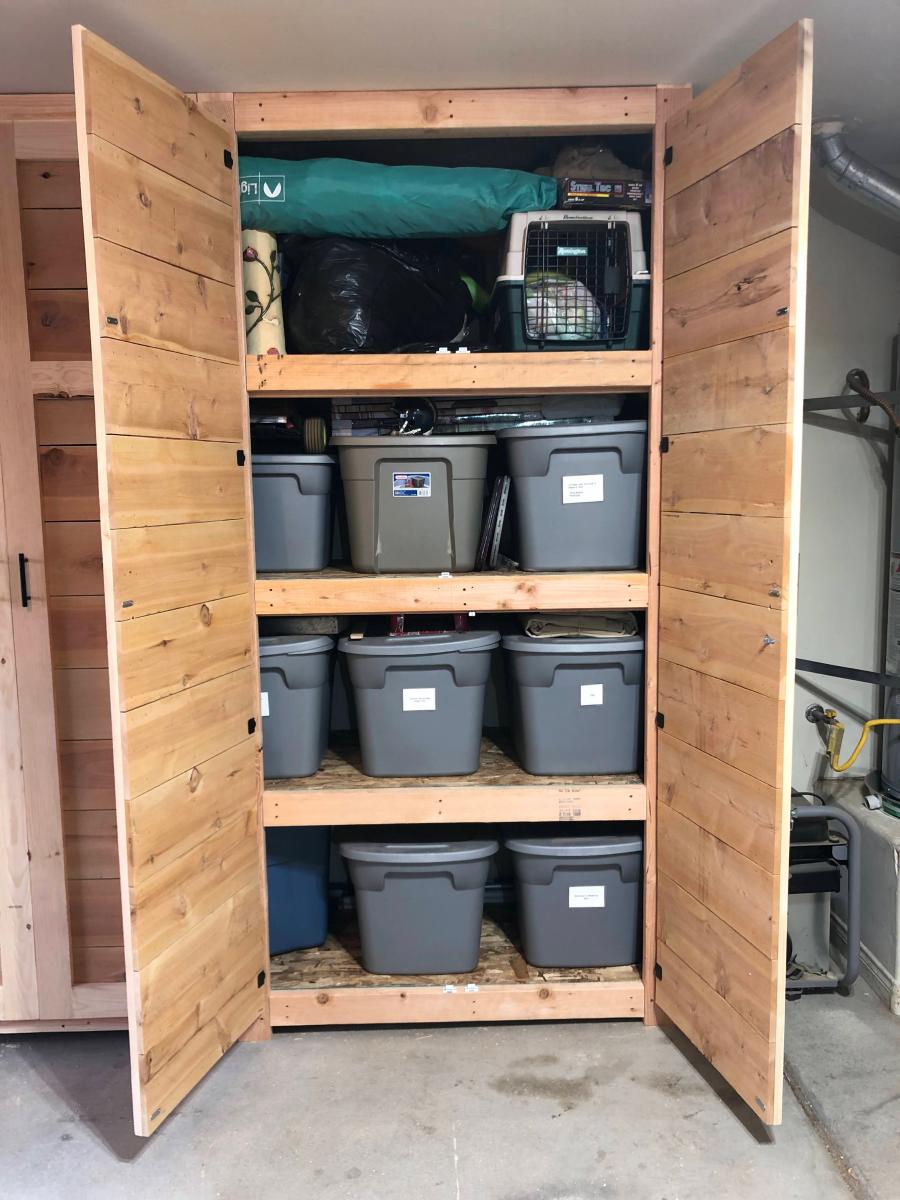

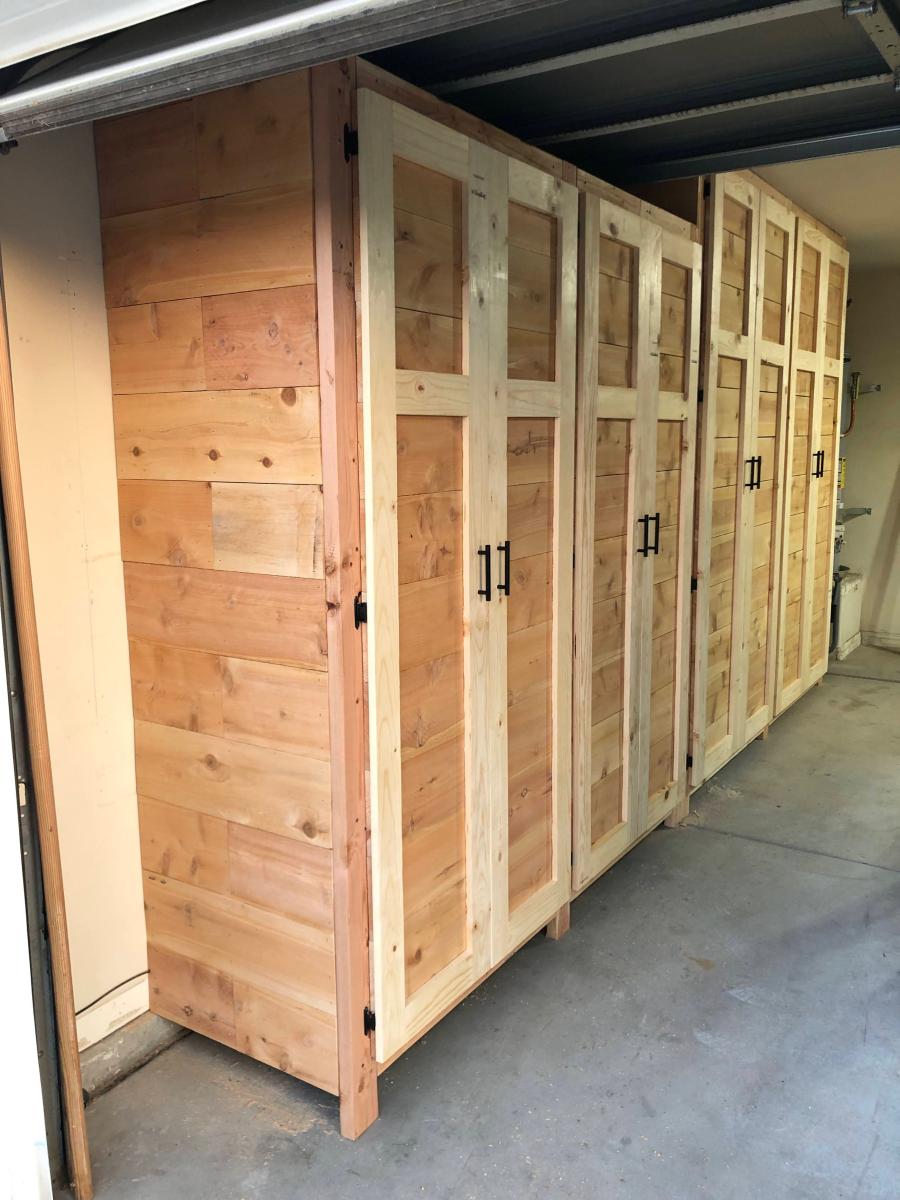
My second building project... this one took quite a while, building in the evenings after the kids went to bed.
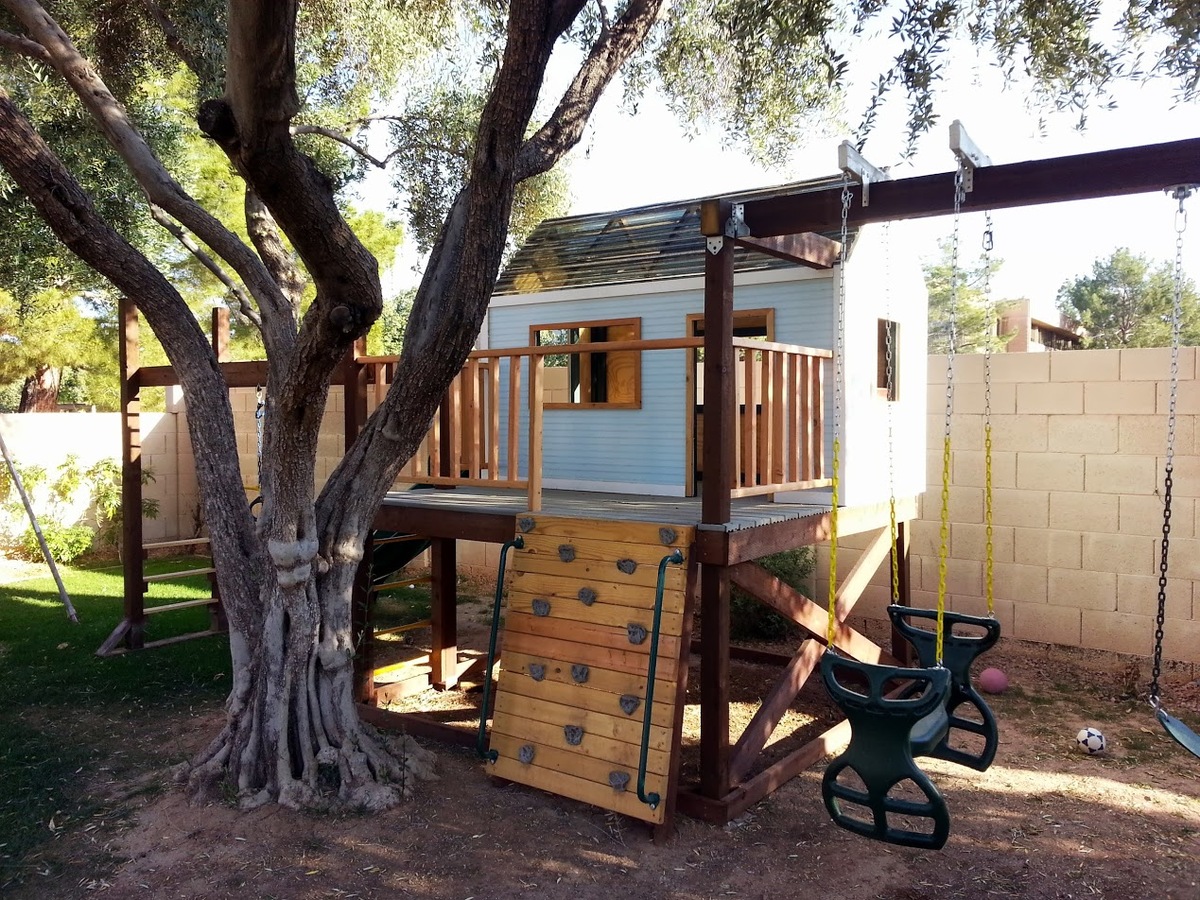
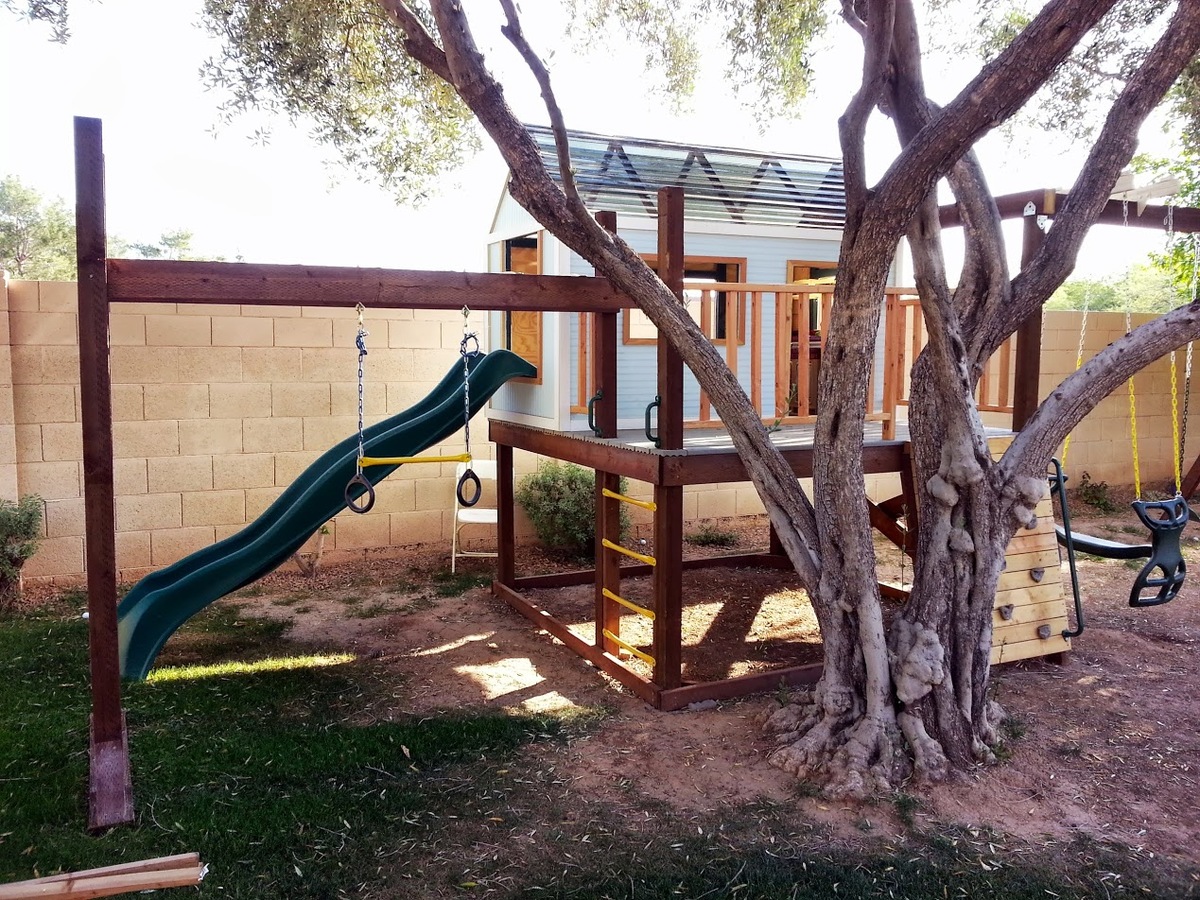
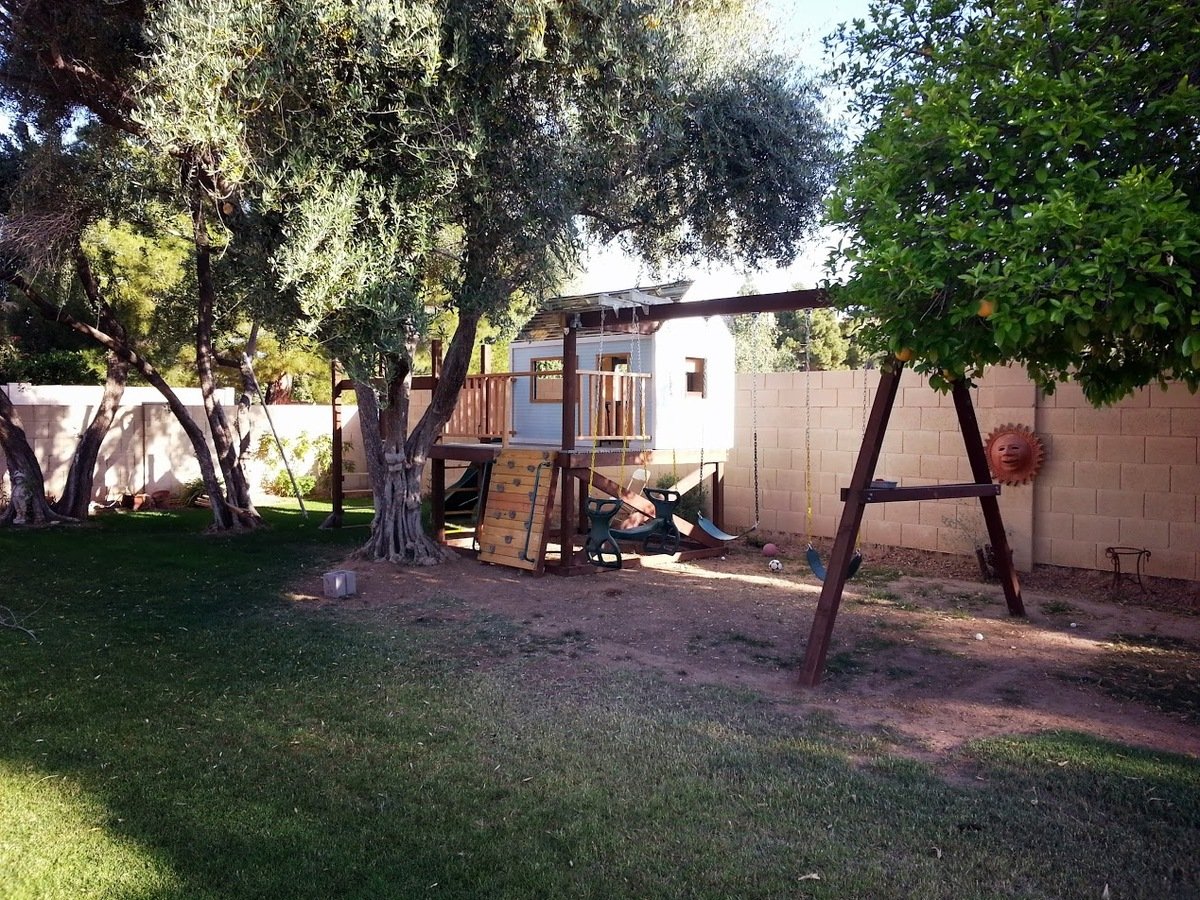
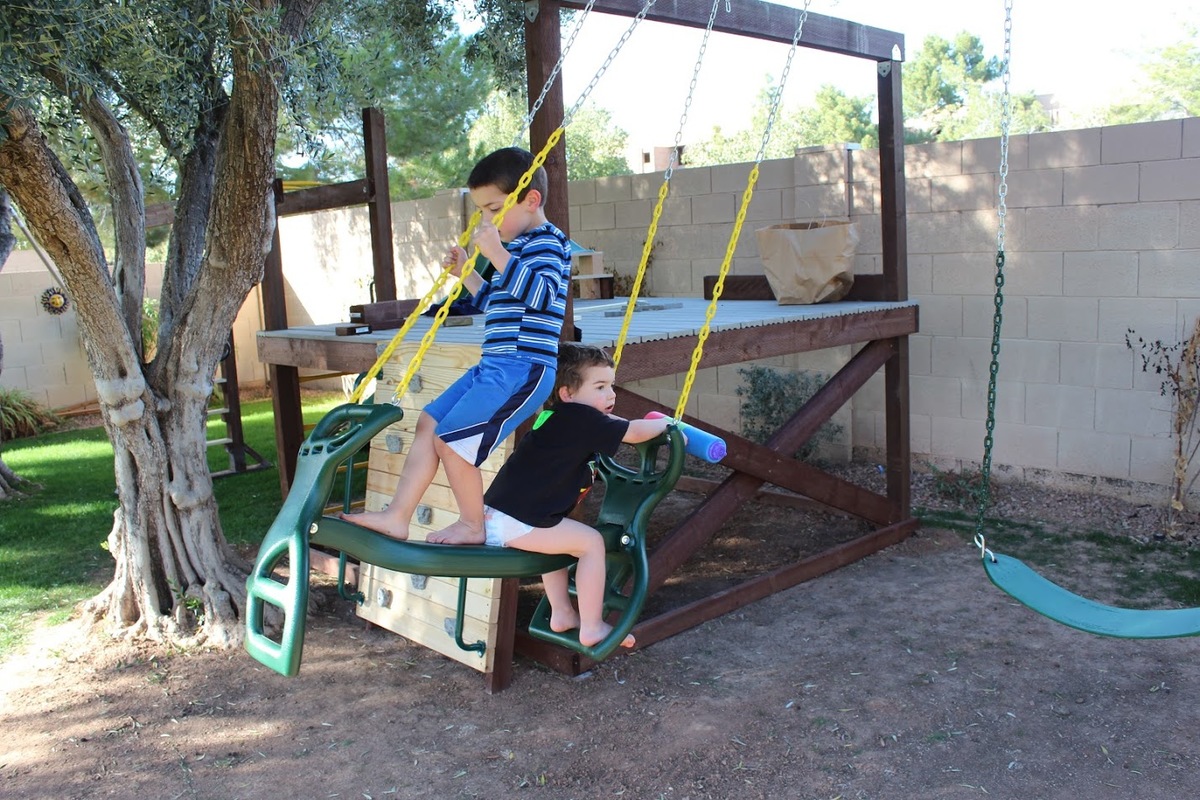
The playhouse is based off of Ana's Playhouse Building series, with some modifications to fit the space in my backyard and accommodate climbing wall, monkey bars, and slide.
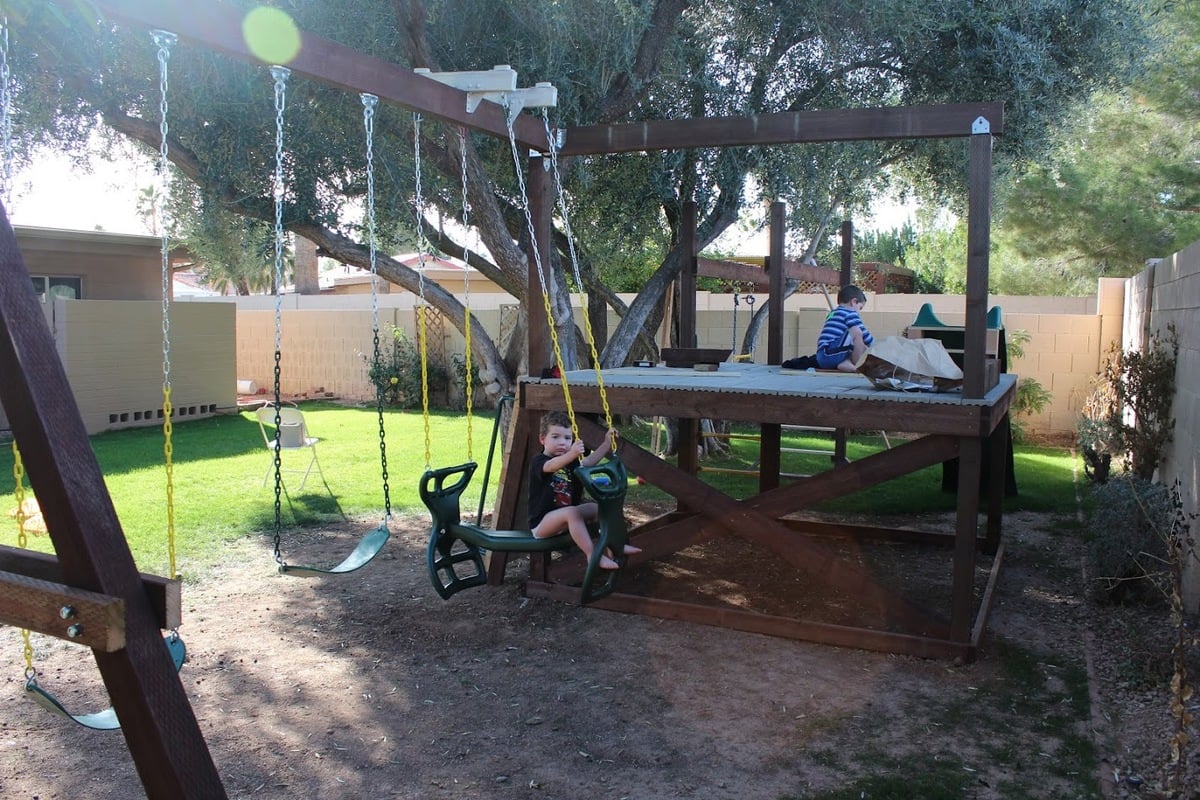
To put the main deck structure into the ground for sturdiness while protecting from moisture, I dug out 5 holes to fit single hole cinder blocks (4 corners plus an extra 4x4 for the monkey bars; you can see an leftover block on the ground in one of the pictures). I placed some brick in the holes, then the cinder blocks on top. I then partially filled the cinder blocks with sand, put the pre-built deck in the cinder block holes (with help - it's heavy!), and then filled the rest of the cinder block holes with sand. It's worked remarkably well - the deck has been up for about a year now. I also sprayed some clear waterproof sealant on the bottom part of each beam near the ground for extra protection (deck, monkey bars, climbing walls, and swingset A-frame). This has allowed me to still run sprinklers near/around the playset and even grow grass underneath the swings!
Materials used:
* Playhouse: pine, plywood, Suntuf solar grey polycarbonate corrugated roofing panels (I live in Arizona, so little rain to worry about but lots of heat - the sheeting lets light in but blocks most of the UV rays, corrugated shape also provides venting at top when placed sideways)
* Deck/Swingset/Monkey bars: treated lumber, composite decking, pine for railings, monkey bars purchased from Amazon
* Climbing wall: pine, treated lumber, handholds/railing bought off ebay/Amazon
* Swings/slide/bongos/wheel, telescope: purchased from Amazon
Modifications:
* Turned playhouse 90 degrees to be in back of the deck, with swingset coming off the side. This meant the support beam for the swingset had to pass through the playhouse - modified the frame for that wall slightly and created a notch for the beam to pass through.
* Slide comes out one end of playhouse - made the "window" on that end larger than the plans called for in order to give room for the slide.
* Monkey bars come off one side of the deck - used extra 4x4 here to create support for the bars, and used extra bars to make a ladder on this side
* Climbing wall instead of ladder for main entrance
* Put large window in back wall of the playhouse
* Added cross bracing to side of decking on swingset end to make it more solid/cut down on sway when swinging
Tue, 04/29/2014 - 20:41
This is phenomenal - just the plan & design we've been looking for. Can you upload a few more pictures? Any sketches you can provide? Shopping list? Really great job - I hope your kids love it. It looks awesome.
Wed, 09/10/2014 - 14:03
Thanks! It's certainly nestled in right behind that tree - I originally was going to place it in between that tree and another one but then decided to just place it behind them in order to take better advantage of shade (critical in AZ) and fit in everything I wanted to put on it (monkey bars, swings, slide, climbing wall)

Mon, 07/08/2019 - 00:48
We've been looking at these type of players for our son, and good grief! Prices are astronomical for playsets that are NOTHING like this. This absolutely an amazing place for those boys to make memories. You're amazing! Do you mind if I ask what it cost once it was finished? I never imagined that it would cause a tic in my eye to look at the kids from Lowe's or anywhere else for that matter.
Tue, 08/20/2019 - 10:14
I don't remember how much it cost in the end... but probably around $900? That may include getting some tools that I needed but didn't have at the time. The slide was the most expensive single piece I bought - I think I got it from Amazon.
When it was all done, I remember thinking that what I got for my money was *way* beyond what I would have gotten by purchasing a kit or a pre-built play structure. Plus, by going my own way, I was able to build it to fit my space and the needs/abilities of my kids.
While the whole thing is big and looks like an intimidating build, it really isn't bad - the platform is a fairly blank base to design everything else off of, and is incredibly sturdy. Everything else is a discrete part that branches off of the platform and can be planned out as you need. Adding the monkey bars required putting in a 5th upright (the first 4 are the corners), but that was an easy modification since I knew I wanted it before building the platform. The playhouse just sat on top of the platform (screwed down, of course).
Sat, 08/01/2020 - 20:40
Hello. This is pretty cool, probably the best modification that I am looking for from Ana's default plans. Could you please add some more detail on the right side wall, and how you incorporated the support beam through the playhouse? (with maybe a picture from inside of that wall). And secondly, if you can add the dimensions for the monkey bar setup on the left side of the deck? Thanks, much appreciated
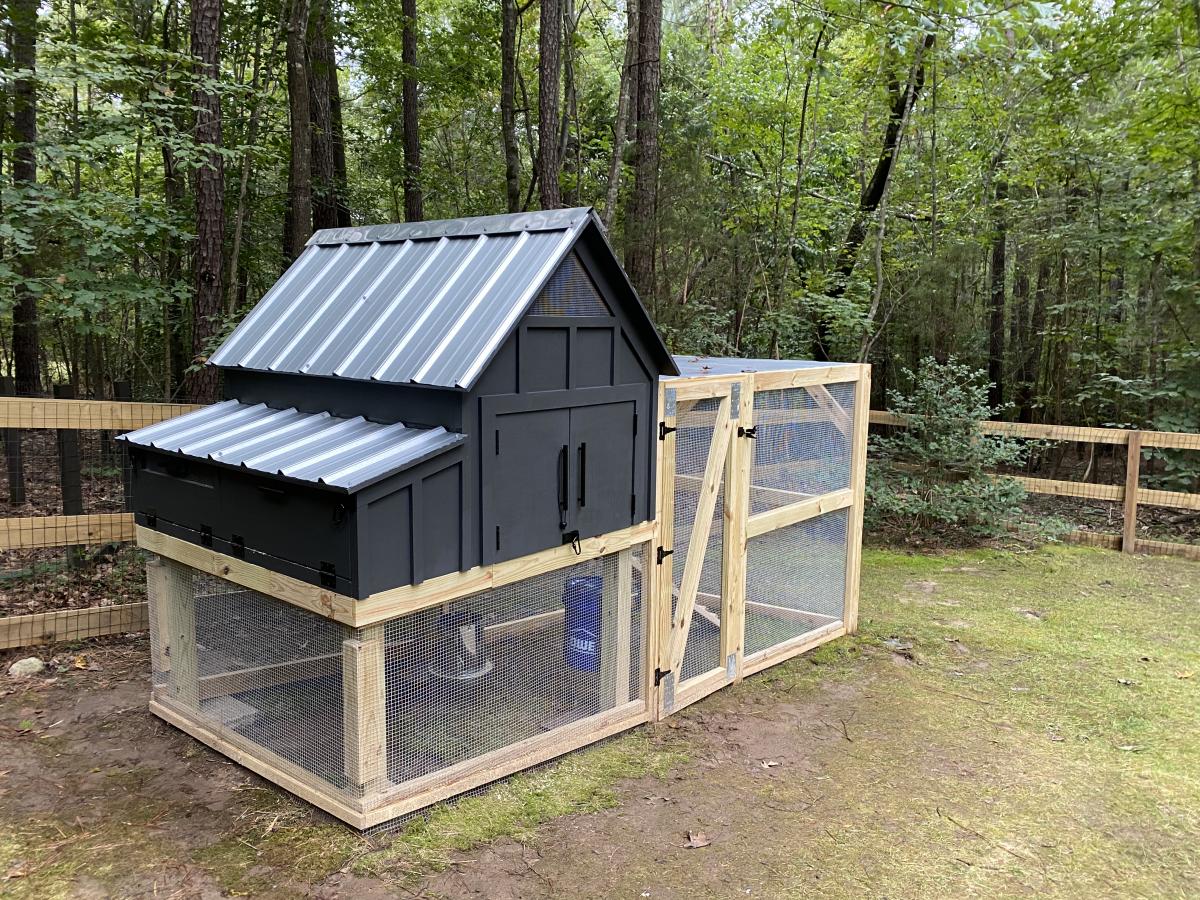
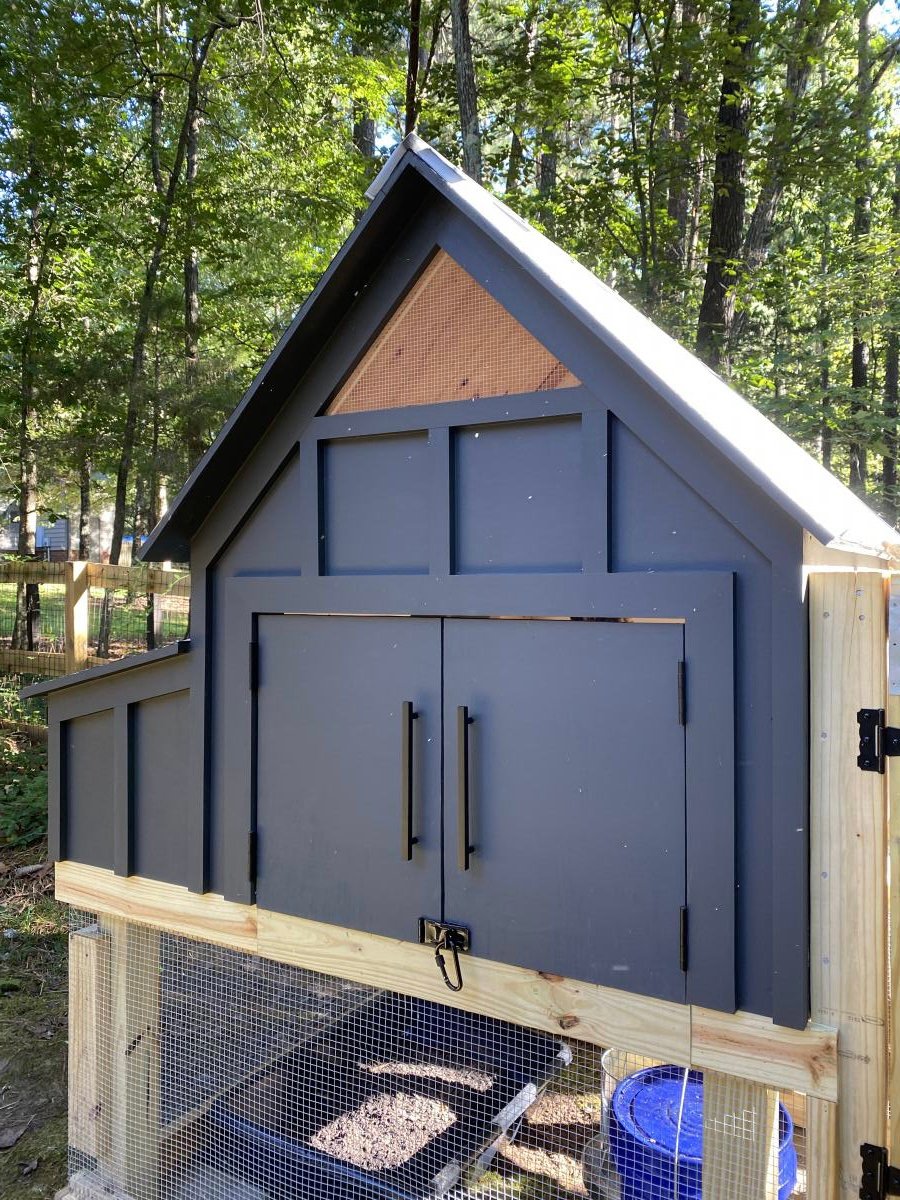
We took some creative liberties on the Williams Sonoma inspired coop posted here. Because we don’t get a whole ton of sun in our backyard, we eliminated the herb garden planter and instead built a longer run. We also made the coop a bit wider to accommodate for the inevitable chicken math. And, you’ll notice the vent both shaped differently and is a bit higher. This was to increase air flow, avoid the dreaded draft, and to lend a more Scandinavian vibe. We also decided to place the chicken exit on the outside wall to allow for more living space under the coop itself. The project took about a month to complete, dedicated to only working weekends. And, it was very much over budget! Who knew wood is so expensive?! But overall, the outcome was even better than I expected. The chickens love it and I don’t mind looking at it!
P.S. this was a pretty advanced project. The fractions alone had me yelling “uncle!” Thankfully my husband is pretty handy, and my father-in-law (career in the construction industry) had a few pointers, so they took the lead in executing. I chose the paint colors and suggested the deviations from the original blue print. ;-)

Wed, 11/18/2020 - 12:55
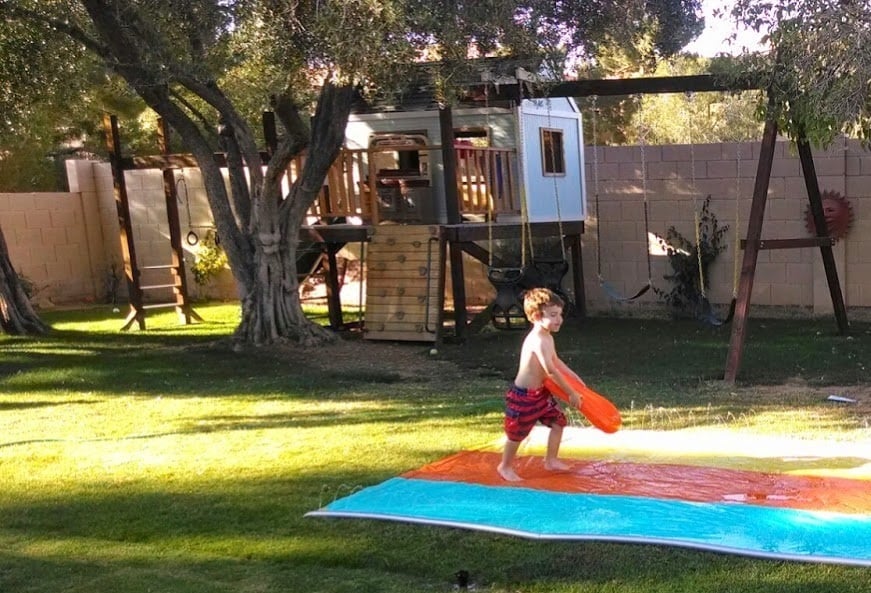
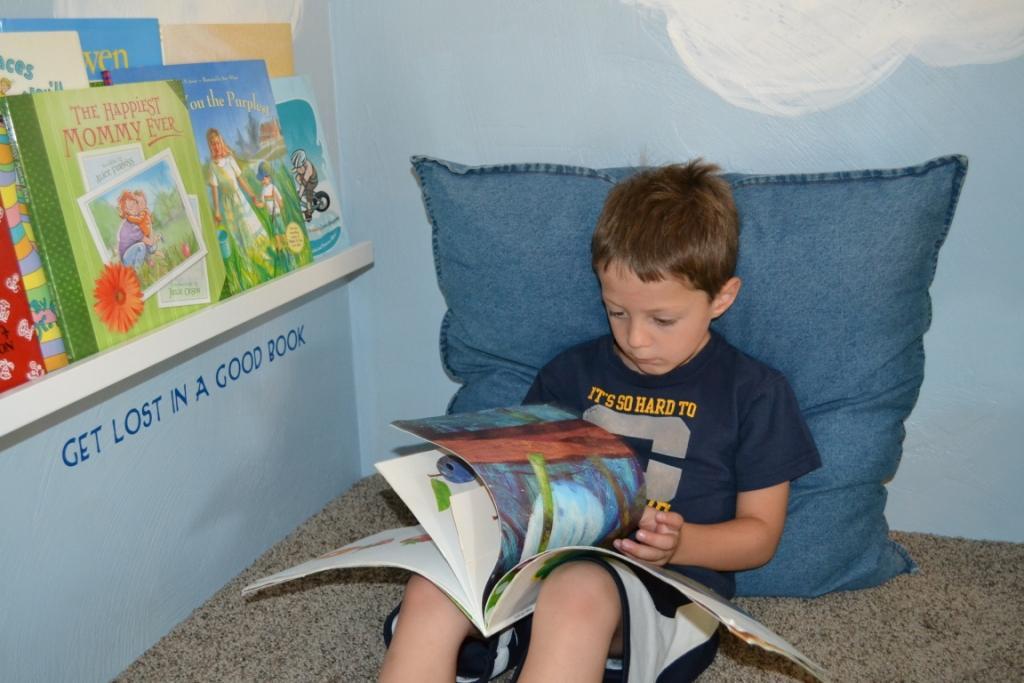
Thank you! Yes, I suppose everyone is wanting wood for home improvement projects now that we're not leaving the house! Also, I didn't mean to post a picture of my son and his friends. Am I able to delete?
Thu, 01/14/2021 - 07:43
does this roof have the same angle as the 'Small Chicken Coop with Plans'? It seems to be 'less steep'. Wanting to start this project next weekend and trying to get my mind wrapped around everything!. Thanks.
Wed, 03/16/2022 - 09:53
Do you have a run side photo? I am thinking about adding more run onto mine.....
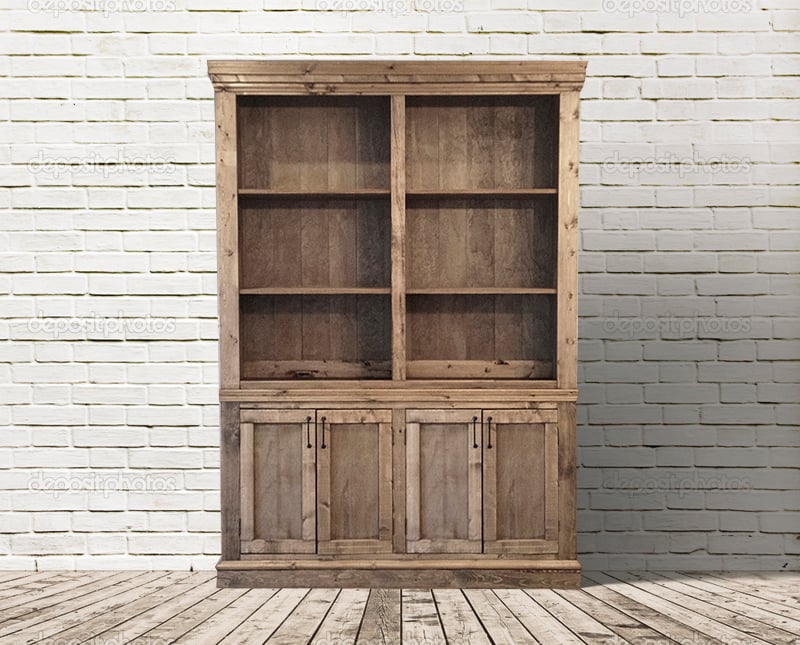
Have been wanting to build this for 6 months now and just havnt had the time. Finally completed it!
I made some small changes to the design, different trim layouts, different dimensions, and went with a plank look for the back of the hutch instead of a solid peice of 1/4" plywood.
In reply to This looks great. I love the by handmadewithash
Wed, 12/31/2014 - 17:00
Thank you very much for the comment! =).
Happy New Years as well!
Cheers,
Justin
Thu, 01/01/2015 - 22:48
Thank you ehays216! Ive looked at your Farmhouse Storage Bed a few times.. Have always wanted to try the Steel wool/Vinegar trick.
Cheers,
Justin
In reply to Stunning! by Ana White Admin
Thu, 01/01/2015 - 22:49
Thank you very much Ana White Admin!
Cheers,
Justin
In reply to Beautiful!!! by Smjackson82
Sun, 01/04/2015 - 16:07
Of coarse! I used the same height and depth dimensions, just shortened the width by 9 inches.
Cheers,
Justin
In reply to backdrop by timberandsoul
Sun, 01/04/2015 - 16:09
Thanks a lot timberandsoul!
Photo was taken on an empty wall in my living room, Which is currently a light gray wall. thought it looked boring so I did a quick switch of backdrops in PS. I just typed in brick wall in google.
Cheers,
Justin

Sun, 01/04/2015 - 11:30
Hi Justin. Did you use any special technique between the two coats of stain to achieve that effect. Thanks. Andy
In reply to How to achieve that finish? by AndyH
Sun, 01/04/2015 - 16:10
Got your email Andy, hopefully you got mine!
Cheers,
Justin
Sun, 01/04/2015 - 18:36
Hey Singhs, I went with Home Depot Regular Knotty Pine. Cheap and easy to work with.
Cheers,
Justin
Mon, 01/19/2015 - 13:03
I love this! Can you give me information on how you modified the plan to achieve the plank backing and the stain color?
In reply to Stain color and plank backing by juddgirl2
Sat, 01/24/2015 - 13:08
Sure! the plans call for 2 solid sheets of 1/4 plywood for the backing.. I simply just ran the plywood through a table saw at 5.5" wide and brad nailed it the back. =)
The stain is weathered oak and let sit for 15min. Then right away special walnut and let sit for 15 min.
repeat until desired colour. let me know if you have any more questions!
Cheers,
Justin
Sun, 01/08/2017 - 07:33
How many coats did you have to do to achieve this look? The weathered oak looks so light...and gray.
Thanks!

Sun, 05/17/2015 - 19:40
What was your strategy on attaching the sideboard to the Hutch. I haven't seen where there is any instructions or conversation around this. What and how did you accomplish this and/or is there anywhere to go that discussed this that helped you.
Thanks,
Tue, 07/05/2016 - 00:19
This inspired hutch/sideboard is absolutely divine! What an awesome job!

I built a big kids see saw using 2x6's all around with a 2x8 seat. The center post is 30"h.


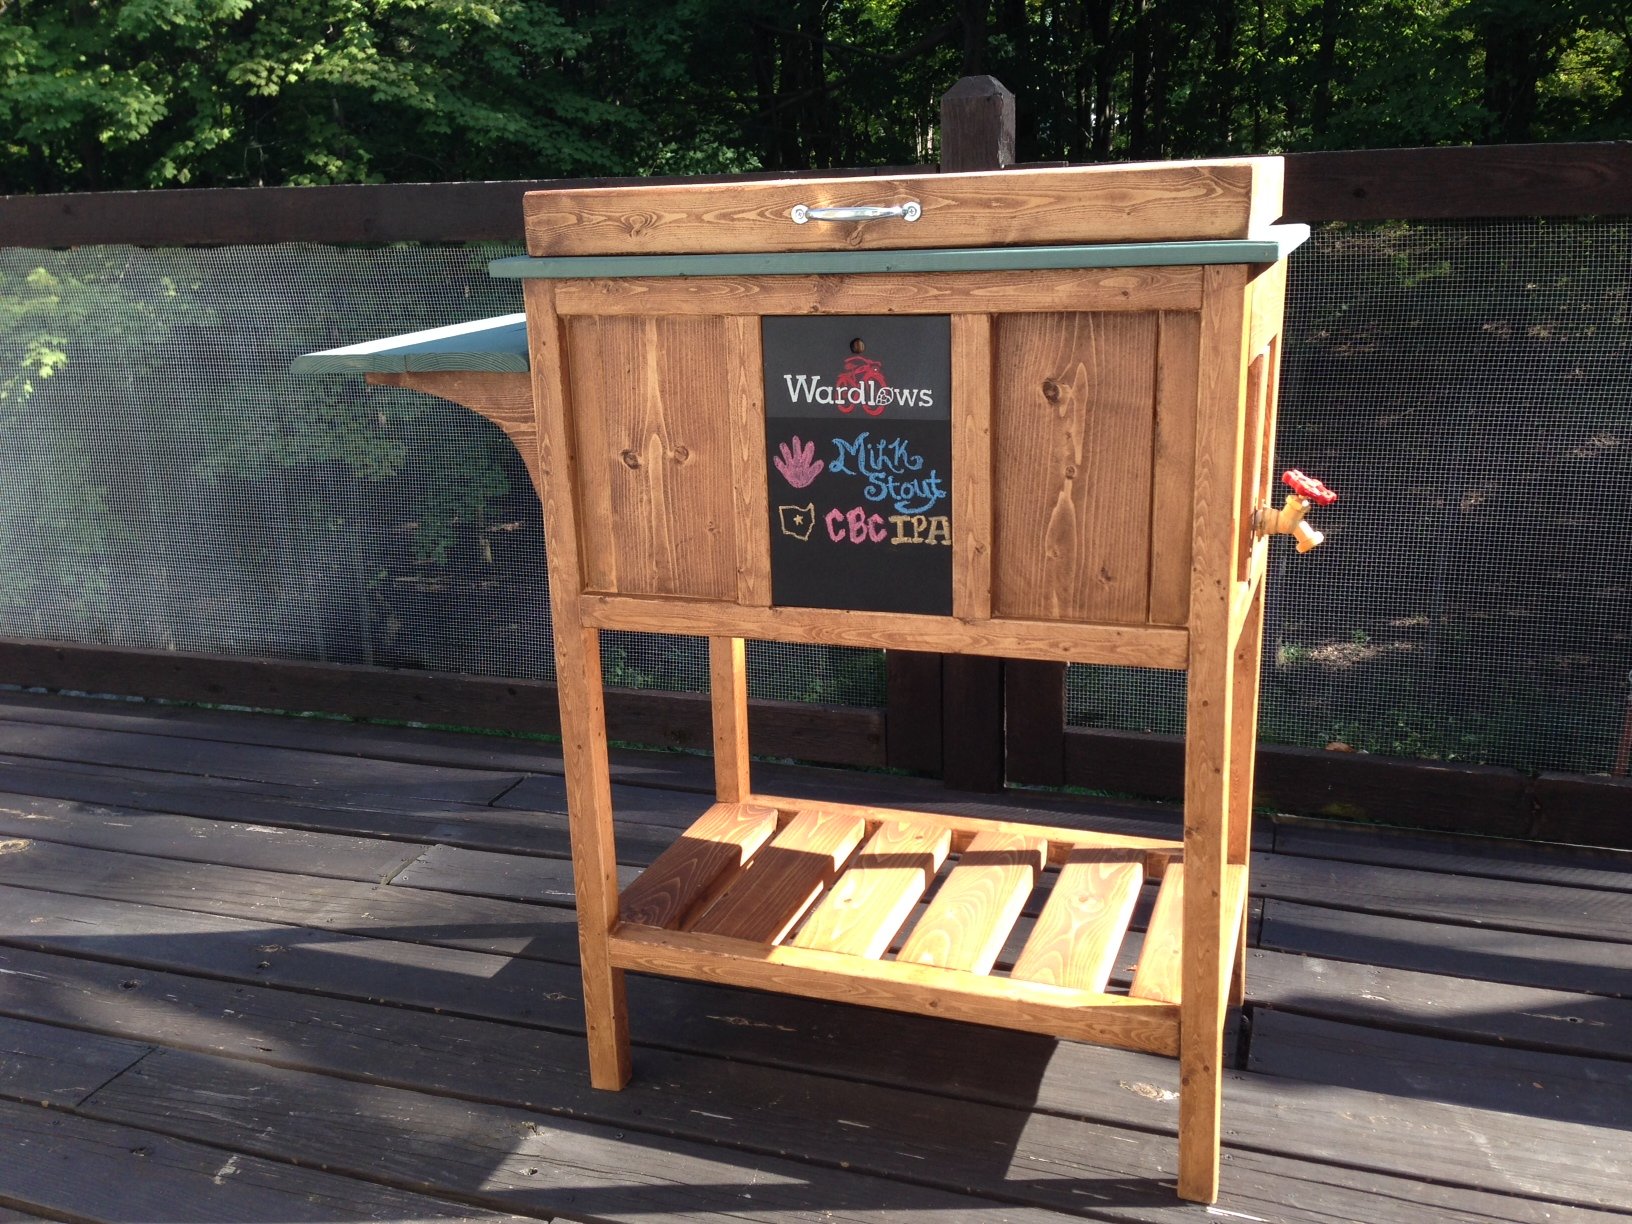
We built this as a birthday gift for family members and boy were they excited. We, though, were not excited to let it go. So happy with how it turned out. The plans are good for reference but make sure to make your own measurements when using milled lumber from a big box store. Some of the the changes we had to make on the fly were to the back and front panels having to use a different combination of board sizes to fill it in without massive gaps. Its recommended that you lay them out first before attaching them to the frames. Also the measurements on the cooler lid were smaller by 1/4" to 1/2" of what's listed in order to get a snug fit. The shelf on ours is two 1x6's cut to the width of the whole project (around 16.5") and then the shelf brackets were also 1x6's cut to a length of 10". Brackets are mounted inside the legs using wood glue and three 2.5" screws through the backside/inside of the cooler box to hide (obviously done before the cooler was inserted). For drainage we attached a 2" piece of 1/2" inside diameter clear tubing that was fed/jammed through the cooler drain and pulled through the other side and then a 1/2" push on adapter, threaded on the other end screwed unto a 1/2" faucet head. Drilled a 3/4" hole about 2.5" (center mass) from the 2x4 cooler base through the middle piece on the side. We placed the cooler in first and used a pair of pliers to grab the clear tube and line it up with the hole and then pushed a long screw driver through the tube from inside the cooler in order to guide the faucet head/adapter combo into the tube and stiffening the tube so it didn't collapse when pushing it on. We couldn't decide what do to with the center display piece and then remembered we had a can of chalkboard spray paint left over from another project. We spray painted the whole menu board and then painted the "logo" at the top before clear-coating it with a protective enamel. Its a snug fit so the pressure holds it in place but you could also use velcro strips on the back if that tickles your fancy. We took the snug fit route that way if they didn't want the menu board in. A 1/2' hole was drilled towards the top so they can use a finger to pull the board out.

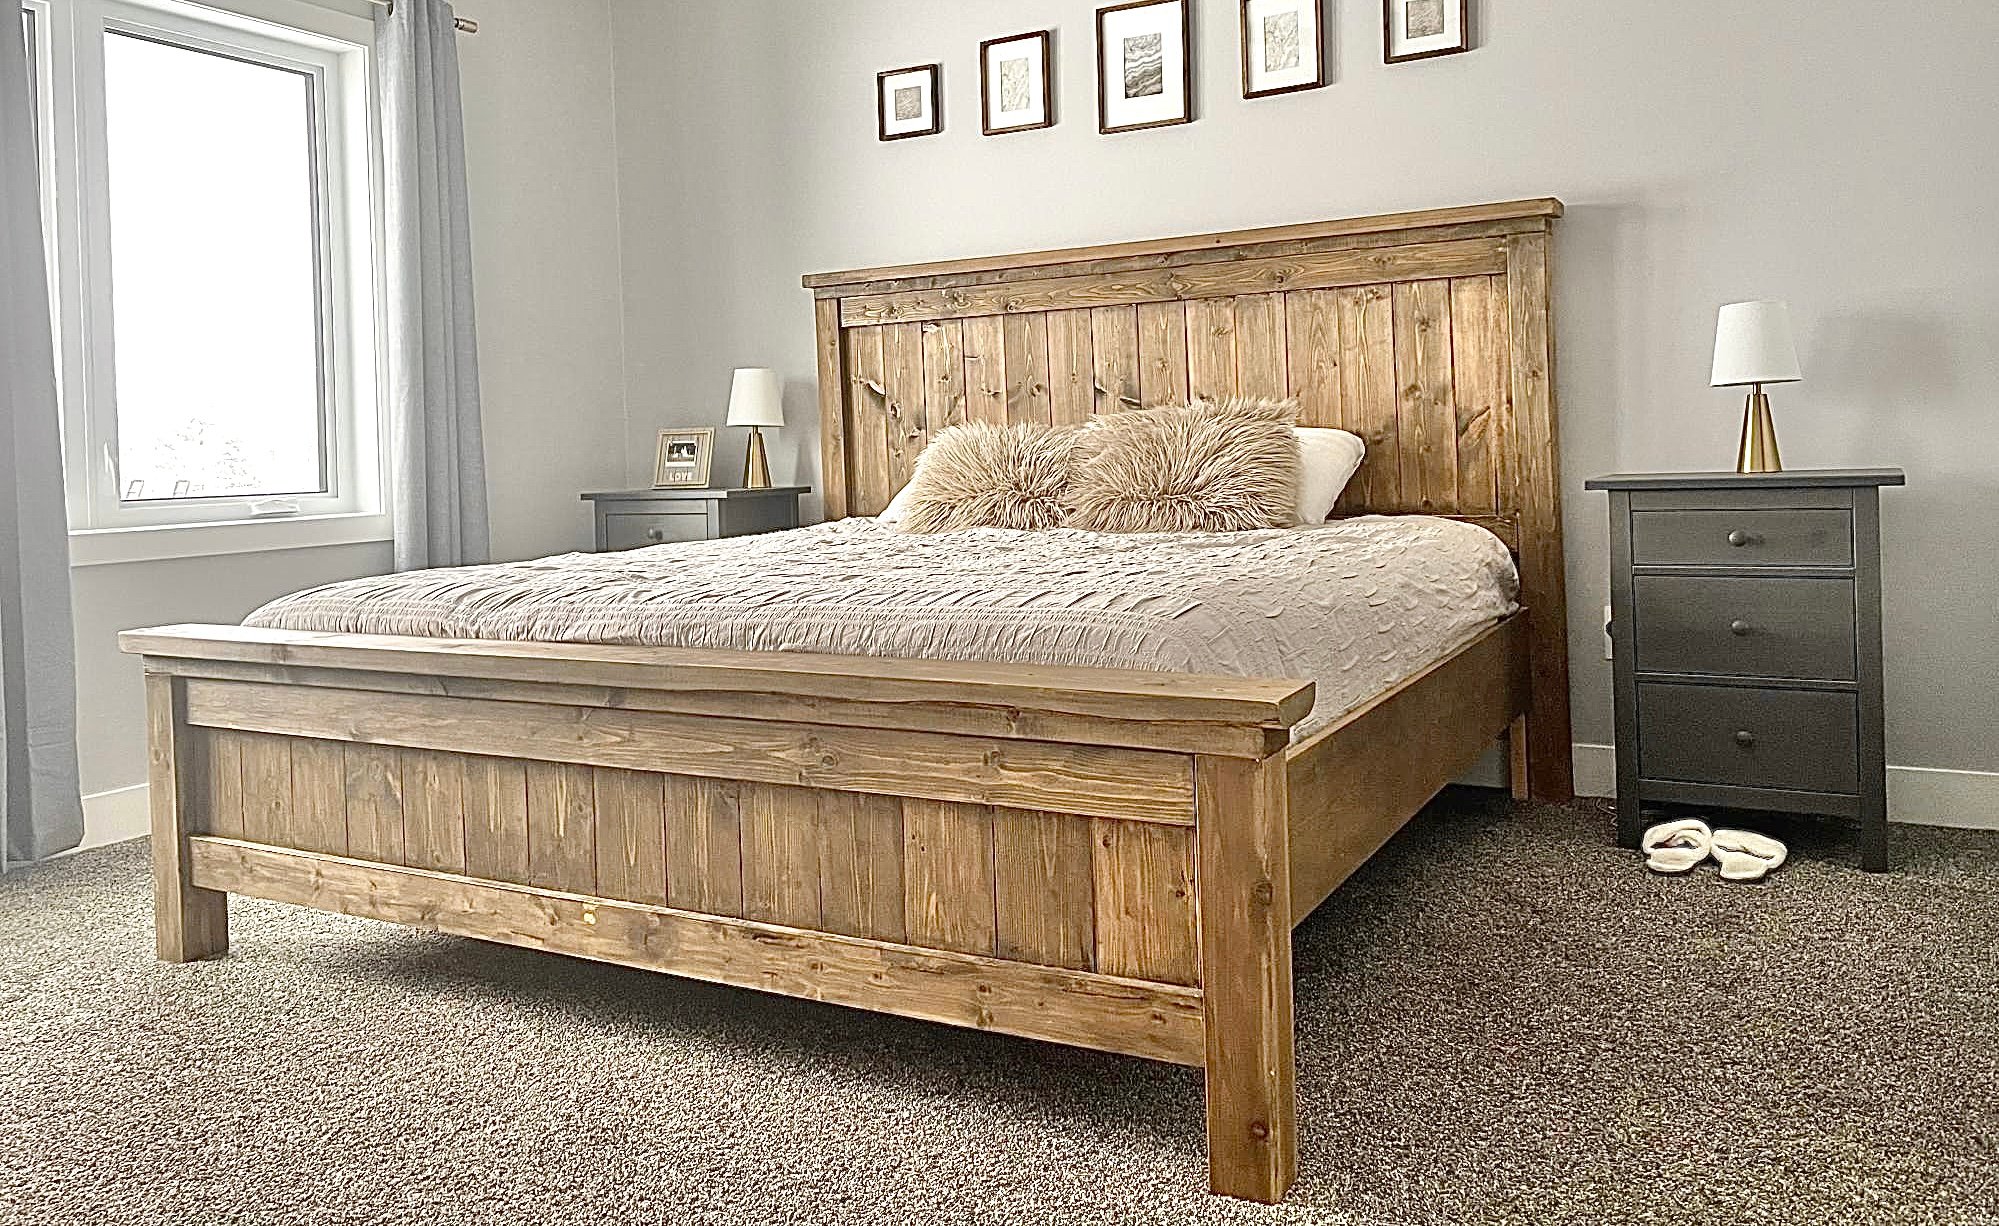
I love how this bed frame turned out! Everywhere that has stain is cedar and the rest is all scrap spruce. Thanks for another great plan Ana!


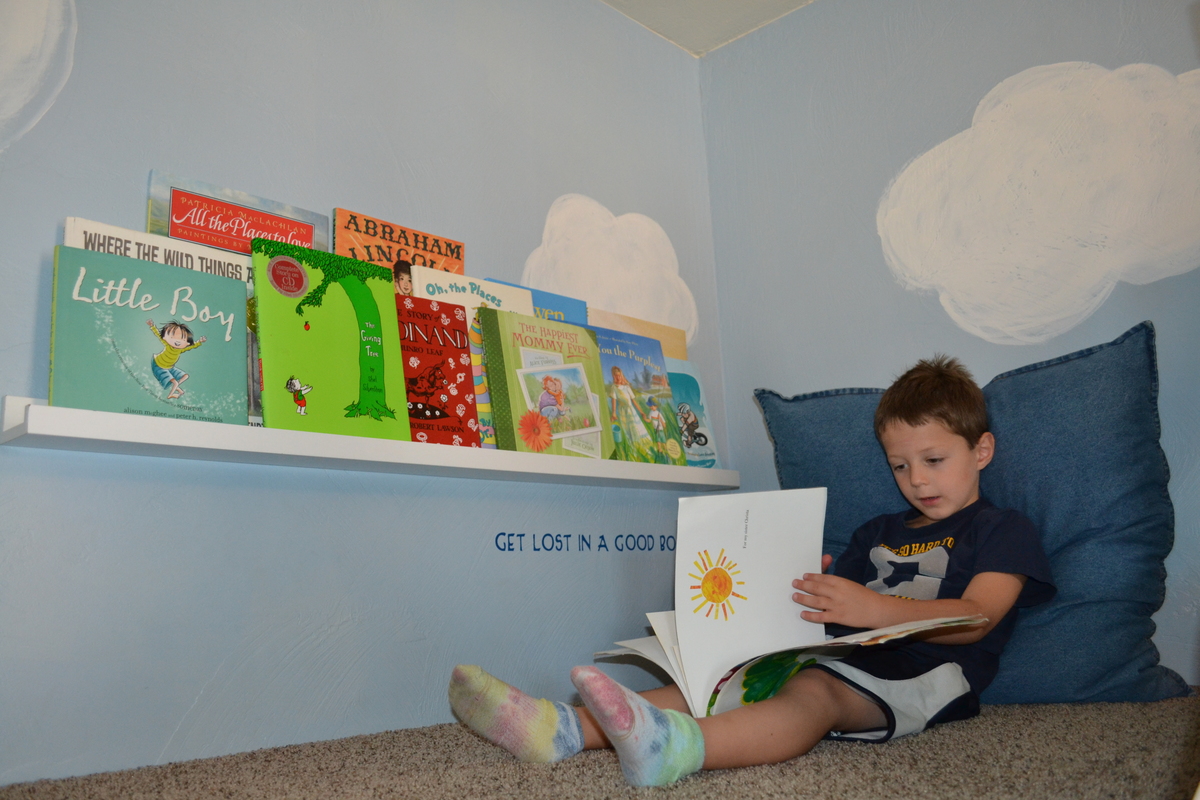
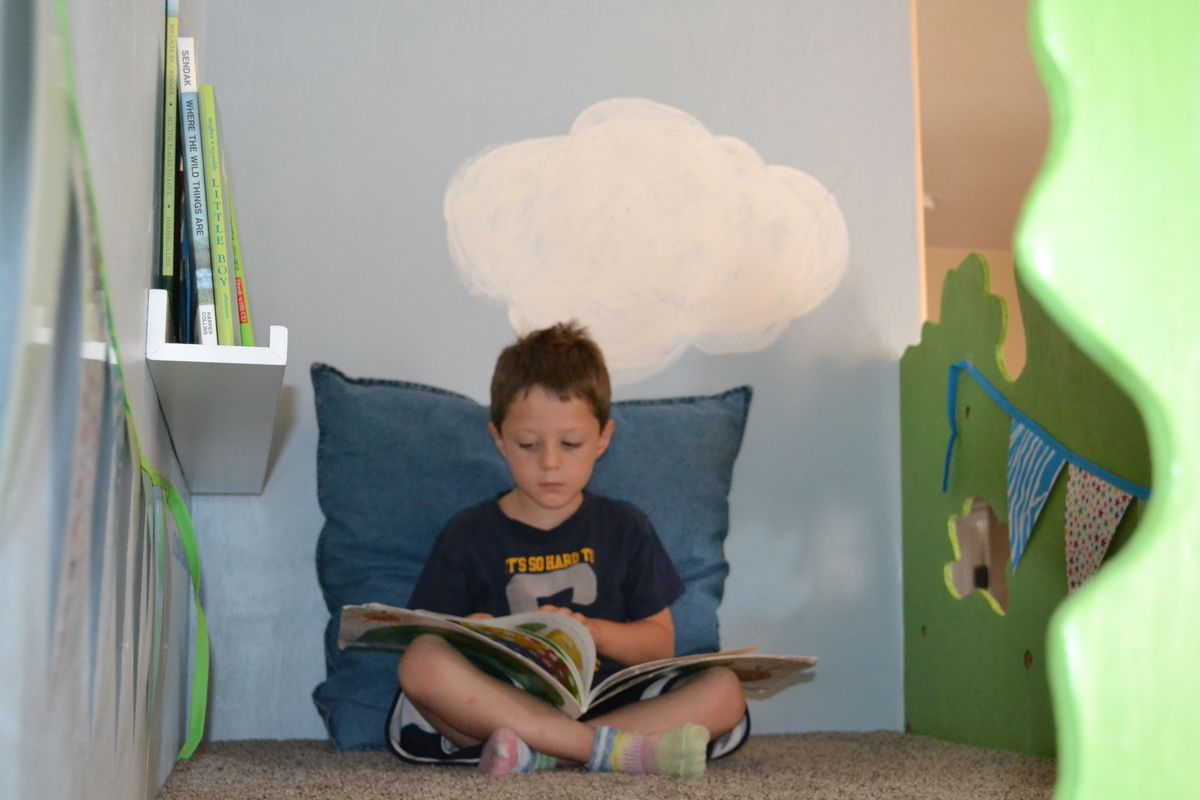
I love these plans! I build a reading loft tree house for the kiddos that they love... and I might love even more.
My husband and I had worked on this bed together, and we are so happy with it! We went with taller side tables that we purchased, and just stained the wood instead of painting it.
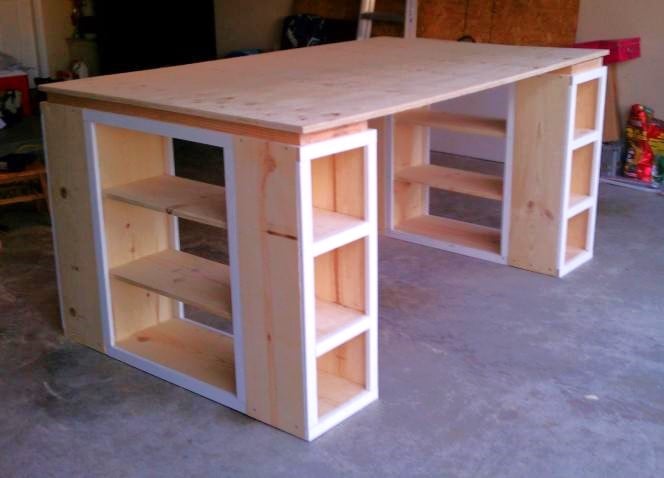
Completed Modern Craft Table! We tweaked the plans a bit because I was looking for a larger table top. The top now measures 48" x 76". We simply did this by adding an extra set of cubbies to the other side of the shelves. Absolutely LOVE how this turned out! All I need now is 4 counter height stools built and lots of shelves to complete my craft room! Will be sure to post those once they are completed!
Thu, 11/17/2011 - 01:10
Darn I was so excited to see you craft table! I apologize that your brag post did not show images. If you can send me images at knockoffwood(at)gmail.com I'd be happy to post. Thanks so much for submitting a brag post. Ana
Sun, 03/04/2012 - 07:31
I LOVE LOVE LOVE your craft table. I want one! Looks like my husband wil have to get busy! Thanks for sharing!
Kristina
Houston, TX
Tue, 05/29/2012 - 00:05
This is great!! I am planning something similar, but what is your idea or the plan you used for the middle support to keep it from sagging over time? My idea is to run another cubby in the middle from side to side. What do you think?
Mon, 01/21/2013 - 09:54
I love the modern craft table, just what I have been looking for, do you share instructions, dimensions, etc.? thanks, Laura
Thu, 05/12/2016 - 15:14
I'm loving this and would love to have FIL build it for me but the plans look like its for the regular modern craft table but not the tweaked? Also is there support for the middle? Can you send me a link for the tweaked supply list please, can't seem to find it. Love what you do!
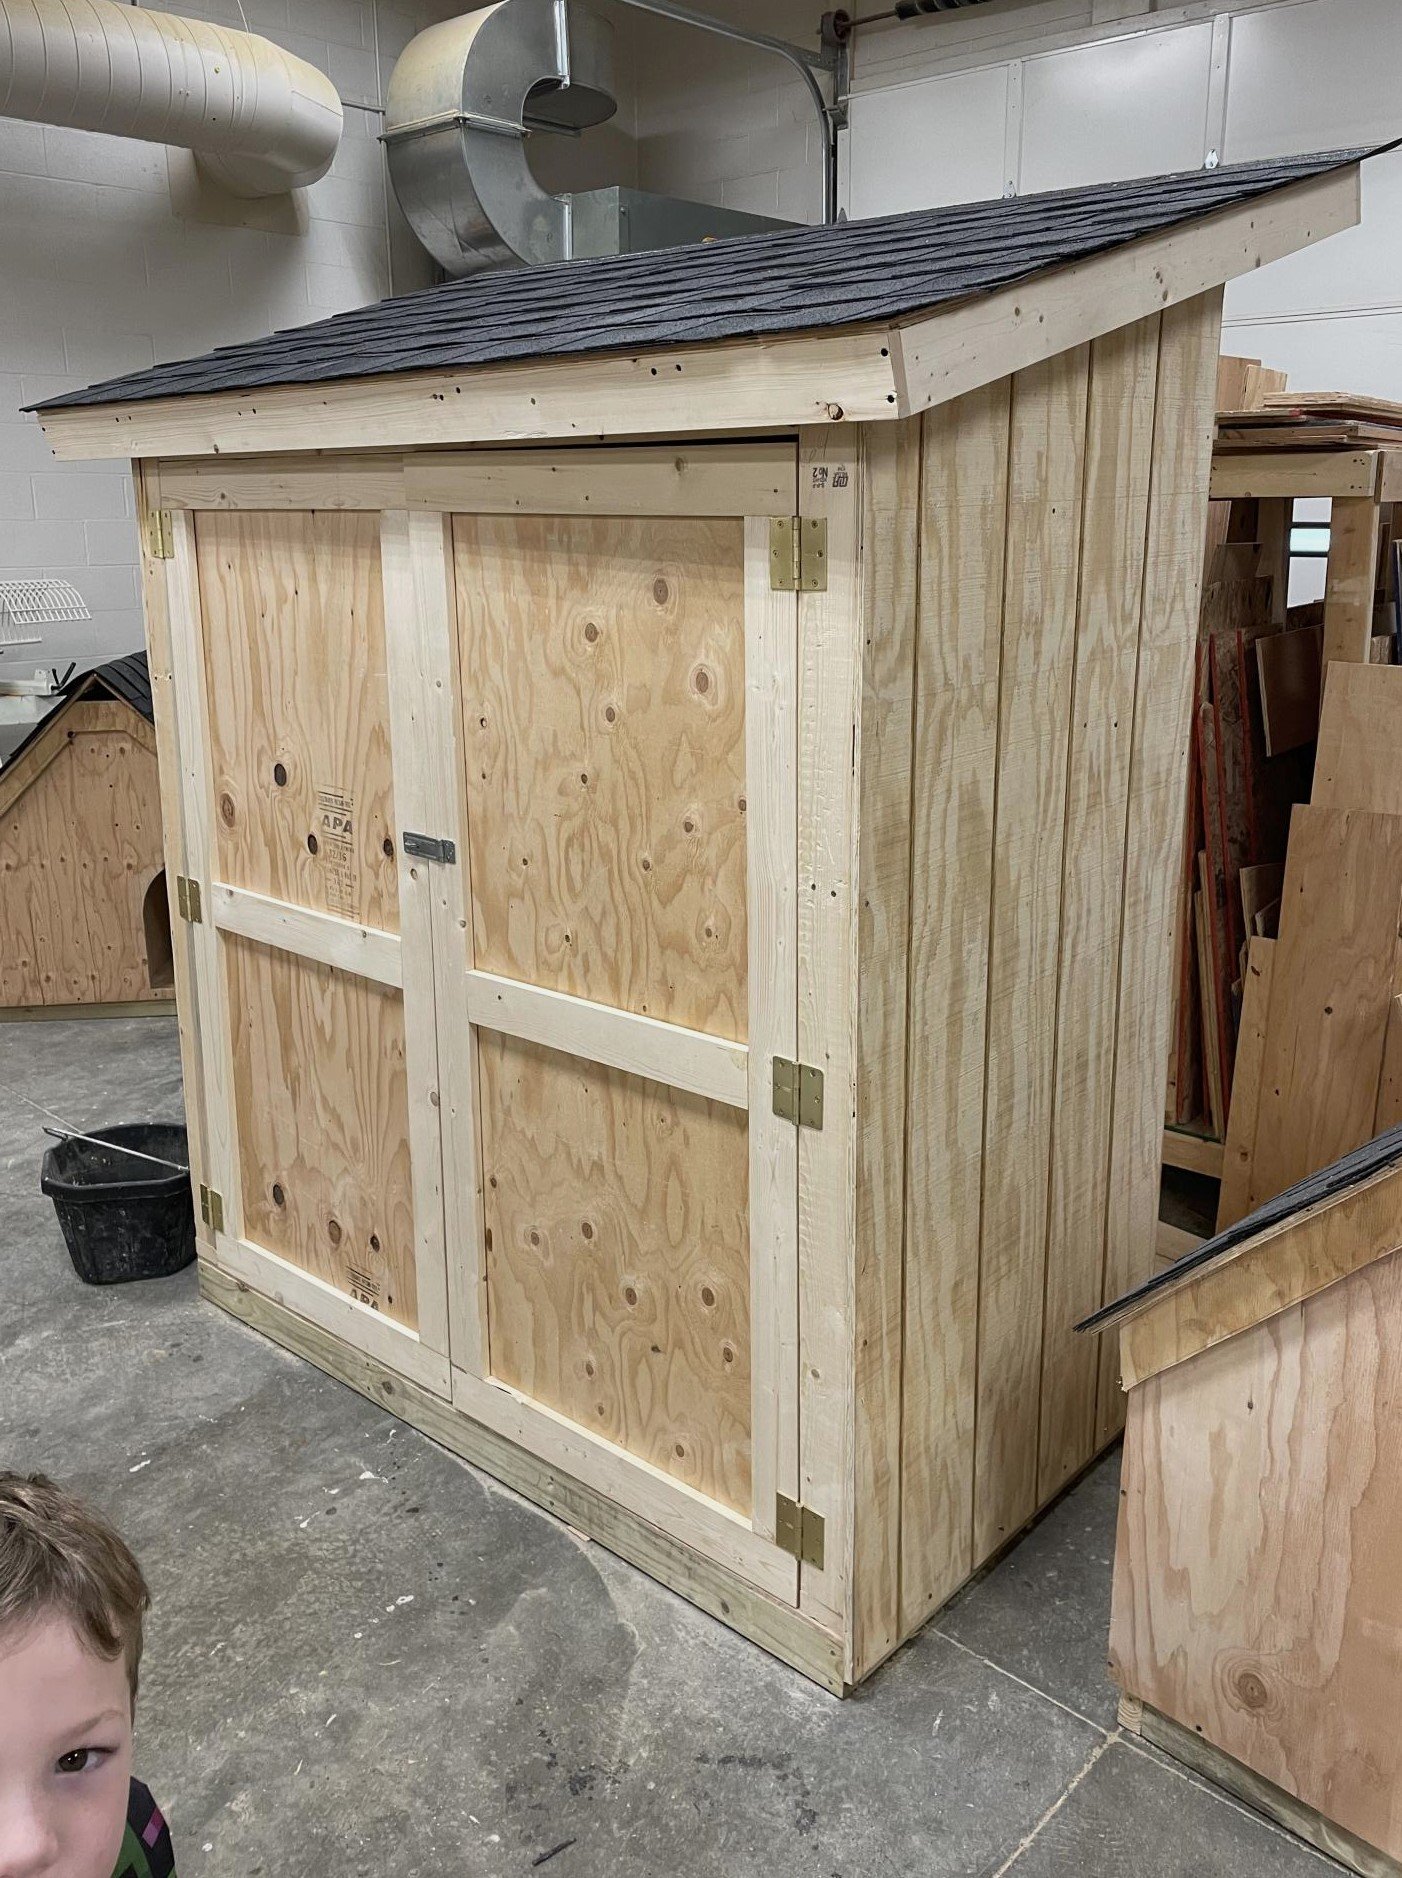
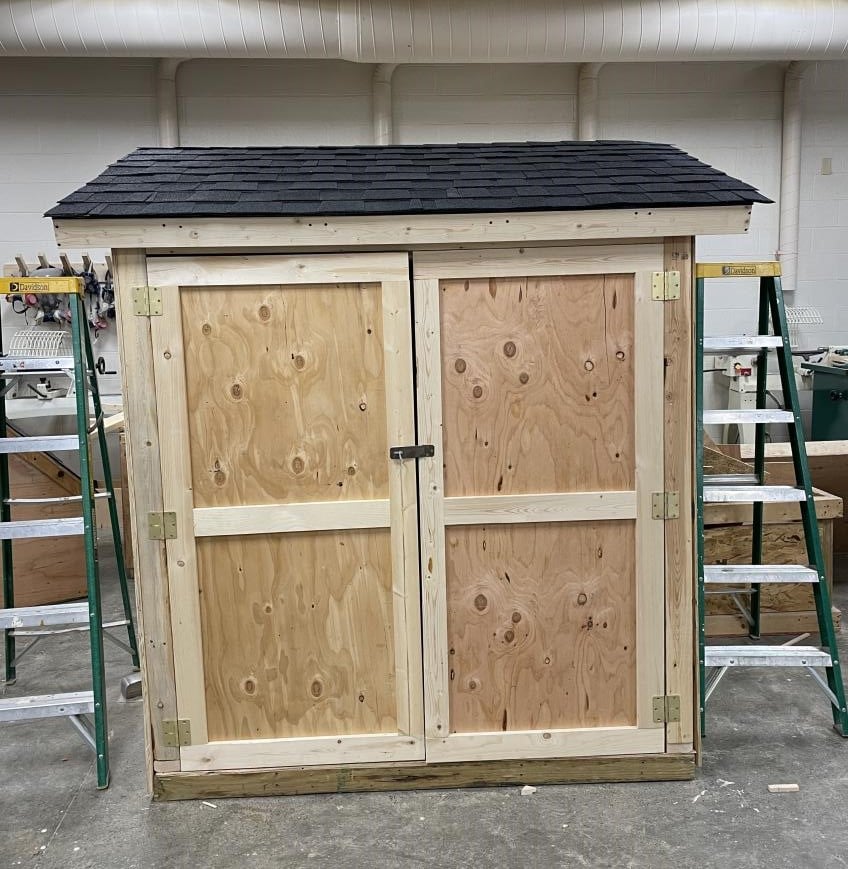
I’m a first year teacher of construction class at Waterloo High School in Illinois. We recently used your Small Cedar shed instructions with some modifications for a class project. It’s a bear getting cedar right now, so we used T1-11 for the outside and 2x4 for the frame.


Sat, 03/25/2023 - 09:14
Very fun and job well done! Thank you for sharing.
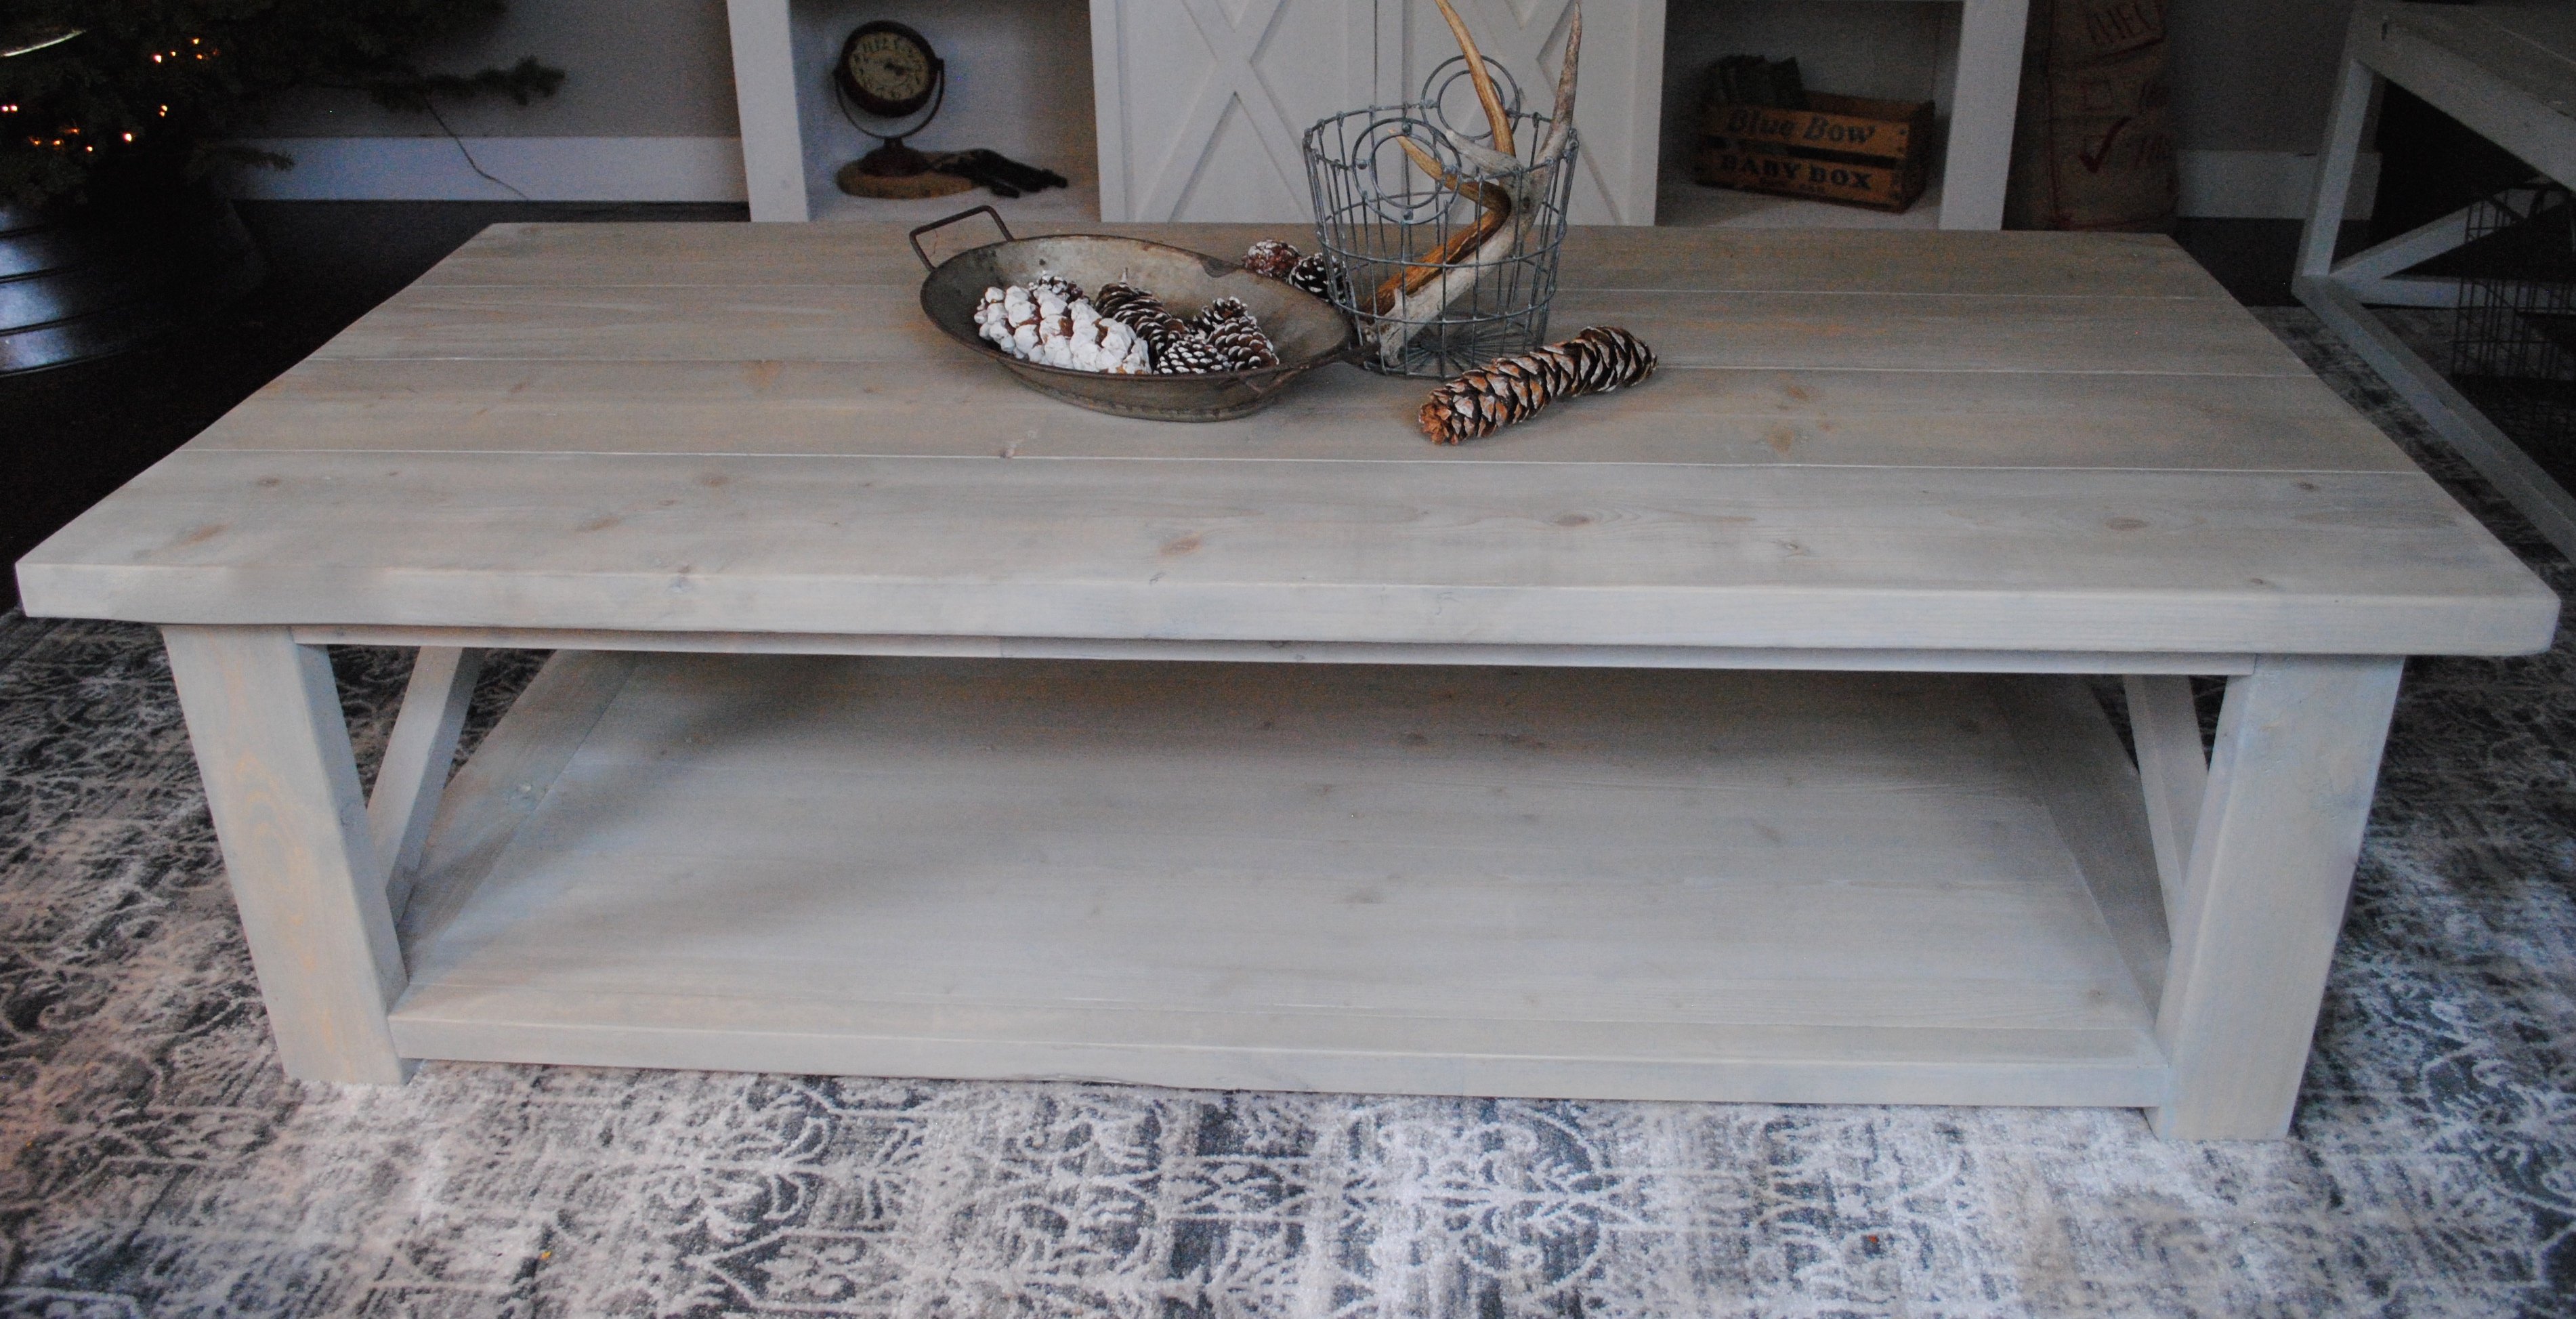
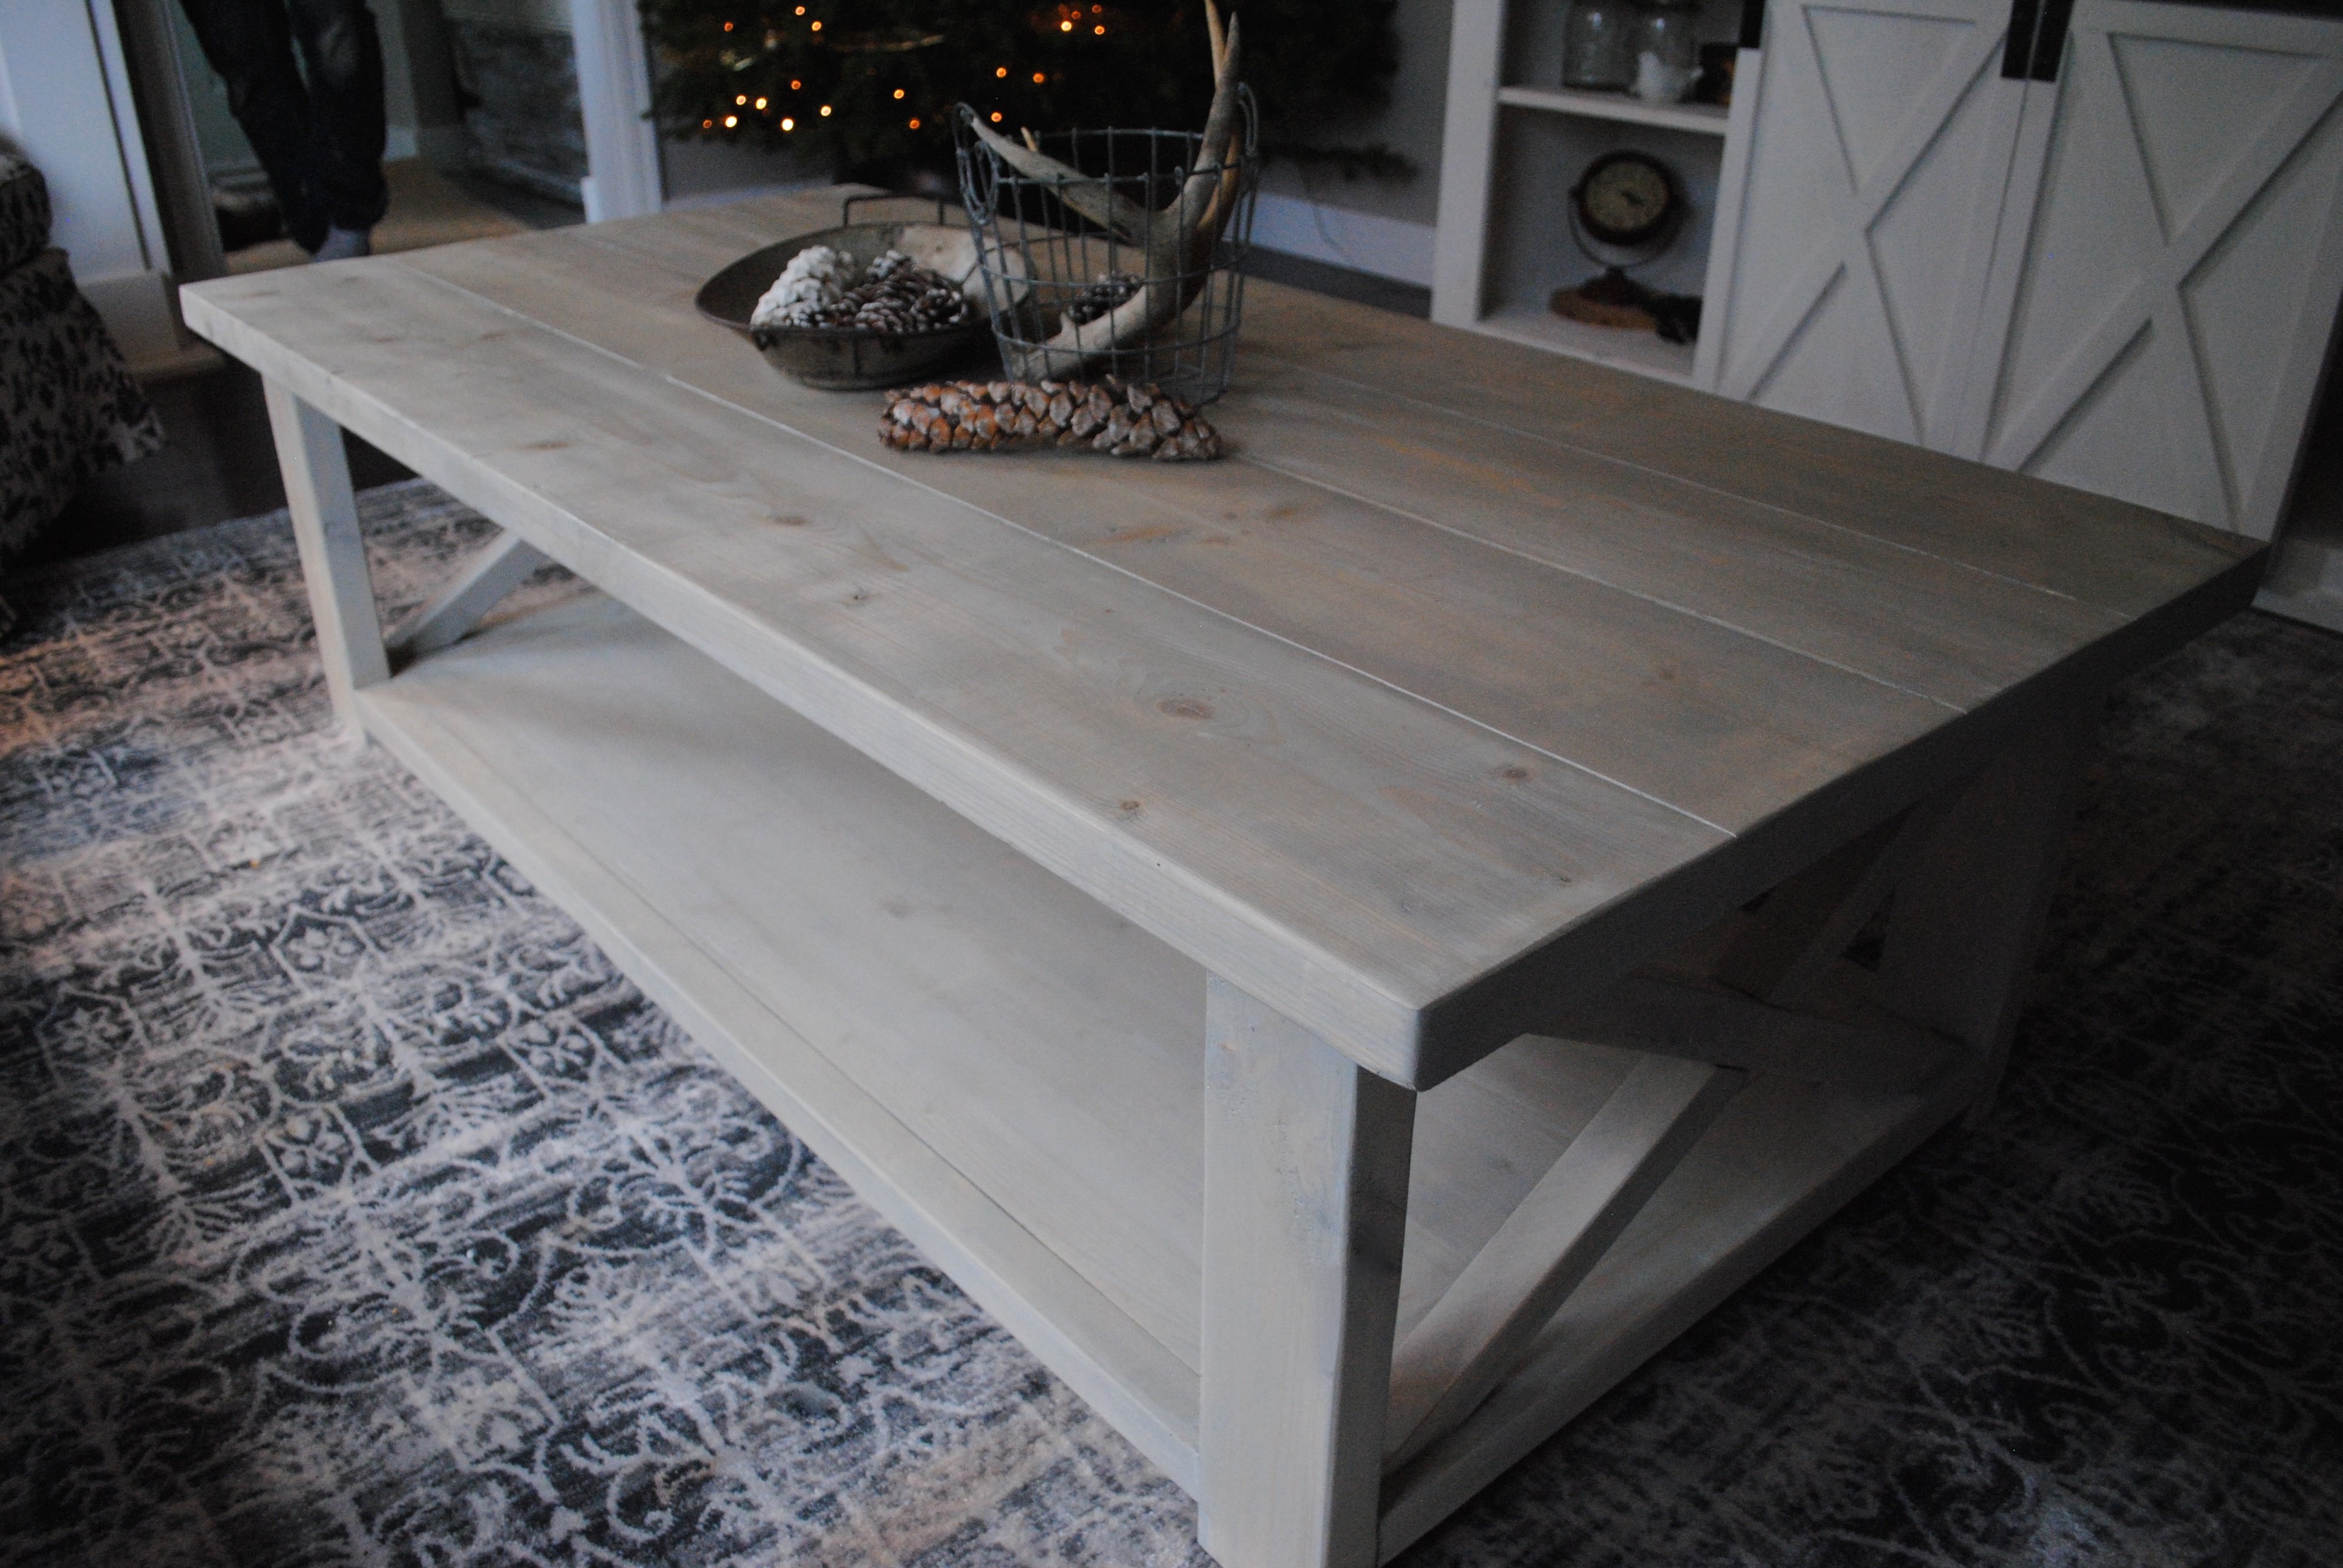
We've built so many of these coffee tables, but this one has got to be my favorite. Isn't the stain so dreamy?
I think the biggest thing about this coffee table is to finish it properly. We like to plane our boards down so it gives it a bit more of a seamless look - but real rustic lovers don't need to do this.
We sanded the coffee table down with 120 grit paper & then stained this table in Sunbleached Oak by Varathane. It's literally the most stunning color. Blends with almost any decor.
Once that was dry, we applied two coats of polyurathane