Community Brag Posts

Laundry Station

Submitted by Anonymous (not verified) on Mon, 02/27/2017 - 10:03
We followed these plans, but instead of building two cabinets, we combined them with one side in the middle. We also used pine planks on top. The sides are painted with chalk paint, and the top is finished in dark wax. 
Built from Plan(s)
Estimated Cost
$200
Estimated Time Investment
Afternoon Project (3-6 Hours)
Recommended Skill Level
Beginner

Comments

Planter Boxes

Submitted by Doc54 on Tue, 03/09/2021 - 22:31

Hi,
I made these planter boxes from Ana's plans. The plans made it an easy project and we also decided to paint them white.

Cheap and very effective in the garden.

Thanks Ana...

Estimated Cost
Approx. AUD $40 per box
Estimated Time Investment
Afternoon Project (3-6 Hours)
Finish Used
We simply used an outddoor paint - low sheen - white and applied 3 coats to each box.
Recommended Skill Level
Beginner

Comments

Washer & Dryer Pedestal / Platform with Drawers

Submitted by dmccoy on Tue, 03/12/2013 - 10:26

Platform (Pedestal) with Drawers for front-loader Washer & Dryer. Cheaper than buying the manufacturer's plastic pedestals and more fun to build anyway! The drawers are also much wider and deeper than the manufacturer's pedestals. We can usually fit about 3 full loads of laundry in each drawer. (That's 6 loads of laundry before we have to start folding!) It's a very easy and basic DIY project. I made a 2nd one for my brother using these plans (sans the drawers). I gotta say, the drawers are SO nice to have though. But you could just leave the front open, without drawers, and slide some laundry baskets underneath for an even quicker project. We've been using this platform now for over 2 years and there is still no squeaking or rattling. The washer & dryer haven't moved from the vibration even in the slightest. They're exactly where I placed them on the pedestal 2 years ago. There's also zero problem with the weight of the washer either...it really is a strong frame. (After finishing, I jumped up and down on it!) A couple small tweaks I would make doing it over is raising the drawers a 1/2" in. off the floor to tuck a rug underneath (as is, they sit about 1/8" in. off the floor). Also, I would cut out a couple of square holes in the back panel to access those socks that fall behind (I can't access the sides of my W&D in our particular laundry room). Lastly, I would have painted with a quality paint (I just used a few cans of white spray paint to be quicker). Step-by-Step Plans and Materials List (PDF) and many more photos found at the Blog Link below...I'm certainly no professional "Plans Writer" so email if you have questions! Happy DIY-ing! Estimated Cost: ~$200 (2x6 lumber, plywood, drawer trim, nails, screws, paint)

Estimated Time Investment
Weekend Project (10-20 Hours)
Finish Used
White spray paint
Recommended Skill Level
Beginner

Comments

nikolegraves@h…

Wed, 03/13/2013 - 10:12

I have wanted to do the pedestal project for quite a while. I am so glad I held off though. Yours are fantastic! I would never have thought of drawers to hide the dirty laundry! Love it!

gmccoy20

Tue, 04/02/2013 - 11:06

Really appreciate the help with mine brotha! We really like them (even without the drawers) and are glad you had these plans to go off of for ours.

I'll be calling you for our next project!

strahmers8

Fri, 02/07/2014 - 17:05

Hello this looks great and for the amateur carpenter I am but one item I need clarified "the top measurement at 64" is .25" greater than the bottom at 63.75"

Please explain if I am missing something
Thanks

dwm22

Mon, 02/10/2014 - 15:33

Not sure what measurement you mean that's 63.75" since there's no "bottom" to the pedestals. Or do you mean 1/4" wider than the sides? The top panel should overhang both sides by 1/4" each so that when the side plywood is attached, it will be flush. Hopefully that helps? (If I'm understanding the question correctly)

jmkc

Mon, 02/24/2014 - 10:29

Could leave the back panel of plywood out so you could reach what may fall behind? Then you would just have to pull the drawers out?

heverest

Wed, 06/22/2016 - 16:35

Back panel is very very structural and provides lot of strength. If i wanted more access than the 5-7 inch of duct space behind the pedestal gives me, then i would replace the back panel with a long 2x6, that holds the three legs from going in different directions due to all that weight.

dmccoy

Mon, 12/12/2016 - 14:58

This is the one modification I could make if i could redo these plans...I would still put on the back panel of plywood as it stabilizes the pedestal, I would just have cut out a rectangle (behind each drawer) so that I could remove the drawers and stick my hand/arm through to grab fallen clothes or vacuum the lint.

dachiri

Mon, 12/18/2017 - 19:17

Rather than cut holes in the back, I just cut the back and side boards a little small and left a gap around the bottom the whole way around.  That way I can get a vaccuum hose in there or reach through and get lost items.  Because my washer and dryer seem to be deeper than yours (I needed at least 33" depth, so I went with 3'), that also worked out well in getting the most out of the boards.  I could do the top, back, and sides out of one single sheet of good 3/4" plywood just leaving those small gaps at the bottom for clean-up and retreival.

Jperera

Fri, 11/20/2015 - 05:23

Hello,

I downloaded the pdf but have exactly the same information that the website html, where can I find a solution step by step guide?

Thank you for all the interesting posts.

Farmhouse Bed with Antique window headboard

Submitted by Anonymous (not verified) on Thu, 10/03/2019 - 13:41

I had been searching the internet looking for plans to make a headboard out of an old window I found. I came across these plans and they worked perfectly. Thank you for the great plans and tutorial!

Built from Plan(s)
Estimated Cost
$200.00
Estimated Time Investment
Week Long Project (20 Hours or More)
Finish Used
Varathane
Pre-stain wood conditioner
Special Walnut penetrating stain
Weathered Oak penetrating stain
Polyurethan
Recommended Skill Level
Intermediate

Comments

Laundry Dresser foling area and hanging shelf

Submitted by sandrabees on Tue, 06/19/2012 - 13:15

more details on my blog. I built 2 of the laundry dressers. adjusted the placement of my baskets due to restrictions in the overall height of my unit (I have a ironing board cabinet built into 1 wall that I still wanted to be able to open and use :) I used MDF, but it was a bear to work with and next time I would spend the extra $$ on birch. i painte the bottom in a semi gloss. and plan to add the doors (which will have a beadboard backing) they will be painted white with a dark walnut glaze. The top and shelf /brackets are all done in a distressed finish with ebony and mahogany stain mixed then 2 coats of poly very sturdy even filled!

Built from Plan(s)
Estimated Cost
$140
Estimated Time Investment
Weekend Project (10-20 Hours)
Finish Used
white semi gloss paint, (will be glazing with dark walnut as well),
Recommended Skill Level
Beginner

Comments

Sherice

Tue, 07/15/2014 - 20:27

Very cool rendition of the original plans. I like the folding area, awesome job!

thewife

Fri, 06/26/2015 - 00:00

I have been wanting to make the laundry basket dresser but am holding off because we are moving. What color did you us on the walls, I love it.

truss shelf/bookcase

Submitted by mritek77 on Mon, 04/14/2014 - 22:34

This was a pretty simple project as long as you make accurate cuts. Making accurately angled cut allows for tight joint also love the pocket screws. I did add a top brace for stability, seemed a little unstable without them. I pocket screwed them on from the backside, so they can't be seen from front. Than went with a two tone paint/stain.

Built from Plan(s)
Estimated Time Investment
Weekend Project (10-20 Hours)
Recommended Skill Level
Beginner

Hybrid Farmhouse / Trestle Table, bench, chairs

I spent a lot of time looking at photos that my wife tagged on pinterest, most from builders who frequent Ana's site.  I learned a lot just from looking.

I stole particular ideas from Ana, Tommie and Ellie, and another site that I can't find right now, but they really did the trestle / farmhouse hybrid idea first and I just modified their idea a bit.  If anyone has seen their site, please remind me so I can give credit where it is due!

I didn't really use a plan other than having a general idea of what I wanted the size of the table to be.  I believe it came out to about 102" x 44"

I built 6 chairs and the bench.

All is built out of construction grade lumber, and gets lots of compliments.


The table came together in a solid weekend, the bench took a couple of evenings, and the chairs...those chairs took forever to cut out, shape, assemble, and finish.

Estimated Cost
About $400, including purchasing a couple of jigs, but I had a lot of stuff "laying around"
Estimated Time Investment
Week Long Project (20 Hours or More)
Finish Used
Minwax English Chestnut and about 8 coats of satin lacquer. Steel wool between coats and finished with carnuba wax and buffed out.
Recommended Skill Level
Intermediate

Comments

JoanneS

Mon, 02/02/2015 - 18:15

Wow these are so great! Beautifully built, and your finish looks flawless! You have a dining room that will last for generations! Love it!

kkmerrett

Tue, 03/07/2023 - 12:47

Truly an inspiration for when we are to the point of building our table. Thank you for sharing.

Kid's Adirondack Chairs

Submitted by tlcbbp on Sun, 04/24/2011 - 16:43

The first one I built (the white one) was a terrible failure because I rushed through it and didn't read directions! Also, I used only scraps that I had on hand. The blue one went smoothly because I used the right materials and took my time.

Built from Plan(s)
Estimated Cost
12 - 15 dollars
Estimated Time Investment
Afternoon Project (3-6 Hours)
Finish Used
The blue paint is oops paint from Lowes & the white is spray paint
Recommended Skill Level
Beginner
Seasonal And Holiday

Rustc X Laundry table

Submitted by Anonymous (not verified) on Sun, 10/14/2018 - 13:16

Customized this table to fit perfectly in my laundry room. It turned out exactly how I had hoped!

Built from Plan(s)
Estimated Cost
$150 for lumber and stain, $80 for 8 baskets
Estimated Time Investment
Weekend Project (10-20 Hours)
Finish Used
Stain color Briarwood
Recommended Skill Level
Beginner

Comments

Ana White

Sun, 10/14/2018 - 13:31

Wow, this is absolutely amazing!  What a perfect and lovely spot to fold and sort laundry!  Thank you so much for bragging.  

Sturdy Workbench Sink

Submitted by Anonymous (not verified) on Mon, 05/01/2023 - 09:57

Used sturdy workbench plans with 2x6 cedar top for outdoor sink. Turned out much better than I expected!!

Built from Plan(s)

Comments

Liquor Cabinet from Benchmark Storage/Media Unit

Hallelujah!! Finally, somewhere to store all our alcohol-related necessities :) We adapted Ana's Benchmark Storage Unit to work as a liquor cabinet. We kept the basic design the same, but added some stemware storage across the top (a feature we loved in a Crate and Barrel liquor cabinet that was $$$$$) and some decorative molding to bulk it up a little bit. We lovvvvvve it! Thanks Ana!

PS: everyone please check out our blog for more details on this and other projects!

http://strawbridgestuff.com

Estimated Cost
$100 (using paint and supplies on hand)
Estimated Time Investment
Week Long Project (20 Hours or More)
Finish Used
White semi-gloss paint followed by a thin coat of Minwax stain (Ebony) wiped off immediately after applying (more details on our blog)
Recommended Skill Level
Intermediate

Comments

Corner TV stand

Submitted by TBarn on Tue, 01/21/2014 - 12:41

After a promise to get a new carpet and TV stand as an anniversary gift, I began a search for a corner stand that would fit a 50" flat screen and hid all of those ugly wires. Craig's List had nothing and the retail options were either cheaply made, ugly or crazy expensive. I stumbled upon Ann's page, and since my son has a wood shop in the basement, I figured why not try to build something. I used the original plan, but borrowed ideas from other brag posts to create a 36" tall model with overlay doors that we think looks great. Next project: bar stools for the kitchen island.

Built from Plan(s)
Estimated Cost
$200
Estimated Time Investment
Weekend Project (10-20 Hours)
Finish Used
Zinder Primer and Gidden (America's Finest) Semi Gloss
Recommended Skill Level
Intermediate

Raised Bed Garden Enclosure

Submitted by Anonymous (not verified) on Thu, 05/28/2020 - 17:08

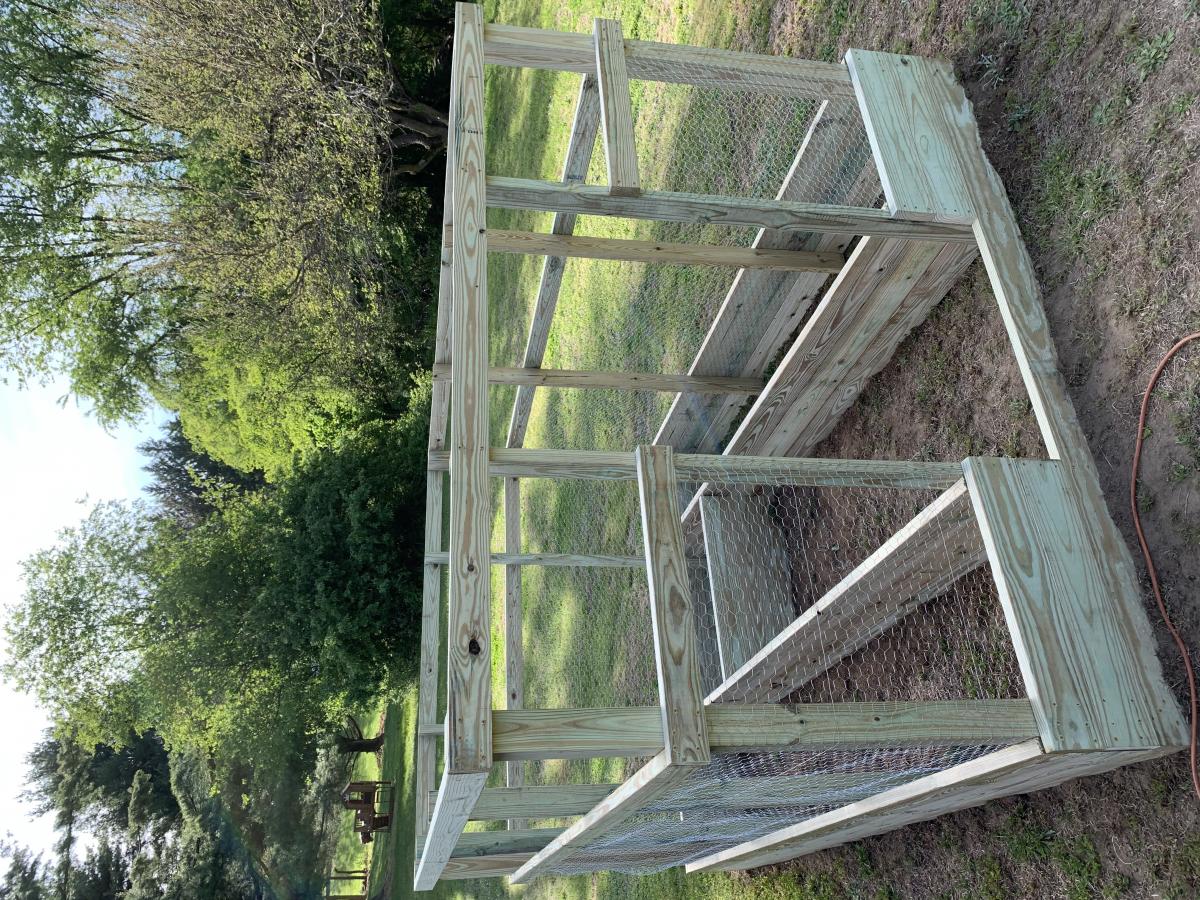
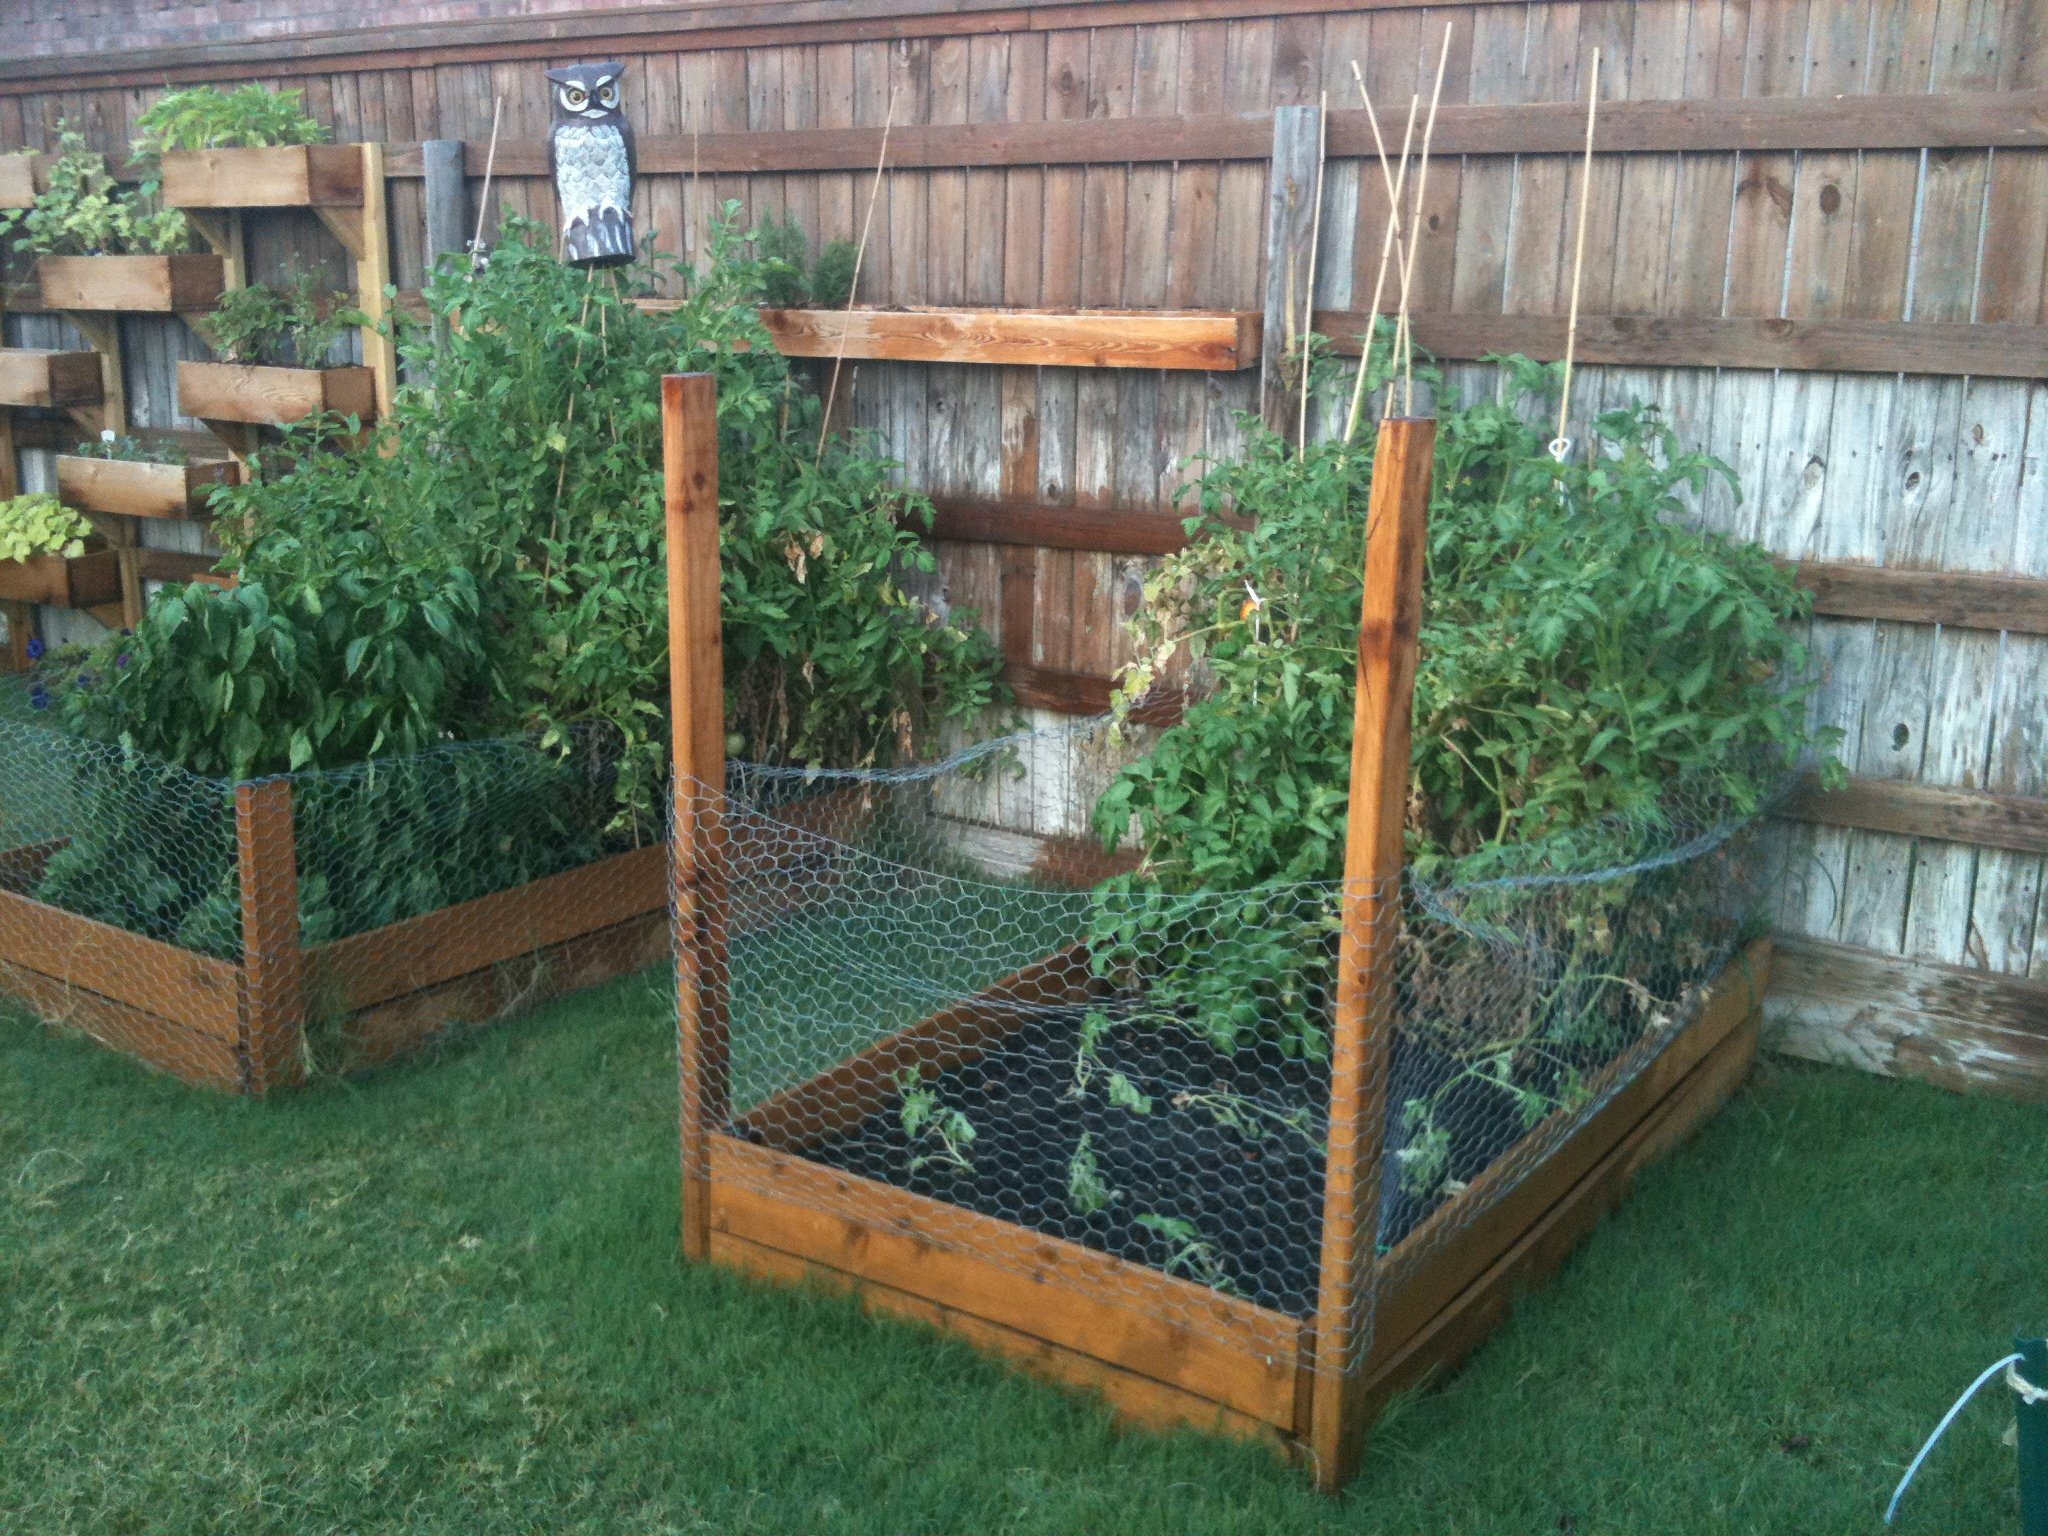
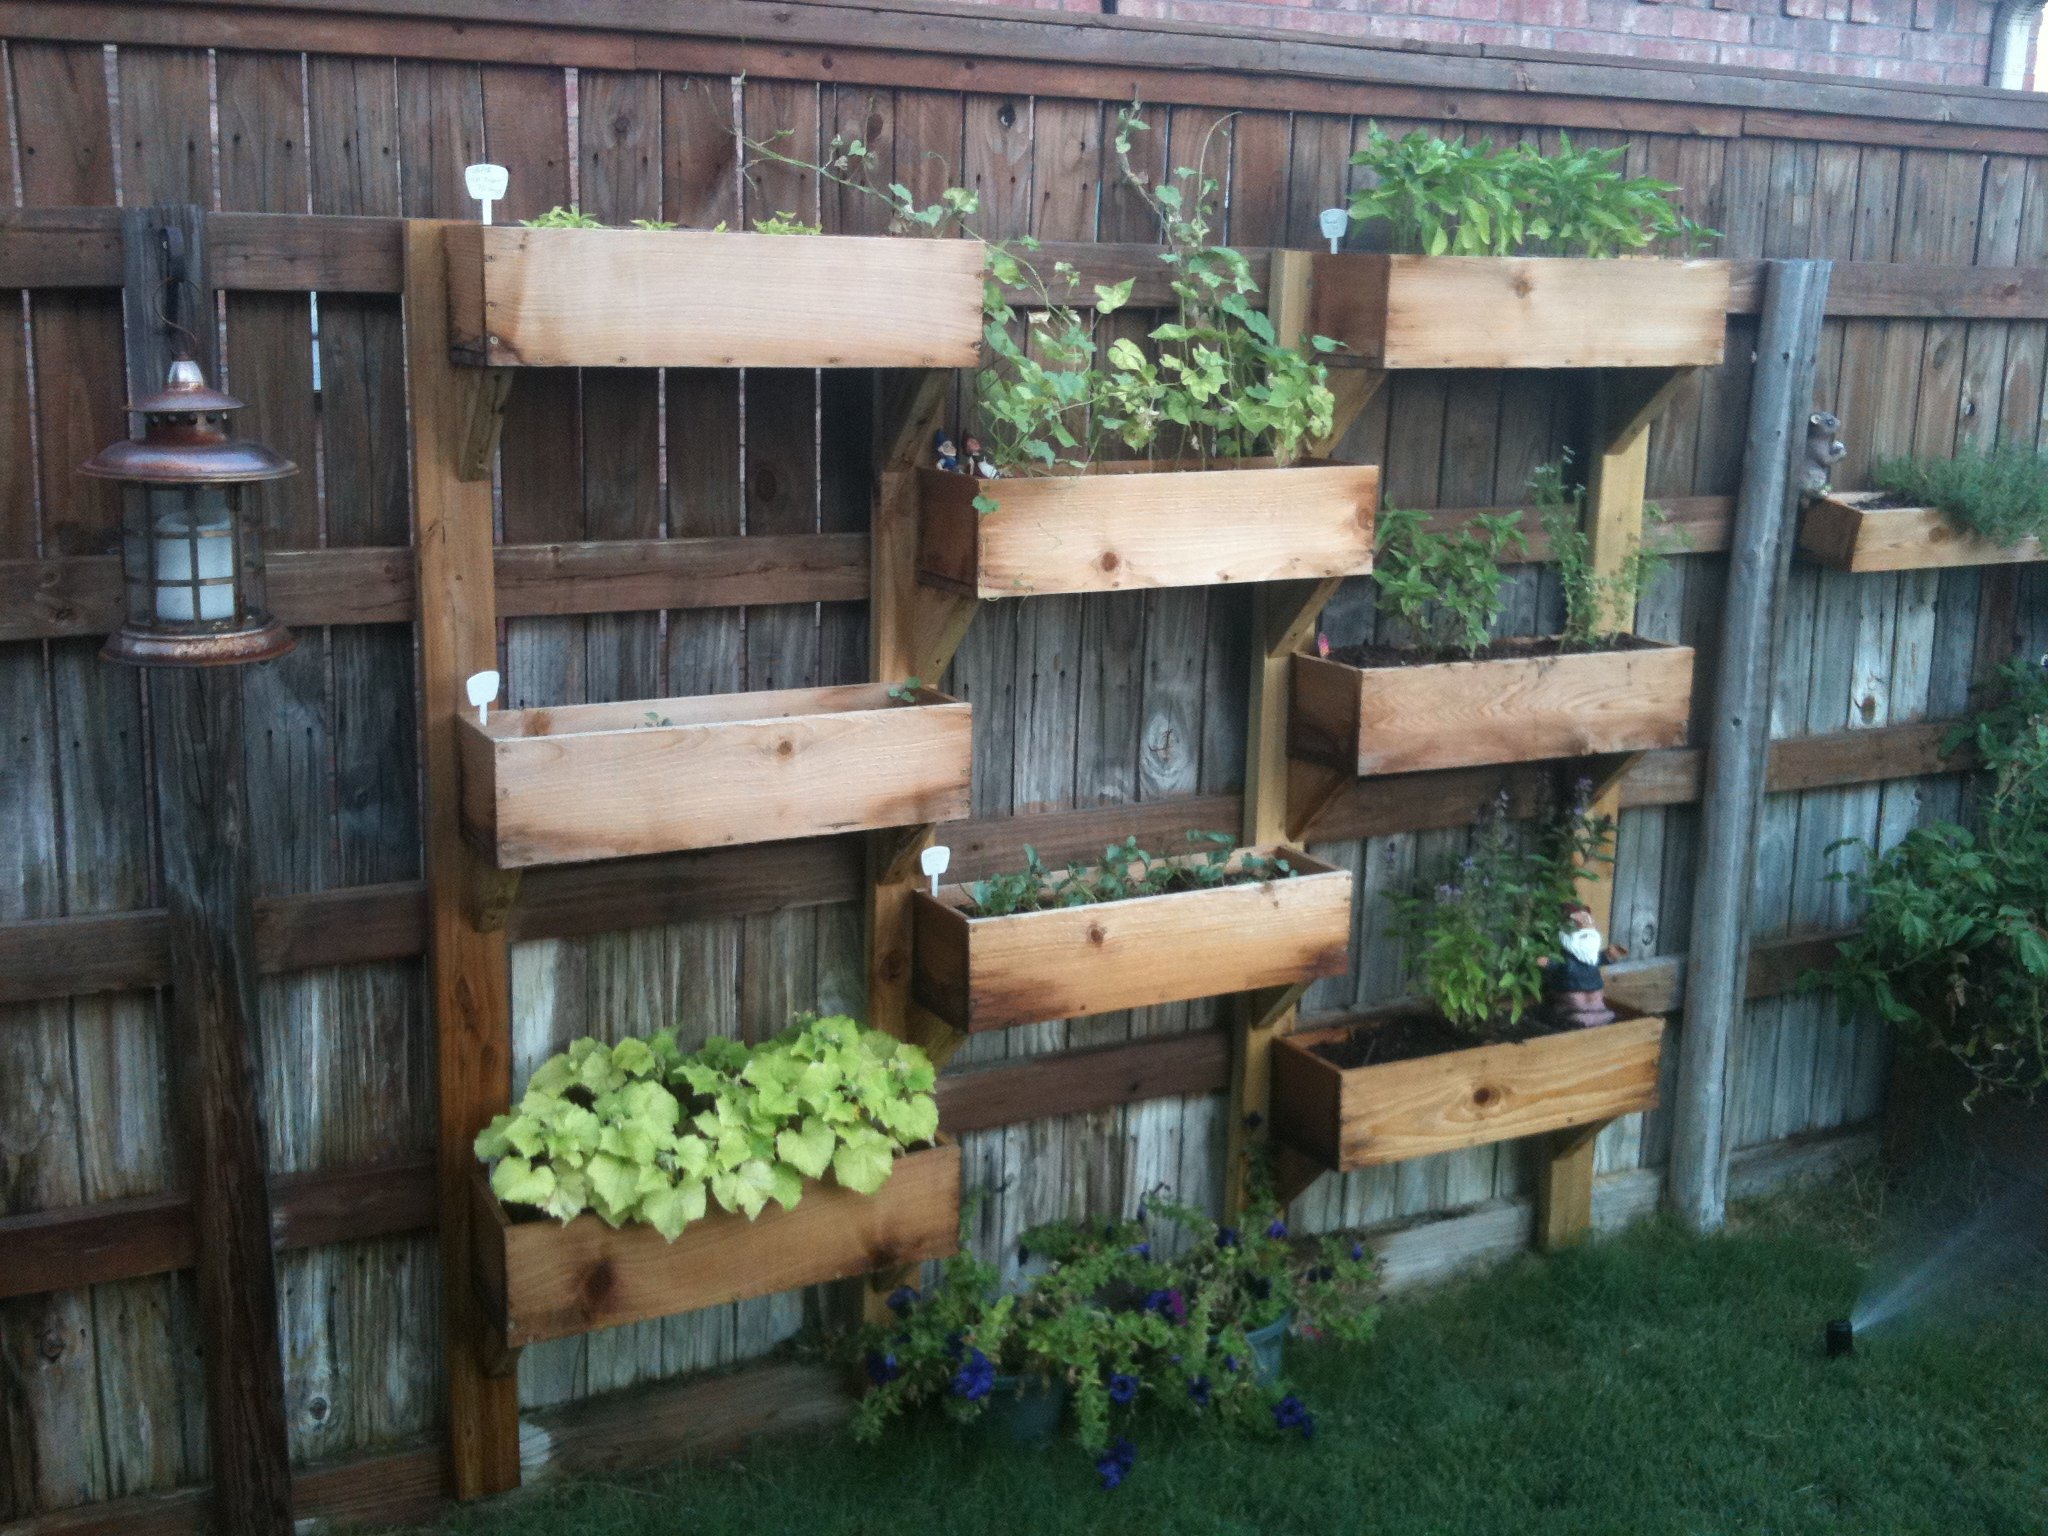
We perviously had a larger garden farther back in the yard, it was on the ground which is very hard and rocky. It was tough to till and maintain, so it was taken down a few years ago.

My wife and teenage daughter have green thumbs and have planted herbs and tomatoes in pots over the past few years, but this year they wanted something more substantial. After an online search we found this plan.

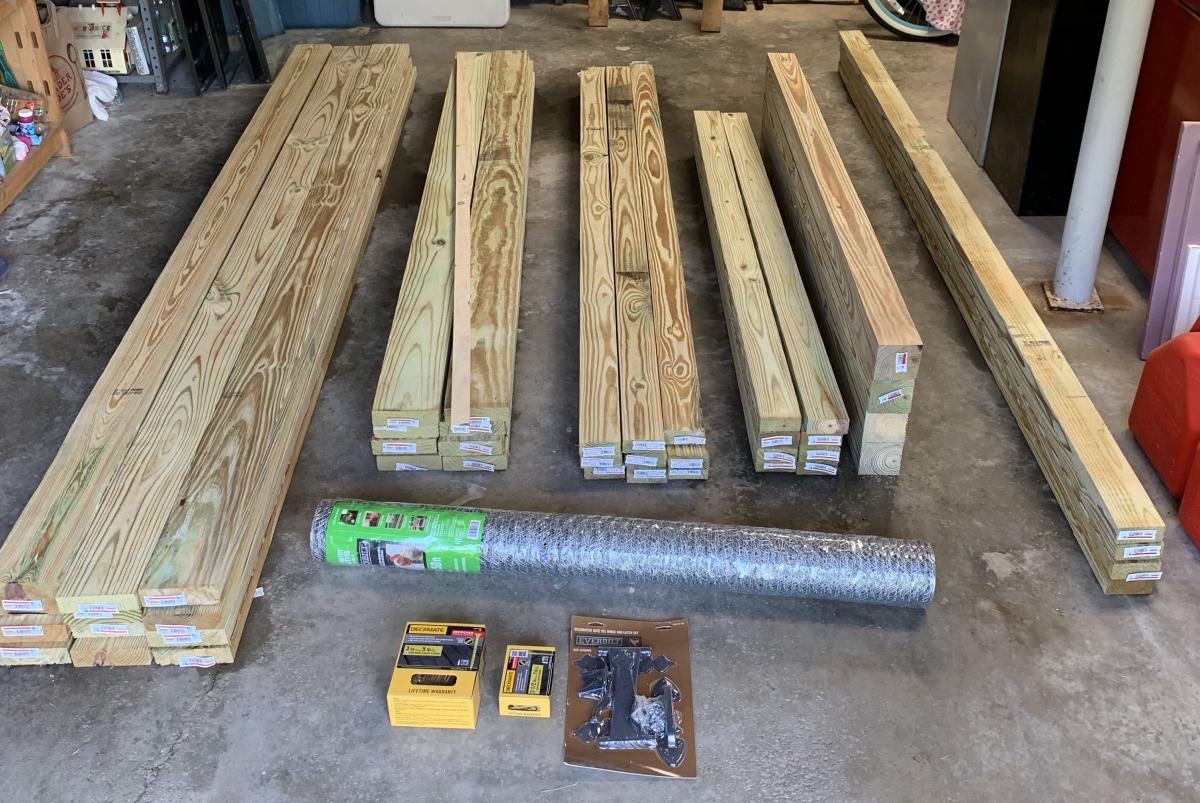
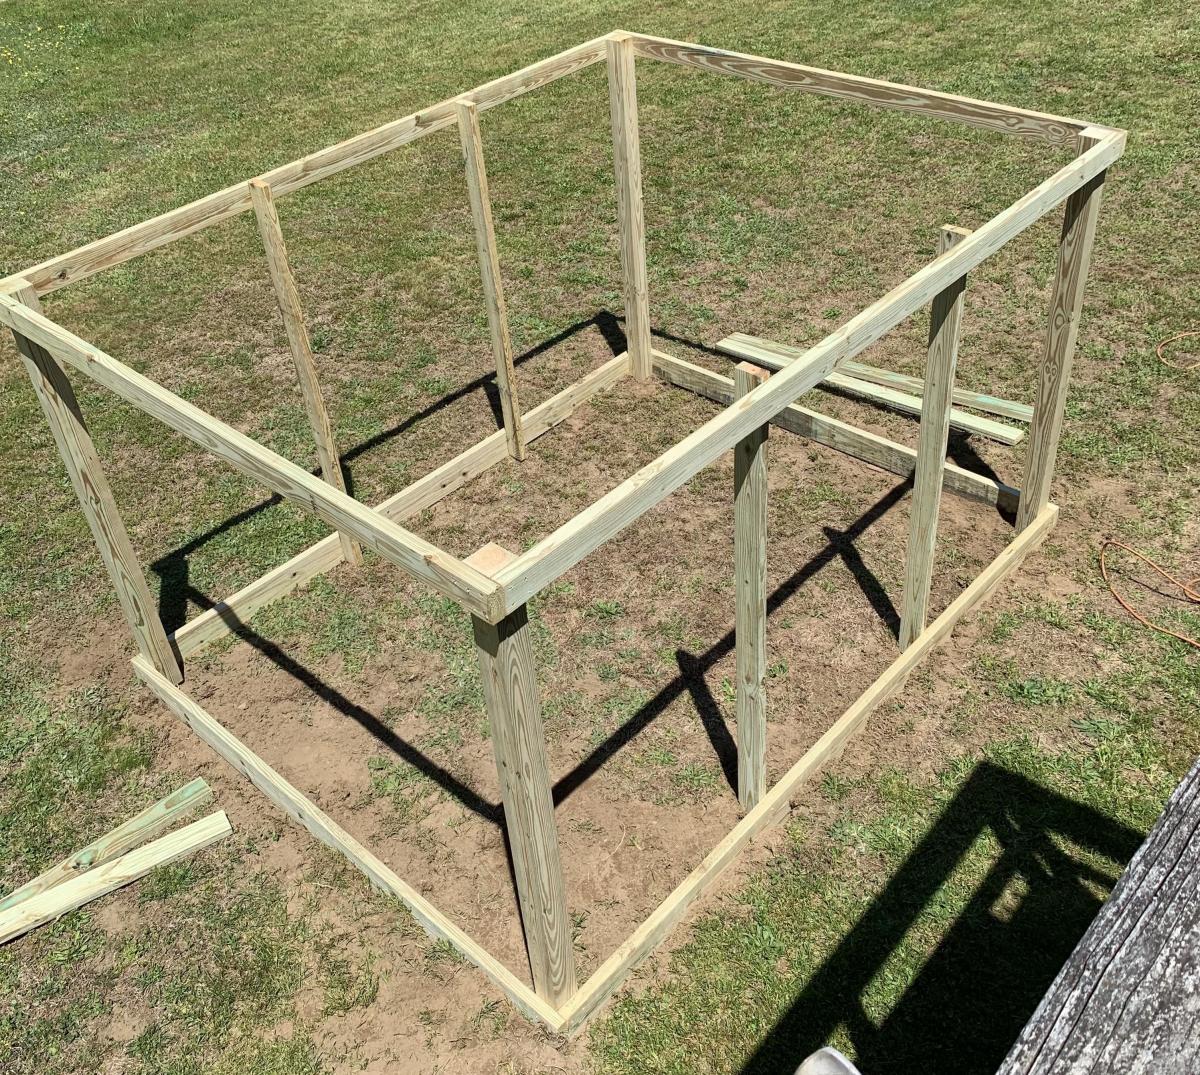
It was a bit small for what the girls had planned, so with a little bit of tweaking, we changed the depth of the enclosure to 10'. It was pretty easy to do. Also the girls wanted the beds to be a bit deeper, so we made them three 2x6's deep instead of two

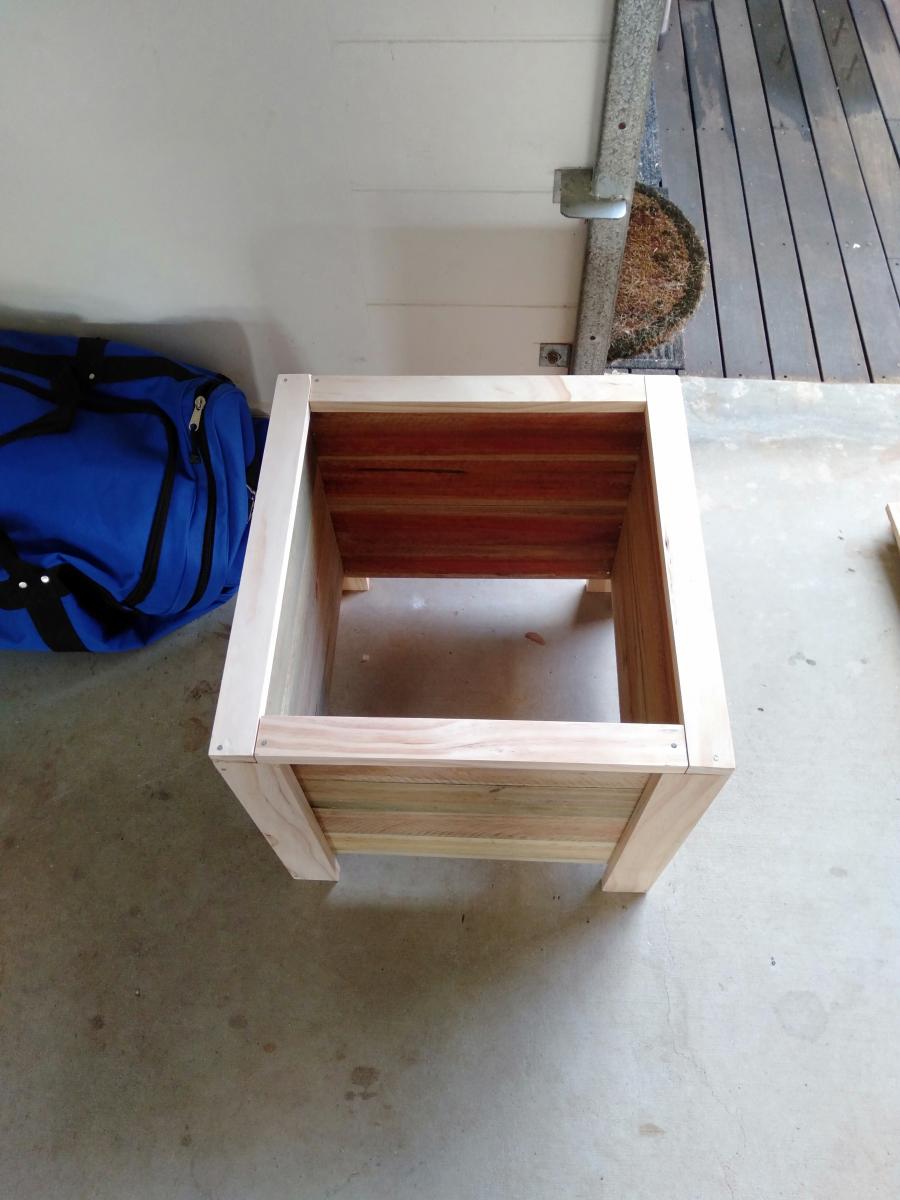
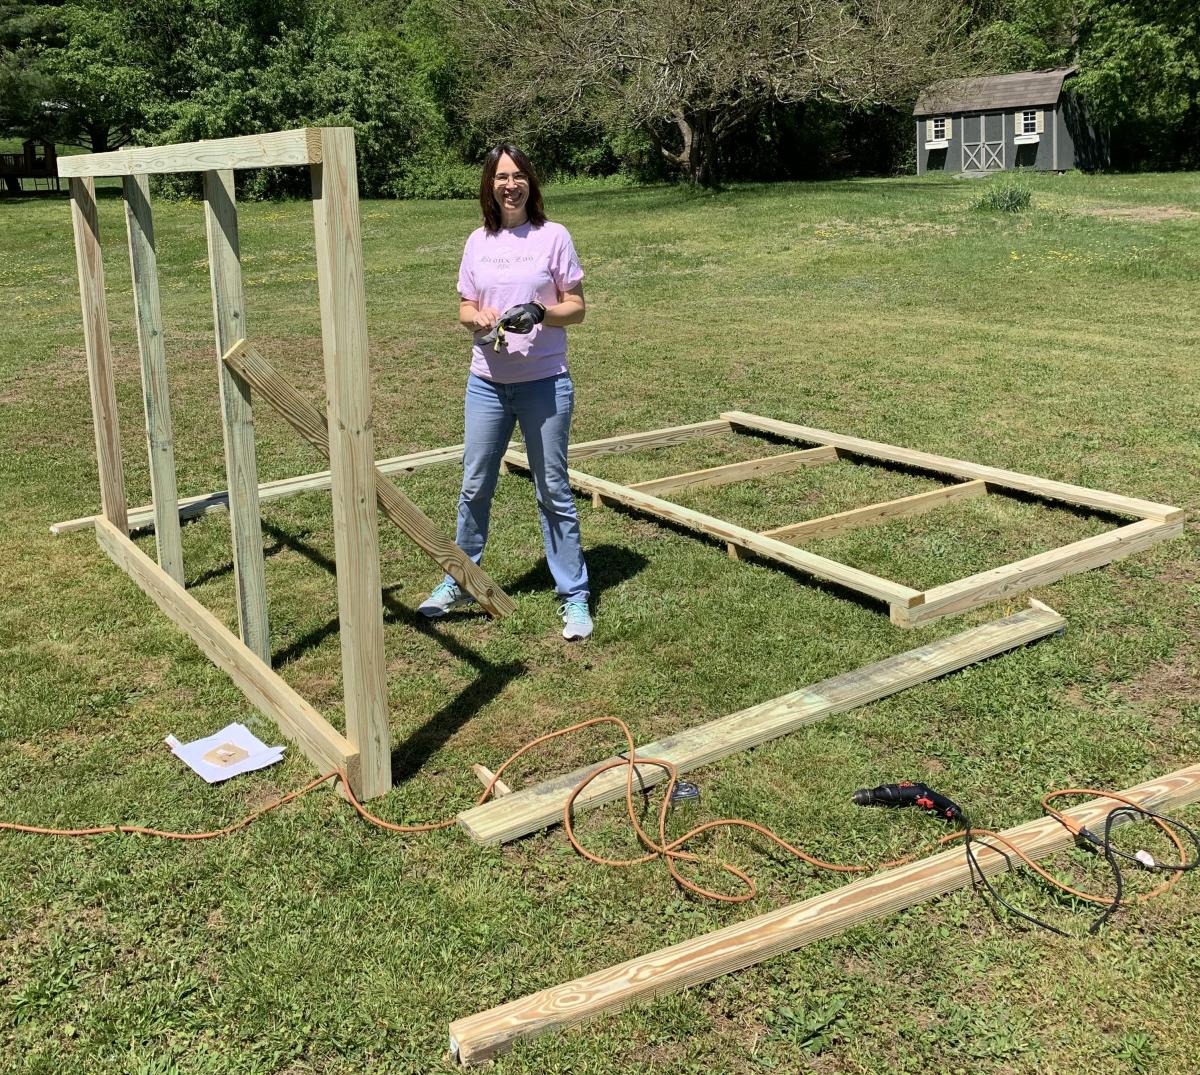
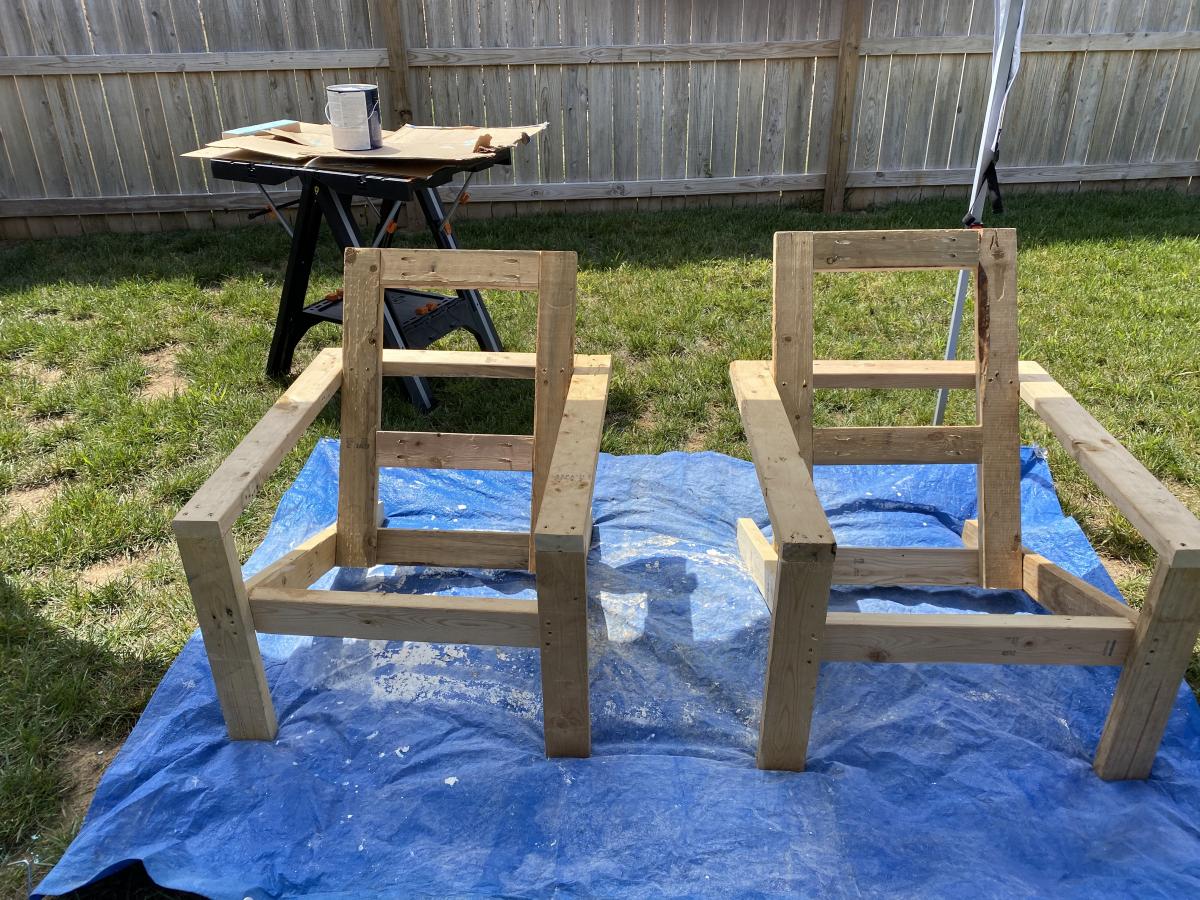
It was built by my wife and I in one weekend, well actually the truth is we built the entire enclosure, minus the door on Saturday about 10am and finish up about 5:30pm. I built the door the next day and we hung it together.

Just an FYI, I have quite a bit of woodworking experience and have a workshop with table saw, band saw and much, much more. I did use the table saw for most of the cuts, with the exception of the gate support which I cut using the band saw.

One caveat, if you have the lumber yard cut any pieces for you, make sure all the lumber is the same length. It's kind os a nit picky thing, but none of the lumber was exactly the length shown on the labels. If you want all the joints to be "perfect" I suggest measuring and cutting all the pieces to the correct length to match the plans.

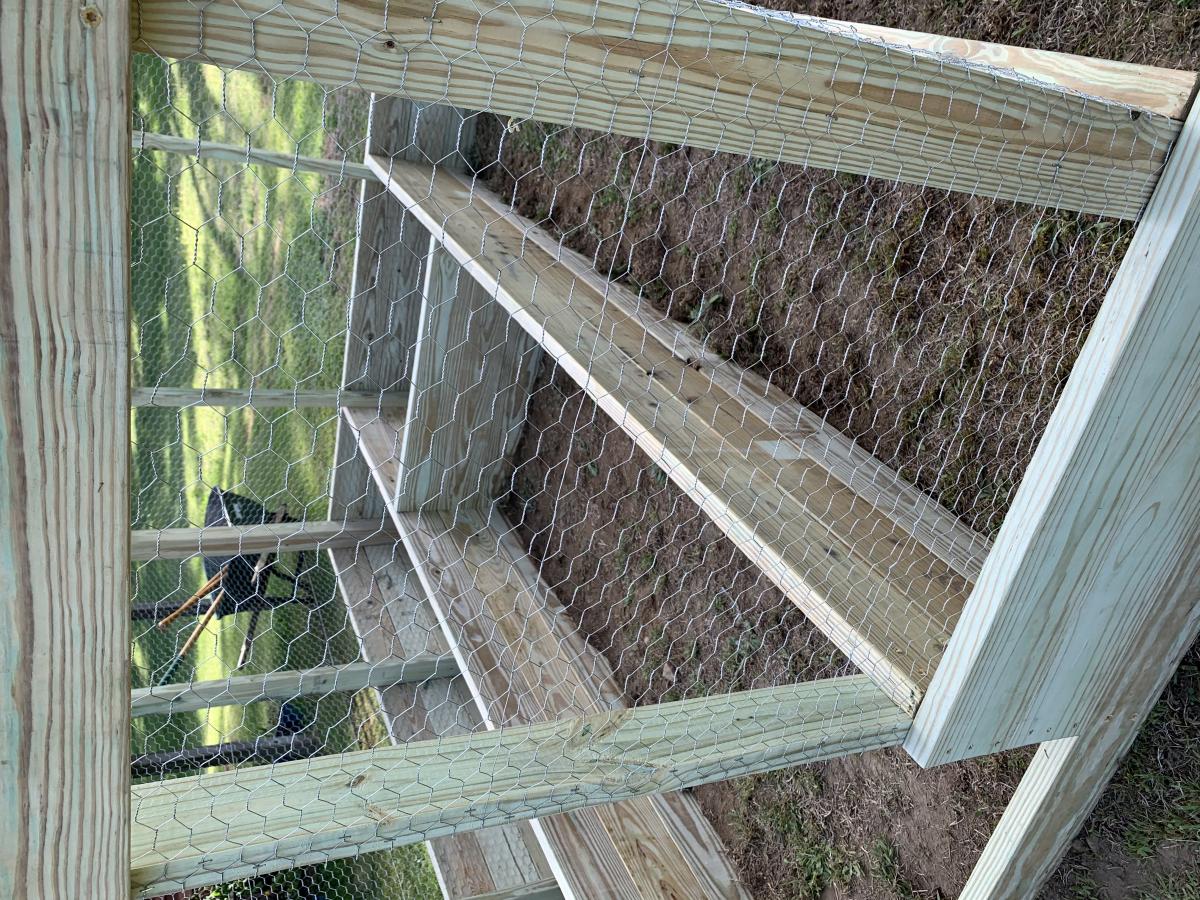
We also used an industrial hand held staple gun to fasten the chicken wire.

The cost of all the materials, including two sets of work gloves came out to $447.92 from Home Depot in 2020.

We are now waiting for a delivery of the top soil to fill the beds. Since we used weatherguard lumber, we are going to gat plastic sheeting and line the beds.

It was a fun project and my girls are looking forward to planting all their seedlings.

For fun we made a time lapse video, which I have uploaded to Youtube. If you watch closely, you will see that we started the build in one area of the yard and moved it because the ground sloped much more than we originally thought.

https://www.youtube.com/watch?v=h7vvBLy034U&list=WL&index=112&t=0s

I hope that our experience may help others in some small way.

Thank you Ana for making these plans available!!

Built from Plan(s)
Estimated Cost
$447.92
Estimated Time Investment
Weekend Project (10-20 Hours)
Finish Used
None.
Recommended Skill Level
Intermediate

Comments

DIY Garden Box with Trellis

Submitted by JenFarrell on Mon, 06/30/2014 - 07:13

We wanted a small garden to fit on the back patio stones and this plan fit well. We reduced the height because we have 3 small children to "help" water the plants. The trellis was hoping that we could extend the amount of produce we could grow. They're very heavy, sturdy and straightforward to build. Thanks very much!!

Estimated Cost
$120
Estimated Time Investment
Weekend Project (10-20 Hours)
Recommended Skill Level
Beginner

Modern Adirondack Chair, Super Sized

Submitted by Anonymous (not verified) on Fri, 08/21/2020 - 10:39

Am a big fan of Ana's work, and have used several of her plans in prior builds including the more traditional Adirondack chairs. Those stayed with my old house, and I wanted something different for my new house. Really liked her Modern Adirondack design with the floating arm rest. However, plans are like recipes to me--a guideline. I wanted the back boards to run up and down, and I am a bit more robust than the lovely and petite Ms. White, so they would need to be wider after I built the first one at 19 1/2" wide per plan. The next three I made 22" wide and that worked well without throwing off the geometry and angles of the other parts. Since I ran the backboards up and down, I needed some cross beams for stability and to give an attachment point for the middle of the boards. Cut some 2x4s at 15" wide, drilled pocket holes in both ends, and attached in between the back supports with the pockets facing up to be hidden by the back boards. All of the 2x4s were leftover cut-offs from the houses being built in my neighborhood. Since the frames were free, I splurged and went with cedar boards for the backs and bottoms. With the wider frames, I had to use 1x12s ripped down to 10 3/4" to get the right look (about a board's width in between). Needed some color, so I painted the frames Teal Seaglass from Menards. Cedar was stained with a natural deck stain from Sherwin Williams. I experimented with salt paint (mixing unsanded grout with the paint) to give a heavily textured and weathered finish but this was unecessary--the wood was distressed enough and I am a terrible painter. It also toned down the color so I skipped that step and just went with 2 coats of plain paint. It looks like outdoor furniture should up close. As always, am pleased with Ana's plans. Thank you for doing all the hard work!

Estimated Cost
about $200 for all 4 chairs due to cedar and paint
Estimated Time Investment
Weekend Project (10-20 Hours)
Finish Used
Paint - Pittsburgh matte exterior with Dutch Boy coloring Teal Seaglass
Stain - Sherwin Williams Superdeck stain, Natural finish
Recommended Skill Level
Starter Project

Comments

Seasonal And Holiday

Jeep Bed

Submitted by papamike on Mon, 07/05/2021 - 17:15

I hope this is OK to add here. It's not an Ana White plan, so moderator please delete if it is not allowed. I made this bed for my grandson. I bought a plan online and modified it from a twin to a full size bed. The dome light and running lights work as night lights. A motion sensor light activates if he crosses the door to illuminate the ladder. Front tire is made as a step so his parents can climb in and read to him. The whole thing is on EZ Sliders so they can move it away from the wall to make the bed.

Estimated Cost
$150.00
Estimated Time Investment
Weekend Project (10-20 Hours)
Finish Used
Latex paint.
Recommended Skill Level
Beginner

Comments

Cedar Boxes

Submitted by drowland on Sat, 07/09/2011 - 07:18

We built these before we saw these plans, but they are pretty much the same... We added the chicken wire to keep the rabbits (and our dog) out of the garden. We added the owl to keep the birds out. We've gotten a ton of tomatoes, onions, and bell peppers so far. Next year, we'll add a few more beds. We also added the verticle garden to take up less space, but its not deep enough. We'll make the next one deeper.

Estimated Cost
$30
Estimated Time Investment
An Hour or Two (0-2 Hours)
Finish Used
none
Recommended Skill Level
Starter Project

Comments

KatieO (not verified)

Sat, 07/09/2011 - 20:11

Wow! LOVE IT! I love the taller posts so you can incorporate the chicken wire! I SOOOO needed to do something like that this year. Also, the vertical garden boxes are BRILLIANT! LOVE IT!

drowland

Thu, 11/17/2011 - 07:59

We ended up getting a ton of tomoatoes and green peppers from the garden boxes. We've actually built a couple more. We'll probably double again before next spring. We're looking at adding more veggies.

We now have ton of stuff planted for the fall...

Guest (not verified)

Tue, 03/13/2012 - 10:46

How did you build the upright planter boxes? Do you mind explaining the building process/design? I really want to plant this in my yard!

colton's mom (not verified)

Tue, 04/03/2012 - 06:19

i love the vertical boxes. I am just trying my hand at the world with a green thumb and could use as much advice as possible about how to make as well as to line the boxes or not to line them. All advice appreciated!

berman (not verified)

Fri, 11/23/2012 - 21:53

Hi, my name is berman. I found you pin from my pinterest and your box garden is so great. I am a newbie in this field and so interested to build garden in my house. If i can ask you some question, could you please to answer that?

cheers,
berman

Seasonal And Holiday

Rocking horse

Submitted by jerfer on Wed, 01/18/2012 - 19:16

I made this for my daughter based on one her uncle made for her when she was little.

Estimated Time Investment
Day Project (6-9 Hours)
Finish Used
mini-wax Bombay mahogany
Recommended Skill Level
Beginner

Comments

hammertime

Thu, 01/19/2012 - 09:00

What a lovely heirloom gift you've created. So much more meaningful (and much more beautiful) than the plastic toys we see these days.

moldah

Thu, 01/19/2012 - 15:32

This is wonderful! I have been thinking of trying to search for plans for a rocking horse to build for a few family members. Looking at this picture, I really like it!

jerfer

Sat, 01/21/2012 - 19:19

I can give you the rough dimensions if you want. I used yellow pine. It is basically a 2x8x8 and a 2x4x8. The head, seat and rocker rails come from the 2x8. The 2x4 pieces hold it all together in the crossbeams. There is also a 1.25 inch dowel holding the two rocker rails together below the crossbeams. A piece of the same dowel is used for the handles.

First Project!

Submitted by katiea40 on Sat, 04/07/2012 - 18:20

I saw this and thought - FINALLY...the answer to my laundry chaos! My husband built it for me this weekend with a couple of minor modifications. He put casters on the bottom, so I can move it to clean and sweep. He also added clear plastic drywall corner protectors over the 2x2's so that they paint is protected when the baskets slide in and out! Pretty clever! Oh, and I thought I was being super creative when I picked the color - and then saw that it is the EXACT color that you painted it! So much for that creative spark - but, I'll work on it! Thanks for the plans!

Built from Plan(s)
Estimated Cost
$100
Estimated Time Investment
Afternoon Project (3-6 Hours)
Finish Used
Primed and painted with high gloss finish.
Recommended Skill Level
Beginner