Community Brag Posts

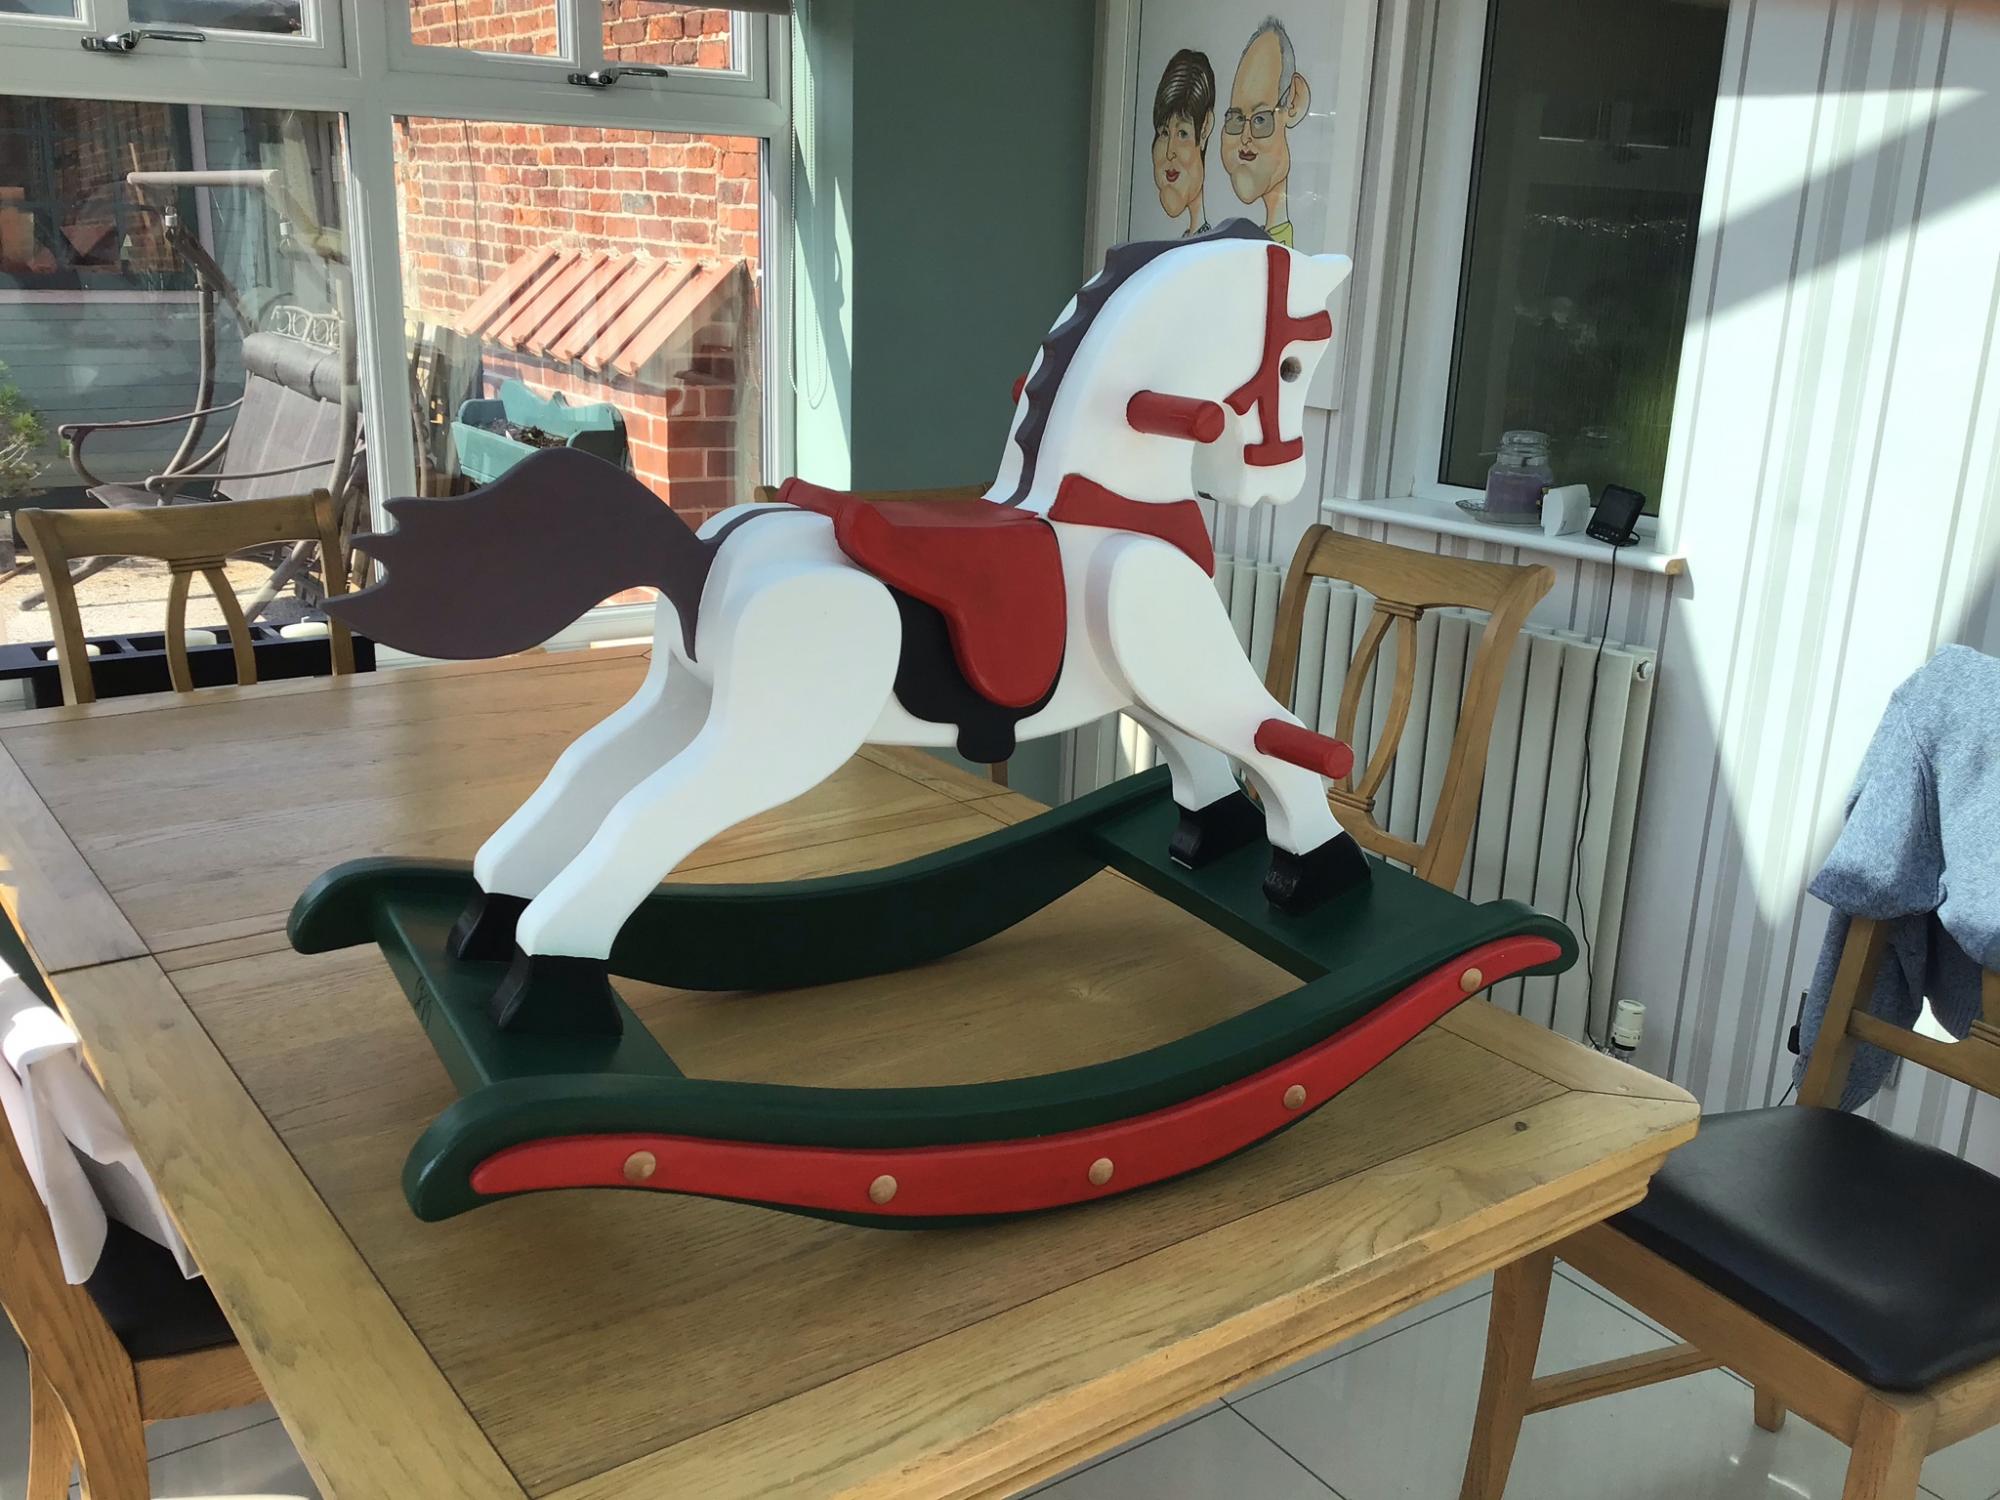
Ambrosia Maple Box Frame Coffee Table with Lift Top

Submitted by Kimiark on Mon, 04/19/2021 - 14:41

Wow, building this table was more than I bargained for, but all the difficulties were my own fault. For starters, although the wood is beautiful (wormy ambrosia maple) the piece I chose to work with had a large knot hole that needed filling with an epoxy pour. It looks pretty good if I do say so myself (it's probably hard to see in this photo). Second, I didn't count on the hinges being so long and my wood came up about 3/4 inch too short for them. Had to scour the internet for some that were not so long. They ended up being a bit of trouble to install, but all's well. I used my router to cut a cove for finger grips which did make it easier to lift the top. I also made the top sides bigger that the original 2 x 2 (2 x 5 maybe) for weight and stability. I had extra wood so I added a bottom shelf as well. The finish is several coats of Varathane semi gloss polyurethane. I really like how it turned out!

Estimated Cost
$200
Estimated Time Investment
Week Long Project (20 Hours or More)
Finish Used
varathane semi gloss polyurethane
Recommended Skill Level
Intermediate

Comments

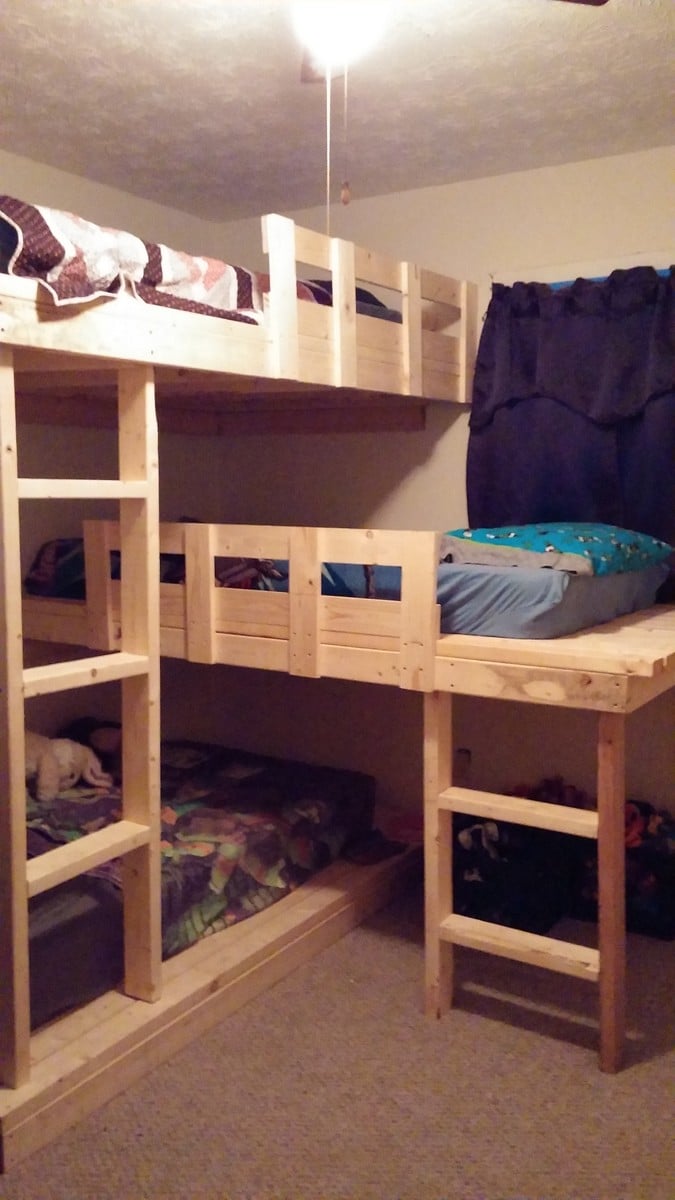
Triple Bunk Beds

Submitted by hughes3627 on Tue, 03/03/2015 - 07:22

We needed a space saving alternative to individual twin beds...these were very simple to make. Our boys love them! We kept the same deminsions as the original plans and ended up having a little extra room on each bed for storage as well as toy storage under the second bed. Worked out very nicely and left space for the next project...a study station :)

Built from Plan(s)
Estimated Cost
About $230
Estimated Time Investment
Weekend Project (10-20 Hours)
Finish Used
Natural
Recommended Skill Level
Beginner

Comments

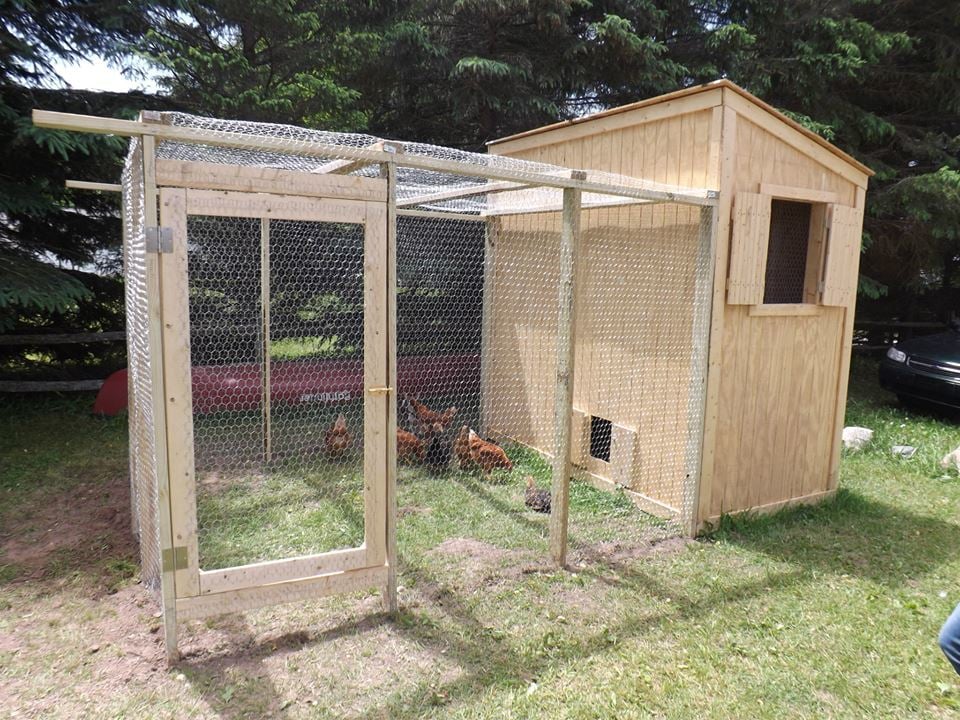
My incredible chicken coop and run!

This was my first attempt at building anything....ever. It was so incredibly fun and I certainly learned a lot. My 8 little chickens are loving their new home and I can't wait to build my next project!

Estimated Time Investment
Week Long Project (20 Hours or More)
Recommended Skill Level
Intermediate

Comments

GreenLaLa

Wed, 06/19/2013 - 11:51

Hello! Could you repost the picture / info on your chicken run? I keep getting "page not available" and I've been trying for days :O) I think I want to build that chicken shed (too big for 3 hens?? It's just so cute!) and a run like that to go with it! Thanks! Have a great day!

Teaching Easel in the Classroom

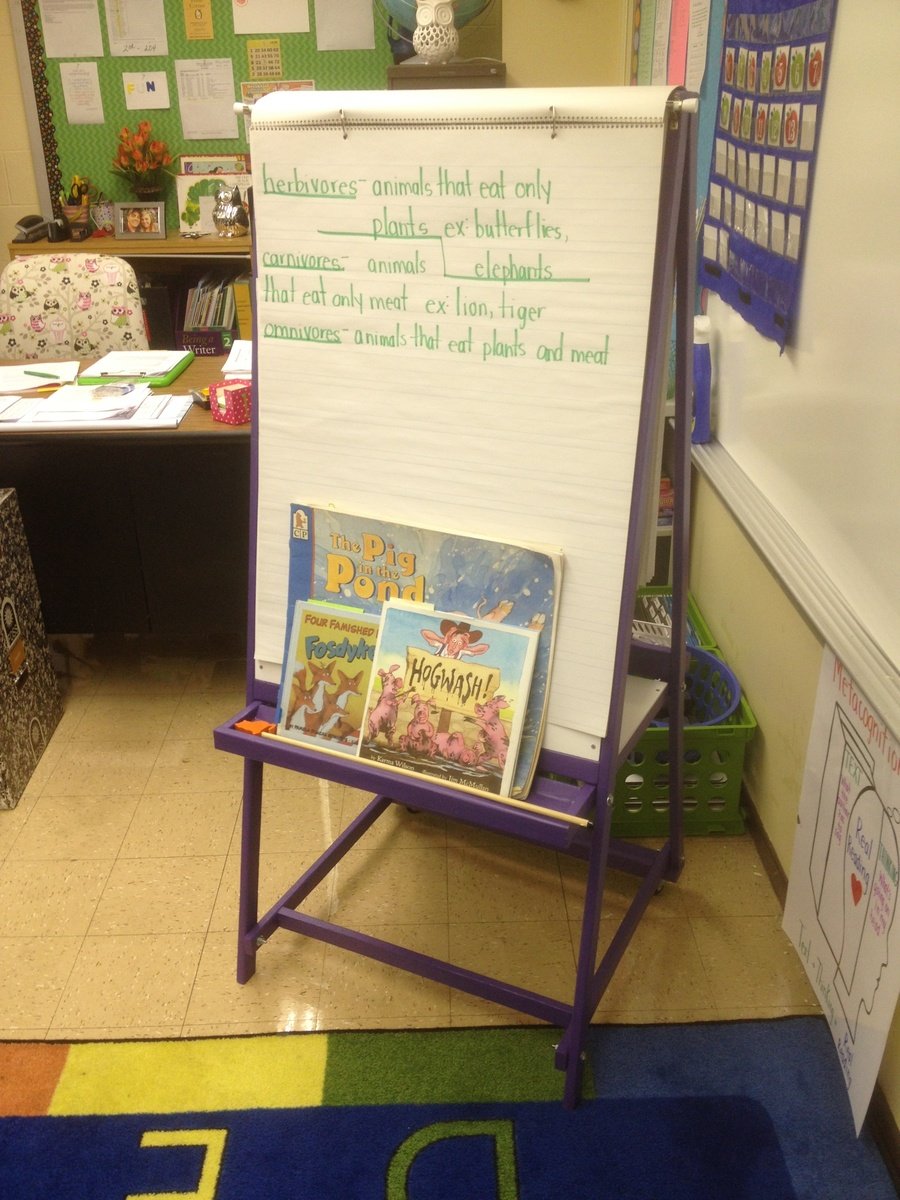
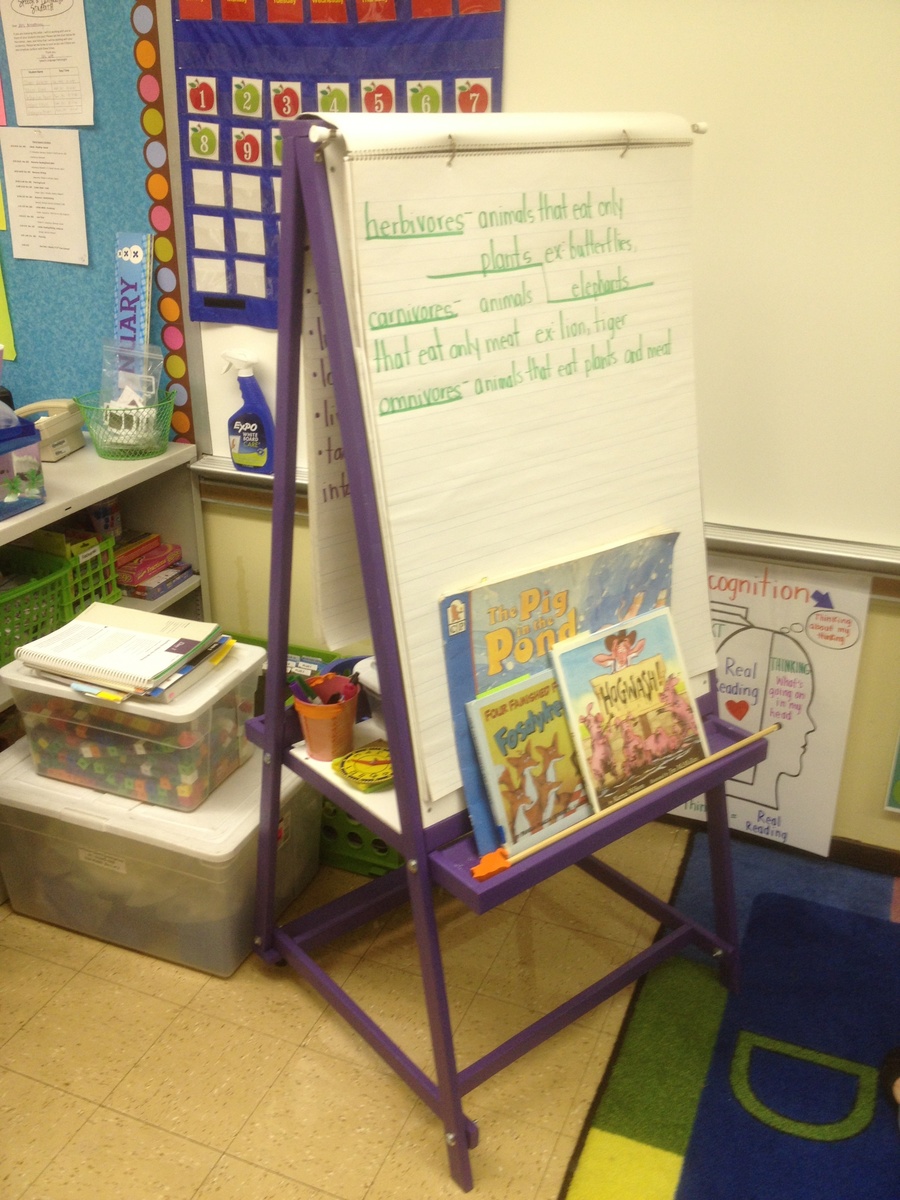
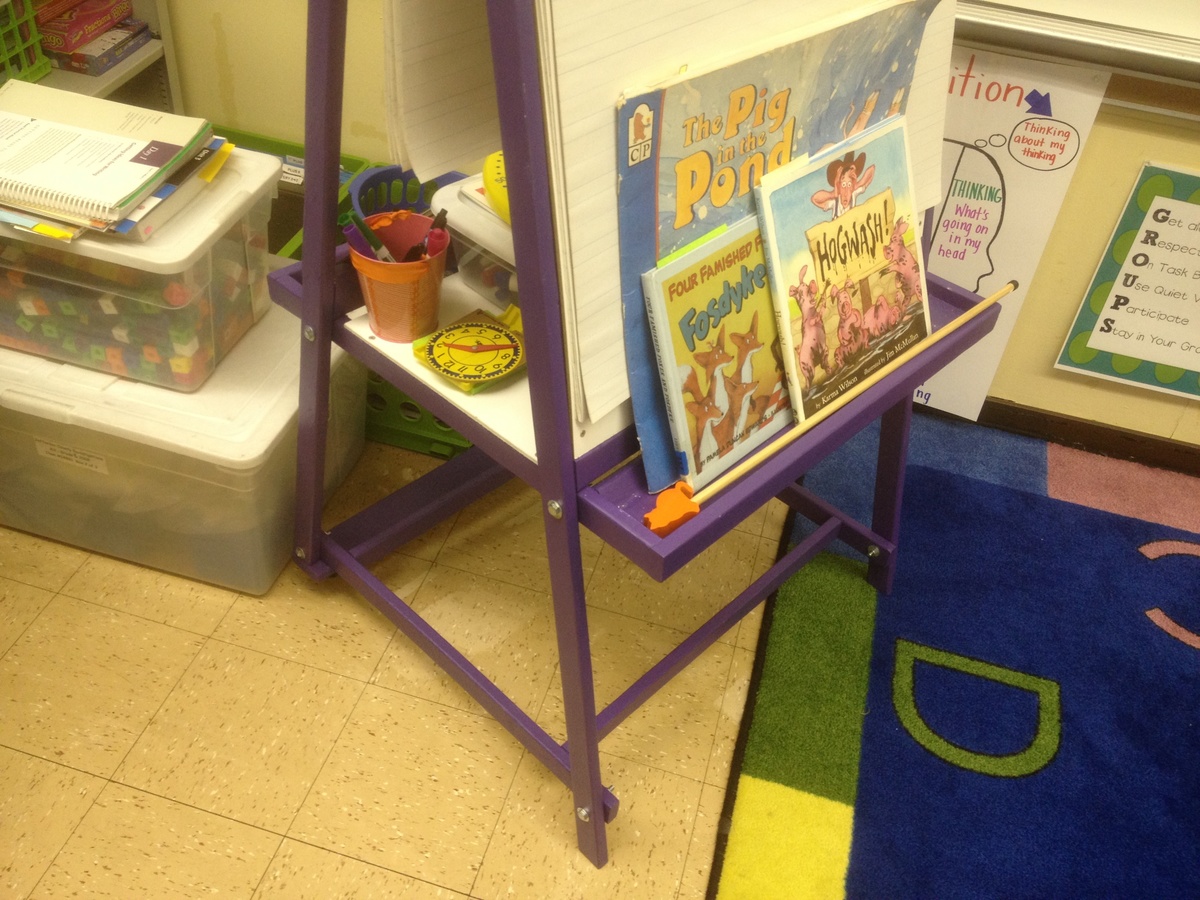
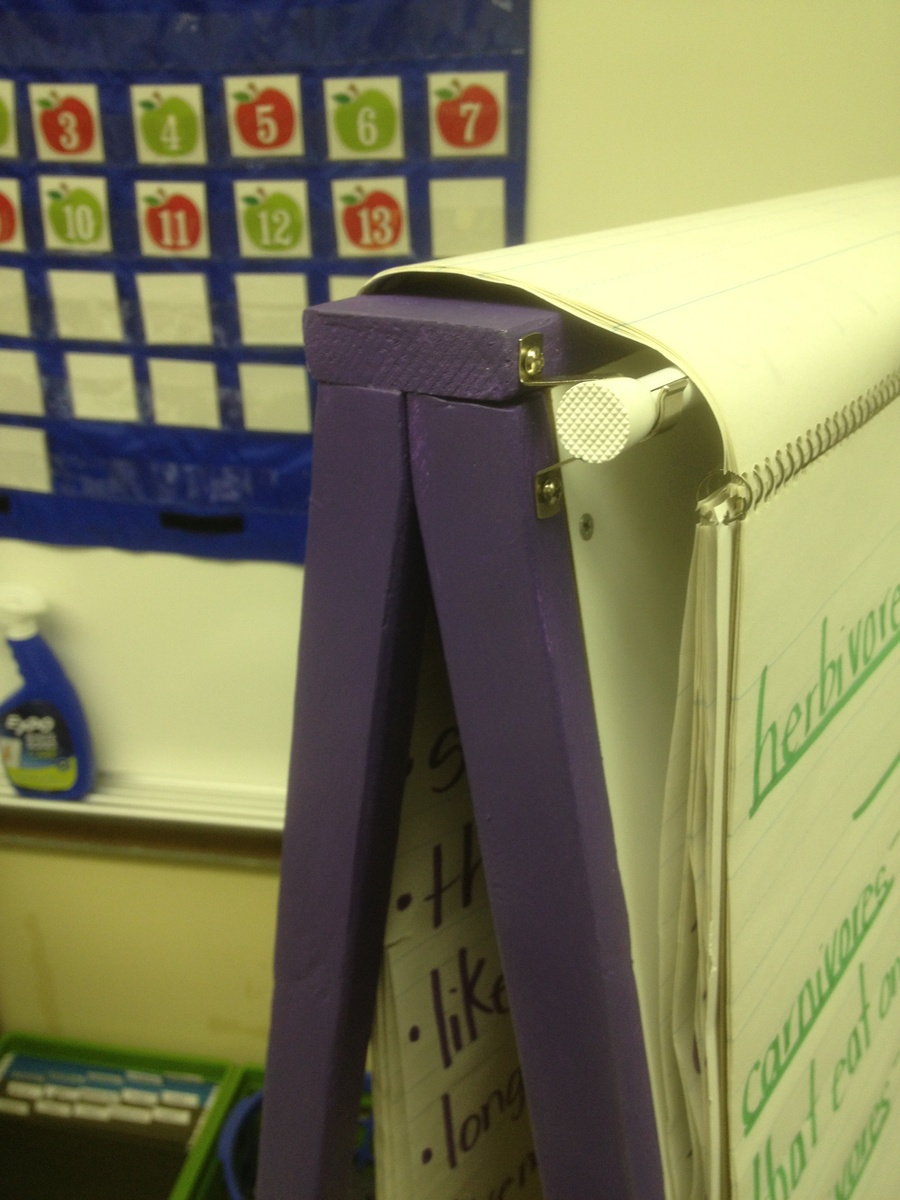
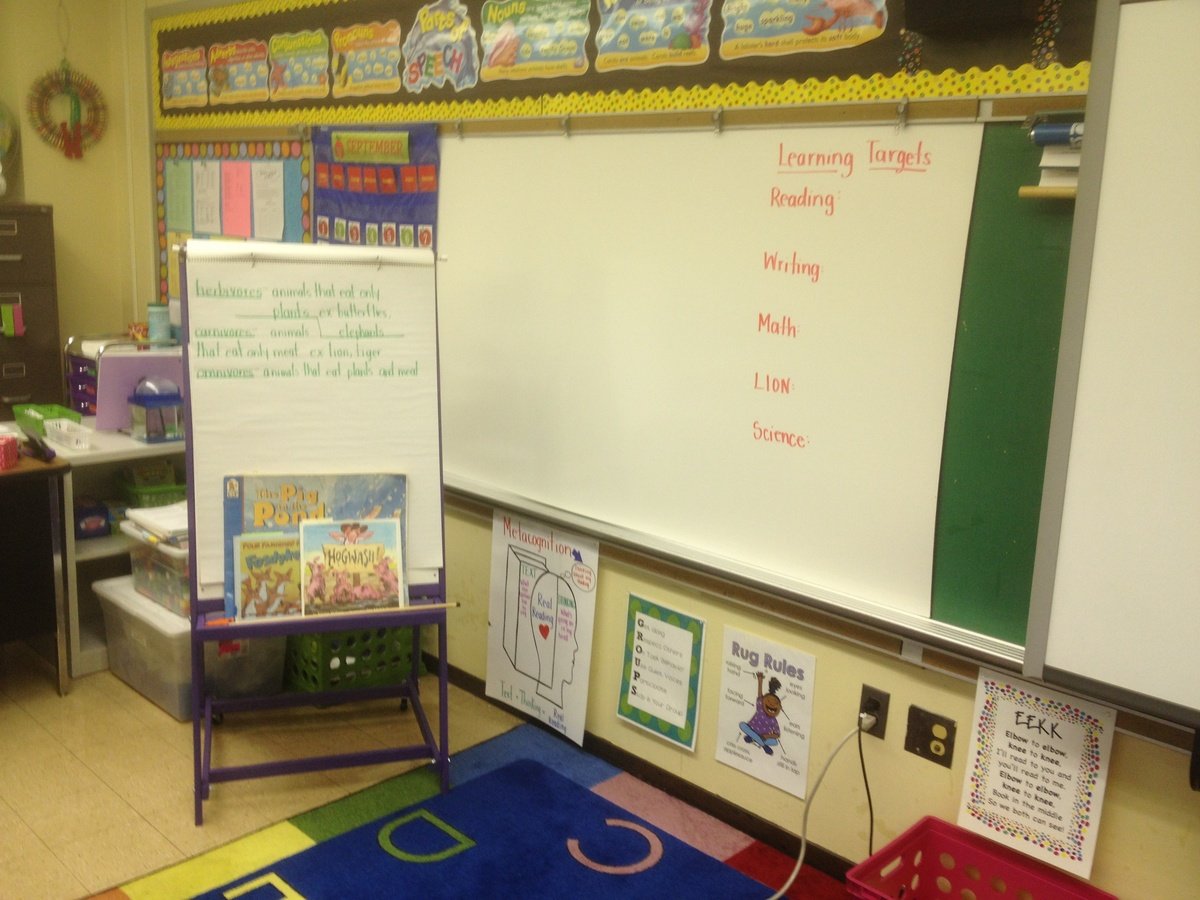
I built this easel for my wife who teaches 2nd grade using the plan on this site. I used a jigsaw to make all the cuts which is why some of them are not perfect. All holes were countersunk and covered with wood filler as I have not yet purchased a Kreg Jig. One sample jar of paint was just enough to cover the whole project with 2 coats. Home Depot sells the whiteboard in 2' x 4' pieces for about $10 in my area. The toughest part was getting the holes to line up just right for the bolts that fix the four main pieces together. Some of them I had to use a little bit of force to make fit. The plan was easy to follow and worked well. I added a curtain rod to the top to hang a paper pad from which I bought for about $5. The big whiteboard behind the easel was hung over the existing chalkboard using industrial strength velcro strips. I bought the whiteboard material from Home Depot for $13 for a 4' x 8' sheet (it is actually called a "hardboard panel board". It works very well with dry erase markers and was an easy, cheap way to install a whiteboard over the current chalkboard.

Built from Plan(s)
Estimated Cost
$40
Estimated Time Investment
Day Project (6-9 Hours)
Finish Used
Behr purple paint sample
Recommended Skill Level
Beginner

Playroom Stage!

Submitted by kdins31 on Thu, 01/02/2014 - 09:48

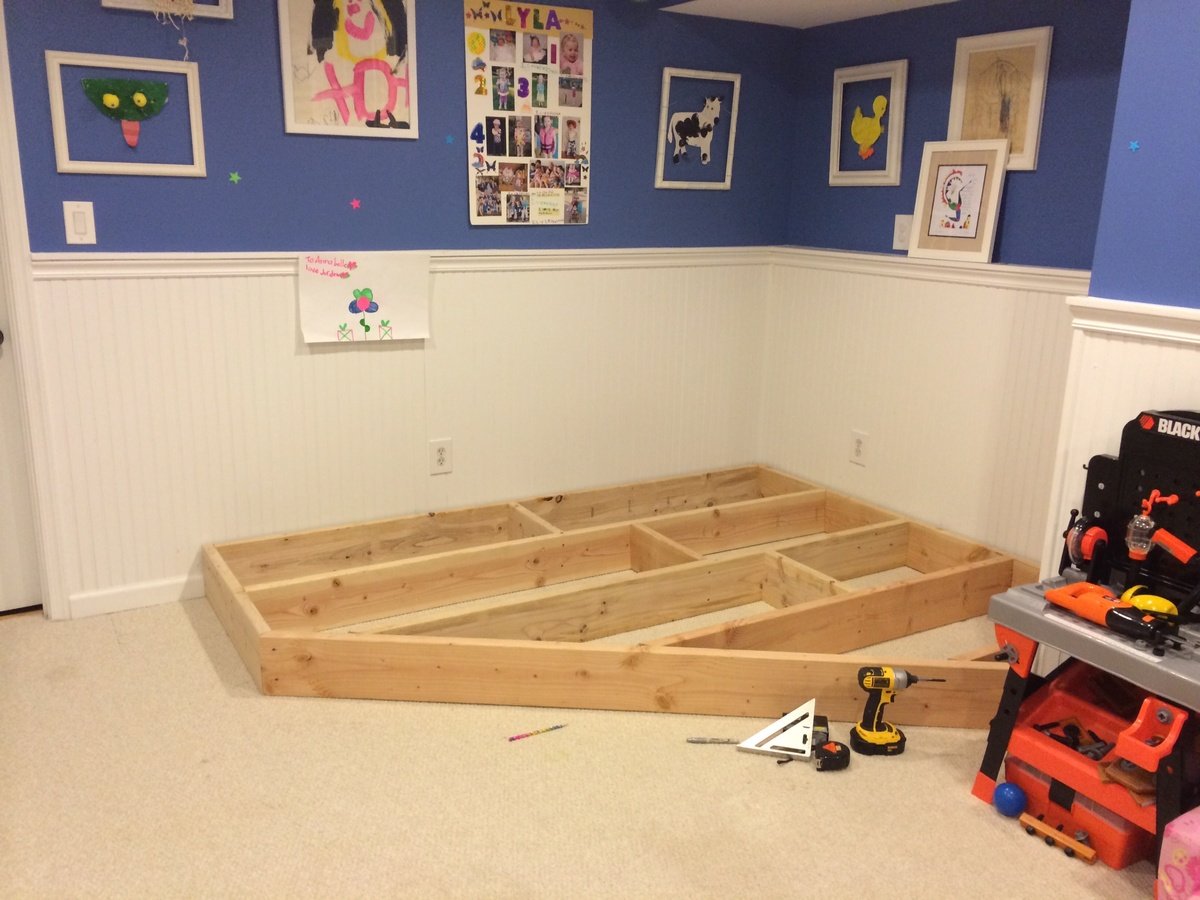
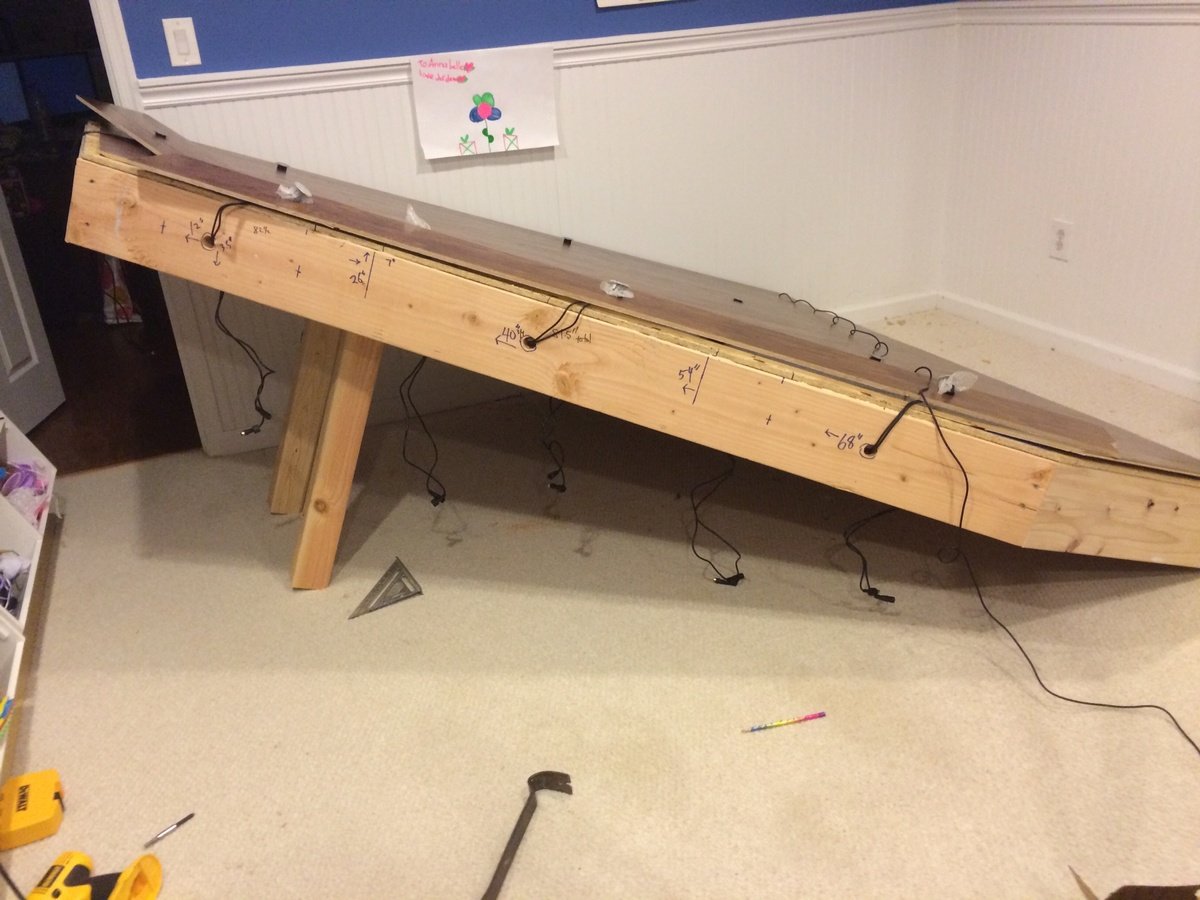
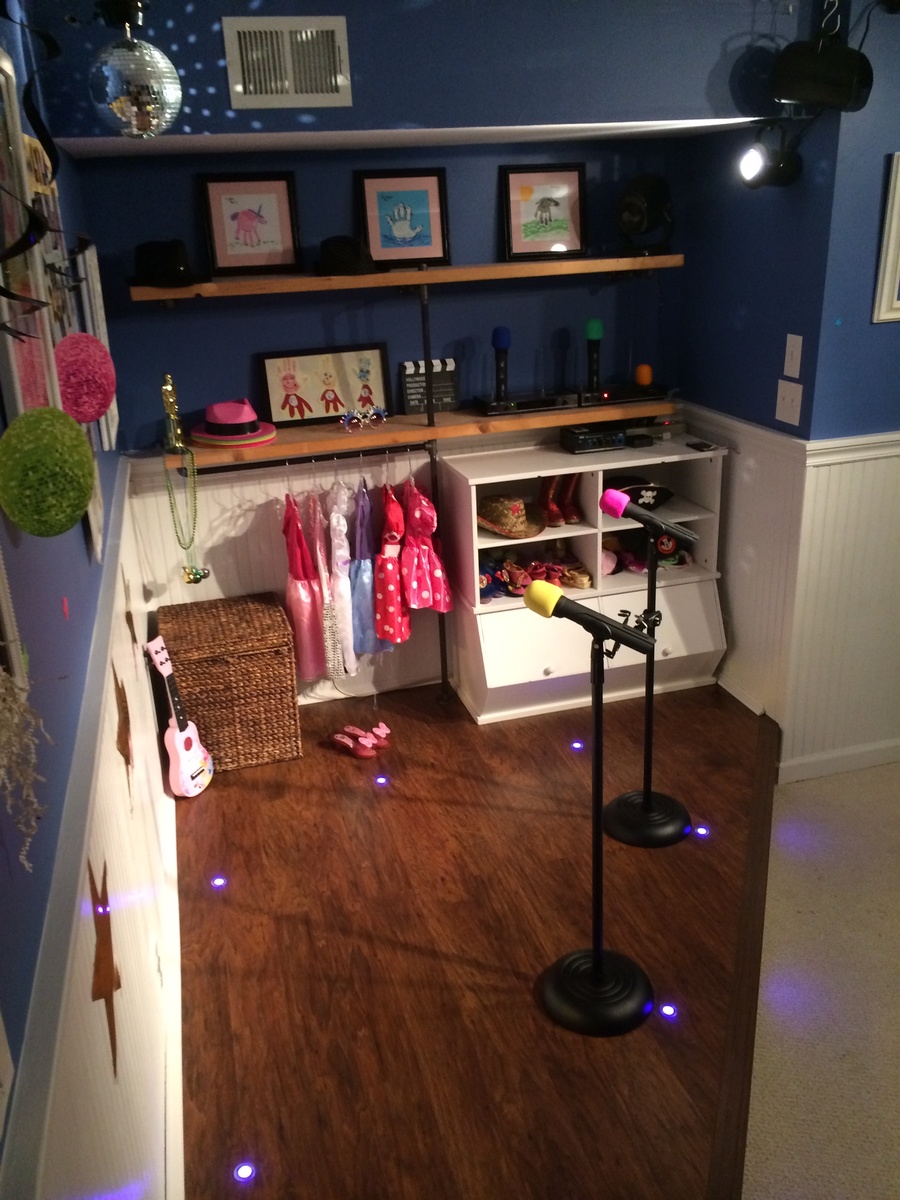
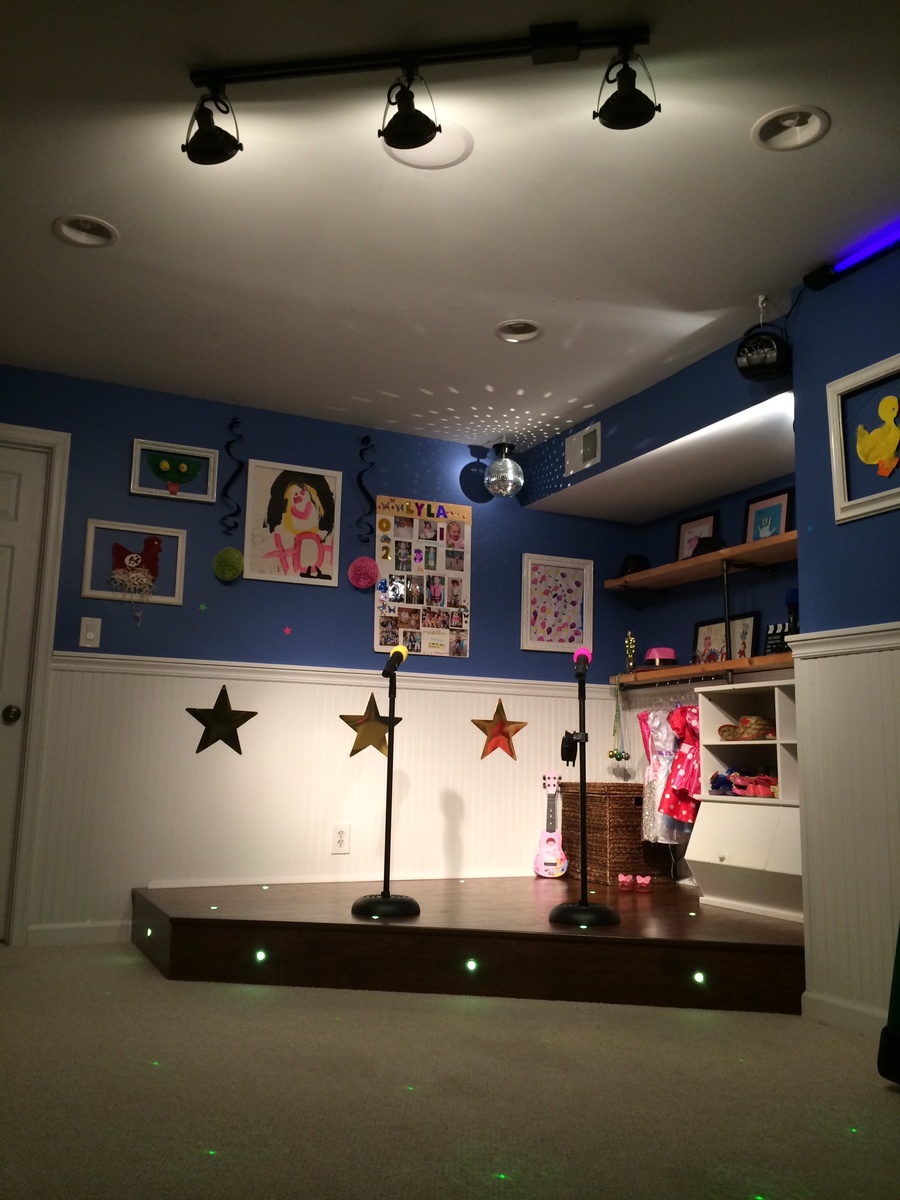
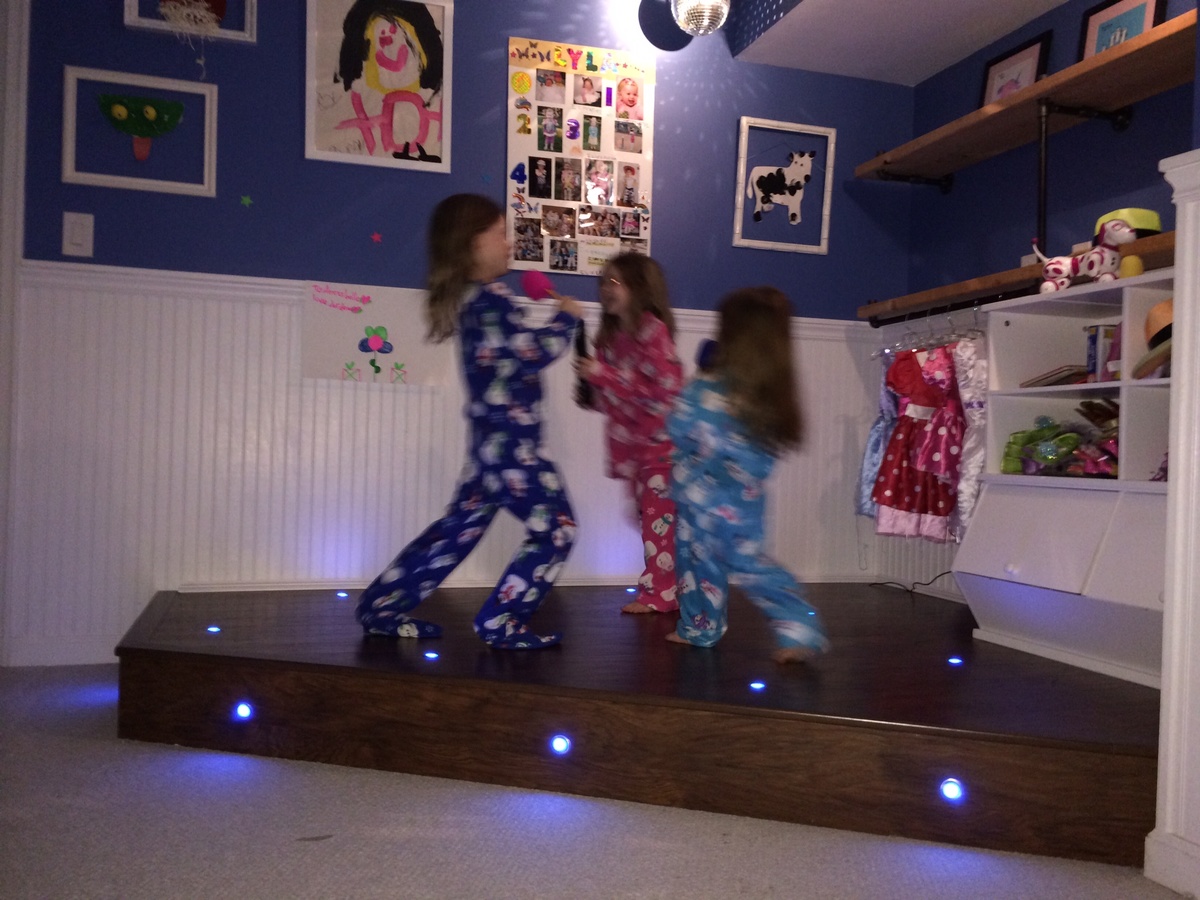
I had a perfect corner in our playroom that was reserved mostly for clutter and always wanted to do something fun with it. The base is made with 2x8"s topped with Handscraped Hickory laminate flooring. Bored holes into the floor and installed 1" diameter color-changing LED decklights. Added theatre-style tracklights, disco ball and other dance floor lighting for extra effect. Of course the stage wouldn't be complete without wireless microphones for karaoke and mic stands hooked up to a small amp and speakers in the ceiling. I made the shelving on the right side with 1/2" black pipe and used leftover 2x12" shelves from an old garage shelving install from 7 years ago! The kids were ecstatic on Christmas morning for the reveal!

Estimated Cost
$125-150 for wood, flooring and moldings. Black pipe is very inexpensive.
Estimated Time Investment
Weekend Project (10-20 Hours)
Finish Used
Send me message if you'd like to know which products I used, e.g. mics, speakers, lights, etc.
Recommended Skill Level
Intermediate

Comments

Garofola2013

Wed, 04/16/2014 - 11:53

I would like to know which products you used...e.g. mics, speakers, lights, etc. We want to do this is in our basement =)

THANKS!

Snix26

Sun, 07/27/2014 - 15:52

This is great! I was just wondering what your dimensions were? I've been looking for something like this to do for my niece but have been struggling to find a plan and figure it out myself LOL.

kdins31

Tue, 08/05/2014 - 05:58

Hello, the back wall is 8' and side wall is 6.5'. The stage comes out about 2.5' on each side then the front is around 7'.

Hope that helps, good luck!

atilley

Tue, 11/18/2014 - 19:37


Great job!! can you tell me where you got the microphones and mic stands for this?


dmbphoenix

Sun, 04/10/2016 - 14:44

Actually, I was wondering ,what lights did you use? I'm working on a very similar project and was curious to the lights your used please.

Mls4460

Wed, 11/13/2019 - 09:53

Do you have the actual plans to build this?

I would love to copy this idea for my 4 year old!

Wood Shop Storage Solutions...

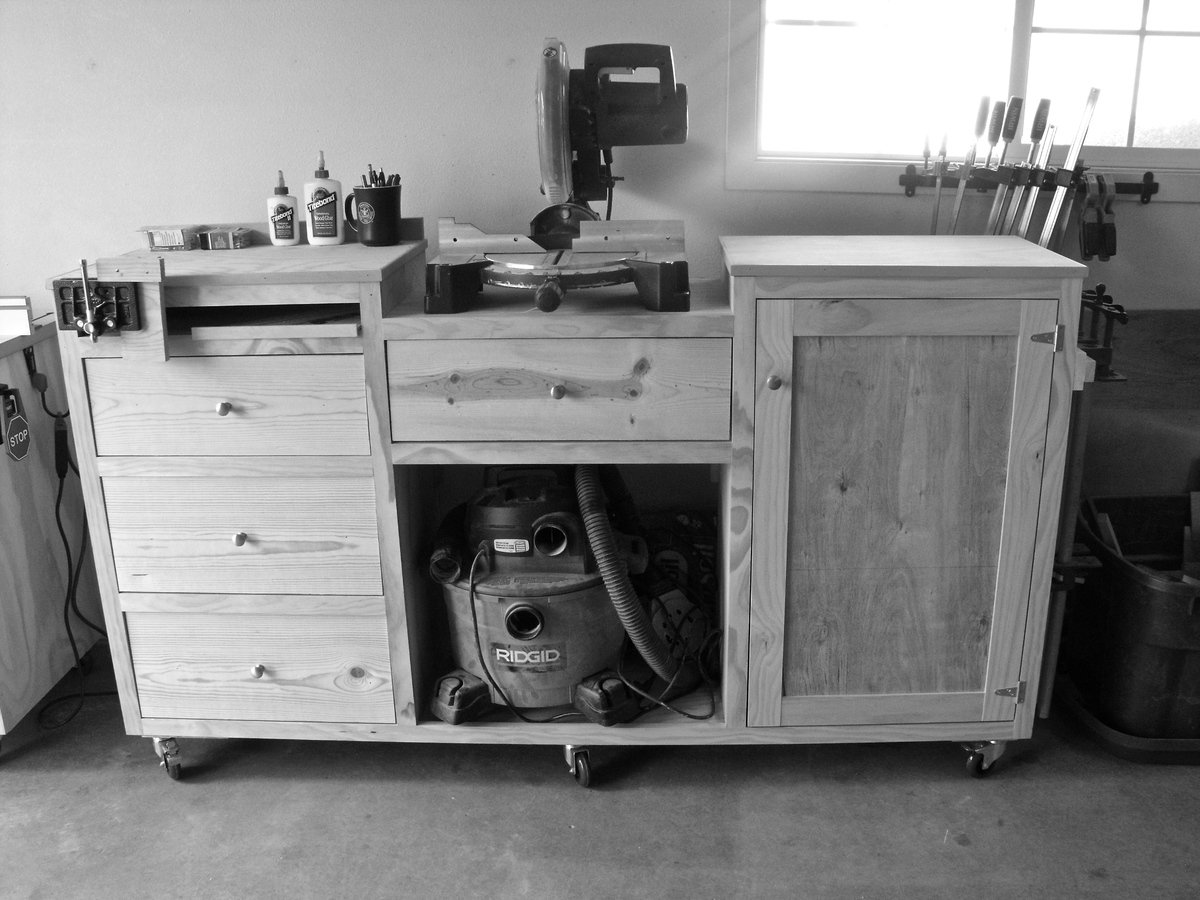
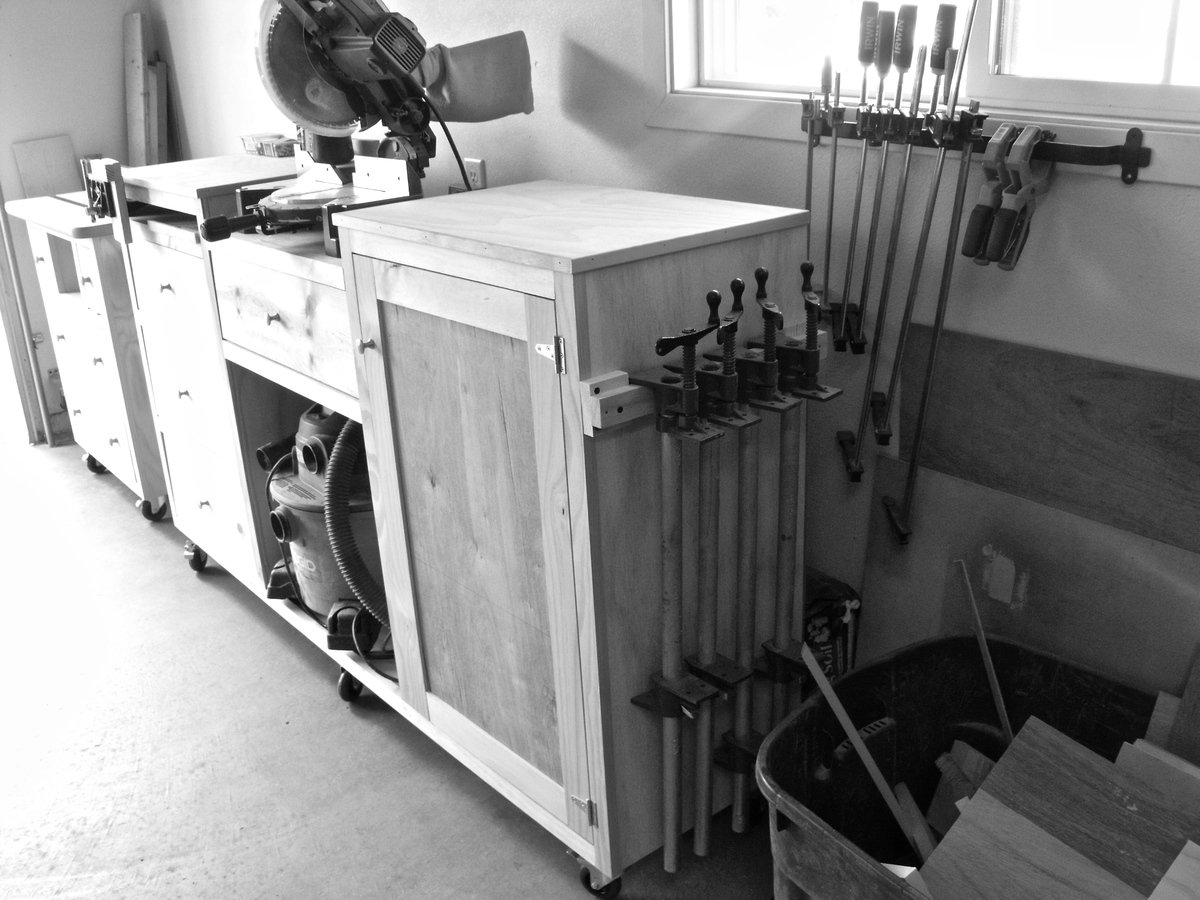
It seems like organization is always a work in progress especially in my one car garage shop. Honestly it took years to realize what I needed to customize my space in order to organize things. I've built bulky work benches out of 2x4s and plywood. I've rearranged the work space over and over again over the last few years and finally came up with my own system

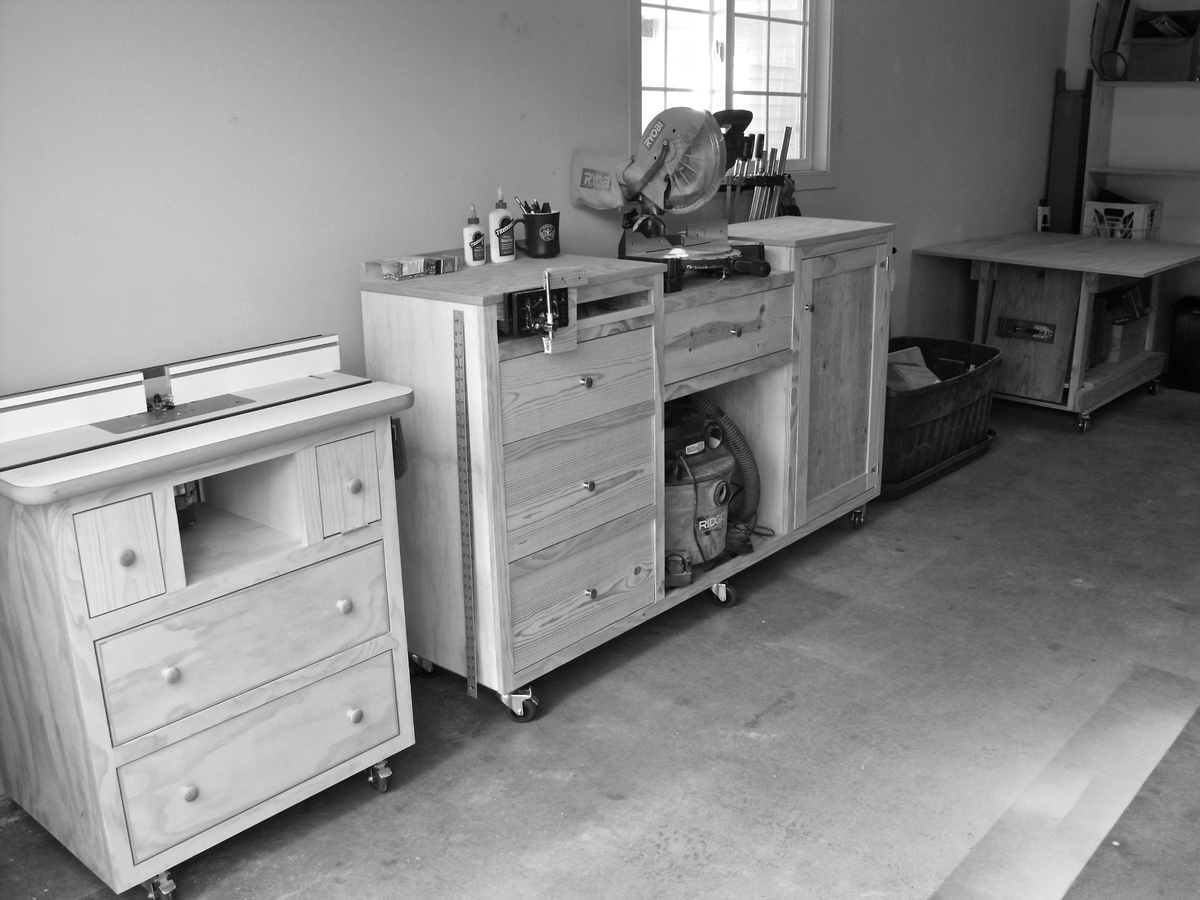
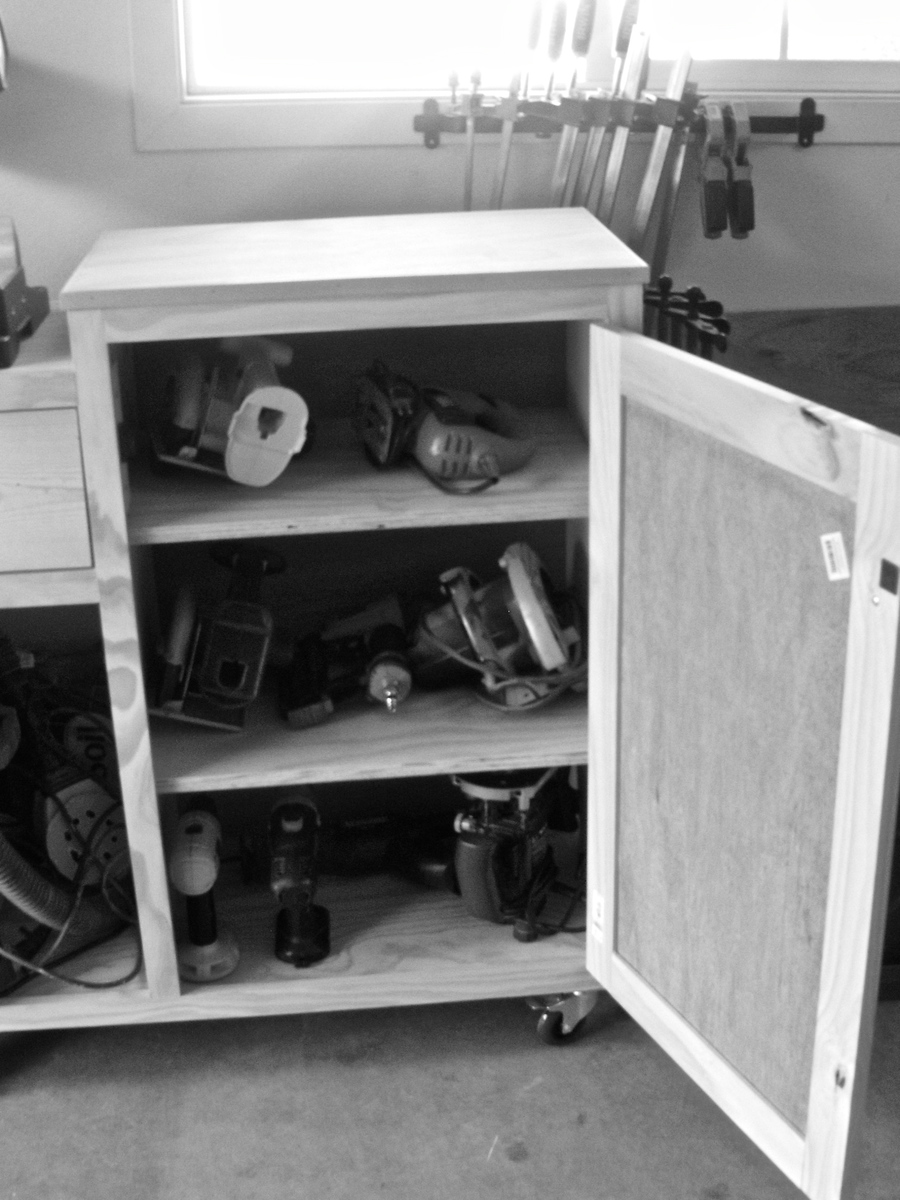
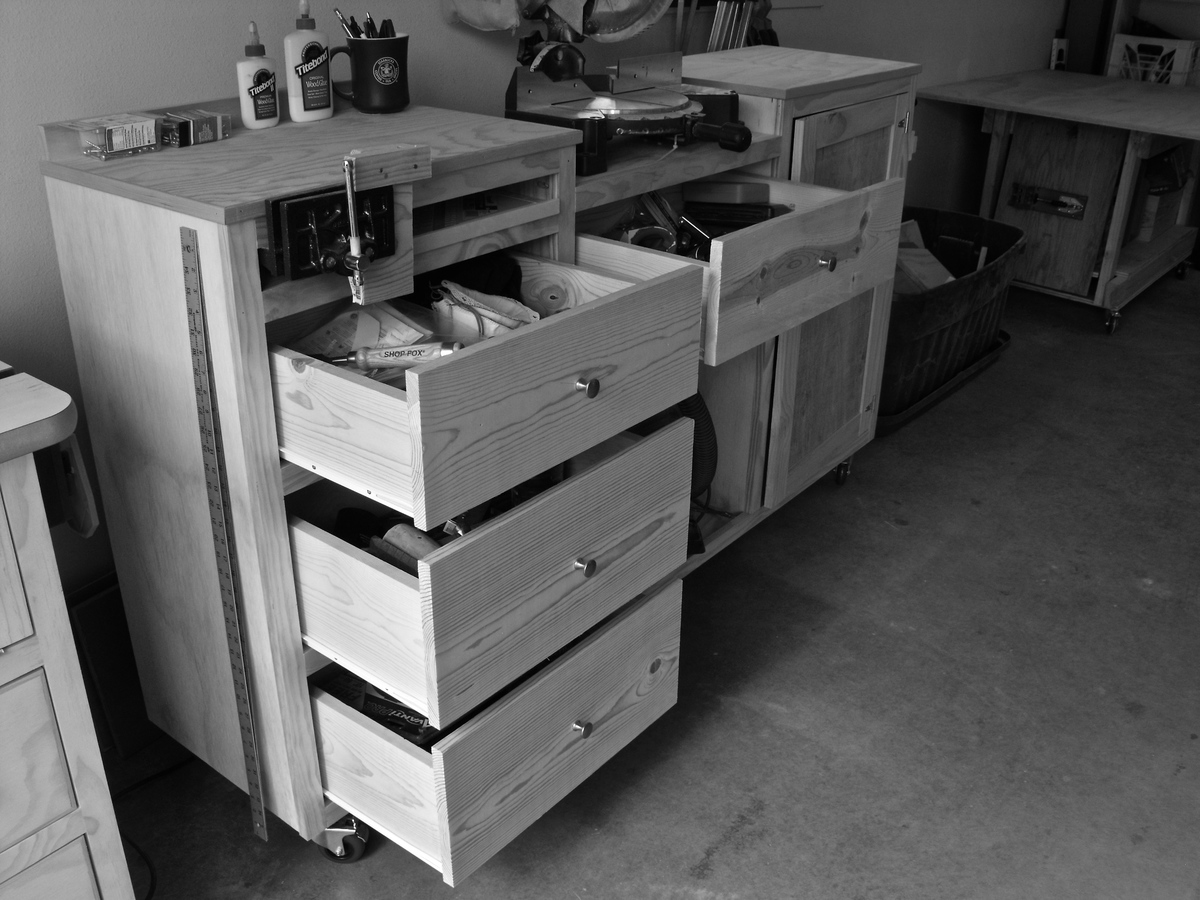
The miter station is a life saver. I had one of the fancy ones with the foldable wings but didn't like it. The object of it was to be able to fold the wings down for storage but I never did and it caused other space saving problems. Now I can easily store all of my small tools and woodworking knick knacks all in one spot. You can find plans for these if you google miter station, but take my advice and custom make one that fits all of your needs. There's a spot for my vice and speed square too. Things like that make it count.

The router table is probably my favorite tool in the shop. You can do so many things with the router table. I started out with just a top and a base and worked from there. Now everything router is in the cabinet ready to go.

Everything is on wheels. Us military guys and gals have to move around a lot so we have to plan for that. Now everything can just roll up the ramp and in to the truck.

Take some time and think about the efficiency of your shop space. How does everything flow? Or do you even flow at all? I used to woodwork myself in to a bunch of brick walls and now I don't.

Thanks for checking it out
Patrick

Estimated Cost
a lot hah
Recommended Skill Level
Intermediate

Comments

birdsandsoap

Fri, 04/06/2012 - 22:05

wow. This is very impressive. I love how tall the pieces are so you don't have to bend down, I'm always working with my tools on the ground and it is a pain.

I covet your router table.

And the miter station is awesome. I just may copy that! I love how it houses all of your other tools as well. OMG! It even holds your shop vac, and has a handy ledge for pipe clamps?! I would love a simple plan.

I'm really curious about your kreg jig setup on that work table too.... details please.

Well Done!

patrickhosey

Sat, 04/07/2012 - 09:20

You've got to get up off the ground. I did that for a looooong time and my back suffered big time.

The kreg jig is mounted to a piece of plywood. Then I drilled 2 holes in the top corners and hung them on the side of the work table.

The miter station has to be custom made for your shop needs but planning it out is very important. I needed a spot for my vice and a quick spot for my speed square. So I calculated all the space needed for 3 drawers and then just added a few inches. Also measure how high your saw sits and recess your work surface exactly that amount.

Grizzly tools has a good deal on simple router table set ups right now. I'd check that out. Eventually the miter saw will be hooked up to the shop vac. I bought an outlet that automatically turns the vacuum on when I use the saw.

It's just like the other stuff. Start with the face frame and the rest will come to you.

Patrick

claydowling

Sat, 04/07/2012 - 11:49

If working without plans makes you twitch, Startwoodworking.com, Fine Woodworking and Popular Woodworking usually all have plans for shop furniture like this. There are enough variations over the years that you can usually find the features you're looking for if you do some mixing and matching. I know there was a very nice router table plan last year.

For the record, I work more like Patrick unless what I'm building gets complex.

birdsandsoap

Sun, 04/08/2012 - 00:25

Me too! i always seem to get inspired by a plan, and by the end of the project, it's totally different than the original because of all of the adjustments I make. I have never even considered building shop furniture before, these photos are inspiring!

Thanks Clay for the link, I will have to go burn some time on that site as well. Someday (when I don't have a leaky garage) I will have a shop worthy of such beautiful equipment.

Great Job again, Patrick!

redhead_61

Sun, 04/15/2012 - 14:24

Uh, this is amazing. Good thing I can tell your shop vac and scraps bin have DUST on them, or I think you might be lying about this somewhere you actually work :) ! I just got around to finishing my work space table. I am planning on doing some major organizing before the heat of the summer hits, and then maybe a router table like this might make it to the top of my list.

Scott Kershaw (not verified)

Mon, 06/11/2012 - 19:56

Patrick, with the recent release of your Farmhouse Table, I find myself watching it over and over and my jaw is always on the floor by the end. In a way, the flow and the craftsmanship is intoxicating. My family is in the process of moving to a new home and I am mostly looking forward to organizing the garage space. I need a man cave and it needs a miter saw station and a router table.

Did you construct it all with pocket holes? What material is the majority of the carcasses, face frames and drawer fronts?

Thanks for the excellent pictures and marvelous video!

Scott

In reply to by Scott Kershaw (not verified)

patrickhosey

Mon, 06/11/2012 - 22:54

The materials are just standard pine boards from Home Depot. White pine for the face frames and drawers and 3/4 pine plywood for the cabinets. I'm glad you like the video and I really appreciate the nice words. We have some new stuff coming up, so be checking back for the router table plan.

Patrick

Scott Kershaw

Tue, 06/12/2012 - 18:36

Do you use a table saw for any of your projects? What would you estimate the cost of the miter saw station, alone, to be? For some odd reason, nice 3/4" birch plywood is the same cost as 3/4" pine/fir plywood here is Missoula, MT. An 8' x 4' sheet goes for ~$45. Is your switch for the vacuum the Rockler product like in this video: http://www.youtube.com/watch?v=7LmSVvOnxsI ? Sorry for all the questions. Your station is by far the closest to the what my mind has been imagining and what my garage could handle. Thanks!

patrickhosey

Tue, 06/12/2012 - 20:18

I just bought a used Grizzly table saw. It's pretty new to me so I'm all excited about learning on it. For the most part I used a circular saw with a straight edge. Now that I have a table saw, all that should go a lot faster. The switch is very similar to that one, but I bought it from sears a few years back. The miter station is hard to make plans for. Every miter saw is different so the platforms need to be different sizes to match whatever saw you're using. Then you have to keep in mind the size of your shop vac and design it around that as well.

claydowling

Wed, 06/13/2012 - 05:31

Table saws are something that can last fifty years or more without any trouble, so you can get them used pretty readily. You want to buy a good sturdy saw. Locally the used market is dominated by Craftsman/Sears saws. The saws made before 1962 were made by King-Seeley, a company local to me, and those are pretty good saws (I own one and really like it). The ones made after that were made by Emerson Electric, and the owners of those saws have not had such kind things to say about them.

cmm314

Tue, 09/16/2014 - 06:30

Hi Patrick,

I am in the process of desinging a similar miter station, but am curious as to how long your's is?  Some of the recommendations call for a full 8 ft long base, but not sure I have the space in my garage for something like that.  What is the length of yours?

Thanks!


justinjester

Thu, 06/02/2016 - 13:55

Hey Patrick. Thank you for providing so many plans to such beautiful pieces.  I am about to start working on the router station this weekend.  I can't wait to get started.  The reason for the message, could you possibly provide the plans for the miter station you created.  I am a new woodworker and I need plans to be able to create some of these pieces.  I would love to have a garage of similar pieces.  Is that something you could provide?  I would be happy to purchase it from you.  Thank you again for your hard work. - Justin

Desk featuring "X" legs - farmhouse style

Submitted by Anonymous (not verified) on Fri, 12/27/2019 - 07:20

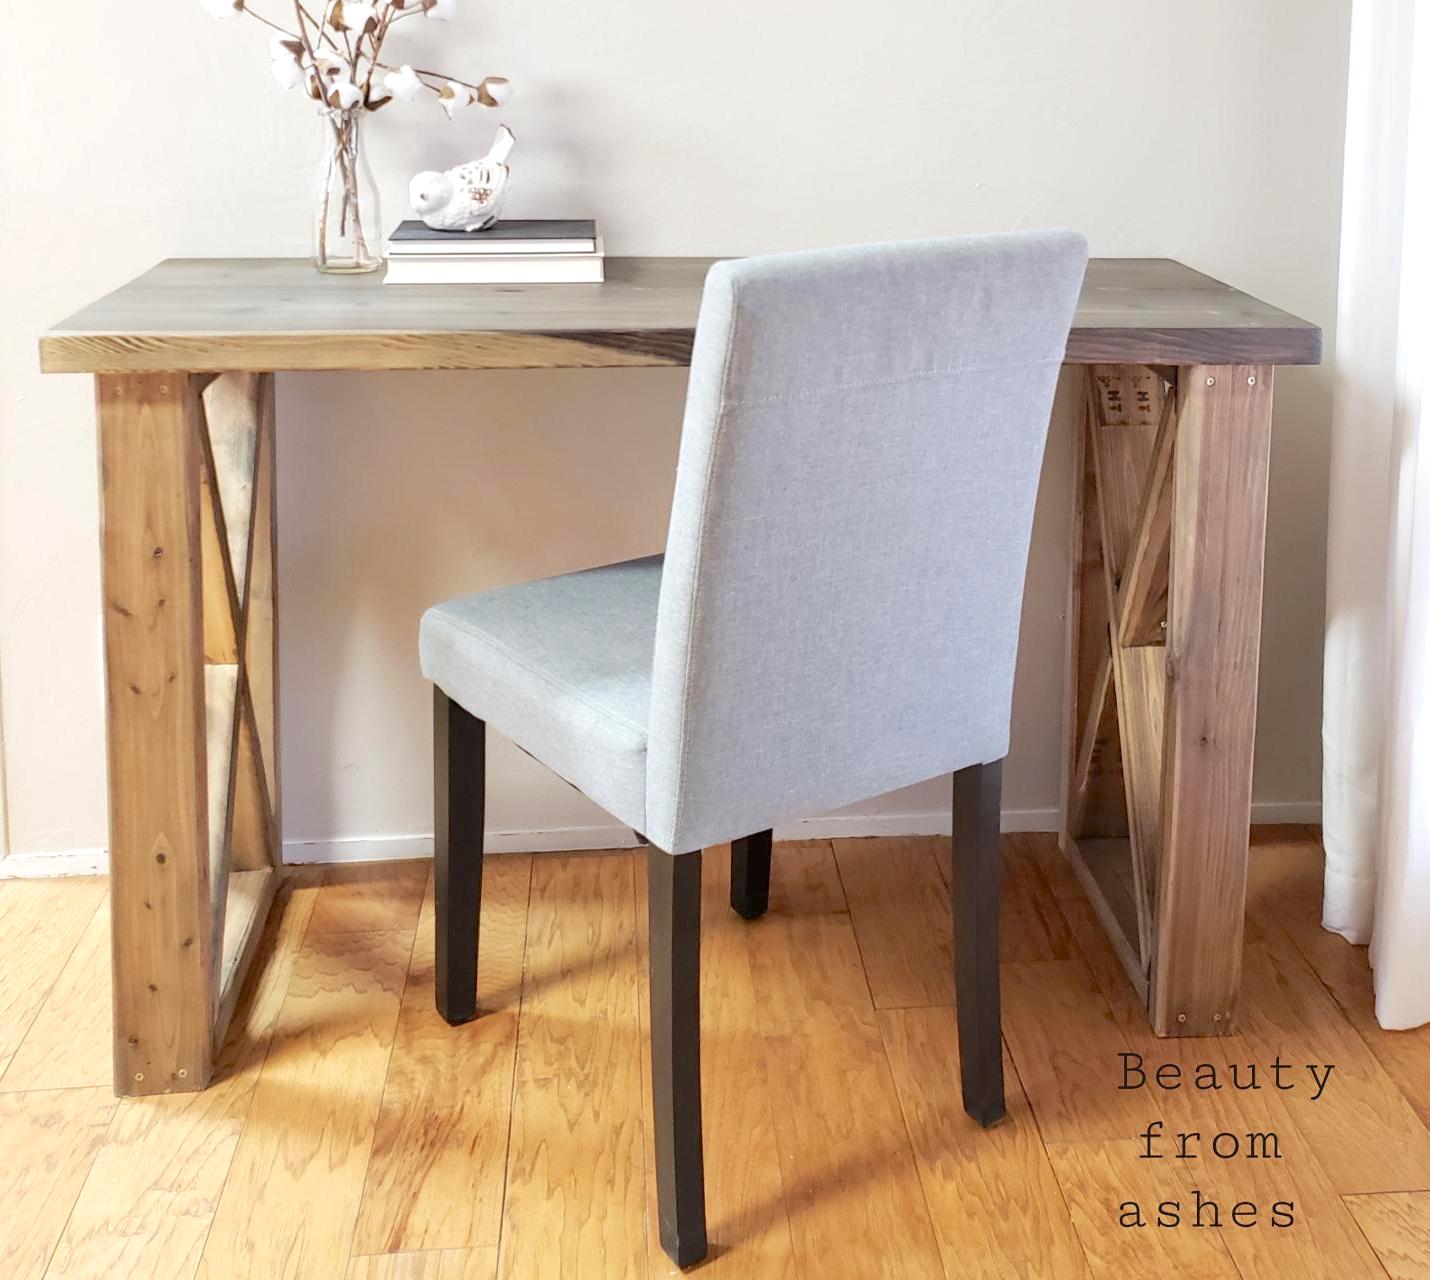
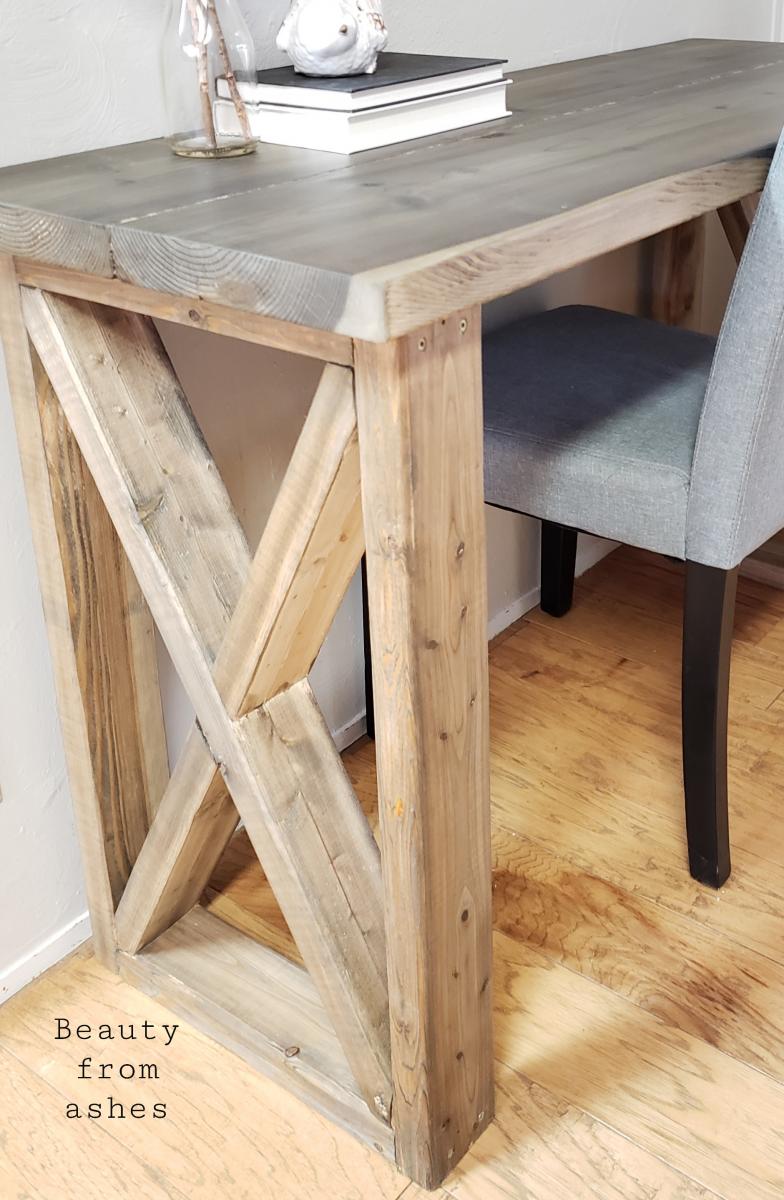
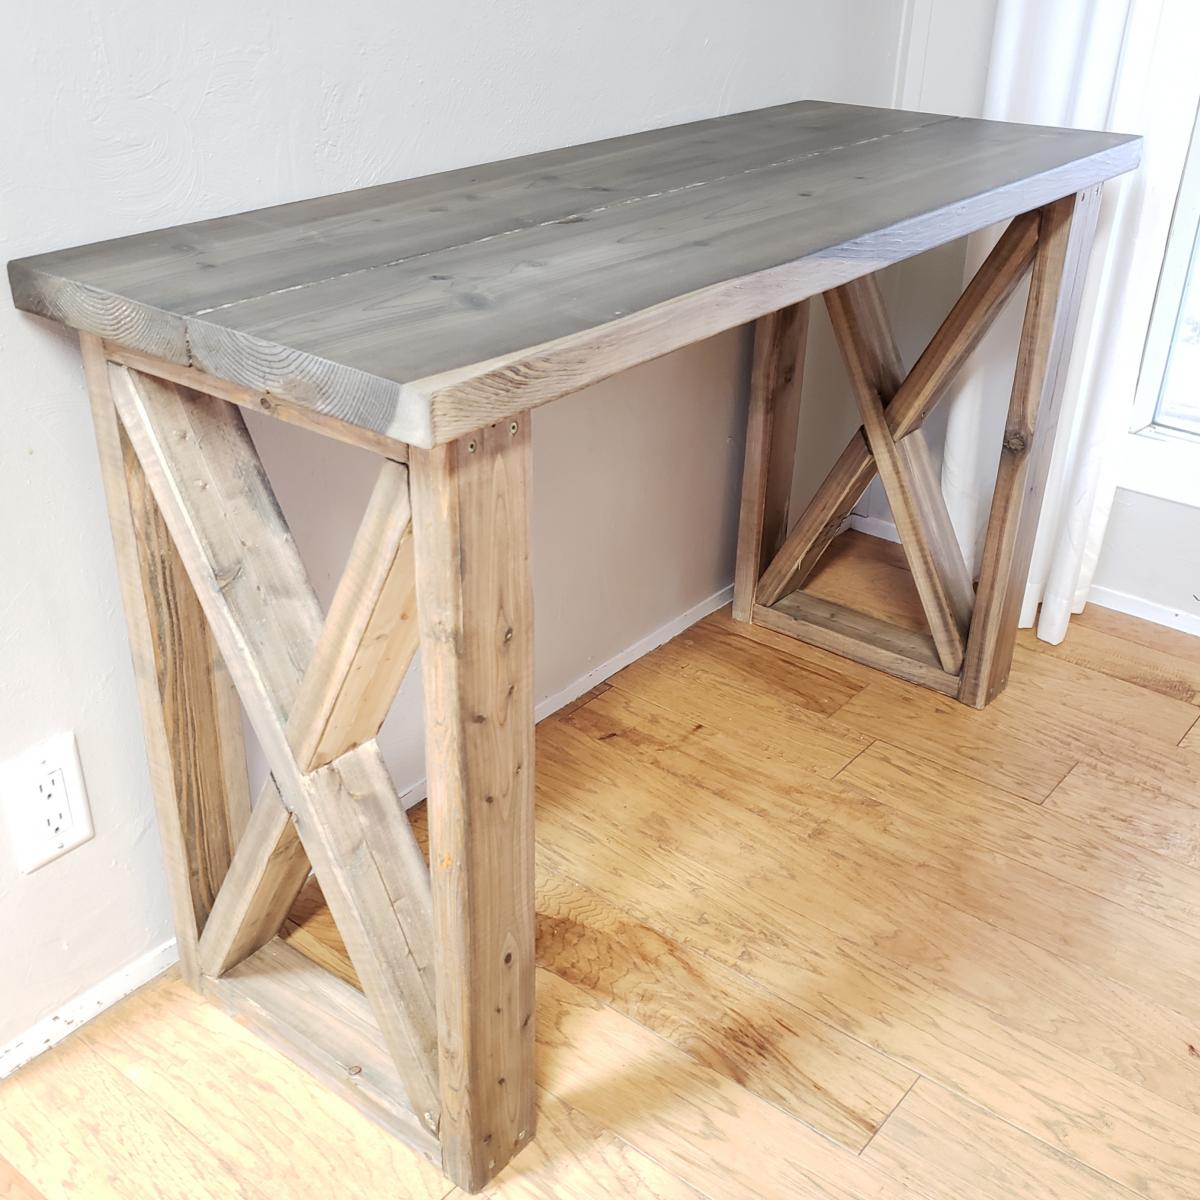
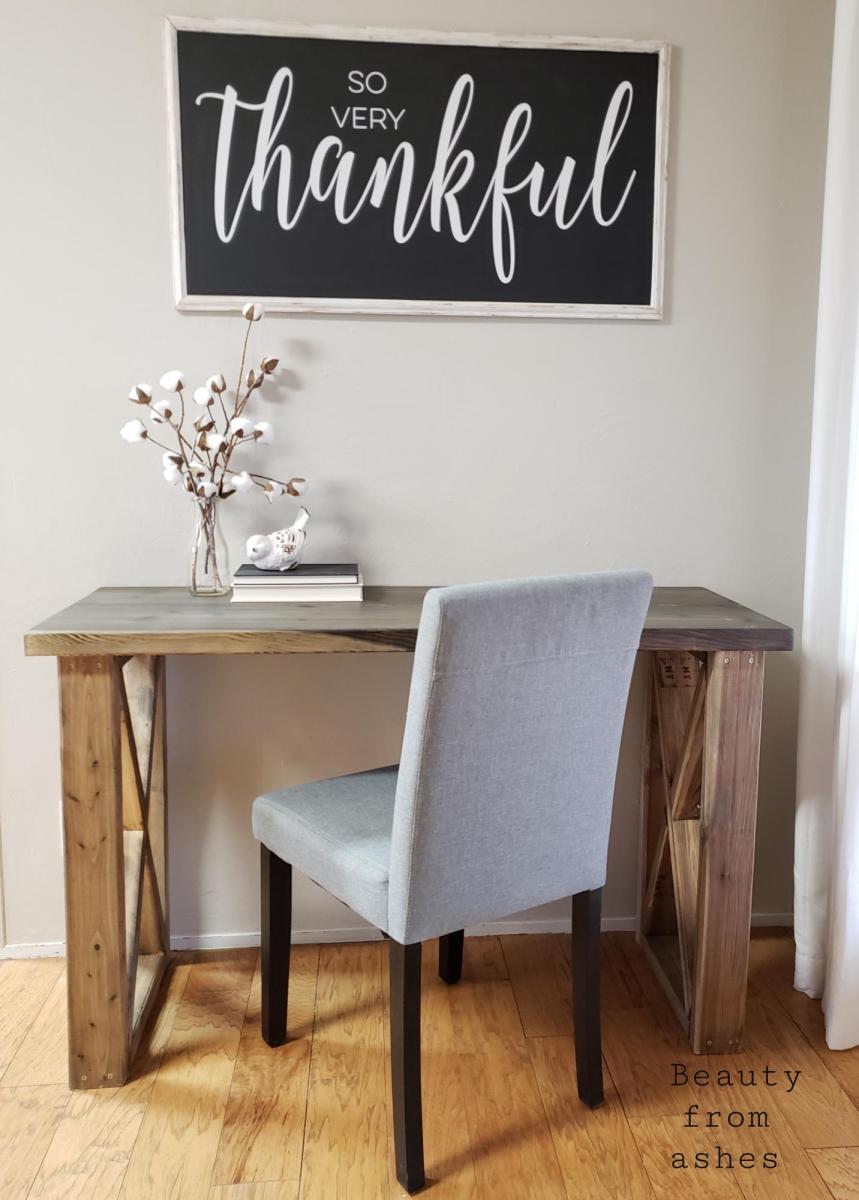
I built this table for my son to use as a "Lego building station" in his room. I made it narrower (18" deep) x 4' long to fit along three wall in his small room. I had some trouble chiseling out the piece for the "X" part to interlock and ended up just cutting the piece through like Anna does with her "$40 farmhouse coffee table", which worked well. I sanded and then stained using homemade vinegar and coffee stain and sealed with water based polyurethane in matte finish.

Built from Plan(s)
Estimated Cost
$35
Estimated Time Investment
Afternoon Project (3-6 Hours)
Finish Used
I mixed up a homemade batch of coffee stain (vinegar, coffee, steel wool) and top coated with Matte polyurethane.
Recommended Skill Level
Intermediate

Comments

OCTAGON PICNIC TABLE

Submitted by BigBry on Sat, 03/01/2014 - 07:36

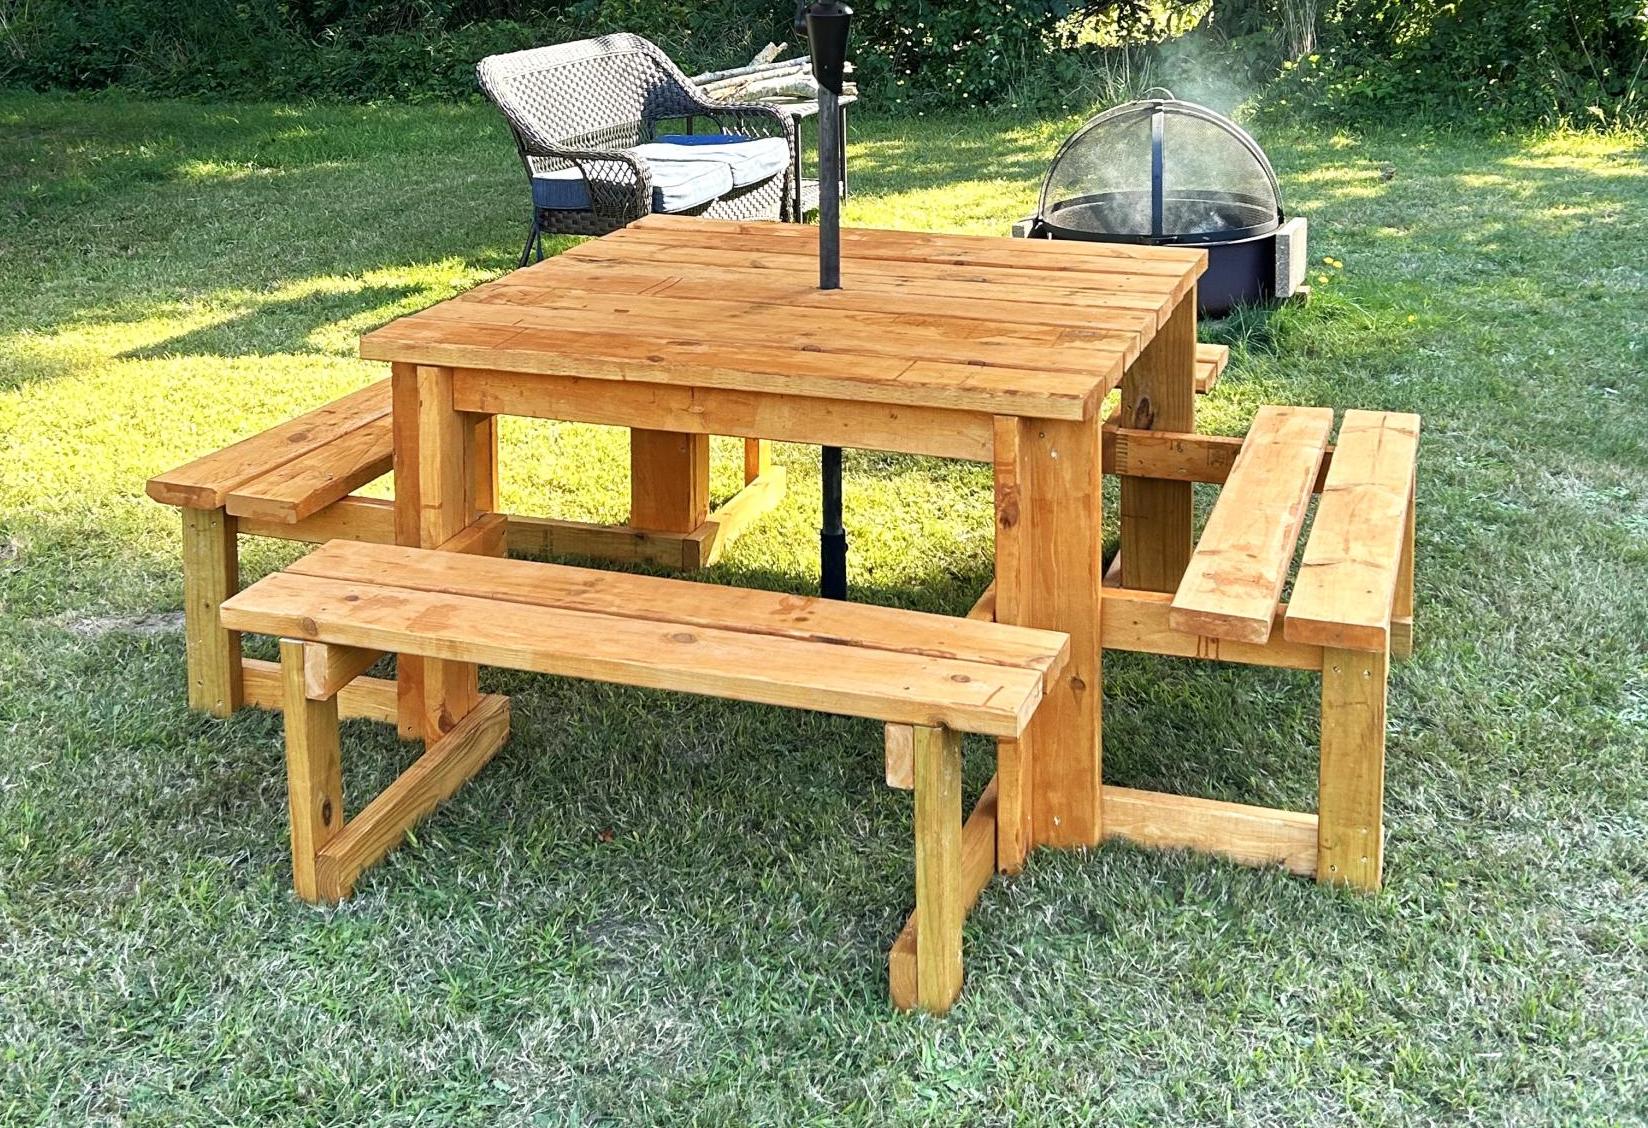
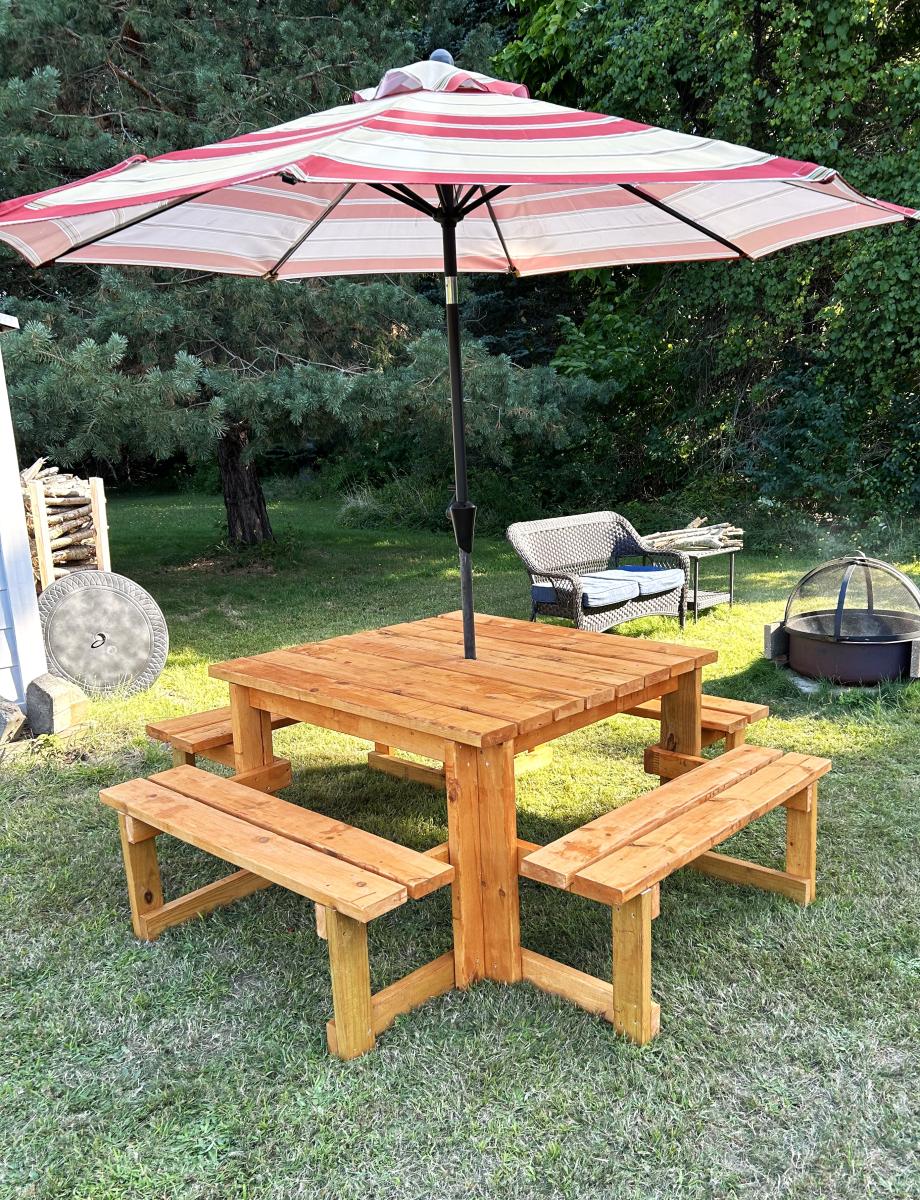
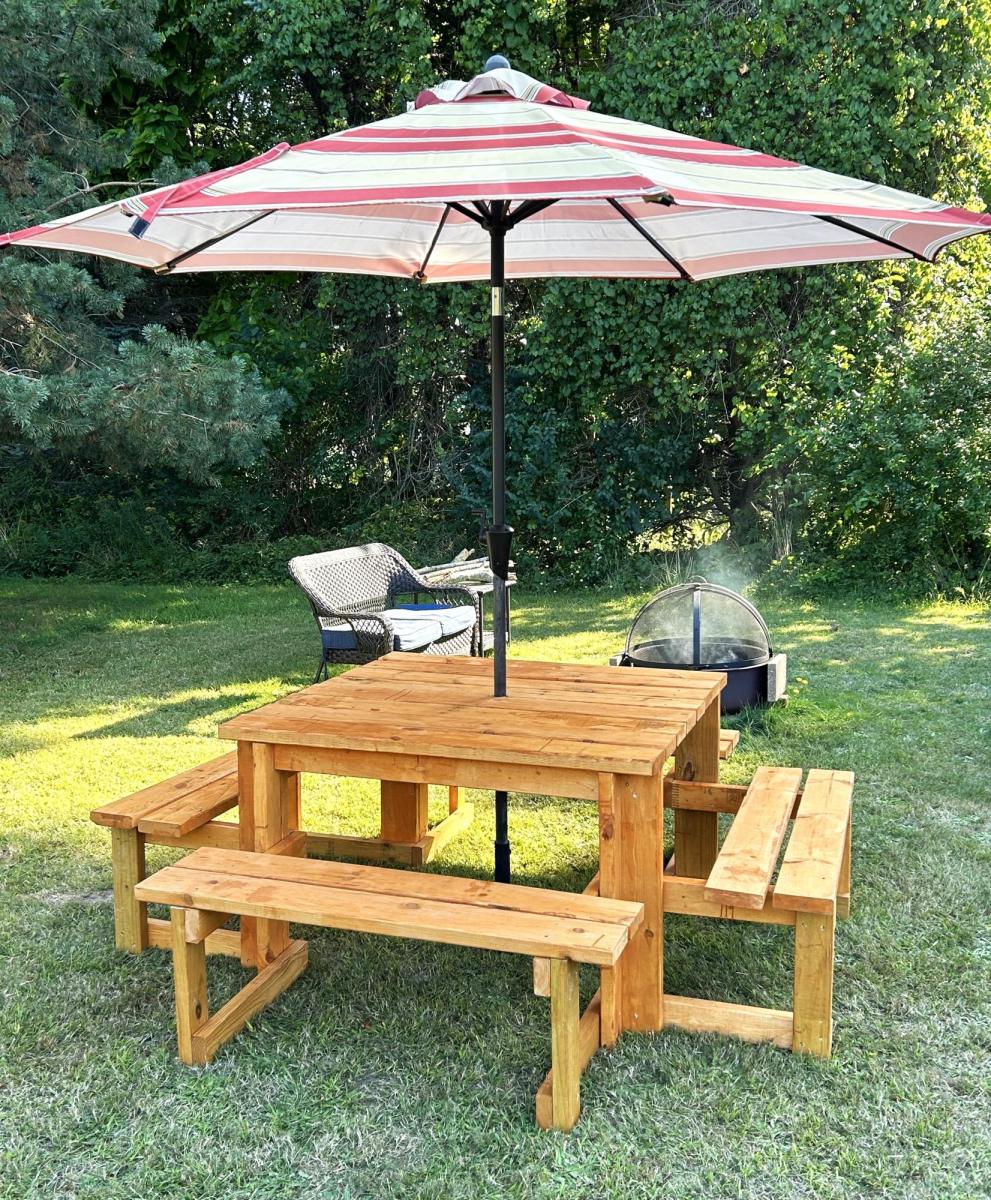
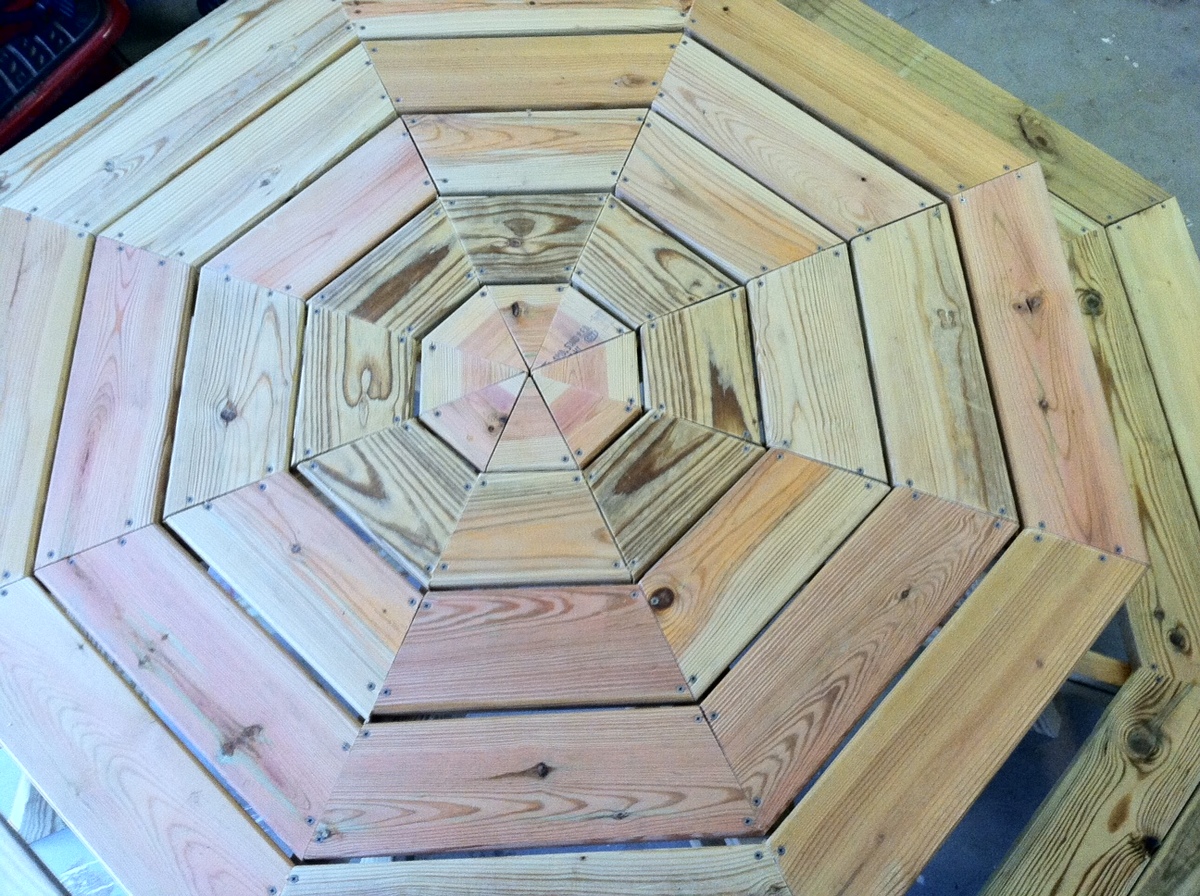
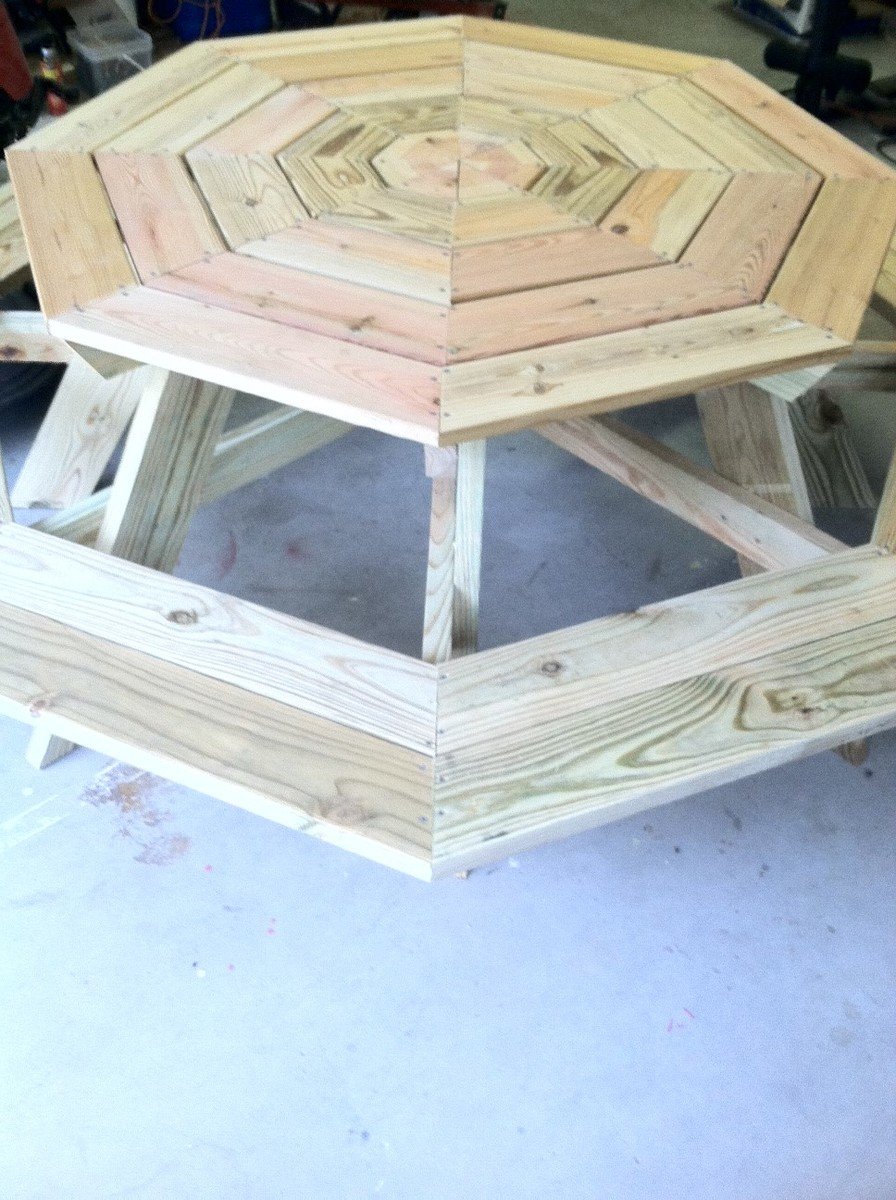
My son and I had a blast building this table last October. I have been meaning to write and thank you for the great plans. We took the suggestion of staggering the legs for better access and it turned out great. I also used deck boards for the top to help reduce weight and they were already slightly curved on the sides which made sanding easier. Thank you!
My cost includes a nice Kreg Jig set up (approx $100)

Built from Plan(s)
Estimated Cost
$220
Estimated Time Investment
Weekend Project (10-20 Hours)
Recommended Skill Level
Intermediate

Beginner Bar Stools

Submitted by pchireah on Sat, 07/14/2012 - 13:20

This was my first time building anything, since the tool box I made in wood-shop in highschool! I made the stools about 3" shorter than the plans to accommodate our low counter height. Otherwise, I really had no idea what I was doing, but learned a lot through the process. Also, I don't really have a great work space, other than the 10'x10' second bedroom in our NYC apartment. At least all the dust can stay in one place. Looking forward to my next project of an outdoor table for our terrace - I'm hooked!!! Thanks Ana for making this so accessible. Some of my friends now want to come over and build projects for their apartments too!

Built from Plan(s)
Estimated Cost
I have no idea. I had to purchase everything from saws to nails to wood glue and wood. Also I bought the wood in multiple stages. Wood in NYC is too expensive, but I probably spent around $100 on wood for all three stools.
Estimated Time Investment
Day Project (6-9 Hours)
Finish Used
on the top, Antique Walnut gloss stain and poly in one, sanded down after the fact and Ultra Pure White, paint and primer in one - two coats.
Recommended Skill Level
Starter Project

Old English Style Farmhouse Dining Table

Submitted by Anonymous (not verified) on Sun, 11/27/2016 - 06:12

First table my husband and I have ever made, and it turned out beautifully!

Built from Plan(s)
Estimated Cost
$150
Estimated Time Investment
Afternoon Project (3-6 Hours)
Finish Used
Minwax Provincial Stain, 2 Coats
Recommended Skill Level
Beginner

XL Modern Craft Table

I modified this plan so I could have 4 total work areas. Total Size: 48" x 96"

Built from Plan(s)
Estimated Time Investment
Weekend Project (10-20 Hours)
Finish Used
White paint to match walls and trim (SW Alabaster)
Recommended Skill Level
Intermediate

Comments

briannamcelfresh

Tue, 09/08/2020 - 19:42

Is there anyway you can share these plans with me!? I drew out some plans for an identical table but I think my cuts may be off! It would be so helpful.

My First Build -- the $55 Fancy X Desk

This was my first build EVER. I had never even used a saw before, so if I can do this, so can YOU!

The original plans call for this desk to be 72" in length, but my space only allowed for a 60" desk, so I cut the 3 braces that go along the back down by 12", as well as the 2x6s that make the desktop. The cross-braces in the back were also cut down, but I did that by measuring for fit (as demonstrated by Ana in one of her videos where she made the x-bench).

I described this as a weekend project ONLY because of the time I had to allow between coats of paint, etc. I built it easily in one day (with kids at home!).

This was a GREAT experience and I am HOOKED! Thanks to Ana and Shanty-2-Chic for designing this!

Built from Plan(s)
Estimated Cost
$35
Estimated Time Investment
Weekend Project (10-20 Hours)
Finish Used
I painted the base with flat black paint, and the top of the desk with Minwax Jacobean stain (primed with the Wood Conditioner first, and finished with the Polcyrilic Spray that Ana recommends).
Recommended Skill Level
Intermediate

Comments

Lianna (not verified)

Tue, 01/08/2013 - 08:27

I hope to build this desk this week! Your post timing is great! AND your end result is gorgeous!!!

berryrach89

Thu, 01/10/2013 - 19:31

I absolutely love this. I've been searching for a new desk and I think I want to copy yours. Love it.

Jodye (not verified)

Fri, 01/11/2013 - 00:35

Well done...I too have been contemplating giving this ago. Our out door glass table exploded due to the heat here in Australia on monday...never going glass again...did I mention the nightmare clean up job :-((
Im building the big version....Im excited..you did it so I can too!

Pool equipment fence refresh

Submitted by Anonymous (not verified) on Thu, 07/06/2017 - 21:00

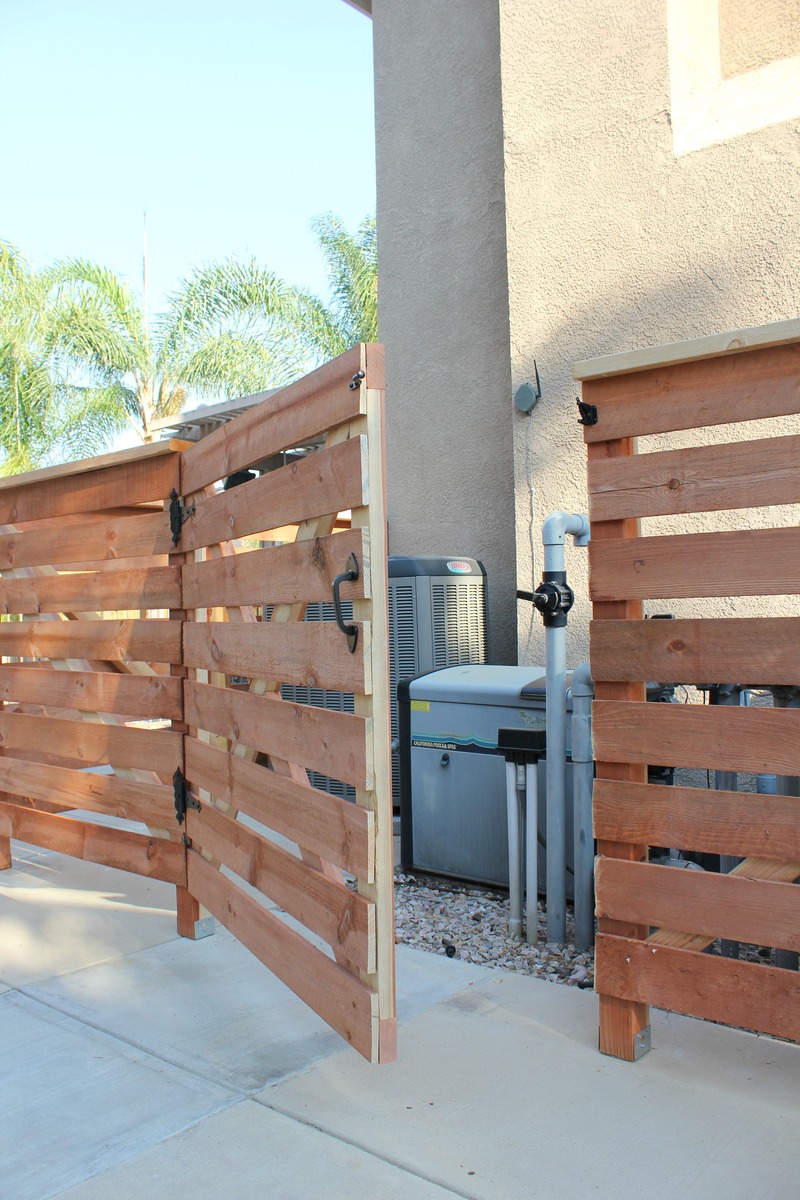
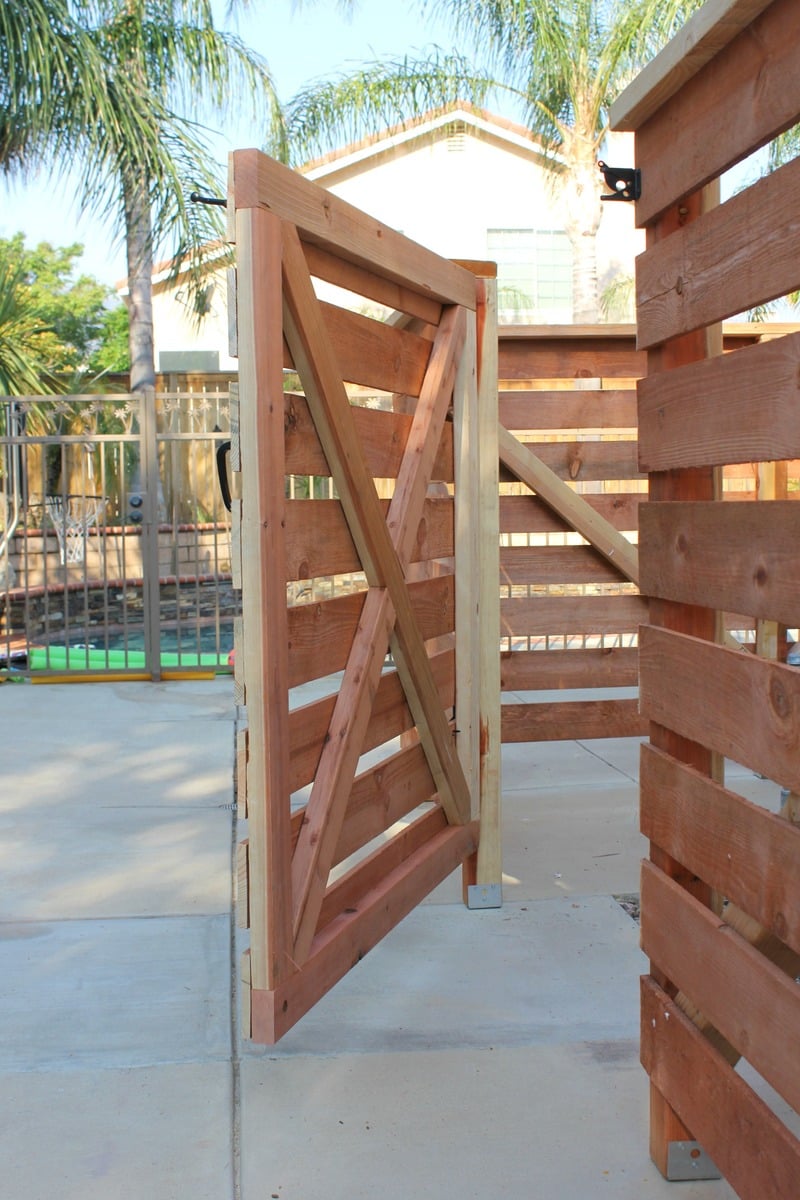
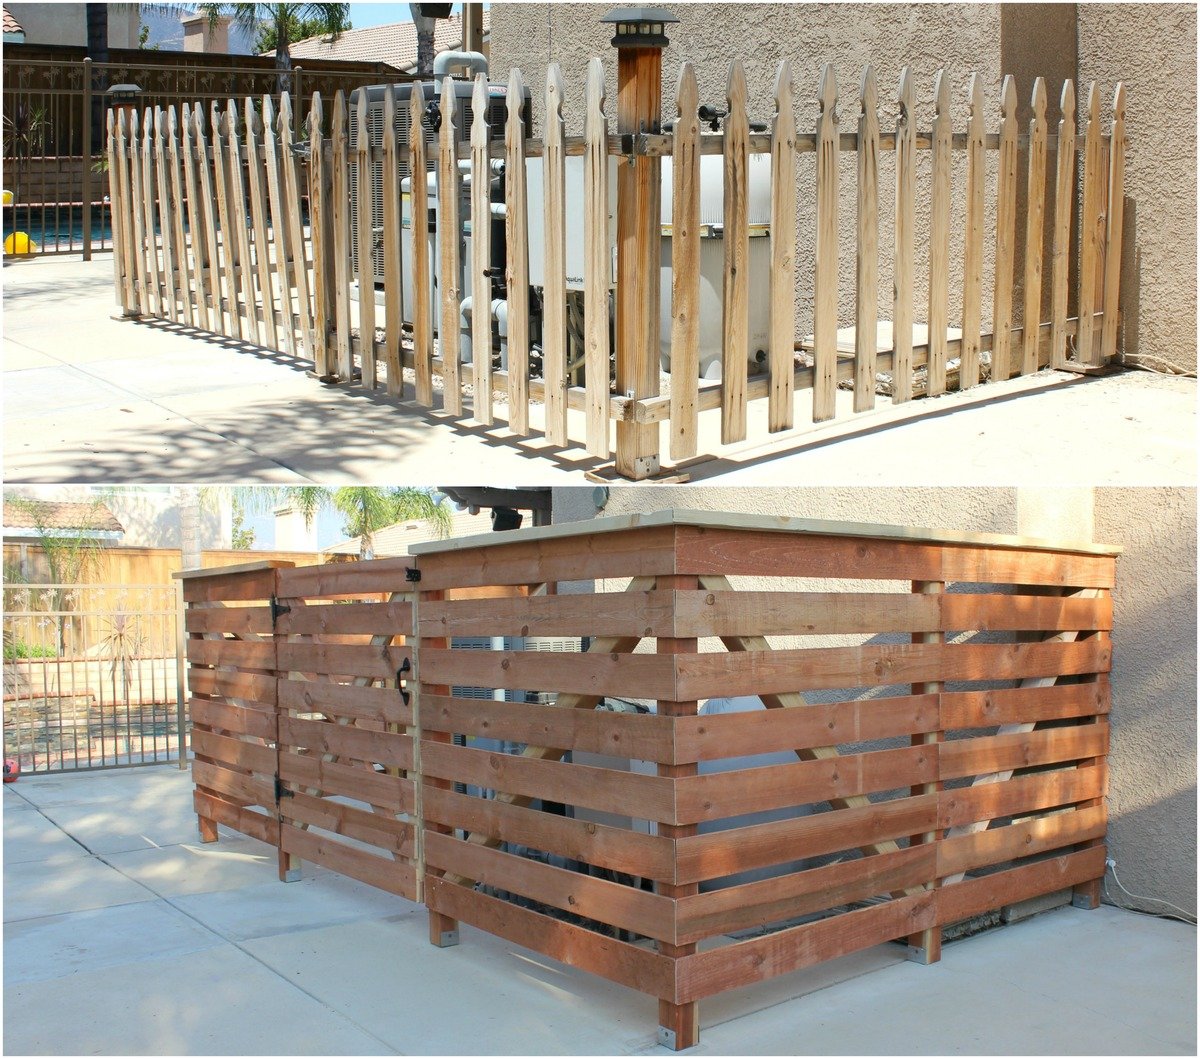
We love this fence refresh from the previous owner's solution to enclosing the pool equipment and a/c unit! It was the first time we fastened something to our house - drilling through stucco in the process. That was a big deal for us diy-ers! We made the frame out of 4x4's (which ended up being the most challenging part to the whole thing), applied the horizontal fencing boards and then used one of those $15 fence hardware kits - it was a great project that has made a huge difference in our backyard. Yay!

Estimated Cost
$300
Estimated Time Investment
Weekend Project (10-20 Hours)
Recommended Skill Level
Intermediate

Laundry Basket Rack

This was a great last minute Christmas gift. Took me a little over two hours. Made completely out if pallet wood.

Comments

Kid's Adirondack Chairs

Submitted by tlcbbp on Sun, 04/24/2011 - 16:43

The first one I built (the white one) was a terrible failure because I rushed through it and didn't read directions! Also, I used only scraps that I had on hand. The blue one went smoothly because I used the right materials and took my time.

Built from Plan(s)
Estimated Cost
12 - 15 dollars
Estimated Time Investment
Afternoon Project (3-6 Hours)
Finish Used
The blue paint is oops paint from Lowes & the white is spray paint
Recommended Skill Level
Beginner
Seasonal And Holiday

Bathroom Wall Crates

Submitted by eralben on Mon, 06/08/2015 - 05:36

Ana's little crates go perfect in our beach themed bathroom. I altered Ana's plans a little. I changed the dimensions to 12 x 11 1/4, and I did not use lath sticks for the crate slates because I wanted something sturdier. I had some left over 2×12 wood from a previous project, so I cut off 3/4 in wide pieces to make the crate slates. The wood grain gives character to the crates and makes it look more weathered.

Built from Plan(s)
Estimated Time Investment
An Hour or Two (0-2 Hours)
Recommended Skill Level
Starter Project

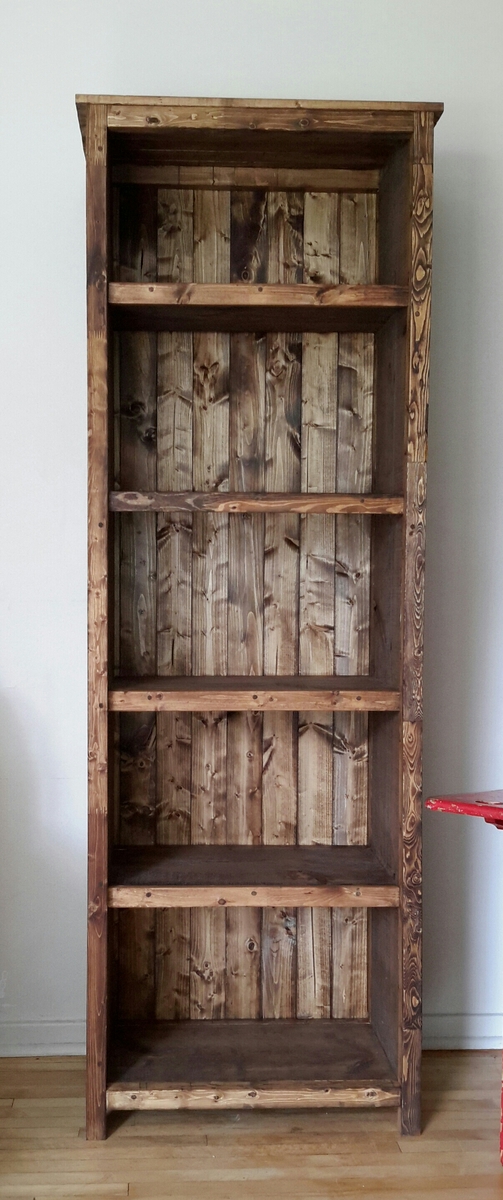
Kentwood Bookshelf

Submitted by worrow on Tue, 08/11/2015 - 17:33

I loved this from Ana's site so much we tacked one. Please note I glued, screwed and dowel ed the holes. I hate kreg jigs. We also made ours taller to add an extra shelf.

Estimated Cost
$90.

Provincial stain and triple coat poly
Estimated Time Investment
Weekend Project (10-20 Hours)
Finish Used
3m triple coat in 1 semi gloss not pictured. My image is stain at this point
Recommended Skill Level
Beginner

Comments

Back