Community Brag Posts

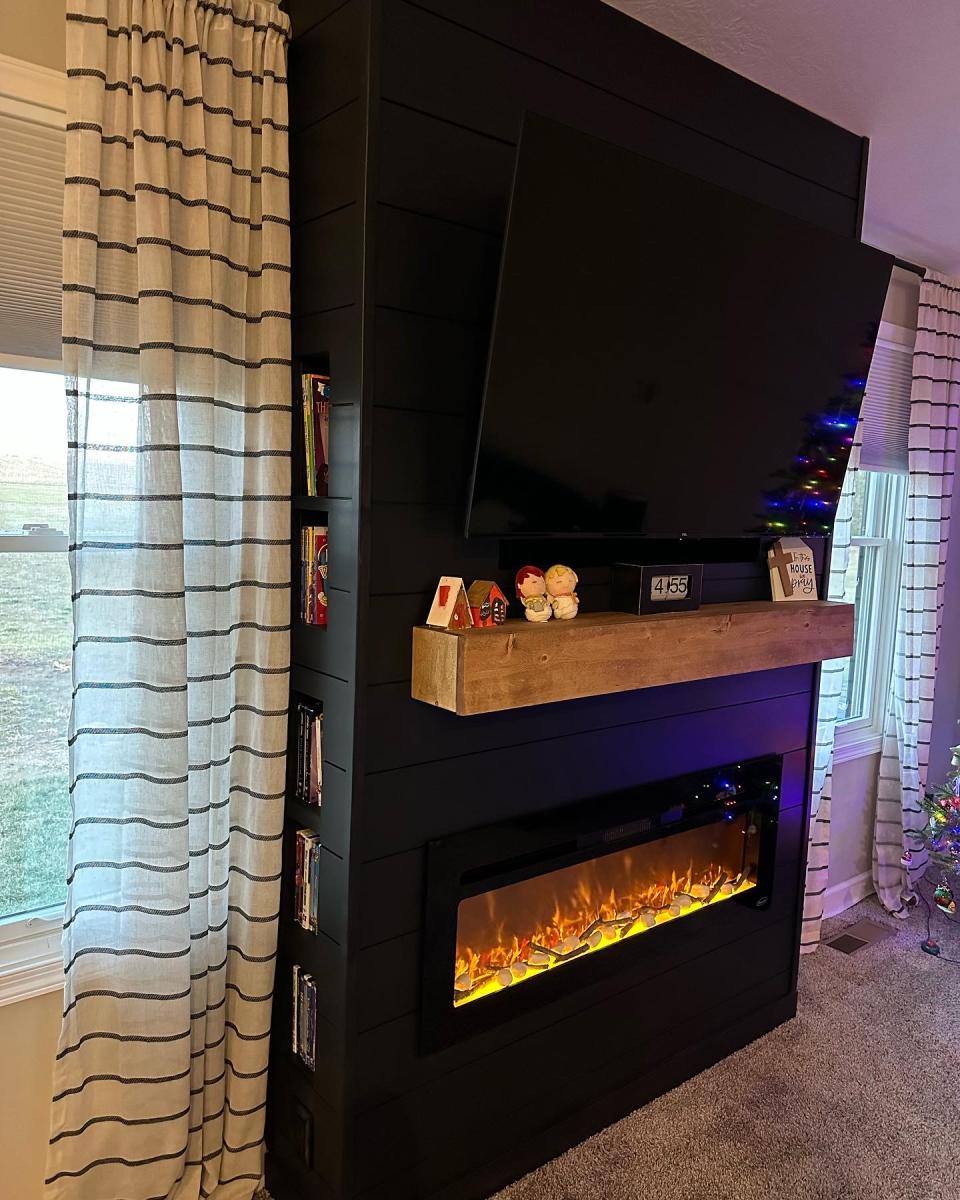
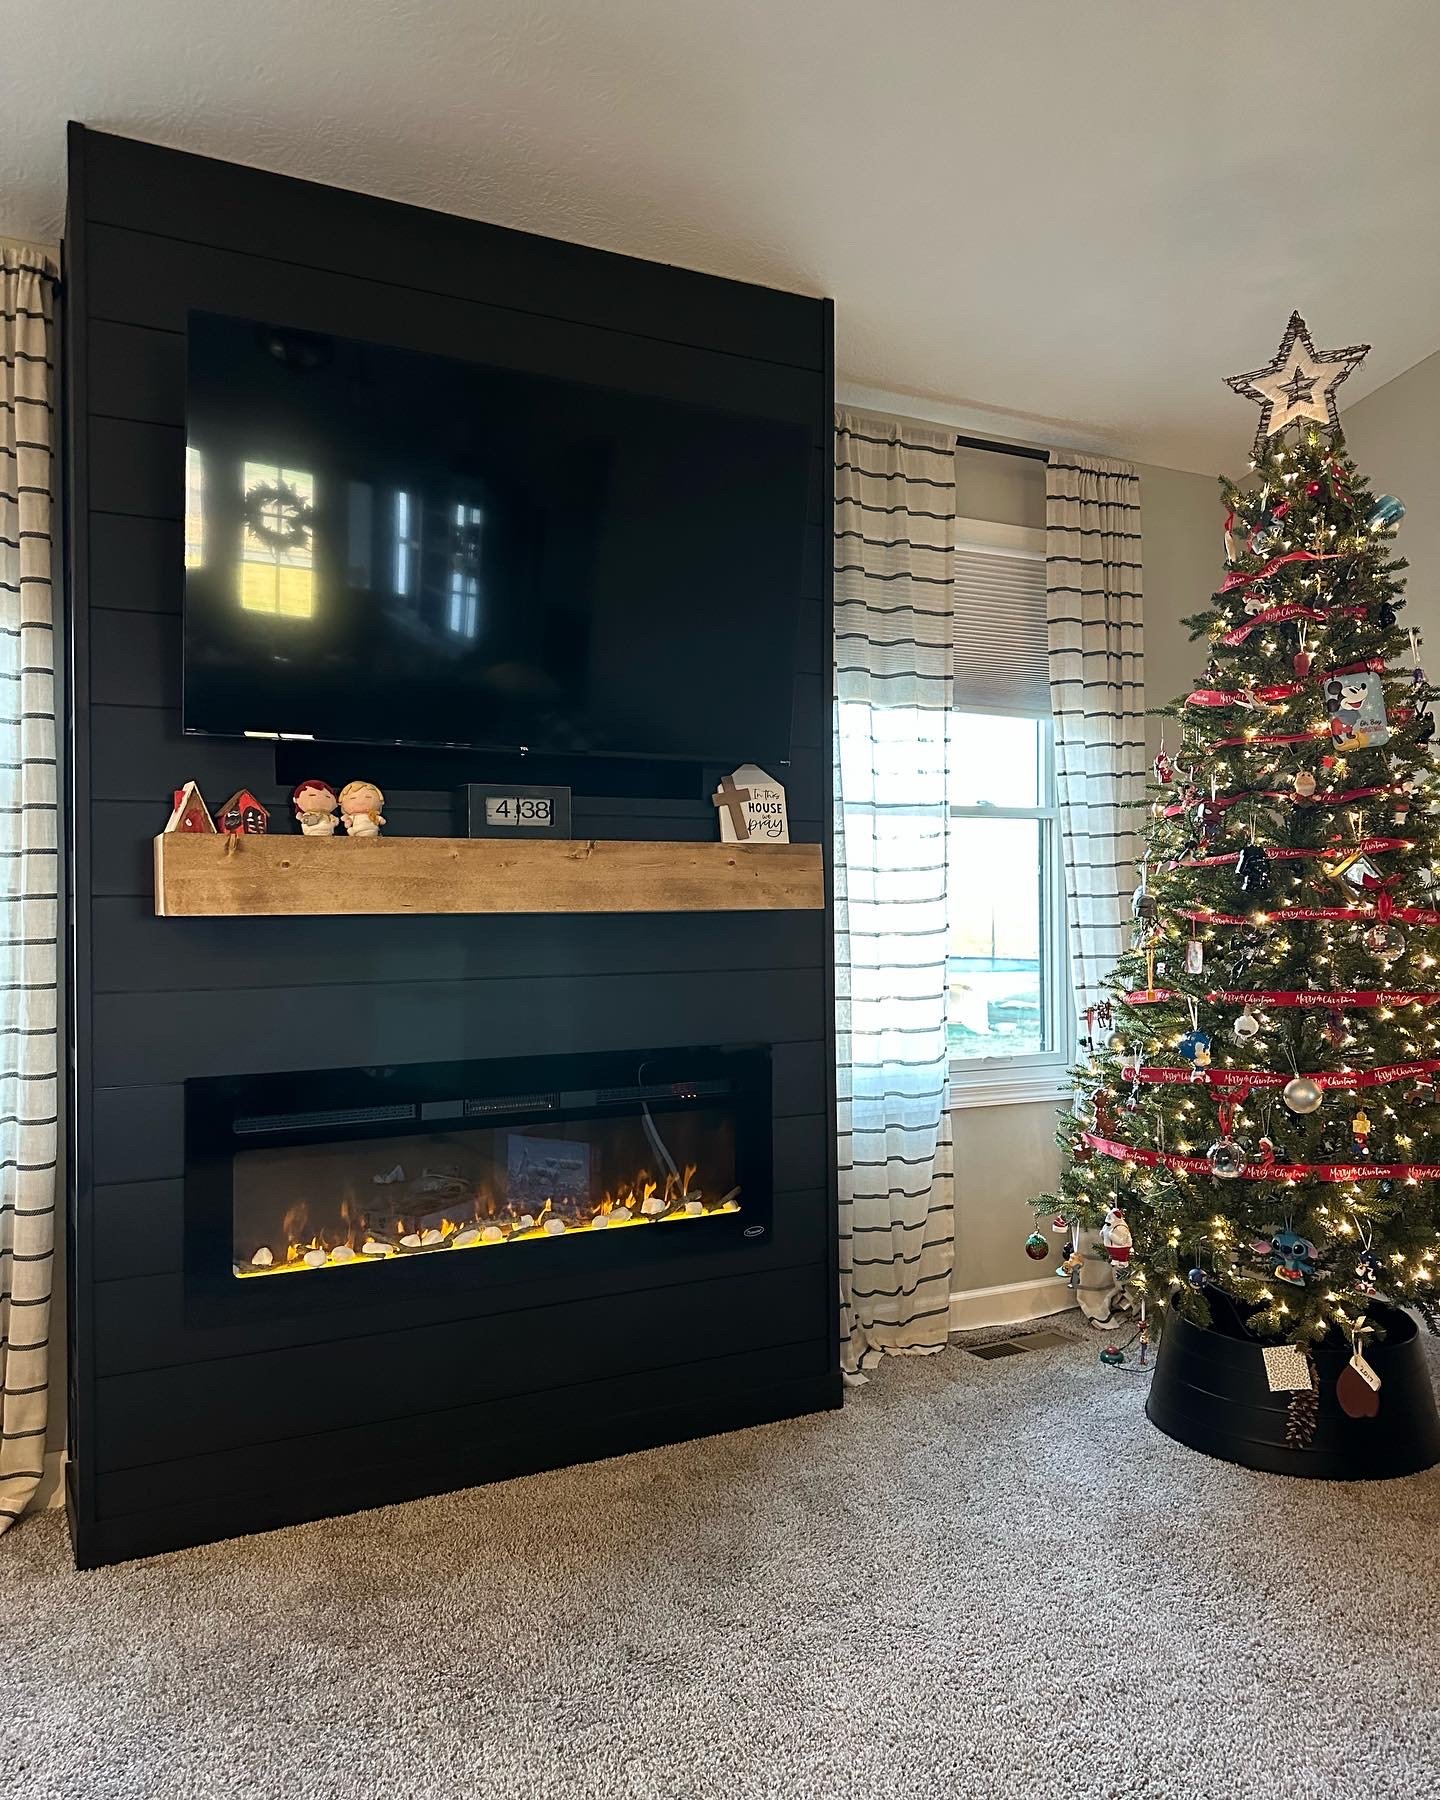
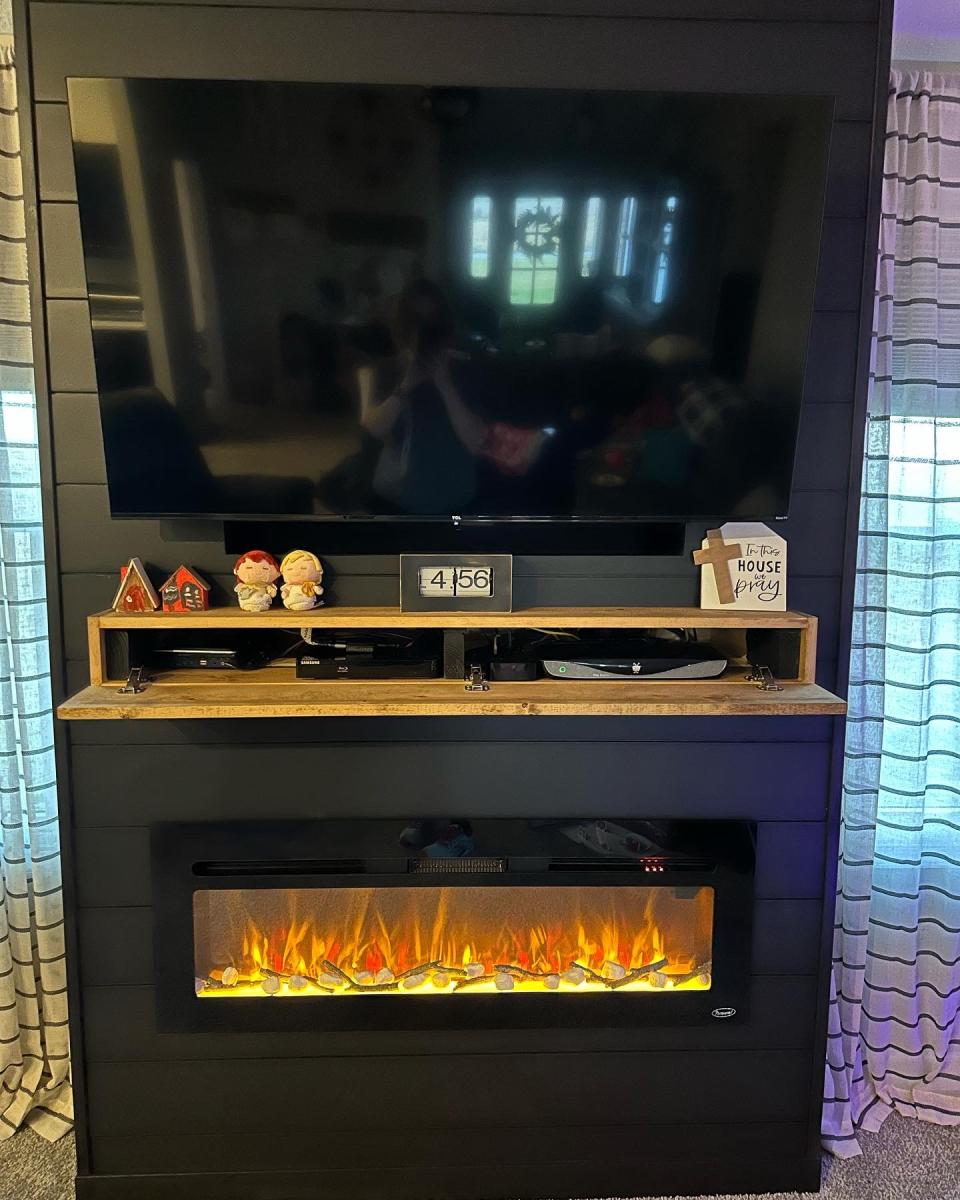
Fireplace with hidden Mantle storage and side bookshelves

Submitted by ibseenu on Thu, 12/01/2022 - 14:30

Thank you Ana for you Fireplace design as it was exactly what I needed! We’ve lived in our house for 3 years now and I’ve wanted a fireplace ever since. Your plan was perfect and with a few modifications I made it come to life. My 9yr daughter as I was almost done building thought there should be a shelf for books and movies below the fire place. It gave me the idea of adding storage on the sides. I had already had the idea of the mantle storage and just used a floating shelf idea and made that. This was a lot of fun!! It took me a little over a week to build. But can’t wait to build something else for our house… like the mudroom!

Amy

Comments

jtemperley

Sun, 01/08/2023 - 19:02

That looks awesome! My husband and I are planning on doing this as well. I do have a question, as I see you have carpet just like us. Did you cut out the carpet where you built out, and if so how did you go about that, or did you just build on top of it?

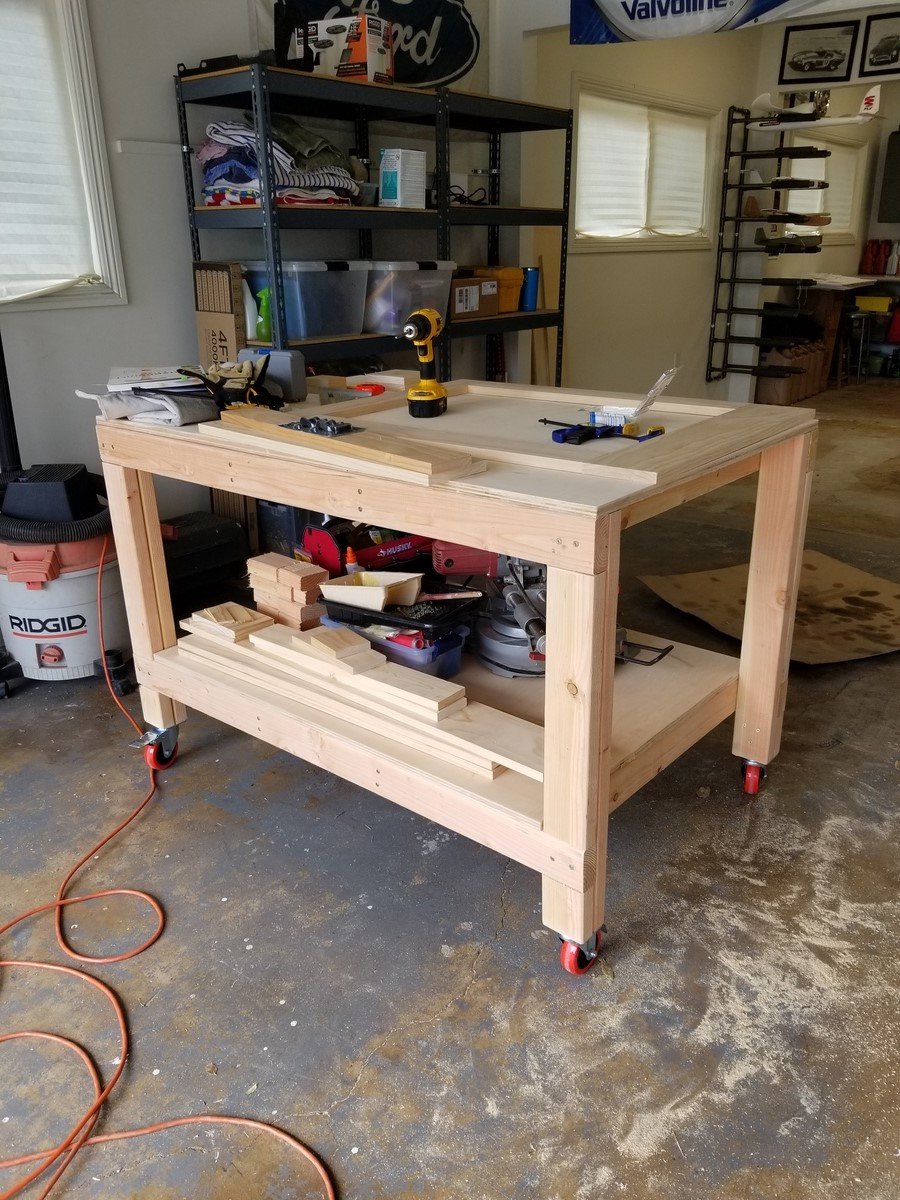
Workbench modified with casters

Submitted by ogie287 on Tue, 04/02/2019 - 20:06

I love this workbench! I added casters so I can move it around the garage, outside, wherever it's needed. I just took 4 inches off the bottom of the legs. My hubby is admiring my handy work and planning on making one for himself.

Estimated Cost
$130
Estimated Time Investment
Afternoon Project (3-6 Hours)
Finish Used
None
Recommended Skill Level
Beginner

Comments

JBeecher

Wed, 01/25/2023 - 14:31

Love this with the casters! So beautiful. I'm new here and wondering at what point you took 4 inches off the legs. Did you build the table and then just cut off the legs? Or did you adjust the measurements of the cuts? Thanks in advance! :)

JimCoz516

Mon, 01/30/2023 - 02:32

The overall height of a 4-inch caster wheel is a little over 5 inches with the mounting bracket, so that also needs to be taken in to consideration. 2nd photo shows the overall dimensions, but to me the bracket and brake area appear to be a bit more than 1.03 inches. https://amzn.to/3DkMKzB
I think the best bet would be to have and measure the overall wheel height, prior to measuring and cutting the lumber.

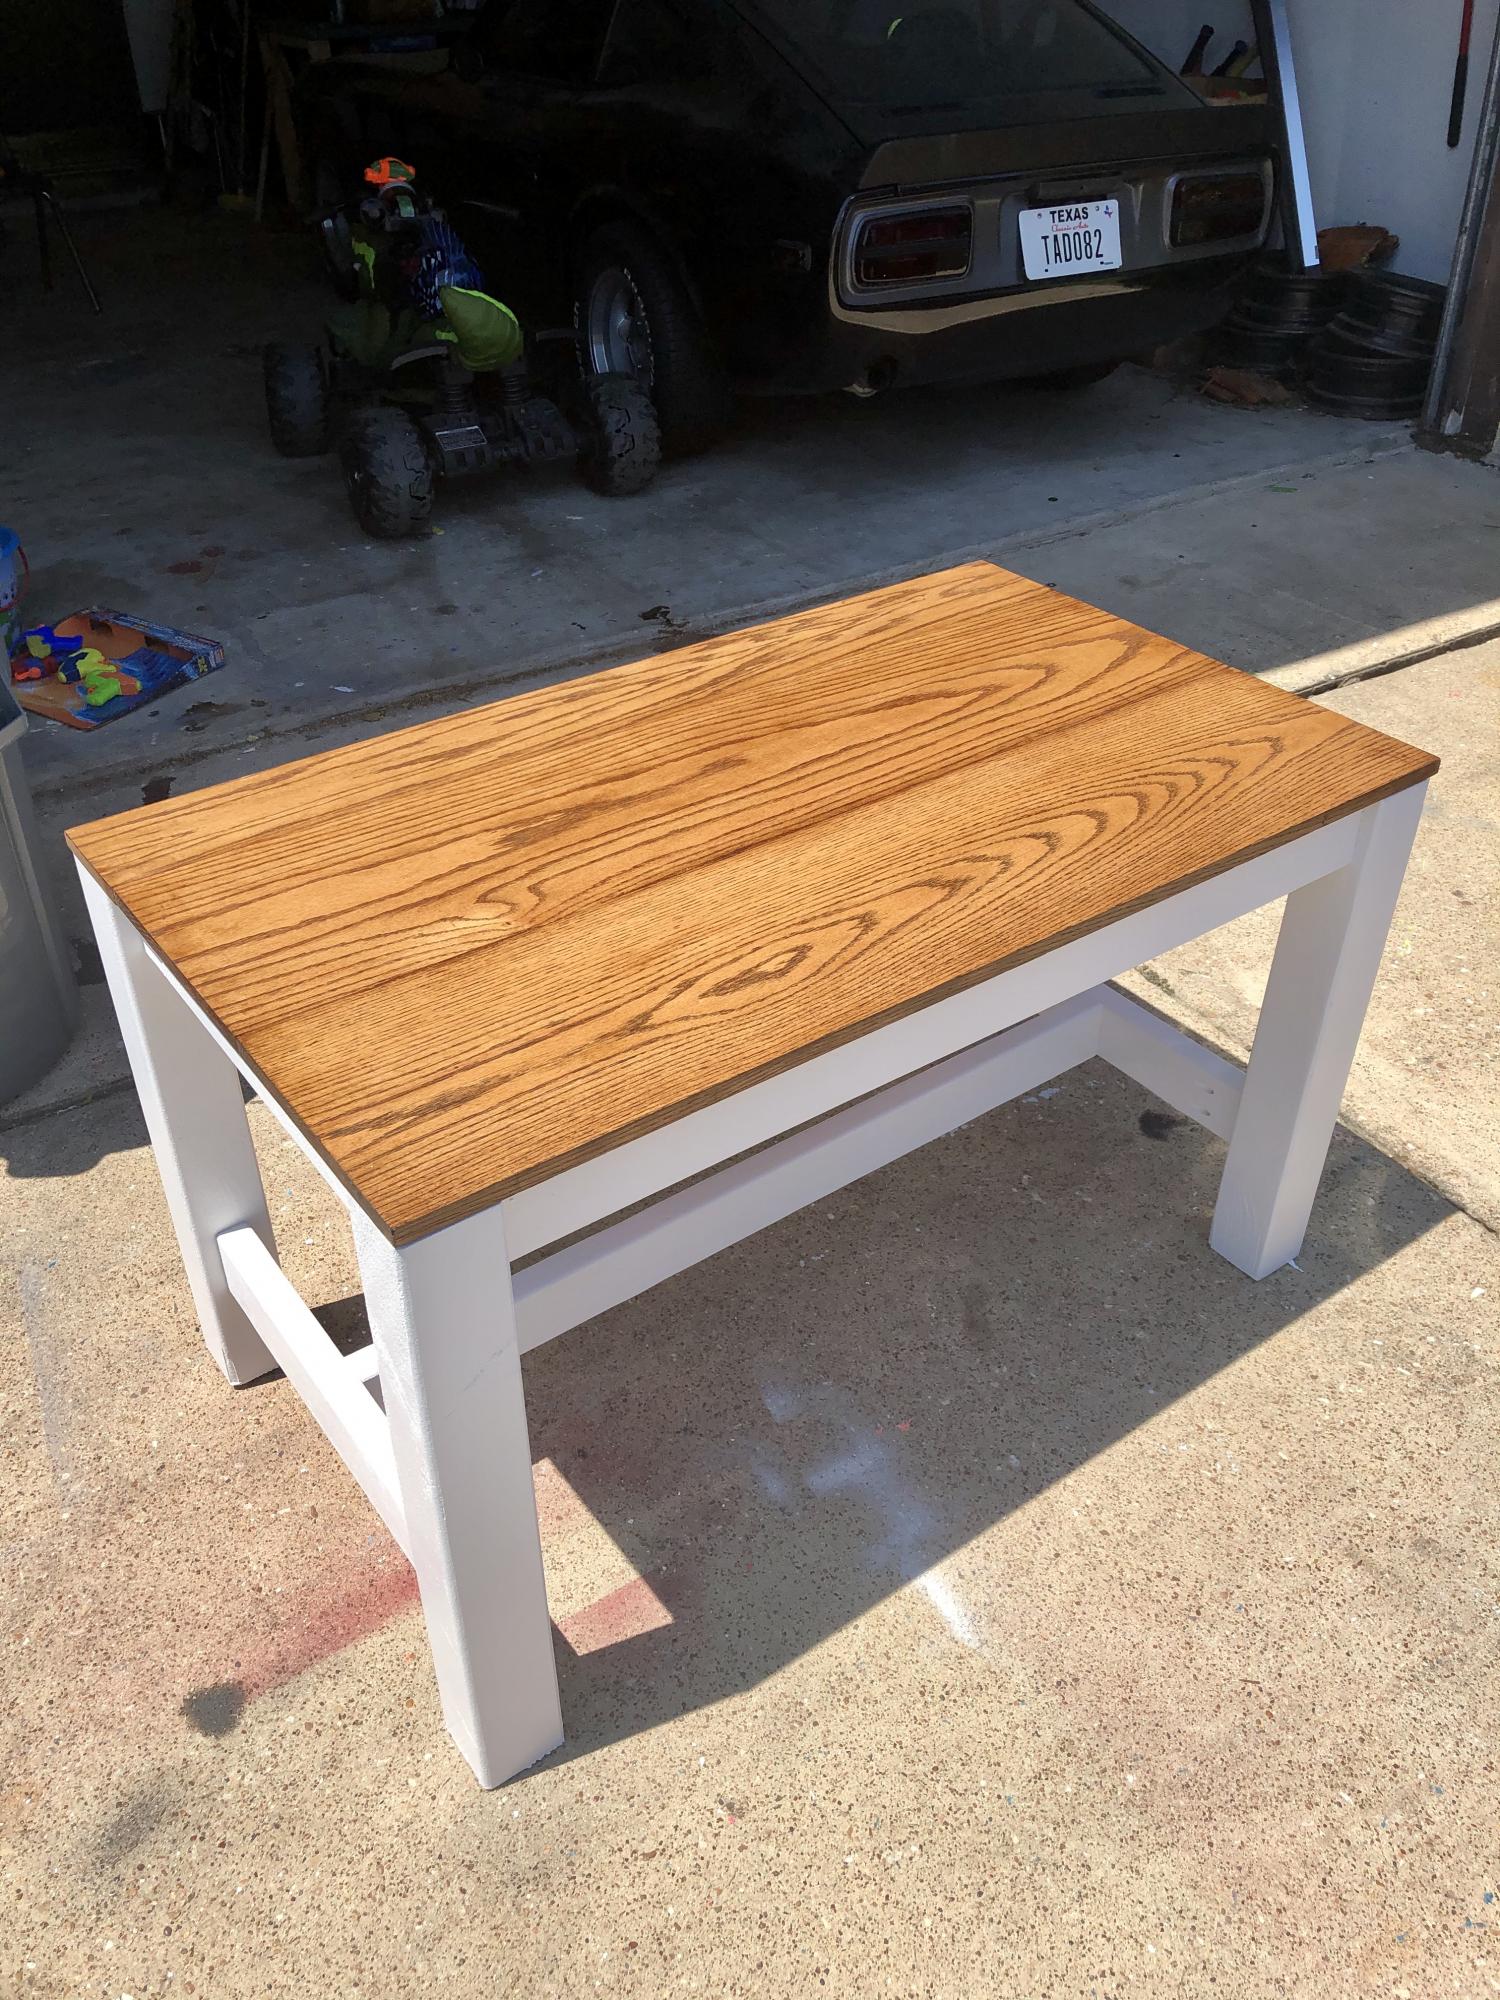
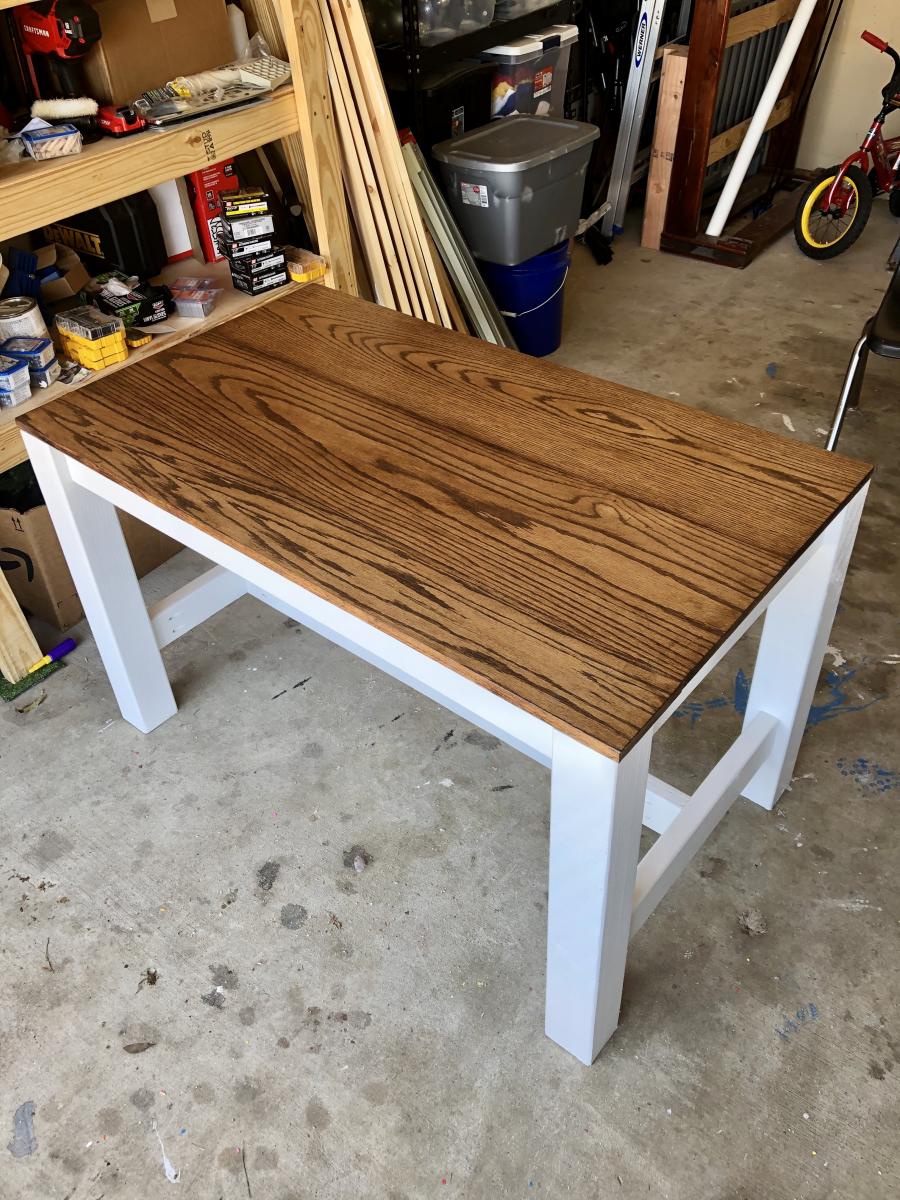
Adjusted Counter Height Farmhouse Table

Submitted by rahurtado on Mon, 05/04/2020 - 23:26

I liked the look of the “counter height table” and adjusted the height to make it a table for an office. I used 4x4s for the legs and oak for the top.
I used a biscuit joiner to join the top, a Dremel tool to carve grooves in the frame so I could attach the top with figure 8 fasteners (allows wood to move as it expands and contracts).

Recommended Skill Level
Intermediate

Rustic Dining table

Submitted by Anonymous (not verified) on Sun, 08/07/2016 - 09:28

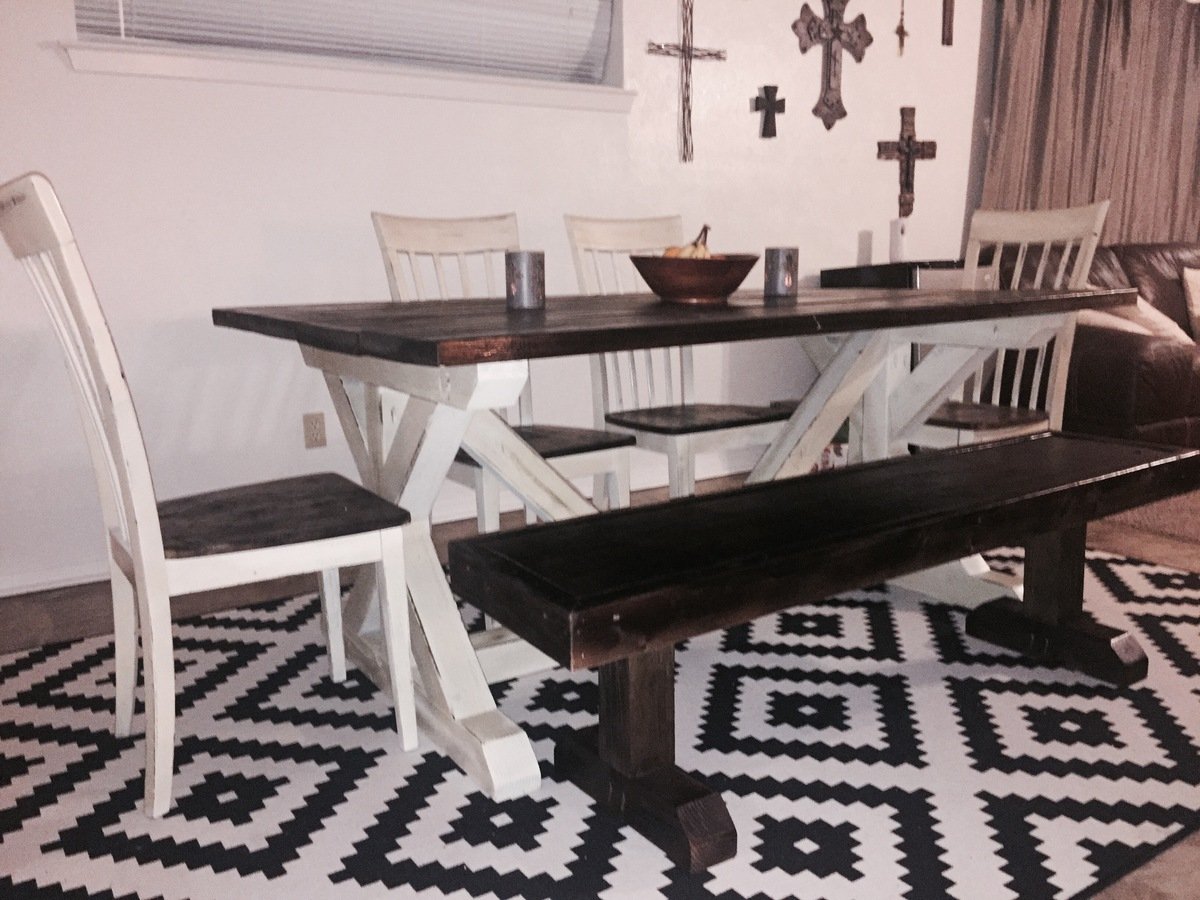
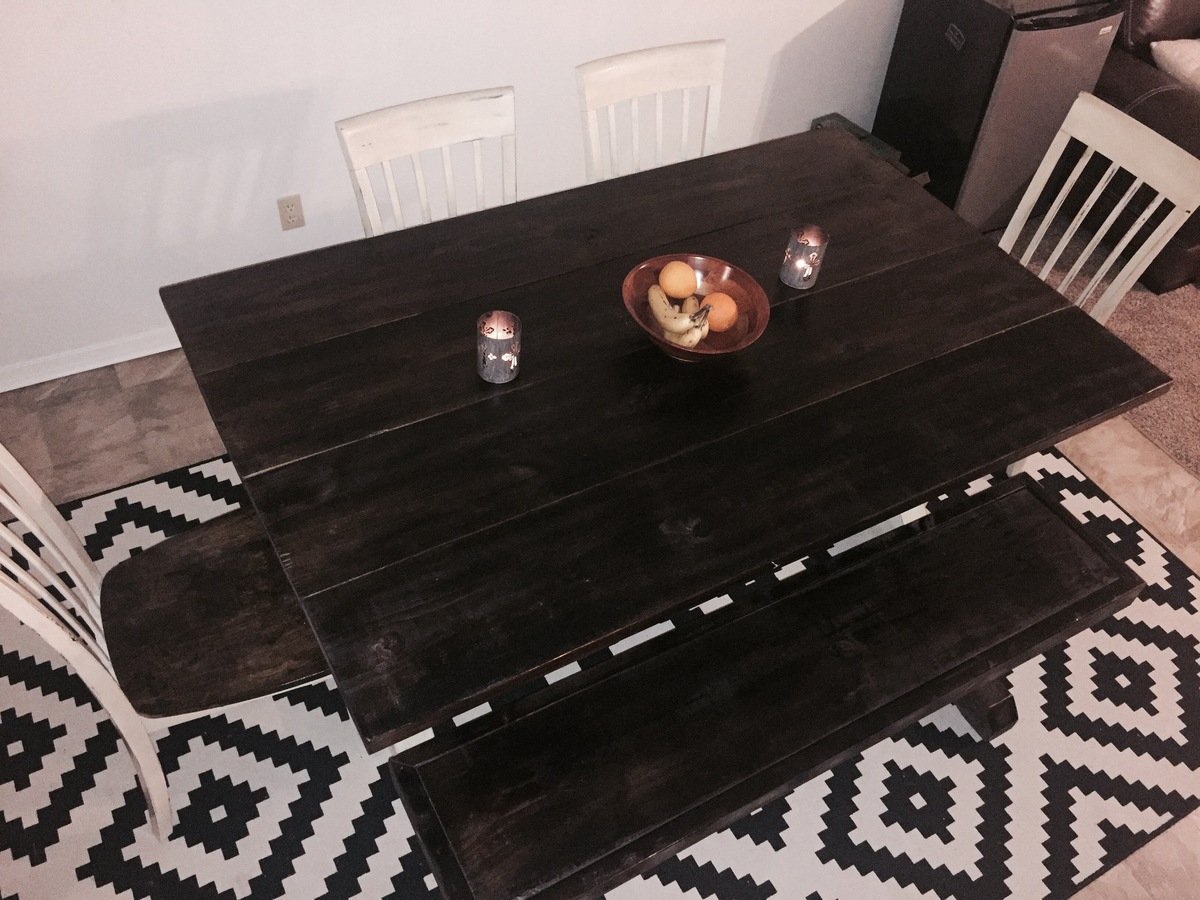
Took the plans from Ana white and made my own twist to it! Came out awesome and the person loved it that I made it for! Kona stain on table top and Navajo white on the bottom. Did the same for benches and chairs to match! Thanks for the great instructions! 

Built from Plan(s)
Estimated Time Investment
Weekend Project (10-20 Hours)
Finish Used
Kona stain and Navajo white, clear gloss poly
Recommended Skill Level
Beginner

Breakfast Bar Conversion to Storage Shelving

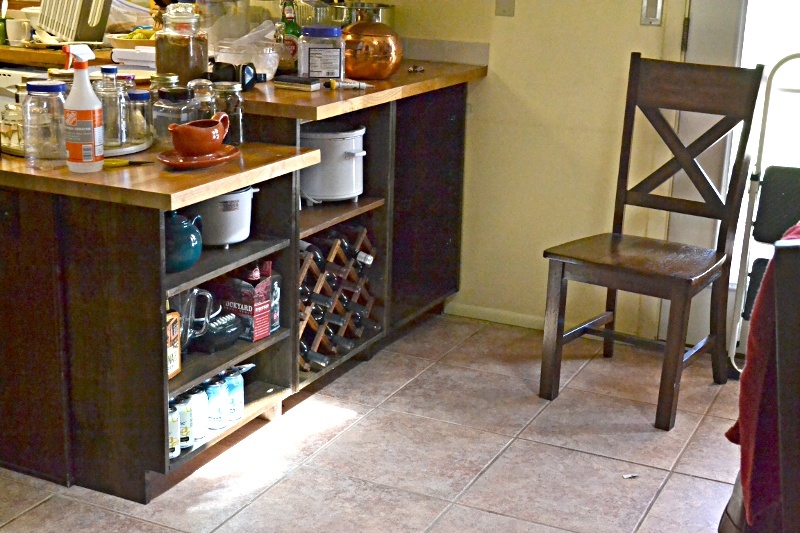
Added kitchen and dining room storage by building bookcases / shelf units to fit under the peninsula breakfast bar overhang. It's the simplest possible "box with a toe-kick", loosely based on Ana's plans for a bookshelf and the closet master system.

Much of the "working time" was stain and finishing time. Actual cutting and assembly time was under 3 hours.

No dimensions: every breakfast bar is different.

1 - The boards were cut to fit under the overhang, with 1/8 or less clearance. Top and bottom of unit is between the upright pieces.

2 - Width of units was also cut to fit. One unit is the width of the lower section of countertop (appx 23 in), the taller section was divided into 2 equal units (appx 21 in)

Shelves were cut about 1/4" narrower than the insiude dimension of the unit, to allow for insertion and the shelf pegs.

3 - Toekick space cut to match the cabinet on the far side of the peninsula. Used a circular saw and then a hand saw to finish the corners.

4 - Drilled pocketholes in the top and bottom boards.

5 - Used Rockler's jig for drilling shelf pin holes in the 6 uprights. Oops! I should have drilled every possible hole. I drilled every other hole and don't have the shelf flexibility I really need.

6 - Stained and topcoated everything, let it dry.

7 - Assembled each shelf unit, using corner clamps and a carpenter's square to make sure it was square. The bottom shelf is screwed at the same level as the toe-kick.

8 - Slid units under the overhang, shimmed them firmly under the countertop.

9 - Added shelf pegs and shelves

DONE!

Doors could be added, using the hinges for inset doors on frameless cabinets.

==========
NOTES:
The units are backless. I considered nailing a 1/8 hardboard back onto them, but because the finished back of the peninsula is visible behind them, and they are shimmed into place to prevent slouching it was not needed.

Cost is low because we had some 1x12 boards in the attic. Already had the tools and stain from earlier projects. 3 1x12 x 6ft boards were new, the rest were salvage.
Estimated Cost
$100
Estimated Time Investment
Week Long Project (20 Hours or More)
Finish Used
Minwax Jacobean oil stain - one coat wiped on after light sanding

General Finishes gel topcoat - one coat wiped on
Recommended Skill Level
Beginner

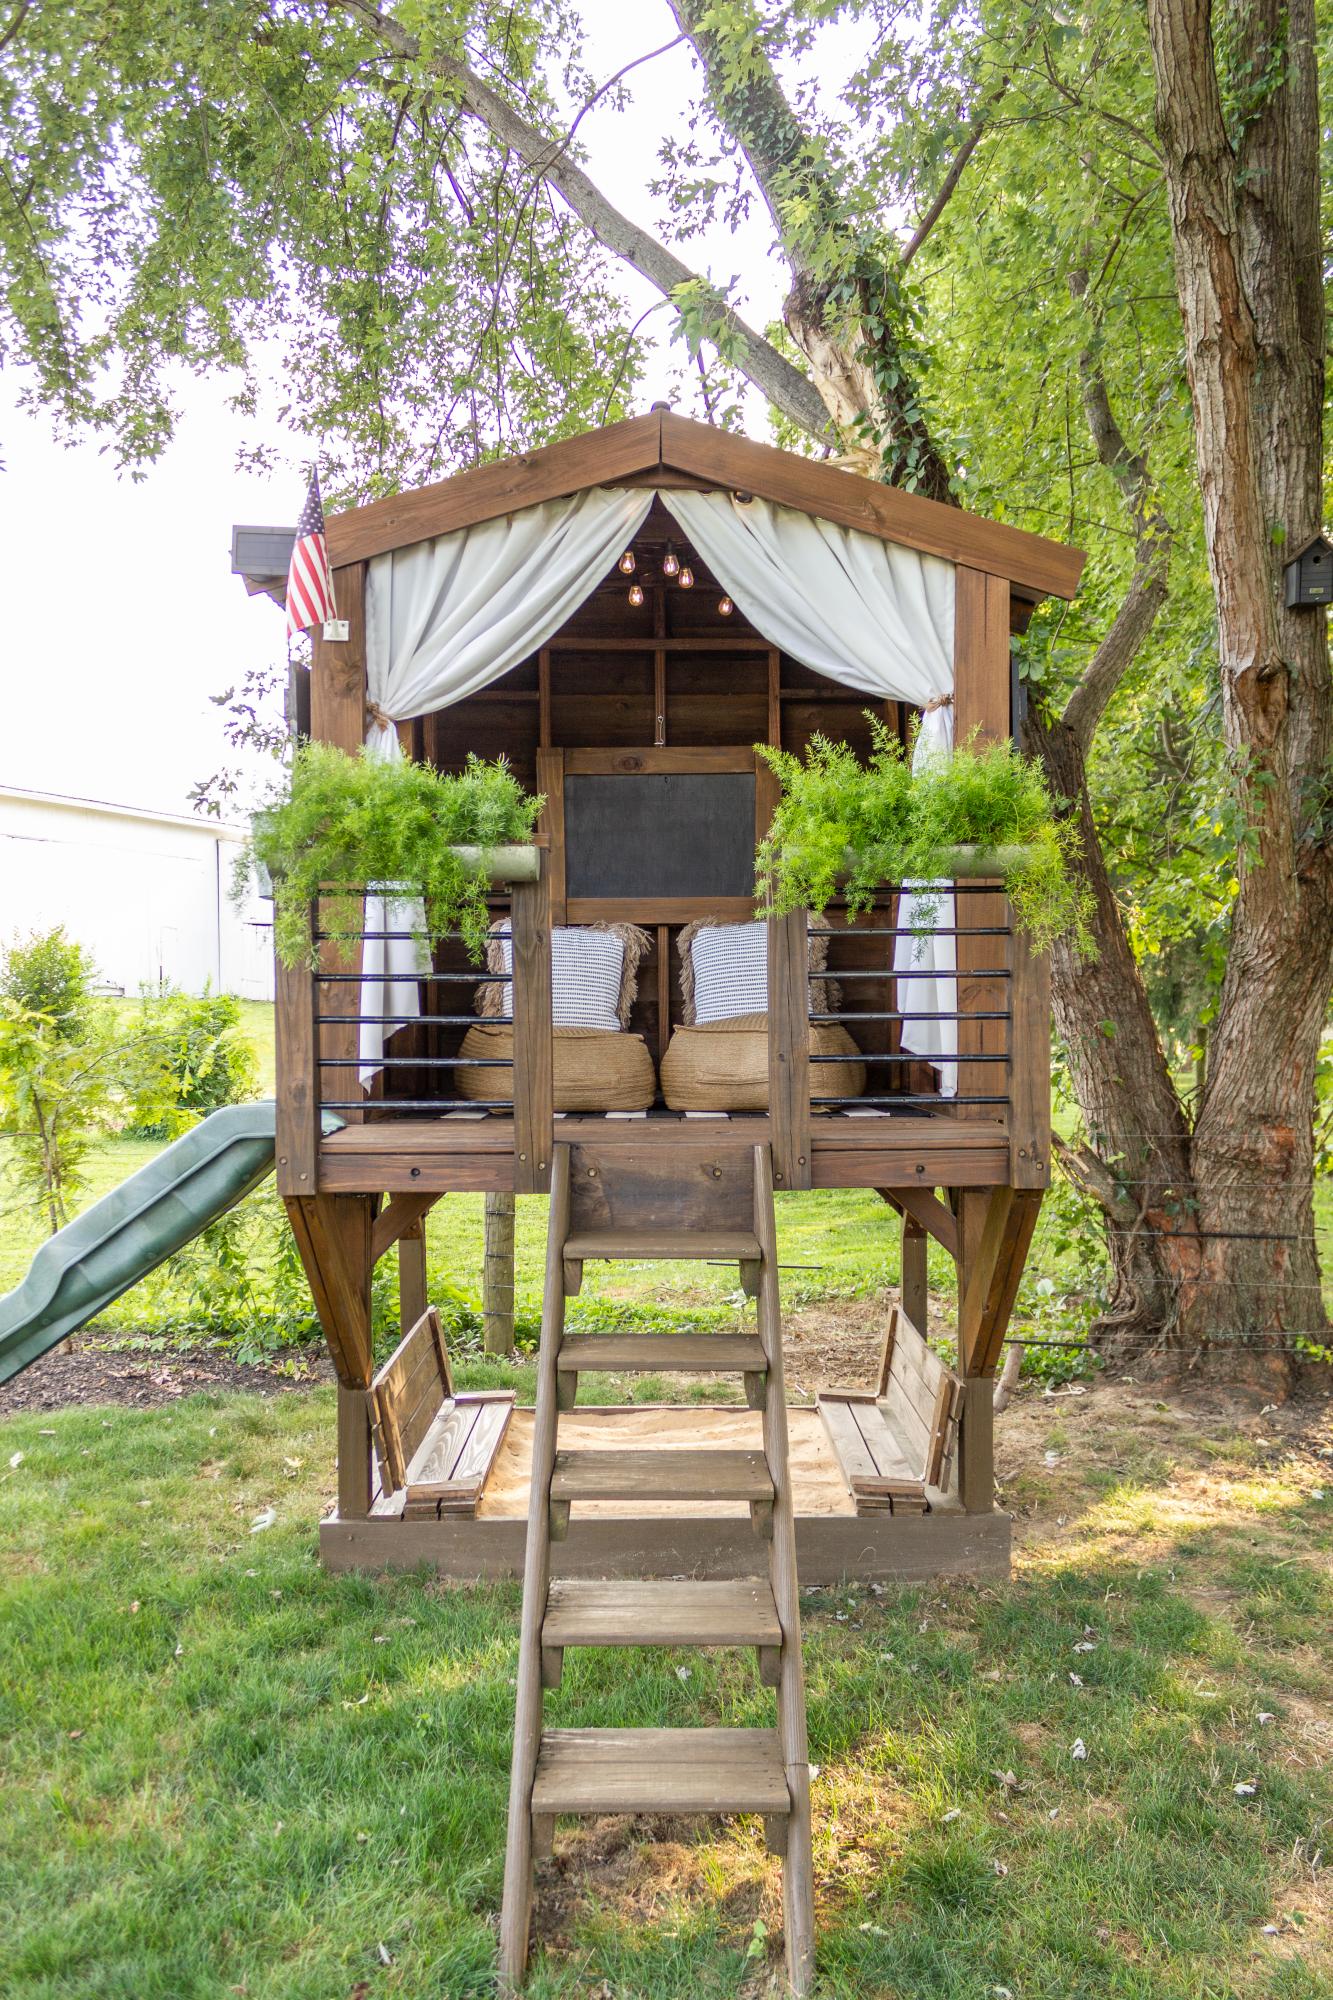
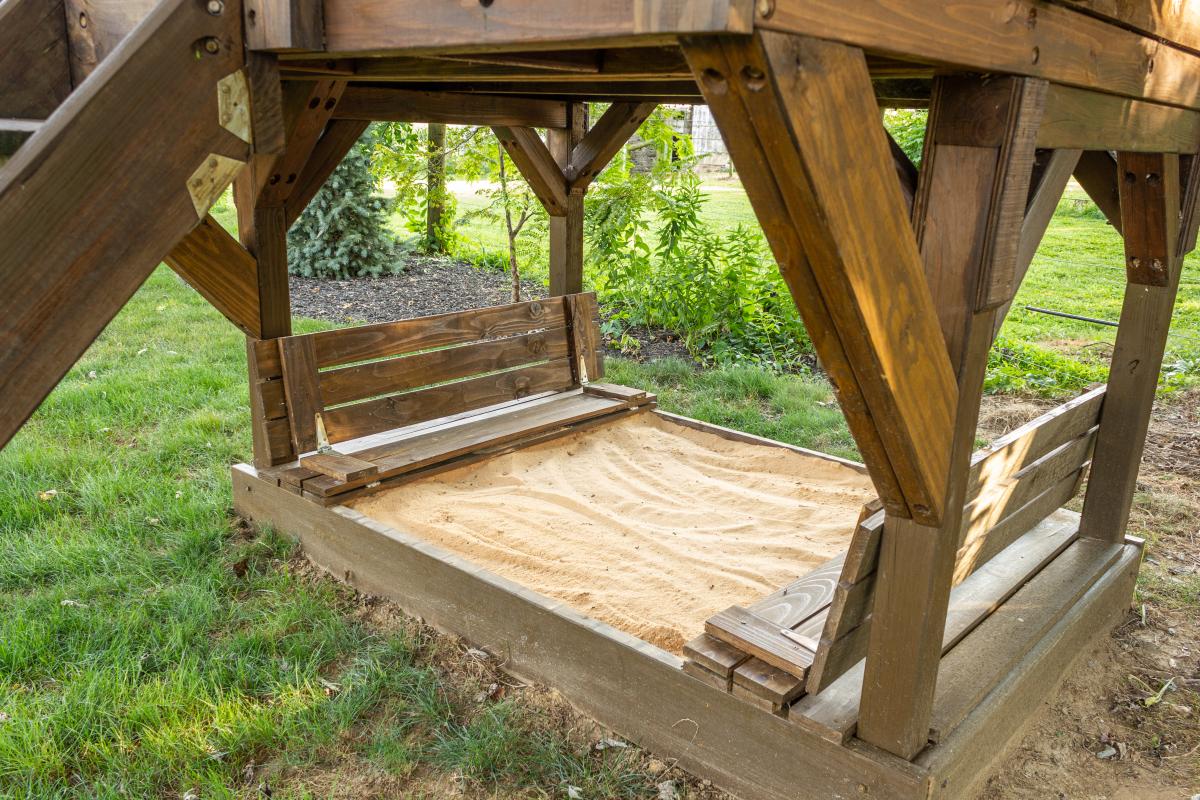
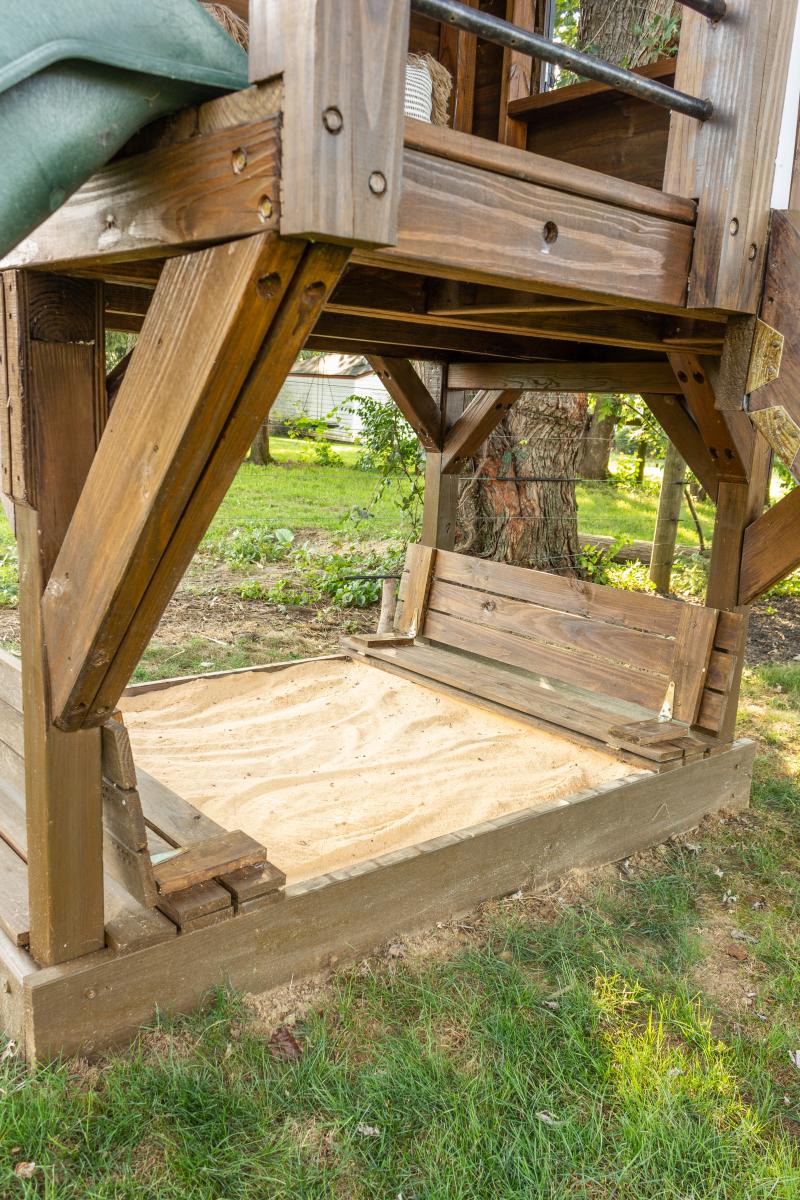
Sandbox with built-in seats in our playhouse

Submitted by Anonymous (not verified) on Thu, 09/10/2020 - 10:55

The base of our playhouse felt like the perfect spot to use the sandbox plan with built-in seats. The bench seats actually fold flat to create a lid for the sandbox when it’s not in use. I followed Ana’s plans exactly and used the list of materials she provided. The only modification I made was eliminating the back supports. It was not necessary for me to add the back supports since we have the playhouse posts to support the back of the bench.

Built from Plan(s)
Estimated Cost
$60
Estimated Time Investment
Afternoon Project (3-6 Hours)
Finish Used
Stain
Recommended Skill Level
Beginner
Seasonal And Holiday

Outdoor Sectional - Love It !

Submitted by Anonymous (not verified) on Sun, 10/18/2020 - 06:11

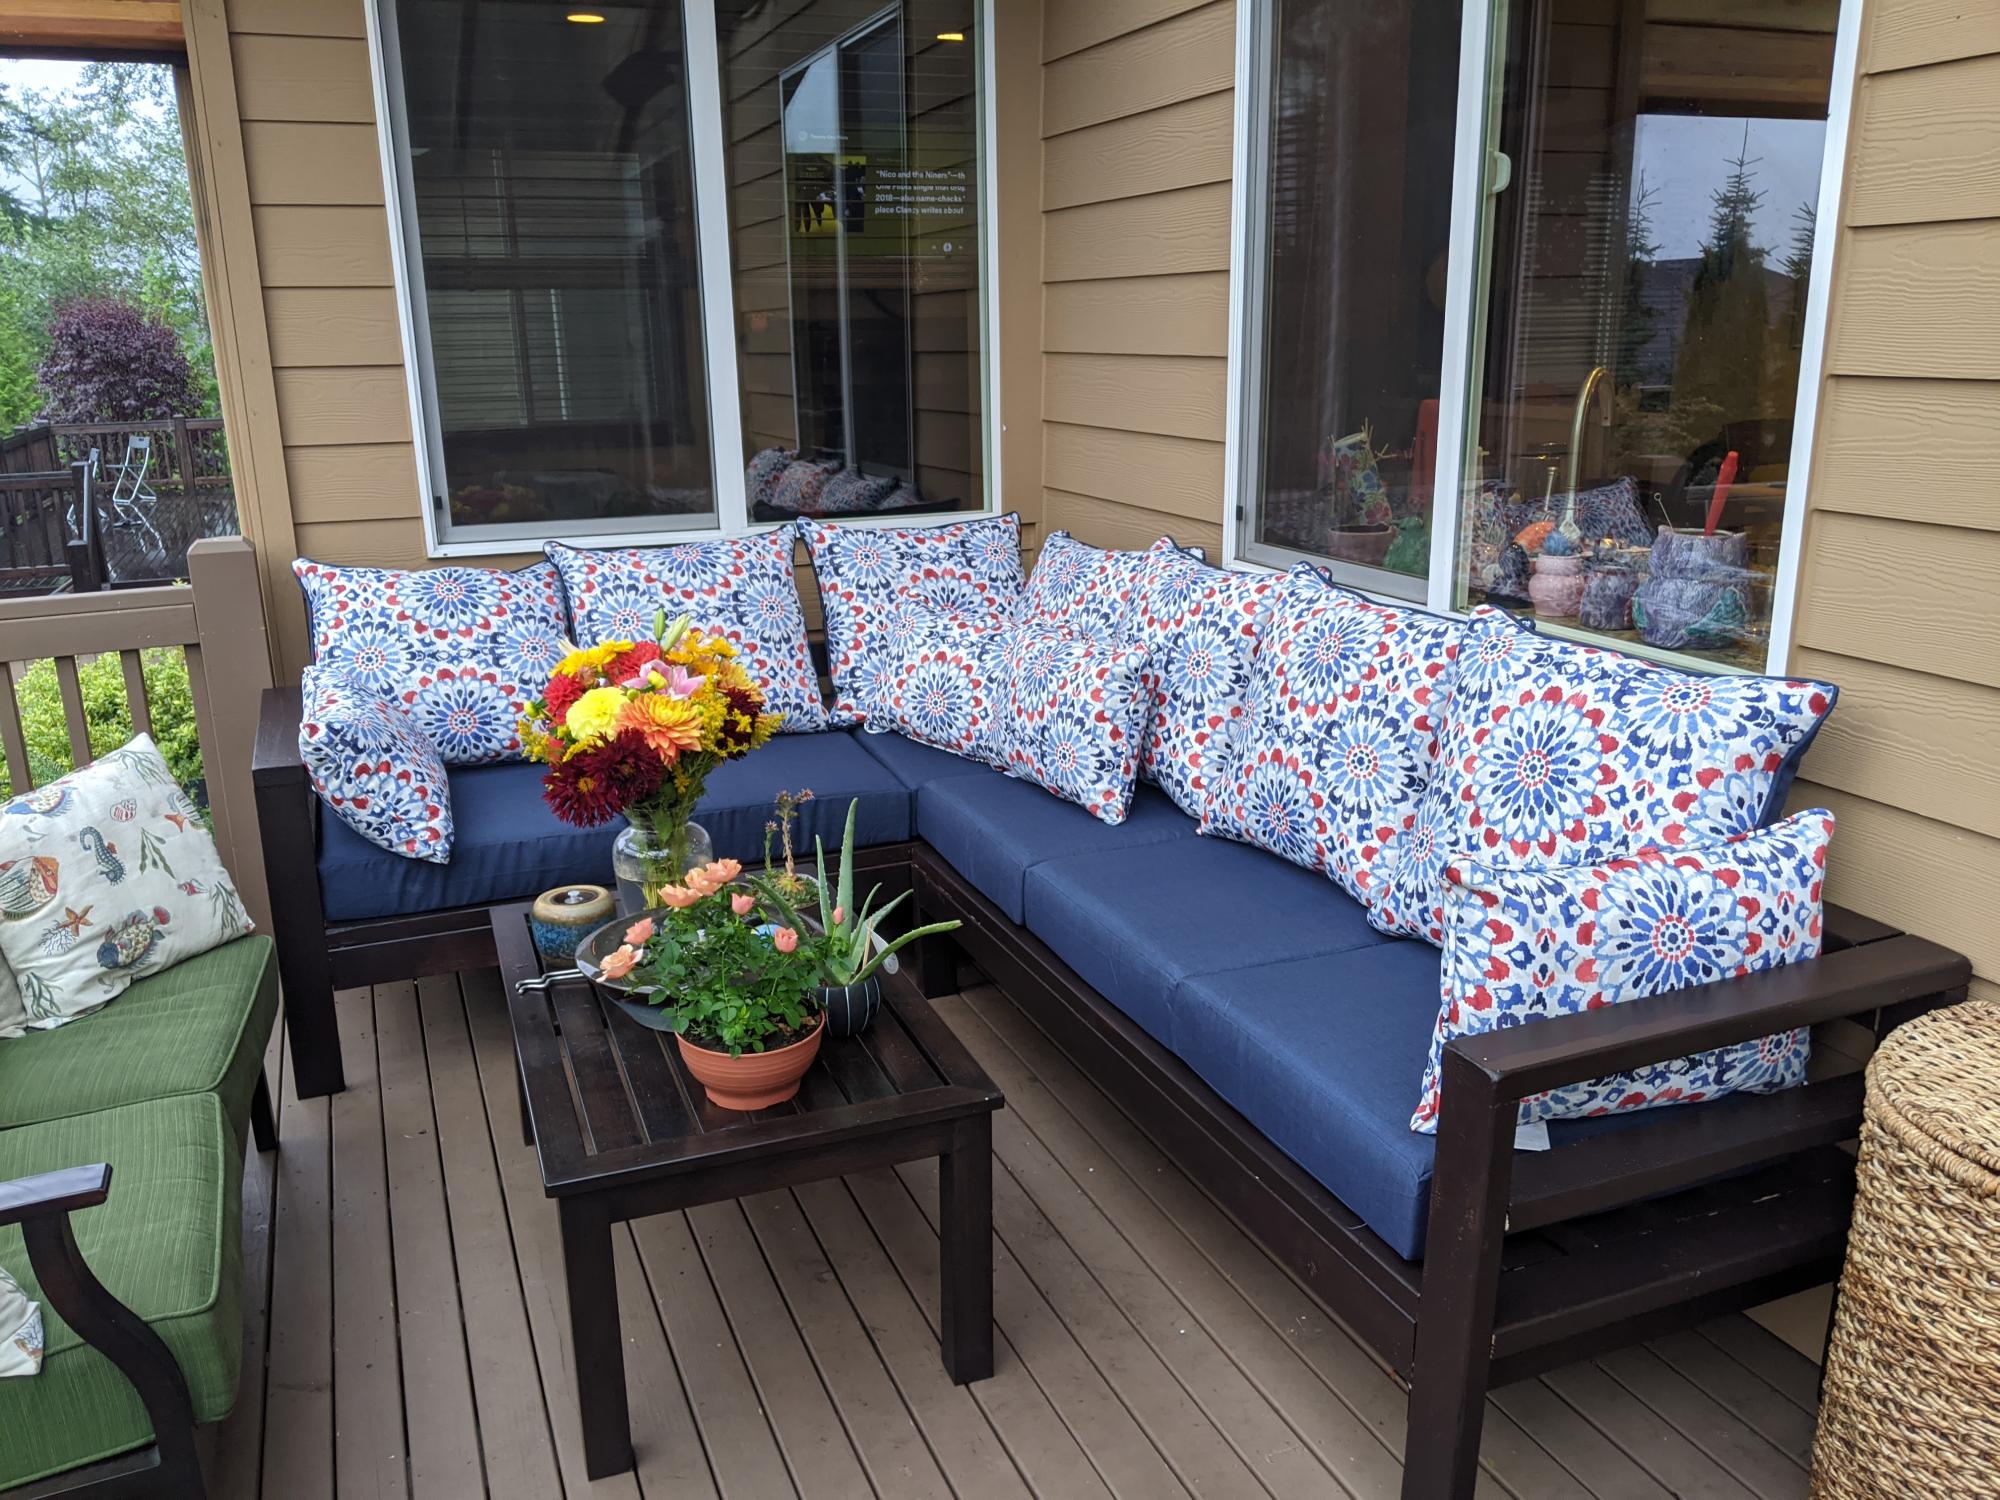
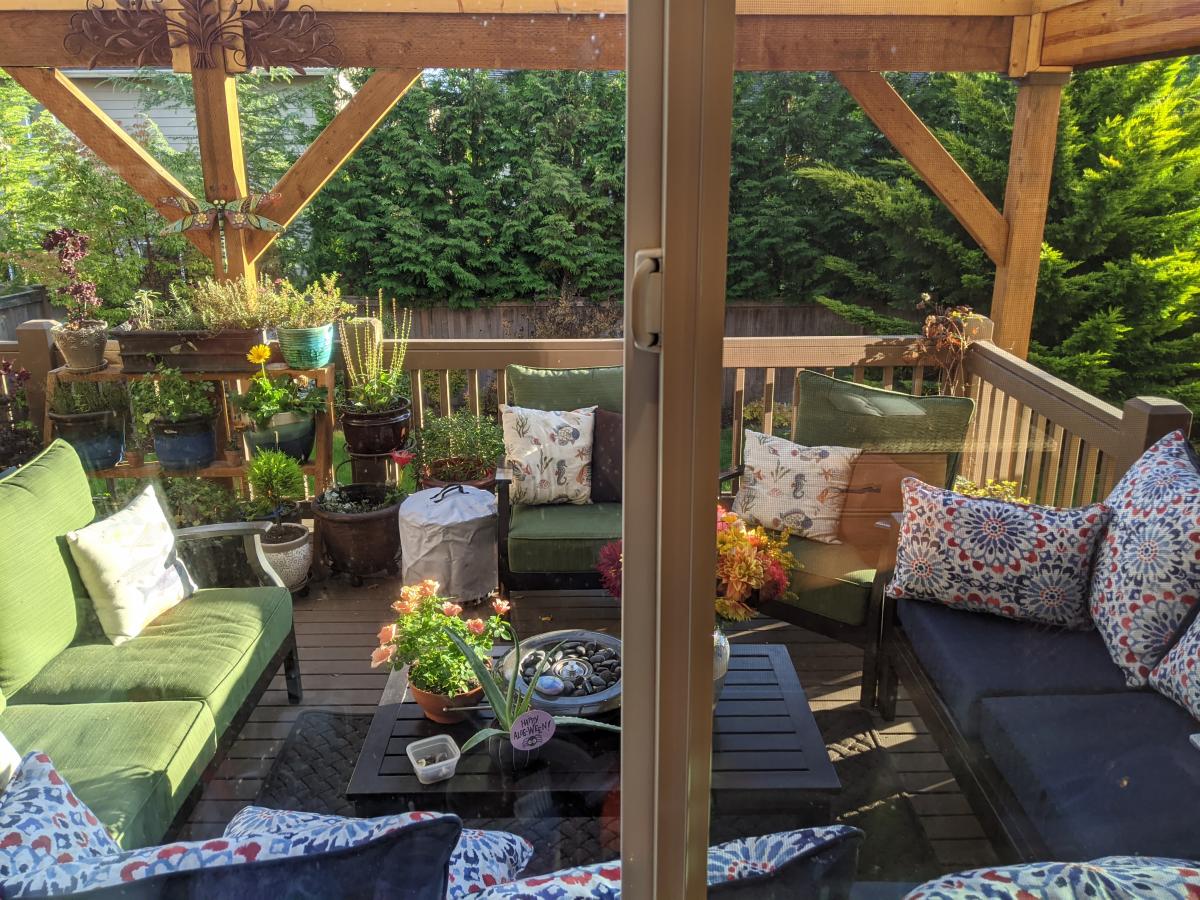
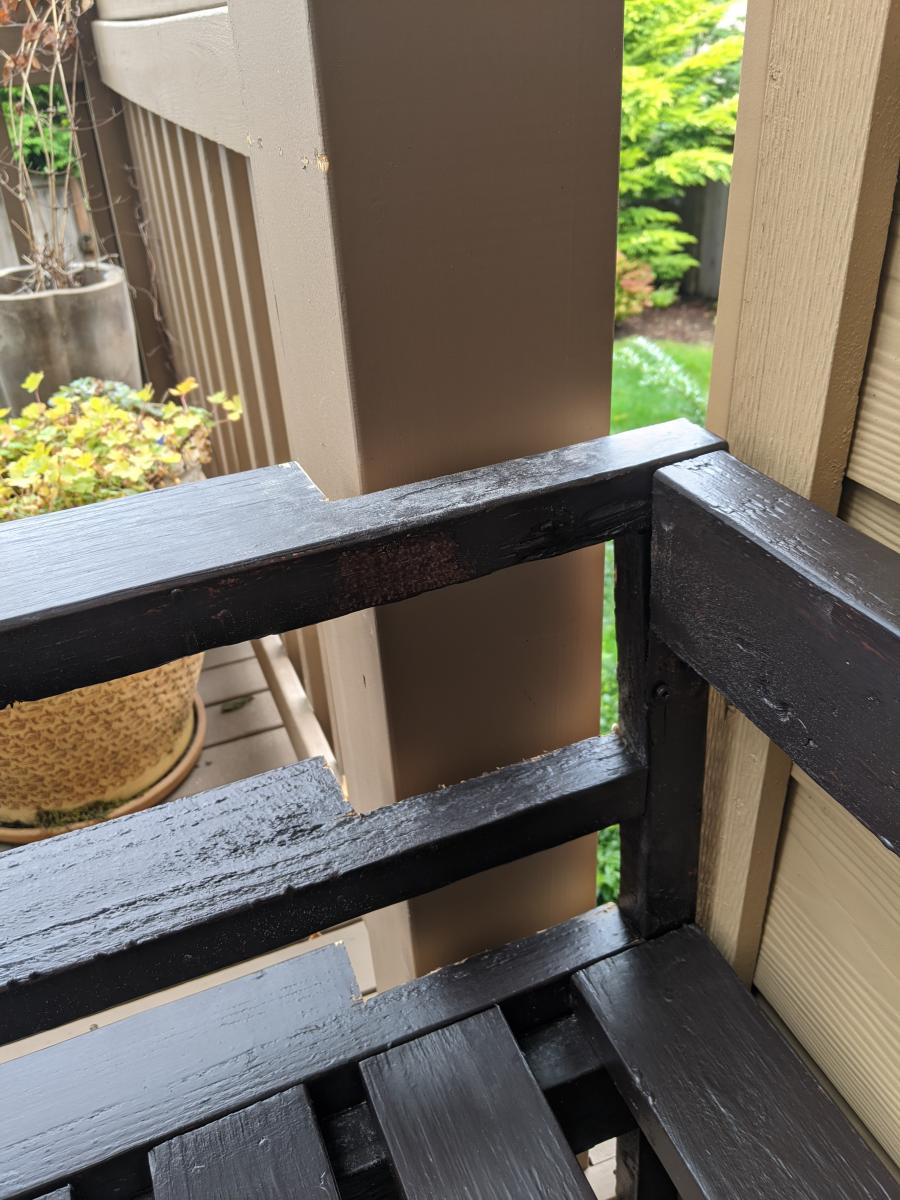
Great experience building this sectional, although would recommend pre-drilling the holes where practical to avoid splitting. It only happened to me a few times on #2 douglas fir, but I would have preferred to avoid it. As you can see from the picture, I didn't account for the siding taking up the space, and was expecting a perfect fit. Easily fixed with a bit of saw work, and now it's really custom fit for the space. :-)

I've added the details of the finish we used, and really happy with how it turned out, with the exception of my garage workshop lighting not revealing the spots I need to touch up now that it is in the natural light.

And of course, this is a terrific time to purchase couch cushions at the end of the season. Lots of great sales, and we found these at Target for $47 per top/bottom set.

Estimated Cost
$600
Estimated Time Investment
Week Long Project (20 Hours or More)
Finish Used
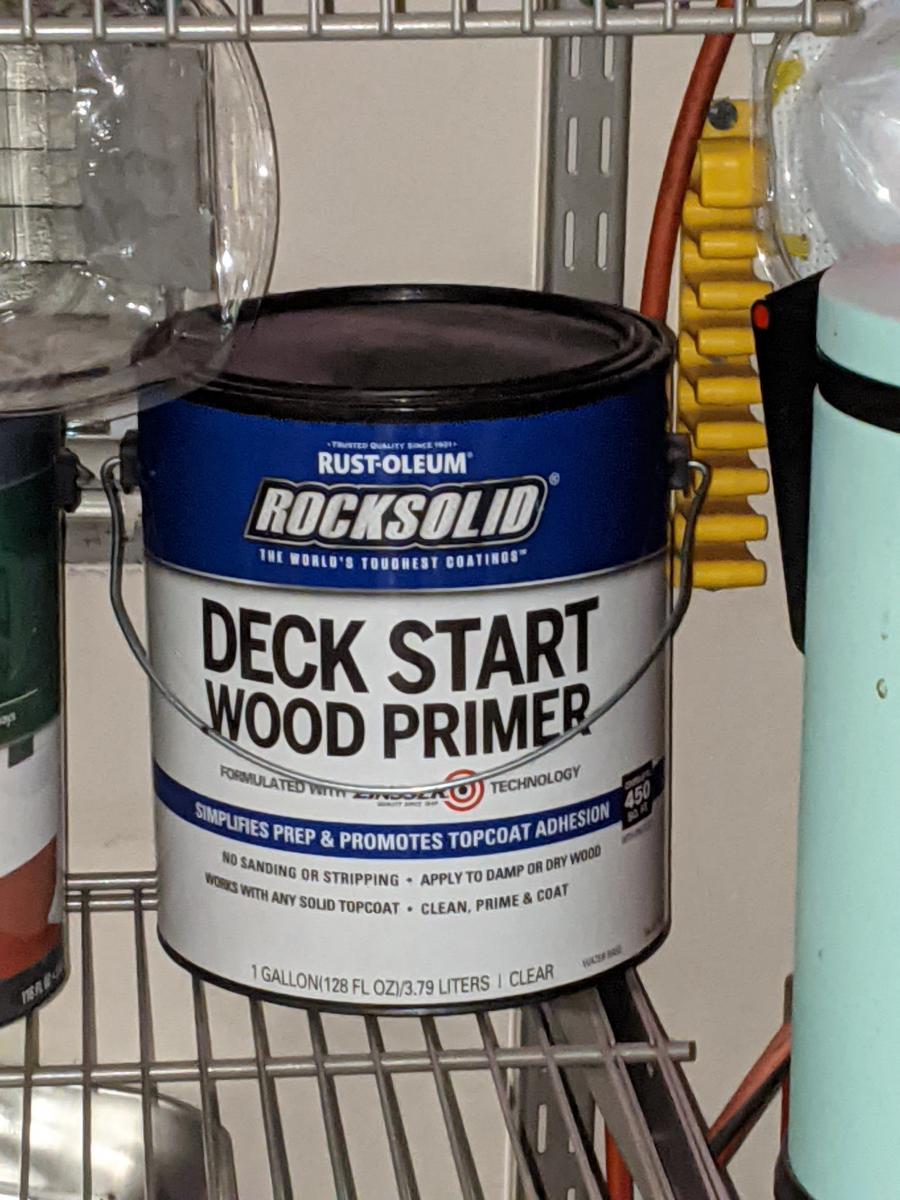
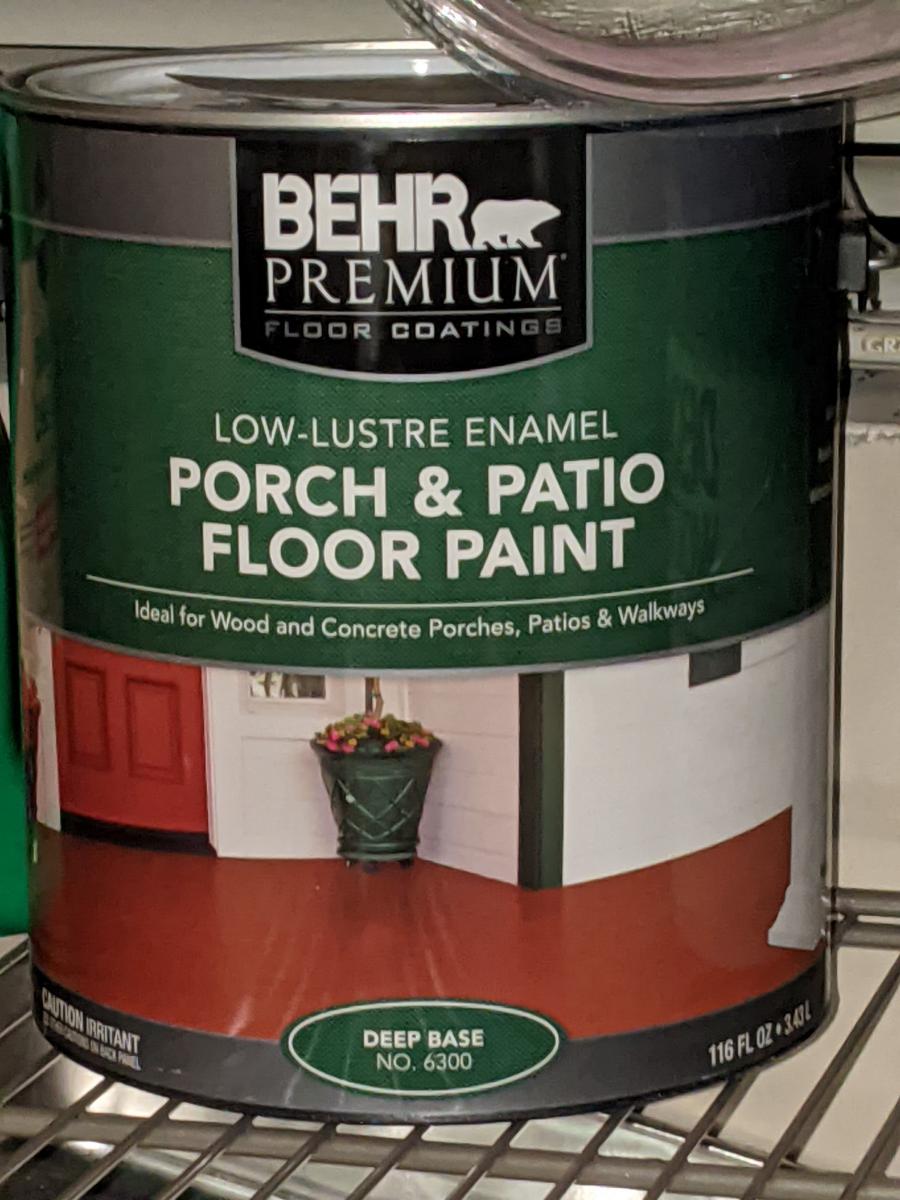
Rustoleum Rock Solid Deck Start Wood Primer followed by Behr Premium Porch and Patio Floor Paint. This gave a really matte finish that looks a lot like the metal patio furniture we will have next to it, and Home Depot was able to tint this for us. We also added a mildew and moss inhibitor to the paint at the store for a couple extra bucks since we live in the PNW. The extra time needed to get multiple coats on for full coverage was totally worth it.
Recommended Skill Level
Beginner

Garage Shelves + Work Bench

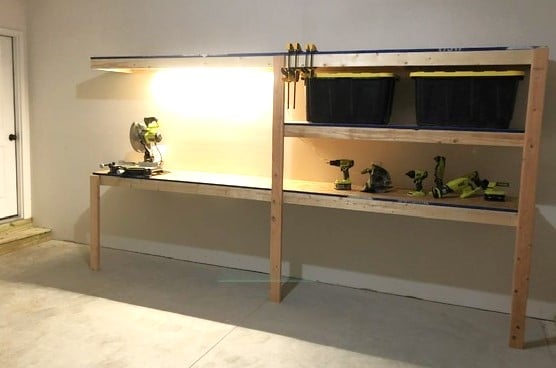
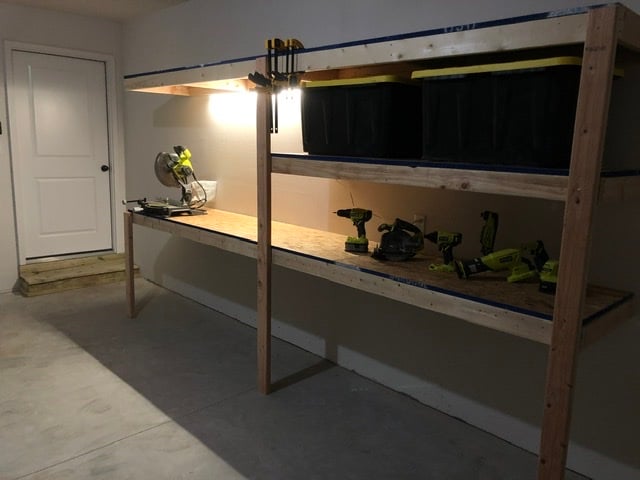
I used Ana’s plans for the garage shelves, but modified them to include a work bench. A lot of you tubers have done this, built a combination work bench and shelving, but I built nearly everything according to Ana’s plans. 12 feet long, 24 inches deep. I got some LED lights (two 1600 lumen strip lights) from menards that really brighten up my entire garage and make the work bench more useful. The one thing I really wanted was to not have a supporting pillar on the work bench to keep it open, and I loved how it turned out. I went for 3/4 plywood, mostly to have a stronger work surface, and I’m glad I did. I have since added a supporting 2x6 off of the study to support the top shelf above the bench and its strong enough to do pull-ups off of, and I have reinforced the support leg under the bench with a cross bar. Thanks for the great plans!!

Estimated Cost
~$200 (lumber prices have gone up recently due to supply issues with covid)
Estimated Time Investment
Weekend Project (10-20 Hours)
Recommended Skill Level
Starter Project

Comments

Brook Laundry Basket Dresser

Submitted by krochelle on Thu, 01/01/2015 - 15:42

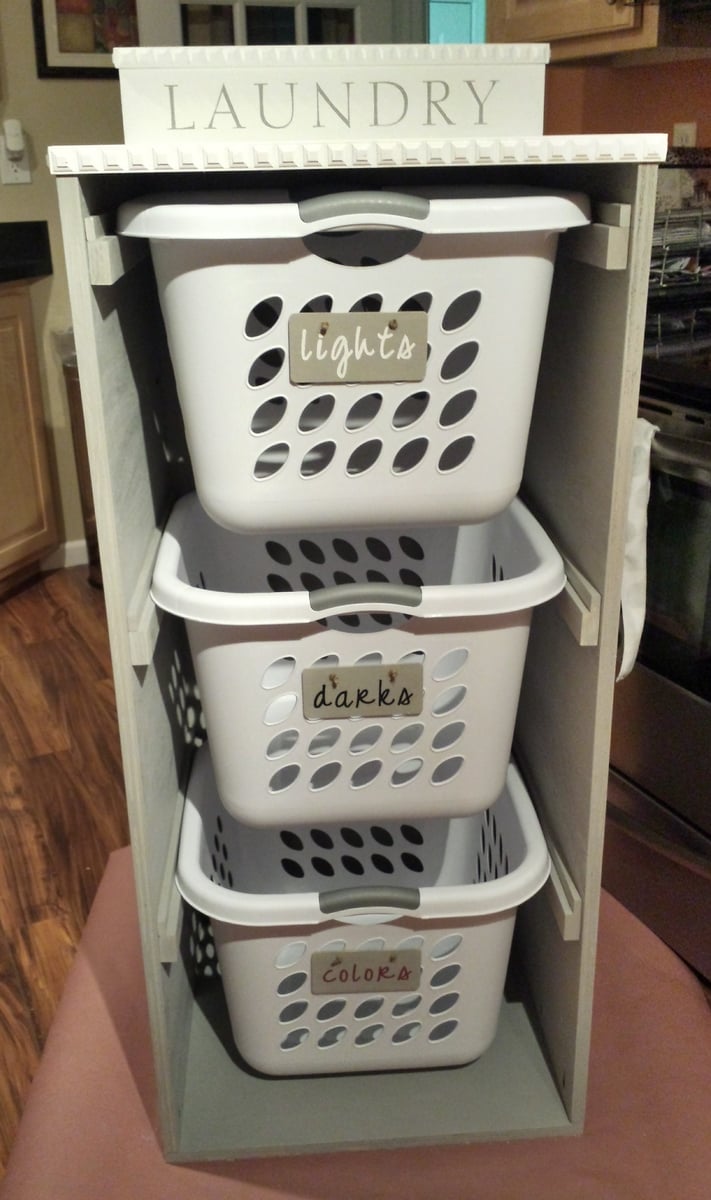
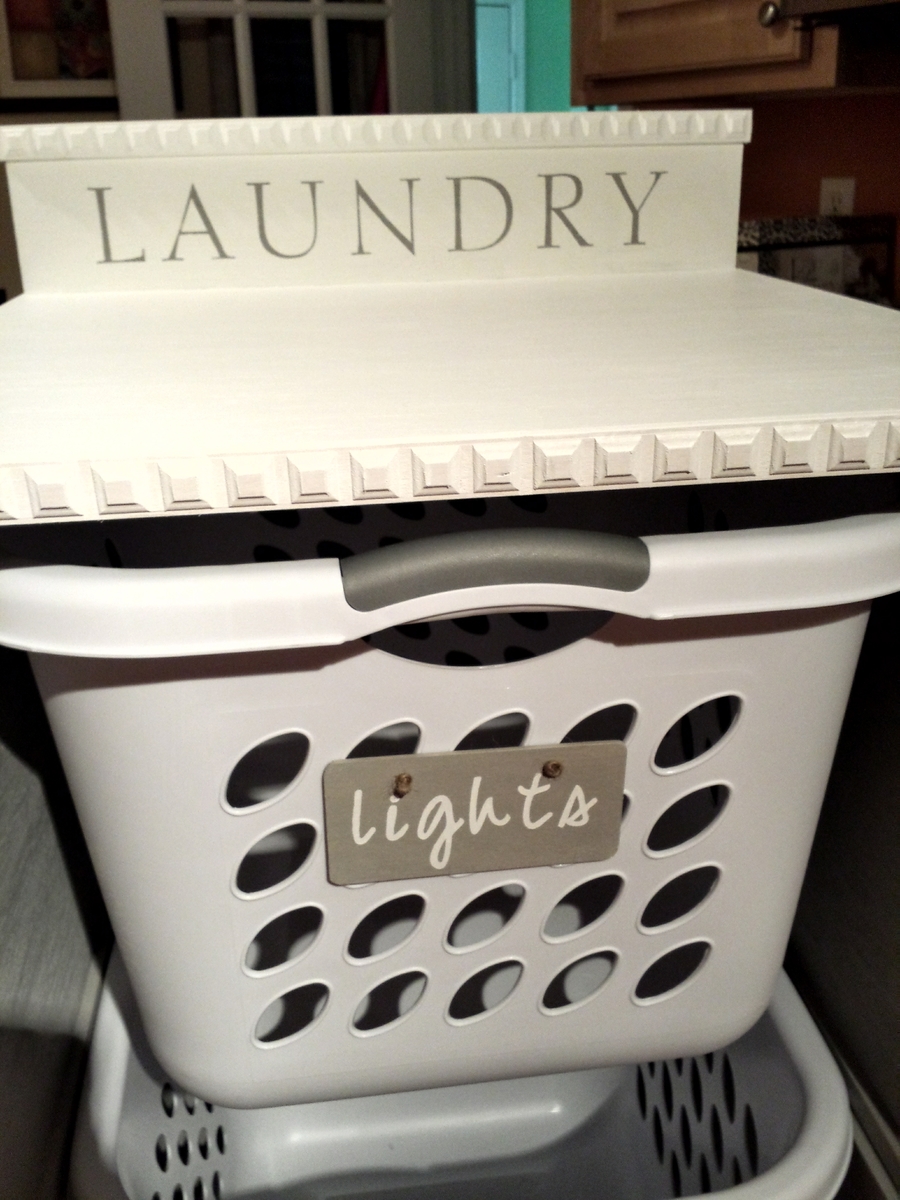
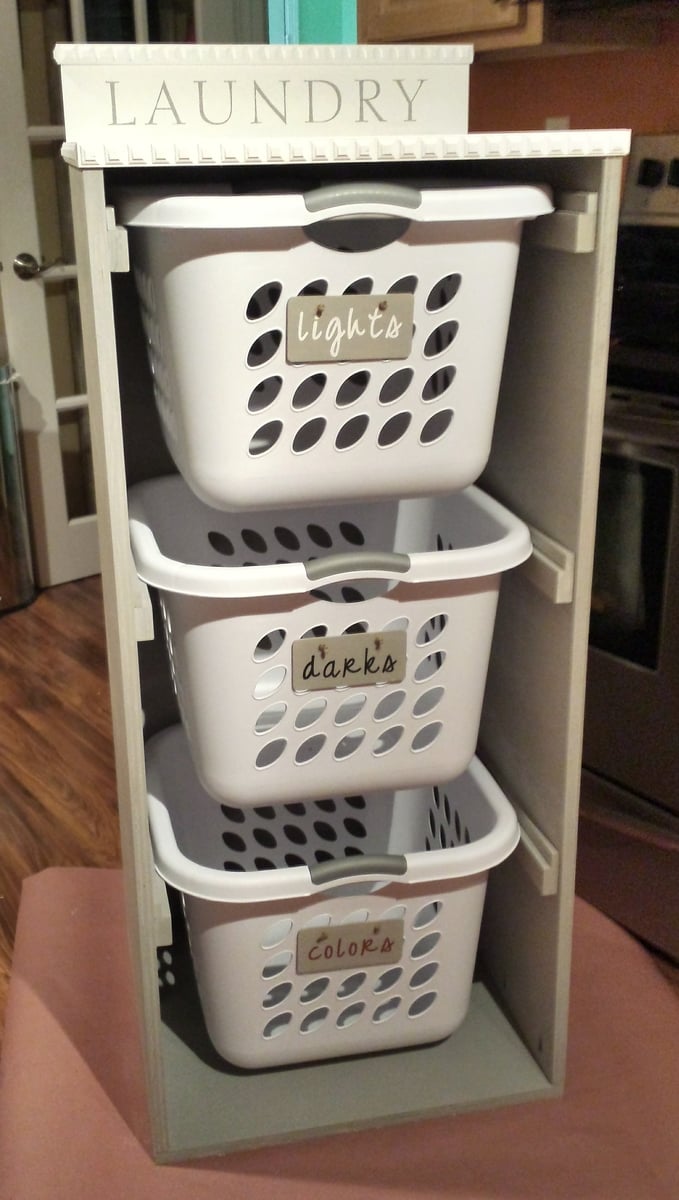
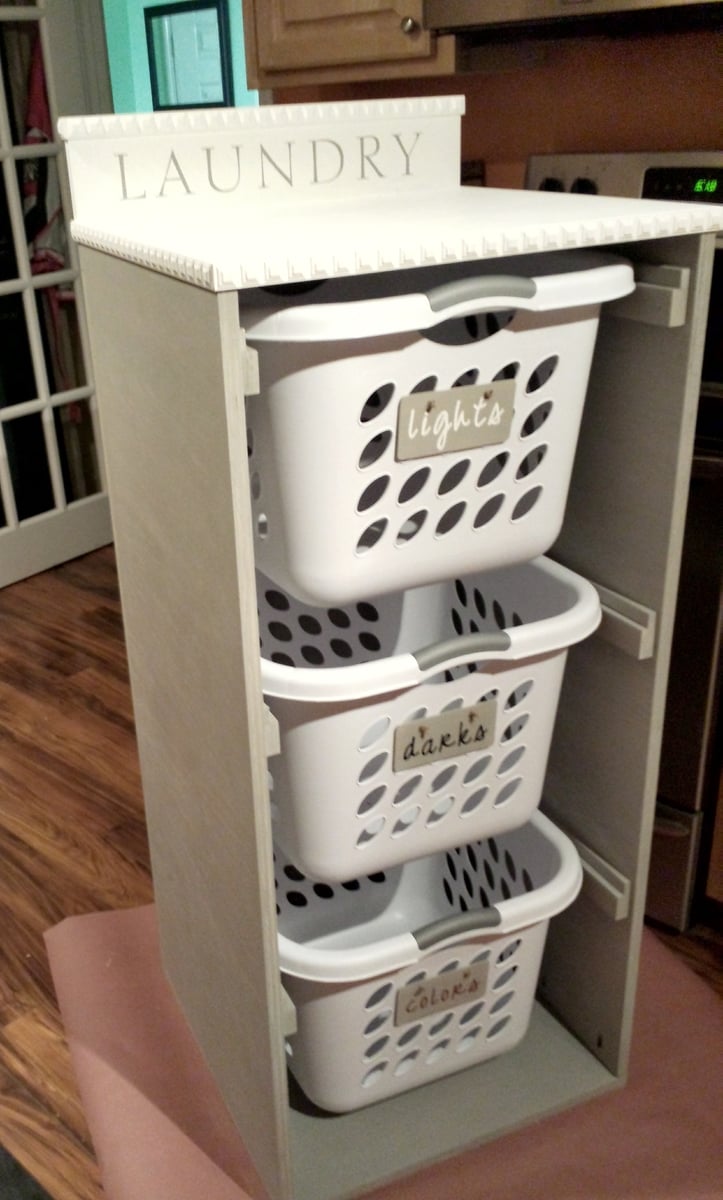
Used square laundry baskets instead of regular rectangular baskets. The square ones aren't as deep but are a bit taller so I had to modify the plans. I added a backsplash and some wooden tags to the baskets to designate them for certain colors. I also added some decorative trim and finished the bottom in a gray stain and used white chalk paint for the top.

Estimated Cost
$70
Estimated Time Investment
Day Project (6-9 Hours)
Finish Used
Weathered gray stain
White chalk paint
Recommended Skill Level
Beginner

Kid's Playhouse and Slide

Submitted by docfin02 on Mon, 03/28/2011 - 18:56

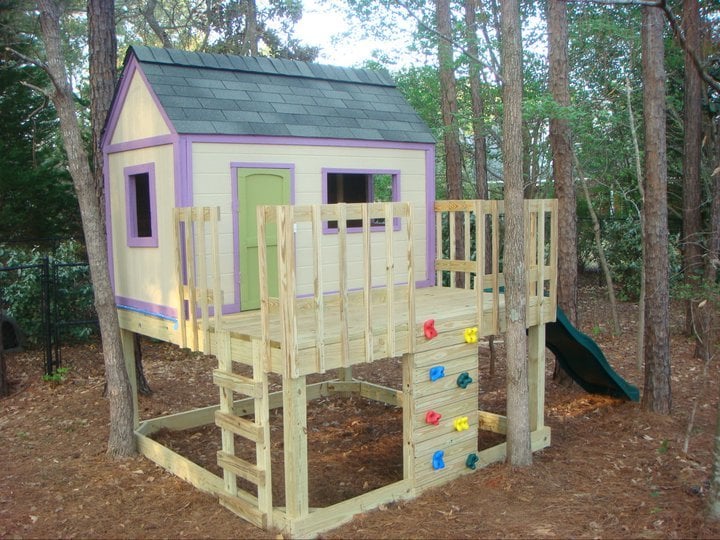
I LOVE these plans. This was my first project, and although it was a big one to start with, the plans were easy to follow. If I can do it, anyone can. I added the rock wall. My kids and I love it. Total cost for me (including all lumber, nails, paint, slide, etc.) is about $850.

Estimated Cost
$850
Estimated Time Investment
Week Long Project (20 Hours or More)
Finish Used
1 coat primer, 2 coats paint
Recommended Skill Level
Intermediate
Seasonal And Holiday

Cedar Boxes

Submitted by drowland on Sat, 07/09/2011 - 07:18

We built these before we saw these plans, but they are pretty much the same... We added the chicken wire to keep the rabbits (and our dog) out of the garden. We added the owl to keep the birds out. We've gotten a ton of tomatoes, onions, and bell peppers so far. Next year, we'll add a few more beds. We also added the verticle garden to take up less space, but its not deep enough. We'll make the next one deeper.

Estimated Cost
$30
Estimated Time Investment
An Hour or Two (0-2 Hours)
Finish Used
none
Recommended Skill Level
Starter Project

Comments

KatieO (not verified)

Sat, 07/09/2011 - 20:11

Wow! LOVE IT! I love the taller posts so you can incorporate the chicken wire! I SOOOO needed to do something like that this year. Also, the vertical garden boxes are BRILLIANT! LOVE IT!

drowland

Thu, 11/17/2011 - 07:59

We ended up getting a ton of tomoatoes and green peppers from the garden boxes. We've actually built a couple more. We'll probably double again before next spring. We're looking at adding more veggies.

We now have ton of stuff planted for the fall...

Guest (not verified)

Tue, 03/13/2012 - 10:46

How did you build the upright planter boxes? Do you mind explaining the building process/design? I really want to plant this in my yard!

colton's mom (not verified)

Tue, 04/03/2012 - 06:19

i love the vertical boxes. I am just trying my hand at the world with a green thumb and could use as much advice as possible about how to make as well as to line the boxes or not to line them. All advice appreciated!

berman (not verified)

Fri, 11/23/2012 - 21:53

Hi, my name is berman. I found you pin from my pinterest and your box garden is so great. I am a newbie in this field and so interested to build garden in my house. If i can ask you some question, could you please to answer that?

cheers,
berman

Seasonal And Holiday

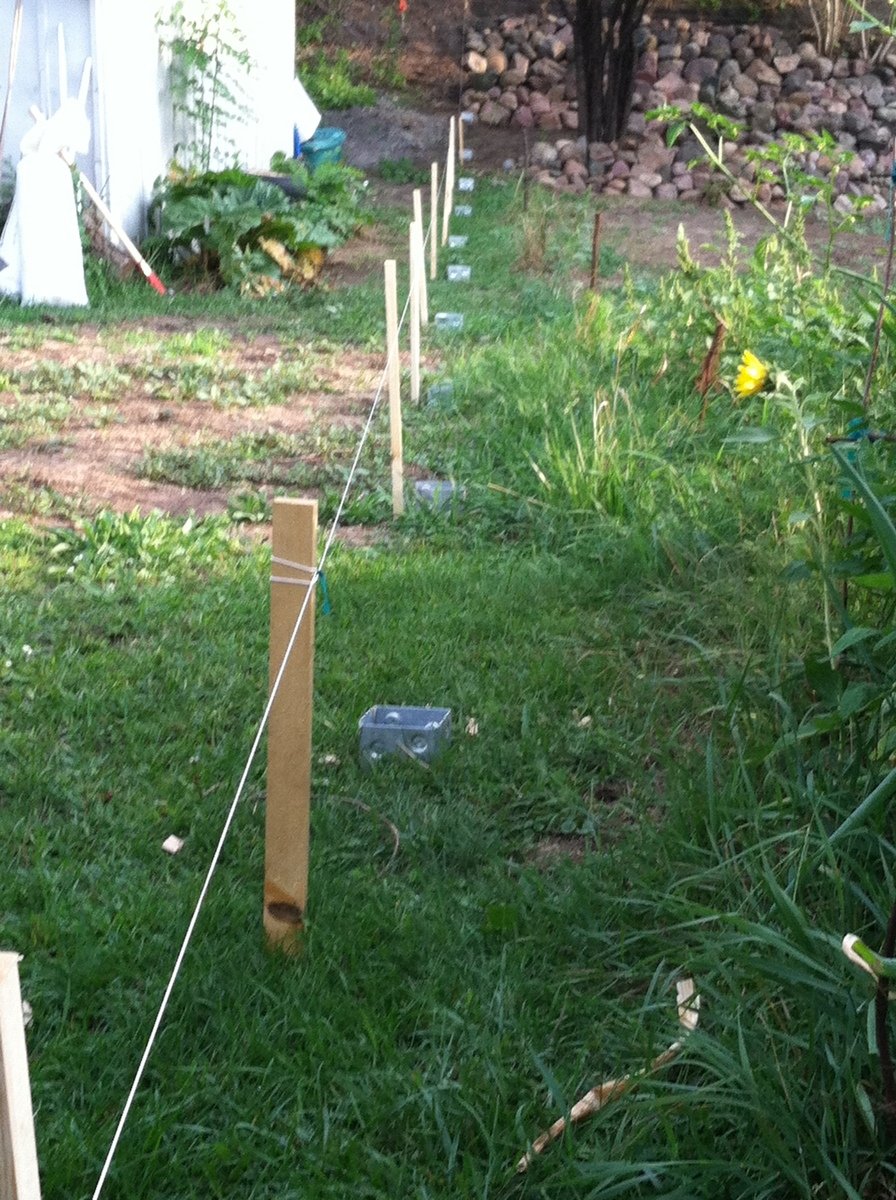
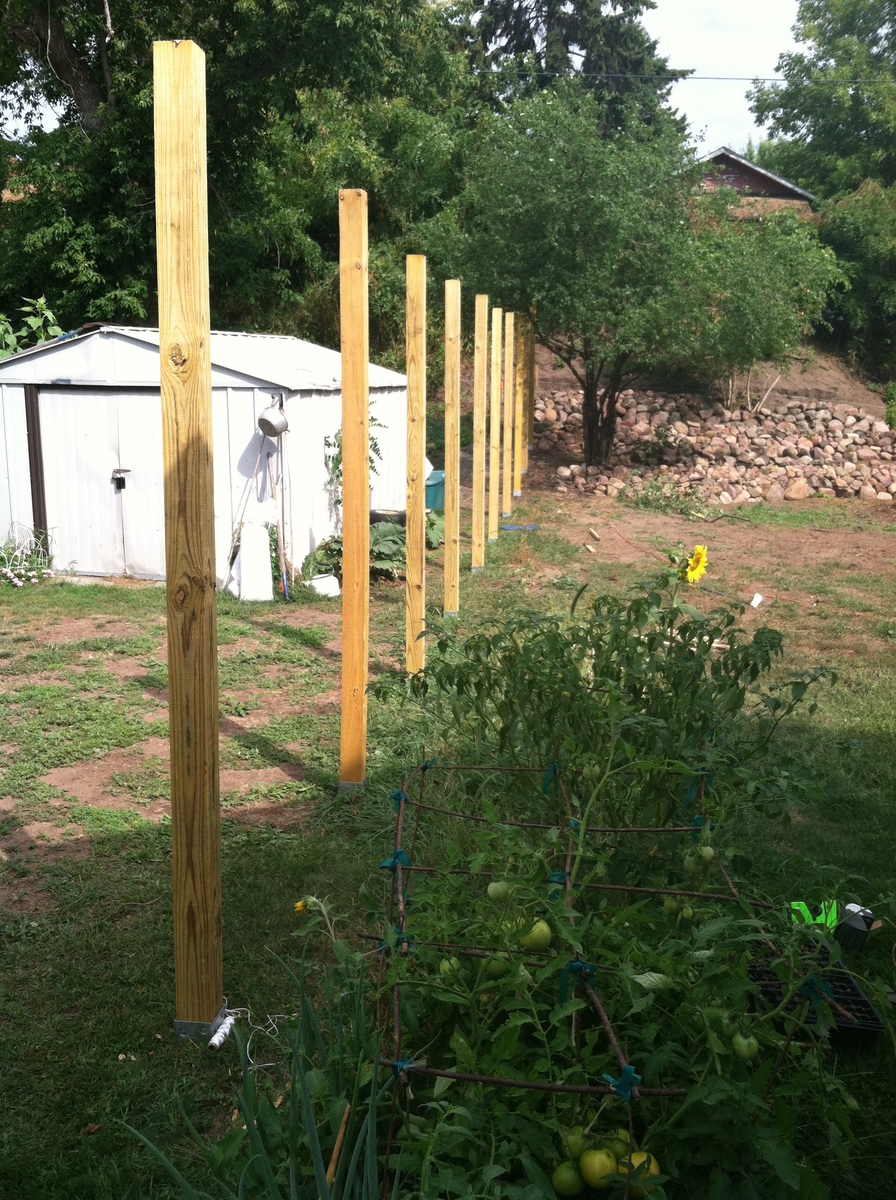
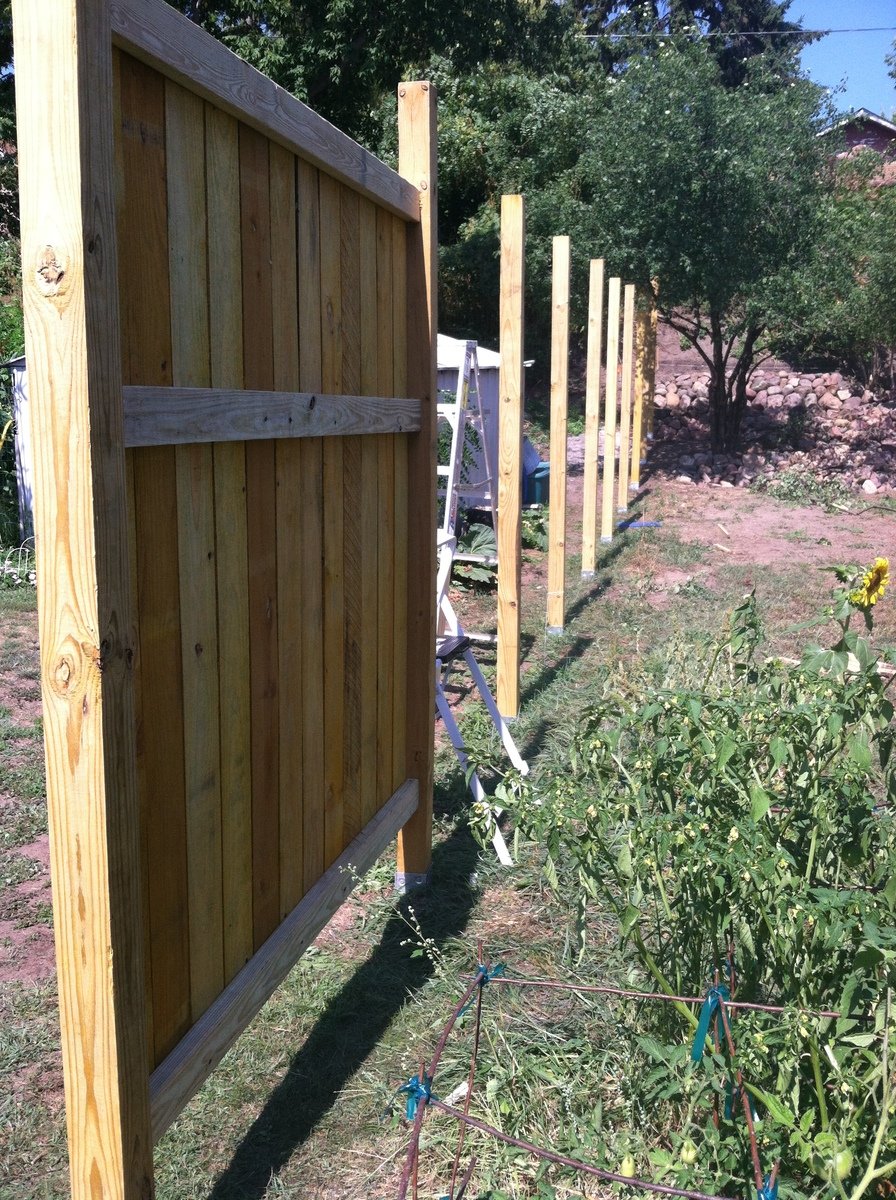
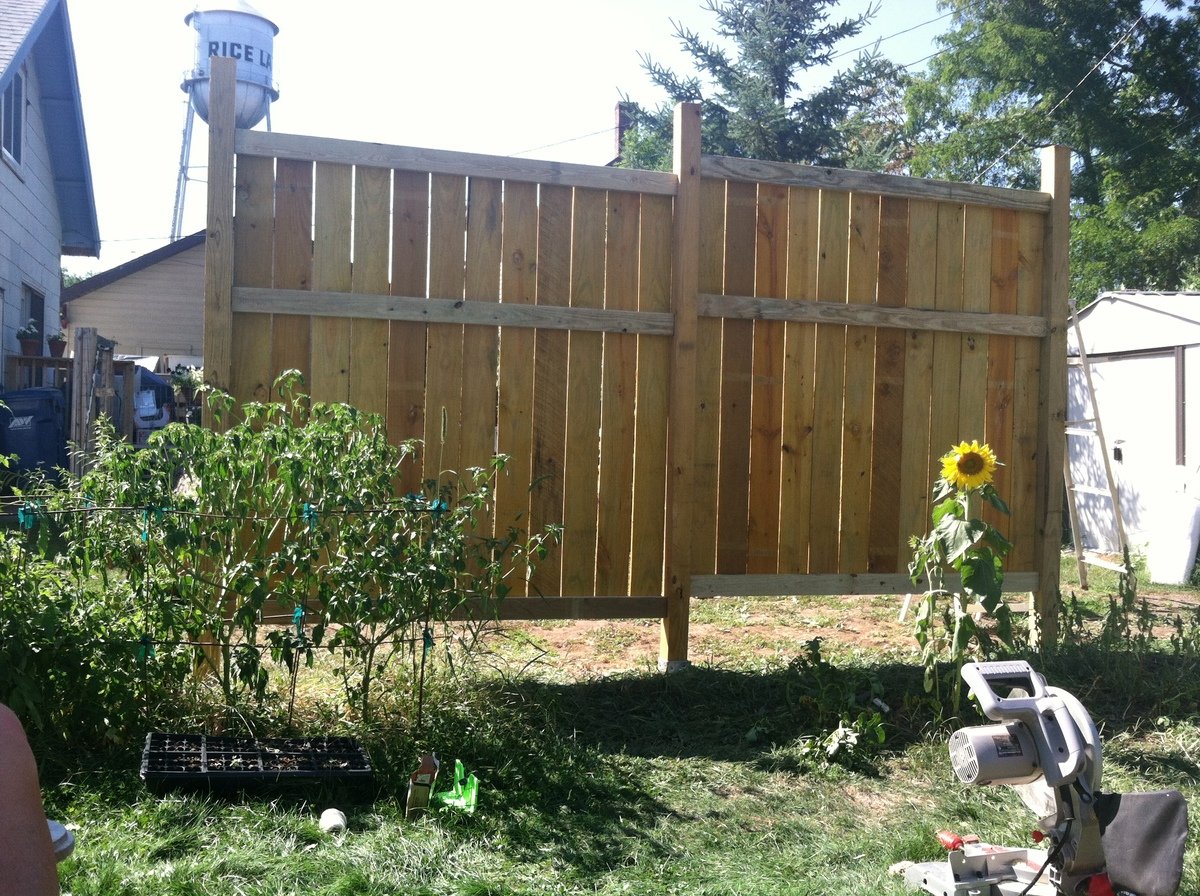
My cedar fence--thank you!

Submitted by NayNay on Tue, 09/03/2013 - 12:48

Thank you for the plans for this fence! So many sites tell you what you need to do to plan for a fence, but don't give you any dimensions, materials, etc.

I didn't do it exactly like your instructions, but close enough to give you all the credit!! I am a 45 year old woman, with only a little do-it-yourself experience. I went to the hardware store, and asked "what are these PH screws?" and felt a little stupid. But my friend Tanya and I built this fence this weekend, with a post level, stakes and string, a chop saw, two 18v drills,a sledgehammer, a string level and a sharpie! We are so proud of ourselves.

I still need to trim off the tops of the posts, and do a few little tweaks. Also, we did not dig post holes. We used oz-posts, and pounded them in with a sledgehammer, attached the wooden posts into the oz-posts with heavy-duty construction adhesive and 8 screws, and straightened them with a huge wood clamp. And next weekend, I'll be putting in raised flower beds along the bottom to cover the lower space. :-))

Built from Plan(s)
Estimated Cost
$76 per panel
Estimated Time Investment
Weekend Project (10-20 Hours)
Finish Used
cedar-toned (pre-finished)
Recommended Skill Level
Beginner

Comments

carongirls

Wed, 09/04/2013 - 06:40

I am excited to hear about these Oz posts. I put up a small fence and dig holes which took me a week and blistered my hands.
I love your fence!

NayNay

Wed, 09/04/2013 - 07:36

If you check out the oz-post website (just google "oz-post"), there are video tutorials. We pounded them in with sledgehammers which kicked our butts. The oz-posts are about $16 each from Home Depot, which adds to the cost of your fence. But renting a jackhammer was $130 per day plus $30 per running hour, PLUS gas. Renting a post hole digger and buying cement is also expensive. So, buy yourself a sledgehammer, and use chunks of pressure treated wood to put in the tops and wack away!! We first used just regular wood, which splintered terribly, and then spent a lot of time trying to pry them out. If you do get the wood stuck in the posts, drill in a couple screws through the top, and pull them out with someting attached to the screws. Use chunks of pressured treated 4x4s and try to hit it square in the middle!! Good luck!

HD

Thu, 10/30/2014 - 12:46

I know this has nothing to do with woodworking or fence buidling...but that water tower in one of the picture reminds me of one I saw during a drive through Wisconsin. 

Storage Step

Submitted by sophie on Wed, 10/12/2011 - 01:38

I built the storage step using my own measurements as it's designed for adults. It is used for reaching the very highest shelves in my floor-to-ceiling wardrobe system.
It was my first project using my jigsaw and am very happy with how it turned out.
I added some rubber non-slip mats stuck down so no one goes flying when stretching for clothes!
Have a look at my blog for more pictures and information.

Built from Plan(s)
Estimated Cost
€20
Estimated Time Investment
Afternoon Project (3-6 Hours)
Finish Used
Turquoise and white paint
Varnish top coat
Recommended Skill Level
Beginner

Quick and free wall decor

Submitted by AlexWS on Tue, 10/18/2011 - 14:02

So about a month ago I had planned for people to be over for a casual evening of story telling, snacking, casual beer drinking and the exchanging of a variety of craft beers. All in all, a good time, no biggie.

Fast forward a little bit after making this commitment, the roommate tells me he and his girlfriend are getting their own place and therefore moving out. Great! Now I don't have to put on pants when I wake up to pee at night.

Fast forward to the first of this month, he's moved out. Gone with him is much of the furniture and things in the house. Not really a big deal except now it looks like I live with nothing but a bed, a couch and some milk crates. Not the image I want conveyed to a group of people who are going to see where I live for the first time.

Of course maybe a more normal person would go buy some things to fill the gaps, unfortunately for a 24 year old making not nearly enough over minimum wage, that isn't an option. Besides, even if I could afford it, furniture markup makes me ill.

So I had two weeks to make enough furniture to make my house appear respectable with a limited budget. To my favorite medium it was, pallet wood.

Everything featured here is made with reclaimed pallet wood, leftover paint and leftover screws/nails/sandpaper.

Except for the beer bottle shelves which were simply painted the paint was all worn down to look aged by using worn out sanding pads on a random orbital sander(seriously, leftover sanding pads). They were all left that way then with the exception of the shelves for the glassware which were rubbed down with ebony stain.

I'm listing my time for all these at just 3-6 hours even though it took two weeks because the time was spread out between other projects at the same time and most nights I only had a couple hours to work on them after work. Plus the obvious time for paint to dry.

Built from Plan(s)
Estimated Cost
Free
Estimated Time Investment
Afternoon Project (3-6 Hours)
Finish Used
Oops paint sanded with used sanding pads on a random orbital sander.
Recommended Skill Level
Starter Project

Comments

AlexWS

Wed, 10/19/2011 - 17:46

If your tastes are "anything I can get my hands on" than yes we do! That's actually only about a quarter of my collection so far, the rest are on the opposite wall.

Side-Street Loft Bed

Submitted by Anonymous (not verified) on Fri, 02/19/2016 - 07:41

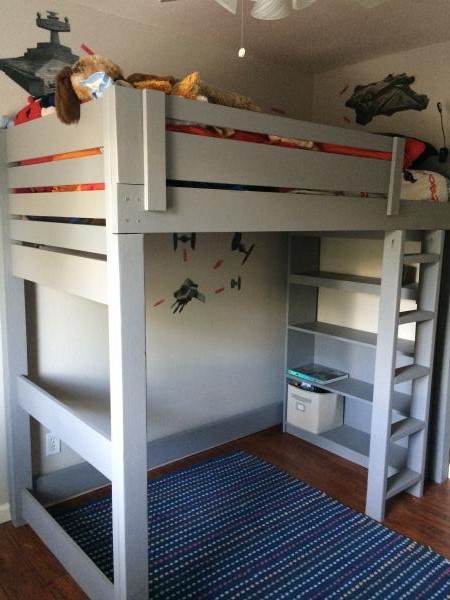
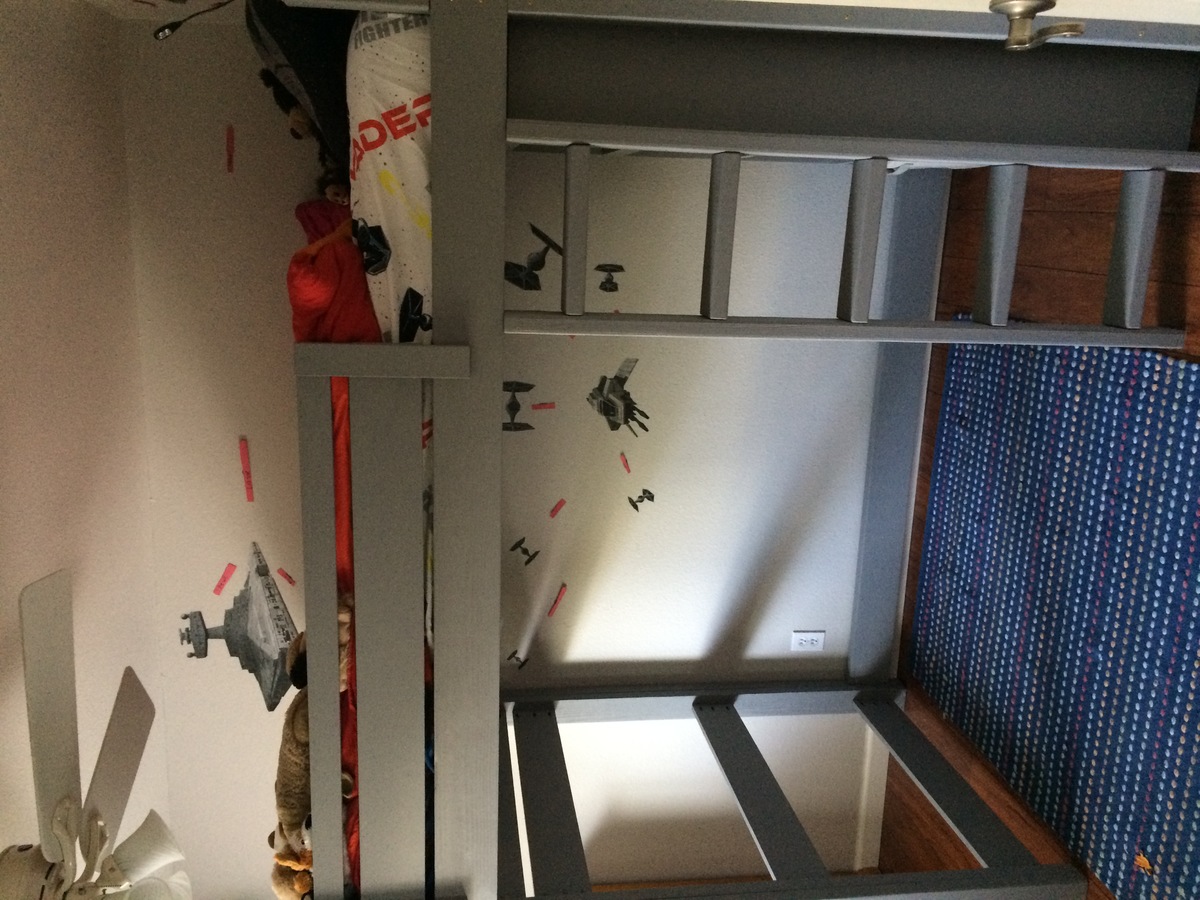
This is a mix the "Side-Street bunkbed" plan and the "How to Build a Loft Bed." I used "Spax" 3 inch wood screws to attach the side rails instead of bolts used in Side Street plan.  I used KregJig pocket holes for everything else. 

Estimated Cost
$250
Estimated Time Investment
Week Long Project (20 Hours or More)
Finish Used
Behr paint: Anonymous
Recommended Skill Level
Beginner

Comments

Extra long, no middle shelf Rustic X Console

Submitted by Anonymous (not verified) on Mon, 04/04/2016 - 08:34

We have a huge sectional and loved this table, so we modified it a little to fit our needs. Took out the center shelf, made it 10 feet long, and added breadboard ends to the top. Came out perfect! Couldn't be happier.

Built from Plan(s)
Estimated Cost
$115
Estimated Time Investment
Week Long Project (20 Hours or More)
Finish Used
One coat of Rustoleum Sunbleach, allow to dry completely. Really, like one or two days. If the base coat isn't completely dry the following step will lift the first coat right off. Then one coat of Rustoleum Kona with some Sunbleach mixed in to lighten it a little, about a 5 parts Kona to 1 part Sunbleach blend. Lightly wiped Kona mixture back immediately, wipe with the grain, and only once (product is more like a paint than a stain in many ways and will get sticky and splotchy if you fiddle with it too much). I had to move fast on a table this long and I still got some splotches! I wanted it a little rough looking, so to me that was fine.

Finished with three coats of wipe on satin poly (gentle knockdown with very fine steel wool between coats), and finally a coat of clear wax. Buff until arms give out.
Recommended Skill Level
Beginner

First Project!

Submitted by katiea40 on Sat, 04/07/2012 - 18:20

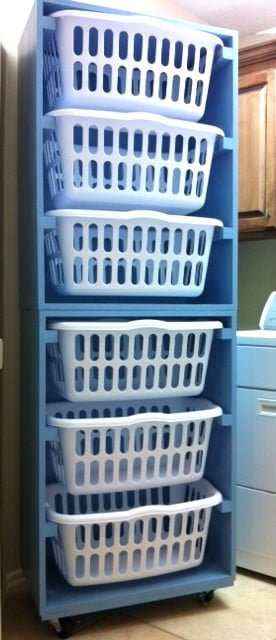
I saw this and thought - FINALLY...the answer to my laundry chaos! My husband built it for me this weekend with a couple of minor modifications. He put casters on the bottom, so I can move it to clean and sweep. He also added clear plastic drywall corner protectors over the 2x2's so that they paint is protected when the baskets slide in and out! Pretty clever! Oh, and I thought I was being super creative when I picked the color - and then saw that it is the EXACT color that you painted it! So much for that creative spark - but, I'll work on it! Thanks for the plans!

Built from Plan(s)
Estimated Cost
$100
Estimated Time Investment
Afternoon Project (3-6 Hours)
Finish Used
Primed and painted with high gloss finish.
Recommended Skill Level
Beginner

DIY Shed Chicken Coop

Submitted by Anonymous (not verified) on Mon, 10/16/2023 - 10:30

8x12 coop modified from your classic shed plans. 2/3 for the chickens, 1/3 for storage.

by Harmony Munson

Built from Plan(s)

Comments

Seasonal And Holiday

Doggie Daybed

Submitted by MurdaRae on Wed, 06/06/2012 - 10:16

I've thought for a while about building a bed for our dogs, but wasn't sure where to start. We had an extra crib mattress so I set out to find a toddler bed that would work. I decided the Lydia Toddler Bed plan would work best. It doesn't look anything like it, but it was a great starting point.
First, I got rid of the canopy and the decorative side pannels. I also raised the bed 12 inches. (The hope is to add a rug on the floor underneath as sort of a "bottom bunk") The lumber store didn't have 2x2s so I used 2x3s for the legs. I also only used two 1x6s at the head and foot of the bed. They are seperated by 1" because when I got home, I realized they were actually 1x5 (RUDE).

All in all, it turned out exactly as I had hoped and the dogs love it! GOODBYE stinky dogbeds!

**Photo 1: Just finished building--the slats weren't screwed down yet.
**Photo 2: Deacon is testing out his new digs! See the stinky dogbed underneath?YUK!
**Photo 3: Dog Bed Completed! Mac & Deacon love it!

Built from Plan(s)
Estimated Cost
$38
Estimated Time Investment
Day Project (6-9 Hours)
Recommended Skill Level
Beginner

Comments