Community Brag Posts

Just one of many Honey to Do projects

Submitted by Anonymous (not verified) on Tue, 04/26/2022 - 04:53

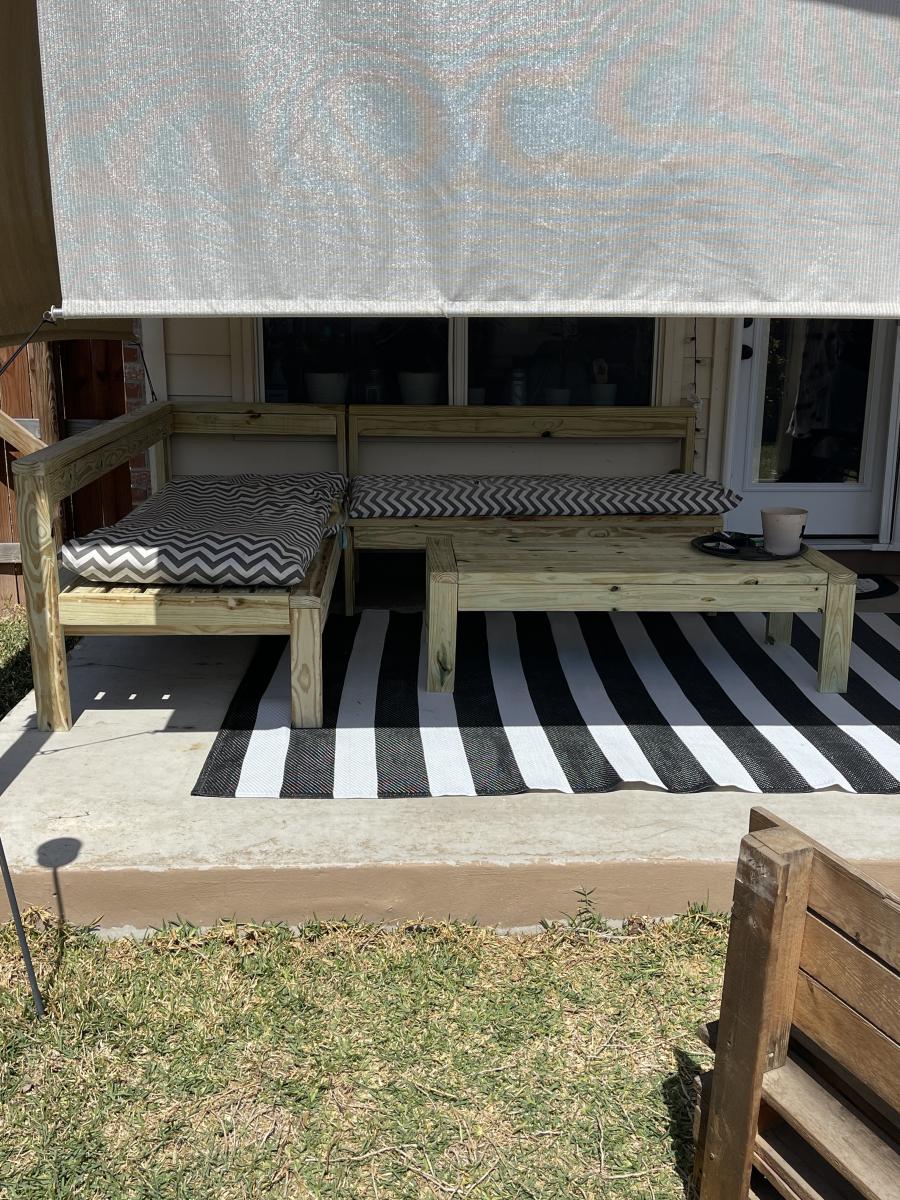
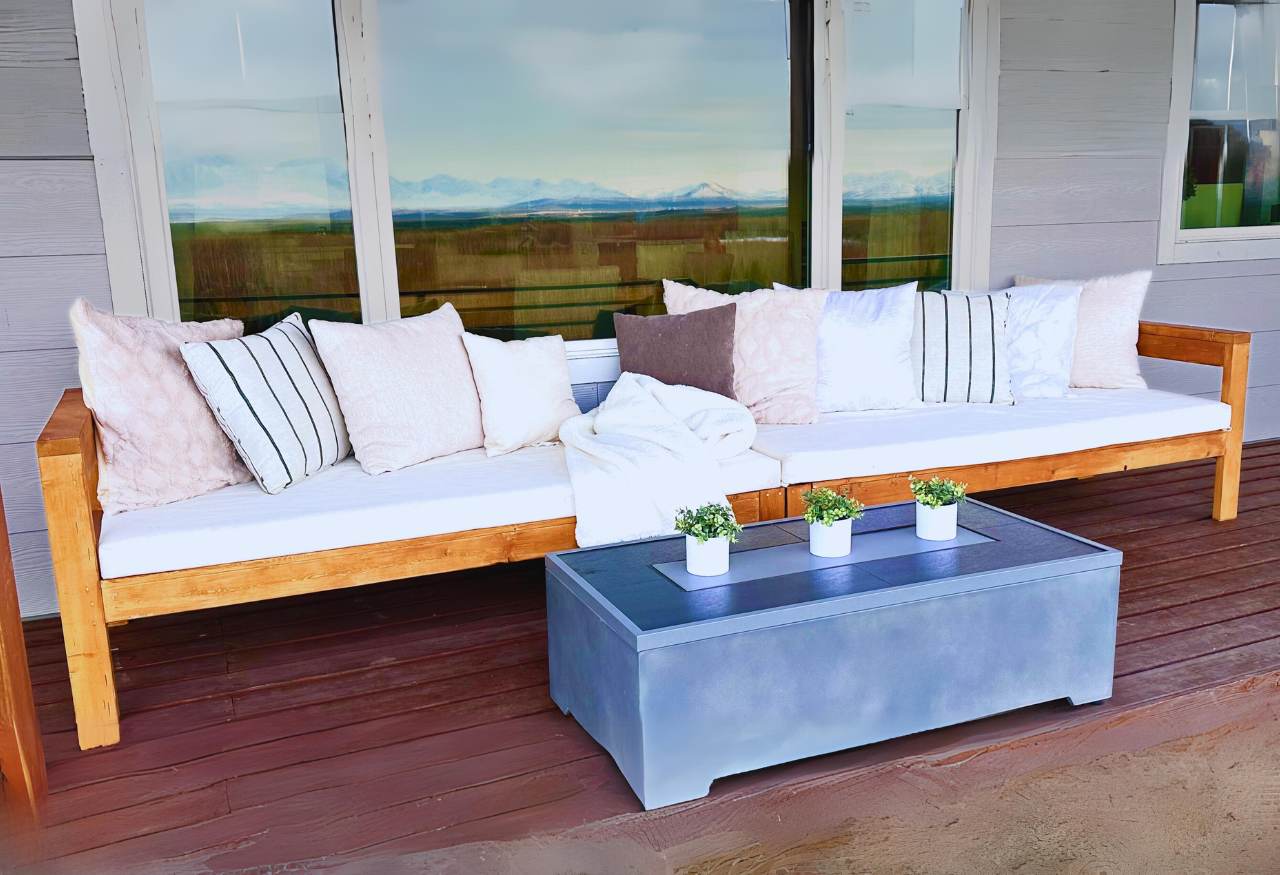
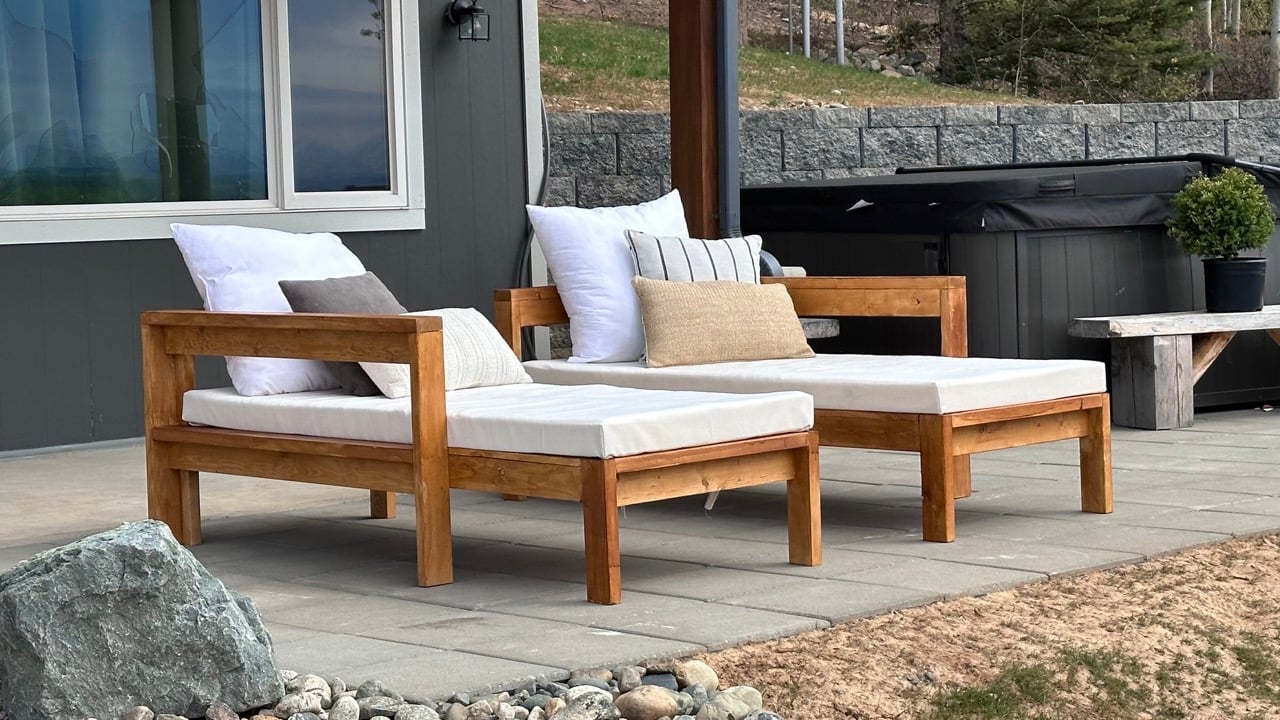
My wife wanted a patio set and I initially made a set using pallets but I knew I could make a better one so after seeing one Ana made on Pinterest I went to work. I have now painted it white and my wife will be make the cushions for it as I made it a little wider than the actual plans called for.

Comments

Bedroom Dresser

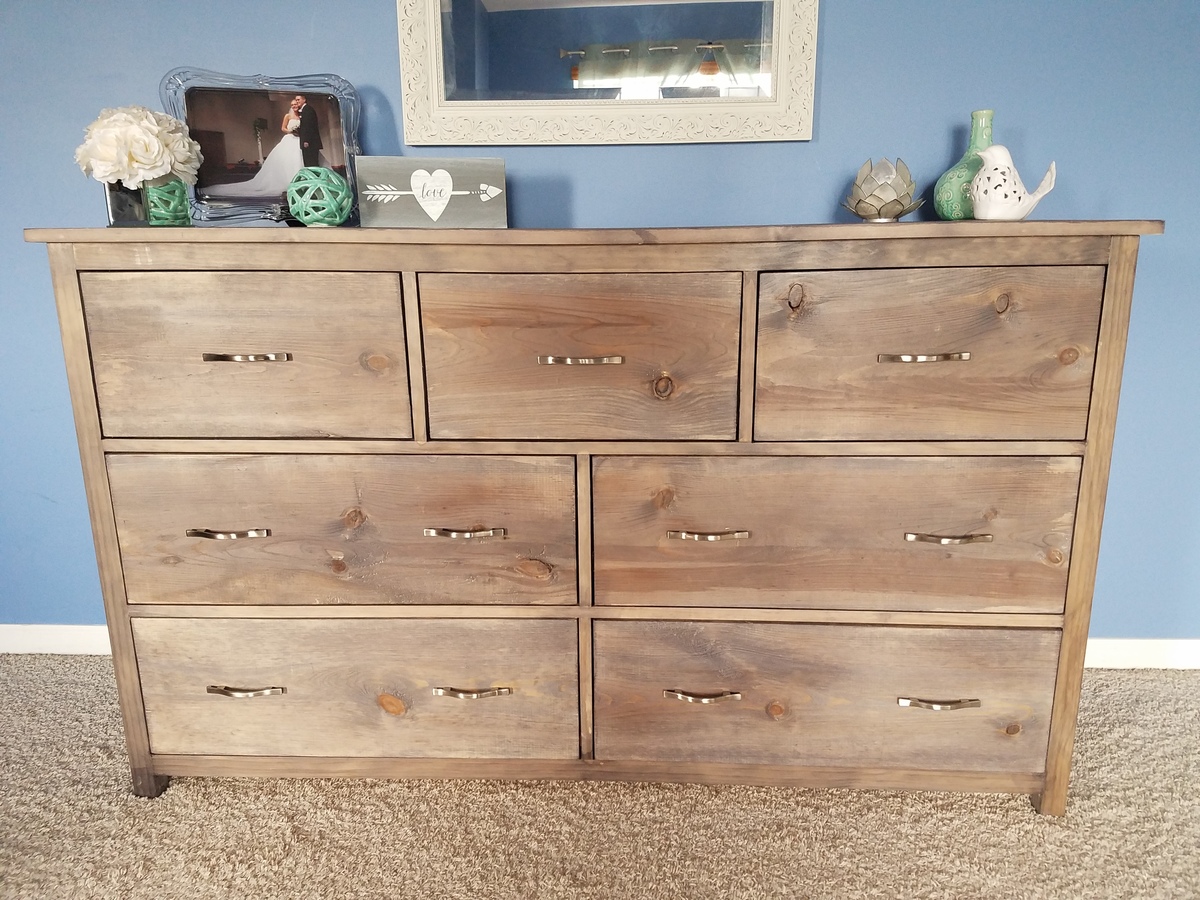
First time using drawer slides, and what a learning curve it was! The color is Varathane Weathered Wood Accelerator. This piece is huge and heavy! Absolutely love it and rebuilding other bedroom pieces to match this color. I also built a matching dresser which is taller and much more narrow. It can be found here: http://www.ana-white.com/2018/08/DIY_furniture/tall-bedroom-dresser

Estimated Cost
$200-$250
Estimated Time Investment
Weekend Project (10-20 Hours)
Finish Used
Varathane Weathered Wood Accelerator, Varathane Poly
Recommended Skill Level
Advanced

Comments

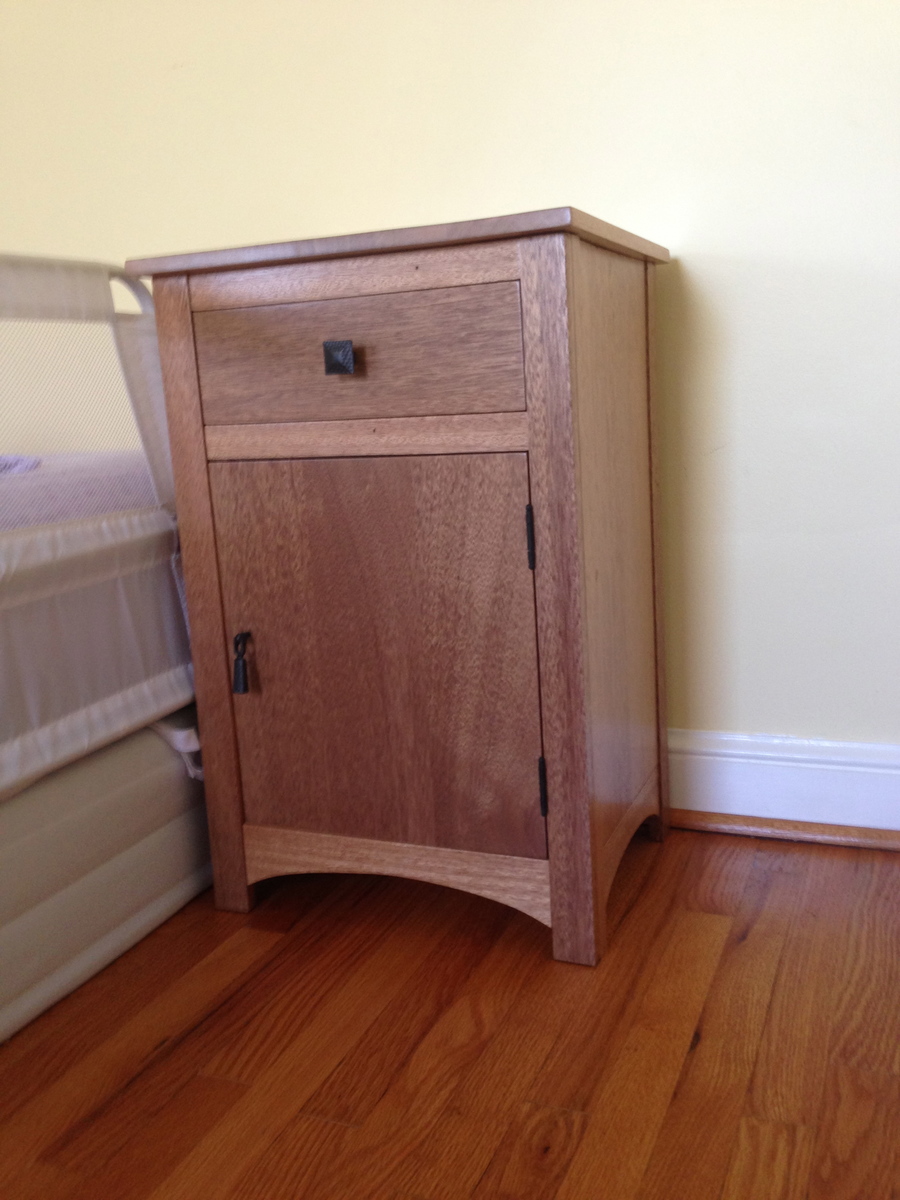
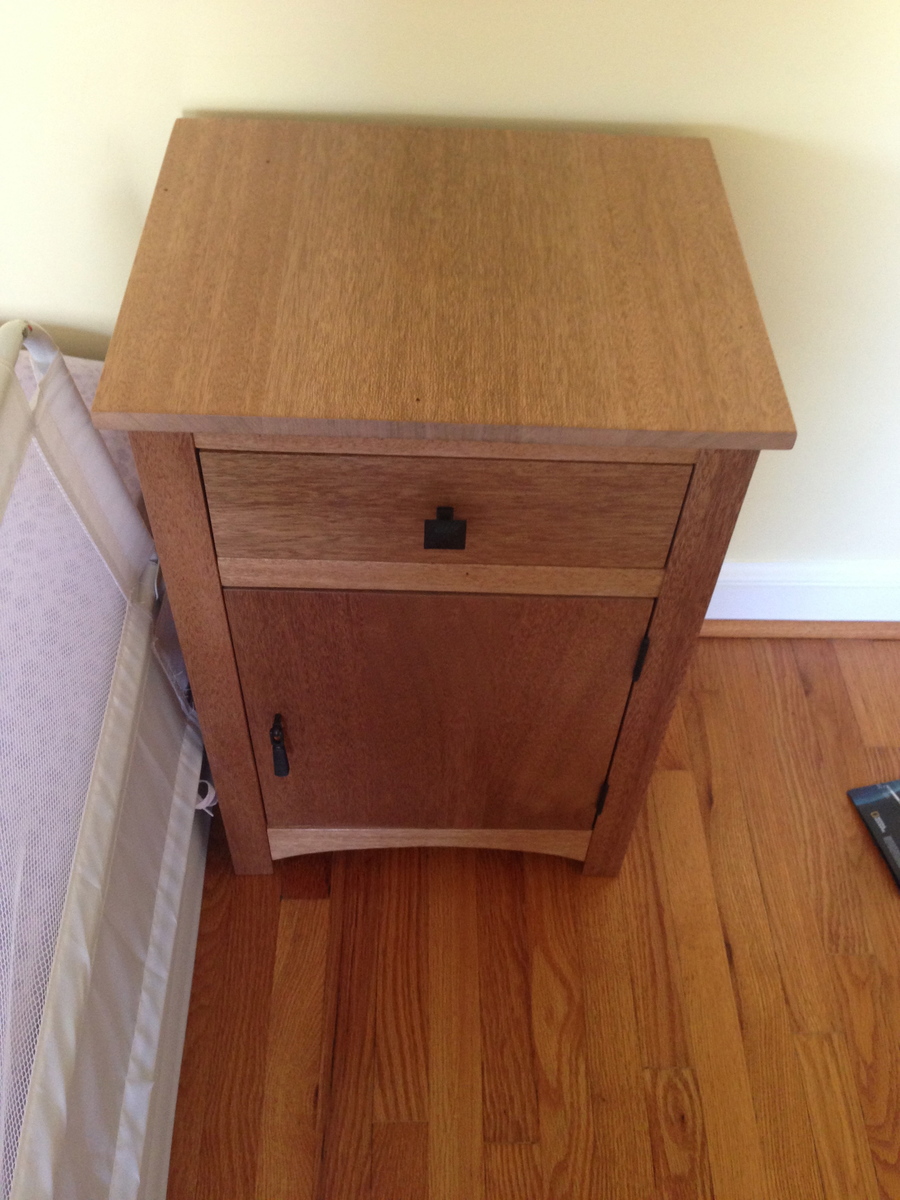
Inspired by Julia Nightstand

Submitted by kirst1230 on Mon, 09/02/2013 - 10:03

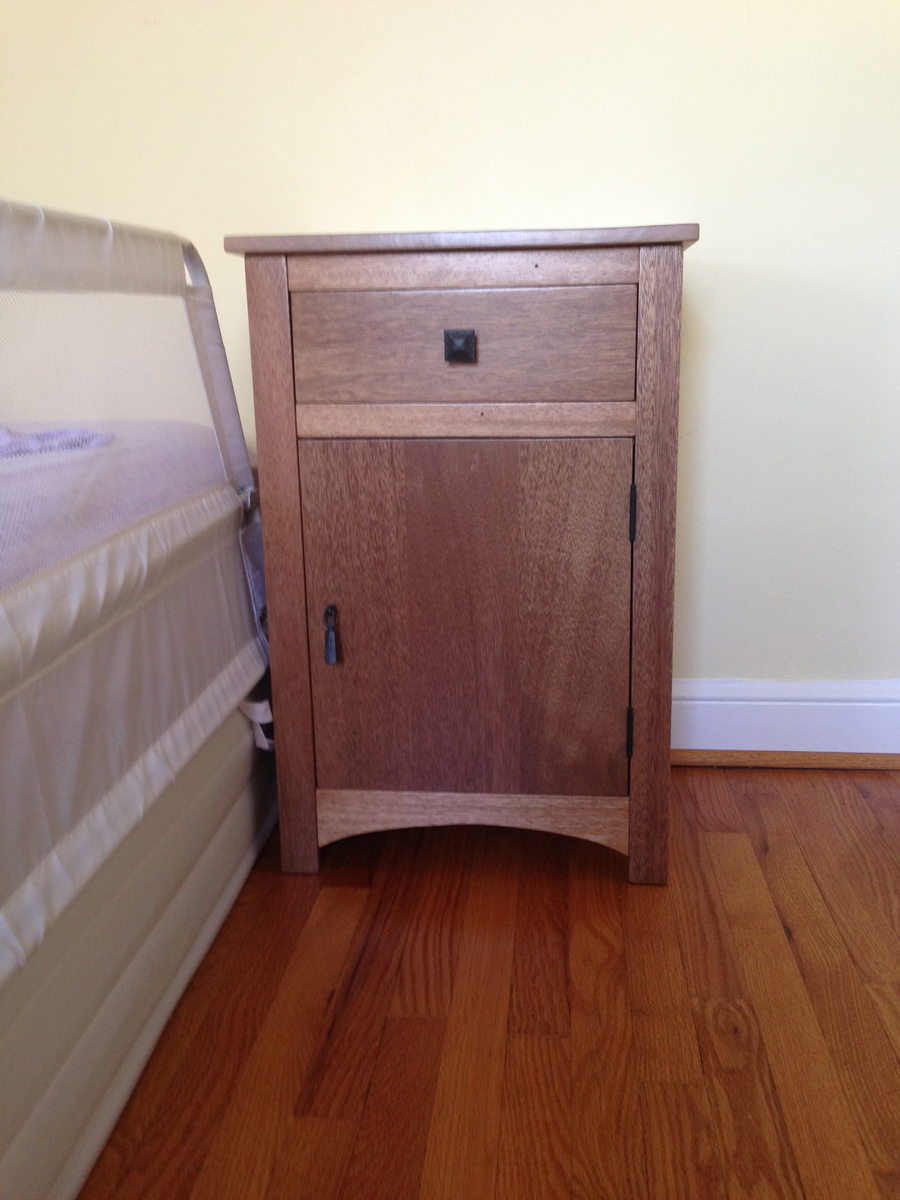
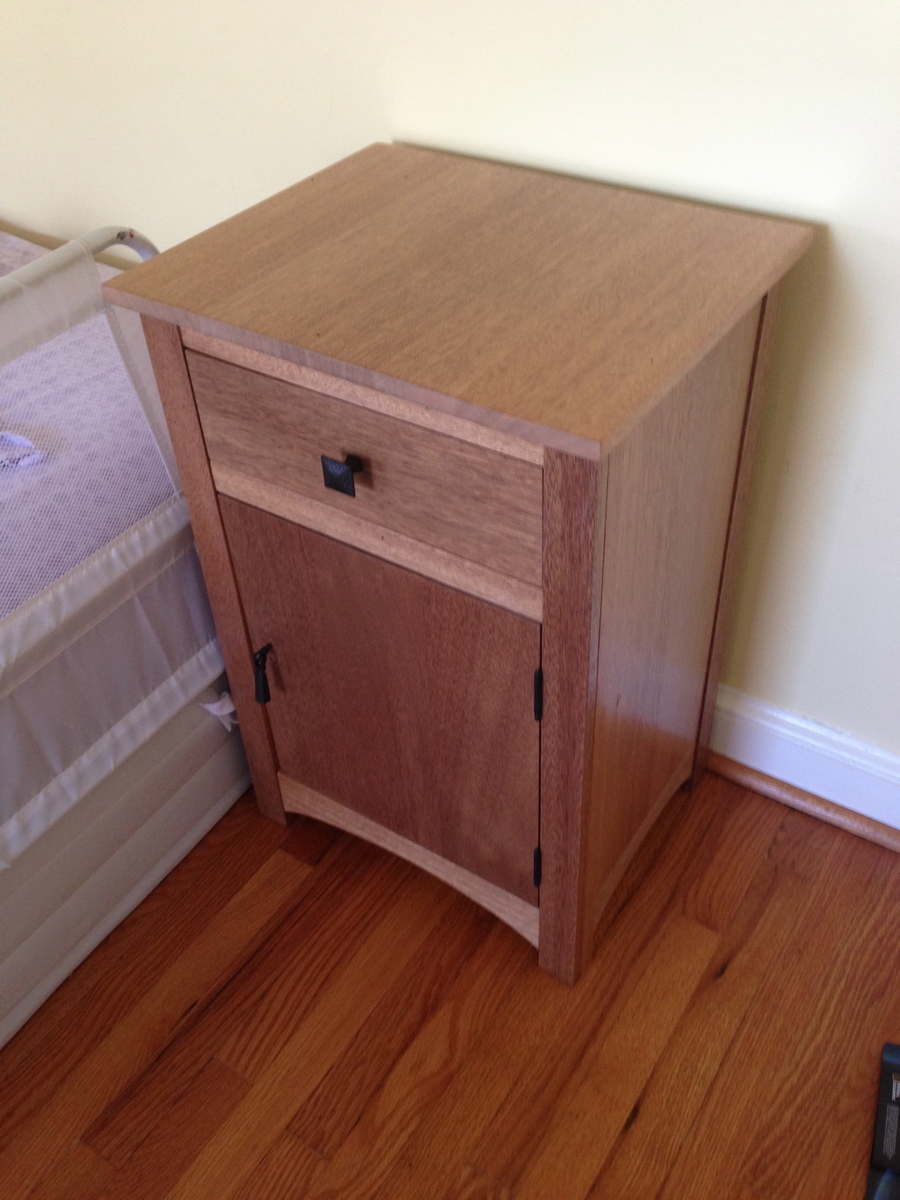
This nightstand was inspired by the Julia Nightstand. I changed a few of the measurements and added a door. The entire piece is built out of wood I salvaged when I tore out the wall paneling in my basement. The old nail holes add nice character and the color of the wood and grain are really nice. This piece does not have any stain - this is the natural color of the wood. I finished it with water based polyurethane.

Built from Plan(s)
Estimated Cost
$25
Estimated Time Investment
Week Long Project (20 Hours or More)
Finish Used
Water based polyurethane painted with synthetic hair brush. I did not use any stain. The water based polyurethane raises the grain so I sanded between the first two coats. Total of 4 coats. No odor and very easy cleanup (soap and water).
Recommended Skill Level
Intermediate

Comments

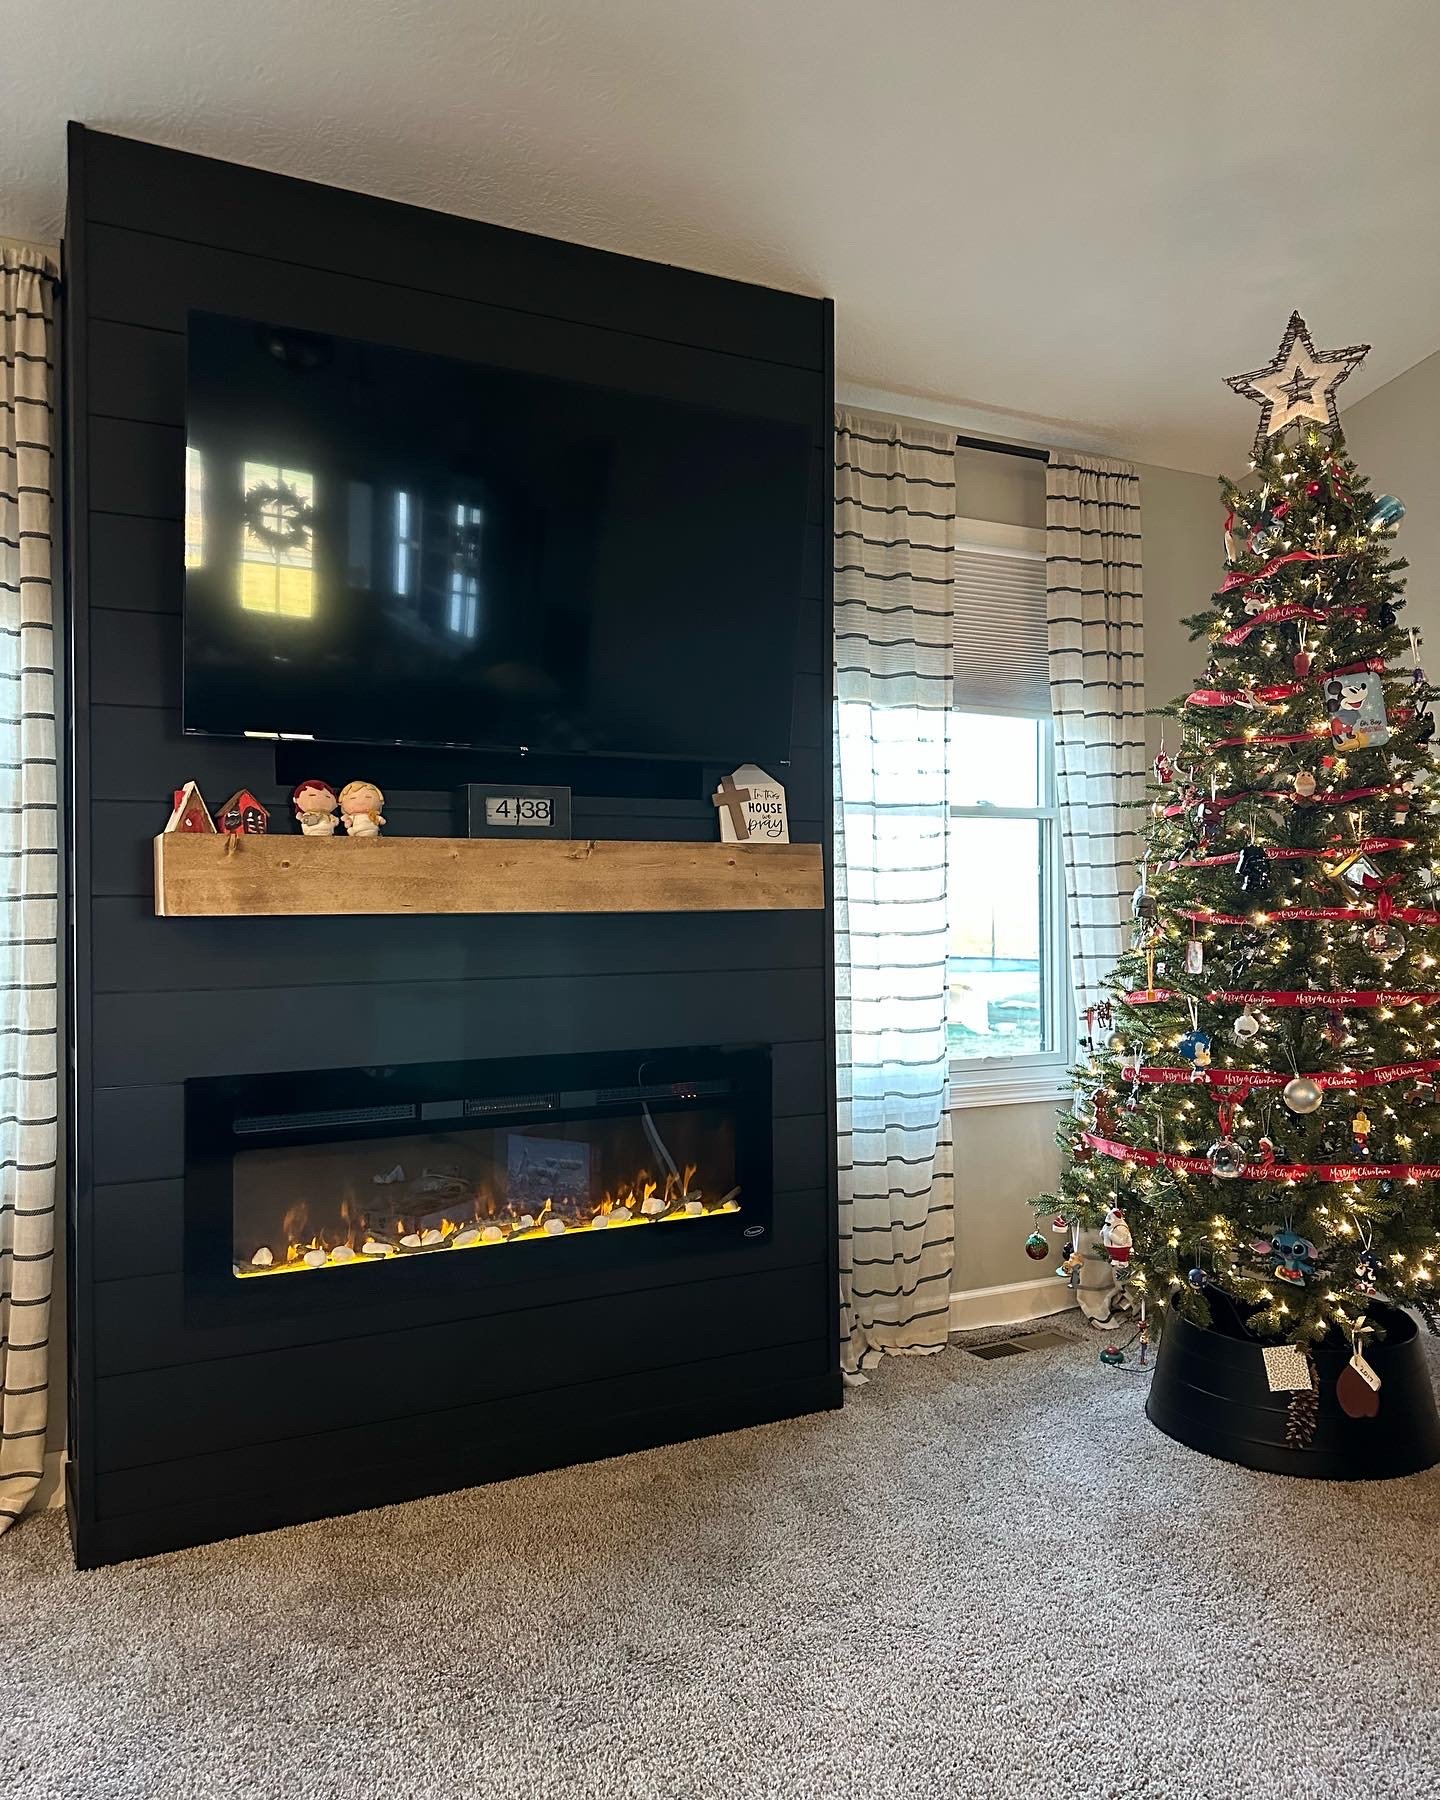
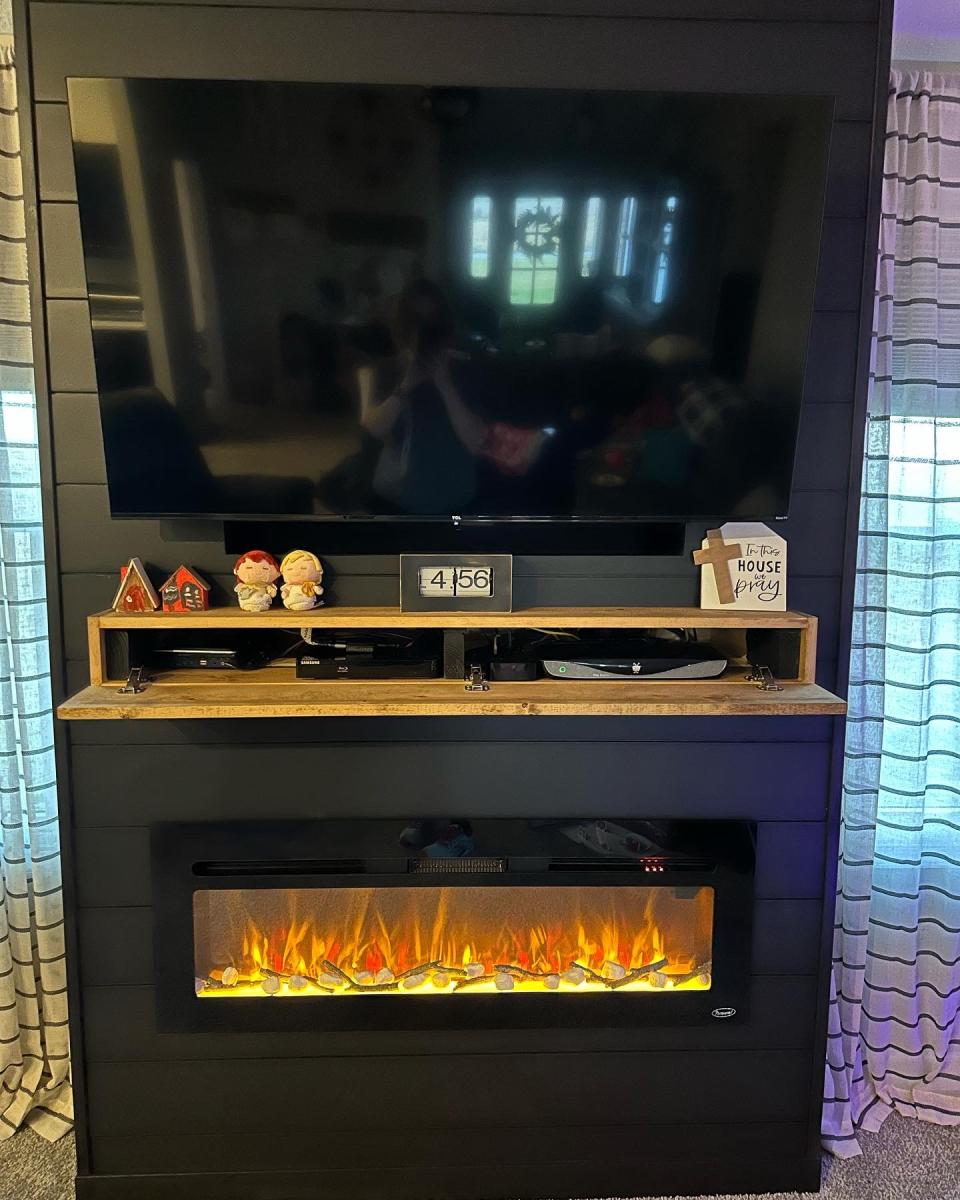
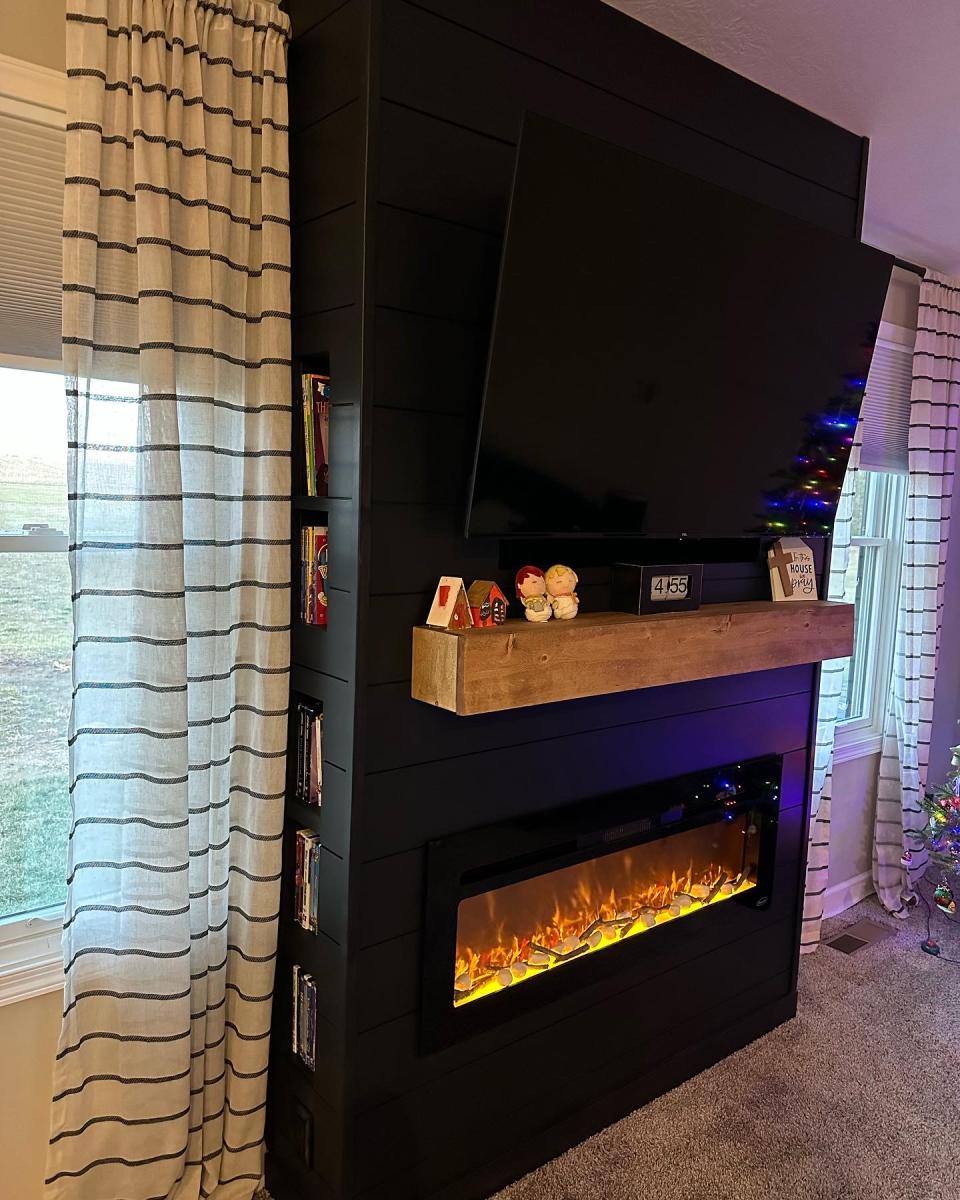
Fireplace with hidden Mantle storage and side bookshelves

Submitted by ibseenu on Thu, 12/01/2022 - 14:30

Thank you Ana for you Fireplace design as it was exactly what I needed! We’ve lived in our house for 3 years now and I’ve wanted a fireplace ever since. Your plan was perfect and with a few modifications I made it come to life. My 9yr daughter as I was almost done building thought there should be a shelf for books and movies below the fire place. It gave me the idea of adding storage on the sides. I had already had the idea of the mantle storage and just used a floating shelf idea and made that. This was a lot of fun!! It took me a little over a week to build. But can’t wait to build something else for our house… like the mudroom!

Amy

Comments

jtemperley

Sun, 01/08/2023 - 19:02

That looks awesome! My husband and I are planning on doing this as well. I do have a question, as I see you have carpet just like us. Did you cut out the carpet where you built out, and if so how did you go about that, or did you just build on top of it?

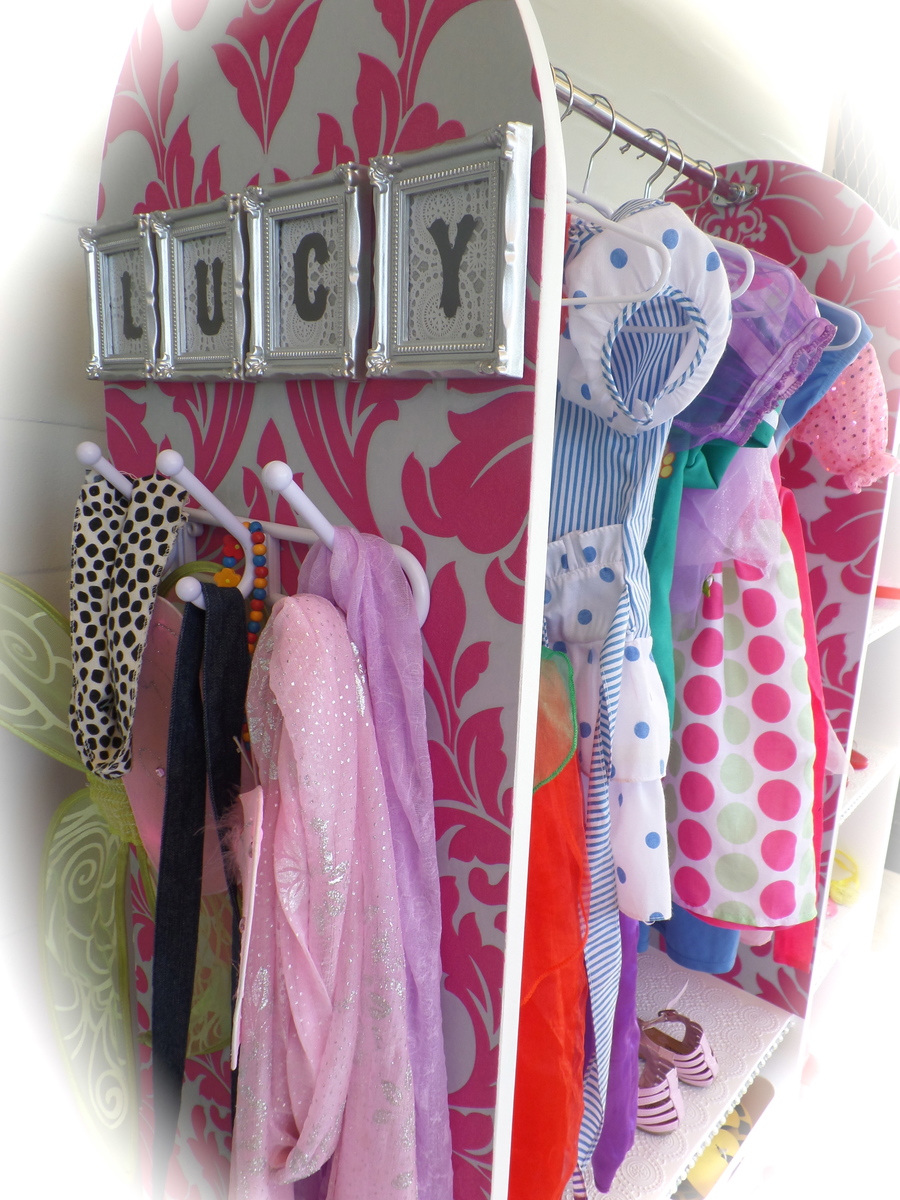
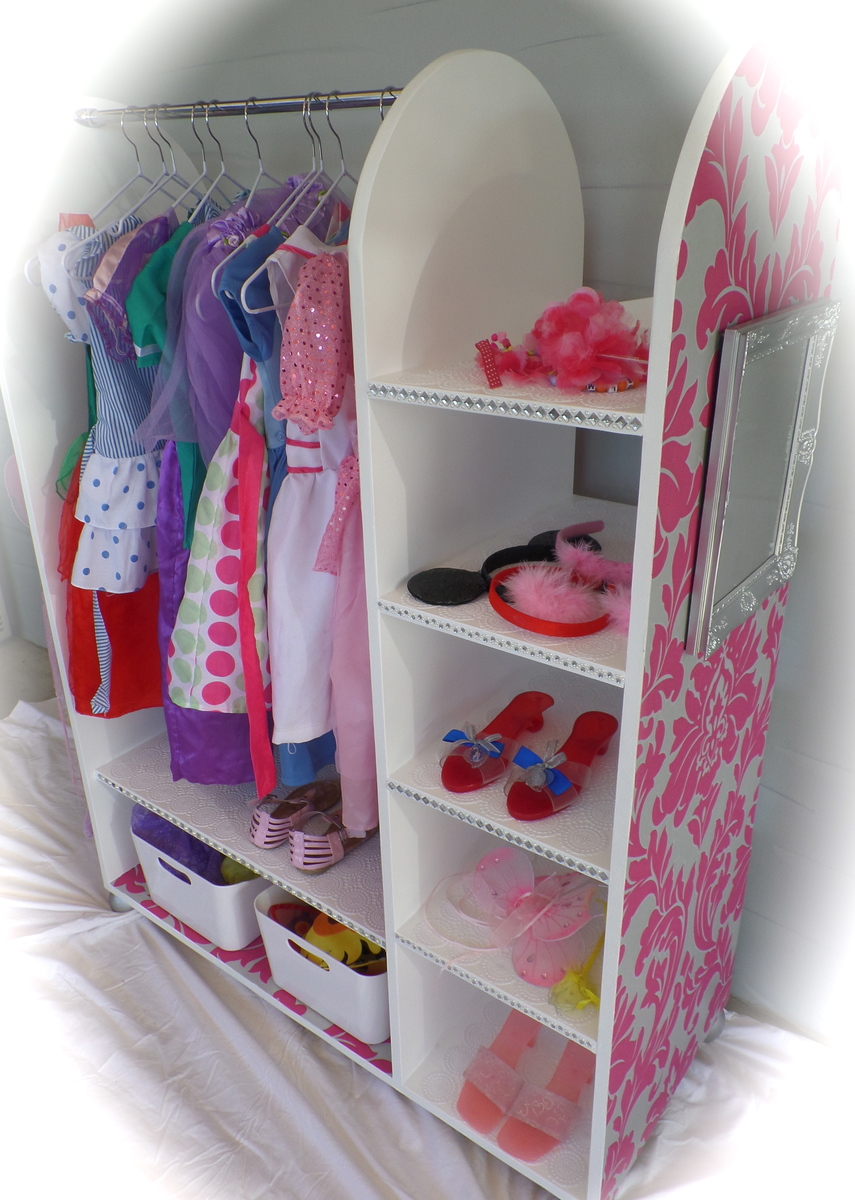
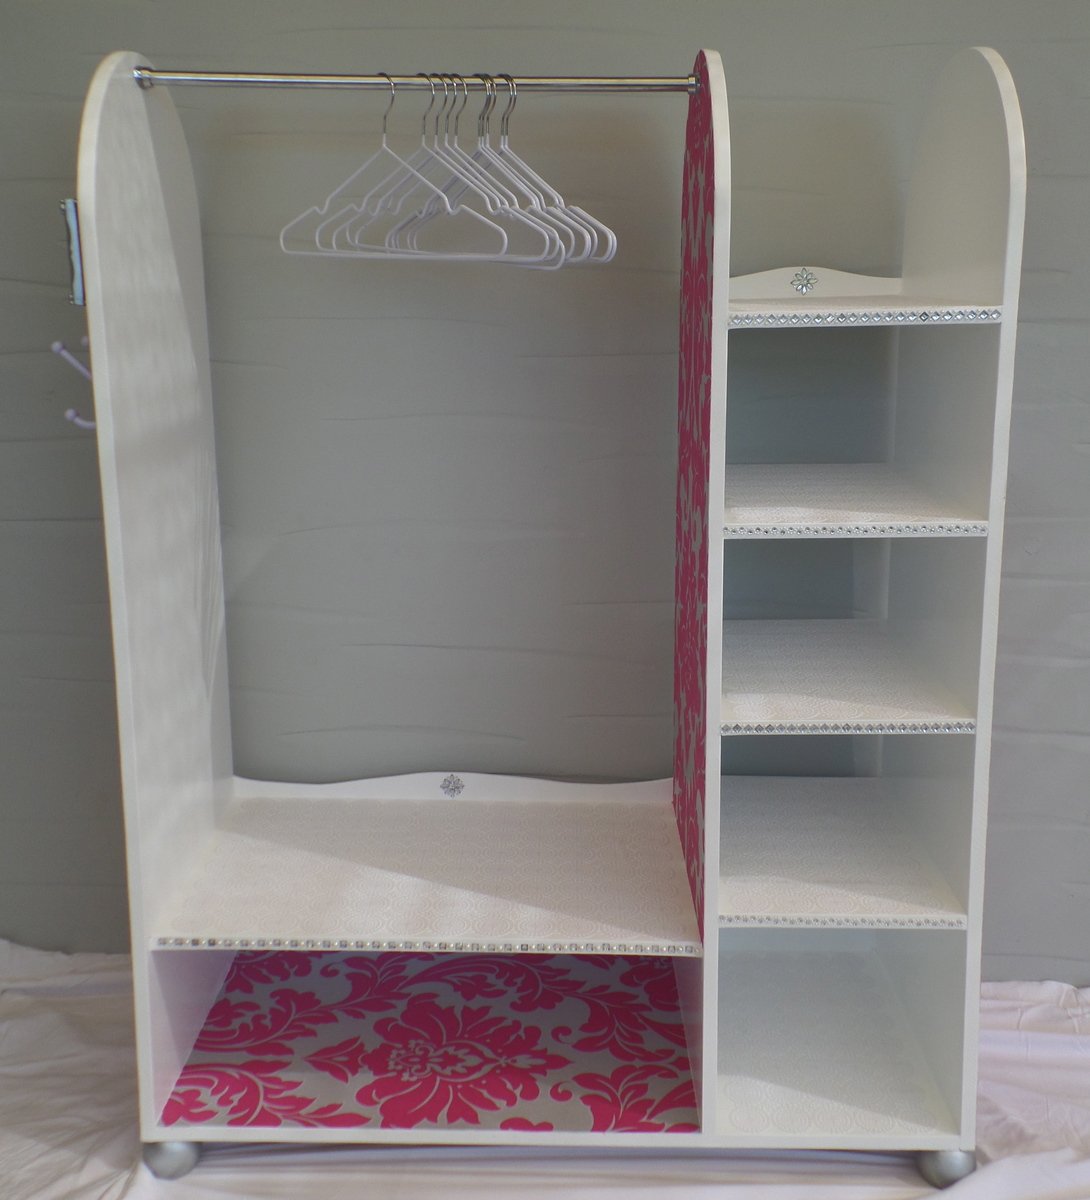
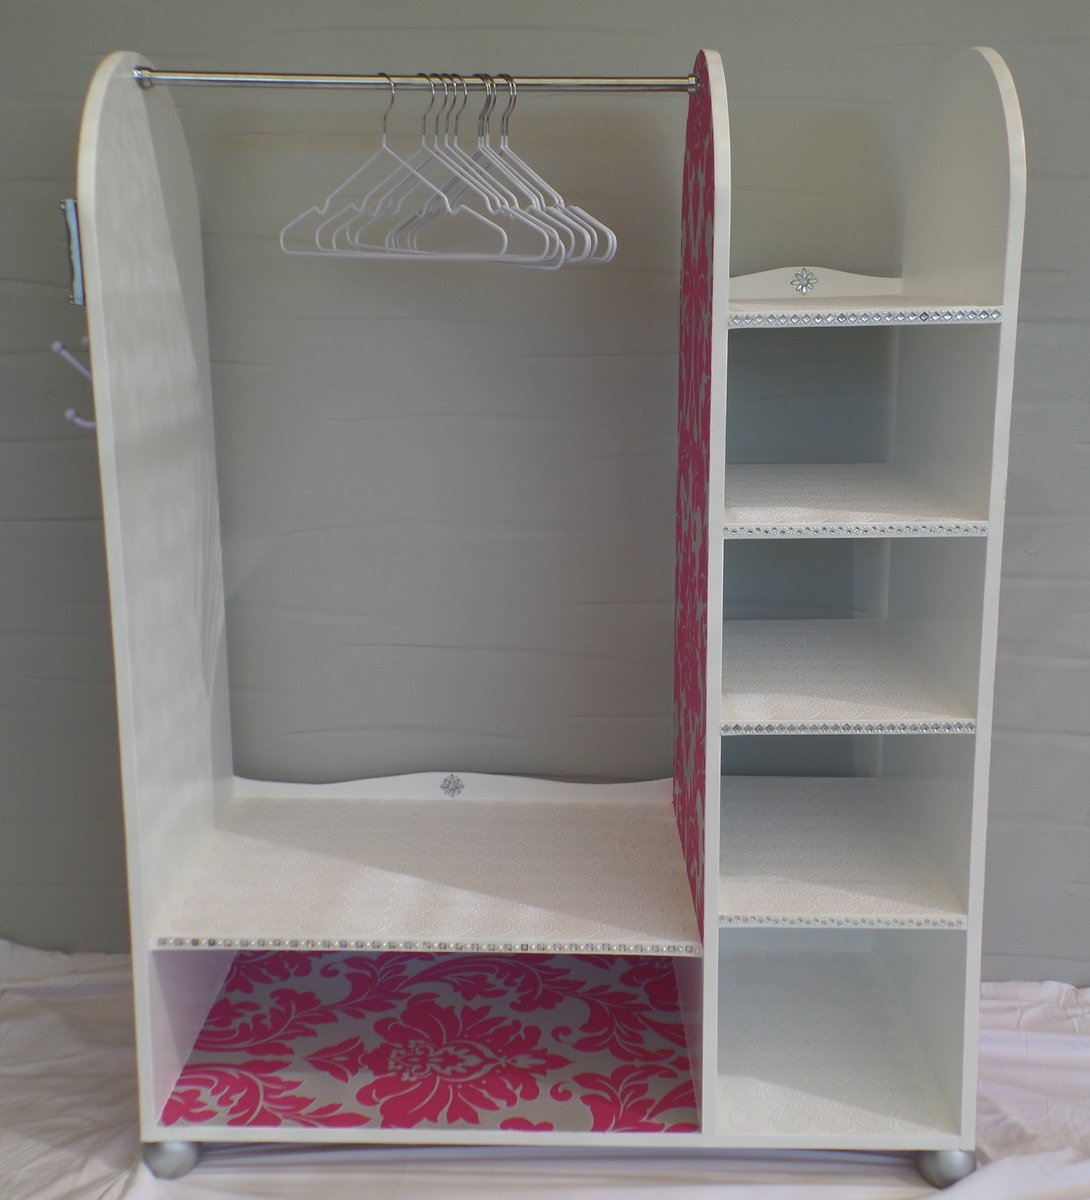
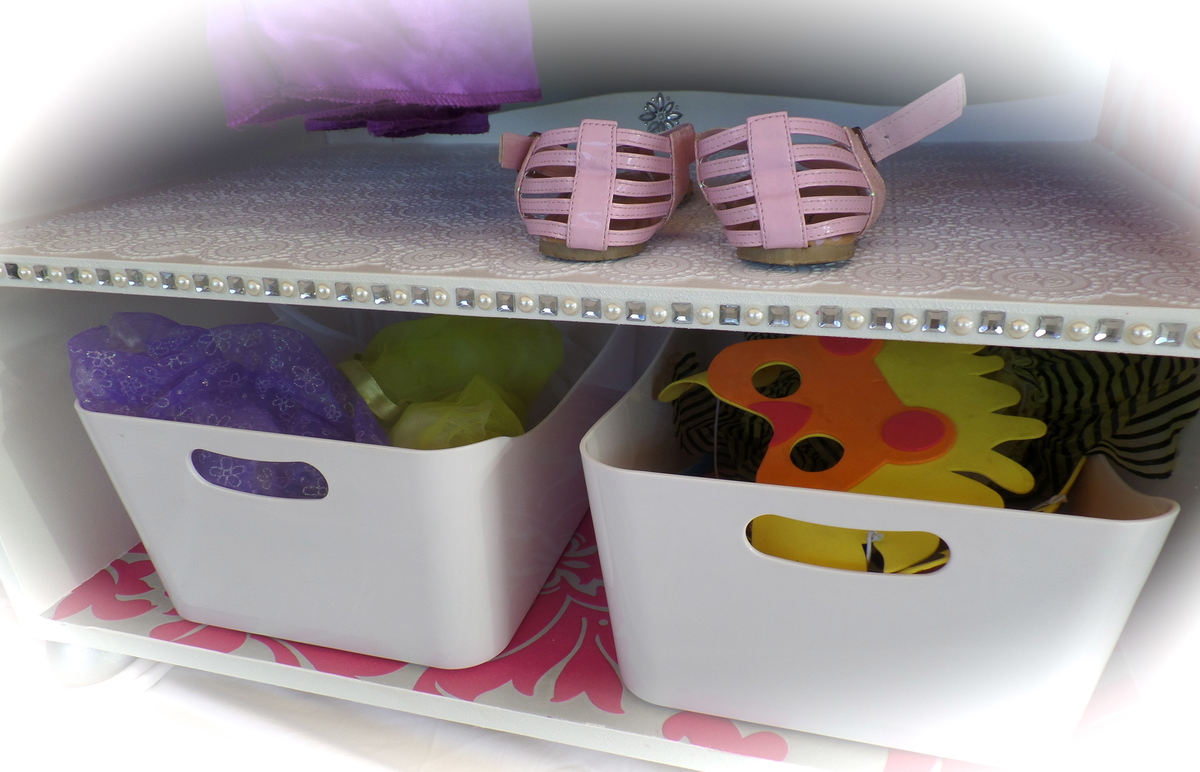
dress up station

Ive made a couple of these dress up stations now, for presents for my daughters friends. I plan to make her one next!
Plenty of room for storing all their fancy dress items :)

Built from Plan(s)
Estimated Time Investment
Weekend Project (10-20 Hours)
Finish Used
wallpaper and paint, rubber lace lining for the shelves, wooden ball feet, decals, mirror, name, hooks
Recommended Skill Level
Intermediate

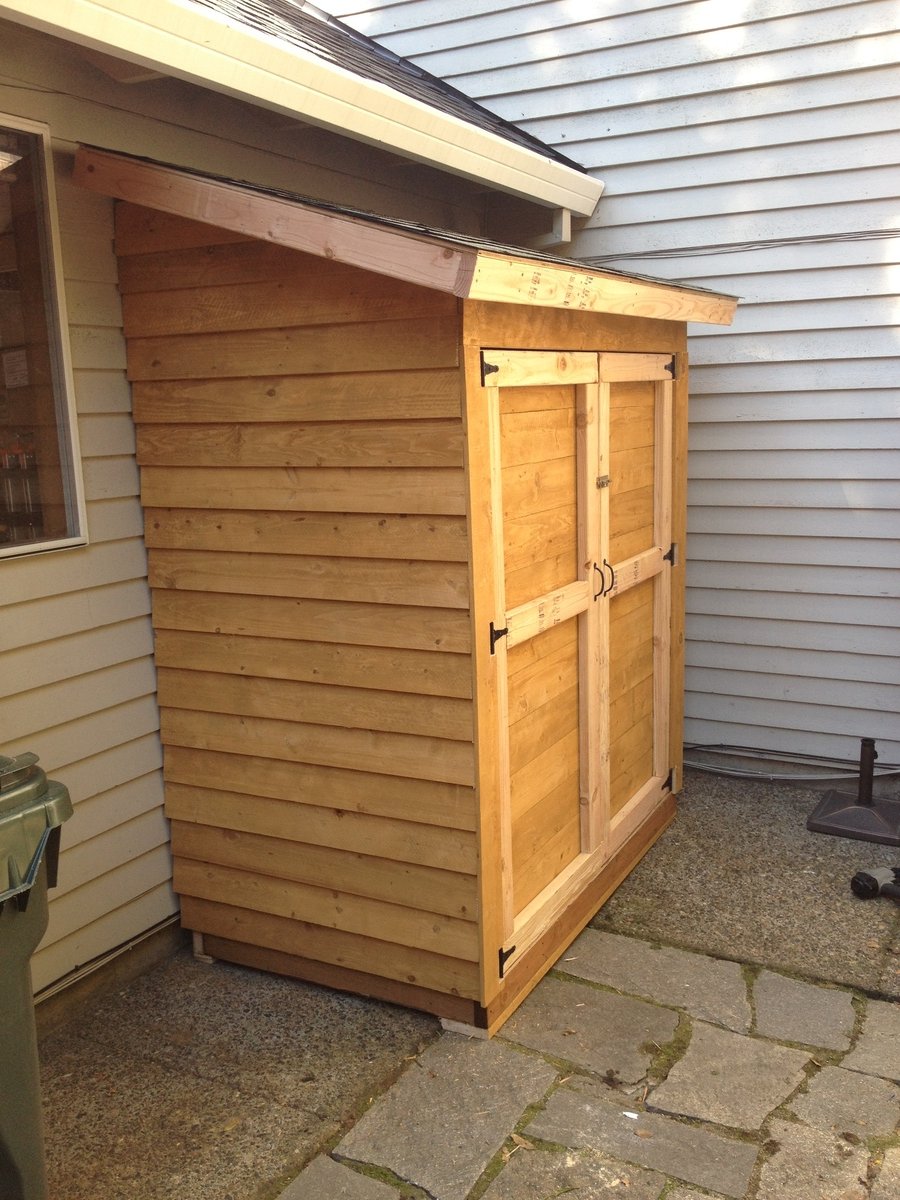
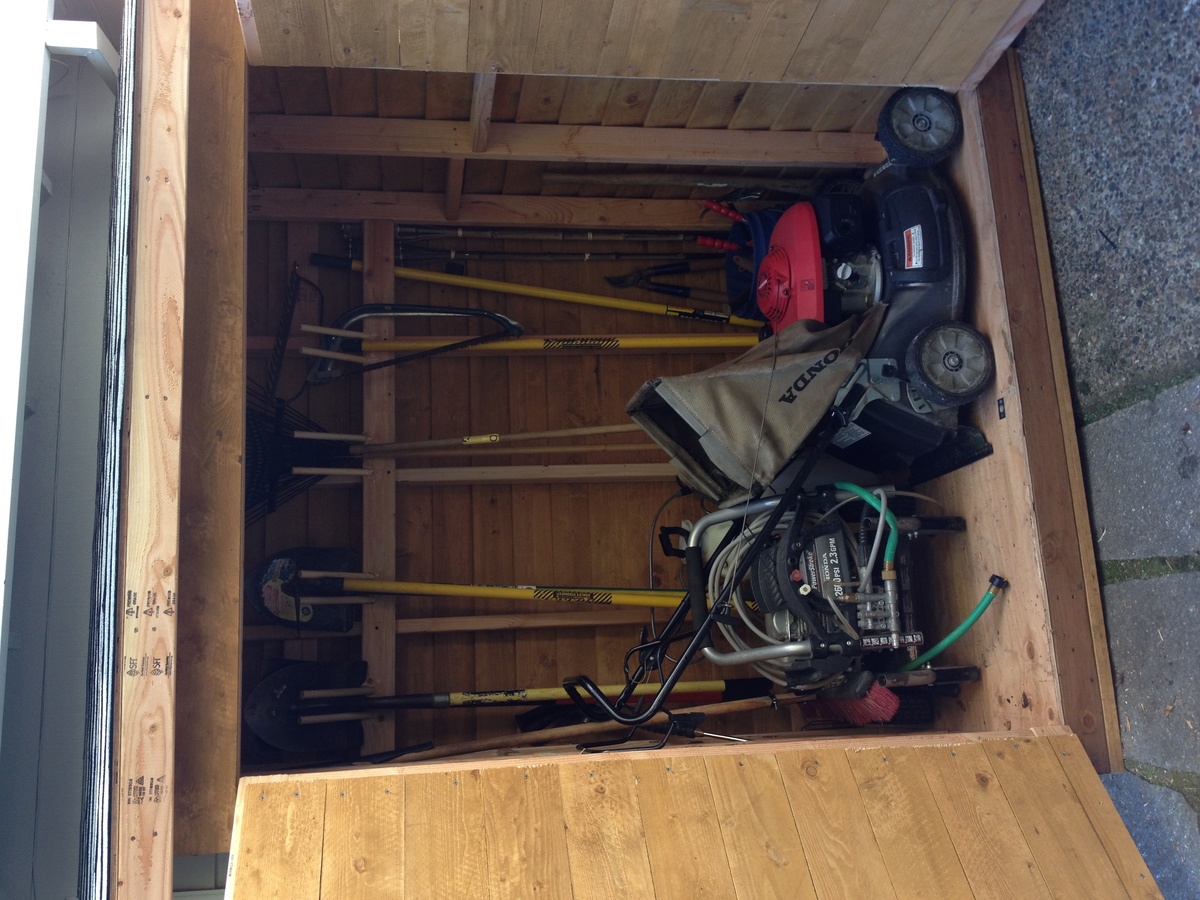
Small Cedar Fence Picket Storage Shed

Submitted by Pembat on Sun, 10/06/2013 - 20:37

Built this in a weekend, took about 1.5 days. I ended us using 2x4's instead of 2x2's, I think it resulted in a much stronger frame. I also built a base for it to sit on. I got pre-stained cedar fence boards, and overlapped them 1" instead of a 1/2". Pretty easy project, I ended up siding the back on the ground, installing it, and then adding the side walls without the siding (just the framing), and then sided them in place. The doors work perfectly. I took my total inside dimension between walls, made sure the opening was square, and then divided that by two to get the width of each door. I then took another 1/4" off that, so each door had an additional 1/8" gap, it worked perfectly. When I set the doors, I put them on a piece of roofing closed as I screwed in the hinges, and then opened them and removed the roofing. I opted to run the door siding horizontal to use up a bunch of waste wood. I'm happy with the outcome. I also found some 6" self starting lag bolts and lagged through the back of the shed into studs (through the siding) into the garage behind it.

Estimated Time Investment
Weekend Project (10-20 Hours)
Recommended Skill Level
Intermediate

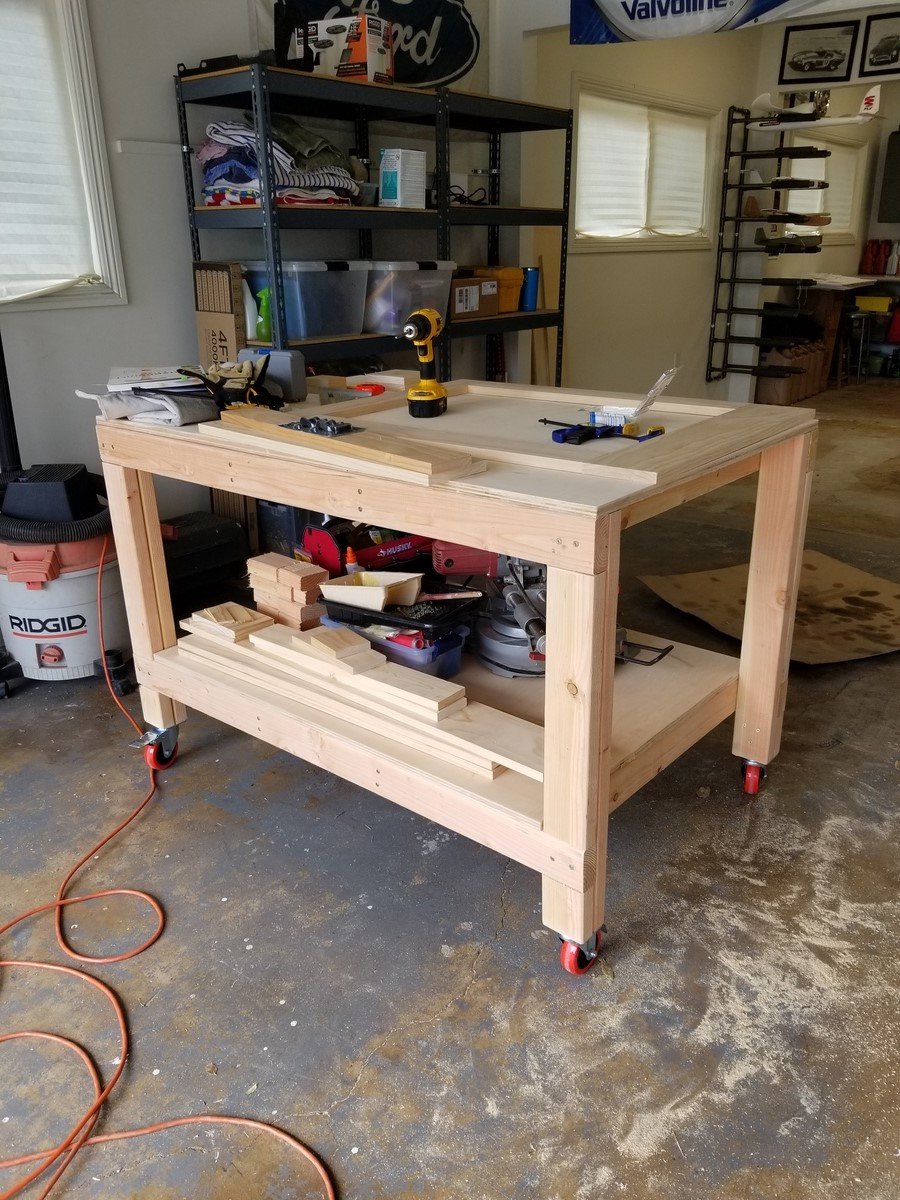
Workbench modified with casters

Submitted by ogie287 on Tue, 04/02/2019 - 20:06

I love this workbench! I added casters so I can move it around the garage, outside, wherever it's needed. I just took 4 inches off the bottom of the legs. My hubby is admiring my handy work and planning on making one for himself.

Estimated Cost
$130
Estimated Time Investment
Afternoon Project (3-6 Hours)
Finish Used
None
Recommended Skill Level
Beginner

Comments

JBeecher

Wed, 01/25/2023 - 14:31

Love this with the casters! So beautiful. I'm new here and wondering at what point you took 4 inches off the legs. Did you build the table and then just cut off the legs? Or did you adjust the measurements of the cuts? Thanks in advance! :)

JimCoz516

Mon, 01/30/2023 - 02:32

The overall height of a 4-inch caster wheel is a little over 5 inches with the mounting bracket, so that also needs to be taken in to consideration. 2nd photo shows the overall dimensions, but to me the bracket and brake area appear to be a bit more than 1.03 inches. https://amzn.to/3DkMKzB
I think the best bet would be to have and measure the overall wheel height, prior to measuring and cutting the lumber.

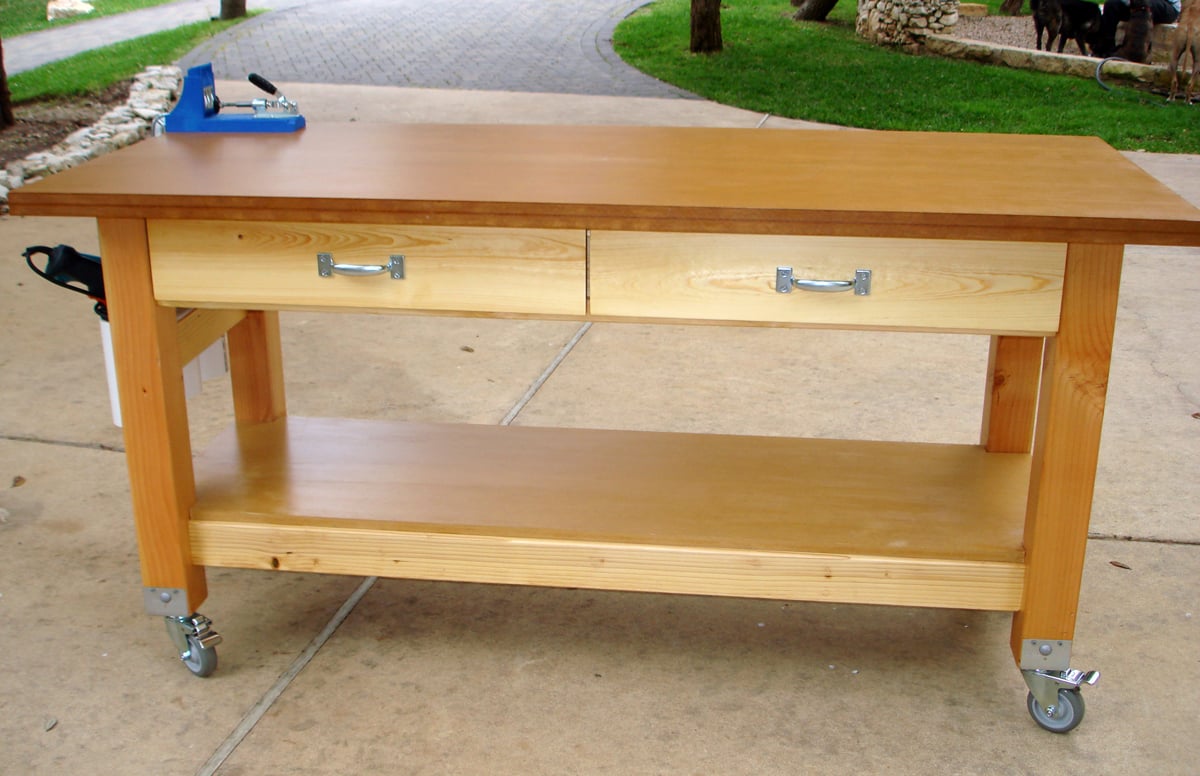
Rolling Workbench with "Drill Holders"

Submitted by Joni on Sun, 03/18/2012 - 11:03

Given that I work out of my garage, I desperately needed a rolling workbench in order to roll out, make the sawdust mess, and roll back in. I had already made Michaela's island for another purpose inside my house, and I loved the sturdiness of the 4x4 posts as legs. I had industrial-type locking castors, but they only screwed in with a threaded post. Thanks to my engineer dad, he determined the best way to attach a screw-in castor to the bottom of the 4x4 (and did all that work for me!).

The size is modified from Michaela's original plan to include a 3 1/2" overhang all the way around for easy clamping (and top is 6' x 2.5'). I also cut a 2' piece of PVC pipe into 3 sections and attached for my drill storage. I put full-extension glides on the drawers and made some dividers from scrap wood.

Built from Plan(s)
Estimated Time Investment
Week Long Project (20 Hours or More)
Finish Used
4 coats of Spar Urethane
Recommended Skill Level
Intermediate

Comments

birdsandsoap

Sun, 03/18/2012 - 13:29

This is beautiful. If anything you create ON this table looks nearly as beautiful as the table itself, you have found a new profession. Good job!

My Simple Outdoor Lounge Chair with 2x4 modification

I modified this chair with 2x4's as the base and 2x2 for decoration on arms, this is prior to sanding and finishing

Built from Plan(s)
Estimated Cost
$15-$20 dollars, depending on local lumber prices and finishing options.
Estimated Time Investment
An Hour or Two (0-2 Hours)
Finish Used
Unfinished
Recommended Skill Level
Beginner

Comments

RandyW

Sat, 06/13/2020 - 16:33

I always take my sander to the sharp edges and round them off

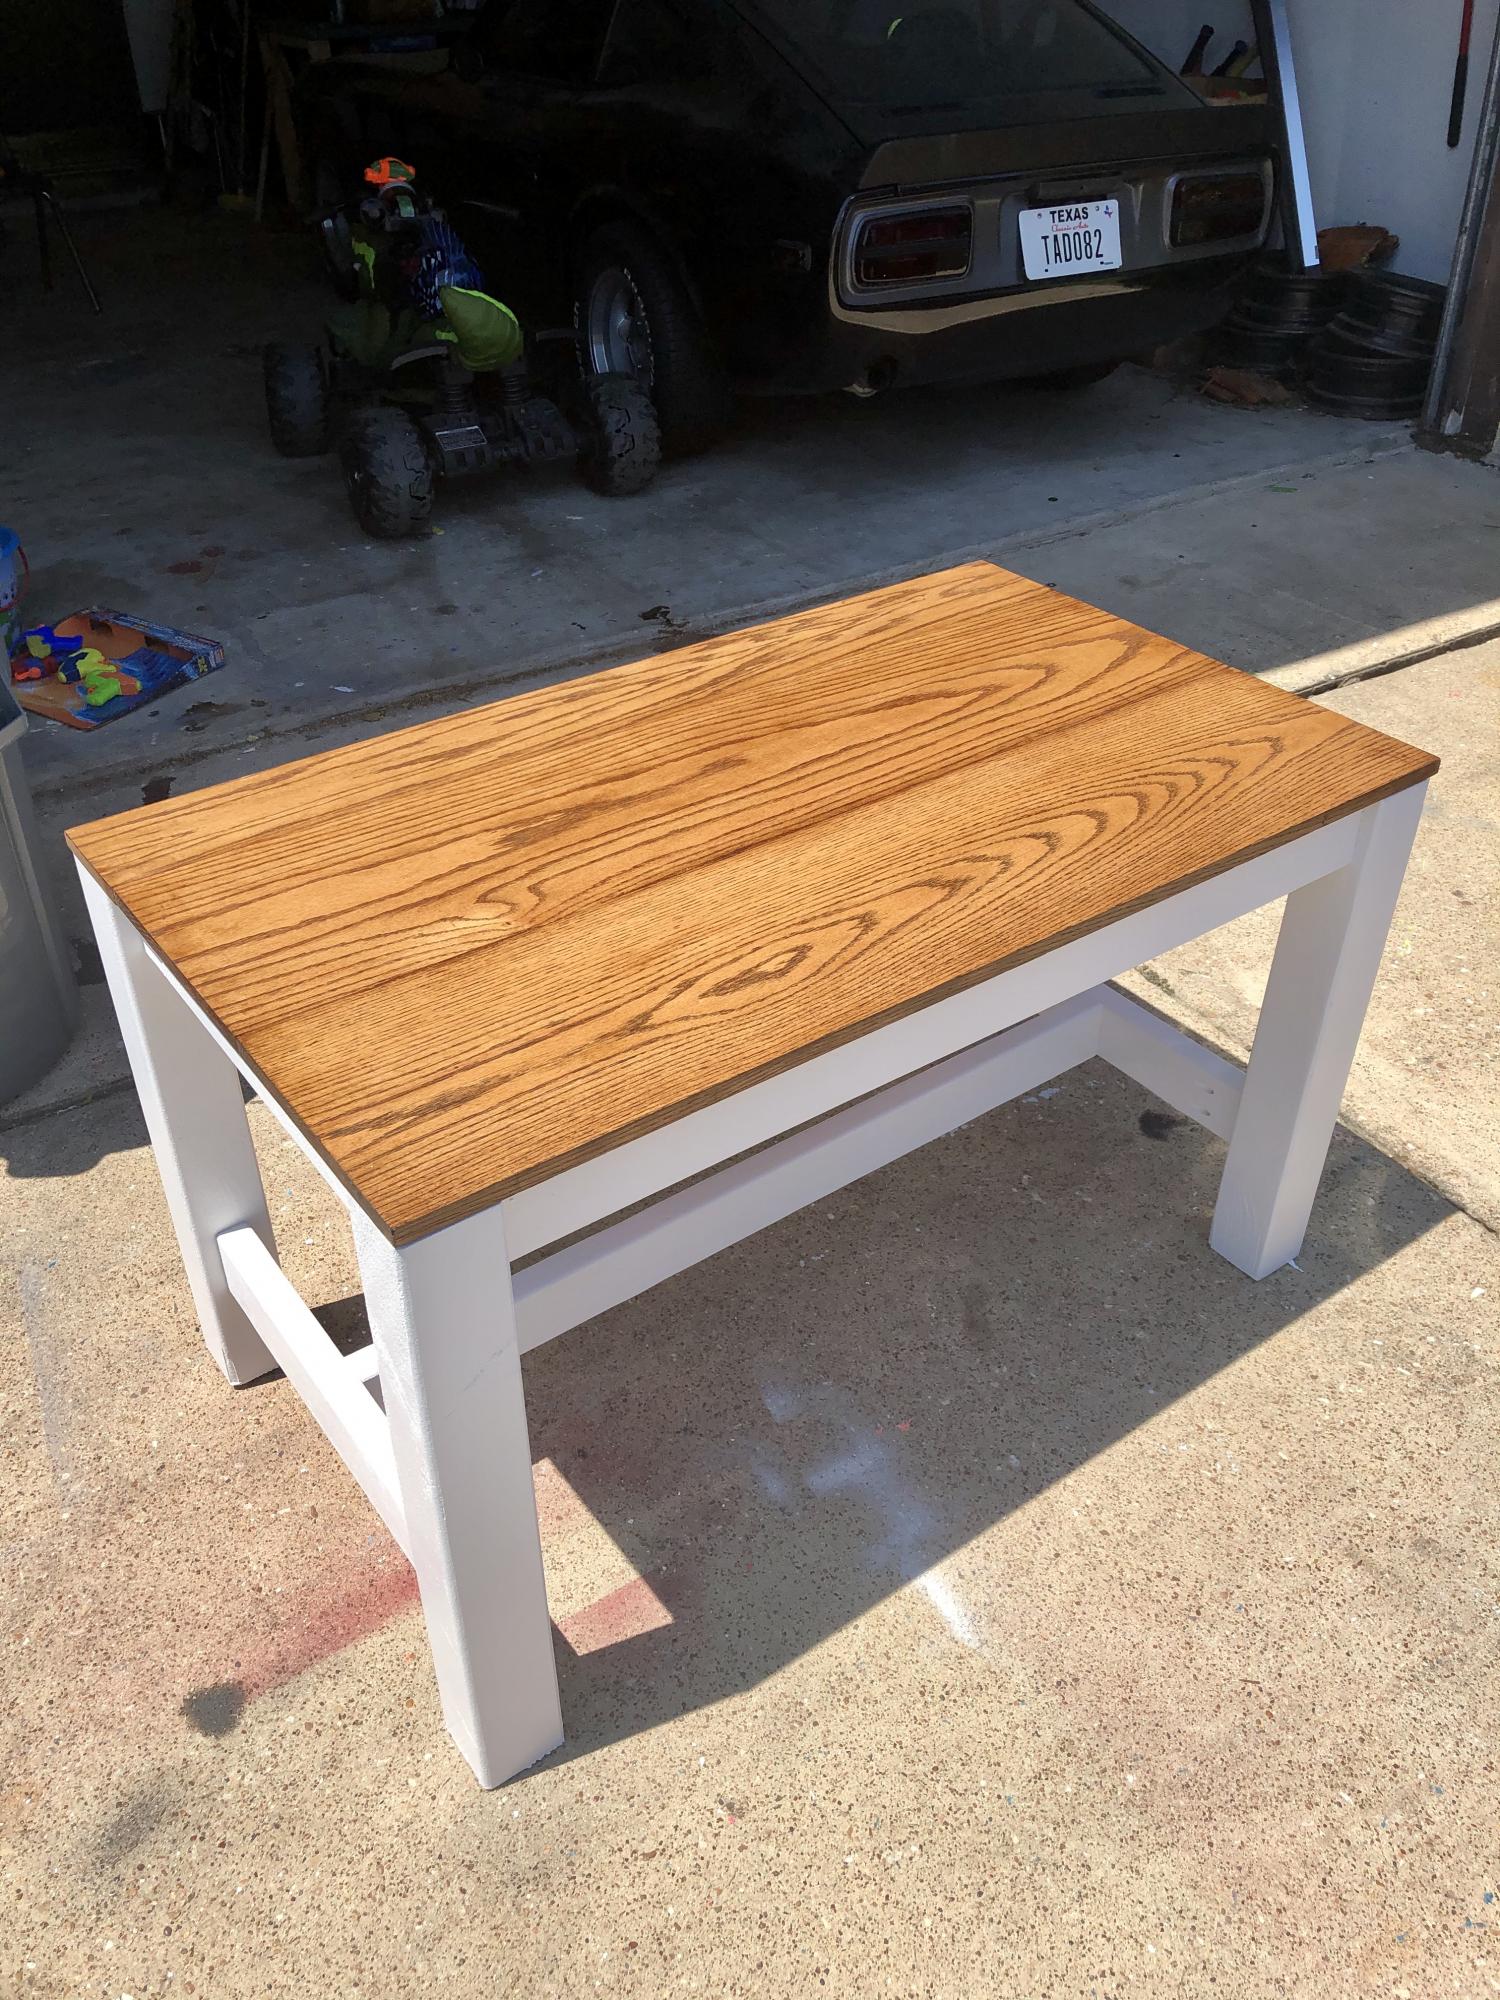
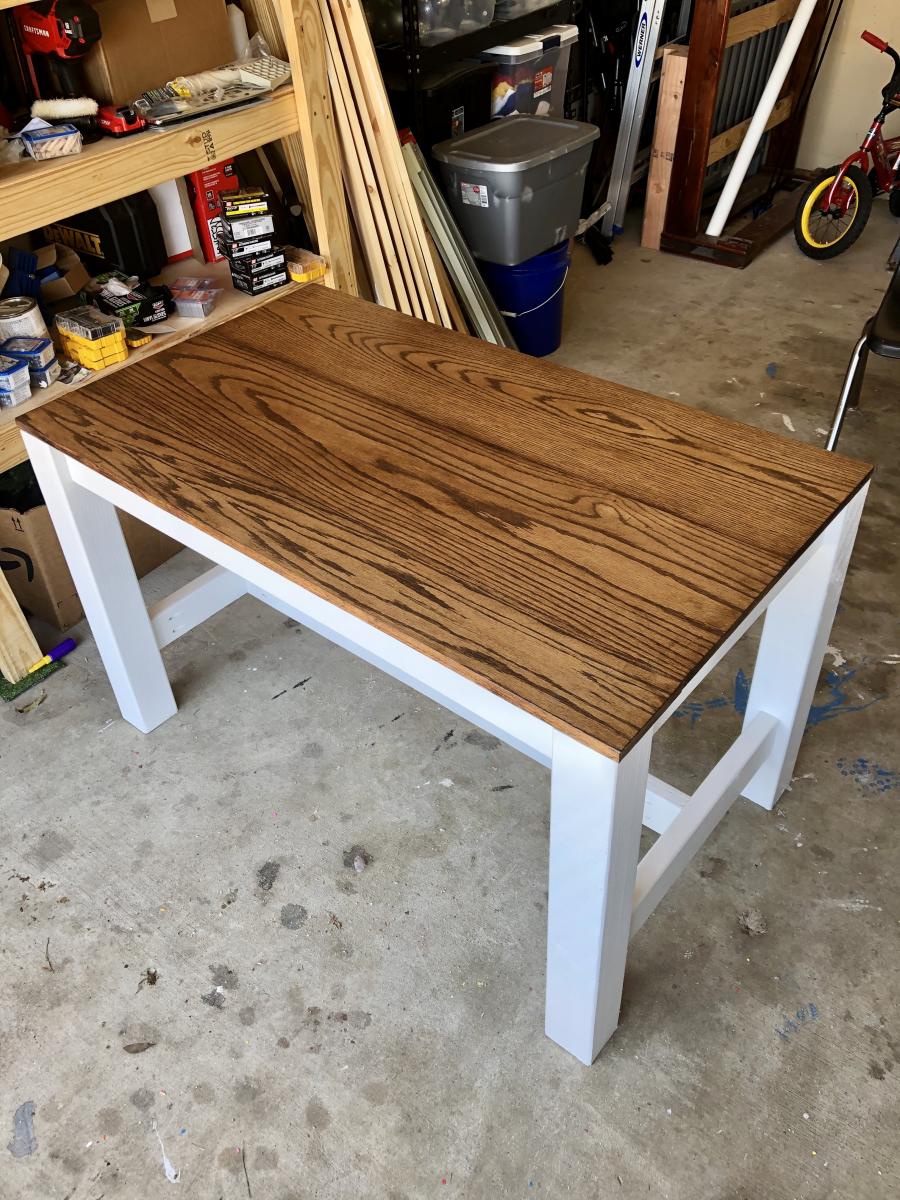
Adjusted Counter Height Farmhouse Table

Submitted by rahurtado on Mon, 05/04/2020 - 23:26

I liked the look of the “counter height table” and adjusted the height to make it a table for an office. I used 4x4s for the legs and oak for the top.
I used a biscuit joiner to join the top, a Dremel tool to carve grooves in the frame so I could attach the top with figure 8 fasteners (allows wood to move as it expands and contracts).

Recommended Skill Level
Intermediate

Rustic Dining table

Submitted by Anonymous (not verified) on Sun, 08/07/2016 - 09:28

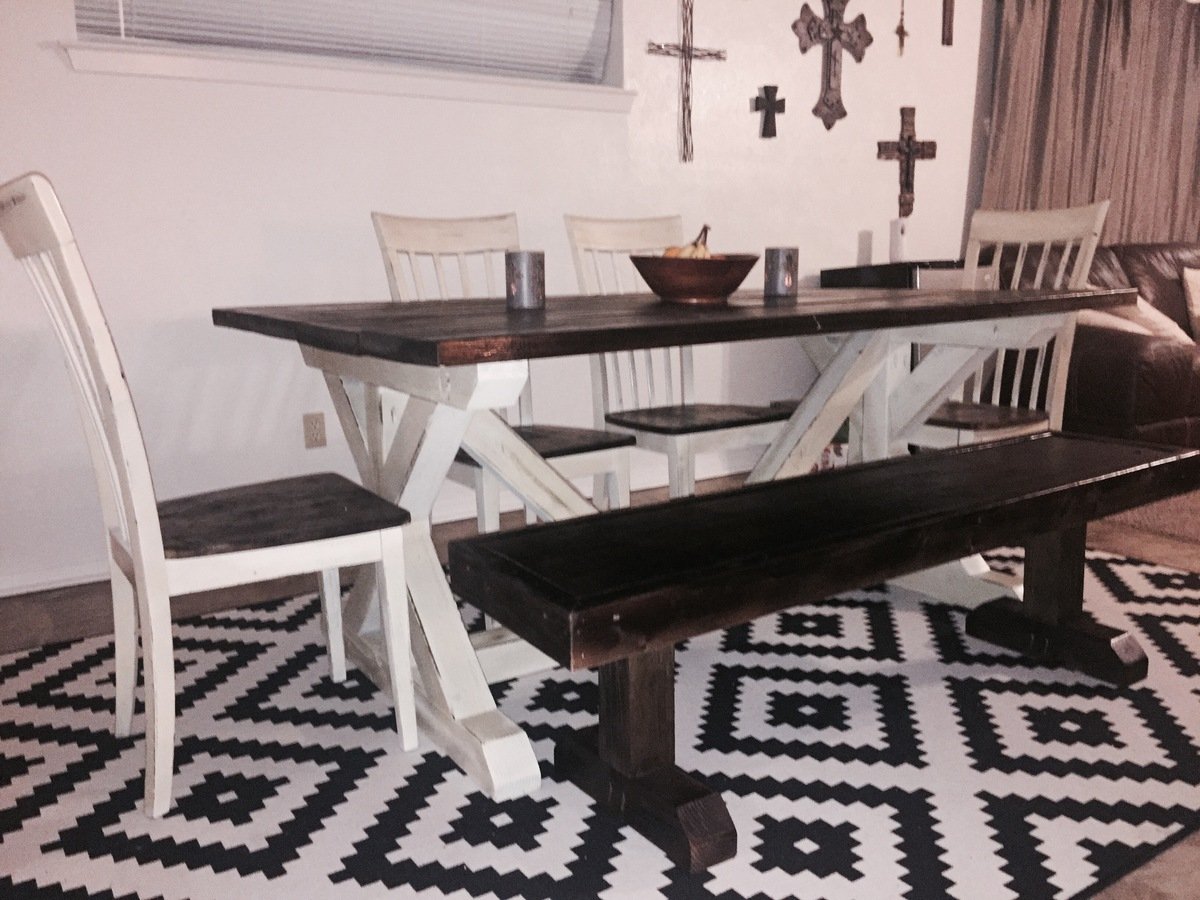
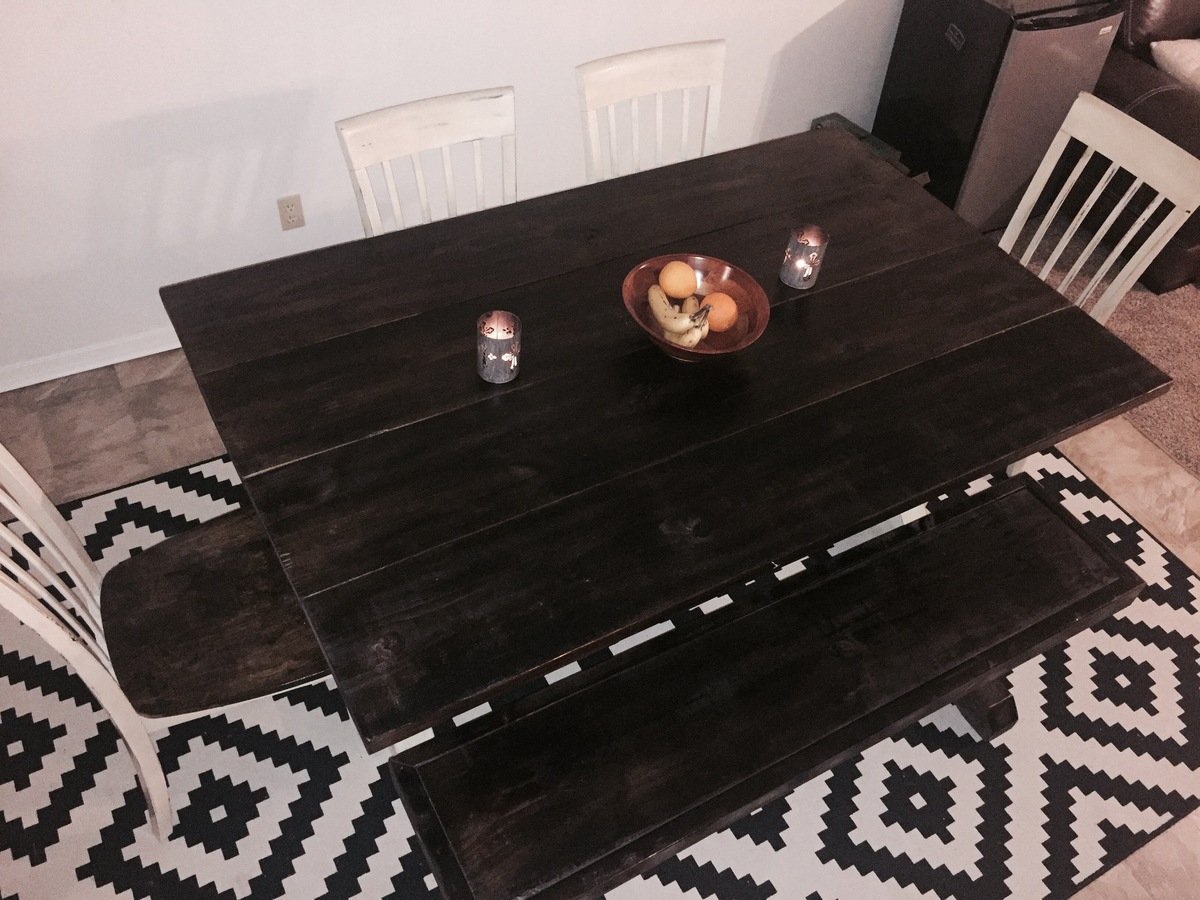
Took the plans from Ana white and made my own twist to it! Came out awesome and the person loved it that I made it for! Kona stain on table top and Navajo white on the bottom. Did the same for benches and chairs to match! Thanks for the great instructions! 

Built from Plan(s)
Estimated Time Investment
Weekend Project (10-20 Hours)
Finish Used
Kona stain and Navajo white, clear gloss poly
Recommended Skill Level
Beginner

Breakfast Bar Conversion to Storage Shelving

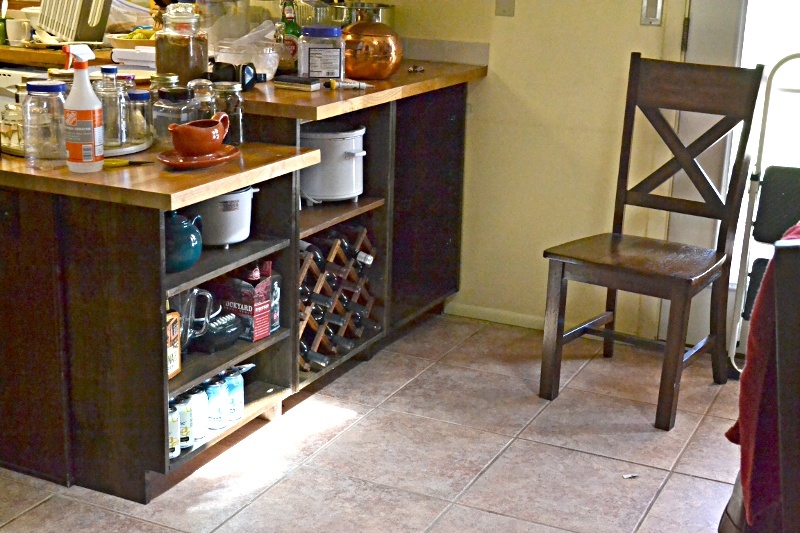
Added kitchen and dining room storage by building bookcases / shelf units to fit under the peninsula breakfast bar overhang. It's the simplest possible "box with a toe-kick", loosely based on Ana's plans for a bookshelf and the closet master system.

Much of the "working time" was stain and finishing time. Actual cutting and assembly time was under 3 hours.

No dimensions: every breakfast bar is different.

1 - The boards were cut to fit under the overhang, with 1/8 or less clearance. Top and bottom of unit is between the upright pieces.

2 - Width of units was also cut to fit. One unit is the width of the lower section of countertop (appx 23 in), the taller section was divided into 2 equal units (appx 21 in)

Shelves were cut about 1/4" narrower than the insiude dimension of the unit, to allow for insertion and the shelf pegs.

3 - Toekick space cut to match the cabinet on the far side of the peninsula. Used a circular saw and then a hand saw to finish the corners.

4 - Drilled pocketholes in the top and bottom boards.

5 - Used Rockler's jig for drilling shelf pin holes in the 6 uprights. Oops! I should have drilled every possible hole. I drilled every other hole and don't have the shelf flexibility I really need.

6 - Stained and topcoated everything, let it dry.

7 - Assembled each shelf unit, using corner clamps and a carpenter's square to make sure it was square. The bottom shelf is screwed at the same level as the toe-kick.

8 - Slid units under the overhang, shimmed them firmly under the countertop.

9 - Added shelf pegs and shelves

DONE!

Doors could be added, using the hinges for inset doors on frameless cabinets.

==========
NOTES:
The units are backless. I considered nailing a 1/8 hardboard back onto them, but because the finished back of the peninsula is visible behind them, and they are shimmed into place to prevent slouching it was not needed.

Cost is low because we had some 1x12 boards in the attic. Already had the tools and stain from earlier projects. 3 1x12 x 6ft boards were new, the rest were salvage.

Estimated Cost
$100
Estimated Time Investment
Week Long Project (20 Hours or More)
Finish Used
Minwax Jacobean oil stain - one coat wiped on after light sanding

General Finishes gel topcoat - one coat wiped on
Recommended Skill Level
Beginner

Big kids picnic table

Submitted by boneill on Wed, 07/08/2020 - 20:14

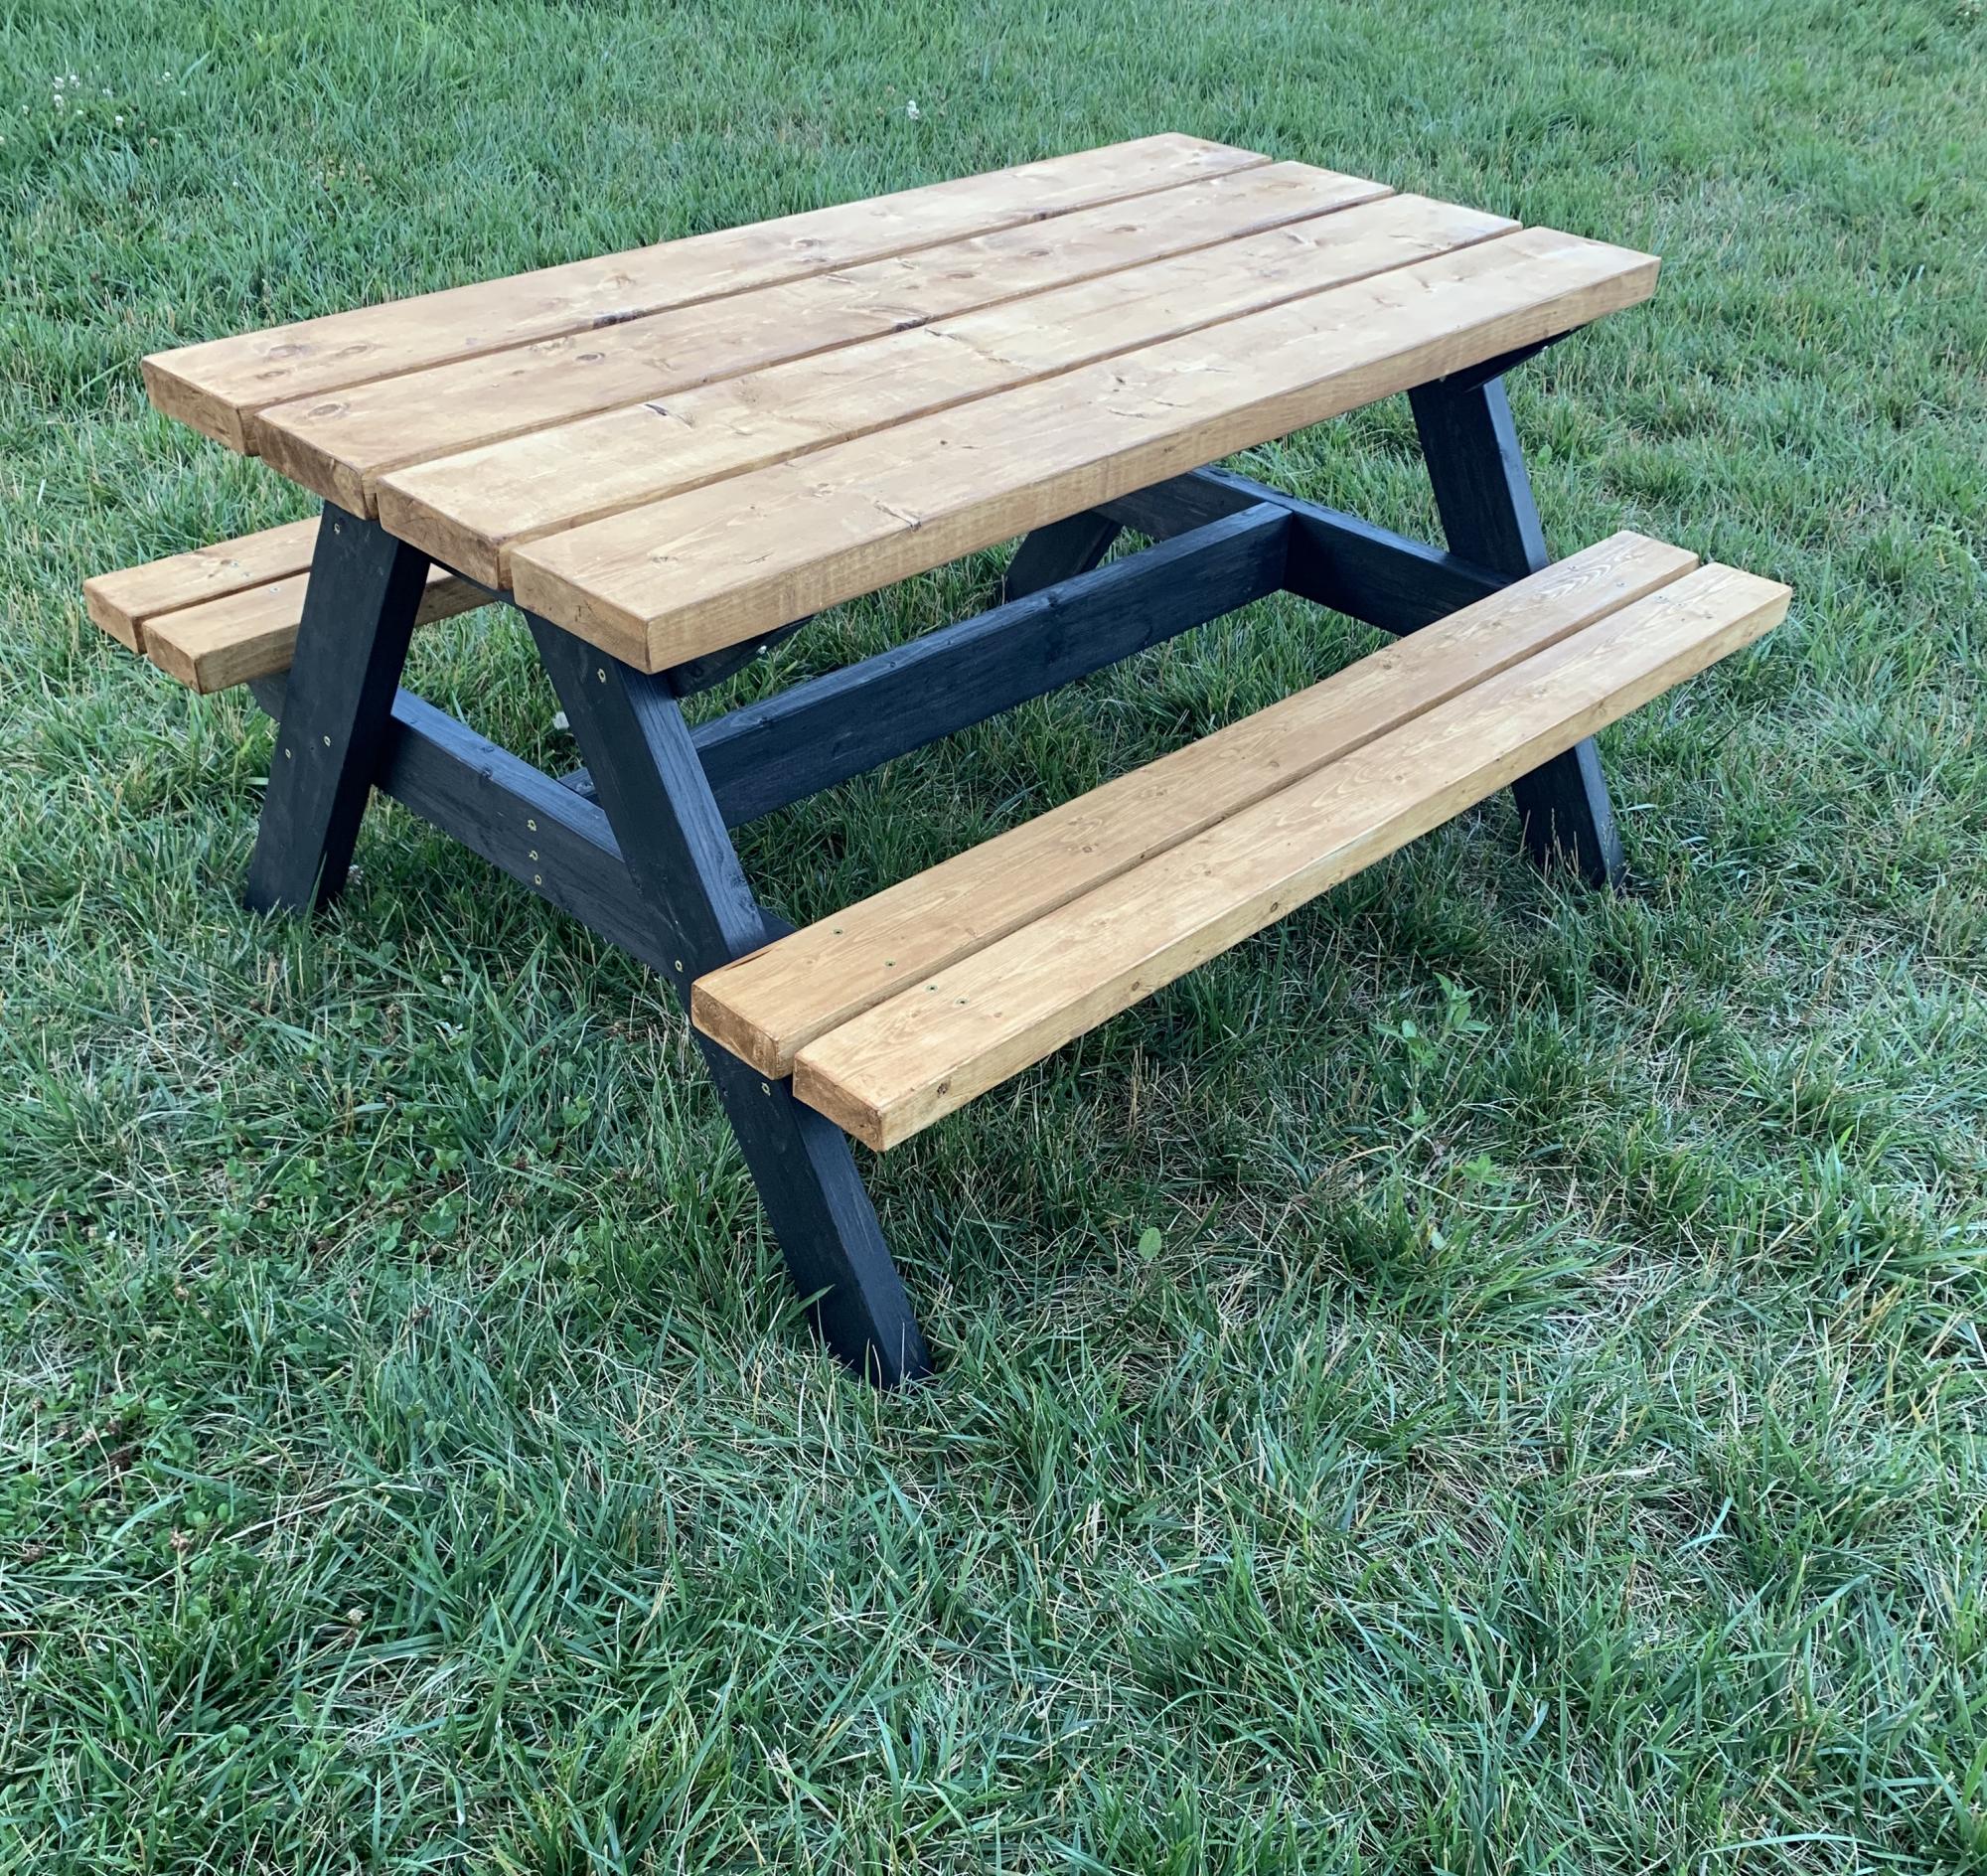
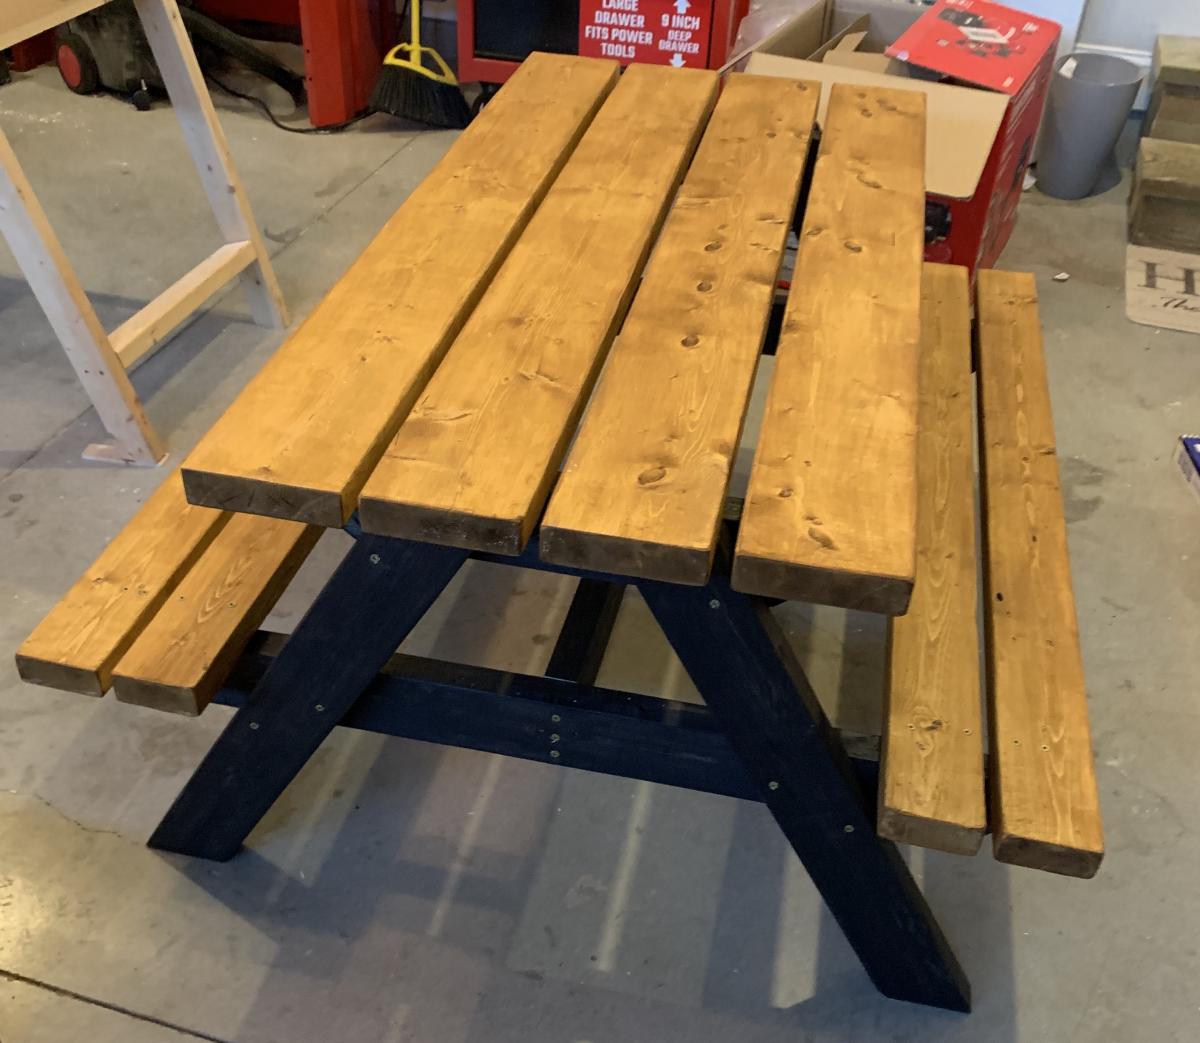
This was a easy build and is super strong . ITs built for a kid sized picnic table but I tested It with my weight to see how it holds up and (200 lbs) didn’t hurt it or even make the seat budge.
Built from Plan(s)
Estimated Cost
$55
Estimated Time Investment
Afternoon Project (3-6 Hours)
Finish Used
Valspar canyon brown transparent on seats and Table top . Black (midnight ) solid stain on the frame .
Recommended Skill Level
Intermediate

Modern Adirondack Chair, Super Sized

Submitted by Anonymous (not verified) on Fri, 08/21/2020 - 10:39

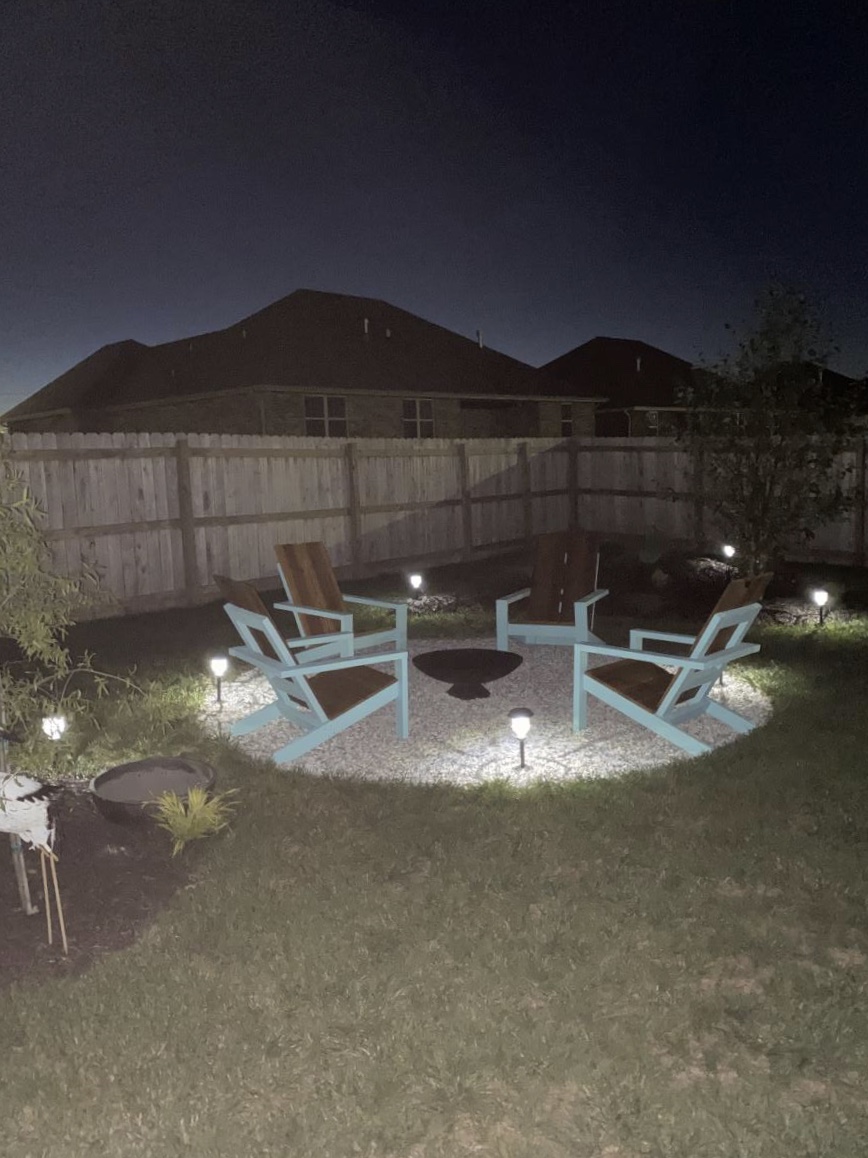
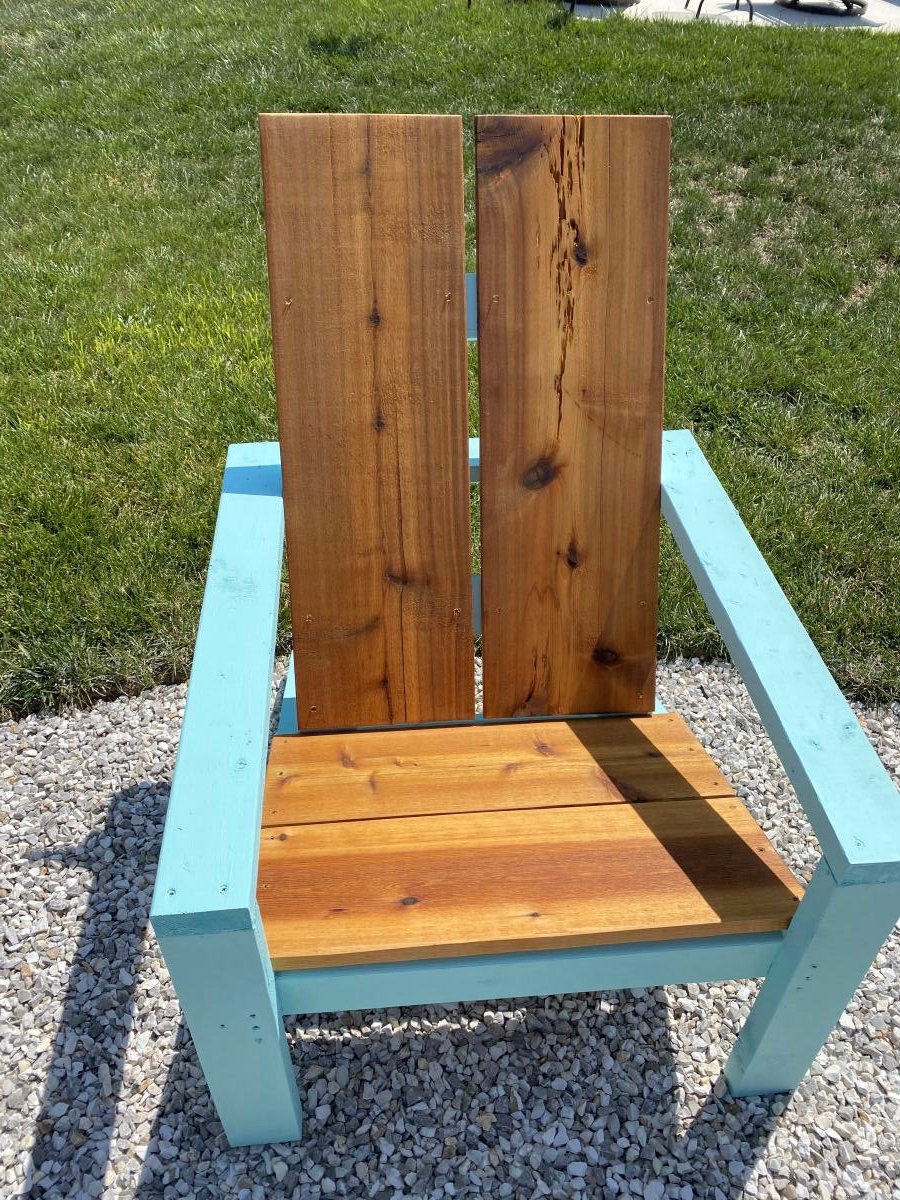
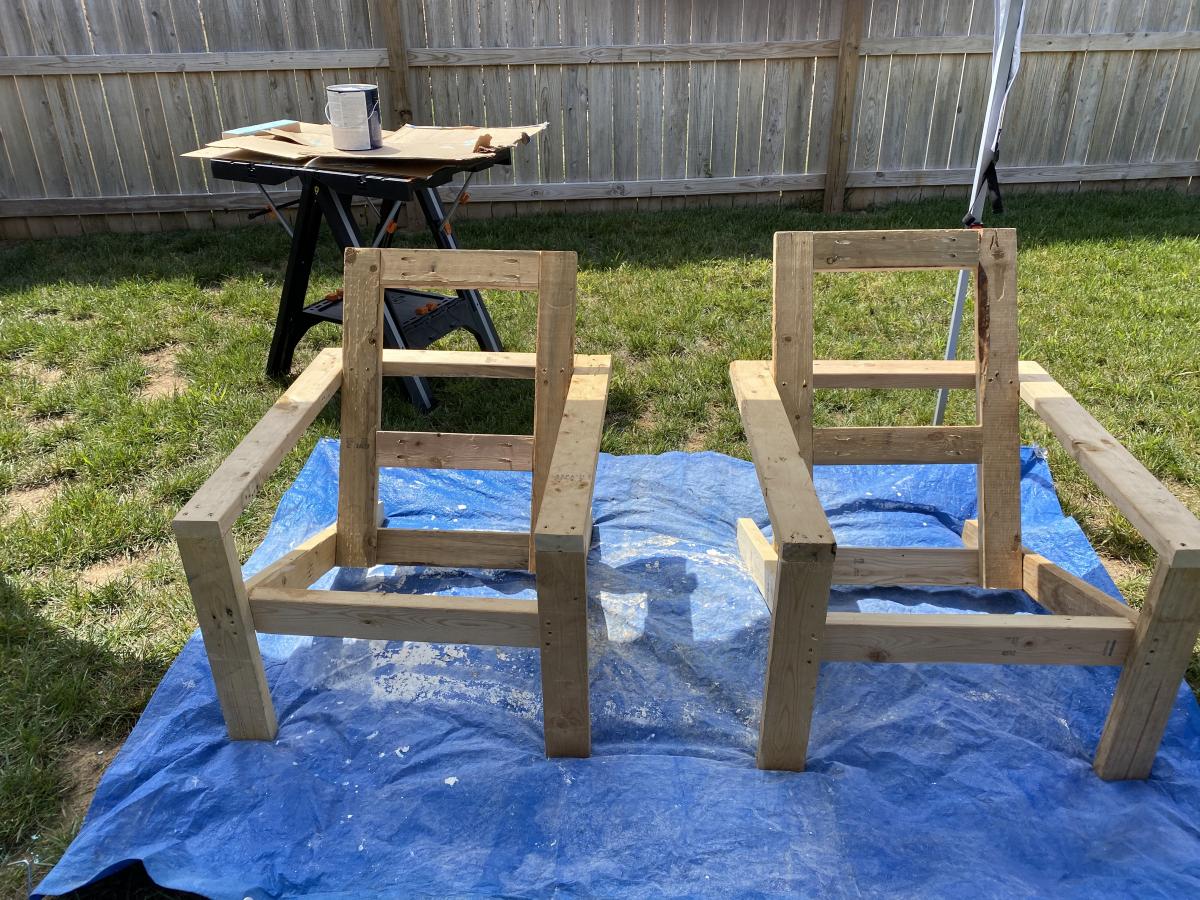
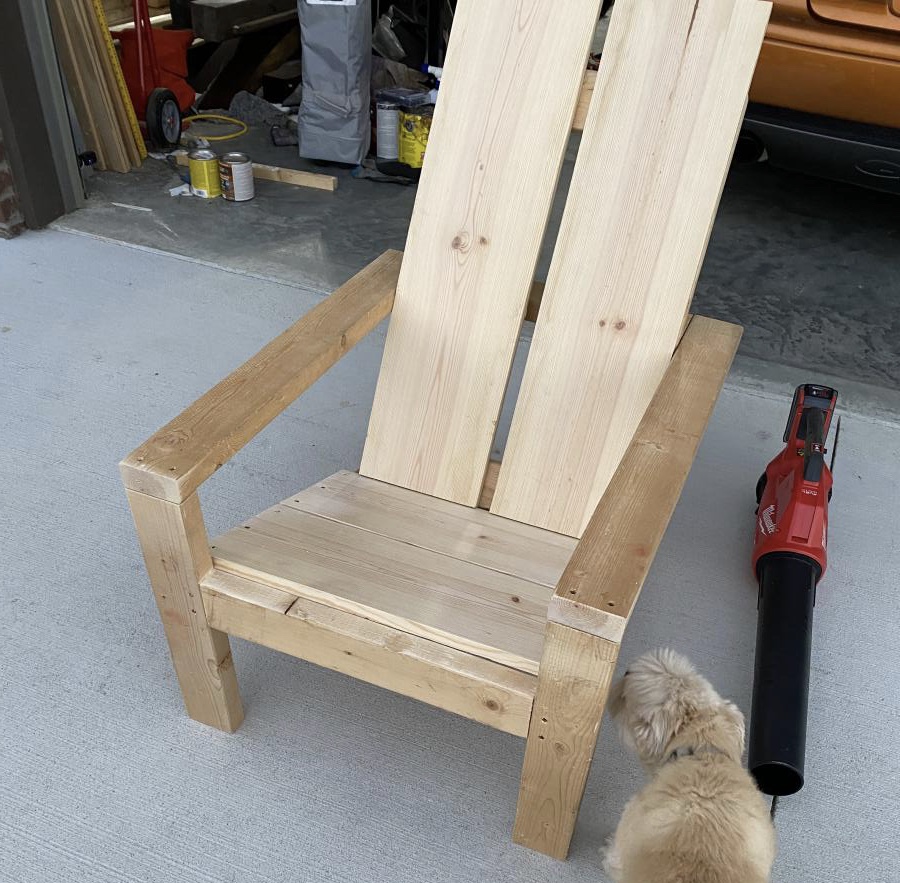
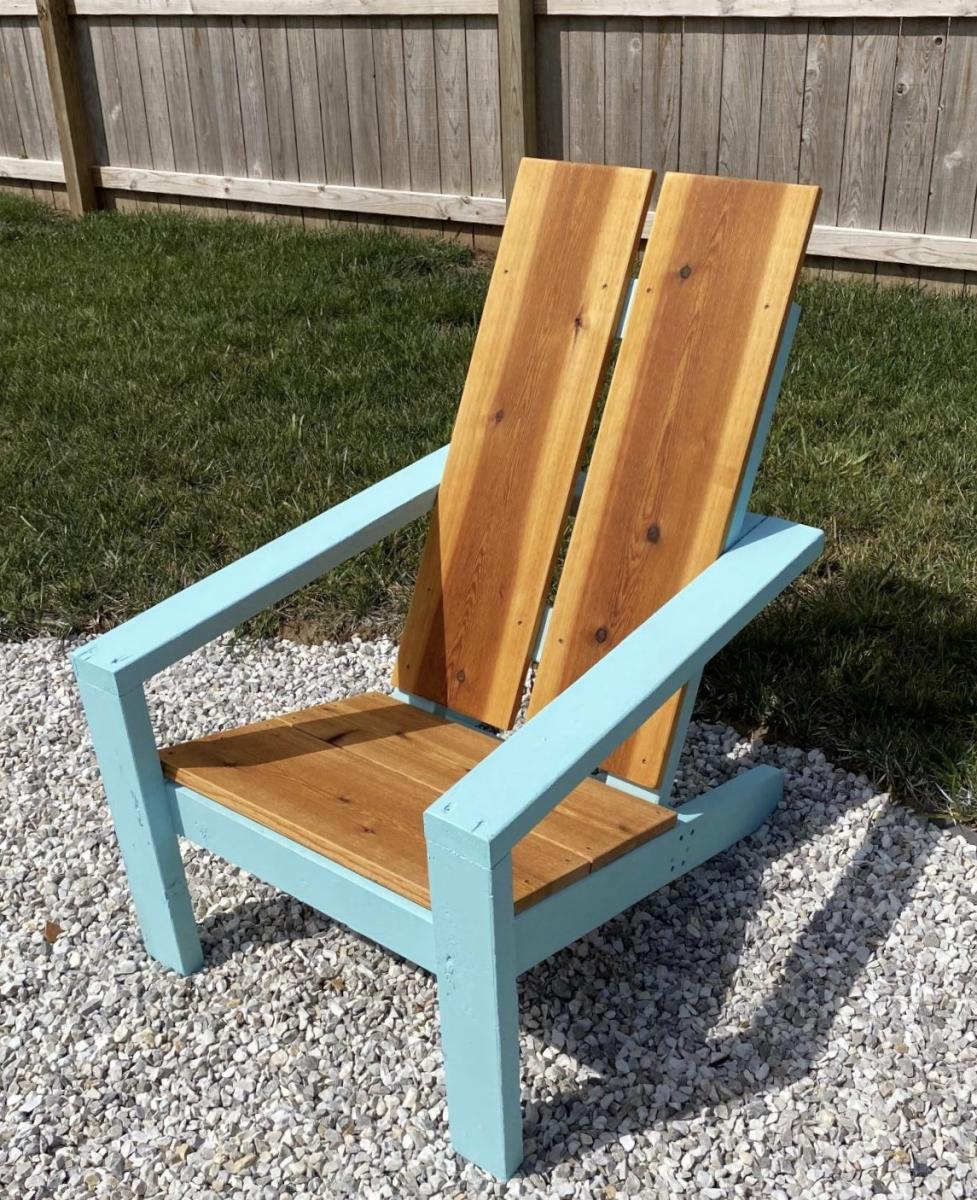
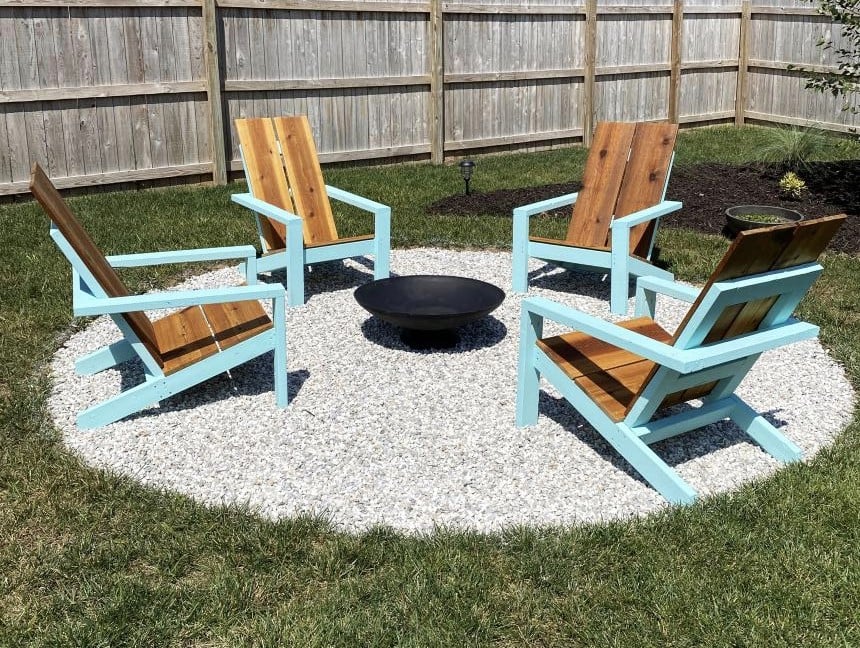
Am a big fan of Ana's work, and have used several of her plans in prior builds including the more traditional Adirondack chairs. Those stayed with my old house, and I wanted something different for my new house. Really liked her Modern Adirondack design with the floating arm rest. However, plans are like recipes to me--a guideline. I wanted the back boards to run up and down, and I am a bit more robust than the lovely and petite Ms. White, so they would need to be wider after I built the first one at 19 1/2" wide per plan. The next three I made 22" wide and that worked well without throwing off the geometry and angles of the other parts. Since I ran the backboards up and down, I needed some cross beams for stability and to give an attachment point for the middle of the boards. Cut some 2x4s at 15" wide, drilled pocket holes in both ends, and attached in between the back supports with the pockets facing up to be hidden by the back boards. All of the 2x4s were leftover cut-offs from the houses being built in my neighborhood. Since the frames were free, I splurged and went with cedar boards for the backs and bottoms. With the wider frames, I had to use 1x12s ripped down to 10 3/4" to get the right look (about a board's width in between). Needed some color, so I painted the frames Teal Seaglass from Menards. Cedar was stained with a natural deck stain from Sherwin Williams. I experimented with salt paint (mixing unsanded grout with the paint) to give a heavily textured and weathered finish but this was unecessary--the wood was distressed enough and I am a terrible painter. It also toned down the color so I skipped that step and just went with 2 coats of plain paint. It looks like outdoor furniture should up close. As always, am pleased with Ana's plans. Thank you for doing all the hard work!
Estimated Cost
about $200 for all 4 chairs due to cedar and paint
Estimated Time Investment
Weekend Project (10-20 Hours)
Finish Used
Paint - Pittsburgh matte exterior with Dutch Boy coloring Teal Seaglass
Stain - Sherwin Williams Superdeck stain, Natural finish
Recommended Skill Level
Starter Project

Comments

Seasonal And Holiday

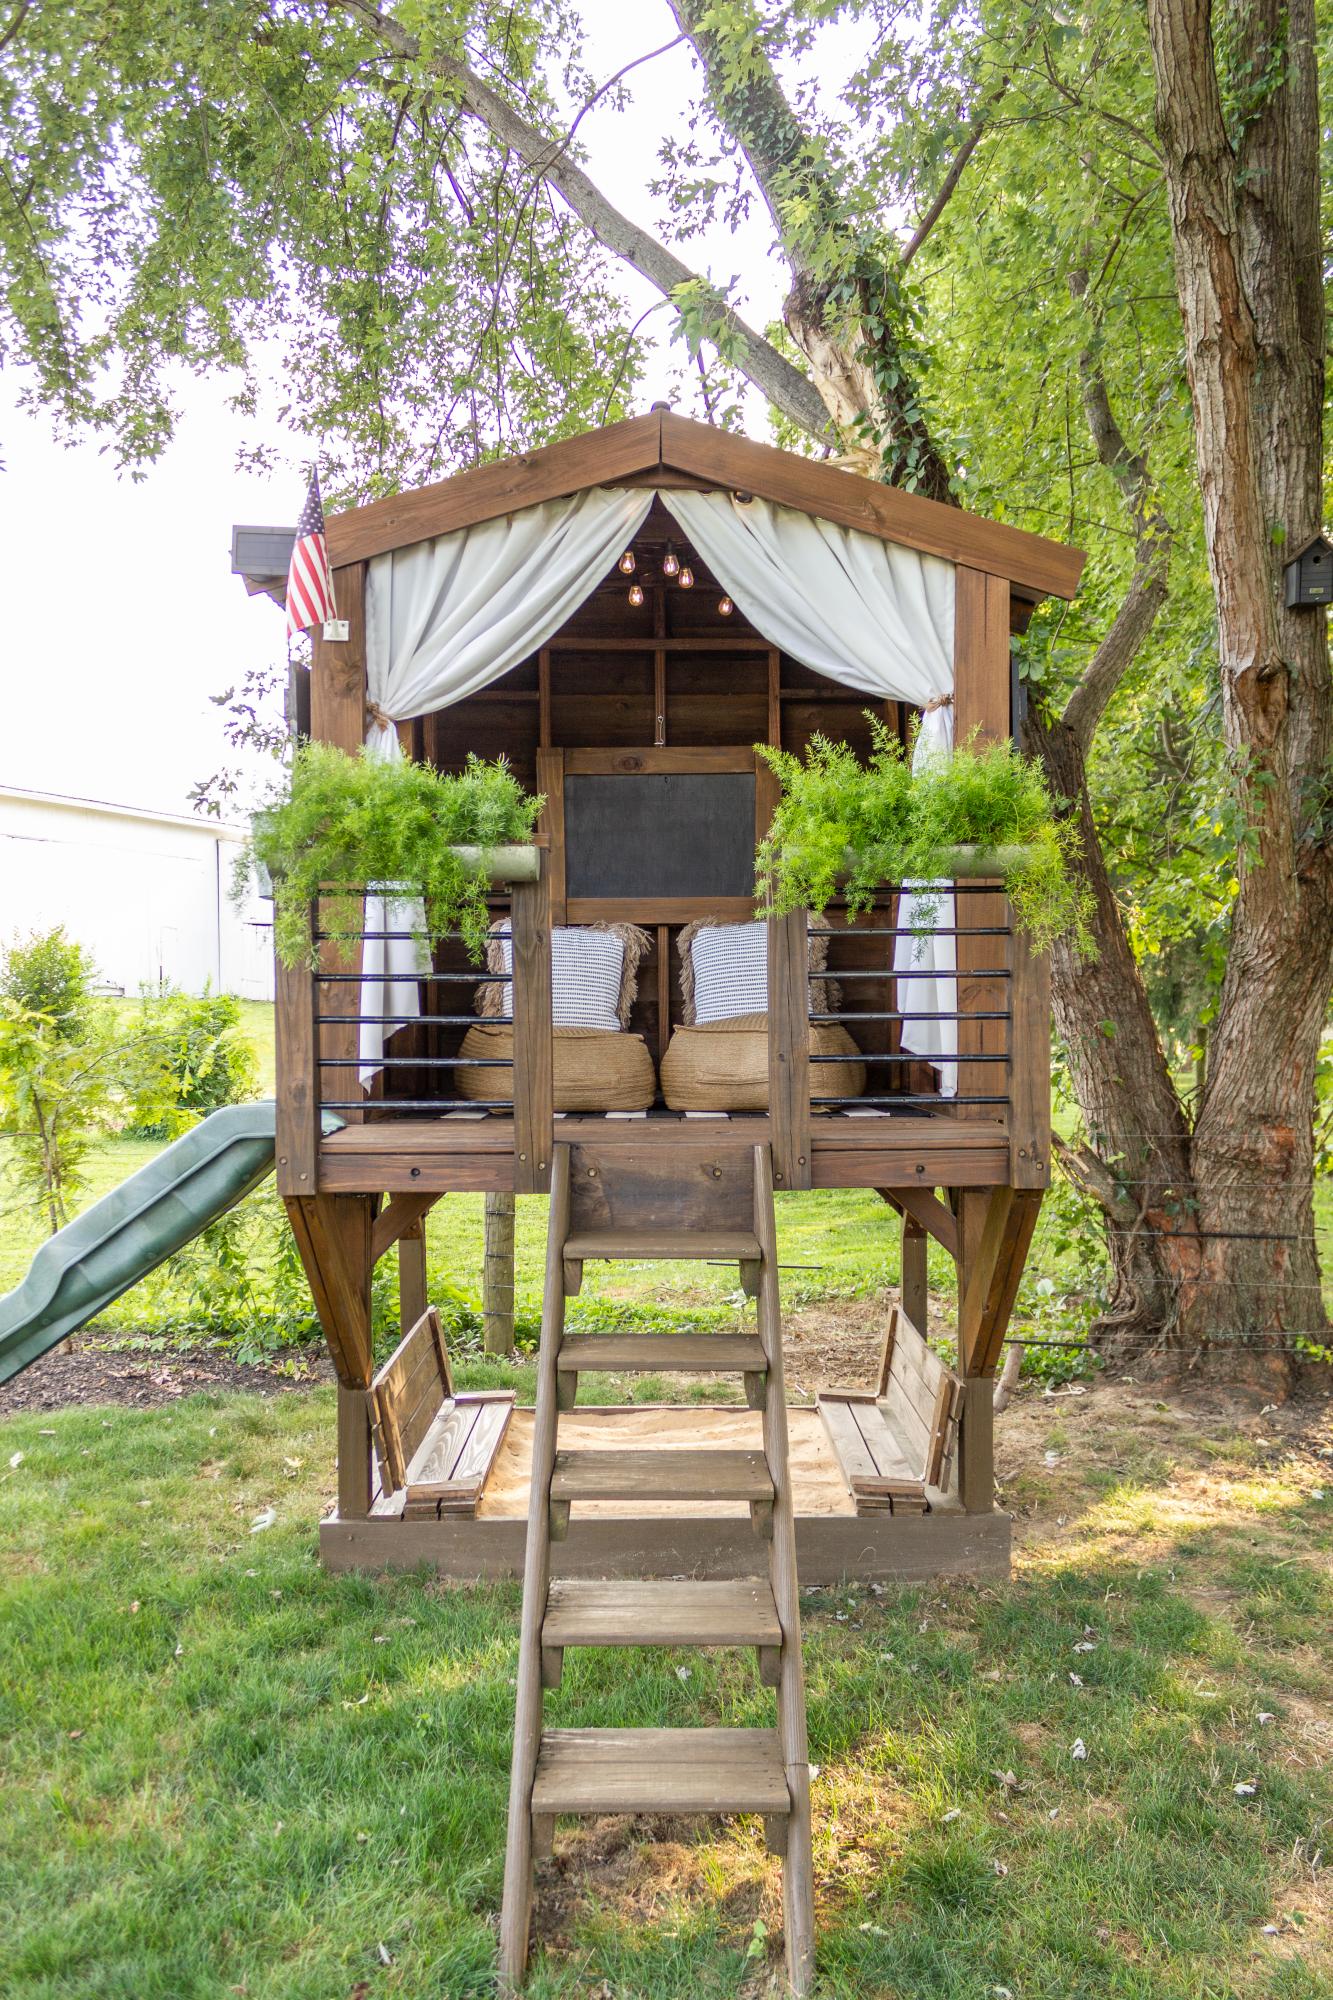
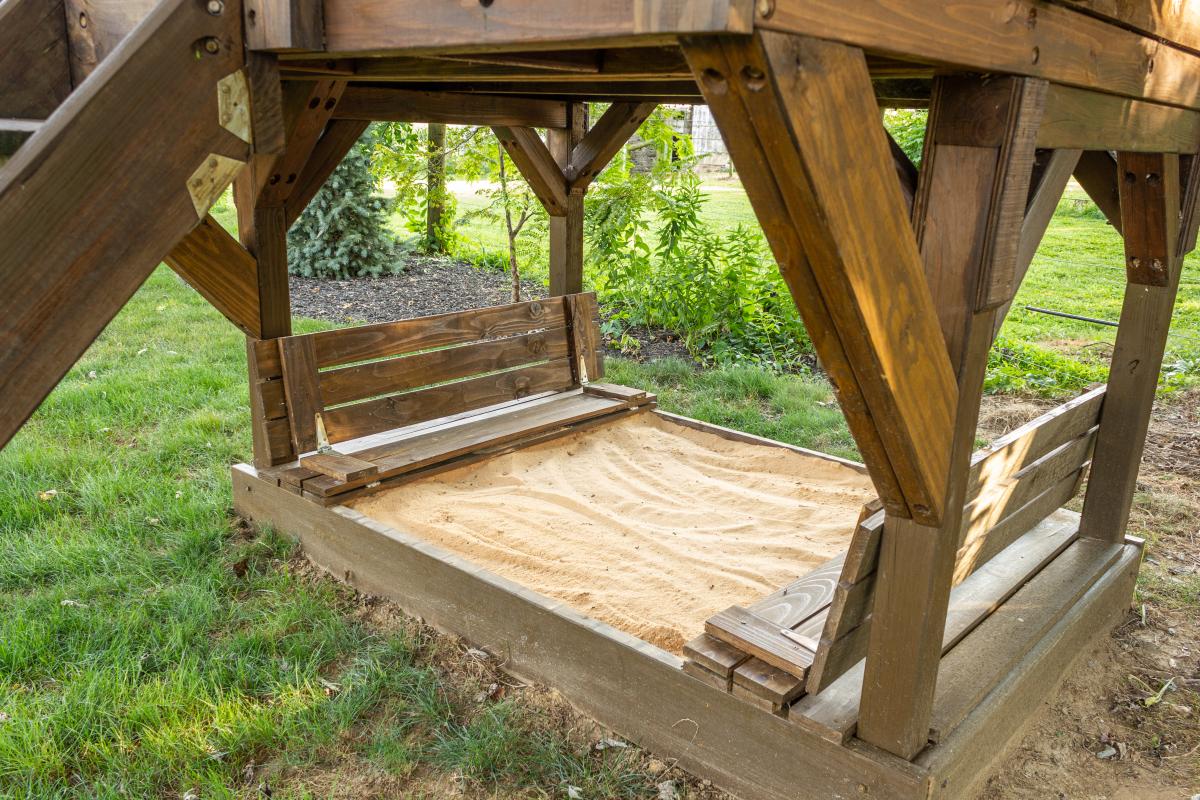
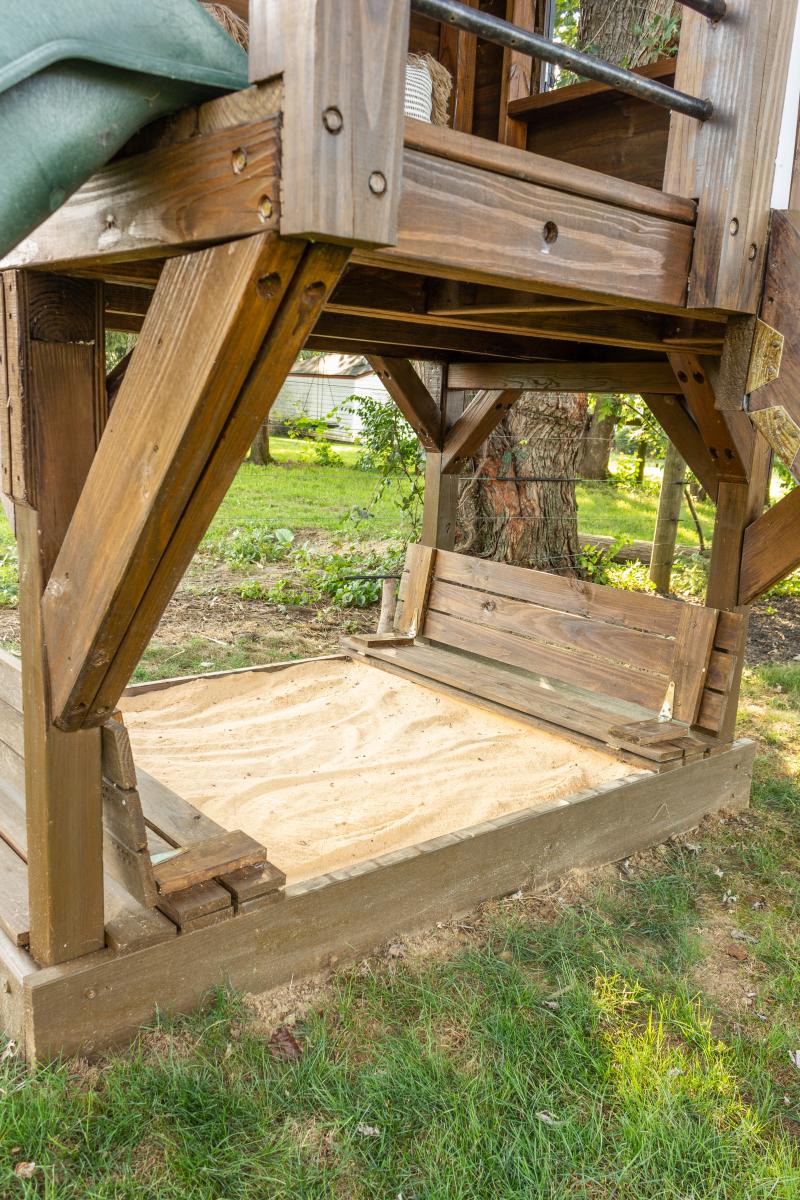
Sandbox with built-in seats in our playhouse

Submitted by Anonymous (not verified) on Thu, 09/10/2020 - 10:55

The base of our playhouse felt like the perfect spot to use the sandbox plan with built-in seats. The bench seats actually fold flat to create a lid for the sandbox when it’s not in use. I followed Ana’s plans exactly and used the list of materials she provided. The only modification I made was eliminating the back supports. It was not necessary for me to add the back supports since we have the playhouse posts to support the back of the bench.

Built from Plan(s)
Estimated Cost
$60
Estimated Time Investment
Afternoon Project (3-6 Hours)
Finish Used
Stain
Recommended Skill Level
Beginner
Seasonal And Holiday

Outdoor Sectional - Love It !

Submitted by Anonymous (not verified) on Sun, 10/18/2020 - 06:11

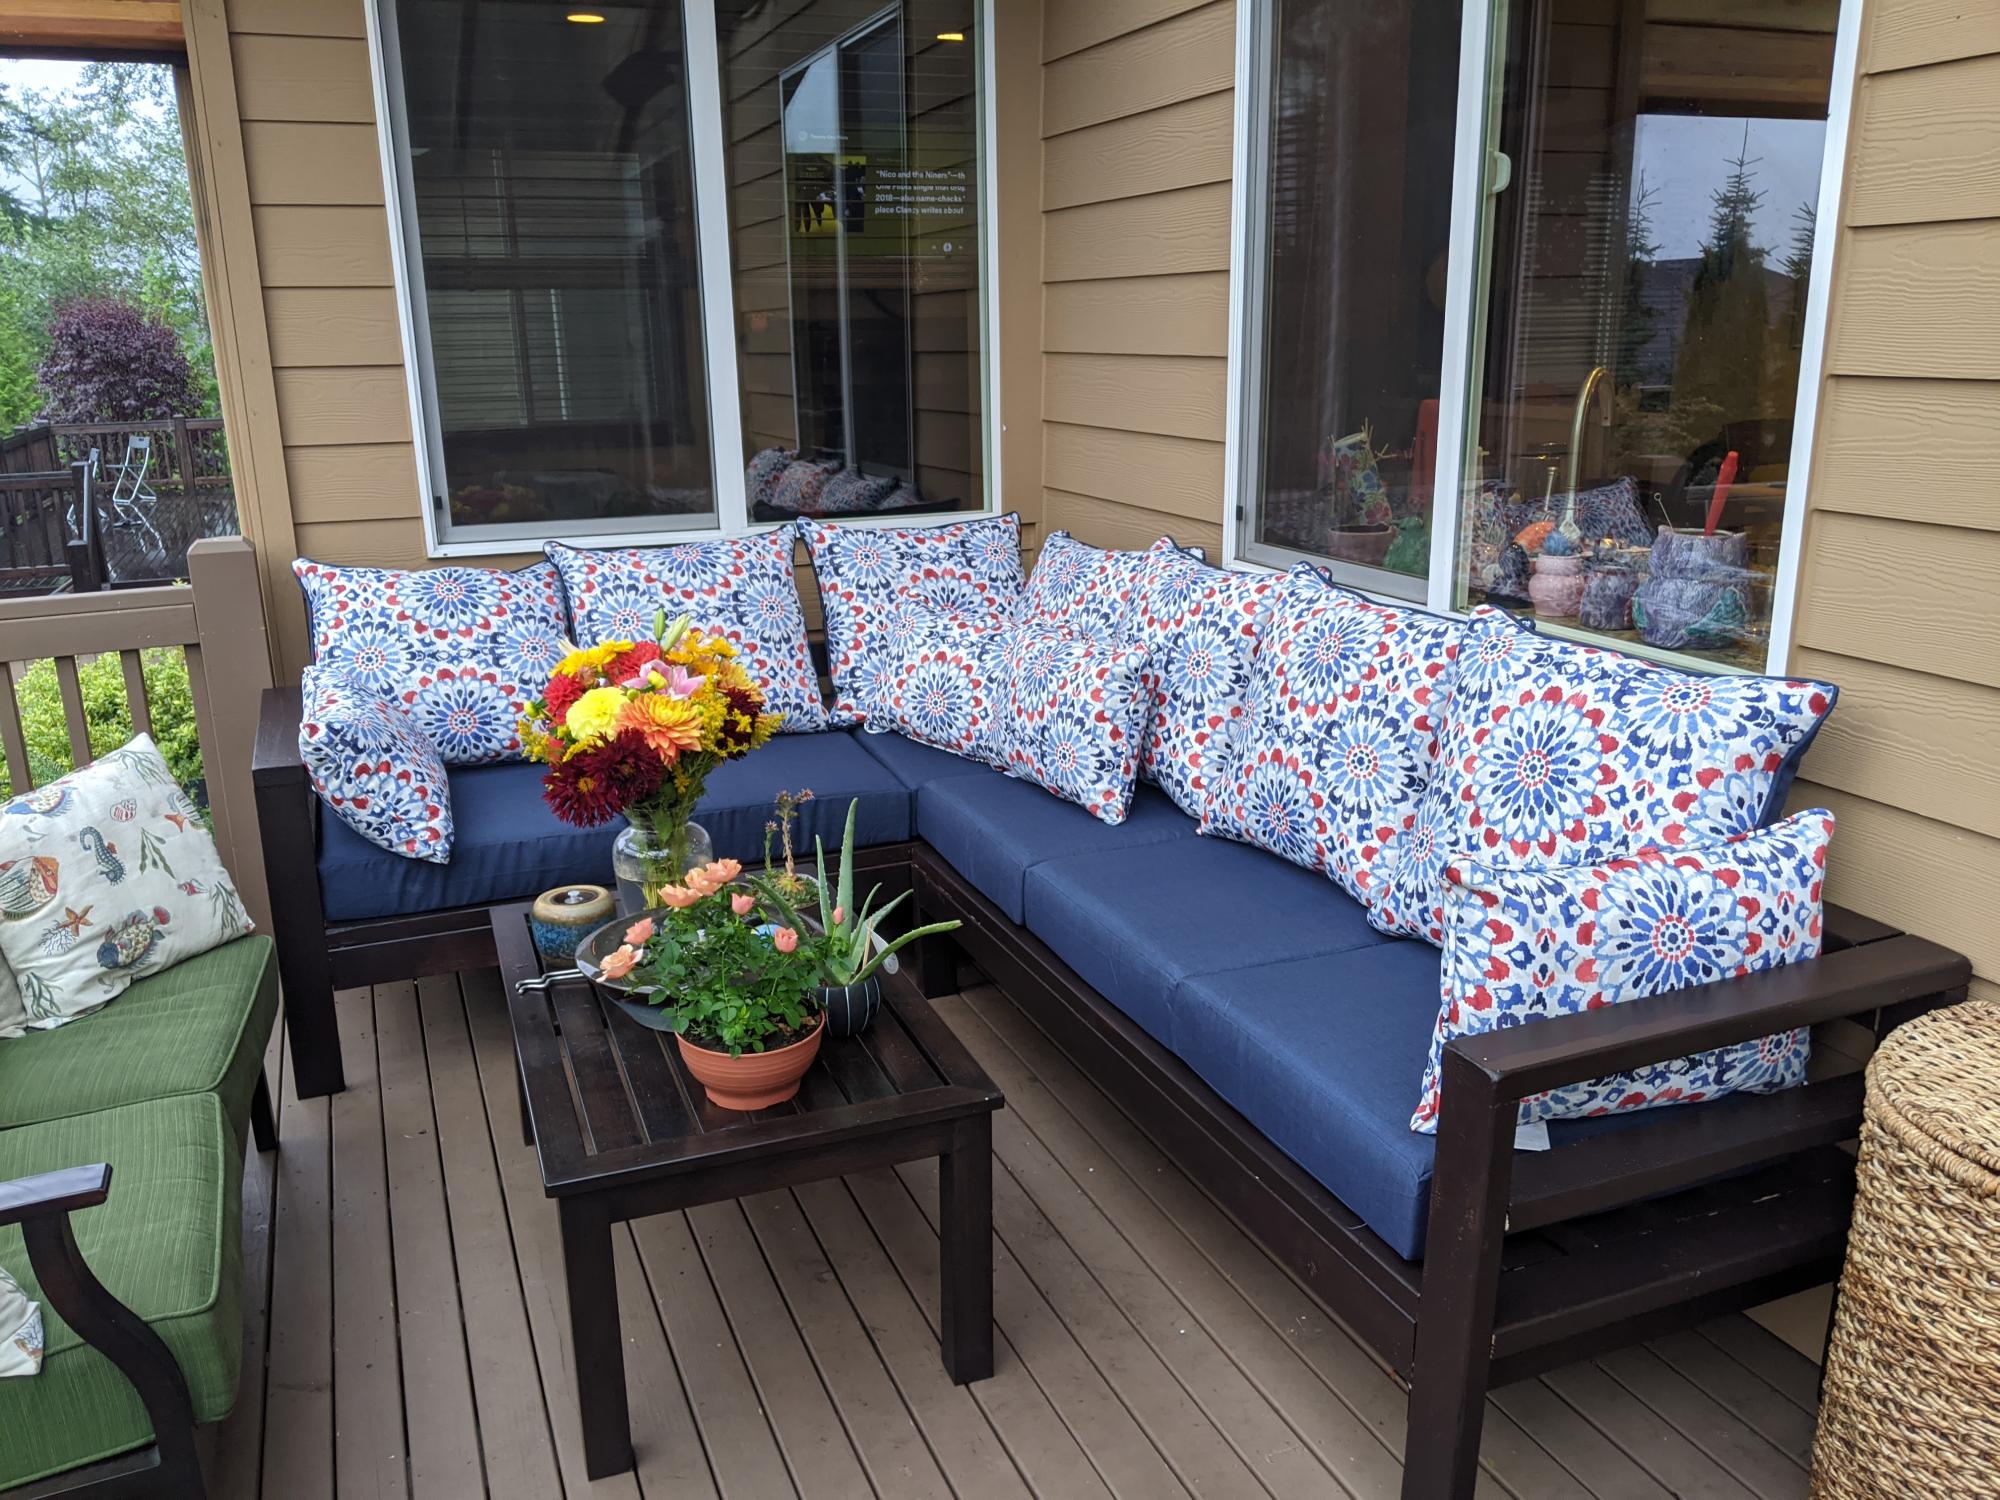
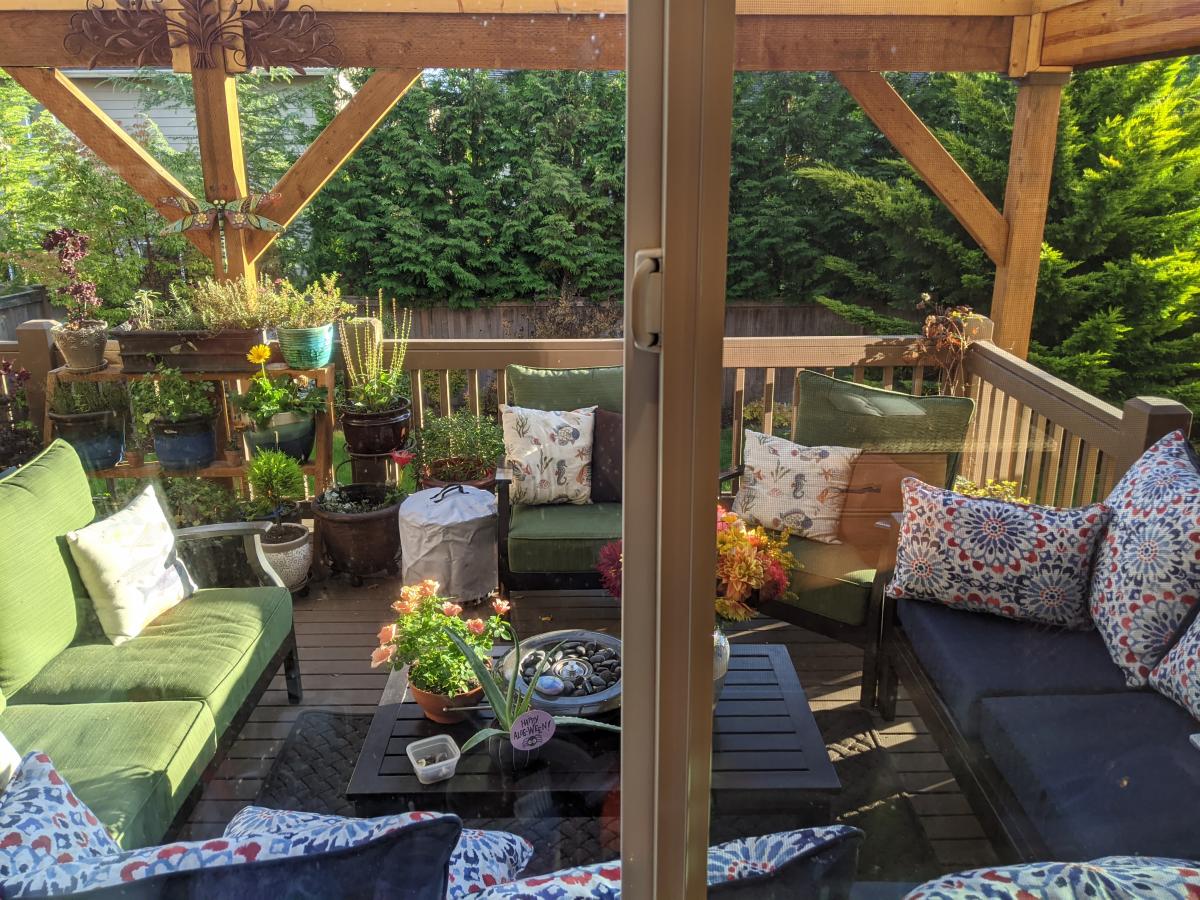
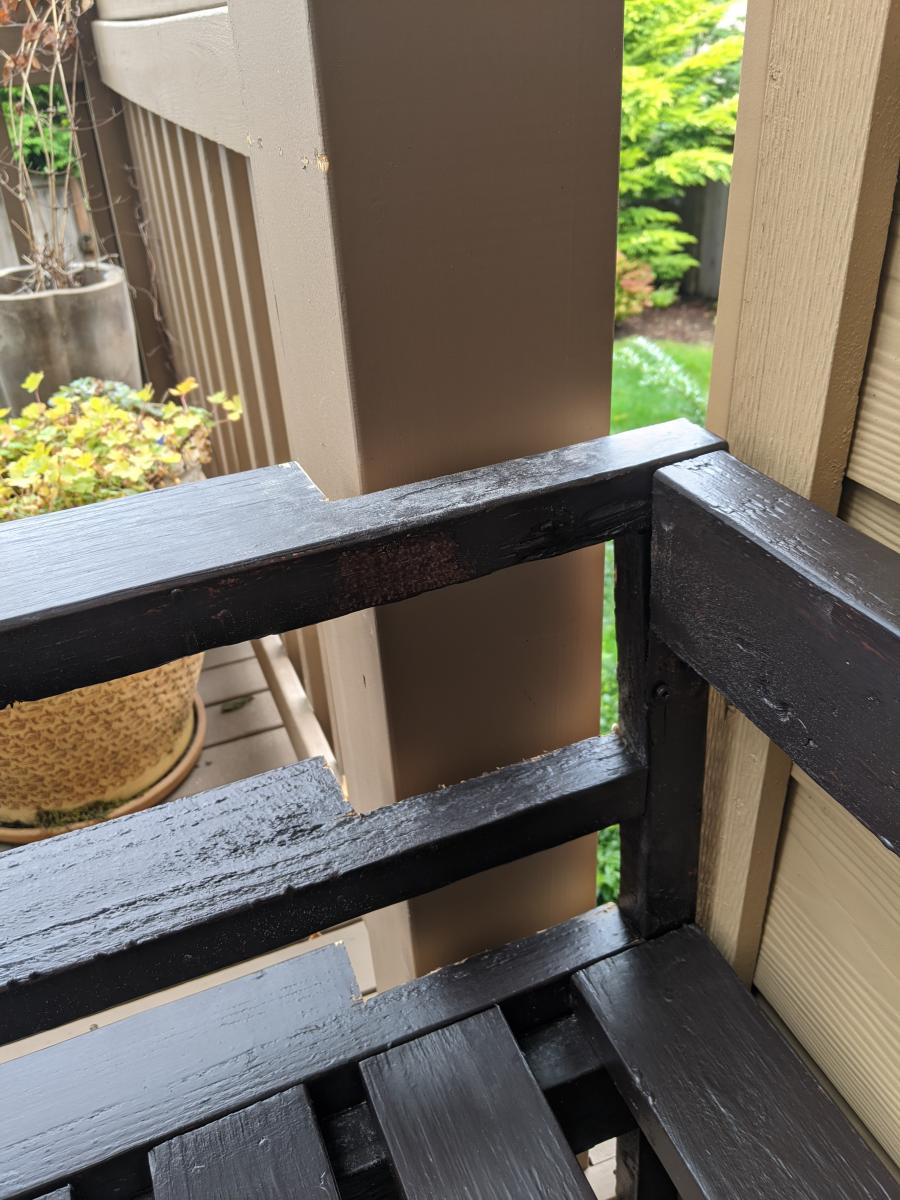
Great experience building this sectional, although would recommend pre-drilling the holes where practical to avoid splitting. It only happened to me a few times on #2 douglas fir, but I would have preferred to avoid it. As you can see from the picture, I didn't account for the siding taking up the space, and was expecting a perfect fit. Easily fixed with a bit of saw work, and now it's really custom fit for the space. :-)

I've added the details of the finish we used, and really happy with how it turned out, with the exception of my garage workshop lighting not revealing the spots I need to touch up now that it is in the natural light.

And of course, this is a terrific time to purchase couch cushions at the end of the season. Lots of great sales, and we found these at Target for $47 per top/bottom set.

Estimated Cost
$600
Estimated Time Investment
Week Long Project (20 Hours or More)
Finish Used
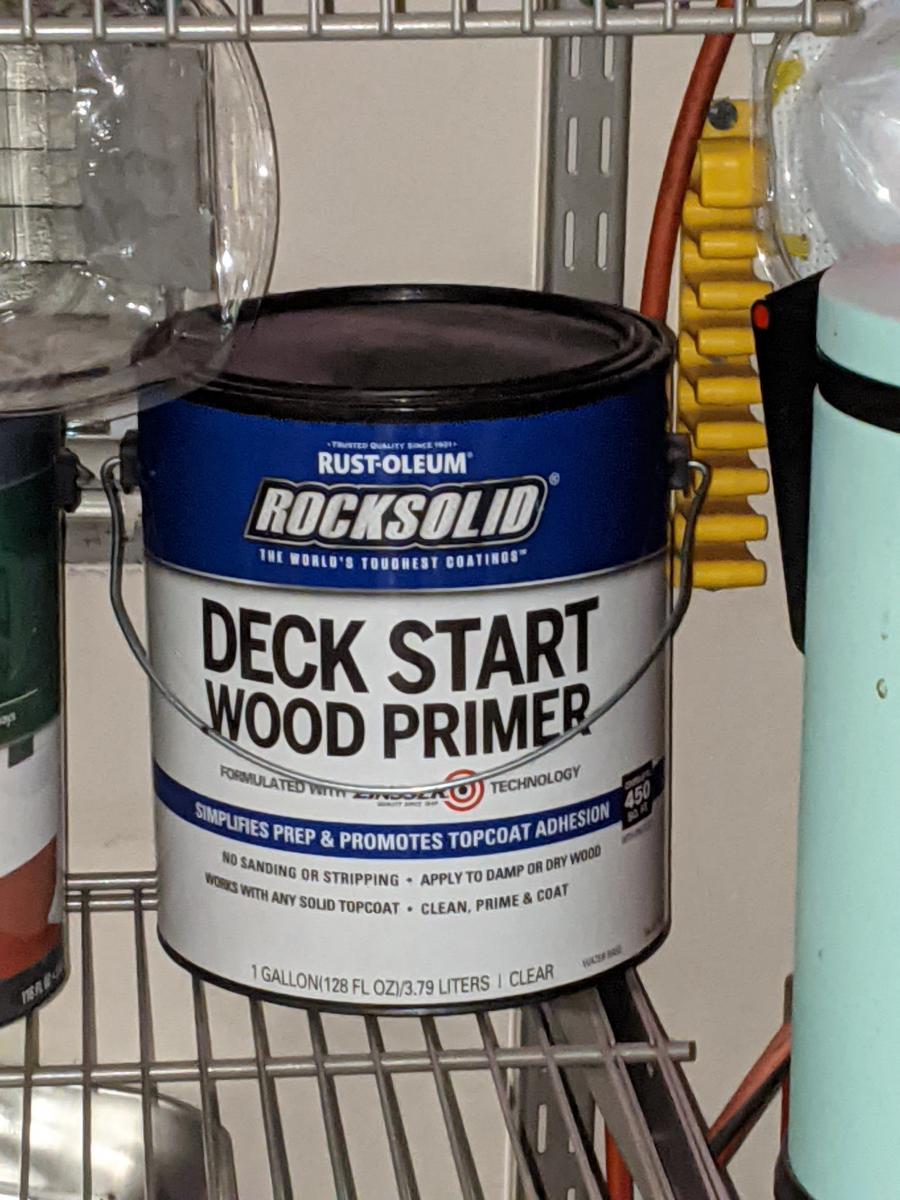
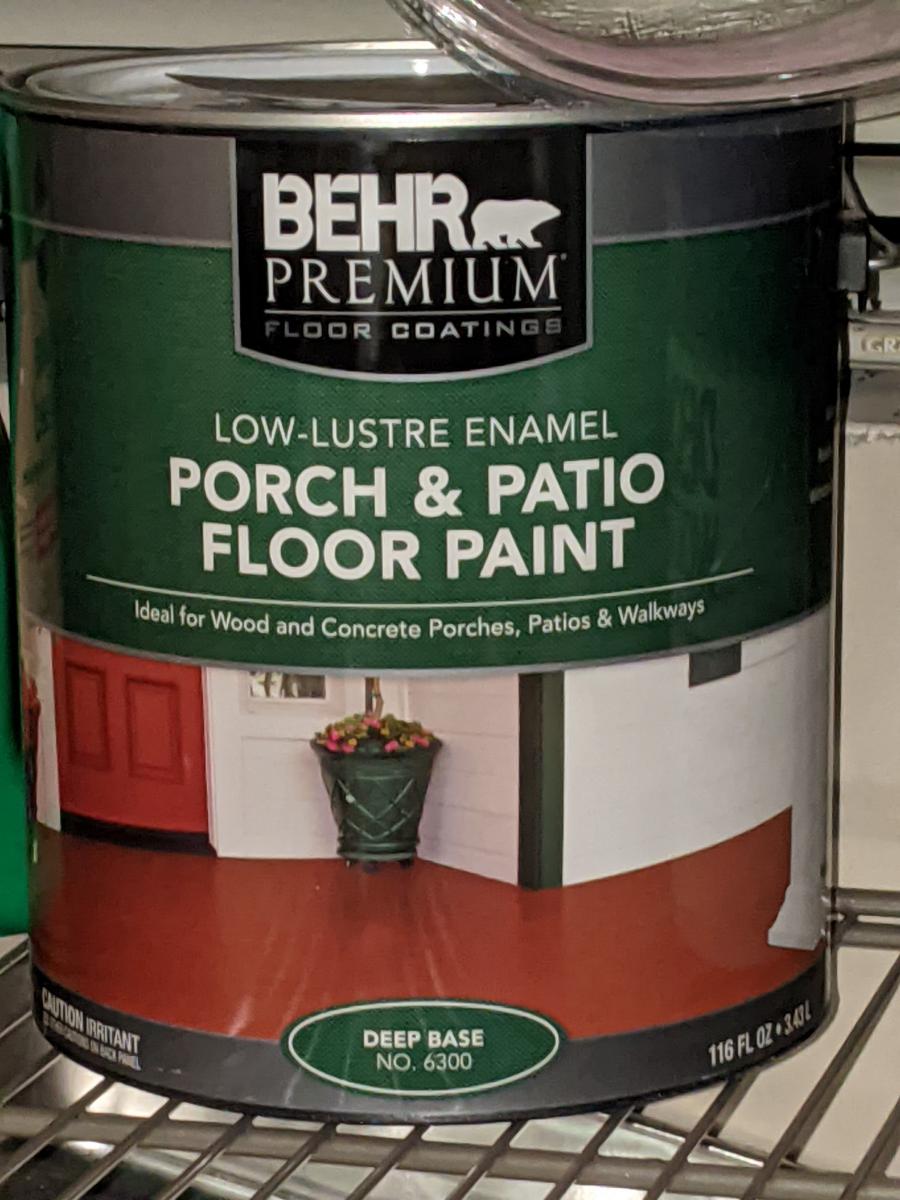
Rustoleum Rock Solid Deck Start Wood Primer followed by Behr Premium Porch and Patio Floor Paint. This gave a really matte finish that looks a lot like the metal patio furniture we will have next to it, and Home Depot was able to tint this for us. We also added a mildew and moss inhibitor to the paint at the store for a couple extra bucks since we live in the PNW. The extra time needed to get multiple coats on for full coverage was totally worth it.
Recommended Skill Level
Beginner

Garage Shelves + Work Bench

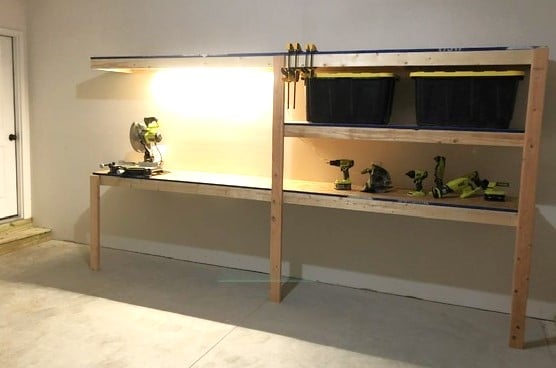
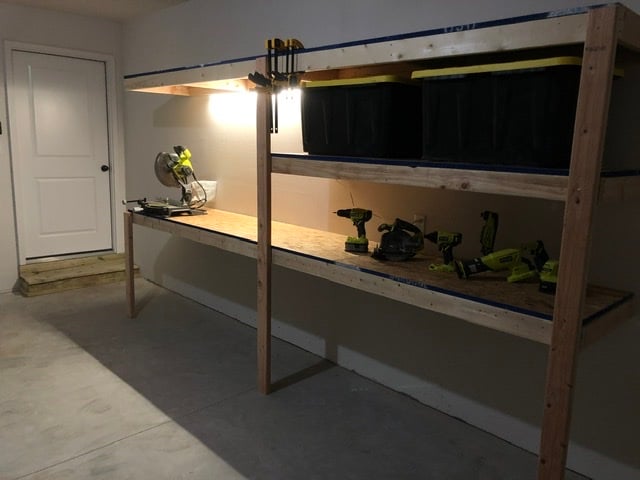
I used Ana’s plans for the garage shelves, but modified them to include a work bench. A lot of you tubers have done this, built a combination work bench and shelving, but I built nearly everything according to Ana’s plans. 12 feet long, 24 inches deep. I got some LED lights (two 1600 lumen strip lights) from menards that really brighten up my entire garage and make the work bench more useful. The one thing I really wanted was to not have a supporting pillar on the work bench to keep it open, and I loved how it turned out. I went for 3/4 plywood, mostly to have a stronger work surface, and I’m glad I did. I have since added a supporting 2x6 off of the study to support the top shelf above the bench and its strong enough to do pull-ups off of, and I have reinforced the support leg under the bench with a cross bar. Thanks for the great plans!!

Estimated Cost
~$200 (lumber prices have gone up recently due to supply issues with covid)
Estimated Time Investment
Weekend Project (10-20 Hours)
Recommended Skill Level
Starter Project

Comments

Brook Laundry Basket Dresser

Submitted by krochelle on Thu, 01/01/2015 - 15:42

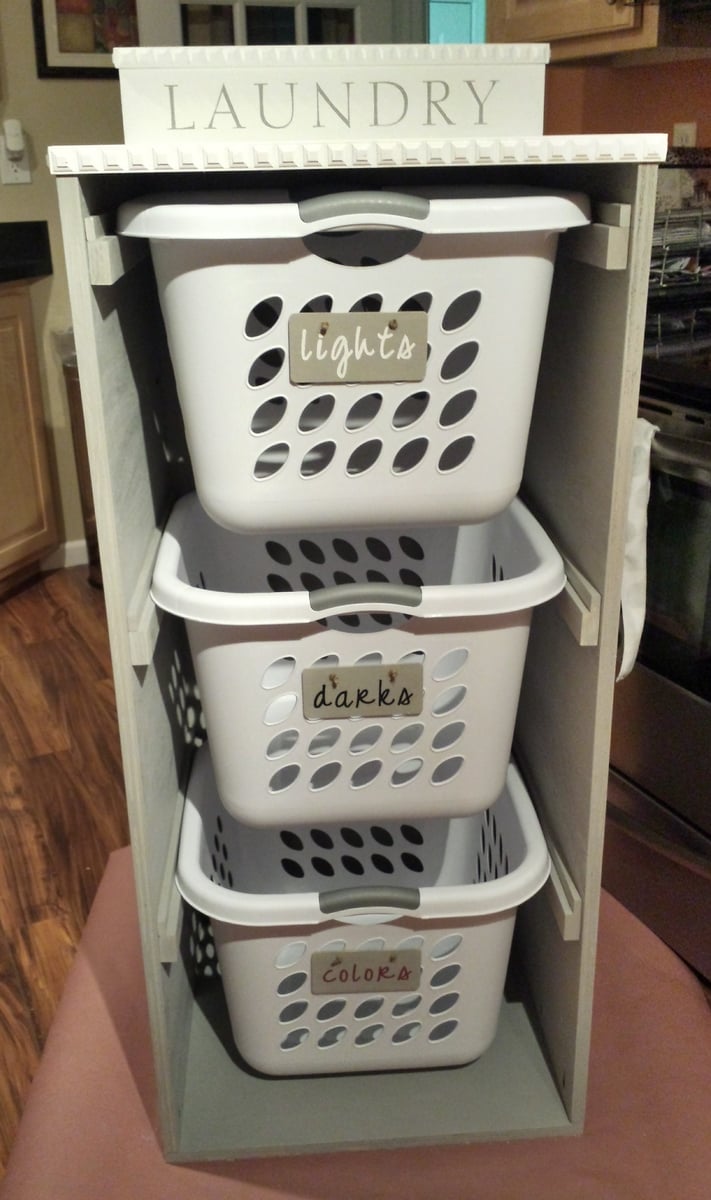
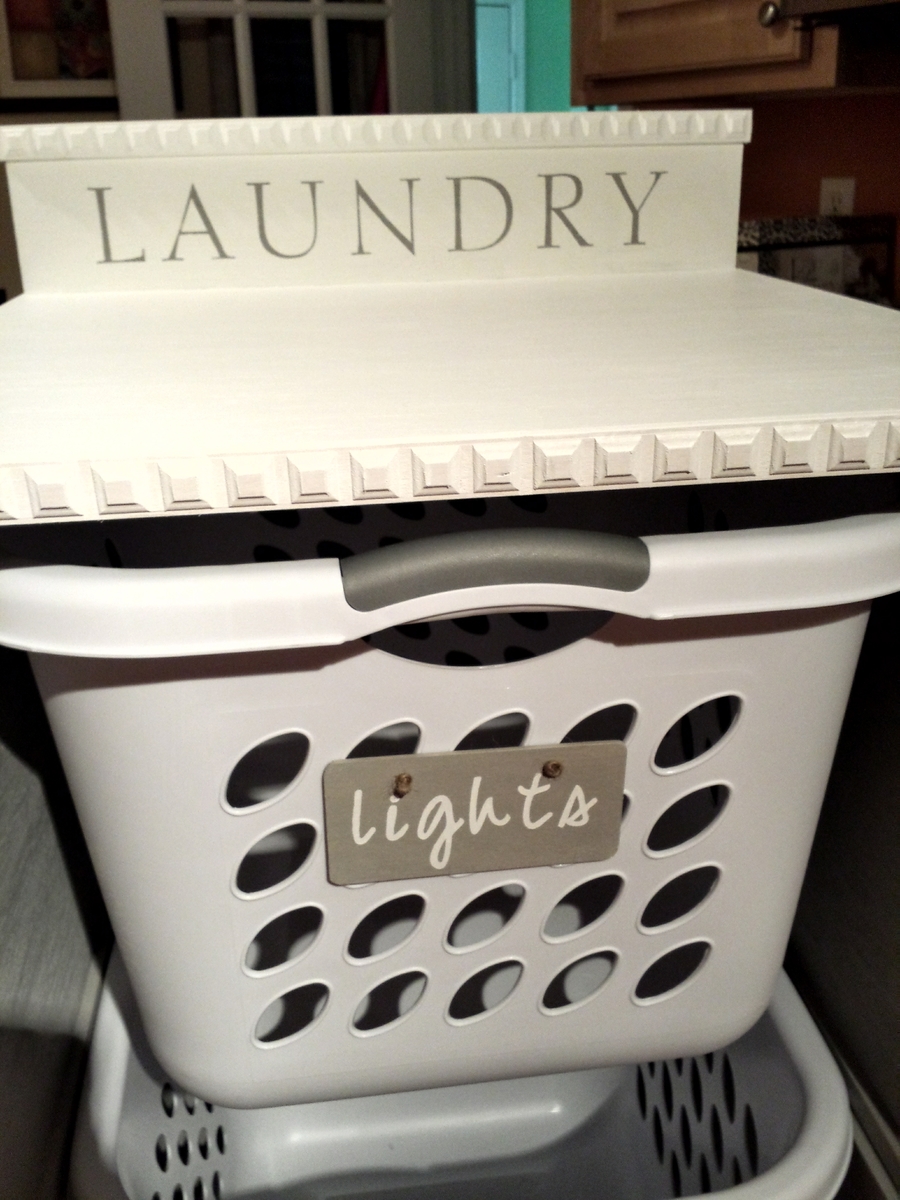
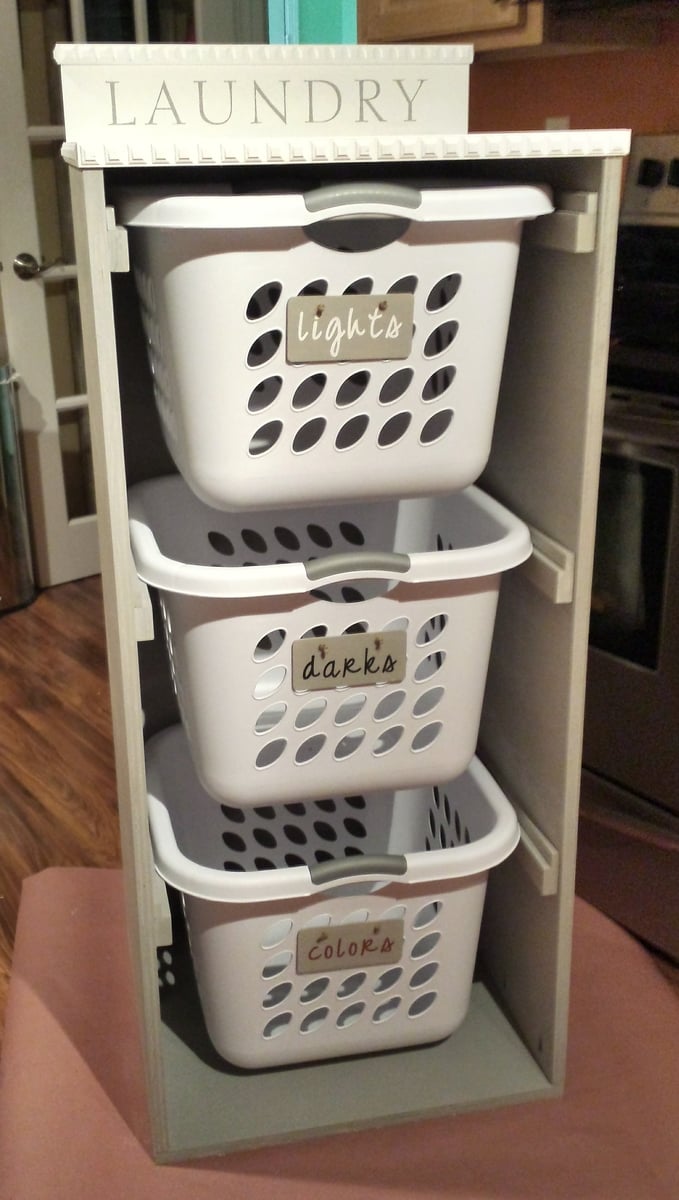
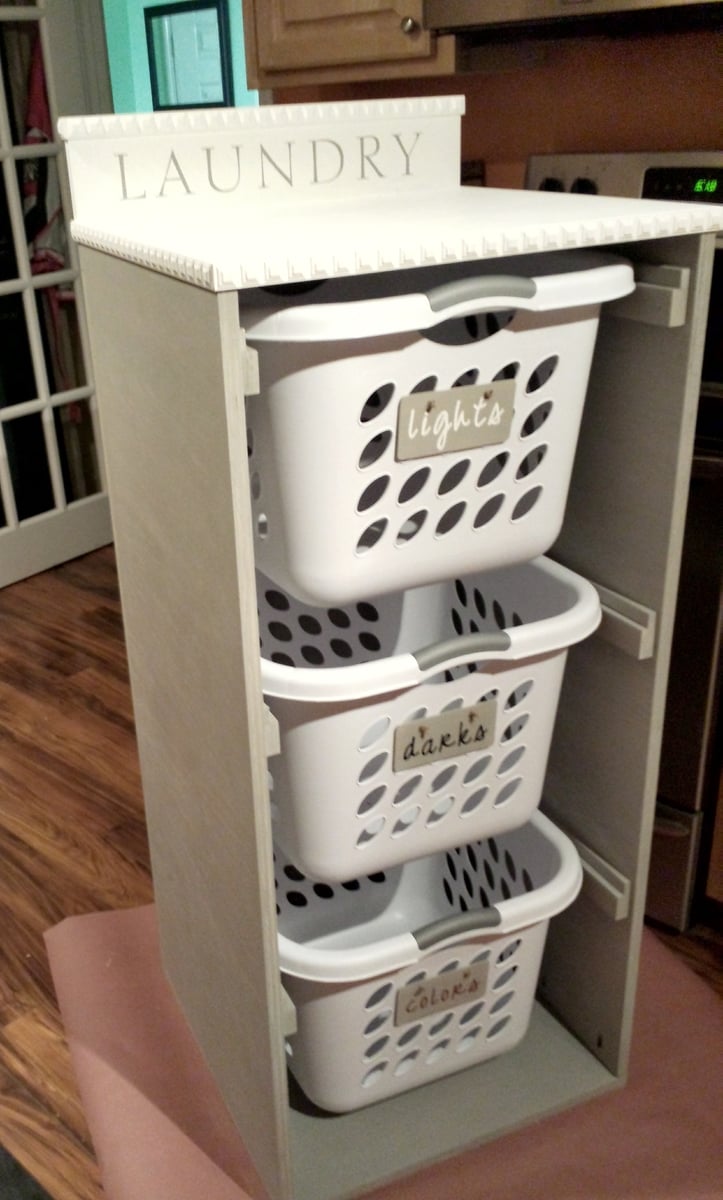
Used square laundry baskets instead of regular rectangular baskets. The square ones aren't as deep but are a bit taller so I had to modify the plans. I added a backsplash and some wooden tags to the baskets to designate them for certain colors. I also added some decorative trim and finished the bottom in a gray stain and used white chalk paint for the top.

Estimated Cost
$70
Estimated Time Investment
Day Project (6-9 Hours)
Finish Used
Weathered gray stain
White chalk paint
Recommended Skill Level
Beginner

Kid's Playhouse and Slide

Submitted by docfin02 on Mon, 03/28/2011 - 18:56

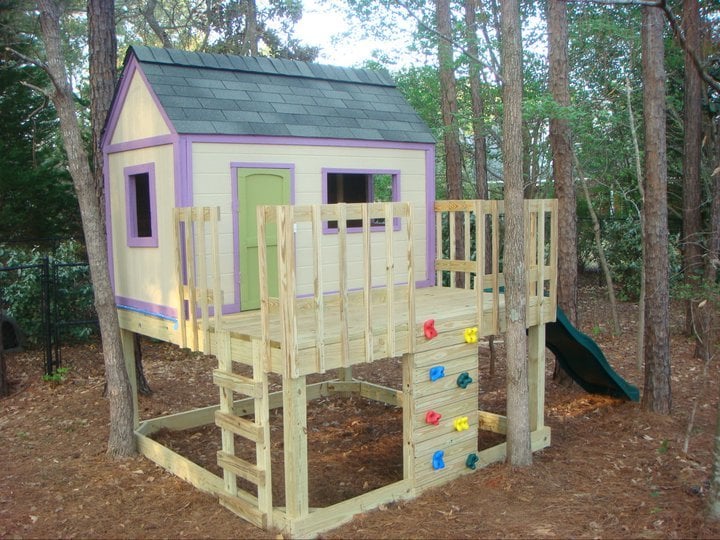
I LOVE these plans. This was my first project, and although it was a big one to start with, the plans were easy to follow. If I can do it, anyone can. I added the rock wall. My kids and I love it. Total cost for me (including all lumber, nails, paint, slide, etc.) is about $850.

Estimated Cost
$850
Estimated Time Investment
Week Long Project (20 Hours or More)
Finish Used
1 coat primer, 2 coats paint
Recommended Skill Level
Intermediate
Seasonal And Holiday