


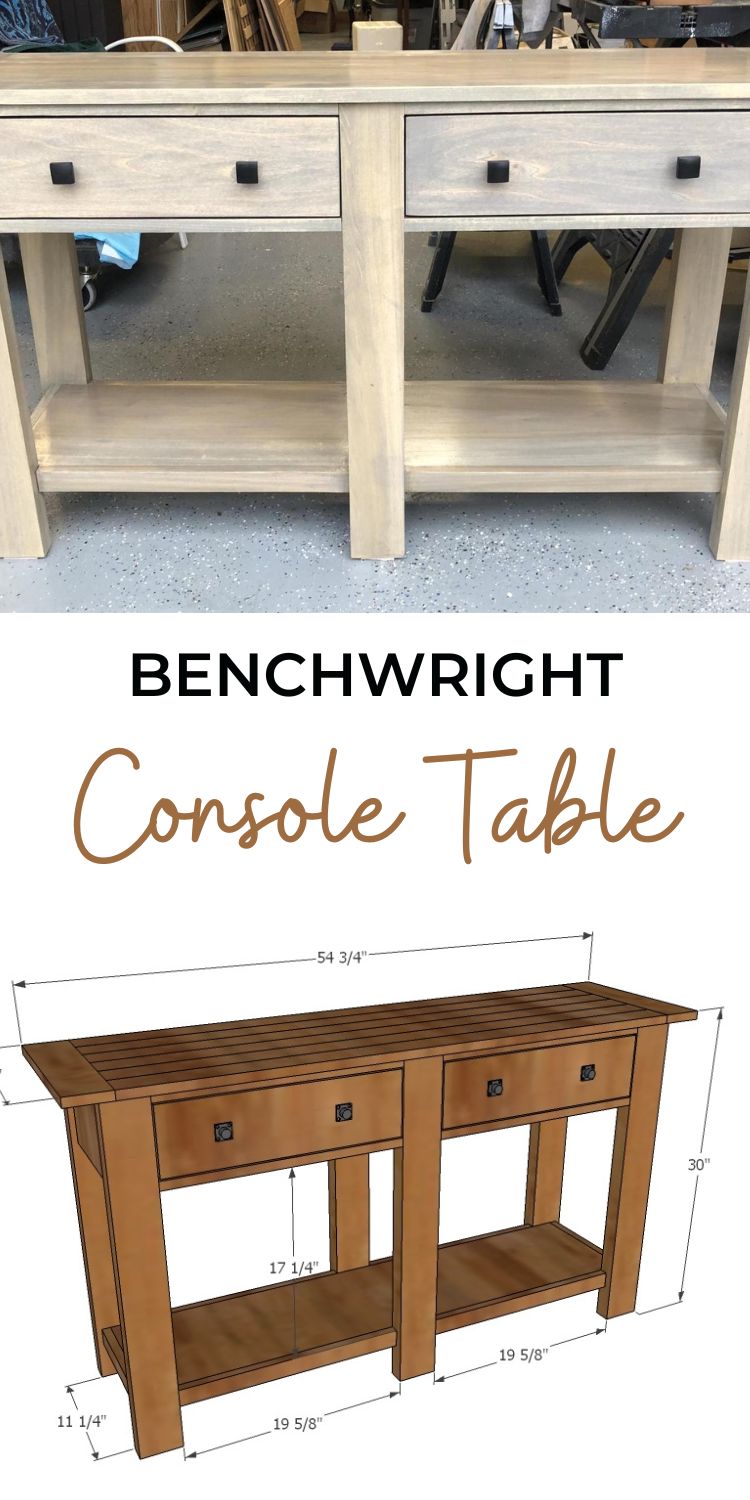
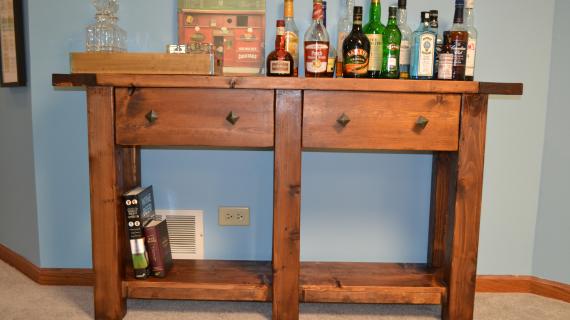
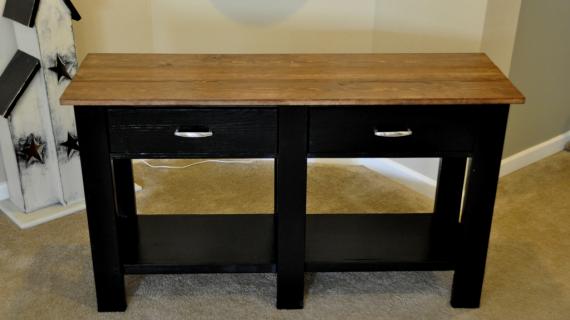
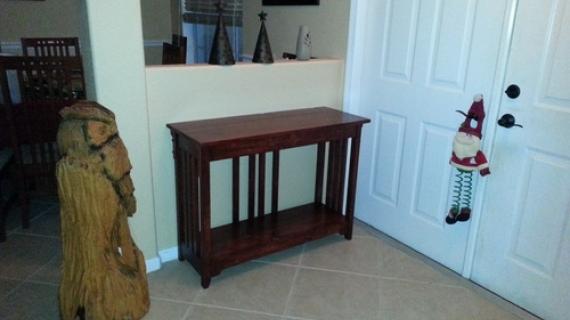
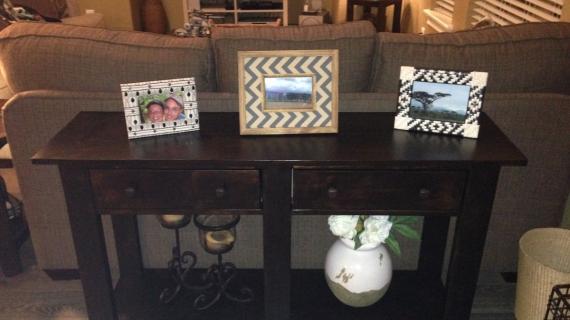
Free plans for console table with two drawers and open shelf on bottom. Step by step plans from Ana-White.com
Pin for Later!

Preparation
- 1 – 1x12 @ 10 feet long
- 2 – 2x4 @ 8 feet long
- 4 – 1x2 @ 8 feet long
- 2 – 1x4 @ 8 feet long
- 1 – 1x6 @ 4 feet long
- 4 - 1x3 @ 8 feet long
- 1/4 sheet 1/4” thick plywood or hardboard (drawer bottoms and back)
- 4 knobs
- 1 1/4" pocket hole screws
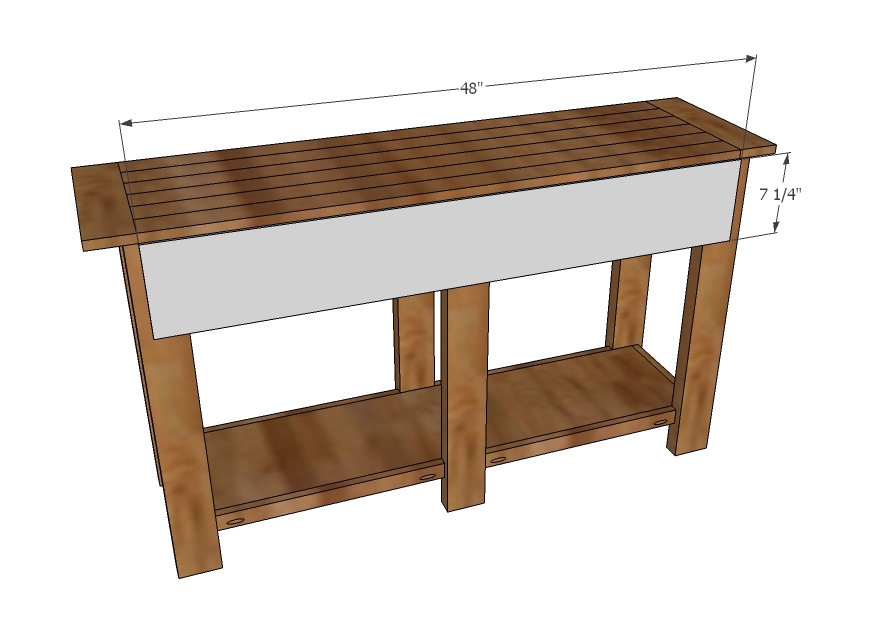
- 2 – 1x12 @ 47 1/4" (shelves)
- 2 – 1x12 @ 7 1/4" (side aprons)
- 6 – 2x4 @ 29 1/4" (legs)
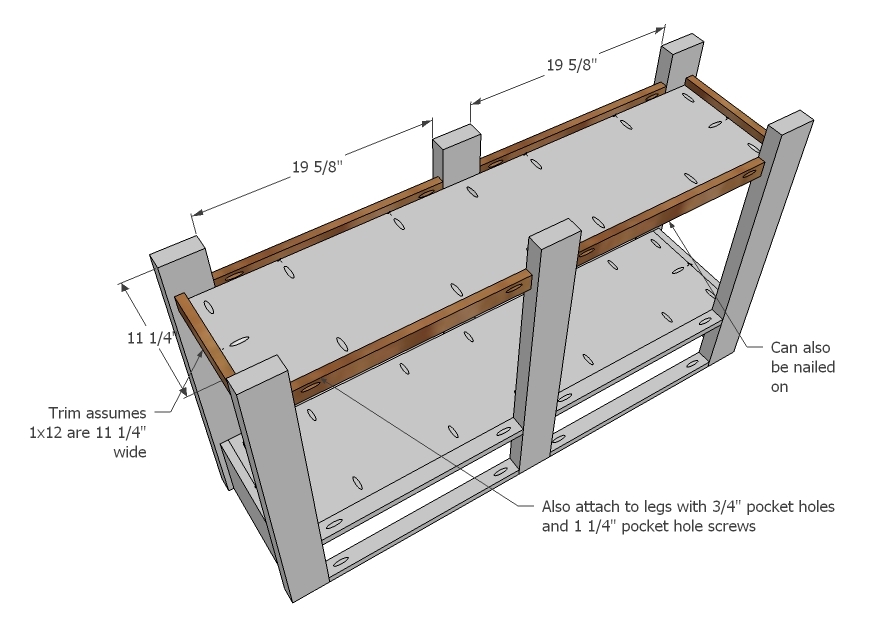
- 12 – 1x2 @ 19 5/8” (front/back shelf trim)
- 2 – 1x2 @ 11 1/4" (side shelf trim)
- 2 – 1x2 @ 11 1/4" (drawer guides)
- 1 – 1x4 @ 11 1/4” (center drawer guide)
- 2 – 1x4 @ 15” (breadboard ends - cut to fit)
- 6 – 1x3 @ 47 3/4" (top)
DRAWERS
- 4 – 1x4 @ 17 7/8
- 4 – 1x4 @ 13 ½”
- 2 – 1/4" plywood @ 19 3/8” x 13 1/2"
- 2 – 1x6 @ 19 3/8”
BACK
- 1/4" plywood 48" x 7 1/4"


Please read through the entire plan and all comments before beginning this project. It is also advisable to review the Getting Started Section. Take all necessary precautions to build safely and smartly. Work on a clean level surface, free of imperfections or debris. Always use straight boards. Check for square after each step. Always predrill holes before attaching with screws. Use glue with finish nails for a stronger hold. Wipe excess glue off bare wood for stained projects, as dried glue will not take stain. Be safe, have fun, and ask for help if you need it. Good luck!
Instructions
Step 1
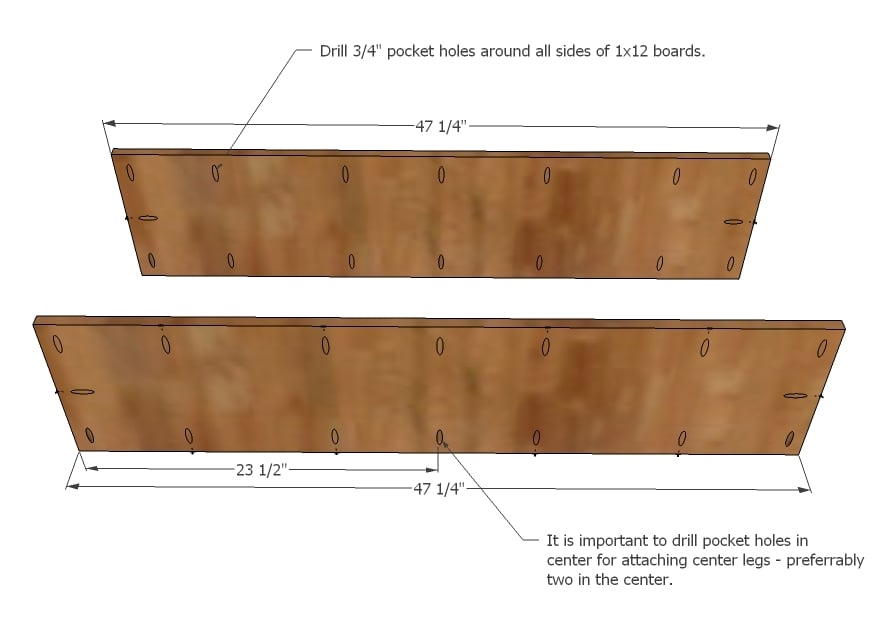
It is very important to drill all pocket holes first. Make sure you drill adequate holes for attaching legs on the ends and centered. Also, I’d drill at least two pocket holes on each end for attaching side aprons and end trim in later steps.
Step 2

First drill 3/4” pocket holes along side edges of side aprons for later attaching legs – see next step, but place pocke tholes on insides. To the top shelf, attach the side aprons.
Step 3
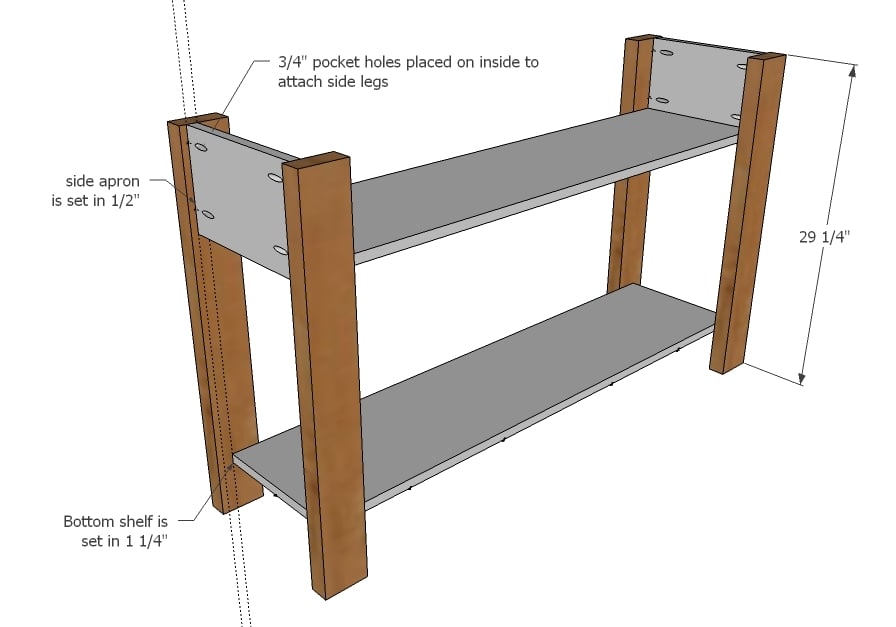
Mark four legs 1/2” in from edge along top, at least 7” down. Then mark 1 1/4” line on the bottom 6” of the legs for attaching bottom shelf. Attach shelves and aprons with 1 1/4” pocket hole screws and glue.
Step 4

Next comes the middle leg. It’s super important to get just right and square. If your 2x4s are not 3 1/2” wide this could alter your measurements slightly. Attach legs through predrilled pocket holes.
Step 5
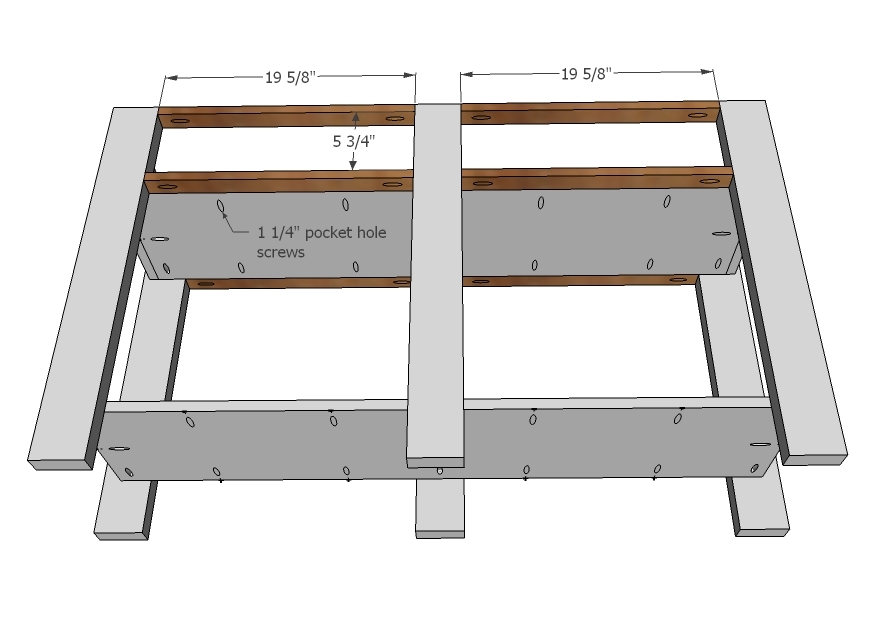
Add 1x2 trim between legs with pocket holes.
Step 6
And then the lower shelf trim.
Step 7
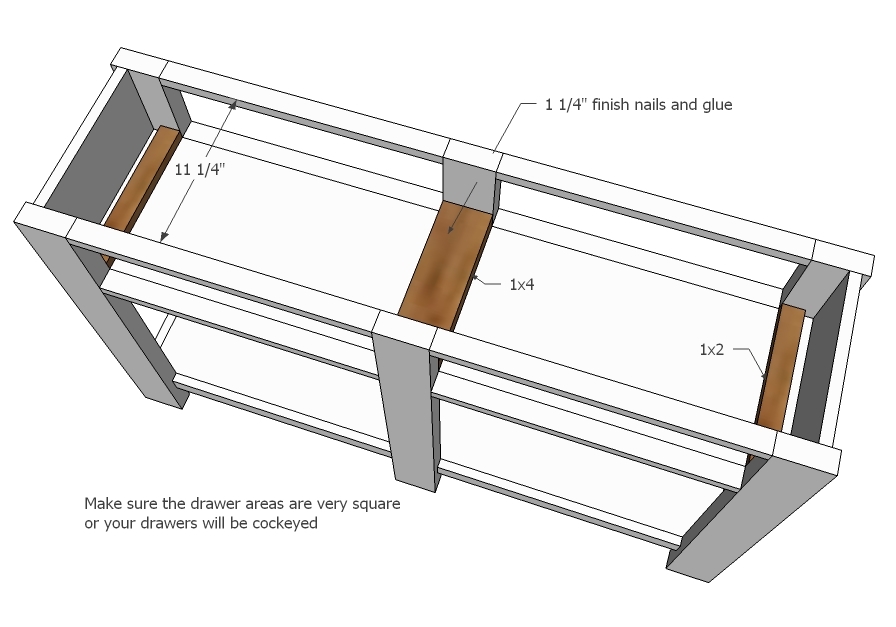
These are to guide your drawers. Because of how shallow these drawers are, and because console table drawers are relatively low use, I choose to just make very simple box drawers. One could add drawer slides if desired, but I felt it unnecessary. Make sure the distance between the drawer guides is square by taking a diagonal. Better yet, build your drawers first, and then fit around to make sure they slide just right.
Step 8

Build top separately, then attach through top 1x2 trim with 1 ¼” nails and glue.
Step 9
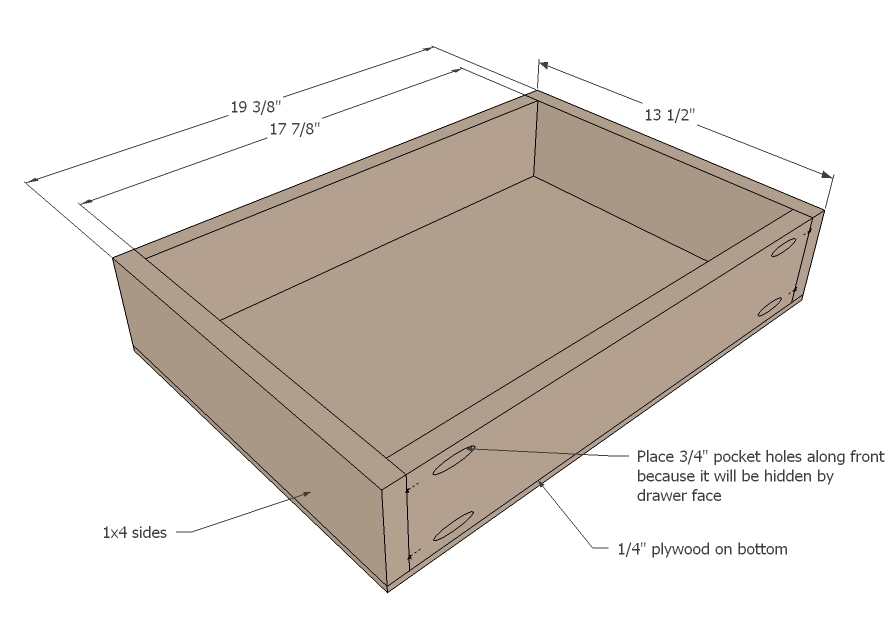
Here is the drawer diagram. I like to place pocket holes to the front, outsides. Then they get covered by the face.
Step 10
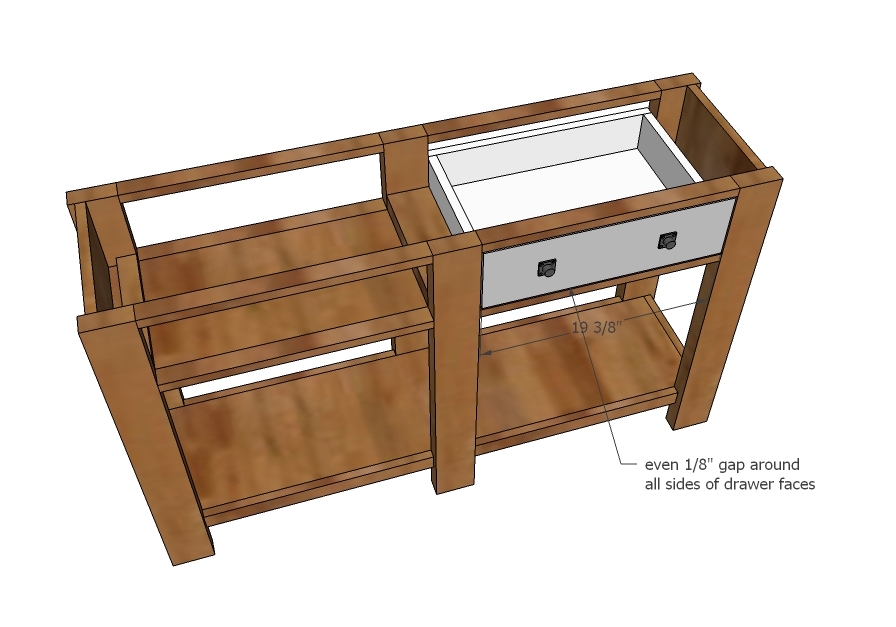
When you install the face, make sure there is an even 1/8” gap around all sides, including the bottom. Nail on with 1 1/4” finish nails and glue.
Step 11
Next, attach back. Use 1 ¼” nails and glue. The back will keep your drawers from sliding through.
It is always recommended to apply a test coat on a hidden area or scrap piece to ensure color evenness and adhesion. Use primer or wood conditioner as needed.


Comments
jcmcclure77
Tue, 04/10/2012 - 11:33
Thank you Ana!
Thanks for letting me have the opportunity to contribute to your site!
JM
YankeeBelle
Tue, 04/10/2012 - 15:05
Beautiful!
This really makes me wish I had a bigger house so I could build this! Great job!
dananryan
Wed, 04/11/2012 - 16:16
Better than the original!
I actually like your version better than the original PB console table. I love the 2x4 legs. Great plan and great build!!!
Jasondmcintyre (not verified)
Sun, 04/15/2012 - 09:48
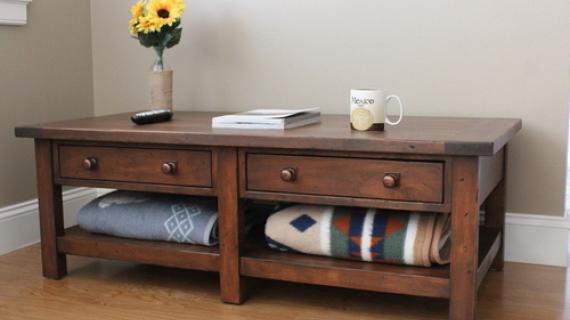
Step 8, Building the Top
Hi, I didn't quite follow the directions on step 8, building the top surface. You say to build it with pocket screws, does that mean you just screwed them edge to edge with pocket screws? How many screws per board? And how about the end pieces, also with pocket screws? Did you put one coming out of the end of each board into the bread board ends? I started building this yesterday and haven't done this technique before but I think I've seen it done. Great plans!
In reply to Step 8, Building the Top by Jasondmcintyre (not verified)
birdsandsoap
Sun, 04/15/2012 - 22:59
You are right on track with
You are right on track with the top build! The boards are screwed and glued with pocket holes edge to edge like you mentioned. Ana has detailed instructions for a coffee table using the same method. Here is the link to the Benchwright Coffee Table: http://ana-white.com/2012/02/plans/benchright-coffee-table. The top is assembled in step 14.
Good Luck!
KatieC (not verified)
Tue, 04/17/2012 - 14:54
Scaled-down version?
Do you think it is possible to build a scaled down version? I was looking for something about 48" long. I love this console, but I'm afraid it might look a bit too intrusive if I were to build it the full size. My entryway wall is only about 63" long.
Guest14 (not verified)
Wed, 04/18/2012 - 10:18
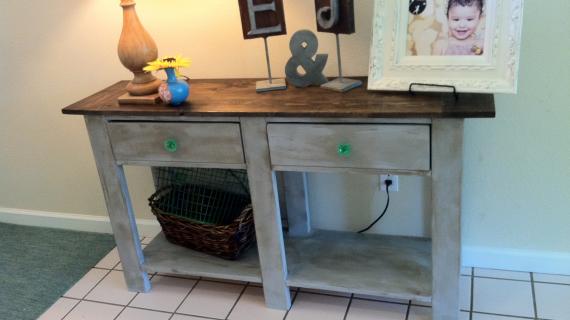
I love the finished look of
I love the finished look of this table and but it's too big for my space so I am going to build one of the smaller ones and I can't wait! I have been searching for a way to achieve this look but I can't seem to find what I am looking for. How did you make it so beautiful?!
Daniel (not verified)
Thu, 10/25/2012 - 17:41
Drawers
how do the drawers slide in and out? grooves? brackets?