
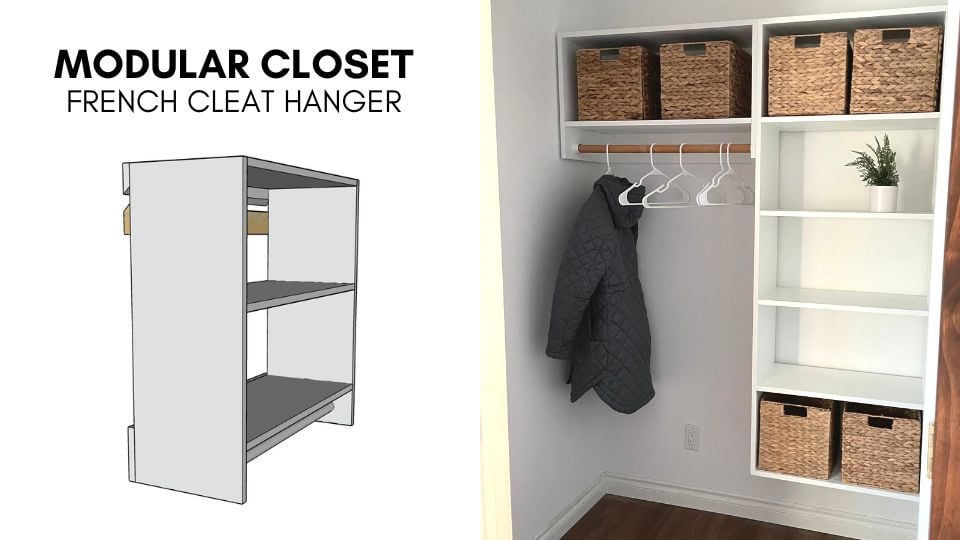

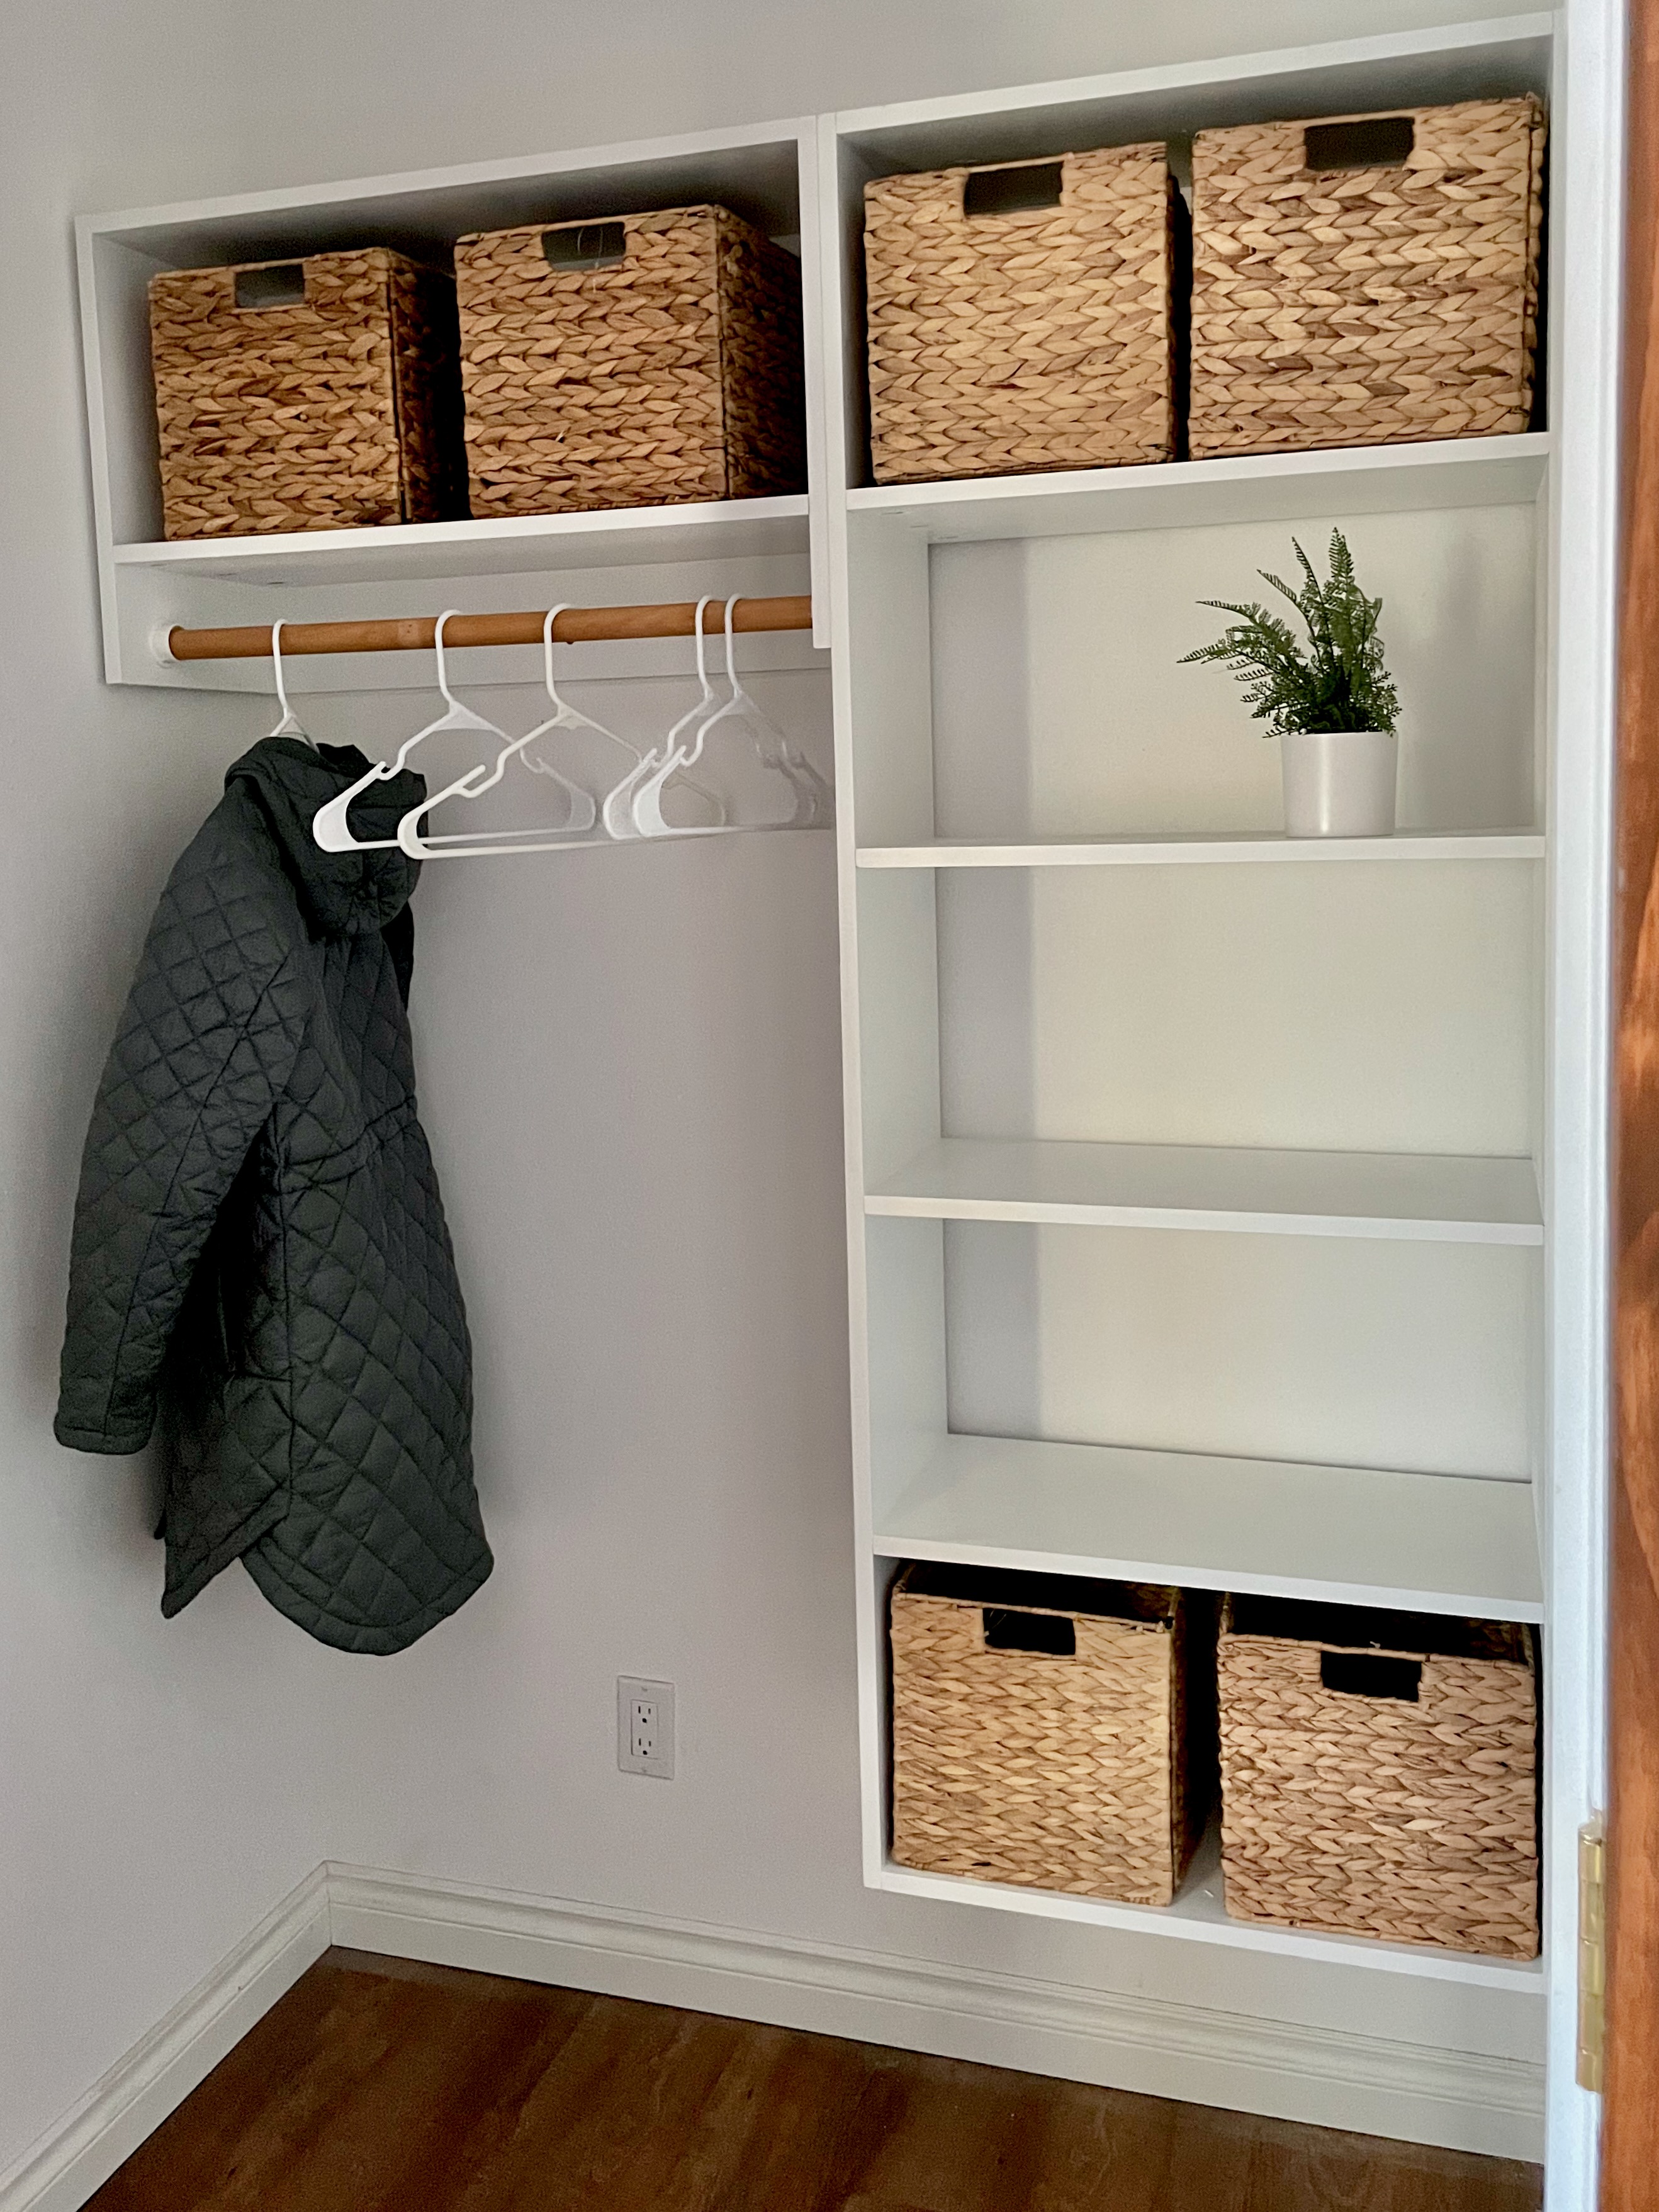
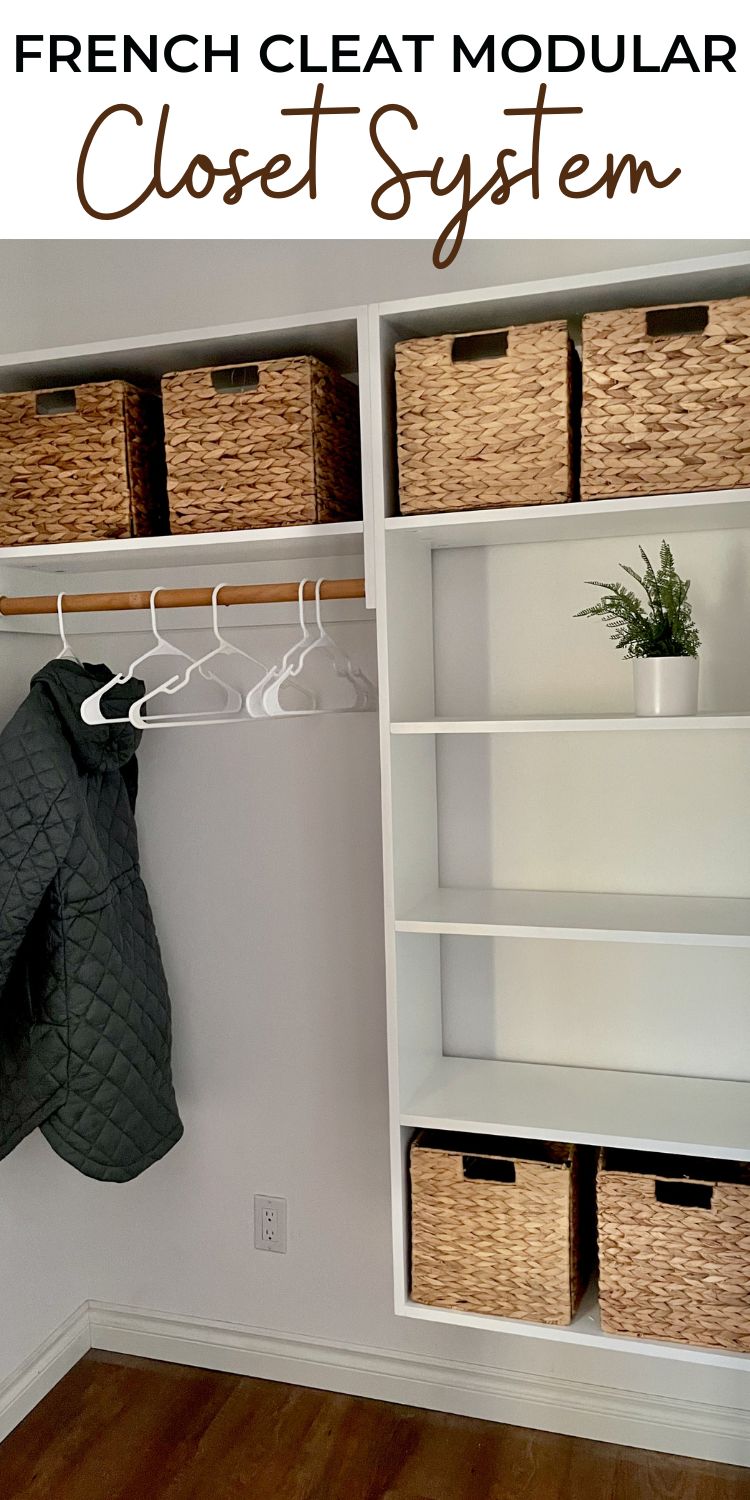
The best DIY closet tutorial! Easy to build, easy to hang, custom fit for your space and needs. Free build plans for five different modular closet organizers all with step by step directions with diagrams and video from Ana-White.com
French Cleat Modular Closet Build Video
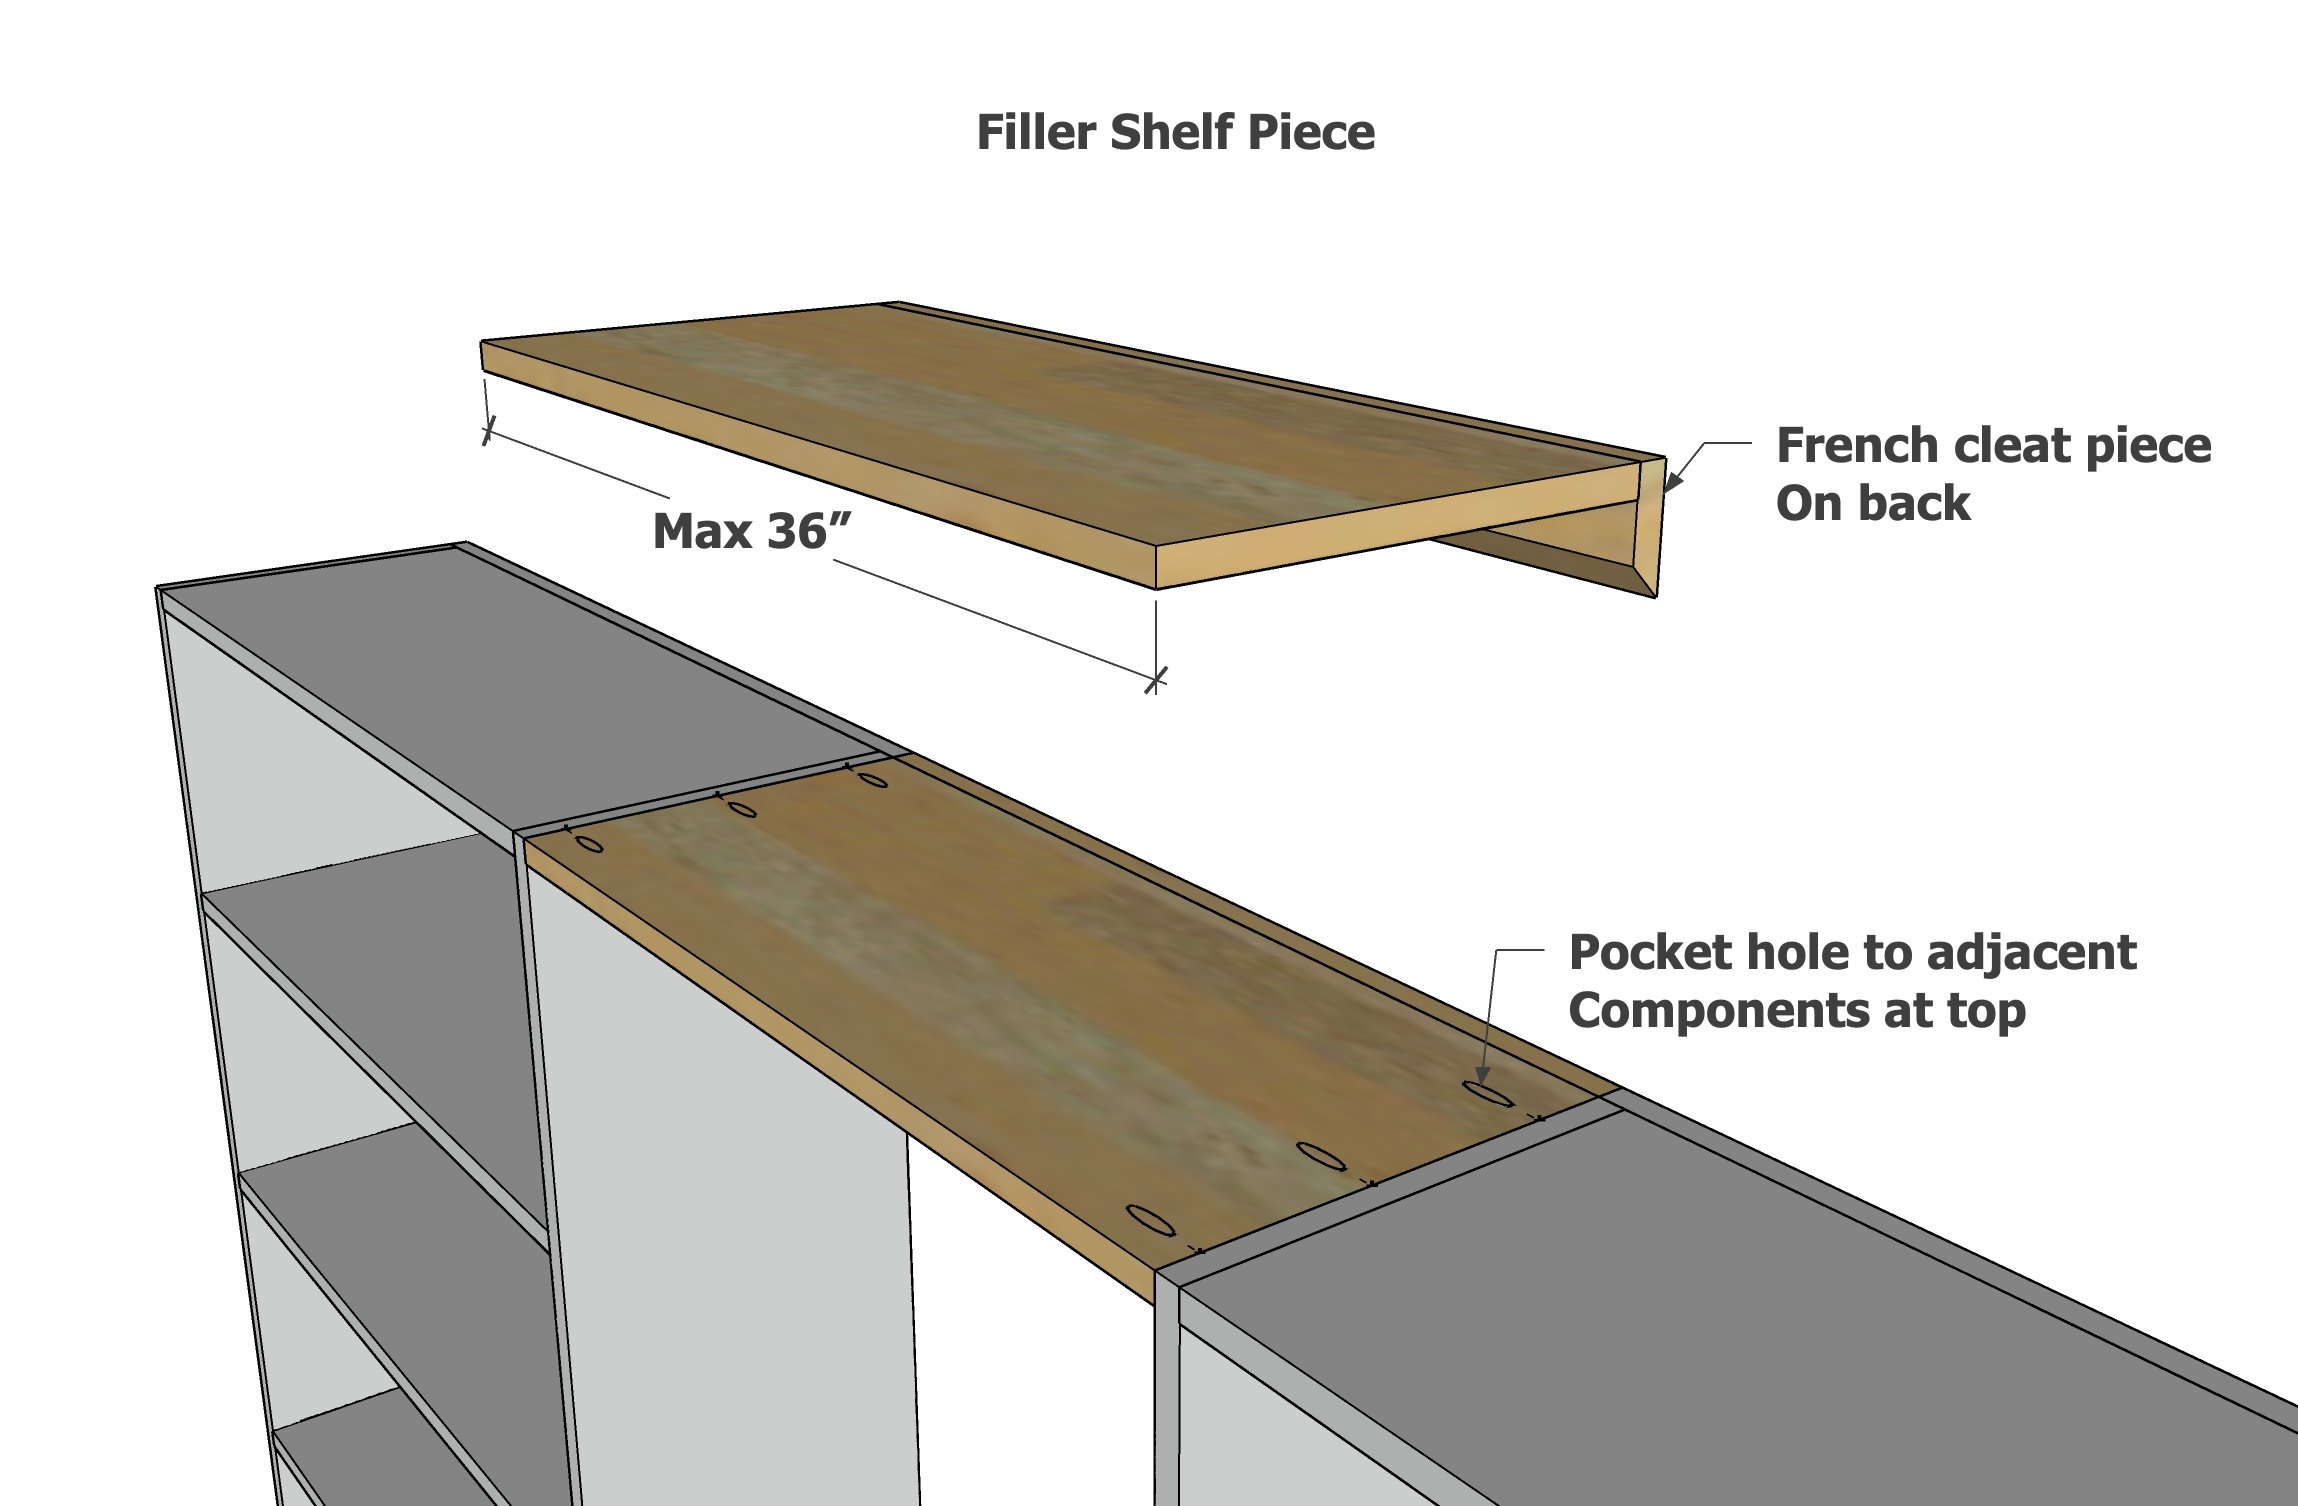
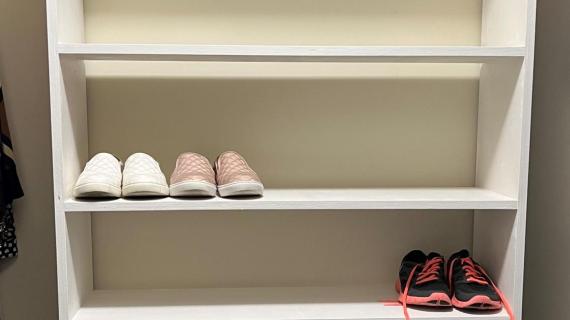
Modular Closet Components
By using different organizers, you can create the closet of your dreams! Here are the standard modular closet components.
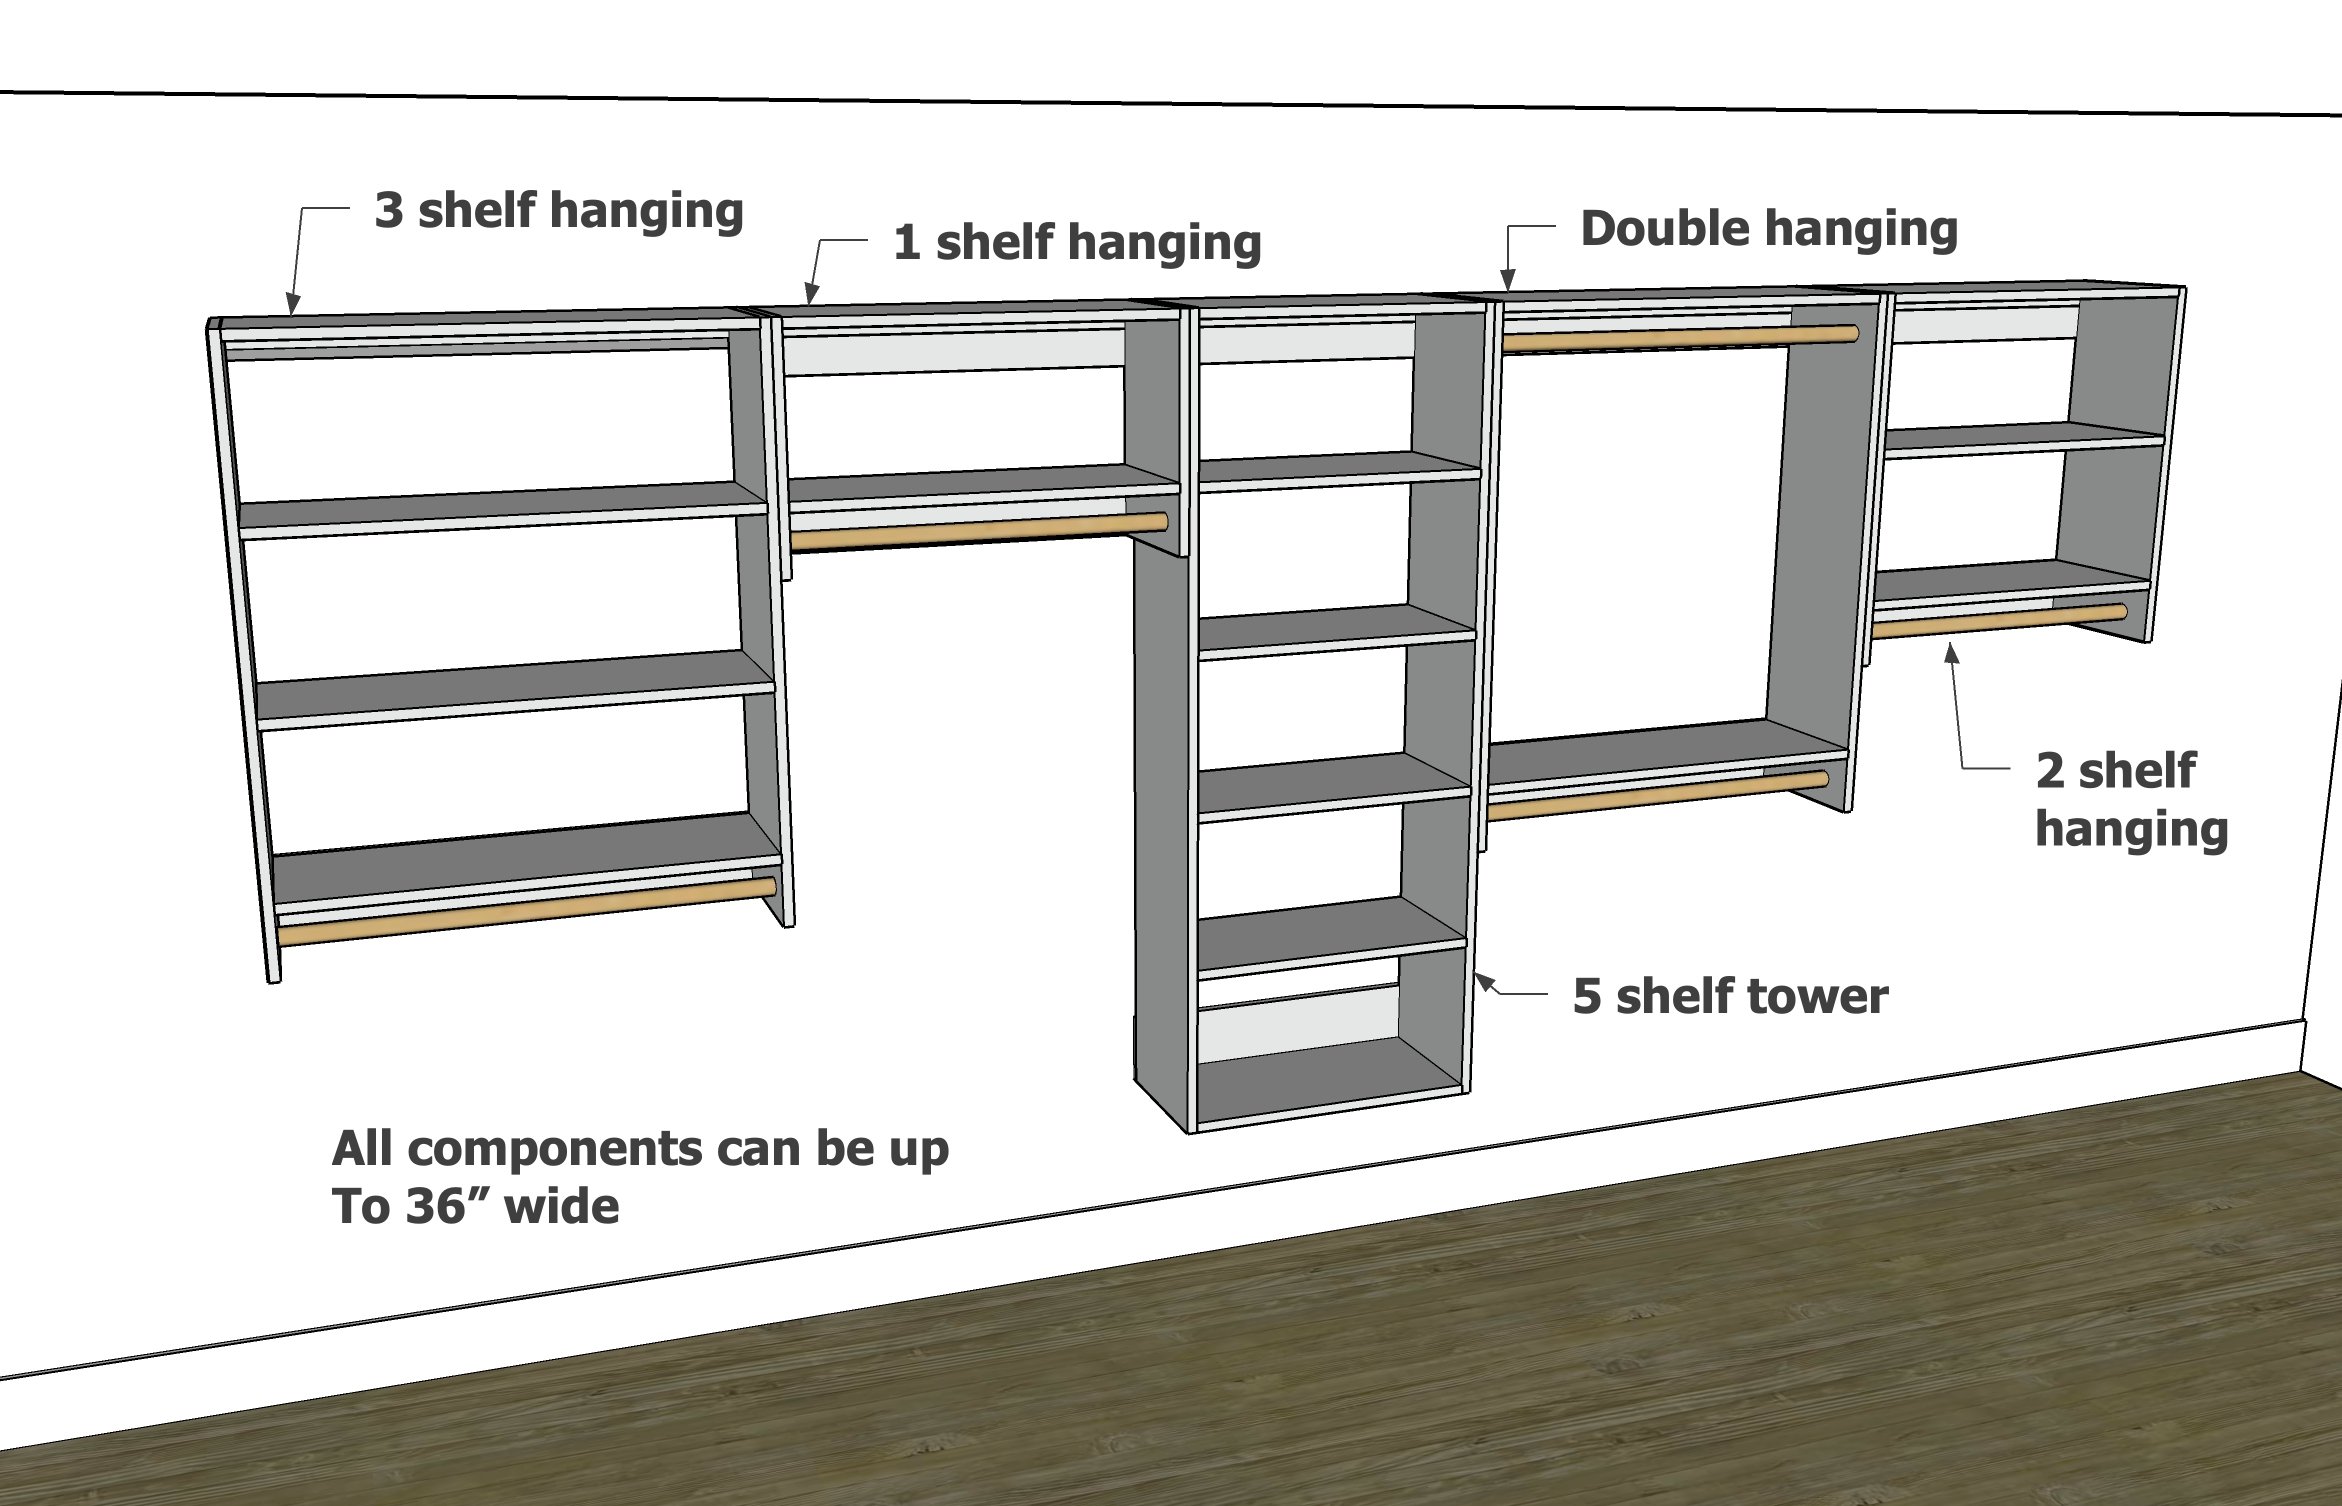
All of the components are constructed with the same steps, the only difference is the length of the sides and the number of shelves. Follow the construction steps below, but use the diagrams to come up with your cut list.

Recommended Materials for Modular Closet Carcasses
You can use a variety of different materials to build your closet components. As shown, I used 3/4" hardwood plywood, ripped to 11-1/4" wide, with the front edges finished with an iron on edge banding. All cuts then are just cross cuts as shown in the component diagrams.
- 1x12 Whitewood Boards
- 3/4" plywood, ripped into desired width (not greater than 16") and front edges edge banded
- 12" or 14" prefinished closet shelving boards
Rip Width for Carcass Pieces (if using plywood)
I ripped my closet pieces to 11-1/4" (same as 1x12) and constructed (as shown).
However, this is not a deep shelf, and may not be suitable for folding tall pants. For a larger person using the closet consider a 14" or 16" plywood rip. Do not go over 16" - as this will become very heavy for this type of hanging.
Hanging Without French Cleat
If you have a house with walls that are bowed outward or inward, or don't have a tablesaw to rip the french cleat, you can simply use 1x3s in place of the french cleat pieces, but you must screw the closet pieces to the wall to keep them in place. The 1x3 should still be attached to the wall first, to help install the closet.
Pin For Later!
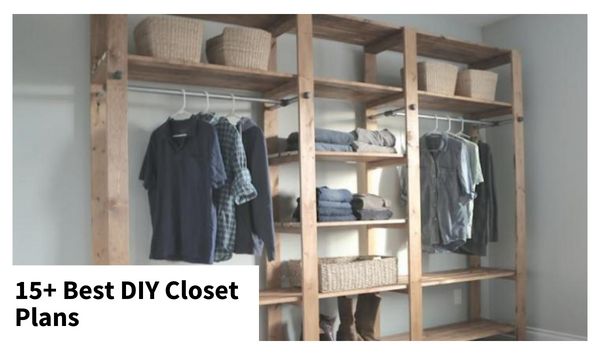
MORE CLOSET PLANS
Want even more DIY Closet Plans? Here's a round up of some of our favorites!
Preparation
- 1x12 or 3/4" plywood ripped to width, linear footage depends on closet design
- 1x6 boards - two times the overall length of the closet (ie for an 8 foot closet, buy two 8 foot long 1x6 boards)
- 3" long self tapping wood construction screws (star bit)
- 1-1/4" pocket hole screws
- 1-1/4" staples for attaching back pieces, can also use 1-5/8" trim screws
- wood glue
- if using plywood, front edges will need to be finished with edge banding
- finishing supplies to include sandpaper, paint, or stain
- closet rod sockets
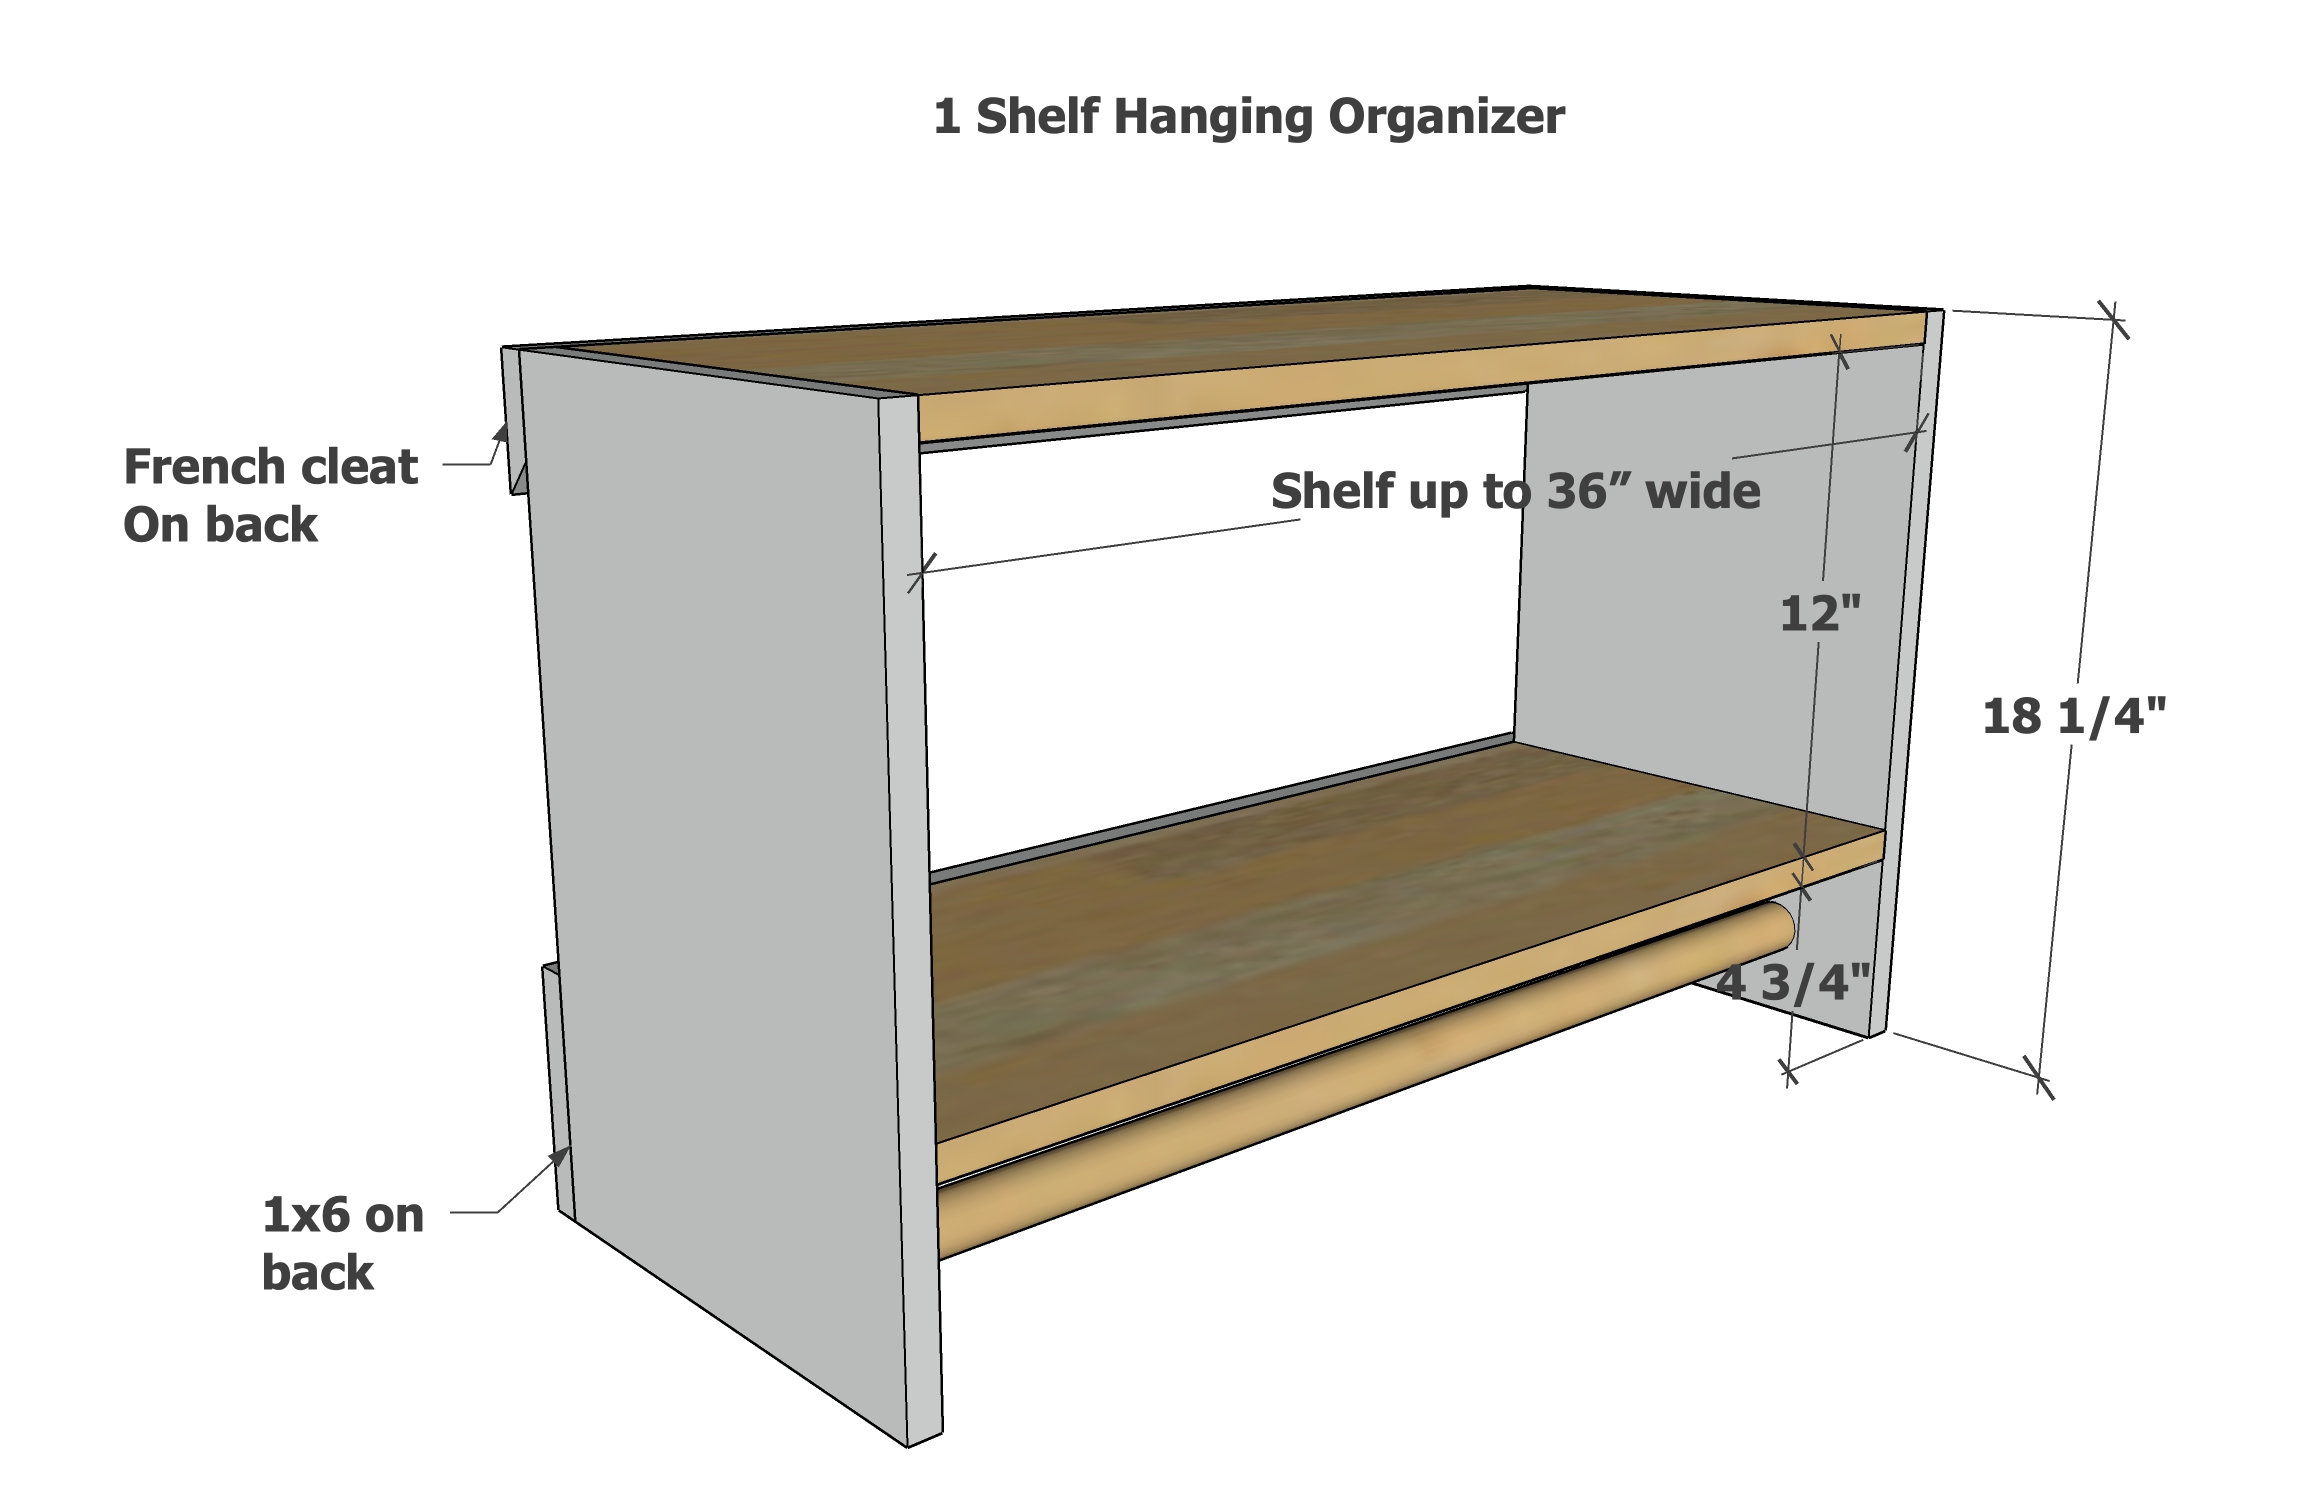
1 Shelf Hanging Cut List
- 2 - 1x12 or ripped plywood @ 18-1/4" - sides
- 2 - 1x12 or ripped plywood @ desired width of organizer, up to 36", minus 1-1/2" - shelves
- 1x6 and french cleat @ desired width of organizer
- 1-1/4" closet rod dowel cut to fit
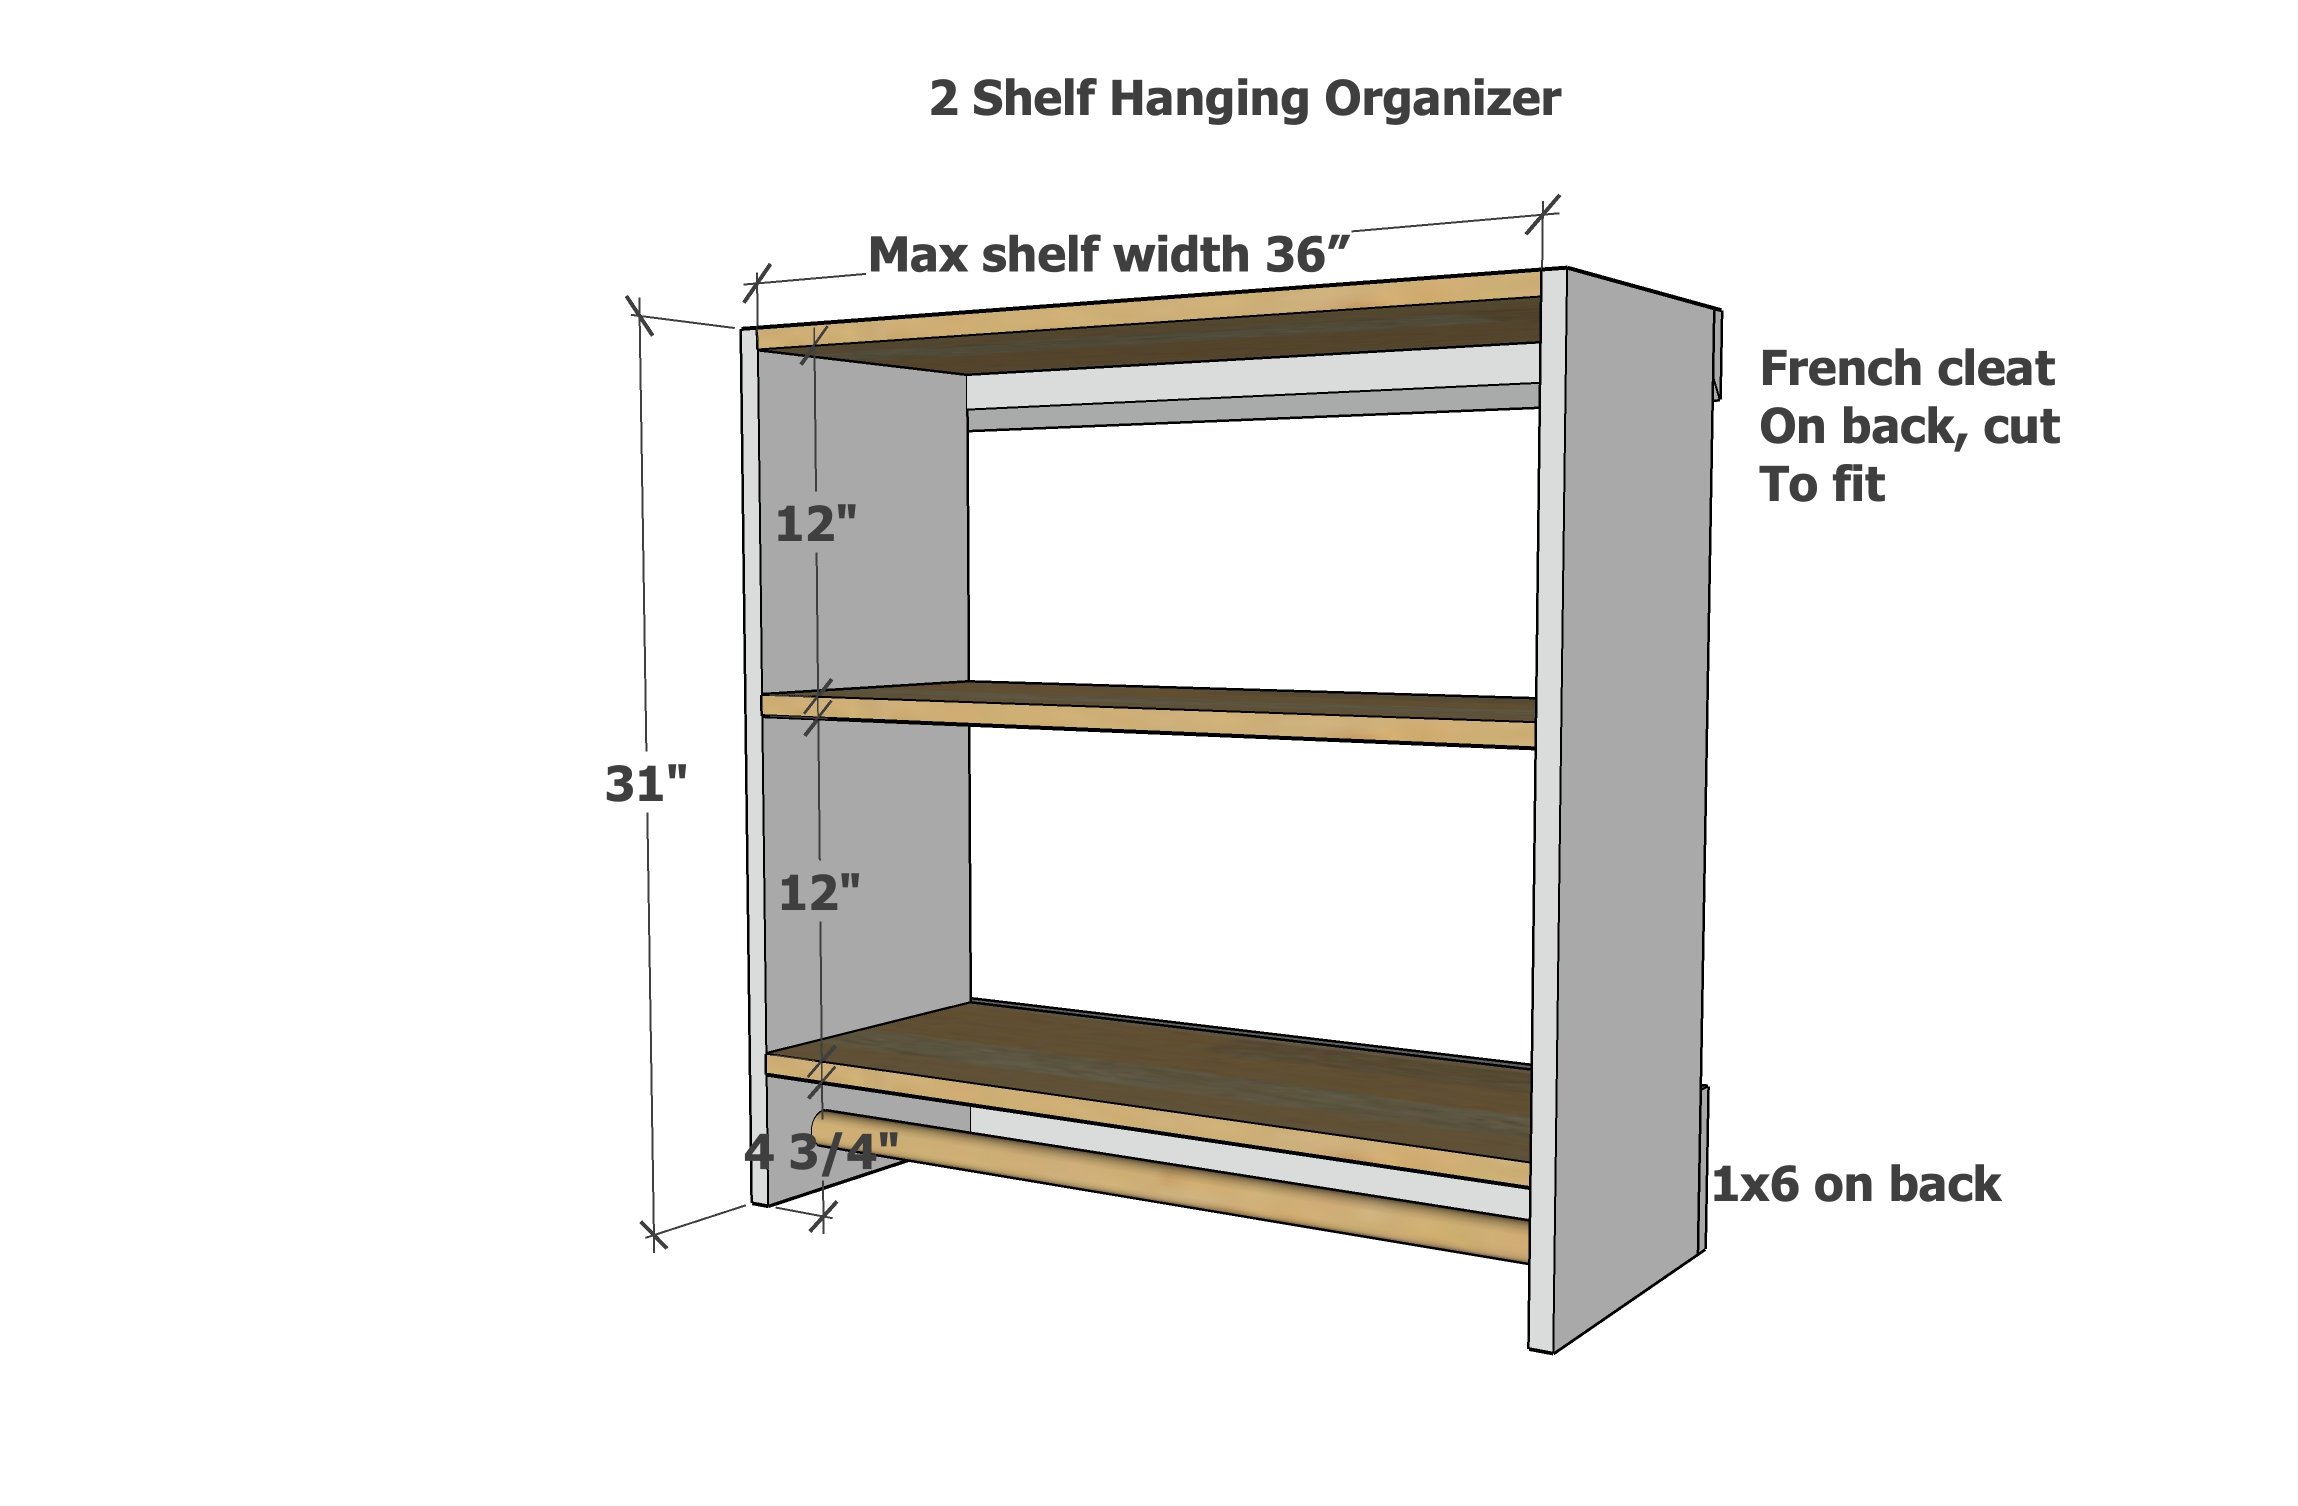
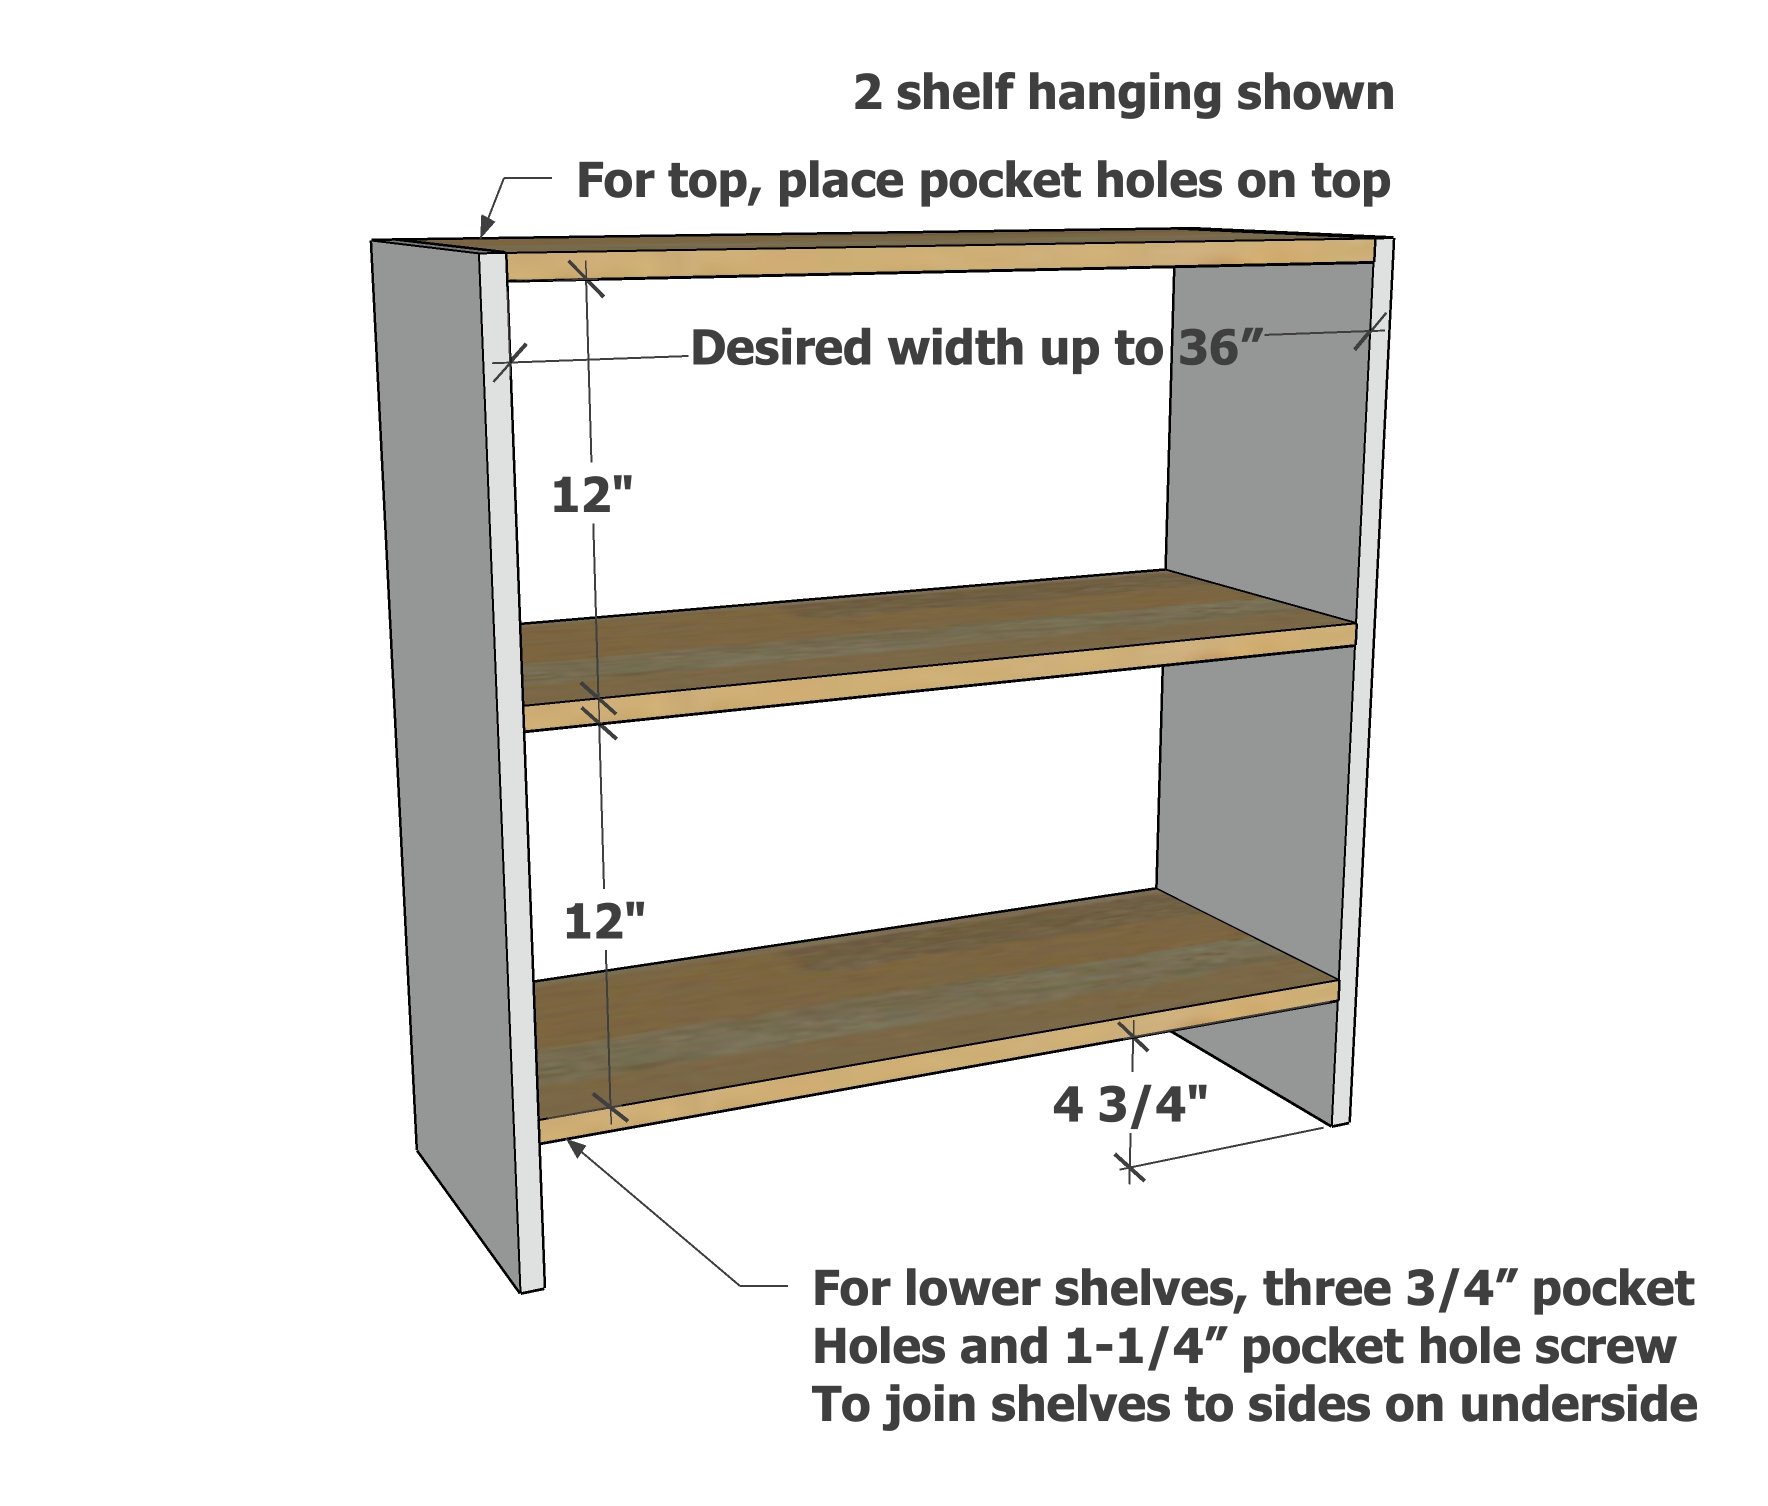
2 Shelf Hanging Cut List
- 2 - 1x12 or ripped plywood @ 31" - sides
- 3 - 1x12 or ripped plywood @ desired width of organizer, up to 36", minus 1-1/2" - shelves
- 1x6 and french cleat @ desired width of organizer
- 1-1/4" closet rod dowel cut to fit
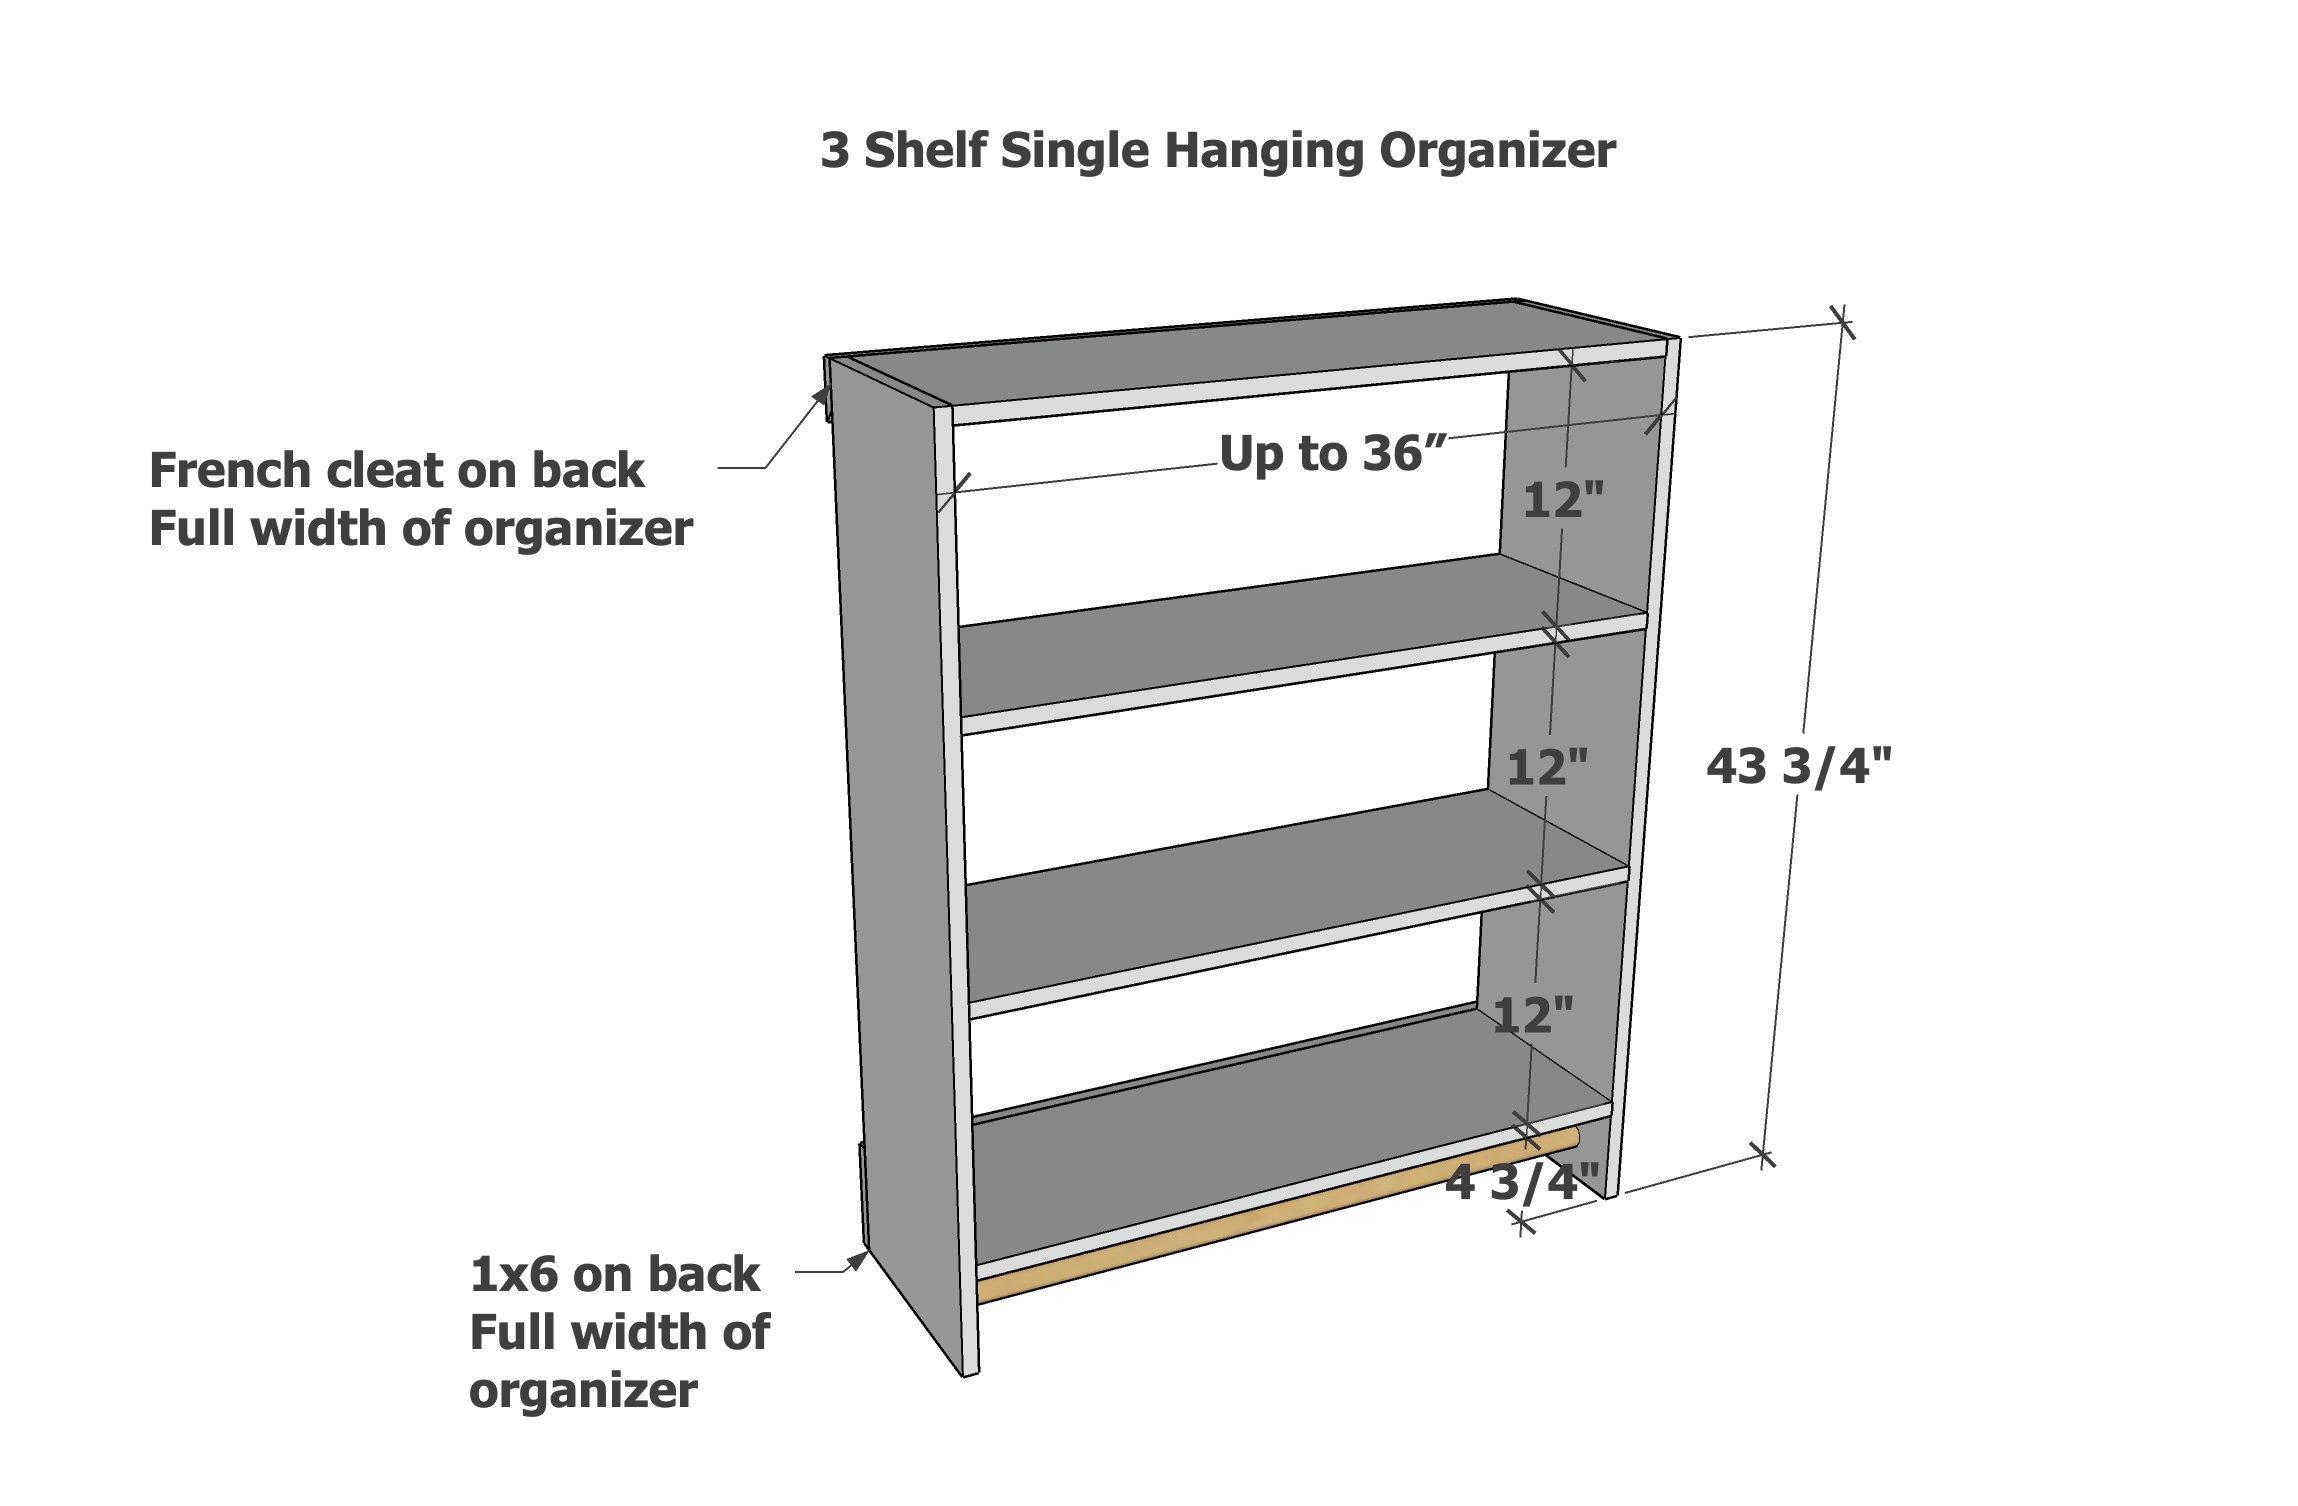
3 Shelf Hanging Cut List
- 2 - 1x12 or ripped plywood @ 43-3/4" - sides
- 4 - 1x12 or ripped plywood @ desired width of organizer, up to 36", minus 1-1/2" - shelves
- 1x6 and french cleat @ desired width of organizer
- 1-1/4" closet rod dowel cut to fit
5 Shelf Hanging Cut List
- 2 - 1x12 or ripped plywood @ 64-1/2" - sides
- 6 - 1x12 or ripped plywood @ desired width of organizer, up to 36", minus 1-1/2" - shelves
- 1x6 and french cleat @ desired width of organizer
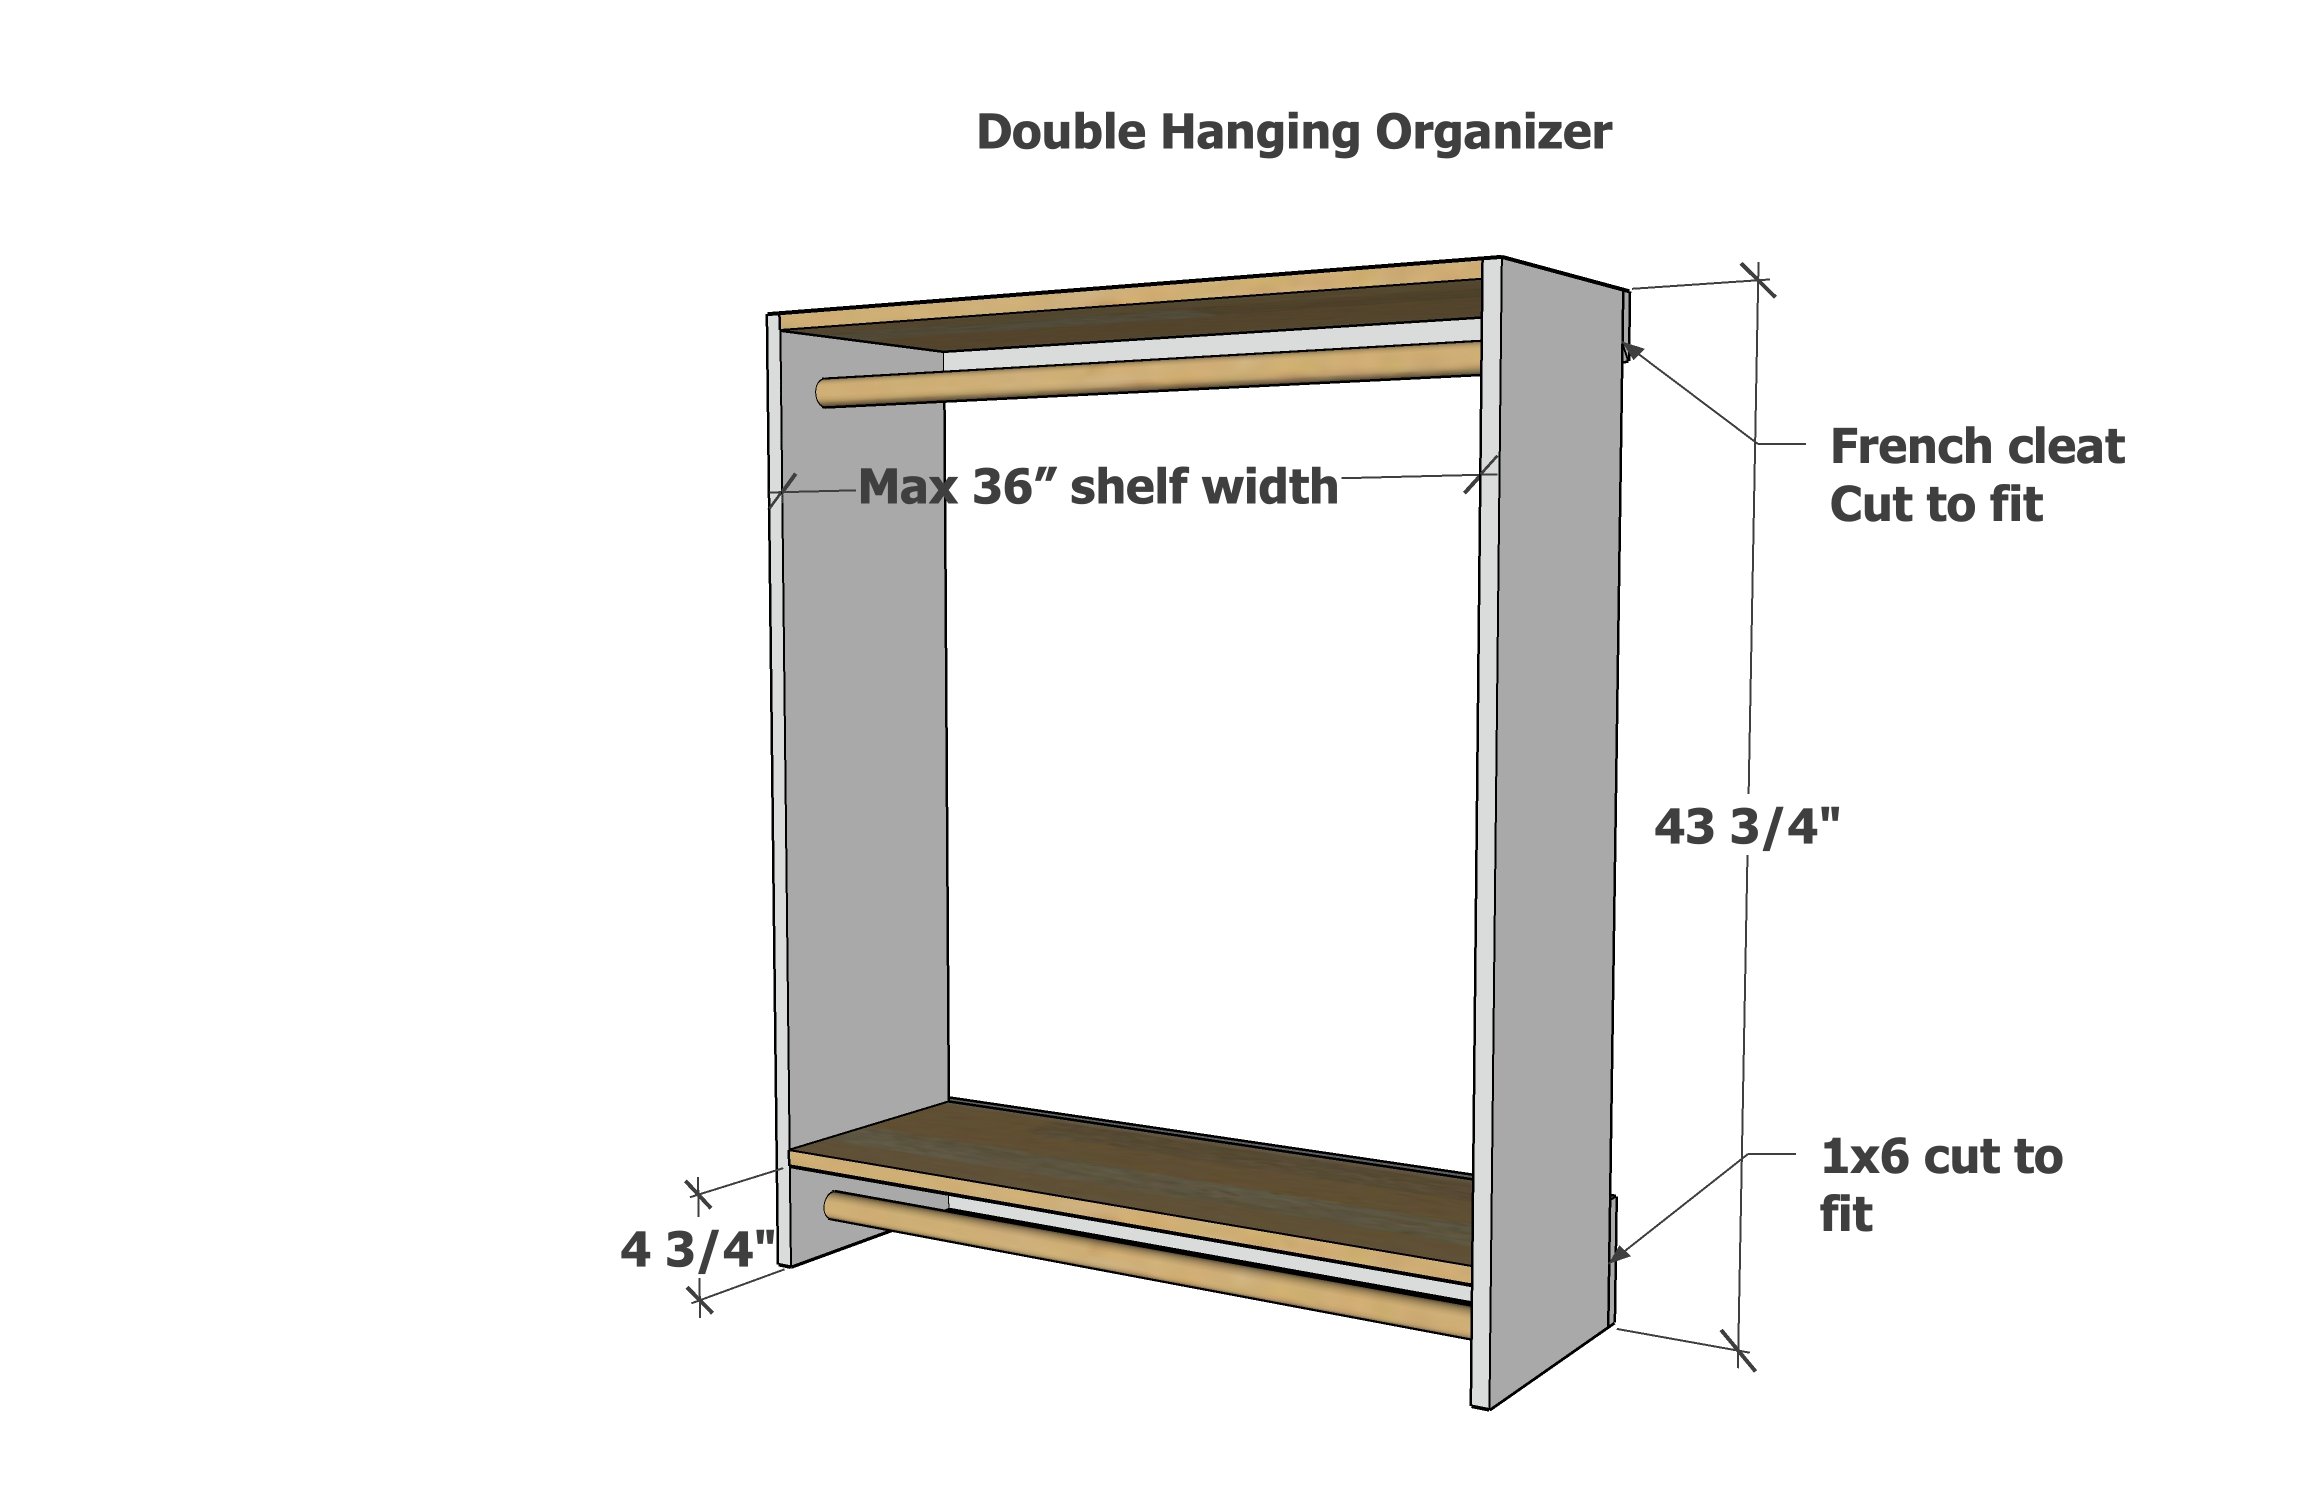
Double Hanging Cut List
- 2 - 1x12 or ripped plywood @ 43-3/4" - sides
- 2 - 1x12 or ripped plywood @ desired width of organizer, up to 36", minus 1-1/2" - shelves
- 1x6 and french cleat @ desired width of organizer
- 2 - 1-1/4" closet rod dowel cut to fit


NOTE: The french cleat system requires a straight wall without significant crowns or bows in it. You may need to shim the french cleat if your wall is not square horizontally.
Instructions
Step 1
French Cleat
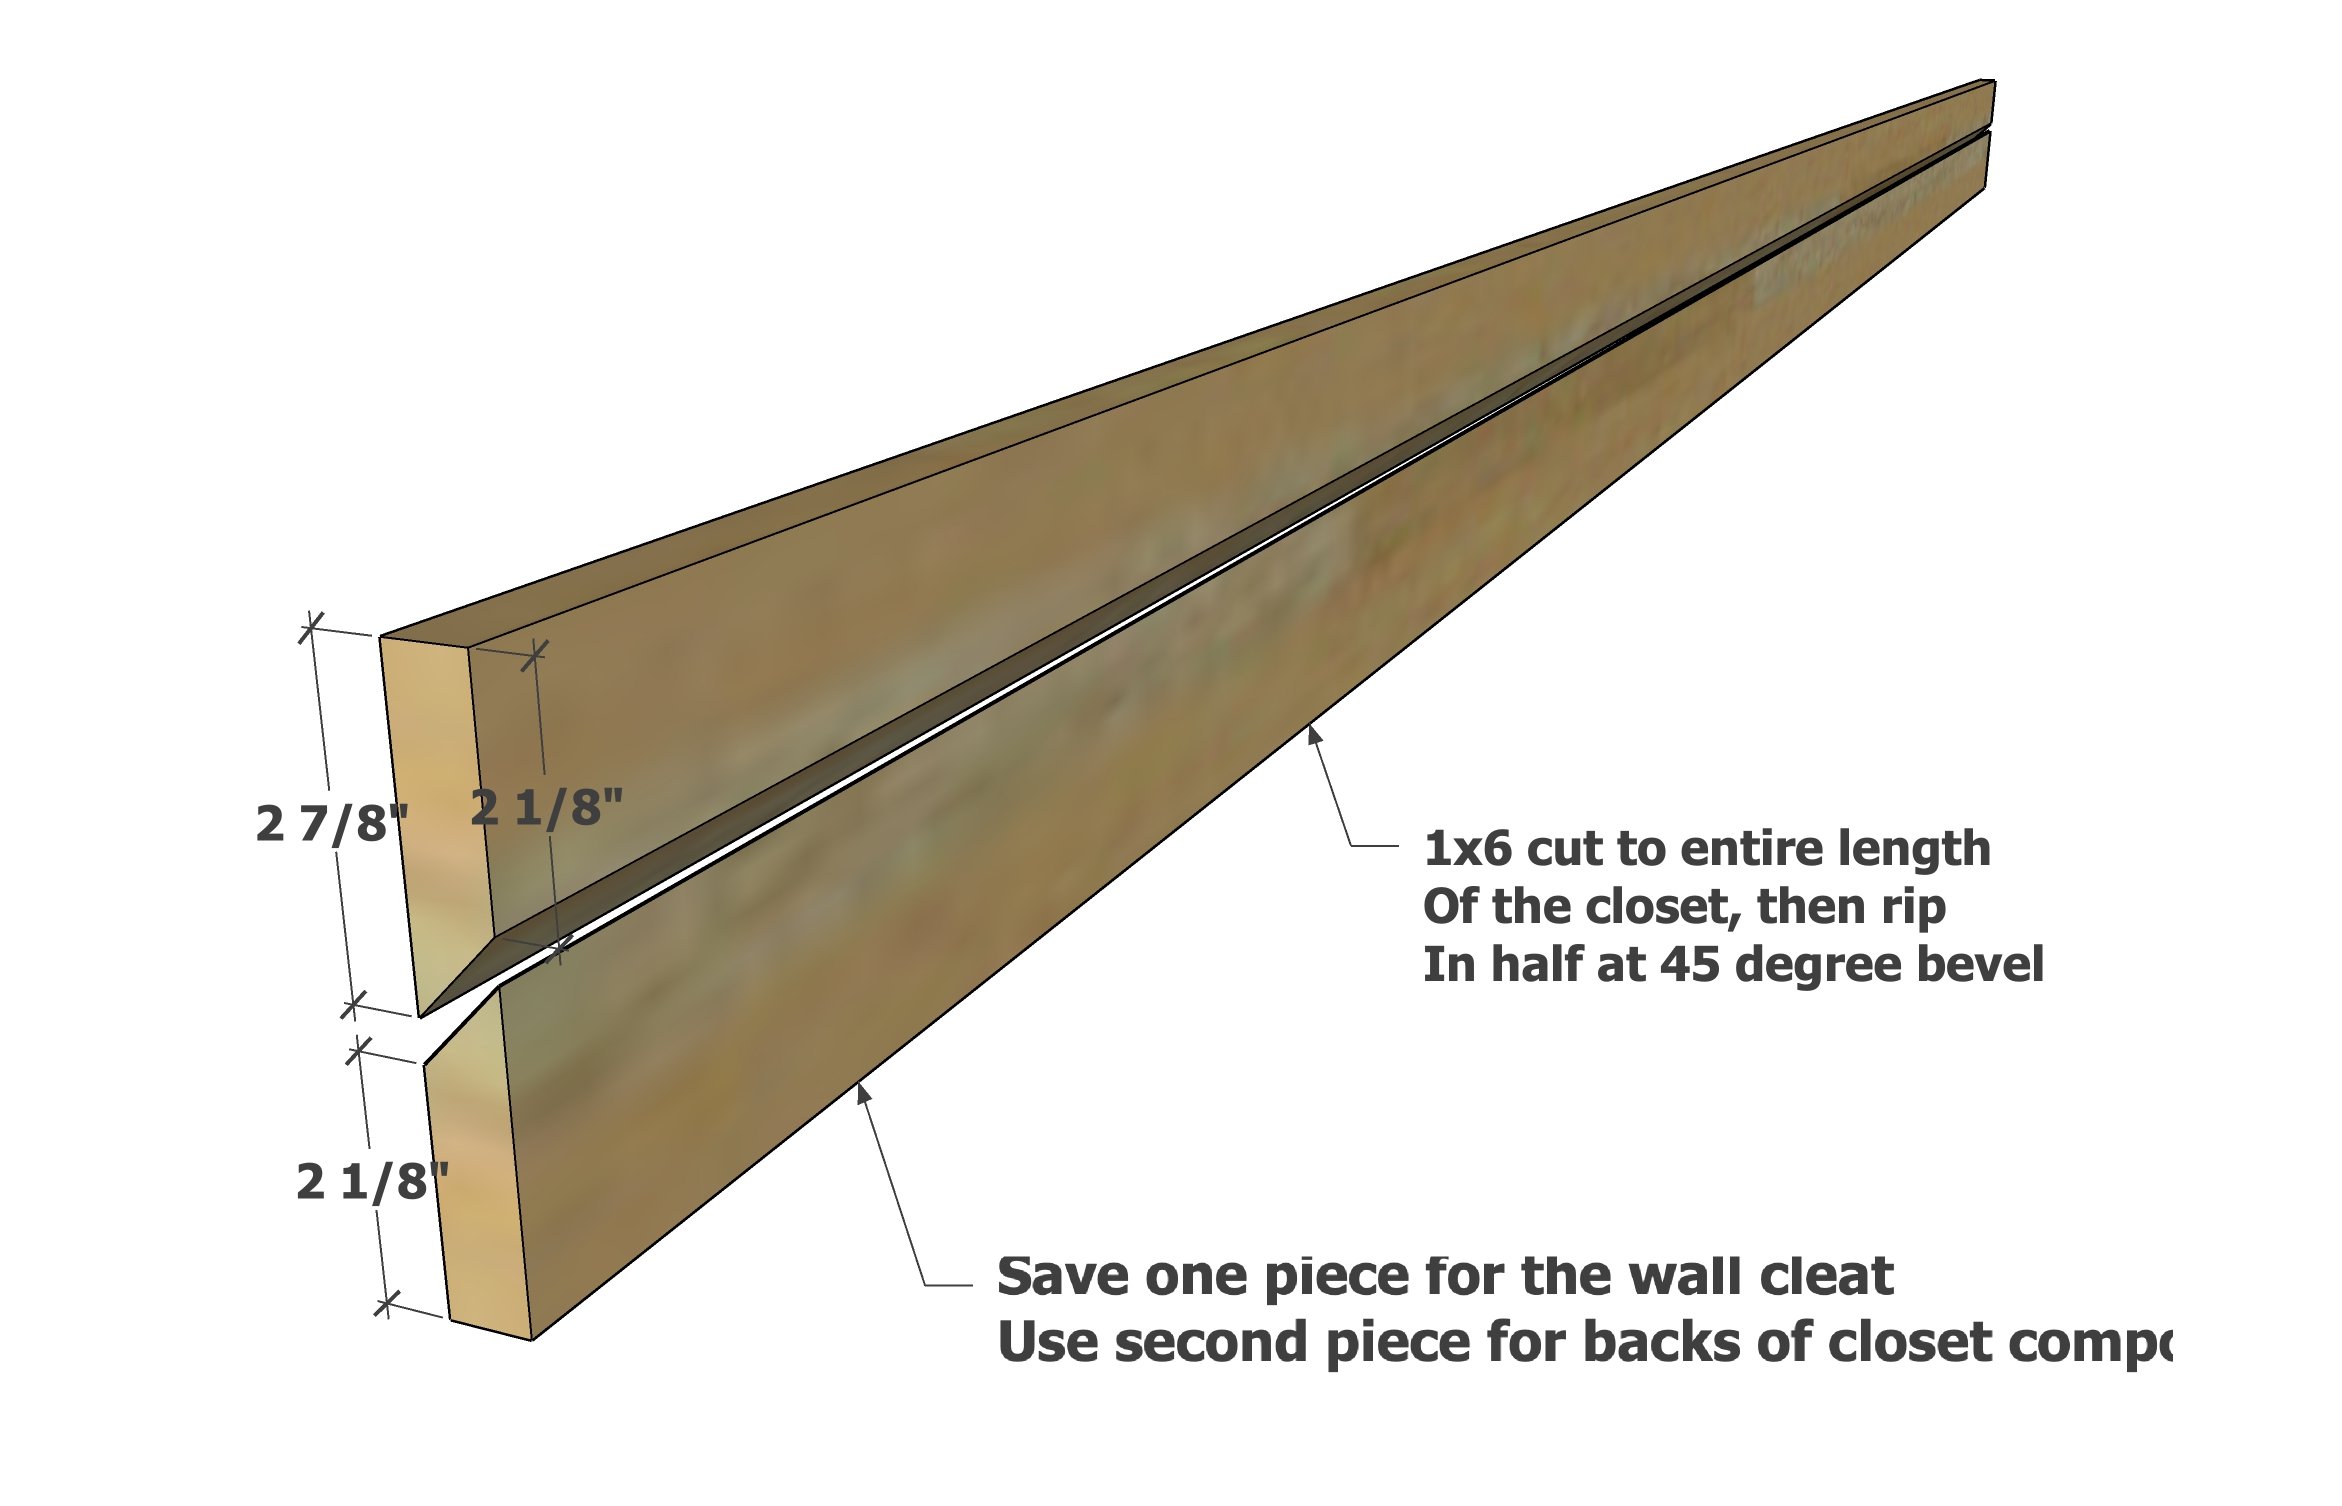
Cut a 1x6 board to the entire desired length of the closet run.
Set table saw to 45 degree bevel rip, and fence to 2-1/8".
Test a scrap piece.
Adjust if needed, then run the entire 1x6 through the tablesaw to create the two pieces for the french cleat.
Step 2
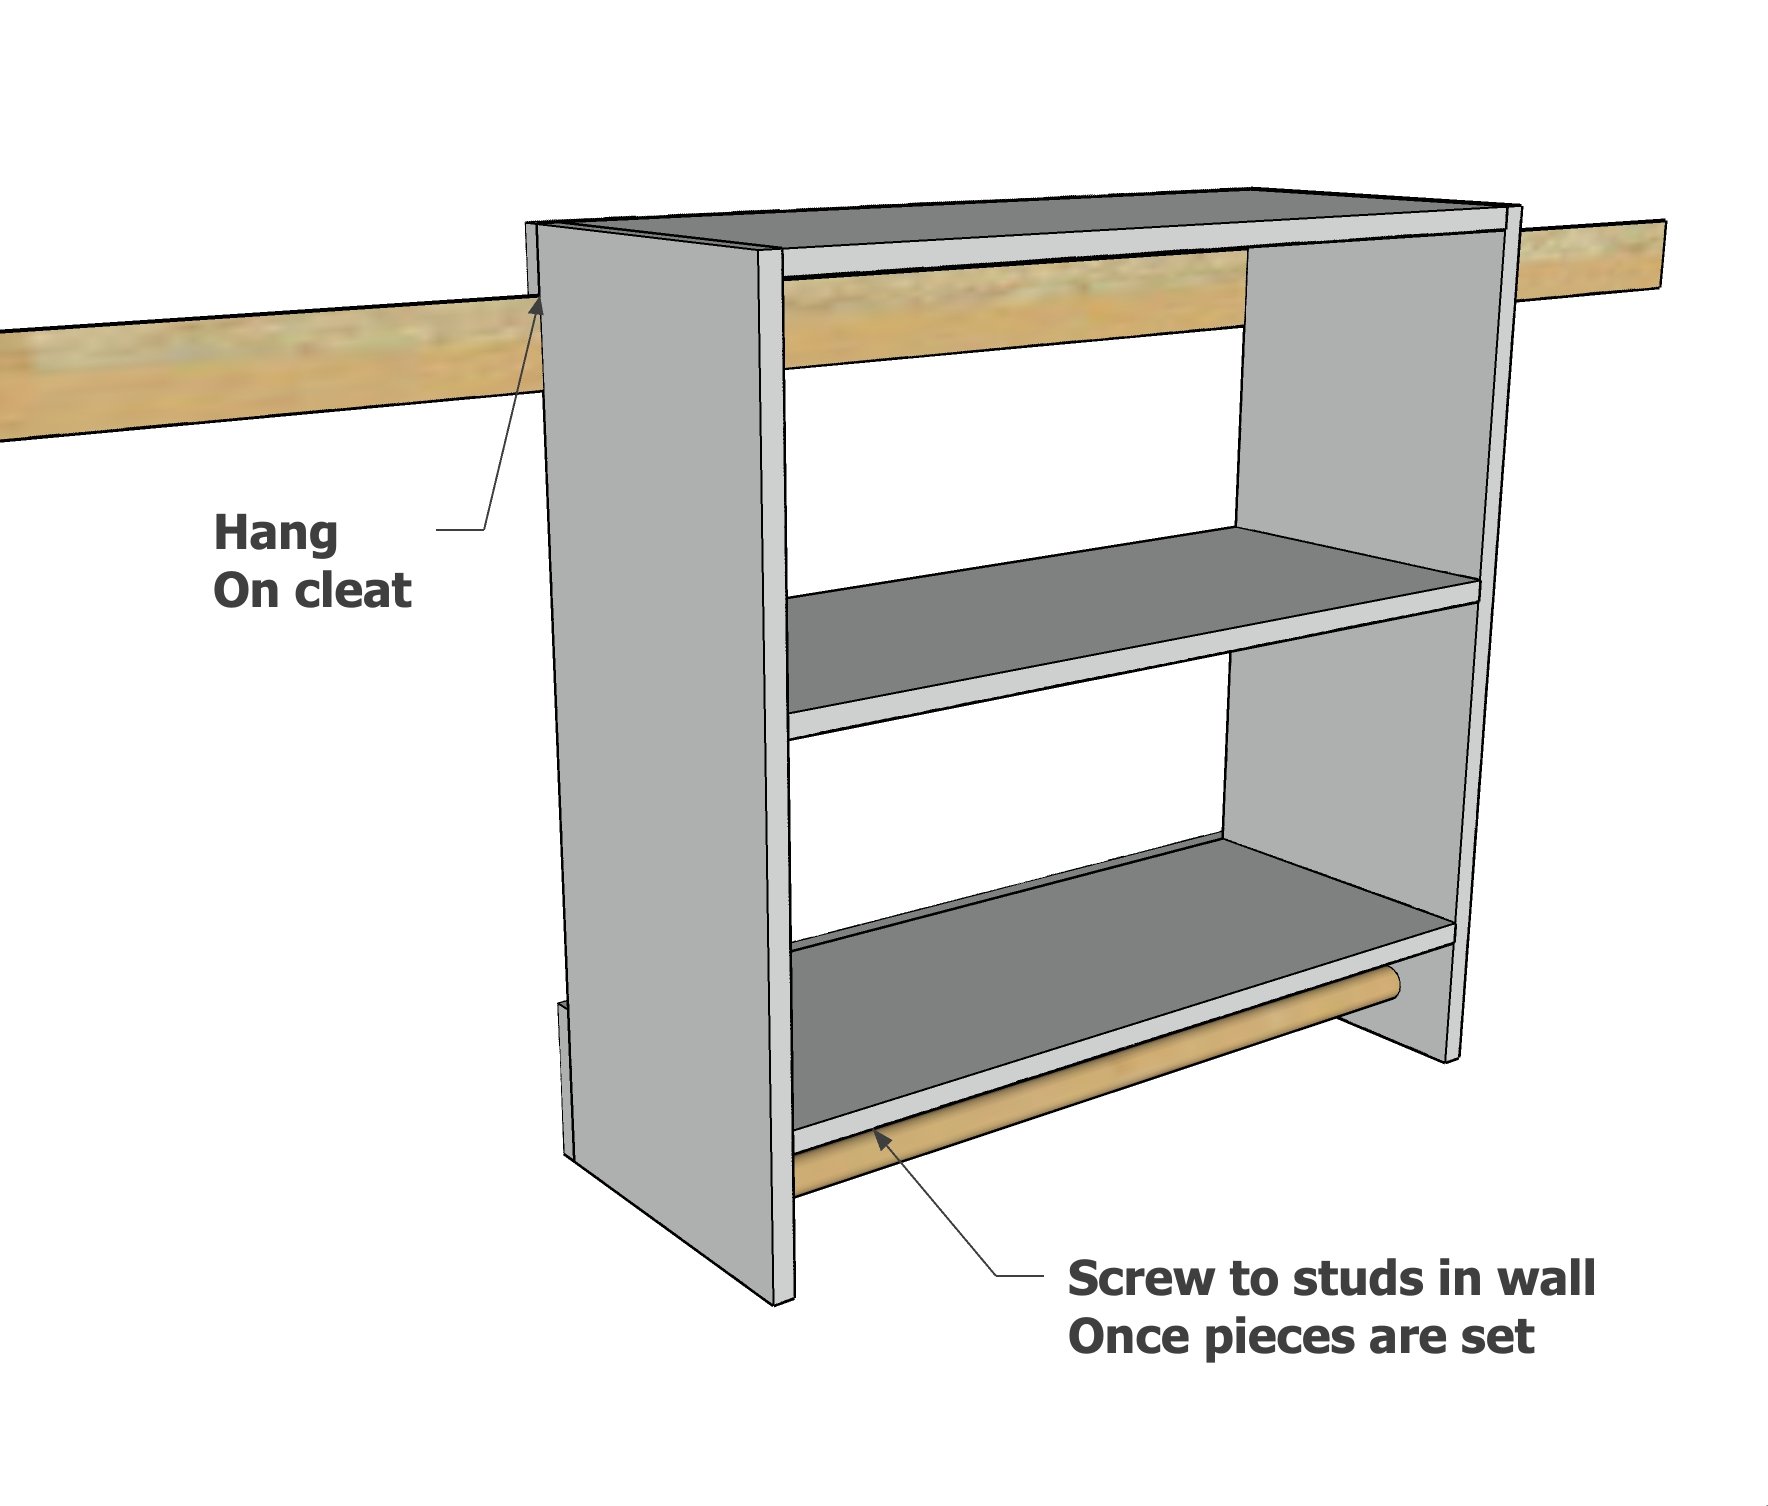
Hanging French Cleat
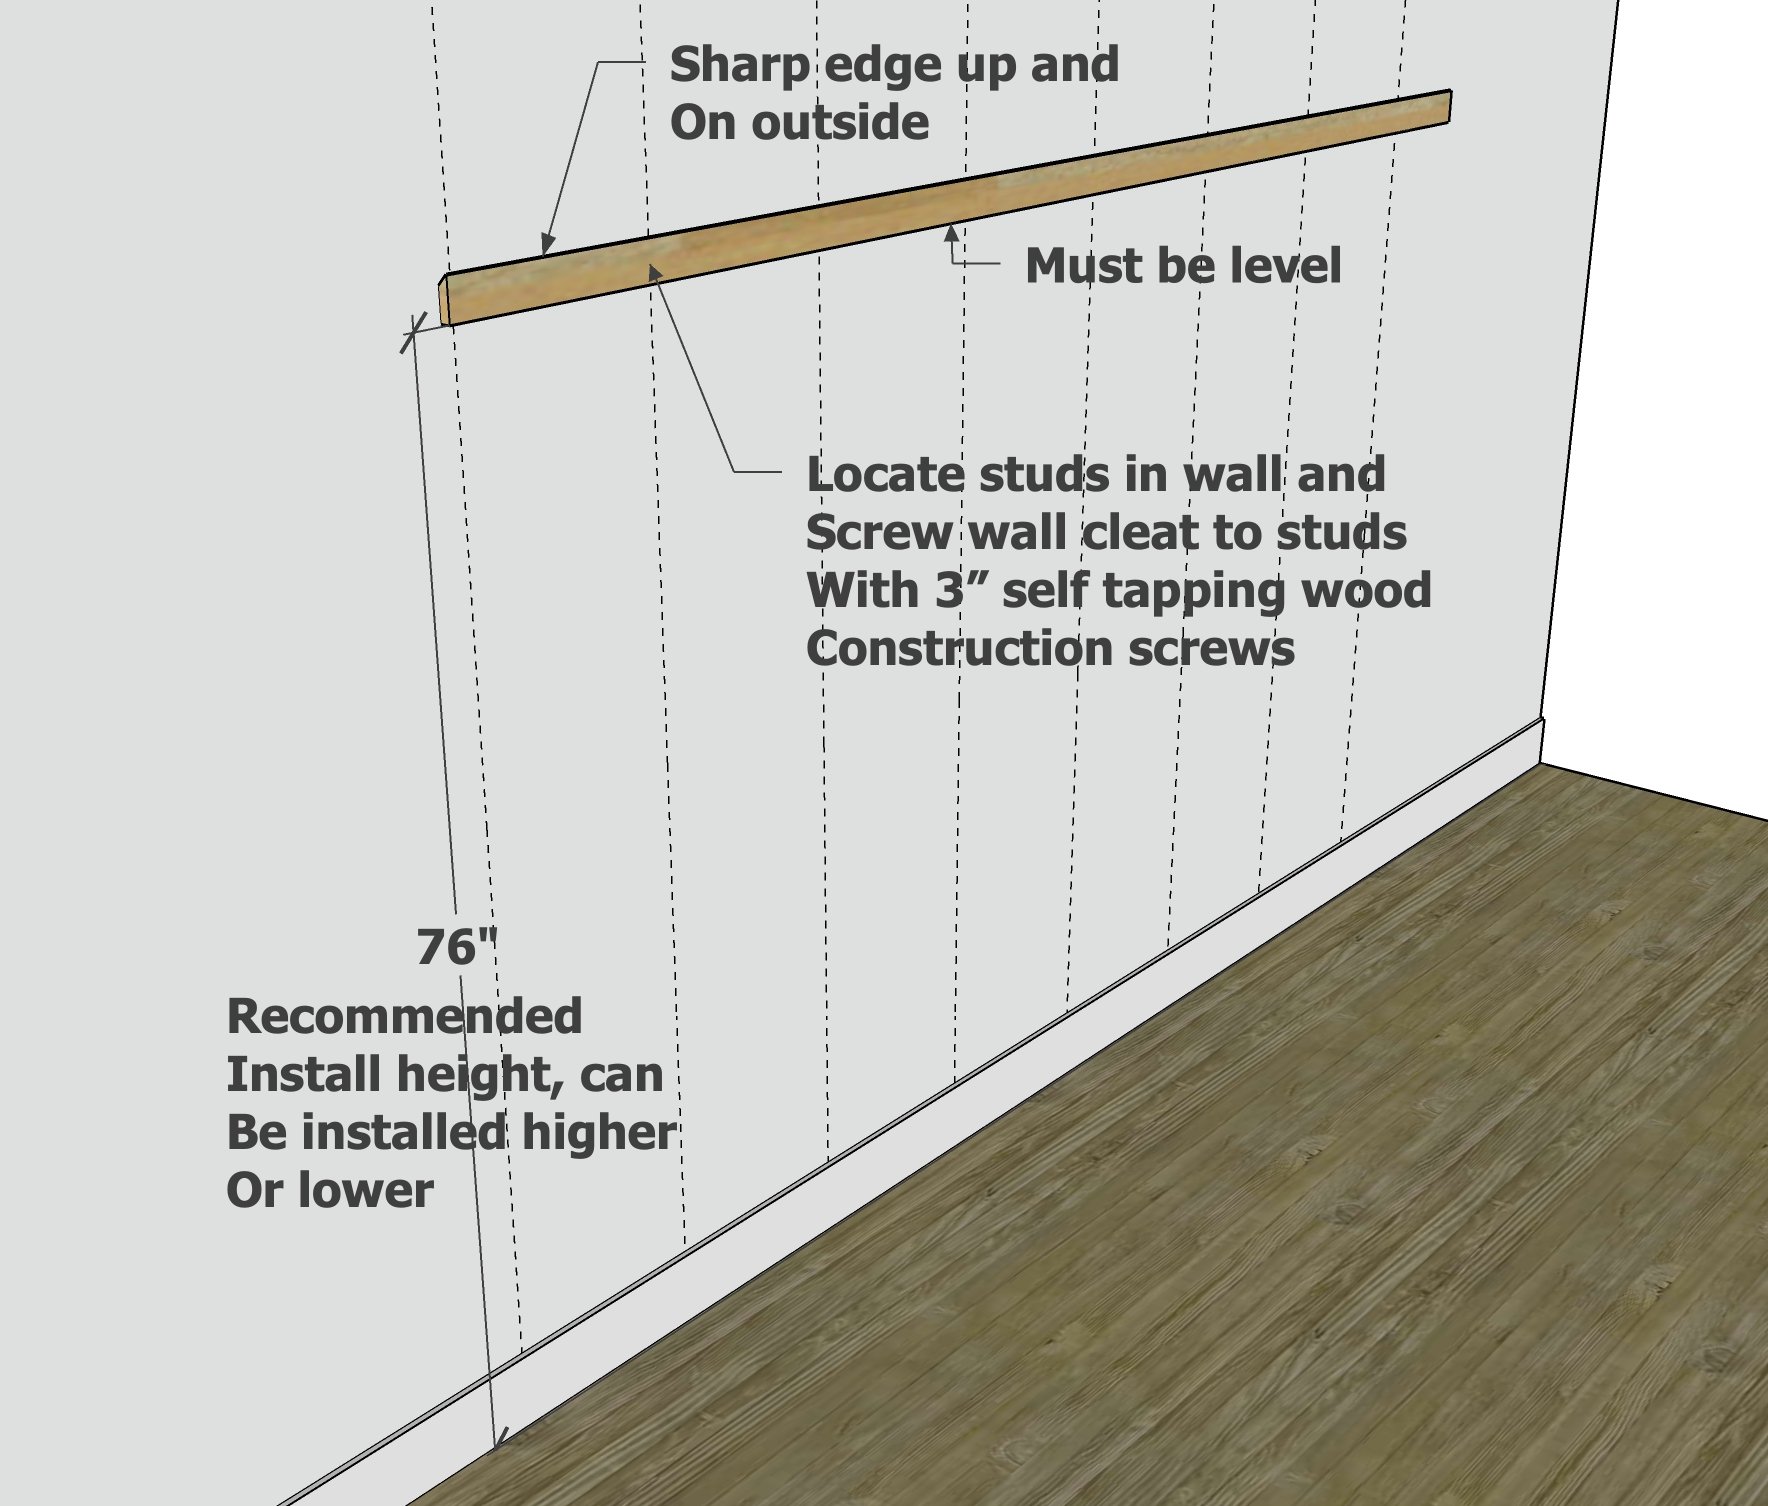
Locate studs in the wall at about the height you'd like to hang the french cleat.
Attach one half of the french cleat to a stud in the wall, using 3" long self tapping star bit screws, with the sharp edge on the outside, pointing upward.
Use a level to make sure the french cleat is hung perfectly level.
Add additional screws so the french cleat is attached to multiple studs in the wall.
Reserve the second half of the french cleat for attaching to the closet components.
Step 3
Closet Component Carcass Construction
All components follow same building steps, just change the size and number of shelves to create different options.
For each shelf, drill three 3/4" pocket holes on each end of each shelf boards.
No pocket holes are drilled in the side boards.
Attach the shelves to the side boards with 1-1/4" pocket hole screws.
Step 4
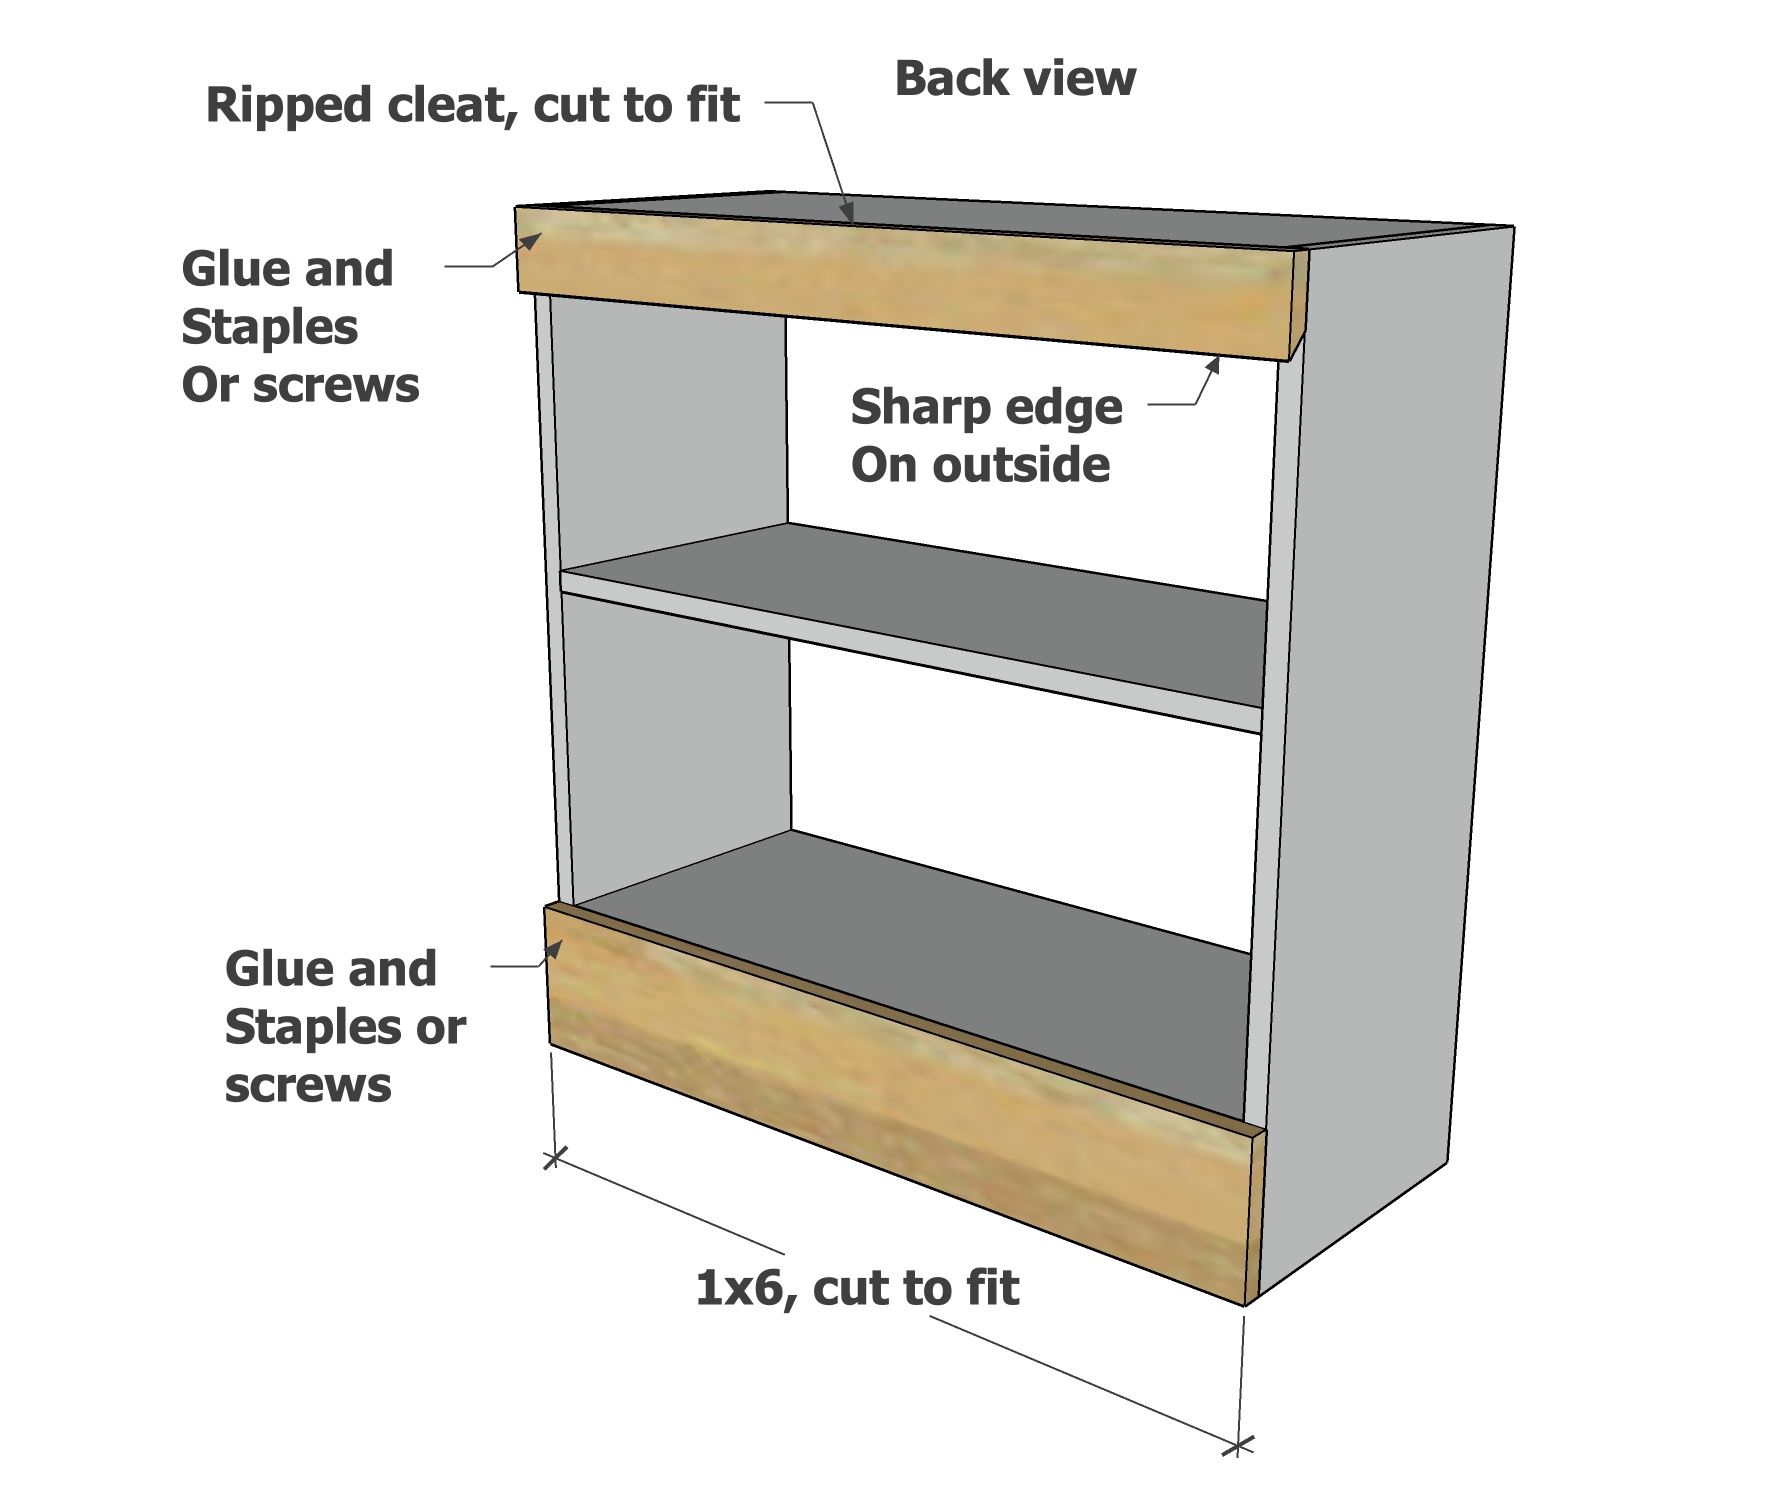
Closet Component Back Pieces
On the bottom of the closet components, attach with glue and trim screws or 1-1/4" staples a 1x6 board, cut to fit.
Repeat for the french cleat piece at the top, with the sharp edge facing downward and to the outside.
Step 5
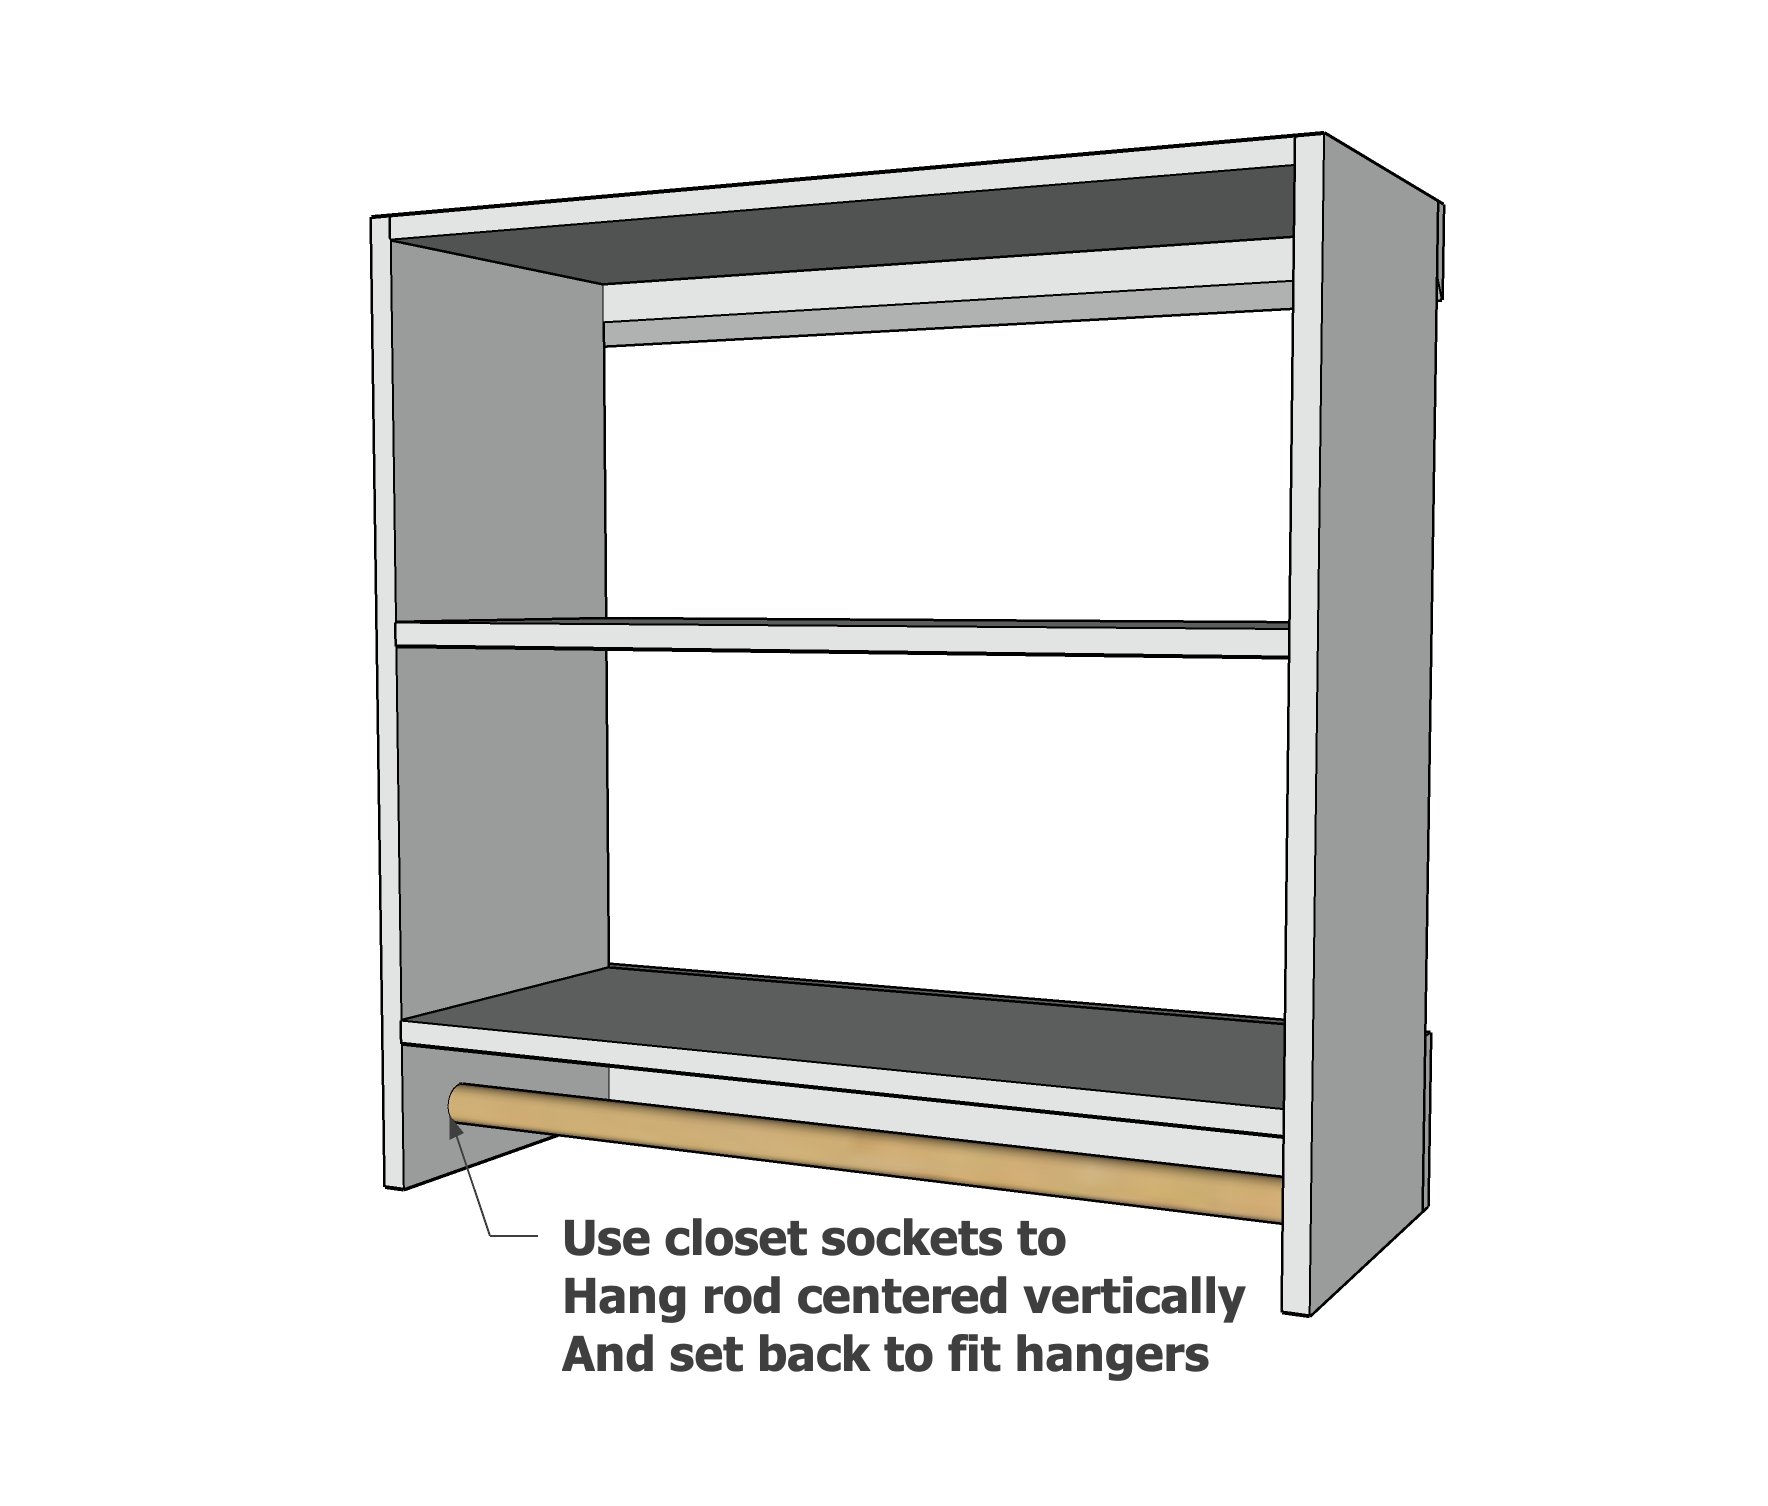
Closet Rod Installation
Use closet rod sockets to hold the closet rods. Install centered vertically, and spaced back to accommodate a hanger (depending on your closet carcass rip depth).
Step 6
Hanging Closet on French Cleat
Hang the closet components on the french cleat installed in the closet.
Additional screws into studs in the wall are recommended for safety and increased strength.
Step 7
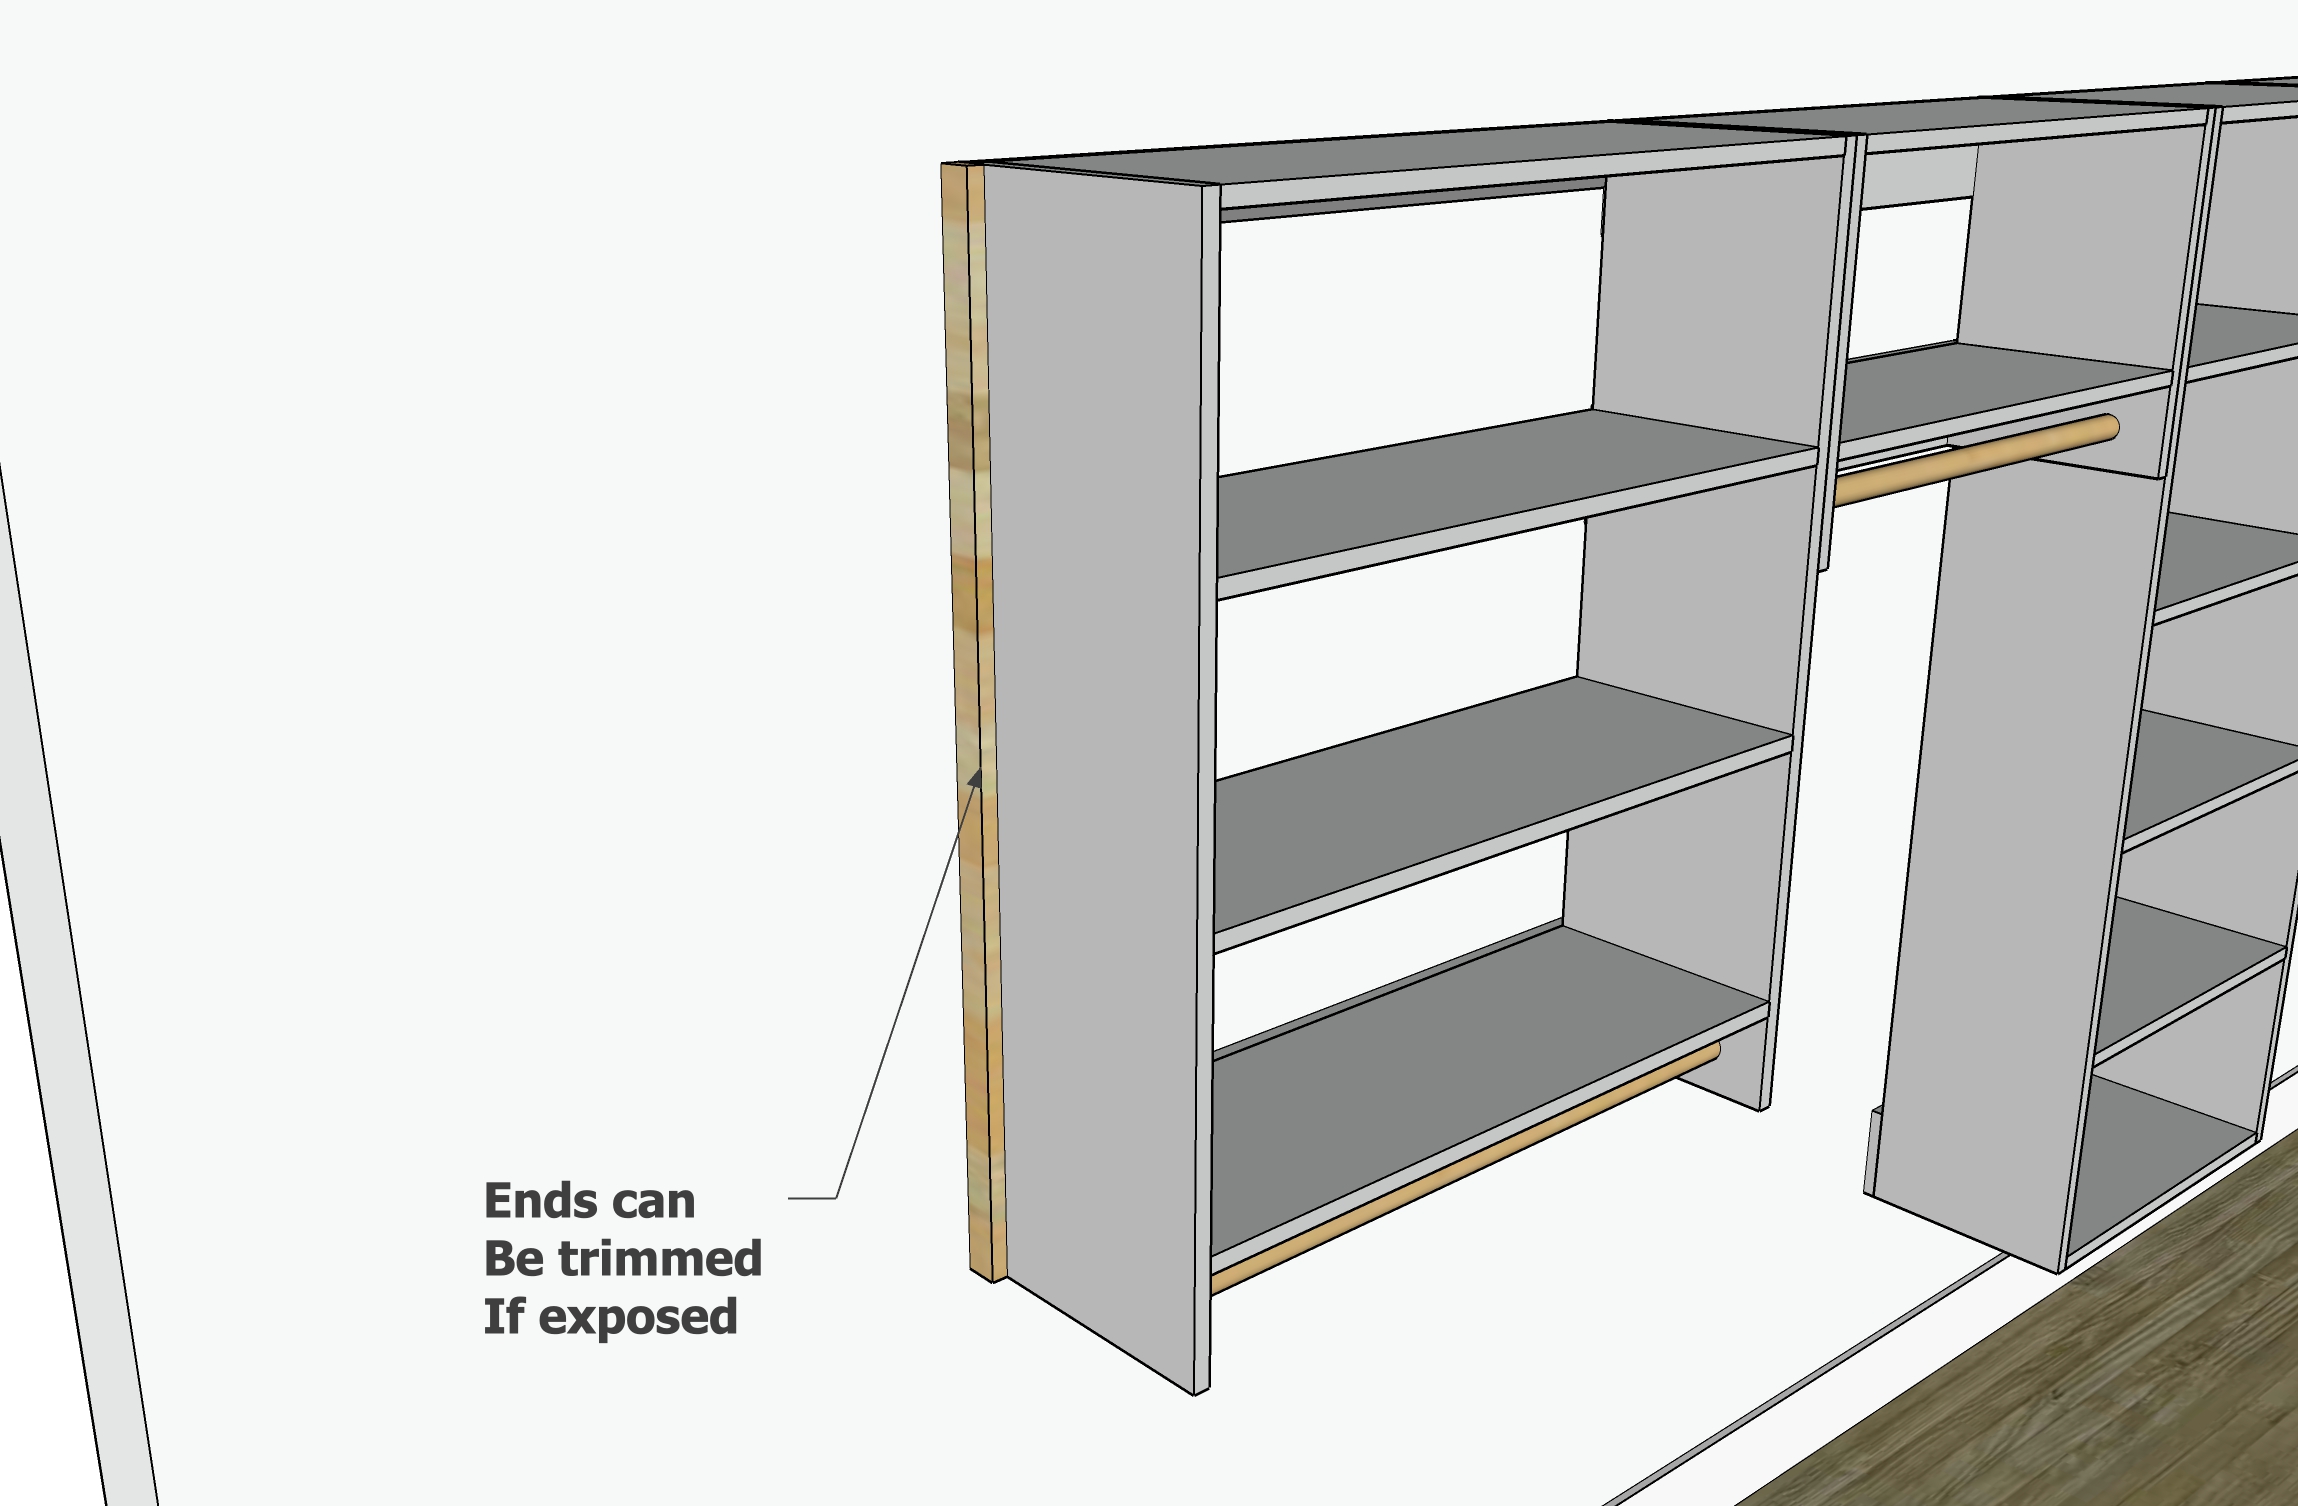
Exposed Ends
If the closet has an exposed end, the end can be trimmed out with a 1x2. Attach with 1-1/4" brad nails.

Comments
TheHLT
Fri, 01/20/2023 - 23:01
Clarification on shelf measurement
Hi Ana.
This post comes just as I need to do *something* with my closet because it’s a hot mess but I need clarification on something- the instructions for the shelves:
Is that “up to 36” minus one half inch shelf” OR “up yo 36” minus 1.5” for the shelf “?
Newbie here so clarification would most appreciated.
TheHLT
Fri, 01/20/2023 - 23:05
Correction to original question
That looks like the same thing so let me try again:
“Up yo 36” minus one, 1/2” shelf “
OR
“Up to 36” minus 1.5” so the shelf can be added”
That’s better :)