
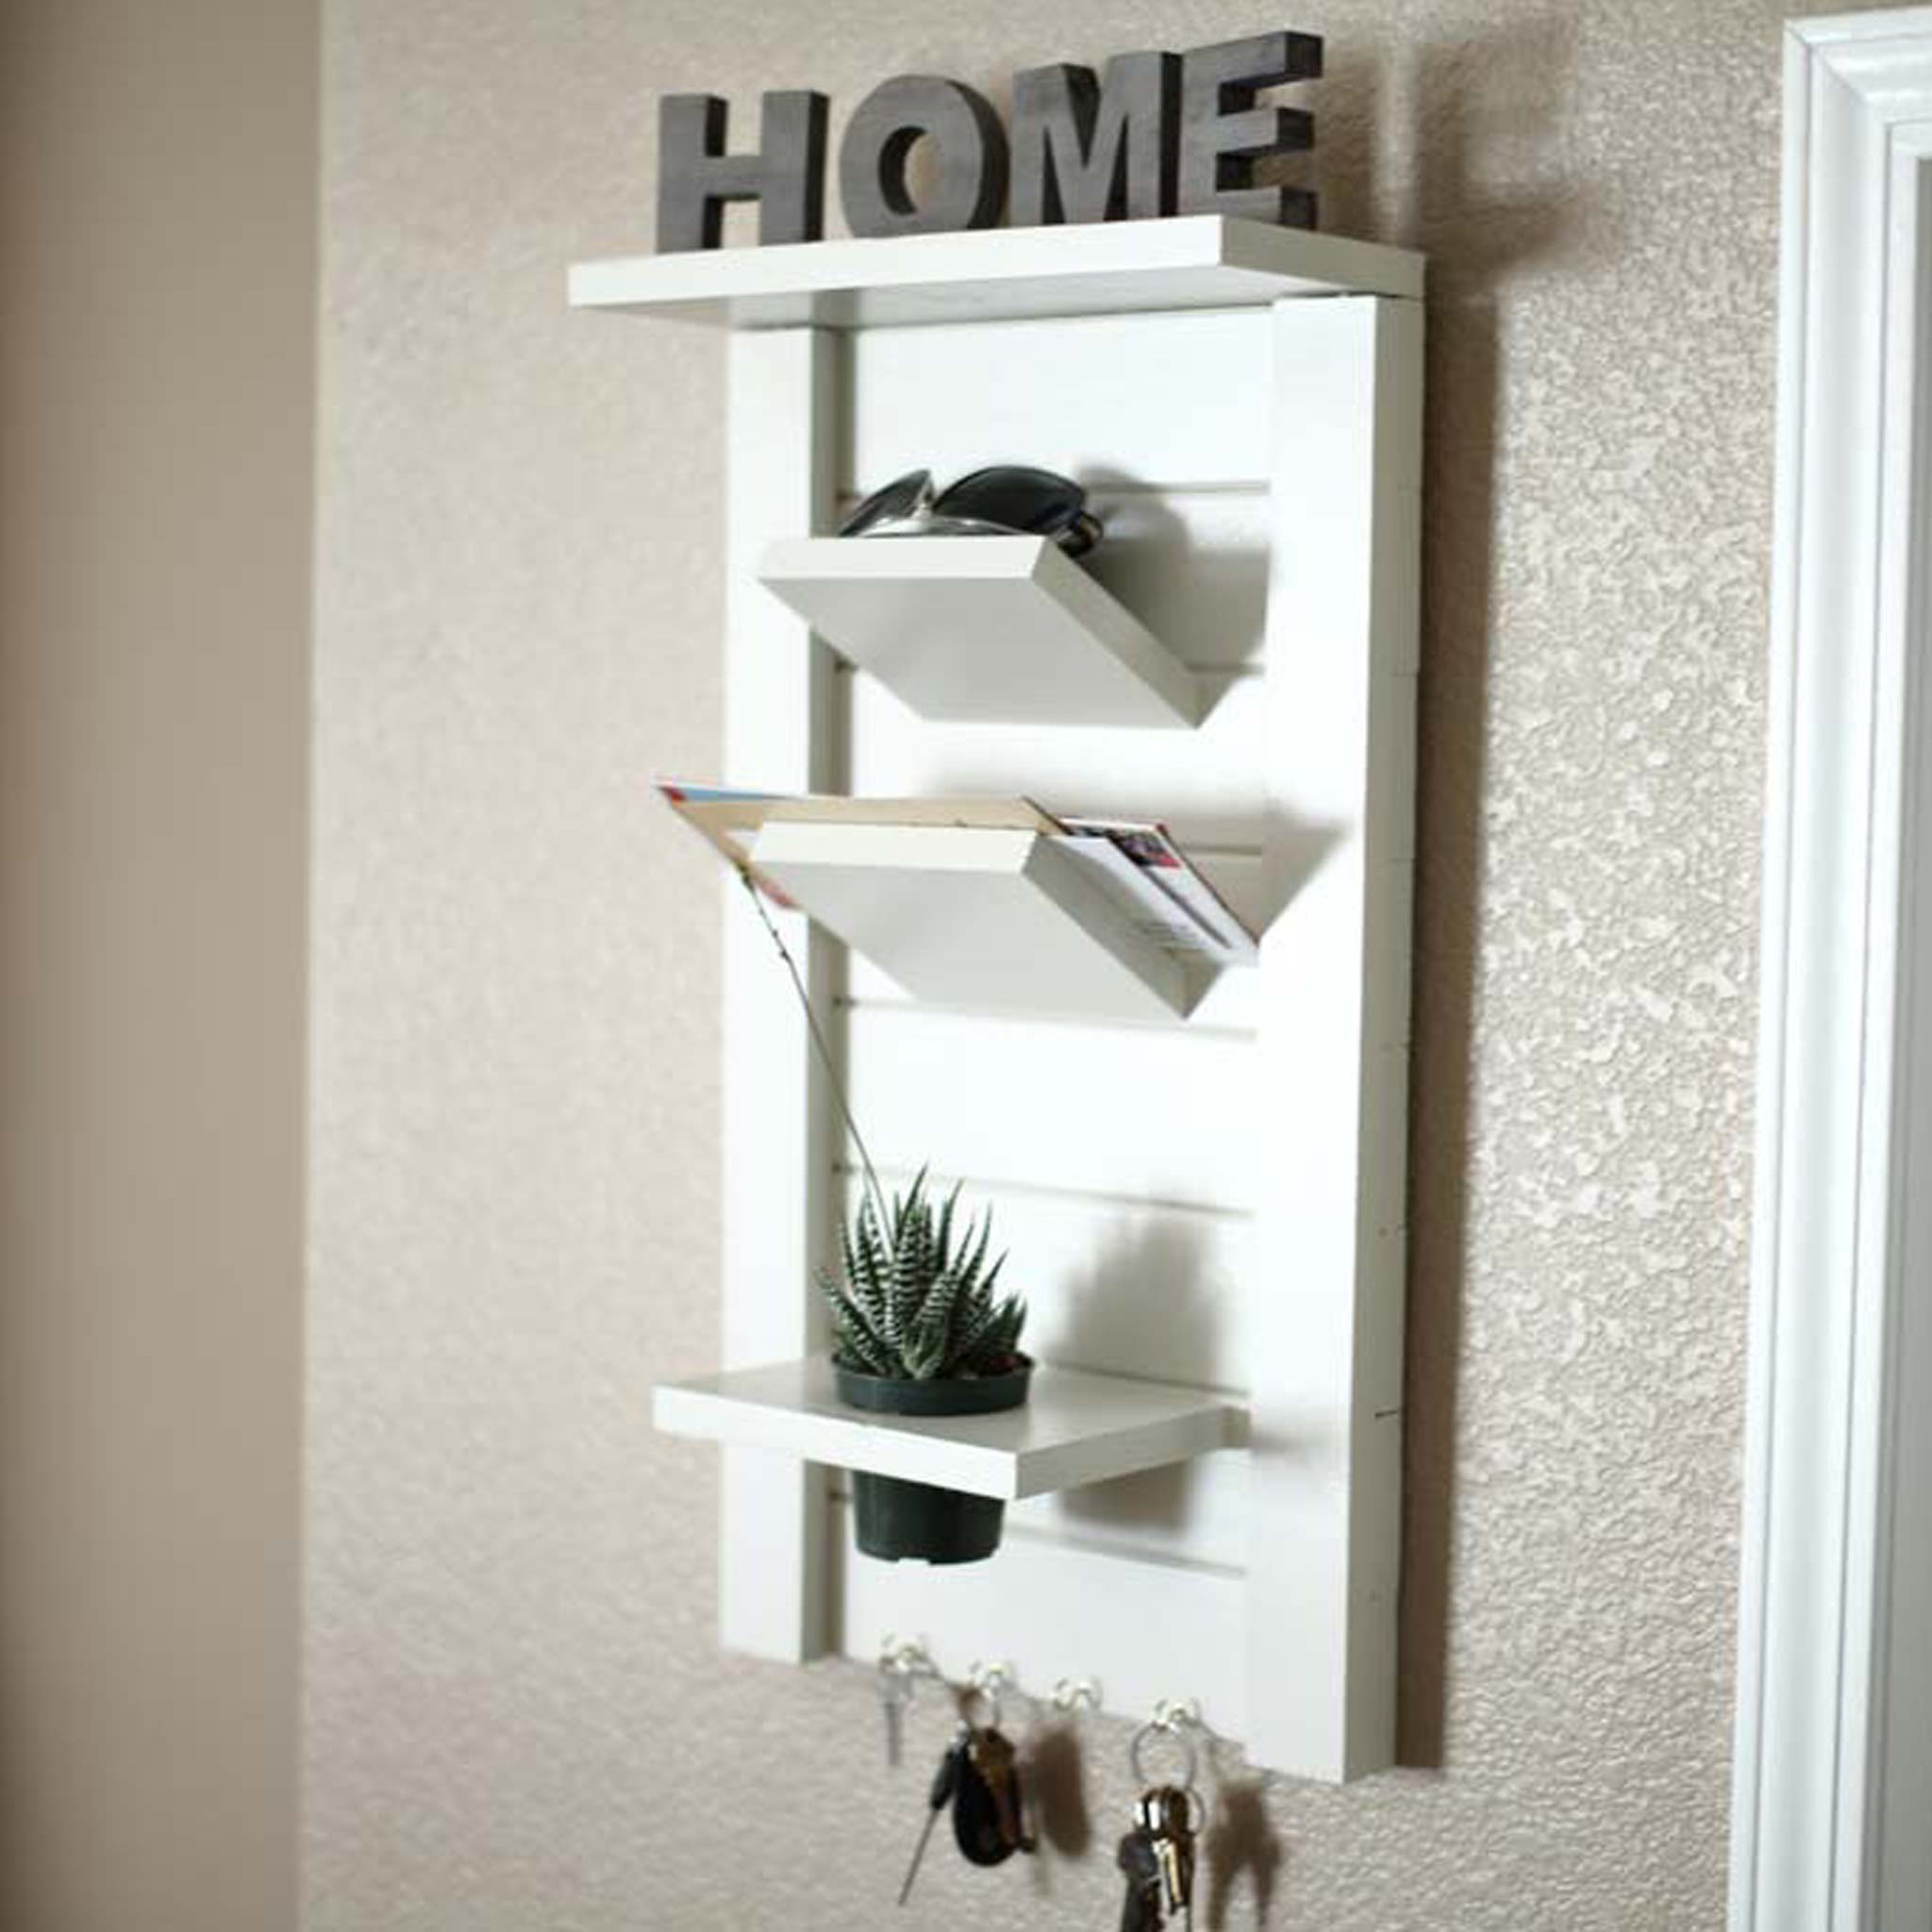

Check out this DIY simple mail and key organizer! Now you can have your mail arranged and your keys always in one place, so you don’t need to look for them any longer. Also having small place for plant makes it cozy and lovely.
For more information on this mail and key organizer, visit TheDIYPlan

Preparation
Tools for this project
• Miter Saw
• Tape Measure
• Nail Gun
• Jig Saw
Material List
• 1x10x8' (x1)
• Finish Nails
• 1 1/4" Pocket hole screws
Note: Lumber dimensions are listed as nominal size. See lumber sizes for actual dimensions vs nominal.
Disclosure: Some of the links on this page as well as links in “tools for this project” and “material list” sections are affiliate links.

Instructions
Step 1
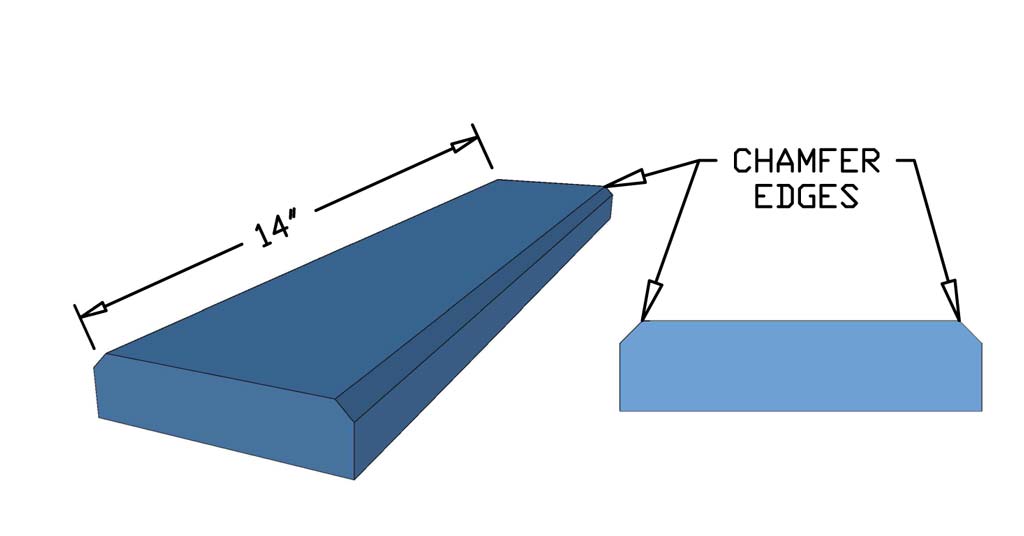
Cut and Chamfer edges
Cut boards to provided dimensions in the cut list. Take 14x3 boards and chamfer the edges slightly at 45°.
Step 2
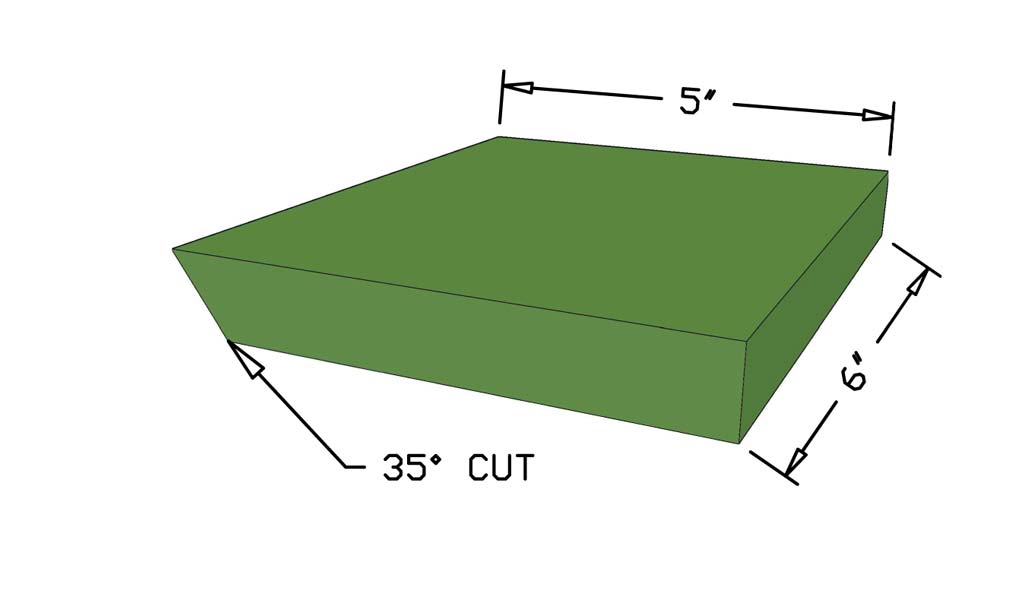
Cut at 35 Degrees
Take both of the 5"x6" board and cut one side at 35°
Step 3
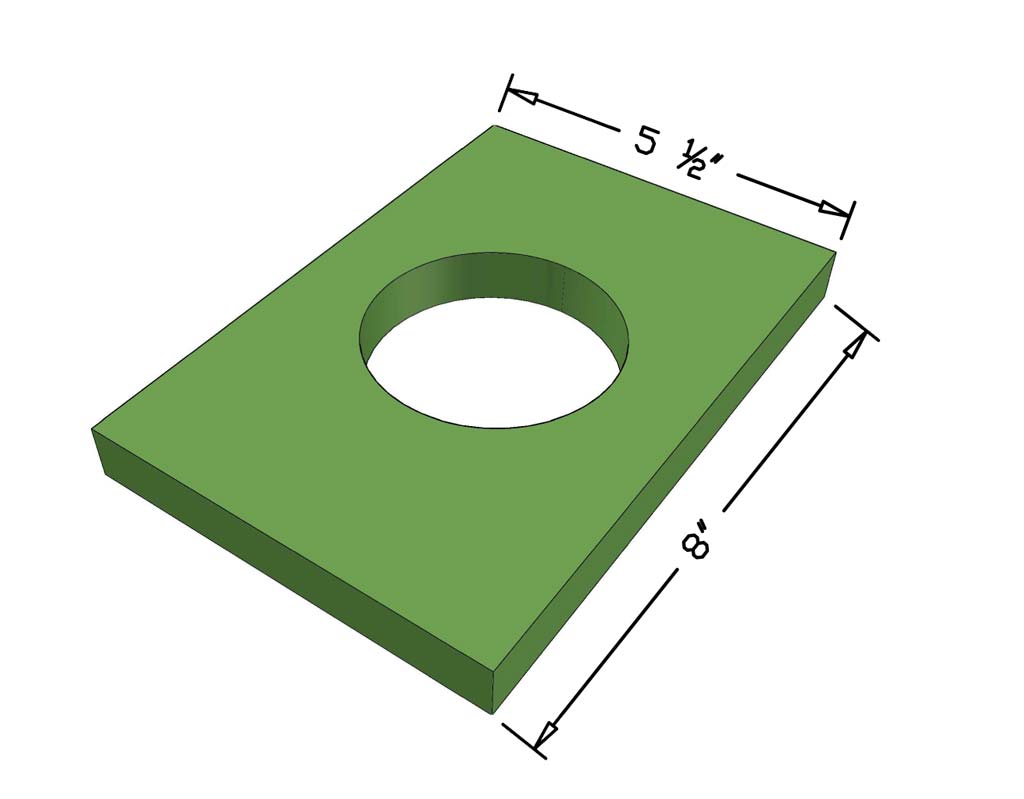
Cutting a Hole for Flower Pot
Using a jig saw cut a 3" hole in the middle of 8" x 3 1/2" board. This will be for a flower pot. You make cut a different hole size depending on your flower pot.
Step 4
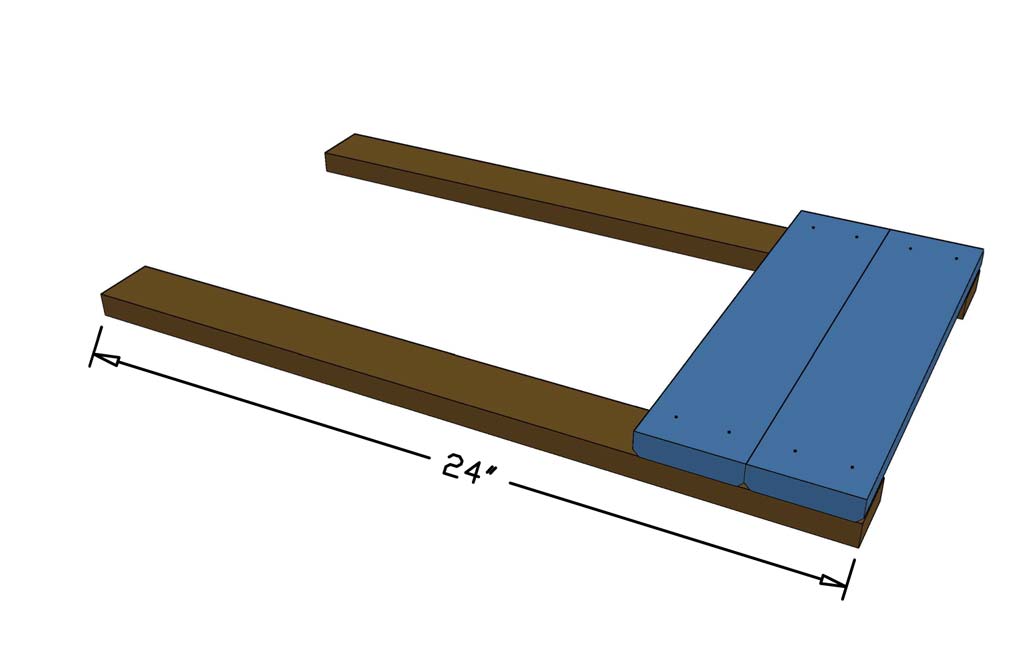
Attach Boards with Nail Gun
Paint or stain all the boards before attaching them together. Place both 2"x24" boards on a flat surface, then using nail gun attach the 14" boards with finish nails
Step 5
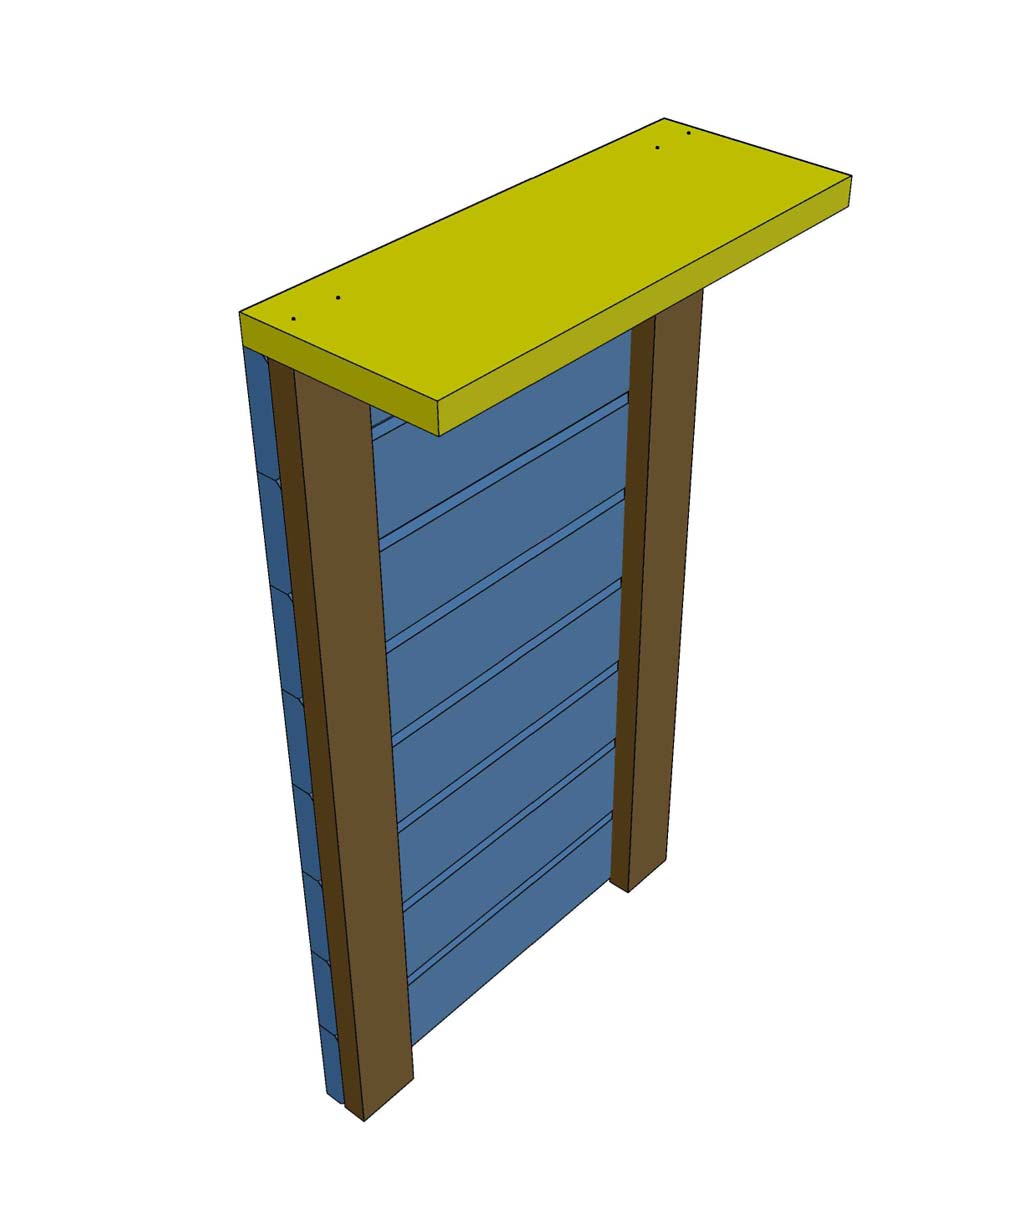
Attach Top Board
Attach the top 14"x5 1/2 board using finish nails.
Step 6
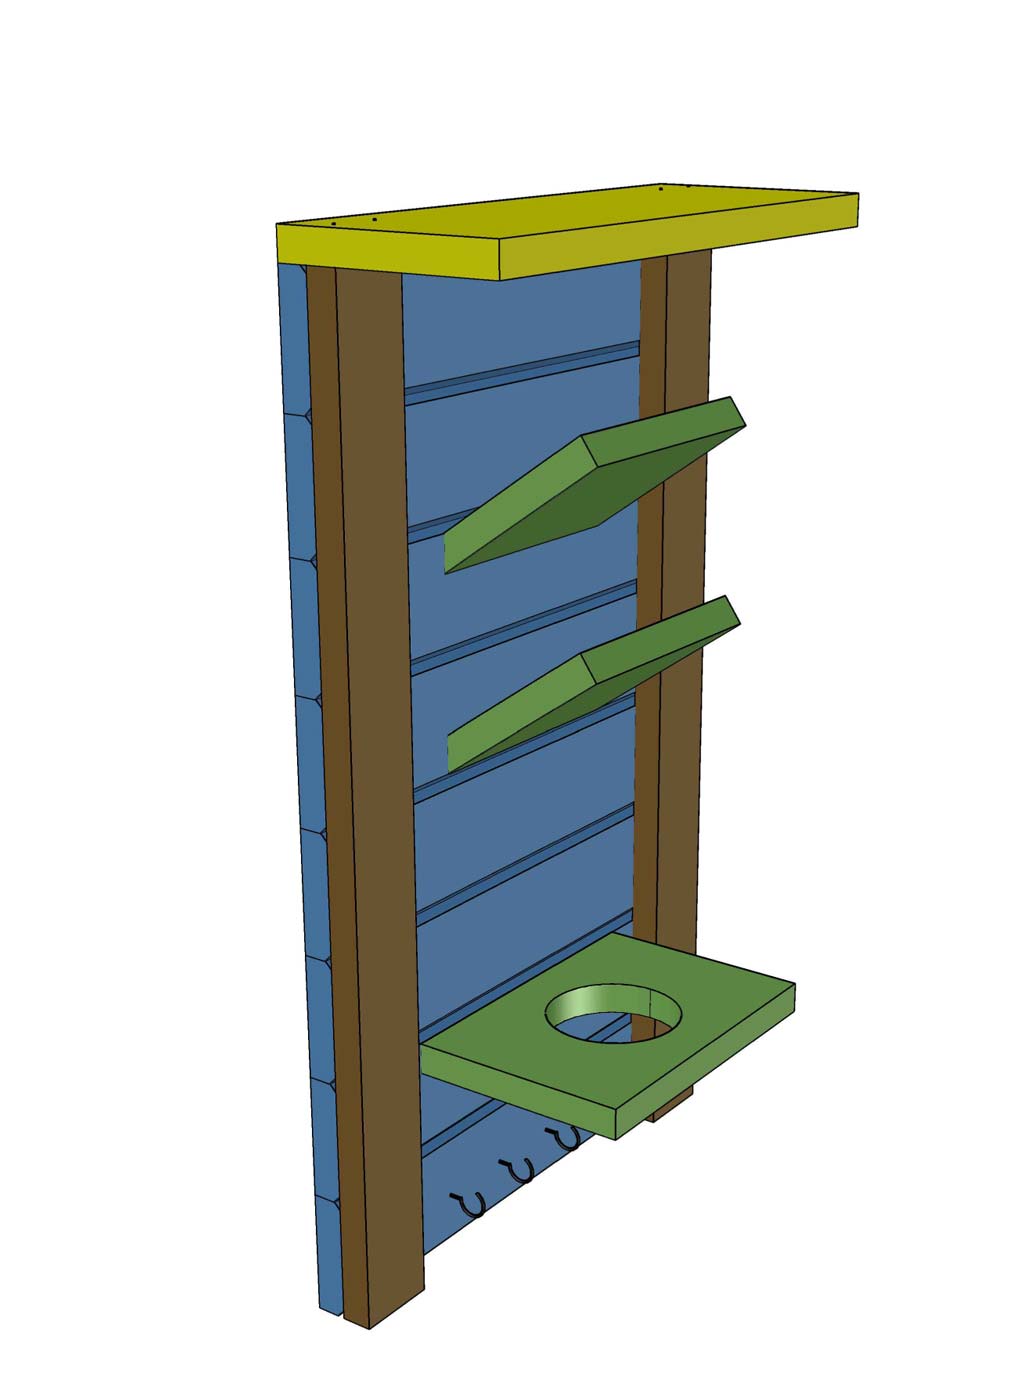
Attaching Remaining Boards
Attach the remaining boards using a nail gun. Could use a wood screw to hold it stronger. Also screw in the hooks at the bottom for your keys. That's it with mail and key organizer.
