


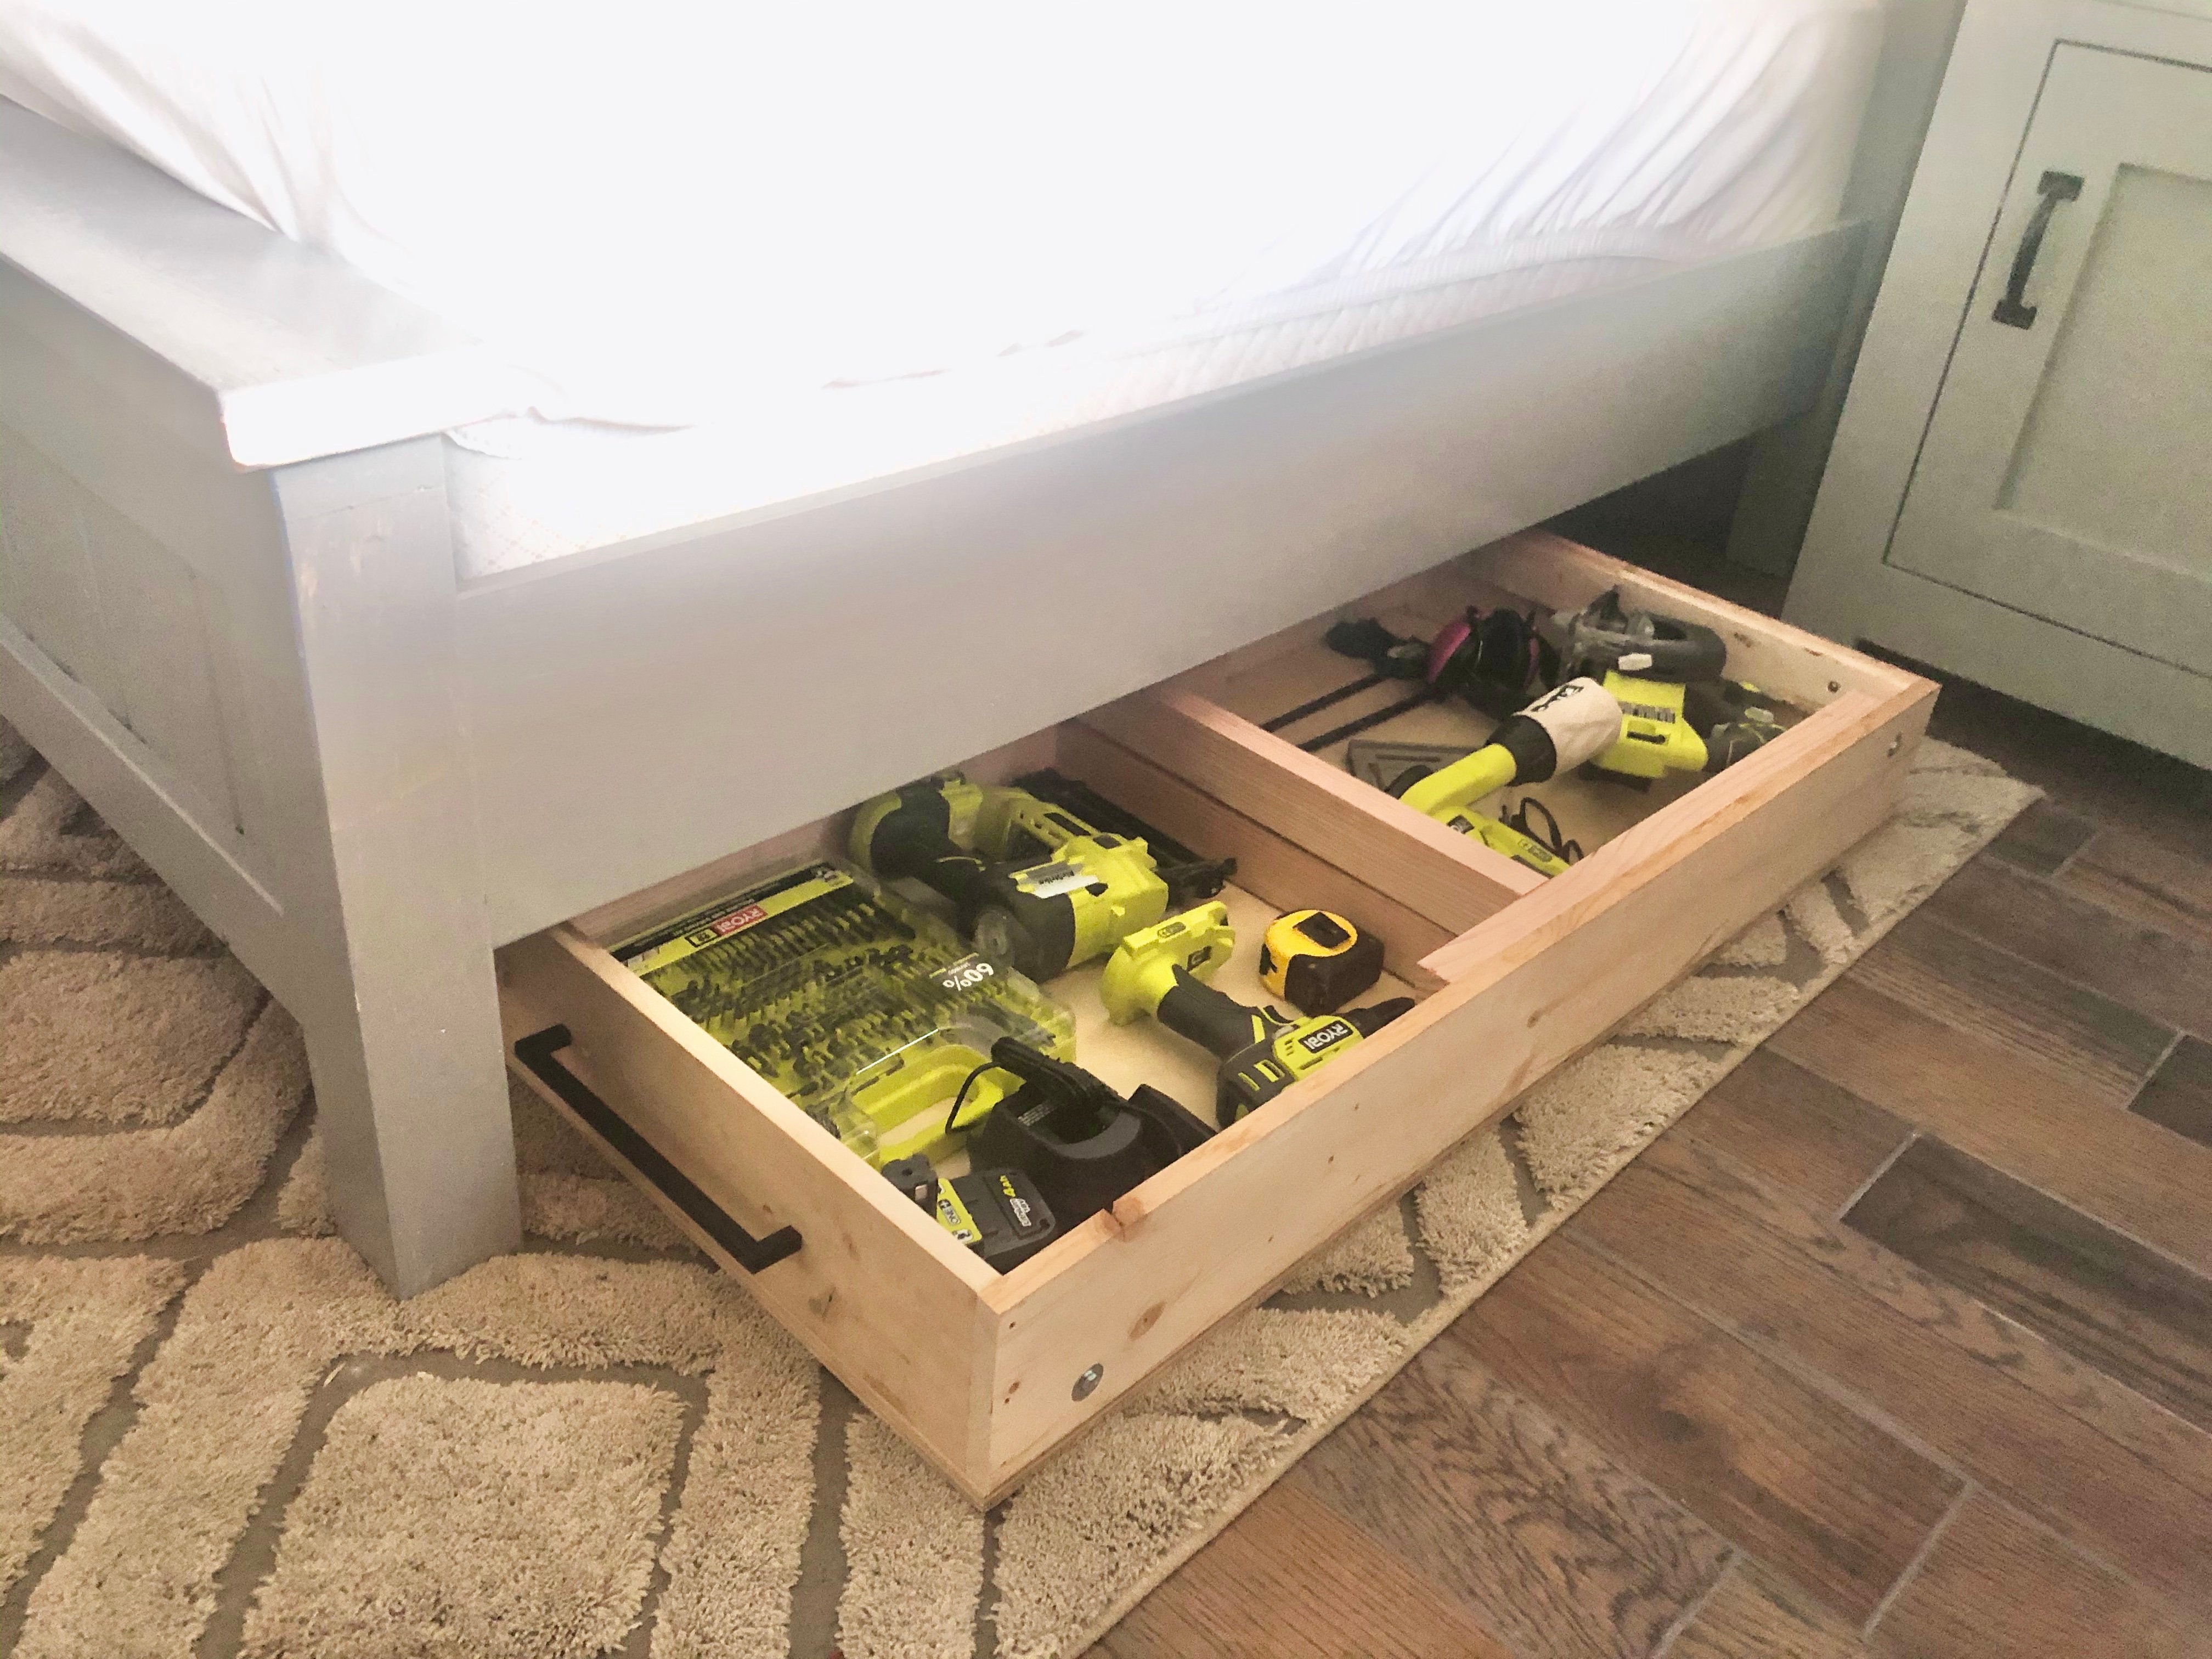
This portable workbench stores the tools with it! It can be stored under the bed, and easily pops up to become a sturdy workbench. We love it for builders in apartments, small spaces, or on the go.
You can build this portable workbench for about $40 with basic tools. This is a quick and easy project with free step by step diagrams, shopping and cut list and video tutorial.
Portable Workbench Features
- Sturdy workbench sized to accommodate small to medium sized projects. Can be paired with a second portable workbench to tackle almost any sized project.
- Easily folds down to a compact size
- Flips over for storage
- Portable - can be easily transported - and it carries all the tools!
- Fits on most standard 24" garage shelving
- Fits under most standard height beds (less than 7" tall)
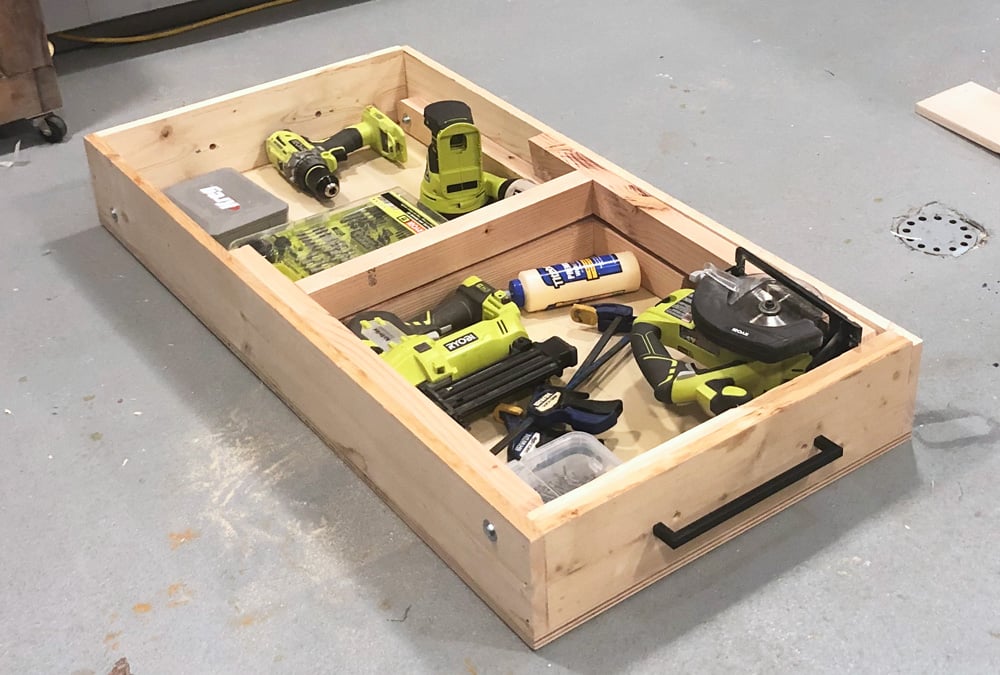
- Just enough storage for all essential DIY project tools
- Quick and easy to build
- About $40 in materials
I've been wanting to build a "loaner" workbench with all the tools for a bit, and just hadn't come up with the right design. We were putting the bean bag toss games away this fall and it hit me. Why not build a workbench like the bean bag toss game, with fold out legs? And what if we could use the space to hold and store the tools?
Folded flat, it is just big enough to hold all the essential tools for most DIY projects. It can be carried (although most likely a two person task) outside on a balcony, put in the car, or up or down stairs.
Its compact enough to fit under most beds -
Pull the tools out and flip it over, and it becomes a great workbench.
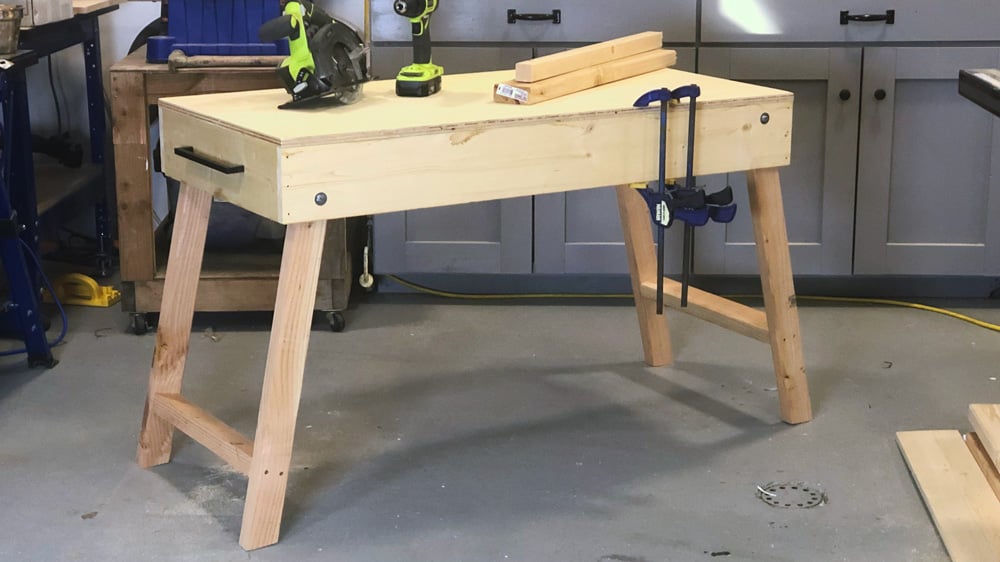
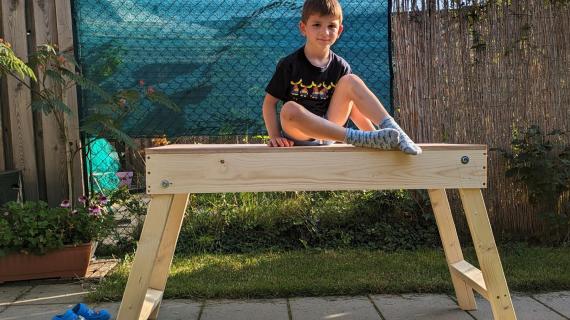
It is VERY sturdy and with the 2x legs, will hold up for a long time.
There are not hinges - the legs simply rotate on a bolt and hold in place at an angle.
Video Tutorial
This project is very quick and easy to build. We filmed the process so you can watch and see!
What Tools do I Need?
For this project, you only need a drill and a saw (and some hand tools like tape measure and safety glasses). You can build alot of projects with just these tools. But I wanted to give you the essential list, the basics that you can use to build almost any project out there.
- Cordless Drill
- Circular Saw (recommend the 5-1/2" diameter blade size)
- 18 Gauge Brad Nailer
- Random Orbital Sander
- Tape Measure
- Speed Square
- Safety Glasses
- Speed Square
- Pencil

Preparation
- 2 - 1x6 @ 6 feet long
- 2 - 2x3 @ 8 feet long or stud length
- 1 - 1/2" or 3/4" thick plywood panel, 24" x 48"
- 4 - 3" bolts
- 4 - matching locking nuts
- 12 - matching washers (three per bolt, one on each end and one in between wood)
- 16 - 2" self tapping wood screws
- 16 - 1-1/4" self tapping wood screws
- wood glue
- 2 - handles (optional)
- 2 - 1x6 @ 48" or length of plywood
- 2 - 1x6 @ 22-1/2" or width of plywood minus 1-1/2"
- 1 - 1/2" or 3/4" thick plywood project panel measuring 24" by 48"
- 2 - 2x3 @ 28-1/4" - longest point measurement, one end cut at 15 degrees off square
- 2 - 2x3 @ 31" - longest point measurement, one end cut at 15 degrees off square
- 2 - 2x3 @ 19-1/4"


Instructions
Step 1

Measure the length and width of your plywood. Adjust measurements in cut list if your plywood does NOT measure 24" x 48"
Attach sides to ends with three 2" self tapping screws and glue.
Optional handles can be cut on ends.
Step 2

Apply glue to bottom edge of 1x6 box.
Attach plywood to bottom with 1-1/4" screws, the screw heads should be slightly below the surface of the plywood.
Screw at least every 12" and on all ends/corners.
Step 3

Cut 2x3 legs with bottoms at 15 degree angle off square.
Mark out square cut end 1-1/4" down and 1-1/4" in and drill holes sized for your bolts.
Nip off corners as done in video to allow the leg to rotate and not catch on the corners.
Drill holes in side 1x6 as shown, the same on both sides, with a drill bit sized for your bolt.
Insert the bolt with a washer at the front, in between the 1x6 side and the leg, and then just before the nut. Tighten nut to secure.
Step 4

Position the leg supports on top of each other, centered on the storage compartment, as shown in diagram. Mark with pencil.
Attach legs to center divider with 2" or longer screws.


Comments
ladybug'13
Sun, 11/24/2019 - 19:27
Genius!
I'm amazed by your never-ending ingenuity and love seeing your solutions to issues like this. Until I have a dedicated workshop I need to keep my things together in small spaces. Definitely adding this to the build list. Thank you!
tizlad
Mon, 01/06/2020 - 02:55
How far in do the legs sit…
How far in do the legs sit in from the from the ends of the unit
dmoomey
Fri, 01/31/2020 - 04:20
Placement of the workbench legs.
I struggled with the placement of the legs, but I finally figured it out. You mark the non-angled end of the legs at 1 1/4" in and 1 1/4" down on all four legs. Then you drill your holes. For the 28 1/4 " legs, you place the legs 2 1/4" in and 1 1/2" down. For the 31" legs you place the legs 4 1/4" down and 3" in. Hopefully this helps.
BubbaGee
Fri, 01/31/2020 - 09:35
This gives me an idea of a…
This gives me an idea of a portable router table with a removable router.
rcgonz
Tue, 05/05/2020 - 06:35
Taller?
I’m tall. Could the bench be made longer to fit longer let to make it taller?
In reply to Taller? by rcgonz
chennessy13
Mon, 06/15/2020 - 15:38
Just a positive comment
Hey, I just asked about making an even smaller, more compact version of the table for myself! I found a little bit of irony in our completely different dilemmas that made me chuckle! Hope you’re able to modify the measurements to fit you height?(so jealous! I’m 5’2”). Happy building!
revjball
Tue, 06/02/2020 - 06:13
DONE! This was so cool! The…
DONE! This was so cool! The next one I build like this will be done on this workbench... and will also look 3000x better. Thanks for the plans!
chennessy13
Mon, 06/15/2020 - 15:32
Could I build an even smaller version of the table?!
I love this idea but I have a question about redesigning it to fit what I would like to have. I’d love to make a smaller, more compact version of this so I can use & storage it on my small balcony. Obviously, I would need to tweak the measurements but as a brand new DIYer who hasn’t built anything yet, I would like to know if anyone has any suggested measurements that would result in a functional workbench? The table wouldn’t be used standing up, more or less sitting down on a paint can or on my knees—gotta love being vertically challenged and petite! ;-)
To realistically work every time with the size of the area available, the table can’t be more than 3 1/2 feet but I’d prefer it to be closer to just 2.5 ft–3 ft. I know that’s tiny but I’m only making small simple projects, nothing big. I’ve been getting my boards precut to size or no more than a 8” long board. I guess I’m looking to build something like a table top work table but without the table to put it on, just the tile floor on my balcony.
I currently only have a Ryobi jigsaw (bought before I saw this video & I do like Ryobi tools so far except their hand vacuum), a Dremel & Dremel work station (going to try building the drill press cart I saw), an Bosch orbital sander, Dewalt drill and impact drill, and most hand tools but I do need clamps. Is there a way to add a clamp gadget/area like you have on your shop table to this table as is and to a possible mini version of this table?
I won’t be storing tools in the table like you’ve done but I’m going to see if I can add a small compartment/pocket closure to store small items like hand tools/screws/nails/measuring tape, most likely not made of wood though. Thanks for your suggestions/advice! All us welcomed!!
nestico
Tue, 06/16/2020 - 17:58
Just built the work table. Strong and sturdy but lightweight.
I just finished making this work table. I really enjoyed making it. The plans are are very easy to follow and very clear. I added a handle on the side of the table to carry around like a suitcase. My work table stays in the garage and is tucked away ready to be used at the drop of a hat. It's sturdy but very lightweight. Thank you so much for sharing your plans
Velisus
Thu, 06/25/2020 - 14:26
Works perfect
Just finished this myself. I slightly changed the height of the table to about 3-4in taller just by cutting the legs those extra inches. Had to move the holes for the legs too but other than that no problem building this. Thank you for the plans :)
Tangamanga
Thu, 08/20/2020 - 14:20
15° angle measurement with speed square.
I'm making this workbench for my sons (10 & 6) and I'm having a problem measuring the 15° cut for the legs. I don't have a miter saw and this is what's holding me back. Do you have a video or instructions on how to do it correctly?
Andrew Sparks-Sperry
Thu, 01/20/2022 - 11:10
Very clear and Easy Instructions
The instructions were very easy and my wife loves it. I made it for her crafting projects.