
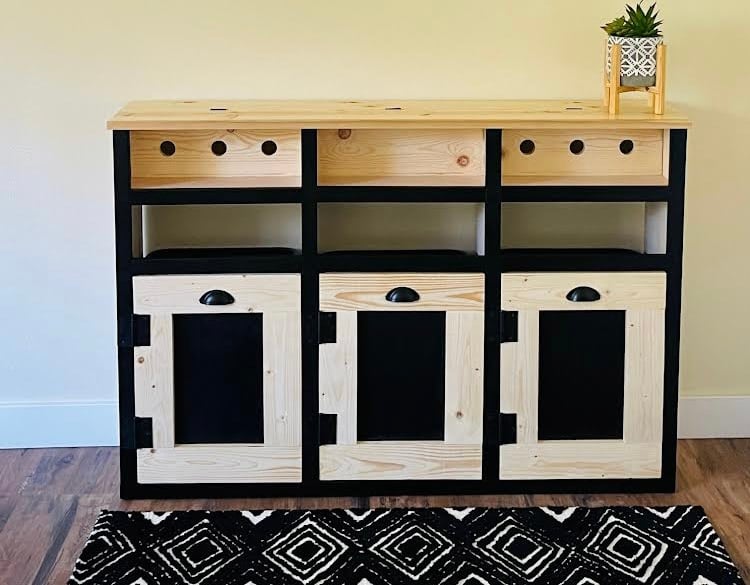

Build your own recycling console table with integrated charging station. Narrow enough to fit in a hall, but versatile enough to help you stay organized, build it with free plans from Ana-White.com
Designed and built by Family DIYnamic
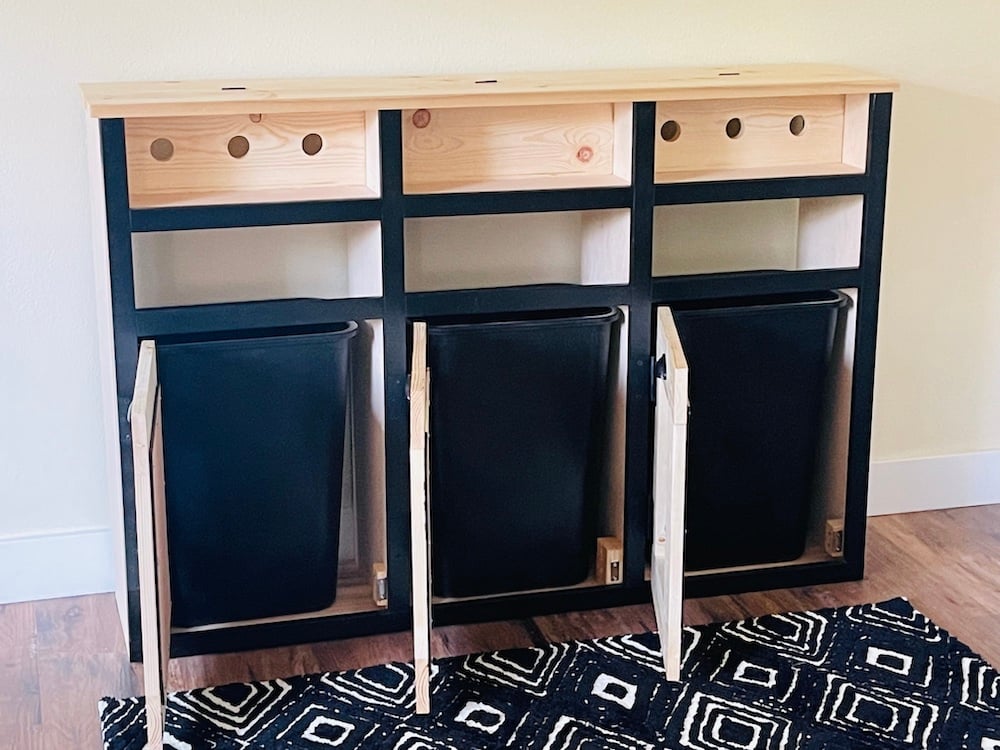
Get a little more organized and build yourself a recycling console table with charging doc! The cords are hidden, the trash cans are hidden, but the functionality is all there!
This makes such a great drop zone. Sort and recycle mail, bottles, papers. Charge up those phones and tablets. And a little desktop space for setting things on in transition. This project can be modified easily to suit your needs and space.
Build Video for Dropzone Console Table
VIDEO COMING SOON
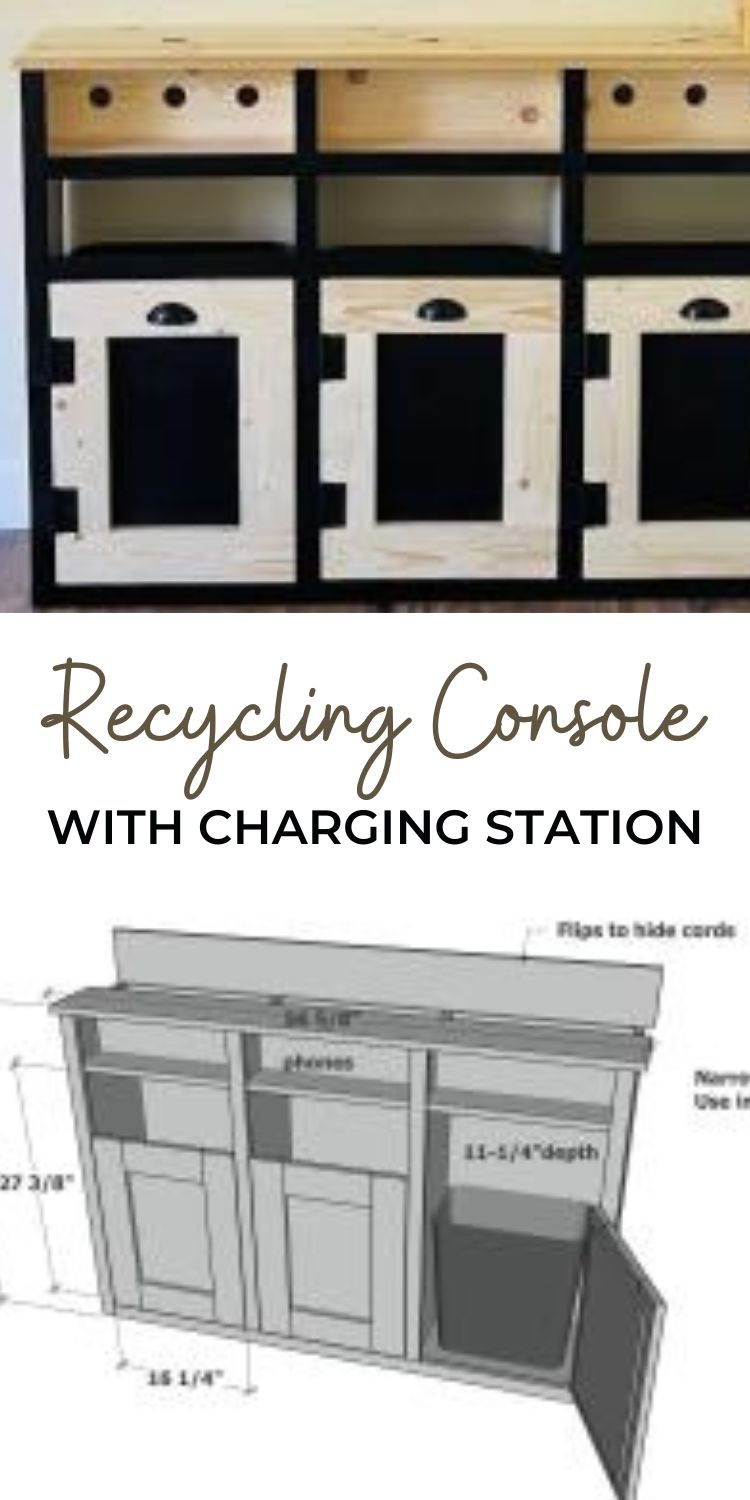
Pin For Later!

Preparation
- 2 - 1x12 @ 6 feet long
- 2 - 1x12 @ 8 feet long
- 1- 1x6 @ 10 feet long
- 1 - 1x8 @ 5 feet long
- 3 - 1x2 @ 8 feet long
- 2 - 1x4 @ 8 feet long
- 1 - 4x8 sheet of 1/4" thick plywood
- 1-1/4" kreg pocket hole screws
- 5/8" and 1-1/4" brad nails
- 4 sets of surface mount hinges
- 3 magnetic clasps
- 3 recycling containers, max size 16" wide x 11" deep x 20" tall
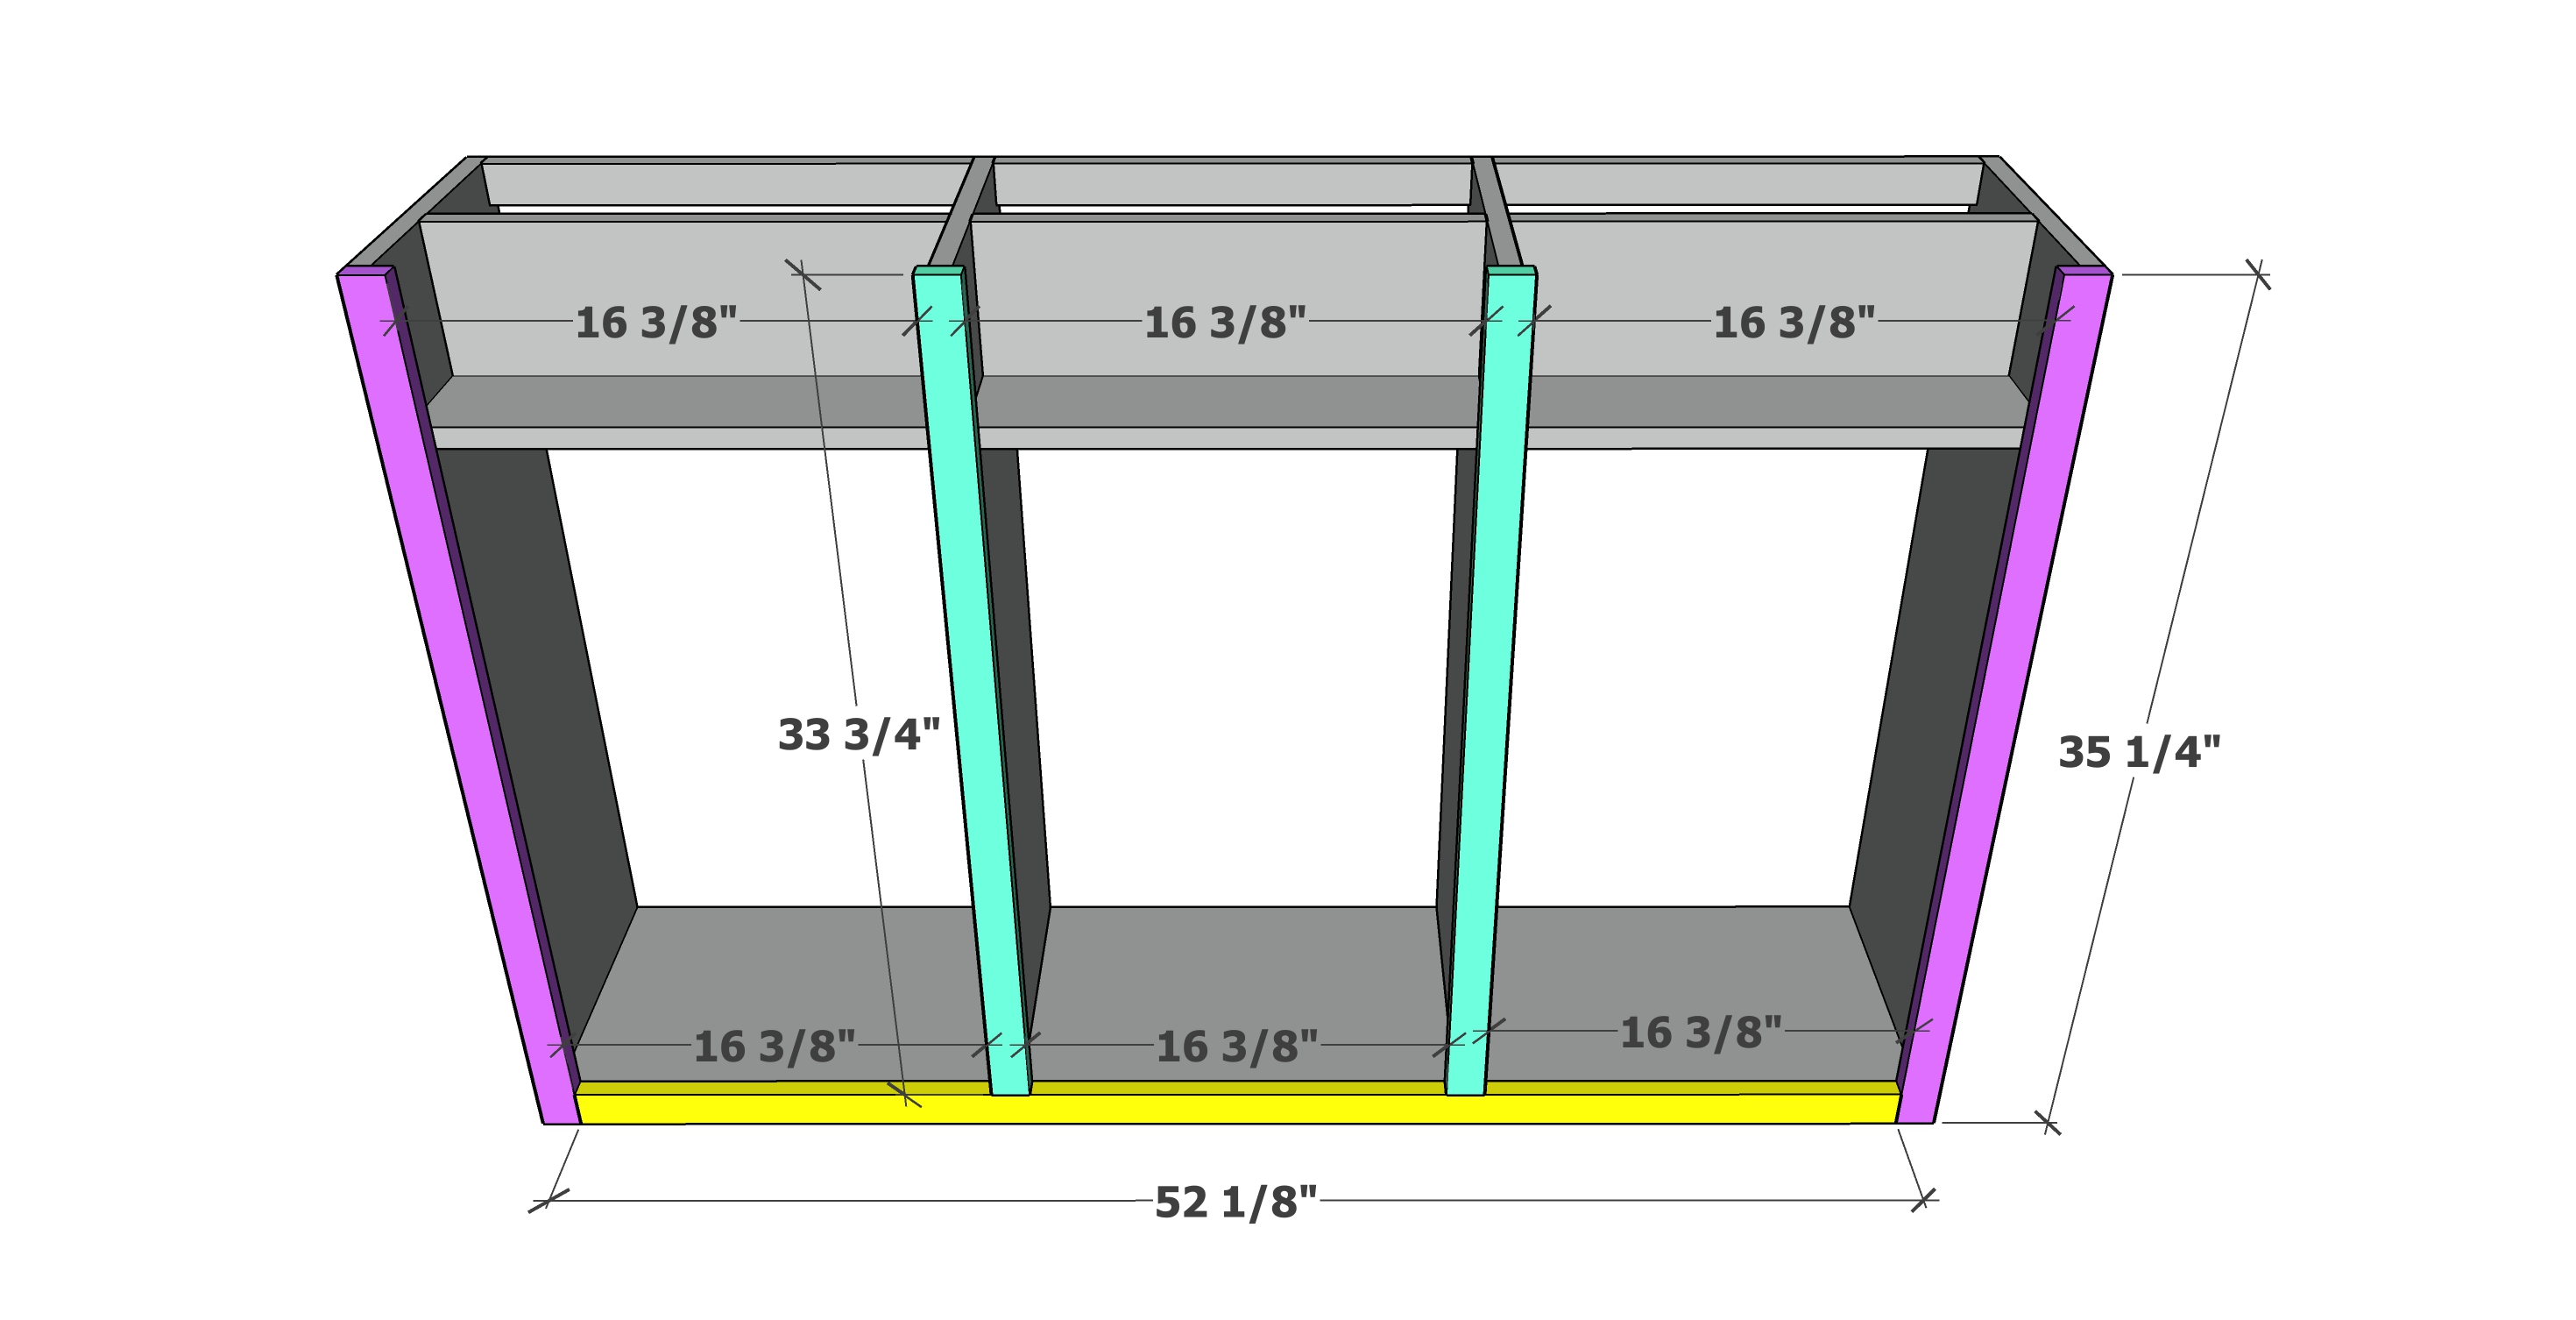
Carcass
- 4 - 1x12 @ 35-1/4" - sides and dividers
- 4 - 1x12 @ 17-1/2" - outside shelves
- 2 - 1x12 @ 17-1/8" - center shelves
Trim/Top
- 2 - 1x6 @ 17-1/2" - charging dividers
- 1 - 1x6 @ 17-1/8" - center charging divider
- 2 - 1x2 @ 17-1/2" - back supports
- 1 - 1x2 @ 17-1/8" - center back support
- 1 - 1x6 @ 56-5/8" - top, back
- 1 - 1x8 @ 56-5/8" - top, front
- 2 - 1x2 @ 35-1/4" - face frame sides
- 2 - 1x2 @ 33-3/4" - face frame, dividers
- 1 - 1x2 @ 52-1/8" - face frame bottom
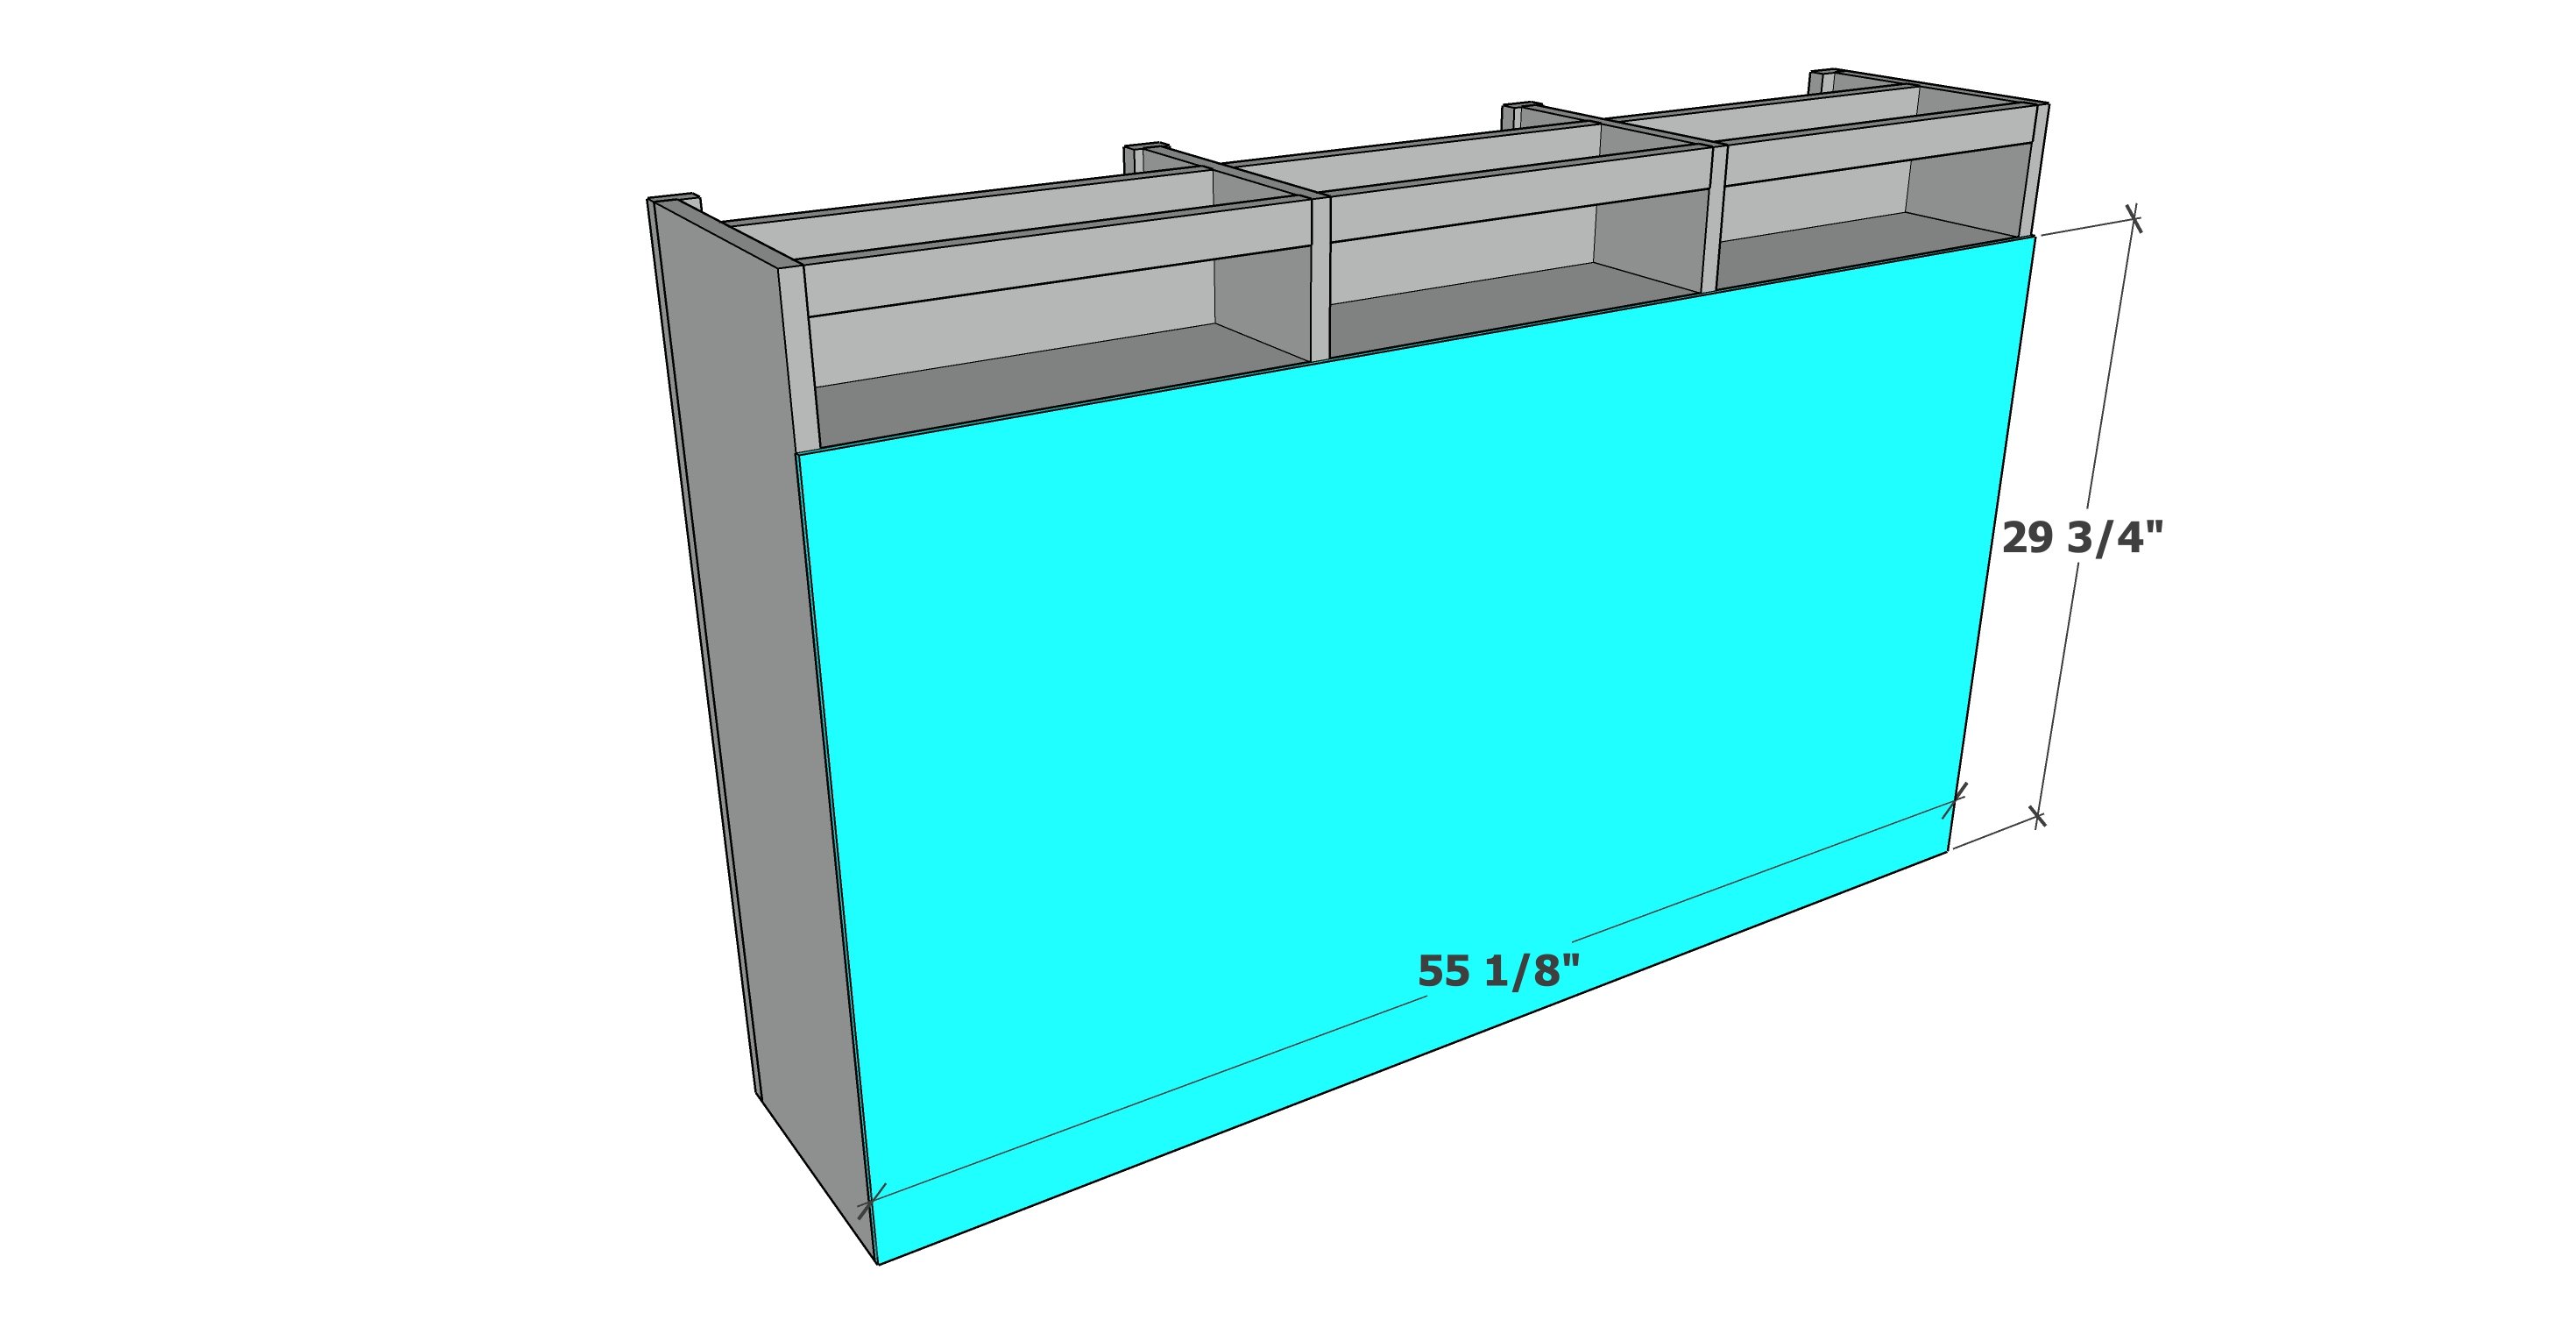
- 1 - 1/4" plywood @ 55-1/8" x 29-3/4" - back
Doors
- 6 - 1x4 @ 9-1/8"
- 6 - 1x4 @ 20-1/2"
- 2 - 1/4" plywood @ 16" x 20" - door backs


Instructions
Step 1

Drill three 3/4" pocket holes on each end of the horizontal 1x12 shelf boards. Attach to the vertical 1x12s with 1-1/4" pocket hole screws.
Note that the center 1x12s are a different width than the outside 1x12s.
Step 2
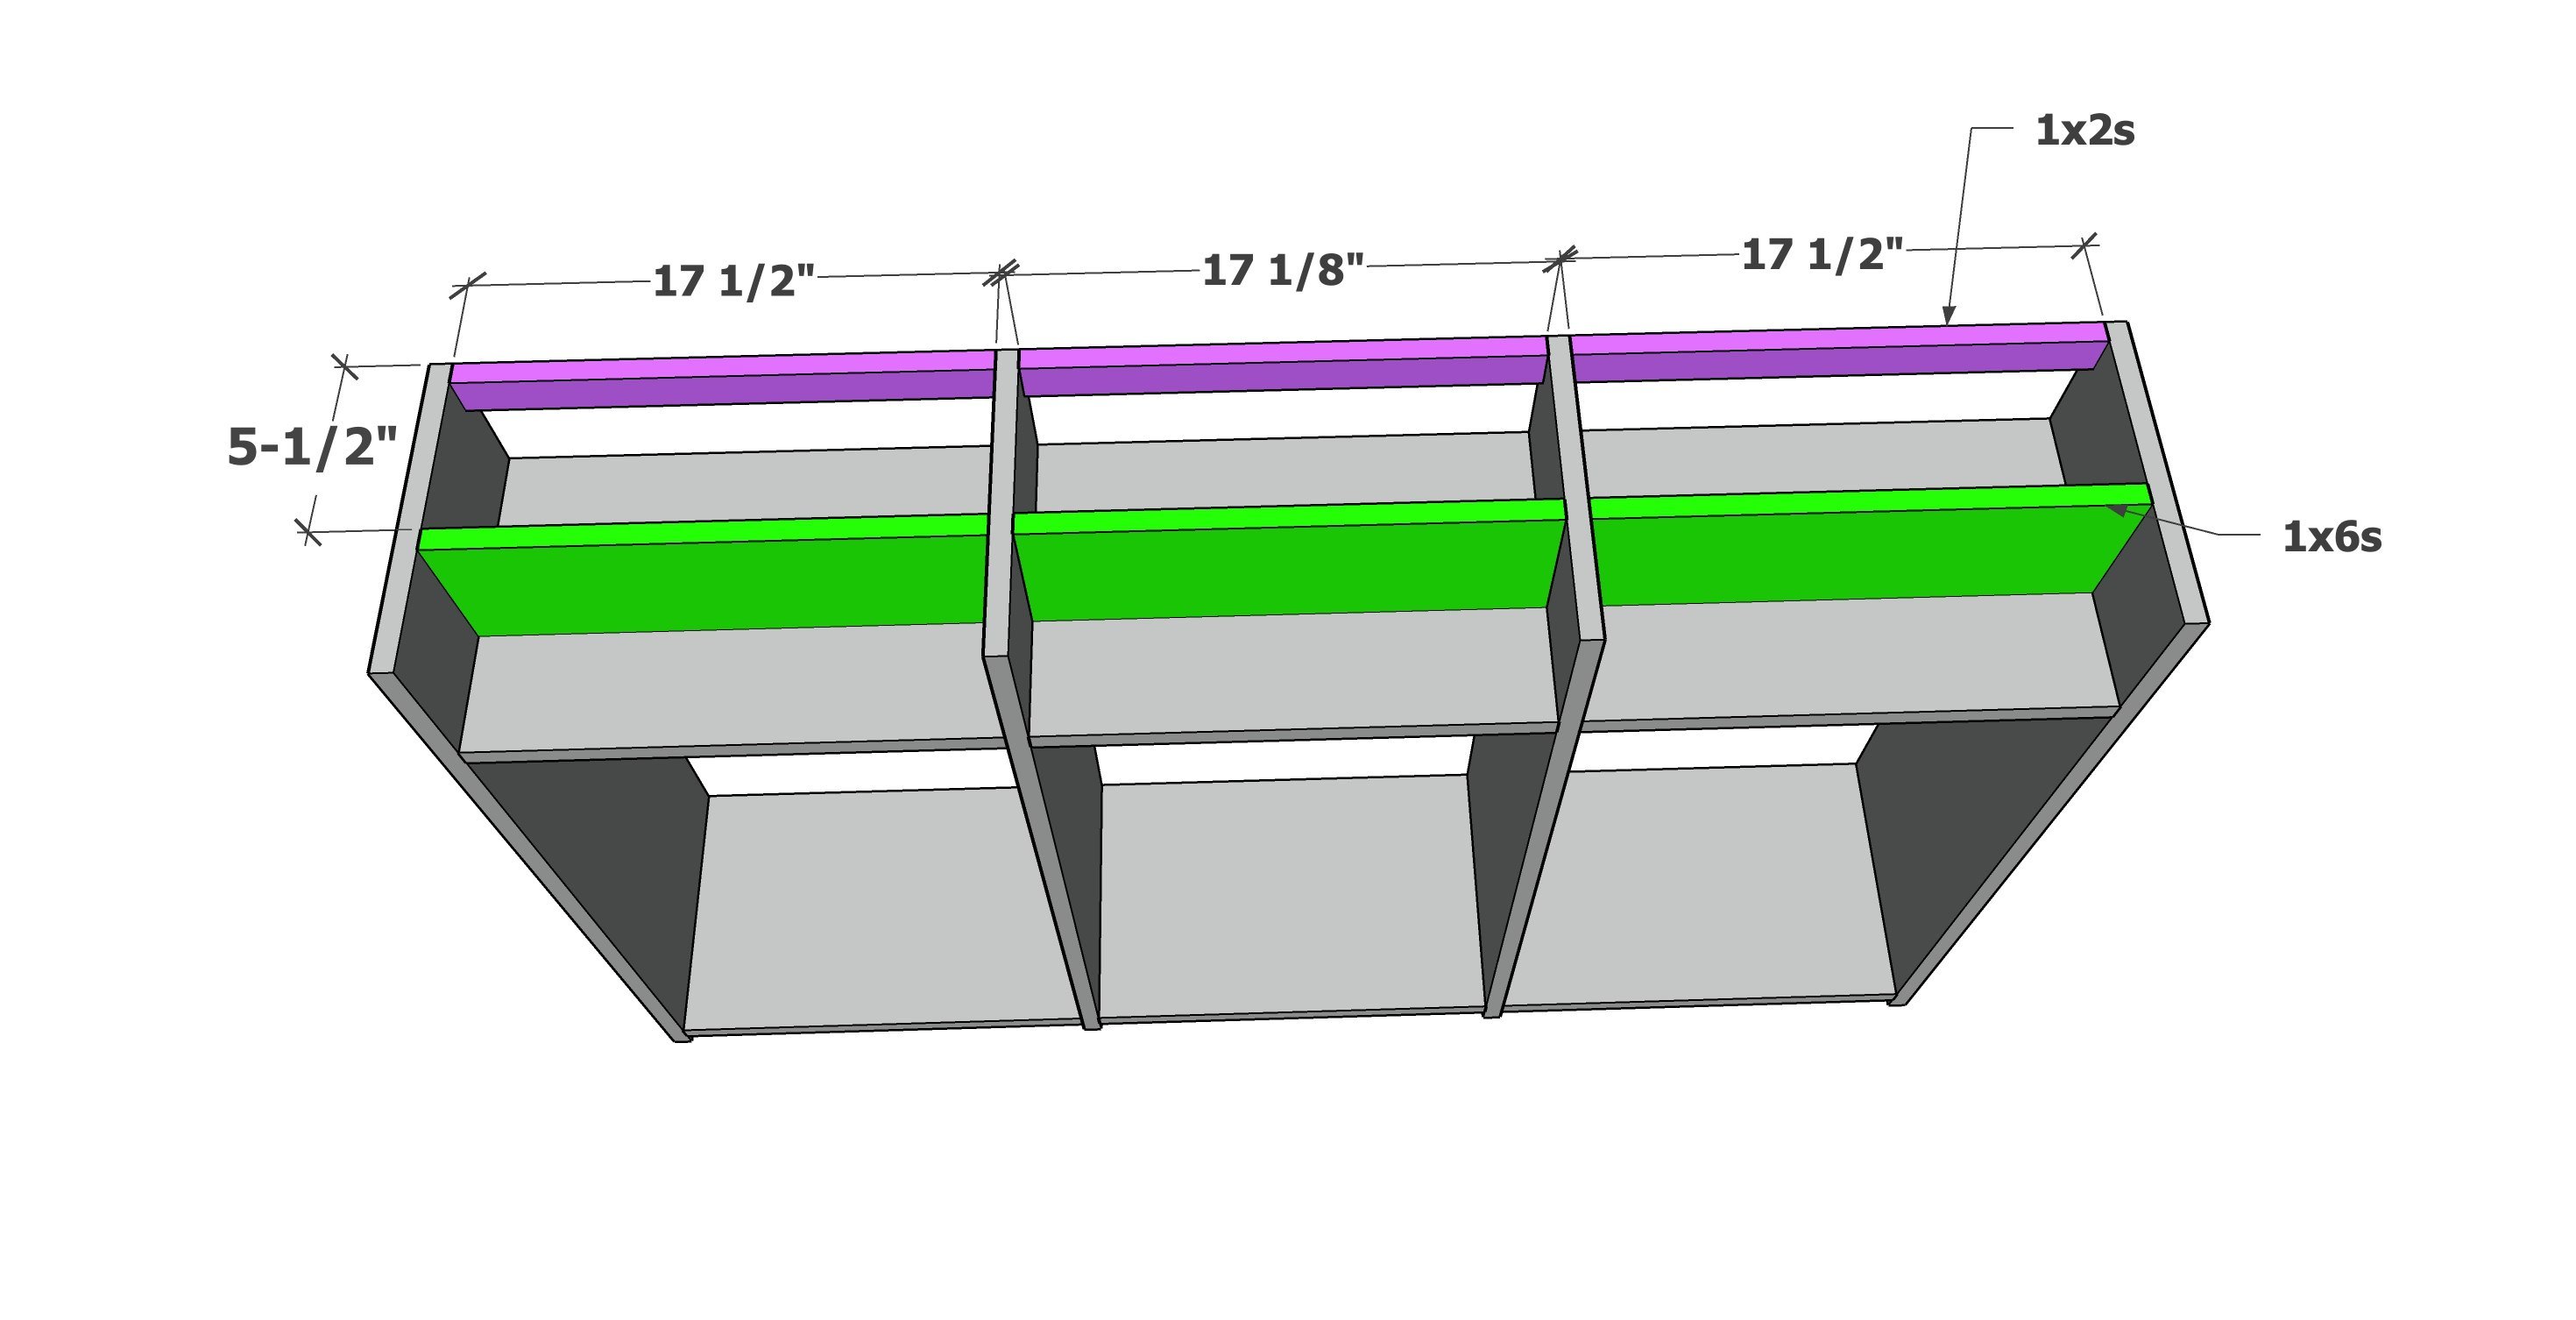
Attach the 1x6 dividers inside with pocket holes.
Then attach the back 1x2s with pocket holes.
Note that the center boards are a different width than the outside boards.
Step 3
Attach the 1x2 face frame boards to the front of the project with 1-1/4" brad nails and wood glue.
NOTE: Additional face frame boards can be added as shown in the photos. Add now using 3/4" pocket holes and 1-1/4" pocket hole screws if desired.
Step 4
Attach back with 5/8" brad nails and wood glue.
Step 5
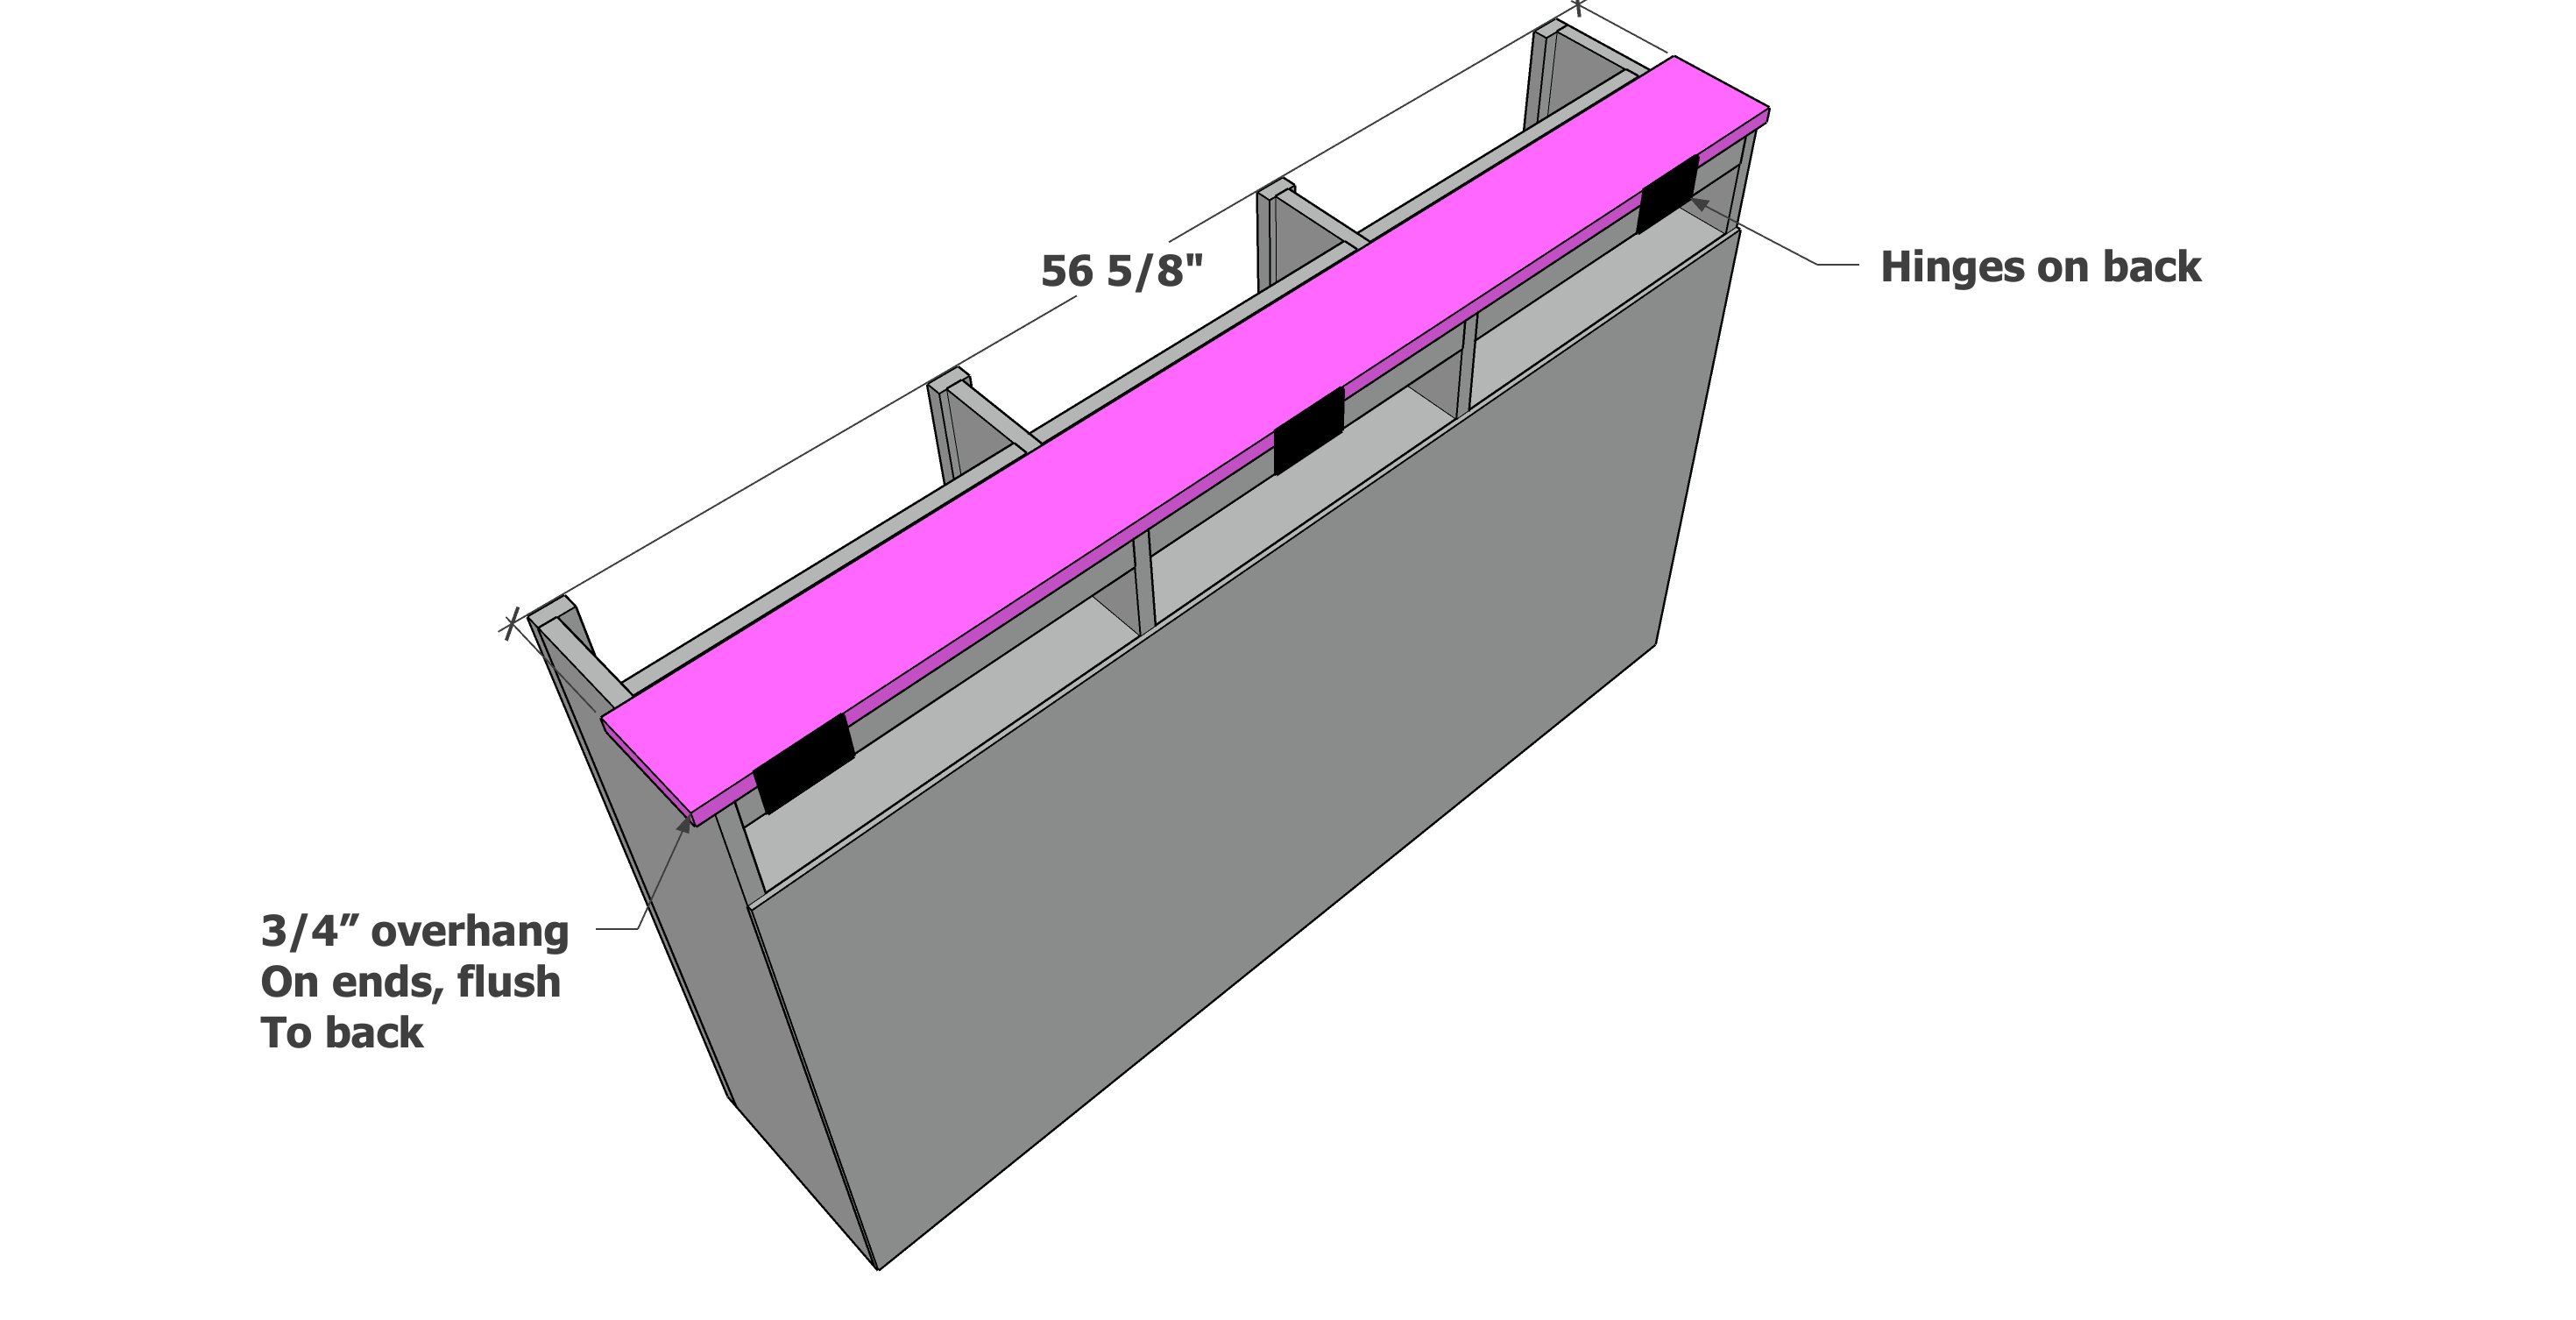
Hinge the top 1x6 on as shown.
Step 6

Add the front 1x8 with 1-1/4" brad nails and wood glue.
Step 7
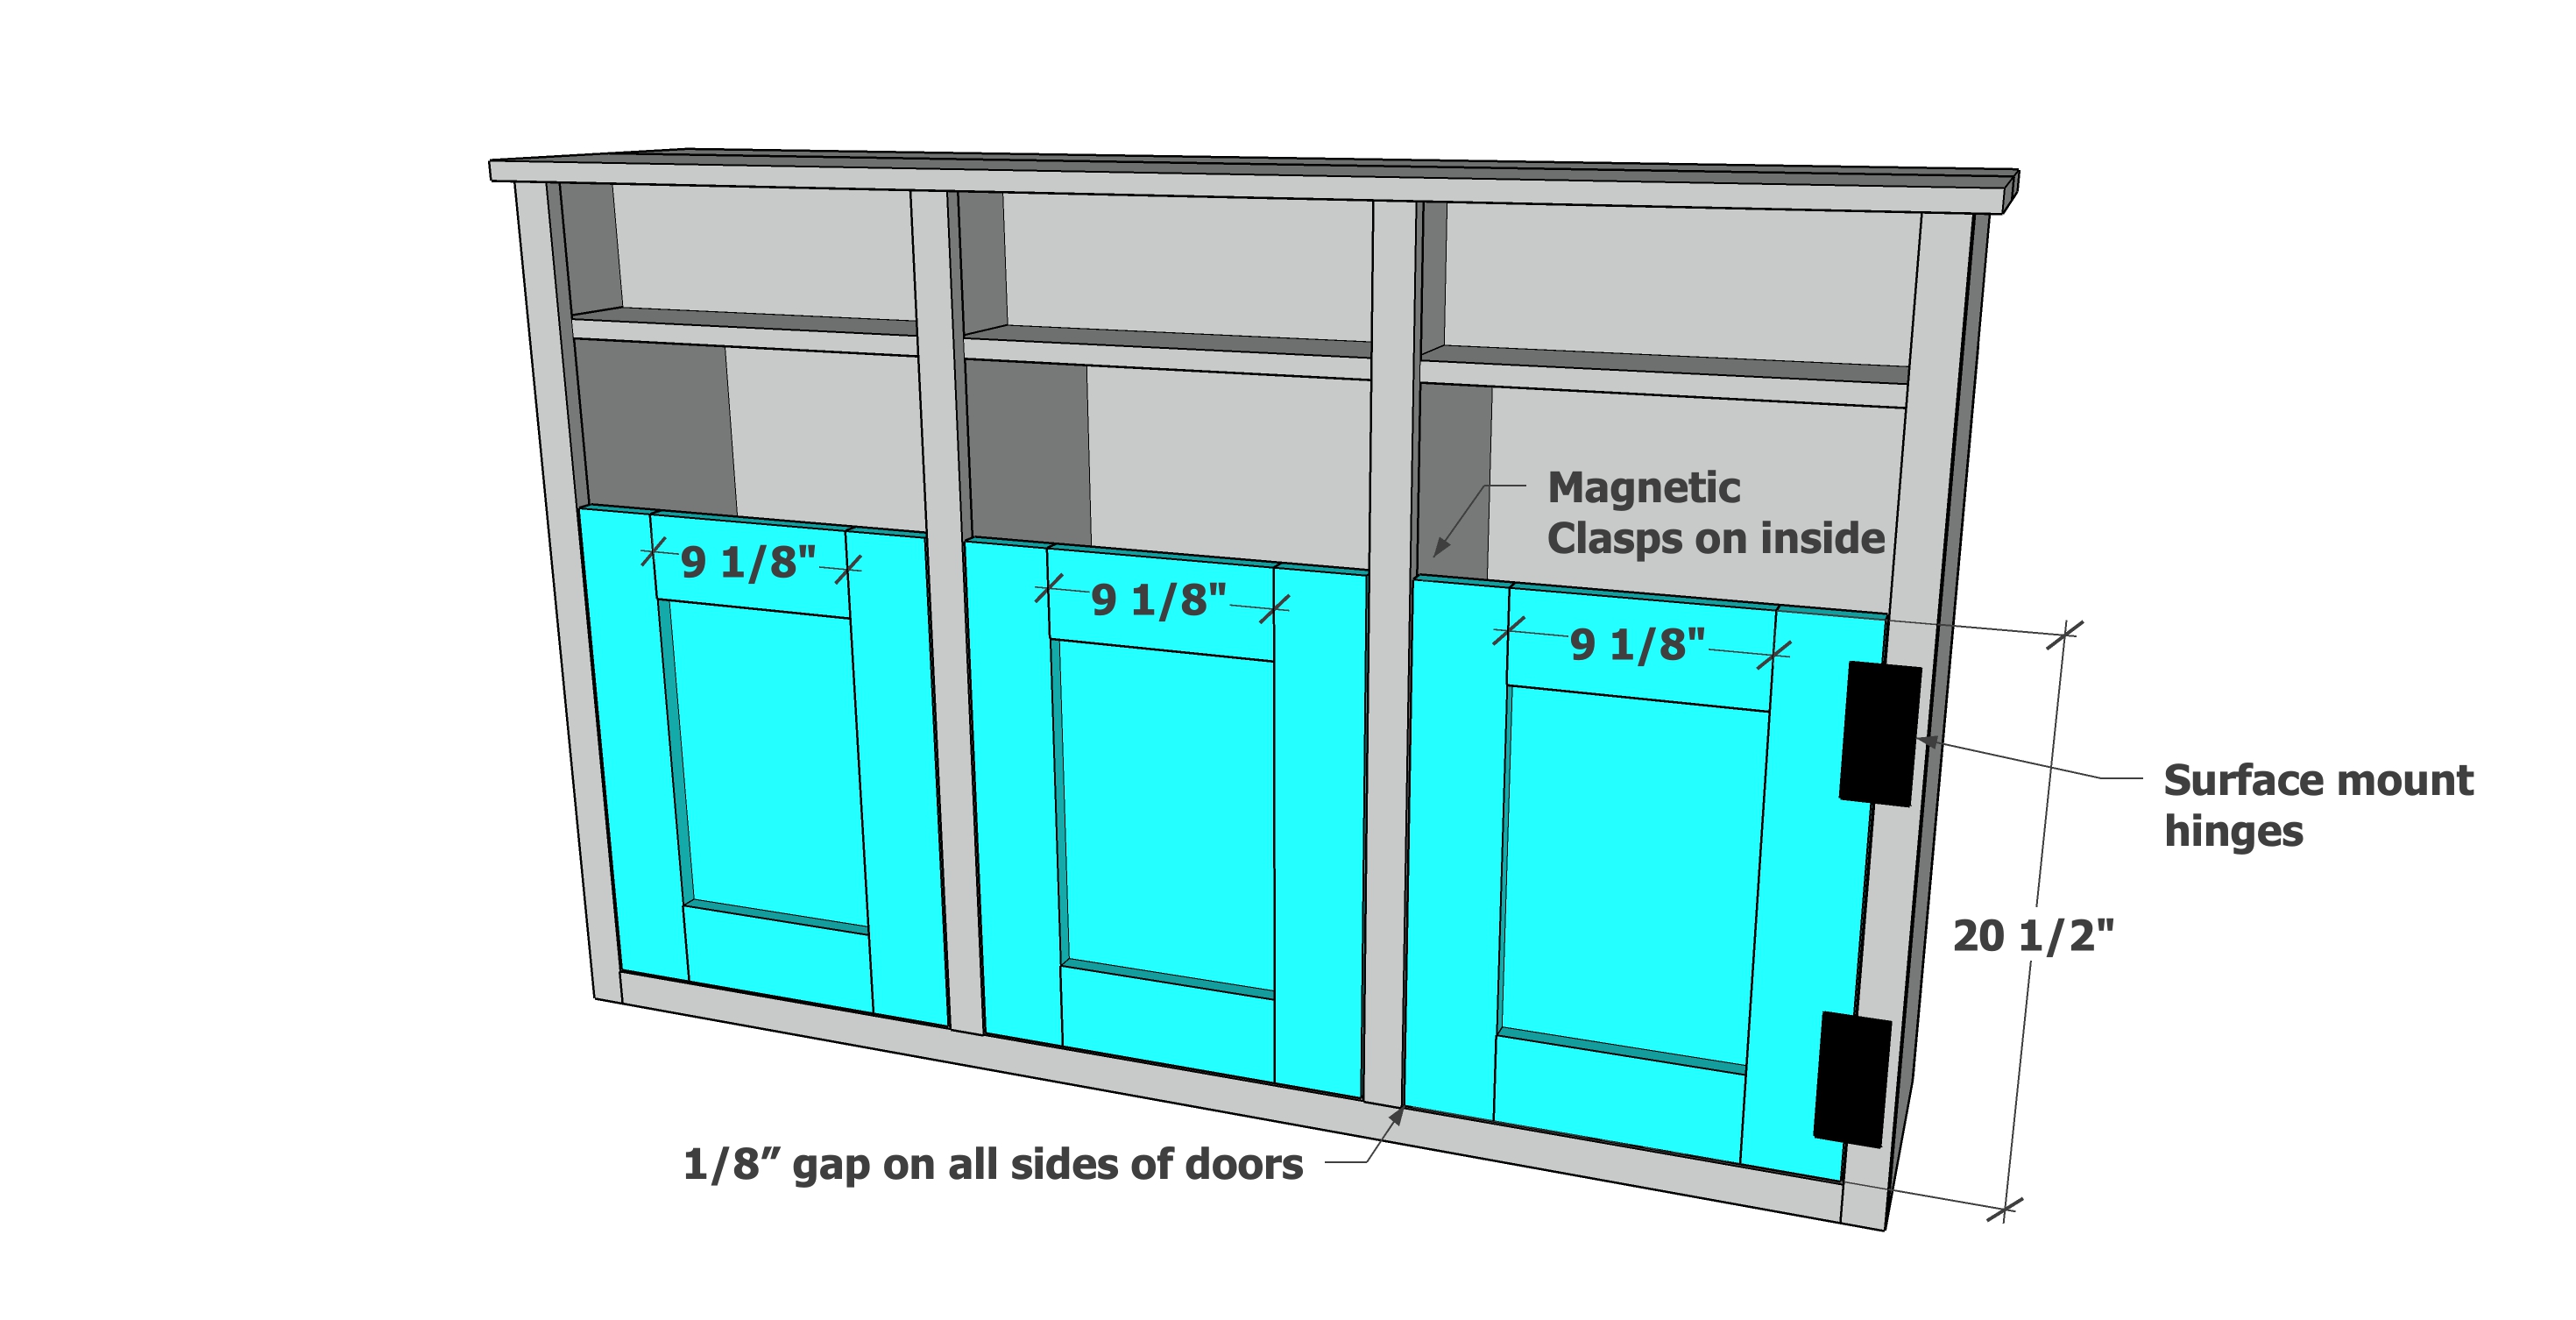
Build the door frames using 1x4s and the 3/4" pocket holes with 1-1/4" pocket hole screws.
Cut the back plywood pieces and attach with 5/8" brad nails and glue.
Attach doors with hinges.
Also, magnetic clasps recommended to keep doors closed.

Comments
jennievh
Fri, 11/11/2022 - 12:44
Also for laundry...?
This could be a great idea for family hampers for laundry, too!
Ana White Admin
Mon, 11/14/2022 - 12:18
YES!
It sure could!