


Slide out cabinet for tiny house - designed and built by Ana White


Disclosure: I have loved and used Rustoleum and Liberty Hardware products for many, many years, and am proud to be a brand ambassador for them. This post is part of my relationship but all opinions expressed are my own.
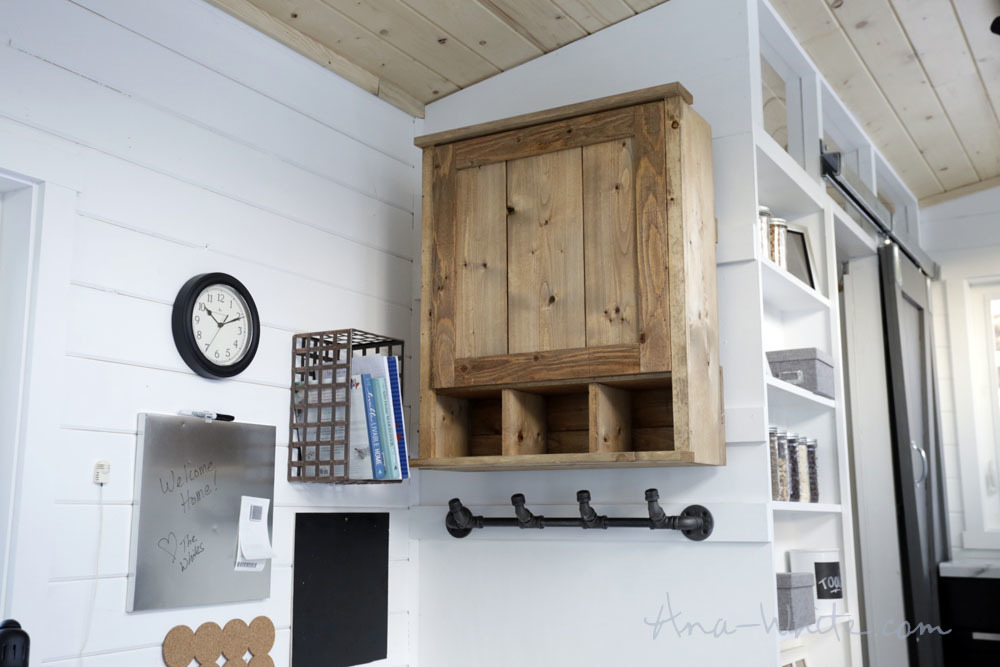
On our most recent tiny house, it kept bugging me that we didn't have much pantry space. There was ample storage for dishes and more attractive items, but no where to put a cereal box. So at the very last minute, I had this idea to build a cabinet in the entryway, with cubbies for sunglasses, wallets, and other accessories -
But there was one big problem -

The storage above the cubbies was very difficult to reach because of the high height.
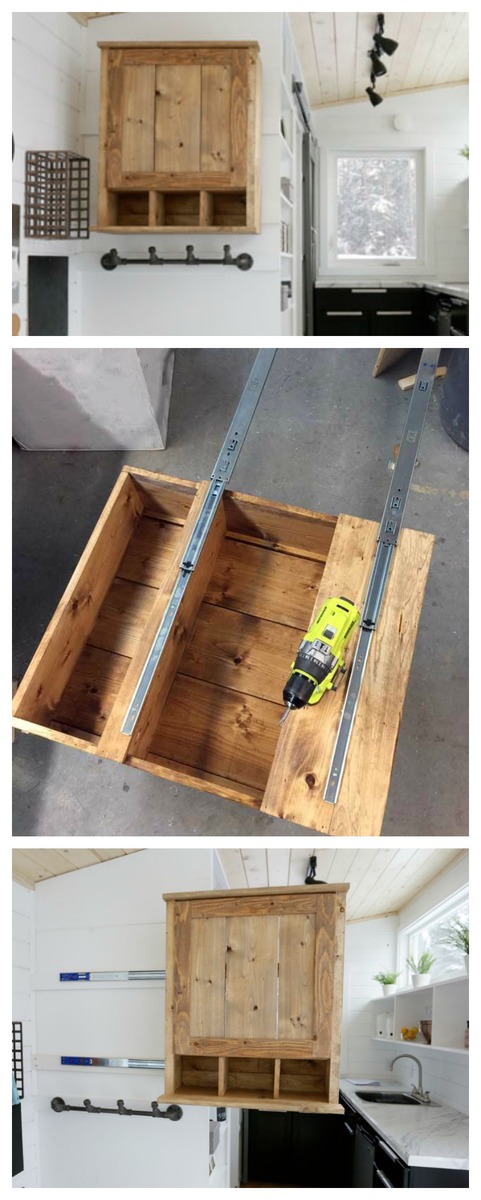
So I thought, what if the upper portion wasn't even storage at all for the entryway? And was instead a slide over cabinet for storage in the kitchen?
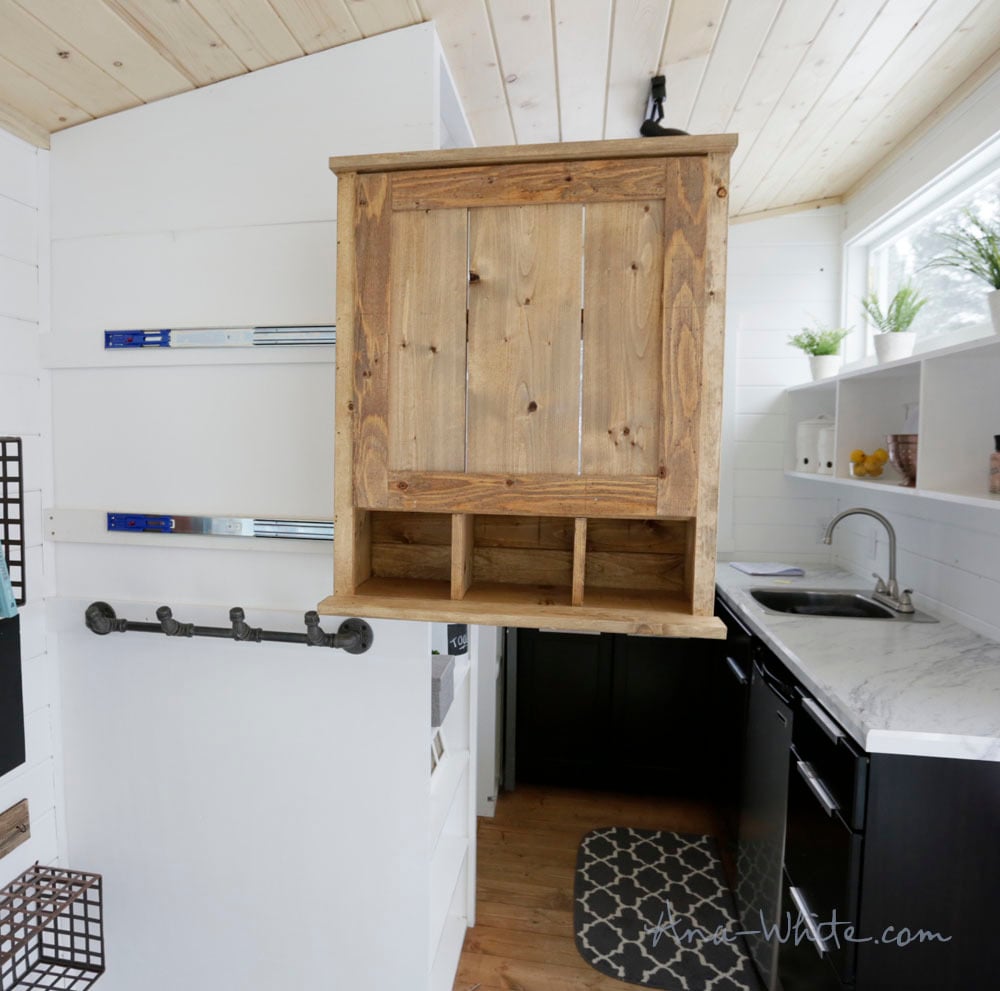
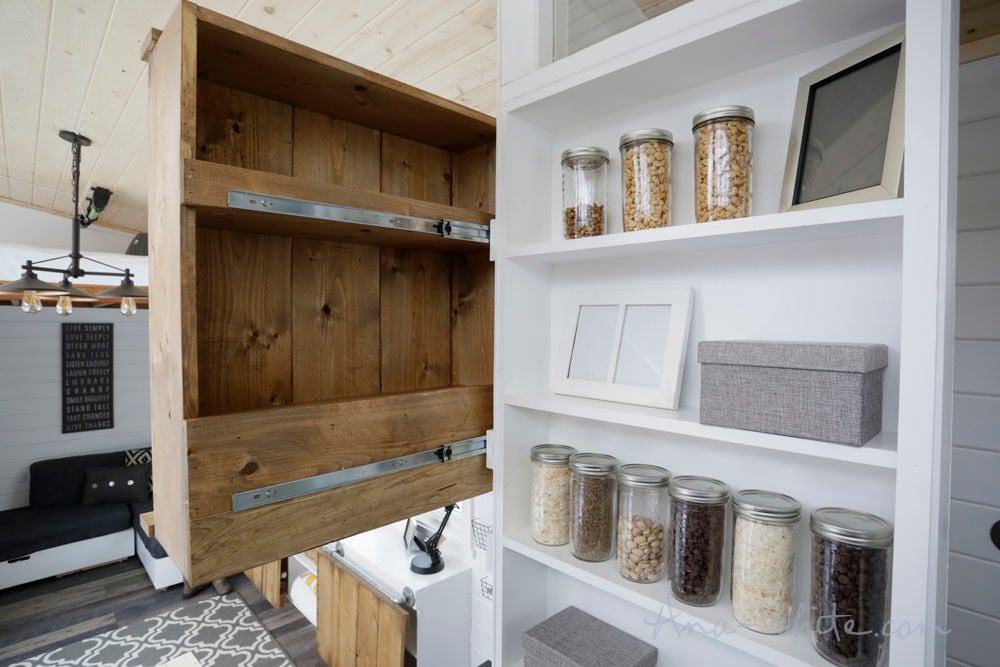
I still can't believe this actually worked!
You can see it in action in the video -
This project was very much about the concept and custom building it for the space, so I thought I'd share with you today a little more about it.
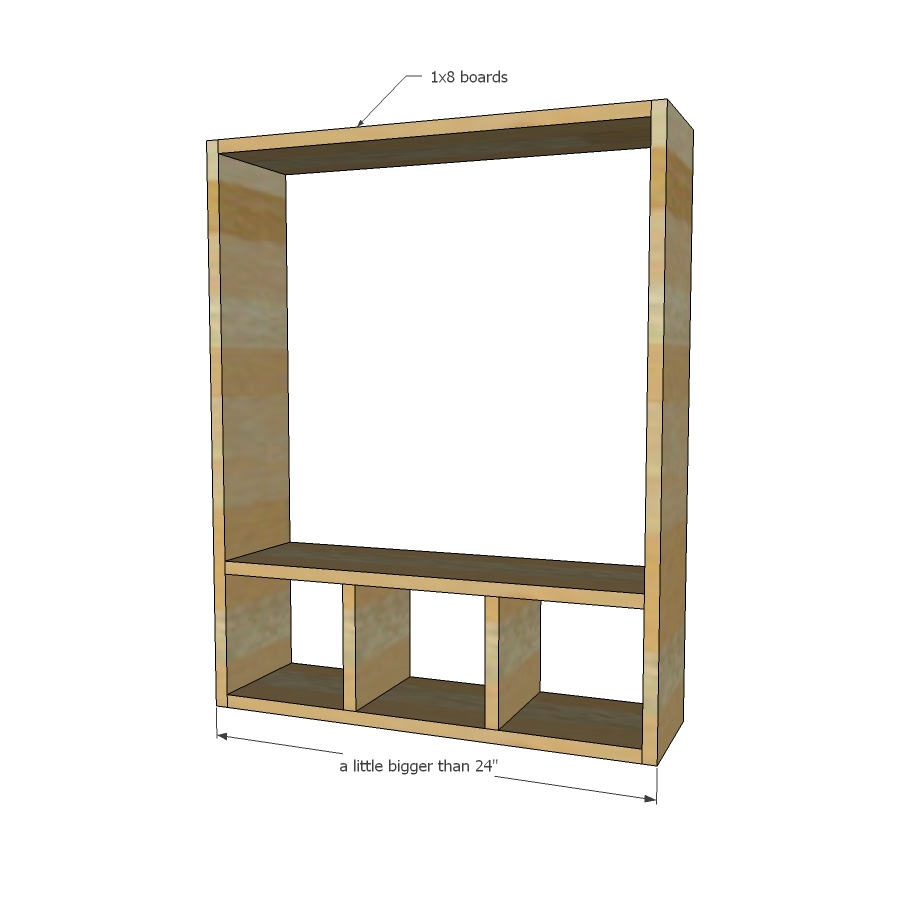
First I decided how big I wanted the cabinet to be. I had a pair of Liberty full extension drawer slides in 24" length that I wanted to use, so I kept the cabinet a little over 24" long so it would work with the slides.
I built the cabinet carcass with my Kreg Jig on the 3/4" setting, using 1-1/4" pocket hole screws, all out of 1x8 boards.
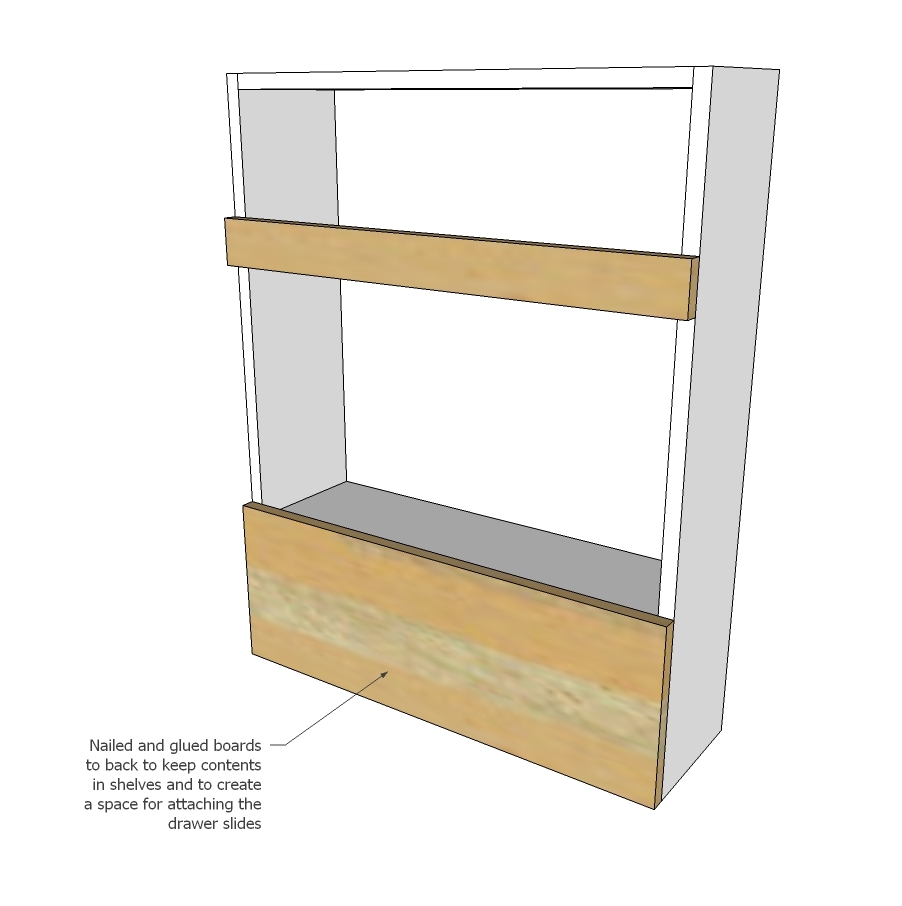
On the back side, I nailed 1x boards (the bottom is a 1x10 to cover the cubby opening back, and top is a 1x3) to keep contents in shelves, and also give me a spot to mount the drawer slides later on.
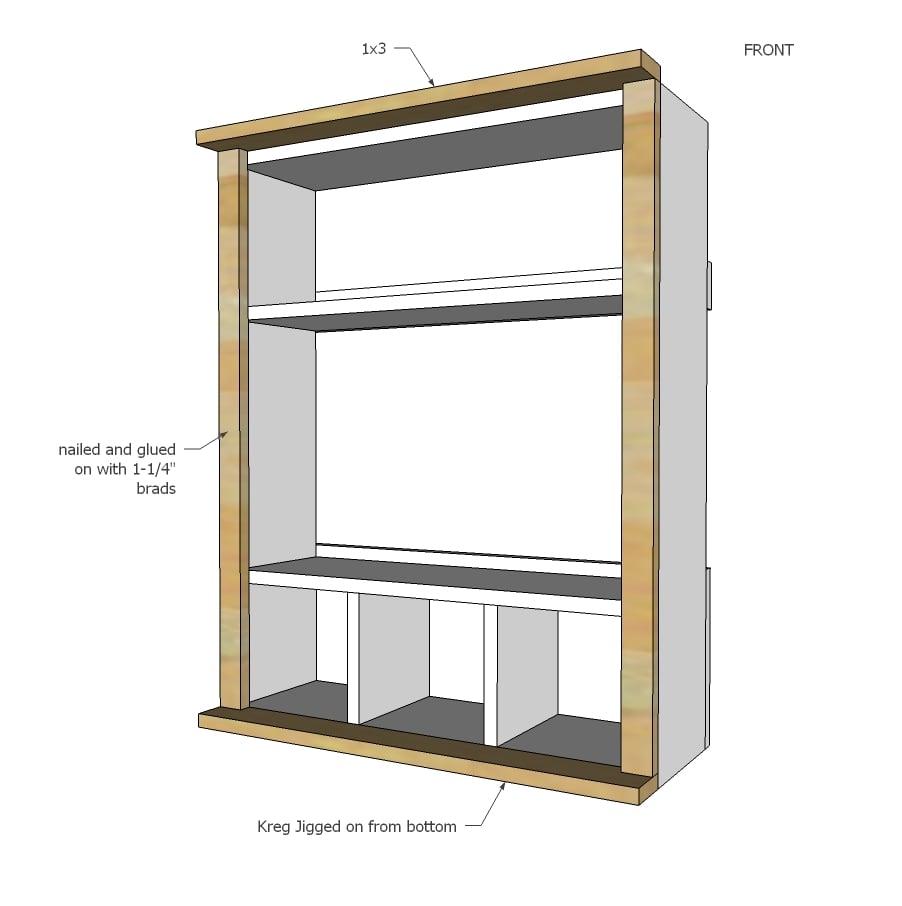
On the front, I concentrated on making the cabinet look like a real cabinet. I started by adding a face frame with a lip on top and bottom for some interest - 1x2s on the sides and 1x3s on the top and bottom.
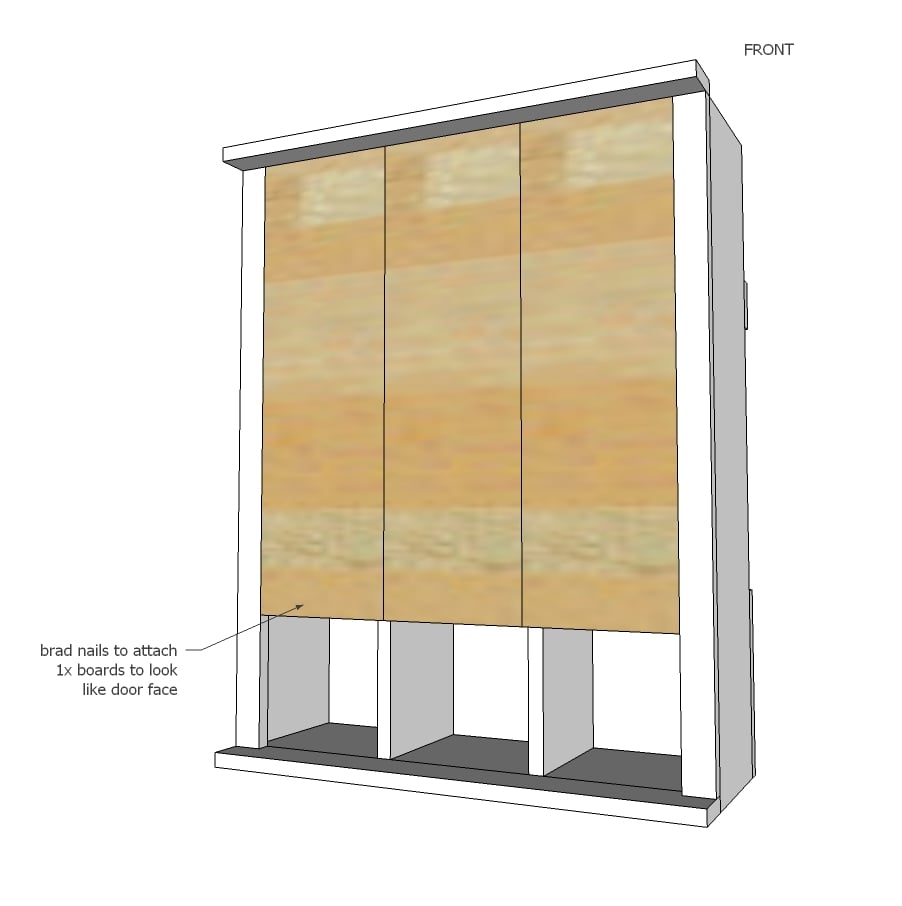
Then I filled in the center area with 1x boards. I left gaps in between my boards, cutting down to the right size on a tablesaw.
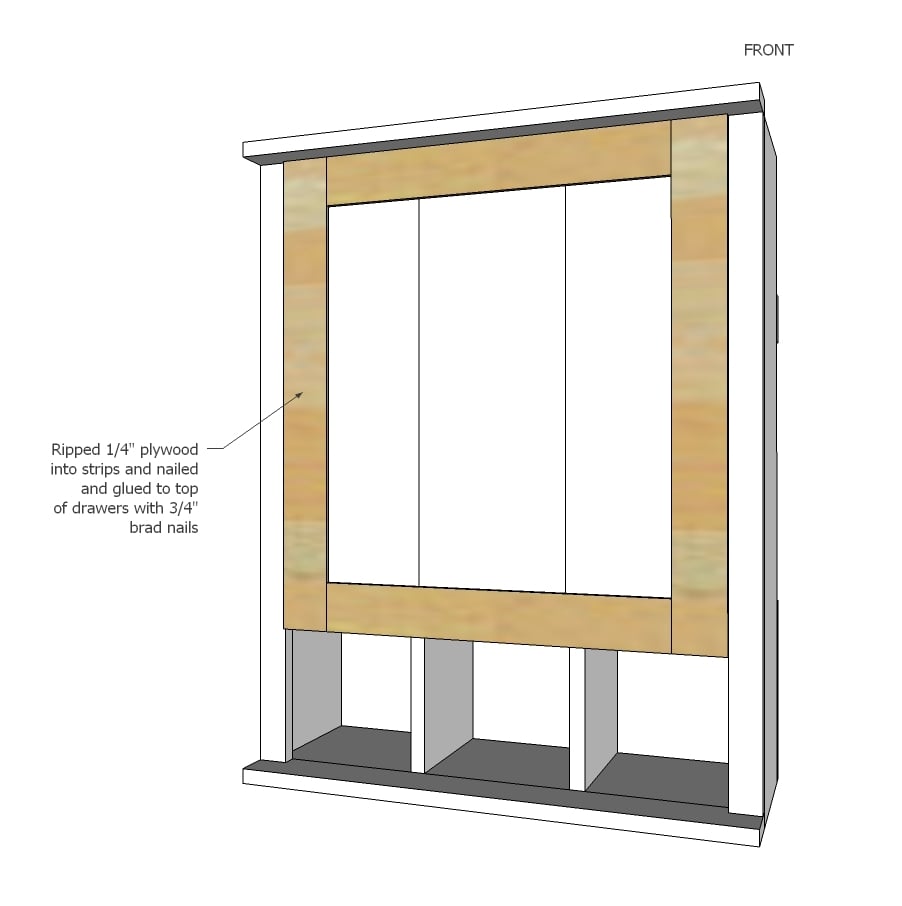
It still didn't look right, so I ripped some 1/4" plywood down to 2-1/2" wide and nailed it to the front of the "door" to create more of a door look.

My absolute favorite one step finish is Danish Oil by Watco. It is easy and stains and seals in one step, and there is no drips, blotchiness, etc. I wiped on a coat over the entire project.
Now for the drawer slides -

I used Liberty full extension drawer slides in 24" length (bought off the shelf at Home Depot).
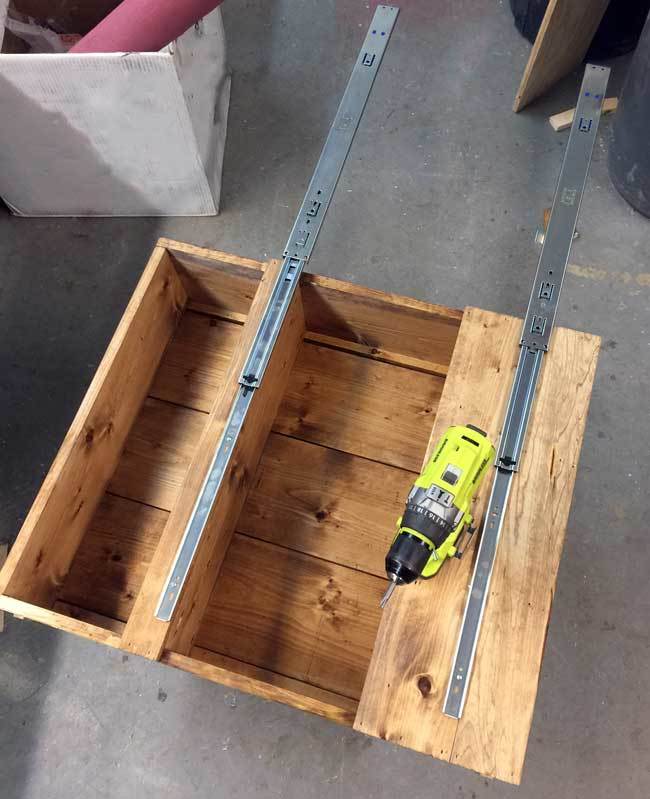
This application is a little different than a standard drawer application, but the slides work in the same way. I attached the drawer member of the drawer slide to the cabinet, making sure the two slides are exactly paralllel. If you experience any binding or difficultly sliding, there's a good chance it's because the drawer slides were not installed exactly paralllel.
Then I attached the cabinet member part of the drawer slide to the wall. Notice I also attached 1x4 boards on the wall to studs in the wall, then I could just attach the drawer slides to the 1x4 without worrying about hitting a stud.

This cabinet turned out to be one of the most favorite elements of the entire tiny house. By adding the slides to the back of the cabinet, we created a system that was so much more accessible and functional. Would love to see how you use this concept in your home and projects too - do share if you build!
XO Ana
PS - You can check out the rest of the plans in this Tiny House here.
Preparation


