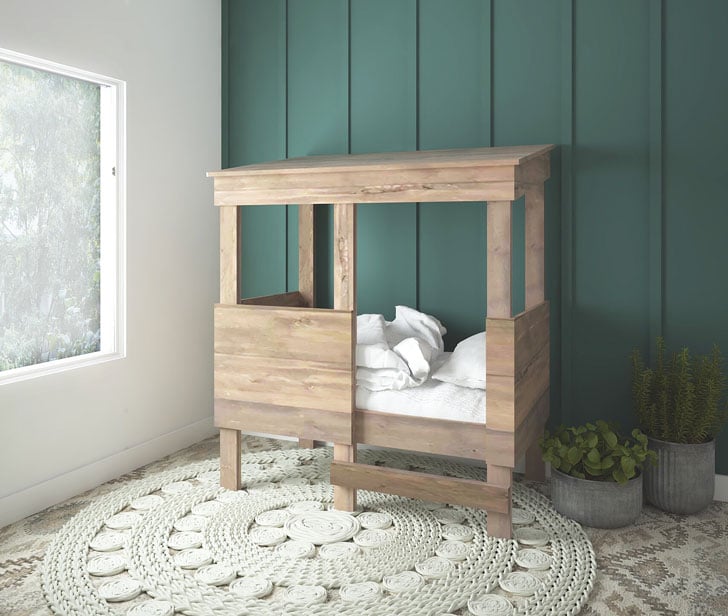

A playhouse bed for a toddler? Why not?! You can build it yourself for about $100!
Designed to look like a treefort, but to fit a standard crib mattress. Our free step by step plans include detailed diagrams, shopping lists and cut list. No pocket holes and no plywood required. Created by Ana White.
Also check out our Twin Treehouse Bed plans.
We just finished building our son a treehouse bed and he loves it!
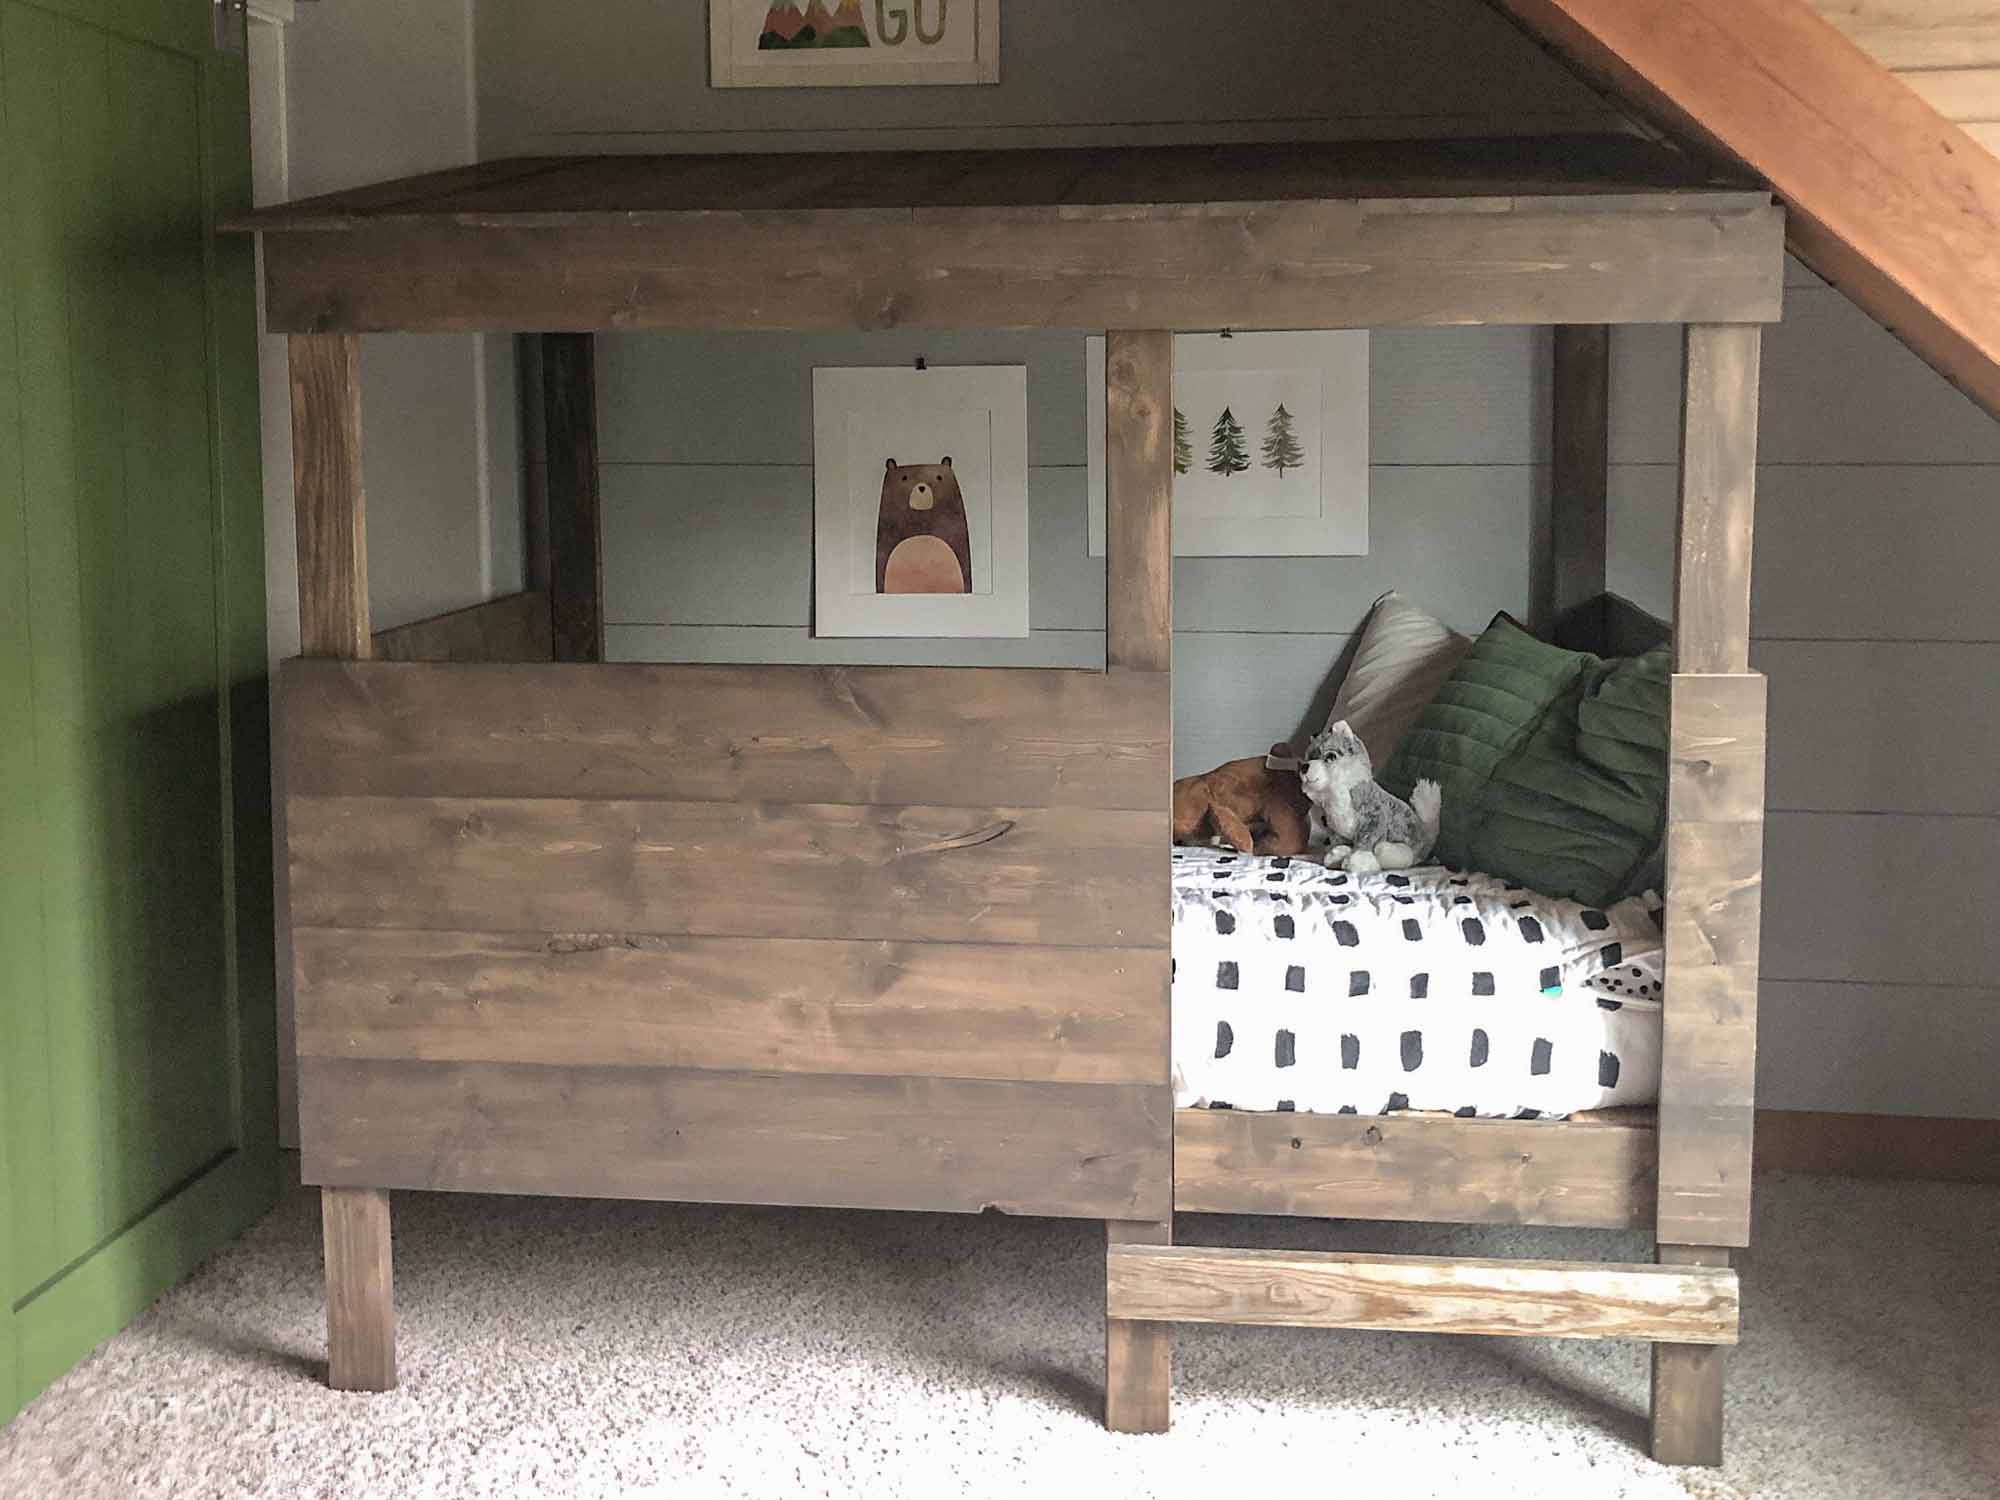
And so does his one year old sister. She crawled up the ladder and looked out the window and started singing in her baby babbling way. So precious!
We've also had a few requests from readers to design a toddler sized version of the treehouse bed, and since you guys are always so awesome to me, I put together brand new plans!
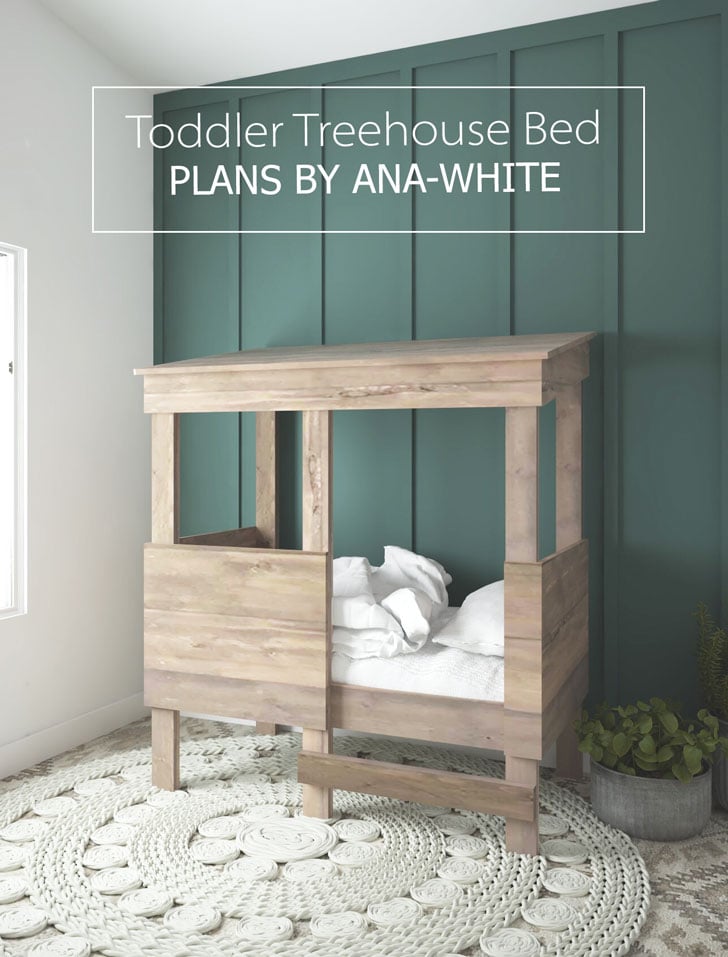
Toddler Sized Treehouse Bed Plans
It's designed just like the bigger twin version, and we kept the same easy to build, no pocket holes and no plywood design. But it's sized down to fit a crib mattress.
Preparation
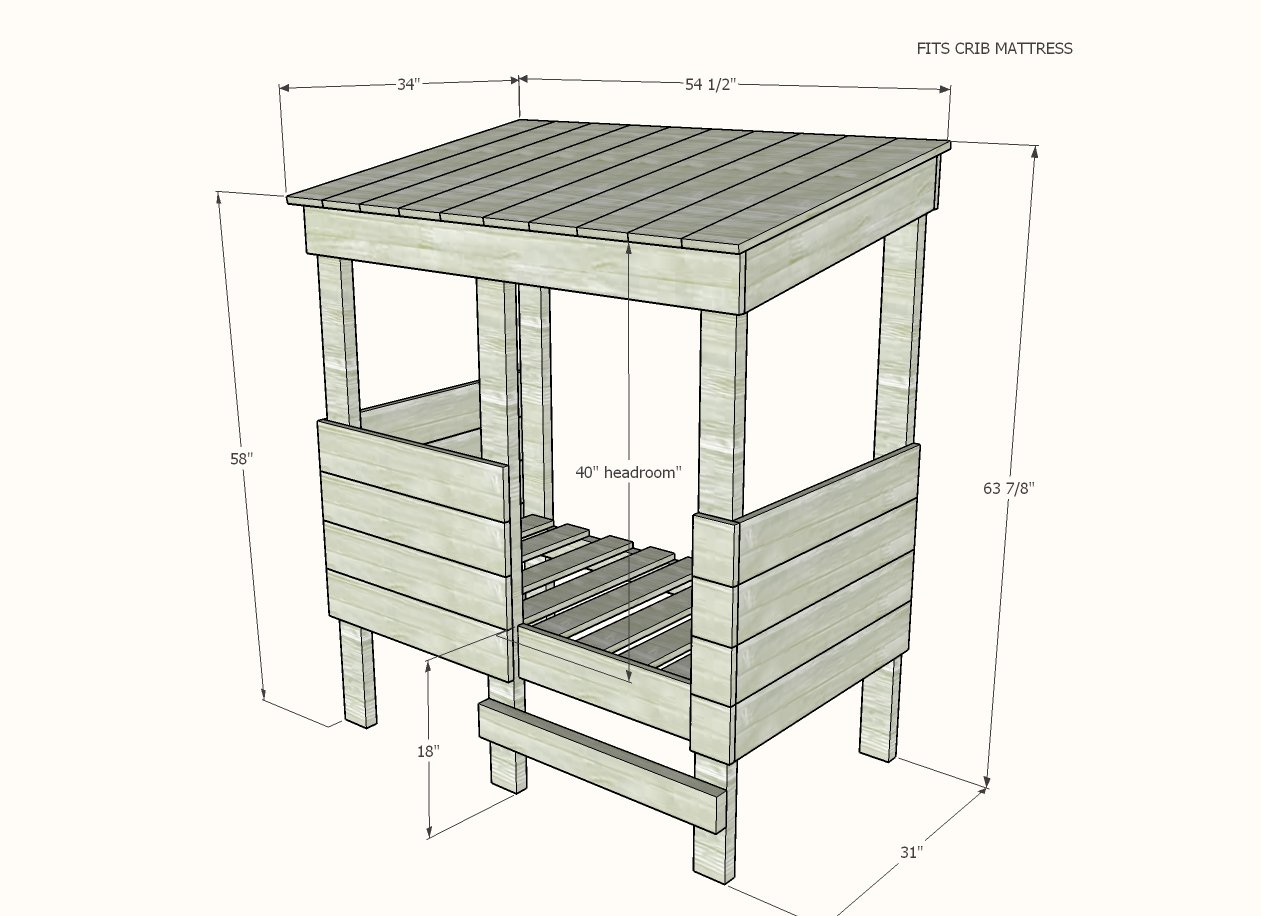
4 - 2x4 @ 10 feet long
4 - 1x6 @ 6 feet long
7 - 1x6 @ 8 feet long
3 - 1x4 @ 8 feet long (or similar material, used for bed slats)
3 - 2x4 @ 57-7/8" - longest point measurement, one end cut at 10 degrees off square BEVEL cut - front legs
2 - 2x4 @ 63" - longest point measurement, one end cut at 10 degrees off square BEVEL cut - front legs
2 - 2x4 @ 52"- bed cleats
8 - 1x6 @ 31" - bed siding on ends
2 - 1x6 @ 31-1/2" - long point to short point measurement, both ends cut at 10 degrees off square, ends ARE parallel *
2 - 1x6 @ 53-1/2" - front and back *
4 - 1x6 @ 27" - front siding
4 - 1x6 @ 4 - 1/4" - front siding
1 - 1x6 @ 22-1/4"
1 - 2x4 @ 29-1/4"
9 - 1x4 @ 28" - bed slats - can substitute other 3/4" materials or scraps like plywood, 1x3s, or a random mix of scrap wood
10 - 1x6 @ 34-1/2" - cut from 8 of these from 1x6 x 6 feet long, the remaining two share the same board as the 22-1/4" cut - roof boards
* Cut from same 1x6 board, one each, 53-1/2" and the angled 31-1/2" cuts
Cut longest boards first to conserve materials (except as specifically noted)
Preferred cutting method is a compound miter saw, but a circular saw can be substituted with a straight edge used as a guide.


The finished bed may not fit through your doorway.
You may wish to prestain all the cut pieces in your work area or outdoors, let dry, and then move into the room for final assembly.
Instructions
Step 1

Layout the front and back leg sets and screw the mattress cleats to the legs with the 2-1/2" self tapping wood screws.
Take care to make sure the width at the top is the same at the bottom, and that you aren't creating a parallelogram. You can check to make sure the walls are square by taking opposite diagonal measurements and adjusting until the opposite diagonal measurements match.
Step 2

Attach siding to sides with the shorter screws.
Step 3

Attach front and back siding to the front and back. Use the shorter screws.
Note the top boards is held down about 1/8" to allow for the roof boards in later steps to lay flat.
Step 4

Attach the step with the longer screws.
Attach the 1x6 trim with the shorter screws.
Step 5

Lay slats in bed and screw down with shorter screws.
Step 6

Start in the center and work outward with the roof boards. It may be tricky screwing these down because of the angles.
The back should be flush to the back, so the bed can be placed as close to the wall as possible.