

My heating bitlls in the winter are outrageous, and the trees on my property have been dropping limbs like nobody's business this spring and summer. Two problems, one solution: lots of fires this winter!
The problem is that stacking the fallen wood too close to the house encourages termites. Stacking it farther away on the property, though, will leave the wood waterlogged and rotten. Not to mention that it's unsightly to have a pile of firewood in your yard. Hence a firewood shed.
Preparation
16 - 2"x3"x8' construction grade
1 - .5"x4'x8' roofing ply
4 - cinder-blocks or other sturdy base
3" Exterior grade screws (deck screws are fine)
Tar paper
Shingles
Deck Stain
8 - 2"x3" @ 2'
2 - 2"x3" @ 7'
2 - 2"x3" @ 6'
9 - 2"x3" @ 8'
2 - 2"x3" @ 2'6" (approx.)


Please read through the entire plan and all comments before beginning this project. It is also advisable to review the Getting Started Section. Take all necessary precautions to build safely and smartly. Work on a clean level surface, free of imperfections or debris. Always use straight boards. Check for square after each step. Always predrill holes before attaching with screws. Use glue with finish nails for a stronger hold. Wipe excess glue off bare wood for stained projects, as dried glue will not take stain. Be safe, have fun, and ask for help if you need it. Good luck!
Instructions
Step 1

Start by building the sides. Cut a 1x3 to six feet, giving the cut edge a 22.5* angle. Then cut a second 1x3 to seven feet, again giving the cut edge a 22.5* angle.
Next, cut a 2x3 to two feet, and fasten it to the two longer sticks, six inches up from the edge. Notice that the two foot 2x3 overhangs the shorter stick by 1.75" - the same as the width of a 2x3.
Finally, checking carefully for square, place a 2x3 on top of the longer sticks, connecting them flushly. Scribe the angle of the cut on 2x3, cut it, and then fasten it to the top.
Step 2
Repeat the same process as step one to create the second side. REMEMBER that the 2x3s connecting the long sticks will need to be on the OPPOSITE SIDE in order to make mirror image frames.
Step 3
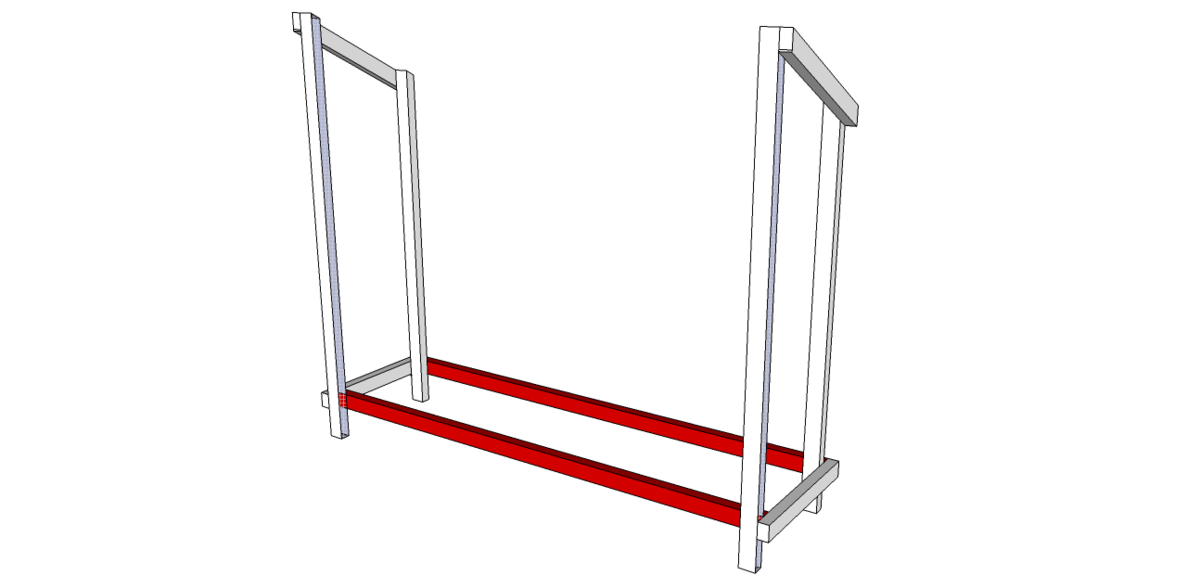
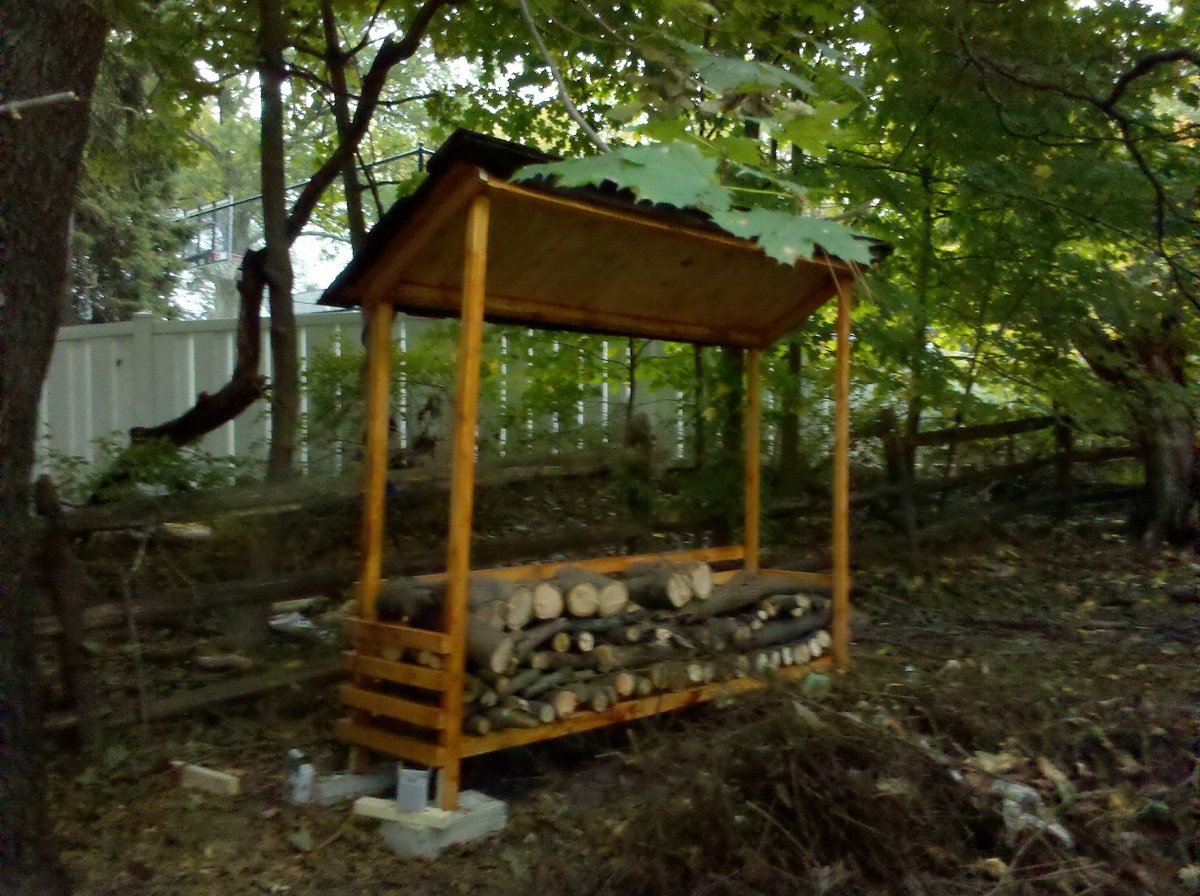
Next, attach the two faces using uncut 2x3s. The rear 2x3 fastens to the overhang you left in steps 1 & 2. The front 2x3 goes just behind the long stick.
If you aren't building on-site, this is a good time to move your frame to its intended location. Place the long sticks on top of stable cinder-blocks or patio pavers to make a level base.
Step 4
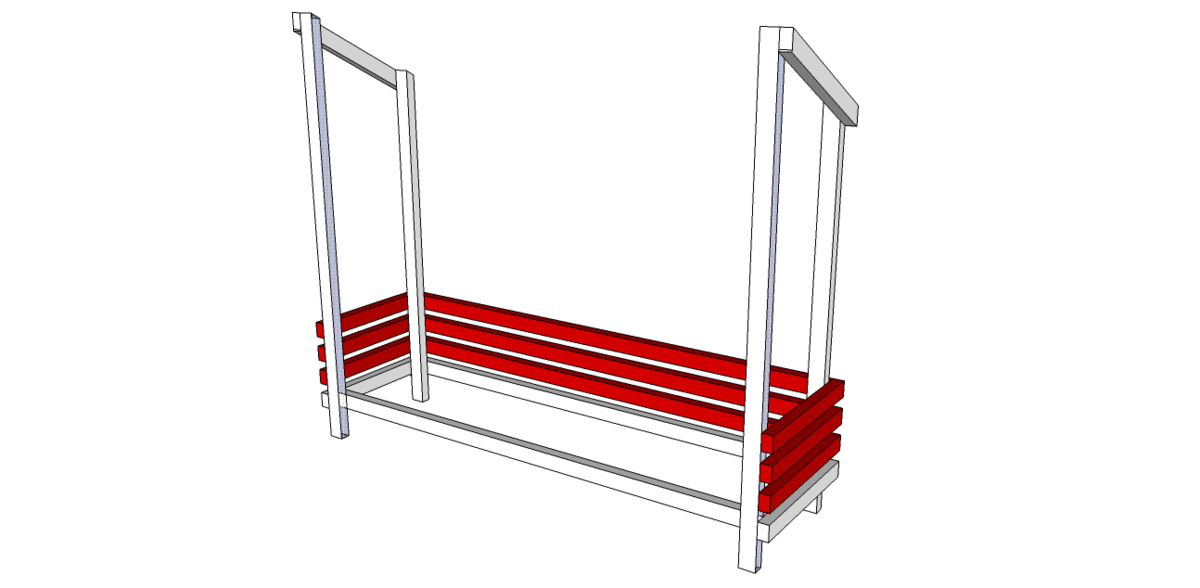
Add additional 2x3s get stacked up the sides and back. I left even spaces between for air-flow by using scrap 2x3s as spacers. You can go up as high as you want.
Step 5
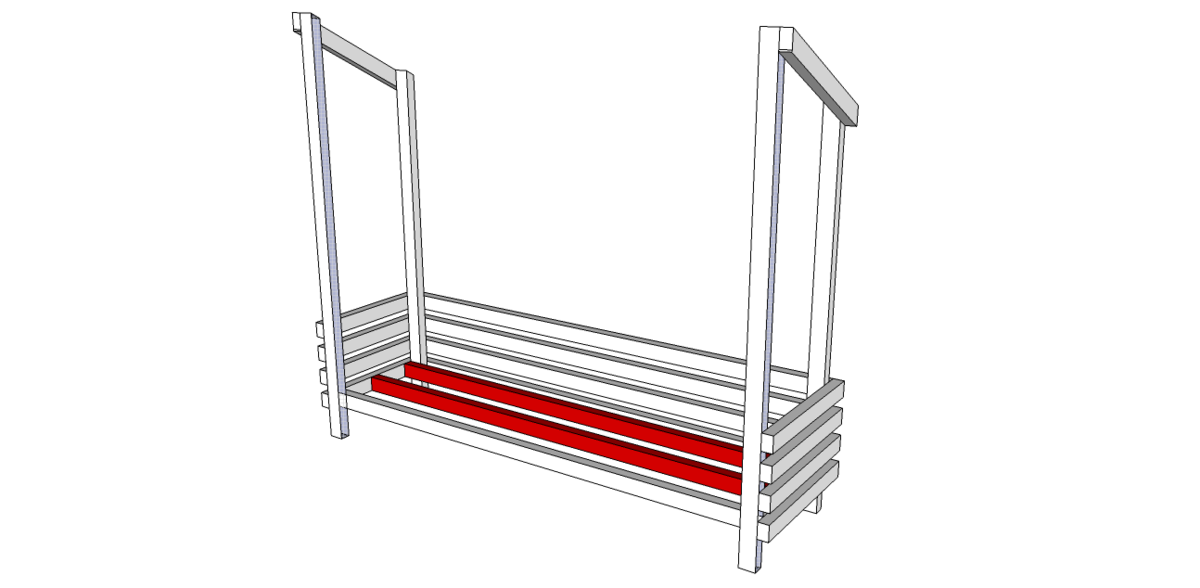
Step 6
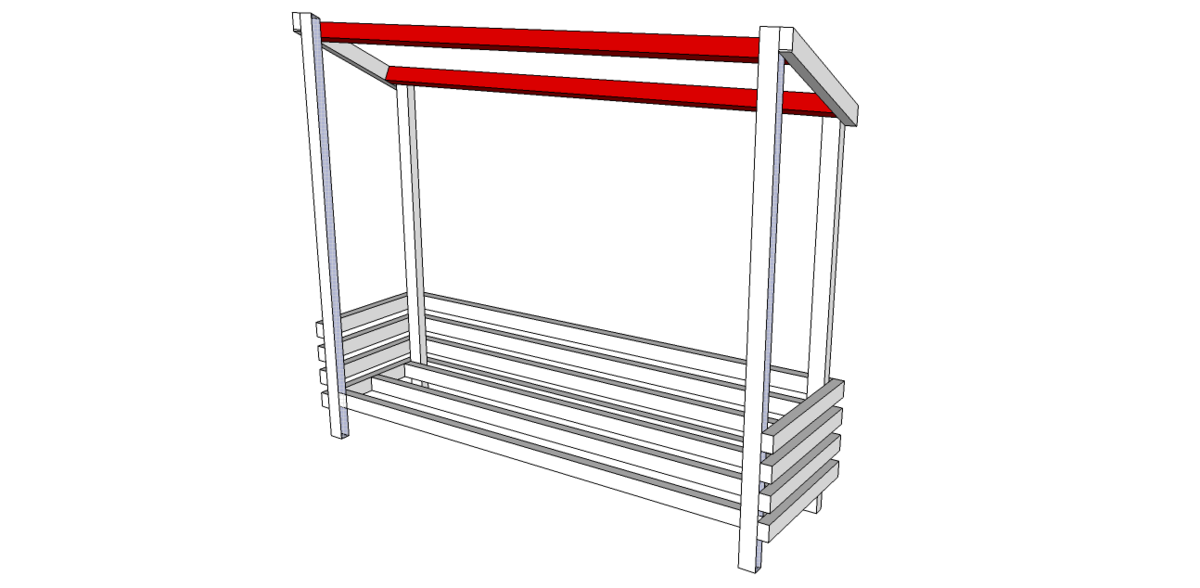
Fasten 2x3x8s to the top of the shed, making sure that their edges are flush with the angled sticks.
Step 7

Add the plywood roof. You can cut it out of a single piece of 4x8 roofing ply, by cutting the piece into two 3x4 sections and a single 1x4 section (leaving you with a single 1x4 section as waste).
Step 8

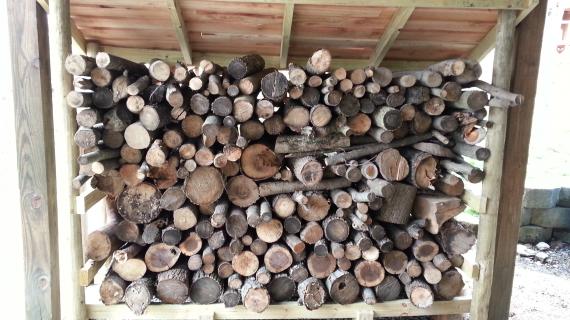
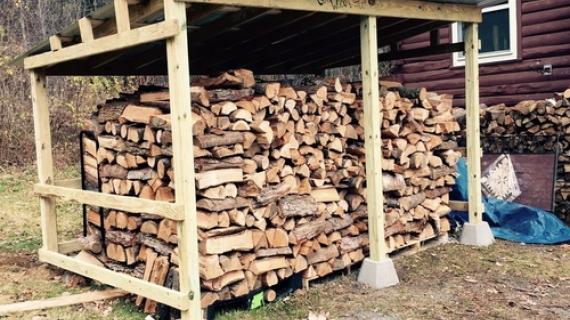
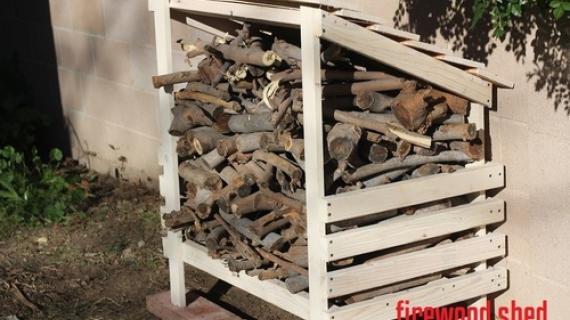
Stain the whole thing with deck stain to preserve the construction grade 2x3s. Then stack up your firewood, making sure to alternate directions to maintain good airflow.
It is always recommended to apply a test coat on a hidden area or scrap piece to ensure color evenness and adhesion. Use primer or wood conditioner as needed.


Comments
cassiopeia_816
Sat, 12/03/2011 - 17:30
I want this!
I so want this!
PapaCFako (not verified)
Sat, 01/21/2012 - 21:12
woodshed
Cool. Close to the design I am using but I like rough pole using old mortise and tenon techniques. No metal to rot.
Rivid
Mon, 09/28/2015 - 12:19
Lumber
I'm looking to build this and was wondering how long the untreated studs typically last outdoors. Would it be better to use pressure treated? Even with a stain I'm skeptical the shed would last.
RayInPa
Wed, 04/07/2021 - 06:37
I am thinking the same way. …
I am thinking the same way. I would stain, but wondering if before assembly, a coat of even stain and Poly when cut will keep it holding up. I PA we get wild swings in snow and water. So rain is not going to hurt, but being covered in snow for a while could be an issue.
moomooachoo
Tue, 01/26/2021 - 12:58
Instruction typo?
The cut list only lists 2x3s but the instructions mention 1x3.