
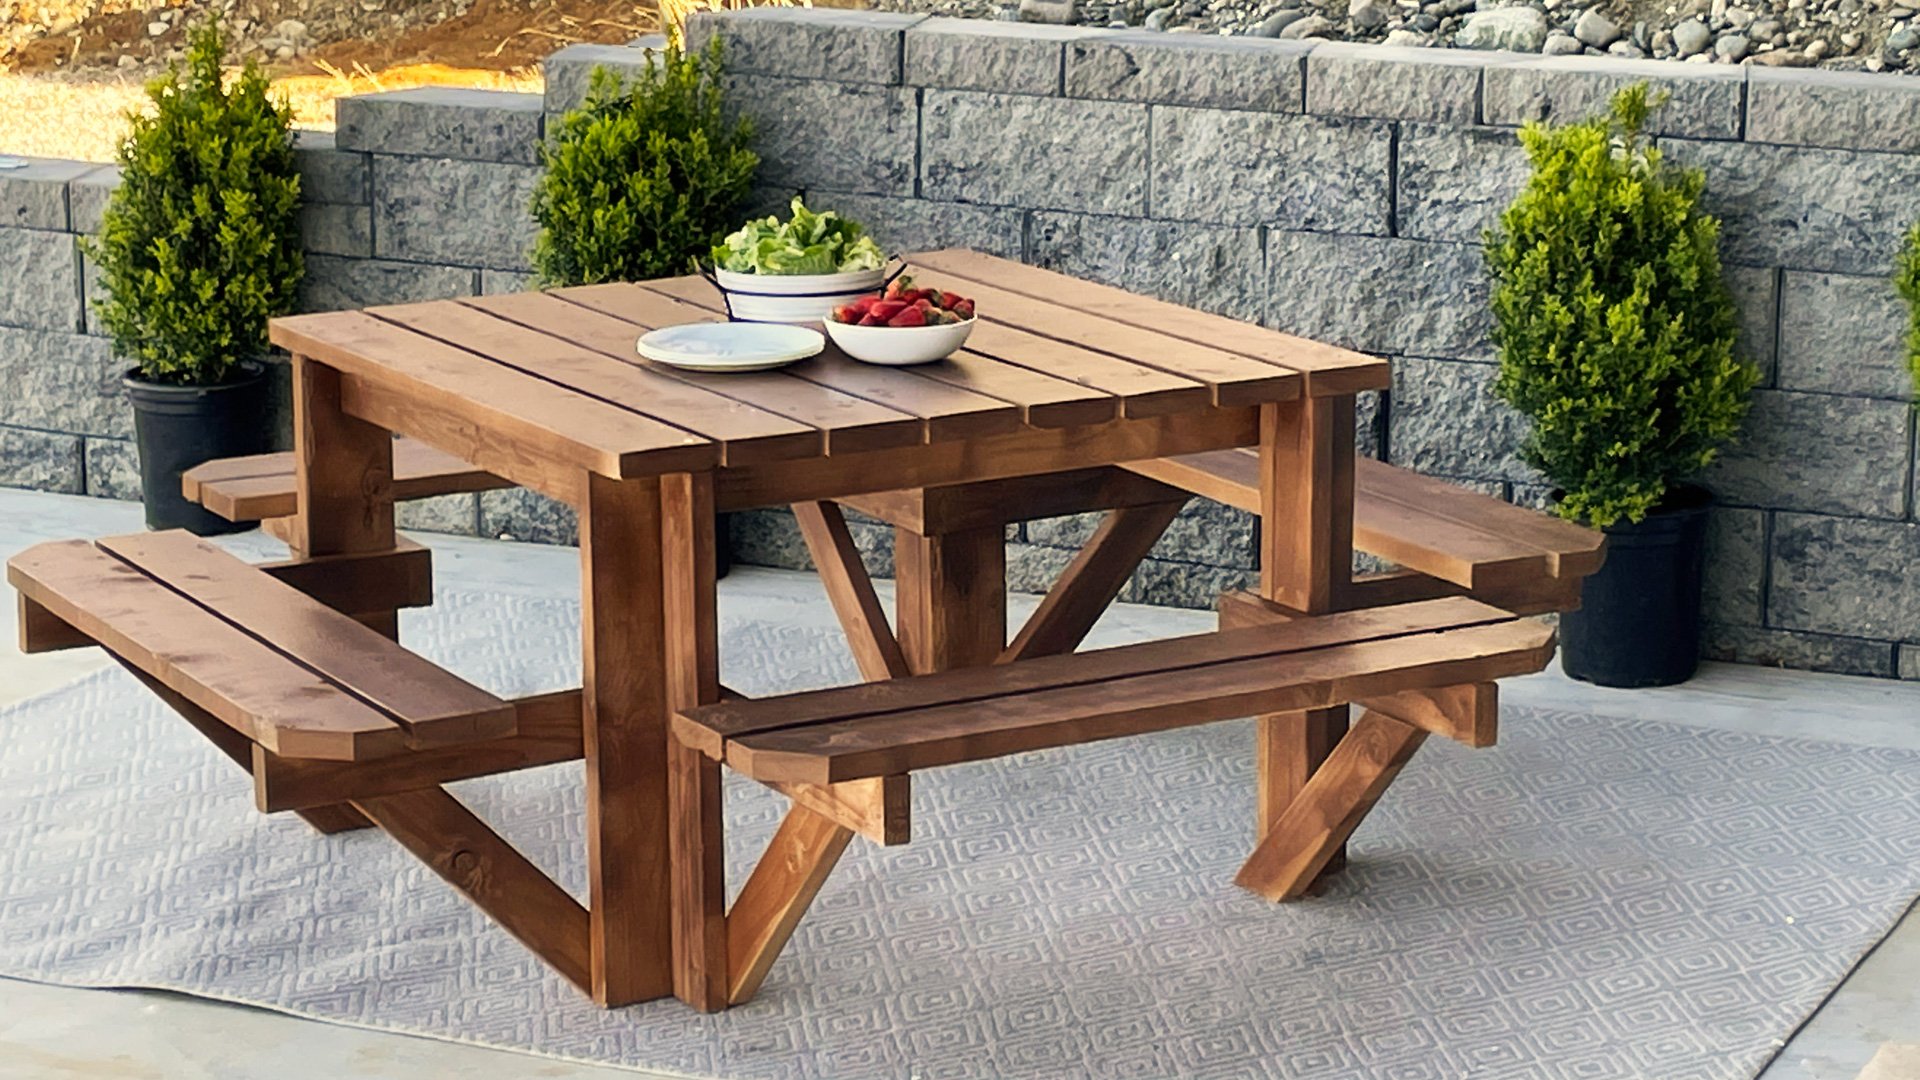

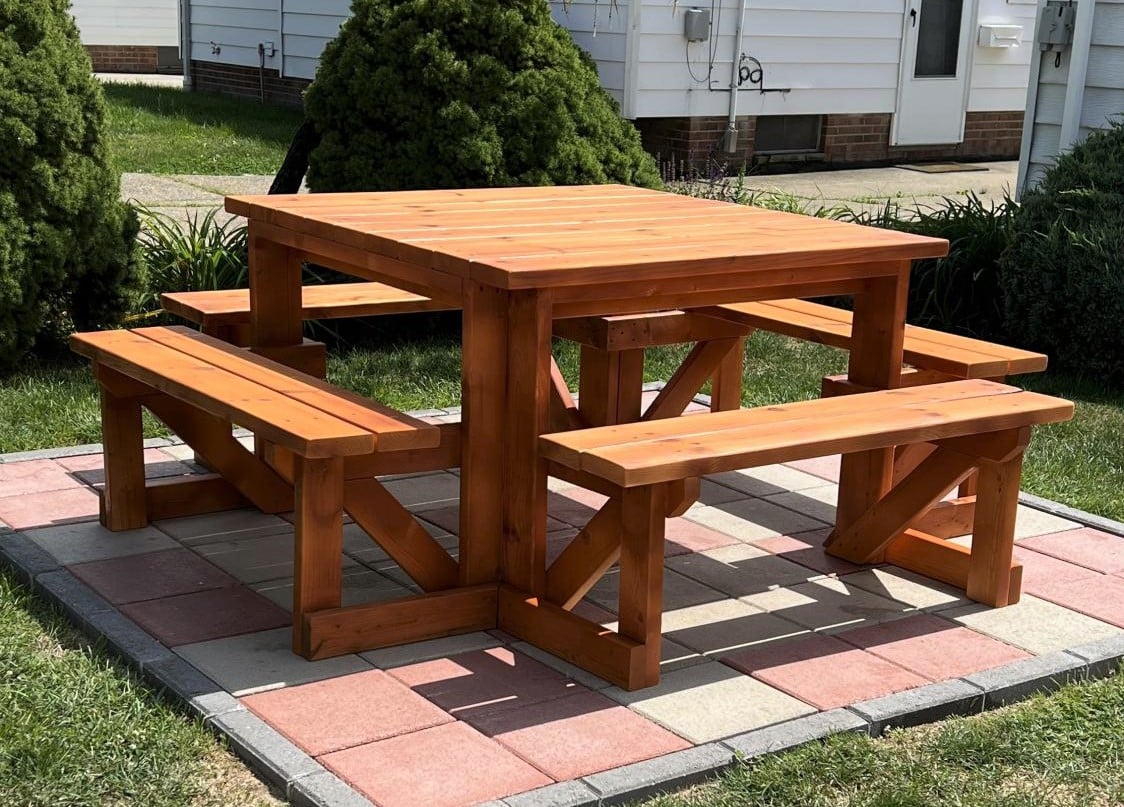
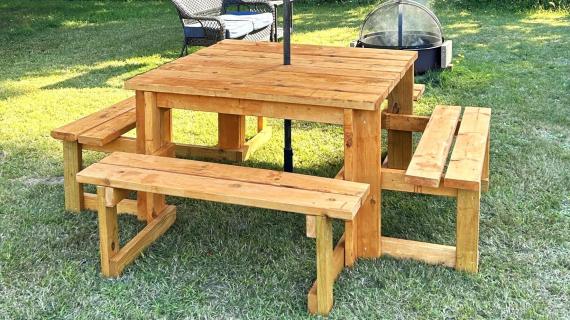
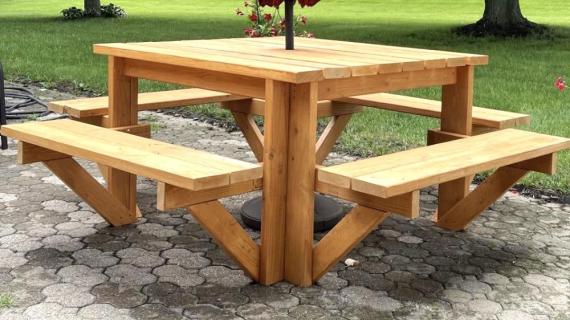
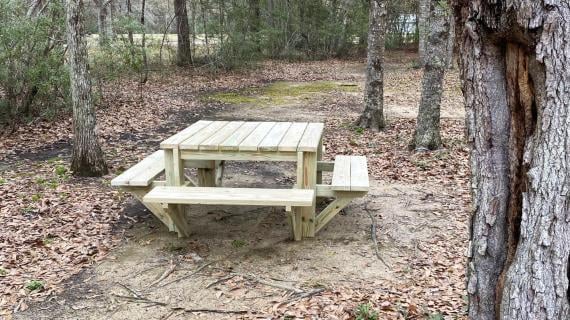
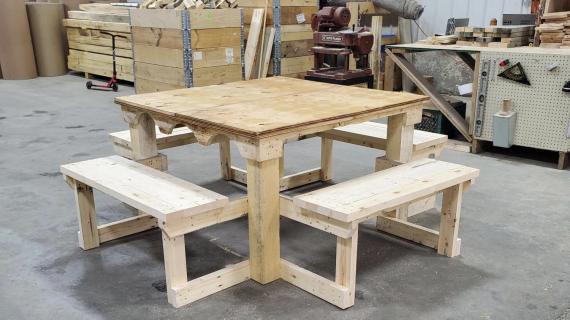
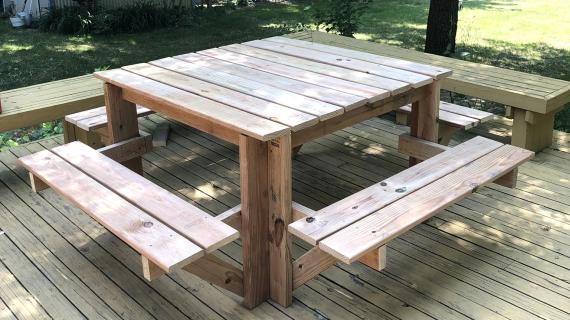
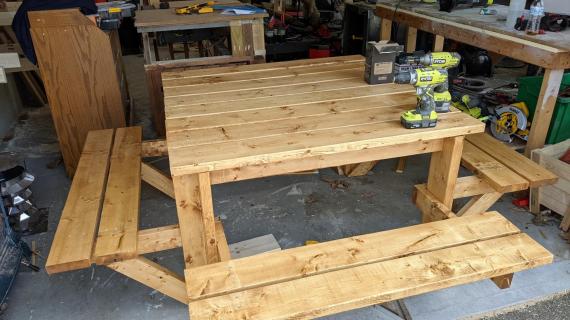
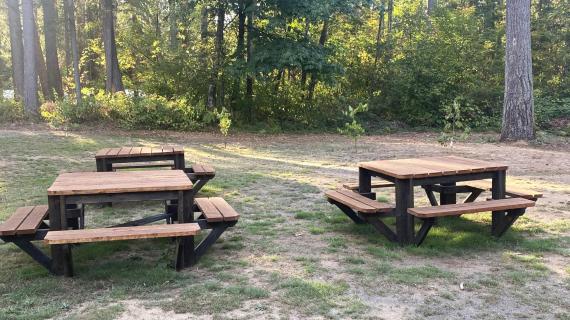
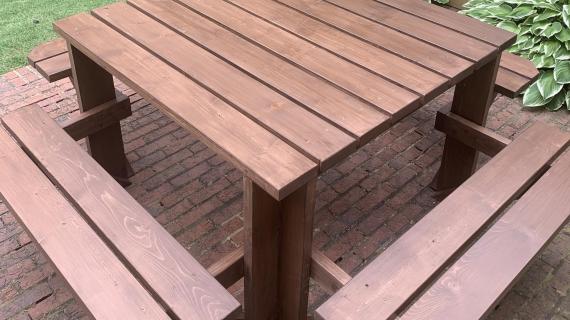
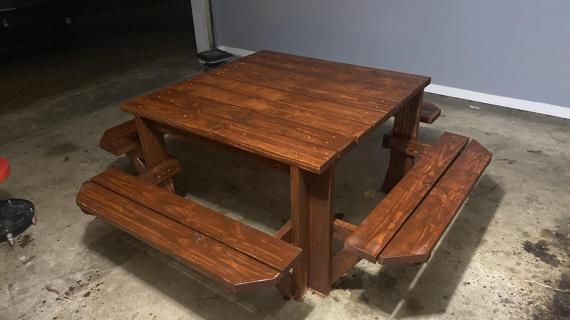
Build your own square picnic table with free plans by Ana-White.com
Everything you love about the classic picnic table, but in a cozier, updated design!
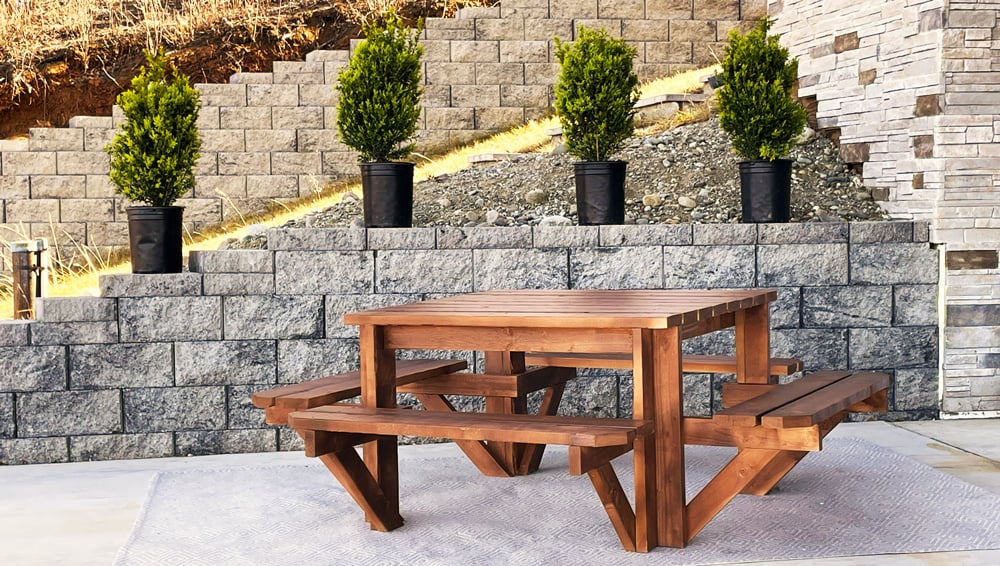
Square Picnic Table Features
- Seating on four sides, for a cozier experience
- Easy to build design
- Comfortably seats four adults, could seat as many as 8
- Smaller footprint may be more suitable for some spaces
- Fun, modern design
Sitting around a table, instead of in a line at a table, is usually more desirable. But most round style picnic tables - whether it's an octagon or a hexagon or a four sided picnic table - become complicated and hard to build. In this plan, we tried our hardest to create a project that is quick and easy to build, but still gives you a quality project that you will love for many years.
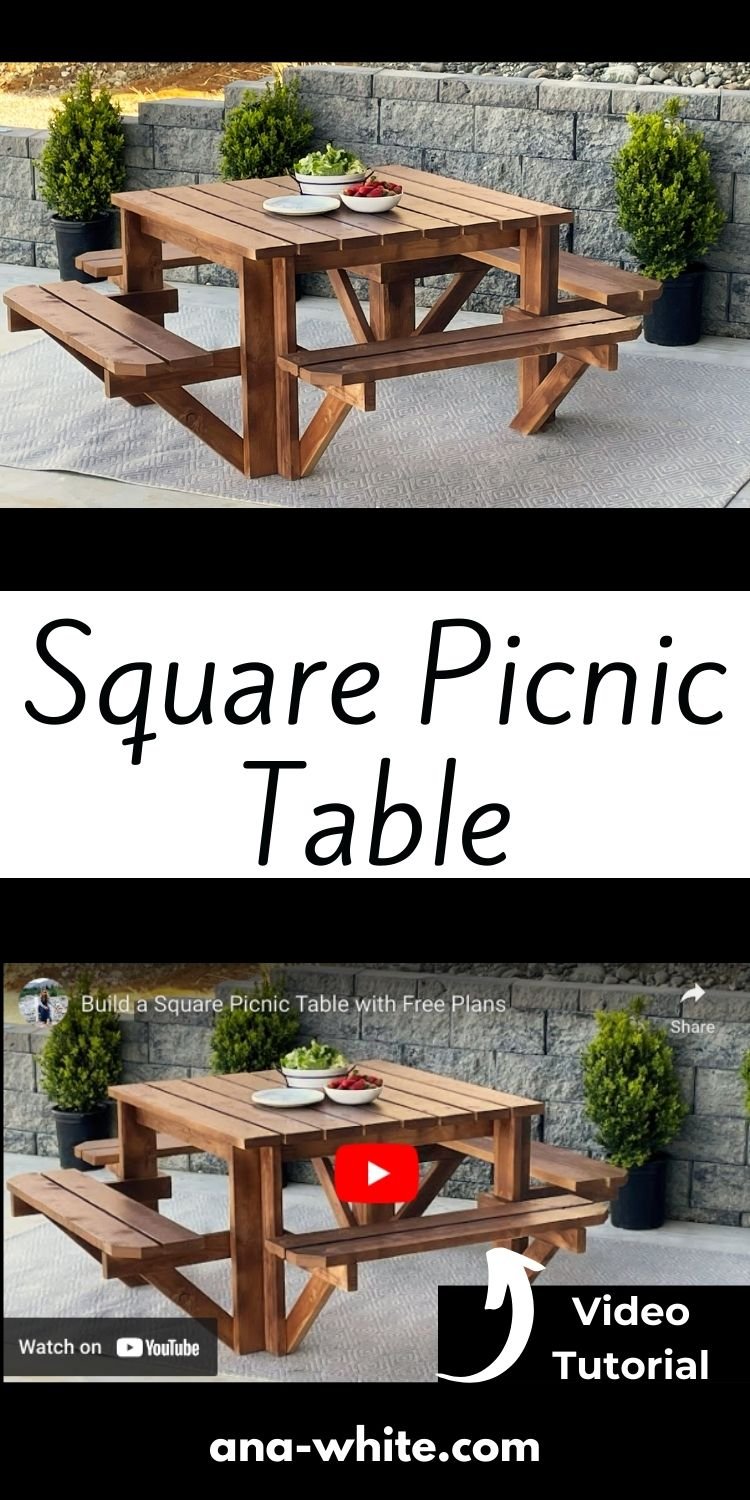
Video Tutorial for Square Picnic Table
You have to watch how this one is built! It's easier than you might think. Check out the video linked below.
Free Plans for this Square Picnic Table
The free plans for this picnic table follow. Thank you for using our plans. Please post brag photos when you are done, we greatly appreciate your feedback and photos.
Pin for Later!
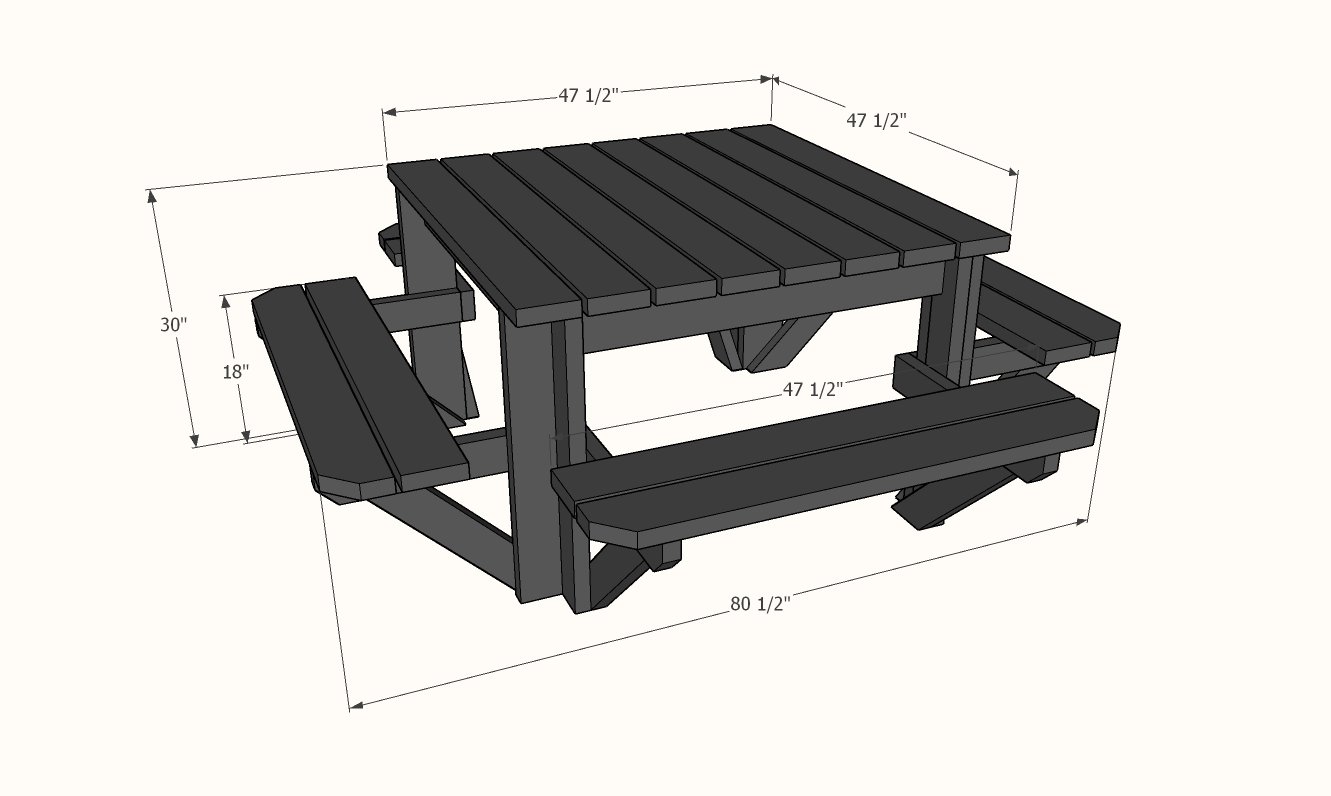
Preparation
- 1 - 2x6 @ 10 feet long
- 1 - 2x4 @ 10 feet long
- 6 - 2x4 @ 8 feet long
- 8 - 2x6 @ 8 feet long
- About 170 - 2-1/2" to 2-3/4" long self tapping exterior wood screws, star-bit self drilling recommended
- 4 - 2x6 @ 28-1/2" (cut from the 10' long 2x6 board)
- 4 - 2x4 @ 28-1/2" (cut from the 10' long 2x4 board)
- 2 - 2x4 @ 36-1/2" - aprons between 2x4 legs
- 2 - 2x4 @ 37-1/2" - aprons between 2x6 legs
- 4 - 2x4 @ 23" - long seat supports
- 4 - 2x4 @ 22" - short seat supports
- 8 - 2x4 @ 18-3/8" - both ends cut at 45 degrees, ends are parallel, long point to short point measurement
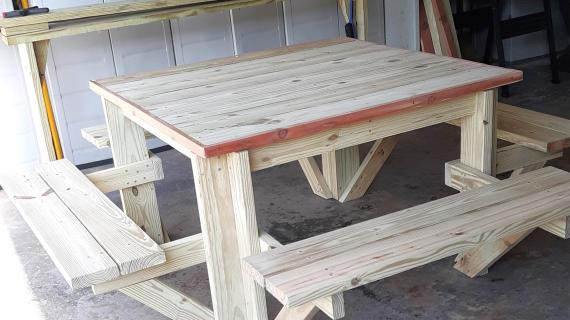
- 16 - 2x6 @ 47-1/2" - tabletop and seat boards


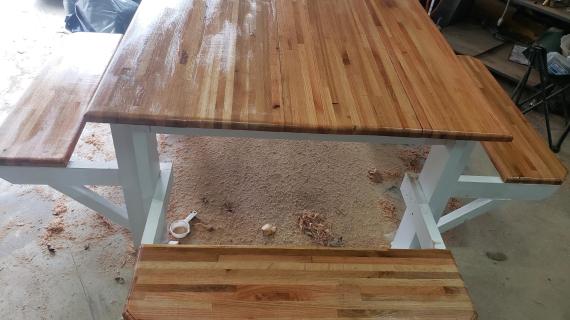
Pre-staining or painting before cutting is recommended. Use an exterior appropriate finish.
Instructions
Step 1
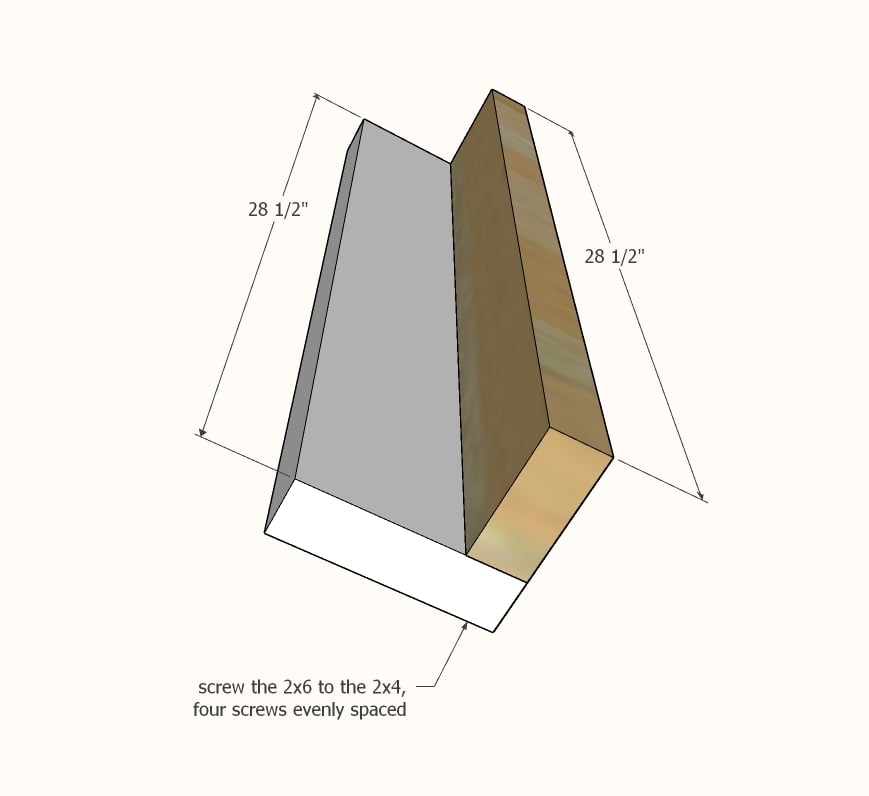
Screw the 2x6 leg piece to the 2x4 leg piece with four screws, outside edge is flush. Best face of both boards should be faced inward.
Build four identical.
Step 2
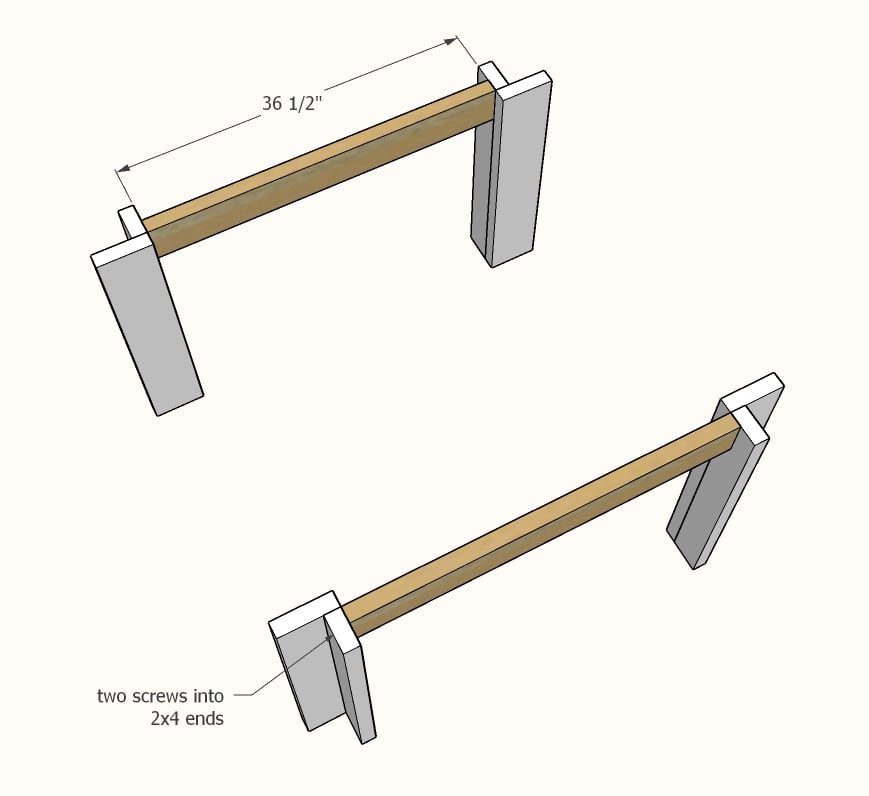
Attach the 2x4 leg side to the shorter, 2x4 apron (36-1/2" long) with two screws per end. This is important, as it may affect the overall tabletop size. Double check to make sure the overall leg width is 47-1/2" from outside of leg to outside of leg after attaching.
Slightly angling the screws will create more strength in the joint.
Step 3
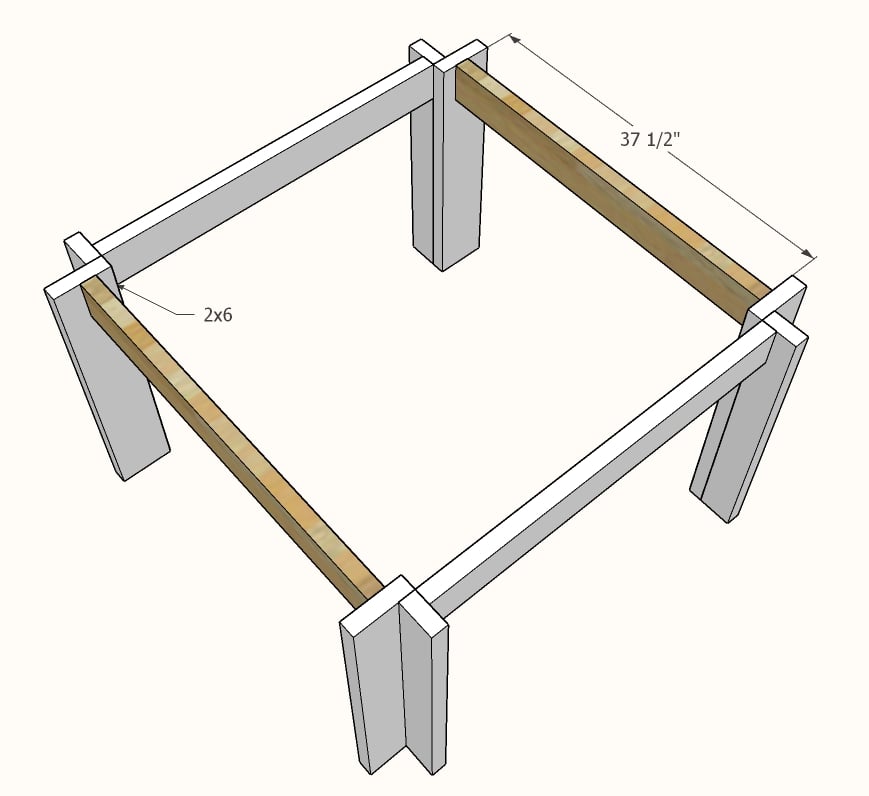
Repeat with the longer (37-1/2") from the two 2x6 sides of the legs.
Double check that the tabletop dimensions are 47-1/2" x 47-1/2" at the widest part of the legs.
Step 4
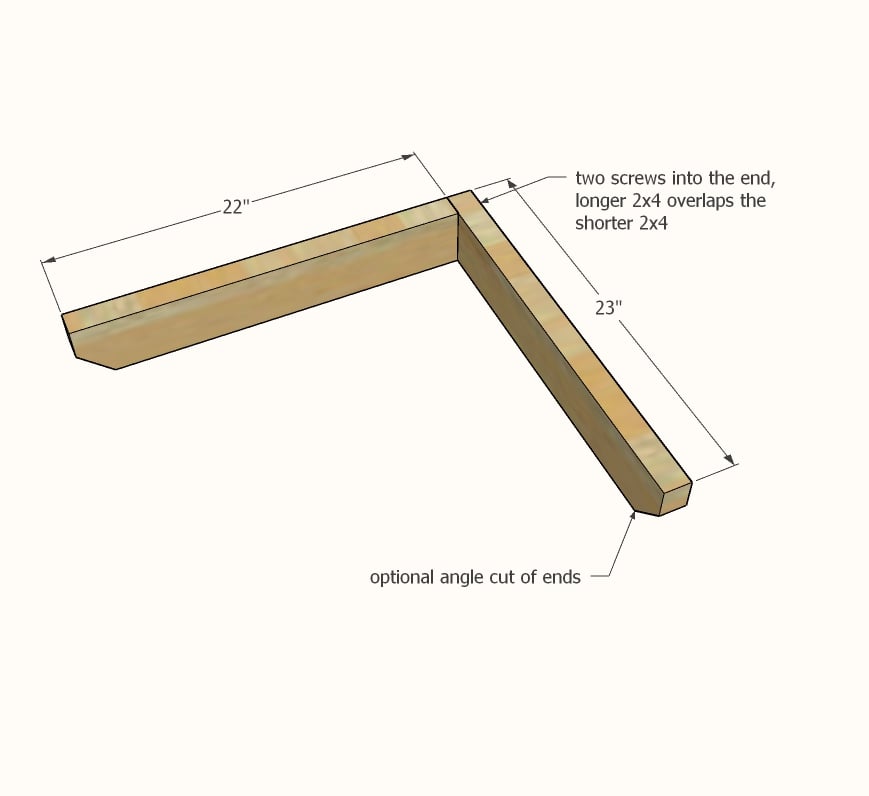
Build four of the seat supports by attaching the longer 2x4 to the shorter 2x4s.
Step 5
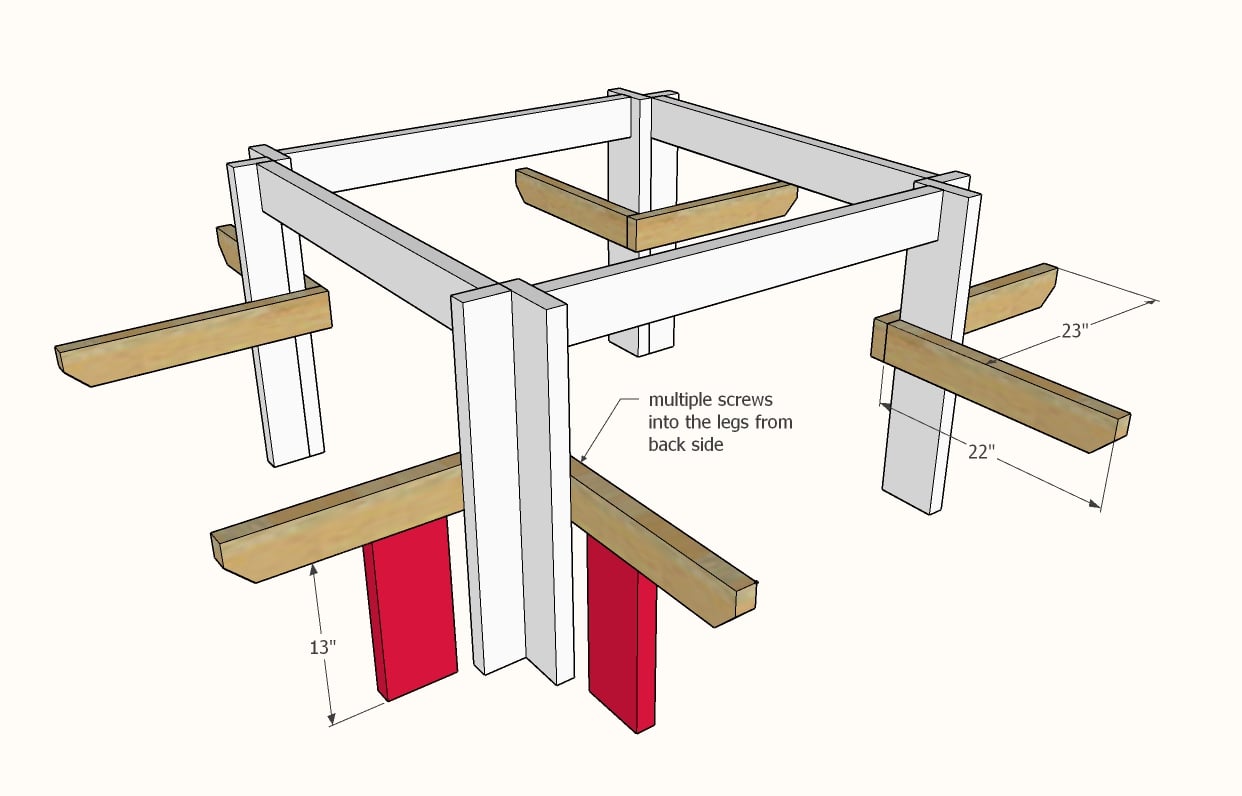
TIP: Cut two blocks 13" and use as a spacer to help set the seat supports in the right height.
Attach the seat supports to each of the legs.
Make sure the shorter seat support piece (22") is attached to the 2x6 part of the leg, and the longer (23") seat support piece is attach to the 2x4 side.
Step 6
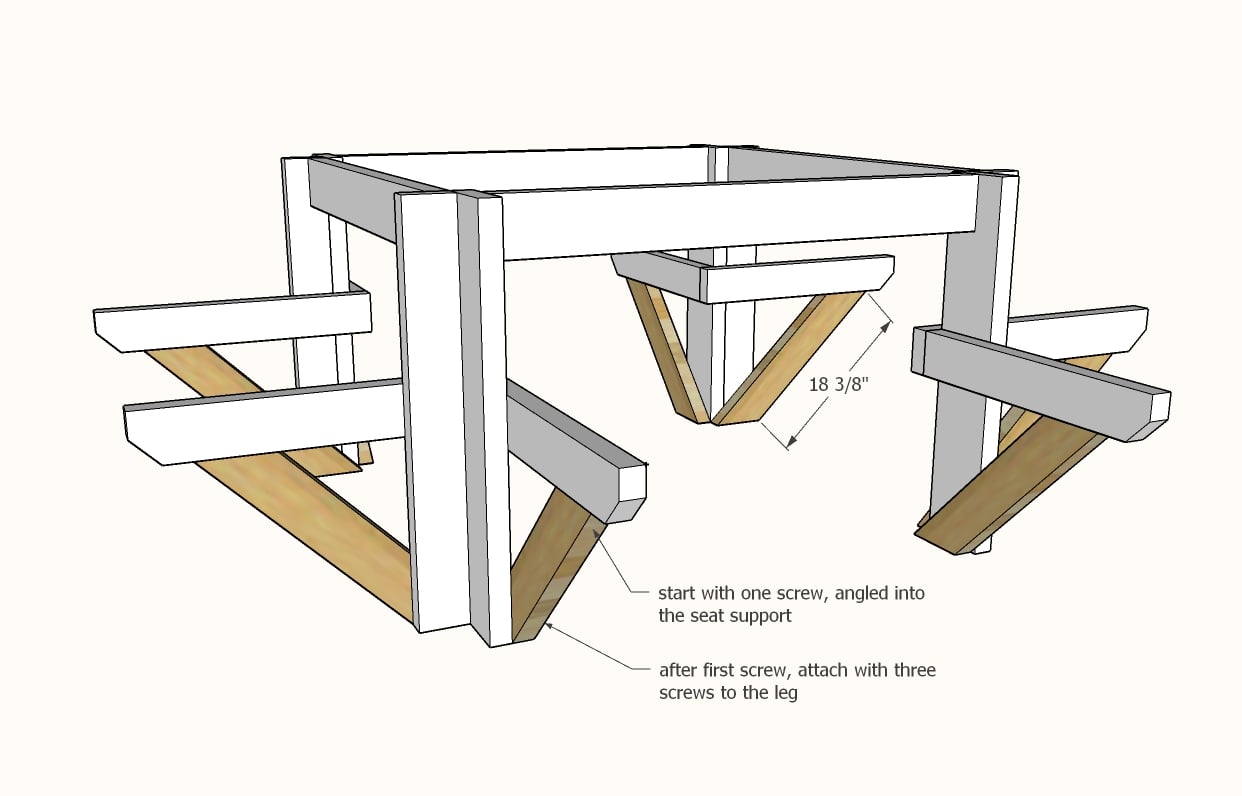
Cut the 2x4s at a 45 degree angle.
Set in place and attach first at the top to the underside of the seat support. Then attach to the legs on the inside with multiple screws.
Step 7
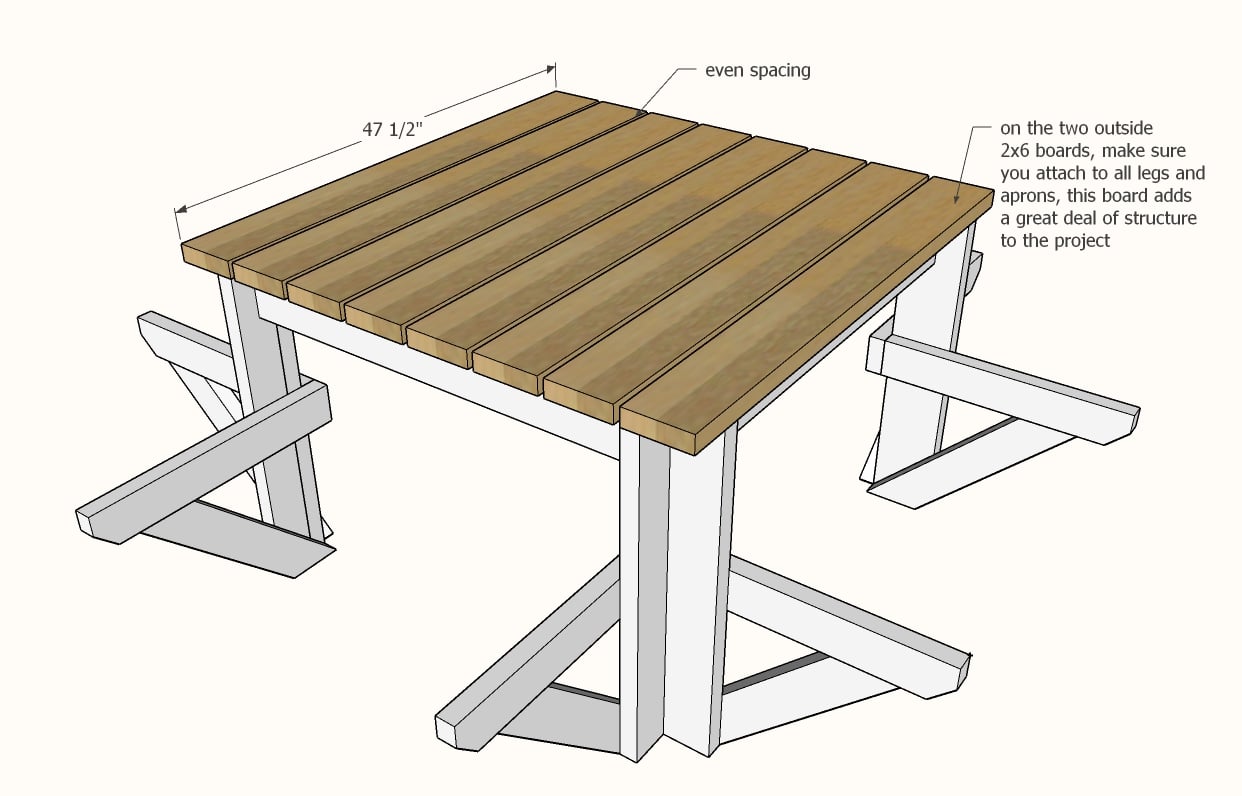
Adjust the table frame for square.
Attach the tabletop boards to the frame with screws.
On the end boards, add extra screws into the aprons and tops of the legs, the end boards are structural.
Step 8
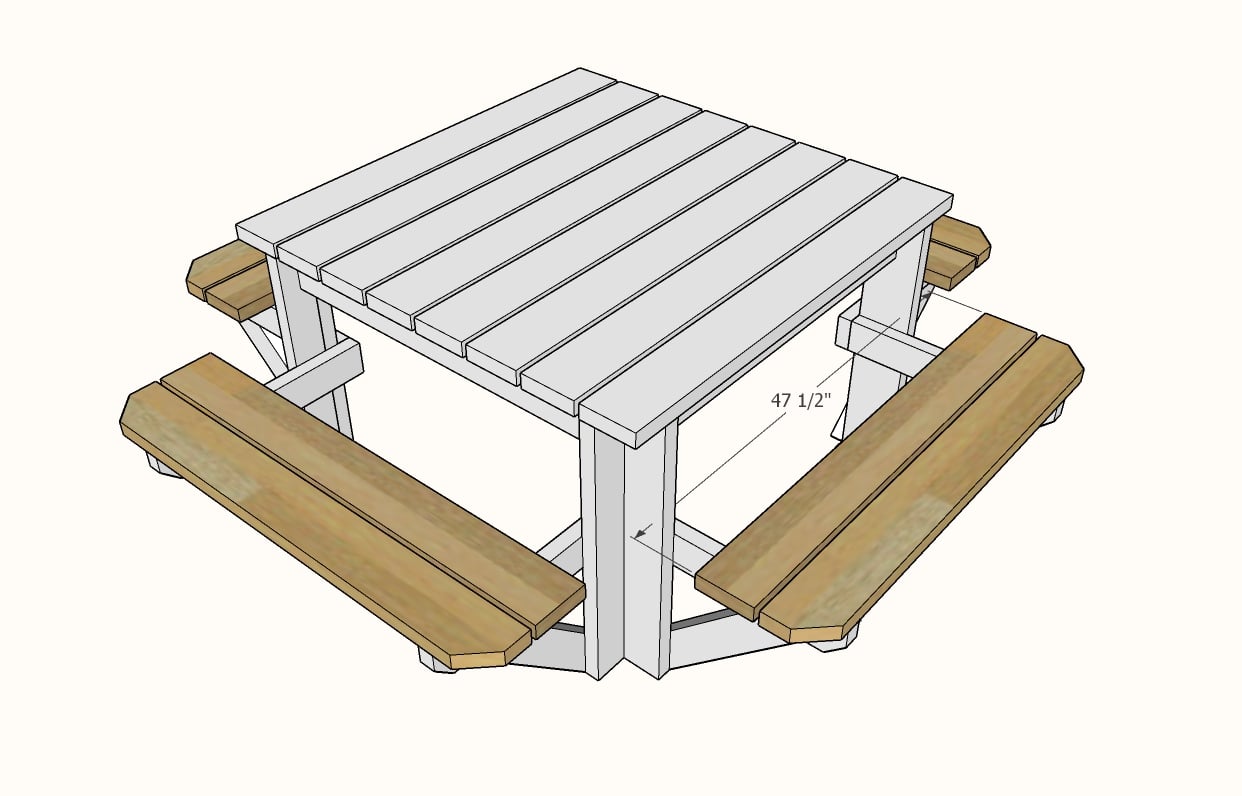
Add the seat boards to the seat supports.
Step 9
Optional seat bracing idea


Comments
byceman1890
Thu, 04/22/2021 - 10:35
Type of wood
Would you recommend using pressure treated lumber?
Cyberie
Mon, 04/26/2021 - 17:08
Modification adjustments
Hello Ana White,
How would one go about adjusting the height between the table top and the seat top? By increasing the length of the 45 degree angle seat supports? I want the table to also serve as an outdoor desk the height of the table measuring 29 inches and the height of benches, 20.5 inches. What would the general principle be? Basic geometry I know but it has been a long time...
Many thanks and best regards.
Carpintero101
Wed, 04/28/2021 - 13:28
What kind of wood did you…
What kind of wood did you use? Can you use treated wood?
Jorgecabrales
Fri, 04/30/2021 - 08:27
This site is awesome! Where…
This site is awesome! Where do we go to see all of your replies to the questions?
gillette.ed
Tue, 07/20/2021 - 18:25
Nice Table
Nice summer project. It turned out great! Easy build. I also added a hole in the center for my patio umbrella. I would recommend using the longer screws.
antpanman
Sun, 08/08/2021 - 08:46
Added a Korean BBQ in the middle
Thanks for the plans! I made this but added a Korean BBQ in the center. This will become the centerpiece of a deck we are adding to the house.
https://drive.google.com/file/d/1gj7dn9QZMzKls-j_xV8vSqY8toh4dMJq/view?…
LaurenTurow
Thu, 08/19/2021 - 10:18
Tipping
How do you get the finished table to not tip over?
ArmyRedDad52
Sat, 10/09/2021 - 08:18
Same issue. 4 adults sit on…
Same issue. 4 adults sit on this carefully.
3
1. 2
4
ArmyRedDad52
Sat, 10/09/2021 - 08:16
Nice table. Problems with leg support
Nice looking but unsteady. Maybe design issue (2021 build)
I am having issues with the Step 3 method of securing legs. Despite setting screws at an angle. the weight of kids/adult on seats has caused the joint screws to pull out at all four points. The table top is barely secured. I’m concerned wood screw method will continue to fail due to force on seats/legs. What’s your recommend fix?
( Longer screws…?)
I built this table with 2 adirondack chair for our porch.