
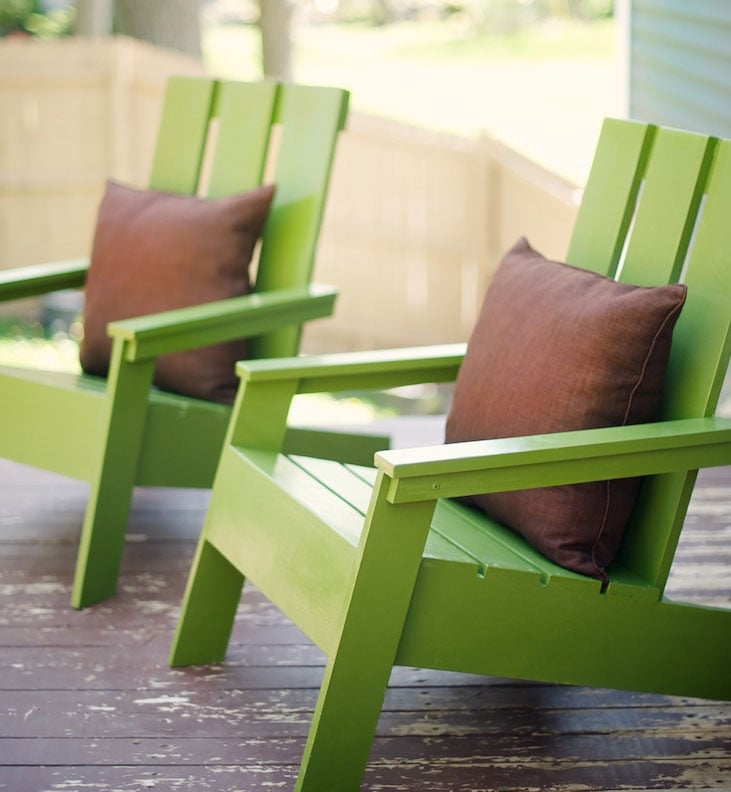

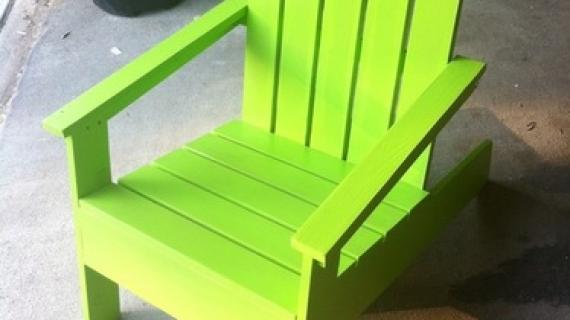
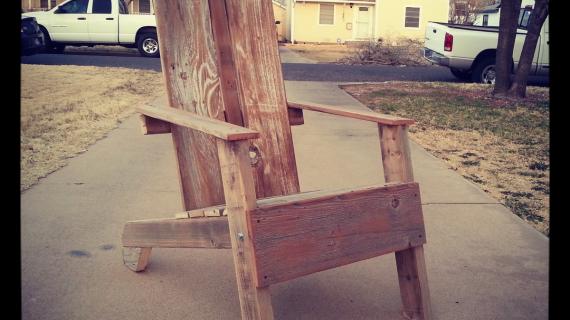
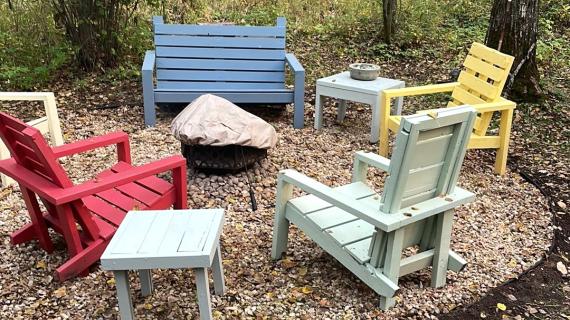
This modern style Adirondack chair plan features clean lines and simple materials. The base is sturdy and substantial 2x6s, so it will hold heavy weights and won't blow away in the wind. You'll love our step by step plans and diagrams.
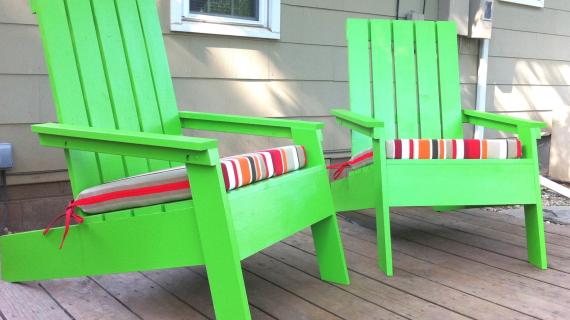
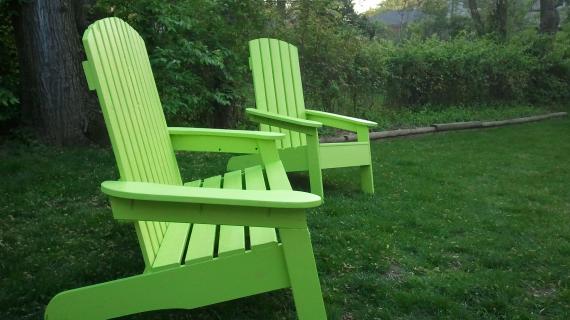
Reader submitted photo by HARLEYANDCHRISTINA
More Free Adirondack Chair Plans from Ana White


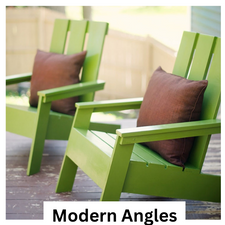
Modern Adirondack Chair Features
- Modern Styling
- Deep recline for enhanced relaxation
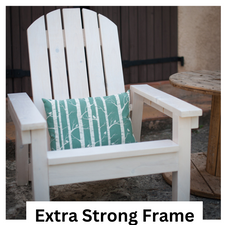
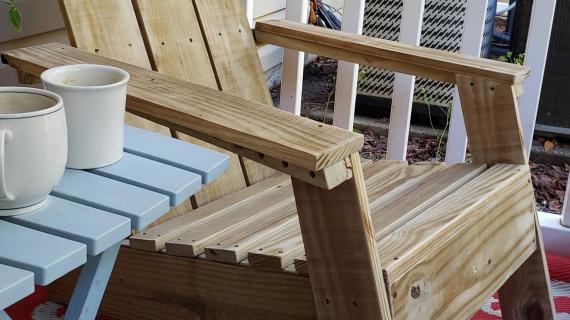
- 2x6 base framing for increased strength, durability, and weight
- 2x4 legs will last longer and hold more weight
- Simple angle cut construction that is easy to build
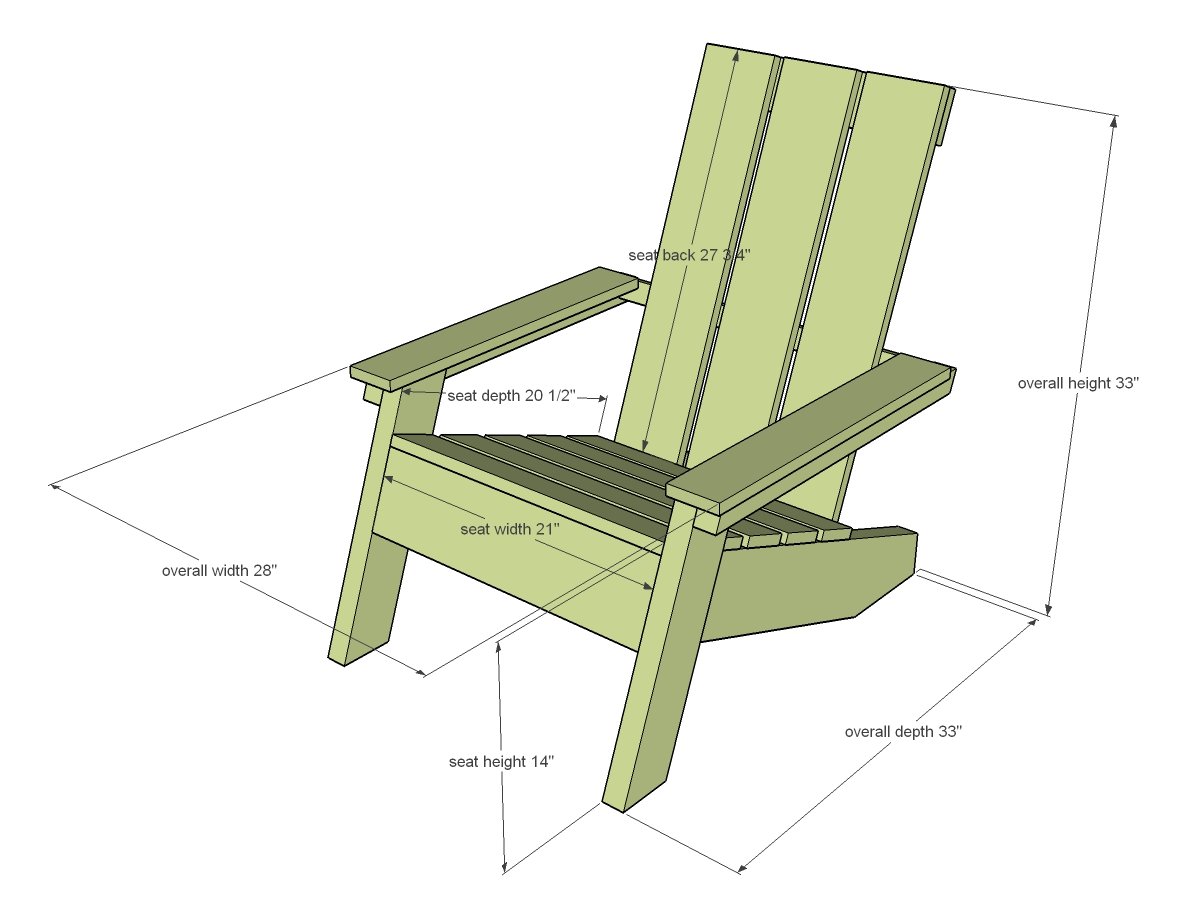
Modern Adirondack Chair Plans
This is an updated plan. If you need the old version of this plan, you can find it here.
Preparation
- Cedar wood or other exterior appropriate is recommended. You can use whitewood or spruce - just make sure the wood is finished well.
- 1 - 2x6 @ 9 feet long or 9 foot stud length
- 1 - 2x4 @ 4 feet long
- 1 - 2x2 @ 8 feet long
- 1 - 1x6 @ 8 feet long
- 2 - 1x4 @ 8 feet long
- 8 - 2-1/2" pocket hole screws (recommended but can substitute for 2-3/4" self tapping wood screws)
- 25 - 2-3/4" exterior self tapping wood screws
- 70 - 2" exterior self tapping wood screws
- 2 – 2×6 @ 29-1/2″ (Stringers, cut in step 1)
- 1 – 2×6 @ 21″ (Front Apron)
- 1 - 2x6 @ 18" - (Base Support)
- 2 – 2×4 @ 18″ (Legs, ends cut at 20 degrees off square, ends ARE parallel, long point to short point measurement)
- 2 - 2x2 @ 24-3/16" - (Arm Supports, both ends cut at 20 degrees off square, long point to short point measurement, ends ARE parallel)
- 1 - 2x2 @ 24" - (Back Support)
- 3 - 1x6 @ 32" - (Back Slats)
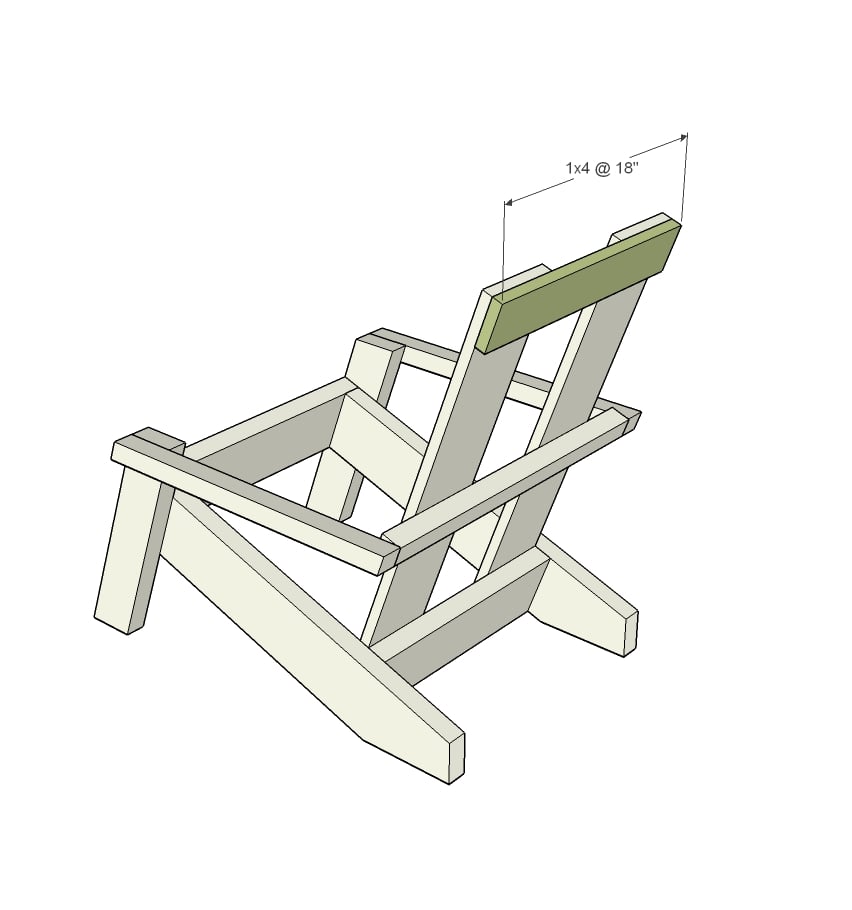
- 1 - 1x4 @ 18" - (Seat Back Top)
- 5 - 1x4 @ 21" (Seat Slats)
- 2 - 1x4 @ 23-1/2" (Arm Rests)


Instructions
Step 1

Mark out the stringer pattern on 2x6 stringer boards.
Cut angles with a circular saw.
Cut two matching.
Step 2
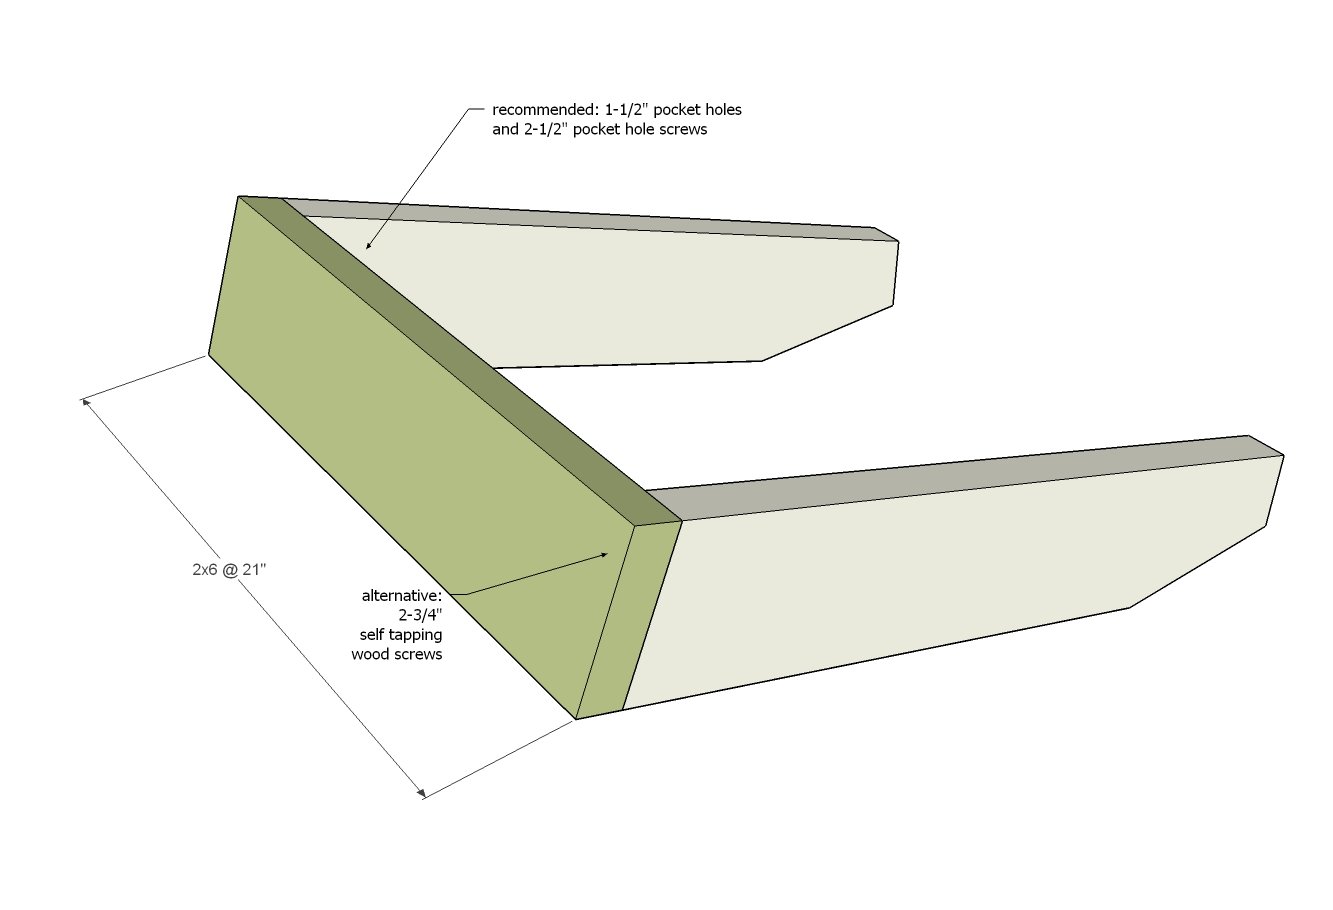
Attach stringer to front apron. Pocket holes would be hidden and recommended, but you can also use 2-3/4" self tapping wood screws.
Step 3
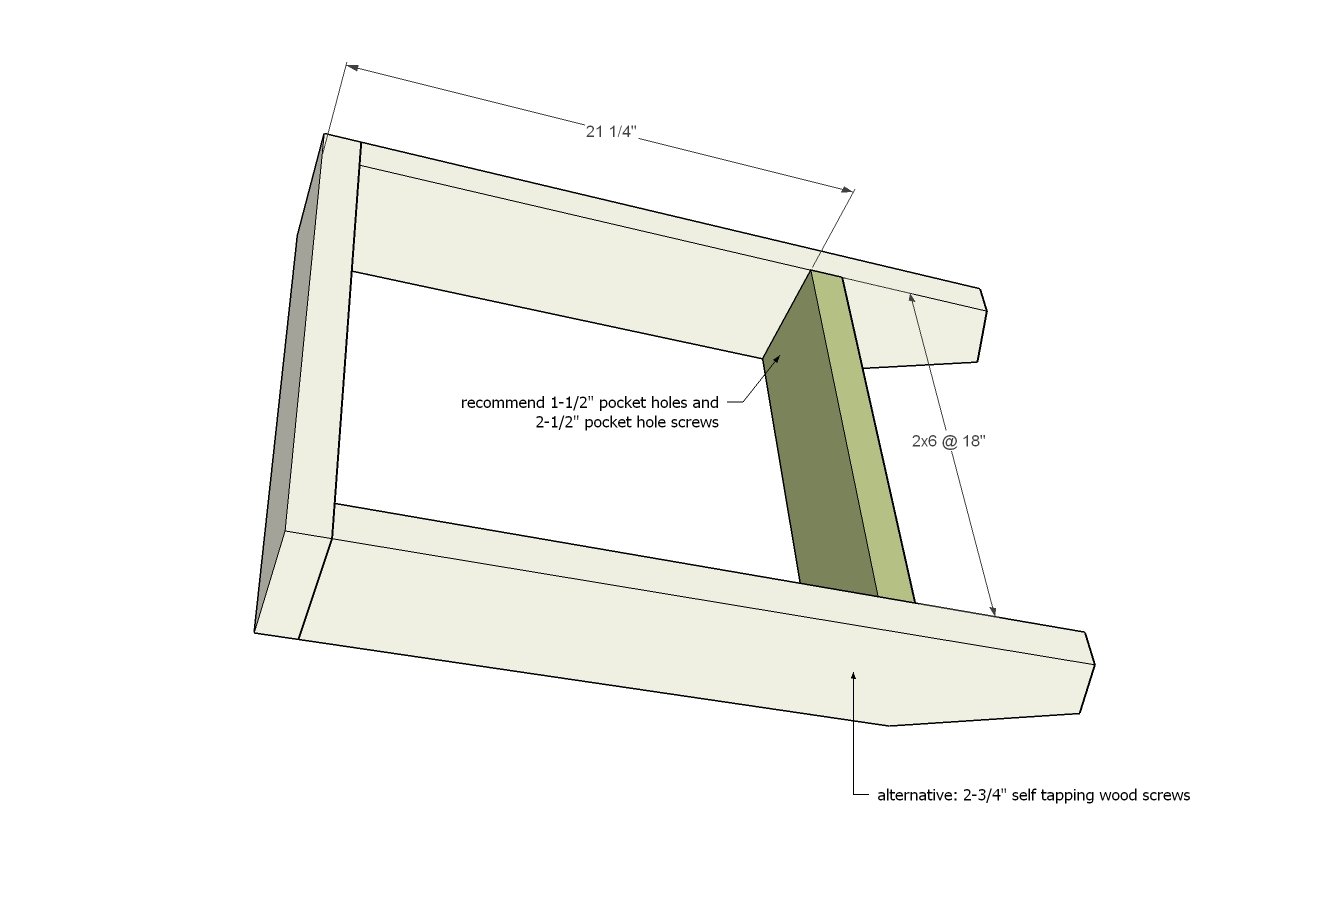
Add the back aprons support between the stringers.
Step 4

Cut legs on compound miter saw.
Attach to the base with 2-3/4" screws.
Step 5
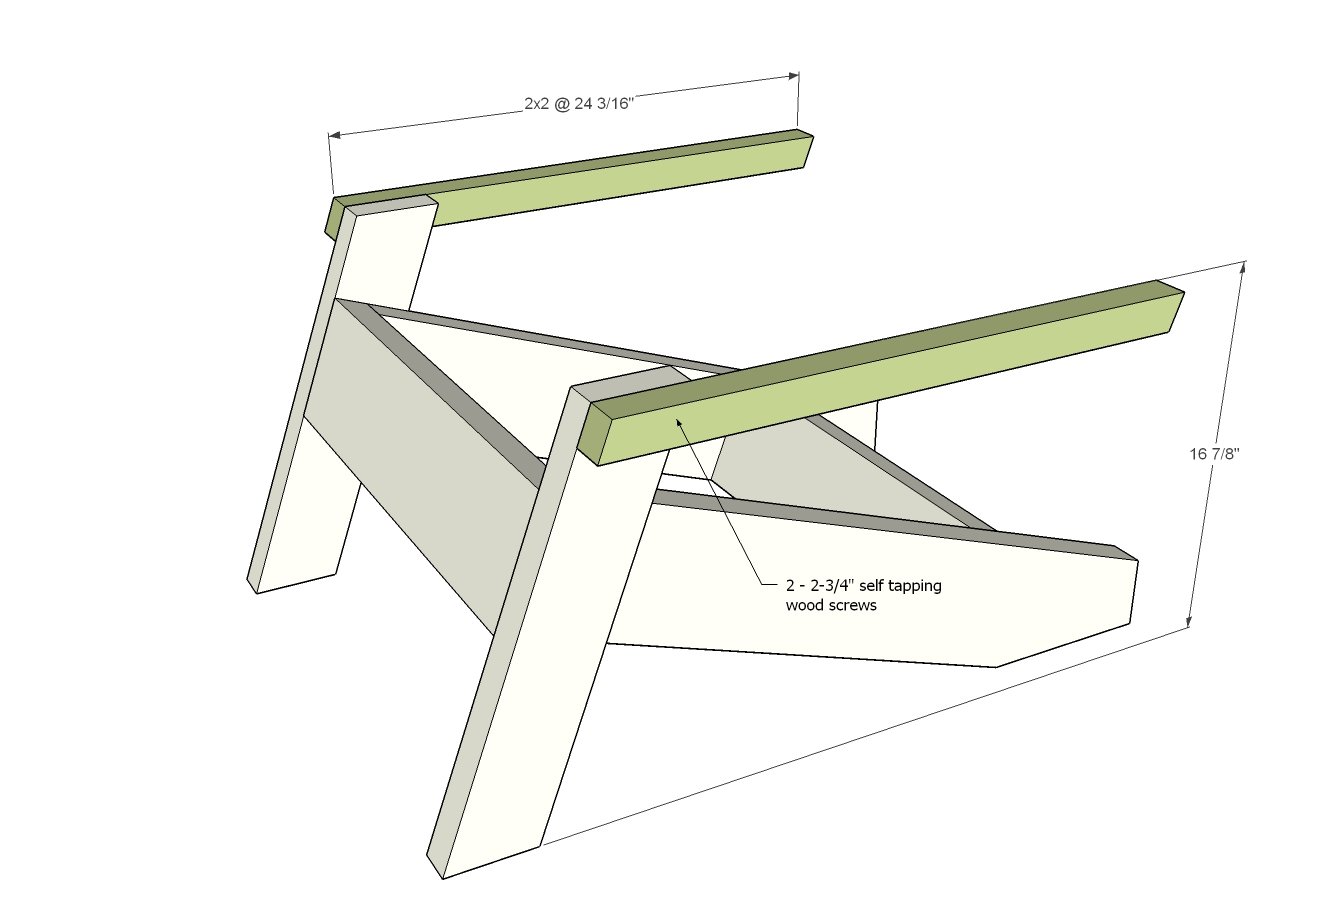
Attach 2x2 side supports with 2-3/4" screws, making sure the 2x2s are level all the way back.
Step 6
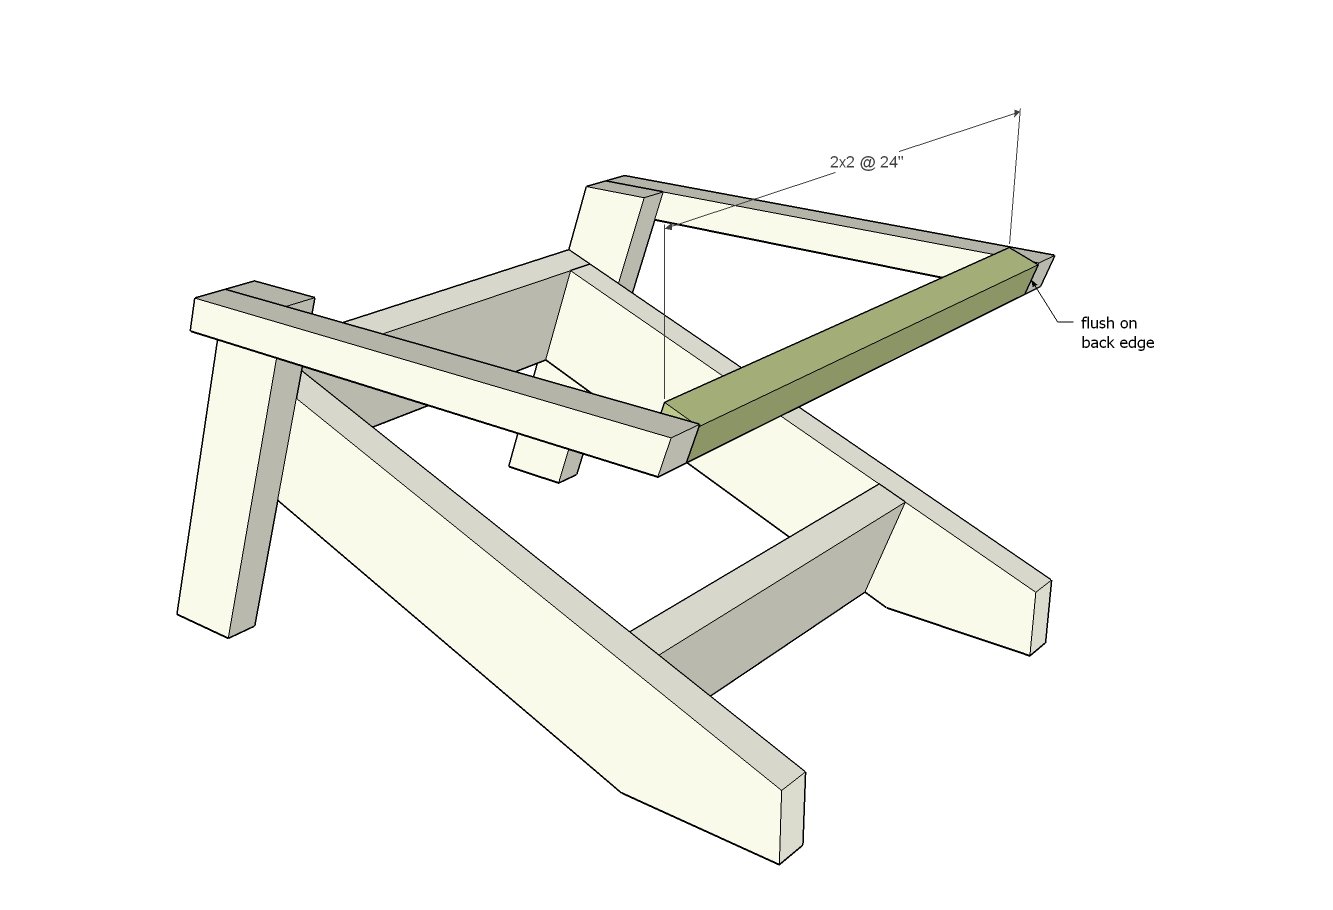
Use 2-3/4" screws to attach the back support between the arm supports.
Step 7

Add the two outside back slats with 2" self tapping wood screws.
Step 8
Attach top with 2" self tapping wood screws.
Step 9

Center remaining back slat in between and attach with 2" self tapping wood screws.
Step 10
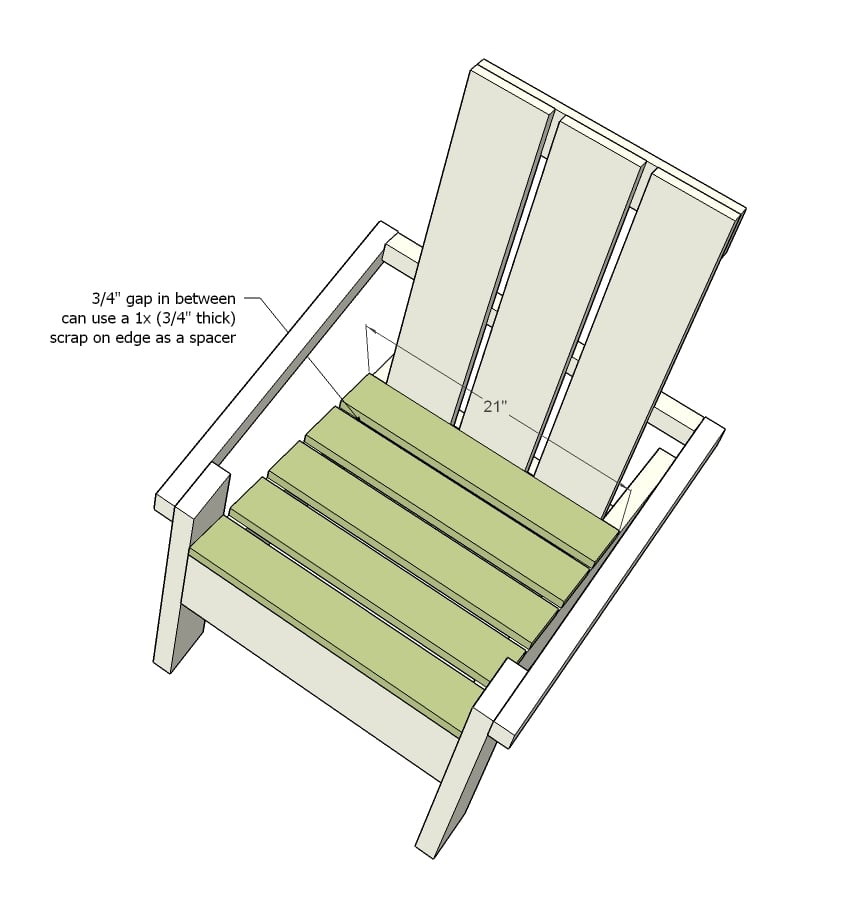
Lay seat slats and screw down with 2" self tapping wood screws.
TIP: Attach the front and back slats. Then attach the center slat. Then center the remaining two in between.

Comments
Little Birdie … (not verified)
Mon, 05/24/2010 - 14:00
Love it!
Love it!
Clear thinking (not verified)
Mon, 05/24/2010 - 14:26
My advice is to have wider
My advice is to have wider boards on the arm rests!!! We live in these chairs all summer and I LOVE LOVE LOVE having the wide boards to put eveything on. Thus not having to have things sitting on the ground or be reaching for my purse or something all the time. With the wide boards I can have my drinks, cell all the goodies etc.
Laura PARING DOWN (not verified)
Mon, 05/24/2010 - 15:32
I heart Adirondack
I heart Adirondack chairs...and that header!!!
:) Laura
Susan (Between… (not verified)
Mon, 05/24/2010 - 16:52
Ana, You're amazing! You
Ana, You're amazing! You design/build amazing furniture, playhouses, etc...AND you have a beautiful garden, too!
Lacking Productivity (not verified)
Tue, 05/25/2010 - 04:30
Yippee! My porch is in
Yippee! My porch is in desperate need of one of those Adirondack benches!
MommyKate (not verified)
Tue, 05/25/2010 - 10:24
I am planning on doing this
I am planning on doing this project on Saturday... two chairs and the bench... big goal but I am soooo excited! Thanks Ana!
Locker Cabinet… (not verified)
Thu, 10/07/2010 - 07:28
[...] Yep, that our
[...] Yep, that our Adirondack Chair! You can build your own with these plans. [...]
Stephanie (not verified)
Sat, 10/16/2010 - 16:42
I have never built anything
I have never built anything in my life but really want some Adirondack chairs for our porch. I've read through your directions and it seems very doable- thus making me very excited. However, I am wondering if you have made the child-size plans yet? I would want one of those too since we have a two year old who loves to have his own size item that looks like the adult version.
Ana White (not verified)
Sun, 10/17/2010 - 14:56
Hi Stephanie, check the plan
Hi Stephanie, check the plan catalog, there is a kid's sized one!
Joshua (not verified)
Sun, 12/19/2010 - 18:41
Hi Anna...I really like this
Hi Anna...I really like this a lot. Is there anyway to make this a rocker? Thanks!
lunadaat (not verified)
Sat, 01/01/2011 - 21:28
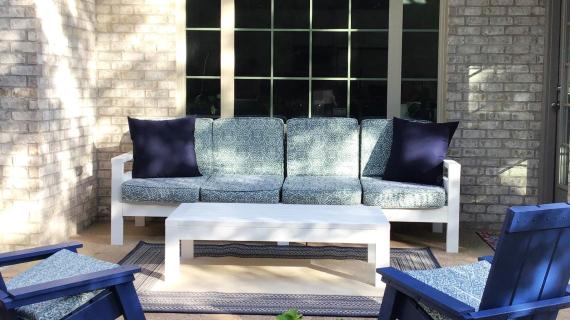
Are there plans for the foot
Are there plans for the foot stools and side table in the pic with all the colored ones? I was wanted to build a sofa size and 2 of the chairs but I would like the side tables and foot stools too.
Ana White (not verified)
Mon, 01/10/2011 - 10:13
Not yet, but this is a
Not yet, but this is a priority for spring!
razvan (not verified)
Tue, 01/11/2011 - 12:18
Dear Ana, I appreciate very
Dear Ana,
I appreciate very much your articles and most of all your achivements . I am from Europe (Romania)and as a beginer I try to do a Sharp Adirondack Chair following your instructions. I notice that if I cut the front legs to 15 degree ,paralel to each other , the high of the chair will not be 19 3/8 ( 48,4 cm) but much shorter .
It's really 15 degrees cut off , or maybe 1,5 degrees ???
Thank you in advance for your answer.
Regards
Razvan
razvan (not verified)
Mon, 01/17/2011 - 11:19
Dear Ana, Sorry , I want to
Dear Ana,
Sorry , I want to say ............." the high of the legs will not be 19 3/8...."
Regards
Razvan
Guest (not verified)
Thu, 04/14/2011 - 20:40
Sofa
I guess I have a question and a comment. First, the comment. I made the chair the other day and it was rather simple and looks very nice. Thanks for all the detailed instructions. Now for the question. For the sofa, I see where you add the additional support for the seat, but I'm not understanding what you are saying about the back.
Helga from Austria (not verified)
Sat, 11/12/2011 - 17:07
I love your Adiron Chairs...
I'm in love with your Adiron Chairs... :-)
and wanted to be able to make also such as one, (I'm
a absolute beginner)
Unfortunately your drawings are not in metric measurement.
Kind regards :-)
Helga
In reply to I love your Adiron Chairs... by Helga from Austria (not verified)
claydowling
Sat, 11/12/2011 - 18:25
How I do it
I'm from the U.S., but I've bought a couple of plans from a Canadian woodworker that have measurements in a mix of imperial and metric units. While I'm comfortable working in both systems, conversions are always prone to inaccuracy, and his plans are as much engineering as woodworking.
My solution is to use metric measuring equipment. For the most part I have to mail order it from Canada (although perversely my nice metric ruler is made in the U.S.).
You could do the same in reverse. Some woodworking supplier in Australia will be selling measuring tools marked in imperial units. A folding rule would probably be sufficient, since a good one can measure two or three meters, which should be sufficient. I would check out Japanwoodworker.com, which sells to both Japanese and American woodworkers, and I think they have a presence in Australia.
I think your lumber there is actually marked in imperial units, probably because a significant portion of lumber in the world comes from the U.S. and Canada. I've seen the dimensions given backwards though. I don't know if that's Australians having some sport with Americans, or legitimately what is done. In any event, if you see lumber marked at 4x2, it's equivalent to our 2x4 lumber.
Helga from Upp… (not verified)
Sun, 11/13/2011 - 02:21
Thank you Claydowling, thats
Thank you Claydowling, thats very nice, I'll try
to find a woodworker because I'm beginner.....
I live in the small country Austria not in Australia :-)
Have a nice day :-)
Helga
In reply to Thank you Claydowling, thats by Helga from Upp… (not verified)
claydowling
Sun, 11/13/2011 - 08:52
Late night posting
That's what I get for posting later in the day. Austria is definitely different than Australia. I would expect that it makes getting good measuring equipment even easier though.
Guest (not verified)
Tue, 11/15/2011 - 17:53
Cut ends off square so that
Cut ends off square so that they're parallel... Cut ends off square so that they're perpendicular... You have a lot of plans, but all of them have errors.. Slow your posting down, and correct the errors first, rather than rushing to get a lot online
jimmyp (not verified)
Thu, 05/17/2012 - 10:54
angle to the down
hello , question , for us old folks with stiff backs is there any way to make the angle not so steep ,, its mighty rough getting outta these boys ,, Thanks
Hailey-Guest (not verified)
Wed, 07/04/2012 - 14:17
Are there plans for the foot
Are there plans for the foot stools yet? I couldn't find any but they would really complete the look!
Hailey-Guest (not verified)
Wed, 07/04/2012 - 14:17
Are there plans for the foot
Are there plans for the foot stool yet?
swenson68
Wed, 11/14/2012 - 22:11
pdf file
Would like to save this plan but there is in an error in opening the pdf file link
dallynd
Wed, 05/01/2013 - 12:00
Problems with PDF
Beautiful and I want to make it, but I can't seem to link to the PDF. All others are working fine for me.
CptChris
Thu, 06/19/2014 - 06:43
types of wood?
Just out of curiosity...would it be bad to build these chairs out of cedar...is it too soft? I can only assume these plans are made out of pine? Is there a stronger but more cost effective wood to build these out of?
Also...any reason to not use 2x8's or 2x4's for the major structural weight bearing parts? Other then cost? Might last longer?
sprucegoose
Sun, 06/07/2020 - 15:39
When to Sand?
Do you recommend sanding each of the cut pieces prior to assembly or do you recommend assembling the entire chair and then sanding at that point?