
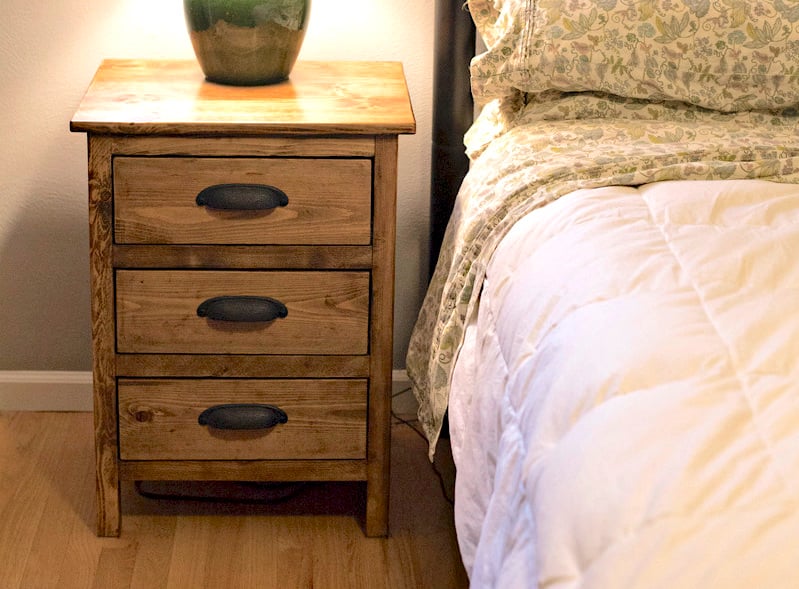

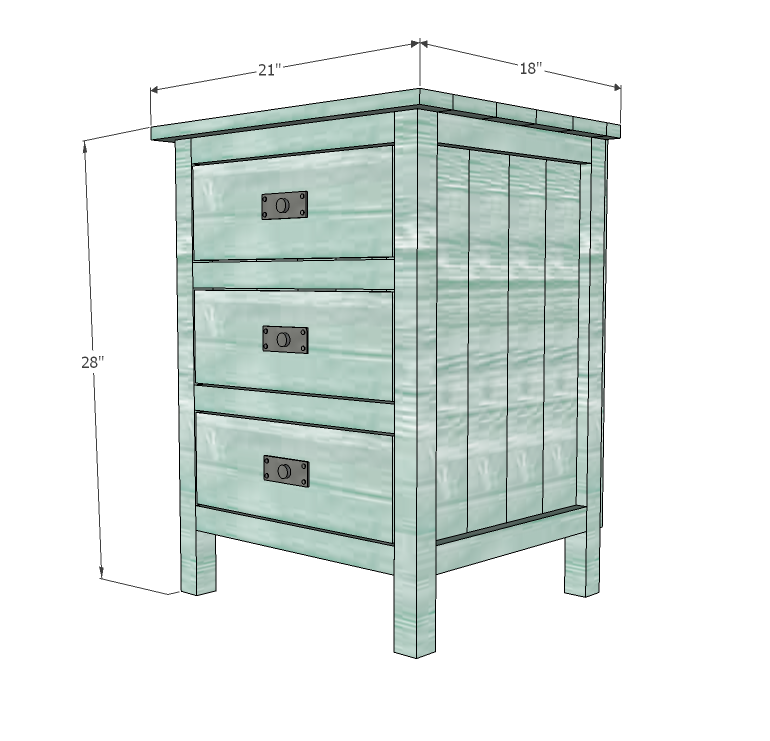
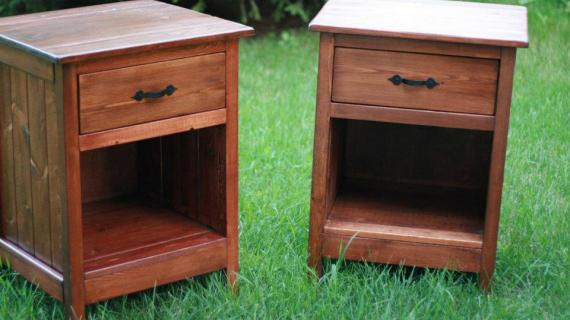
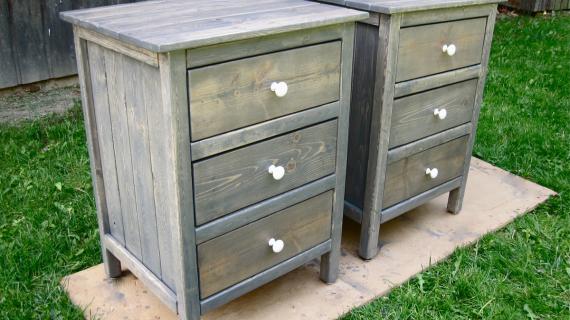
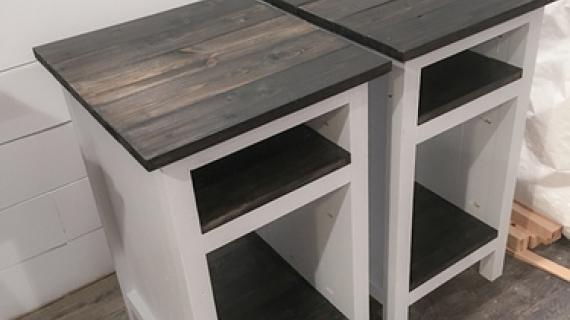
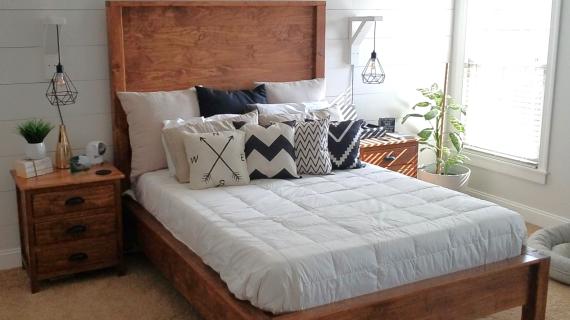
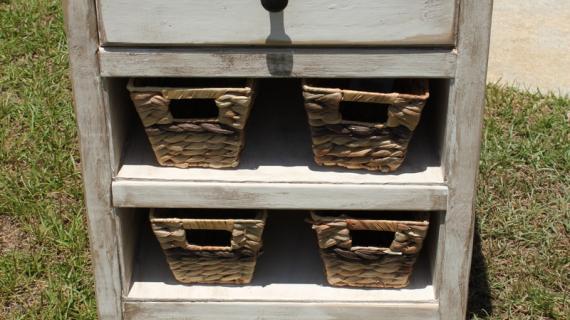
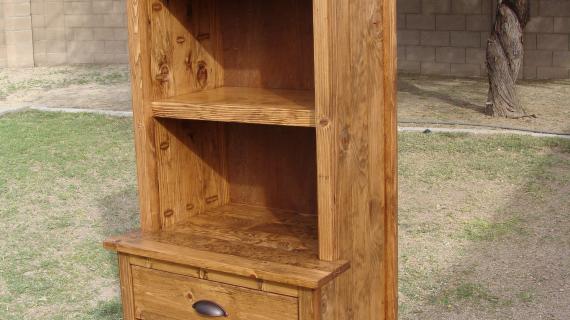
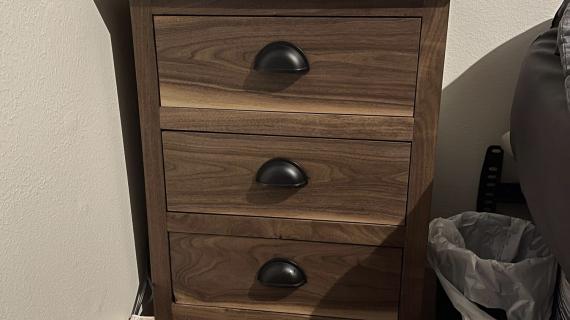
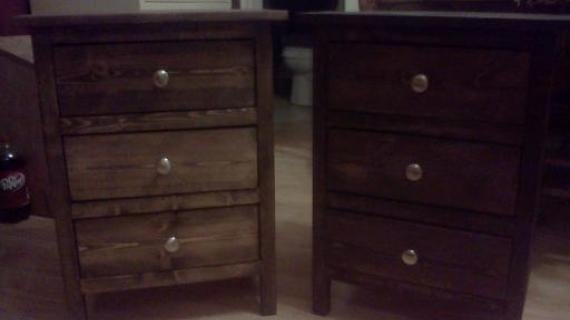
Rustic bedside table or nightstand - farmhouse style. Free plans from ANA-WHITE.com
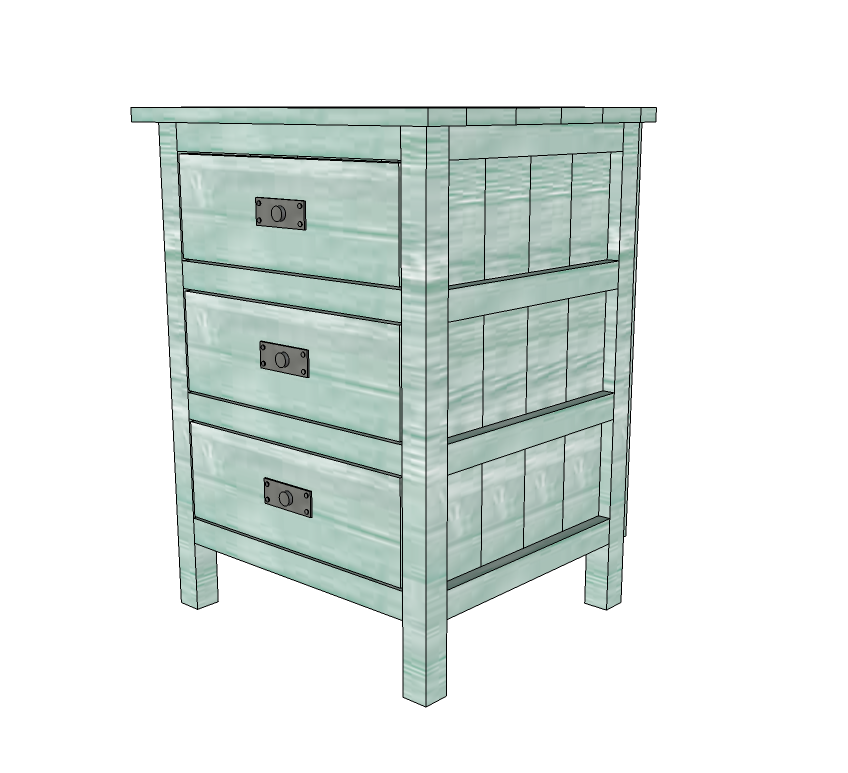
This rustic three drawer nightstand is easy to build with off the shelf lumber and basic tools.
Preparation
3 - 2x2 @ 8 feet long
1 - 1x2 @ 8 feet long
3 - 1x4 @ 8 feet long
1 - 1x6 @ 8 feet long
2 - 1x3 @ 10 feet long
1/4" plywood for back
3 knobs or pulls
3 sets 16" White Euro style drawer slides like shown in this plan
4 - 1x2 @ 14" (Side Trim)
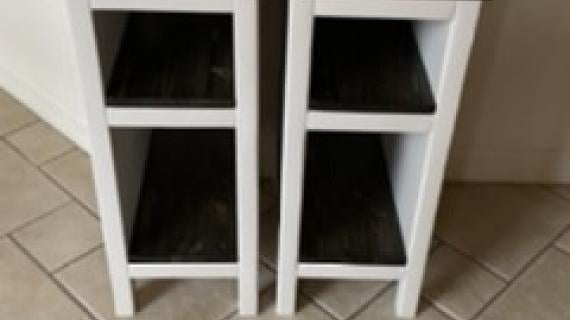
8 - 1x4 @ 23 1/4" (Side Panels)
4 - 2x2 @ 27 1/4" (Legs)
6 - 2x2 @ 16" (Front/Back Tie ins)
1 - 2x2 @ 14" (Center Tie In)
1 - 1/4" plywood @ 19" x 23 1/4" (Back)
1 - 1x2 @ 21" (Top)
4 - 1x4 @ 21" (Top)
1 - 1x3 @ 21" (Top Front) Drawer cut list in plan
Dire to the success of this project is using straight boards that measure true to width as follows: 1x6 - 5 1/2" wide 1x4 - 3 1/2" wide 1x3 - 2 1/2" wide 2x2 - 1 1/2" x 1 1/2" If your boards do not measure to these widths, you will need to adjust the plan. If your boards are not straight - namely the 1x4 side panels, you could have trouble with the drawers.


Please read through the entire plan and all comments before beginning this project. It is also advisable to review the Getting Started Section. Take all necessary precautions to build safely and smartly. Work on a clean level surface, free of imperfections or debris. Always use straight boards. Check for square after each step. Always predrill holes before attaching with screws. Use glue with finish nails for a stronger hold. Wipe excess glue off bare wood for stained projects, as dried glue will not take stain. Be safe, have fun, and ask for help if you need it. Good luck!
Instructions
Step 1
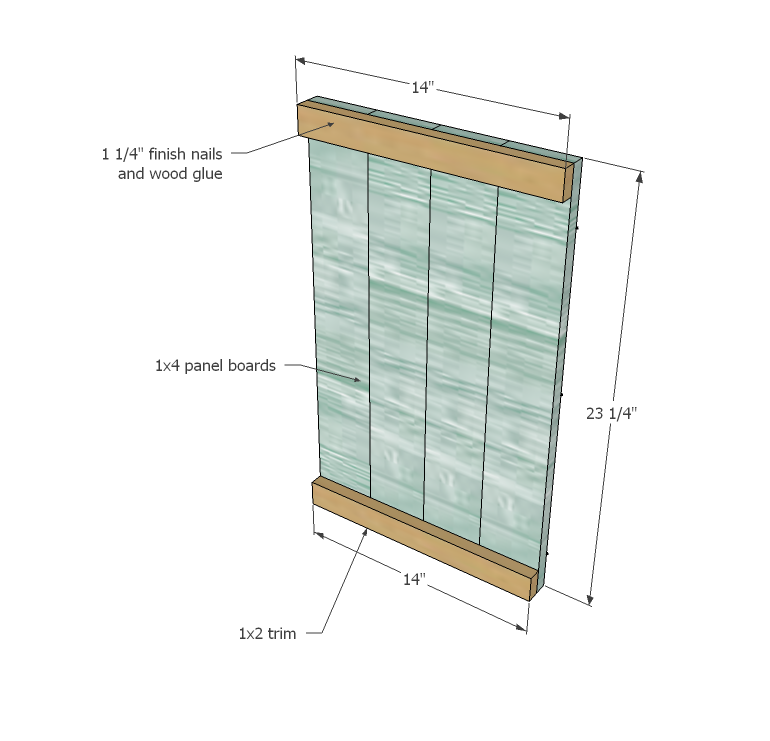
If you have a Kreg Jig, attach the panel boards to each other first with 1 1/4" pocket hole screws, with your jig set for 3/4" stock. This will make the panel a solid piece. Attach with 1 1/4" finish nails and wood glue the panel trim, flush to top and bottom. Ensure that your panels are square (very important!)

Step 2

Now attach legs to ends of panels as shown in diagram, flush to tops.
Step 3
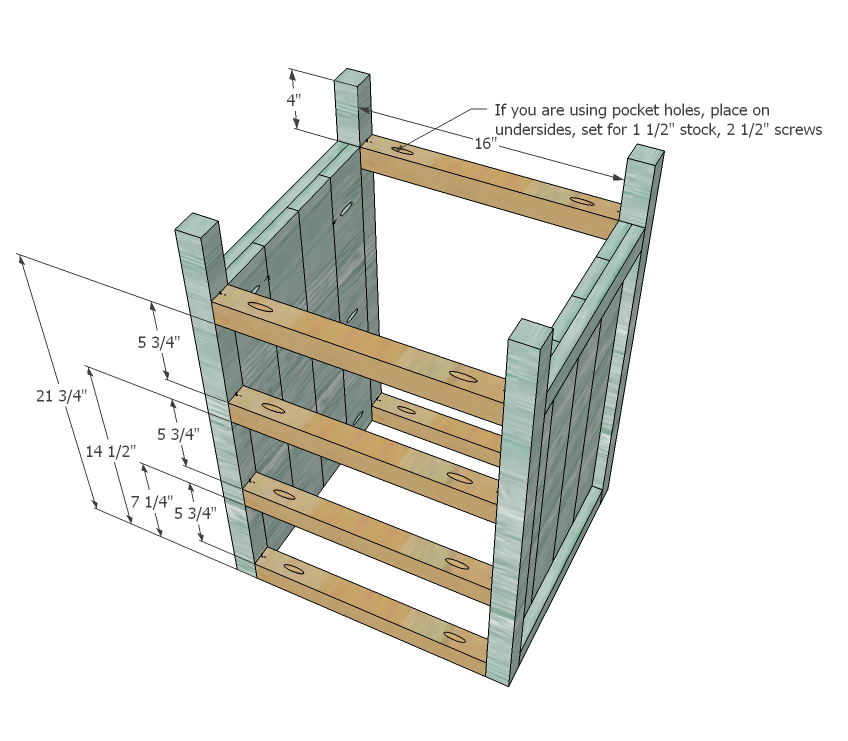
Whenever you build for drawers it is crucial that your project is very very square, or your drawers will not slide correctly. Attach the front/back tie ins, and check the entire project for square, measuring from opposite leg to opposite leg on both the top and bottom of the legs. You can also use 2 1/2" screws and wood glue to attach tie ins, with predrilled screws and wood glue.
Step 4

Add the center support as shown above.
Step 5

Step 6

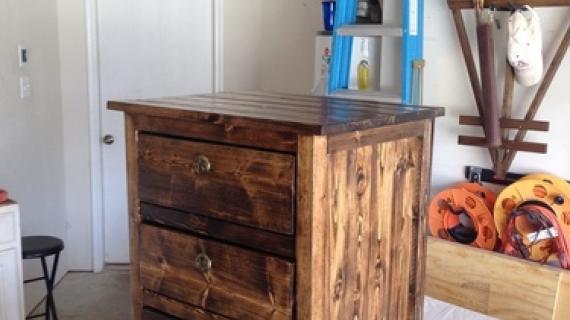
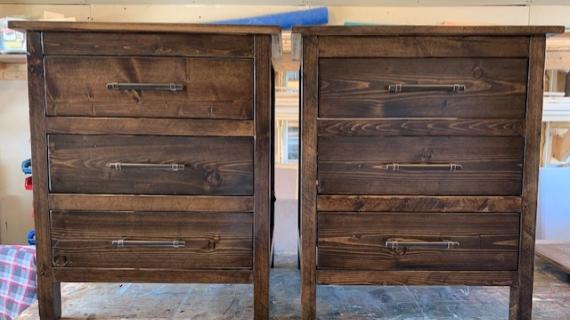
Now the top, start at the back with the 1x2 and attach flush to the back, 1" overhangs on both sides. Continue adding 1x4s, and finally, the front is a 1x3 . . . Would be super cute to leave the top wood and paint the base a distressed finish.
Step 7

Now the drawers . . . Super important to build square drawers. Your drawer boxes should be built 1" less in width than the drawer housing (the interior of the project) to give clearance for drawer slides. The "perfect" measurements are shown here, but you may need to adjust for differing board thicknesses 6 - 1x3 @ 14 1/2" (Sides) 6 - 1x3 @ 15" (Fronts and Backs) 3 - 1/4" Plywood @ 16" x 15" (Drawer Bottoms) 3 - 1x6 @ 15 3/4" (Drawer Faces) Don't add the drawer faces quite yet. For a drawer with higher sides, you can also use 1x4s.
Step 8
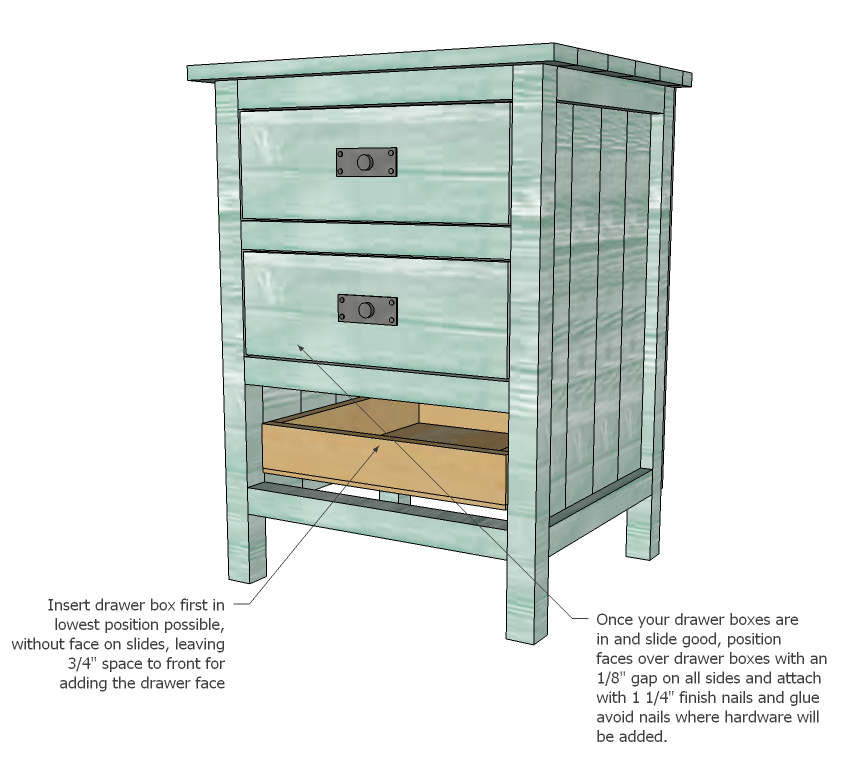
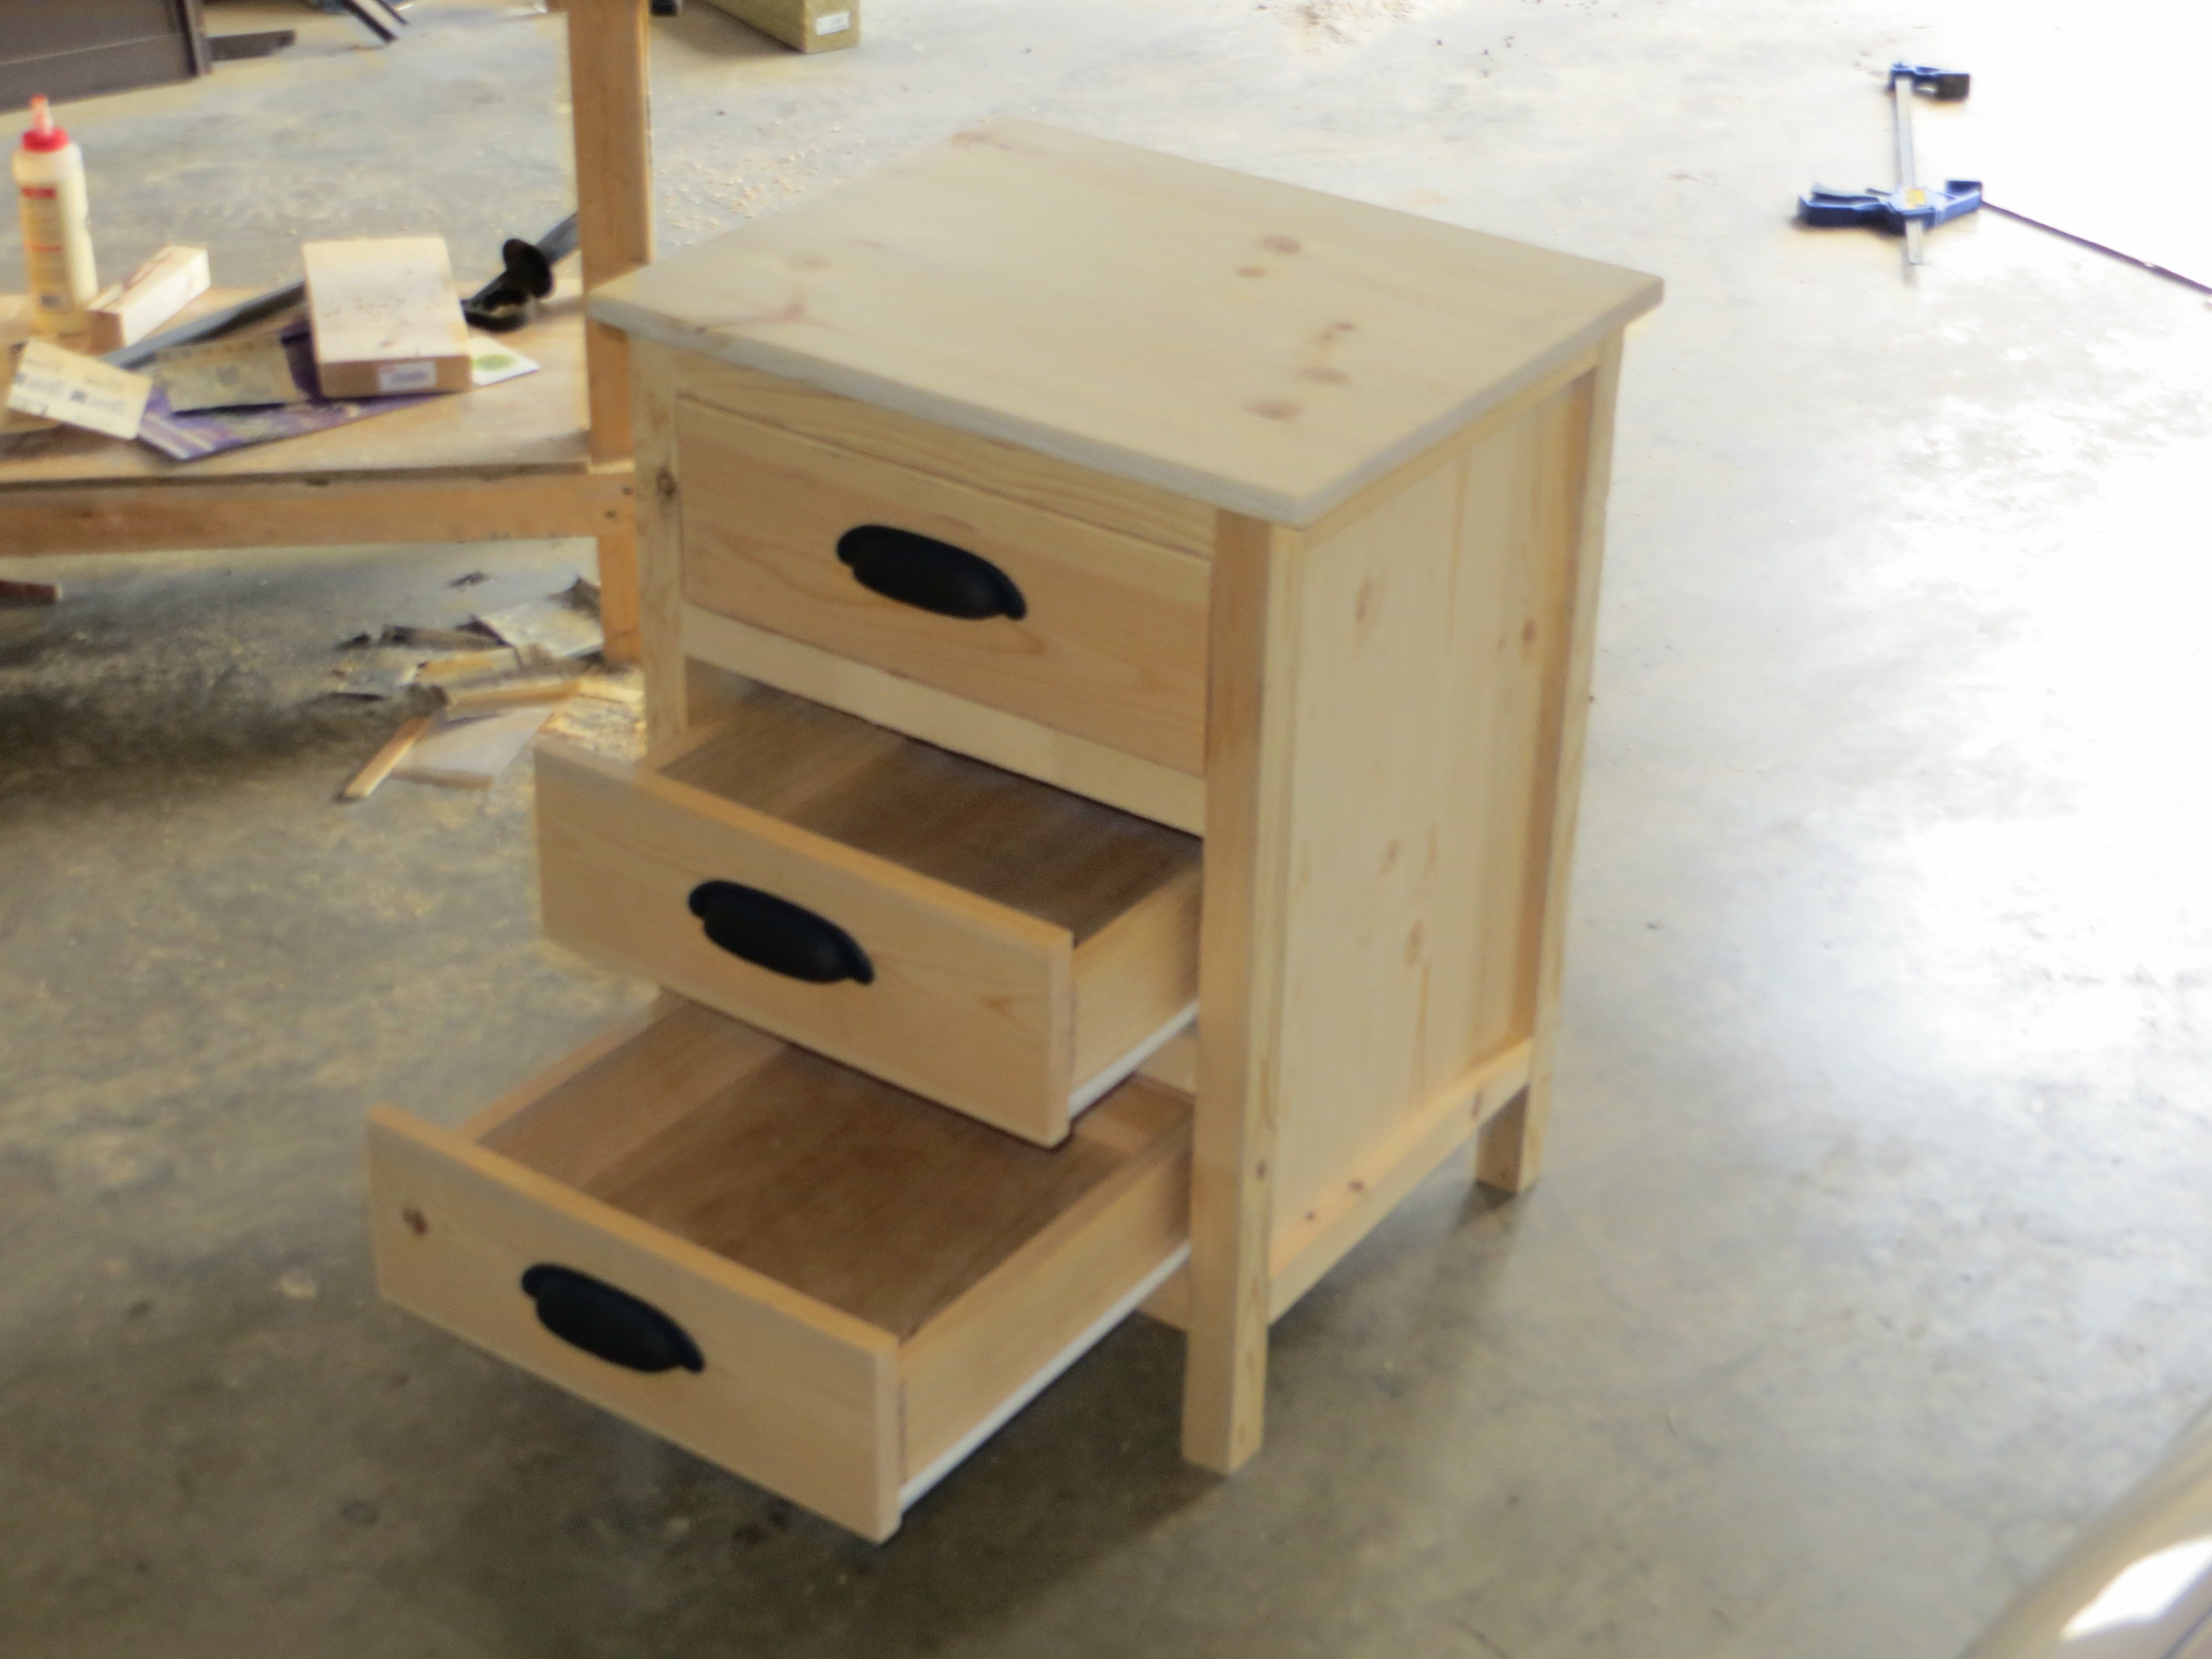
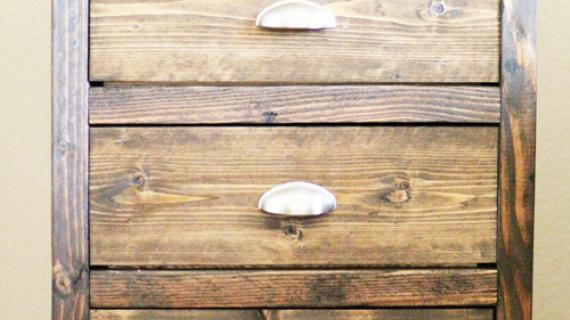
Install drawer boxes as shown above, inset by 3/4" from the front of the project. Make sure your drawers slide well. Then position the drawer faces over the drawer boxes until there is an even 1/8" gap on all sides and nail drawer faces on. Be aware of hardware locations so you don't have to drill through nails later.
It is always recommended to apply a test coat on a hidden area or scrap piece to ensure color evenness and adhesion. Use primer or wood conditioner as needed.

Comments
Apron Appeal (not verified)
Thu, 06/23/2011 - 11:05
no wasted space
this is my idea of a bedside/end table! Who needs all that wasted space under an end table anyway?
deanna_g
Thu, 06/23/2011 - 11:26
Yes yes yes!
I love this!!!! Once I have more money to purchase the lumber, I'm making 4 of these!!! 2 for the guest room and two for MY room!!!!
hook Fam
Thu, 06/23/2011 - 11:37
Excited!
I'm so excited!! I just finished the reclaimed headboard and a footboard from the same pattern and just logged in to start a different side table. But I'm totally doing this one now!! Thanks!
ferbit
Sun, 06/26/2011 - 19:41
Beautiful!!! Love the drawers!
I agree with Apron Appeal - who needs all the wasted space under an end table! I love the idea of three drawers! This would be really pretty next to my storage daybed........ :)
ACraftyCauldron
Fri, 06/24/2011 - 09:18
Ditto with April
Love the drawers! This is the typeo f storage that I love - beautiful, accessible and multi-functional!
ktsg2007
Fri, 06/24/2011 - 12:04
Today's featured project .pdf plans
Ana, can you fix today's .pdf file? I am getting an error
Chelsey (not verified)
Thu, 07/14/2011 - 07:23
Almost done with this awesome
Almost done with this awesome night stand... just need to add the drawer fronts.. This is my first picture it was hard because i dont own my own saw so had to get it cut at home depot.... great project....and cheaper to make then MOST nightstands... Thanks for the blueprint!
Guest (not verified)
Sun, 07/31/2011 - 19:01
how and where did you install
how and where did you install the drawer slides? Are they attached directly to the sides of the nightstand?
Guest (not verified)
Fri, 12/02/2011 - 09:34
finishing nails???/
Where do you put the finishing nails, do you just nail them in right on top or from the backside so they don't show? Do you have to countersink a space for them first, and then fill it in with wood filler?
James Shelton
Wed, 05/02/2012 - 16:21
Pdf file
Hello,
I wanted to get the pdf for this project as it would be great to surprise my wife with.
But I keep getting an error every time I click on the pdf.
Thanks,
James
In reply to Pdf file by James Shelton
claydowling
Wed, 05/02/2012 - 18:25
Right click
Right click, Save Link As
Tori (not verified)
Tue, 05/08/2012 - 22:10
Can't wait to build this, but I have questions re: shrink/swell
I've just finished Grace's bookshelves and now I have the woodworking bug. This is hopefully my next project but I am concerned about shrinking and warping with the vertical panel pieces being glued and nailed to the 1x2 trim pieces (Step 1). Is there room for movement with this so that there won't be issues with warping or cracking?
MCD (not verified)
Sun, 05/20/2012 - 14:06
Drawer Slides
Where do we attach the drawer slides? Half of each set goes on the drawer, but where does the other half go?
claydowling
Sun, 05/20/2012 - 15:33
Positioning drawer slides
The traditional advice is to put the other half on the cabinet side. The vertical positioning is the challenge. You want about a dime's width between the bottom of the drawer and the opening. I usually just set the drawer on a pair of dimes. I assemble the slides, put the drawer into place, and then mark where the parts touch at the front, either on the drawer or the cabinet frame, depending on which you attached the slides to.
Senathon
Mon, 03/04/2013 - 12:17
Drawers Guide
This project was great and easy to build. The thing I can not figure out is how do the drawers are supposed to stay in without any type of guide. If a guide is suppoed to be used, can you provide tips on when and how to install for this table?
q0987
Thu, 12/31/2015 - 13:11
How to build the drawer support frame inside the bed table?
Hello all,
I am not able to figure out how the drawer is supported by the frame. Do we need to install extra frame in order to support the drawer? Basically, I don't understand how the drawer can slide in and out inside the table bed because I don't see any structure that can support the box.
Thank you
Wendy1972
Sat, 05/04/2019 - 07:19
Can't wait to make it!
Can't wait to make it!