
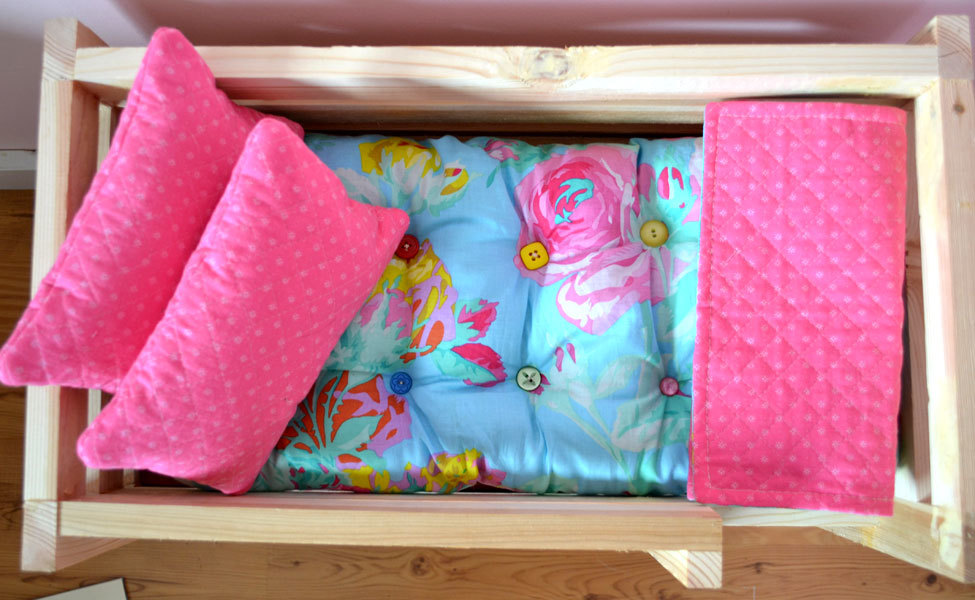

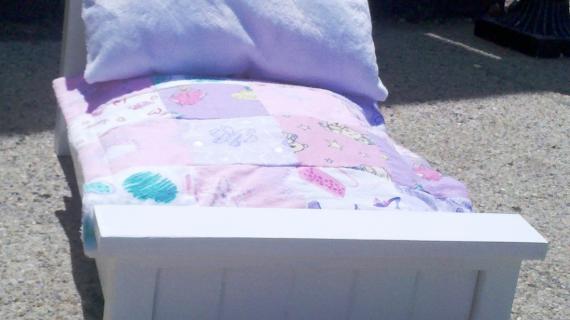
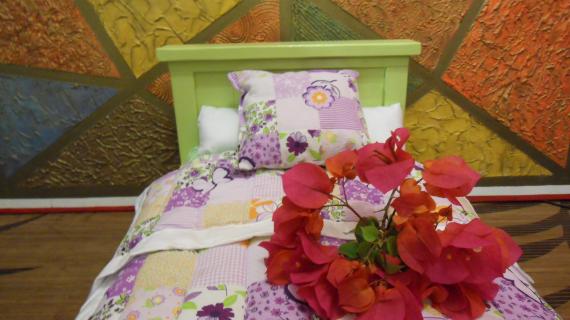
Make your own doll mattress for American girl doll furniture and beds with this simple step by step sewing tutorial designed for beginners.
Preparation
For one mattress finished size 10" x 19" I used:
1/2 - yard of fabric
Thread
Stuffing from recycled pillows and stuffed animals
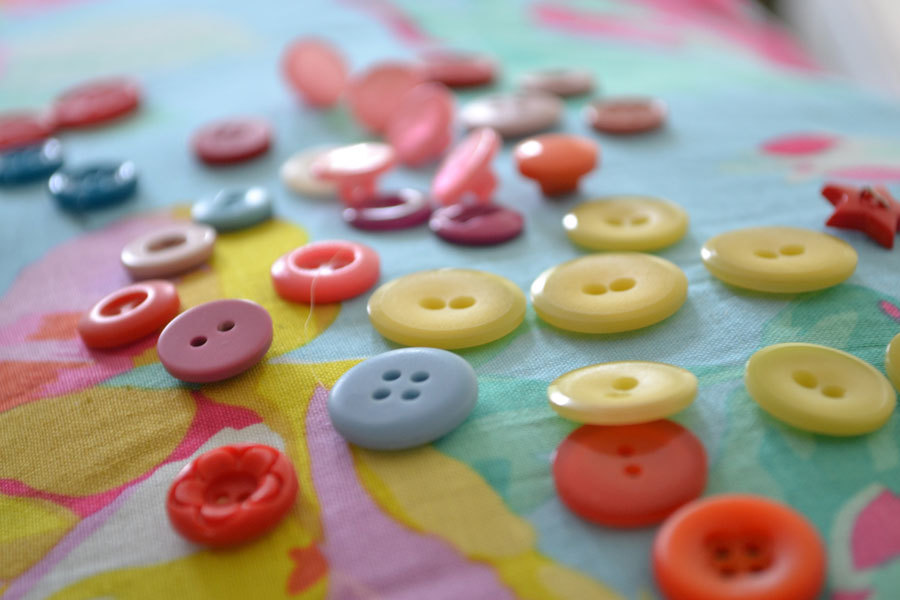
Mix-matched buttons
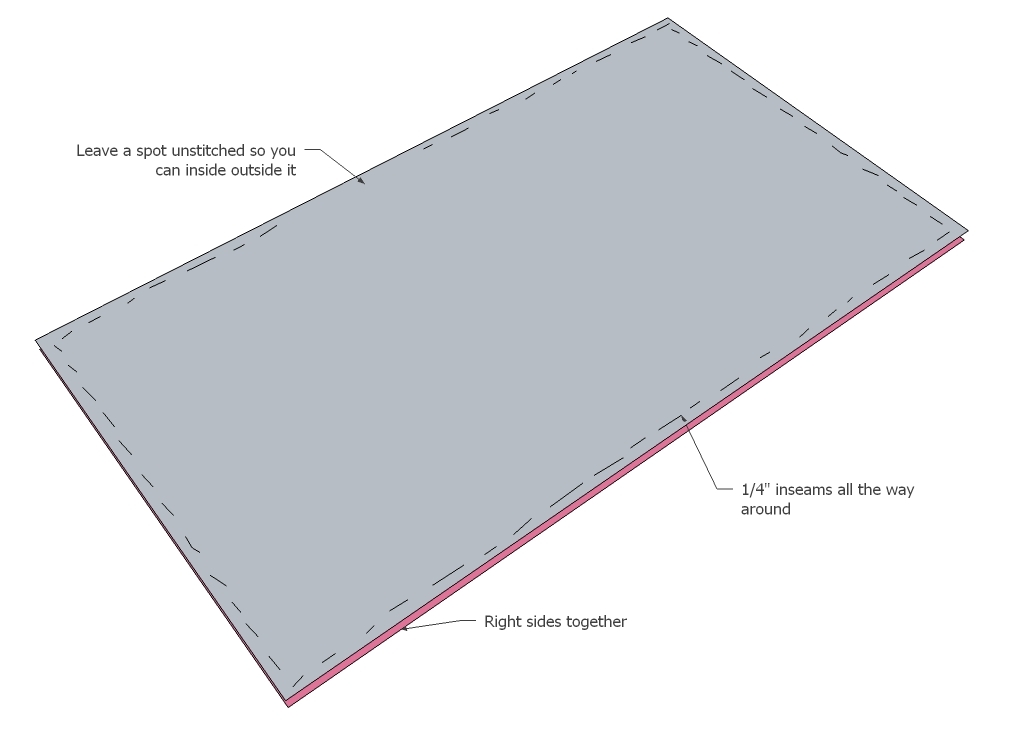
2 - Pieces of Fabric 2 1/2" wider and 2 1/2" longer than the desired finished mattress size (for 2" thick mattress)
Please read through the entire plan and all comments before beginning this project. It is also advisable to review the Getting Started Section. Take all necessary precautions to build safely and smartly. Work on a clean level surface, free of imperfections or debris. Always use straight boards. Check for square after each step. Always predrill holes before attaching with screws. Use glue with finish nails for a stronger hold. Wipe excess glue off bare wood for stained projects, as dried glue will not take stain. Be safe, have fun, and ask for help if you need it. Good luck!
Instructions
Step 1
Determining Size
Sewing the Edges
Step 2
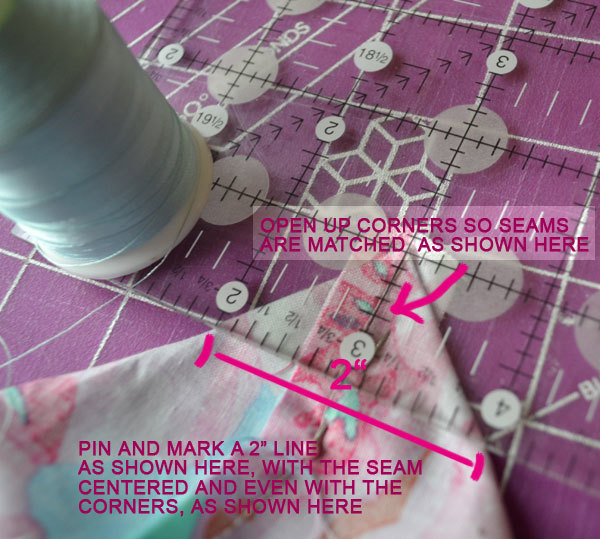
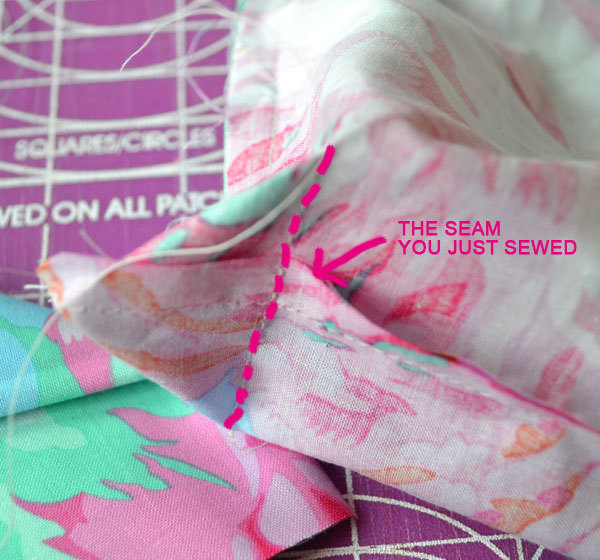
Clip Stitching Corners
Now this a little tricky, but once you "get" it you'll breeze through. Open up the corners so the seams you stitched in step 1 are matched up, and the corner forms a 90 degree angle, with the seam down the center. Pin. Then line a ruler up with this seam and mark a 2" clip off the corner. Sew a seam right on the mark you made.
Step 3
Seam Check
Step 4
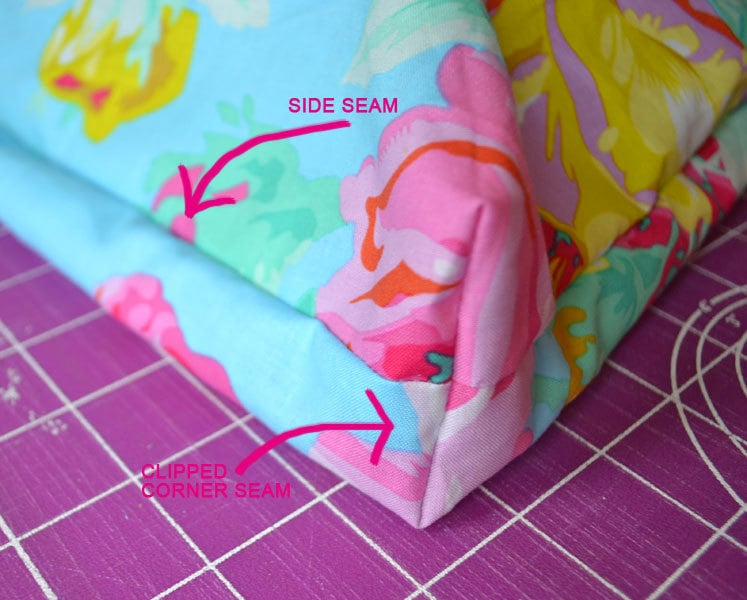
Finished Corners
Filling
Step 5
Step 6
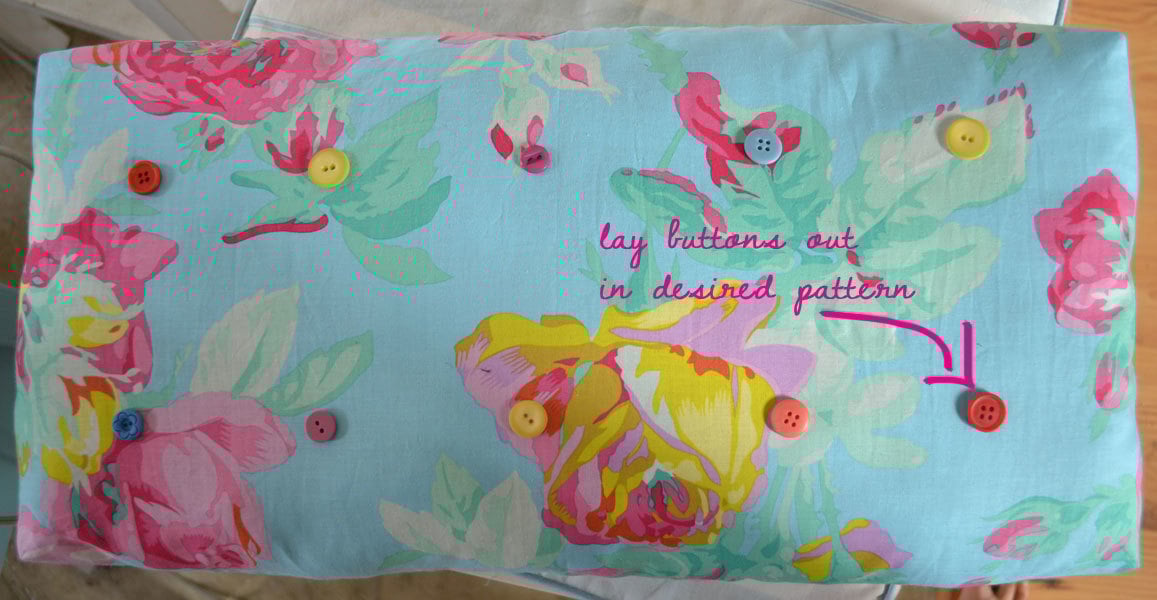
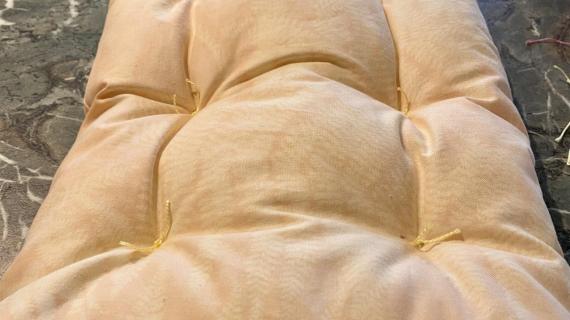
Layout Buttons
Next, lay the buttons out in a desired pattern. Note that you will need twice as many buttons, for the top and bottom. Once you are happy, mark the location of the buttons on front and back.
Step 7
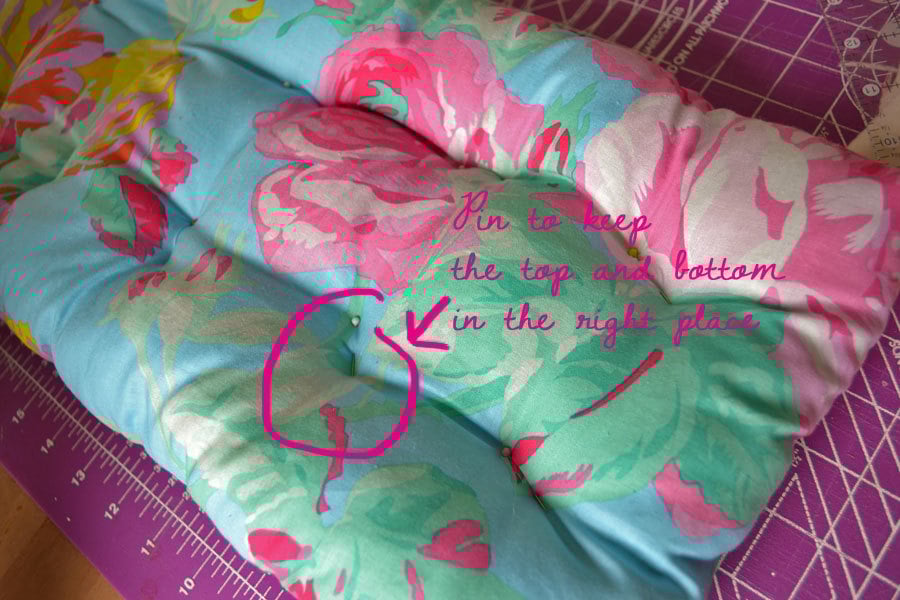
Pin Mattress
Step 8
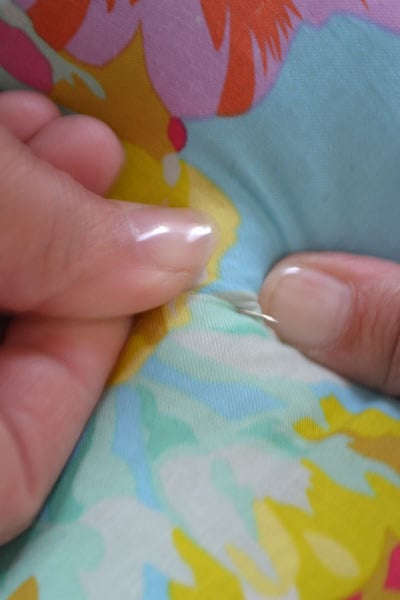
Sew Buttons
Step 9
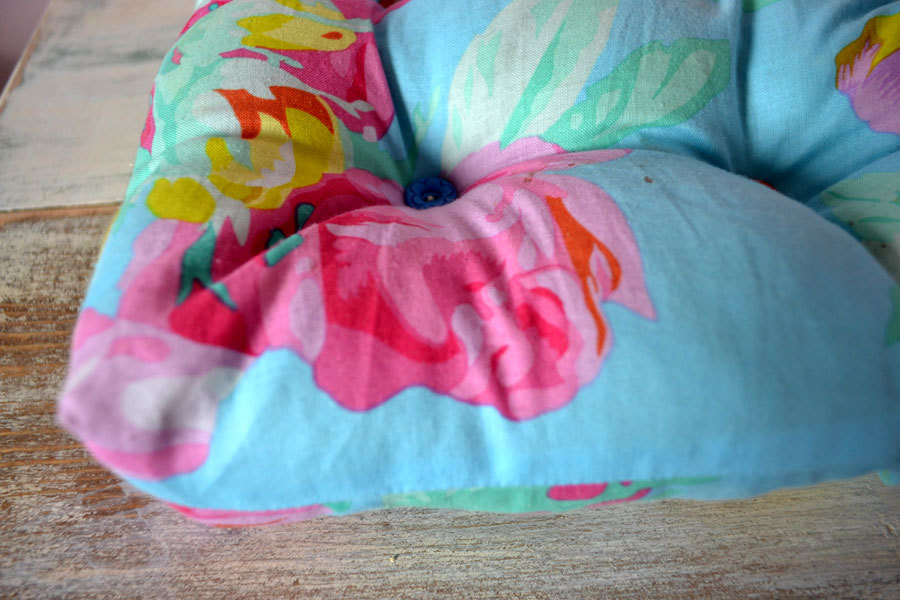
Admire Your Hard Work
Step 10
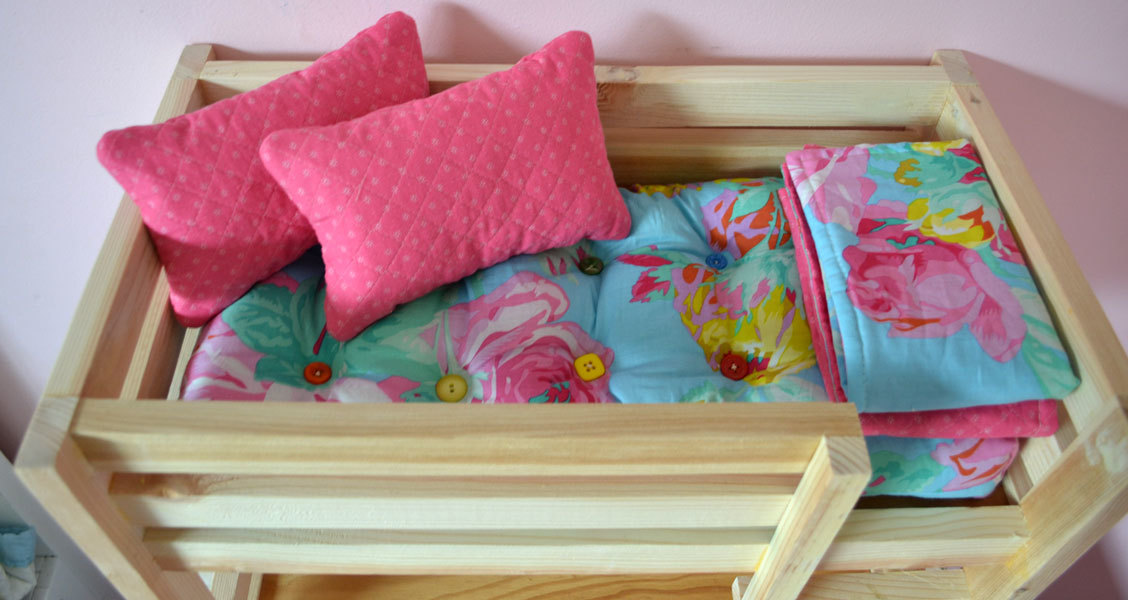
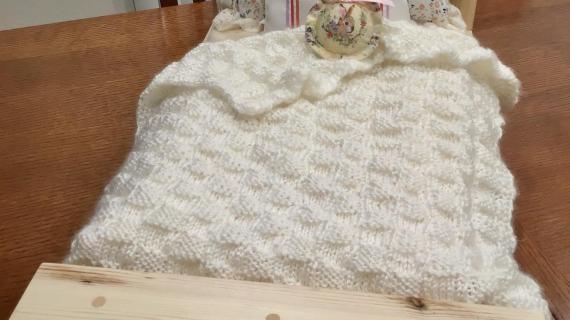
Pillows and Blankets
Step 11
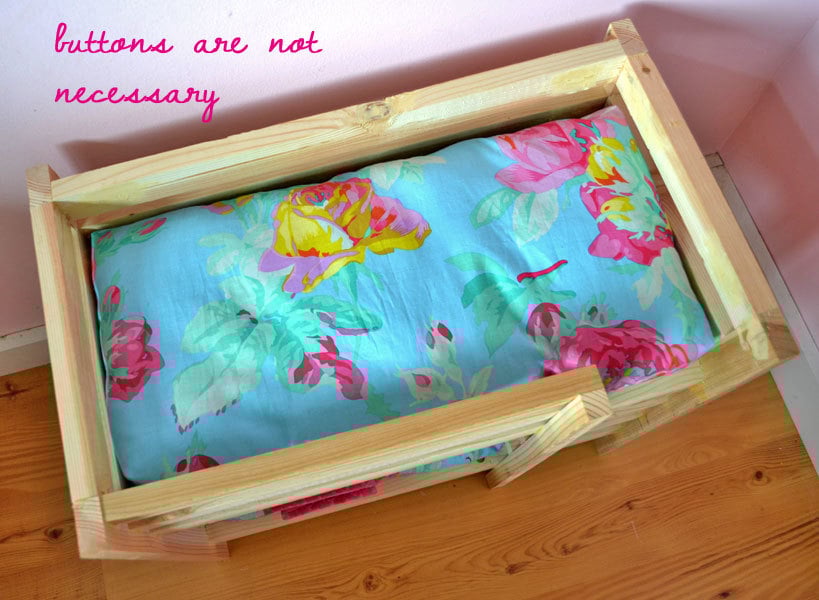
No Buttons
It is always recommended to apply a test coat on a hidden area or scrap piece to ensure color evenness and adhesion. Use primer or wood conditioner as needed.


Comments
blessednest
Thu, 08/11/2011 - 22:59
yay!
and i love this too! thank you ana!!!!
Tsu Dho Nimh
Fri, 08/12/2011 - 06:29
Fake Box Cushions
Oh yeah! Fake boxes. My favorite cushion technique.
If you are a perfectionist, you can sew a small tuck into the fabric from corner to corner to enhance the boxed look.
I combine that with an "envelope back" cushion cover, like used for pillow shams, where the back just overlaps. It makes nice couch cushion covers.
In reply to Fake Box Cushions by Tsu Dho Nimh
birdsandsoap
Mon, 08/15/2011 - 12:10
Thanks!
I'm slipcovering my neighbor's sofa right now and I think this envelope technique may be perfect for the seat cushions. Thanks for the idea!
spiceylg
Fri, 08/12/2011 - 07:42
:-)
Thanx, I needed this!
Cherie Heltne (not verified)
Fri, 08/12/2011 - 08:39
Fabric
What fabric is that? It's amazing!
In reply to Fabric by Cherie Heltne (not verified)
Ana White
Fri, 08/12/2011 - 09:34
Thanks everyone! The fabric
Thanks everyone! The fabric is Kaffe Fasset English Rose.
nealandlori
Sat, 08/13/2011 - 10:06
more my expertise
This project is more where my talent lies although I have high hopes of making the beds to put them on too. Last year I made all my girls in daycare baby doll diaper bags full of clothes, changing pads, etc. I love the idea of making them beds with mattresses and maybe blankets and rag dols to go with it. I'm very new to woodworking so we will have to see if I can figure it out well enough for gifts. I love your plans, so far on my first project very easy to follow. I can't wait to start on the baby doll stuff!
Guest (not verified)
Thu, 08/18/2011 - 13:06
NO Buttons!
This is how I made my Grandaughters (x4) mattress for their doll beds, except I did NOT use buttons. In the place of buttons I used embroidery thread and make tucks. The reason I did this is because of their ages, 4 - 14 months. I am in the process of making the beds to go with the mattresses. Did it a bit backwards because of the heat in my state. Trying to plan ahead for Christmas gifts!!!
Thanks for all you do Ana!!!
Loretta (not verified)
Wed, 10/12/2011 - 13:27
At our daughter's request my
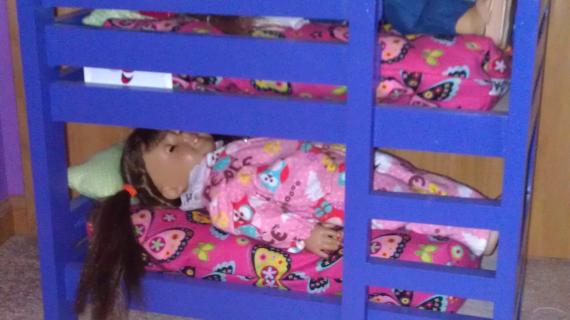
At our daughter's request my husband made the bunkbed for our granddaughter for Christmas, so of course I got out my sewing machine and made the mattresses -- twice!
For the first 2 mattresses I used your dimensions: 12-1/2 x 21-1/2. Got the mattresses all stuffed and found them to be too short for the bed by about 2 inches! Well, I wanted the mattresses to fill the entire space, so I made another set using my dimensions: 12-1/2 x 24, and they fit perfectly.
I think what you forgot to figure was those nice boxy corners actually take up an extra 2-1/2 inches on each end of the mattress. Anyway, just thought I'd pass this along for anyone else making them.
The first set of mattresses won't go to waste, as I figure that our granddaughter's dolls will need a place to sleep when they come down with her to spend the night! It's all fun isn't it?! Thanks for the pattern!
Dianne (not verified)
Sat, 11/10/2012 - 17:07
Hey Loretta, I know what
Hey Loretta,
I know what happened because I almost did the same thing. At first I printed out the PDF format which does not show pictures. I realized my mattress was going to be the wrong size. I went back and looked at the pictures. On step 2, you place your ruler across the triangle and slide it down until the bottom of the triangle from side to side measures two inches - not from top down. When you do this, from top down only measures one inch. Does this make sense? Look at the picture and you see the two inches are across the bottom not up and down.
ChelleWeezie (not verified)
Wed, 10/12/2011 - 14:29
Lorretta.. I just started
Lorretta.. I just started these this morning, same day as your post. I have them cut and everything, one even sewn completely... then I get on and see what you wrote! Now I am in a panic. My husband hasn't built the bunk bed yet.
Loretta.. will you do me a favor and measure your beds inside length. :-)
Loretta (not verified)
Thu, 10/27/2011 - 14:53
Bunkbed measurement
Oh ChelleWeezie, I didn't realize that you asked for these dimensions, so I'm really sorry to take so long to reply.
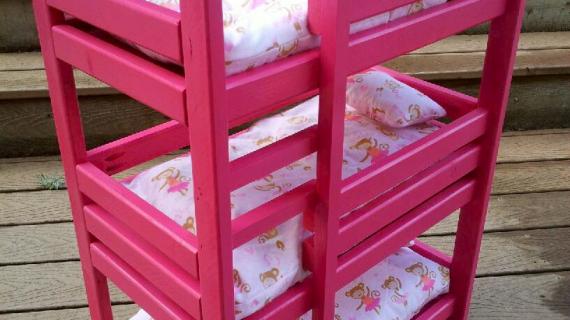
Inside dimensions of the bunk beds are 19" x 9.5"
I made my mattresses extra fluffy, so that may be why the first ones I made were too short. (I'm really surprised that no one else ran into this problem.)
You could just not stuff them quite so full and that would probably work. Or maybe add a nice big doll-size pillow, or even roll up the doll's blanket and place at the foot of the bed if you want to fill up the space. Your daughter will love the bunkbeds in any case!
kyliandkatelinsmama
Sun, 10/16/2011 - 08:09
So cute :)
My husband built the bunk beds last night for our oldest daughter for Christmas. Thankyou so much ! It was an answered prayer to find your sight ! Money is so tight this year and she was just dying to have an American girl Christmas. I was able to get the doll but when I looked at the accessories I almost cried in the middle of the store !!! But we found this site when looking to see if we could find someone who builds them and sales them. It was his first project EVER and he did awesome, I am quite fond of him but I think he may even have a talent for this. But the part that brings me to tears is this custom doll bed which was sturdy enough for my husband to sit on set us back a whopping 15 dollars ! Now for the scarrey part, I am going to have to try to sew for the first time ! lol Thank you so much and God Bless you ! You saved Christmas for my eight year old !
Denise Wittenbach (not verified)
Tue, 01/03/2012 - 19:43
I just made the 'fancy' crib,
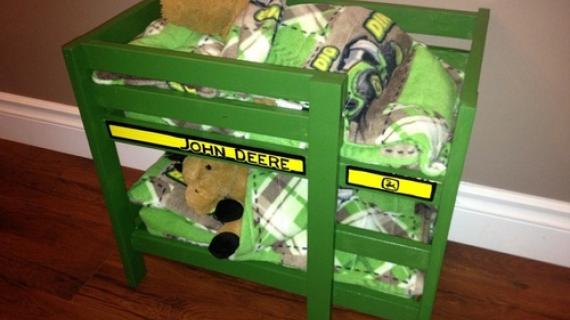
I just made the 'fancy' crib, bunk bed and mattress for all :) The girls couldn't decide on the fabric, so I used a pink fabric for one side and purple for the other! Super easy and quick!
susanr
Fri, 03/02/2012 - 06:27
wow!
I sew a lot and have never ever seen this!! This is going to be great for pillows on my bed, too!!
Andie Nichols (not verified)
Mon, 03/26/2012 - 11:52
if I was going to use an 1
if I was going to use an 1 1/2 '' thick matress instead of a 2 '"matress like the direction are shown - should I just subtract a 1/2 inch and only cut 2 pieces of fabric 2 inch wider and 2 inches longer than the desired finished matress instead of the 2 1/2 that is suggested for the 2" thick matress
Guest (not verified)
Tue, 04/10/2012 - 07:27
bunk bed for American Girl Doll
This is so cute. My hubby just made it for our grandaughter. I will be making the mattress and pillows and then ship it to her. Hubby was so proud of himself after he finished it. We will be painting it to match her decor in her bedroom it is Disney colors. Thanks Anna
K Coake (not verified)
Tue, 10/16/2012 - 20:54
Linking to your site
Hi -
I wanted to first Thank you for this tutorial. It was really helpful to me and my mom as we worked on making bedding for my daughters American Girl Doll beds. I also wanted to let you know that I am doing a post about our making of the bedding and mattress we just made. I will be linking to this post as it was the inspiration for how to make our mattress. Here is the link if you want to see the reference to your site. http://realcoake.blogspot.com/2012/10/american-girl-doll-bedding-patter…. Once again, thank you very much for your helpful tutorial. Have a great night.
marcia siluch (not verified)
Mon, 12/17/2012 - 05:27
Doll mattress
thank you for the awesome tutorial, just completed 2 of them.
marcia
Lauren Grimshaw (not verified)
Wed, 01/02/2013 - 20:47
Doll Mattress
I just finished making these mattresses for the bunk beds my husband is making. Thank you for such a simple method - I could not believe how quickly they were completed. I wanted to mention that I used coordinating bundles of 5 fat quarters (one bundle for the top bunk and one for the bottom) and used a different fabric for each side of the mattress so my daughter can flip it when she wants to. The fat quarters are 21", not the 21.5" required, so to compensate I just measured 1 3/4 inches for the clipped corners instead of 2 inches. They came out perfectly, and I used the other 3 fat quarters from each bundle to make both a double sided blanket and a pillow for each bed. It was an easy way to get a coordinated look!
gmom karen (not verified)
Sat, 01/19/2013 - 12:49
Even easier
My son is making the bunkbeds and I the bedding from my grand-daughter's birthday. If you want to make this even easier, go in your linen closet and find those pillow cases that you hate to toss even though they don't match anything else. The width of case was perfect for the length of the mattress, I just cut off the right size and had only one seam to sew.
ladams1221
Sun, 11/15/2015 - 10:05
Mattress dimensions are incorrect
Hi, Ana - Love the doll bed & bedding. I just made them for my granddaughter. The bedding took about two hours total for two beds. As a professional dressmaker of 30+ years, (and a woodworker for about 20), I wanted to suggest an amendment to the instructions for the mattresses. If you measure down from the corner 2", and mark a line across the corner, that line/seam will measure approximately 4", thus making a 4" thick mattress - not the 2" one that is mentioned in the tutorial. Measure down 1" for a 2"-thick mattress, which fits the little bed nicely. Also, I changed the cut size of the mattress, adding 2" for the 2" you're taking away in height, plus the 1/2" seam allowance, plus an extra 1/4" just for good measure. My dimensions were 12" x 21¾" for a 2" high mattress. For the original 4" high mattress, add 4" plus the doubled seam allowance. After filling all the nail & pocket holes, I sanded, then I spray painted the bed using Zinsser 123 spray primer, followed by Krylon all-surface spray paint. It looked gorgeous! Thanks for the darling bed and bedding. It was the hit of the birthday party with all the little girls!
ladams1221
Sun, 11/15/2015 - 10:09
Sheesh - I should have read more closely!
I just saw that you were measuring across the corner 2", not down! My bad. Sorry - just delete my post(s).