
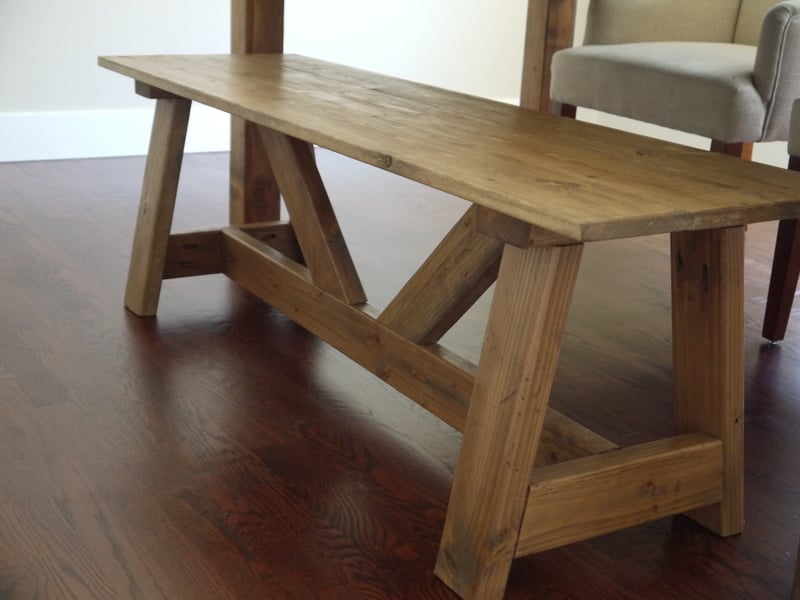

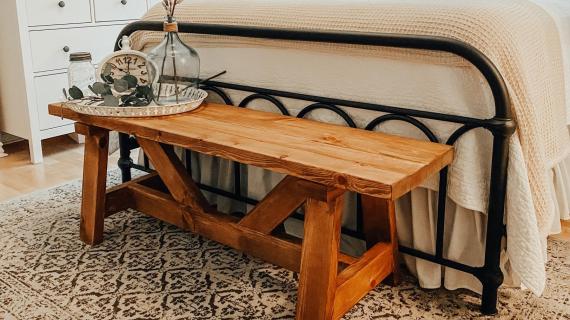
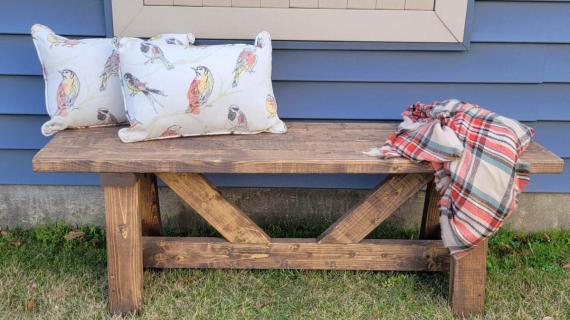
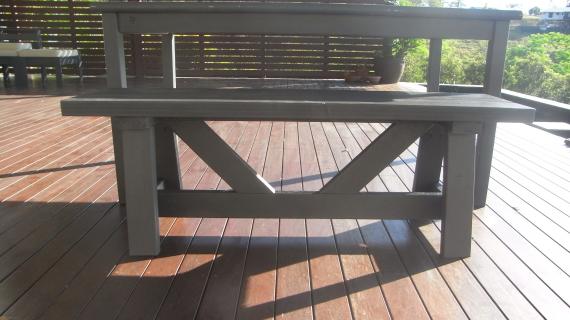
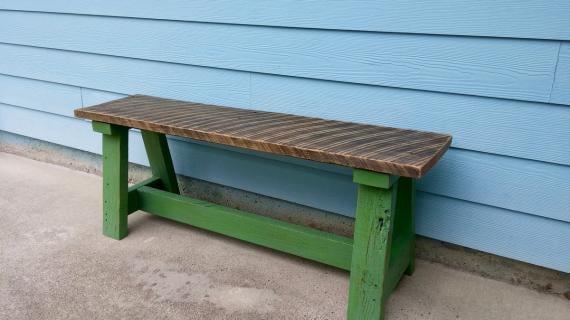
Make this sturdy and beautiful truss style bench with just 5 2x4s - we make it easy with step by step plans and diagrams.
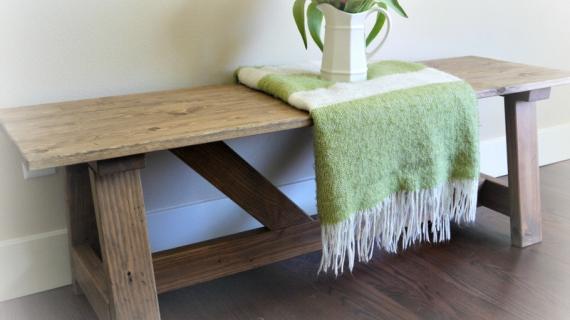
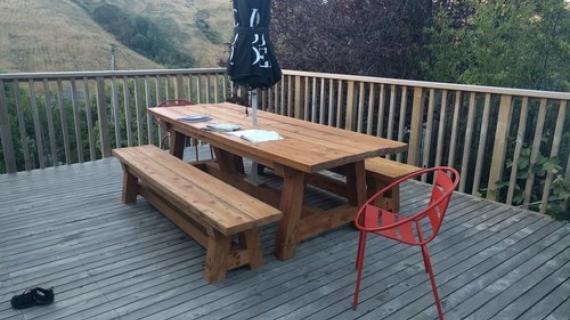
Also build the matching table plans.
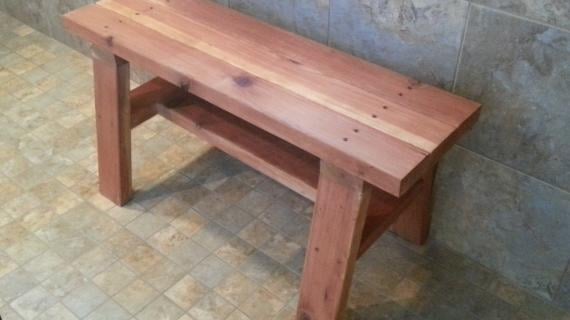
I love that this bench is made from just 5 2x4s.
I love that you can make the matching table from 2x4s.
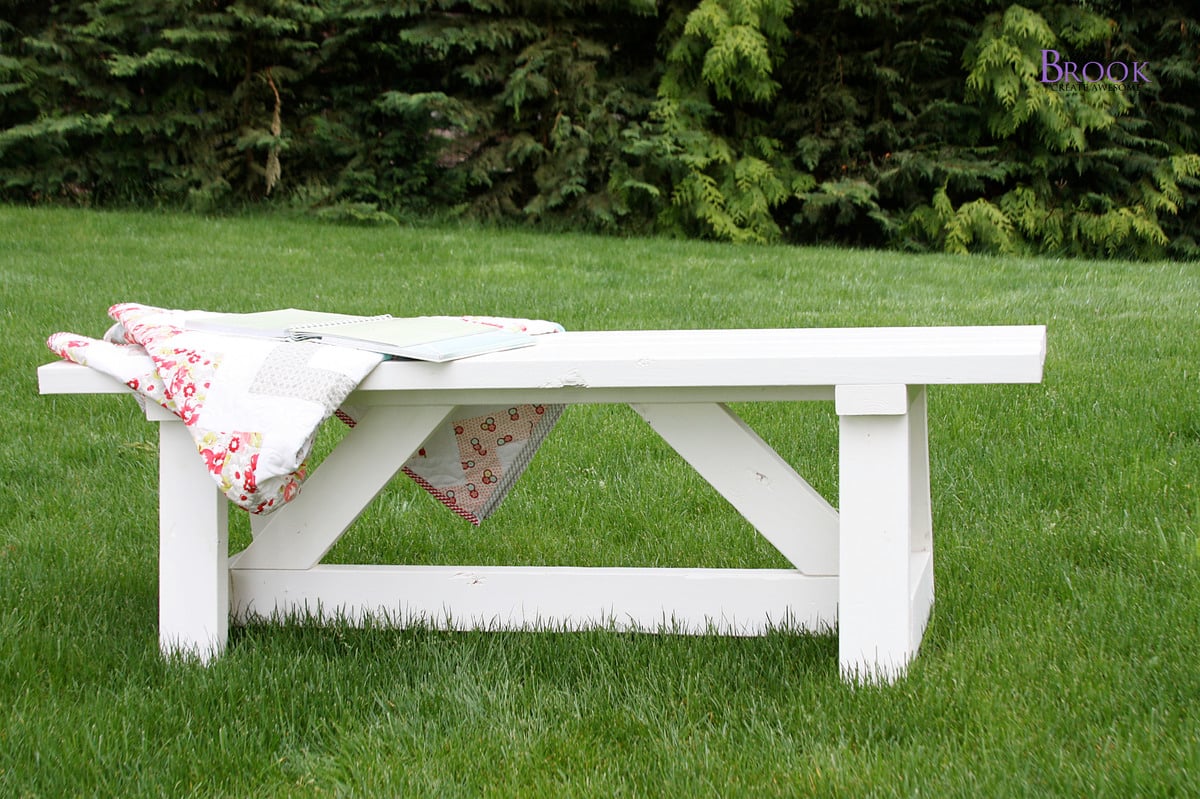
I love that you can adapt this table and bench set for exterior use.

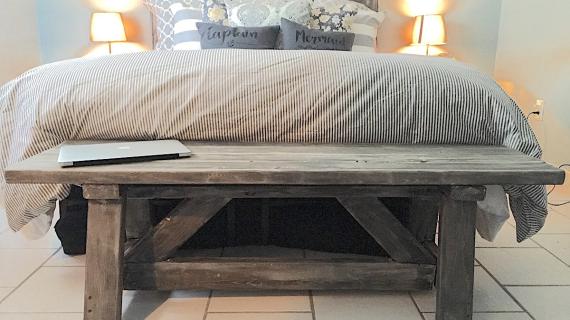
This project was built by Being Brook. Thank you Brook for working with me on this set. I hope you enjoyed this plan and stop over and see lots more photos and tips from Brook here.
PS - Brook has a tutorial on the mini serving stands here.
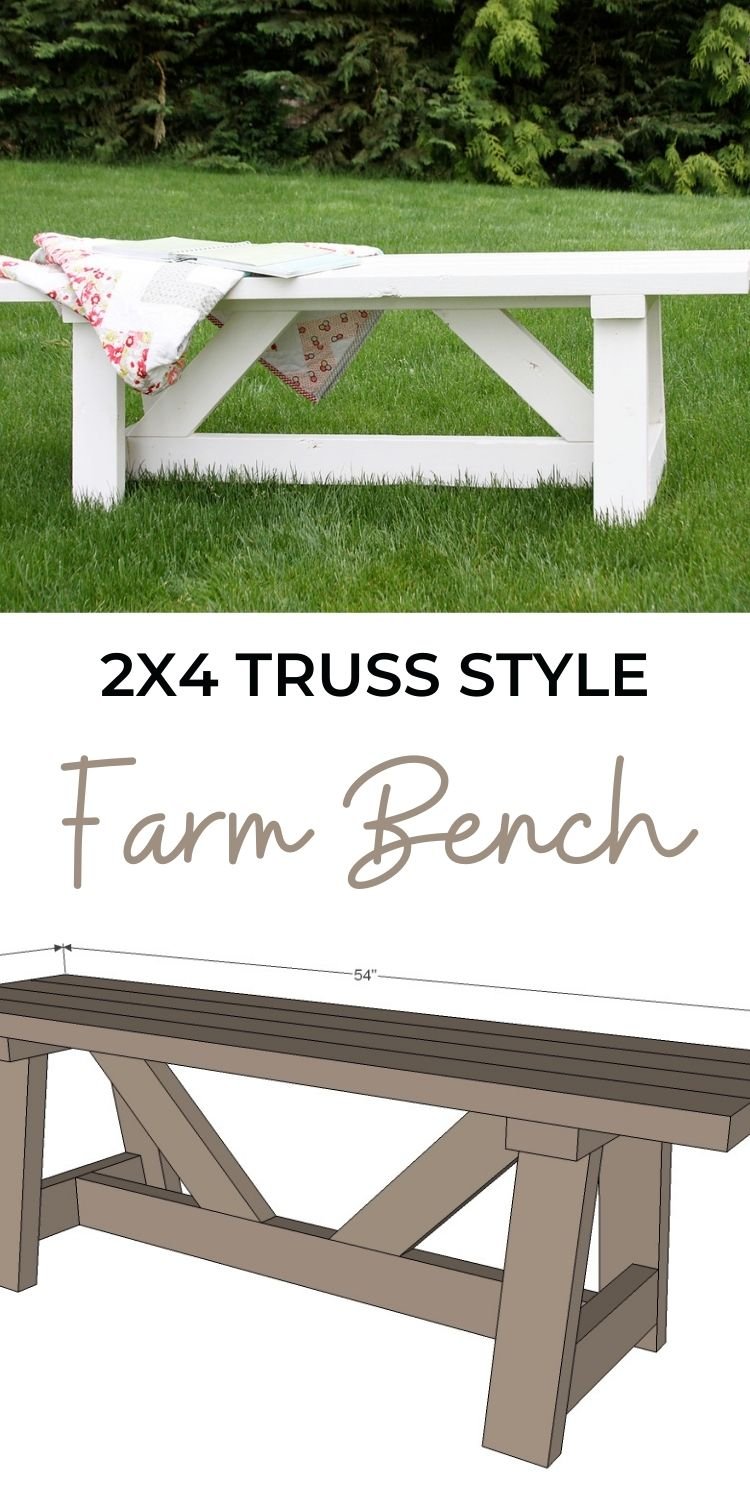
Pin for Later!
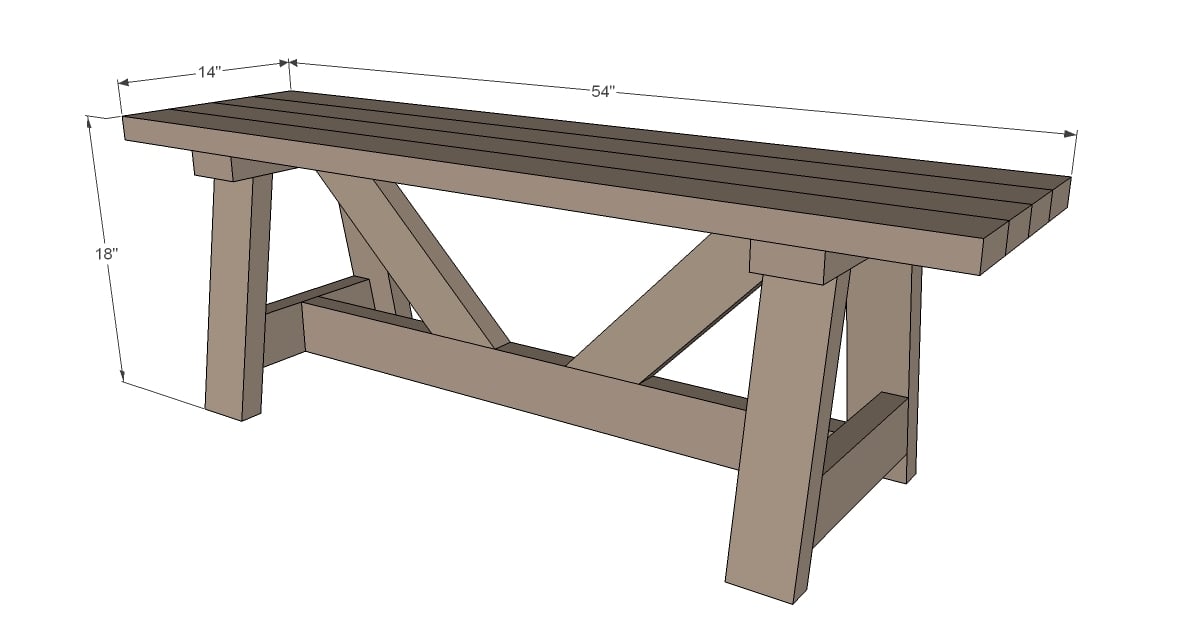
Preparation
5 – 2x4 @ 8 feet long – cut longest boards first
2-1/2" self tapping wood screws (star bit)
Optional 1x3 under bench supports
- 2 – 2x4 @ 14”
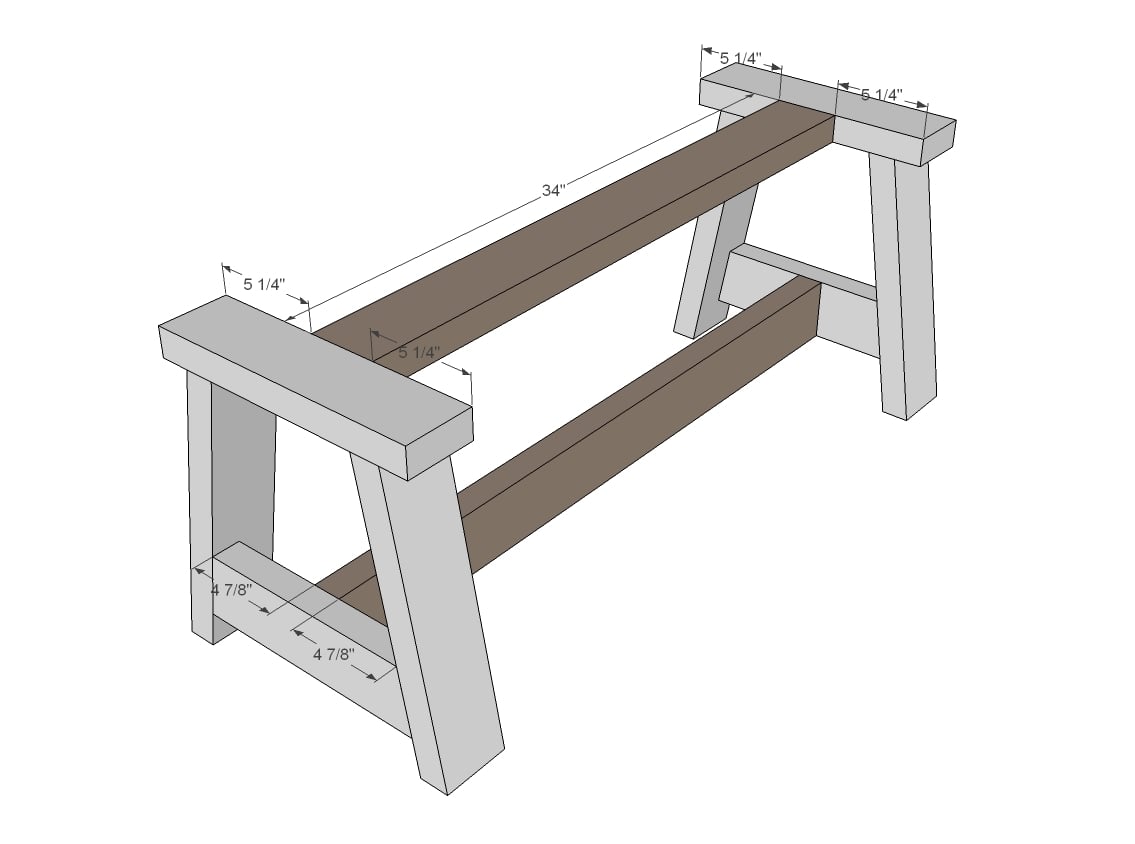
- 4 – 2x4 @ 15 1/4" – both ends beveled at 10 degrees off square, ends ARE parallel
- 2 – 2x4 @ 12 1/2" – long point to long point, both ends cut at 10 degrees off square, NOT parallel
- 1 – 2x4 @ 34”
- 1 – 2x4 @ 38”
- 2 – 2x4 @ 13 3/8” (both ends cut at 45 degrees off square, ends ARE parallel)
- 4 – 2x4 @ 54”


Instructions
Step 1

Build two ends as shown above, using screws to attach. They are identical.
Alternative method: Brook used the Kreg Jig on 1 1/2" setting with 2 1/2" pocket holes.
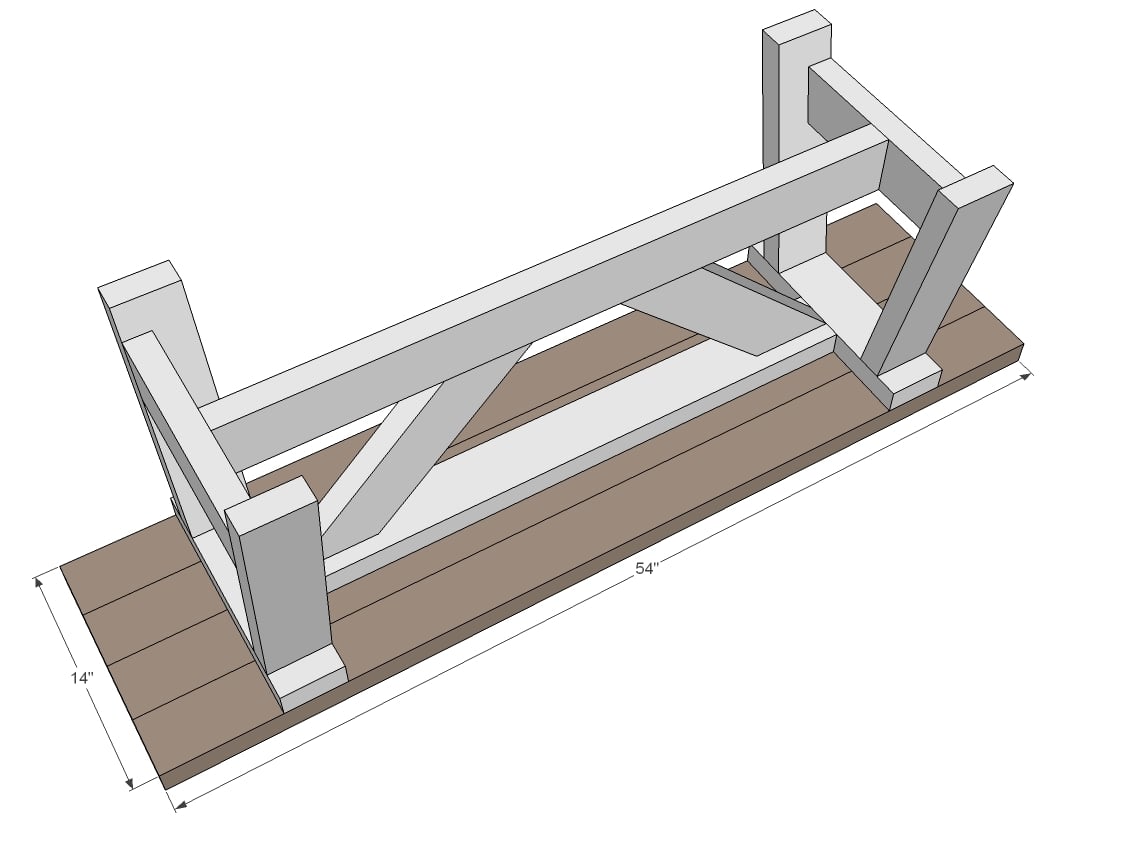
Step 2
Now add the stretchers, for the bottom, use the 2-1/2" screws.
For the top, Kreg Jig is recommended to attach, but alternative method is to "toenail" screws in at an angle.
The top will be reinforced with the seat boards as well.
Step 3

And then the cross supports. Attach through the top with 2-1/2" screws.
For the bottom, either use pocket holes or the toenail method.
For the toenail method, screw through the top about 1-1/2" from the angled tip end, straight down.
Step 4
Finally, the seat boards. Attach from underside with 2-1/2" screws.
NOTE: You can leave a small 1/8" gap between boards for water drainage if desired.
Step 5
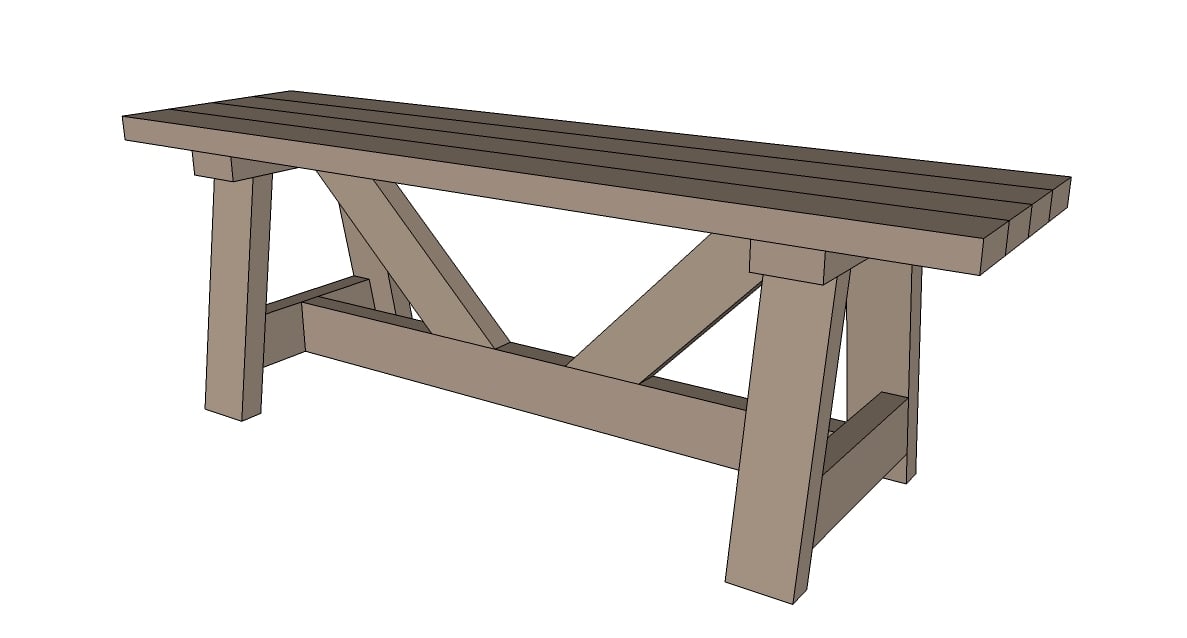
Sand the bench well and stain or paint as desired.
It is always recommended to apply a test coat on a hidden area or scrap piece to ensure color evenness and adhesion. Use primer or wood conditioner as needed.


Comments
whitney_smith
Thu, 04/26/2012 - 11:24
So simple and great and
So simple and great and CHEAP! Will be looking through my pile of wood.
RHgaijin2
Sun, 08/11/2019 - 06:59
Truss style bench
I made two of these benches over a weekend and posted a video of it on youtube at:
https://youtu.be/siTT2jxBsWE
I also have a brag post
RHgaijin2
Tue, 04/07/2020 - 06:48
2x4 Truss Bench X
I made another one and modified the angle braces on it to form an X. I made a youtube video of it here. https://youtu.be/RQriGWLUAIU
luckrish (not verified)
Thu, 04/26/2012 - 12:56
Wonderful!
I can't wait to try these! I was literally just thinking about making some benches for my dining room...and then you post these. FABULOUS!
Michelle Caudle (not verified)
Mon, 05/07/2012 - 18:18
Perfect!
I've been wanting a cute, cheap bench for my front yard and this is PERFECT! And since it's made from 2x4's (my hubby's lumber of choice) ...I can get him to build it while I finish my other building projects!!!
KaraPUK (not verified)
Tue, 05/29/2012 - 08:43
Very, very basic question.
This will be my first ever DIY project so please don't laugh at my basic question. I do not have a Kreg Jig so would be using counter sink screw method but I don't know exactly where these go on the first step? Any help would be greatly appreciated. Thanks from not so sunny Scotland!
BeckySmith
Wed, 06/06/2012 - 06:13
Help attaching cross supports
I built this bench yesterday and I am so thrilled with how it turned out. I'll post pics as soon as I get the finish on it tomorrow. The only thing I struggled with is how to attach the cross supports. It wasn't a problem so countersink the screws through the top stretcher since it is positioned horizontally but I couldn't figure out a good way to attach the cross support to the bottom stretcher. I ended up drilling through the angled part of the support from the top and into the bottom stretcher. This made sort of an unsightly screw in an odd place. I know the plans suggest using a Kreg jig, which I did for the top and legs but I don't really want the big holes created by the jig on the cross pieces since I will be staining the bench. Any suggestions?
zookeeperjay
Thu, 07/05/2012 - 17:12
1x3
I'm so excited about this bench! I saw that I could add a 1x3 for extra support I did not see where I should do that. I need the extra support any suggestions on where it goes?
zookeeperjay
Fri, 07/06/2012 - 09:39
Help please?
Does the extra support for this bench go lengthwise under the bench? I have 5 teens and one almost teen. Need that extra oomph like fish need water. All the pieces are cut and ready to go! Anxiously waiting for reply. Warmly Jay
In reply to Help please? by zookeeperjay
Lady Goats
Fri, 07/06/2012 - 09:59
1x3s
Hi Jay, I'm really not getting where the extra 1x3 would go, either, if it were me, I would build the bench as instructed, then test to see if you need the supports. It looks really sturdy to me, so you may not need the supports (trust me, I have to worry about extremely obese in laws, and I wouldn't think it would need them). If it turns out that you're worried about the structure, then add the 1x3 where it's needed.
zookeeperjay
Fri, 07/06/2012 - 10:23
Thank you LadyGoats. I'm
Thank you LadyGoats. I'm hoping to finish this today. It will be perfect for the front porch. ;o)
Alma (not verified)
Thu, 08/09/2012 - 15:22
Providence Chairs
I'd love to see some chairs to go with this collection. I made the table the other day and it is beautiful. I was hoping to figure out how to make chairs from this bench, but just can't figure out how to attach a back. Anyone else?
spiceylg
Thu, 08/23/2012 - 05:44
Providence bench angles
Hello. Can somebody please clarify, I assume you have to cut a 10 degree angle on both the top and bottom of the legs?
TxDork76
Mon, 04/01/2013 - 14:17
1x3 support and PH screws
Making this for my friends' porch. It's going well but I'm not sure about the placement for the 1x3 support either. The only place I could figure would be under the top, perpendicular to the boards. Not sure though.
I did run into a problem attaching the cross member on the legs (Step 1). I drilled 1.5" pocket holes but the 2.5" screws poked out a bit so I used 2" screws instead.
bullitt453
Mon, 05/20/2013 - 09:05
For those wondering about the 1x3 supports
Take a look at the Restoration Hardware bench that these plans are based on. TxDork76 is correct; the 1x3s go perpendicular to the 2x4 top slats.
http://www.restorationhardware.com/catalog/product/product.jsp?productI…
I plan to build this bench for my parents this week. Will definitely post the finished product.
eheinze12
Wed, 08/07/2013 - 08:32
pdf
I just wanted to ask if I can get the PDF emailed to me? It is giving me an error and I'd love to work on this asap! I am looking to give my entryway a makover:)
Ana White
Wed, 08/07/2013 - 11:32
Try this for the pdf issue
Here is a temporary solution for the PDF problems
- Go to PRINTER-FRIENDLY VERSION at the bottom of the plan;
- Copy the URL;
- Go to http://www.web2pdfconvert.com/
- Paste the URL in the window and create a PDF;
- Download the PDF to your computer and give it a proper name;
- And start building…
momofour09
Thu, 09/26/2013 - 12:23
Making larger?
I want to make the 4x4 truss table: http://ana-white.com/2013/09/plans/4x4-truss-beam-table and was wondering if this bench would work. Also if it does, what length would you recommend? Can the 45 degree pieces just be moved down to accomodate the adjusted size?
Thx
Melissa Keplinger
Sun, 07/13/2014 - 11:09
Supports
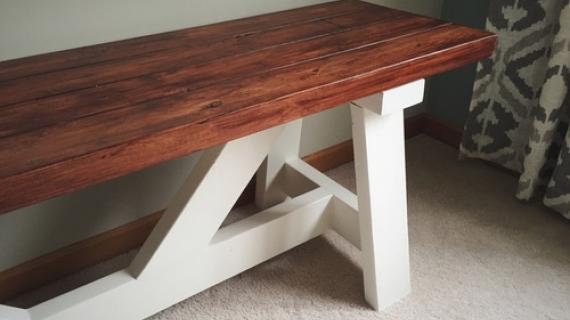
Did anybody comment on the fact that the 45 degree supports in the plans don't match the images. The images show them providing support for the middle of the table, while the plans are not providing any useful purpose, and actually will get in the way of a person's legs when they are seated.
I attached them as shown in the images because the extra stability of the middle of the table and the benches is absolutely necessary.
The plans should be updated to reflect this.
lisashortell
Tue, 12/13/2016 - 12:32
Warping?
Hello! I love this bench and have built it many times modifying it for different needs or styles.... this build I modified the top to 3 2x6's and noticed my benches starting to wobble. I took it part and my top had warped... I didn't add the cross support.... would that help stop the top from twisting? Or at 2x6's too big for the bench base? Any hep is greatly appreciated. I haven't had this issue before.... ? Thank you!!
cherokeesteve
Thu, 08/06/2020 - 16:32
Greatly appreciate the plans for this bench
Was fairly easy to make for this new to woodworking person. Came out better than expected (due to my inexperience). Stained with a light, natural looking honey pine and love how it turned out.
Bigherd
Wed, 01/13/2021 - 07:54
2X4 Truss Style farmhouse bench.
I made two of these. Both were 48" long and 18" tall. One was 12" deep and the other 15" One bench seat was made up of 4 2x4s while the 15" bench seat was made using three 2x6's. I used my jointer flatten the edge and face of the lumber. then i used my thickness plainer to get the width i needed. I had about $30 in each bench and ended up selling each one for $100. I enjoyed making this bench.
woodworkHER
Wed, 04/28/2021 - 12:41
Awesome!
I loved making this bench, it was my first project following wood plans. I want to make an outdoor sofa, but considering the price of lumber I wanted a cheaper project to try out first. Your plans are wonderful, I only wish there were screw locations included with the plans like others I’ve seen.