

Make this farmhouse style wall jewelry cabinet! Free plans from Ana-White.com
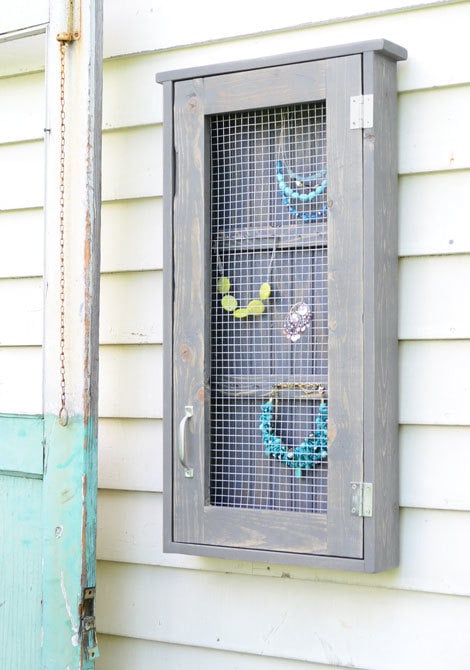
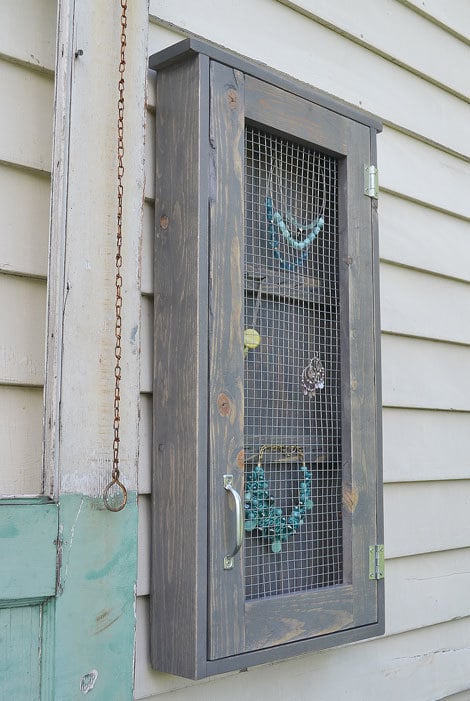

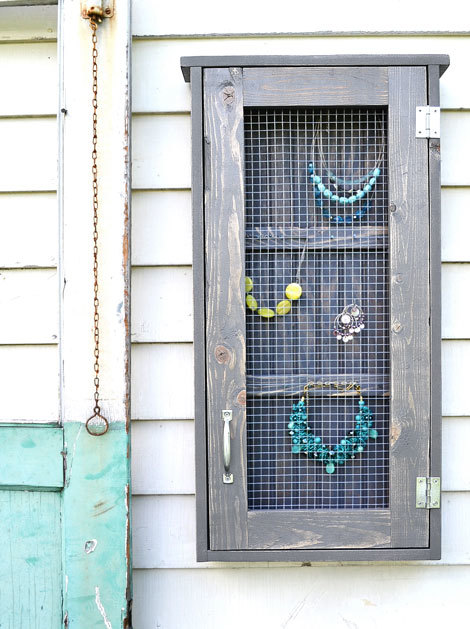
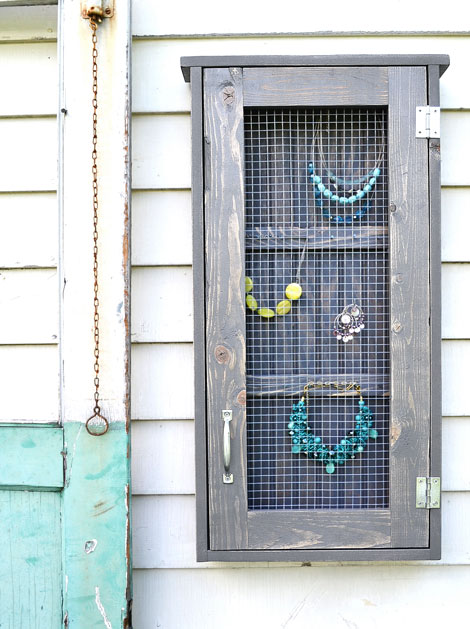
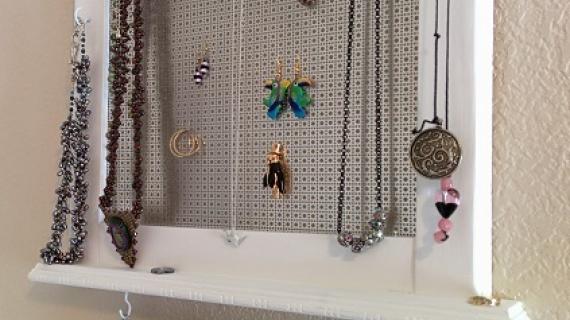
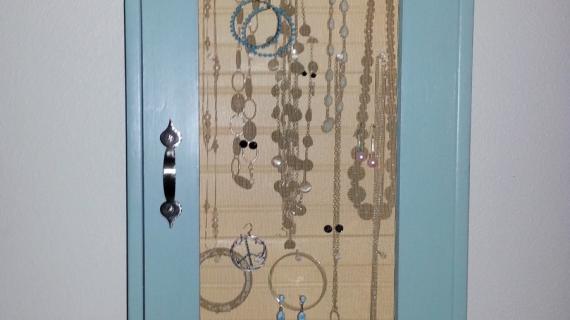
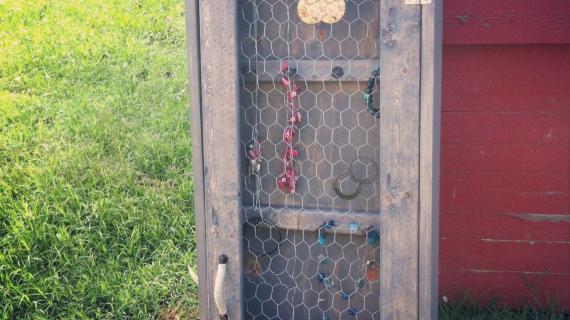
Display your statement jewelry in this easy to make farmhouse style cabinet.

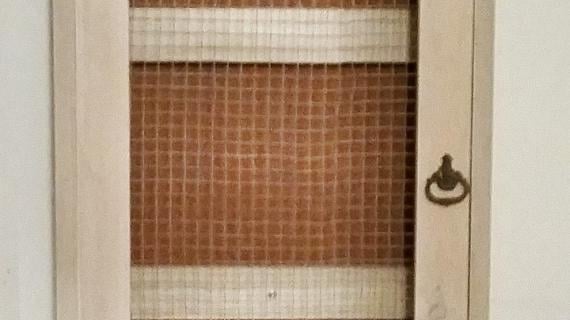
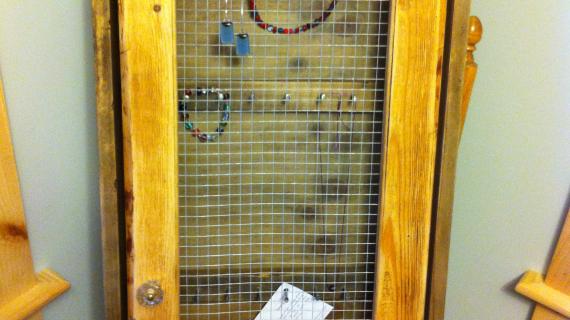
It's made of wood - so you can stain it any color of your choice. This cabinet is stained "Classic Gray" by Minwax Wood Stain.
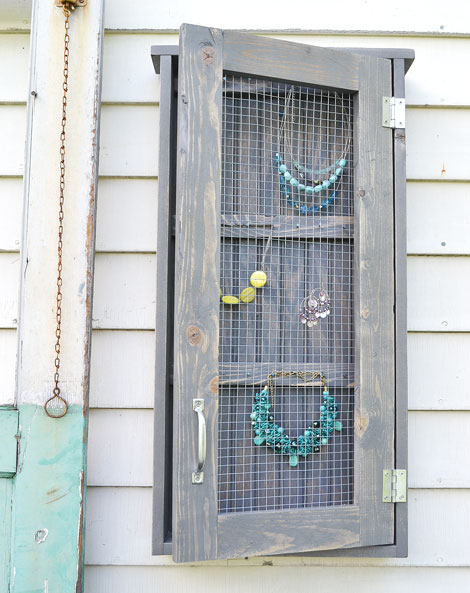
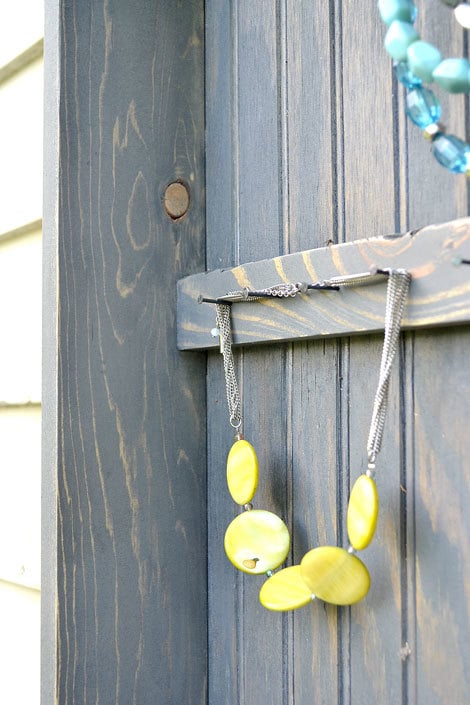
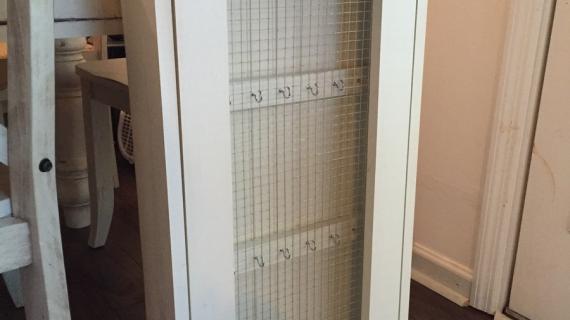
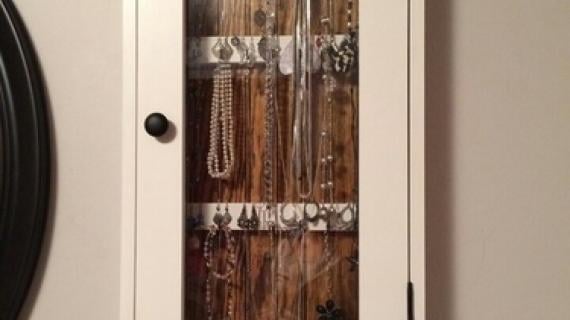
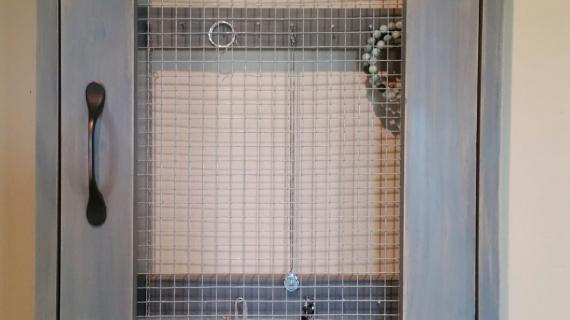
The cabinet hinges open to reveal rustic nails used as jewelry hooks.
Beadboard on the back adds to the charm - but you can also use scrap wood or even leave the back off (hello shiplap wall!)

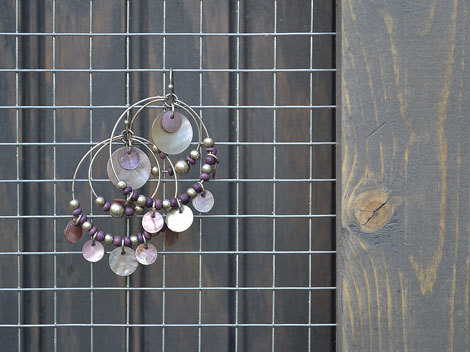
We love that the hardware cloth door is perfect for hooking earrings too.

This is a gorgeous piece, only made more beautiful by your jewelry!
The free plans are following.
Thank you for using our plans. If you do build, please share a pic - you can tag me on Instagram @anawhitediy or #anawhite or upload a brag post.
Ana
Preparation
1 - 1x4 @ 8 feet long
1 - 1x3 @ 8 feet long
1 - 1x2 @ 8 feet long
1/4" plywood or beadboard for back @ 16" x 32" (optional)
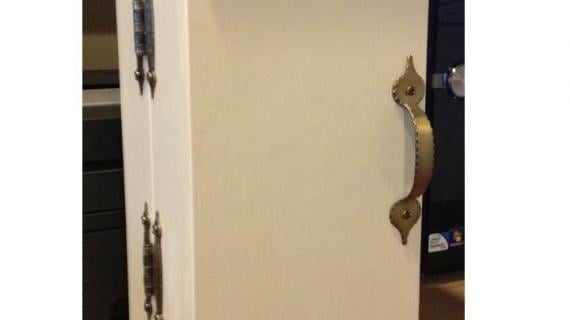
1 set narrow profile hinges
1 handle
chicken wire or hardware cloth
magnetic clasp or hasp (optional)
You'll need some staples for attaching the hardware cloth or chicken wire
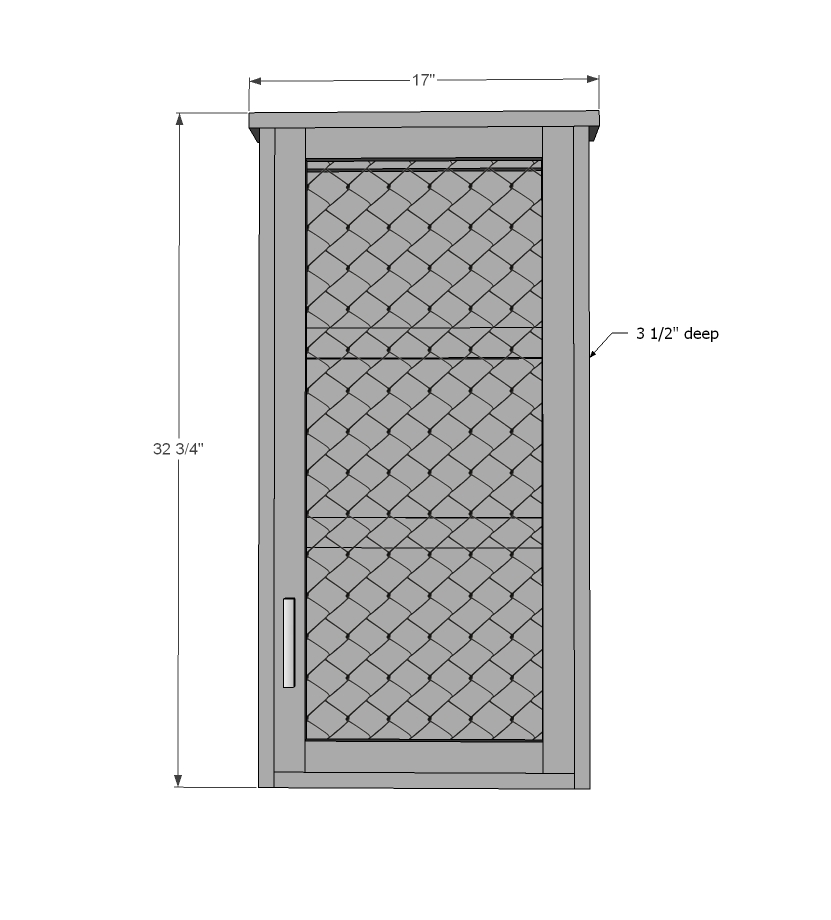
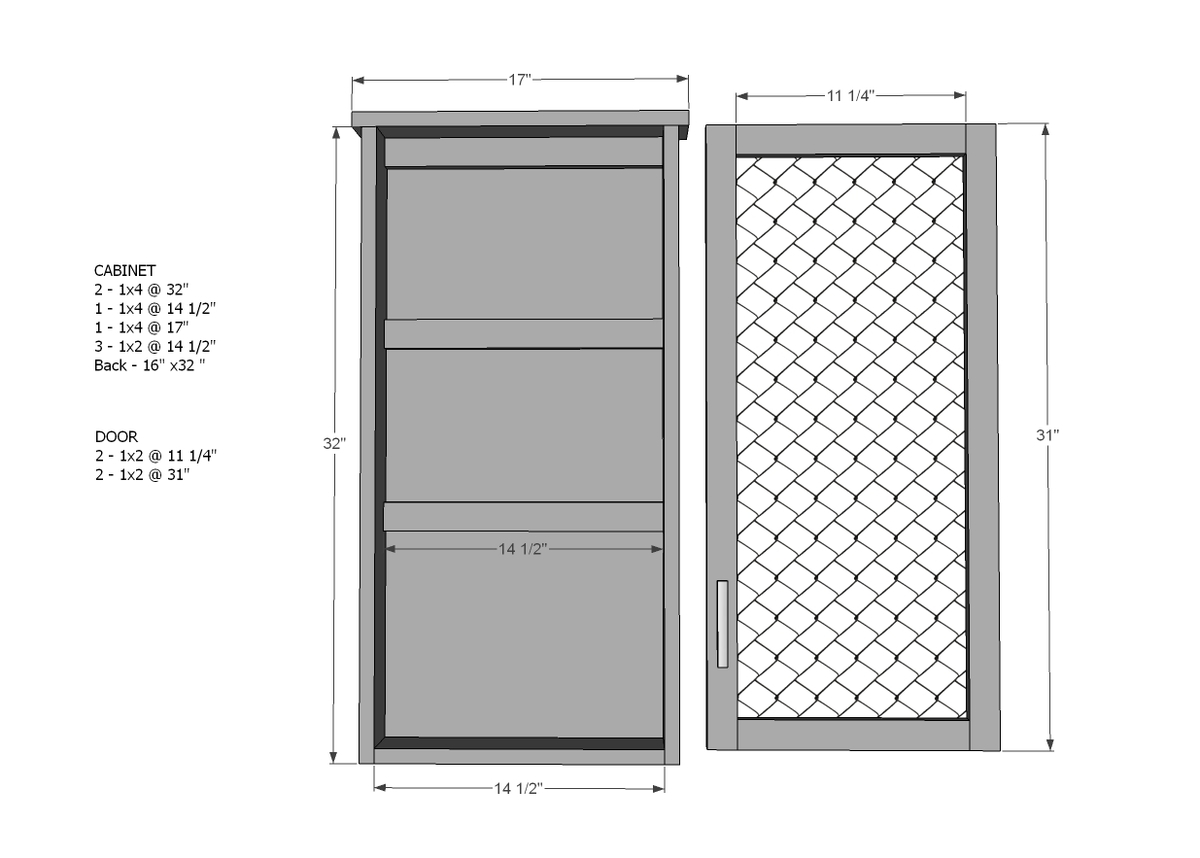
2 - 1x4 @ 32"
1 - 1X4 @ 14 1/2"
1 - 1X4 @ 17"
2 - 1X2 @ 14 1/2"
Back is 16" x 32"
DOOR
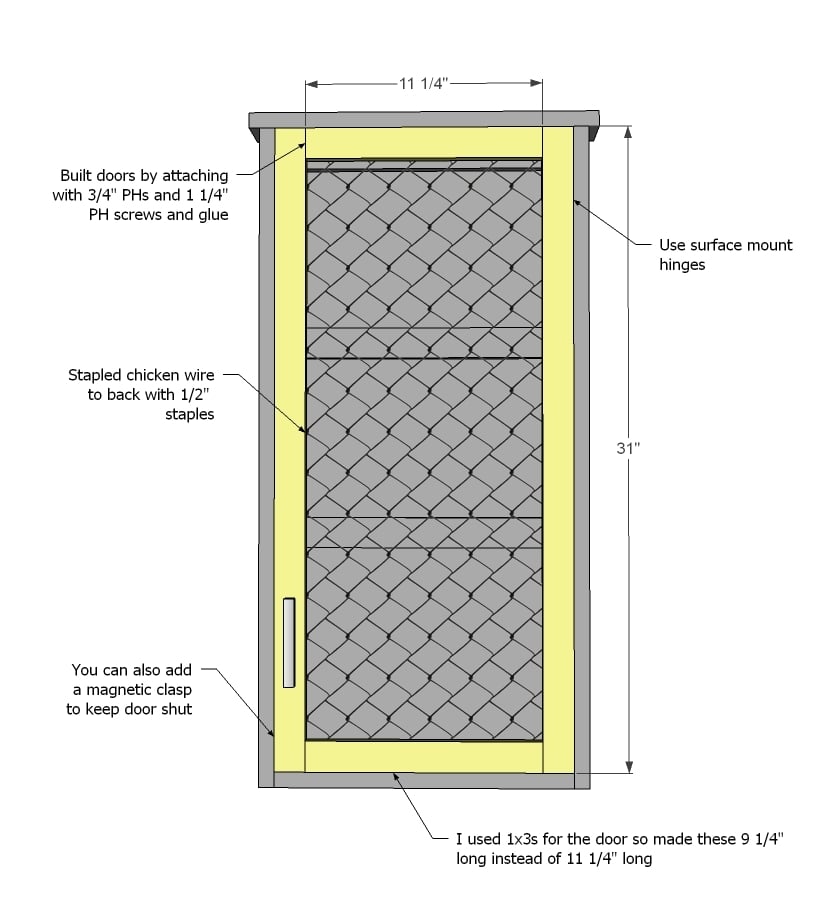
2 - 1x3 @ 9 1/4"
2 - 1x3 @ 31"


Instructions
Step 1

Okay - just build the box bottom as shown here. If you don't have a Kreg Jig, you can certainly countersink or even nail and glue.
TIP: If you wish to attach top with pocket holes, drill two 3/4" PHs facing upward on the inside of the sides for attaching the top in later steps.
Step 2
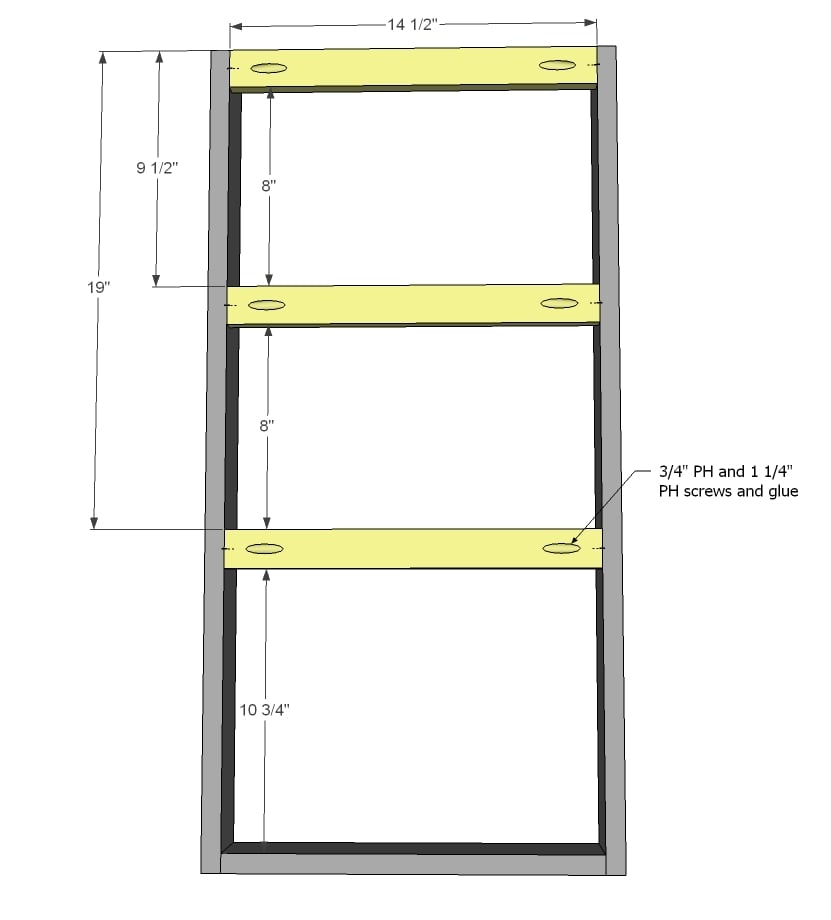
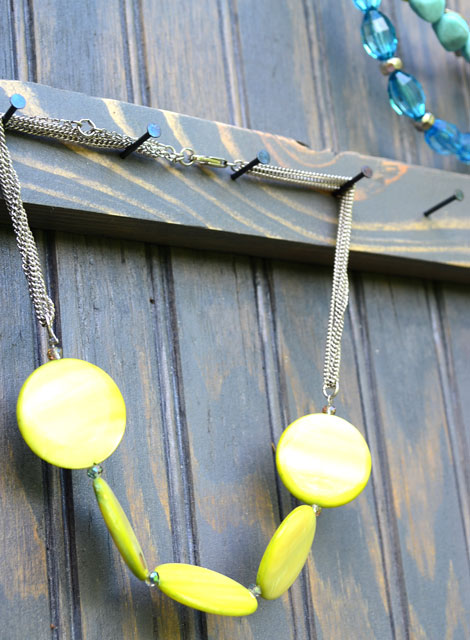
Then add the back supports. I actually adjusted my placement for the length of my necklaces. Remember, you can loop necklaces a couple times around a nail to shorten.
TIP: You'll hang the cabinet through a screw through these back supports.
Step 3
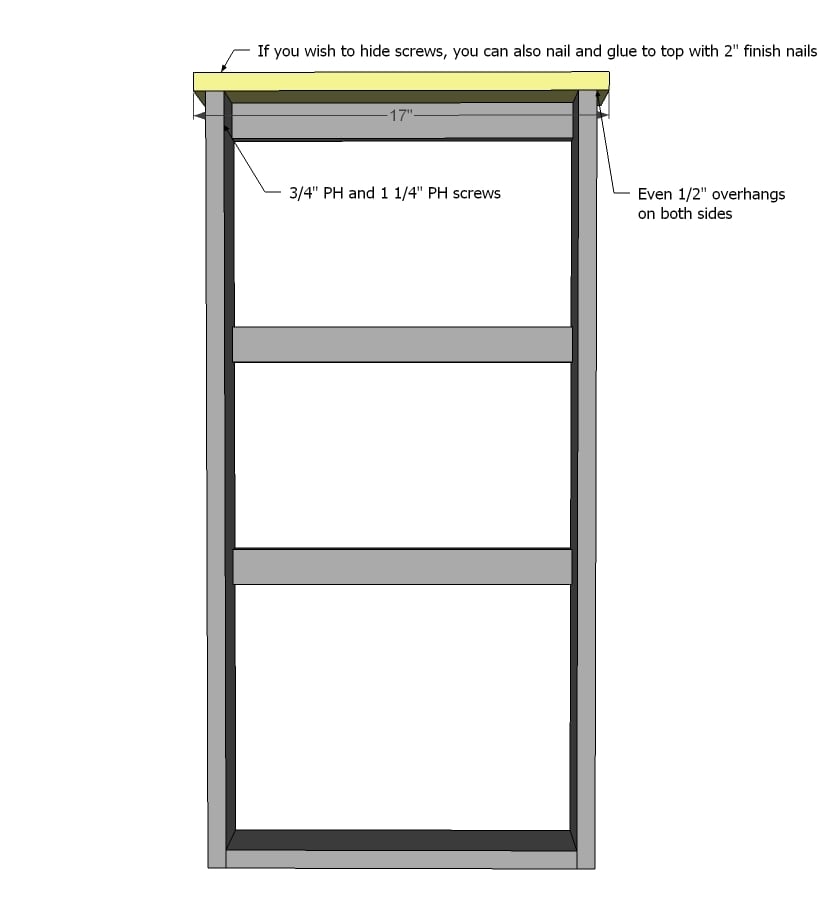
Now add the top.
Step 4
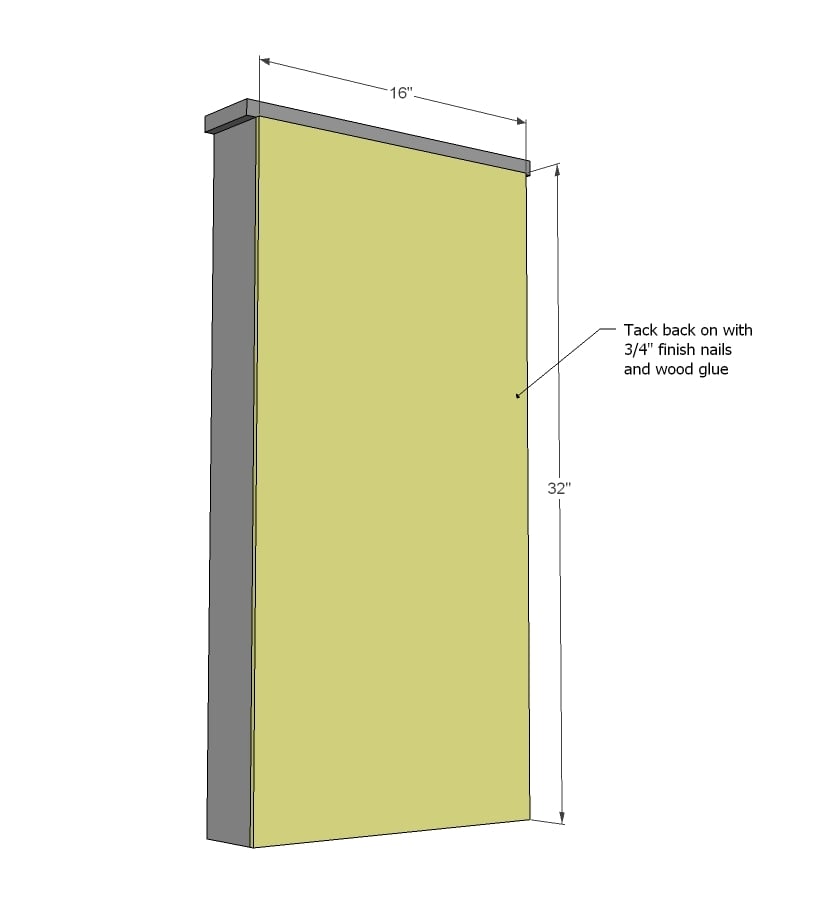
And then the back. Again, back is optional.
Step 5
Step 6
And a cheat sheet ...
Step 7
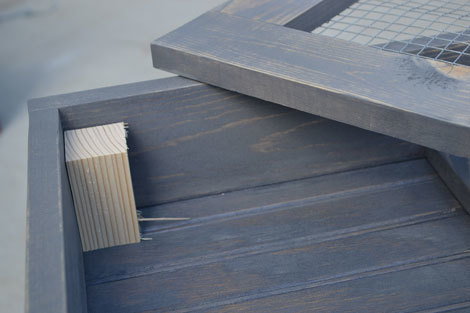
May I suggest cutting blocks 2 3/4" long and placing inside the project?
Step 8
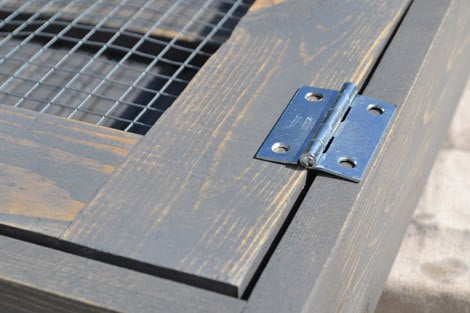
Then when you go to put the hinges on, just rest the door on the blocks!
Step 9
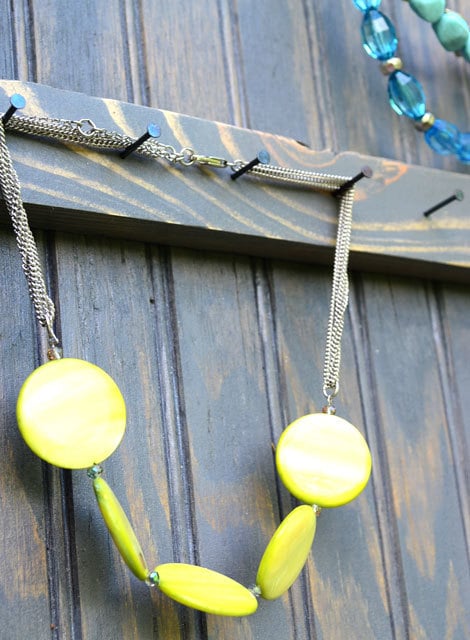
And I just nailed a nail every inch or so for hanging the necklaces.
Step 10
And stapled on hardware cloth with 1/2" staples from the back. Use tin snips to cut the wire - it's much easier than wire cutters. Or try to find spring loaded wire cutters.
It is always recommended to apply a test coat on a hidden area or scrap piece to ensure color evenness and adhesion. Use primer or wood conditioner as needed.


Comments
Flippin1999@ya… (not verified)
Tue, 06/26/2012 - 10:29
Thank you for this, now I
Thank you for this, now I know what my afternoon project will be! Im lazier than you,I've been Using THUMB TACKS in the bathroom wall for my necklaces. Shudder.
Ana White
Tue, 06/26/2012 - 10:41
Hi Beth, so good to hear from
Hi Beth, so good to hear from you!!! I can't wait to see your version! It's going to be ah-mazing!
oldpaintdesign
Tue, 06/26/2012 - 11:43
Hinges
That tip about the block for installing the hinges? Aweeeeesome! Thanks for sharing!
brookifer86
Tue, 06/26/2012 - 15:11
Peg Board Backing
I love this project! And though the beadboard looks beautiful, if anyone has any scrap pegboard that may also be a good earring holding solution for the backing. You could even pop in a peg or two for rings. So much easy customization here! Can't wait to make one
spiceylg
Tue, 06/26/2012 - 17:02
Lazy?!!!
Ana with all that you do and give on a daily basis I can't even believe you even kid about being lazy! There's just no way you are lazy! Love the build. Genius once again.
KellyLynn (not verified)
Tue, 06/26/2012 - 19:05
This is beautiful, but I'm
This is beautiful, but I'm not much of a jewelry person, either. I'm thinking the addition of some shelves would turn this into an adorable spice cabinet.
Ana White
Tue, 06/26/2012 - 23:22
Or key rack!
Or key rack!
Milca (not verified)
Wed, 06/27/2012 - 05:04
Love the idea of turning this into a spice rack!
No jewellery here... except one necklace from when we visited Republic Dominican a while back. And then the kids got a hold of it... :S Oh well.
Love the idea of a spice rack with this rustic look. Definitely a project that I could handle very soon :) Thanks Ana for your plans and KellyLynn for the idea of a spicerack mod!
Jeanine (not verified)
Wed, 06/27/2012 - 08:08
Wall Jewelry Cabinet pdf issue
I want to make this! The .pdf link is broken, can you please repost!? :-)
Gregg (not verified)
Wed, 06/27/2012 - 09:08
What finish did you use?
This looks great Ana. I love your site by the way. What finish did you use to get the grey look?
Tenney (not verified)
Wed, 06/27/2012 - 18:57
plastic canvas scraps help
For earrings with posts, I have used scraps of plastic needlepoint canvas to keep all the fronts and backs together. You could just nail the scrap to one of the crossbars so it would be easy to pull the earring and back thingy apart. The long hooks for the dangling earrings can hang on the bottom row of the canvas - I'm sure there are actual names for all these jewelry parts, but I'm not much of a girly-girl and don't know them!
Christy Panzarella (not verified)
Thu, 06/28/2012 - 17:37
A latch would make it toddler
A latch would make it toddler proof!!
Jennifer Leigh (not verified)
Mon, 07/02/2012 - 15:56
Beautiful Project
You are so talented! Organizing jewelry has always been a problem for me. I've tried everything from the hanging organizer in the closet to baskets. This is such a rustic yet beautiful way to display jewelry while keeping off the dresser or closet floor!
Evelyn Talitha… (not verified)
Sun, 07/08/2012 - 07:50
hand cut nails
This is cute when i make key boards or Jewelry boards I use tiny old handcut nails . My son pulled them out of a bathroom he was remodeling, from the rotten floor in a 200 year old house
Amanda Morgan (not verified)
Mon, 07/23/2012 - 18:24
Hanging
I love this cabinet and plan on making one this week, but I'm not sure how I should hang it. Do you suggest screwing two screws through the top support right into studs?
Linda Johnson (not verified)
Thu, 07/26/2012 - 11:41
An outdoor jewelry cabinet?
An outdoor jewelry cabinet? Wow, you really ARE bragging!
It would work just as well inside, I guess (;) )
Jimmy Labis (not verified)
Sat, 08/25/2012 - 07:24
nice job!!!
I saw this plan and thought it was a great relatively fast project.... with a 2 year old running around I need to make the most of my time in the shop... I made one for my sister using wood I salvaged from a barn built in the 1800's... it looks totally awesome...thank you for sharing the plans!!
Billig GHD Rettetang (not verified)
Mon, 09/10/2012 - 07:10
Kjøp GHD Rettetang til å velge en vanlig nettside
I saw this plan and thought it was a great relatively fast project.... with a 2 year old running around I need to make the most of my time in the shop
iluvmy0341
Mon, 10/15/2012 - 20:55
Next deployment project!
After the "X Console Table" I'm making this! I need to get my cheap jewelry out of the "junk box" and actually start wearing it again!
Shane Ripley (not verified)
Mon, 10/29/2012 - 17:28
A few vaiations.
I followed the steps almost to a "T".
For step 5: I glued the ends of the top 1x2 of the door, attached both 1x2 sides and clamped them tight. Once I ensured that it was level, I used a right angle bracket and screwed that in. Then I let the glue dry and off I went. I did this becuase the 1x2 I bought had too much grain and when I screwed the pocket hole screw in, I split the wood.
Another thing is my wife has a lot of home made earrings. I used the screen from a screen door for this door. That means there are a lot more holes to hang even more.
The next time I make this I have a few variations I want to do. I want to turn the 1x2 90 degrees and make them into shelves for shot glasses. then add a glass to the door.
Another tip: ensure you 1/4" backing lays flat before you attach it. If you don't, it won't sit flat on the wall.
lbadger
Thu, 11/01/2012 - 07:57
Just finished!
Nailed the hangers on this morning! This was a really fun project. I made it for an auction item for my daughters school fundraiser. Thanks again Ana for another awesome plan!
Brag post:
http://ana-white.com/2012/11/jewelry-wall-cabinet
Dave Lawson (not verified)
Fri, 11/02/2012 - 03:25
To keep our expensive
To keep our expensive commodities we have been simply referred boxes or lockers but here we can witness an innovative and unique piece of smart idea of jewellery cabinet.
A perfect place to keep our jewelry safe, it provides the choices to hang on our favorite places either in bedroom or in drawing room.
We are really blessed with such an awesome trick for preparing these kinds of jewelry cabinets through the help of the above instructions and steps.
http://sharinginnovation.blogspot.in/2012/10/tips-to-save-money-when-bu…
lawsondave88
Fri, 11/02/2012 - 03:36
To keep our expensive
To keep our expensive commodities we have been simply referred boxes or lockers but here we can witness an innovative and unique piece of smart idea of jewellery cabinet.
A perfect place to keep our jewelry safe, it provides the choices to hang on our favorite places either in bedroom or in drawing room.
We are really blessed with such an awesome trick for preparing these kinds of jewelry cabinets through the help of the above instructions and steps.
http://sharinginnovation.blogspot.in/2012/10/tips-to-save-money-when-bu…
nicholaix
Fri, 12/06/2013 - 11:42
Yay!
Seriously, I was about to fork over $200 for one of these when it occurred to me to check your website for plans. easy to customize plan too for those of use with larger jewelry storage needs.( wait til the kids get older and you need a place for those pipe cleaner bracelets and macaroni necklaces!)