
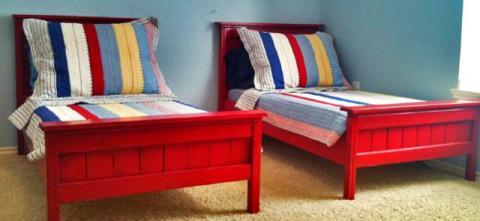

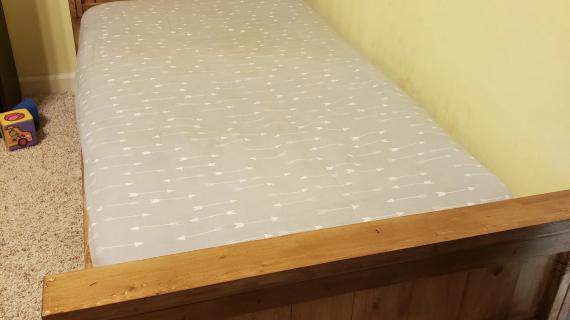
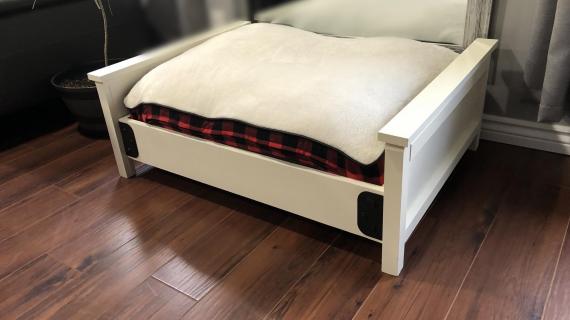
You will be amazed at just how easy it is to build these cute little farmhouse beds. And how inexpensive! Designed to fit a toddler sized mattress, please read comments as your mattress size may differ and you will need to make slight adjustments for the best fit.
Preparation
10 – 1×2 Boards, 8′ Long (about $1 Each)
1 – 1×3 Board, 8′ Long (about $1.50 Each)
2 – 1×4 Boards, 8′ Long (about $3 Each)
2 – 1×6 Boards, 8′ Long (About $5 Each)
2″ Screws
1 1/4″ Screws
1 1/4″ Nails
Wood Glue
Wood Putty
Sandpap
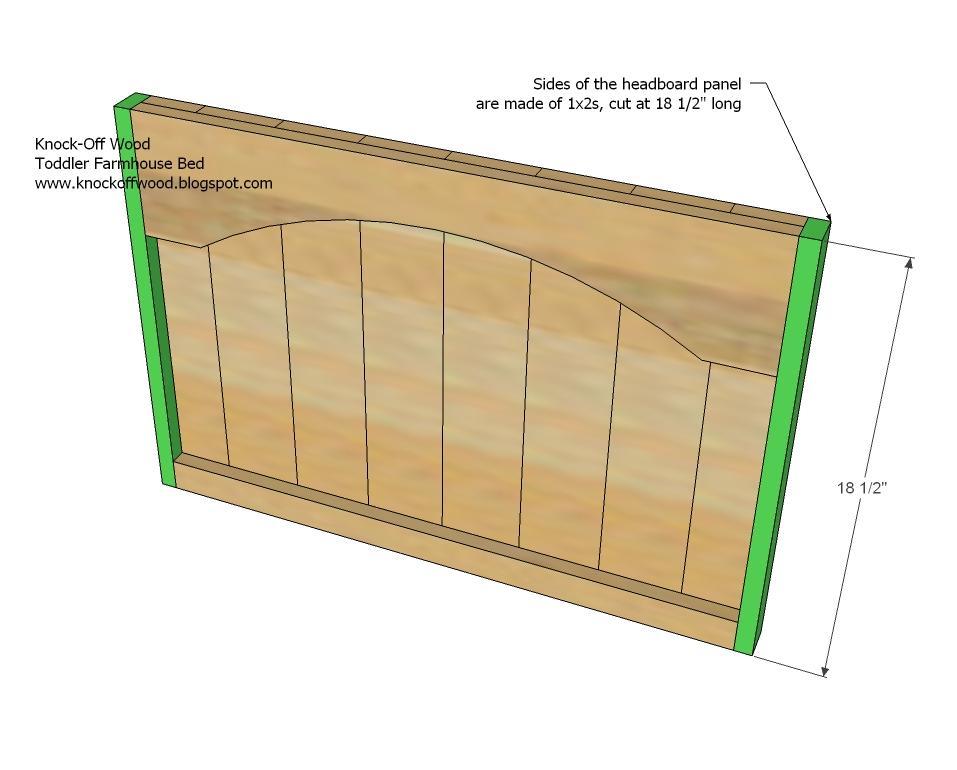
Cut List for the Headboard
A) 6 – 1×4 @ 18 1/2″ (Center Panel)
B) 2 – 1×3 @ 18 1/2″ (Side Pieces for Center Panel)
C) 1 – 1×2 @ 26″ (Cut to measurement, headboard trim – cut 2 if you do not want a arch)
D) 1 – 1×6 @ 26″ (Cut to measurement, headboard header, use 1×2 if you do not want arch)
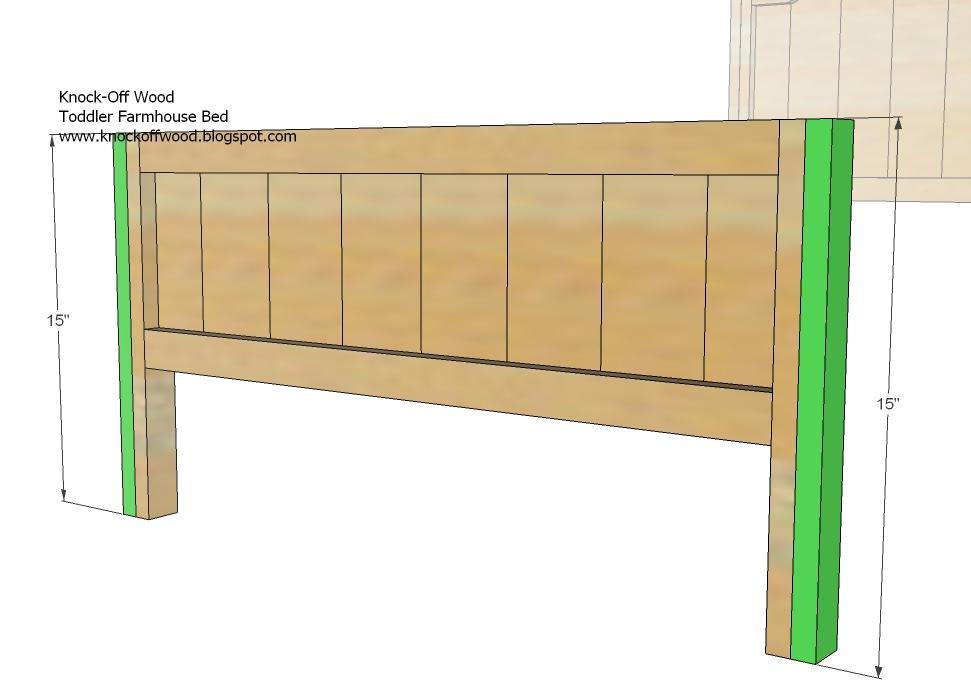
E) 2 – 1×2 @ 18 1/2″ (Inside Leg Pieces)
F) 2 – 1×2 @ 30″ (Full Legs)
G) 1 – 1×2 @ 29″ (Top of Panel and Legs)
H) 1- 1×3 @ 30″ (Top of Headboard)
I) 2 – 1×2 @ 6″ (Cut to measure, Inside bottom Leg Pieces)
Cut List for Footboard
J) 6 – 1×4 @ 9″ (Center Panel)
K) 2 – 1×3 @ 9″ (Side Pieces of Center Panel)
L) 2 – 1×2 @ 26″ (Trim for the center panel, cut to measure)
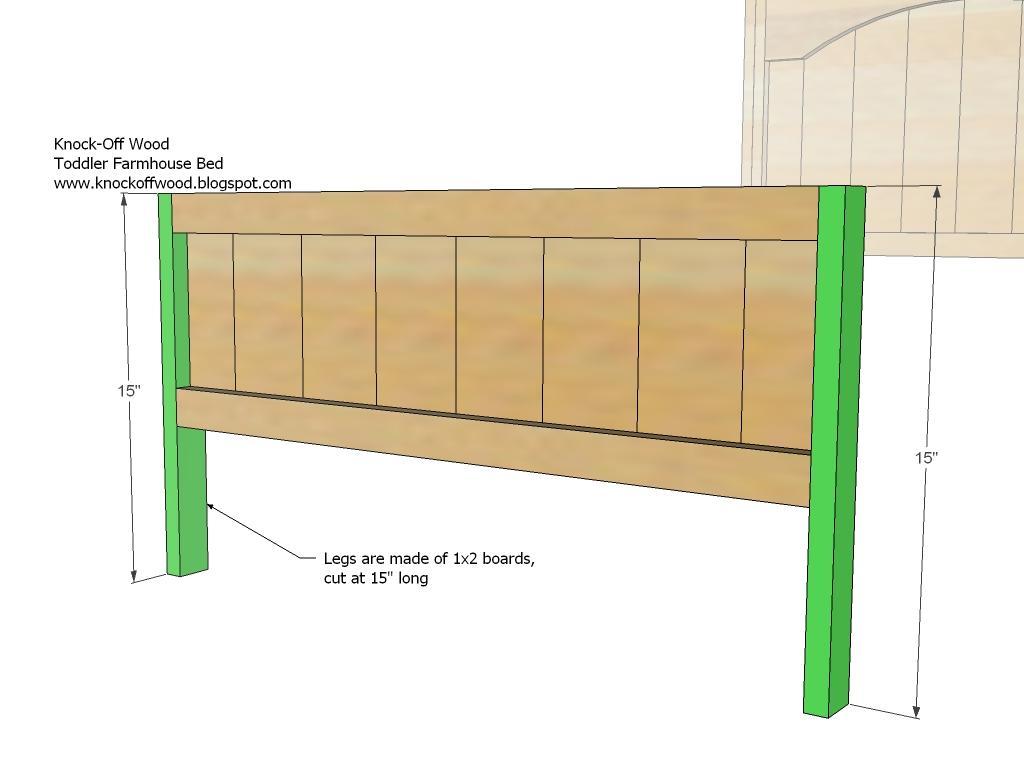
M) 4 – 1×2 @ 15″ (Legs)
N) 1 – 1×2 @ 29″ (Top of the Panel and Legs)
O) 1 – 1×3 @ 30″ (Top of the Footboard)
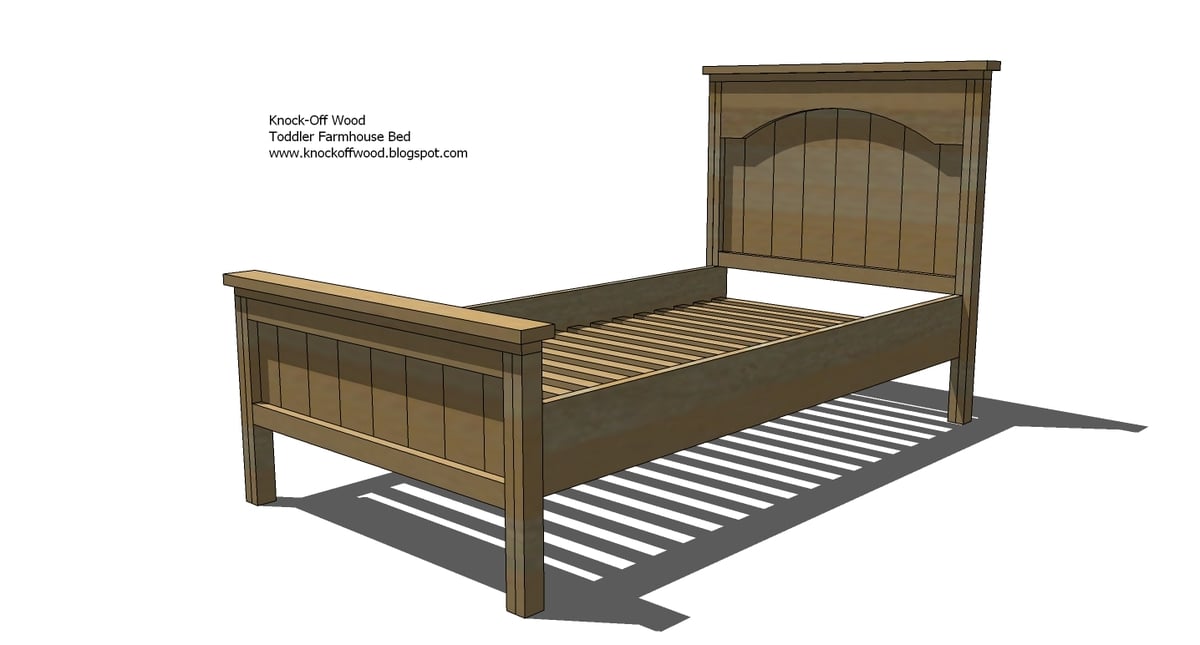
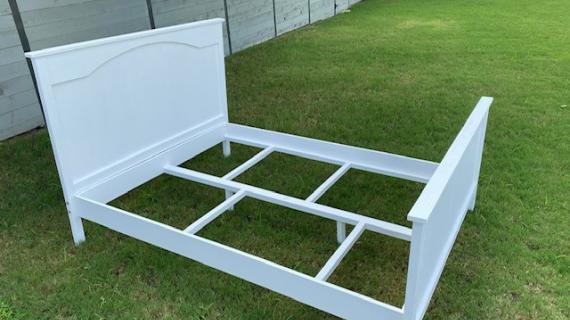
Bed Frame
P) 2 – 1×6 @ 54 1/2″ ( Side Rails)
Q) 1- 1×6 @ 26″ (Endplate)
R) 2 – 1×2 @ 53 1/2″ (Cleats)
S) 18 – 1×2 @ 26″ (Slats)
Please read comments and be aware that I designed this bed off of crib sized measurements from my daughter's mattress. Your mattress may be of a different size, and you will need to modify the plans to fit your mattress. Many people have done this successfully - please take a second to read comments.


Work on a clean level surface. Check for square after each step. Predrill and countersink your screw holes. Measure and cut all your boards. Use straight lumber. Wear eye and ear protection. Always use glue.
Instructions
Step 1

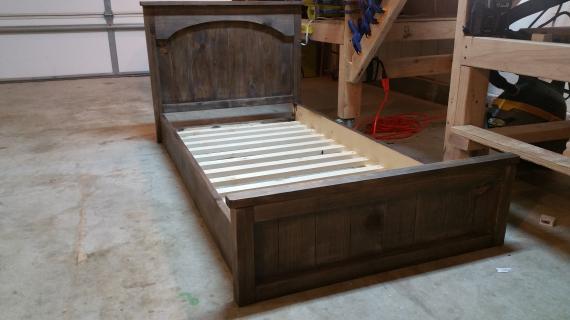
Headboard Panel. Fasten the center panel boards, shown in green and blue above, to the bottom trim piece, as shown above. I recommend using the 1 1/4″ nails and glue, and fastening from the back into the back side of the bottom trim piece. Measure and cut the bottom trim piece to fit. Then if you are choosing to have an arch, cut out the arch and fasten the header to the center panel. If you do not want an arch, you can use a 1×2 board for the header.
Step 2
Inside Legs. Fasten the inside leg pieces to the sides of the center panel, as shown above. Use the 2″ screws and fasten to the header and the bottom trim, and the side panel piece.
Step 3
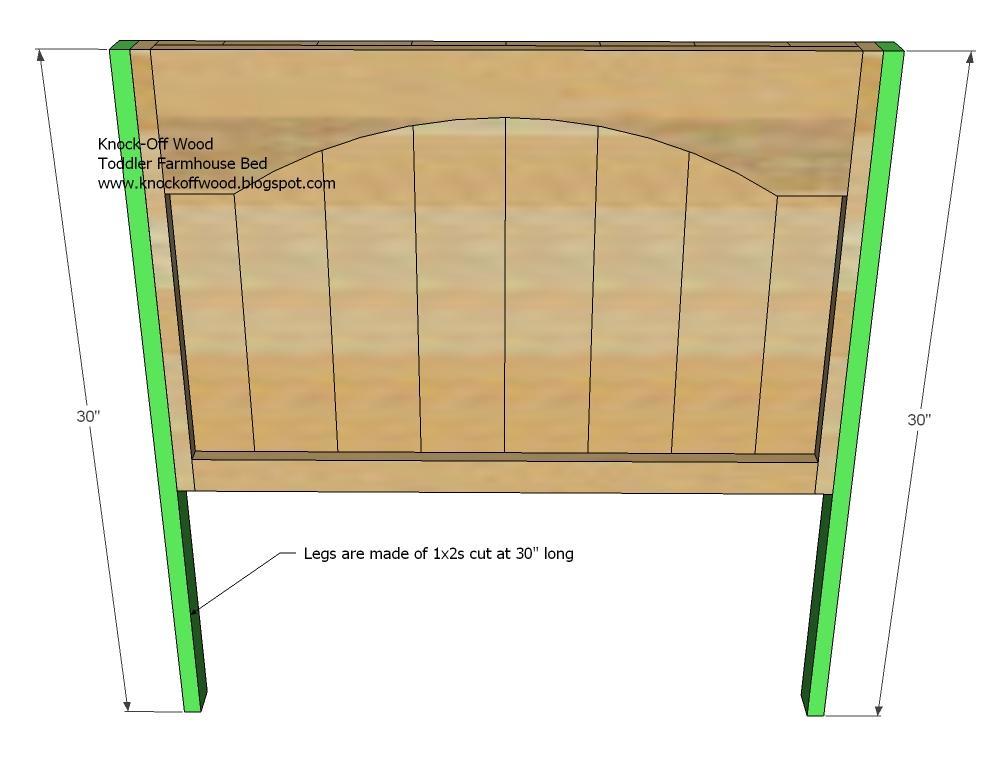
Outside Legs. Use the 1 1/4″ nails to fasten the full leg piece to the inside leg piece from step 2. Then use the 2″ nails to fasten the outside leg piece to the header and bottom trim.
Step 4
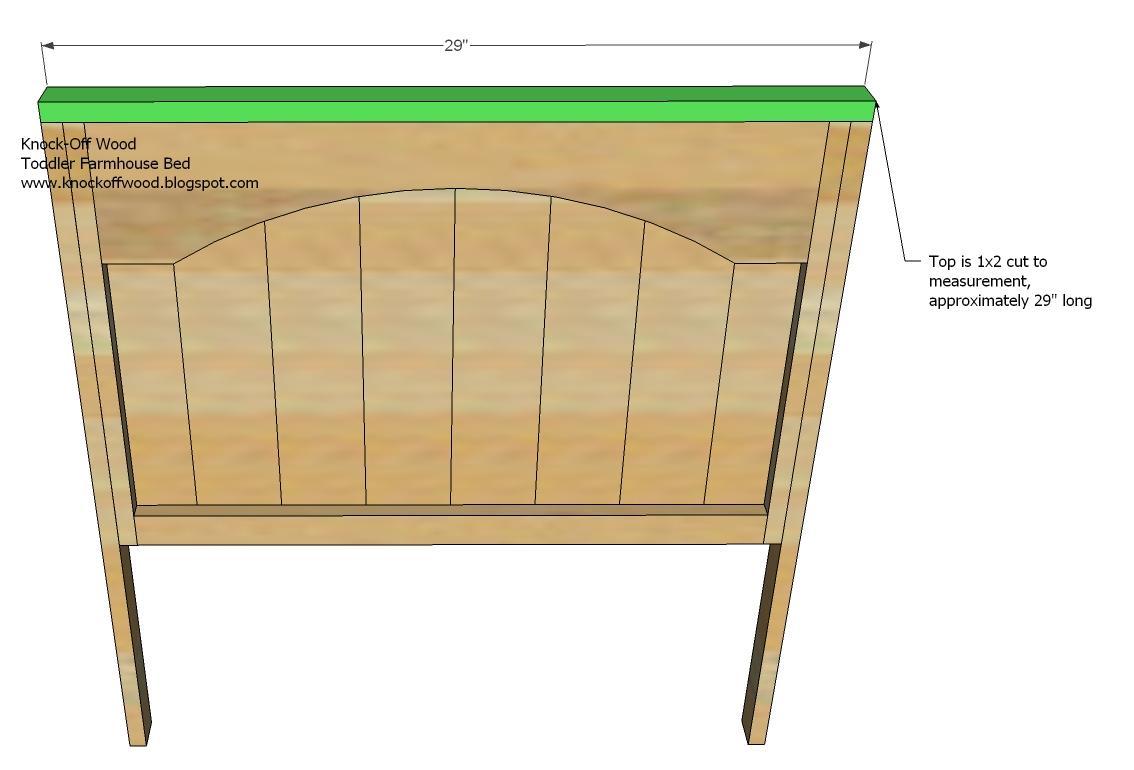
Top of the Panel and Legs. Use the 2″ nails to fasten the top piece, G, to the headboard. Measure and cut to fit.
Step 5

Step 6
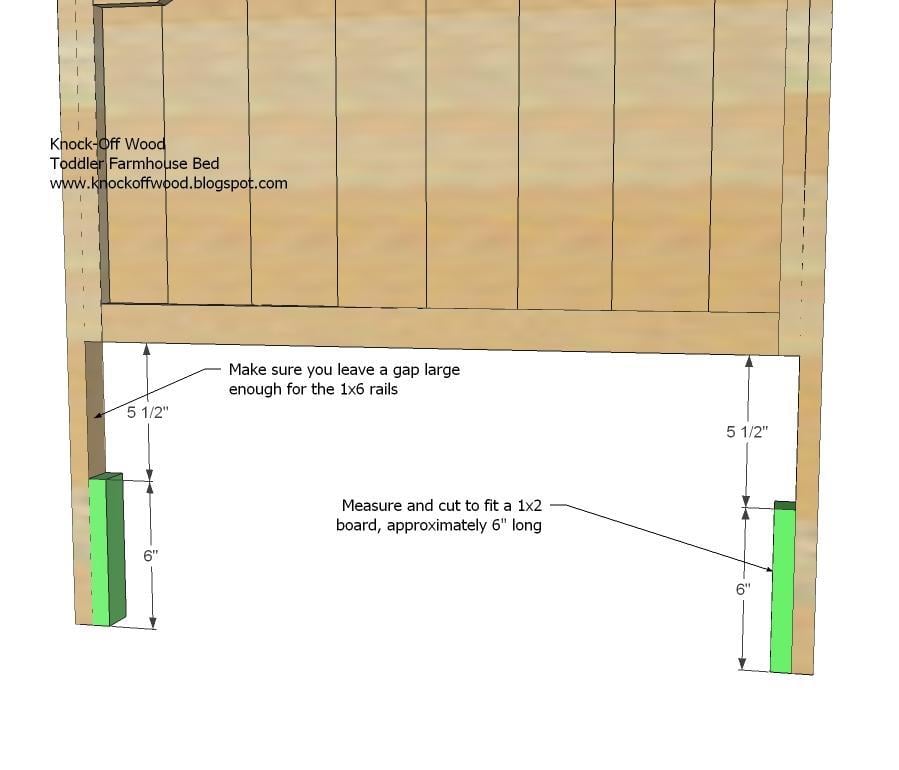
Bottom Leg Pieces. Measure your 1×6 board to make sure it is exactly 5 1/2″ wide. Then use the above diagram to create a notch for the side rails. Use the 1 1/4″ nails and glue.
Step 7
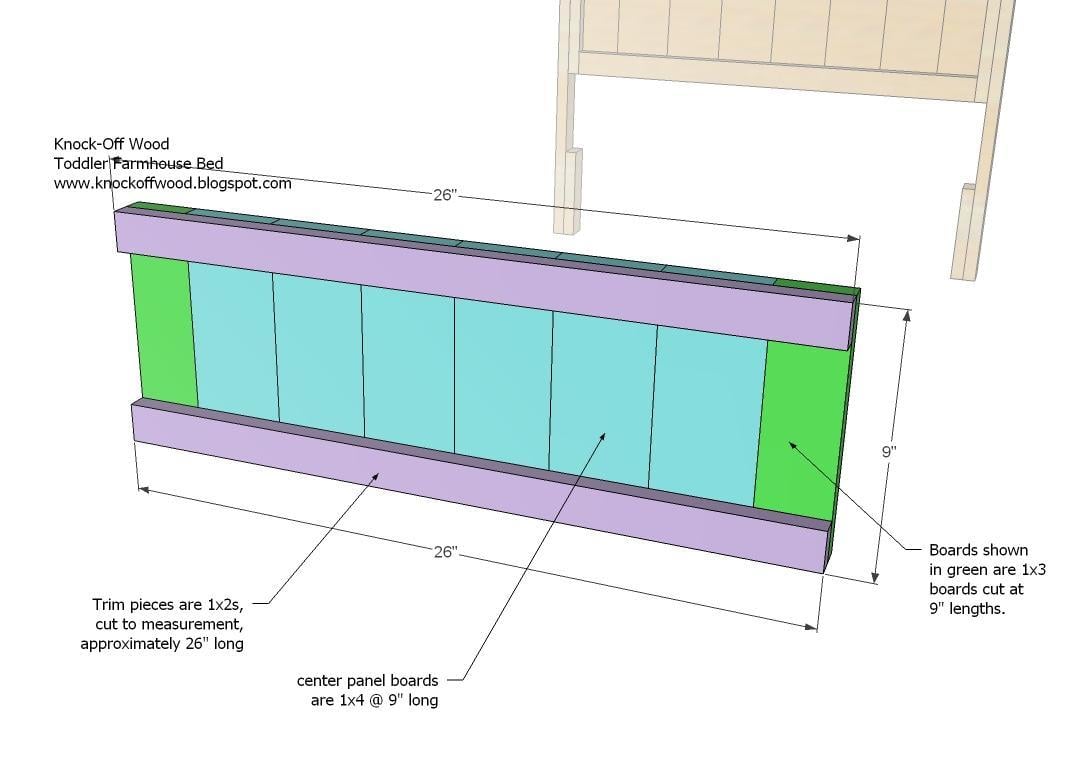
Footboard Panel. Build the footboard panel, shown above, as you built the headboard panel in step 1.
Step 8
Inside Legs. Attach the inside legs using screws to the footboard panel as you did with the headboard panel in step 2.
Step 9
Outer Legs. Fasten the outside legs in place, as you did with the headboard panel. Use 1 1/4″ nails, and 2″ nails where there is more than 2″ of backing.
Step 10
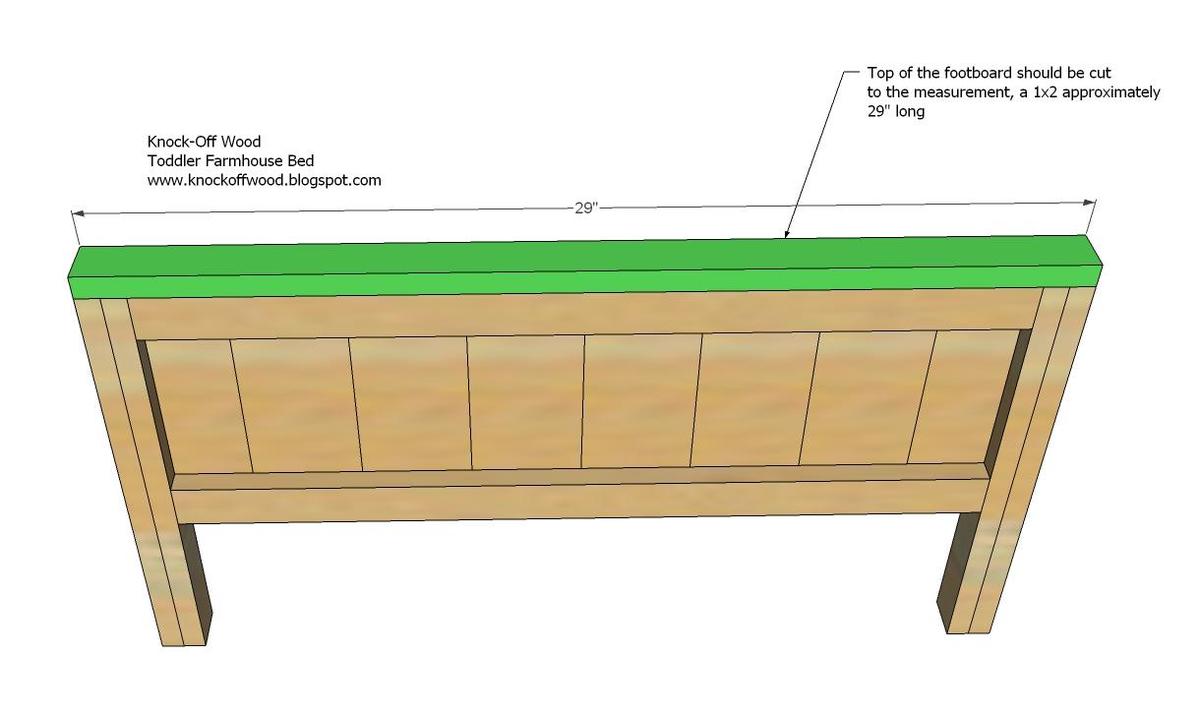
Top of Footboard Panel and Legs. Measure and cut the top of the panel and legs, and fasten in place using the 2″ nails and glue.
Step 11
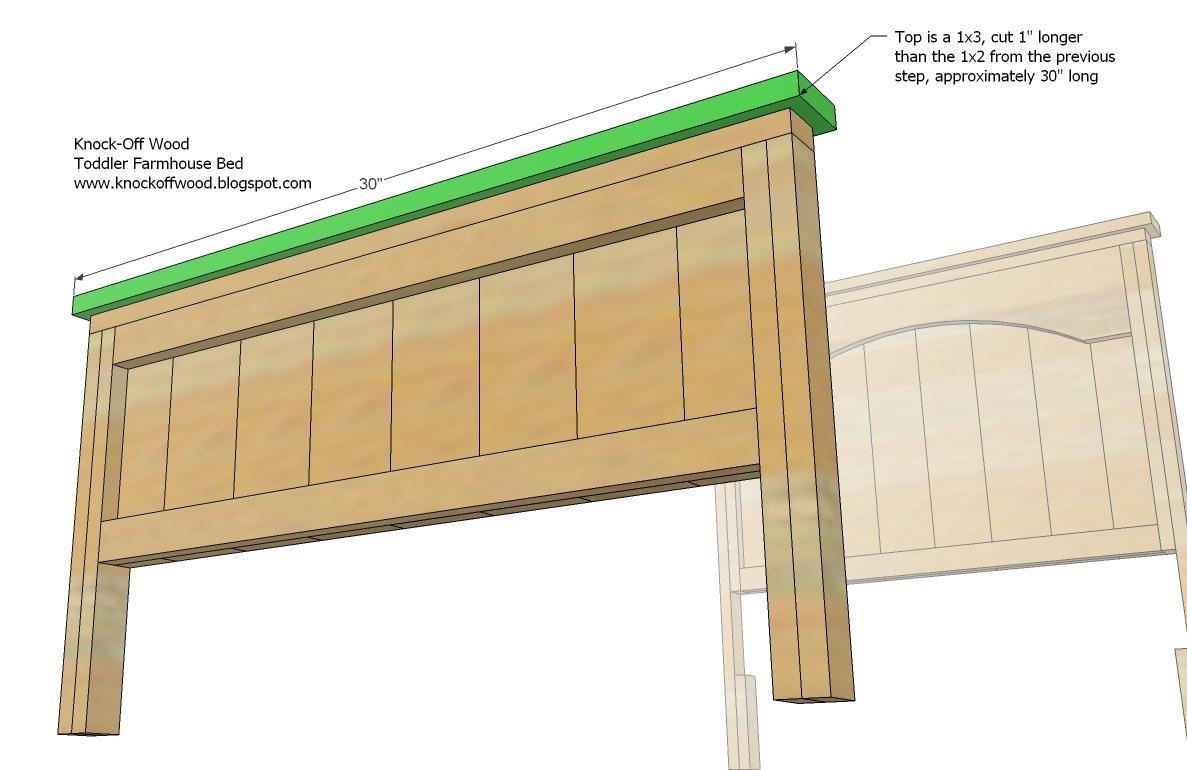
Top of Footboard. As you did with the headboard, fasten the top piece to the footboard as shown above.
Step 12

Side Rails and End Plate. Begin by fastening the side rails to the end plate using 2″ screws. Then use the 1 1/4″ screws to fasten the end plate to the footboard. Then use the 2″ screws to fasten the siderails to the headboard. The siderails will fit into the opening on the headboard.
Step 13
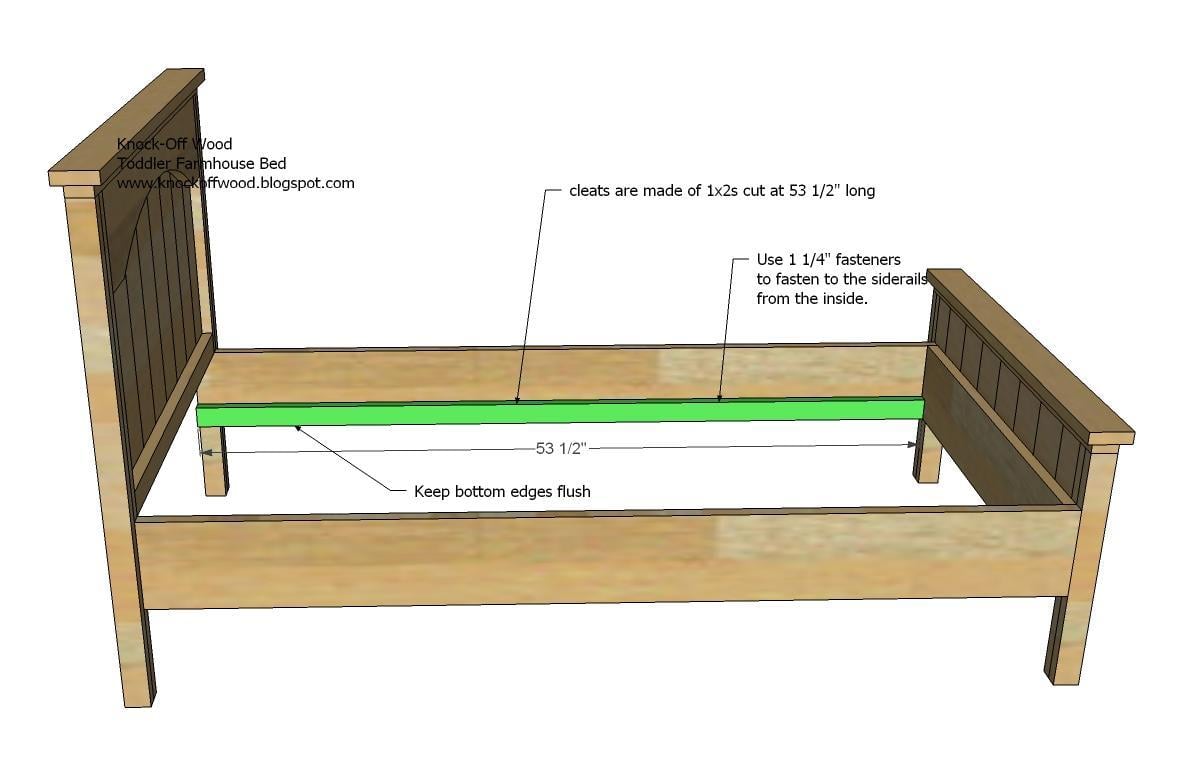
Cleats. Fasten the cleats to the inside of the siderails, as shown above. Use glue and the 1 1/4″ nails.
Step 14
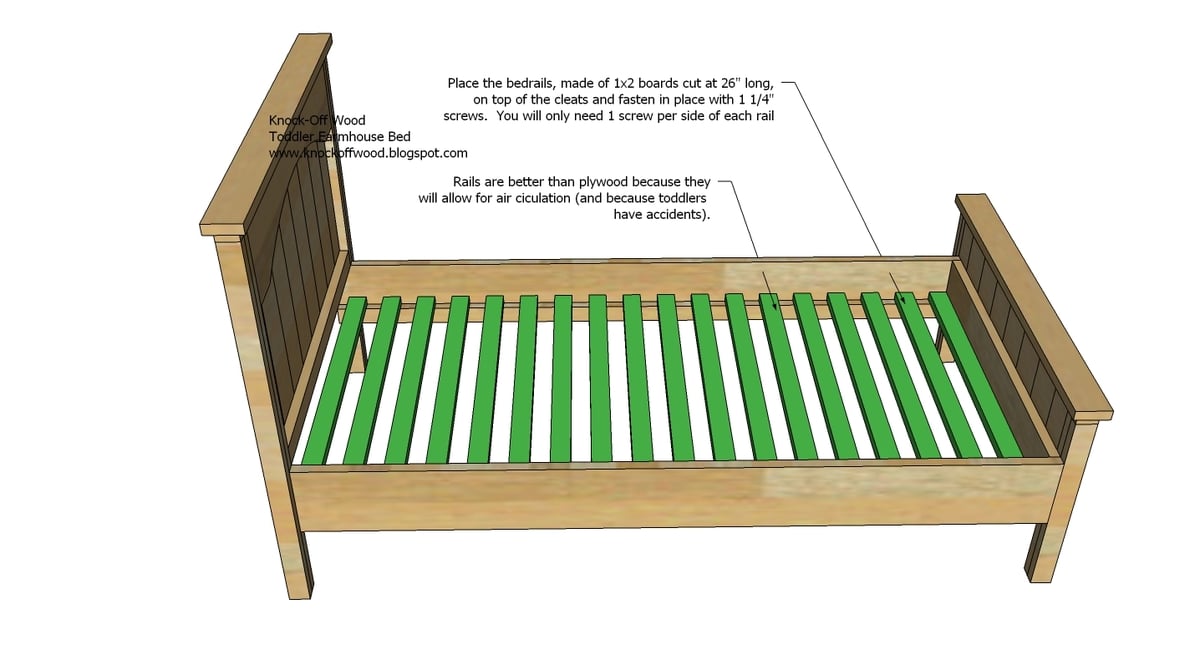
Slats. As directed above, lay the slats on top of the cleats. Fasten in place with screws.

Comments
kim mangum (not verified)
Sat, 02/19/2011 - 20:42
Just built the farmhouse
Just built the farmhouse toddler bed. . . . . the 1 X 3 X 8 comes to 96 inches but the cuts come to 115 so be sure to buy a 10 footer instead of an 8 footer!
undefinedBRYLEE QUILT AND BED 2 19 2011Stephanie (not verified)
Sun, 02/20/2011 - 09:36
Hi All, I found this link
Hi All,
I found this link to the edited plans that will fit a 28" mattress perfectly. Hope this helps all who are wanting to build this bed!
http://learningmydslr.blogspot.com/2010/05/knock-off-wood-is-my-new-fav…
shortermama (not verified)
Mon, 08/13/2012 - 17:31
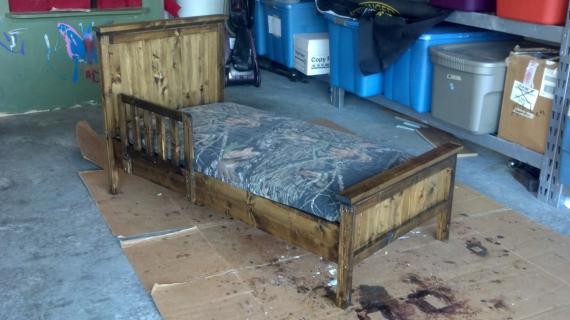
Safety Rails
We just finished this bed yesterday. We love it. I can't seem to find any bed-rails that would work though. Are there any plans or does anyone know of any that would work for this bed? Thanks so much!
Wood Worker (not verified)
Fri, 08/17/2012 - 15:27
Expansion Issues
This is a nice and easy toddler bed. After reviewing your assembly instructions; illustration 1 and 7 have considerable expansion and contraction issues. You never want to glue and screw or nail a perpendicular piece of wood to a vertical solid wood panel. This will not allow the panel to expand and contract during climate change and moisture variances. Which will lead to catastrophic damage to the toddler bed. When the wood finally gives, it will sound like a gun shot. Since this is a bed, theres a good chance it could happen during sleeping hours. One it will wake your child and two it will be frightening, plus you may or may not be able to use the bed again. Wood has tremendous force built up inside its grain; and when it cant move freely- disaster strikes.
You can correct this problem easy; only if you have not built the bed yet. You will need-
Head board
2 - 1" X 2" @ 26"
1 - 1" X 3"ish @ 26"
Instructions for head board only-
Attach both 1 X 2 to the 1 X 3 to form a 'U' shape when looking at the end grain (Glue and Screw). Slide the panel into the groove (Do not glue panels into the groove). Repeat steps for top of header. Attach sides only to the two U shaped caps with screws.
Repeat steps for Foot Board
This process will solve the expansion and contraction issues.
Take Care
Jami (not verified)
Sat, 09/08/2012 - 22:35
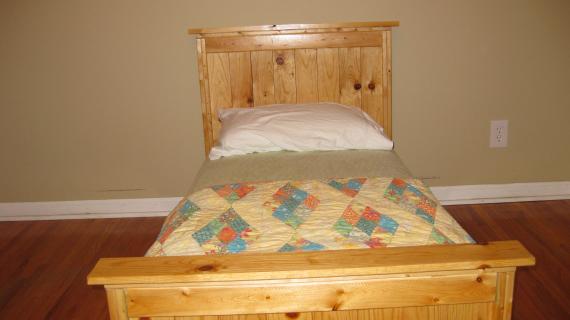
Pictures of a completed Farmhouse Toddler Bed - with the arch!
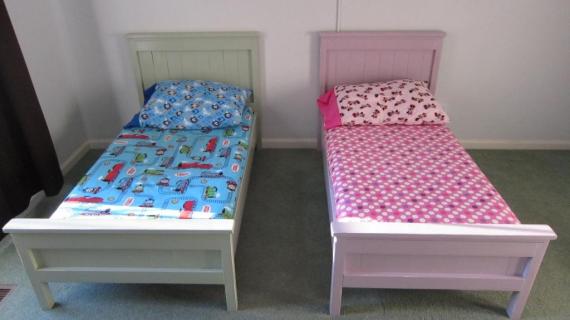
My husband just finished this toddler bed for our 18 month old son, who learned to climb out of his crib just last week! It turned out beautiful. Thank you, Ana White! We love it! (And our son does too!)
http://howdyhepworths.blogspot.com/2012/09/over-edge-lincolns-new-toddl…
Cazra
Thu, 08/08/2013 - 23:00
Built a toddler farm house bunk!
We made four head boards, and attached one set of the top finish pieces to the bottom of the legs. Then screwed through that to the bottom headboard set. My kids adored it and everyone we know wanted us to build one too!
marielynnv
Sun, 01/05/2014 - 19:26
Is the Nailer absolutely necessary?
Is it worth it to get a nailer for this bed, or can I just use a hammer?