
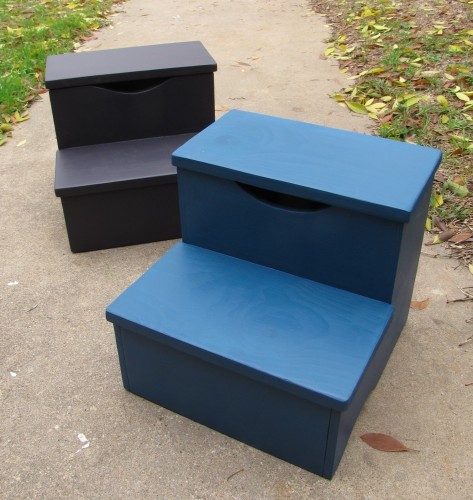

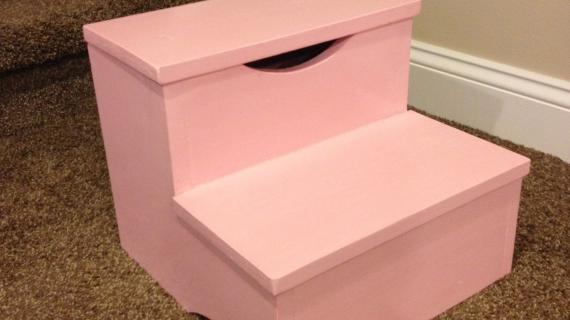
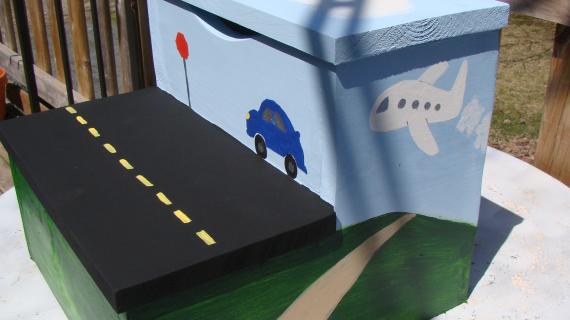
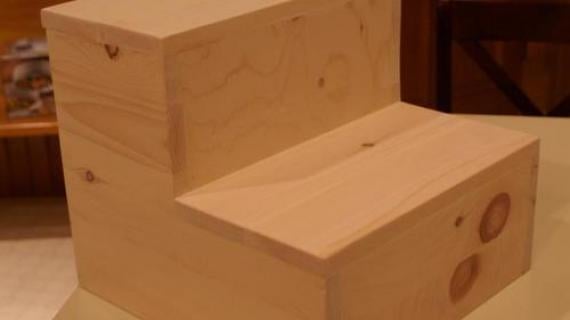
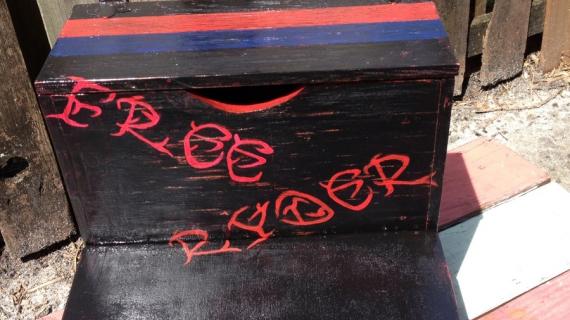
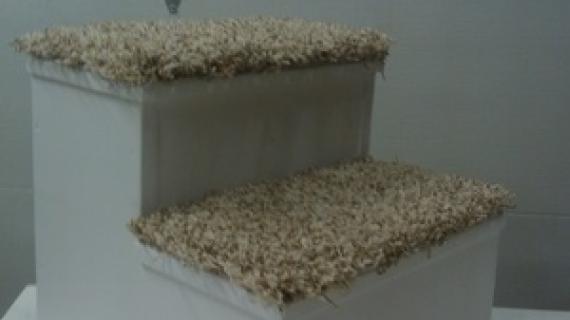
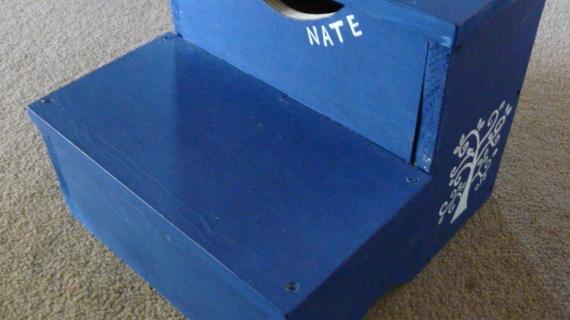
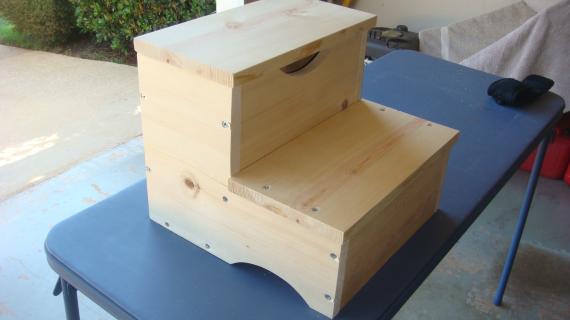
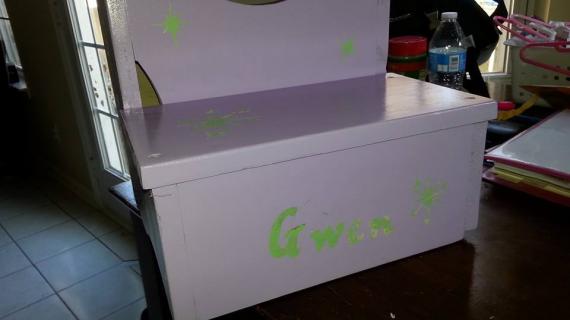
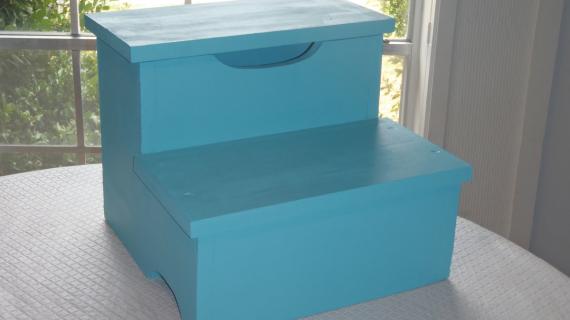
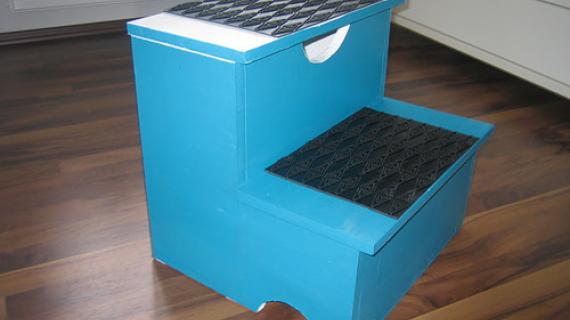
Children's wood step stool with lift top storage compartment - easy to build with our free step by step woodworking plans.
Preparation
- 53″ of 1×12 Pine Boards
- 24″ of 1×6 Pine Boards
- 26″ of 1×8 Pine Boards
- 2″ self tapping wood construction screws or 1 1/4″ Pocket Hole Screws (if you are using the Kreg Jig)
- Wood Glue
- Finishing Supplies
- 1 Set of standard hinges
- 2 – 1×12 @ 14″ long (Sides)
- 2 – 1×12 @ 12″ (Storage Box sides)
- 2 – 1×6 @ 12″ (Storage Box Bottom and Footer)
- 2 – 1×8 @ 14″ (Treads)
This plan greatly depends on the use of standard width boards, which can vary in size depending on where you live. Please measure the width of all of your boards and adjust the cuts and construction as necessary. This plan assumes 1x6s are 5 1/2" wide, 1x8s are 7 1/2" wide, 1x12s are 11 1/2" wide.


Instructions
Step 1
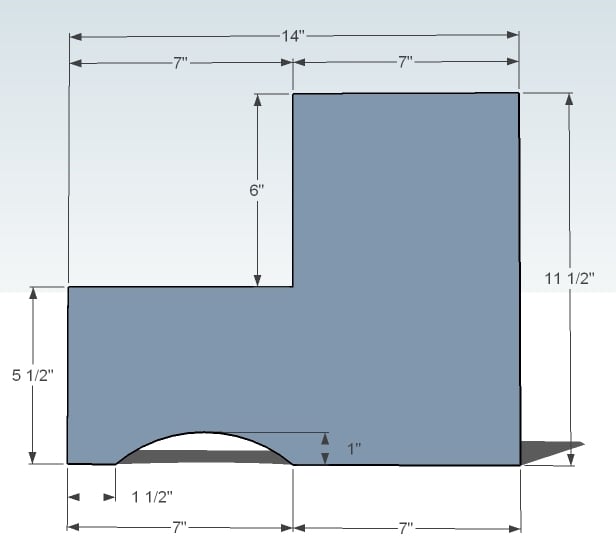
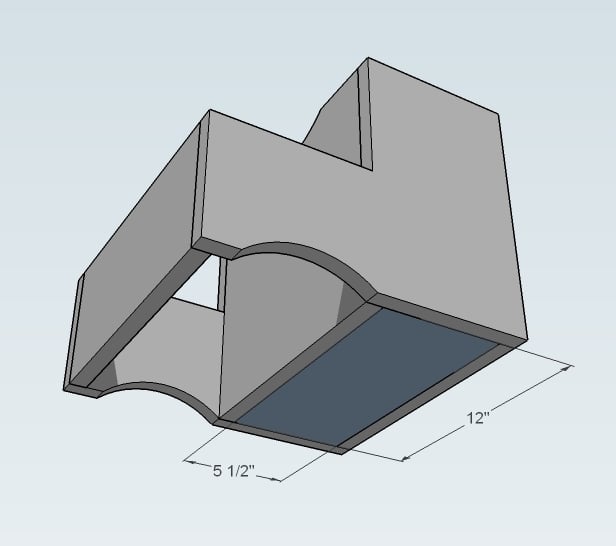
Cut Sides Out From the sides, draw the above pattern and carefully cut out using a jigsaw
Step 2
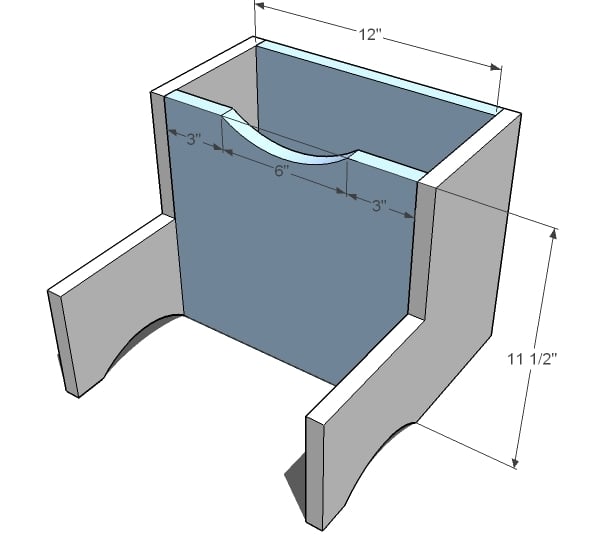
Storage Box Cut a notch out of one of the storage box sides. Attach both storage box sides to the sides using 2″ screws and glue or 1 1/4″ pocket hole screws and glue.
Step 3
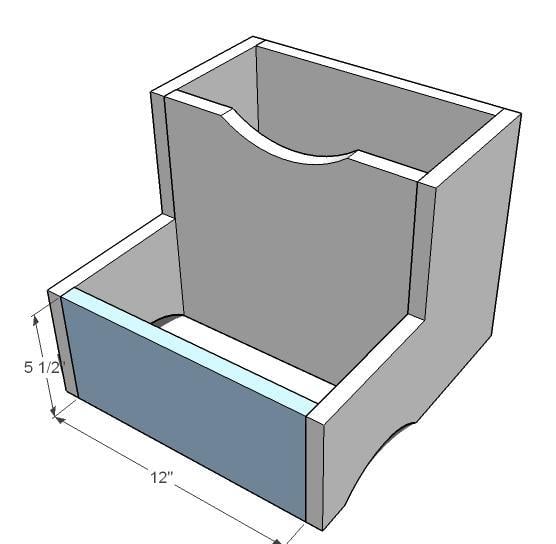
Footer Attach the footer to the front using 1 1/4″ pocket hole screws or 2″ screws and glue.
Step 4
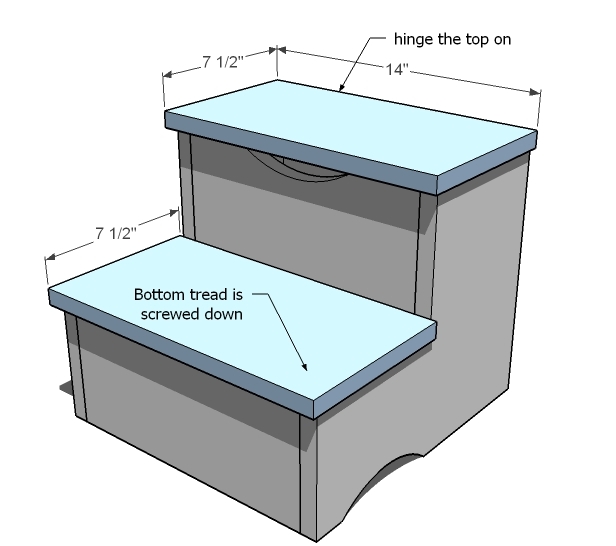
Bottom With the remaining 1×6, add the bottom to the step stool. Attach from all sides with glue and screws.
Step 5


Comments
anabenet (not verified)
Thu, 09/09/2010 - 03:52
I've been wanting some steps
I've been wanting some steps like these for the kids for a while! They make for great time out chairs. LOL Thanks for posting these.
Jess (not verified)
Thu, 09/09/2010 - 03:57
Thanks so much! I've been
Thanks so much! I've been wanting one of these forever but they're so expensive for something you're going to put your feet on. You're amazing!
Leah (not verified)
Thu, 09/09/2010 - 04:17
I can't click the 'like'
I can't click the 'like' button, but i do :)
Isn't it funny how you post plans just as we're looking at their retail counterparts? :)
lyndyjo (not verified)
Thu, 09/09/2010 - 08:19
This would be great in the
This would be great in the kids bathroom. Maybe we can use the top for towel storage.
Viola (not verified)
Thu, 09/09/2010 - 09:40
Thank you Ana! I needed one
Thank you Ana! I needed one of these for my grandchildren.
becwilson (not verified)
Fri, 09/10/2010 - 05:51
Ana, so cool! I had plans
Ana, so cool! I had plans drawn up for something similar, but was intimidated...the storage was drawers. This is so much easier! Thank you!!!
momsmess (not verified)
Sat, 09/11/2010 - 05:12
I need to build some of these
I need to build some of these so the dog can get in and out of our bed!
Gwenevere (not verified)
Thu, 10/14/2010 - 06:44
Has anyone made this yet?
Has anyone made this yet? What are the finished dimensions? I need to make sure this is going to fit in my tiny bathroom
In reply to Has anyone made this yet? by Gwenevere (not verified)
BurnettaBennett
Tue, 07/14/2020 - 09:50
Dimensions:
According to the plan, it is 14" wide, 14" deep, and 11 1/2" tall.
Gwenevere (not verified)
Thu, 10/14/2010 - 06:47
nevermind...I had y'all
nevermind...I had y'all worried there for a minute huh? I managed to figure the dimentions from the plans...yeah me!
With A Little … (not verified)
Sat, 10/16/2010 - 03:31
[...] to thank this lady for
[...] to thank this lady for the inspiration and the plans. The plans for the step stool can be grabbed here, and the plans for the super easy ledge can be grabbed here. For free. Yeah, you heard me [...]
Niki (not verified)
Mon, 11/15/2010 - 21:28
OK, I've built this and it
OK, I've built this and it turned out great. I love it, it went together SO nicely. I didn't have any 1x6 scrap, and I didn't want to buy one for 24" So I just made sure I bought a 1x12 a little longer. The measurements are slightly off in the plans. The 1x12 pieces for the storage box aren't actually 12" wide (11 1/4 to 11 1/2 depending on lumber supplier) So if you are using a 1x6 for the toe kick and the bottom of the storage box, you will need to the length to match the width of the 1x12.
I posted a picture on the facebook site.
Guest (not verified)
Wed, 04/06/2011 - 13:51
Confused
On the 1 x8 the shopping list says to buy a board that is 26" but the cut list says to cut 14". Isn't 14 X 2 =28? I wish I would have looked at this better because I need to go back to the store for a longer board. The store I went to cut them in length for me. I like the blue and orange store better because you get to pick out the wood.
melissa2
Fri, 02/03/2012 - 16:14
Great plan--thank you!
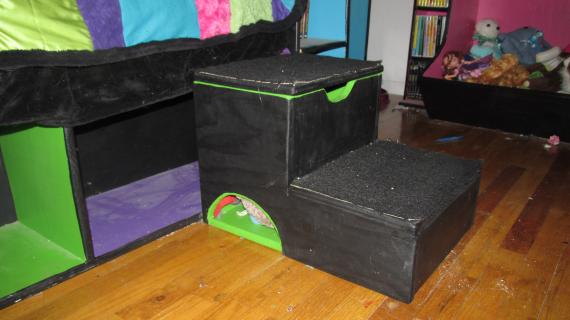
After doing a few plans from the site, I finally had the confidence to modify this into something I've been wanting for years after seeing them featured in catalogs--an adult-sized storage step with sloped sides and an inset lower step (here's how to make modifications if anyone else wants to do the same: http://ana-white.com/2012/02/storage-bed-step-modifications-kids-storag… ). Thanks for sharing your talents and helping give women the confidence to build!
Terralee #Rich (not verified)
Thu, 09/13/2012 - 12:22
wowwwww
I have been looking for a small step stool. Bless you. I'm a large woman and have trouble getting into the bed of my camper. This will be much easier for me. Thank you do much!!!!!
Stephanie Lujan (not verified)
Sat, 12/29/2012 - 09:33
step stool
Hi! I love this site and your story Ana! Just one quick thing, I just built a step stool that looks exactly like this one but the cuts all came from one pine board that is 1x12x8feet. I haven't done the math yet, but I wonder if your plan could work out the same way. Here is the plan that I used : http://www.diynetwork.com/decorating/how-to-build-a-storage-step-stool/…
Brian Carlson (not verified)
Mon, 12/31/2012 - 07:23
paint/stain
Should paint or stain be applied before or after attaching the hinges?
Runsomewhere
Wed, 01/09/2013 - 09:09
hinges
I attached the hinges as the very last step. I was afraid painting over them would goop them up. Stain won't stick to metal. Paint will, but it may flake off and peel over time.
kdalton324
Sun, 09/27/2015 - 21:15
measurements
I think that the measurements for the total amount of wood is off. In the shopping list section you list 26 inches of 1x8. but in the cut list you have "2" 14 inch 1x8 boards for your stair tred.