


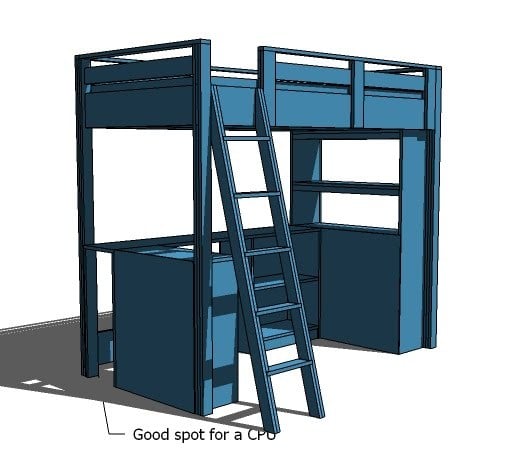
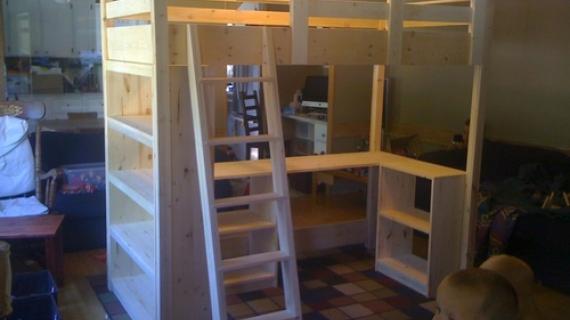
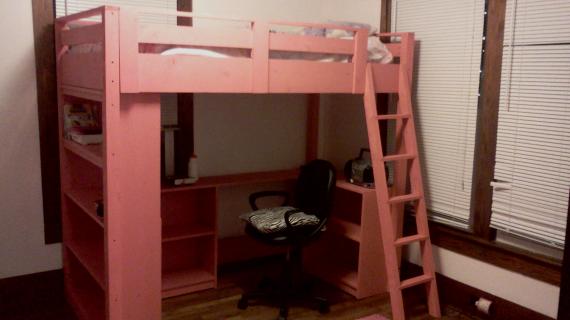
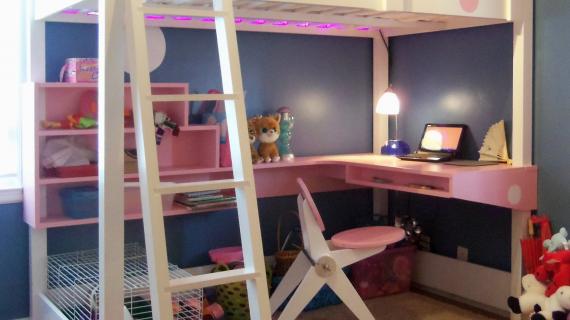
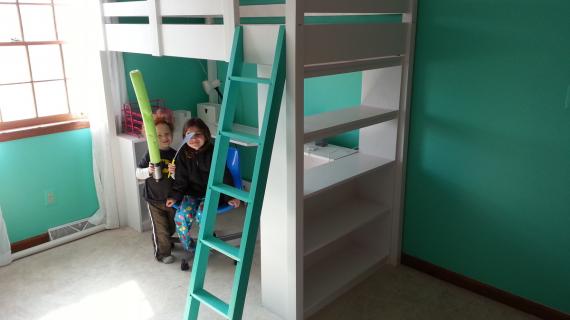
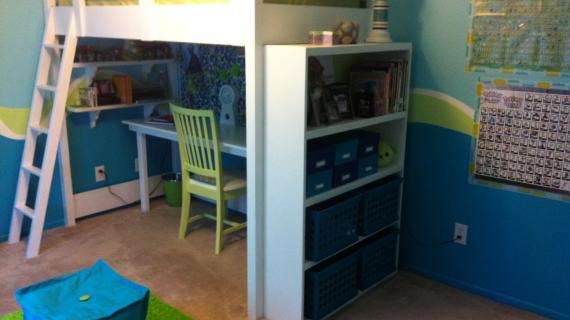
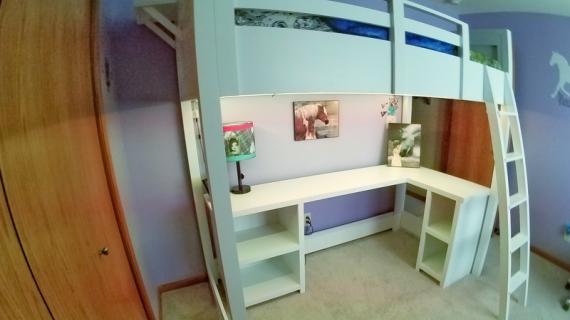
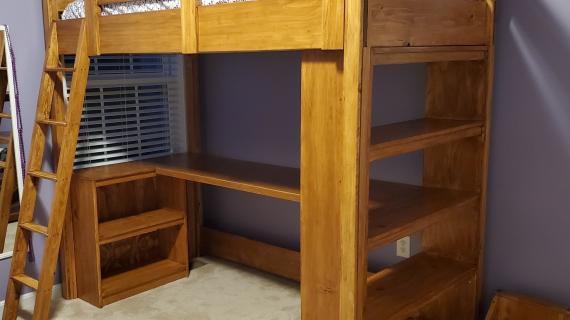
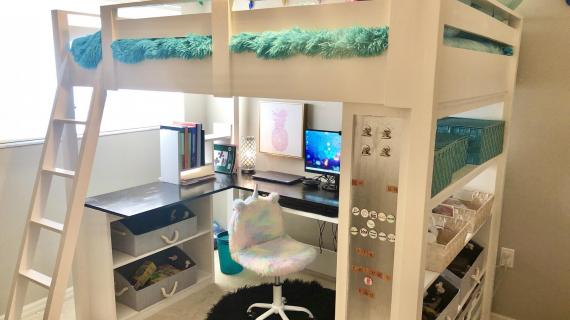
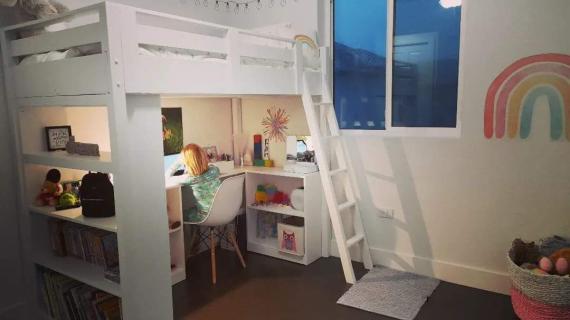
Convert space under a loft bed into storage and a desktop space. Simple plans even have a spot to hide a cpu!
Works with the loft bed and the loft bed big bookcase plans

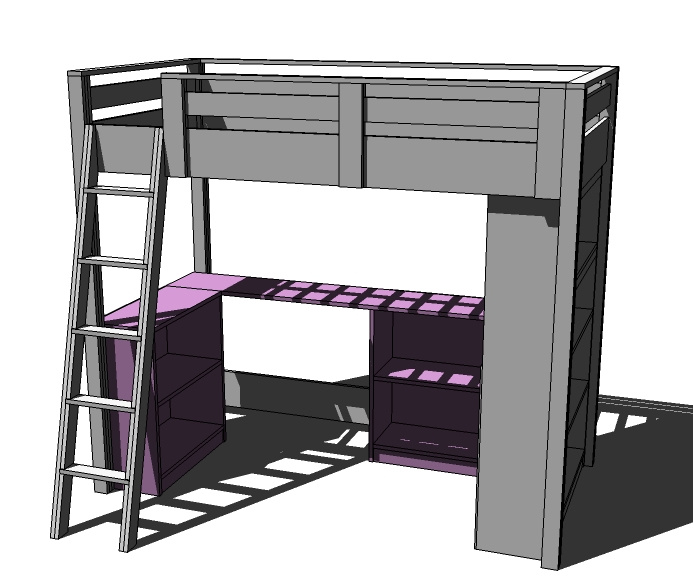
Today, we are going to finish up the loft bed plans by adding two small bookcases and a desktop. I actually designed this plans so that it's really one small bookcase, with a longer top on one of the bookcases.
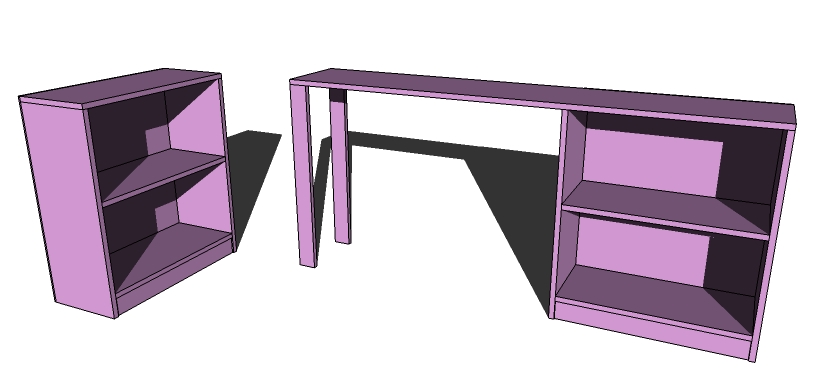

We already have plans for the loft bed and the large bookcase, so these smaller bookcases are the final pieces to the loft bed collection.
Preparation
- 1 – 1×4, 6′ Length
- 3 – 1×12, 8′ Length
- 1 – 1×12, 6′ Length (Desktop)
- 1 – 1×3, 8′ Length
- 1/4″ Plywood
- 2″ self tapping wood scews
- 1 1/4″ self tapping wood screws (or brad nails and wood glue)
- Wood Glue
- Wood Filler
- Finishing Supplies
- 4 – 1×12 @ 29 1/4″ (Bookshelf Sides)
- 4 – 1×12 @ 24 1/2″ (Bookshelf Shelves)
- 1 – 1×12 @ 26″ (Small Bookshelf Desktop)
- 1 – 1×12 @ 67″ (Large Desktop)
- 2 – 1×3 @ 24 1/2″ (Footer)
- 2 – 1/4″ Plywood @ 26″ x 30″ (Backs)
- 2 – 1×4 @ 29 1/4″ (Desktop Legs)


Work on a clean level surface. Check for square and use good straight boards. Predrill all screw holes with a countersink bit. Be safe and have fun!
Instructions
Step 1
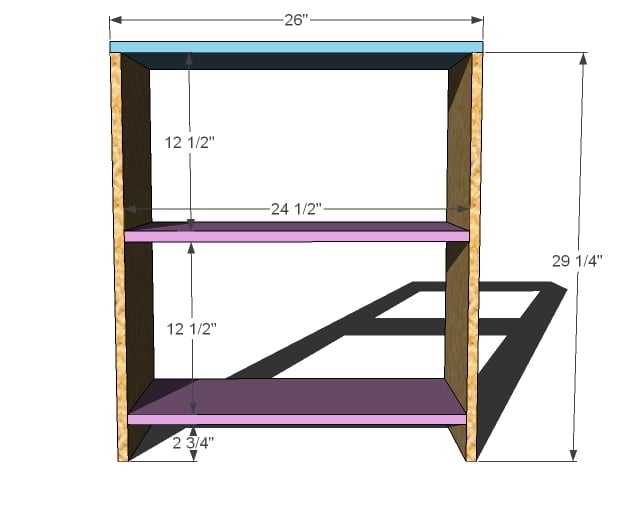
BUILD THE BOX
Build the box as shown above using 2″ screws and glue. Build one as shown above, and the other without the top attached.
Step 2
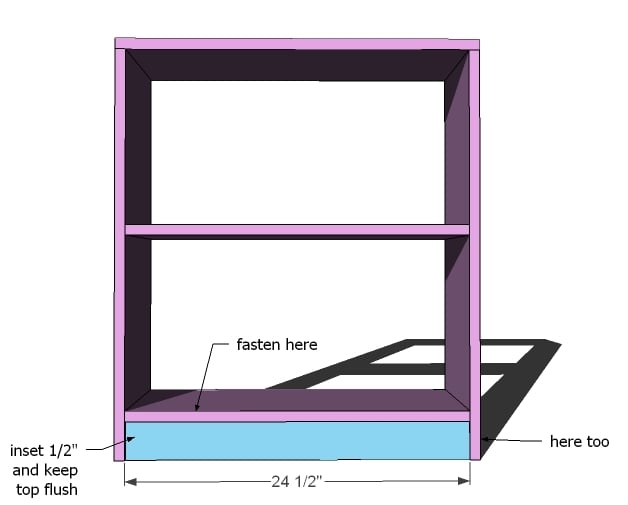
FOOTERS
Attach the footer as shown above, using 2″ screws and glue. Inset the footers 1/2″ and also keep the top edges flush. The bottom edge will be just shy of meeting the ground.
Step 3
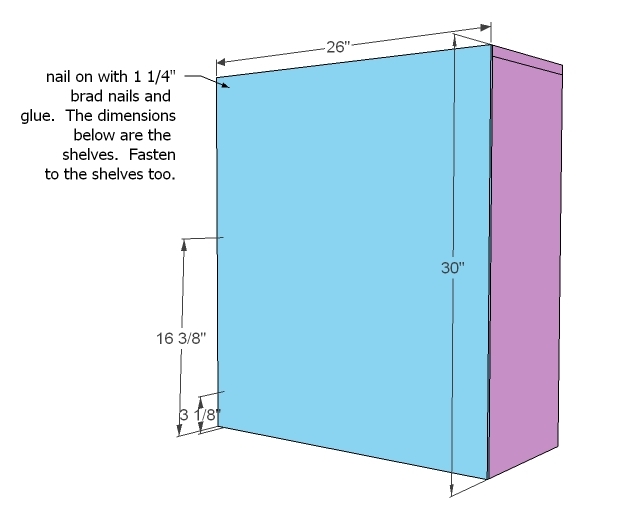
BACKS
Attach the backs to the bookcases. You may need to wait to attach the top in the next step to the second bookcase before adding the backs. Make sure you fasten to the shelves too. Use glue and 1 1/4″ nails.
Step 4

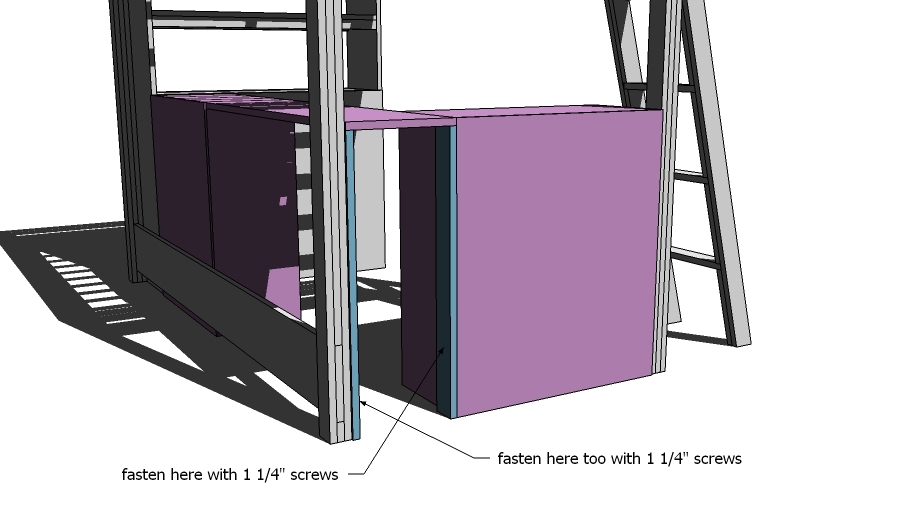
LARGE DESKTOP
Attach the large desktop to the top of the second bookcase, and the legs too. Use 2″ screws and glue.
Step 5

Comments
Building Hope (not verified)
Mon, 06/28/2010 - 03:44
Trying to decide if I should
Trying to decide if I should shorten up the bookcases and the desk if I'm going to take 8" off the loft due to a lower ceiling. Which would be better, less headroom or a little lower desk? Book cases will be fine either way, it's just sitting at the desk doing homework comfortably that I worry about?
Christine (not verified)
Mon, 06/28/2010 - 07:51
Thank you so much for posting
Thank you so much for posting the rest of the Loft Bunk Collection!!! I am so excited to get this made for my son's room! I've already got the wood for the bed and large bookcase! I'll post pics when it's done :0)
Many Thanks!
shanley (not verified)
Tue, 06/29/2010 - 08:00
thank you so much for this
thank you so much for this complete set! I have plans this summer to build the whole set for my daughter's room. will post pics when it is done. We may be combining it with the cubby bed for a shared bedroom so you have done us two big favours. thank you again.
Loft Bed Small… (not verified)
Sat, 11/13/2010 - 08:20
[...] Full reference
[...] Full reference (Copyright acknowledge) This entry was posted in Wood Furniture Plans. Bookmark the permalink. ← Plans For Shed and All Additional Matters to Take Into Account … Outdoor Garden Statues Atlanta – Outdoor Garden Decor's blog → [...]
randomlittlelady (not verified)
Fri, 12/10/2010 - 18:22
Hey, i am a teenage girl and
Hey, i am a teenage girl and i found it easy (with a little help from dad) to build this loft bed.
I added a large mirror to the wall behind and put fairy lights around it so that is is like a really cool vanity. I also turned one of the bookshelves into a chest of drwaers so that i can store my makeup there! I added plywood in the shape of giant polkadots, varying in sized to make it a little prettier and so that it would fit in with my overall colour scheme. Thanks so much, my room is only 250cm by 210cm so this made a big difference to the space i have in there. Very effective for saving space, i would reccomend this for any teens room.
lrae
Wed, 09/12/2012 - 18:33
vanity under loft bed
randomlittlelady, I would love to see a picture of your bed. This is exactly what I plan to do for my 12-year old daughter's room and would love to see one with an actual vanity underneath. Could you please post a picture? It sounds great! Congrats!
shdvl (not verified)
Thu, 01/27/2011 - 19:08
Does this plan have any
Does this plan have any dimentiions change if I was building the loft bed as a full instead of a twin? My daughter is the oldes but as the only girl with two brothers she gets the smallest bedroom so this helps alot with space.
Alana Cummings (not verified)
Sun, 12/30/2012 - 15:20
bed for William
What do you think of something like this for William's room?
DIY.Mommi
Thu, 05/21/2015 - 14:38
Stand Alone
Could this be used also as a stand alone desk?
Lady_Cynara
Tue, 06/09/2015 - 07:57
Large Bookcase?
The link to the large bookcase doesn't seem to be working anymore?
Have those plans been taken down?
Lady_Cynara
Tue, 06/09/2015 - 08:11
Correct link.
After browsing the site more, I found a link to the plans, but it's not the same link that is provided on this post, so I figured I would share the link here in case anyone else is looking for it.
http://ana-white.com/2010/06/plans/what-goes-under-loft-bed-how-about-b…
In reply to Large Bookcase? by Lady_Cynara
Ana White
Wed, 06/10/2015 - 08:30
http://ana-white.com/2010/06
http://ana-white.com/2010/06/plans/what-goes-under-loft-bed-how-about-b…
Take a look at this plan post
koleyann89
Wed, 09/30/2015 - 15:18
Dimensions for the Full size loft
My oldest loves this loft bed and everything underneath, but she has a full size mattress so we wouold be doing the full sized loft. What would be the dimensions be for bookcase for a full sized loft bed?
playaergames
Sun, 07/04/2021 - 08:09
Your 3D design is quite…
Your 3D design is quite interesting, it adds to my insight to read