Weatherly Outdoor Loveseat

Difficulty
Intermediate
| Print this plan

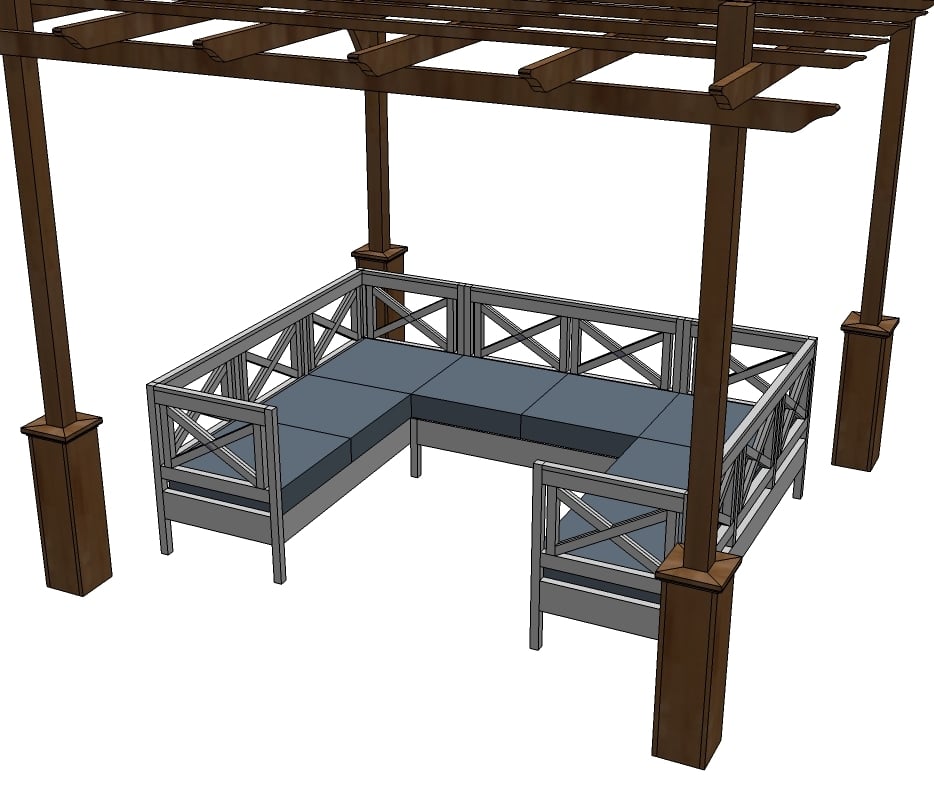
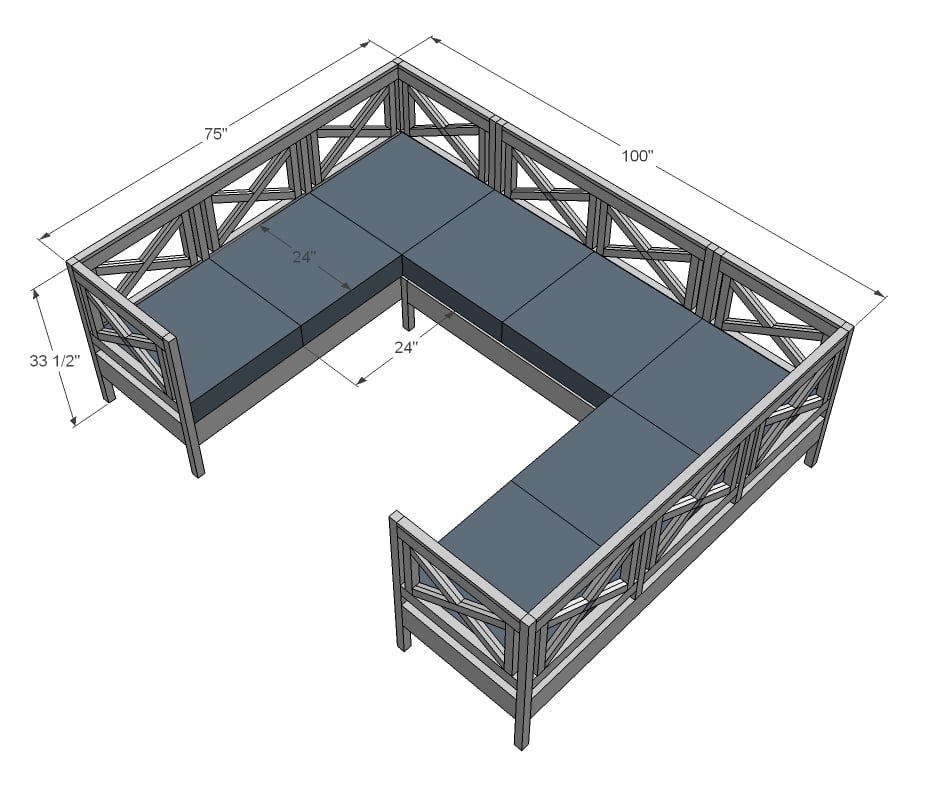
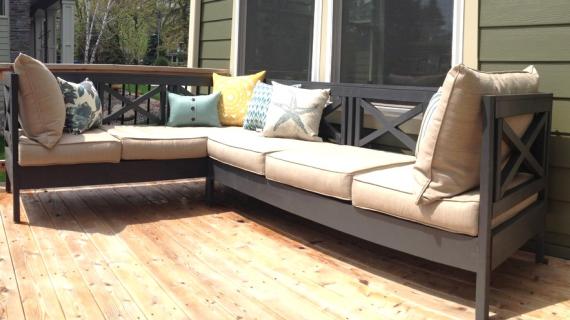
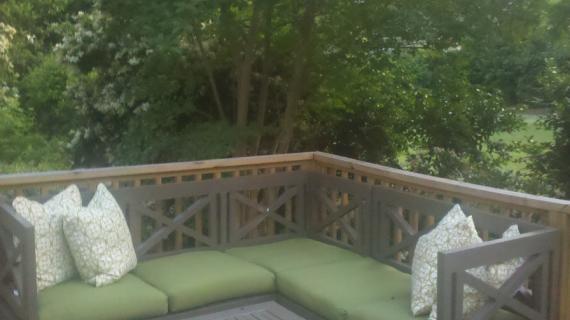
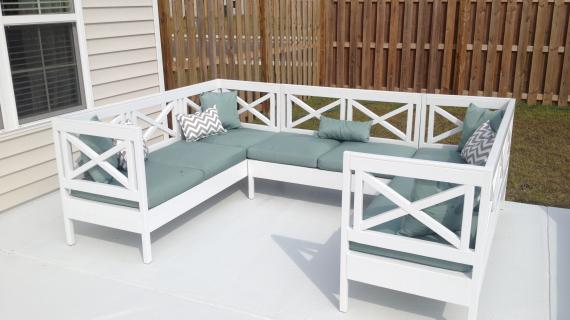
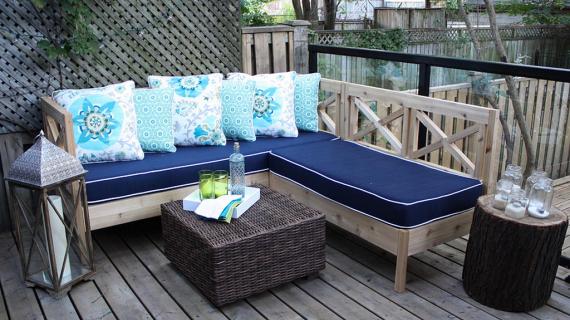
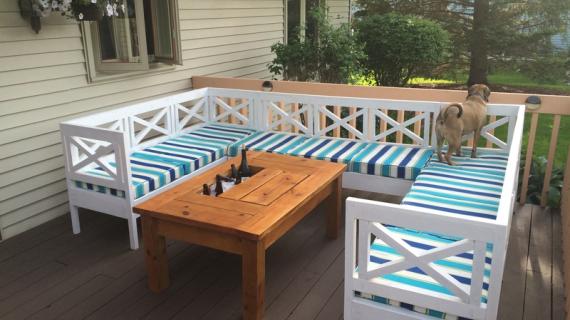
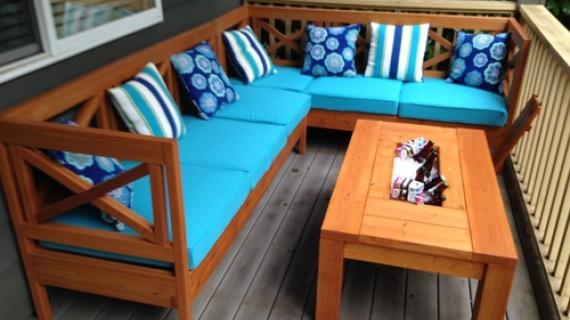
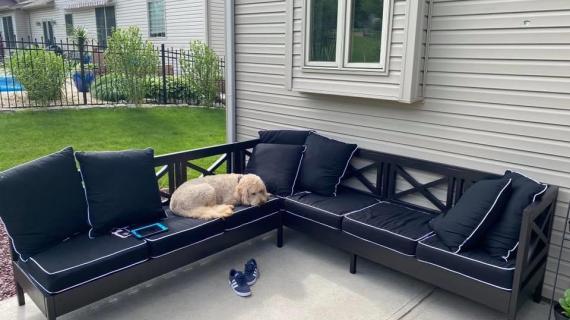
An outdoor loveseat project plan featuring X back, double cushions, and an armless design that works with the Weatherly Sofa to create a dream sectional.  Uses standard 24" x 24" deep seat cushions, available everywhere.

While the paint dries on the sofa, thought I would post the loveseat plans for you all looking for ways to add comfort and style to your patios and decks this summer.

I am so glad that I built the sofa - made quite a few mods and changes to make this set of plans easier to build and stronger.  Also, this set of plans is highly inspired by Pottery Barn's Weatherby Sectional, but because 30" x 30" cushions are very very expensive, I opted to use standard 24" x 24" cushions.  If you can find the 30" x 30" cushions, you can easily modify this plan to fit those cushions.  I might suggest adding a center leg for added support if you do choose to use larger cushions.  Another big change from Pottery Barn's Weatherby Sectional is I made this plan to be standard seating height - so this could work as a bench at a table.
Later this week when I post the Sofa plans (with photos yay!) I'll go into more details.  Also, for those of you looking for something a tad simpler . . . I've got one more outdoor lounge collection in the works that I hope to post next week, so stay tuned for that.
Got a paint brush with my name on it, so gotta run.  Have a great day!

Dimensions
Dimensions for the full sectional are shown above. Step 1 shows loveseat dimensions.

Preparation

Shopping List

3 - 1x3 @ 8 feet long (slats)

3 - 1x2 @ 8 feet long 
4 - 2x2 @ 8 feet long
1 - 2x3 @ 8 feet long
2 - 2x6 @ 8 feet or stud length
Common Materials
2 1/2 inch screws
1 1/4 inch finish nails
2 inch finish nails
120 grit sandpaper
primer
wood conditioner
paint
paint brush
Cut List

4 - 1x2 @ 20 13/16" (both ends cut at 30 degrees off square, ends parallel to each other)

8 - 1x2 @ 10 3/8" (both ends cut at 30 degrees off square, ends NOT parallel to each other)
4 - 2x2 @ 12 1/8"
2 - 2x3 @ 45"
1 - 1x2 @ 45"
2 - 2x2 @ 33 1/2"
2 - 2x6 @ 45"
2 - 2x6 @ 23"
2 - 2x2 @ 13"
2 - 2x2 @ 45"
9 - 1x3 @ 23"
Tools
Tape Measure
Speed Square
Pencil
Safety Glasses
Hearing Protection
Kreg Jig
Drill
Miter Saw
Brad Nailer
Power Sander
Level
Drill Bit Set
General Instructions

Please read through the entire plan and all comments before beginning this project. It is also advisable to review the Getting Started Section. Take all necessary precautions to build safely and smartly. Work on a clean level surface, free of imperfections or debris. Always use straight boards. Check for square after each step. Always predrill holes before attaching with screws. Use glue with finish nails for a stronger hold. Wipe excess glue off bare wood for stained projects, as dried glue will not take stain. Be safe, have fun, and ask for help if you need it. Good luck!

Instructions

Step 1

Designed to fit standard 24" x 24" cushions, this loveseat is 48" wide, 33 1/2" tall (without finials) and 27" deep overall.
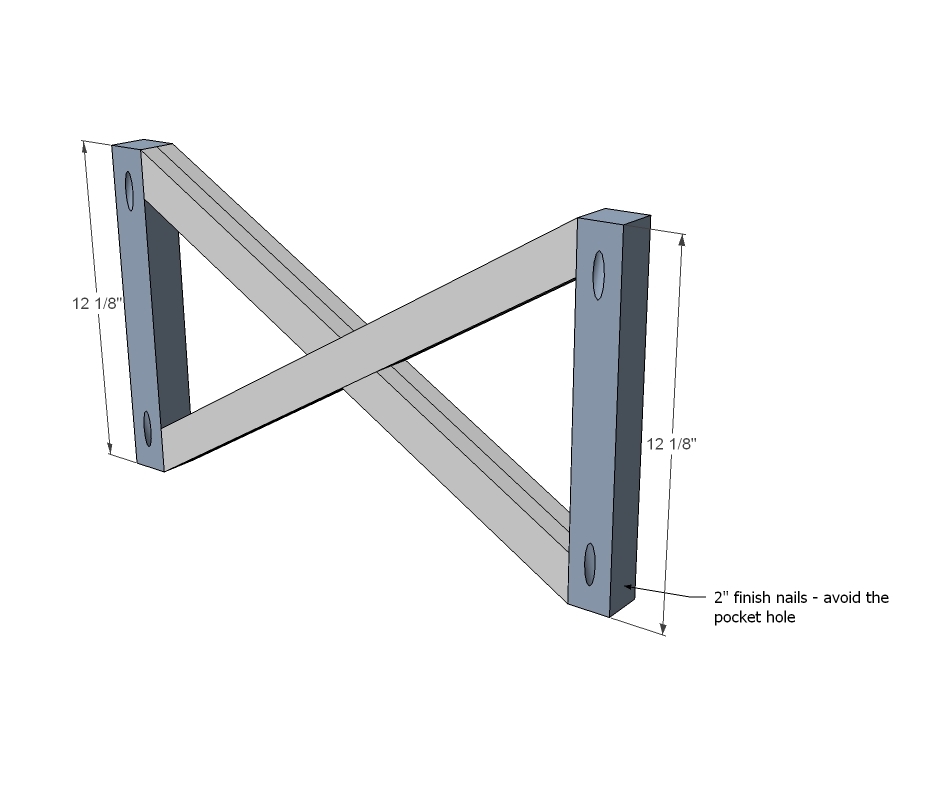
Step 2

Start by taking all four longer back pieces and nailing two of the shorter pieces to them as shown above with 1 1/4" finish nails and glue. You should end up with a total of four of these.
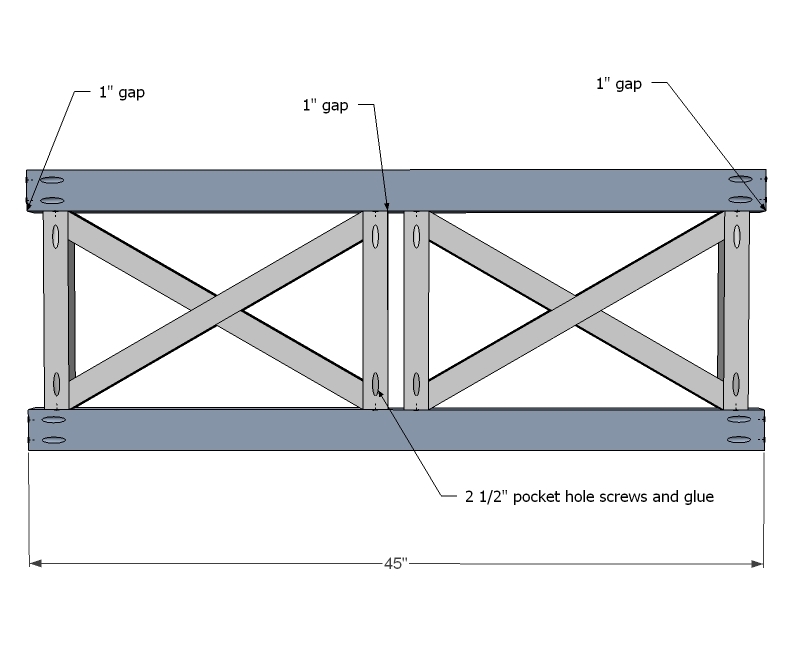
Step 3

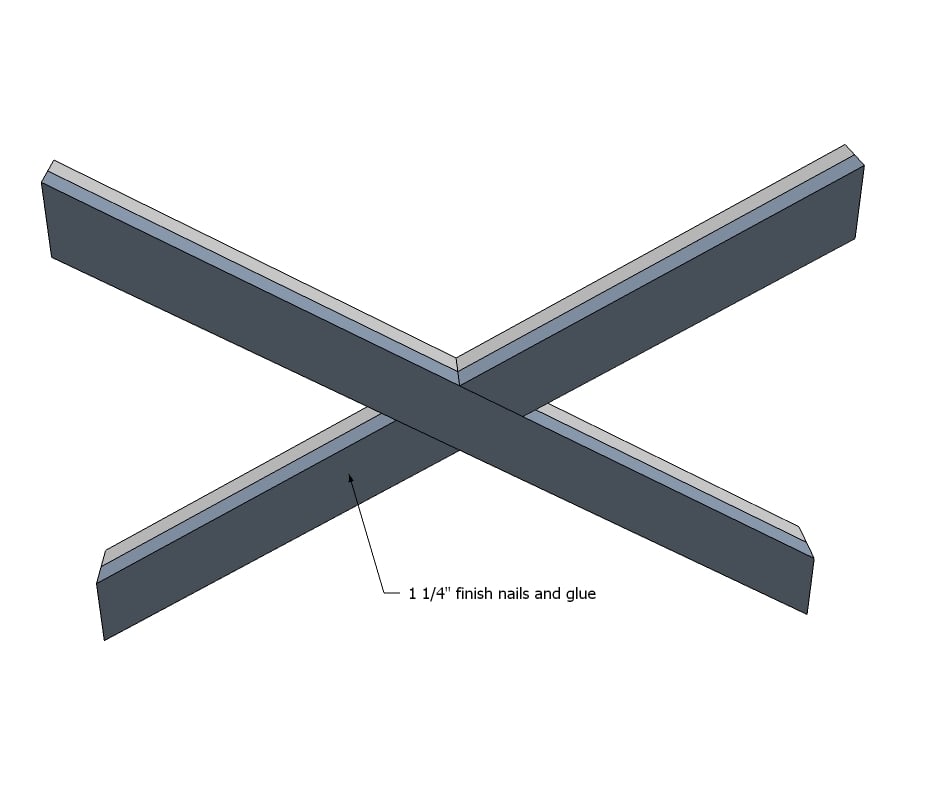
Then make Xs out of the pieces from step 1. Attach with glue and 1 1/4" finish nails.

Step 4

Now add the sides. This is not super structurally important, so I glued and nailed mine - and there was no issue. You could use the Kreg Jig™ - but the pocket holes are going to cross, and I had some issues with screws overlapping. You will need to drill your pocket holes in the 2x2s in this step

Step 5

Step 6

Now attach the top with 1 1/4" finish nails and glue.
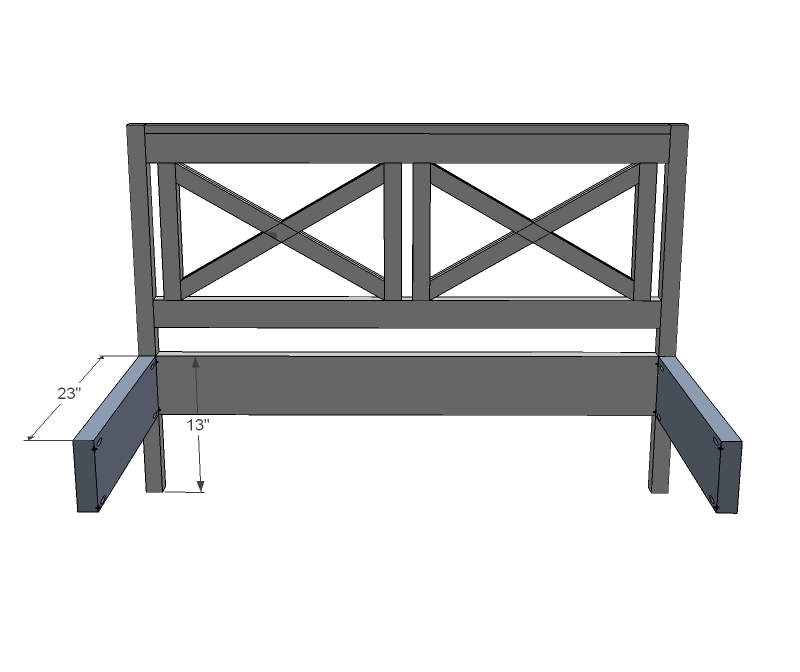
Step 7

And the legs. Shown above is the Kreg Jig™ pocket holes, but you could also use 2 1/2" screws countersunk from the legs (That's what I ended up doing, and it worked great!)
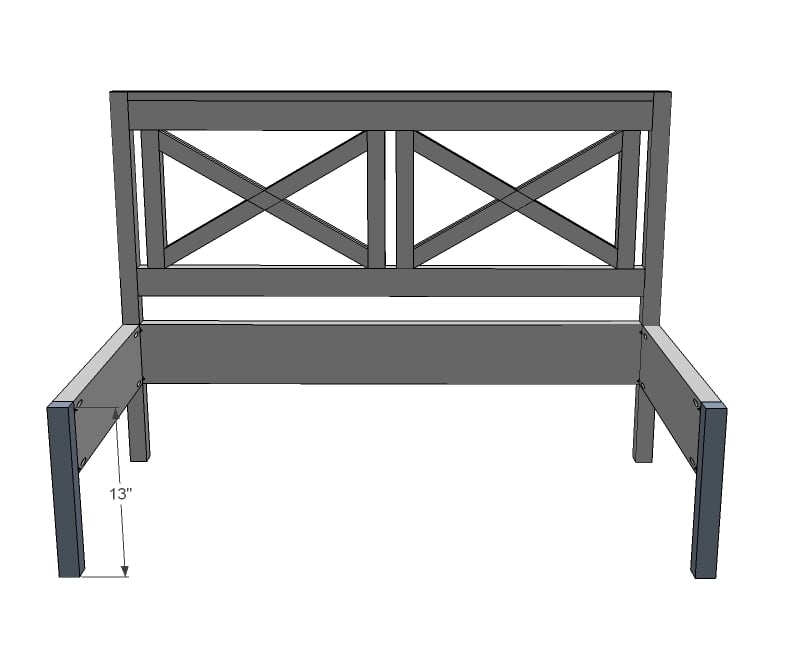
Step 8

Now the sides - use the Kreg Jig™ as shown above or again, 2 1/2" screws countersunk with glue.

Step 9

And the front legs. Use the Kreg Jig™, set for 1 1/2" stock and 2 1/2" screws. TIP: If you find your boards splitting out on you, sometimes using a shorter screw of setting your Kreg Jig™ for smaller stock (for example, 3/4" stock and 1 1/4" screws) can minimize the splitting.

Step 10

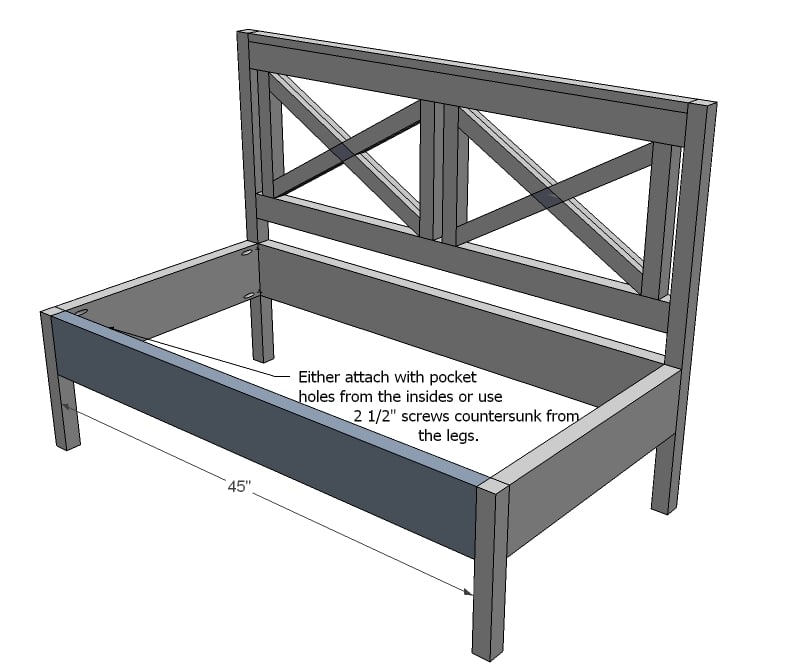
And finally the front.

Step 11

Now the cleats.

Step 12

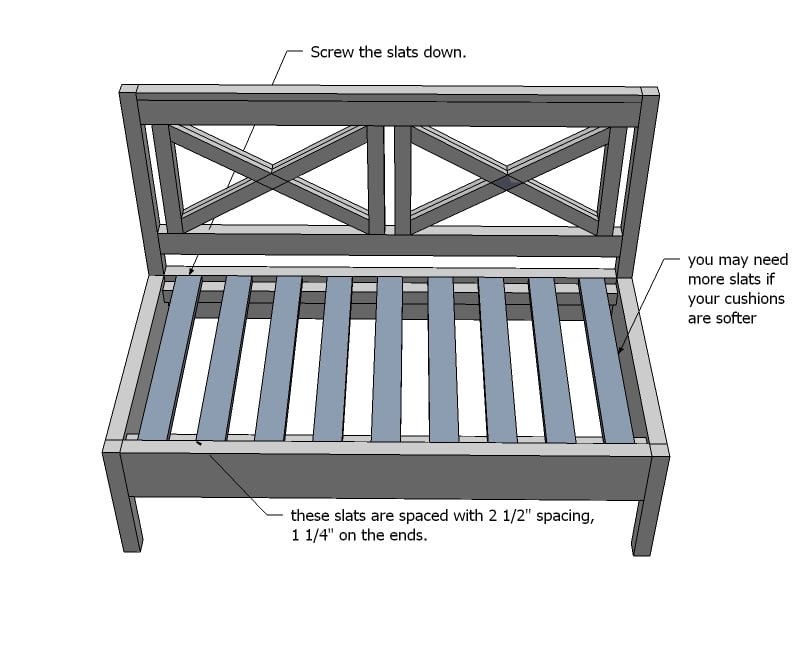
And finally lay the slats.

Finishing Instructions
Preparation Instructions
Fill all holes with wood filler and let dry. Apply additional coats of wood filler as needed. When wood filler is completely dry, sand the project in the direction of the wood grain with 120 grit sandpaper. Vacuum sanded project to remove sanding residue. Remove all sanding residue on work surfaces as well. Wipe project clean with damp cloth.

It is always recommended to apply a test coat on a hidden area or scrap piece to ensure color evenness and adhesion. Use primer or wood conditioner as needed.

Comments

Nora (not verified)

Mon, 04/18/2011 - 14:04

You are awesome... I was trying to see how I could come up with a way to update your plans to do this one... I loved it when I saw the PBbcatalog.. Awesome job... Can't wait for the sofa plans...

Butch

Mon, 02/06/2012 - 12:10

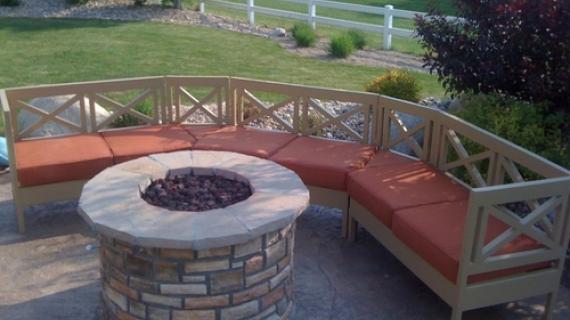
I'm using this idea to build some custom patio furniture by our new pool. Thanks for sharing.

Eric (not verified)

Fri, 06/08/2012 - 10:57

Is there a plan for the virtual arbor in the picture as well?

JordanMorris (not verified)

Tue, 06/26/2012 - 10:33

I love your plans Ana, but is there any way I could ask you for an estimate total cost to build these were? Lumber/hardware/etc.. just what you bought? I find so many cute plans but I shy away because I don't want to start it and end up finding out it's way more than I bargained for, lol :(

bkay8686

Mon, 05/19/2014 - 08:07

Hello!
So I am using these plans but adjusting for 27.5 x 27.5 cushions found at west elm. One thing I noticed if you use the plans above for 24 x 24 cushions, the total length of the seat comes out to be 49" (45" 2x6 plus (2) 2x2s for legs). Is there supposed to be an inch difference between the total length of the seat and the combined length of two 24x24 cushions (48")?

I adjusted the 2x6 cuts to be 52" (back and front) and 26.5" (sides) to account for my 3.5" difference with my cushions and the 24x24 used for the above project. Finally, one note is to NOT use pressure treated 2x2s because they are actually 1.5x1.5 which will mess up the dimensions if following the dimensions above verbatim.

Love the plan but looking to understand if the 1" difference is intentional or not.

pde00311

Mon, 05/19/2014 - 09:44

bkay8686, This question is actually fresh in my mind since I am just finishing up building and modifying this design to fit the 22 x 22 Pier One cushions that I bought over the winter. If you are building an armless loveseat as part of a sectional, you are going to want the combined cushion length to equal the combined length of your boards, INCLUDING the frame. In other words, you ultimately want the cushions to go flush over the 2 x 2 frame, your 2 x 6's need to be cut shorter (reduced by the width of your 2 x 2s) to accommodate this, and adding an extra inch would be awkward (accordingly, I think Ana's plan measurements anticipate 2 x 2s that actually measure 1.5 x 1.5). HOWEVER, if you are trying to build from the plans with the armrest/side-piece, the cushions will actually fit inside the armrest, so to speak. So in that instance, the 2 x 6's should be cut to your combined cushion length. Does that make sense?

pde00311

Mon, 05/19/2014 - 10:13

Oh...I almost forgot, in terms of depth, the cushions on both the armed and armless plans fit inside the back of the couch, but are flush with the front. So if your west elm cushions measure at 27.5, the width measurement of your 2 x 6 added to the front 2 x 2 should equal 27.5. (depending on the width of your 2x2s, the combined measurement of your sides will equal 29-29.5).

Frequently Asked Questions

Wood Questions

What kind of wood should I use?
Most of our plans use standard construction lumber like pine or fir. It's affordable, easy to work with, and easy to find. It's also rapidly renewing and biodegradable, so a great eco friendly choice!

Can I use hardwoods instead?
Yes—just keep in mind they're heavier, cost more, and can be tougher on tools and harder to join together and finish. I recommend not tackling a hardwood project until after you have built several softwood projects.

What if my boards are warped?
Choose the straightest boards at the store. You can often work around slight warps by cutting them into shorter pieces.

What wood should I use for outdoor furniture?
Use red-toned or pressure-treated 2x lumber for framing, and cedar or cedar fence pickets for the decking. Outdoor furniture should be built like a deck—your local home center can help recommend the right wood for your climate.

Will my wood move or warp after I build?
Potentially, especially in humid climates. Let your wood acclimate indoors before building. Once acclimated and kept in a stable environment, movement should be minimal. Remember, most houses are built using framing lumber - it's all about keeping moisture down indoors.

Cutting Questions

Do I need a miter saw?
A miter saw is great, creating fast, safe, and precise cuts, even for beginners. But most plans can be built with a circular saw and a straight edge. If using a circular saw to cut, take time to practice, and get good at making cuts, before cutting your project boards.

How do I get clean cuts with a circular saw?
Clamp your board, measure twice, cut slow, and use a sharp blade. This takes practice, so spend some time making cuts. I go through becoming proficient at freehand cutting in my course, it is worth taking if you want to master this skill.

Will the store cut my wood?
Yes—most stores will do rough cuts to help you transport your materials home. But from store to store, the quality of cuts could greatly vary.

Joinery Questions

What screws should I use?
We recommend star-head self tapping screws for framing, most common sizes are 2-1/2", 1-3/4". Pre-drill if close to the edge or you find your wood is splitting.

Do I have to use pocket holes?
Pocket holes are the cheapest, easiest and fastest way to do some joints - like edge to edge or a hidden fastener joint. There are other methods, but these can be time consuming and expensive. We recommend using pocket holes as indicated in plans for best results.

How do I keep things square?
Use a speed square and measure diagonals after each step. Always clamp joints before screwing to keep them tight and flush.

Finishing Questions

Stain or paint before or after building?
A quick sand before and a full finish after gives the best results. Pre-finish if you're doing two-tone or detailed finishes.

What type of finish?
Use oil-based or water-based stain. For paint, cabinet-grade latex or enamel works great. High use surfaces on indoor projects should get a coat of polyurethane, I recommend a Helsman or Spar or other flexible poly that won't crack or peel with wood movement. For exterior projects, use a finish suitable for exterior fences.

How to get a smooth finish?
Start with a well sanded project. Sand between coats (220 grit), wipe clean, and apply light coats with a foam brush or roller.

Plan Questions

Can I change the size?
Many people do, and that's the great thing about building your own furniture! But do keep in mind going bigger might mean more supports are required, and often plans are optimized for minimal material waste.

Are these beginner-friendly?
Yes—plans are written with simple tools and clear steps in mind, with every effort to make plans as simple as possible.

Can I sell what I build?
Absolutely! Just don’t resell or repost the plans themselves.

General Questions

What tools do I really need?
A drill, circular saw, tape measure, square, and a few clamps will get you through most projects.

Do I need a workshop?
Nope! A driveway or small patio is plenty to get started, just make sure you have a level place to work. If you find you are building several projects a year, creating a small workbench is a great way to store tools and have a dedicated workspace.

What if I mess up?
Wood filler, sanding, or flipping boards goes a long way. Mistakes are part of the process!

What can I do to make my projects look more professional?
Start with straight boards, make accurate cuts, clamp all joints, and line up everything neatly. Sand thoroughly, use a neutral finish, and apply it in light coats for a clean look.

I've never built anything before. Where should I start?
Start with a few smaller softwood projects to get hands-on experience. Or if you're tackling a big project, buy a little extra lumber and practice your cuts and joints first. If possible, work with someone who has a bit of experience.

Care & Maintenance

How long will my furniture last?
With good joinery and regular care, your DIY furniture can last for decades. I have pieces in my own home that are over 20 years old and still going strong! One of the best parts about DIY furniture is that it’s easy to repaint, refinish, or repair—so your projects can grow and adapt with you.

How should I care for outdoor furniture?
Lightly pressure wash or hose it down once or twice a year. Tighten screws and reapply finish as needed to protect it—just like a deck or fence. A little upkeep goes a long way in extending the life of your furniture.

How about indoor furniture?
Regularly dust or wipe with a damp cloth. If it starts to look worn, a light sanding and touch-up paint or stain can refresh it in no time. DIY pieces are meant to be durable and fixable—so don’t be afraid to give them some love now and then.

Want to Build with Confidence?

Check out my ebook: 12 Skills to Build Your Own Furniture
It walks you through the core skills every builder needs—measuring, cutting, joinery, and finishing—so you can build beautiful furniture that lasts.

Still Have Questions?

Email us anytime at [email protected] and we’ll be happy to help!