


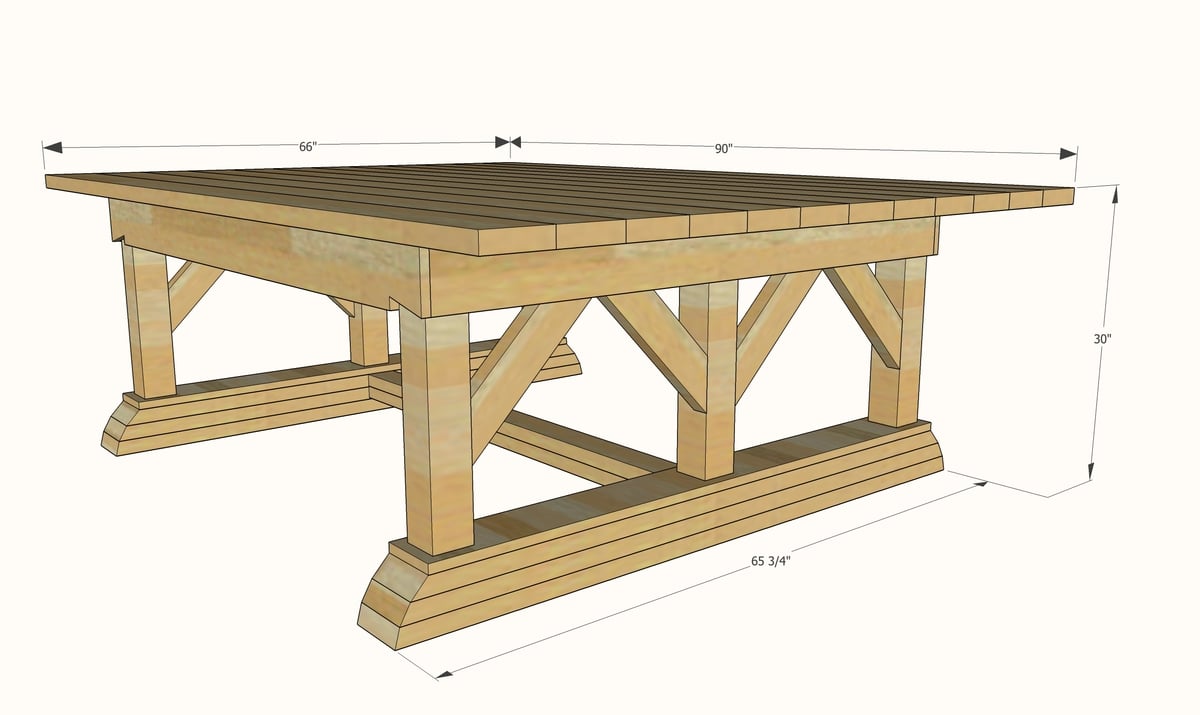
Build your own double wide outdoor table, featuring extra seating for large gatherings and parties, with free step by step plans and diagrams, cut list and shopping list from Ana-White.com
Why We Built this Huge Outdoor Dining Table
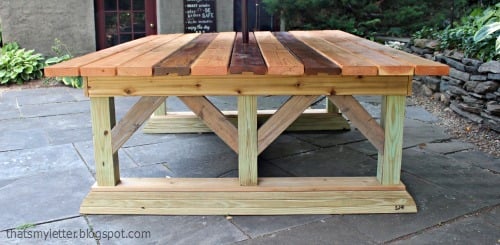
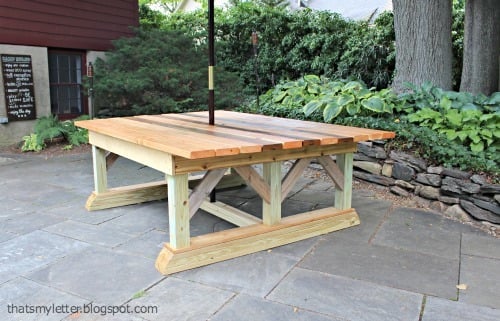
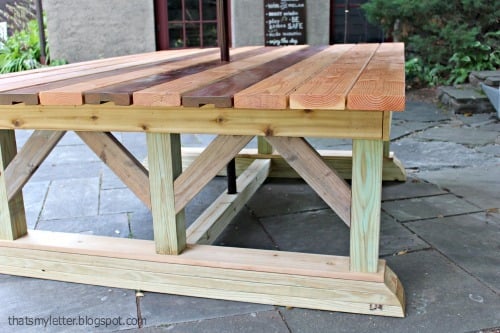
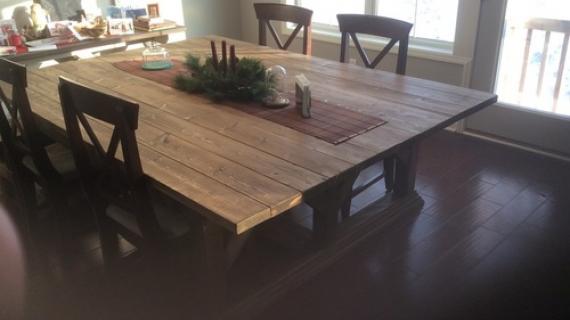
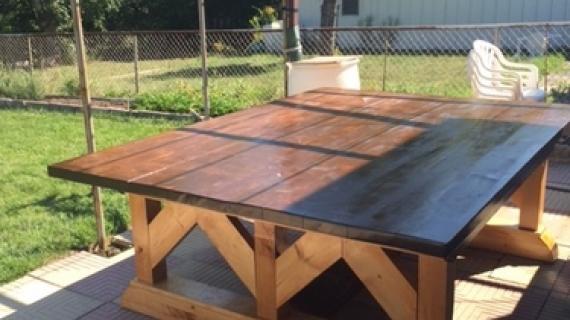
My friend Jaime from That's My Letter wanted a strong and sturdy outdoor dining table to seat up to 10 guests. Jaime and I collaborated on this oh-so-massive outdoor dining table!

Seating now less than 10 adults.

Build Post with More Photos and Details
Of course, plans follow - but please, stop over and check out lots more photos, step-by-step building pics over at Jaime's blog, That's My Letter.
Free Woodworking Plans to Build a Huge Outdoor Dining Table
Preparation
- 19 - 2x6x8
- 6 - 1x6x8
- 4 - 2x4x8
- 2- 4x4x8
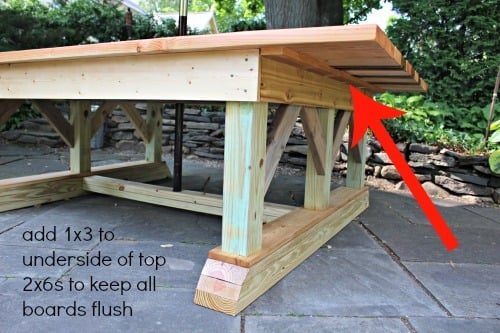
- 2 - 1x3x6 (for added support - see Jaime's post)
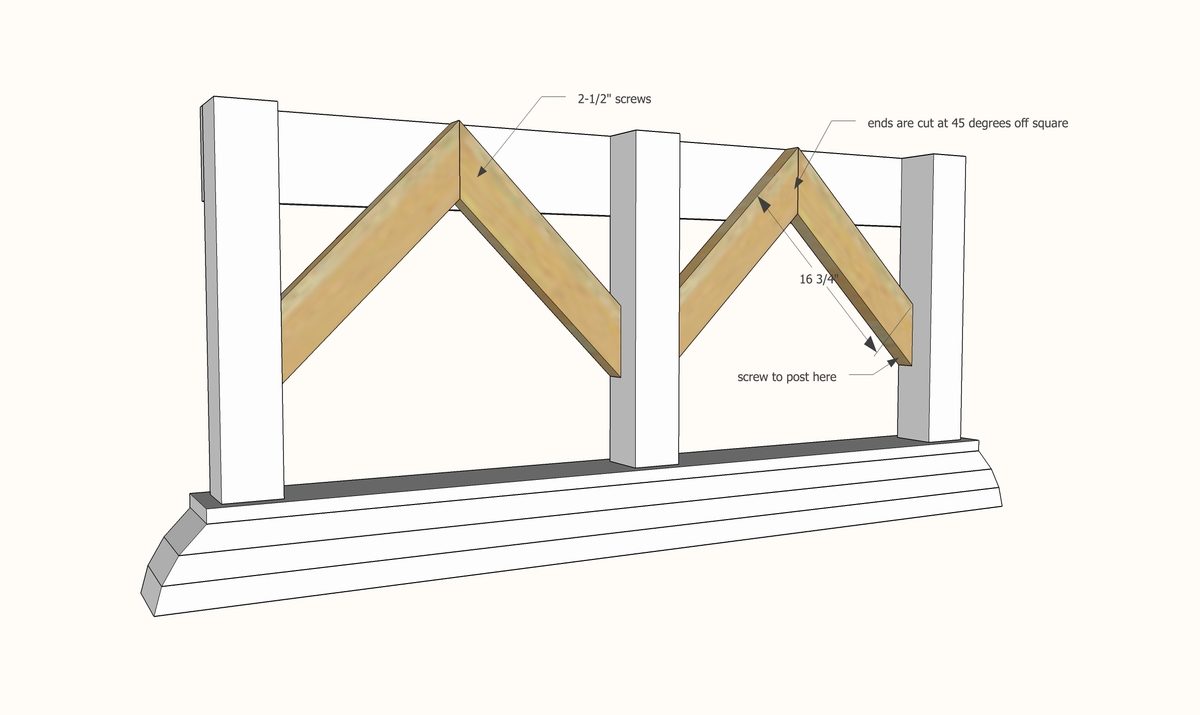
- 2" and 2-1/2" exterior screws
- 2-1/2" pocket hole screws
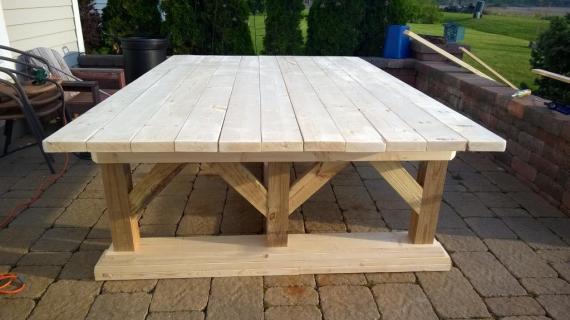
BASE
- 6 - 4x4 @ 23"
- 2 - 1x6 @ 58"
- 2 - 1x6 @ 60"
- 2 - 2x4 @ 60" - shortest point measurement - both ends BEVELED at 45 degrees off square, ends NOT parallel
- 2 - 2x4 @ 63" CUT TO FIT! - shortest point measurement - both ends BEVELED at 30 degrees off square, ends NOT parallel
- 2 - 2x4 @ 64-7/8" CUT TO FIT! - shortest point measurement - both ends BEVELED at 15 degrees off square, ends NOT parallel
- 8 - 2x4 @ 16-3/4" - both ends cut at 45 degrees off square, ends ARE parallel to each other, long point to short point measurement
- 2 - 2x4 @ 55-1/2" (stretchers)
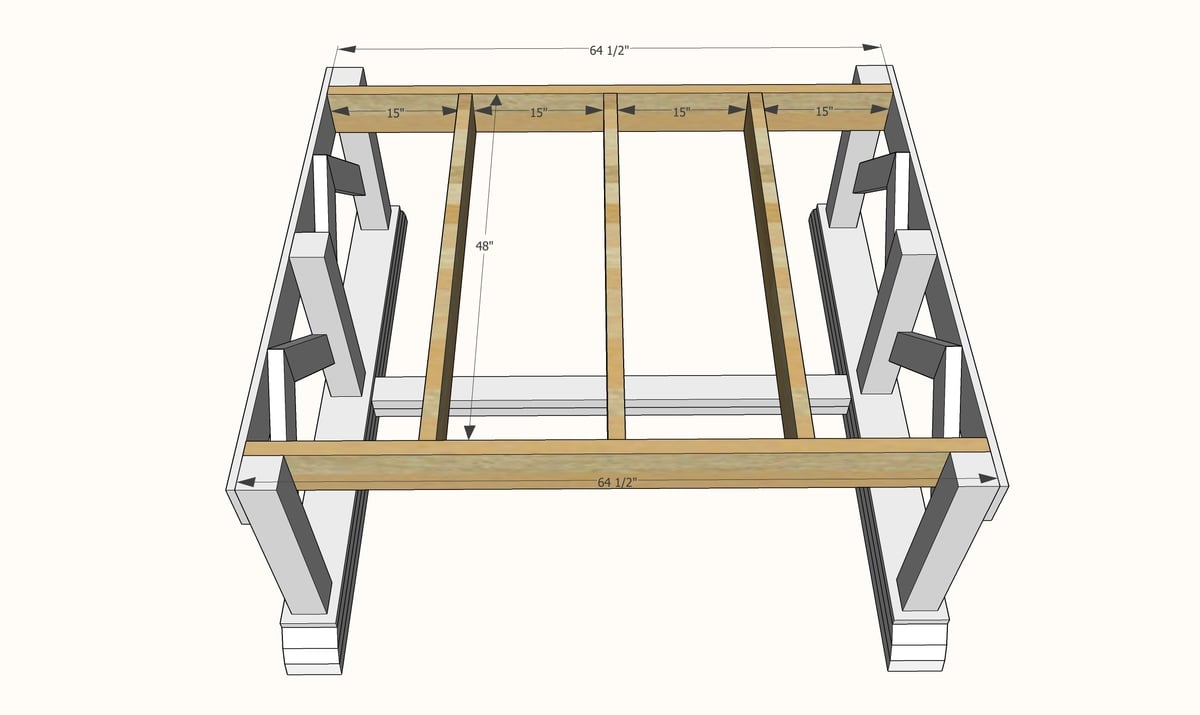
- 2 - 2x6 @ 64-1/2"
- 3 - 2x6 @ 48"
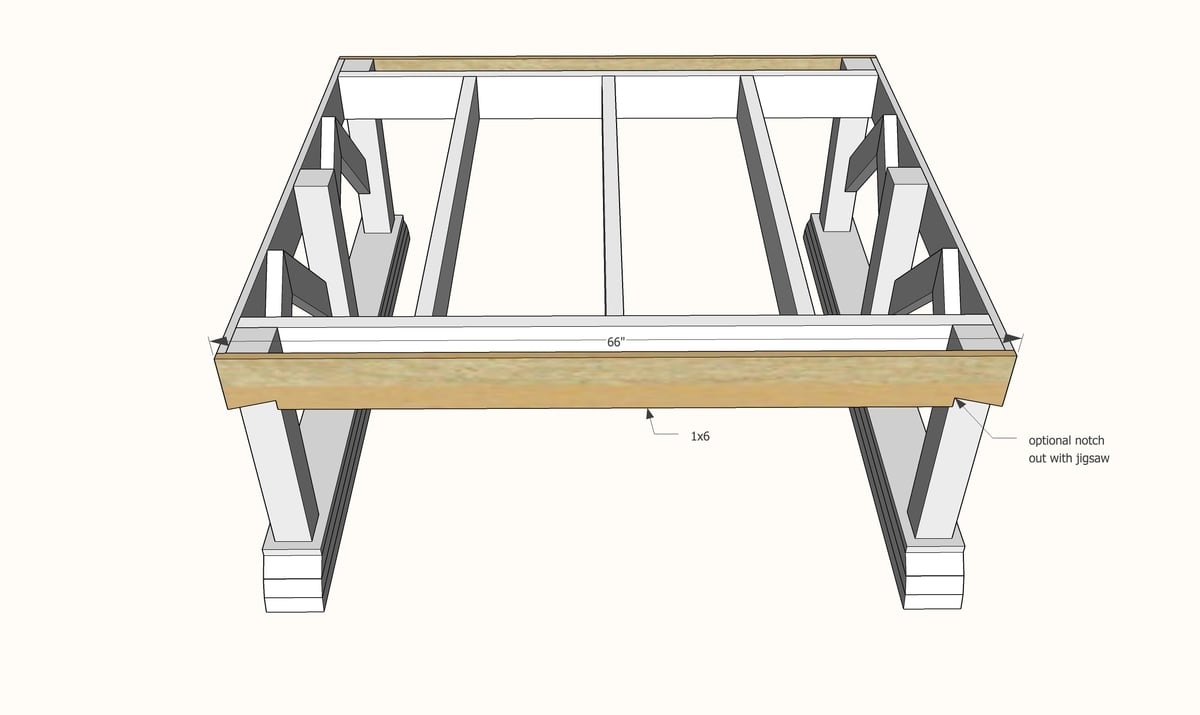
- 2 - 1x6 @ 66"
Tabletop boards are 90" long - use less for spacing in between


Please read through the entire plan and all comments before beginning this project. It is also advisable to review the Getting Started Section. Take all necessary precautions to build safely and smartly. Work on a clean level surface, free of imperfections or debris. Always use straight boards. Check for square after each step. Always predrill holes before attaching with screws. Use glue with finish nails for a stronger hold. Wipe excess glue off bare wood for stained projects, as dried glue will not take stain. Be safe, have fun, and ask for help if you need it. Good luck!
Instructions
Step 1
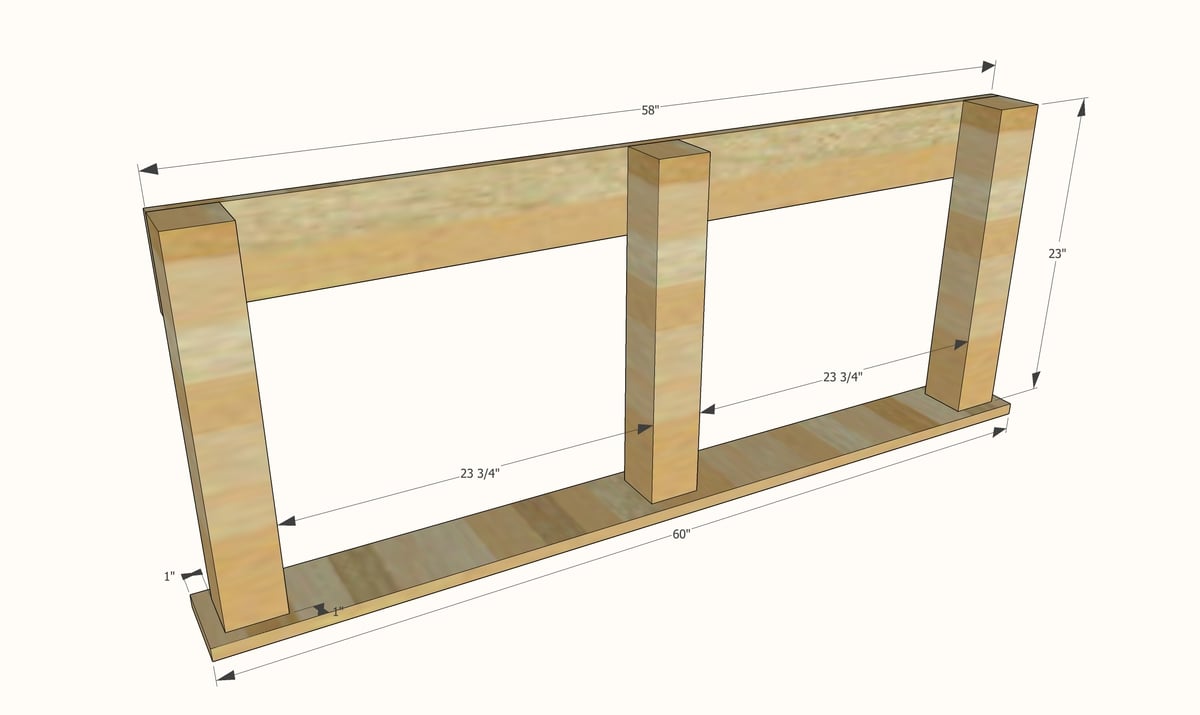
Attach three of the posts to the 1x6 end apron and the 1x6 for the bottom. Screws are recommended - use exterior screws for outdoor application. Predrill holes to prevent splitting.
Screws must be at least 2" long but could be longer if you want to use the same screws as the rest of the assembly.
Step 2
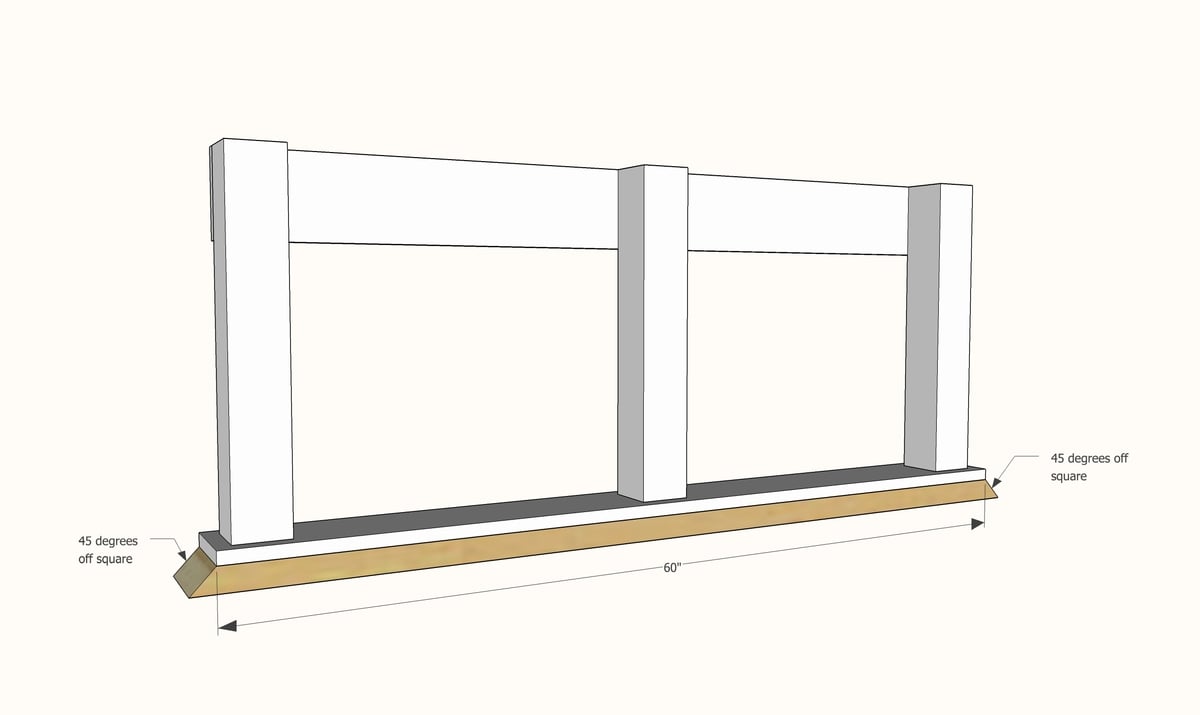
Attach base to the first 2x4 board (ends cut at 45 degrees). To hide screws, attach from underside. 2" screws and glue are recommended here.
Step 3
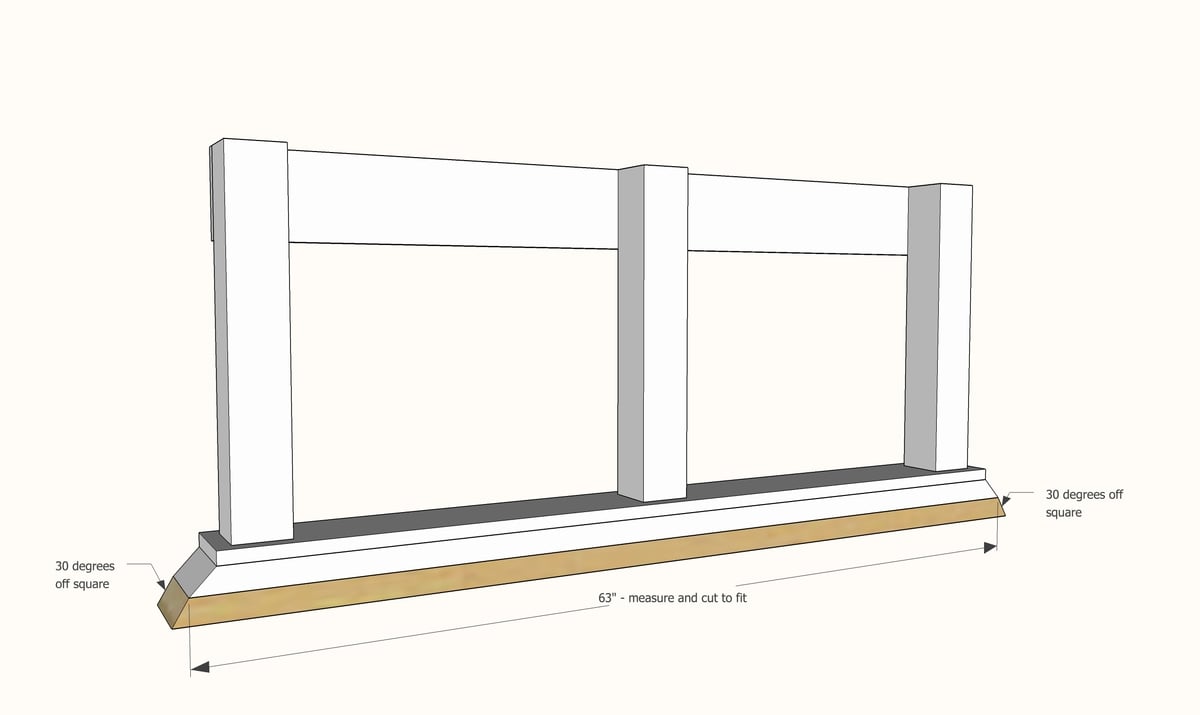
Attach next layer of 2x4 under the previous 2x4. Measure and cut to ensure perfect fit. Use 2-1/2" screws here.
Step 4

Add the final bottom 2x4 same as the previous one.
Step 5
Step 6

Attach stretchers to base.
Step 7
Use 2-1/2" screws to attach aprons to legs. Then attach joist to the 2x6 aprons. You'll need these for attaching the tabletop board to.
Step 8
Attach outer aprons to the outsides of the 4x4 legs. Use 2" screws and glue.
Step 9
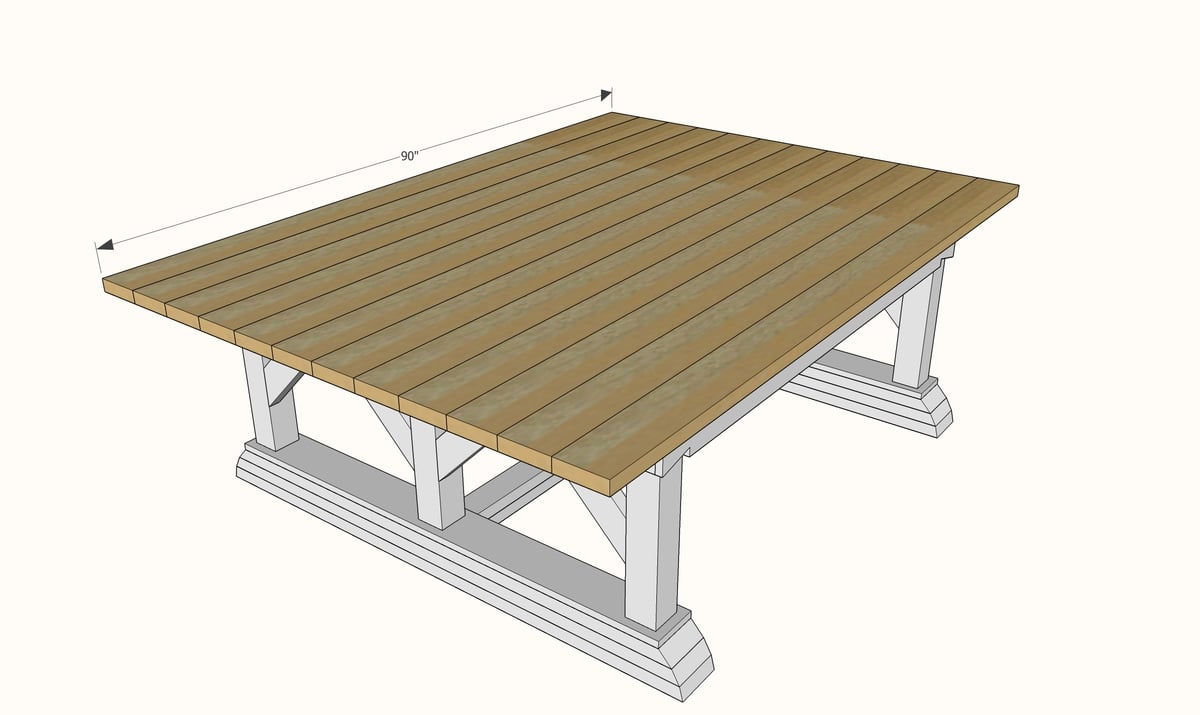
Attach tabletop boards to joists and legs with 2-1/2" screws.
It is always recommended to apply a test coat on a hidden area or scrap piece to ensure color evenness and adhesion. Use primer or wood conditioner as needed.

Comments
cassiet717
Fri, 08/01/2014 - 17:49
Huge!
This table is so great! One problem with most patio furniture is they're usually not big enough for a real gathering. This would be perfect for everything from family dinners to kids' birthday parties.
PedroAA
Sun, 08/03/2014 - 17:11
Lopsided?
Though beautiful, it does look somewhat lopsided to me, with the "open" sides' overhang so much bigger than the legs'...?
Nrhodes
Fri, 10/03/2014 - 12:54
Weather proofing
The table looks amazing! What did you use to weather proof it? Any particular sealer, teak oil or such?
wthalin
Tue, 03/31/2015 - 11:36
I second the last comment.
I second the last comment. What are you using for a finish and do you suggest using regular wood or pressure treated since it is outdoors?
Thanks
wthalin
Tue, 03/31/2015 - 12:38
Just caught a small
Just caught a small correction to the plan. For all 6 cuts for the leg base that are the beveled pieces the plan has them listed as 2x4's on the cut list but they should actually be 2x6's.
lwenger1972
Mon, 07/06/2020 - 12:58
Help??? Need advice?
I’m getting ready to build this table for a friend. She does not like the “runners” on the bottom. Do you think it would be OK if I just take that part off and extend the 4 x 4 legs to make the correct height? Just wondering if the table will be stable enough?? Thx!