
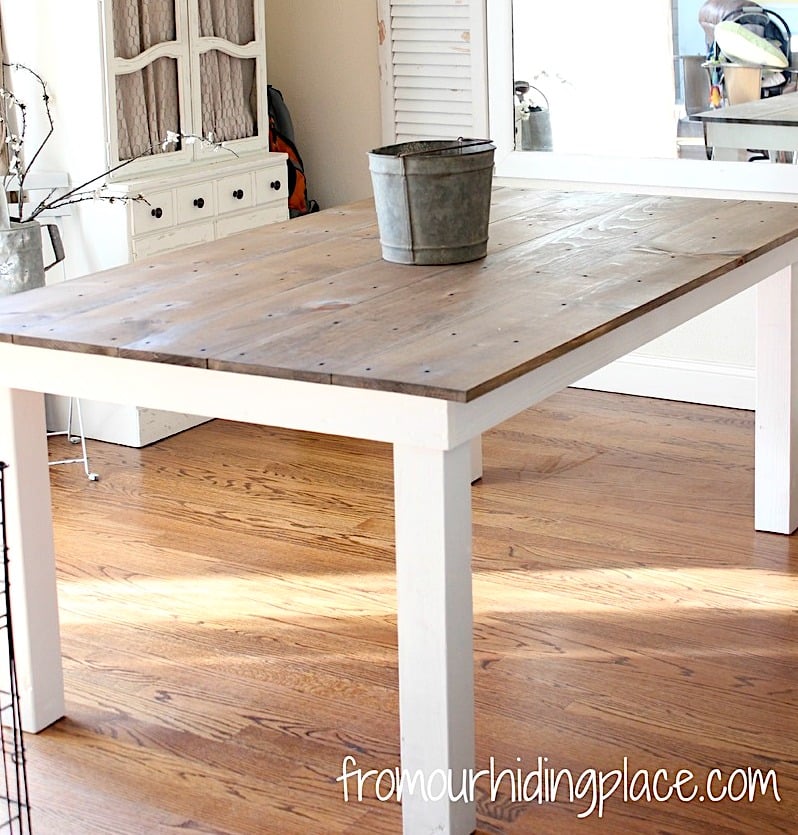

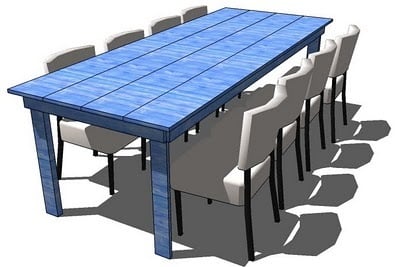
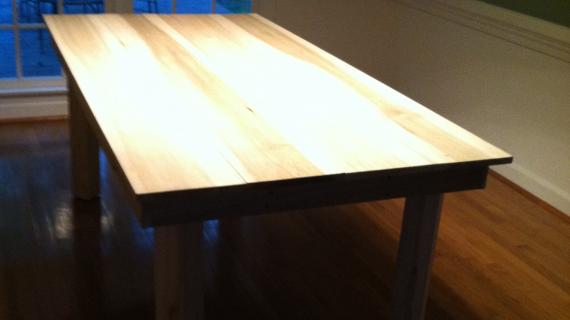
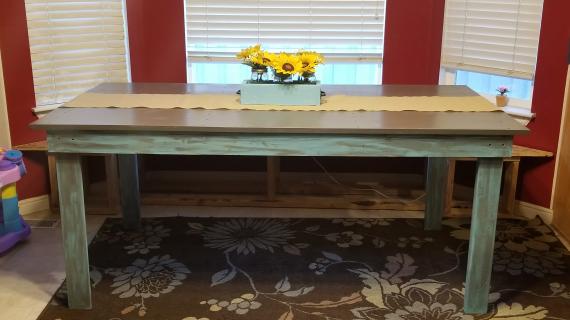
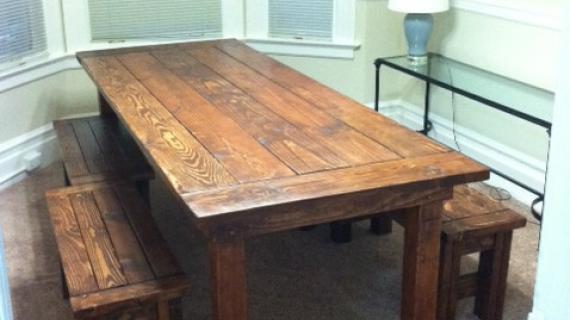
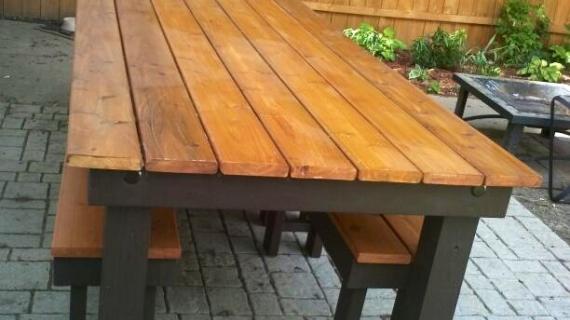
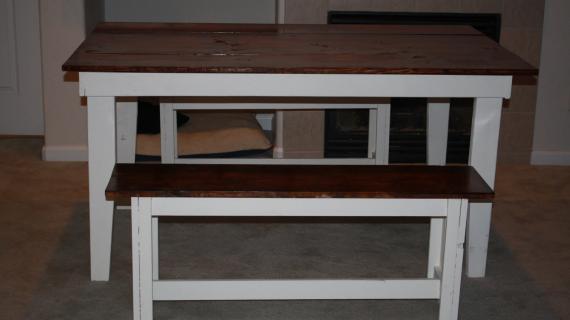
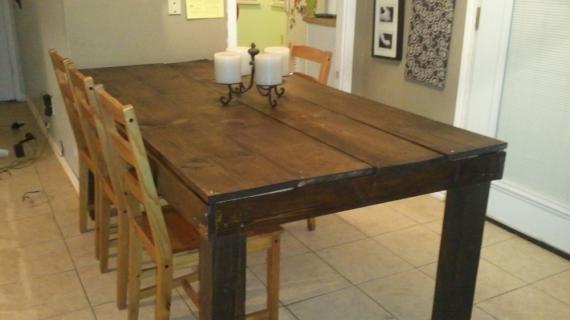
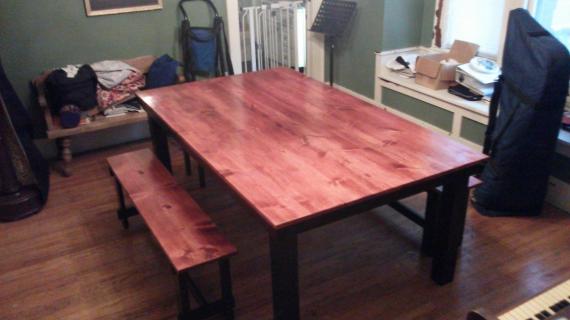
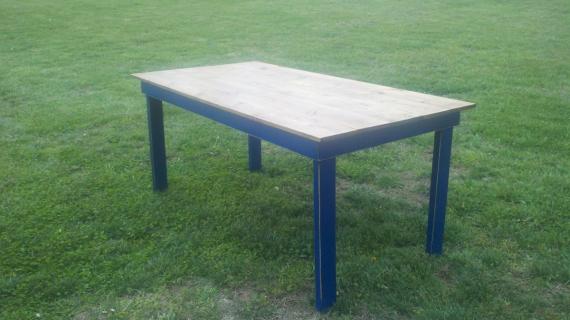
A beautiful, easy to build table that features a 1x top simple legs. This table is designed to look like something one might find and treasure. Step by step plans from Ana-White.com
Preparation
- 4 – 2x2s, 8′ Long
- 3 – 1×4, 8′ Long
- 4 – 1×10, 8′ Long
- 1 – 4×4, 10′ Long
- 2″ self tapping wood screws (star bit)
- 1 1/4″ self tapping wood screws (star bit)
- (16) 3" long self tapping wood screws (star bit) for attaching legs
- wood glue
- wood filler
- sand paper
- 2 – 1×4 @ 90 1/2″ (Side Aprons)
- 2 – 1×4 @ 36″ (End Aprons)
- 8 – 2×2 @ 34 1/2″ (Under Tabletop Supports)
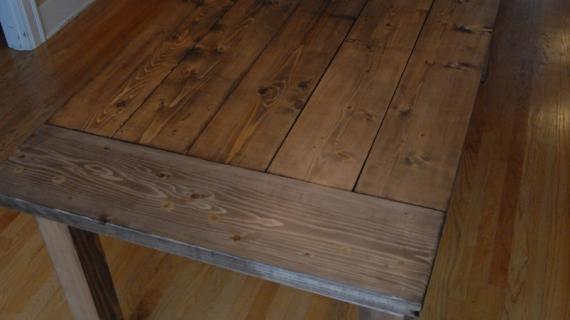
- 4 – 1×10 @ 96″ (Tabletop Pieces)
- 4 – 4×4 @ 29 1/4″ (Legs)
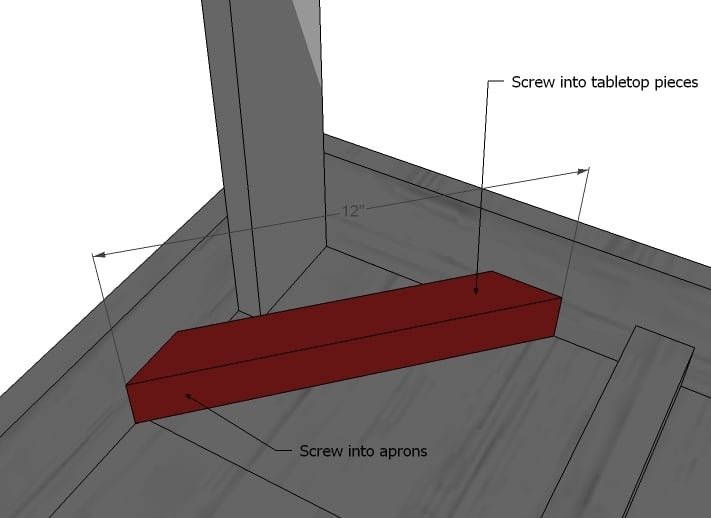
- 4 – 2×2 @ 12″, ends mitered at 45 degrees (cross supports)


Predrill and countersink your screw holes. Keep outside edges flush. Take a square after each step. Work on a clean level surface and use necessary safety precautions.
Instructions
Step 1
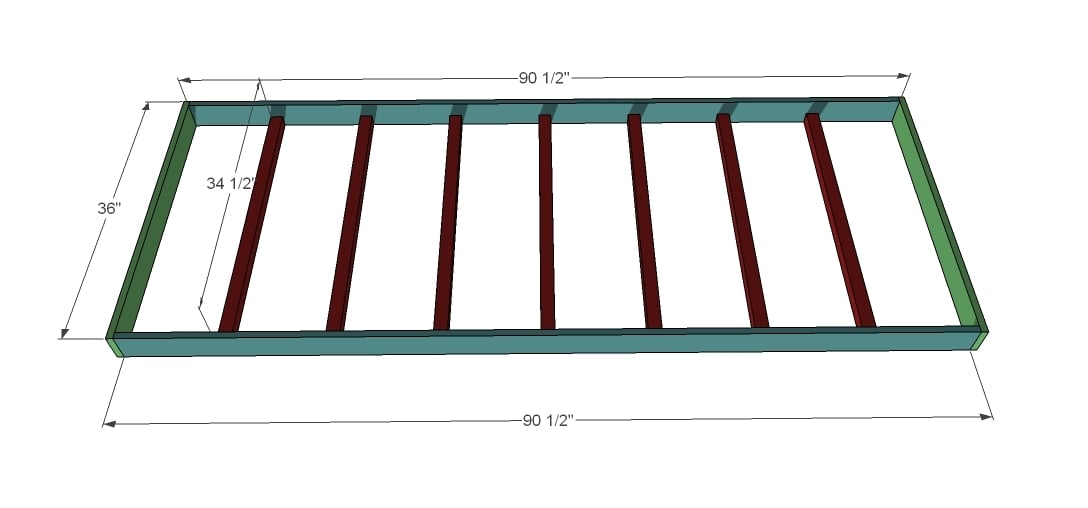
Table Top Supports and Apron. Build the tabletop supports and aprons as shown above. The supports are spaced 10″ apart. Use 2″ screws and glue, countersinking the screws.
Step 2
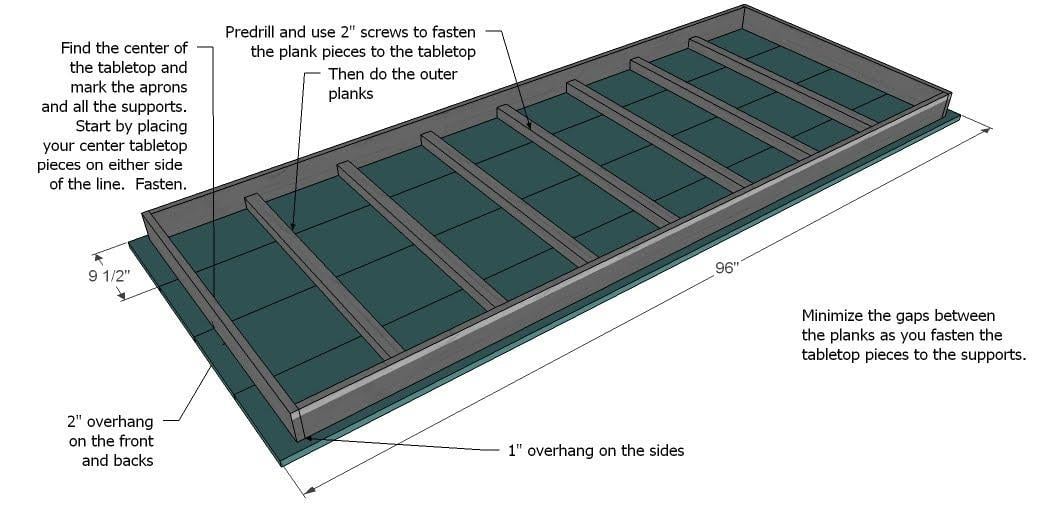
Tabletop Pieces. Take a square of the tabletop. Then find the centers of the tabletop supports and the end aprons and mark. Line up the center tabletop pieces with these marks and fasten through the bottom using 2″ screws and glue. Minimize the gap between the tabletop boards as you go.
Step 3
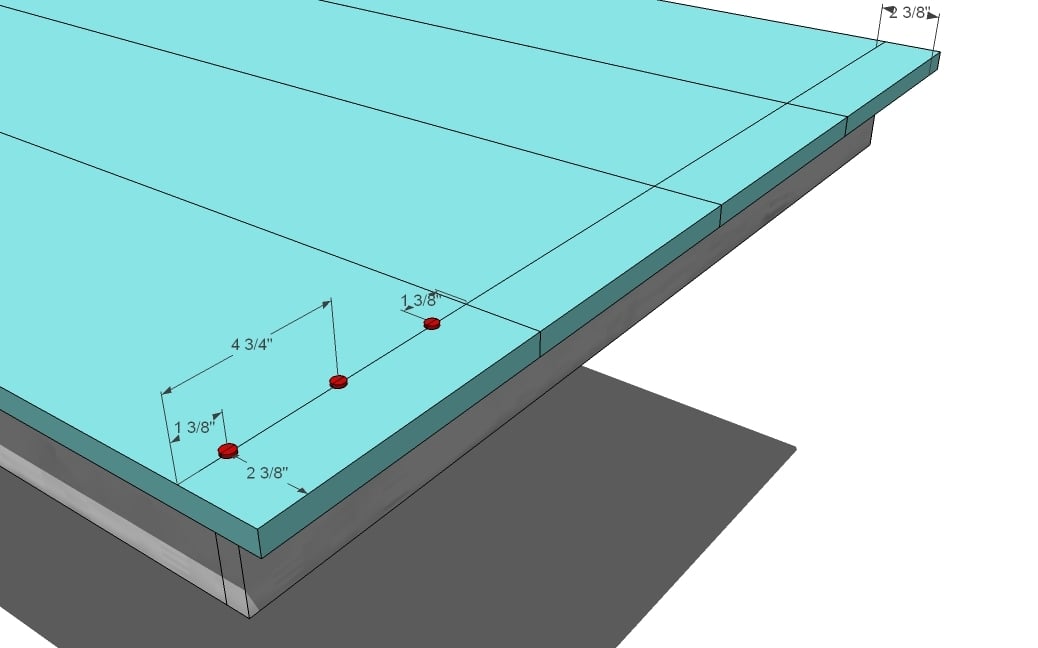
Tabletop Screw Hole Patterns. Mark out the screw holes on the tops of the table as shown above. Then predrill and screw the tabletop pieces to the end aprons. Make sure the table is square prior to doing this. Use the 2″ screws and glue.
Step 4

Legs. Fasten the 4x4 legs to the aprons from the outsides with the longer screws. Do not use glue if you would like the legs removable.
Step 5
Fill nail holes with wood filler. Sand, distress, and finish as desired. Then send Ana your brag photos!</p>

Comments
External Blind… (not verified)
Tue, 07/10/2012 - 00:52
This rustic table looks unique
This rustic table looks unique. The top finish is complements the white rustic touch for the legs. Will adopt this style :)
PB (not verified)
Wed, 09/19/2012 - 14:52
Screws in top?
The photo of the finished table does not seem to include Step 3 which calls for the table top to be screwed into the apron. Putting screws in the top would be fine if it's painted, but not if you plan to stain and finish the wood. In that case is the top screwed into the apron from underneath? Thanks, pb
ellen i (not verified)
Fri, 10/12/2012 - 03:29
Confused
I dont understand why the leggs have to be in two different sizes, 1x4 and 2x4?
Shari Hurley
Sun, 03/17/2013 - 14:20
4x4 legs?
Can someone give me tips on the best way to attach 4x4 legs to this table from the inside so they can be removed? If I go straight through there isn't much of the screw in the apron which seems a bit unstable for that size leg. L brackets? Thanks
Shari Hurley
Sun, 03/17/2013 - 14:21
4x4 legs?
Can someone give me tips on the best way to attach 4x4 legs to this table from the inside so they can be removed? If I go straight through there isn't much of the screw in the apron which seems a bit unstable for that size leg. L brackets? Thanks
swissgal908
Mon, 04/15/2013 - 03:49
Metric Measurements
I have found your page recently and I cant express how amazing and wonderful all your plans are.
I was wondering if it is possible or if any one knows the metric measurements for this table. I have tried converting this although the numbers seem a bit off.
I am currently living in switzerland and one can request wood to be cut in centimeters. The Height, Length and Width would be great if any one could notify me. Or knows a practical way of converting the measurements.
shavit
Fri, 06/07/2013 - 13:06
Re: Shari
Hi. People often use a special bracket called a "Surface Mount corner bracket" to make the legs easily detachable. Instead of screws going directly from the apron to the leg, the bracket is what holds the apron corner together.
They can be difficult to attach correctly. Don't be afraid to file down the corner to get a good flat surface before attempting to sink the bolts in the legs. Let me know if you have a question.
mrc76
Tue, 10/29/2013 - 21:50
Smaller Table
I would like to make this table but we don't have the space for a table this size. What would the cuts be if we wanted the table no bigger than 60 inches long?
SusieK
Mon, 12/02/2013 - 07:49
Love it!
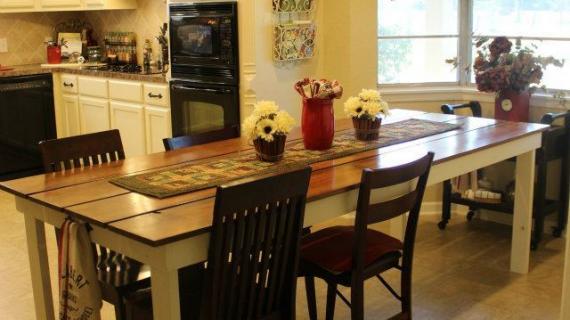
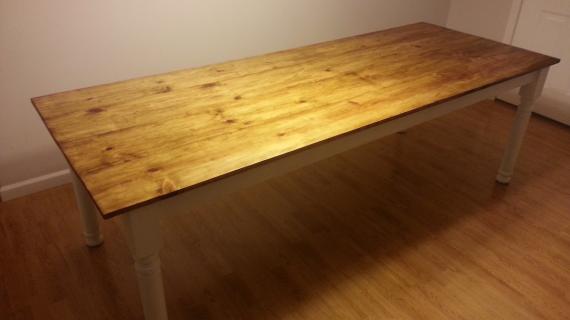
I made this table (well mostly,my 14-year-old made it) and love it! We purchased clear pine at HD which made the process go much smoother for us. He also used the Kreg for the boards - magic! He tapered the legs as suggested by other fans. (He's not your typical 14-year-old, by the way - so talented, lucky me.) The total cost for this beautiful 8 foot table was $140 which included the nicer wood, wood conditioner (don't skip this!), stain, and poly. Right now I'm waiting to put the third coat of stain on the top. I painted the apron and the legs a creamy white. So excited. Thanks Ana!
marchand
Mon, 03/31/2014 - 14:40
Rustic Table Bench
Hello, I wanted to make the rustic table but I don't see plans for the bench. Are there any?
Thanks! Michele
LOVE the site. Just finished the raised garden bed!
Christal Bailey
Thu, 03/26/2015 - 22:40
Leg sizes?
can someone please explain to me the reasoning behind the two different leg sizes? I want to make this table but the alternating leg size really bothers me. is it important?
In reply to Leg sizes? by Christal Bailey
Ana White
Fri, 03/27/2015 - 12:30
Take a look at the "brags" of
Take a look at the "brags" of what others have done. The different sizes
are not important. I would go with a thicker stock instead of all 4 legs 1
x's however. Hope this helps!
devon1182
Thu, 07/23/2015 - 12:26
Tabletop screw holes
Hi Ana! We are getting ready to make this table tomorrow. YAY!! But we have a question, the diection say to screw the tabletop onto the apron from the top of the table. Is this correct or can it be screwed onto apron from the bottom? Thank you!
2078jes
Sat, 09/26/2015 - 14:20
Rustic Table
I would like to build this table but use legs from a previous dining room set. Has anyone done that...and would have made notes as to the best way to approach this?? I'm a newbie but plan on laying some Shabby Chic on this design! Thanks!