


DIY Wood bulk bins from 1x12 boards - easy plans by ANA-WHITE.com

First came our daughter's birthday.
Followed by Christmas just ten days later.
And four days after Christmas, we celebrated our son's birthday.
December is truly a joyful season for us. We have been blessed with more than we could ever ask for, all within two weeks.
But the kids, unfortunately, end up with more than they could have ever asked for, all within two weeks. And this year, with a baby, the toys are especially small and it's hard to keep up with how fast our little guy can pull his toys out.
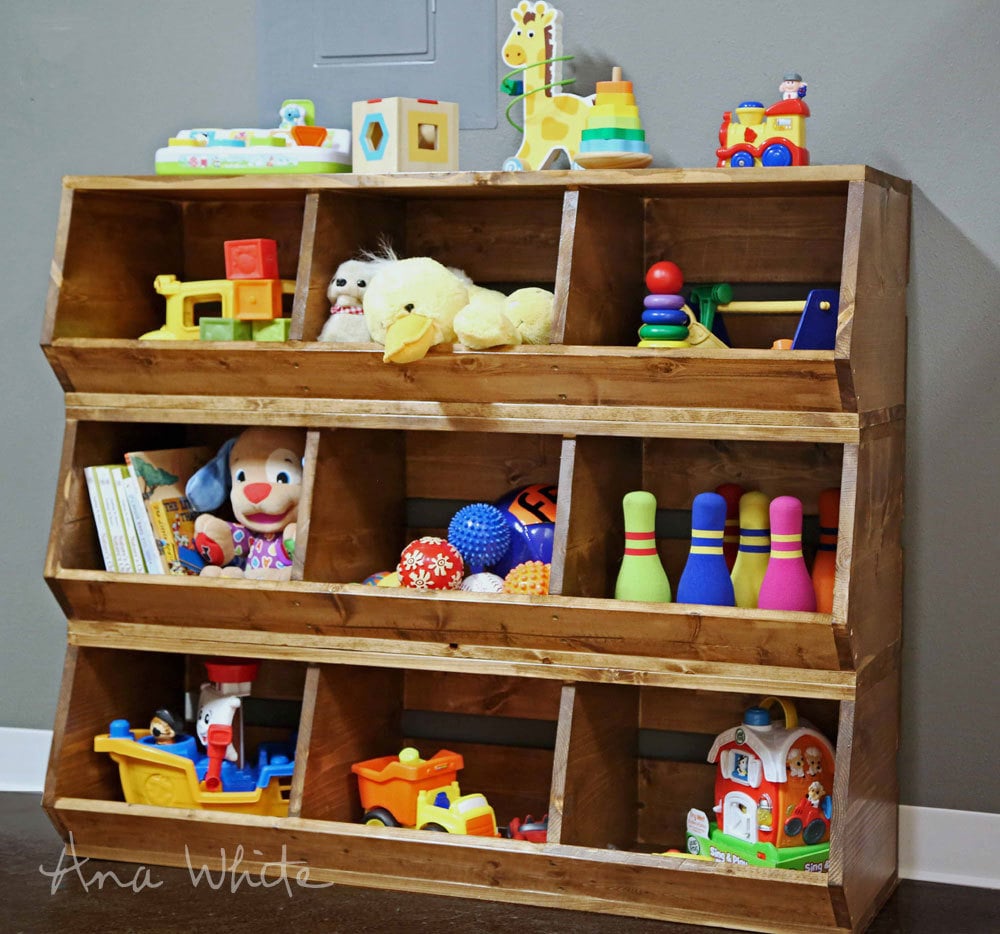
So we thought we'd give stacked bulk bins a try.
I wanted to build this set of bulk bins out of 1x12 boards, so it would be easy for you to make at home without a tablesaw (and the Rogue Engineer also put out some really awesome bulk bin plans here that use plywood). It did take a little thinking, especially since I was adamant about avoiding making angled rip cuts (not fun) to get the front trim board to meet up nicely with the sides.
So here's what we did -
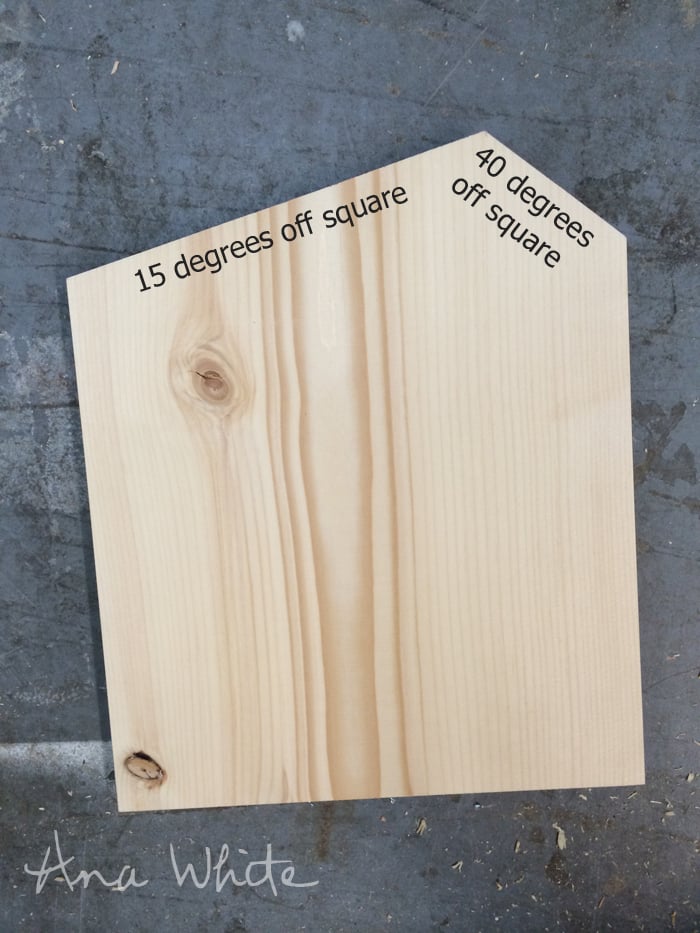
I cut 1x12 boards (see cut list for the actual lengths) FIRST at 15 degrees off square. Then I flipped the boards over and nipped the other corner off at 40 degrees off square. Cutting the 15 degrees off square cut first means less waste (just an itty bitty triangle piece is wasted). TIP: When you make your first 15 degree cut, the leftover piece already has a 15 degree cut on it for you.
The sides are longer than the dividers, to cover the 1x4 ends (it will all make sense here shortly).
Cutting the sides and dividers for this project was the hardest part (even though it wasn't really hard at all). We ended up making three of these bulk bins, so I turned my first cuts into patterns and just replicated them.

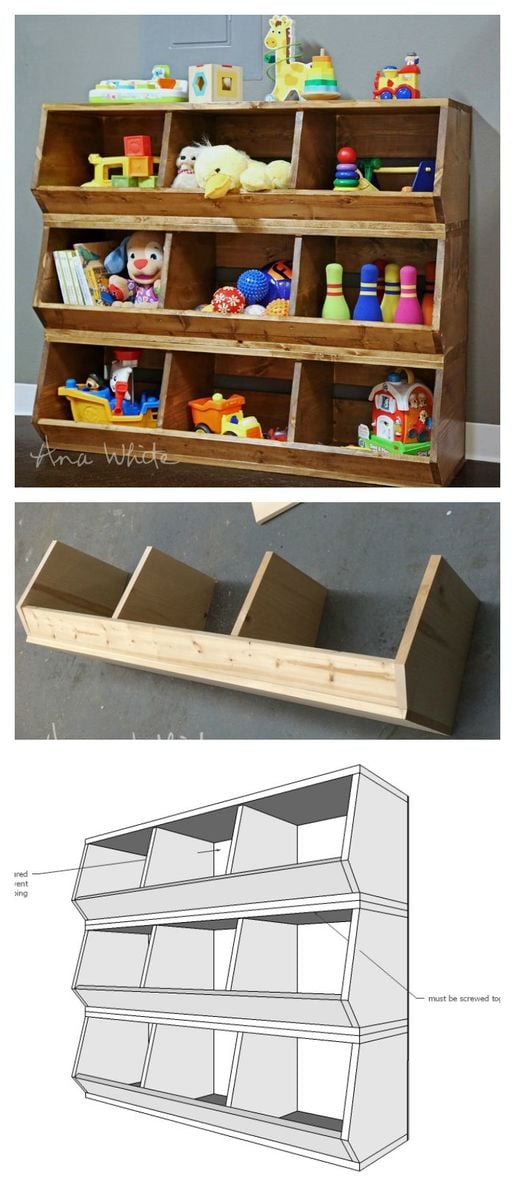
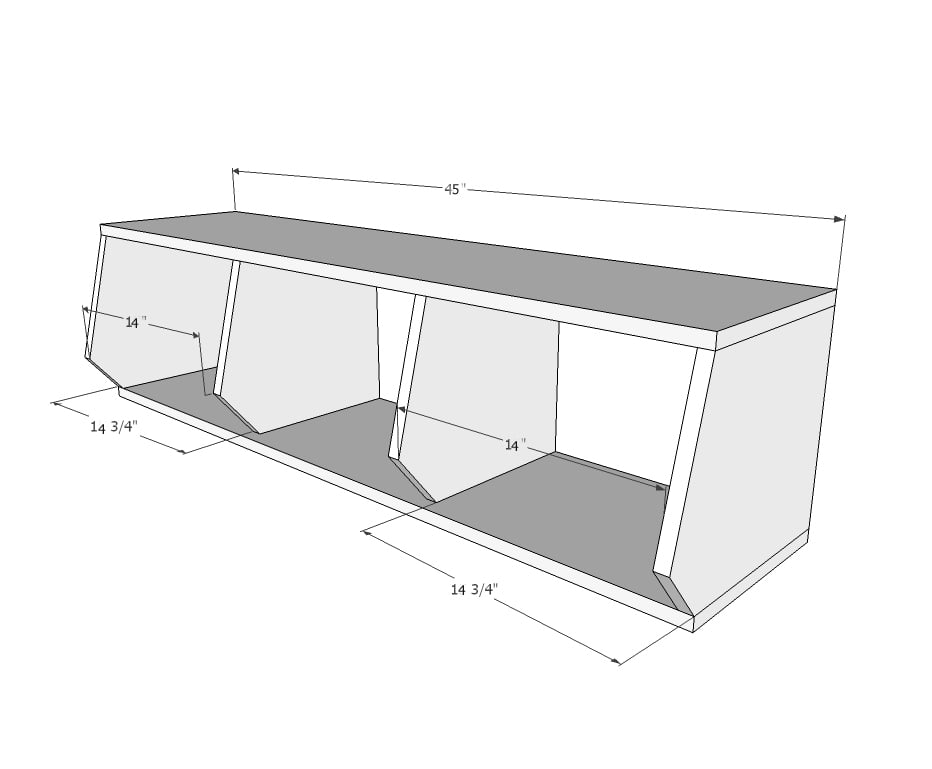
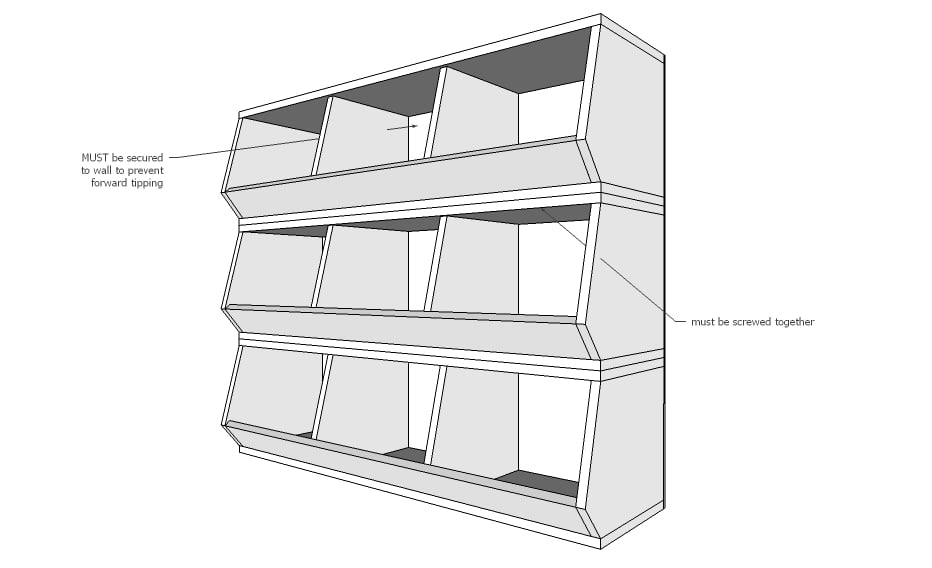
To assemble, we just attached the bottoms to the sides and dividers, everything flush to the BACK. The dividers do not make it all the way to the front so the 1x4 front board can sit inset.

Since we are just building with screws, we glued everything. That, and my kids like to climb on stuff. This is not cheap insurance. This is proactive maintenance.

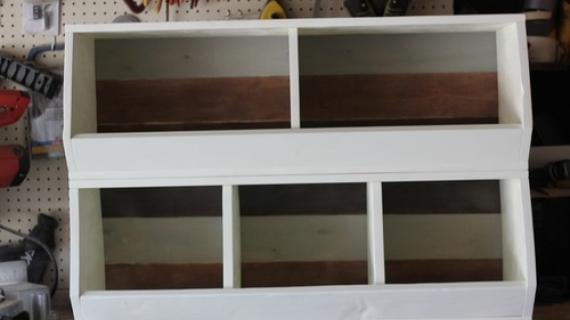
See how that 1x4 fits inset? If we had cut the dividers the same as the sides, there's have been a weird little triangle hole on the ends. Or we'd be ripping the bottom board front edge at a 15 degree angle.

Then we just finished screwing the 1x4 to the sides and dividers, and added the top. We also planked the back with 1x6 boards because we had some in our scrap pile but 1/4" plywood would have done the trick.
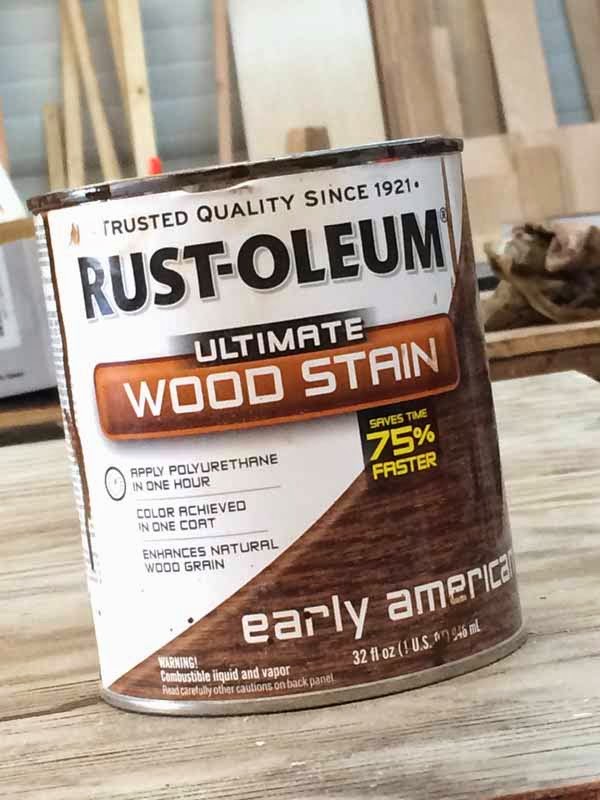
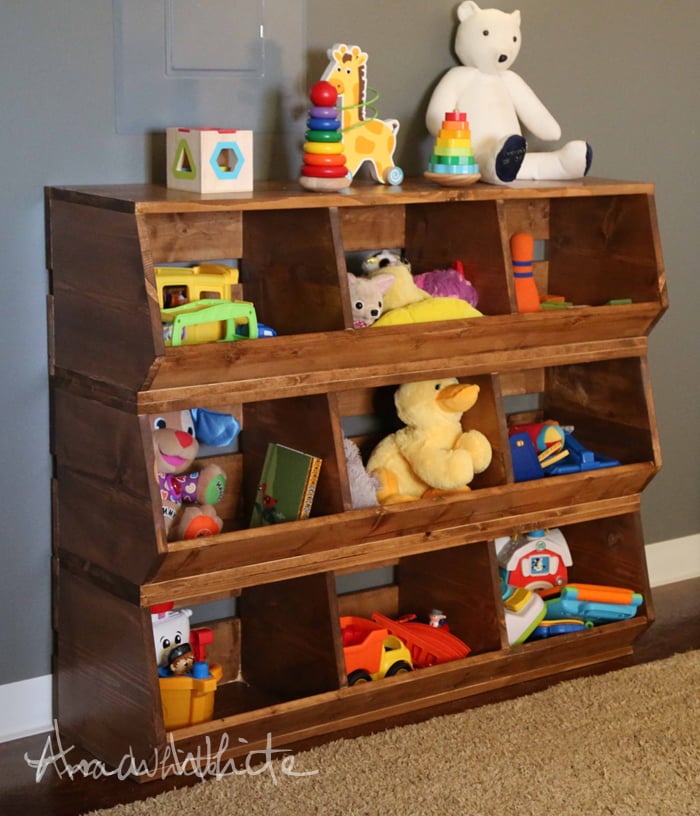
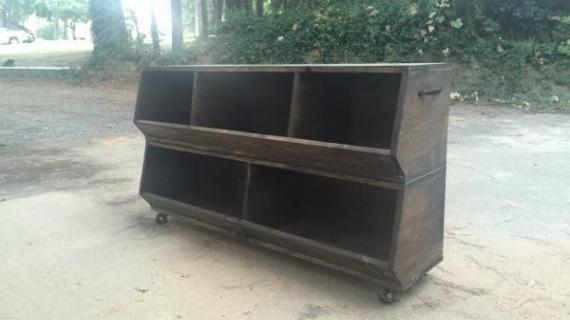
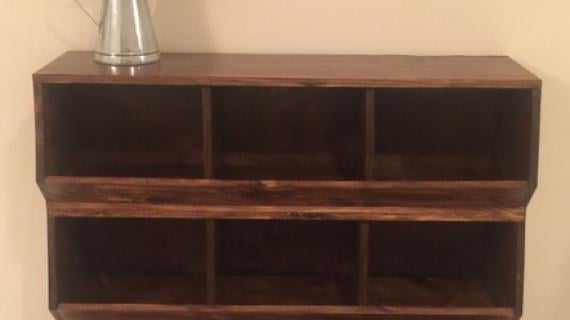
I used my favorite stain, Rustoleum Early American. I just wipe a single coat on with a paper towel. Almost too easy.
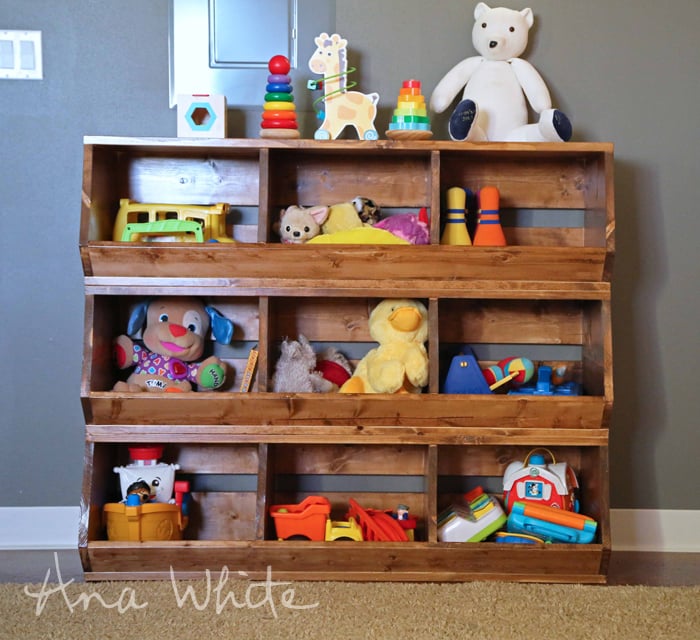
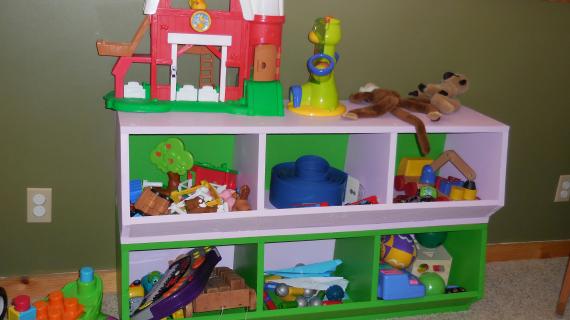
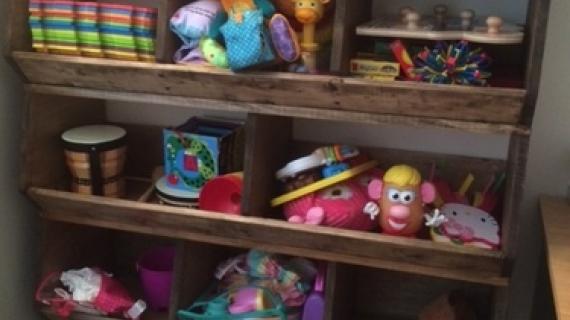
We applied Watco Lacquer over top, and it's time to show the toys who's boss.

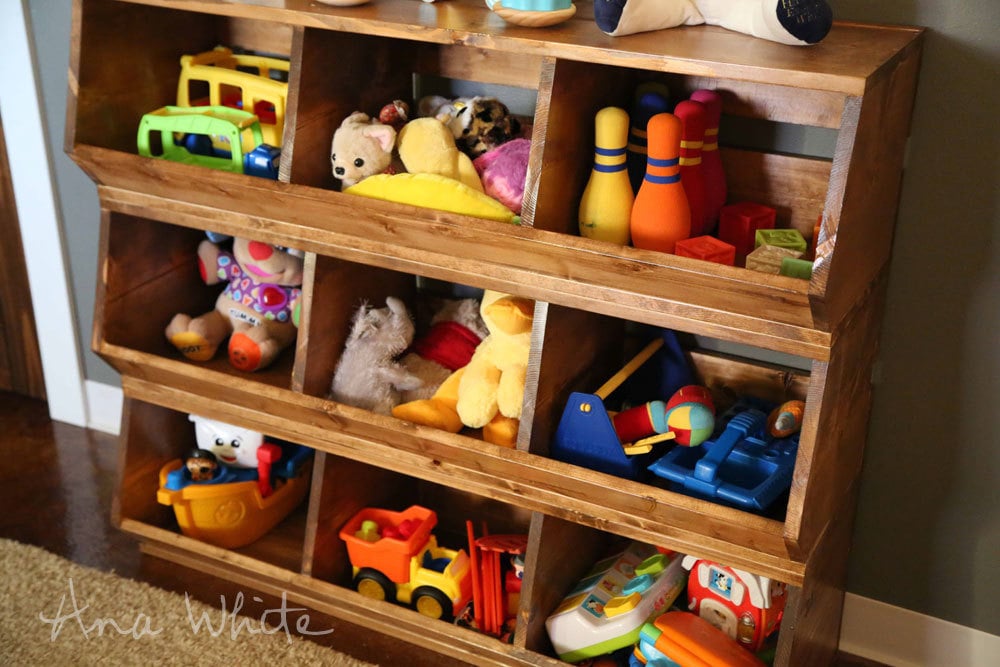
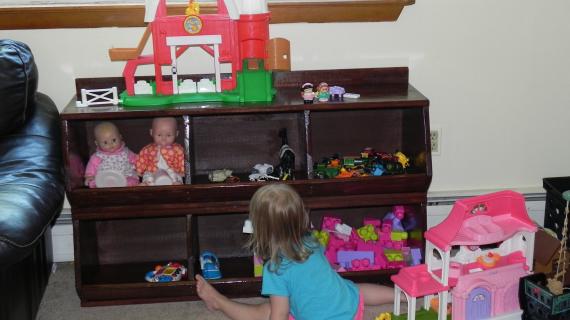
I think they turned out pretty well!

And even someone as uncoordinated as me can toss a toy in the general direction, and somehow, it lands in one of the cubbies.
I'm pleased with how this plan turned out and am confident you'll love it too. If you do build, please share pictures and your experience building too - we'd love to see your version too!
Have a great weekend!
XO Ana + Family
Preparation
PER BULK BIN
- 12 feet of 1x12 boards
- 4 feet of 1x4 boards
- 1/4 sheet of 1/4" thick plywood or other hardboard
- 2" self tapping star bit screws
- 3/4" brad nails for attaching the back
FOR ONE BULK BIN
- 2 - 1x12 @ 10-13/16" long - one end cut at 15 degrees off square, short point measurement
- 2 - 1x12 @ 11-1/4" long - one end cut at 15 degrees off square, short point measurement
- 2 - 1x12 @ 45" (top and bottom)
- 1 - 1x4 @ 43-1/2" long
- 1 - 1/4" plywood @ 45" x 12-3/4"


Please read through the entire plan and all comments before beginning this project. It is also advisable to review the Getting Started Section. Take all necessary precautions to build safely and smartly. Work on a clean level surface, free of imperfections or debris. Always use straight boards. Check for square after each step. Always predrill holes before attaching with screws. Use glue with finish nails for a stronger hold. Wipe excess glue off bare wood for stained projects, as dried glue will not take stain. Be safe, have fun, and ask for help if you need it. Good luck!
Instructions
Step 1
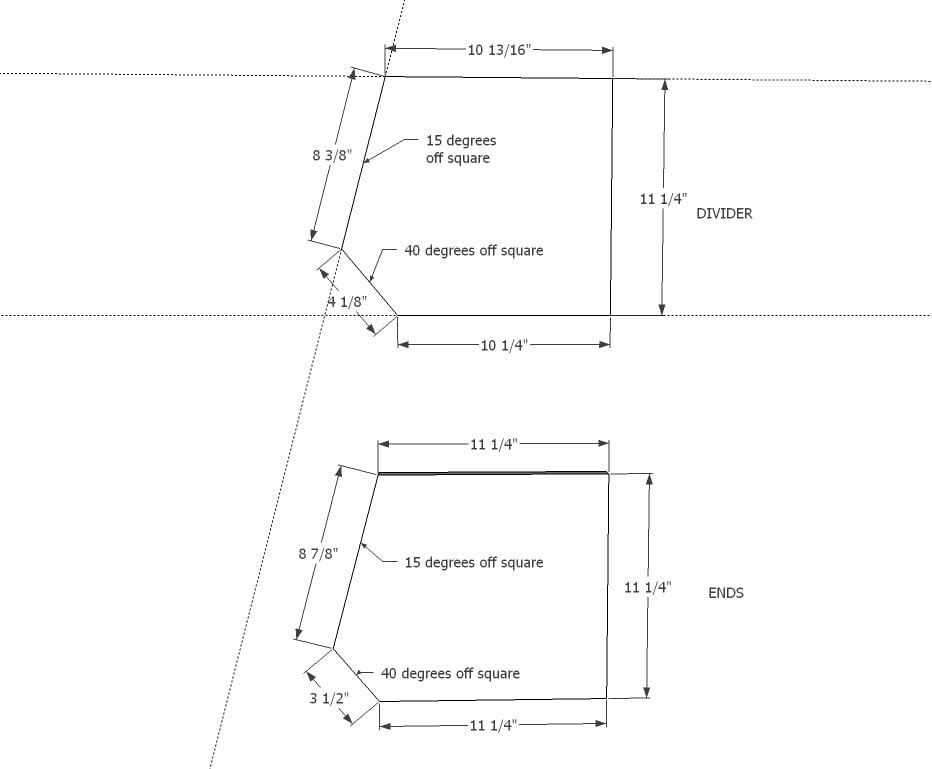
Cut the sides and dividers first at 15 degrees off square. Note that the dividers are shorter than the sides. Then cut from the opposite side at 40 degrees. Label dividers and sides.
Step 2
Attach top and bottom to dividers with 2" self tapping screws. If you wood splits, you'll need to predrill holes. Use glue at all joints.
Step 3
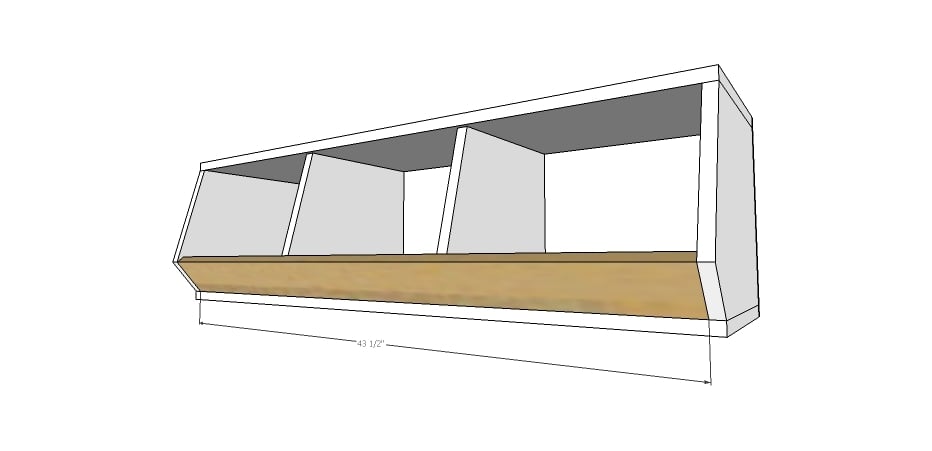
Attach 1x4 to front with screws and glue.
Step 4
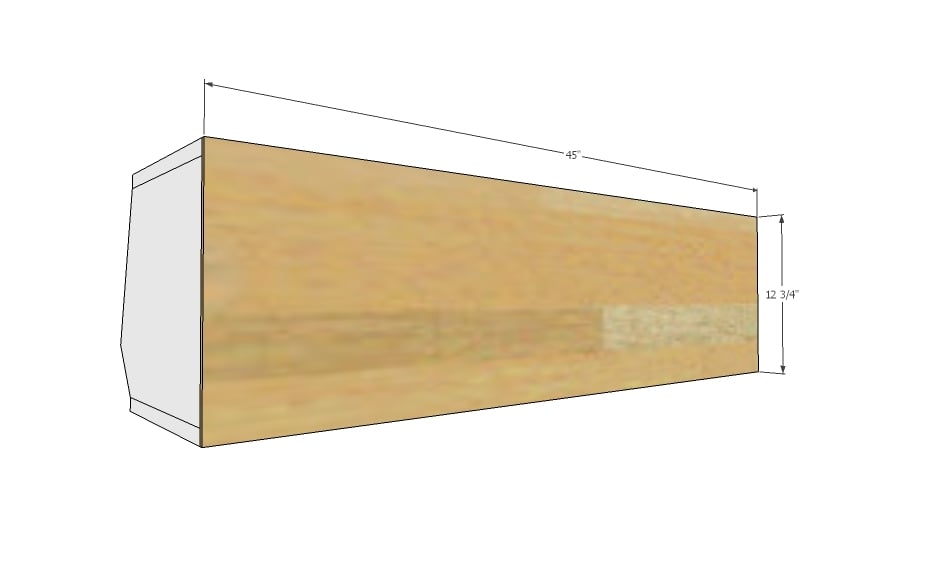
Attach back to all dividers and sides and top and bottom with 3/4" brad nails and glue.
Step 5
It is always recommended to apply a test coat on a hidden area or scrap piece to ensure color evenness and adhesion. Use primer or wood conditioner as needed.


Comments
marenras
Fri, 01/16/2015 - 14:31
I HAVE WANTED TO BUILD THESE FOREVER!
These are PERFECT. And timely. The toys in my house are taking over the floor and every surface and my current system is just not working. Going to give these a try.
Plus, they're gorgeous. I love your finish.
In reply to I HAVE WANTED TO BUILD THESE FOREVER! by marenras
Ana White
Thu, 01/22/2015 - 10:15
Thank you! Can't wait to see
Thank you! Can't wait to see your bulk bins! Please share when you finish!
Jantheman
Thu, 01/22/2015 - 14:49
2 questions about this plan
Has anyone tried this plan using the Kreg Jig? If so what setting would you set it at and what size screws would you use?
I know thats 2 questions already but I have a great supply of 2x6, 2x8, 2x10 and 2x12(don't ask but its a great story)-can I subtitute 2x lumber for the end pieces and if so the previous question comes into play again here. Thank You in advance.
Medickep
Fri, 01/30/2015 - 08:17
Sure you can
You are only limited by your imagination. If you use 2x products on the ends, just be sure to drill the holes to the smaller wood settings. If it was me, I would drill a scrap piece, place the screw in and hole it up to the desired board. If it's a ways a way from the edge, go longer. There are to many variables to tell you exactly how to do it for every scenario!
Hope this helps!
Bown
Sat, 01/30/2016 - 12:53
I may be reading this wrong
I may be reading this wrong but if you want to make pocket holes using your Kreg jig on a piece of two inch material you need to set the end of the jig back further from the end of your piece of lumber so that the pocket hole screw protrudes from the middle of the board when drilling. For example, I was using 2x4 recently and when I checked my Kreg instructions it said that the end of my jig needed to be 1 1/4 inches away from the wood edge. Now keep in mind that 2x4 is actually 1.5 inches thick, not 2 inches. So I'd try 1.5 inches maybe?
Bown
Sat, 01/30/2016 - 12:54
And that was for using 2.5
And that was for using 2.5 inch screws.
In reply to And that was for using 2.5 by Bown
Lady Goats
Sat, 01/30/2016 - 14:48
I second this suggestion.
Your Kreg Jig should have instructions on how to adjust the settings for a certain size stock. 2x's are actually 1 1/2", like Bown said. You'll have to set the jig back 1 1/4" from the edge of the material, but you'll also have to adjust where the depth collar on the bit is. This is a great resource to keep on-hand if your kreg jig doesn't have the instructions. https://www.kregtool.com/webres/Files/mkjkit-product-manual.pdf
Mystiy
Fri, 03/27/2015 - 18:50
Securing tiers
Silly question from a beginner... What's the best way to attach each layer to the next one? Just use shorter screws and go from the underside of the top of one into the bottom of the next? Is there a better way?
In reply to Securing tiers by Mystiy
Lady Goats
Fri, 03/27/2015 - 23:42
Attaching Tiers
Hi Mystiy! Not a silly question at all! You can either attach from the bottom to the top (would never see the screws), but I think it would be easier to screw in from the top. Yes, when they're empty you'll see the screws... But how often will they be empty? And would seeing the screws really bother you?
lehret
Wed, 07/08/2015 - 15:53
What am I missing?
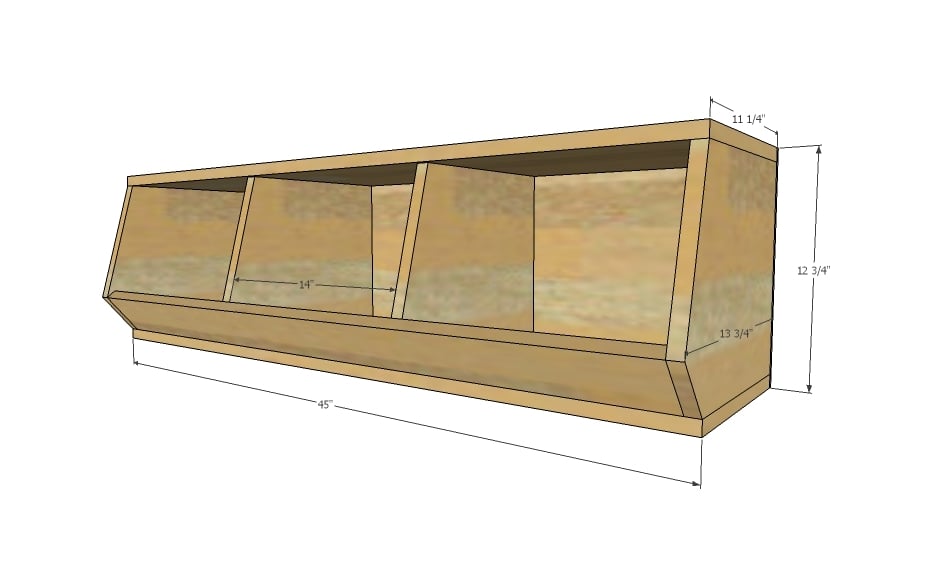
The plan calls for using 12-inch wide board (which actually measures 11.25 inches). But the schematic shows the widest measurement of the bins' end at 13+ inches. So am I reading something incorrectly?
Thanks!
In reply to What am I missing? by lehret
Lady Goats
Wed, 07/08/2015 - 19:24
Not missing a thing..
It looks like Ana actually used the 1x12 sideways (see how it's only 11 1/4" tall?) and cut it at about 13 1/2" (I can't see the measurement from this page, but whatever that dimension is..) for the depth. Then follow the measurements for the 15 and 40-degree angled cuts in the diagrams. Good catch!
In reply to What am I missing? by lehret
Ana White
Thu, 07/09/2015 - 09:00
Look just above step 1 for
Look just above step 1 for the angles, cuts and measurements of the board.
Think of the 1 x 12 laying flat horizontally to make the cuts, hope this
helps.
wmd1810
Fri, 03/11/2016 - 16:24
Lehret,I have the same
Lehret,
I have the same question. Unfortunately I already cut all my pieces and they are all too short now. (severely irritated) Did you ever find the correct lenghts?
Thanks
Nursebay
Sun, 07/10/2016 - 19:03
Yes you are correct 1x12 is
Yes you are correct 1x12 is actually 0.75x11.25, but if you cut like it says it works out...I made these last week no problem.
Nursebay
Sun, 07/10/2016 - 19:07
You are measuring down the
You are measuring down the length of the board not width...measure going long the 11.25 and start your angle cut at 15 degrees towards the long part of the board (I bought 10 footers all I could fit in the suburban.
nkparish
Thu, 07/23/2015 - 17:48
Divider length
I cut the dividers and end pieces to the length specified and I think I figured out how to use the speed square to get the angles right only to discover that the boards are too short. So if they shouldn't be 10 1/4 inches long and 11 1/4 inches long how long should they be?
Fantastic Furn…
Thu, 10/22/2015 - 04:39
Incredible furniture assemble
Incredible furniture assemble!
I must say you are an incredible furniture assembler and designer! The more furnishing plans I look the less of a "pro" I feel like. It might be beacuse of the toys, but I love your bulk bins, not to mention the extremely detailed assembly instructions... I wish I could make something of such scale. My sincere respect.
Bartholomew.
LSmallwood
Fri, 01/29/2016 - 12:07
Dividers
If I only use 1 divider, to make larger bulk bins, do I need to worry about structural integrity? I'm going to stack 3 and 3 next to each other. I'd like the bottom row to be for larger blocks/toys. Hope that makes sense. Thanks in advance for your help.
Lauren
Ronsolo
Mon, 02/15/2016 - 15:30
Dimensions
I followed the directions for the cutouts and have now found that I have to trim the top and bottom boards to match with the dividers. Have I made a mistake somewhere or is this step not listed?
Ronsolo
Mon, 02/15/2016 - 15:51
Measuring mistake
Nvm about my earlier post. Rookie mistake on my part and it's resolved. Rock on with the diy!
wmd1810
Fri, 03/11/2016 - 16:17
Cut List Incorrect?
Correct me if Im wrong but your cut list calls for the 1x12 end pieces to be cut at 11 1/4". I believe they should have been cut at 13 3/4"! What is the correct measurements for the ends AND dividers?
oct333
Wed, 01/31/2018 - 17:13
cost of this bin build?
this would be my first and I am wondering how much does it end up costing you for the build.