Kitchen Drawer Organizer - Adding a Double Drawer to Existing Cabinet

diy double sliding utensil drawer
Difficulty
Intermediate
| Print this plan

How to add a double layer utensil drawer to an exisitng kitchen cabinet drawer.  Tutorial by ANA-WHITE.com

diy double sliding utensil drawer

We've been working hard on a tiny house for a client the past few weeks.  This week's video shares a few of the projects we've been working on inside the tiny house -


How about that amazing new Kreg Jig?  


Kitchen Drawer Organizer

I'm so glad we tackled the kitchen drawer organizer hack.  It works really well, and doubled the storage space options in the one drawer.  Just in case any of you want to take this kitchen drawer organizer hack on in your own home, I thought I'd share a photo tutorial with more specifics as well.

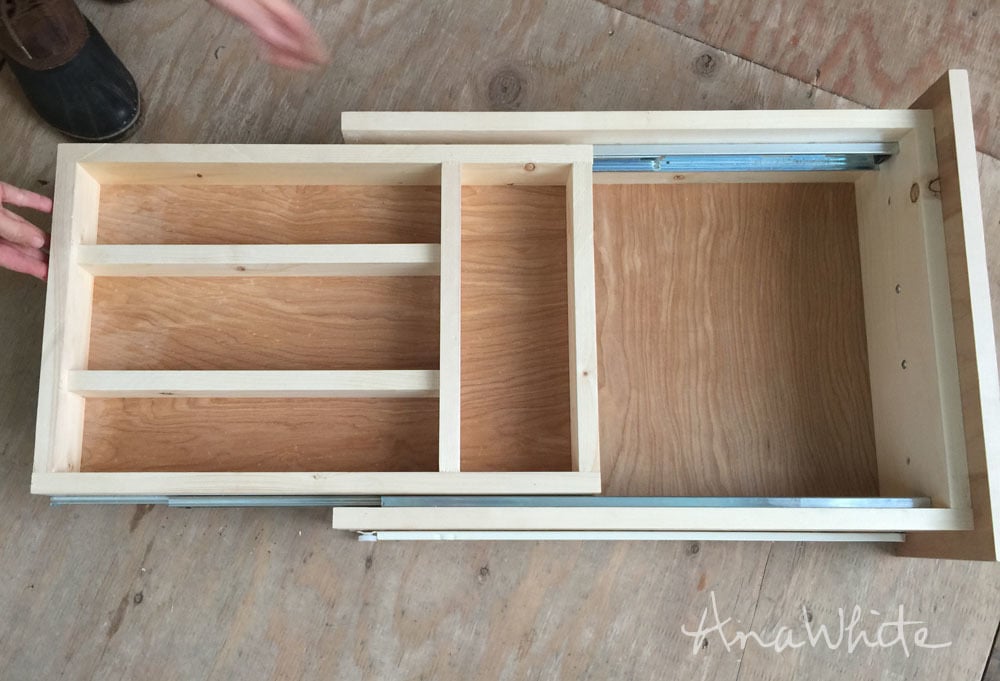
You will need a drawer that is at least 5-1/2" deep.  This drawer we made with 1x6s.  

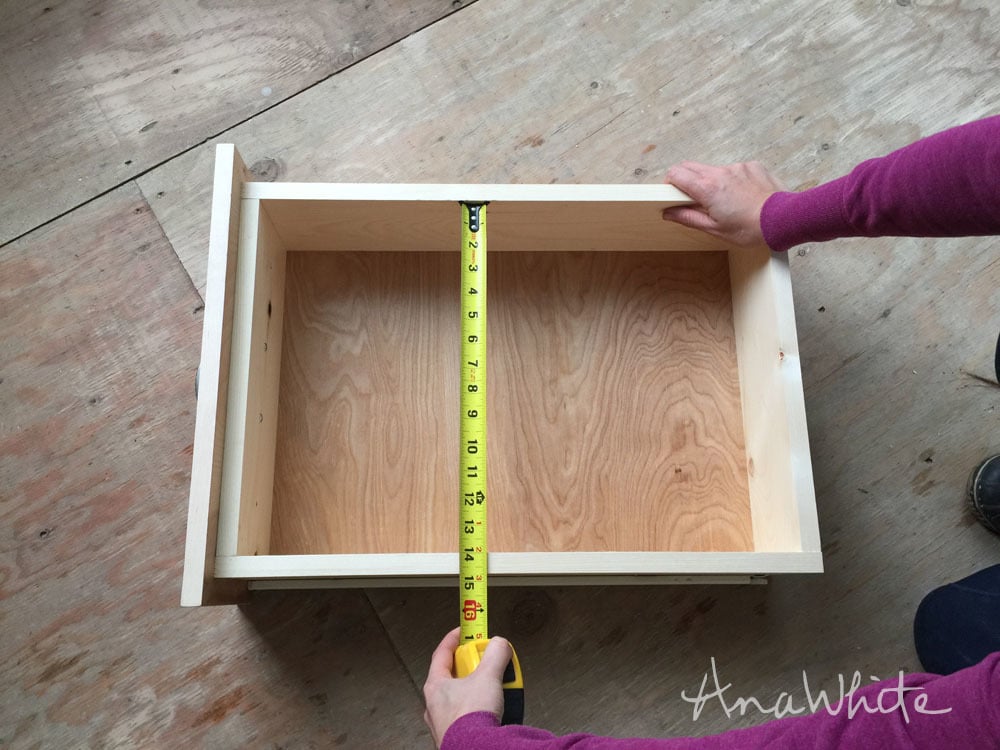
Determine Smaller Drawer Width - Measure the inside width of the drawer.  You will need to make your smaller drawer 1" less in width than this measurement.  I made my smaller drawer overall width of 13".


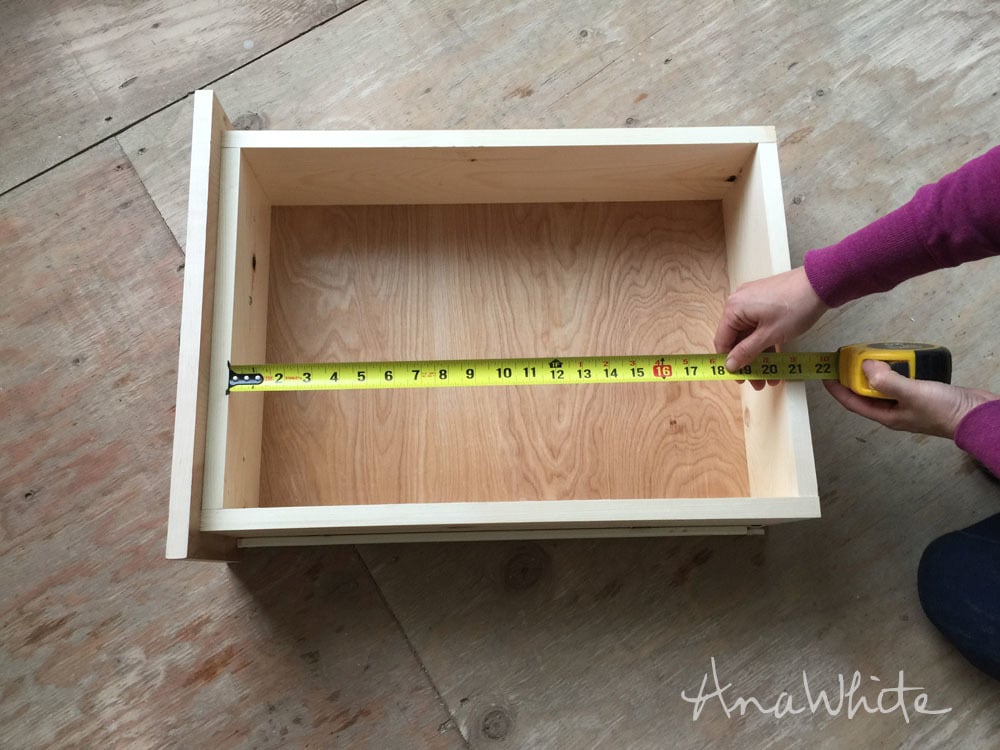
Determine Length of Smaller Drawer - Measure the length of the inside of your existing drawer.  Drawer slides come in specific sizes, I recommend making the smaller drawer to the largest size possible for drawer slides.  I used 20" Full Extension Drawer Slides by Liberty.  The ful extension part is important so the smaller drawer can be pushed completely free of the larger drawer.  So I made my smaller drawer overall length of 20".

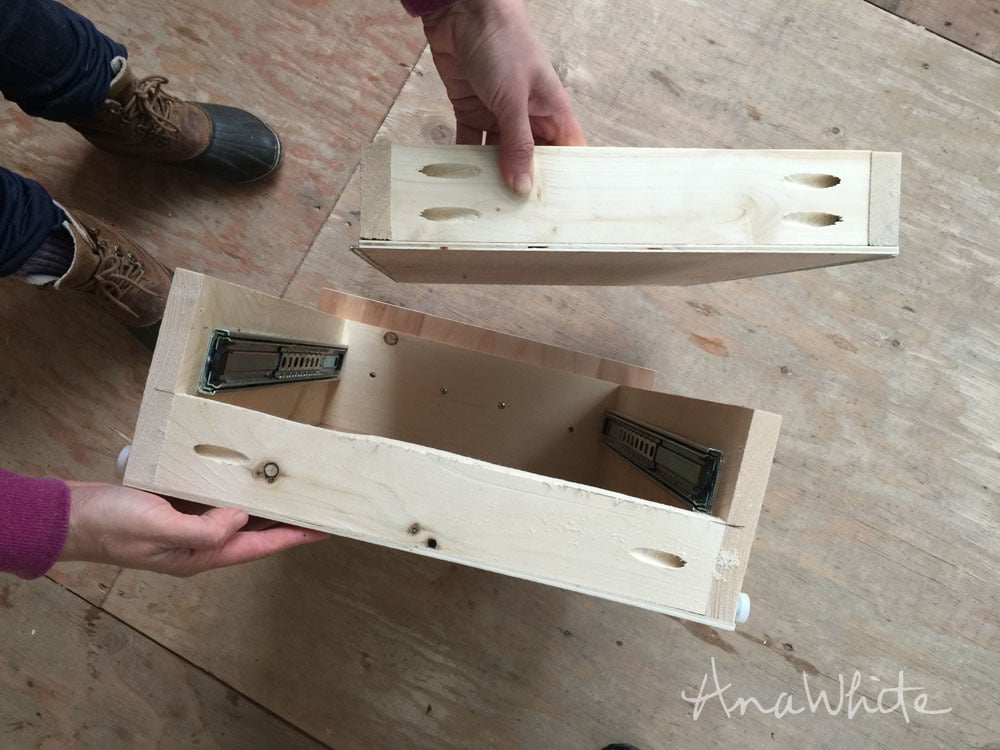
Building the Smaller Drawer - Once you know your outside dimensions, use 1x3s to build it.  Cut the sides to the length of the drawer (20" on my drawer).  Then cut the width pieces 1-1/2" smaller than your desired width (my cuts were 11-1/2").  You can cut additional divider pieces too.  I used a combination of Kreg Pocket Holes and nails to assemble.


Cutting Back out of Bigger Drawer - You'll need to cut the back out of your bigger drawer to allow the smaller drawer to pass through.  I juse used a jigsaw and cut it out.  Make sure you cut big enough to allow the drawer to pass, but not too big that your drawer no longer has strength.


Install the Drawer Slides - Install the drawer slides per instructions.  Make sure they are very square, if the drawer doesn't slide smoothly, the drawer slides may be off just a tiny bit.  TIP: I cut a block to fit under the cabinet member when installing to hold the drawer slide in place while I attached it.  


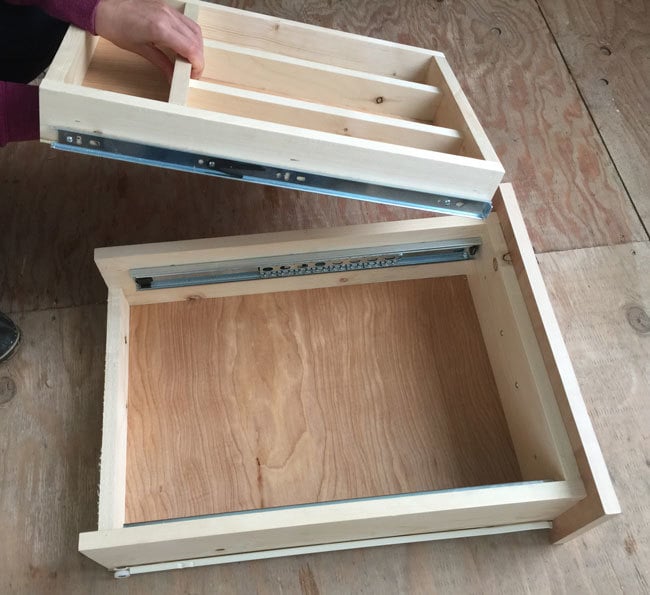
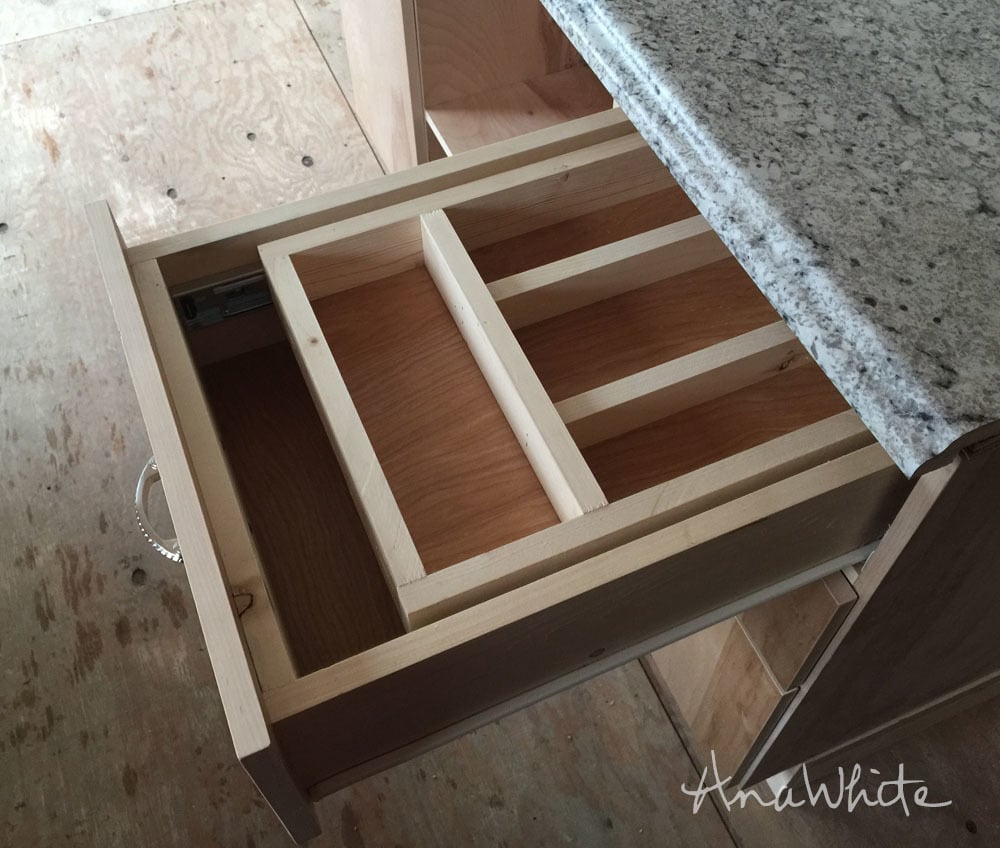
Insert Smaller Drawer Into Larger Drawer - Now it's time to see if the kitchen utensil drawer is going to actually work!  If the drawer doesn't slide very smoothly, adjust the drawer slides until you are happy.


Fastest Most Durable Way to Protect the Wood

For a durable and quick clear top coat, I always turn to Varathane Triple Thick -

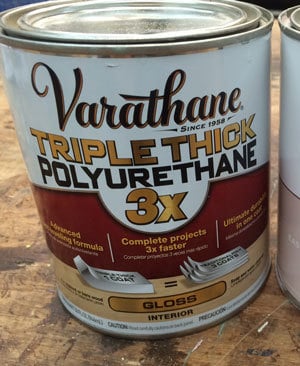
It's one coat instead of many, that dries fast and is very easy to apply.  It is very durable, we put this stuff on tabletop and you can scrub and scrub and scrub and it just keeps on protecting.

If you build, do share, we'd love to see how your project turns out too!

Have a great one!

Ana


Comments

Frequently Asked Questions

Wood Questions

What kind of wood should I use?
Most of our plans use standard construction lumber like pine or fir. It's affordable, easy to work with, and easy to find. It's also rapidly renewing and biodegradable, so a great eco friendly choice!

Can I use hardwoods instead?
Yes—just keep in mind they're heavier, cost more, and can be tougher on tools and harder to join together and finish. I recommend not tackling a hardwood project until after you have built several softwood projects.

What if my boards are warped?
Choose the straightest boards at the store. You can often work around slight warps by cutting them into shorter pieces.

What wood should I use for outdoor furniture?
Use red-toned or pressure-treated 2x lumber for framing, and cedar or cedar fence pickets for the decking. Outdoor furniture should be built like a deck—your local home center can help recommend the right wood for your climate.

Will my wood move or warp after I build?
Potentially, especially in humid climates. Let your wood acclimate indoors before building. Once acclimated and kept in a stable environment, movement should be minimal. Remember, most houses are built using framing lumber - it's all about keeping moisture down indoors.

Cutting Questions

Do I need a miter saw?
A miter saw is great, creating fast, safe, and precise cuts, even for beginners. But most plans can be built with a circular saw and a straight edge. If using a circular saw to cut, take time to practice, and get good at making cuts, before cutting your project boards.

How do I get clean cuts with a circular saw?
Clamp your board, measure twice, cut slow, and use a sharp blade. This takes practice, so spend some time making cuts. I go through becoming proficient at freehand cutting in my course, it is worth taking if you want to master this skill.

Will the store cut my wood?
Yes—most stores will do rough cuts to help you transport your materials home. But from store to store, the quality of cuts could greatly vary.

Joinery Questions

What screws should I use?
We recommend star-head self tapping screws for framing, most common sizes are 2-1/2", 1-3/4". Pre-drill if close to the edge or you find your wood is splitting.

Do I have to use pocket holes?
Pocket holes are the cheapest, easiest and fastest way to do some joints - like edge to edge or a hidden fastener joint. There are other methods, but these can be time consuming and expensive. We recommend using pocket holes as indicated in plans for best results.

How do I keep things square?
Use a speed square and measure diagonals after each step. Always clamp joints before screwing to keep them tight and flush.

Finishing Questions

Stain or paint before or after building?
A quick sand before and a full finish after gives the best results. Pre-finish if you're doing two-tone or detailed finishes.

What type of finish?
Use oil-based or water-based stain. For paint, cabinet-grade latex or enamel works great. High use surfaces on indoor projects should get a coat of polyurethane, I recommend a Helsman or Spar or other flexible poly that won't crack or peel with wood movement. For exterior projects, use a finish suitable for exterior fences.

How to get a smooth finish?
Start with a well sanded project. Sand between coats (220 grit), wipe clean, and apply light coats with a foam brush or roller.

Plan Questions

Can I change the size?
Many people do, and that's the great thing about building your own furniture! But do keep in mind going bigger might mean more supports are required, and often plans are optimized for minimal material waste.

Are these beginner-friendly?
Yes—plans are written with simple tools and clear steps in mind, with every effort to make plans as simple as possible.

Can I sell what I build?
Absolutely! Just don’t resell or repost the plans themselves.

General Questions

What tools do I really need?
A drill, circular saw, tape measure, square, and a few clamps will get you through most projects.

Do I need a workshop?
Nope! A driveway or small patio is plenty to get started, just make sure you have a level place to work. If you find you are building several projects a year, creating a small workbench is a great way to store tools and have a dedicated workspace.

What if I mess up?
Wood filler, sanding, or flipping boards goes a long way. Mistakes are part of the process!

What can I do to make my projects look more professional?
Start with straight boards, make accurate cuts, clamp all joints, and line up everything neatly. Sand thoroughly, use a neutral finish, and apply it in light coats for a clean look.

I've never built anything before. Where should I start?
Start with a few smaller softwood projects to get hands-on experience. Or if you're tackling a big project, buy a little extra lumber and practice your cuts and joints first. If possible, work with someone who has a bit of experience.

Care & Maintenance

How long will my furniture last?
With good joinery and regular care, your DIY furniture can last for decades. I have pieces in my own home that are over 20 years old and still going strong! One of the best parts about DIY furniture is that it’s easy to repaint, refinish, or repair—so your projects can grow and adapt with you.

How should I care for outdoor furniture?
Lightly pressure wash or hose it down once or twice a year. Tighten screws and reapply finish as needed to protect it—just like a deck or fence. A little upkeep goes a long way in extending the life of your furniture.

How about indoor furniture?
Regularly dust or wipe with a damp cloth. If it starts to look worn, a light sanding and touch-up paint or stain can refresh it in no time. DIY pieces are meant to be durable and fixable—so don’t be afraid to give them some love now and then.

Want to Build with Confidence?

Check out my ebook: 12 Skills to Build Your Own Furniture
It walks you through the core skills every builder needs—measuring, cutting, joinery, and finishing—so you can build beautiful furniture that lasts.

Still Have Questions?

Email us anytime at [email protected] and we’ll be happy to help!