

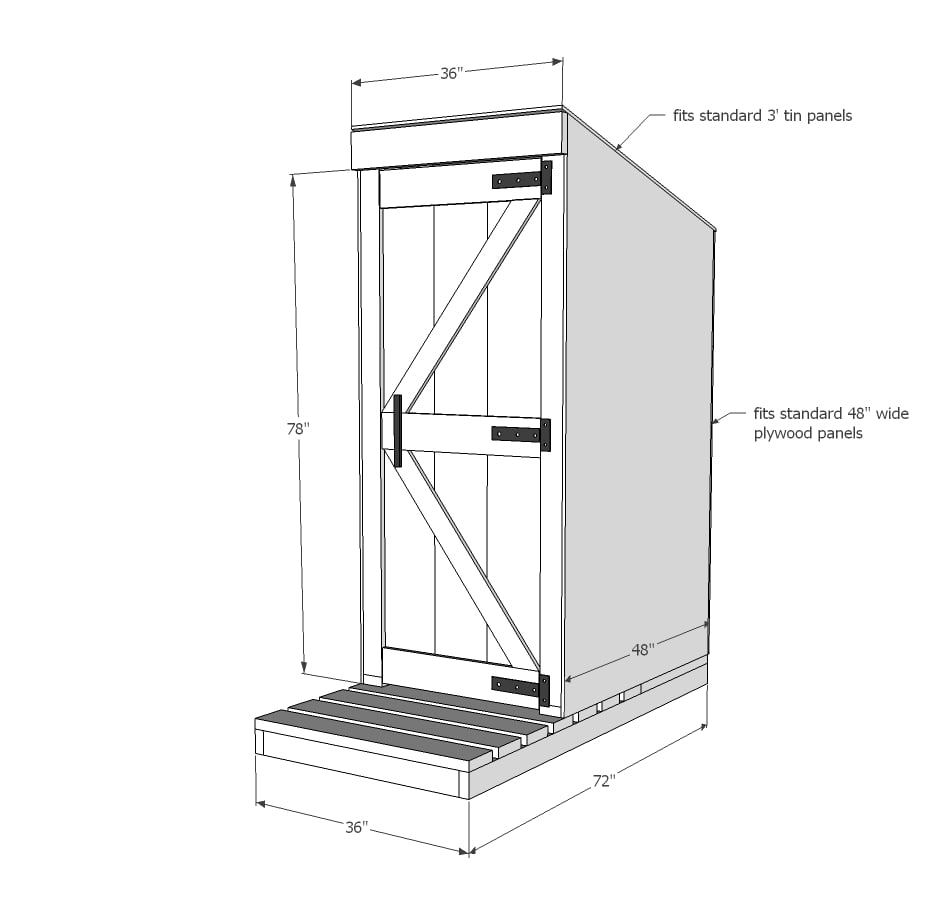
How to build a simple outhouse. Plan optimized for one sheet of standard roofing and standard plywood sides. Step by step outhouse plans by ana-white.com
In Alaska, where temperatures get so cold, composting toilets don't work unless you supply heat to them constantly. So the great majority of cabins and second homes are dry, freeing the homeowners up from wasted heat and frozen water lines through the cold months of the winter.
When we went to build our tiny house, knowing we'd only be using it part time, we made the very unpopular decision to leave it dry. I did not realize things are so different up here in Alaska, where an outhouse is pretty normal - our rest stops (the few we do have) are outhouses, the bathrooms at the city ball park are outhouses, the bathrooms at the lakes and parks are outhouses. It makes sense in our cold climate.
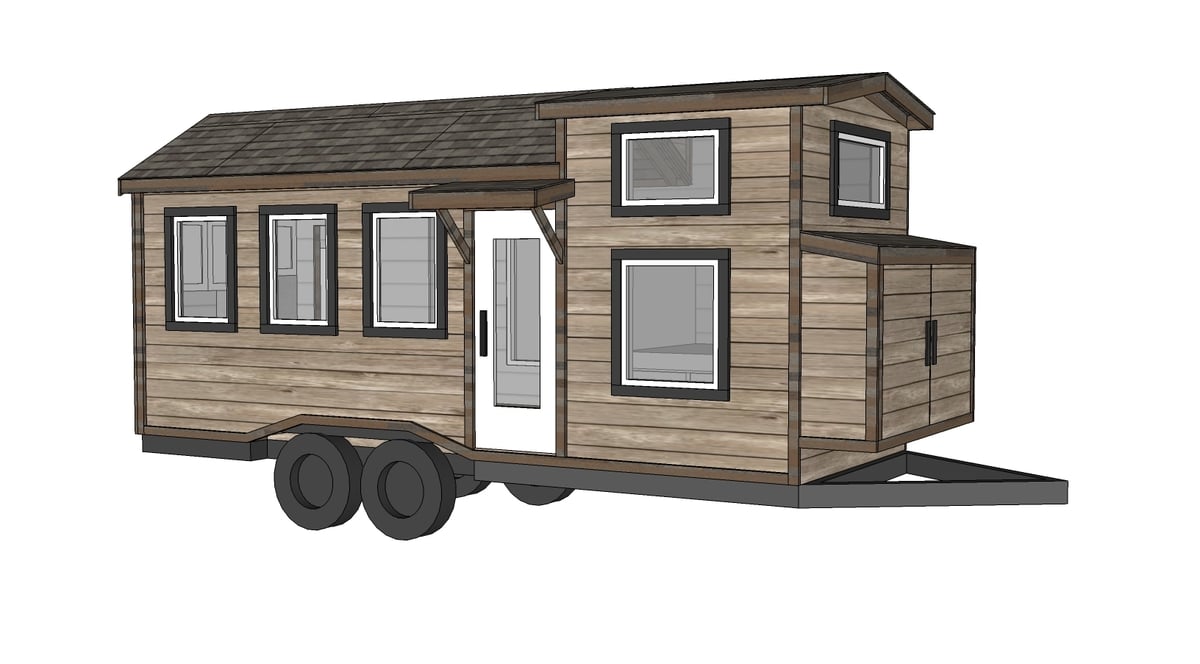
I've since created tiny house plans using the same basic shell and footprint as our original tiny house to accommodate an indoor bathroom with composting toilet here, for those of you who don't live in Alaska or other extreme climates.
But for those of you who do - or perhaps you would just like to move your bathroom outside to save space in a tiny house and make waste management simpler and easier (an outhouse is afterall the original composting toilet), thought I would share with your my outhouse building adventure.
We moved our tiny house across the lake last winter, when the ice was frozen. There are no driveable roads to the tiny house, you can only access it by boat or by a very muddy ATV trail. By very muddy, let's just say my two year old plays "winch" with his trucks in the sand box.
So come summer, and we've got the big house build going full swing, building an outhouse out at the tiny house has been a nagging to do list item. Every time someone needs to use the bathroom, it's a boat ride across the lake to the campground outhouse. But there never seemed to be enough time to get everything done.
My husband took a fishing trip a little while back to fill our freezer with salmon, but I stayed home as this is not a kid friendly fishing trip. Grandma offered to babysit, so I decided to take on the outhouse build by myself.
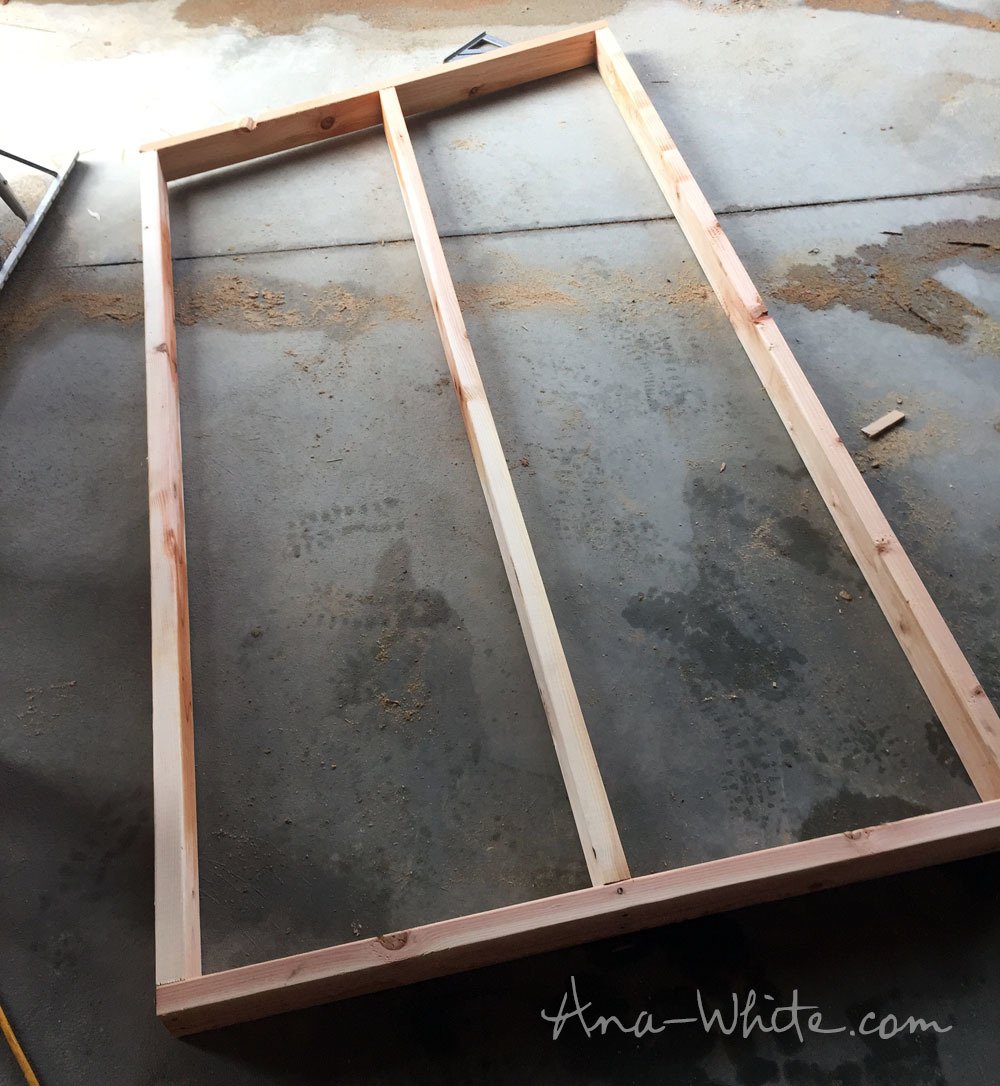
I decided to build it in panels that could be easily broken down or put together so we could transport the entire outhouse in the boat or on the back of the ATV. I built two walls using 3" wood screws (the deck type that are self tapping). Easy peasy.
I also made the outhouse 48" deep so all I had to do on the plywood was cut the top off as the width of the plywood pieces is 48". Sorry, can't take photos and cut at the same time. I used a cordless circular saw with the blade set to the depth of the plywood.

The framing nailer was handy as I built this up at the new house site, so I just used it to attach the plywood to the framing. The nails are 8D 2-3/8" - I'd recommend galvanized if you aren't siding it, as non galvanized nails will bleed when wet.
Bam, bam, bam, done.
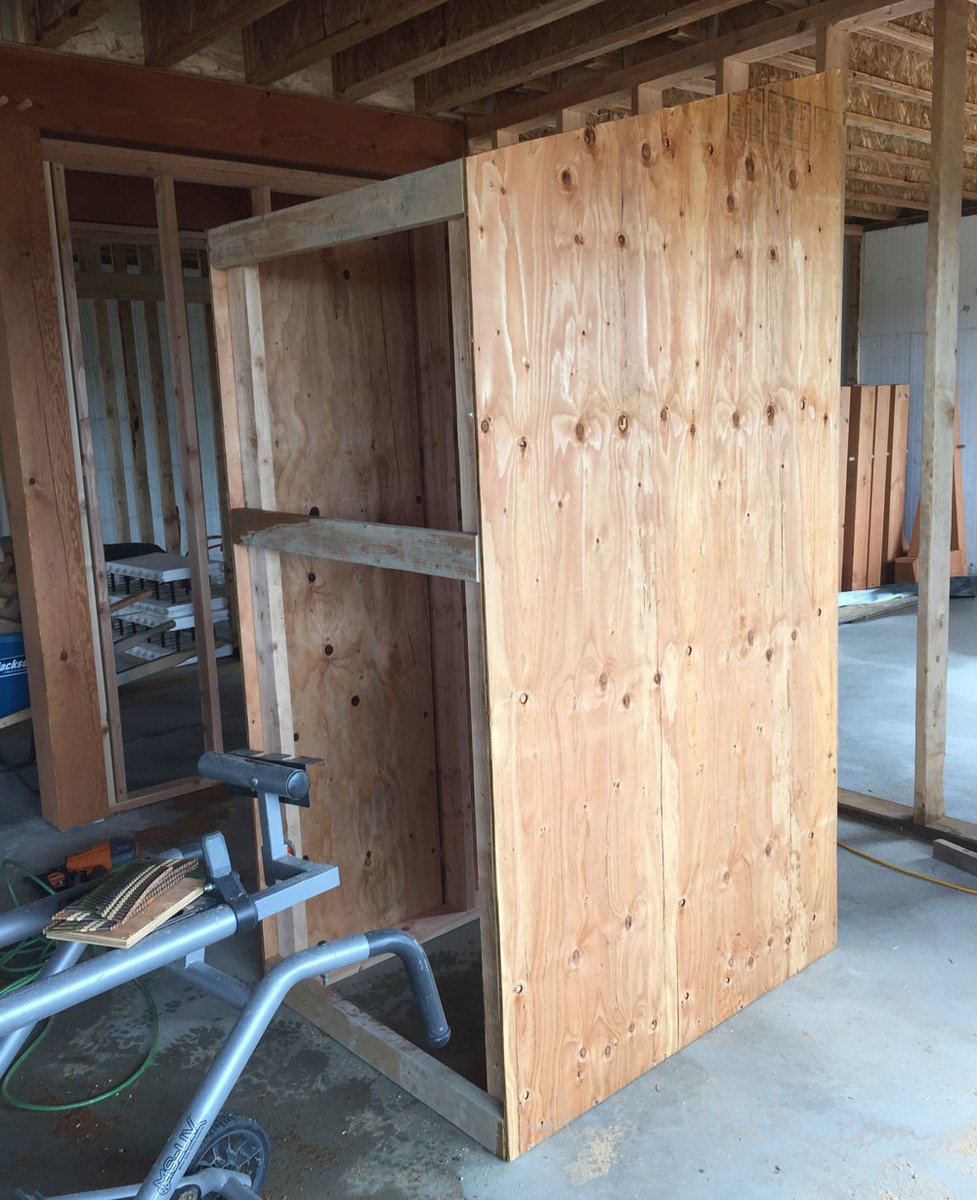
I decided to assemble the panels together just to make sure everything worked. So the two wall panels get tied in with 2x4s along the back. I screwed from the inside so I could easily remove the 2x4s, even after the back is sheeted.
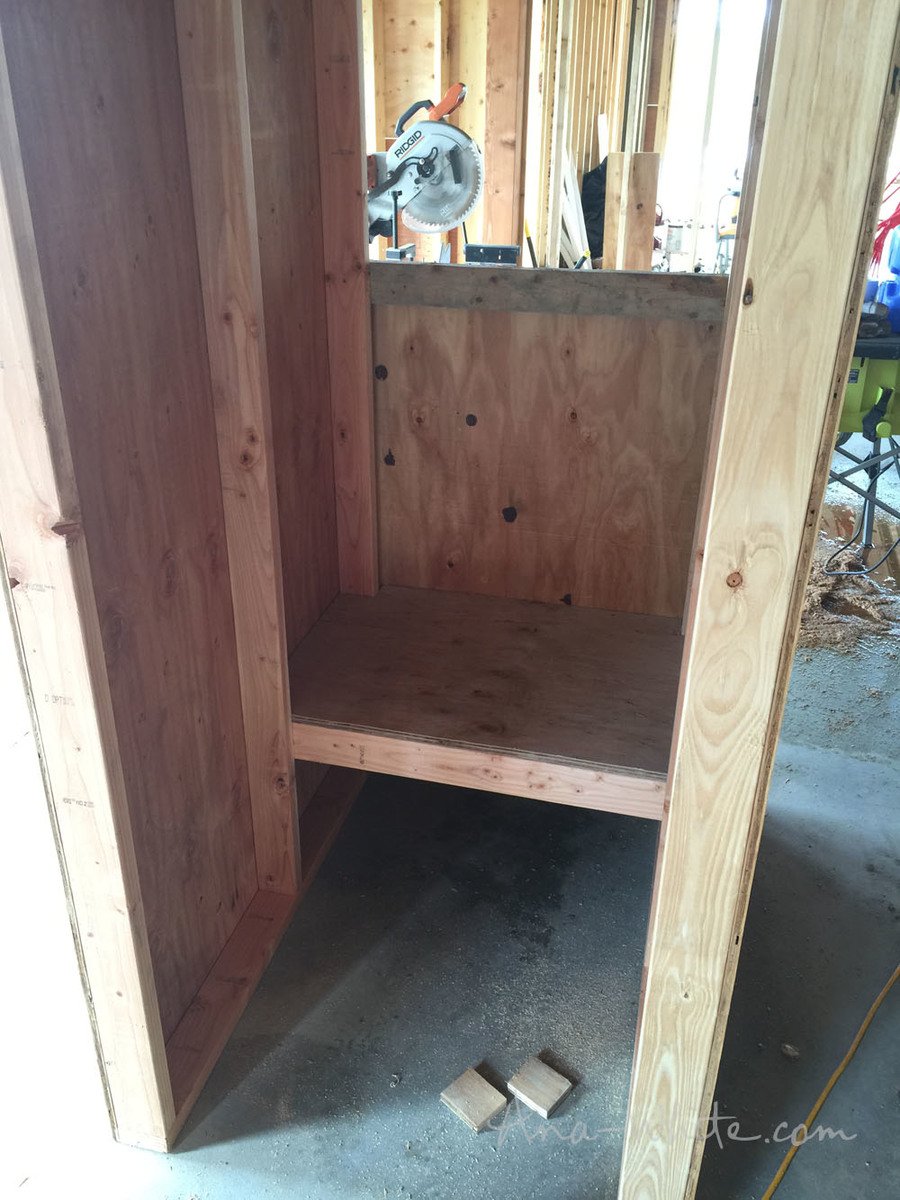
Then I just added sheeting to the back. For the seat, I just tied in a board across the two walls, and put plywood on top.
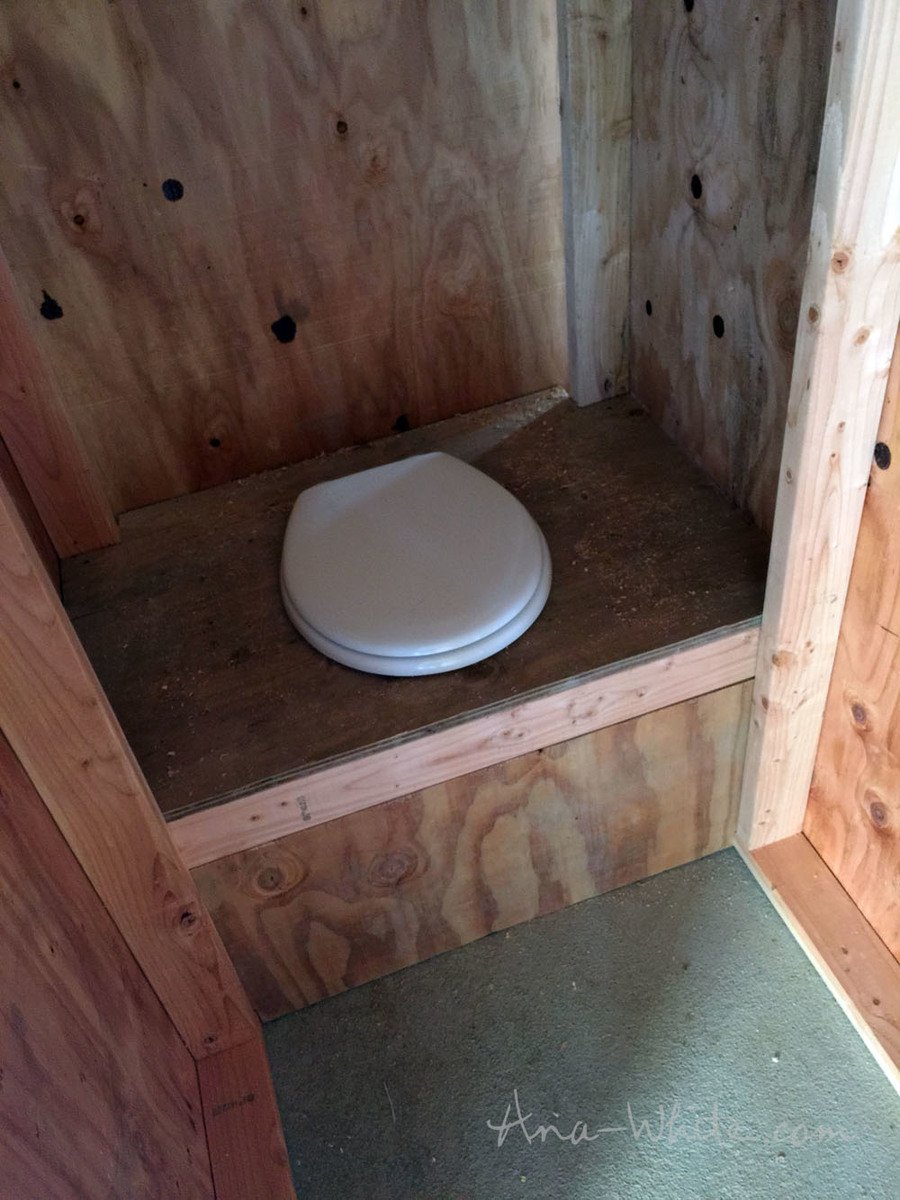
Then used my jigsaw to install the toilet seat.
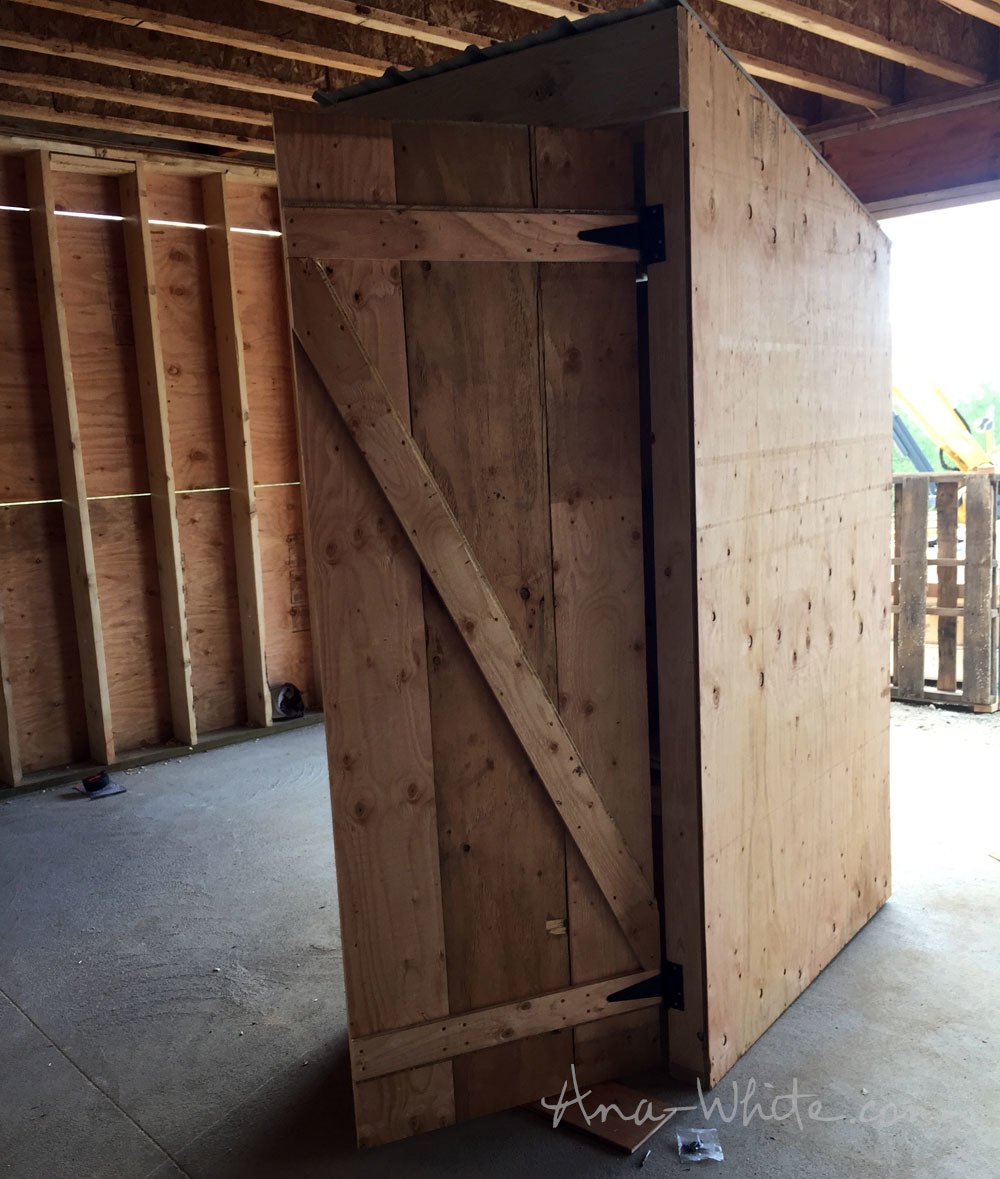
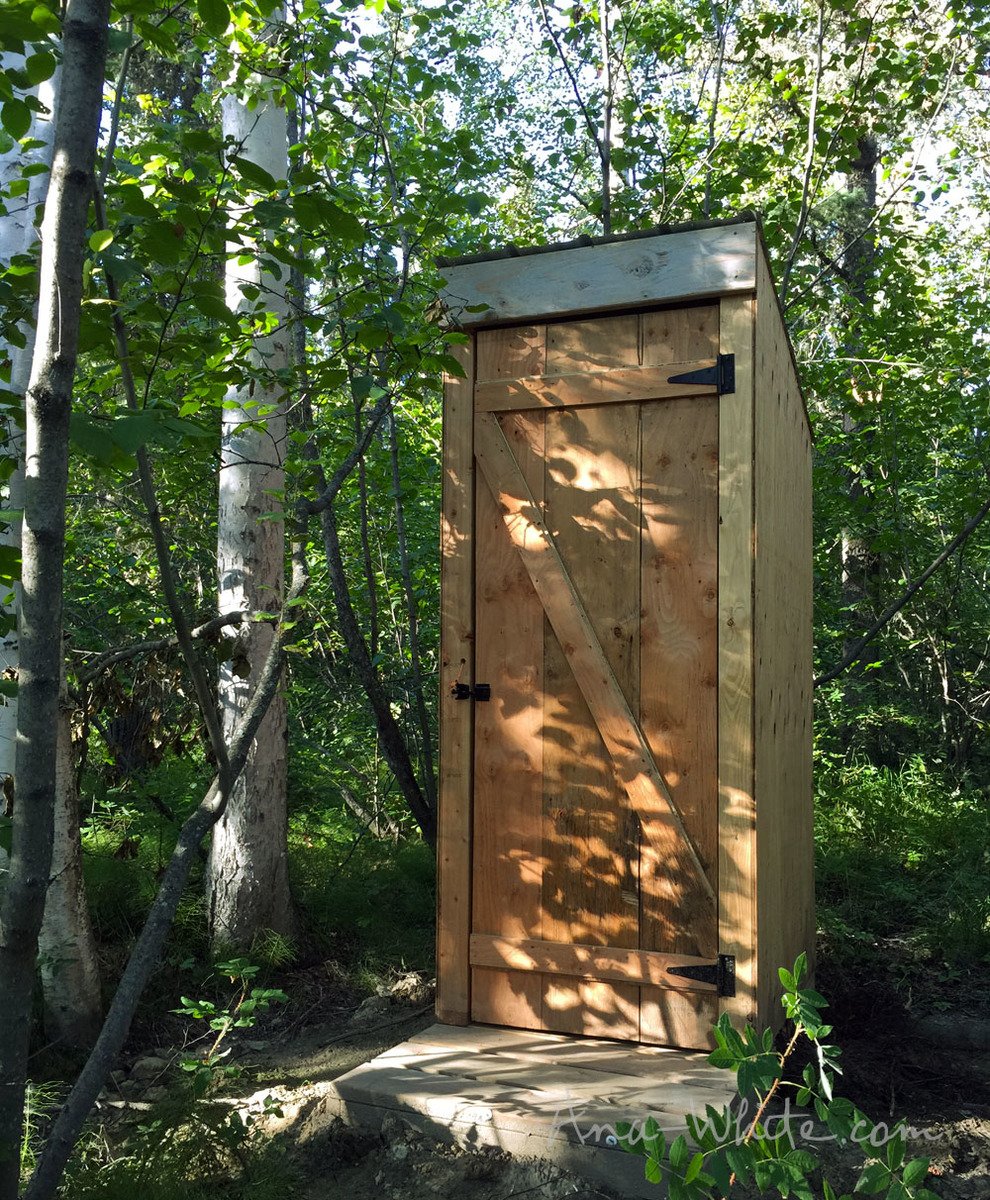
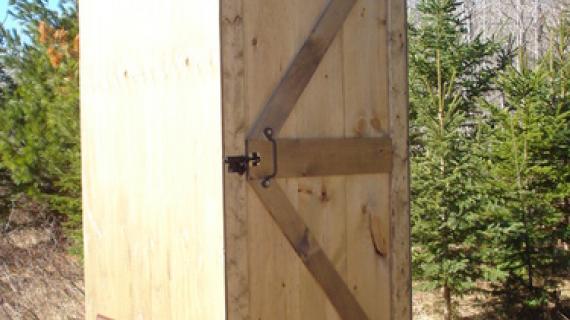
I built the door using 3/4" plywood scraps and set the hinges. My theory is doing this now on a level surface with access to tools and electricity is much easier than doing this in the wood, in the dirt, with the bugs biting me.
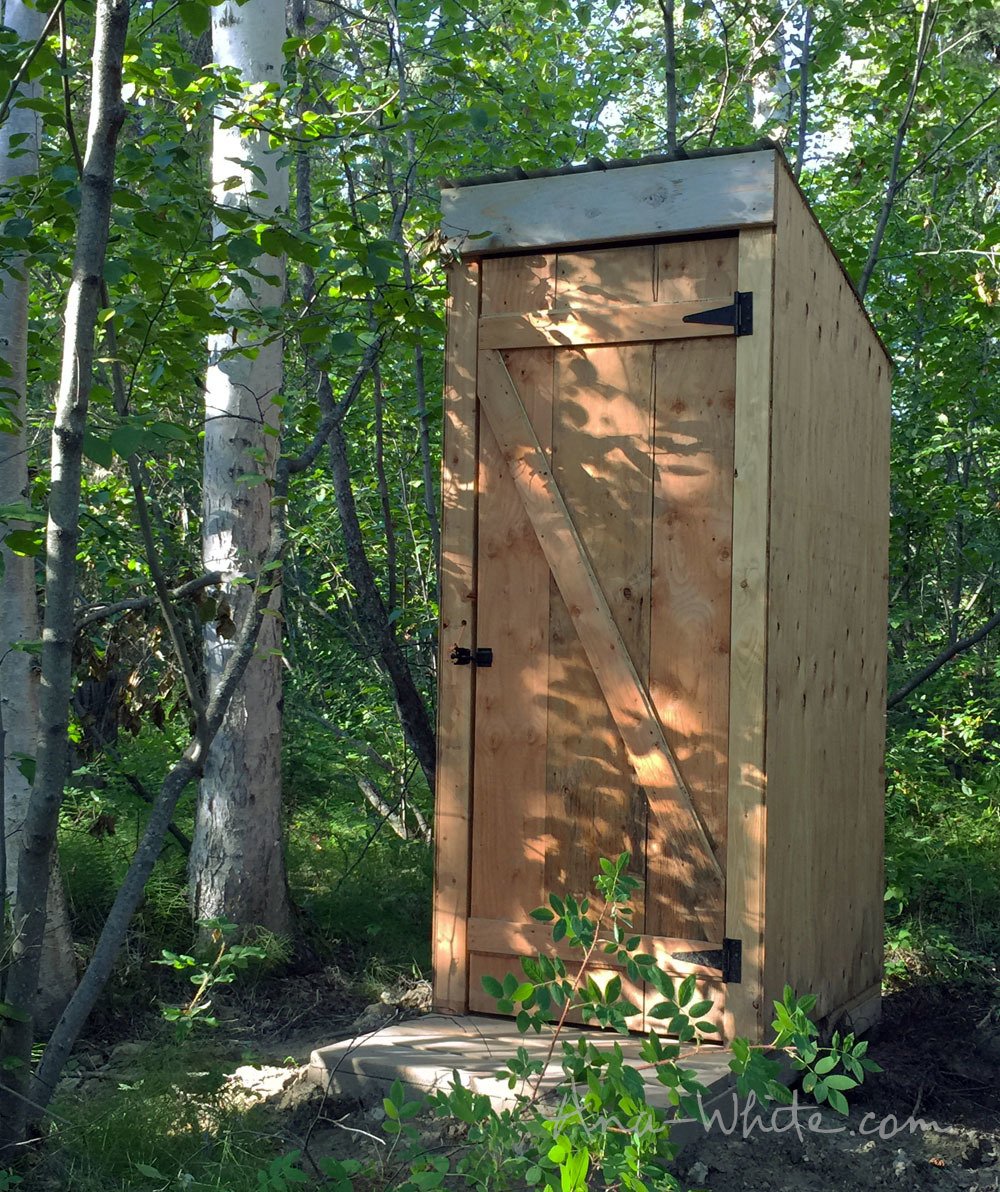
I also put plywood on the roof and added tin to the roof (this outhouse is designed to fit a 36" tin roofing panel).
Then the hubs came home and I showed him the outhouse before I started disassembling it for transport, but he had a different idea ....
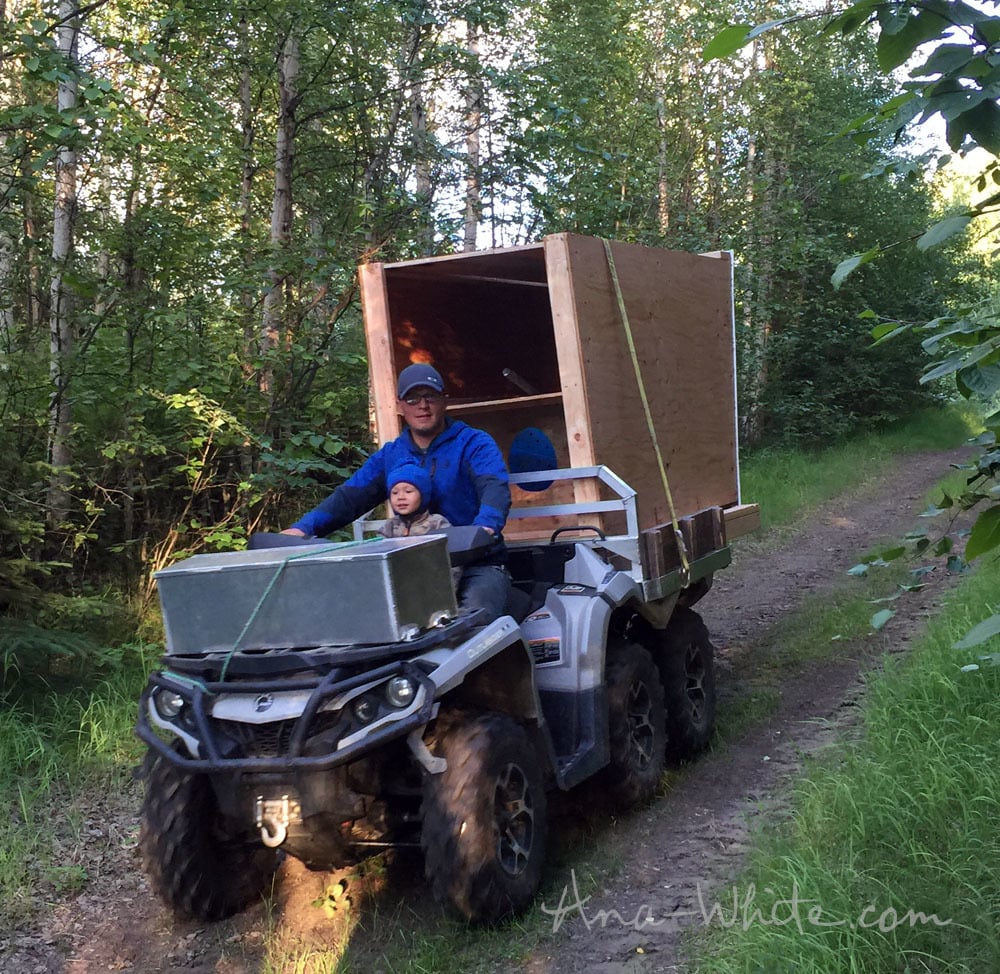
My brother helped up get the outhouse somehow on to the back of the ATV - it weighs a ton a this point and is very cumbersome.
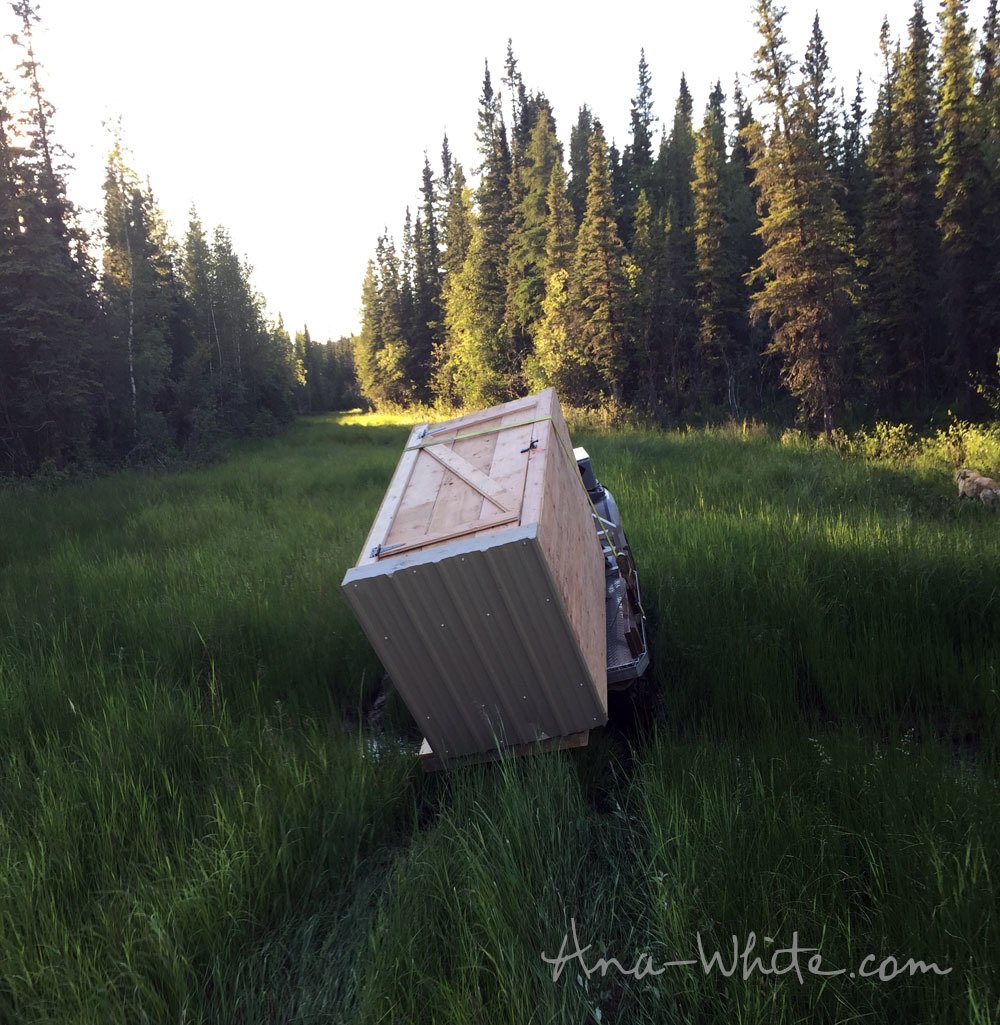
Down the trail, through the mud,
And to the tiny house.
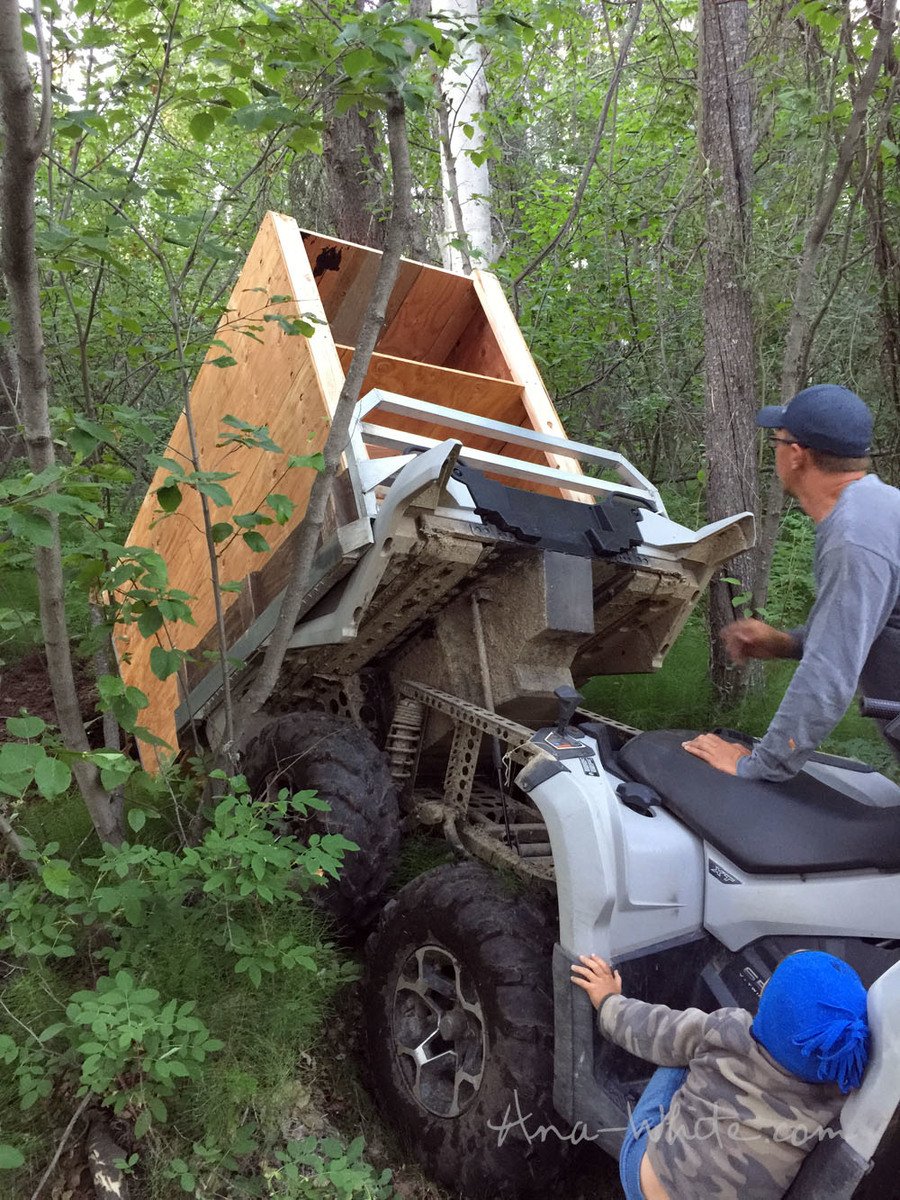
My carefully constructed outhouse just got dumped off the ATV. Thankful I went a little generous on the wood screws right now.
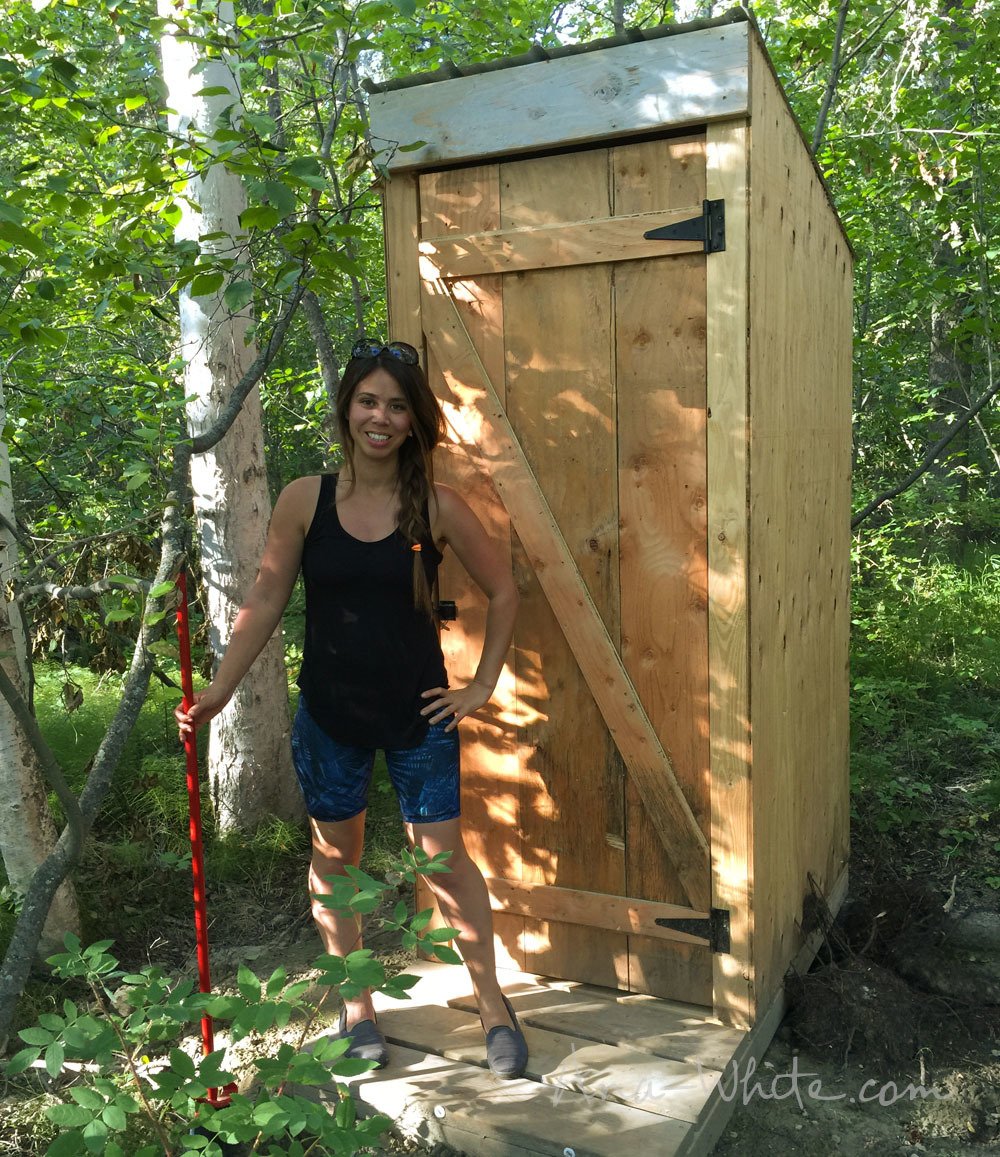
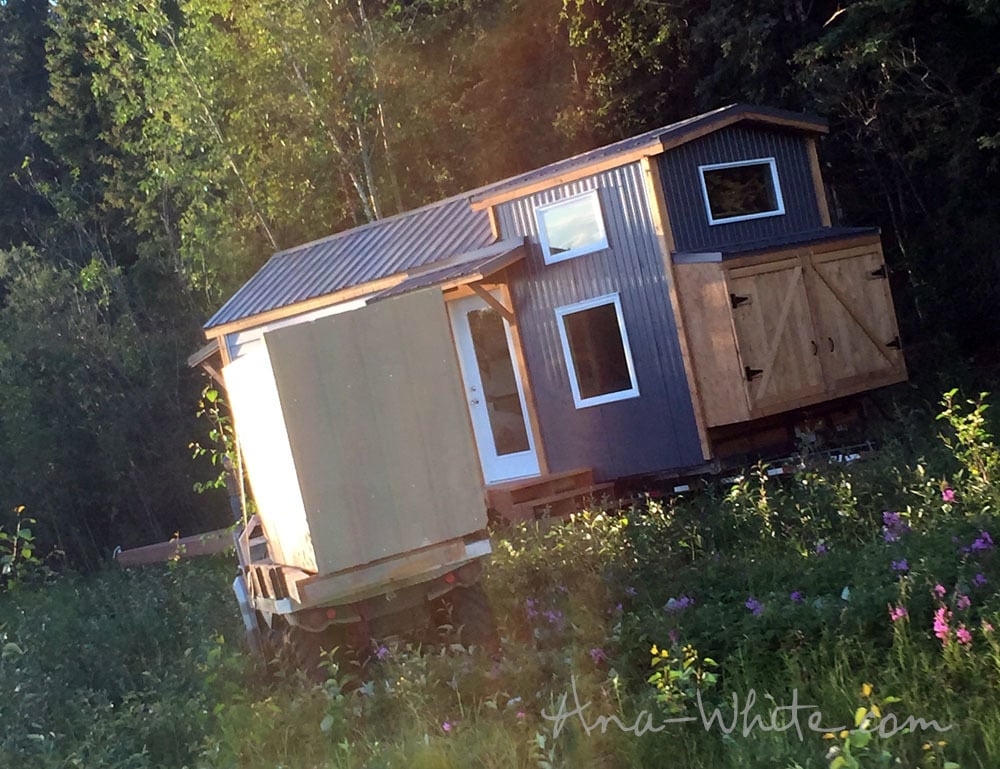
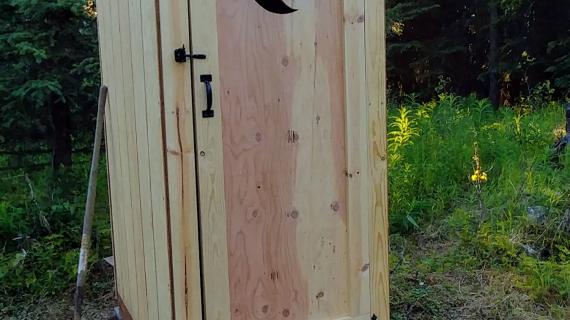
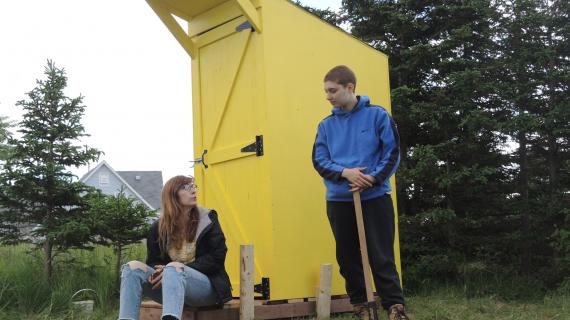
After a little clean up, we've got a bathroom finally!!!

It's simple. It's functional. It's all we need.
Happy to share these plans with you today. If you do build, please share, I'd love to see how your project turns out too.
XO Ana
Preparation
- 3 - sheets 1/2 exterior plywood
- 1 - 12' treated 2x4
- 1 - 10' treated 2x4
- 4 - 2x6 @ 6 feet long (recommend treated or weather resistant)
- 1 - 2x2 @ 29" (recommend treated or weather resistant, try using a railing spindle)
- 11 - 2x4 @ 8 feet long
- 3 - 1x10 @ 8 feet long
- 1 - 1x6 @ 8 feet long
- 1 - 1x4 @ 8 feet long
- 3 Gate Hinges
- Gate Latch and Handle
- 54" piece of 36" wide tin
- Roofing screws to match, roofing screws can be up to 2" in length
- 3" decking screws, self tapping
- Nails or staples for attaching plywood to framing (I used 8D galvanized but you can also use a finish nail, brad nail or staple or screws, depending on your tool)
- 1 - 1/4" exterior screws for buiding the doors
BASE
2 - 2x4 @ 72"
3 - 2x4 @ 33"
7 - 2x6 @ 36" long
1 - 2x2 @ 29" long
2 - 2x4 @ 24-1/2" long
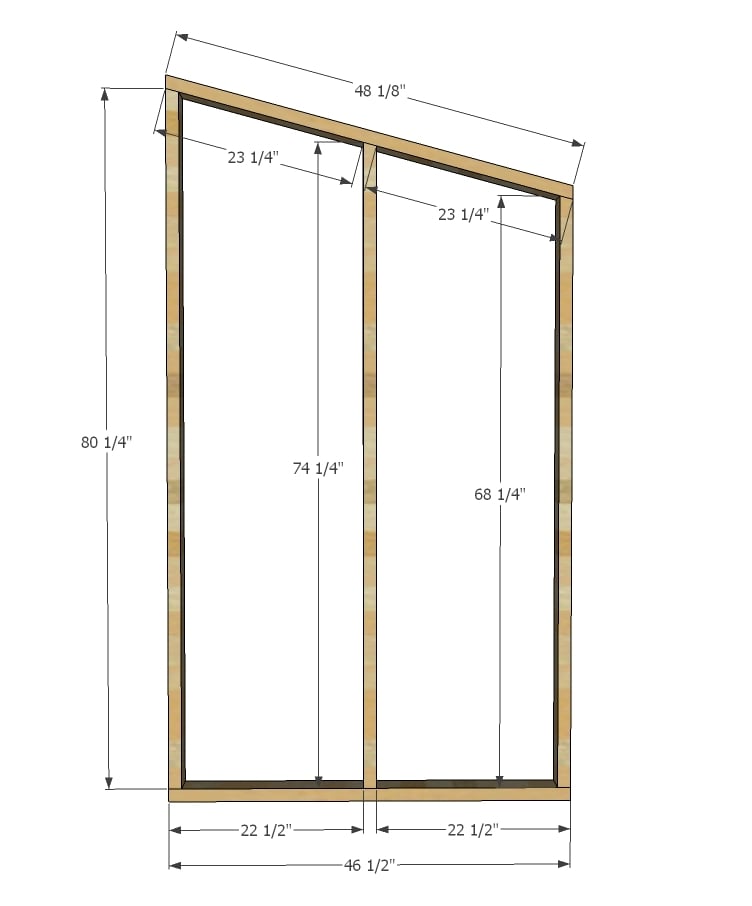
WALLS
2 - 2x4 @ 48-1/8" (long point to short point, ends cut parallel at 15 degrees off square)
2 - 2x4 @ 80-1/4" ( longest point, one end cut at 15 degrees off square)
2 - 2x4 @ 74-1/4" ( longest point, one end cut at 15 degrees off square)
2 - 2x4 @ 68-1/4" ( longest point, one end cut at 15 degrees off square)
2 - 2x4 @ 46-1/2"
2 - 1/2" plywood @ 48" x 83-3/8" (longest point) cut down to 70-1/2" (shortest point)
TIE IN
1 - 2x6 @ 36"
4 - 2x4 @ 35"
2 - 2x4 @ 28"
1 - 1/2" plywood @ 36" x 52" (roof plywood)
1 - 1/2" plwyood @ 36" x 44" (scrap from roof piece)
1 - 1/2" plywood @ 36" x 26-1/4" (may have to piece to use scraps)
DOOR
3 - 1x10 @ 77"
3 - 1x6 @ 27-3/4"
2 - 1x4 @ 38" - long point to short point, both ends cut at 37-1/2 degrees off square, end are parallel


Instructions
Step 1

Build the base with treated or weather resistant 2x4s. If the base isn't fully supported on the ground or with beams, consider using 2x6 or larger boards for additional support.
Step 2

Screw decking to frame. I recommend weather resistant or treated wood for the decking, as the front decking is exposed to to weather.
Step 3
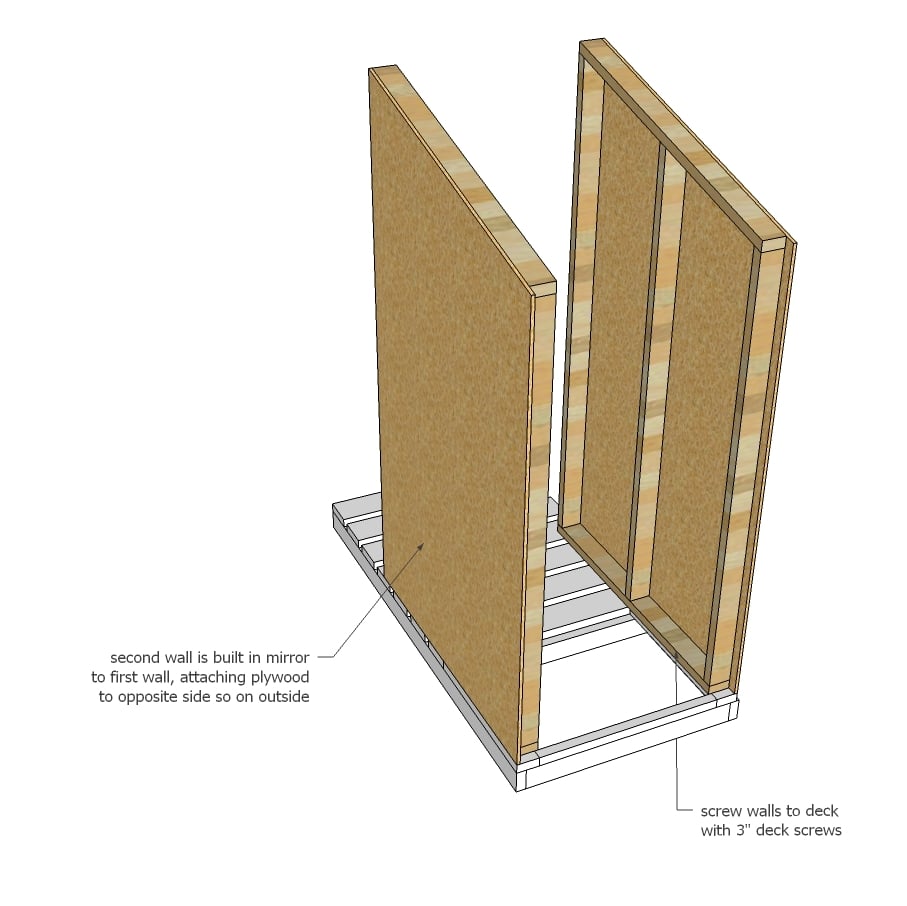
Build two of the walls.
Step 4

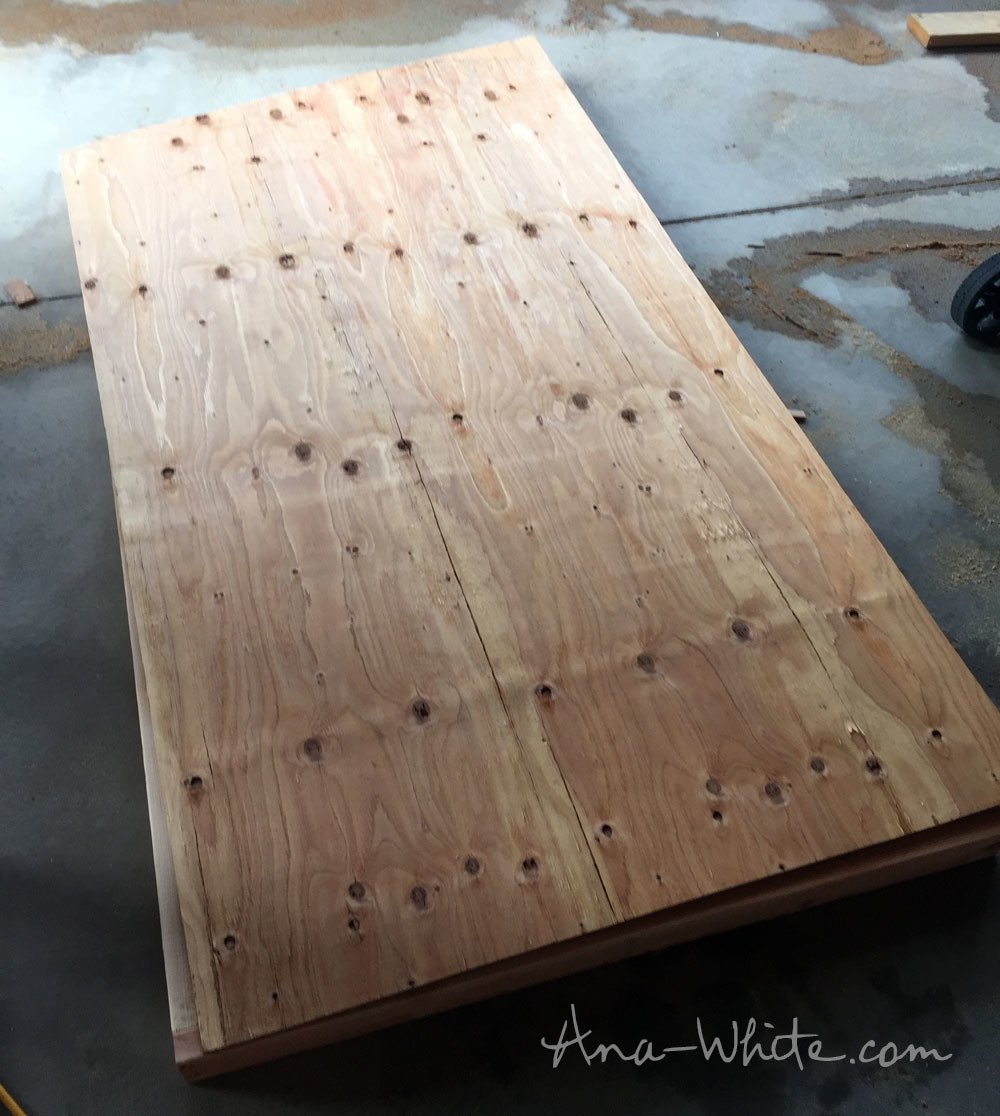
Attach plywood to the outsides of the walls, considering walls are to be built in mirror. On the short side of the wall, the plywood overhangs the back by 1-1/2".
Step 5
Step 6
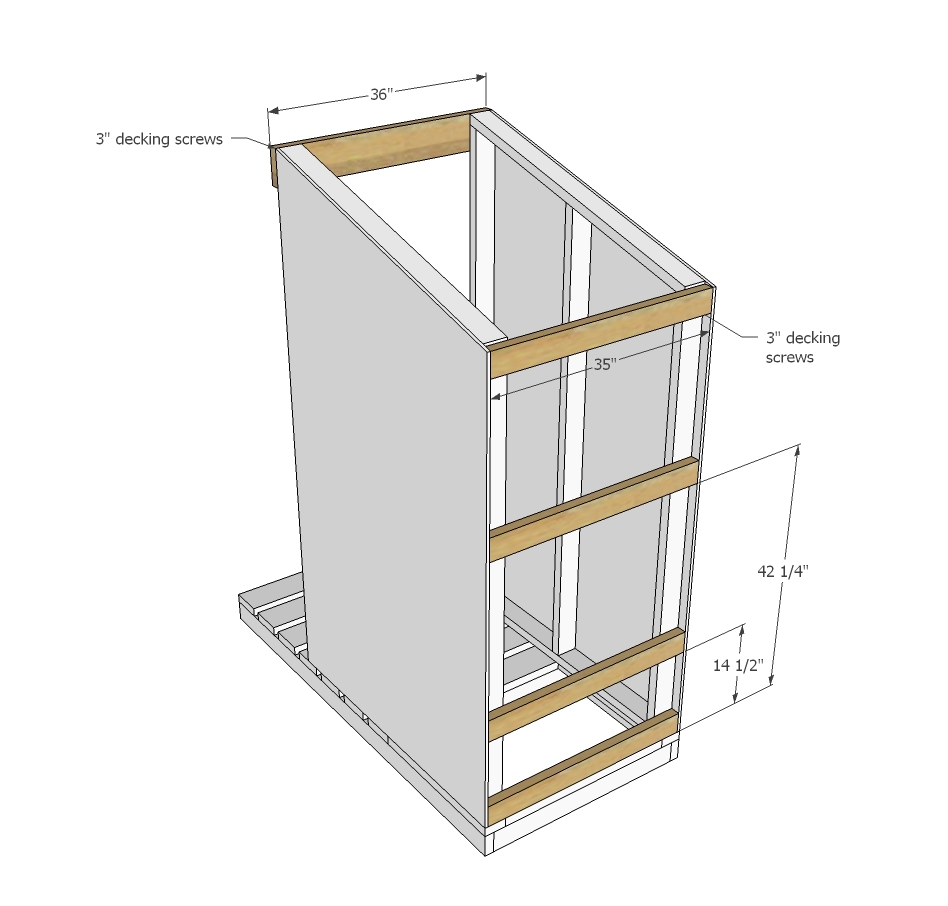
Attach 2x4 and 2x6 boards to walls to tie in the walls at the front and back.
Step 7
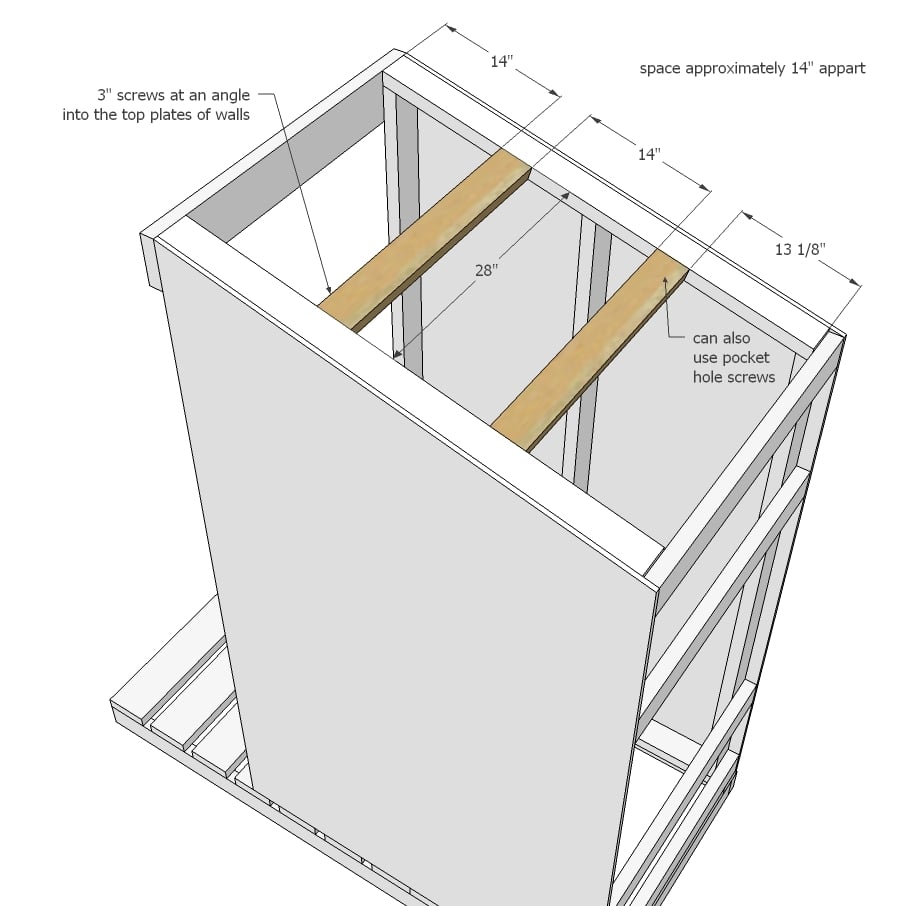
Additional supports recommended for supporting the roof.
Step 8

Attach plywood to roof, nailing or screwing to all availabe tie in points.
Step 9
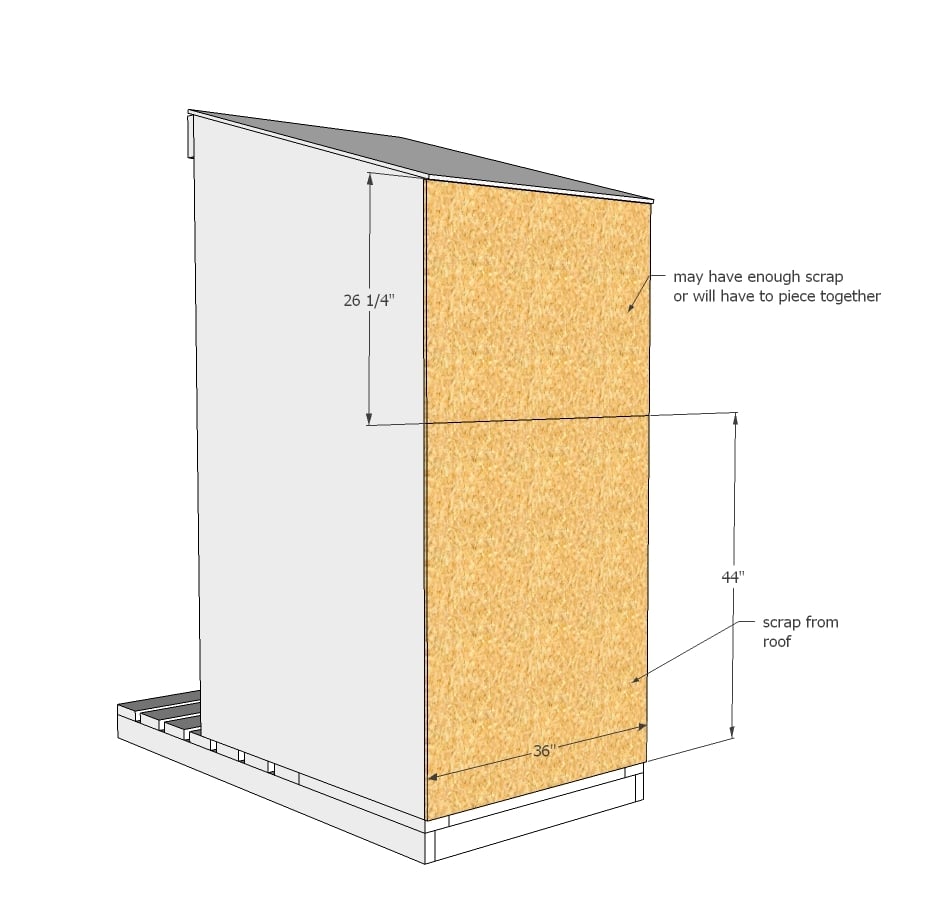
Use scrap plywood pieces to cover back. I considered leaving the top panel open and covering with acrylic glass as well but ended up using plywood.
Step 10

Build the door and attach with gate hinges. If using a gate clasp, make sure there is a way for the door to be opened from the inside. We did this by drilling a hole and attaching a string to the clasp so it can be opened from the inside.

Comments
Jolene H.
Tue, 07/30/2019 - 10:46
Love my outhouse!!
I used your plan and did a couple a couple modifications to suit my needs better, but I am in love with my outhouse!!
https://www.facebook.com/1399152267/posts/10220557417630957?s=1399152267&sfns=mo