
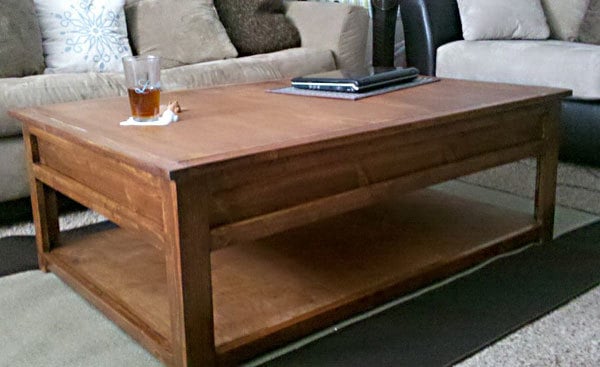

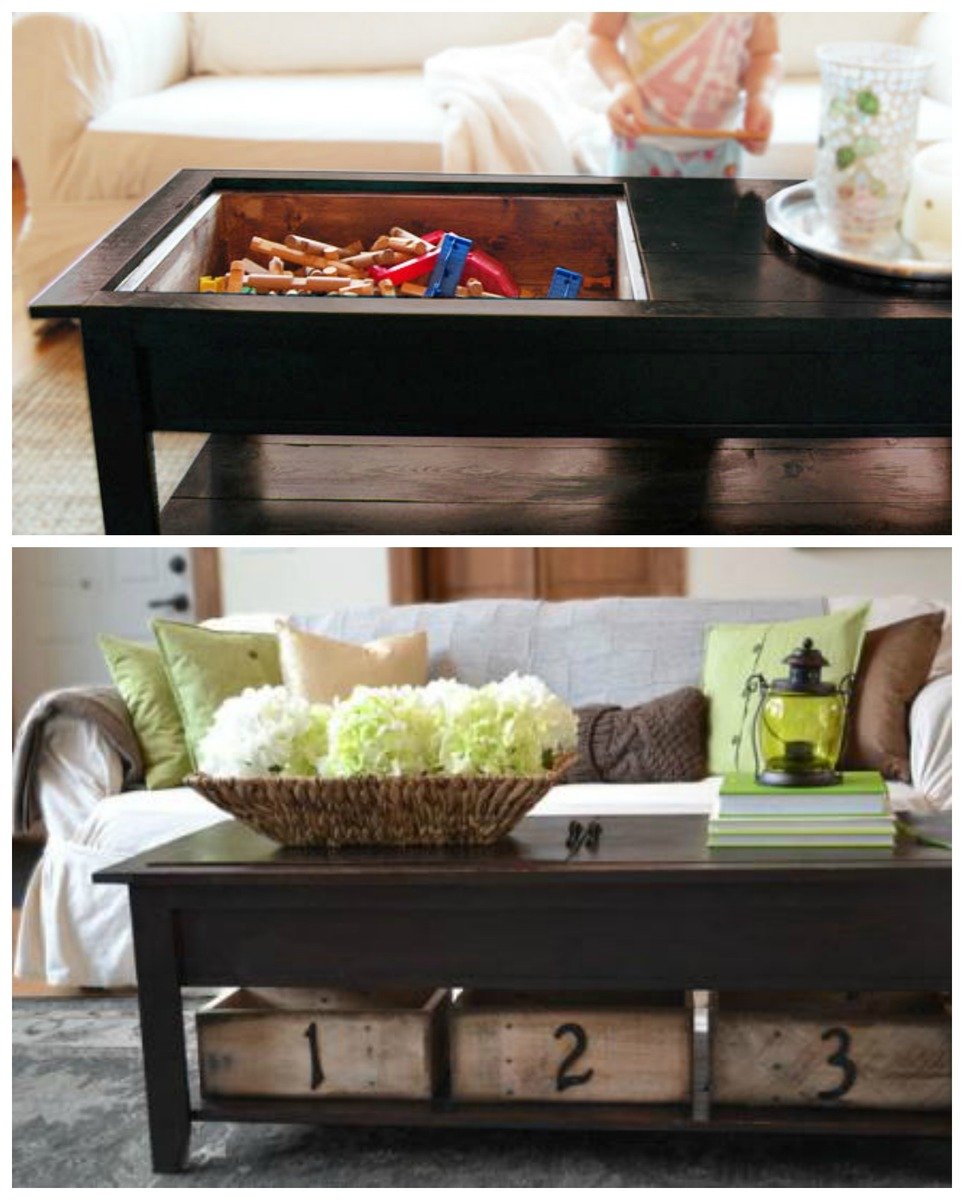
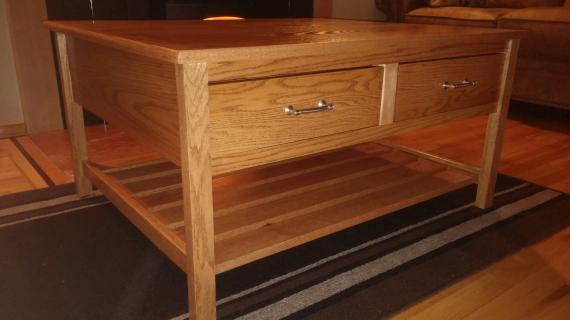
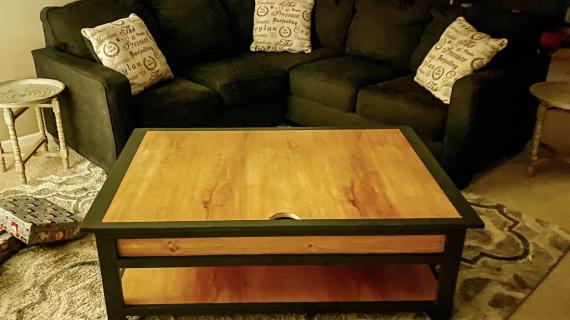
DIY Coffee Table with hidden train table storage inside. Special thanks to Christy for sharing her photos with us.
For a smaller version, check out my original wooden train table - lego - lincoln log etc play table plans here.
Thank you for your beautiful comments and positive feedback on our Lego Table. We all are special in our own unique way. But I am truly blessed because you are giving me an opportunity to follow my dreams, and I can't express how appreciative I am. Truly, thank you for your support.

After posting yesterdays Lego Table, I thought it only fair to then post the matching Train Table

The train table is double the width of the lego table. You just need more room for trains to make their tracks go round.
 But you need that extra space for train tracks to wrap around. We tried a small track on Grace's Lego Table, and there's just not enough room.
For this train table, you won't need a whole lot more supplies. Just a full sheet of plywood instead of a half, and a few extra feet of 1x6s and 1x3s and 1x2s.
Preparation
1 – sheet of 3/4″ plywood or MDF cut into strips 31 7/8″ wide x 48″ long (you will get exactly 3 strips) 1 – 1×6, 8 feet long 1 – 1×6, 6 feet long x – 1×3, 8 feet long x – 1×3, 8 feet long 2″ screws 1 1/4″ screws Finish nails Wood Glue Wood Filler Finishing Supplies All visible edges will be finished, so no need for edge banding on this one.
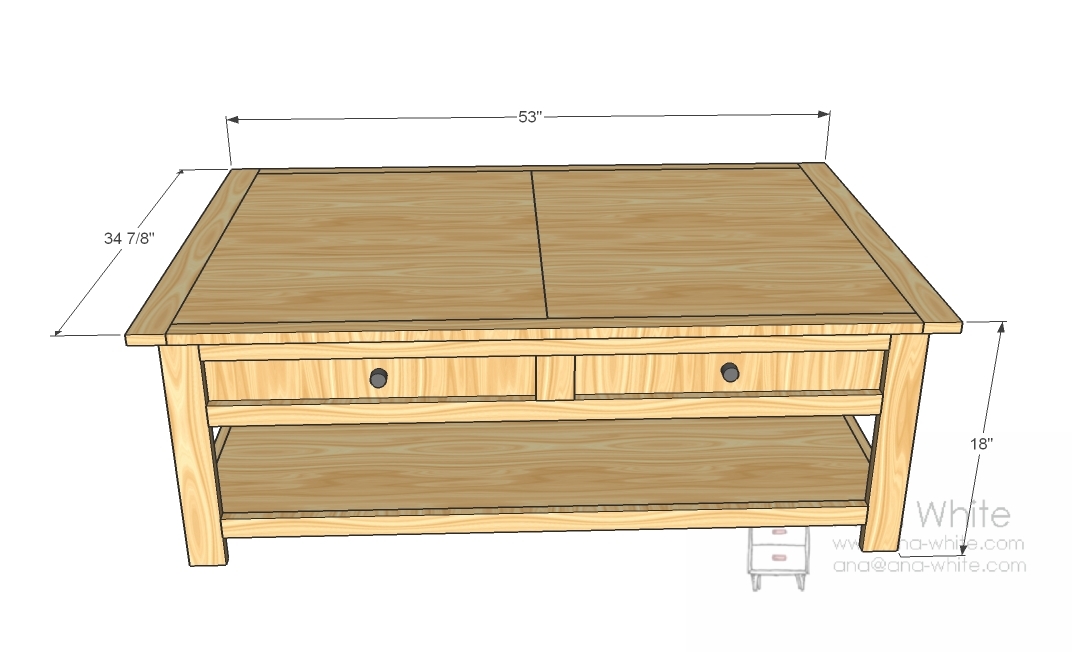
2 – 1×6 @ 48″ 2 – 1×6 @ 30 3/8″ 2 – 3/4″ Plywood or MDF @ 48″ x 31 7/8″ 4 – 1×2 @ 17 1/4″ (Side Legs) 4 – 1×3 @ 17 1/4″ (Front/Back Legs) 2 – 1×2 @48″ (bottom shelf supports) 2 – 1×2 @ 28 7/8″ (bottom shelf) 6 – 1×2 @ 28 7/8″ (trim) 6 – 1×2 @ 44 1/2″ (trim) 2 – 1×3 @ 34 7/8″ (top end) 2 – 1×2 @ 48″ (top sides)


Instructions
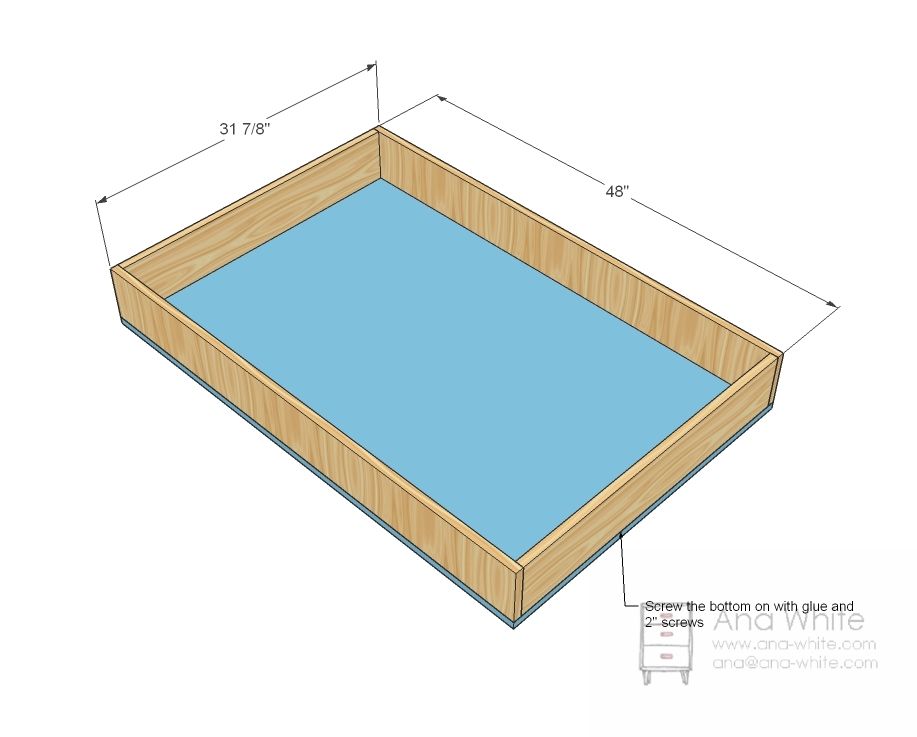
Step 1
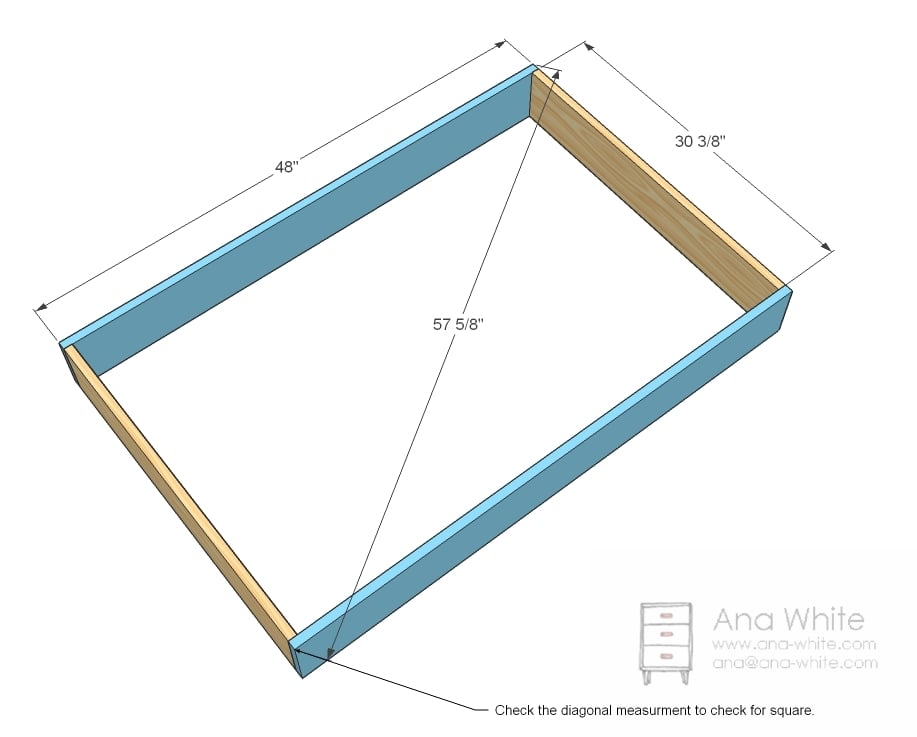
Build the Box Screw the box together as shown above with 2″ screws and glue. The measure across diagonally, checking to see if the measurement matches the diagonal above. Measure the oppostite diagonal. One diagonal will be longer than the other. On the longer diagonal, push the two opposite corners together, decreasing the distance between the corners. This is how you adjust for square. When the diagonals match, you’ve got a square box!
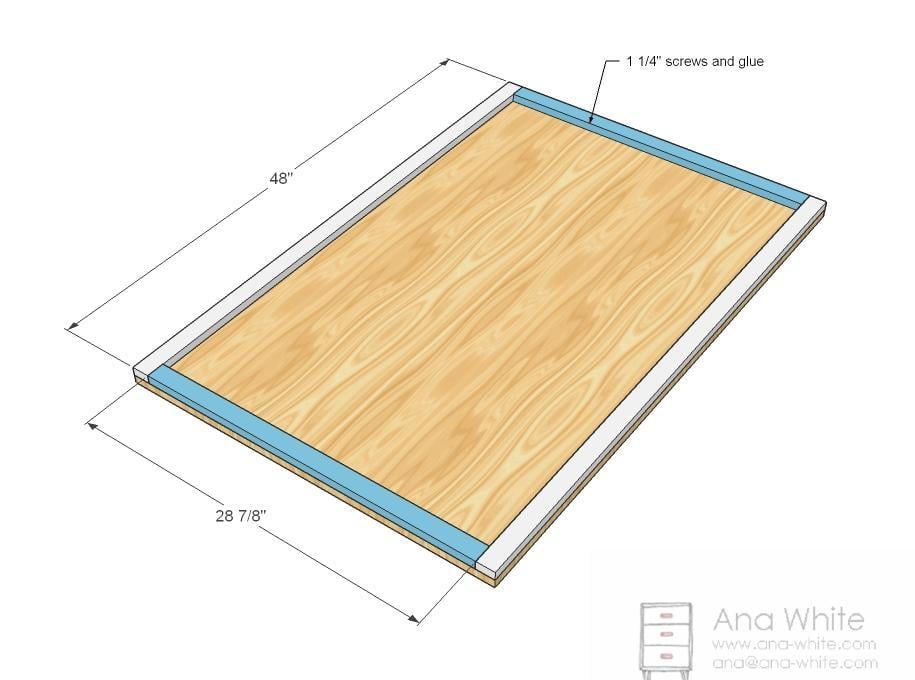
Step 2
Put the Bottom on the Box This diagram really should be upside down. Just lay one of the sheets of plywood on top of the box and screw down with 1 1/4″ screws. Of course, you should always predrill your screw holes and use glue.
Step 3

End Legs Now just screw the legs to the short ends (these are the 1×2 legs) with 1 1/4″ screws and glue. Super easy. Keep things flush to the sides and top.
Step 4

Side Legs Now simply screw the side legs to the end legs and the box sides with 1 1/4″ screws and glue.
Step 5
Step 6
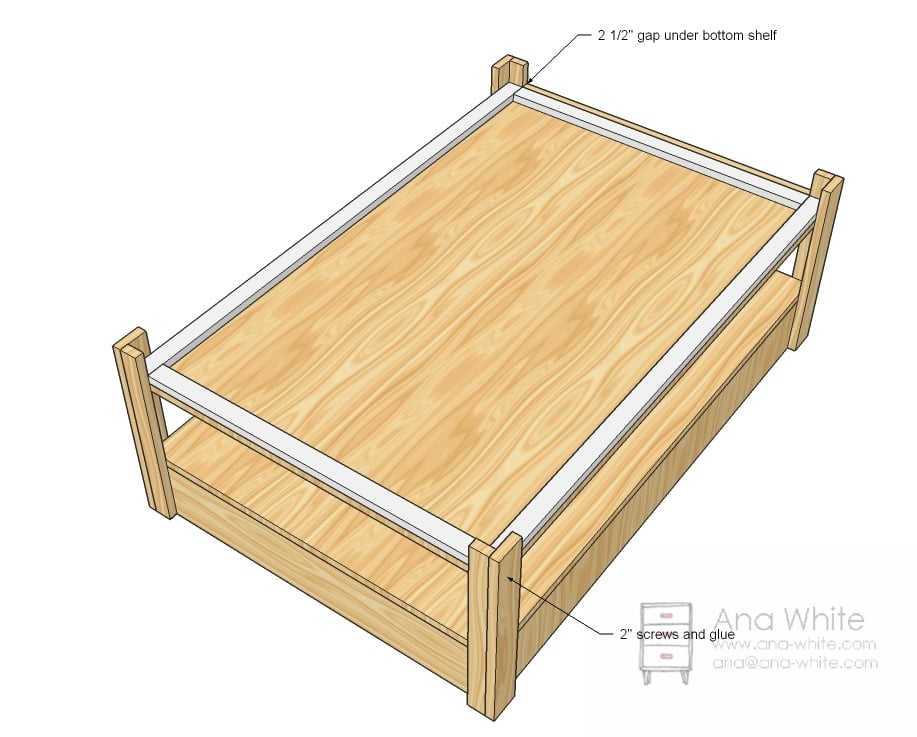
Attach Bottom Shelf Get some help on this one or turn the table on it’s side. Predrill holes and attach the bottom shelf. What I would do is to cut 2 1/2″ long spacers and screw to the inside of the legs on the underside (with the shelf in place) flush with the bottom of the legs. Then let the bottom shelf rest on the tops of these spacers as you predrill holes and screw the bottom shelf on. You could even leave the spacers in.
Step 7
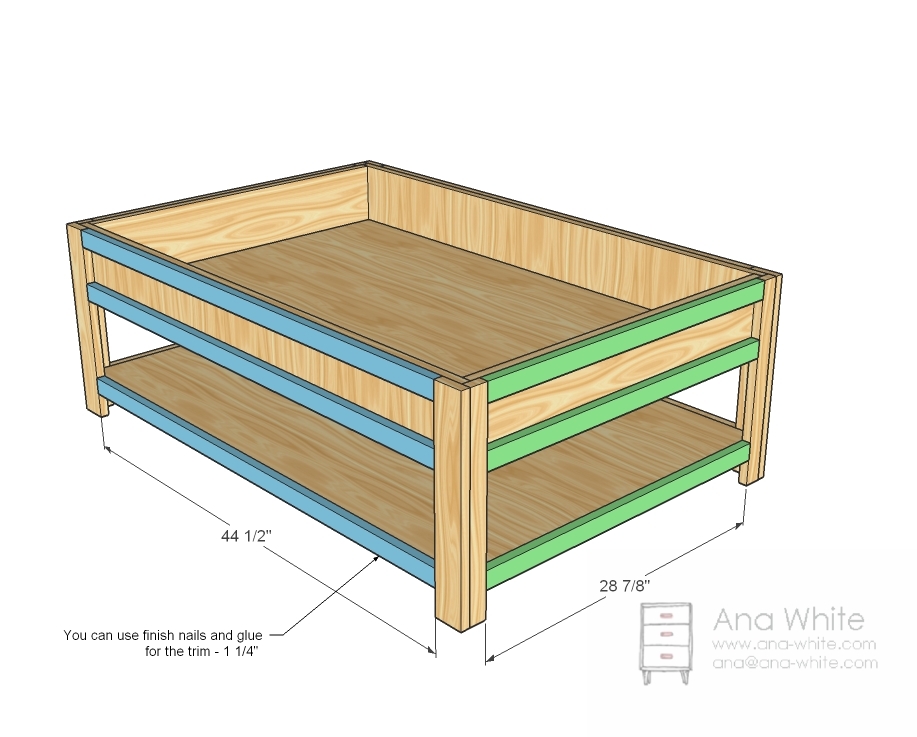
Trim Now the fun part . . at least if you have a nailer. Attach the trim to the sides as shown above. You can use screws or a good ole hammer and nails too.
Step 8

Top Trim Now the top trim. The top trim does not get screwed into the 1×6 sides, rather the legs and the side trim pieces. What I would do is layout the tabletop pieces (see below diagram) and trim around them so you have a nice tight but removeable fit.
Step 9
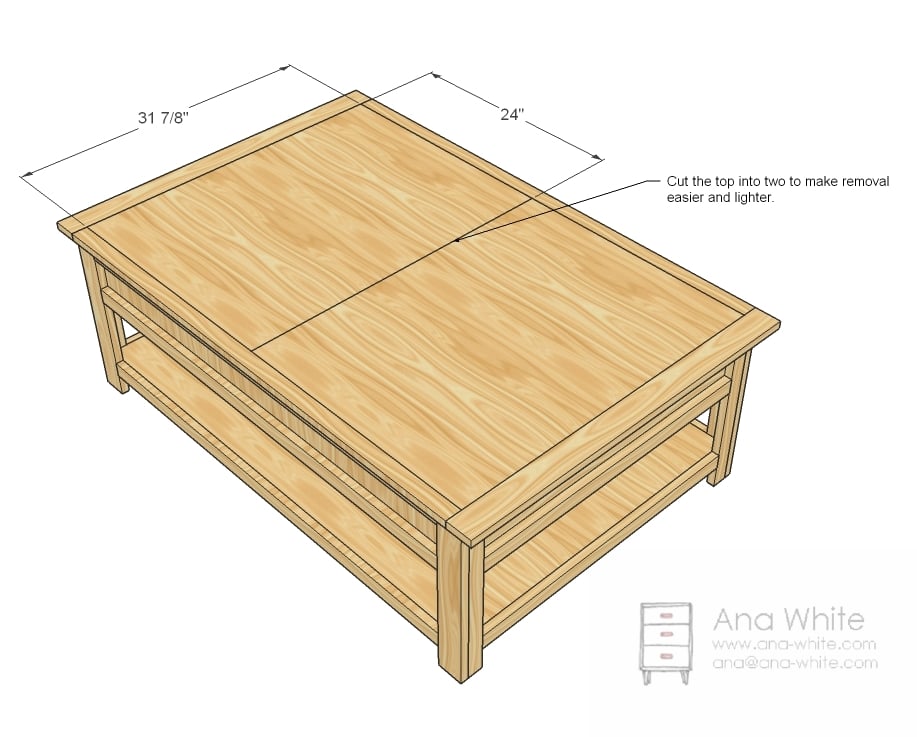
Top Inserts And those are the top inserts I was talking about. Sand them to get a nice fit. You may wish to drill a little hole in the center (half on each insert) to have a spot to pull the inserts up with. For those of you concerned about sagging, I checked the deflection and you should be able to put 70 pounds on each inset with no noticeable deflection – that’s as much as any preschooler would weigh. But if you are going to stand on it, make sure you put a foot on each insert

Comments
Spare time builder
Sat, 12/19/2015 - 22:25
No lip because plywood actual
No lip because plywood actual thickness is 23/32 and 1x whatever wood is 24/32. Difference of 1/32 is nothing and will disappear with sanding. Good luck I'm sure your table will be great!
Spare time builder
Sat, 12/19/2015 - 22:29
No lip
No lip because plywood actual thickness is 23/32 and 1x whatever wood is 24/32. Difference of 1/32 is nothing and will disappear with sanding. Good luck I'm sure your table will be great!
brat62387
Mon, 01/20/2020 - 22:20
Help
The shopping list and cut list don't add up. Is there an updated shopping list?