
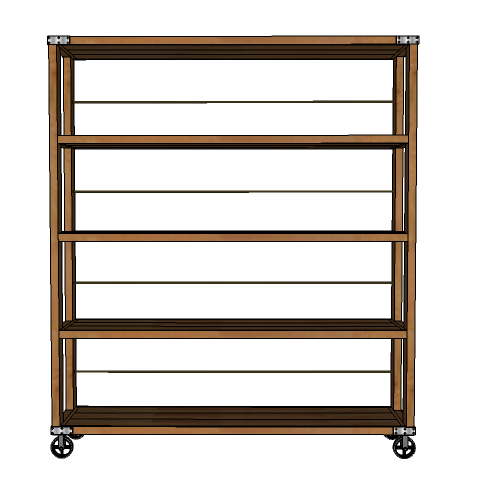

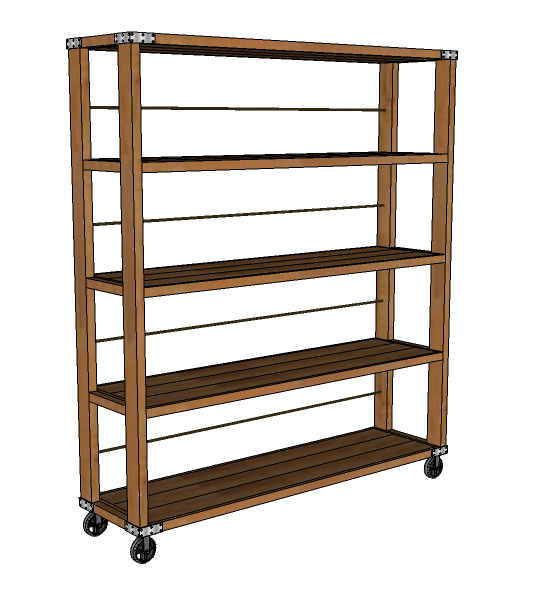
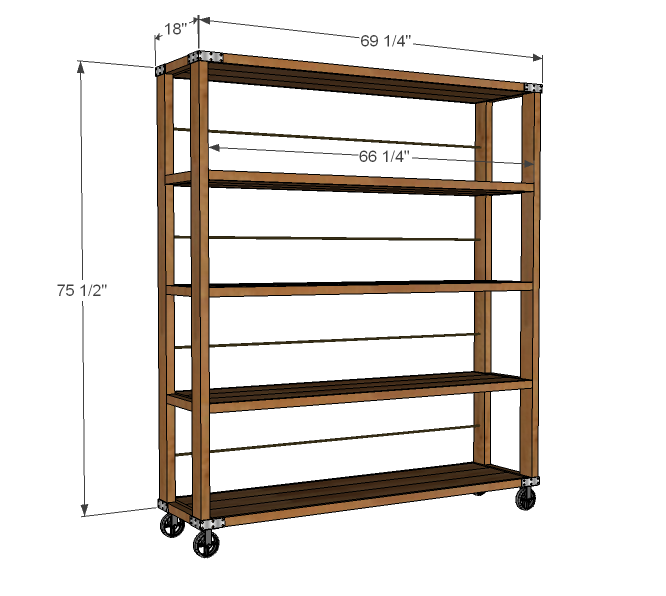
Roll these industrial shelves into your dining room or living room for a little extra storage with a lot of style. Features industrial hardware, rustic design, and five large shelves.
I'm REALLY nervous to post this - this is my first plan and I just know Ana and all of you will have a bunch of ideas on how to improve the design. :) Which is great! I'm hoping to post this plan along with some questions so that we can figure it out the best way to build it together.
I'm REALLY nervous to post this - this is my first plan and I just know Ana and all of you will have a bunch of ideas on how to improve the design. :) Which is great! I'm hoping to post this plan along with some questions so that we can figure it out the best way to build it together.
Ana mentioned wanting to make up these plans ("inspired" by the Wisteria Recycled Pine Wood Bookcase - but I honestly couldn't wait (those darn buildies!) and I know how busy she is so I thought I'd take the plunge!
Preparation
15 – 2×6 Pine Boards, 8 foot length (6′ would be even better, but I’m not sure they make that size!)
4 – 2 x 4 Pine Boards, 8 foot length
10 – 1×2 Pine Boards, 6 foot length (again, I’m not sure they come in 6′, if they don’t, you will need to buy the 8 footers!)
2 – 1 x 2 Pine Boards, 8 foot length
1 – 2 x 2 Pine Boards, 10 foot length, OR 2 – 8 foot boards
OPTIONAL: dowel, metal rod or cabling Qty. 4 at 67.25″L
OPTIONAL: 4 metal angle brackets
4 – 4″ to 6″ Caster Wheels (metal ones are best)
2″ Screws
2″ Finish Nails
Wood Glue and Finishing Supplies
15 – 2×6 @ 64.75″ (Shelves)
10 – 1 x 2 @ 66.25″ (Shelves Front Trim)
10 – 1 x 2 @ 16.5″ (Shelves Side Trim)
10 – 2 x 2 @ 11″ (“Ladder” Sides)
4 – 2 x 4 @ 75.5″ (“Ladder” Legs)
4 – 67.25″ Dowel or Metal Rod


Instructions
Step 1
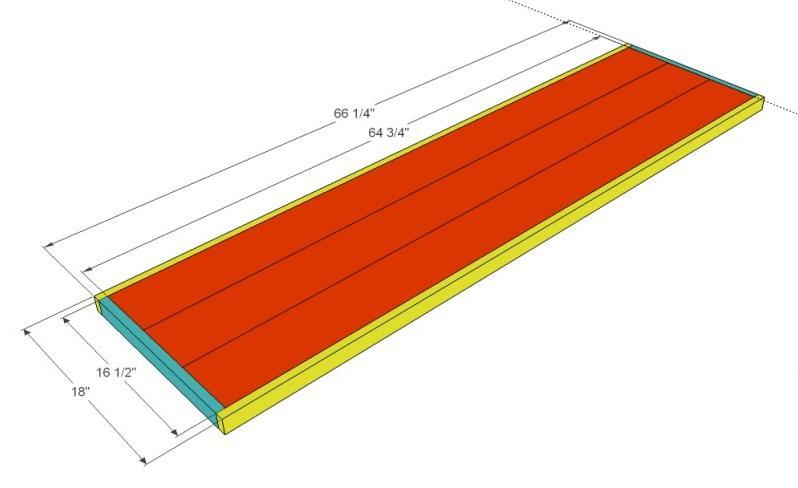
Start by building FIVE shelves.
Red = 2×6 @64.75″ Shelvf board
Blue = 1×2 @16.5″ Shelves Side Trim board
Yellow = 1×2 @ 66.25 Shelves Front Trim board
If you have a pocket hole system, attach your shelves together using pocket holes. If not, then end 1×2 (blue) will keep everything together, but there will not be a joint between the 2x6s. An easy work around would be to use wood dowels or small metal brackets on the underside.
Step 2

Ends
If you have a pocket hole system, attach the 2×2 end trim to the legs. These boards are optional and are not necessary for the structure of the shelf. If you like the looks of the end trim, you can simply add it after you add the shelves.
Green = 2×4 @ 75.5″ “Ladder” legs
Pink = 2×2 @11″ “Ladder” sides
Step 3

Decorative Rods
If you choose to use the decorative rods, mark the back legs as shown in the diagram above. Predrill holes with a bit that matches the diameter of your rods (ANA NOTE: I’ve been on enough concrete pours to know exactly what I would use here – Rebar is cheap, easy to cut, and has the rustic, industrial look. Ask for it in the concrete section of your home improvement store) Cut your rods to fit.
Step 4

Assembly
Attach the bottom shelve to the side ladders (or legs), as well as gluing all of your dowels into place as you attach the bottom shelve. Continue attaching the shelves with 17″ of space between each one.


Comments
Steven (not verified)
Thu, 01/13/2011 - 10:01
Cool! I made a set of rolling
Cool! I made a set of rolling shelves last weekend, although they roll in a slightly different way: http://picasaweb.google.com/Steven.Janowiecki/2011_01_09_0121# They double the storage space in my closet, although aren't as pretty looking as yours.
I used 2-inch casters and I think bigger ones would make it a lot smoother. Maybe I will update it some time.
michelle (not verified)
Thu, 01/13/2011 - 10:37
I so need one of
I so need one of those......and a gargae too. LOL. But those are amazing, great job.
Toni Howe (not verified)
Thu, 01/13/2011 - 11:04
Wow! Great job. I am still
Wow! Great job. I am still working hard to figure out scketch up. It is a true test to my patientence, but I refuse to give up. Thanks for the post.
Jamie (not verified)
Thu, 01/13/2011 - 11:53
I think you'd actually need 8
I think you'd actually need 8 optional angle brackets... Great post! I would LOVE one of these in my house! I'd want to get the finish just right; rough up the boards and make it look really industrial.
Jenny (not verified)
Thu, 01/13/2011 - 12:26
Wow, I need about 10 of these
Wow, I need about 10 of these in the basement!
Laura (not verified)
Thu, 01/13/2011 - 12:37
great job! putting it on my
great job! putting it on my to do list now :)
alison (not verified)
Thu, 01/13/2011 - 14:18
Well done! Do you think the
Well done! Do you think the thickness of the shelves will compensate for how wide they are?
It looks fantastic and Ana, I love the suggestion of rebar for the back support.
flippin1999 (not verified)
Thu, 01/13/2011 - 14:42
Love love love! Thank you! I
Love love love! Thank you! I posted the inspiration pic on Facebook, and have been (im)patiently waiting and hoping ever since. I feel so bad asking Ana to do anything more than the bazillion things she already does for us- but this plan looks great, and it looks like it's time to go wood shopping! Yay!
Bethany (not verified)
Thu, 01/13/2011 - 15:26
I am building this right now
I am building this right now - (I did the model/plan with some suggestions from Ana!) I am hoping to have pics up by the weekend! :) I don't have casters yet though, that is my current dilemma. If/when I find some I will post the link - in the meantime, if anyone finds some will you post a link? :D
Rachel (not verified)
Thu, 01/13/2011 - 18:17
Beautiful! I will have to
Beautiful! I will have to wait until our move this summer but I would LOVE to have a wall of these shelves! Thanks for the post:).
Danielle Z. (not verified)
Thu, 01/13/2011 - 18:31
This is fantastic! What a
This is fantastic! What a great plan! Thanks for posting it. :-)
Annalea (not verified)
Thu, 01/13/2011 - 18:51
This is very well-presented .
This is very well-presented . . . great job!
One thought: I would tend to think that the angle brackets would be necessary for angular stability . . . or something to add some diagonal bracing/ties. Has anyone finished one of these yet who can tell us?
J (not verified)
Fri, 01/14/2011 - 05:05
I was just going to say that
I was just going to say that diagonal stays from corner-to-corner along the back would help keep the whole unit stable, preventing sheering sideways.
Carmelina (not verified)
Fri, 01/14/2011 - 06:50
Love this project - and so
Love this project - and so many of them on this site. Amazon seemed to have some options for casters - here's one that fits the bill http://www.amazon.com/Albion-Industrial-Medium-Duty-Caster/dp/B0036E6YLG. There is also an option for swivel casters. : )
lianatempera (not verified)
Fri, 01/14/2011 - 07:23
This is awesome! How much
This is awesome! How much weight do you think these can hold? I think I might need to build this at some point ...
Carrie (not verified)
Fri, 01/14/2011 - 09:43
Thanks for making these
Thanks for making these plans... I was going to make them myself... and now you have saved me a step. I cannot wait to build these!
Travis (not verified)
Fri, 01/14/2011 - 11:12
Great idea! I would caution
Great idea! I would caution that a height to depth ratio of at least 4:1 should be taken in to account to avoid tipping. The height of the shelving unit (including caster height) should not be more than 4 times the depth of the base (measured from caster to caster, not the 18" shelf depth). Use extra caution if planning on adding swivel casters for added portability, as they can shrink the base a considerable amount if the casters turn in on each other.
Also, make sure when loading to keep the heavier objects down low.
Ferrero33 (not verified)
Fri, 01/14/2011 - 11:33
Forgot I had an account.
Forgot I had an account. Here is a picture to further clarify.
http://picasaweb.google.com/lh/photo/Yl-2LO-0th3z3j2PscxlHQ?feat=direct…Please excuse the horrible paint drawing.
alison (not verified)
Sat, 01/15/2011 - 11:17
Steven, What a brilliant
Steven, What a brilliant idea. Well done.
Deborah (not verified)
Thu, 02/24/2011 - 18:47
This would make a great unit
This would make a great unit for me in my sewing room. I would think swivel casters would be best, especially for me as I am always moving things around trying to get the most space in my sewing/spare room. Even my sewing table has rollers on it, much easier to move on carpet.
jameyk (not verified)
Tue, 06/07/2011 - 19:55
hardware
if you use the shiny zinc covered hardware you can soak it in white vinegar over night and it will strip the coating off of it leaving you with a dull steel finish. The unfinished steel will rust so try not to get it wet!!!
jamey
Guest (not verified)
Thu, 12/15/2011 - 05:57
industrial shelving
Does anyone know where I can buy these rolling industrial shelves for a reasonable price? Thank you!