
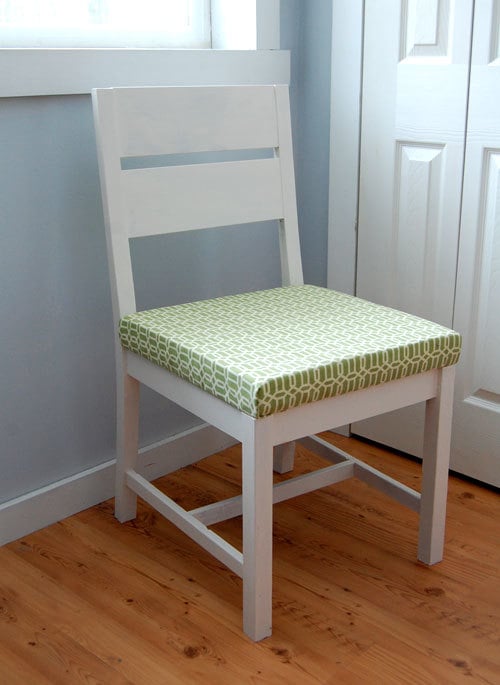

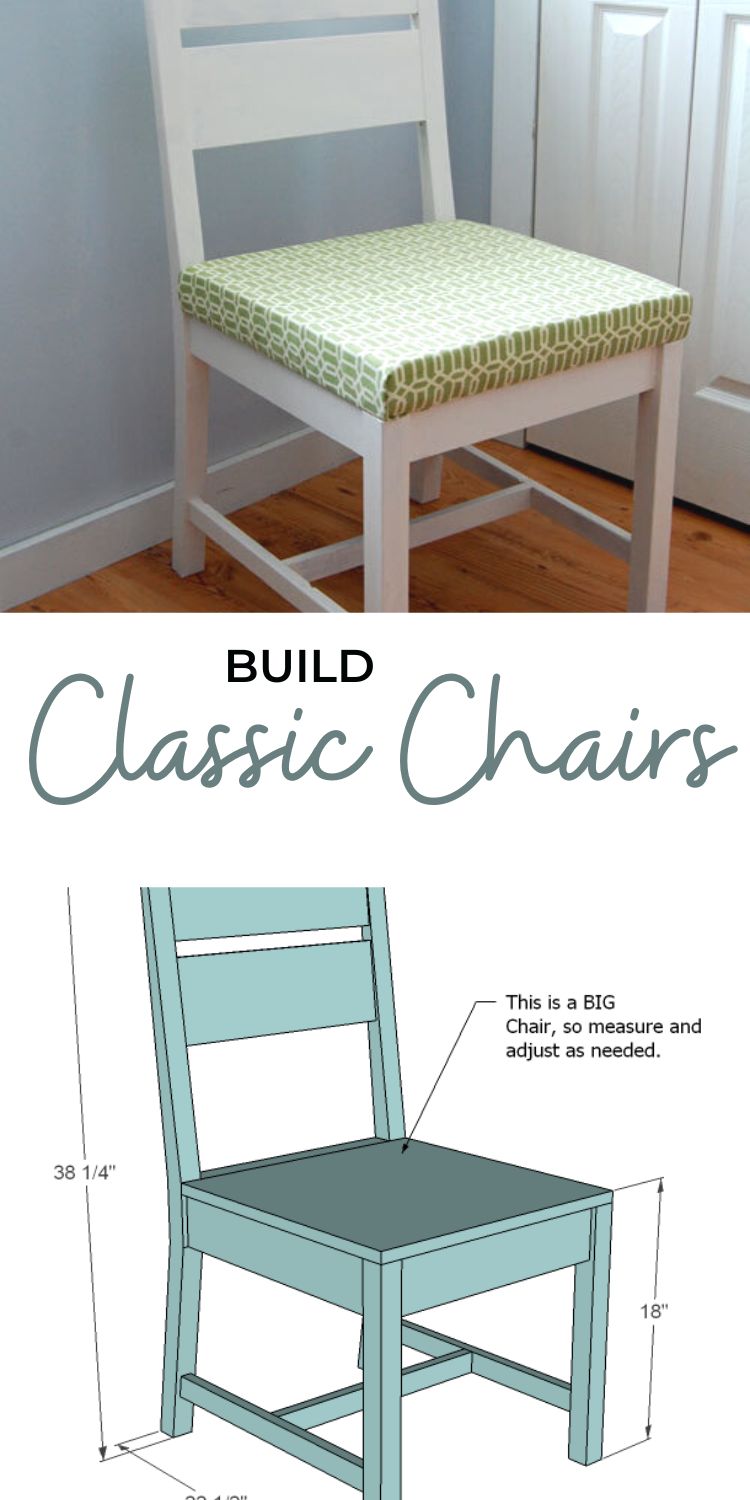
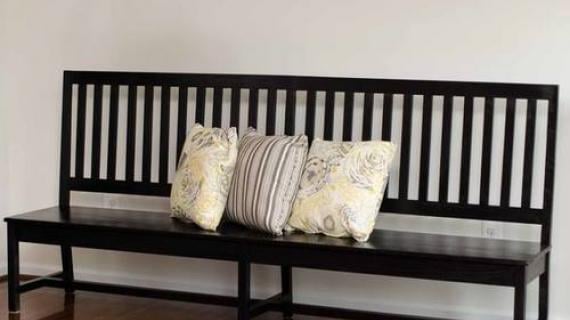
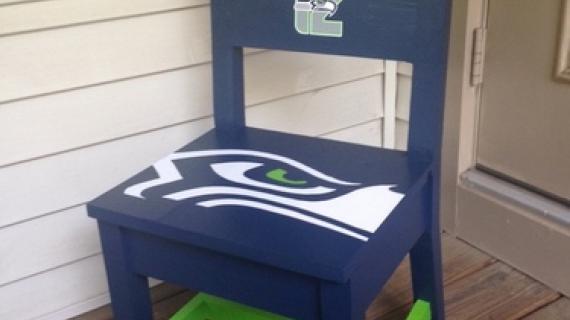
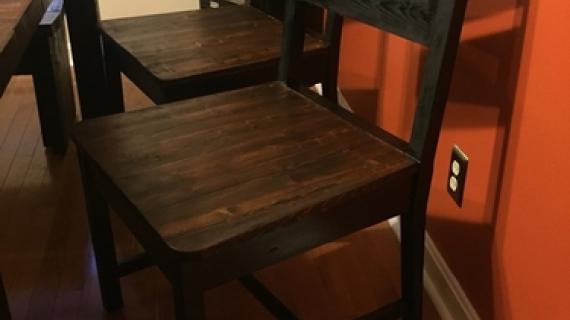
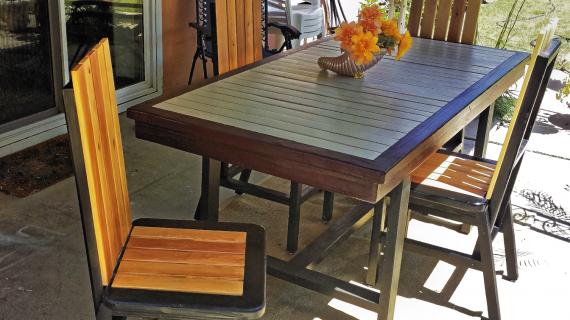
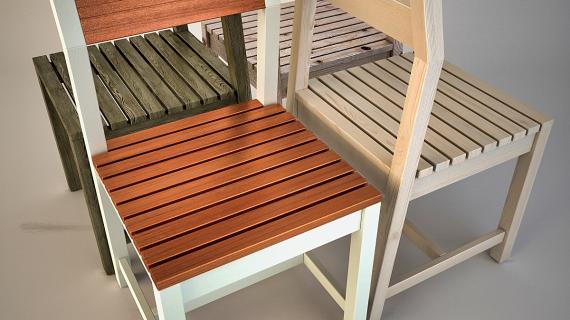
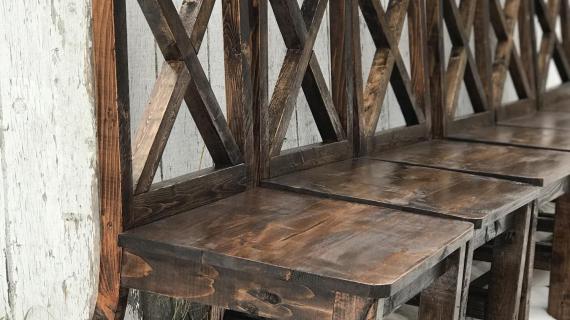
Simple chairs with an upholstered seat. Comfortable and oversized with base supports. Free plans from Ana-White.com
Pin For Later!
Preparation
1×6 @ 3 feet long
1 – 2×2 @ 8 feet long
1 – 1×4 @6 feet long
1 – 1×2 @ 8 feet long
1 – 2×4 @ stud or 8 feet length
1 – 1/2″ scrap plywood for seat top, 19″ x 19″
1 yard of fabric
1 piece of foam, 19″ x 19″ x 1″ thick
3/8″ staples
1 1/4″ pocket hole screws
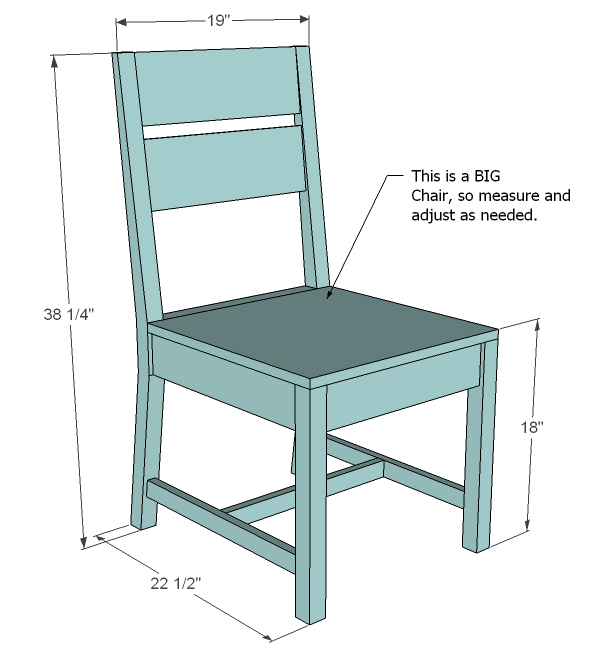
2 – 2×4 @ 38 1/4″ (Chair back legs)
2 – 1×4 @ 17 1/2″ (Side Aprons)
2 – 2×2 @ 17 1/4″ (Front Legs)
2 – 1×4 @ 16″ (Front/Back Aprons)
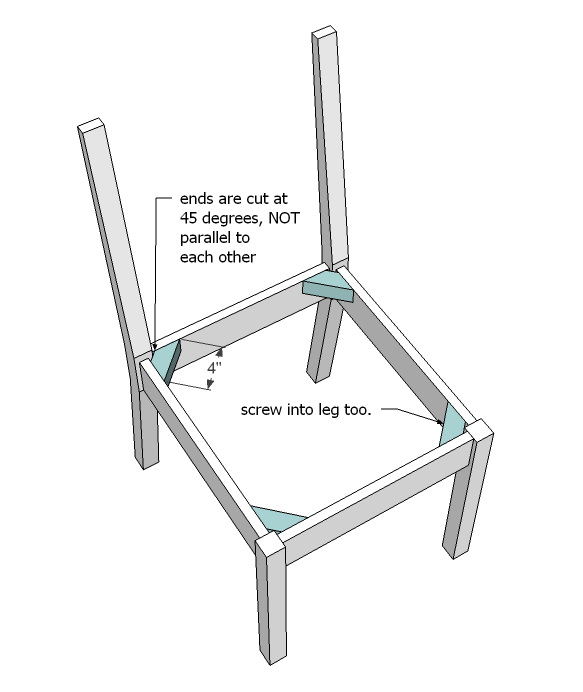
4 – 2×2 @ 4″ (Supports – both ends cut at 45 degrees off square, NOT parallel to each other)
1 – 1×2 @ 16″ (Seat Back Top)
2 – 1×6 @ 16″ (Seat Back)
2 – 1×2 @ 19″ (Longest point, one end cut at 8 degrees off square)
1 – 1×2 @ 16 3/4″ (Center Support)
1/2″ plywood @ 19″ x 19″ (Seat top)


Instructions
Step 1

Back Legs
If you follow these steps carefully, you can cut back legs that are straight and symmetrically to each other. Mark the legs as shown in the diagram. The front – where the chair leg connects to the side aprons – needs to be cut in 1/4″ to account for rounded edges on 2x4s. The goal is to make as many cuts as possible with a circular saw, but you will need to finish inside cuts on the back with a jigsaw. Follow the diagram above carefully. I advise taking the scrap piece of 2×4 and cutting a leg first from it to get some practice. Once your legs are cut, lay them together, and check to make sure that the top, bottom and front sides all match. The other parts are not as significant. Sand your cuts smooth.
Step 2
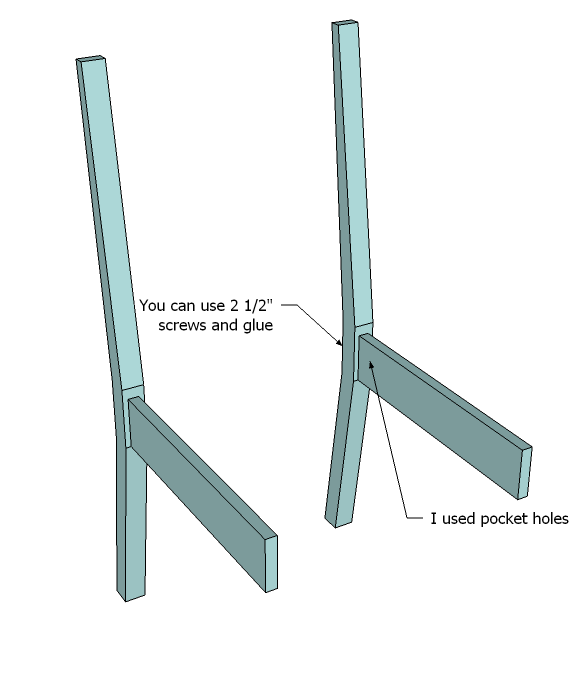
Side Aprons
Attach the side aprons to the back legs, flush to the bottom of the front cuts on your chair back legs. Make sure the two leg pieces still match up – if not, your chair is going to be crooked!
Step 3
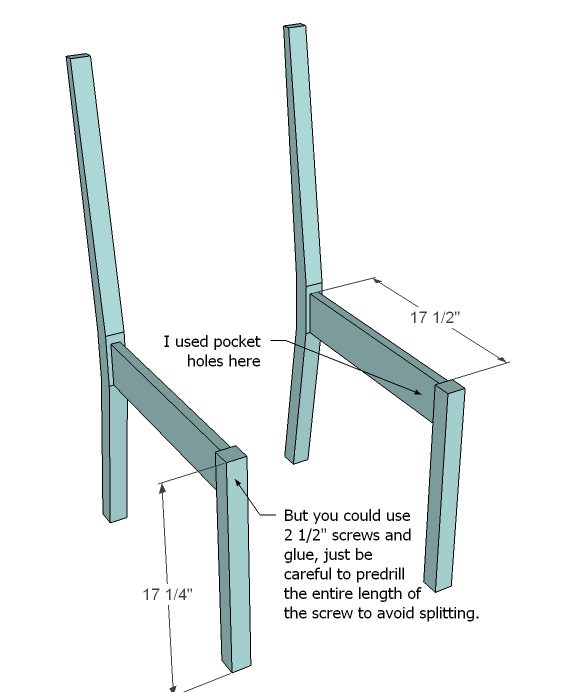
Front Legs
Attach the front legs to the side aprons as shown above. The tops are flush, and your chair part should match up at this point.
Step 4
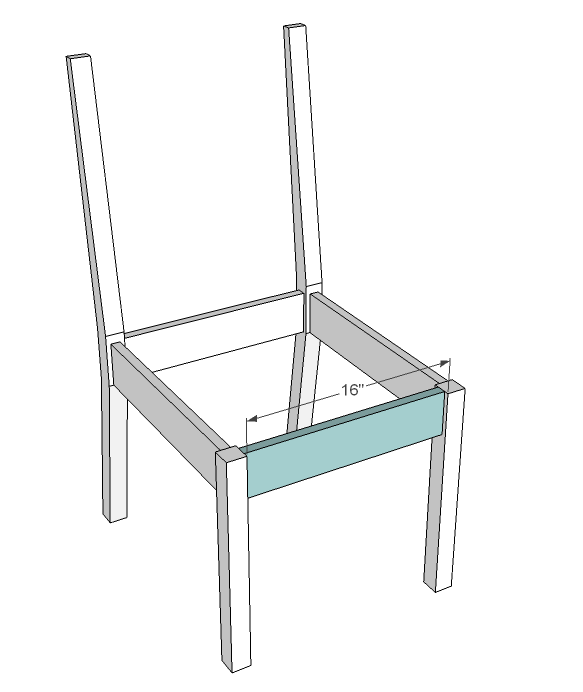
Front/Back Aprons
Attach the front and back aprons, carefully predrilling. I used pocket hole screws and glue. Top is flush.
Step 5
Step 6
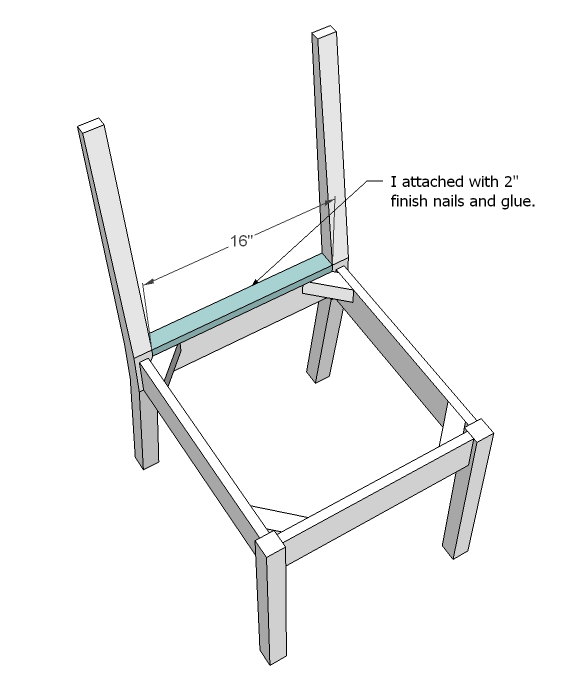
Seat Back Top
Attach the seat back top as shown above.
Step 7
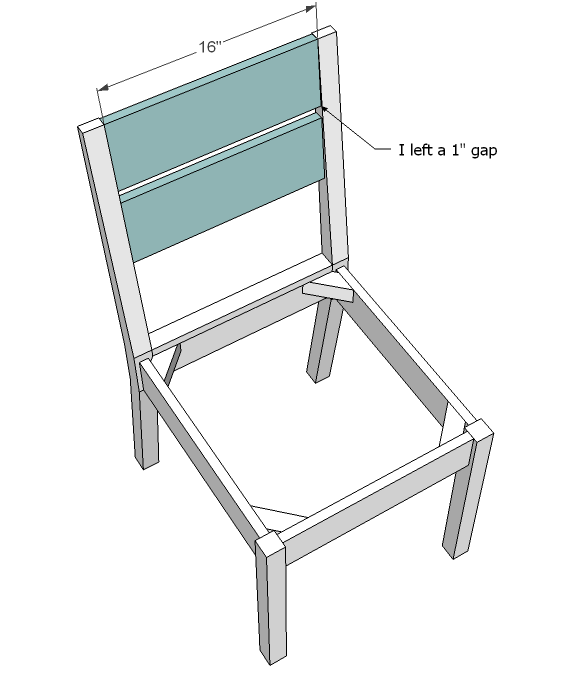
Seat back
I used pocket holes from the back but you can also use predrilled screws from the legs. Attach as shown above.
Step 8
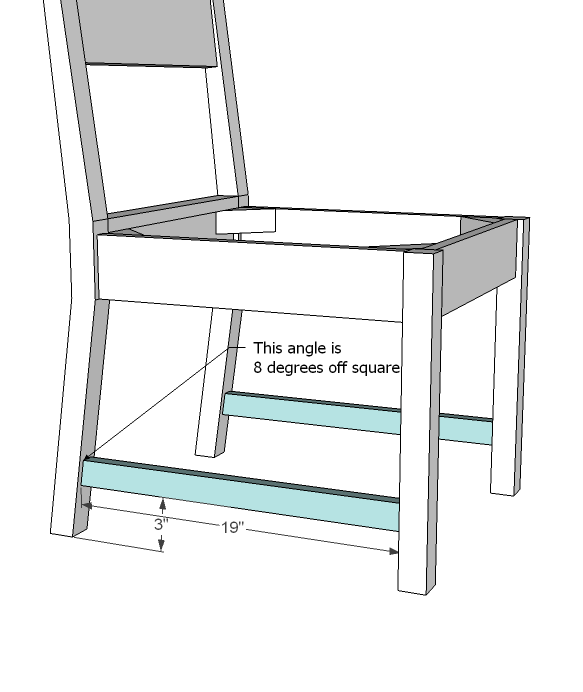
Base Support
The base supports will add considerable strength to your chairs. Attach as shown above.
Step 9
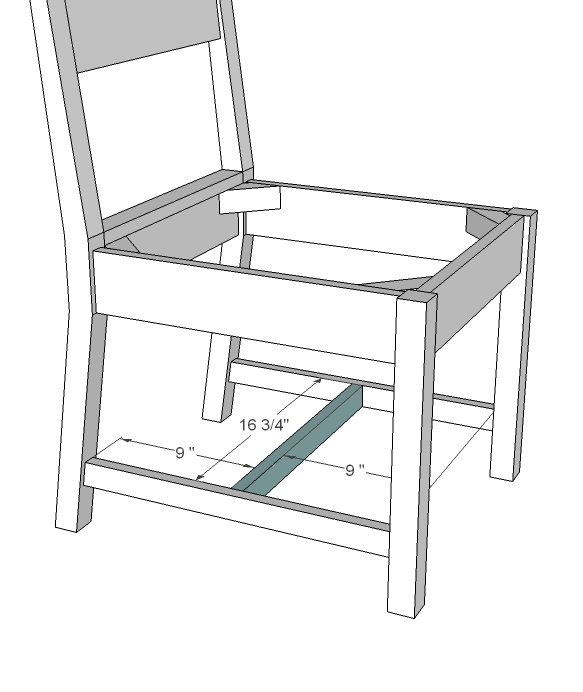
Base Center
Attach the base center to the sides as shown in the diagram above.
Step 10

Seat
Spray glue the seat cushion to the seat top plywood. Lay fabric facedown on table with seat top on top of fabric, foam side down. Staple fabric carefully to the underside of the chair, tucking corners neatly. Use 2″ screws to attach the seat to the cross supports or use pocket hole screws.
Step 11
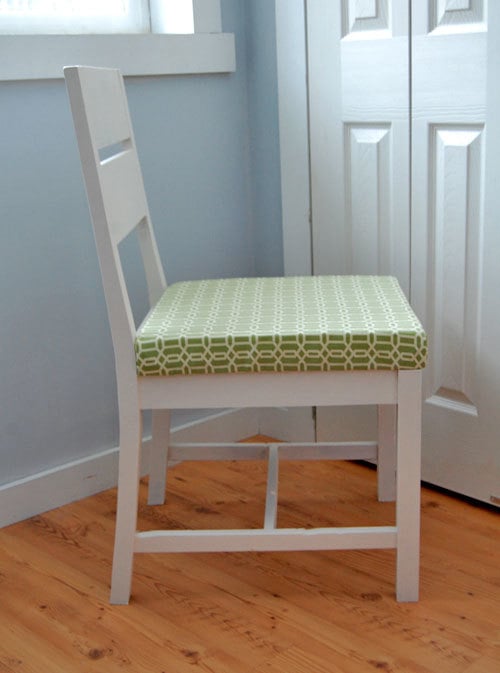
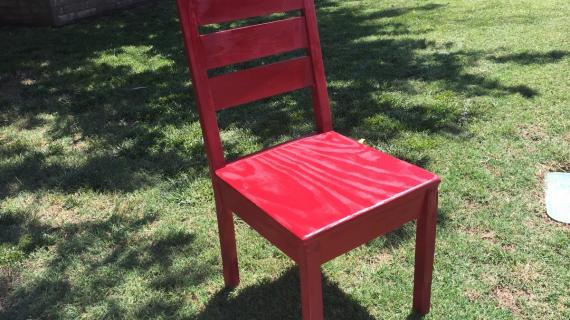
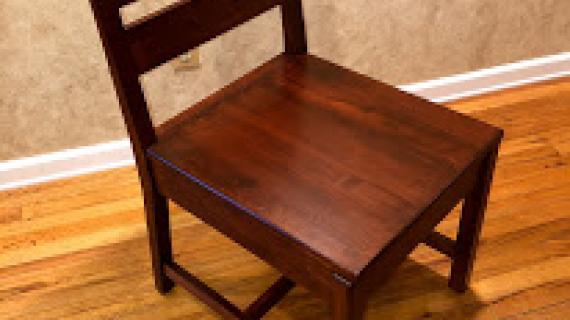
This chair was painted with Valspar Antique White in Flat Enamel, three coats. A top coat (Valspar satin finish poly) was added. The fabric is from Joanns, and is part of the Home Decorator’s 45″ wide fabric, and was on sale for $5 a yard. For a foam pad, I used a discarded chair pad cut to size. Total cost of this chair was under $20.


Comments
TheDabblingCrafter (not verified)
Sun, 01/23/2011 - 18:55
I've been searching for an
I've been searching for an old chair to refinish and recover....for under 20 bucks..it might just be better to try this! I'm a newbie at this, but I think with my husband's help, I might be able to get this done!
Gerri (not verified)
Sun, 01/23/2011 - 18:57
Ana, has anyone ever told you
Ana, has anyone ever told you how much YOU ROCK?!? of course they have, but I'm here to tell you again. ;)
I've been wanting to ask for a chair similar to this, but with all of the website struggles lately, I wanted to wait til you were a little less occupied. But look, you read my mind-woo hoo!!
One question-I would really like to make the seat out of boards running front to back (2x4maybe?) would you mind offering suggestions on how to do that?
Thank you so much again! You have really changed my thought process on furnishing my home. :)
Jess (not verified)
Sun, 01/23/2011 - 19:22
These are great! I was
These are great! I was wondering how long it traditionally took you to post a brag blog submission. I submitted it on Friday and i am really excited to share my build with the world. Thank you so much for your inspiration and giving my husband something we can do together.
dananryan (not verified)
Sun, 01/23/2011 - 19:29
You never cease to amaze
You never cease to amaze us...
Sophie (not verified)
Mon, 01/24/2011 - 03:27
Yesterday I was looking at a
Yesterday I was looking at a photo in Coastal Living magazine, where some simple chairs very much like this had been custom built for a room - and wondering aloud if I could design some like them. I don't have a miter saw - only a circular saw or a handsaw when I want to be more precise...
Ana, now I am convinced you are writing this just for me ;-)
Can't wait to get started on these!!
Carrie (not verified)
Mon, 01/24/2011 - 03:28
Awesome - as usual!
Awesome - as usual!
Whitney Smith (not verified)
Mon, 01/24/2011 - 04:01
I made a similar chair about
I made a similar chair about a month ago and made it with a wood seat. I used 1x4's (5 of them), and I glues and pocket screwed them together from the underside. Turned out great if I do say so myself :) Here is a blog post about it: http://passionforwood.blogspot.com/2010/12/merry-christmas.html
In reply to I made a similar chair about by Whitney Smith (not verified)
whitney_smith
Mon, 12/03/2012 - 10:50
Correction...
Blog has changed! Please follow the new link. Thanks! http://whitneysworkshop.blogspot.com/2010/12/merry-christmas.html
Tasha (not verified)
Mon, 01/24/2011 - 05:29
I really like it! I've been
I really like it! I've been wanting a simple chair. We built the lap desk for a Christmas present for a brother and the chalk board for my son for Christmas. I truly enjoy your plans and love seeing your new designs everyday. With four month and cold garage, I can't build now, but am hoping to do so when the weather warms up. Thank you.
Bonnie (not verified)
Mon, 01/24/2011 - 07:04
Ana, what a GREAT chair! I
Ana, what a GREAT chair! I have one almost like it that I have done in Sketchup. Your other chairs are wonderful, but as most of the people in my family are on the hefty side, and I needed one with more size and structural supports. I am despirately in need of everyday kitchen chairs. So I also put the cross members for the legs on the bottom, and the corner braces under the seat. I have been however, trying to decide what material to make it from when i get to that point. Like I said, as my family members are on the heafty side, I have seriously been considering using a good quality plywood. Making my own 2x4's by cutting 2x4 sized pieces of 3/4 ply, then gluing the together for the legs. Then making the cuts for the back legs / back of the chair. Ply is SO strong! And as I will probably paint the chairs not stain them, plus with some thorough sanding, the ply layers would prob not show anyway. I know that cutting all those pieces will be a lot of work, plus I am adding additional cost to the chairs by using a good quality ply, but thats ok. I have a straight edge that allows me to make pretty precise straight cuts on plywood with a circular saw. Thanks again for that wonderful chair!!
Sara (not verified)
Mon, 01/24/2011 - 07:17
This is fantastic! I'm
This is fantastic! I'm getting ready to build a breakfast nook into our new kitchen (bench window seats and all). I'd been planning to buy chairs for it, but I think I may try these instead! You rock :)
Vanessa (not verified)
Mon, 01/24/2011 - 07:29
I love this chair! I've been
I love this chair! I've been looking for something easy to clean PB&J off of! Thanks.
Michelle (not verified)
Mon, 01/24/2011 - 07:58
I get intimidated just
I get intimidated just THINKING about building a chair...but I'm getting very close to just going for it! I better finish up 2 other projects that I'm working on right now and then maybe I'll have the confidence to do it!! I love the simplistic style of this chair!!
jdub (not verified)
Mon, 01/24/2011 - 10:13
I think your chair looks
I think your chair looks great and I personally like the filler not matching the chair perfectly. It gives it a yesteryear kind of look when the plugs always stained as a different colour. Very nice
Rebecca R (not verified)
Mon, 01/24/2011 - 14:53
This is great! Now how would
This is great! Now how would I modify it to make it bar height? I made the craft table, but need a chair that height to go with it and this would be perfect!!
Kayla (not verified)
Wed, 01/26/2011 - 04:18
Love this plan thank you! I
Love this plan thank you! I have chairs like this in my dining room and in addition to fabric, I got a clear plastic vinyl (you can get it at Walmart) and put that over the fabric (attached with staples just like the fabric). With five kids, it makes the chairs so much easier to stay clean. It has been over five years and they are just starting to have wear issues.... which is perfect timing because after five years I need a fabric change! :)
Anneke (not verified)
Sat, 01/29/2011 - 23:02
I have been working on the
I have been working on the same thing, just for counter height...not sure if just changing the angle works??? I like the tapered leg versus straight, but don't want too much of an angle. Hmmmm???
Tracy Smith (not verified)
Tue, 02/15/2011 - 16:02
Saw your chair and LOVE it!!
Saw your chair and LOVE it!! Looks so good. Did you use the pocket-hole plugs on your chair, or wood filler? I was a bit confused and unsure as to which you used. We (my hubby and I) are in the process of building a console table (plans to come shortly to Ana-White.com) and are using the pocket-hole plugs that came with our Kreg Jig. I'm just wondering if ours will seem mis-matched too. Not that big of a deal, just curious before the stain goes on. Great job on your chair though, our next project is Ana's Classic Chair!
amywerttn
Wed, 09/07/2011 - 19:46
Love this!
I have needed new dinning chairs for a while but haven't found any that are "my style" for a price I'm willing to shell out. ;) I can't wait to try this!
Mommyof4
Mon, 03/26/2012 - 18:57
Weight Capacity?
I know this is a late post, I am new to the site and totally addicted. Just curious if there is an estimated weight limit? My immediate family is fairly small to average but some fairly frequent visitors are rather large. I would hate to make these chairs and have them possibly not withstand some of our heavier guests. They look fairly sturdy, just curious!
bundaboy
Tue, 05/29/2012 - 02:35
Dimensions
I know you crazy yanks have a weird lumber dimensioning system, but shouldn't the cut list be accurate? It would have been OK if the 4" was really 3-1/2" if I hadn't already drilled the pocket holes*... sigh... start again, (cry)
(edit: *and glued and screwed...)
bcrosby32
Sun, 10/04/2020 - 11:10
Late the party here. I’m…
Late the party here. I’m prepping to make this chair but I was looking at the diagram of the back legs. Maybe I missed something but you have the top part of the leg at 3/4” and the waste at 3”, making the total more than the dimensions of a 2x4 (3 1/2”). What should the top part of the leg be?
JBDickerson12
Tue, 03/09/2021 - 05:08
Can I get the sketch up file ?
is it possible to get this as a sketch up file .. i would like to add mortise and tenion joints..